

Bishop Show Chicago Fall 2017
It’s mini show time again! I headed to the Bishop Show – Chicago Fall 2017 event tonight and came home with a few goodies. I also saw the classes for next year’s Bishop International Show, so I have some things to consider. :]
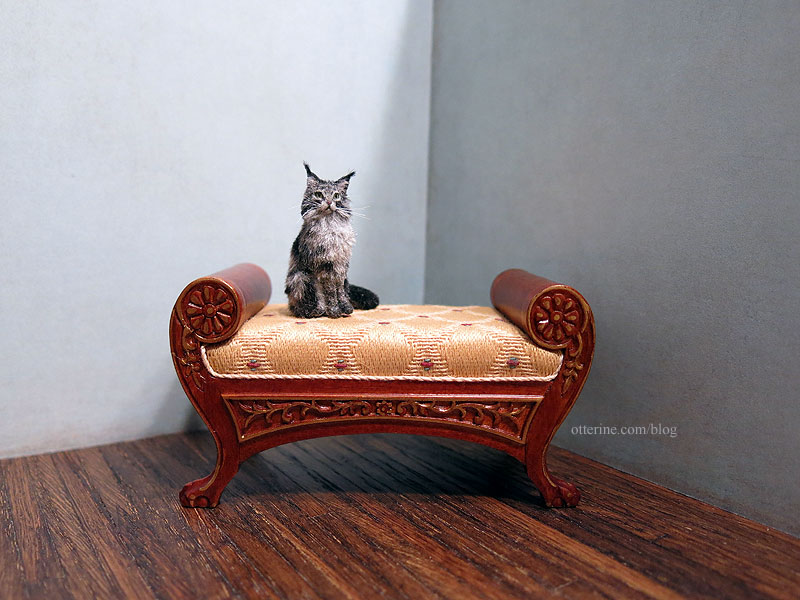
All About Miniatures. A beautiful JBM Miniatures upholstered stool.
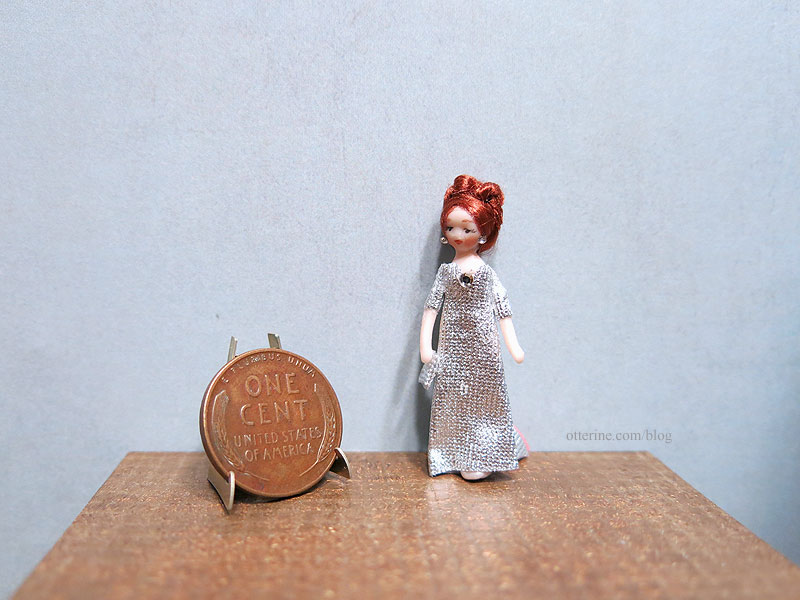
Iklectic Kollectibles. This beautiful tiny doll is by Ethel Hicks.
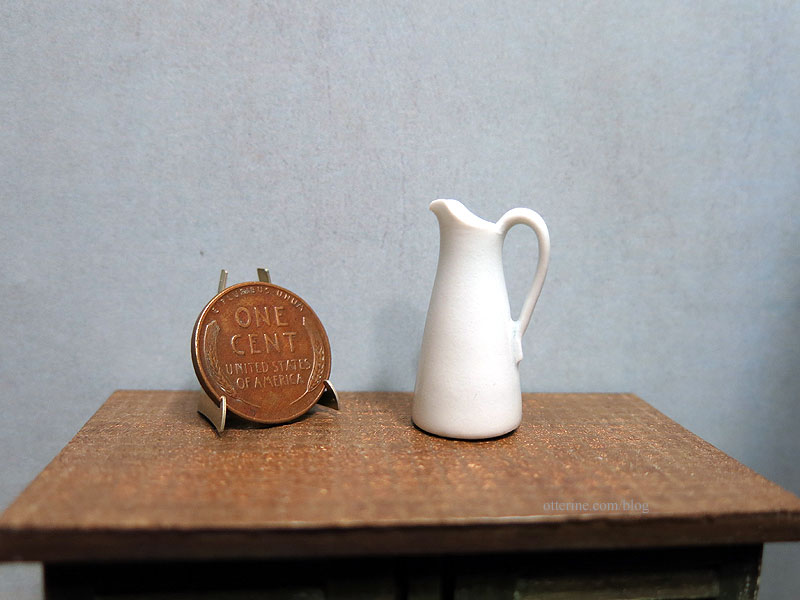
The Little Dollhouse Company. I am a sucker for white ceramics. :D
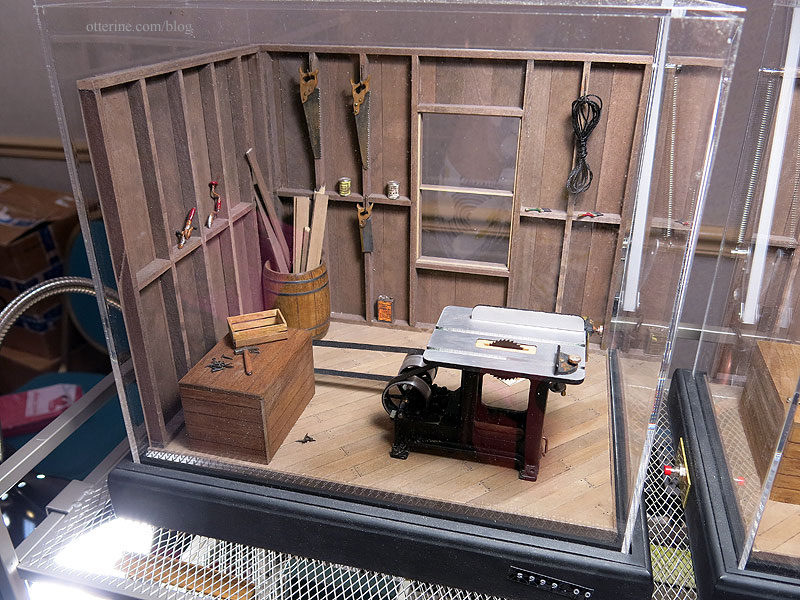
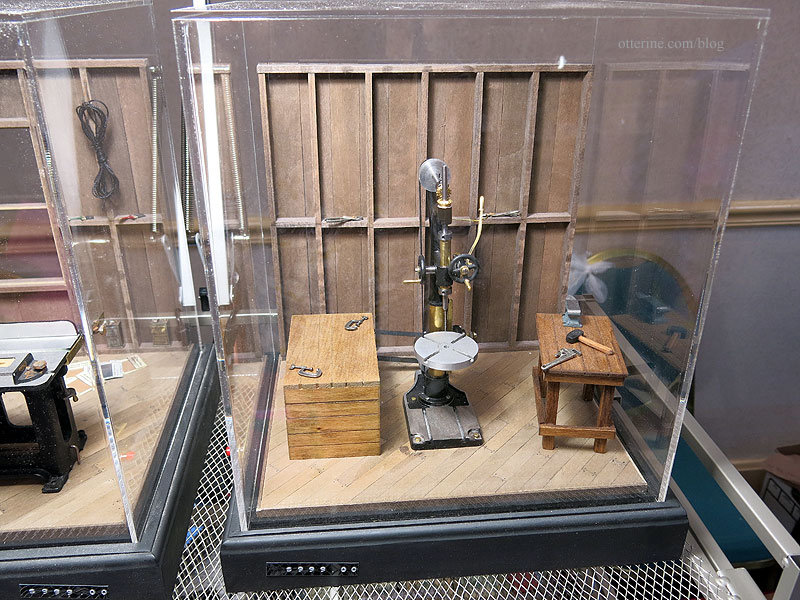
Sir Thomas Thumb. I did not buy these, but they were amazing to see. Yes, those power tools work!
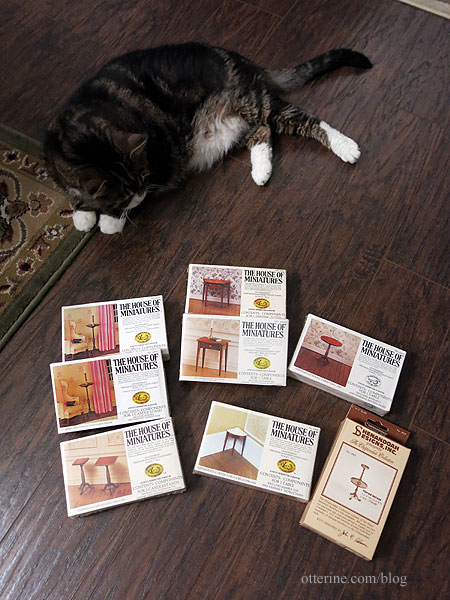
While I’m at it, I will share the birthday goodies from Debora. Always in need of small accent tables, and HoM kits are perfect for that!
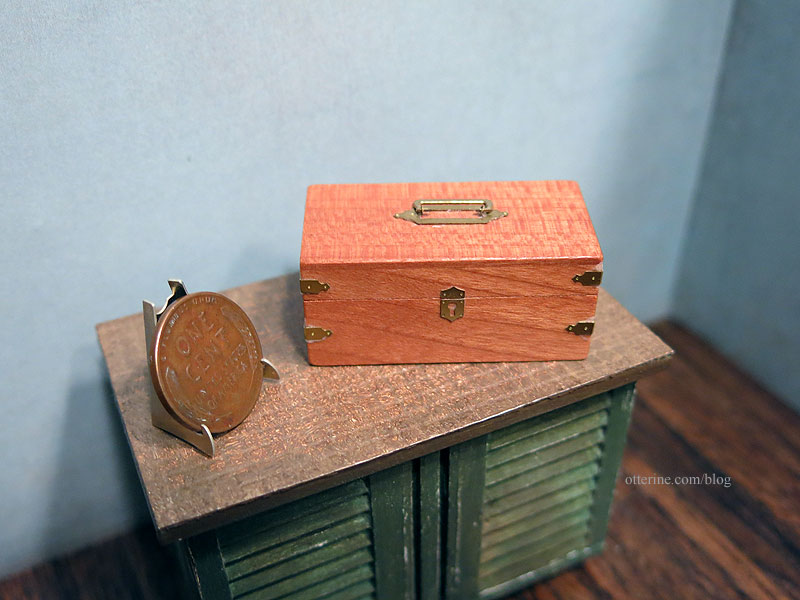
This delightful box has working hardware by Ron Stetkewicz Miniatures.
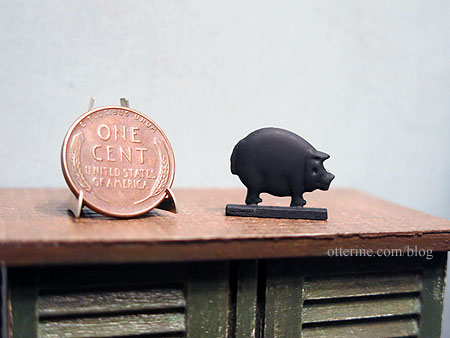
Rustic piggy.
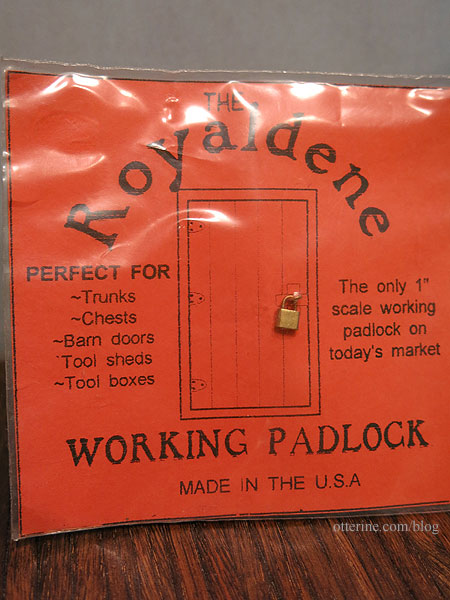
Working padlock!!!! :O I haven’t take it out to try it yet.
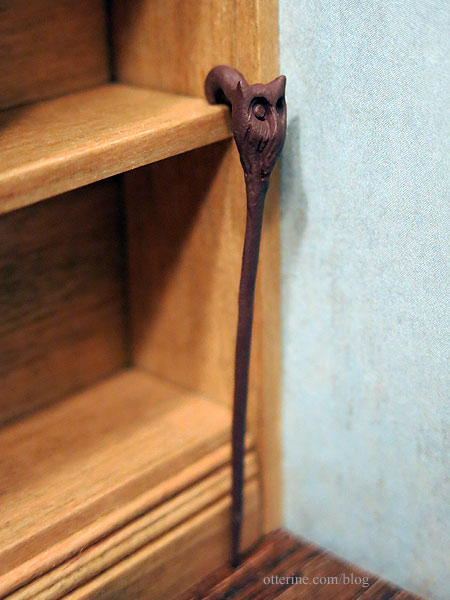
Owl cane. The insert reads, “From an owl cane hand-sculpted by Linda Parr (1941-1985).”
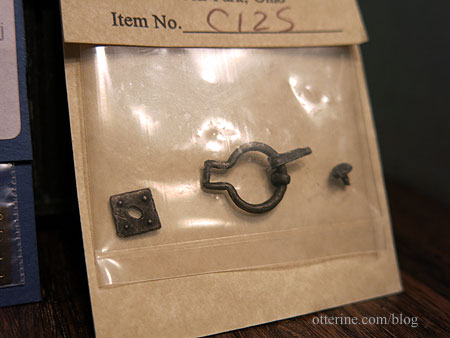
Hardware from The Dolls House Mall and Olde Mountain Miniatures.

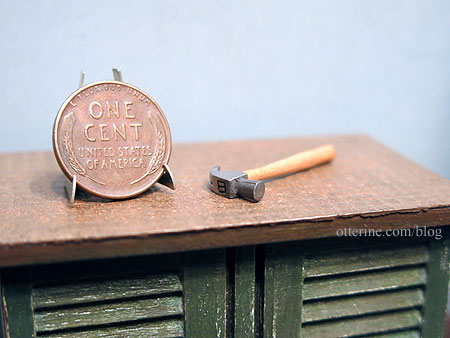
Hand crafted hammer.
Thanks so much, Debora! :D
Categories: Miniature Shows and Shops
August 25, 2017 | 0 commentsWatson Mill – door and windows, part 2
In my perusal of windmills online and from my own stash of vacation photos, I’ve found that the windows and door frames are often rust red or white. Check out this beautifully converted home, for example. I’ve opted for Americana White Birch in satin instead of true white. Painting frames instead of staining makes life easier all around. I don’t have to split between interior and exterior colors, and the filling on the arched door conversion won’t show.
I microwaved the window purchased from Hobby Lobby to take it apart since it was not the kind that already comes in parts for easier painting. White trim on the interior would be a bit stark, so I stained the interior trim Minwax Driftwood to coordinate with the circle library. The tiny bit of white showing will be fine and not as intrusive as large white frames. I need to finish the sashes, so this isn’t back together just yet. (Note: this window was later scrapped due to warping issues.)
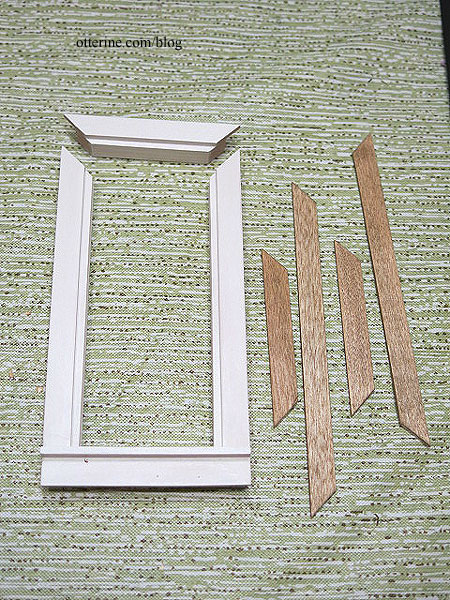
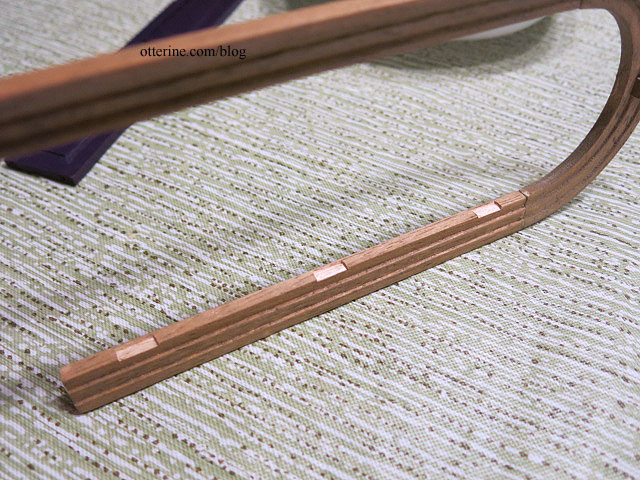
To make life easier, I also microwaved the door frame to separate the interior trim. I was then able to work with all the pieces without masking.
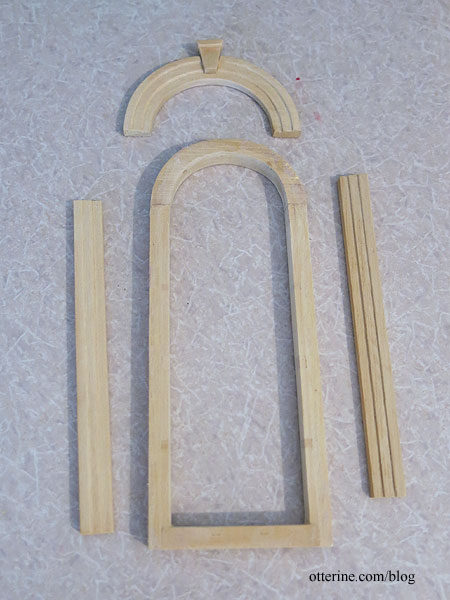
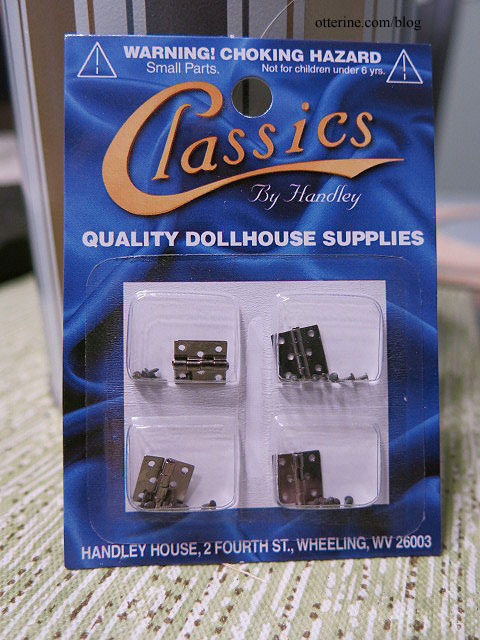
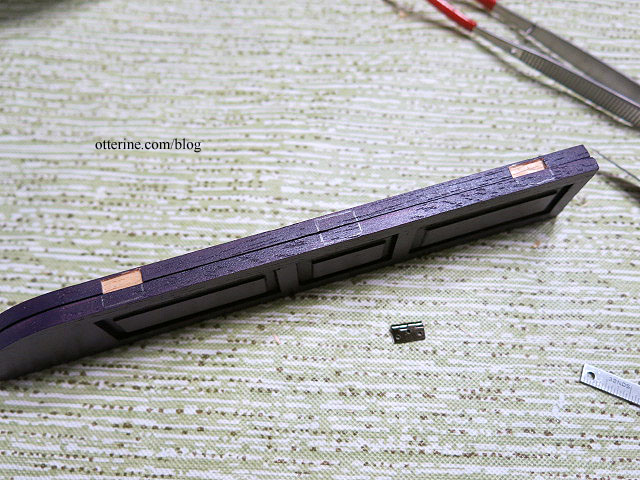
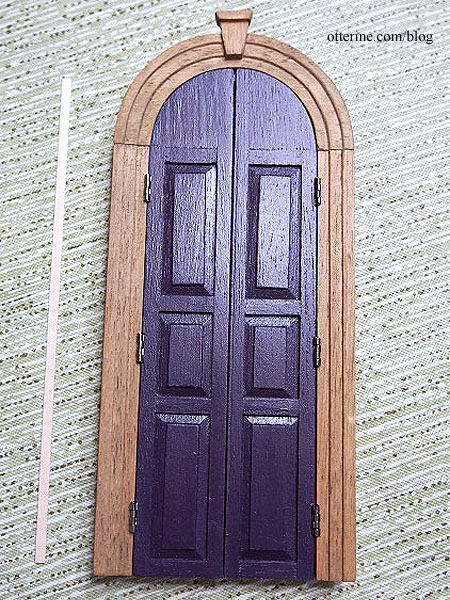
As for the door color, I fell in love with this inspiration photo. To achieve a close approximation, I used two coats of Aubergine by Folk Art followed by two coats of Purple Pansy by Anita’s. I finished it off with Krylon satin spray. The hinges are by Classics.
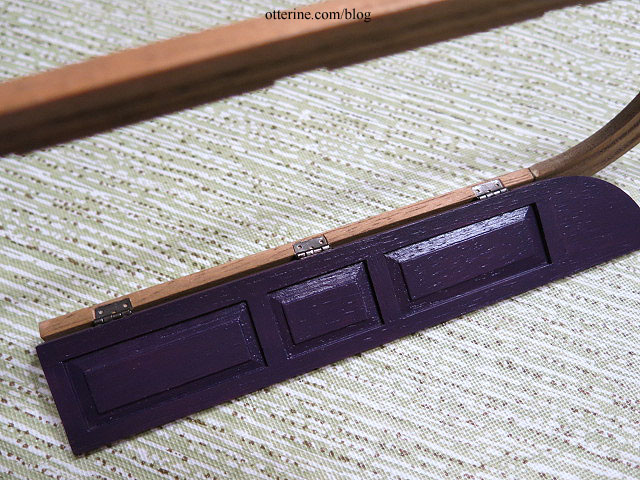
I cut mortises in the door panels to hang the doors like the real deal using a very sharp X-Acto knife to cut and shave the wood a little at a time. The mortises on the door ended up a little large, but both the door and hinges are dark so it will be less noticeable.
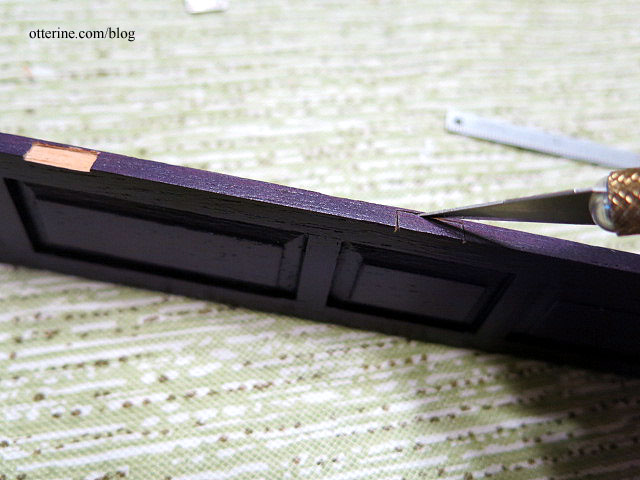
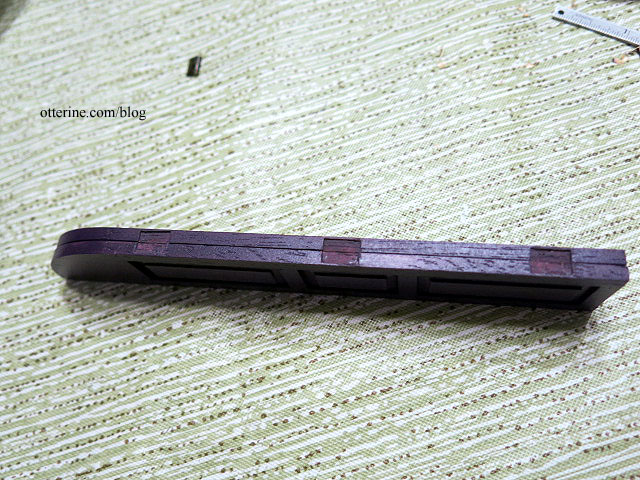
I matched up the two sides to get the hinges as even as possible.
I painted the cut portions purple to blend better.
I used Aleene’s Quick Dry supplemented with super glue gel to hold the hinges in place.

I let that set, then drilled pilot holes for the nails.
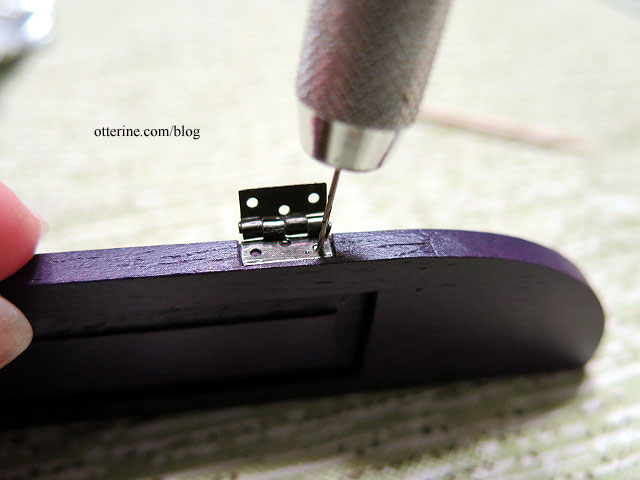
I added a dot of super glue gel to the nails except the one closest to the working portion. I didn’t want to risk getting any glue on the mechanism.
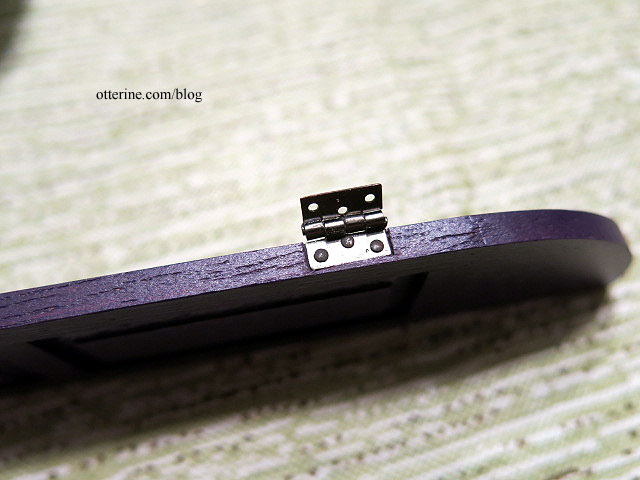
I set the completed door panel into the frame along with the one without hinges. I marked the hinge placement on the frame, then cut mortises to fit.
These turned out better after practicing on the door panels. I followed the same process for attaching the hinges to the frame.
After cutting the remaining frame mortises, I glued the trim back to the frame.

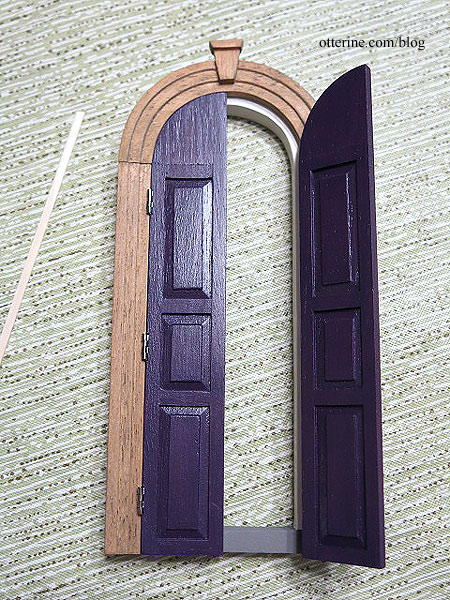
Tiny hinges are fiddly and temperamental, but the door turned out pretty well considering it started as a window with shutters. As expected, there was a gap between the door panels. If I had built the doors from scratch, I could have made a rabbet join down the middle. Instead of trying to reverse engineer that sort of thing from a ready-made component, I will just add a thin strip of wood painted to match down the middle on the interior.
The left panel hinges are fairly tight and don’t want to stay completely closed, so I might end up adding an interior bolt. We’ll see after I get the knobs in place.
Categories: Watson Mill
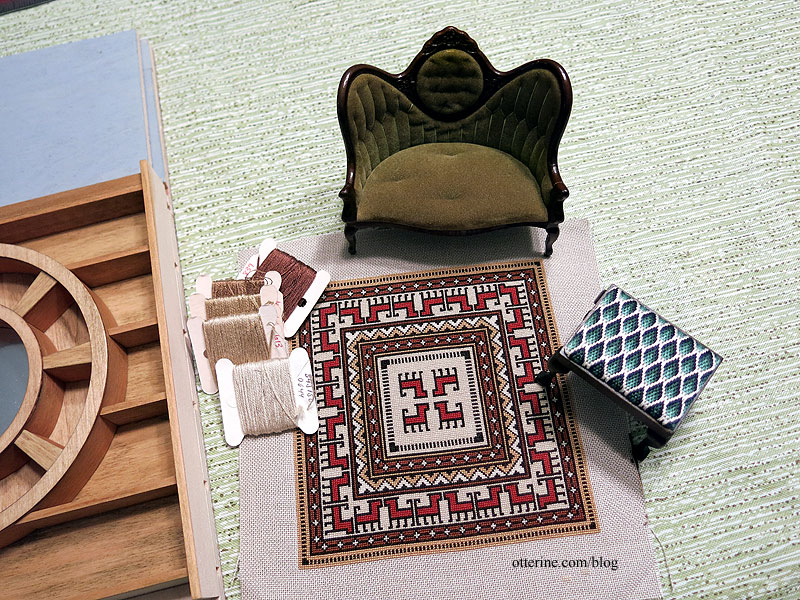
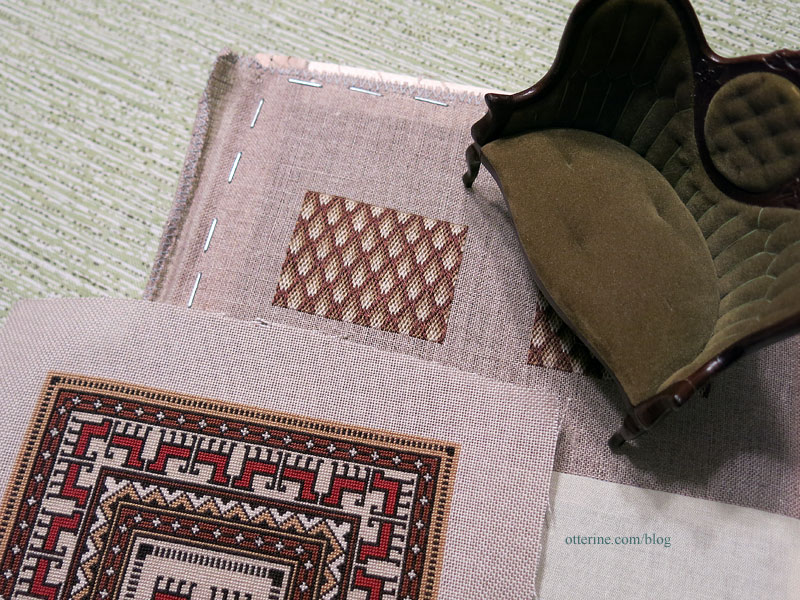
August 24, 2017 | 0 commentsBargello seat covers in tan
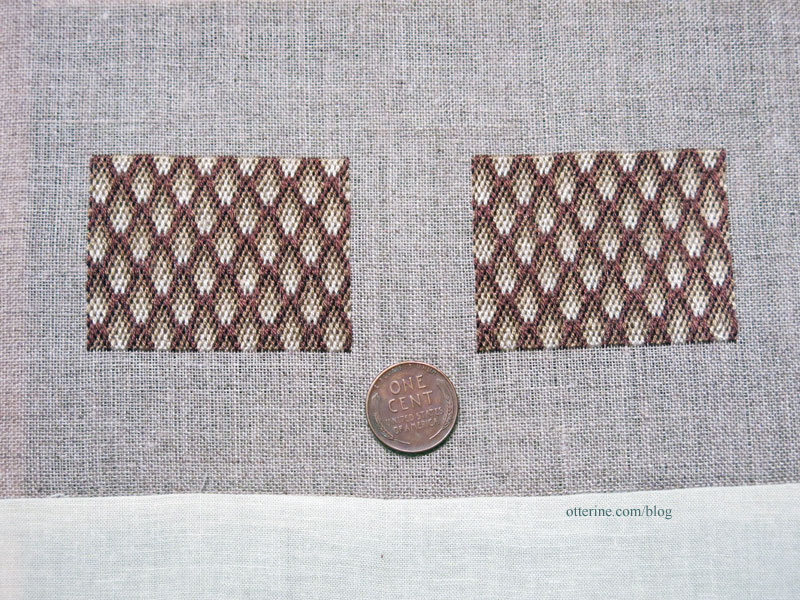
Here is one of the benches with the other items selected for the main floor of the mill. The stain, the settee and the foxes all have yellow/red tones, and the blue cast in the bargello was not working at all. I chose new colors in a grey/brown combination. The darkest brown will be the lattice and the others the “diamonds” inside. I think it will work much better than the blue/greens I had and should be a more subtle pattern as well.
The one on the left took 5 hours and the one on the right took 4.25 hours, just like the first time around. It must just take more time to plot the first one, whereas you can just copy for the second one. The 40 count linen was rough in a couple of places for the second one, so it might look a little threadbare in spots once done. It will just make it look old, so I’m not worried about it enough to redo it.
The colors go much better with the settee and rug. :] Now I just need to make the new benches.
Categories: Needlework - French knot rugs
August 10, 2017 | 0 commentsWatson Mill – I’ve got the shakes again
It apparently takes many years to forget what a right proper pain it is to wood shake an entire house.
It’s a lovely finish though, and very forgiving especially on an old mill. Instead of dark cedar, this time I will be using light wood shakes that I can stain to look weathered. These are from the defunct and partial Tudor Queen Anne kit. No sense in buying supplies when I have some languishing in storage. They are thin and rather uniform, which makes life easier.
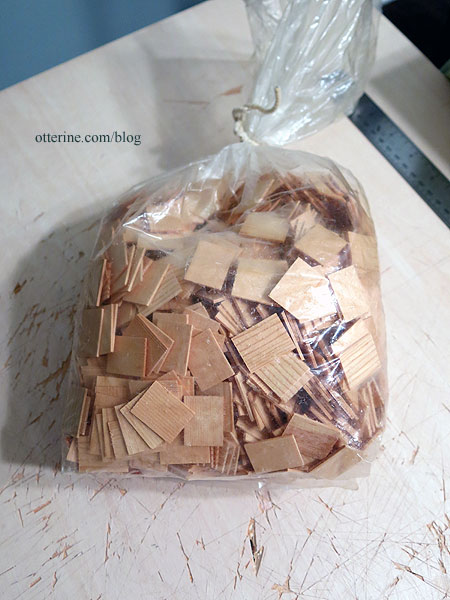
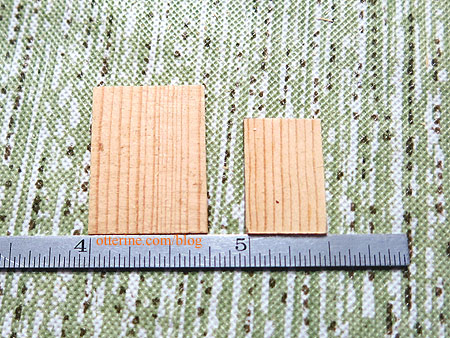
First was determining the size of the individual shingles. True to scale shingles looked out of place for Baxter Pointe Villa, so I hand cut the 1,700 shingles by length and width to work best for proportion. Considering the mill structure is even smaller, I figured I would have to do the same. The 1/2″ by 3/4″ measurements used for Baxter Pointe Villa seemed like they would work for the mill as well.
I did a rough calculation and will need approximately 1,635 shakes. Not that far off from the amount needed for Baxter Pointe Villa, but there are fewer windows and no chimney for Watson Mill. After counting the bag, I discovered I have only 1,617 shakes. :O No margin for error. But, if need be, I will use other shakes for the small back wall. Houseworks makes nice light wood shakes that will work well enough to finish out the set. I will start here, though.
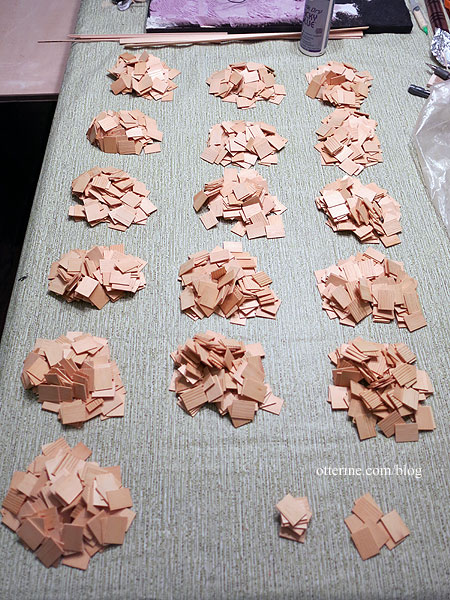
Cut, cut, cut. Once this bear of a task is done, I’ll stain the shingles before application. I’ll also have to finish the windows and door so I can get those installed prior to shingling.
Categories: Watson Mill
August 9, 2017 | 0 commentsWatson Mill – circle library, part 6
Continuing work on the circle library. I finished gluing the circle library boards and backing sheets, cut some paper shims for behind the mirror, removed the protective covering and pushed the circle in place.

The circle can be taken out to clean or replace the mirror as needed since it is held in place by tension alone.

After getting the walls up and the wallpaper in, I could address the final trims. I added a fancy routed trim for the top to cover the plain brace there. I added a piece of baseboard I believe I got from Debora when she was cleaning out some full scale supplies. I sanded the ends to curve toward the side trims since the baseboard was a little too thick for the space. After adding the final side trim, it was all done! Just need to fill it.
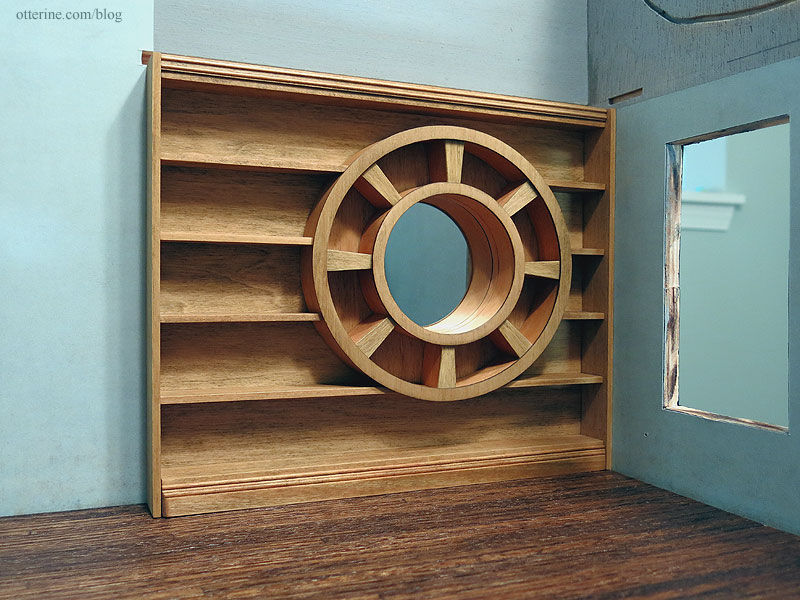
And, for final reference, here is the original again. I skipped the long curved trim for lack of space. Besides, I like mine as is. :]

no discernible source And, now for your dose of cute. Here’s Jasper in his new kitty bed. As many of you with cats know, they tend to like the box more than what comes in it. As I was unpacking the plush house, he was all eager to hop in the big cardboard box. He was just about to when I set the plush house on the ground off to the side. He made a beeline right into the plush house. Success! I even had to carry him upstairs in it (it has a handle), because he refused to come out.

Categories: Watson Mill
August 7, 2017 | 0 comments


NOTE: All content on otterine.com is copyrighted and may not be reproduced in part or in whole. It takes a lot of time and effort to write and photograph for my blog. Please ask permission before reproducing any of my content. Please click for copyright notice and Pinterest use.


