

Watson Mill – bedroom wallpaper
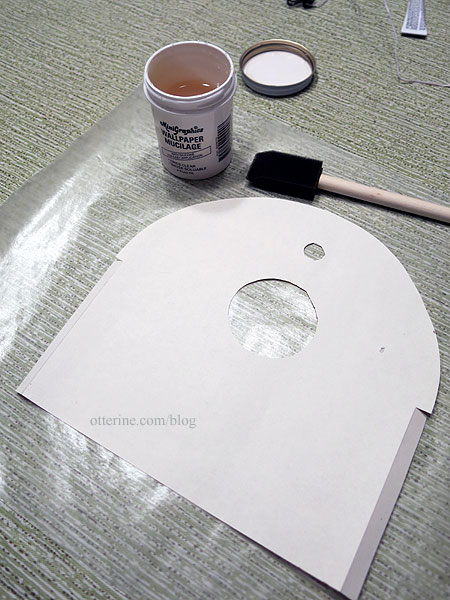
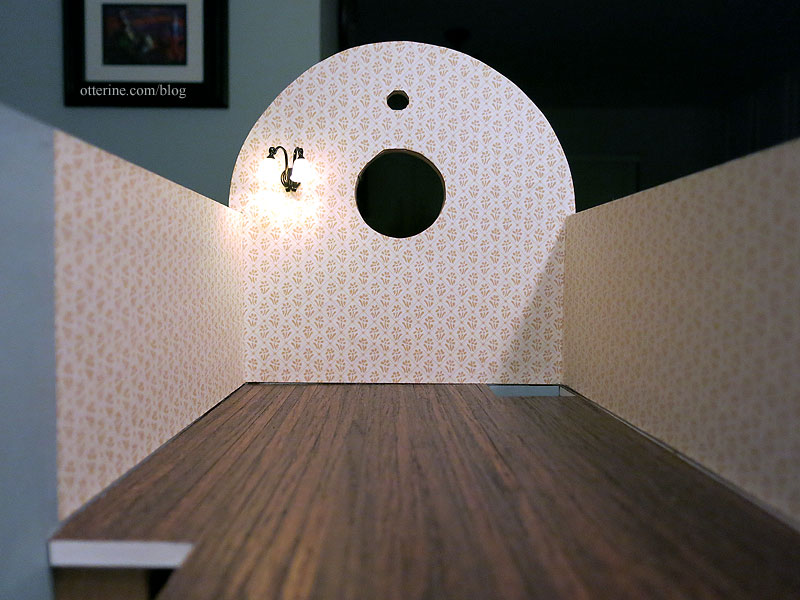
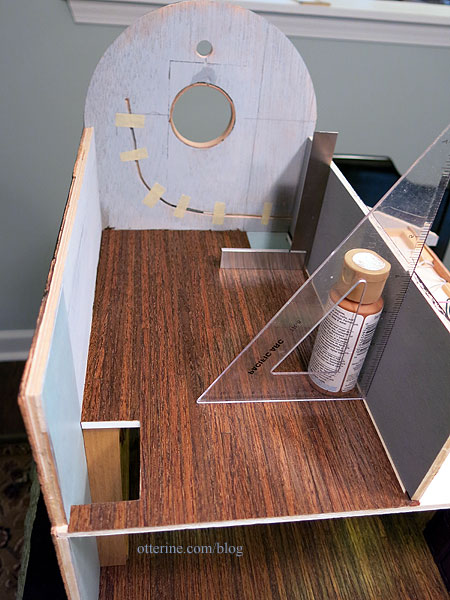
I lucked out with a great find at the recent Wee “c” Miniatures Show 2017 – a vintage paper from Mini Graphics called Gallery Flower. Since it came rolled, I pressed it flat on the table for a couple weeks before using. I had traced the wall outlines before assembly, so these helped me make paper templates to check the fit before cutting the final paper.
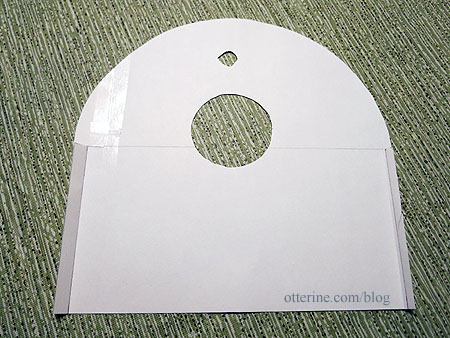
There were only two sheets of the paper in the roll, so I had to be careful with my cuts. I was able to get the three pieces needed to cover the bedroom from one sheet, leaving a couple of small scraps and one full sheet in case of disaster during installation. The light paper color will help keep the room from becoming a dungeon once the roof is on.
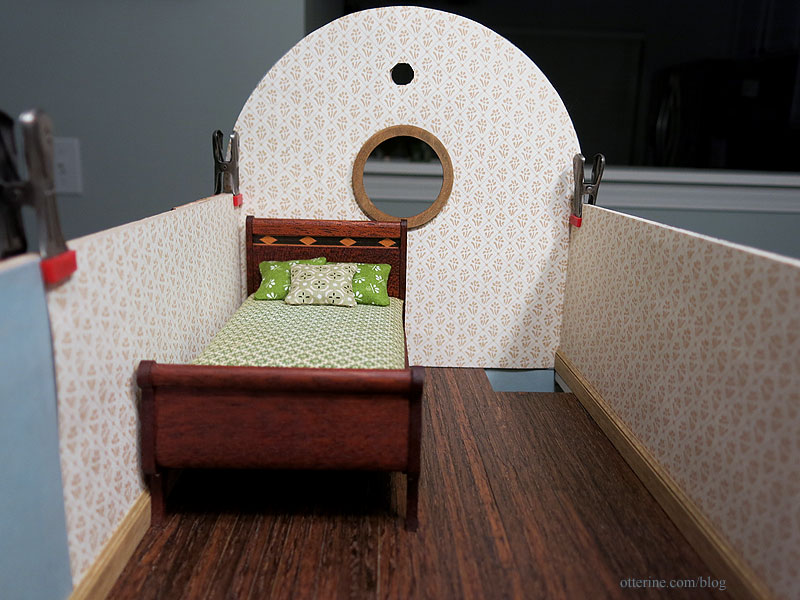
The upper floor will have stained baseboards, so I propped them in place to check the color and fit. They are lighter than the flooring but don’t clash since the paper is light.
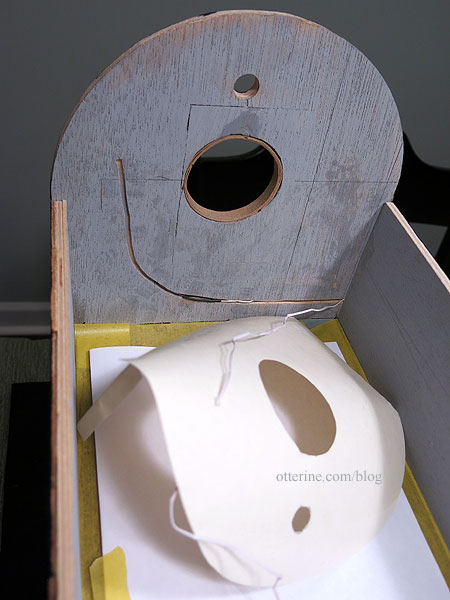
Time to install the wall sconce in the upper bedroom while wallpapering — it will make sense in a minute. I had made the channels for the wires previously. The sconce wires will not be poked through the wall to the exterior but instead will run on the interior wall to the open attic space. The downstairs floor lamp wire runs on the outside, up to the bedroom wall channel. I put a small piece of tape over the interior channel to help hold the wires while still allowing for movement. A whole strip of tape would stick to the wires too much and make it difficult to pull them through. This will matter more for the next step than it did for the floor lamp. I masked the floor prior to working as well to prevent glue mishaps.
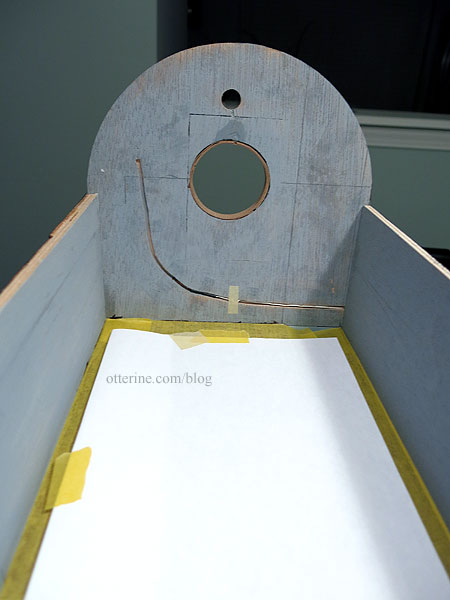
The bedroom sconce wires run through this curved channel, which will be covered by wallpaper. I had to get the sconce attached to the wallpaper, paste the wallpaper in place, and run the wires into the channel all in one step. I marked where the sconce channel began behind the wallpaper. I poked a hole in the wallpaper and fed the wires through, leaving the sconce loose. (My small tape piece isn’t shown here since this was my dry fit trial.)
Of course, I first double checked the height. :]
I then applied Wallpaper Mucilage to the paper.
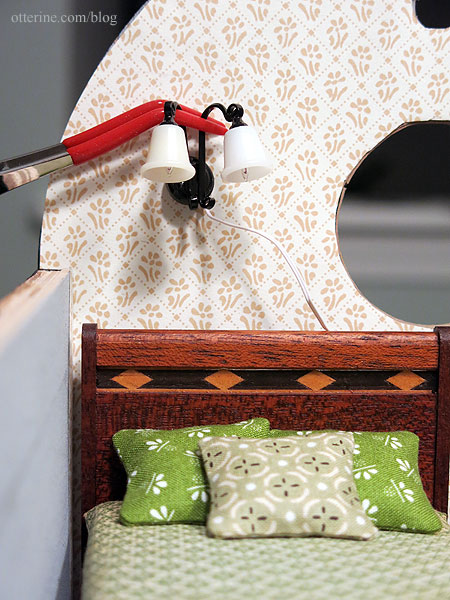
I fed the wires behind the tape and through the channel. Using my third and fourth hands (bahahahaha), I pressed the wallpaper down while pulling the wire through the channel, pausing for a second to apply some glue to the back of the sconce so it would remain in place once the wires were pulled taut. I then smoothed, straightened and stopped swearing. ;D Here you can see the side tabs that soften the joins in the corners.
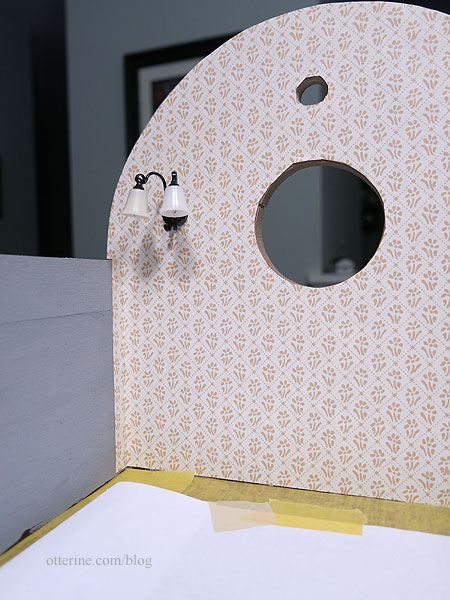
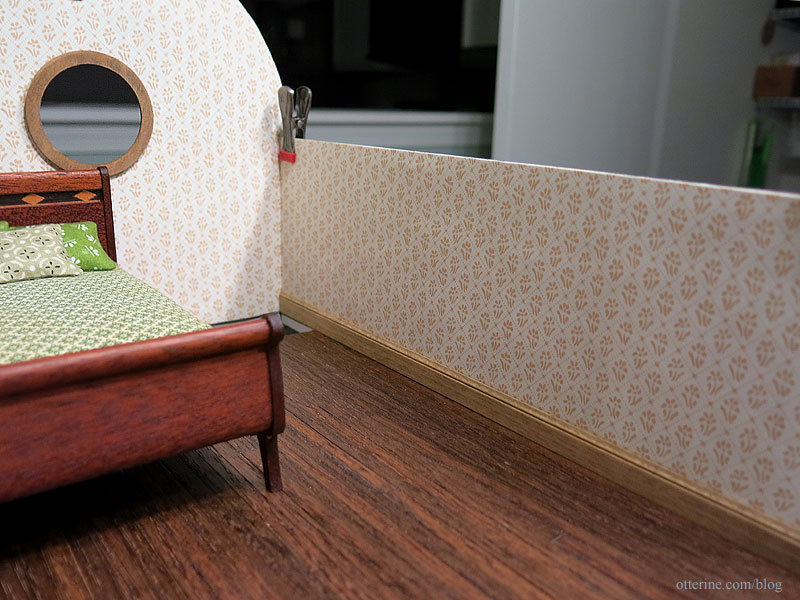
The two side pieces of wallpaper were much easier to install. I applied the paste to the paper and then eased them in place, overlapping the tabs from the front wall. I taped the tail end of the wires in the open attic space then used my color-coded wires to electrify and label the sconce.
The upper room will have baseboard trim and a table lamp, but I need to address the dumbwaiter gate and ladder railings first. So, that’s a wrap for today.
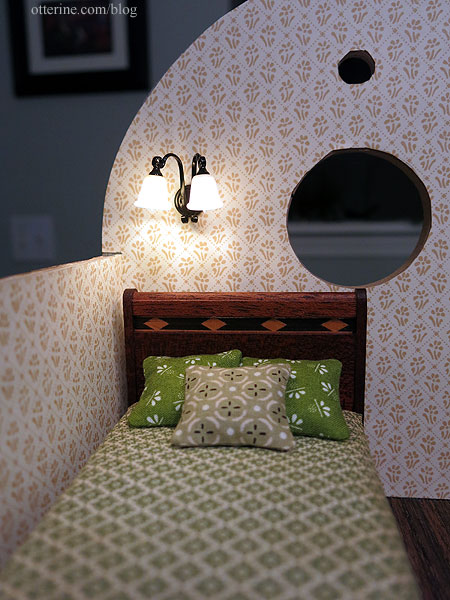
Update: this thin paper ended up buckling, even using the mucilage. I will line the replacement paper with a backing material and redo the application.
Categories: Watson Mill
January 17, 2018 | 0 commentsHappy New Year 2018!
I have a new toy! Mr. Meeseeks is from the Rick and Morty show. It’s a funny albeit crass show that isn’t for everyone, but I love it! Mr. Meeseeks is my favorite character so far. He comes with a gun and a golf club (makes sense if you’ve seen the show), but here he is about to enjoy some wine after completing his work. :D

Categories: Miniatures
January 8, 2018 | 0 commentsWee “c” Miniatures Show 2017
Tonight, I headed to the annual Wee “c” Miniatures Show. It’s a smaller show but there are always wonderful finds to be discovered. The show is open again tomorrow if you are in the area. :]
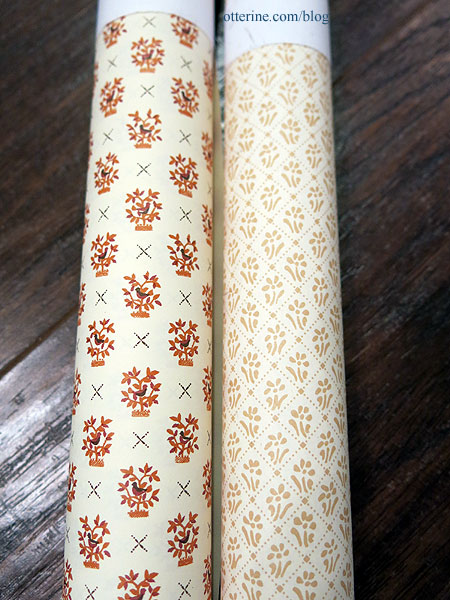
There’s always a bargain table in the lobby with the raffle prizes. I was able to score a few sheets of vintage wallpaper. I was having a hard time choosing something for the mill, and I think the pale yellow diamond pattern on the right will be lovely in the upper room.
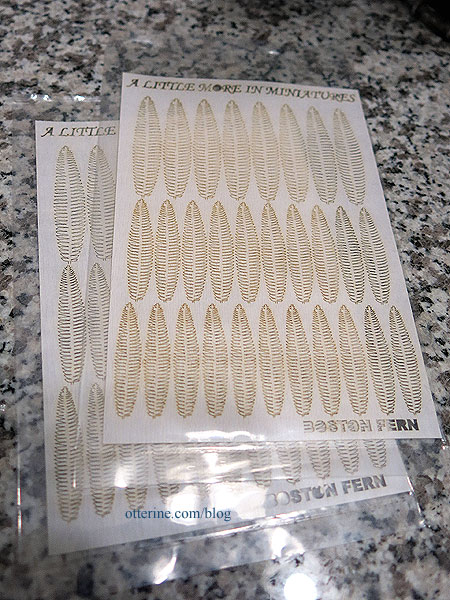
A Little More in Miniatures – Boston fern leaves to make your own plants.
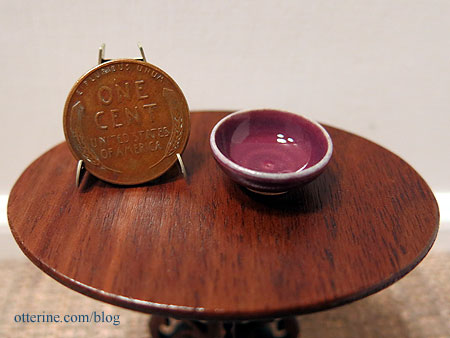
The Garden Path – a lovely purple bowl by Jason Feltrope.
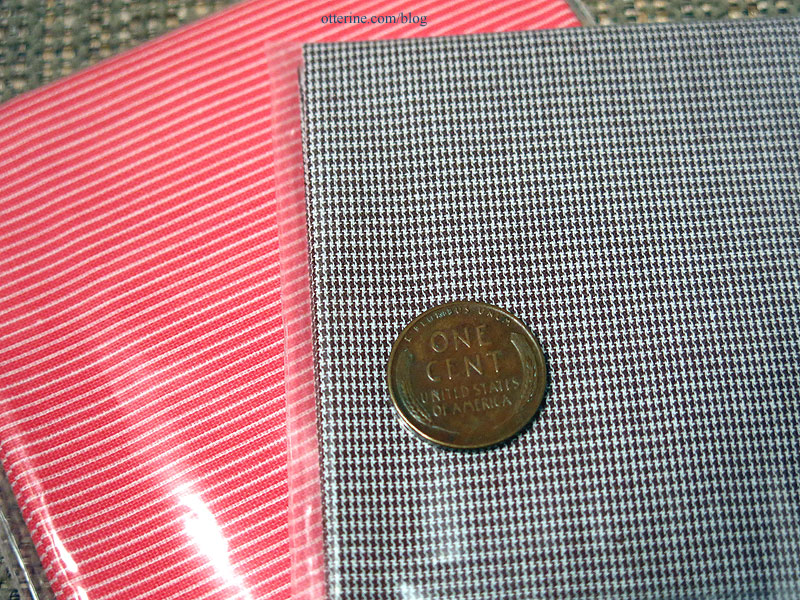
Fabrics, including an amazing brown houndstooth.
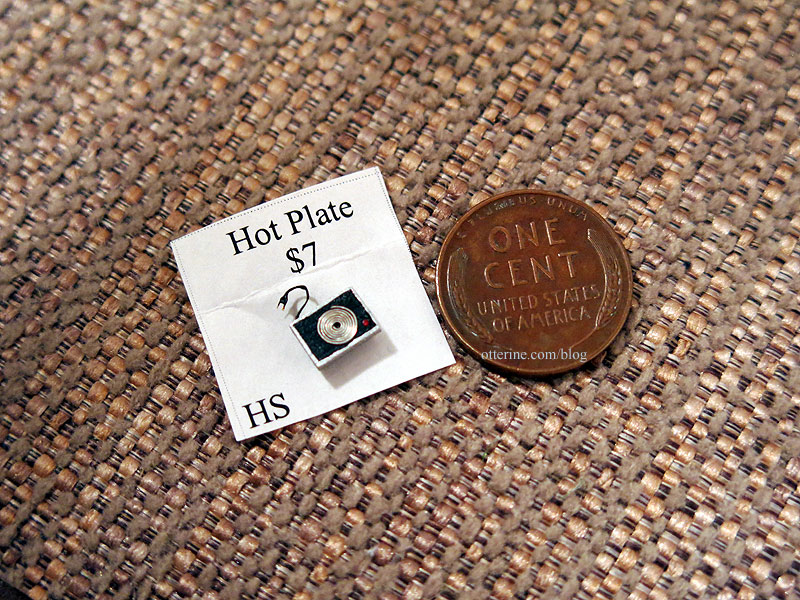
Cea’s Unique Finds – this vendor had a lot of what I am guessing were estate pieces. A had good luck at this table starting with a tiny quarter scale hot plate. Guess who is going to have to build a quarter scale house now. :D
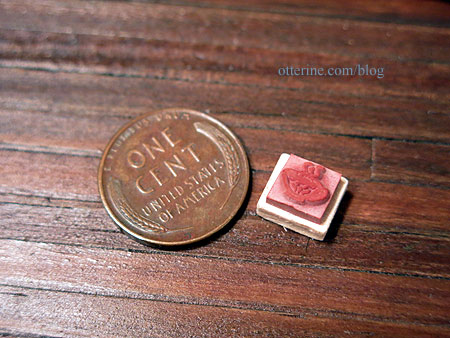
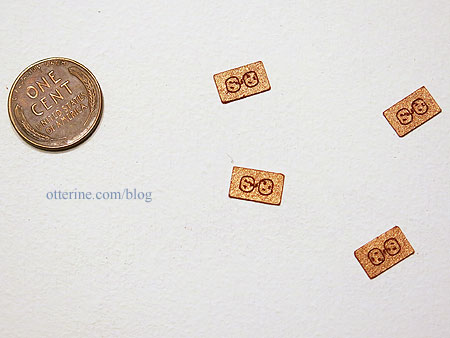
This was a mockup by Donna Bahls for tiny working rubber stamps.
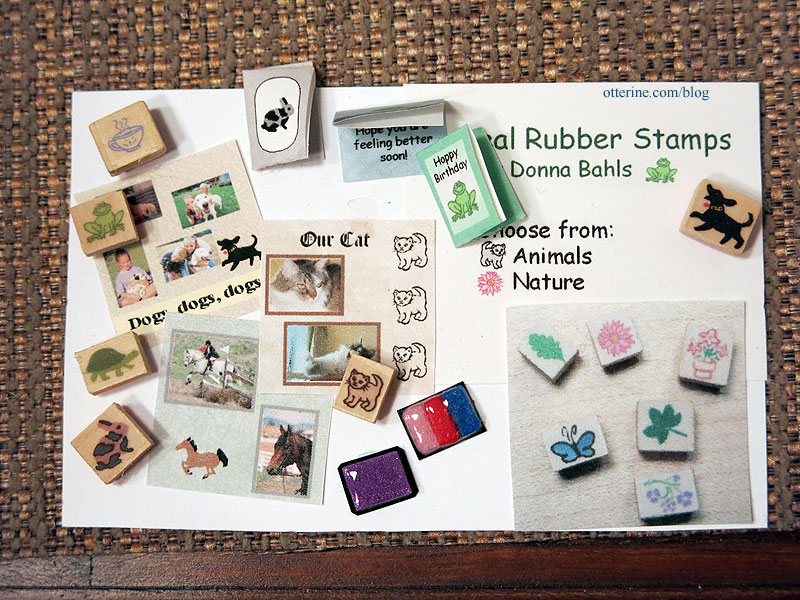
There is only one true working stamp as the rest are just the mockup display, but I couldn’t pass it up. Even if only the tea cup truly works, the others will make for great accessories in a scene.
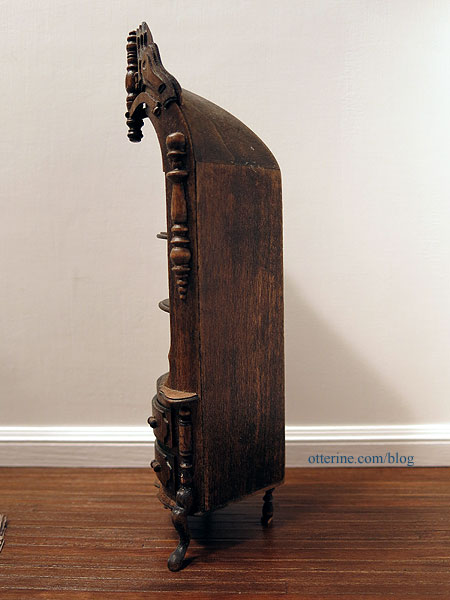
This corner cabinet is marked Lanny Gregg 79.
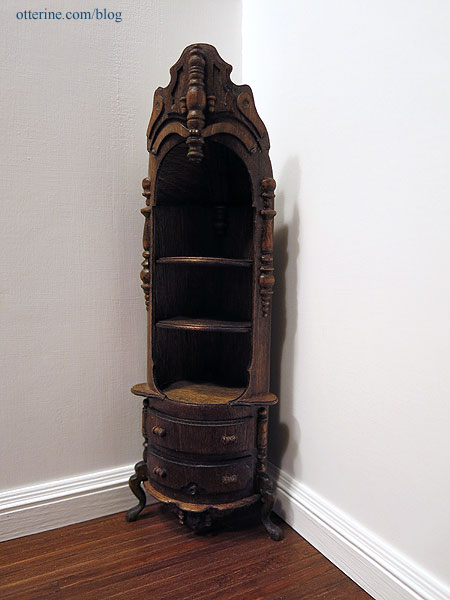
It’s such an unusual piece and in remarkable condition. The drawers do open. :]
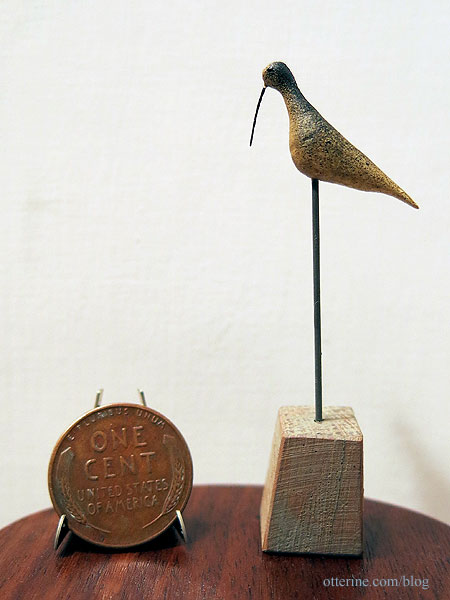
The final mini of the night was this marvelous bird marked J. Holmes 82. I love all things New England, and this is so indicative of that style.
Categories: Miniature Shows and Shops
November 10, 2017 | 0 commentsWatson Mill – building progress
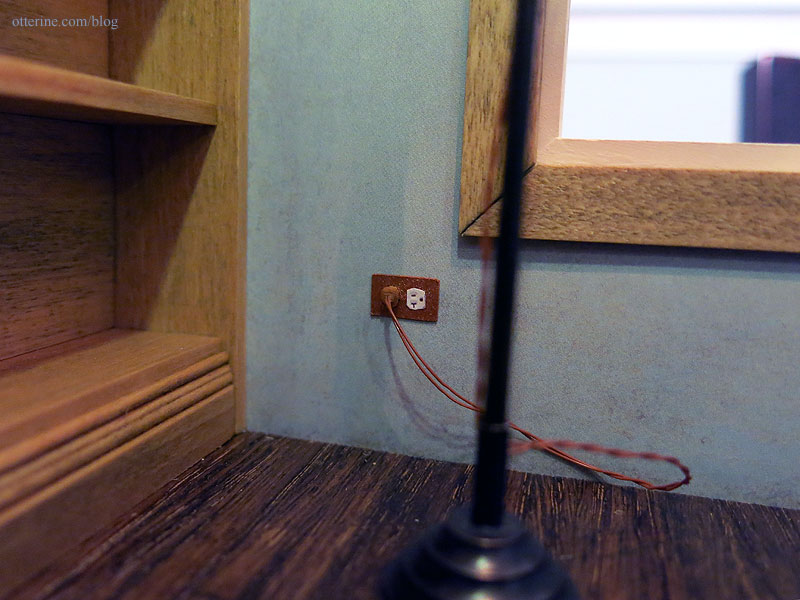
The Ray Storey floor lamp wire runs on the outside, up to the bedroom wall channel. I had made the channels for the wires previously. To install the floor lamp, I made one of my usual faux wall outlets from copper card stock. I have only one more lamp requiring an outlet, but I made four to have matching decorative outlets as well.
I finished the wire with a false plug, added a receptacle cut from stickers, and ran the wire up the outside.
I glued the ceiling board in place. To help with stability, I added strip wood on the upper floor where the wiring space will be.
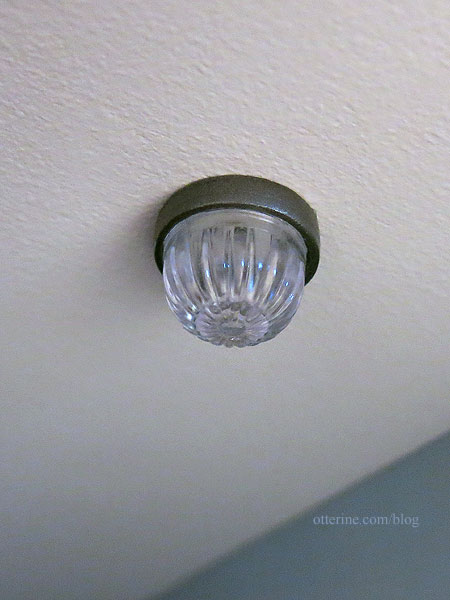
I installed the two ceiling lamps from the first floor and ran the wires into the attic space. These are new old stock ceiling light kits by Illinois Hobbycraft. I spray painted the metal rings Krylon Antique Bronze.
Since I put the wallpaper in prior to putting in the ceiling board, I needed some small crown molding to finish the upper edges. I stained this Minwax Driftwood to coordinate with the other finishes.

I checked the fit of the upper flooring and cut the holes for the two openings before gluing it in place. I had previously stained the red oak flooring with Minwax Dark Walnut, sealing with two coats of Delta Ceramcoat Matte Varnish. Next up was installing the small side wall to complete the bedroom space.
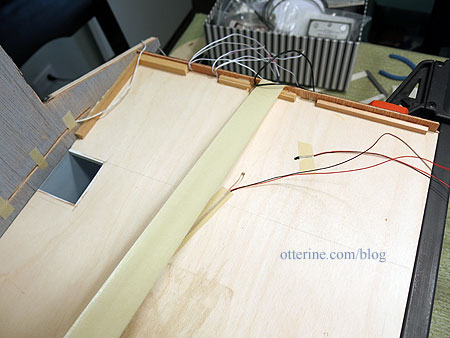
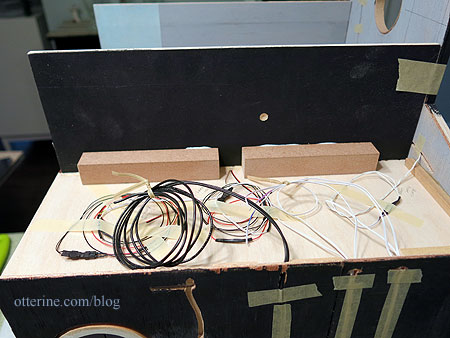
Here you can see the wiring from the floor lamp running through the bedroom channel. I put a few small pieces of tape over the interior wiring channel to make a pocket for the wires while still allowing for movement. The bedroom sconce wires still need to be added to this channel. A whole strip of tape would stick to the wires too much and make it difficult to pull them through.
I stabilized the wall with pieces of mdf. As you can see, the attic space will provide good access to the wiring.
Categories: Watson Mill
October 10, 2017 | 0 commentsWatson Mill – door and windows, part 3
Continuing work on the door and windows. I spray painted four doorknobs and two keyholes in antique bronze since the area for door handles was so narrow. I had to put the knobs a little off center from one another due to the draft strip down the middle.
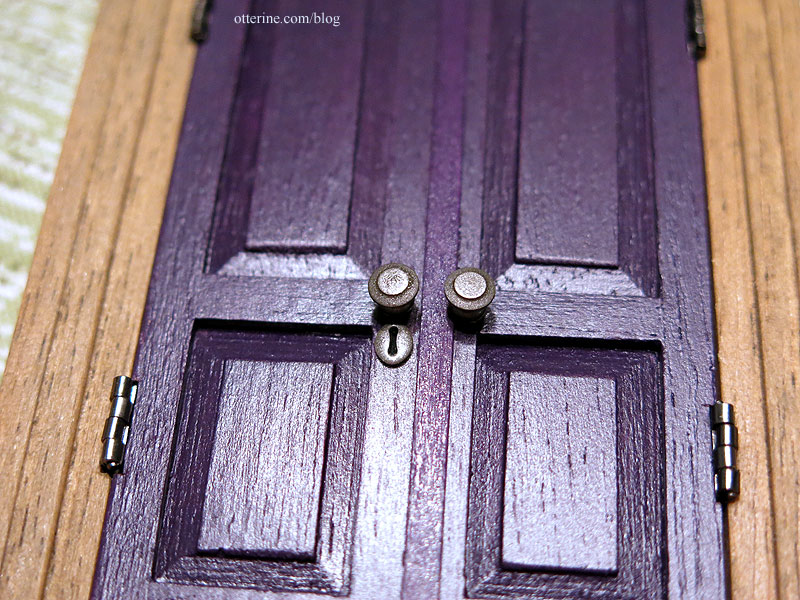
I love the way it turned out, though. :D

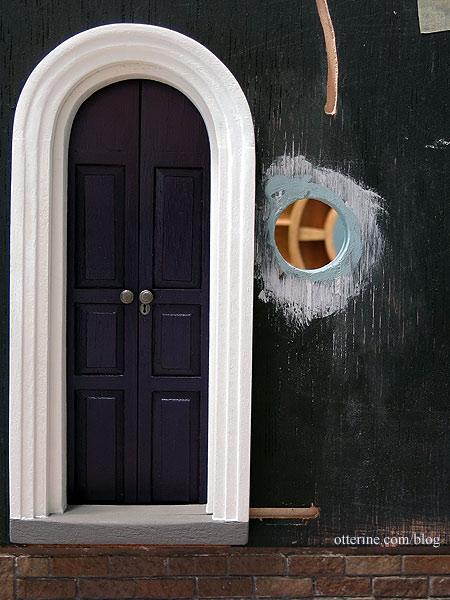
Right now, I have the outer trim held on with putty since I’ll need to use the curve to mark the shingles as I round the top. I tried to fix the bad sanding job on the curved portion, but I’m still not happy with it. (I found another of these vintage windows, so I can replace the outer trim.)
The threshold for the door was painted Neutral Grey after a good sanding to droop the middle as though it has been worn over the years. I’ll add some subtle aging once I do the landscaping.
The window I bought from Hobby Lobby would not go back together correctly, even though I was careful to keep the parts in the right order. I won’t put a wonky window in a build I’ve been so carefully planning. I painted a Houseworks window in replacement, using stained trim for the interior. The corner joins are somewhat pronounced from the stain, but it won’t matter with the window coverings and furniture placement.
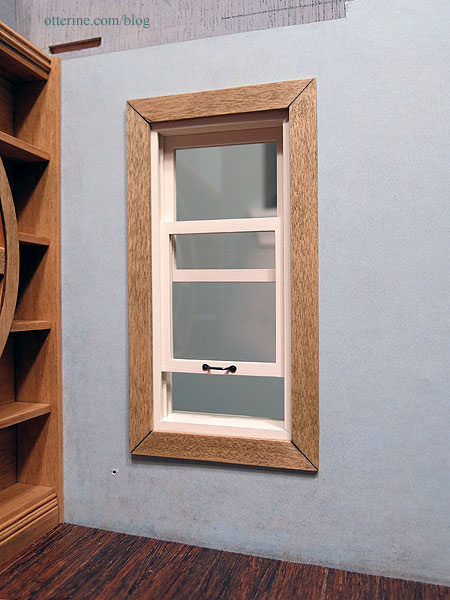
I had to pad the exterior frame with strip wood since the thickness of the wall is 3/8″ but these are meant for 1/2″ thick walls.
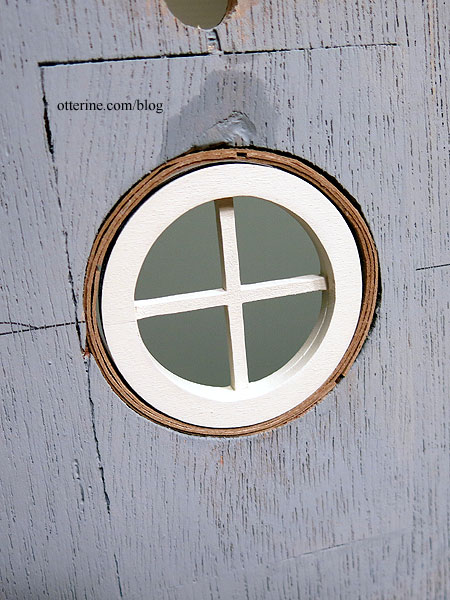
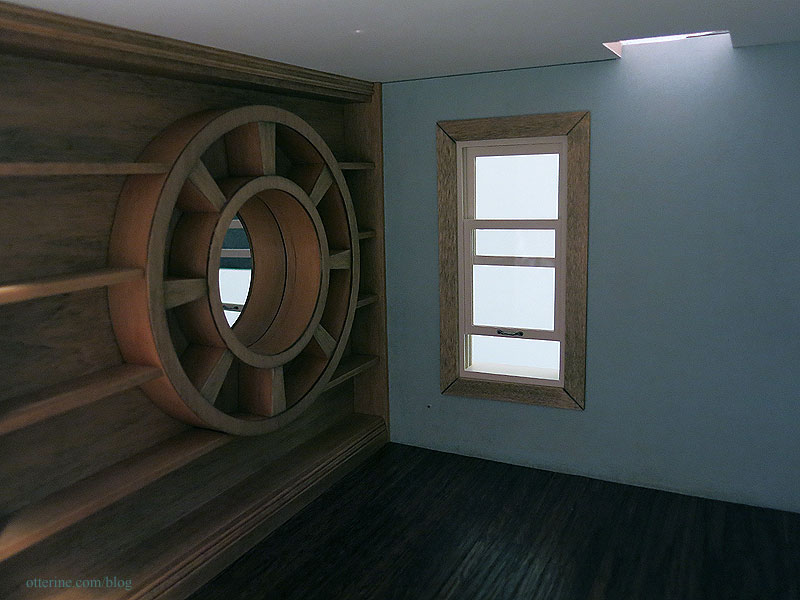
As noted previously, I had to repair the window opening for the round upper window due to a wandering Dremel. I cut strips of cardboard and lined the hole until I had a suitable diameter to hold the window in place. This fix will be covered by wallpaper on the interior and wood shingles on the exterior.
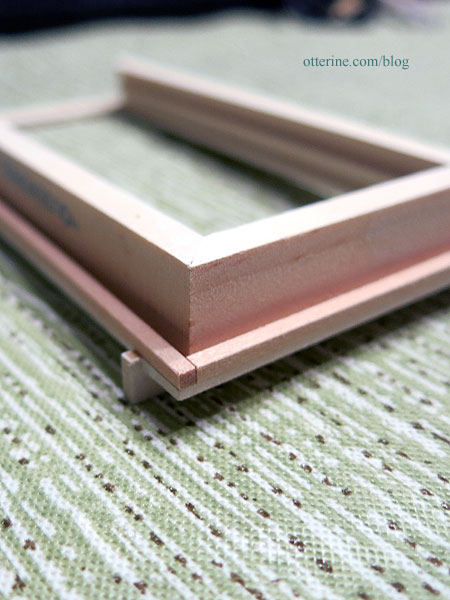
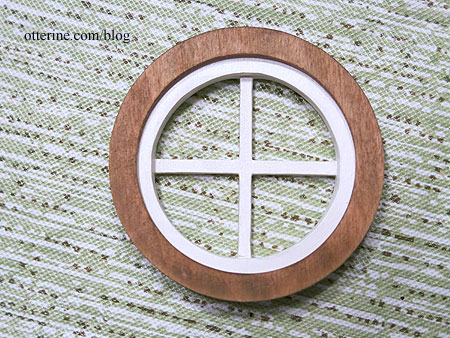
While I love the 2 1/4″ Simplicity Window from Heritage Laser Works, the front wall is 3/8″ thick. Each window comes with one 1/8″ thick center mullion piece and two 1/32 thick outer trim pieces. I bought three windows to have the parts needed to address the thicker wall. I will use two center mullions, one on each side of an acrylic window. I cut the cross bars from the third mullion piece to finish out the required thickness.
I glued three of the outer trim pieces together to make a thicker exterior trim piece then glued the two remaining outer trim pieces together to make the interior trim piece.

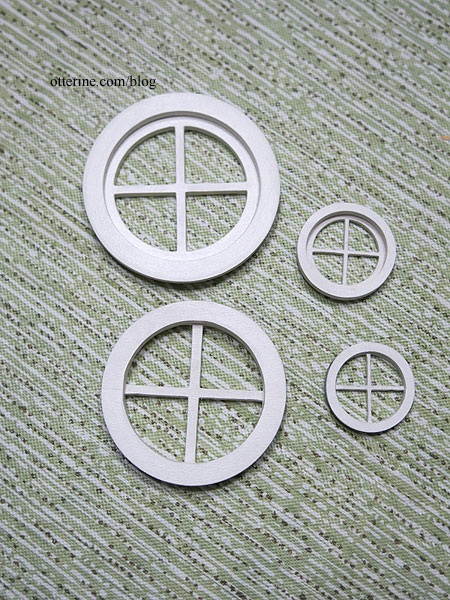
For the 1 1/8″ Simplicity Window from Heritage Laser Works, a little more work will be involved since the pieces aren’t as thick. But, to start, as with the larger round window, I glued four of the outer trim pieces together to make the exterior trim piece then glued the two remaining outer trim pieces together to make the interior trim piece.
I glued the outer trims to one mullion piece for each window. I won’t glue the windows in just yet since I want to use them as guides for cutting the shingles to fit. I painted these Americana White Birch in satin.
The interior trim is stained Minwax Driftwood.
I think I am ready to get the ceiling installed, then lighting, then back to the dumbwaiter and the ladder.
Categories: Watson Mill
September 27, 2017 | 0 comments


NOTE: All content on otterine.com is copyrighted and may not be reproduced in part or in whole. It takes a lot of time and effort to write and photograph for my blog. Please ask permission before reproducing any of my content. Please click for copyright notice and Pinterest use.


