Half Clocked – roof, part 1
Thanks to Sheila, we know what bargeboards are. So, today, I am working on the fascia and bargeboards. I stained lengths of 1/16″ x 1/4″ basswood to attach to the exposed edges of the roof. I used Minwax Jacobean. On top of that, for the gables, I’m adding Paulina trim from Heritage Laser Works. These are only 1/32″ thick and very delicate, so I had to come up with a way to stain them without breaking them.

I used a piece of foam core board and drenched the trim with stain using a brush.

I then turned it over to drench the other side.

Gently picking up the trim, I wiped the excess from the board.

I placed paper towels on the board long enough to cover the length of trim.

I pressed the trim in the paper towel a couple of times until very little stain lifted from the wood.


I installed the basswood trims first.

Then came the fancy trims. I always keep scraps of any fancy trims I use in my projects, and it worked well for tiny finials for the apices. These are parts from laser cut railings from Laser Tech that I used for Walnut Bay Light.

I’ll have to finish this up once the remaining smaller roof pieces are attached.
Categories: Half Clocked
November 5, 2018 | 0 commentsHalf Clocked – recessed lighting
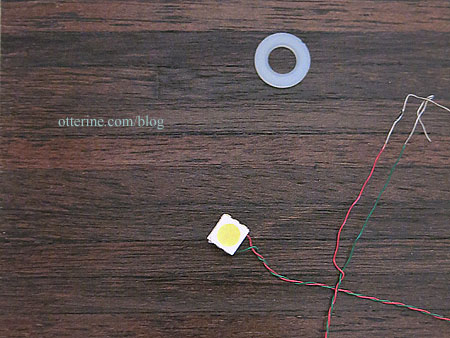
There isn’t a lot of space for lighting now that I’ve cut down the structure, so I’m opting for recessed ceiling lights alone for the interior. I’ve put NovaLyte can lights in past houses, but they require a 3/8″ thick board to sit flush. In this instance, I will fake it with LEDs from Evan Designs and nylon washers.

I am planning eight for the ceiling. It might seem like a lot, but the vaulted ceiling is high above the living space and I want to be sure there is plenty of light. If they are too overwhelming once in place, there are methods for addressing the color and brightness. I will run these wires along the roof to the enclosed gable and down through the small front room to the landscaping board. They won’t be easily replaceable, so let’s hope they last a long time. Hence, the reason to use long-lasting LEDs.
I will add two new old stock ceiling light kits by Illinois Hobbycraft to the front alcove as well. As you can see, I had some flooring issues. I’m finishing a patch for the flooring separately.

The only other light I have in mind right now is the front porch light, which will be a coach lamp.

I had a long weekend taking some vacation days, so I got some extra work done. With the structure out of dry fit, I could start tackling the roof. First up was making templates of all the roof pieces onto drawing paper. This will make for easier shingling later.

I then made my wiring channels for the recessed ceiling lights using a Dremel Trio. After, I taped the two roof boards while flat, added glue and then folded the boards. I used my carpenter’s square and a triangle to hold the boards in position while the glue dried. I left the tape in place on the exterior for stability and will remove it once I’ve installed the board onto the structure. The two smaller roof boards are still in dry fit.

I installed the LEDs in the ceiling on the roof side.

I taped over the channels on the outside to protect the wires and to keep them in place.

On the inside, I added nylon washers to serve as the recessed light rings.


I previously marked where the walls would need to connect, then painted the interior and eaves White Birch by Americana, using the same stucco stippling effect from the outside. I had a little trouble covering the joins where I filled in the one board, but it’s not very noticeable. The eaves should be a nice contrast with the dark chocolate trims.

I painted the front gable portion black. You can also see the wiring for the ceiling lights curled and clamped for later work.

I have some of the wires that will extend to the power strip in place. These have been bundled under the structure for later use when I attach the building to the landscaping board.

I’ve painted the exterior of the roof black to move on to the next steps.

Categories: Half Clocked
November 4, 2018 | 0 commentsHalf Clocked – starting the dovecote
There’s a lovely space in the Three Gables House that is perfect for a built-in dovecote (just ask Sheila). I did some scouting around online, and found a great site for inspiration and instruction. I started by measuring the entire space available. The popholes need to be scaled from 4″ by 6″ (approximately 21/64″ x 1/2″ in 1:12 scale) and roughly 1/2″ apart (in scale). This gives me room for nine birds. I drew this template in Word.

Originally, I was going to cut a triangle and then cut the popholes, but I wasn’t getting good results. So, I re-engineered my approach. I cut 24/32″ wide strips of 3/32″ thick basswood and cut them to fit. I used strips of 1/16″ thick basswood to make each floor’s landing platforms. It also works well as a design element separating the levels. This might seem like a bit of over-engineering, but it just seemed the best way to get cleaner cuts without pulling my hair out.

I marked then cut one pophole with my Proxxon scroll saw. I used that pophole as a template for the rest.

I didn’t get as good a result as I wanted. The holes varied too much for my liking. Yes, I know…time for a laser cutter. I edited an arch in Illustrator, imported it into Cricut Design Space and then used my Cricut to cut out cardstock trim for the popholes.

Now the holes are more uniform, and fancy to boot! :D

I marked the landing platform locations onto the floor boards and then cut those. I could have left the floors intact all the way across, but I wanted some pizzazz. :D

Time for construction. You can see I sanded the platform corners into curves.

I added vertical insert boards to make the interior compartments, but mainly for stability.

The upper compartment has small braces for the front wall.

I used spackling to even out any gaps.

I had to trim and slide the middle section over to line up the sections properly, but the final trims on the outer edges will disguise these issues.

Categories: Half Clocked
November 1, 2018 | 0 commentsNot all ghosts are scary…
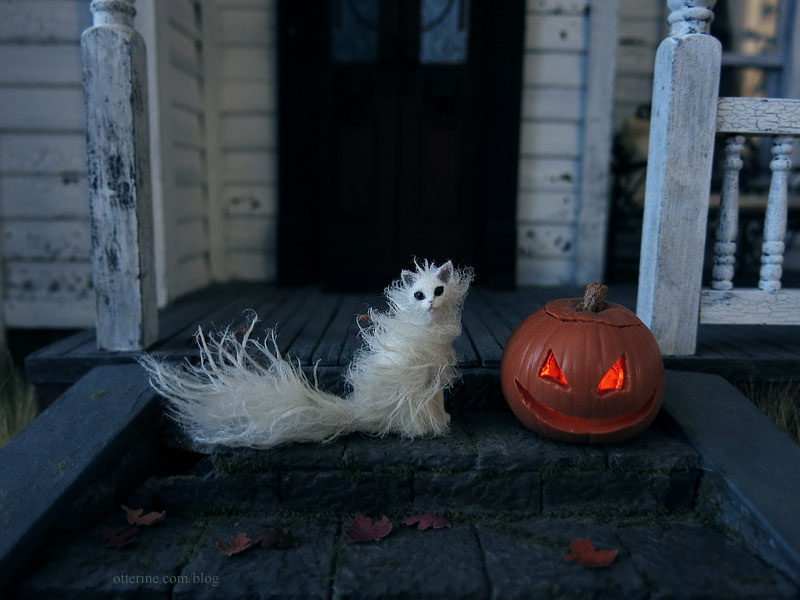
I’m feeling sentimental this Halloween, and this lovely kitty cat has a lot to do with it. Halo is a beautiful creation by Maya Schippl.

Halo reminds me not only of cats from my past, but all the precious pets that have come and gone, each special in their own way. Perhaps this Halloween we will each be granted a visit from our beloved animals who live on in our hearts, and the treats we enjoy will remind us of sweet memories. :] Happy Halloween!

Categories: Animals and birds
October 31, 2018 | 0 commentsRX-7 in half scale, hitting the road…
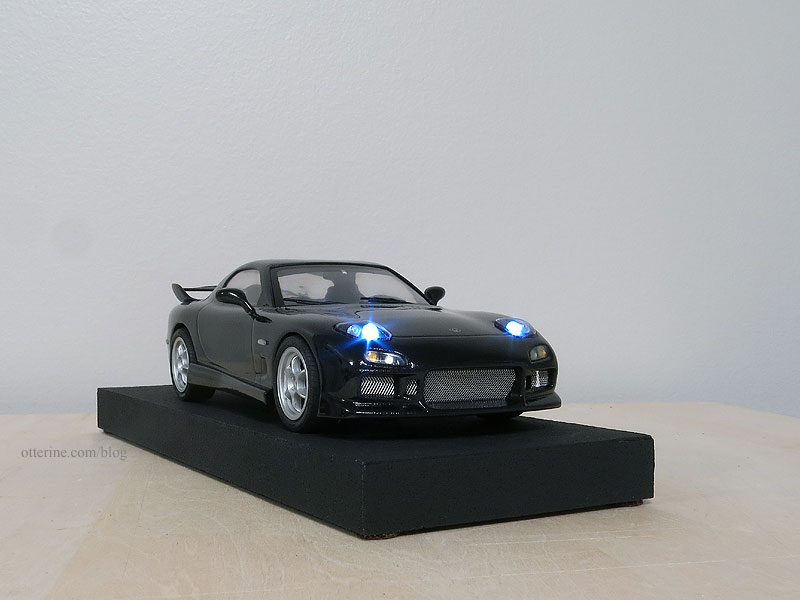
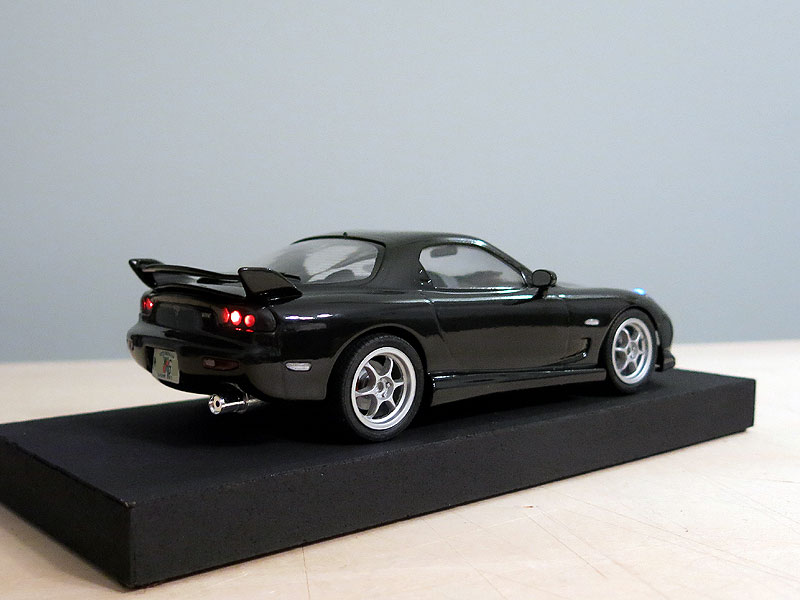
Work has been completed on the RX-7 in half scale. This lovely auto is on its way to Florida where it will be placed on the cake table at a friend’s wedding. This was a side commission and a super fun project to boot!
I’ve included some photos of the original car we were trying to emulate. Fingers crossed that it travels safely and provides some mini wow for the cake table. Sending out a huge congrats to the happy couple! I am honored to have contributed to your special day.


The original:


Categories: Model Cars, Vehicles
October 26, 2018 | 0 comments
NOTE: All content on otterine.com is copyrighted and may not be reproduced in part or in whole. It takes a lot of time and effort to write and photograph for my blog. Please ask permission before reproducing any of my content. Please click for copyright notice and Pinterest use.


