

Riverwood Cabin – colors and prep
Starting work on Riverwood Cabin. After viewing a lot of landscaping videos, I’ve decided it’s better for me to build the house first then do the landscaping to fit. I found this great inspiration house online. I love the colors and the water’s edge landscaping. I won’t be copying directly, like adding a chimney or making a bigger deck, but it gives me a good starting point for a color scheme and landscaping ideas.
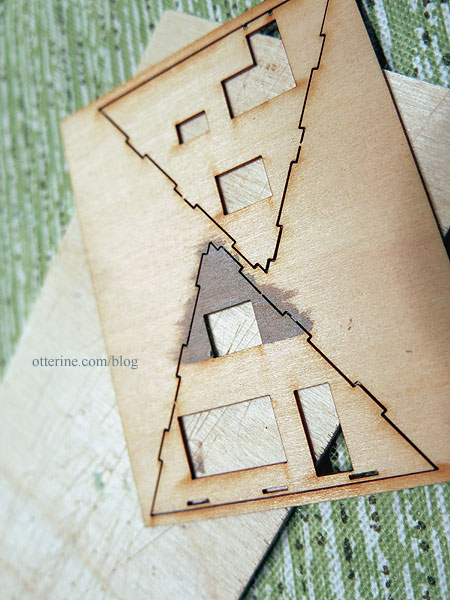
Planning ahead, I bought shingles from Ultimatetrains. The kit shingles are printed and good quality, but I wanted to try true texture.
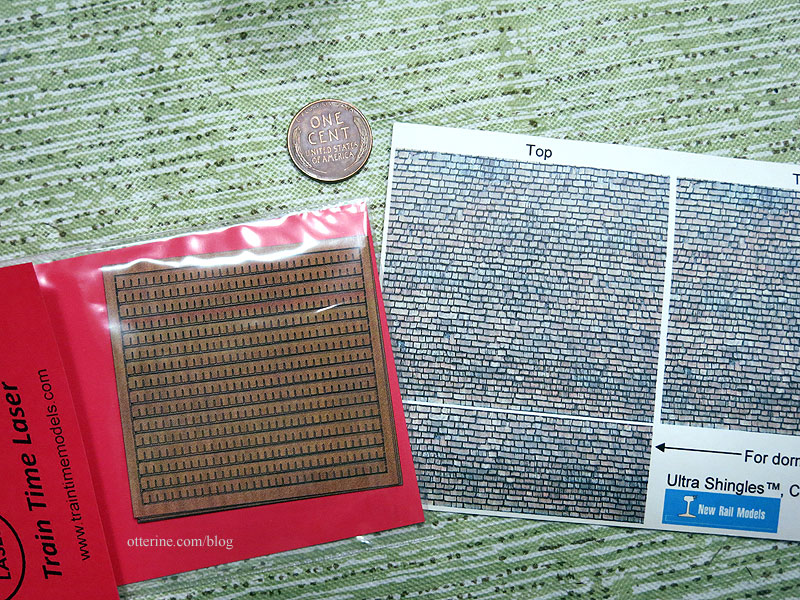
The kit manufacturer has included guide marks for shingle strips if you happen to buy them as a supplement to the kit, which is just awesome. :D Less prep work is always awesome.
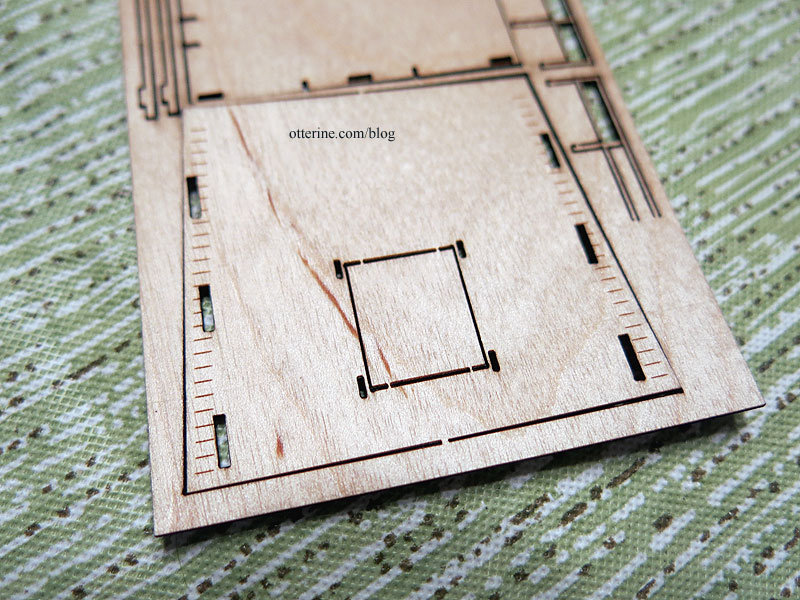
The patio is pretty warped on the frame. I foresee the use of many magic words in my future as I assemble that part. After I get it painted, I’ll press this and any other parts for a few days to see if I can get them flattened a bit more.
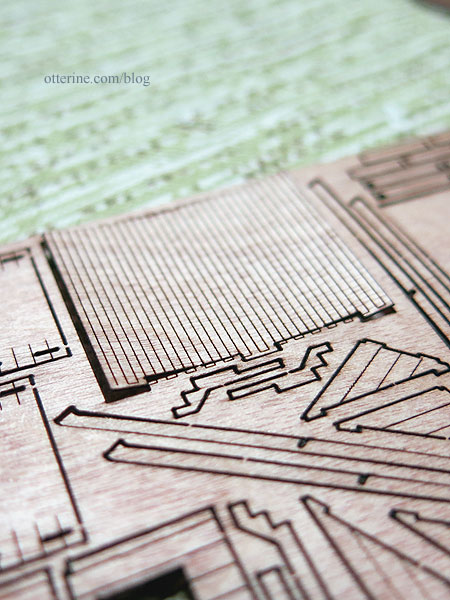
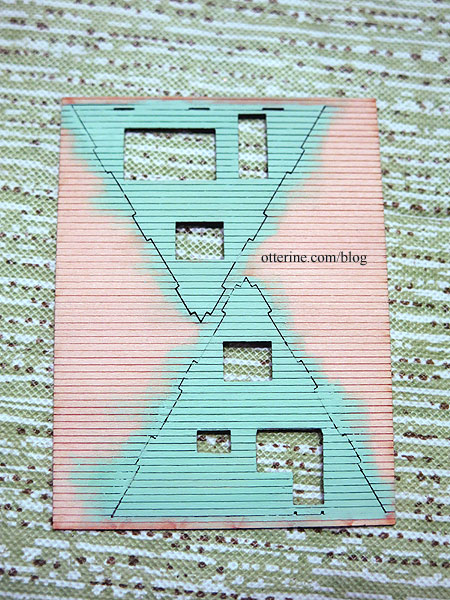
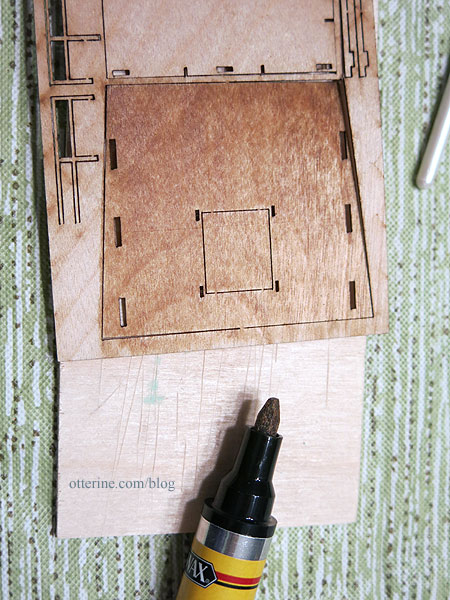
The instructions indicate that painting and staining work better before assembly, so I am going to start there. For the front and back siding, I’ve chosen Villa Green by Folk Art. Paint has to be applied in thin layers to keep the thin wood from warping.
I would apply paint on a portion and then flip over to paint the other side. This kept the warping under control. There is an interior second floor that adds stability and a more realistic interior view. I’d also like to add some LED lighting to the interior. I painted the interior front and back Battleship by Americana so the light will glow through the windows and not light up the whole structure inside.
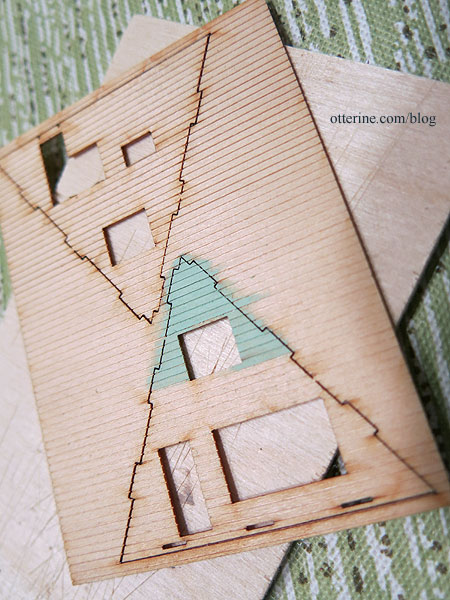
It’s a lovely teal/seafoam mix. Since it’s just the front and back, I didn’t think the brighter color would overwhelm.
I stained some of the pieces using Minwax Staining Pens.
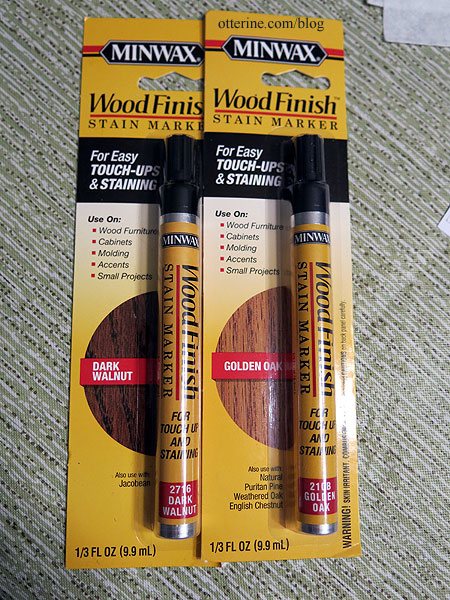
The exterior roof pieces, floors and lower floor supports are dark walnut.
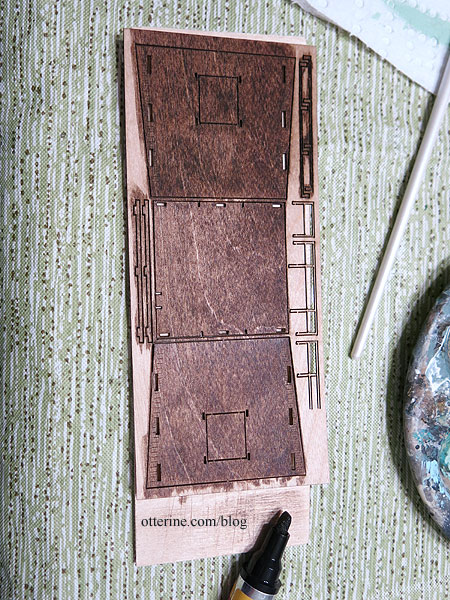
The interior roof pieces are golden oak.
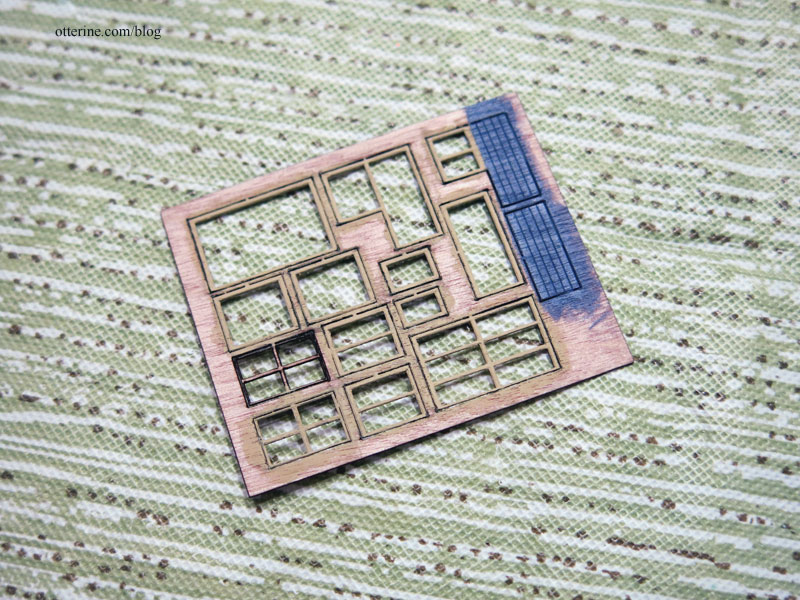
For the trims, deck and railings, I’ve chosen Camel by Folk Art. I’ll need to paint the outer edges as I remove the parts from the frame during construction since they are dark from the laser cutting process. I painted the front and back doors Night Sky by Americana, which I will likely change. These are very hard to paint, and they look a little uneven in the photo. I’ll try to fine tune them a bit more.
Categories: Micro Scale Models
February 7, 2019 | 0 commentsMicro Scale Models
A recap post to make it easier to find the micro scale models. Click the title links for additional details and photos.
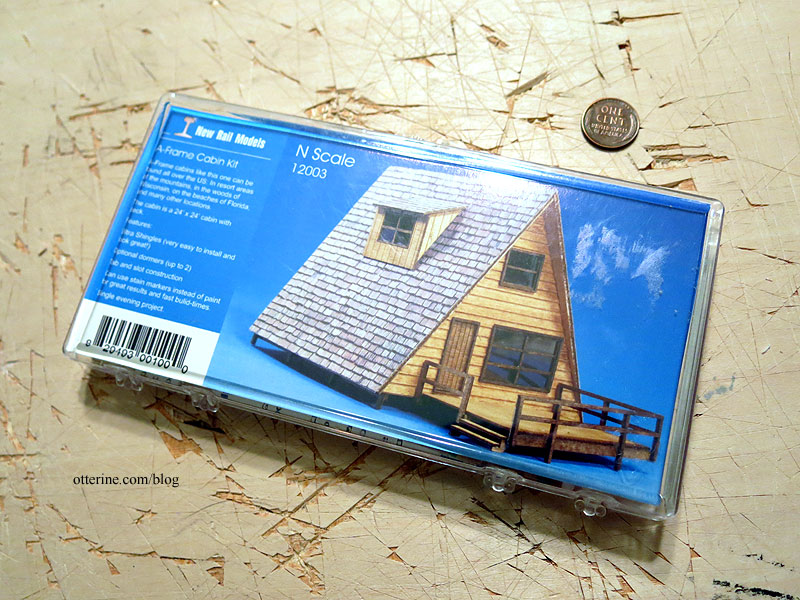
———Riverwood Cabin – New Rail Models A-Frame Cabin kit in N-Scale – work in progress
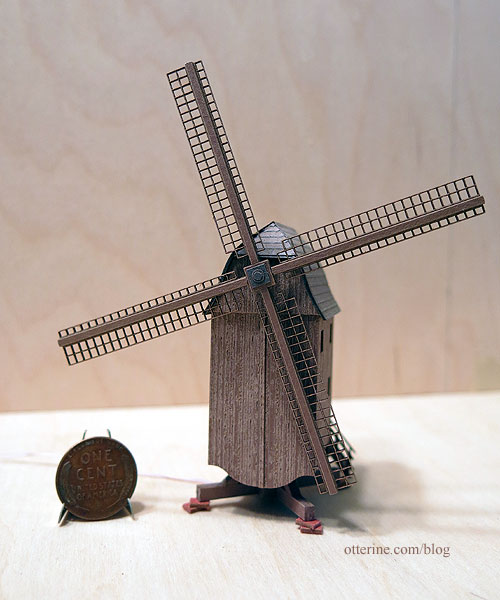
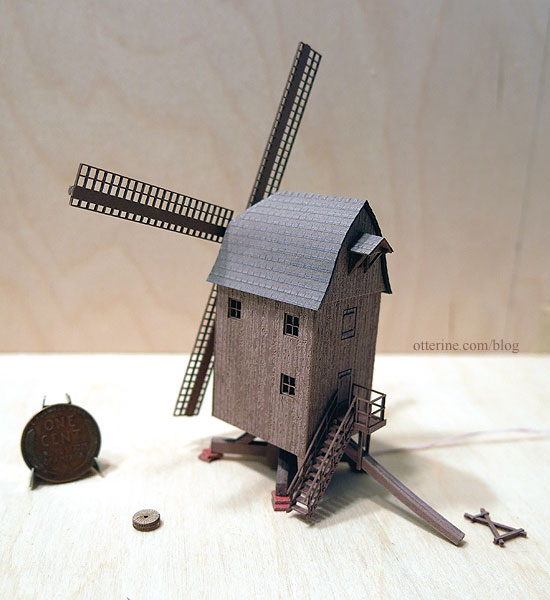
Gustav’s Mill – Archistories Windmill “Marienfehn” in Z scale – work in progress

Hampton House – 1:144 scale – work in progress
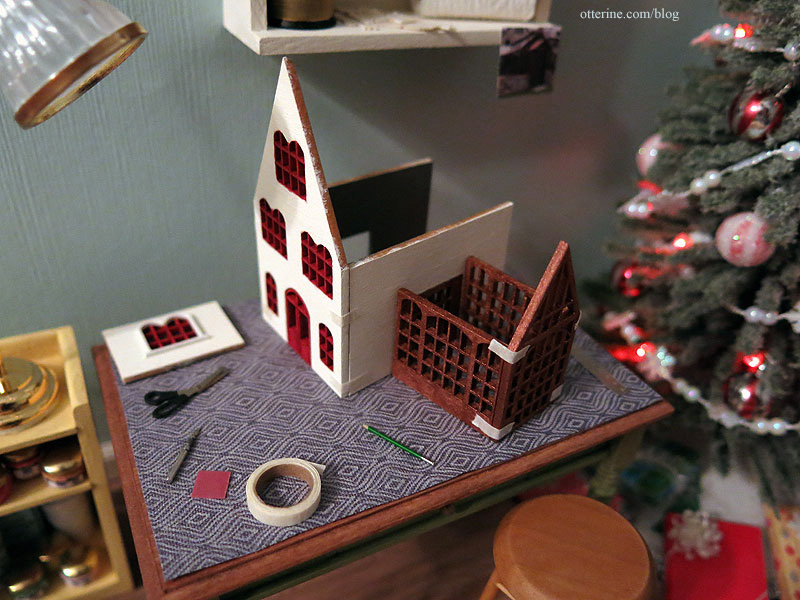
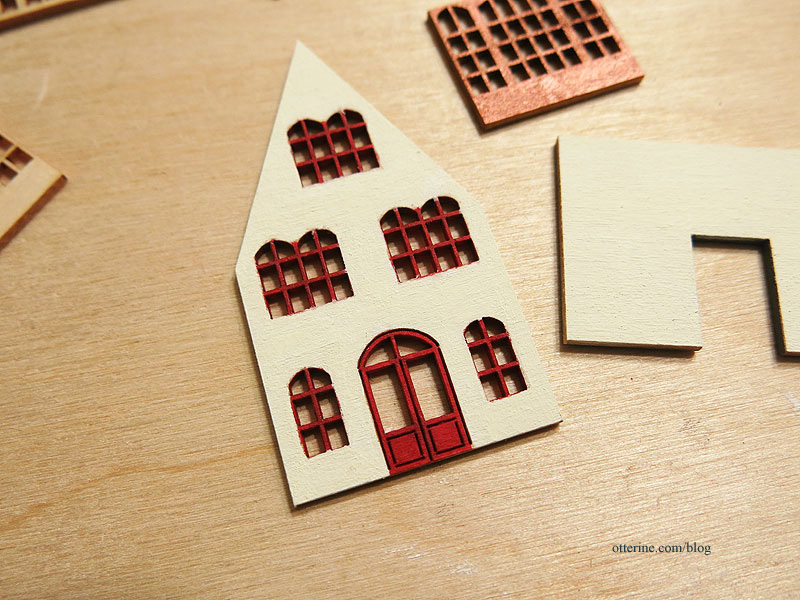

photo from miniatures.com website Categories: Micro Scale Models
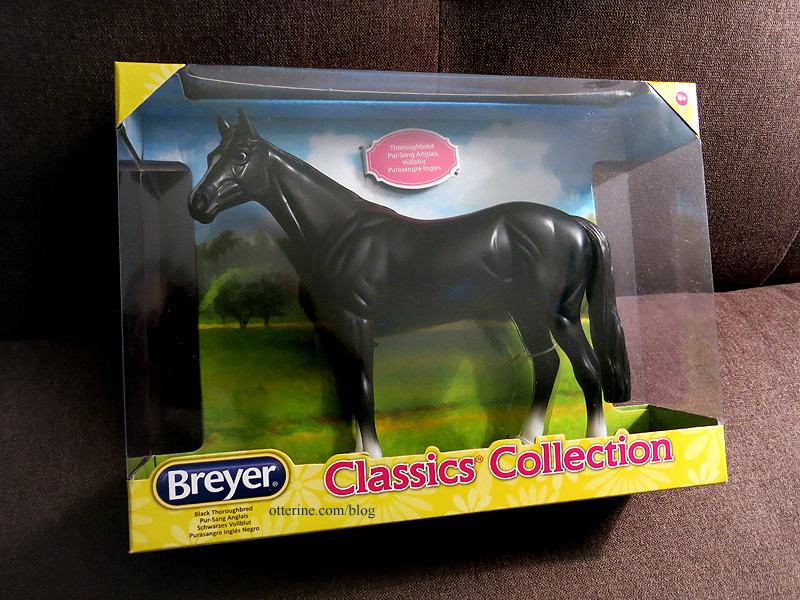
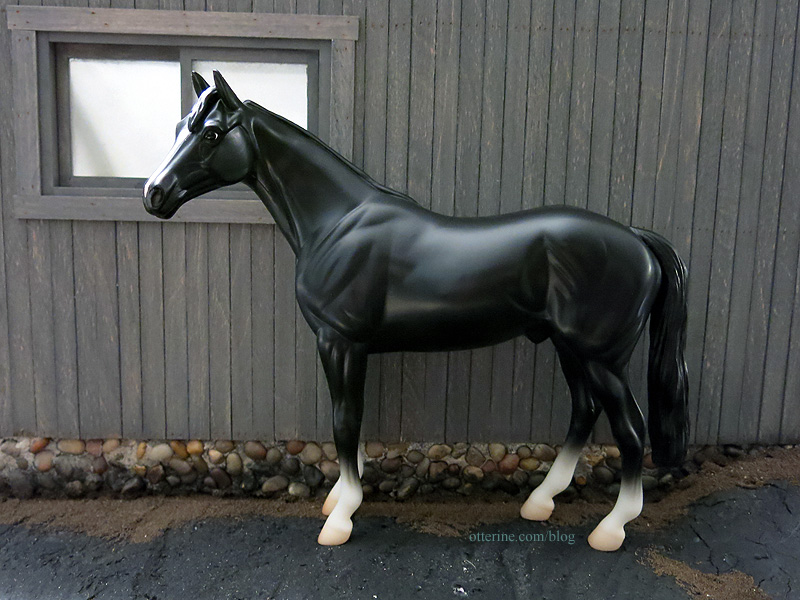
February 6, 2019 | 0 commentsMaking a 1/12 scale horse – part 1
I’ll be starting with a 1:12 scale Breyer Thoroughbred. Adding flocking or fur adds bulk, so I thought I would start with the leanest horse model available. Of course, you can scrape down a model before flocking as well but I’d rather keep it as simple as possible.
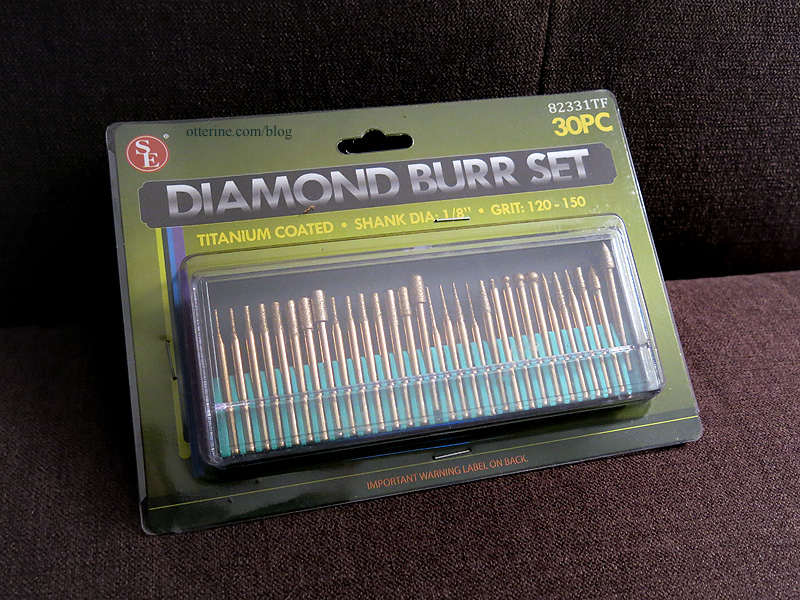
I picked up a set of diamond burrs for my Dremel to help with the deconstruction.
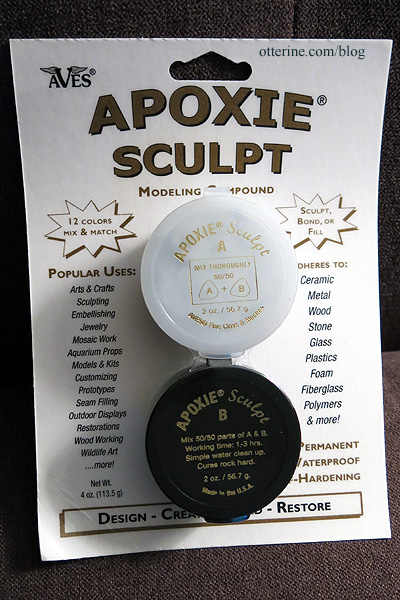
I found a great tutorial about removing the tail and building up with Apoxie Sculpt, so I picked that up as well even though I plan on having a mohair mane and tail.
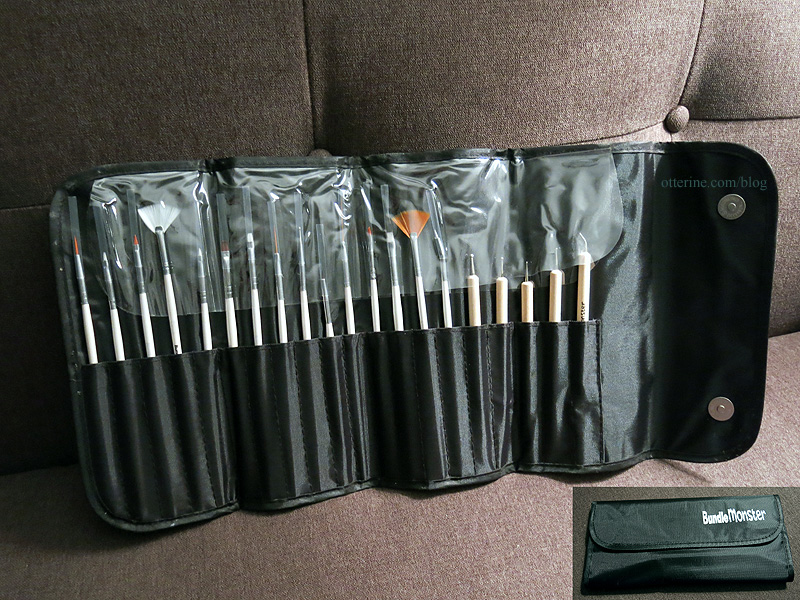
After the deconstruction and any necessary remodeling, I will begin with painting. I’ve always had a fondness for roan horses, so I might give that a go. A friend sent me a fabulous set of brushes and clay tools called a Bundle Monster that will be invaluable here.
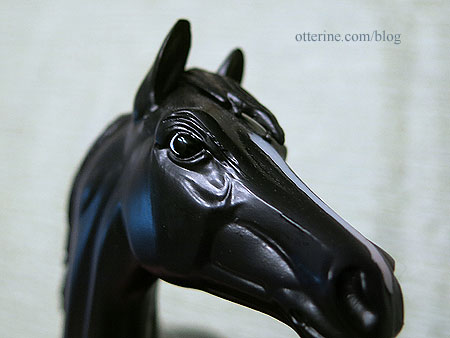
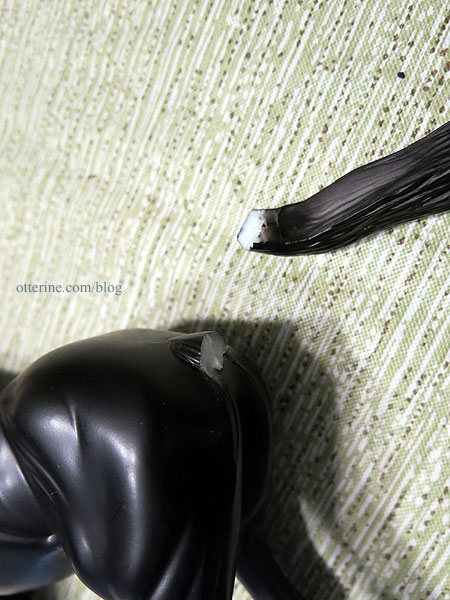
In the time since I bought the horse, the plastic mane had lifted from the neck. It made it easier to wedge in some pliers to pry off the mane.
One thing I didn’t like about the plastic mane from the beginning was that it was formed on the side away from the direction of the horse’s gaze. Removing it for a mohair mane means I can style the hair toward the side I prefer.
The nostrils might benefit from drilling in a deeper hole and the mouth could use some fine-tuning. I’ll need to sand the mold line on the tip of the snout.
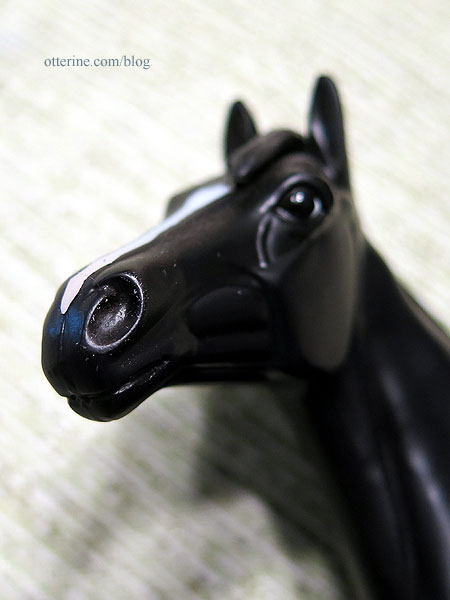
The eyes are great, so I will take care not to paint over those. The front mane has come detached from the small contact points as well.
I cleaned up the spine with a utility blade and will fine tune by sanding. The gap will need to be filled, though it might be a good way to add the mane more securely. I’ll think on that a bit. I need to replace the putty I bought three years ago since I don’t want to take the chance that it has gone bad.
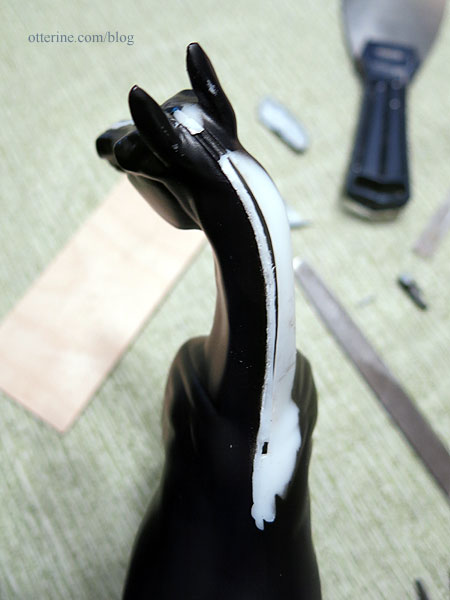
The tail was easy enough to lift and break off since it had no contact points with the legs. I’ll need the Dremel to cut away the remaining excess, but that’s for another day.
Categories: Animals and birds, Ivy Hollow RFD
February 4, 2019 | 0 commentsMemories and gifts
The miniature community lost a talented miniaturist and lovely lady, Elly in Amsterdam. I knew her through a petitpoint group and never met her in person, but she was one of the sweetest ladies and super fun. She’s definitely missed. One of her close friends is also a talented miniaturist and is looking after Elly’s estate. Josje has a blog of Elly’s miniatures for sale, and I bought two items to have something from Elly. :]
These cat matryoshkas are beautifully painted and actually function.

Too stinkin’ cute!

The coal scuttle is something I don’t have a plan for, but it is so well made it could be just an antique used for décor in a more modern setting. :]

One little coal was included.

Mom gave me two needlework books for Christmas that I’m sure Elly would have loved. The first is Embroidered Cats by Hiroko Kubota.

While it’s not an instruction book and not for beginners, the book illustrates the process of turning a photo into an embroidered likeness. I might need to see about making a needlework Jasper. With a little planning, it could probably be done in miniature to make a wall hanging.

The other book is Cluny Tapestry Rabbit, a counted cross-stitch pattern by Scarlet Quince. Elly made a similar one in miniature for a fire screen. This is a larger pattern, but with a high count fabric, it might be a good wall tapestry in miniature.

Categories: Books and media, Miniatures, Needlework - French knot rugs
January 24, 2019 | 0 commentsHalf Clocked – The Clocks, part 3
Continuing my posts on the clocks from Half Clocked. Please click here for part 1, and click here for part 2.
I have no chimney, but I am using a fireplace with a false brick insert. The fireplace was part of a miniatures lot I bought online. The material appears to be some sort of translucent resin. There are no markings or manufacturer details. The seller indicated that she purchased them in 1996 at The Dolls House Toys Ltd., Covent Garden, London. The fire screen is by Ellen Moore.
The modern side table was inspired by the Oly Studio Ichibad Side Table and made with Tiny Turnings. I needed some sort of cash transaction station for my shop, so I added a vintage desk from my stash and stool from Boutique Miniatures. The desk is a cheap miniature, but it has always appealed to me. It was also from a collection a friend gave to me after his mother passed, so it has that sentimental draw as well.
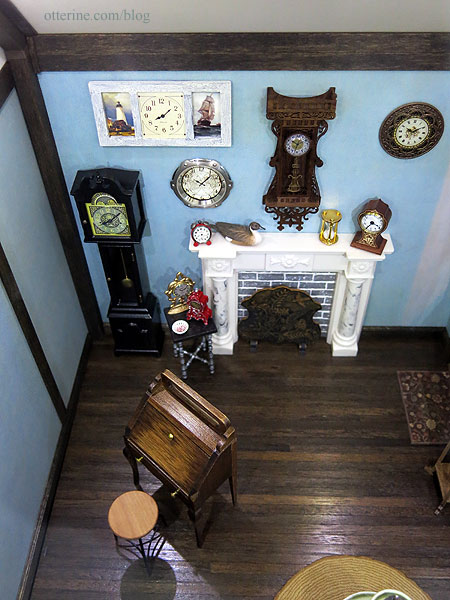
The porthole clock was made with a watch finding Bill sent me and a printed dial. I made the red alarm clock from wood shapes, Tiny Turnings, jewelry findings and a cabochon sticker for the face. It’s similar to the one I made for the Haunted Heritage, which I also borrowed for this build. The Art Deco working clock is from Halls Miniature Clocks. The laser cut Victorian wall clock is from D-Tales Miniatures, bought at the Bishop show. The hourglass is from Here Today Gone Tomorrow, and yes, it works. I think it counts maybe a only second or two.
The pintail drake decoy is by Linda Master, and the candy dish was from Manor House Miniatures. The two metal clocks were originally bright gold with cheap faces. I repainted them and added new faces, using Testors Clear Parts Cement and Window Maker for the red clock’s glass.
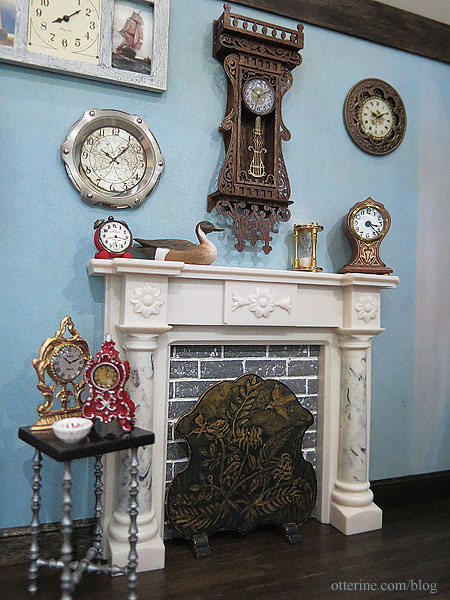
The round clock in the upper right is a jewelry finding with the bail removed with a metal jewelry frame glued around it.
I made the clock with the paintings using an old laser cut wood scrap. I cut an insert for the middle to bring the clock dial forward and added watch hands. The artwork is cropped from paintings by Edward Moran, found on wiki.

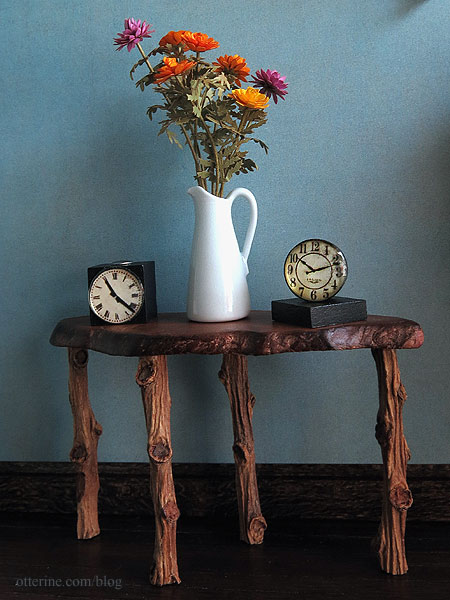
The rustic table is from Barbara Begley Miniature Gardens. I made the two table clocks from wood shapes, jewelry findings and cabochon stickers for the faces. The flowers were made from Bonnie Lavish kits.
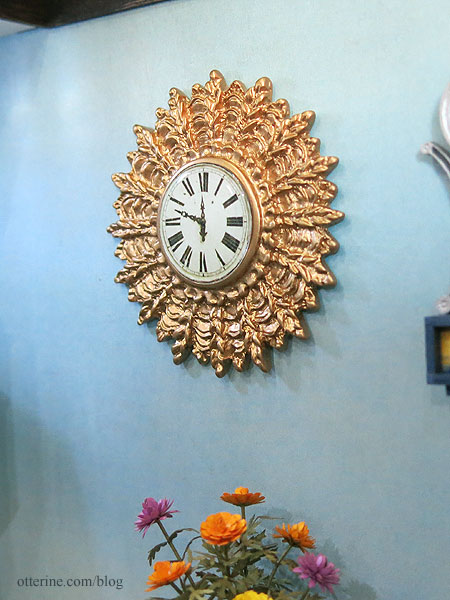
The large gold clock started as a mirror.
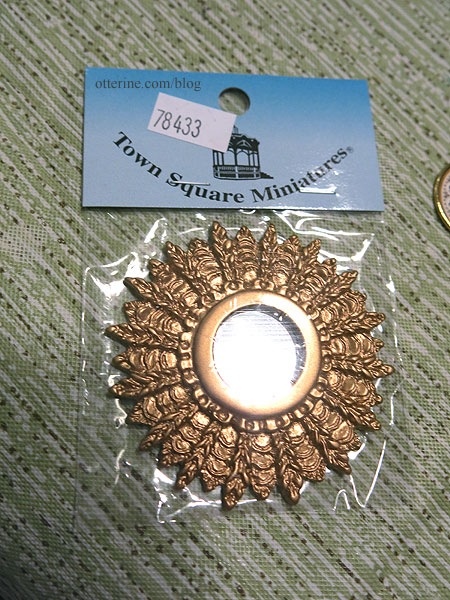
I printed a new face and used a large cabochon sticker for the face.
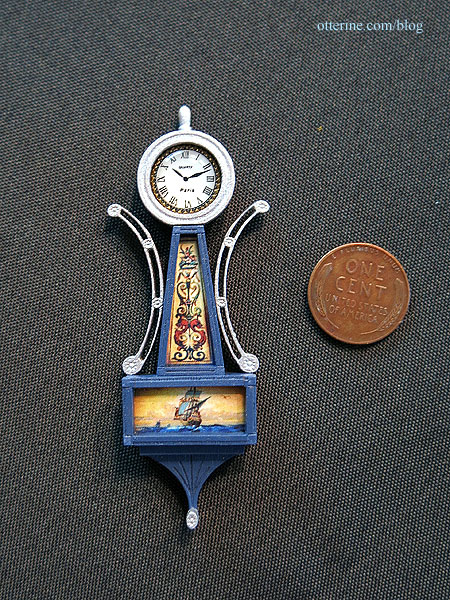
I’ve made the Banjo wall clock from Cynthia Howe Miniatures before, but this time I went less traditional in color.
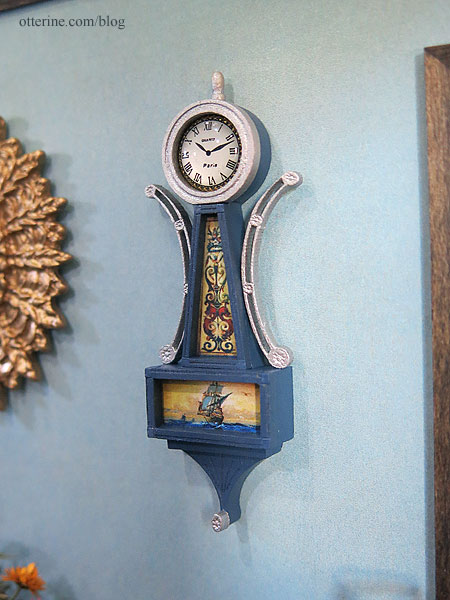
I might have to pick up more of these kits – they are so versatile.
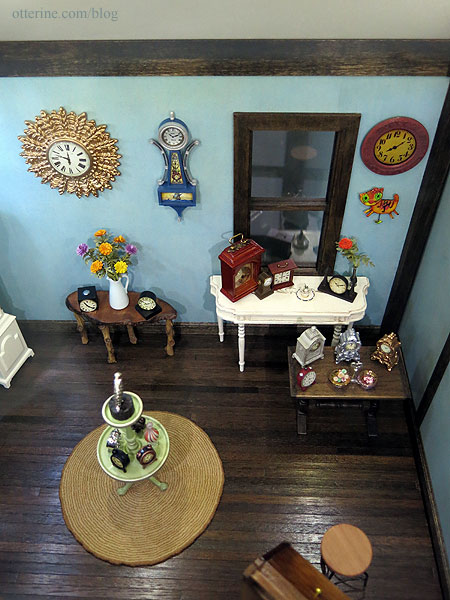
At the last minute, I realized I needed a rug…so I swiped the Tree Ring rug for the space.
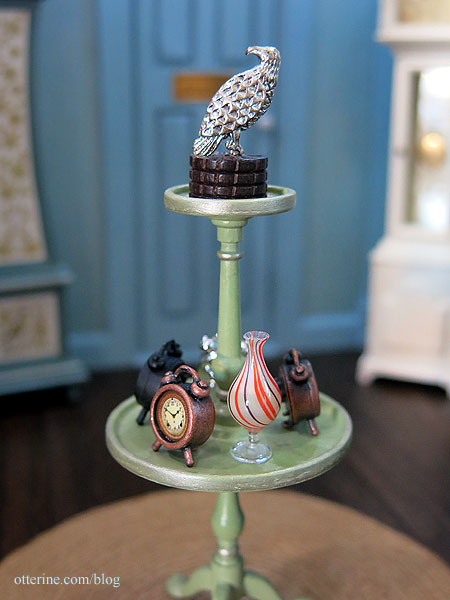
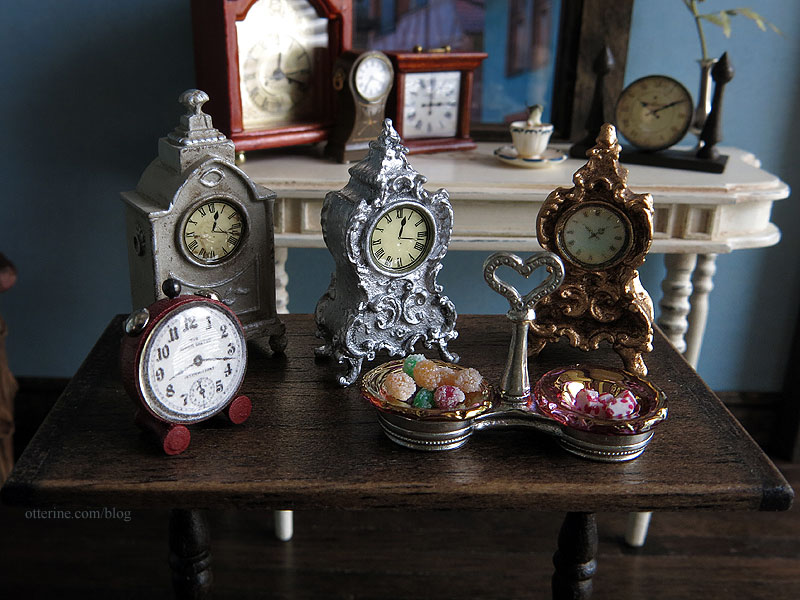
The tiered table has a selection of small clocks that I picked up from shows, but you can find them online. I made the bird statue from jewelry findings, and the spiral vase is from Patricia Paul.
The working mantel clock is from miniatures.com, the small Art Deco clock is from William Cambron Designs, and the small square clock is a half scale mini I’ve had in my stash awhile. I made the right hand table clock from wood shapes, Tiny Turnings and a cabochon sticker for the face. The silver bud vase came from Manor House Miniatures, and the flower was made from a Bonnie Lavish kit.
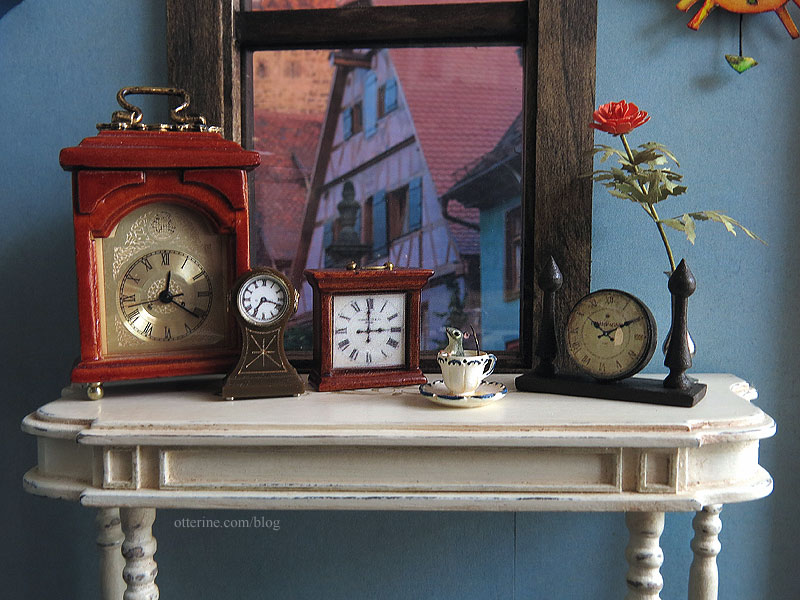
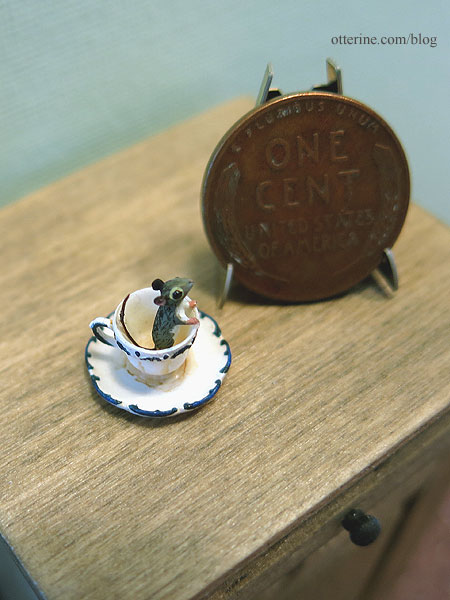
The mouse in the teacup is by Beth Freeman-Kane. Every clock shop needs a mouse, right? :D
The red alarm clock was made for the Heritage and borrowed for this build. The candy dish is from Blondie, and the candy was made by MiniFanaticus.
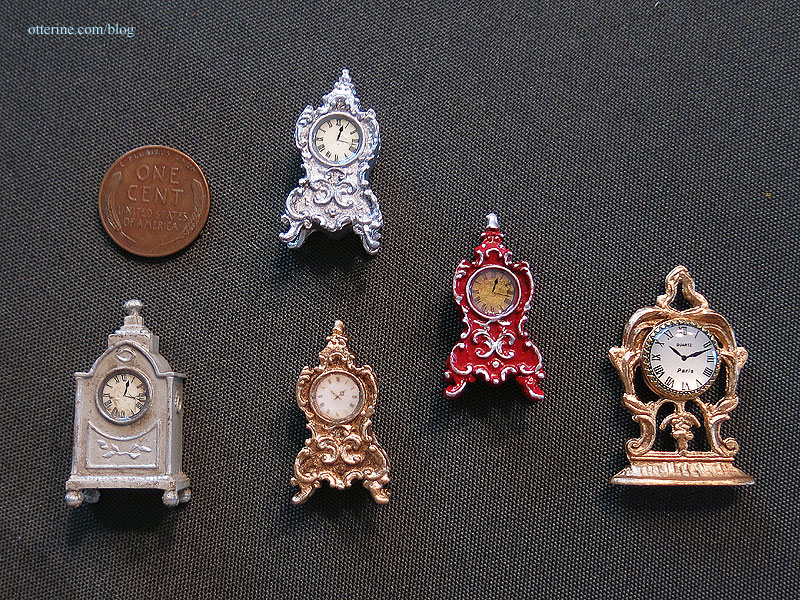
The two silvertone clocks are kits from Phoenix Model Developments. I also found two knock-offs at local shows that I refined and refinished. Since the Phoenix kits came with two faces per clock kit, I had an extra for the red clock. I printed my own for the other. For the paper/decal faces, I used Testors Clear Parts Cement and Window Maker for the glass. The gold clock on the far right was purchased at a local show and refined with new paint and dial.
That should do it! Whew! That’s a lot of clocks! :D
Categories: Half Clocked
January 10, 2019 | 0 comments


NOTE: All content on otterine.com is copyrighted and may not be reproduced in part or in whole. It takes a lot of time and effort to write and photograph for my blog. Please ask permission before reproducing any of my content. Please click for copyright notice and Pinterest use.


