

Ivy Hollow – potbelly stove, part 1
Many moons ago, I building a decrepit potbelly stove from a Chrysnbon kit for Baslow Ranch.
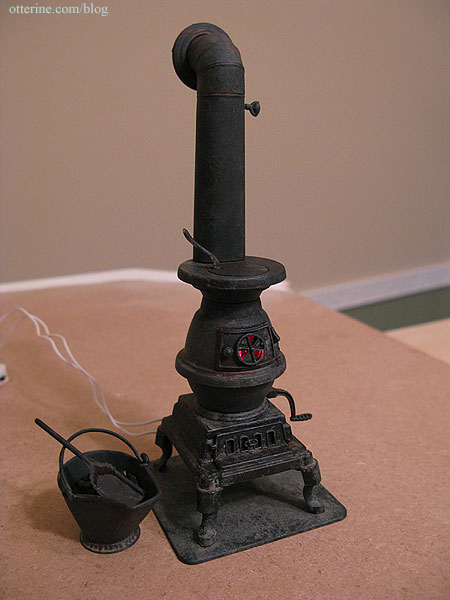
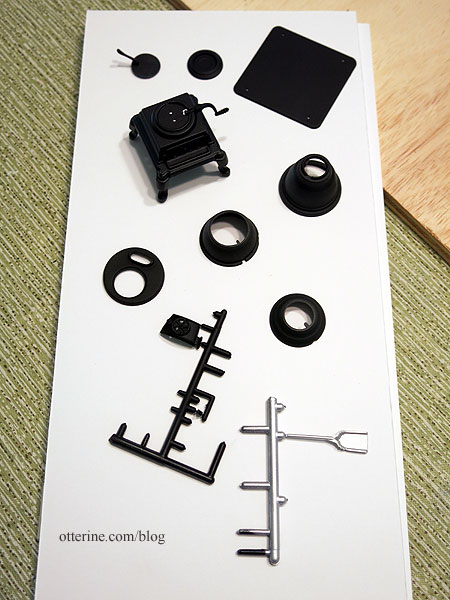
It’s a great kit, with a skinny stove that is perfect for a small structure. Typically, these would be placed in the middle of the building, but we’ve already planned the layout with the stove in the corner. This will have a newer look to it than the Baslow Ranch stove, but I still sanded the pieces with a fine grit sanding paper to remove the shine from the plastic.
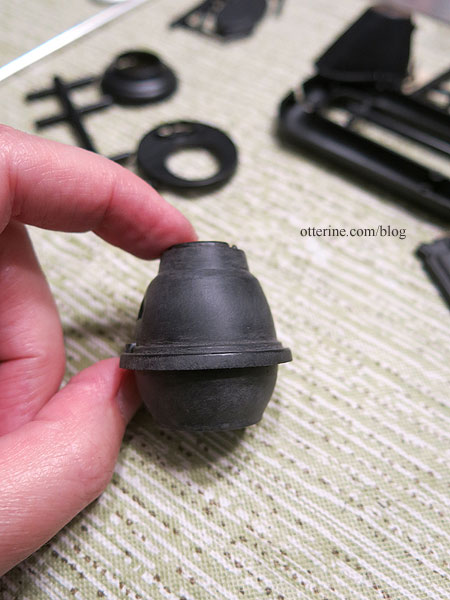
I spray painted the pieces flat black, including the few factory silver parts included. I sprayed the scoop with Model Masters Aluminum Plate Metalizer. More on that in a later post. I assembled the bottom and top halves of the stove, then left them separate for now.
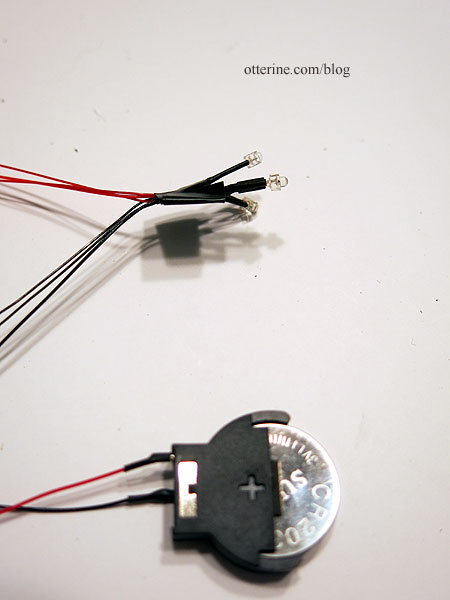
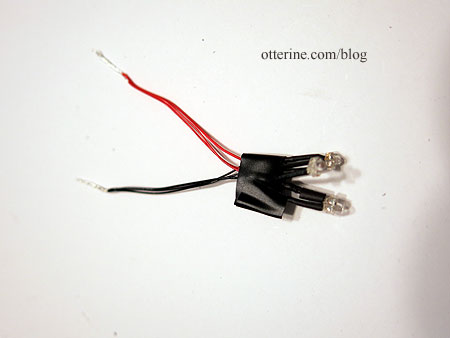
I want my stove to have coal light, but I have learned a lot since I made the Baslow Ranch stove. I used the red bulb included with the kit in that instance, but now I very rarely use anything with non-replaceable bulbs. LEDs and replaceable bulbs make for easier replacement if or when bulbs burn out. I wound three 1.8mm LEDs together – 3V flickering orange and yellow and a 7-19V separated steady red with a rectifier/resister. Since these are all 3V until they are connected to the rectifier/resistor, I am testing the lights with a 3V battery switch. [Note: If I were to do this again, I would make the third flickering bulb orange instead of yellow since the yellow was too bright in the end.]
I shortened the wires, combined the red and black bundles and spliced a new, single end wire to the bunch.
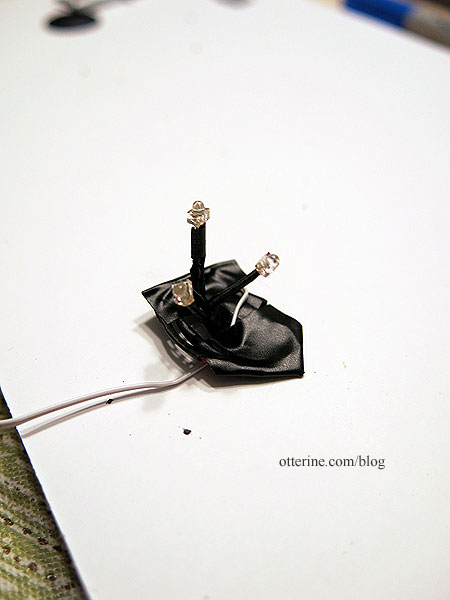
I wound the wires to form a base and taped it together with electrical tape.
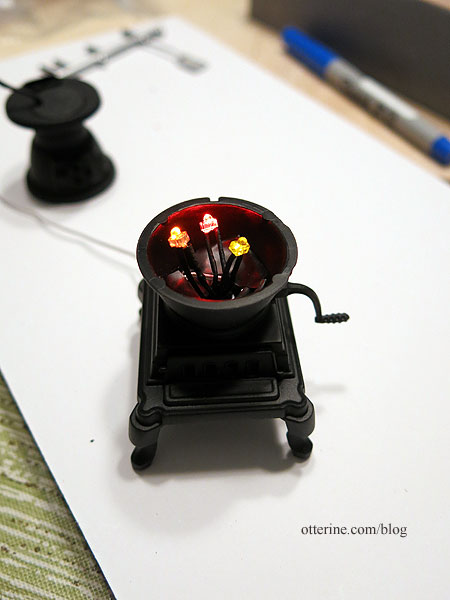
I pulled the single end wire through the bottom of the stove and situated the lights inside. The assembly is not fixed in place just yet.
The light through the damper looks nice already, especially with the orange and yellow flickering over the steady red glow.
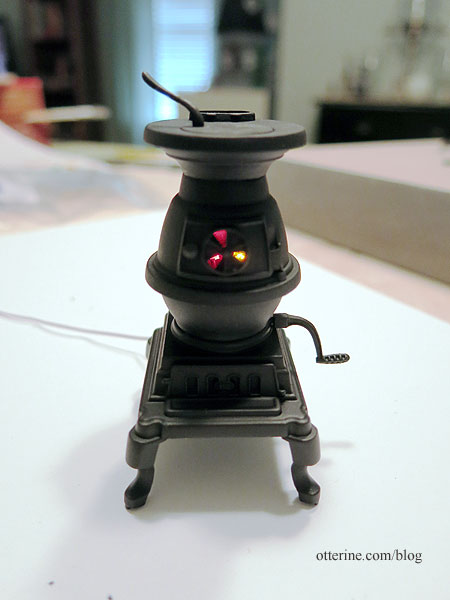
I will work on simulated coals next to diffuse the light a bit more, because you can see the bulbs from certain angles.
Categories: Ivy Hollow RFD
July 28, 2019 | 0 commentsBirds on a Branch, intro and prep
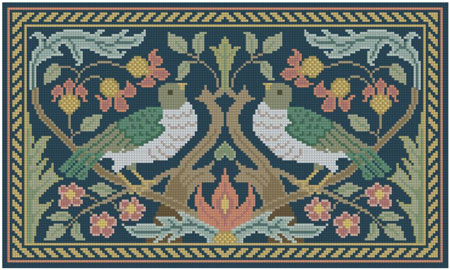
This is a design by Sue Bakker, and I think the folksy look is marvelous. She called it Arts & Crafts Wallhanging, but I like Birds on a Branch better. This is from a 1998 issue of International Dolls House News magazine, but I am not sure which month.

Sue charted the pattern using the same symbols for different parts – such as the X is blue for one area and then the X is pink in another. That was too hard for me to follow, and I had been told by others who stitched the pattern that the colors were wrong in places. So, I redid the chart in Pattern Maker Pro by HobbyWare (as of 2024, it seems the company website is defunct). I converted the Anchor colors Sue used to all DMC colors since I have only DMC in my stash of floss. I corrected what I thought were errors and chose new colors for some parts. I also redesigned the border since my brain prefers symmetrical patterns.
While I loved the wide border of the original, it made the rug larger than I wanted (low ink here in my printer). I’ve narrowed the border, which means saved needlework time as well.

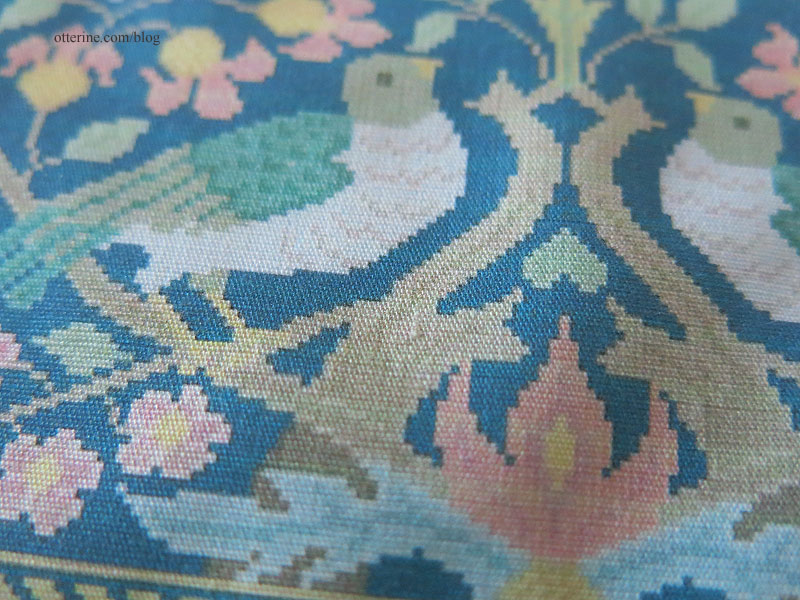
I decided to go the way of the Persian and printed the color photo from the pattern onto cotton to stitch the pattern. Here’s the print after rinsing, before ironing and setting in the hoop.

You can see the tiny squares.
This is two hours of work, and I love it already. I’m still referencing the pattern and symbol chart for the colors, but I am not counting the knots. I use the printed areas as a guide and get the general feel of the pattern using the colors I charted. Much easier this way – working on the details and filling in after.
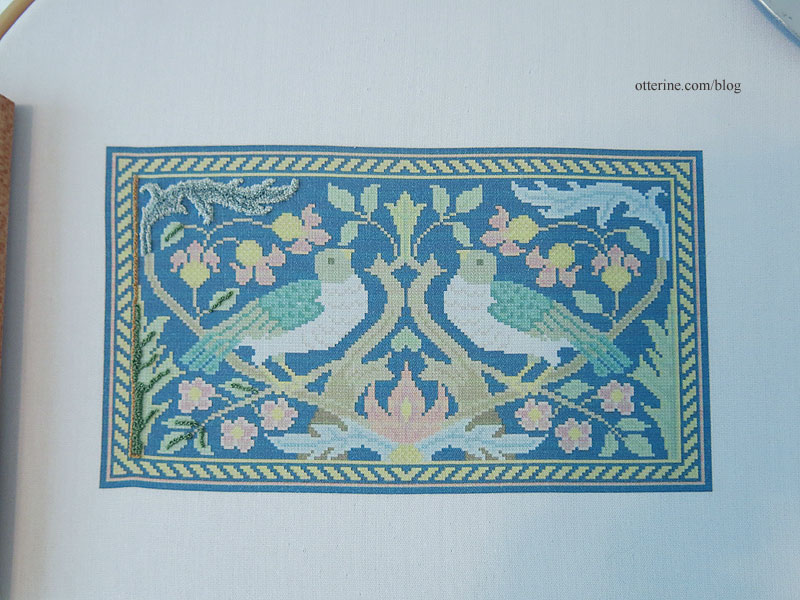
I like seeing the whole design at once, watching the various parts come to life as I complete the knots. As you can see, it doesn’t keep the boxy shape of the original pattern as the knots are made.
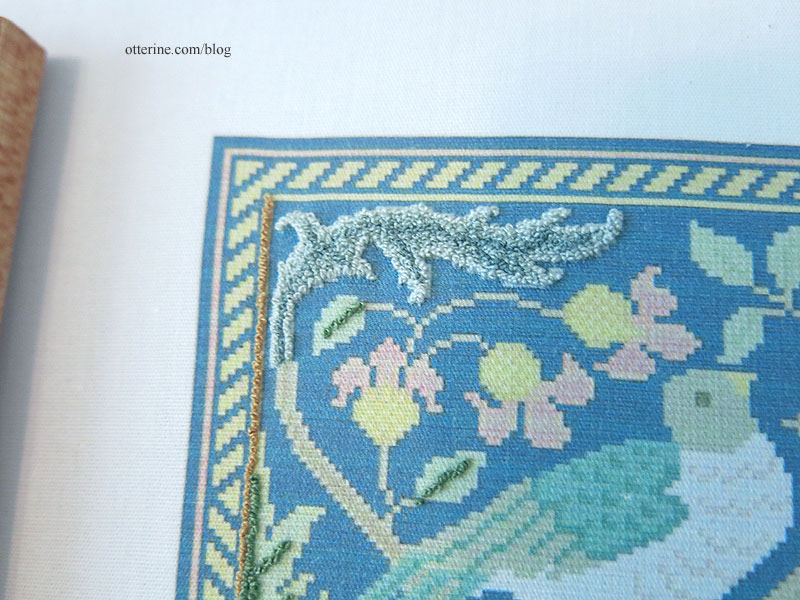
Update: I later changed the border for this pattern.
Categories: Needlework - French knot rugs
July 20, 2019 | 0 commentsSeeking a book – FOUND!
As you may recall, I was seeking a copy of Making Model Horse Harness by Anne Funnell. She used to head Lenham Pottery Models, involved with both horse models (including scale model harness kits) and dollhouse pottery. She had retired, so it seemed there would be no way to contact her. I attempted to find a used copy, but there were none to be found. The only libraries with copies are in the UK, so that dashed hopes of an interlibrary loan. But, through communication with the library system in the UK, I was able to obtain contact info. :]
I sent my plea in a letter using snail mail! It has been a long time since I did that. I included my email address, and the author replied by email within a week of my stamped letter heading overseas. She said she was happy to help, and her husband was gracious enough to take her reference copy and have one made for me. Overseas it came…and into my hot little hands! Took only four days!

The book is a wealth of information with fantastic diagrams and explanations. While I’m not fooling myself into thinking that making the tack will be easy, this reference material will make it much more straightforward than if I tried to take real life sized tack and convert it.
I’m so excited and so pleased how miniaturists come together all over the world. A huge thank you to Anne and Barré Funnell! :D
Categories: Books and media
July 19, 2019 | 0 commentsMail Wagon – part 6
Continuing work on the Mail Wagon. With the front and rear axle assemblies started, it was time to work on the wheels. Most instructions tell you to read through the whole process before starting. This is to familiarize yourself with the parts and process. In this case, the instructions indicate it was noticed during the prototype stage, the manufacturer found it was easier to sand the spokes after assembly. That saves a lot of initial prep work on individual fiddly parts.
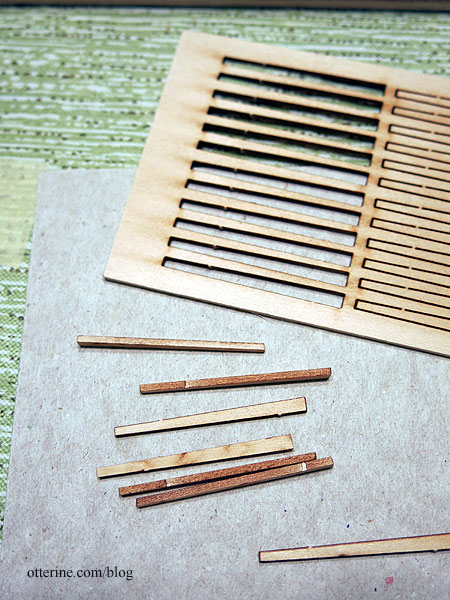
The wheels are made from laser cut wood parts, aluminum hubs and a jig.
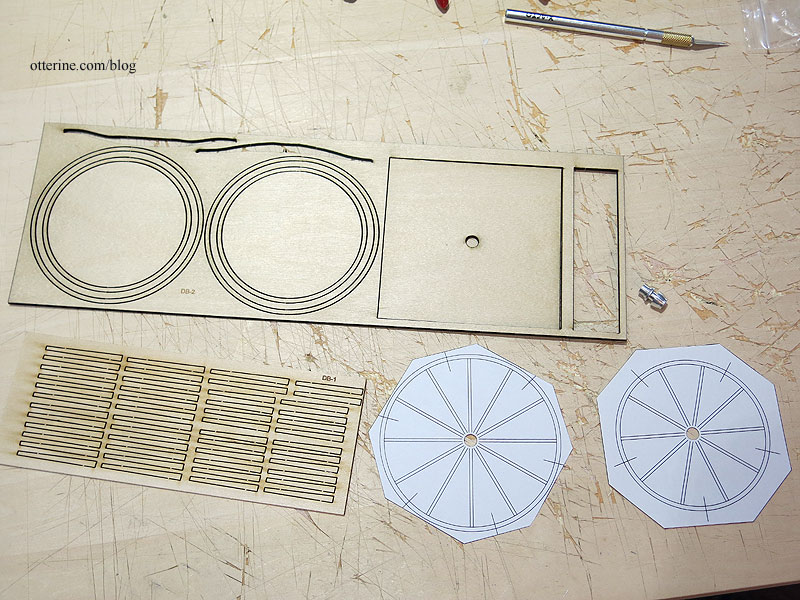
I used MiniGraphics Wallpaper Mucilage to apply the paper patterns to the wood base. Here is the smaller wheel pattern. The larger wheel pattern is on the reverse, but in reality, you would work on one wheel at a time so it’s not an issue.
Another nice thing is the intact inner circle and middle “wheel” waste pieces. I saved those in my stash. Never know when I might need pieces like these. :]
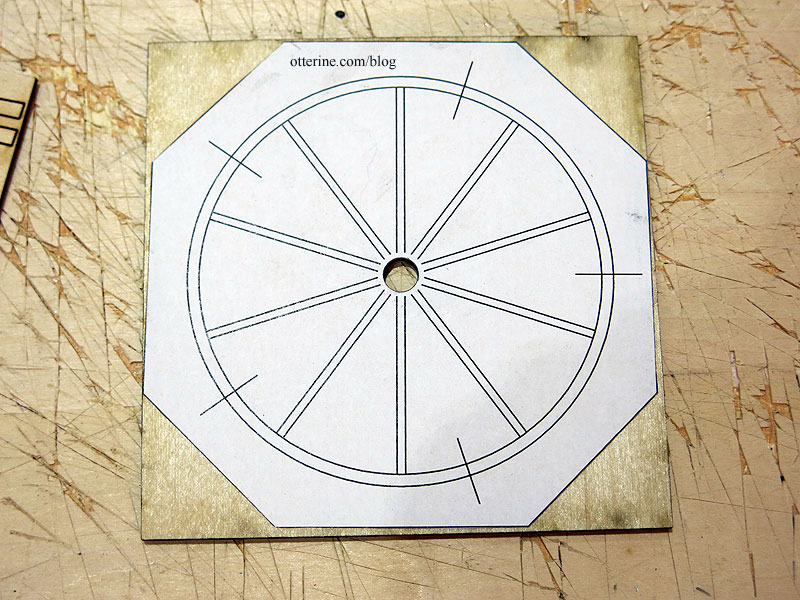
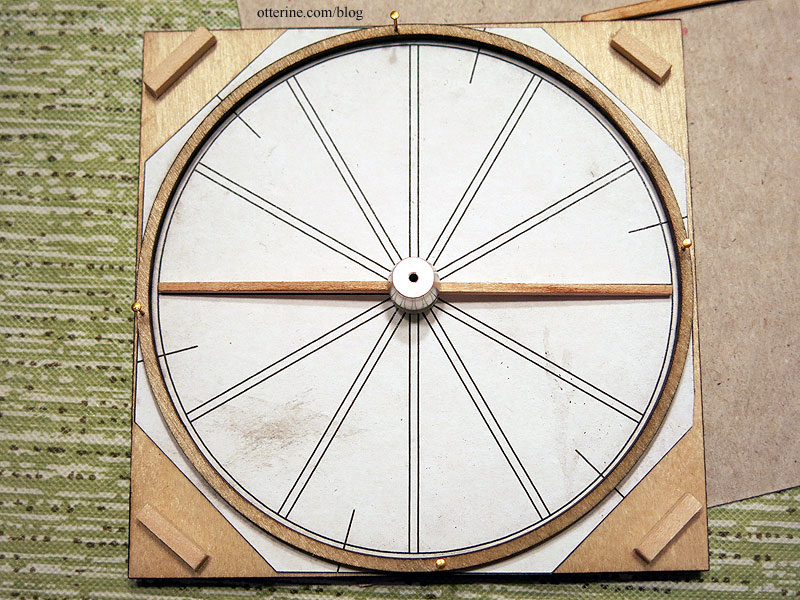
I decided to use the recommended nails to hold the wheels in place while assembling. The paper pattern did not match up with the wheel size, so I centered as best as I could. Using the nails also helped keep the circular shape while working whereas clamps might not have.
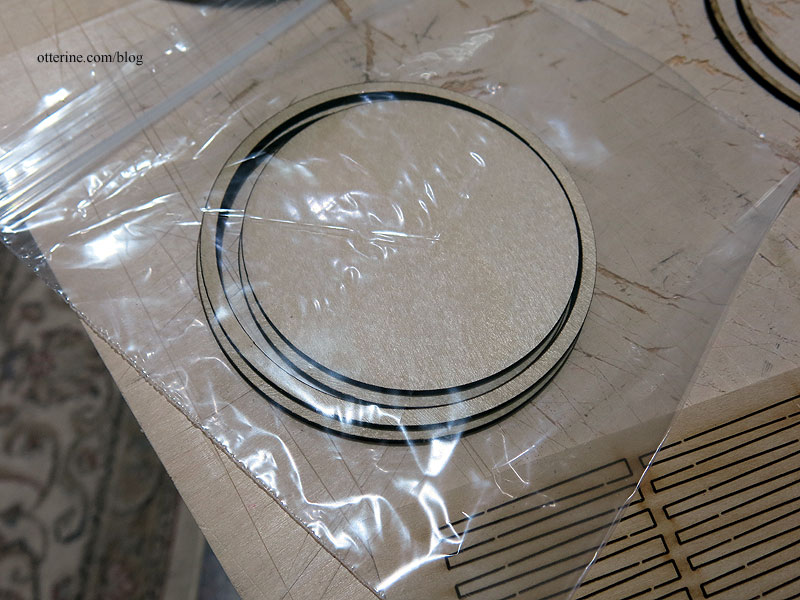
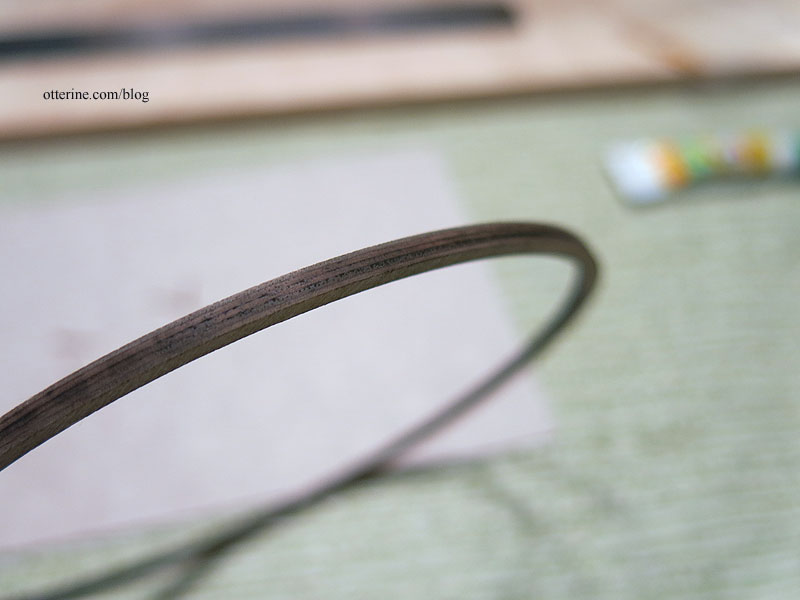
Even though I will be doing the final shaping after assembly, I did clean the laser char from the edges of the spokes beforehand.
I did the same for the wheels to have a cleaner gluing surface.
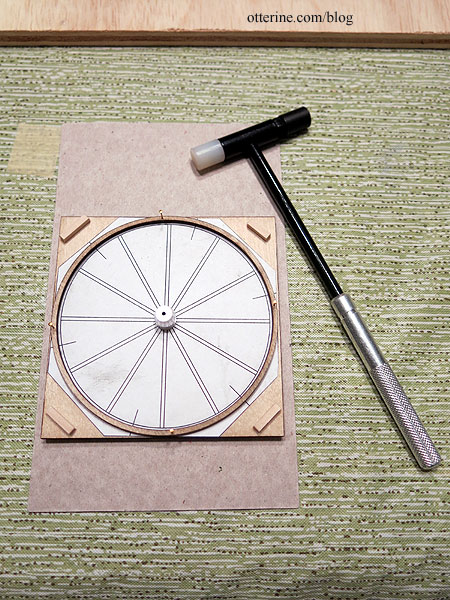
That’s when things went off the rails. The spokes fit well into the hub, but overall the wheels, hubs and spokes simply did not work together. (These will have a snug fit, but I was just testing parts at this point and didn’t trim the spoke ends to fit all the way into the hub groove.)

The wheels are larger than the jig pattern as noted, and the spokes are too short. I am putting the parts together as instructed and have removed the parts precisely from the laser cut sheets without removing any length from the spokes.
I could use the “scrap” wheels between the two true wheels with the longer spokes, but that would give me only two wheels instead of four.
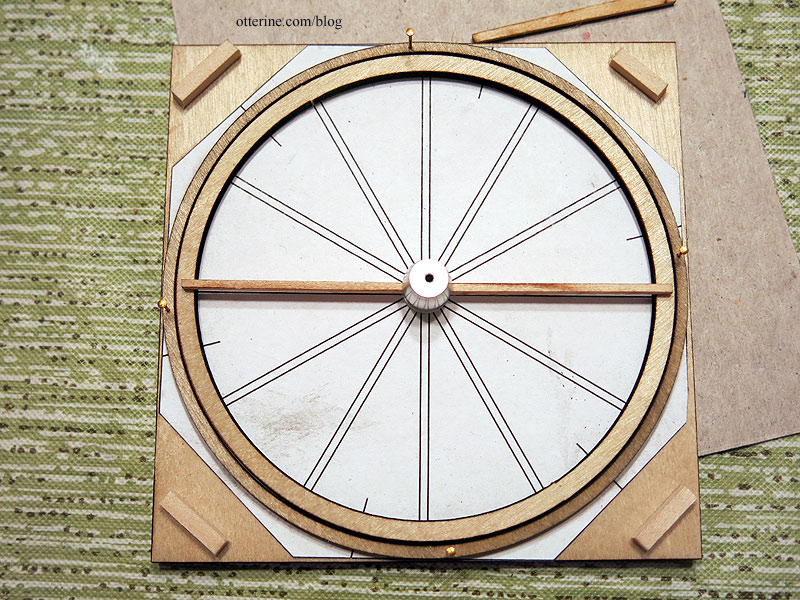
Luckily, this kit is made by a company still in business, so I sent them these photos and told them about my issues. They checked their production, and what they have now is correct. Mine must have been an errant batch. They sent me a new wheel sheet, another spoke sheet and four hubs just to make sure it all worked well together. It’s fantastic when a company will stand behind its product. :]
Now, I need to prep the new parts for assembly. Back soon….
Categories: Ivy Hollow RFD, Model Cars, Vehicles
July 17, 2019 | 0 commentsIvy Hollow – siding and gable bump out
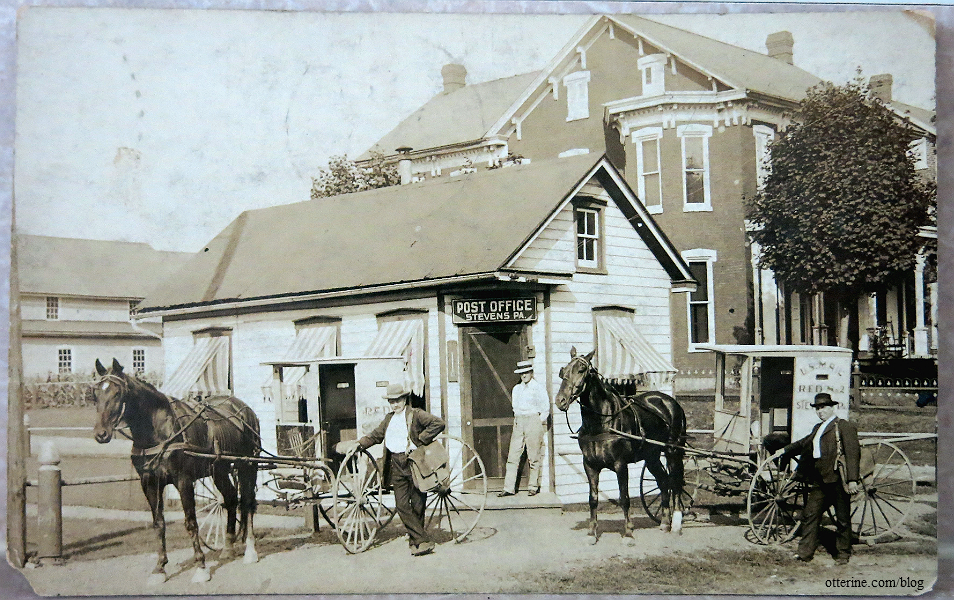
Here’s a refresher on the postcard from 1917 showing a post office with RFD horse wagons picking up the mail. I want to keep most of the details of the original with a few changes.
I bought some half-scale Alessio Miniatures windows for the gables from Manchester Dollhouse and Wood Works. They are square instead of rectangular, but they fit my smaller, shorter structure well.
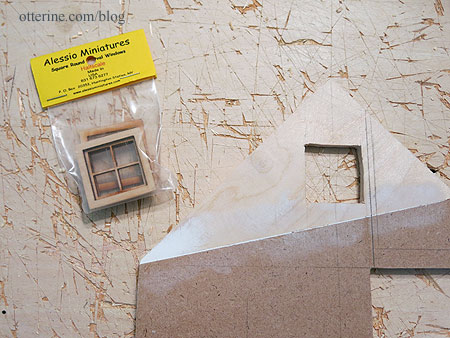
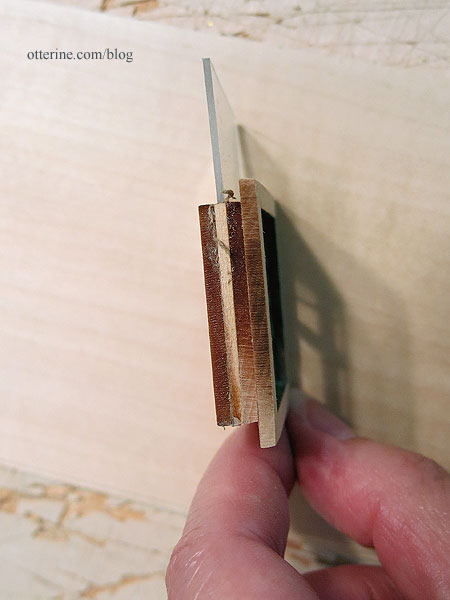
They fit perfectly with the 1/4″ thick walls, but I will need to adjust the depth with the siding in place.
The acrylic insert lifts out for easier finishing.
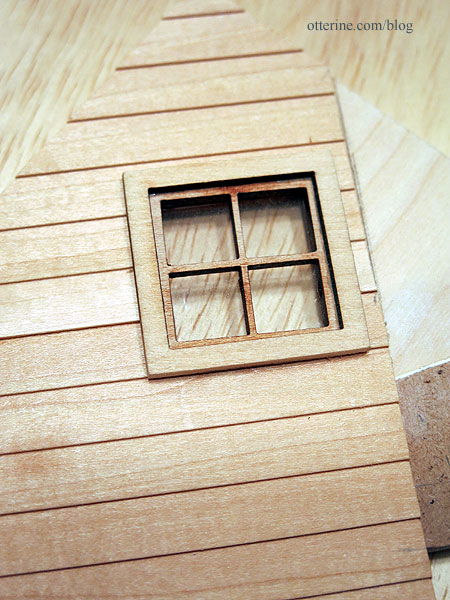
When HBS had their April Fool’s sale, I bought a pack of siding. It was way more than I needed for this building, but it’s a material I know I will use in the future and it was a great deal at 40% off.
I like to apply siding while the walls can be pressed flat for the best results, but if you do that, you have to take the corner joins into account. I’ve left excess on the overlapping edges – not to cover completely but enough to aid in construction later. The corners will be covered with trim. I use Elmer’s wood glue supplemented with dots of super glue gel to apply siding, taping the joins and edges, then pressing flat under magazines and books for at least 24 hours. Makes for a nice, flat wall.
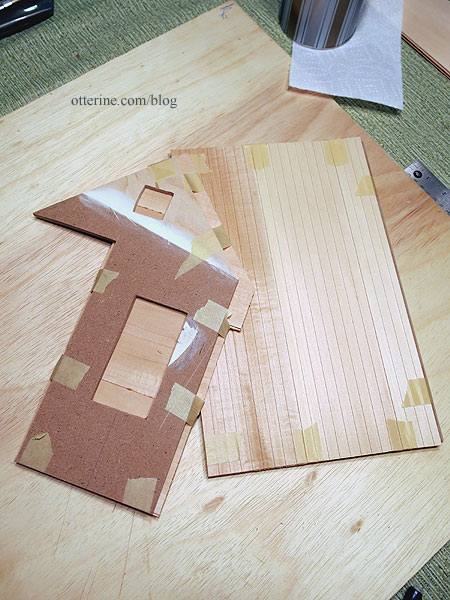
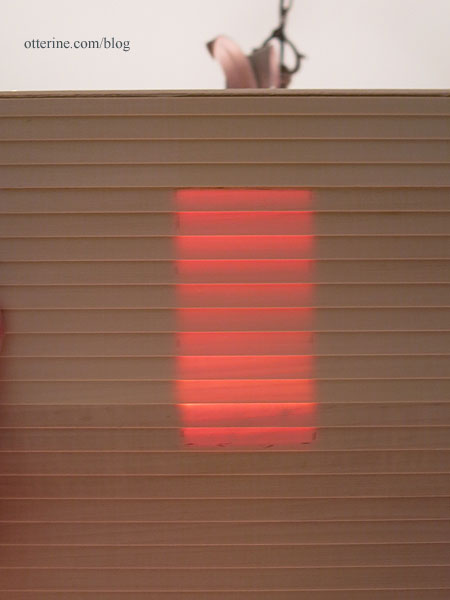
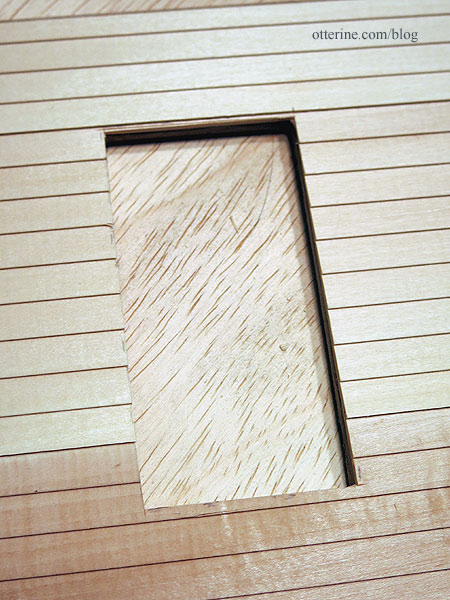
For the window openings, I usually just cover the whole wall. I’ve tried piecing before, and it doesn’t end up saving you much in the long run for all the hassle. To get a cleaner cut, I hold the board up to the light to trace the outline.
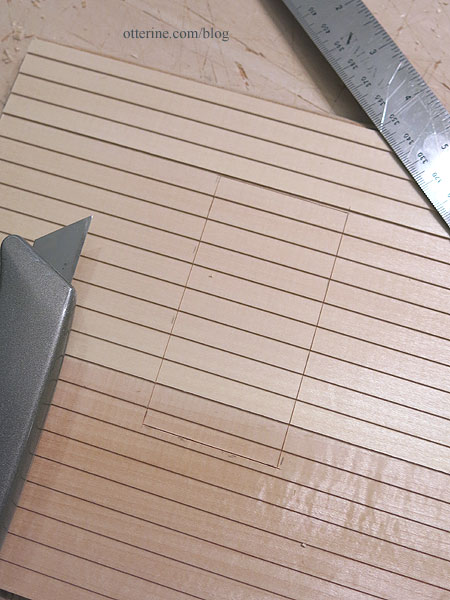
I then make a scored cut along those marks with a fresh blade.
I finish cutting the window opening out from the back side.
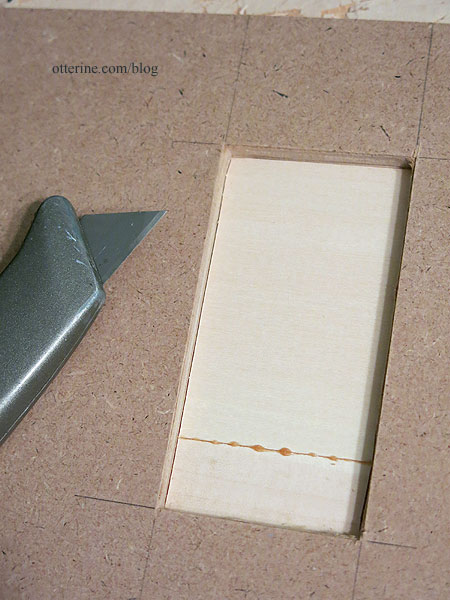
This keeps the siding from splintering. The window trims cover any minor blemishes.
As you recall, I’ve flipped the building construction to better fit the horse. In the original, there’s a bump out in the gable over the angled door. I made a base for this from scrap wood. I’ll determine the final depth I need, add a surface board and then apply siding. I left enough space to apply siding to the part adjacent to the gable window.

Categories: Ivy Hollow RFD
July 10, 2019 | 0 comments


NOTE: All content on otterine.com is copyrighted and may not be reproduced in part or in whole. It takes a lot of time and effort to write and photograph for my blog. Please ask permission before reproducing any of my content. Please click for copyright notice and Pinterest use.


