
Mail Wagon – part 7
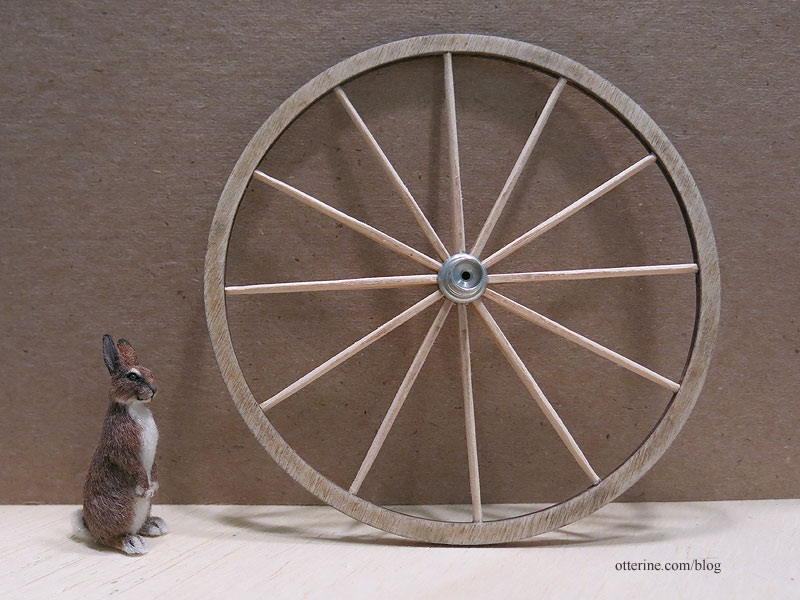
Continuing work on the Mail Wagon. With the replacement wheel parts received, I was able to assemble all four wheels. I decided to use the “scrap” wheels that were cut between the thin true parts. The scrap wheels are more substantial for a mail wagon versus a doctor’s buggy, and I will be handling the wagon and therefore the wheels a lot during the cabin construction. As expected, the replacement scrap wheels are slightly smaller than the original wheels, but this works without issue. I’ve seen mail wagons with all the same size wheel and those with smaller wheels in the front.
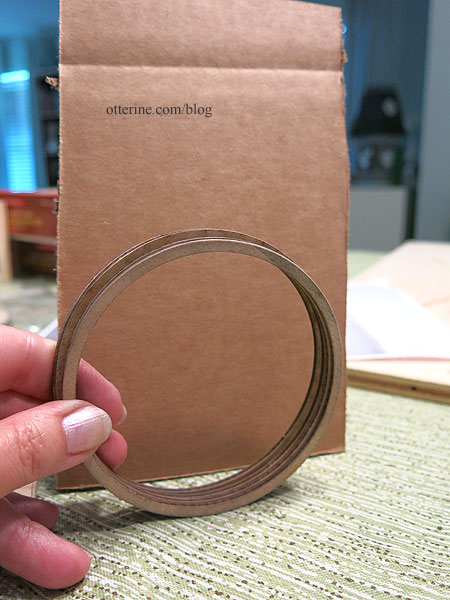
I left the previous large wheel on the jig and fit its corresponding scrap wheel inside since the paper pattern isn’t meant as a guide for the scrap wheels. I’m using only the long spokes, measuring and cutting them to fit one at a time. While there are two extras in each set of spokes in case of disaster, I am assembling the larger wheels first. If I get a spoke too short for these, those shortened pieces will likely work for the smaller wheels.
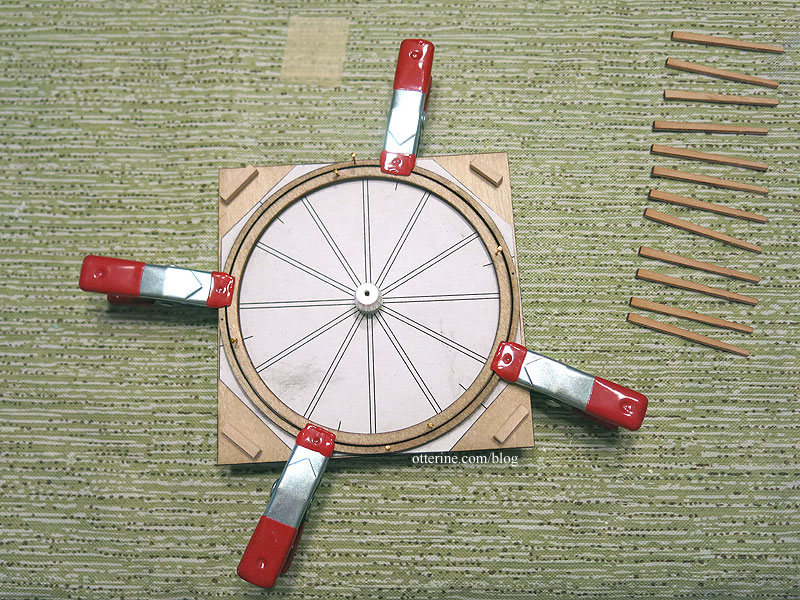
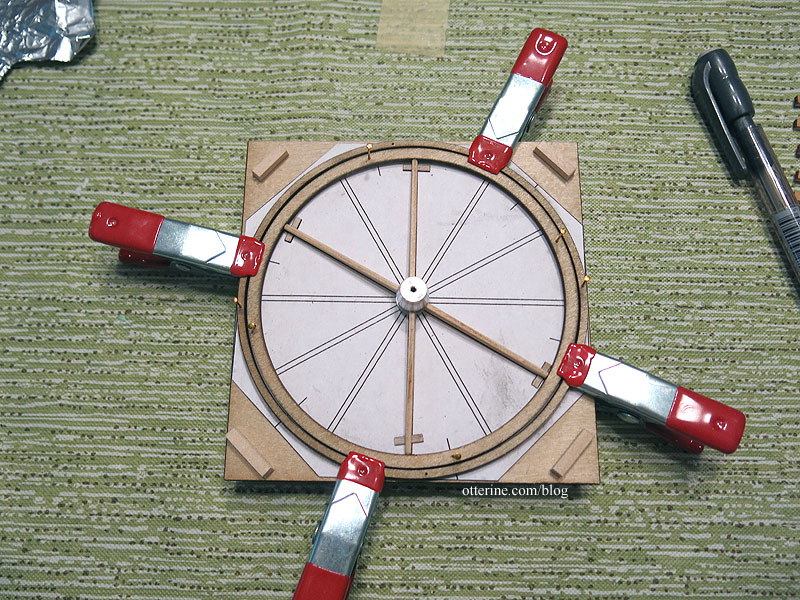
You are to complete the spokes in opposing pairs so the wheel stays uniform and flat. I built in a little tension to help the minimal amount of super glue gel used, but too much tension can make the wheel buckle.
The assembly was actually very sturdy once removed from the jig.
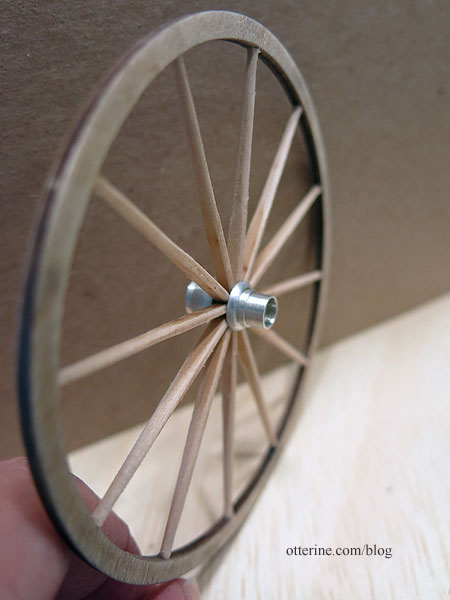
While I did round the edges a touch before assembly, the instructions indicate to fine-tune the small ends into rods. This worked only so well in that each one will always turn out differently. Once painted and with added grime, they should be fine. I filled the nail holes with wood putty.
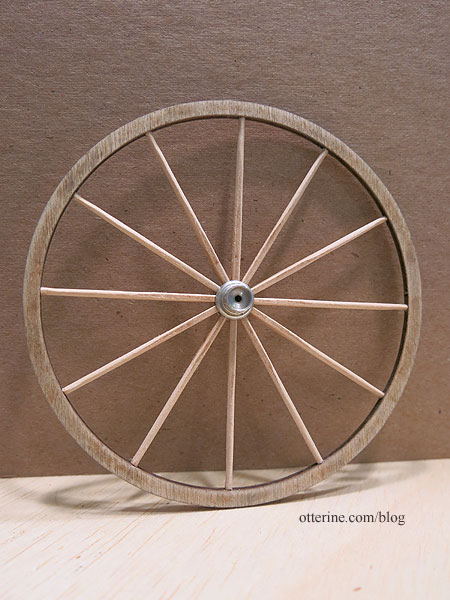
Three more to go….
Categories: Ivy Hollow RFD, Model Cars, Vehicles
August 10, 2019 | 0 commentsIvy Hollow – potbelly stove, part 2
Continuing work on the potbelly stove. This is the reference photo for the finish I’m after (under the dust).
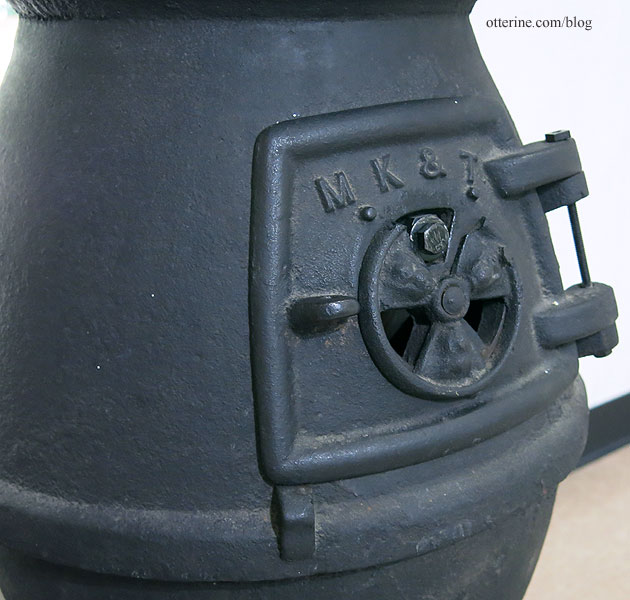
Even the sanding and flat black spray paint didn’t take away all of the sheen and smoothness of the plastic stove, so I stippled on a base coat of satin black by Americana. I then stippled on alternating layers of flat black and satin black, ending on flat black. Using the satin finish base made it look more like iron, which does have a slight sheen. My Baslow Ranch stove doesn’t have this texture, because I didn’t think of it at the time, but all the grime on it disguises that fact.
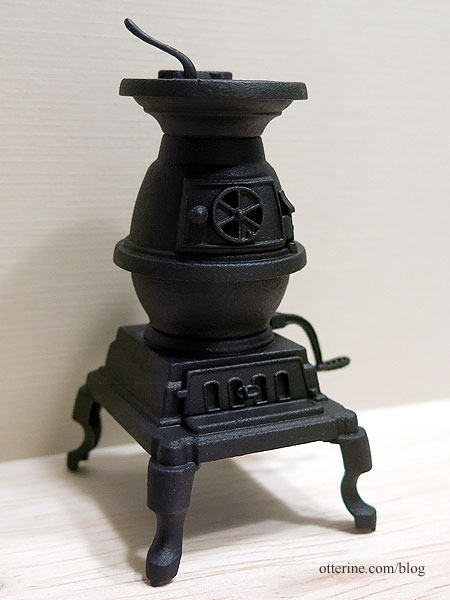
The stippling effect was important to do in thin layers to make sure the texture was in scale. I’ve turned plastic into iron. :]
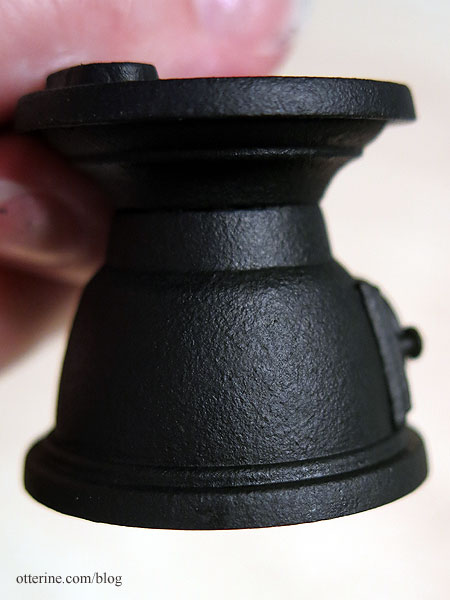
I patched the open holes in the pot except the one for the wire using Squadron Products White Putty, then painted the patches black once dry.
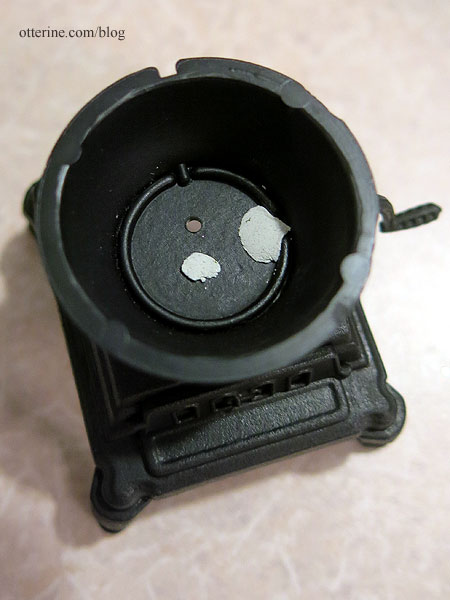
After feeding the wire through the remaining hole, I glued in the wire bundle with Aleene’s Quick Dry supplemented with super glue gel. I kept the lights on the 3V battery while working so I would know if any of the LEDs failed during the process.
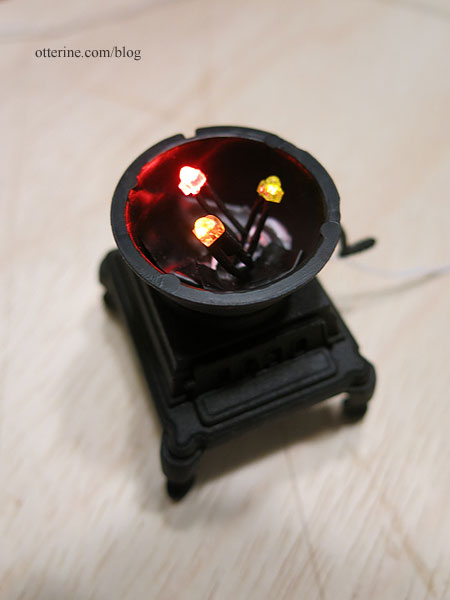
I had dabbed Winsor & Newton Masking Fluid on the LEDs to protect them for the next steps. Here the fluid is still wet; it dries clear.
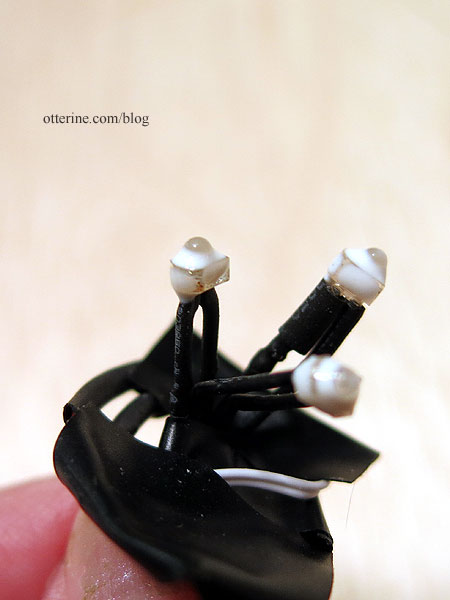
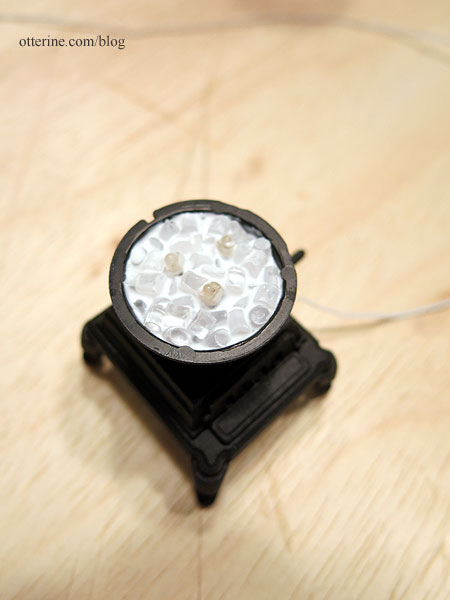
Working in two layers, I added some Aleene’s Quick Dry glue then poured in some ice cubes from Alpha Stamps into the pot, using a toothpick to arrange and settle the pieces.
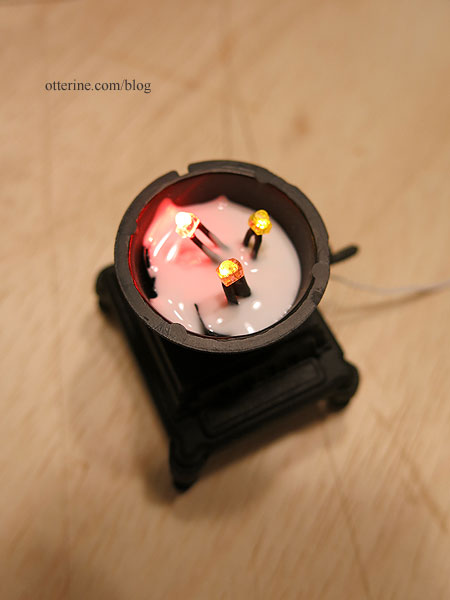
The upper layer of ice cubes is even with the bulbs.
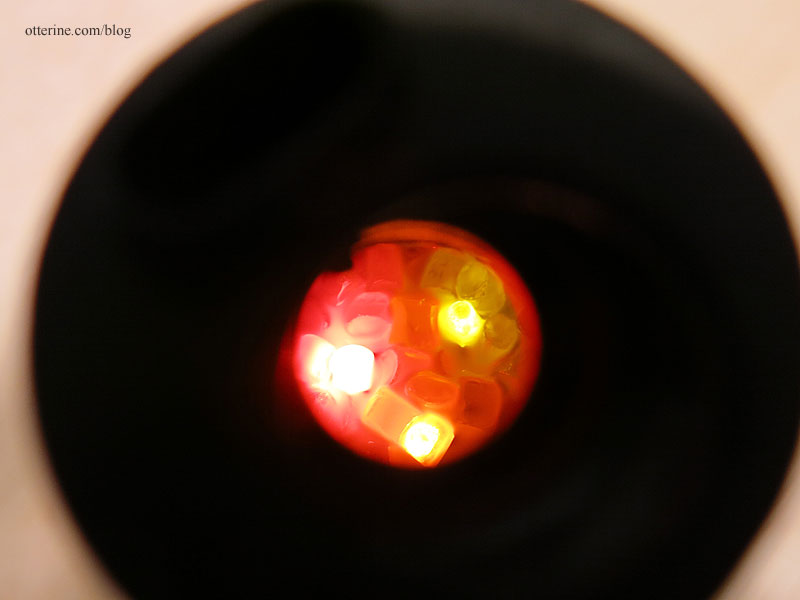
The steady red bulb is the strongest of the three (showing as near white on the left below), but the flickering yellow (upper right) and flickering orange (lower right) bulbs add some nice depth already.
Next up, turning Malt-O-Meal into burning embers. :D
Categories: Ivy Hollow RFD
August 9, 2019 | 0 commentsIvy Hollow – screen door, part 4
Continuing work on the screen door. I was already leaning toward the micro mesh, but the overwhelming votes for it helped seal the deal! :D I tried a couple more tests to see if I could tone down the sheen. I tried to spray paint the mesh once before, but I figured I’d try some other types.
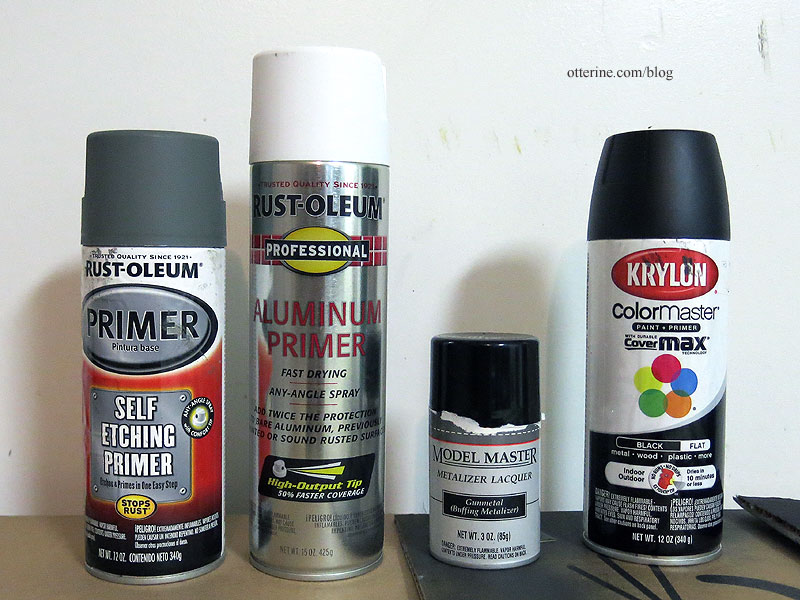
Left to right:
- Rust-Oleum Self-Etching Primer, which is a grey-green. It bonds to metal to serve as a base for better paint adhesion.
- Rust-Oleum Aluminum Primer, which is light grey. It bonds specifically to aluminum, which is the mesh material. I bought this to prime the wagon wheel hubs, which are aluminum.
- Model Master Metalizer Lacquer in Gunmetal, which is…errrmmm…gunmetal grey. :D It’s a buffing paint meant to give a true metallic finish, so the finish is also meant to rub off.
- Krylon Paint/Primer in flat black. The standard base coat.
And, here are the test samples. All very nice colors and no more sheen. Apparently, I was the problem when I tried painting this mesh before. haaaaaaaa. The paint adhered just fine without clogging the holes.
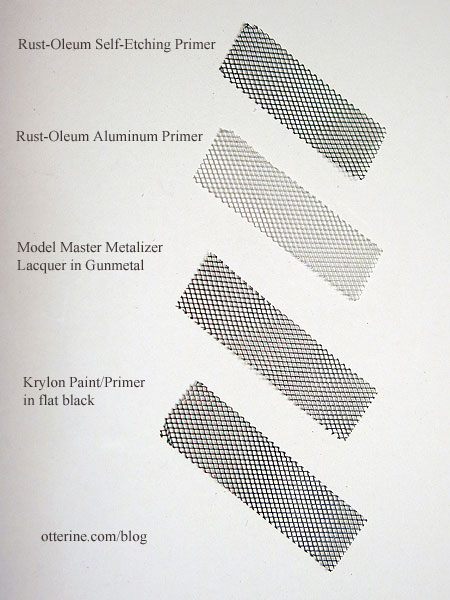
On the door, I think the clear choices for color are the Rust-Oleum Self-Etching Primer and Model Master Metalizer Lacquer in Gunmetal. Both remove the sheen and the results are not too light or too dark.
I think I will go with the Rust-Oleum Self-Etching Primer for the simple fact that it is made to bond to metal. The Model Master Metalizer Lacquer did rub off easily when I ran a paper towel across it, while the Rust-Oleum Self-Etching Primer stayed put.
Categories: Ivy Hollow RFD
July 30, 2019 | 0 commentsIvy Hollow – screen door, part 3
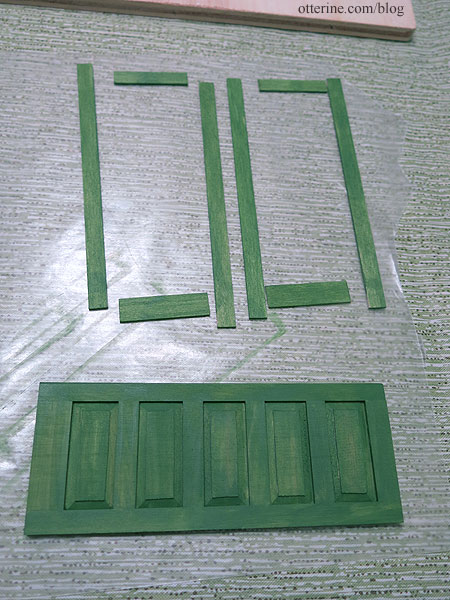
Continuing work on the screen door. When I left the screen door last, I had tried to darken the aluminum micro mesh without success. I moved on to the wood parts. I marked where the glue joins would be and left those unpainted as I gave the screen door boards a first coat of Woodland Green by Americana. It’s a satin paint, which means no need for a final varnish, but it goes on very thin and needs multiple coats. I painted the solid door the same color.
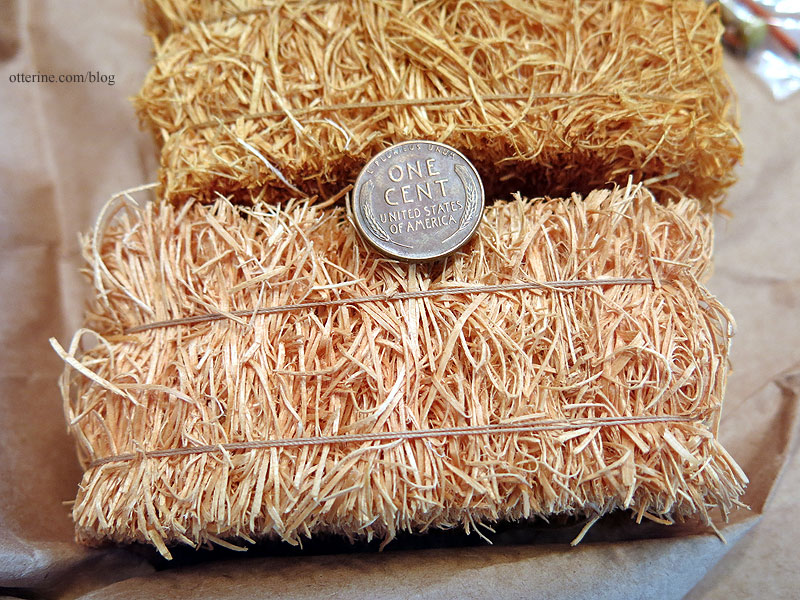
In the meantime, I continued my research and window shopping, happening across the best hay bales I had seen in miniature at Maple Leaf Miniatures. I wrote to the shop owner, and she got back to me with availability. Aren’t they marvelous? :D
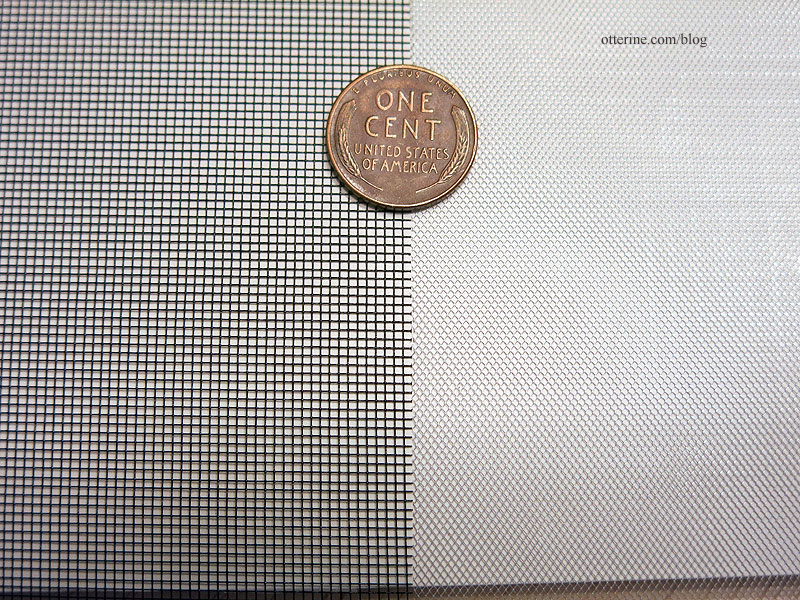
While discussing my project, she offered some black screen material. Here it is next to the micro mesh. The scale is a bit larger, but the color is great. It also doesn’t get damaged just by looking at it the way the micro mesh does.
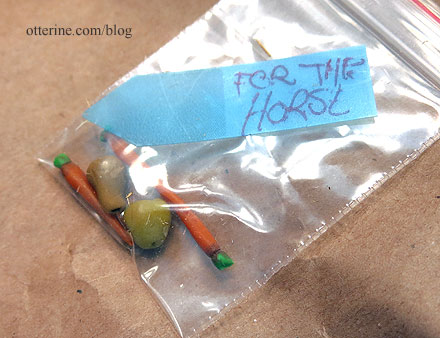
She also included some snacks for Jebediah! :D
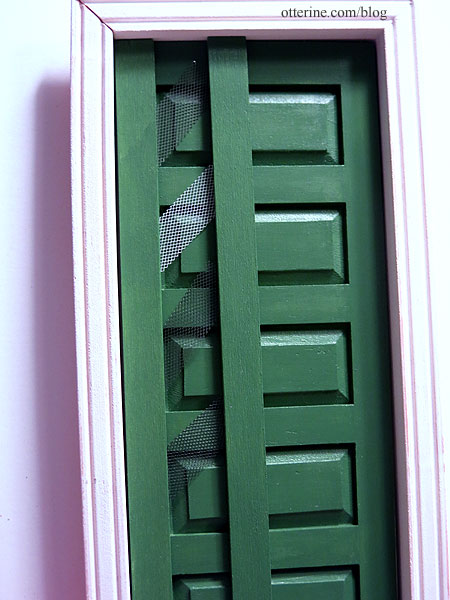
Anyway, today I tested the two materials with the painted door.
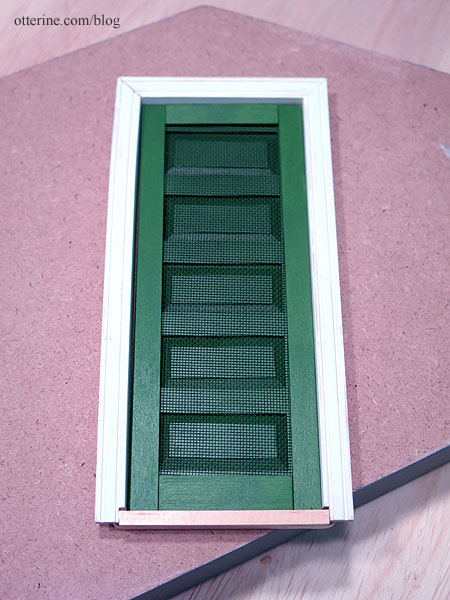
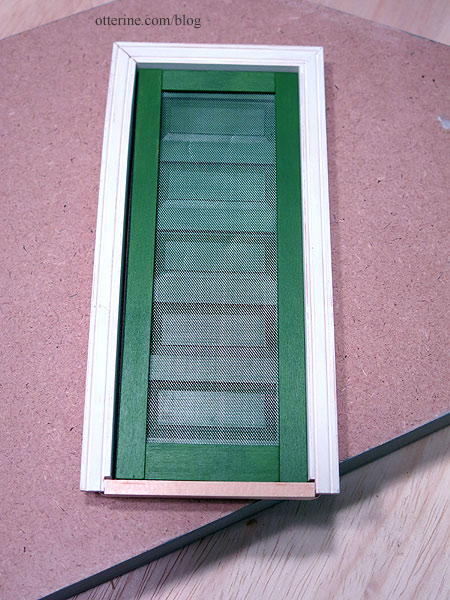
It’s a hard choice. On the one hand, the black screen will be more durable and less obvious. But, the micro mesh is better for scale, and honestly, the damaged bits here and there rather add to the realism. There will be a cross bar in the middle and likely an angled brace, too. I think I will need to see how it looks with the door in dry fit with the building to make a final decision.
Categories: Ivy Hollow RFD
July 28, 2019 | 0 commentsIvy Hollow – potbelly stove, part 1
Many moons ago, I building a decrepit potbelly stove from a Chrysnbon kit for Baslow Ranch.
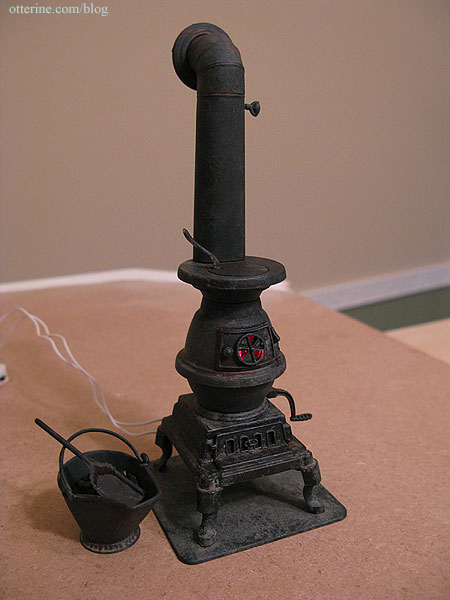
It’s a great kit, with a skinny stove that is perfect for a small structure. Typically, these would be placed in the middle of the building, but we’ve already planned the layout with the stove in the corner. This will have a newer look to it than the Baslow Ranch stove, but I still sanded the pieces with a fine grit sanding paper to remove the shine from the plastic.
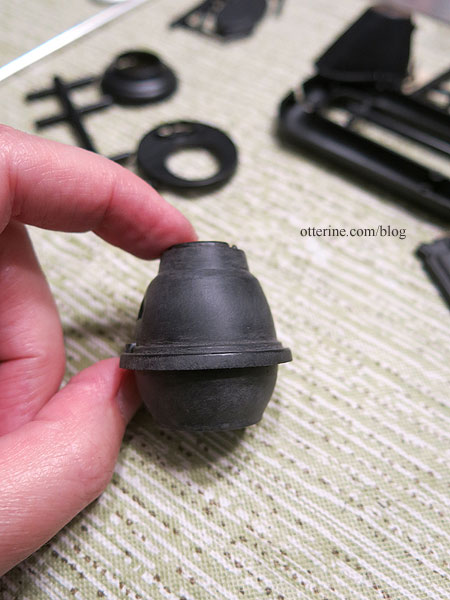
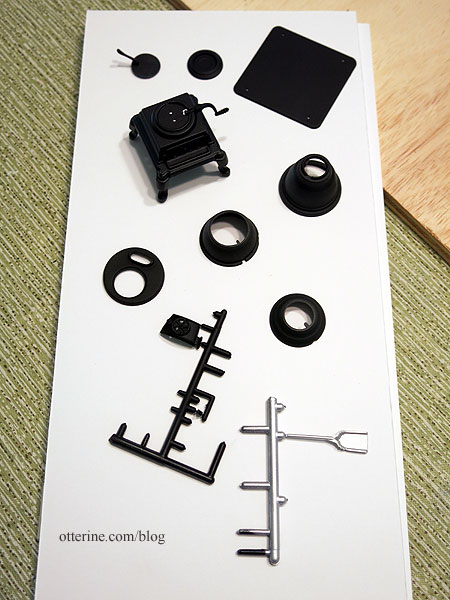
I spray painted the pieces flat black, including the few factory silver parts included. I sprayed the scoop with Model Masters Aluminum Plate Metalizer. More on that in a later post. I assembled the bottom and top halves of the stove, then left them separate for now.
I want my stove to have coal light, but I have learned a lot since I made the Baslow Ranch stove. I used the red bulb included with the kit in that instance, but now I very rarely use anything with non-replaceable bulbs. LEDs and replaceable bulbs make for easier replacement if or when bulbs burn out. I wound three 1.8mm LEDs together – 3V flickering orange and yellow and a 7-19V separated steady red with a rectifier/resister. Since these are all 3V until they are connected to the rectifier/resistor, I am testing the lights with a 3V battery switch. [Note: If I were to do this again, I would make the third flickering bulb orange instead of yellow since the yellow was too bright in the end.]
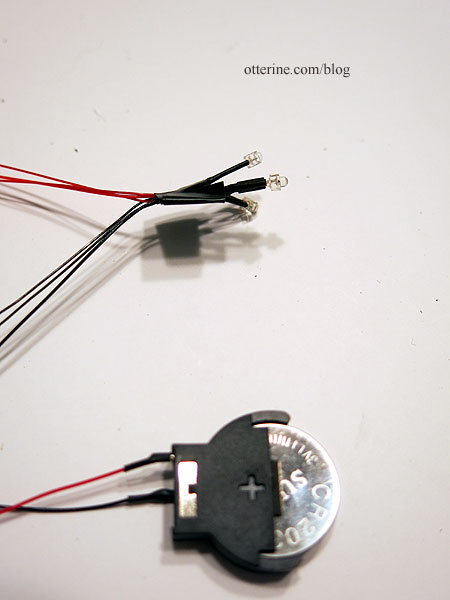
I shortened the wires, combined the red and black bundles and spliced a new, single end wire to the bunch.
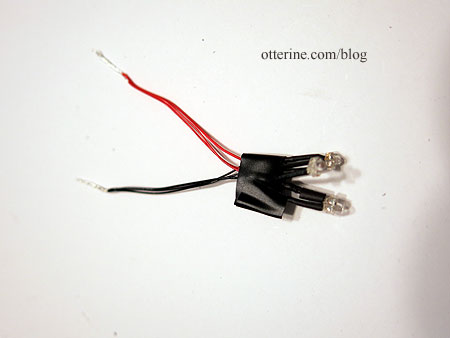
I wound the wires to form a base and taped it together with electrical tape.
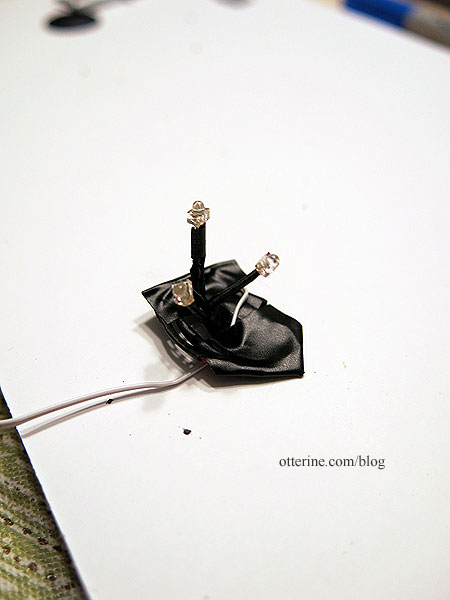
I pulled the single end wire through the bottom of the stove and situated the lights inside. The assembly is not fixed in place just yet.
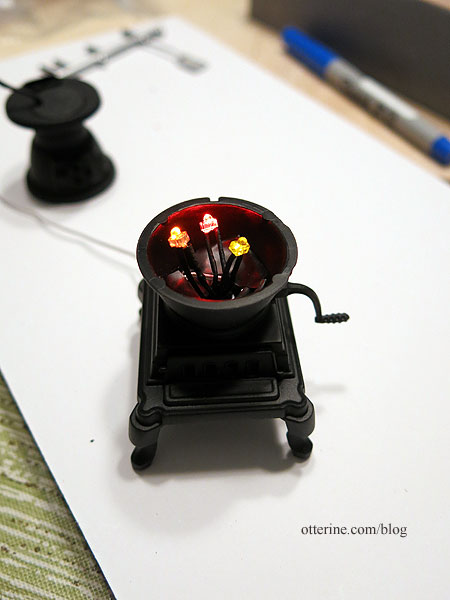
The light through the damper looks nice already, especially with the orange and yellow flickering over the steady red glow.
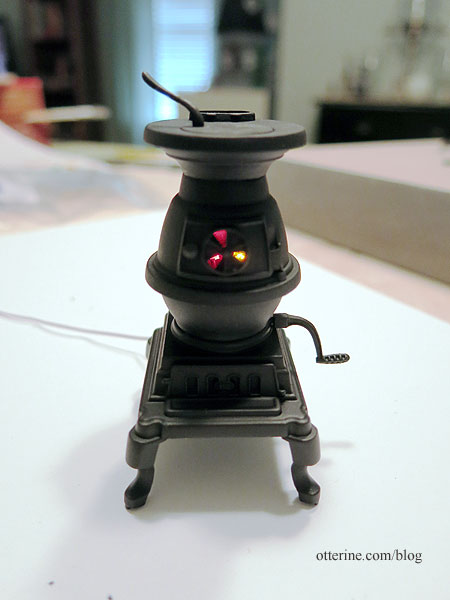
I will work on simulated coals next to diffuse the light a bit more, because you can see the bulbs from certain angles.
Categories: Ivy Hollow RFD
July 28, 2019 | 0 comments
NOTE: All content on otterine.com is copyrighted and may not be reproduced in part or in whole. It takes a lot of time and effort to write and photograph for my blog. Please ask permission before reproducing any of my content. Please click for copyright notice and Pinterest use.


