

Ivy Hollow – inspiration photo and history
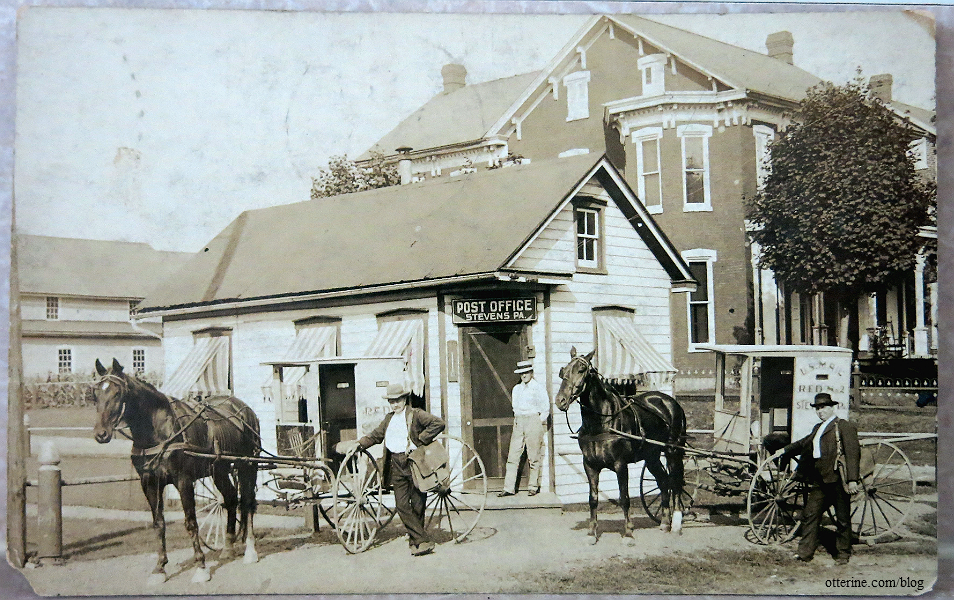
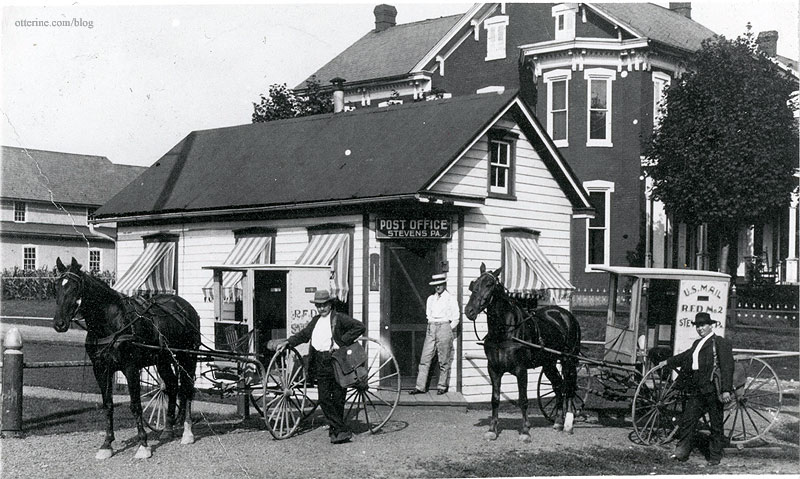
As you recall, when I first started with my idea of building a Rural Free Delivery mail wagon and its post office hub, I found this postcard from 1917 showing a post office with RFD horse wagons picking up the mail. It was precisely the type of building I was after. Stevens, PA is the name of the town on the sign above the door, and there’s a short wiki page on the town. After all this fascination, I ended up buying this postcard. :D
It’s a very interesting piece. The print is almost like a daguerreotype on paper. It has that weird metallic shimmer at a certain angle. Here’s an interesting article on the history of postcards I ran into along the way.
After our lively discussions on the roofing material, which I think we all agree is some type of metal, likely corrugated, I went down a rabbit hole – then explored the whole rabbit warren! It started with a link that Marilyn sent me on historical photos from the Library of Congress (now another research go-to along with Wiki).
To help with my research, I went to newspapers.com and signed up for a membership to peruse old articles. Since Rural Free Delivery was new, along with its aches and pains of growing with the times, there were a number of articles on these pioneering carriers, their professional and personal lives, the service in general and the related news about town.
Sat, Nov 4, 1916 – 8 · The Inquirer (Lancaster, Pennsylvania) · Newspapers.com
During the course of my research, I ended up figuring out who wrote the RFD postcard I bought (postmarked Nov 14, 1917) and to whom it was addressed. The text reads, “I just found a card with the old P. Office so I thought you would like to see where you were still doing the office work. It is rather soiled but the other side is alright. We are well. Hope you’re the same. Mother.”
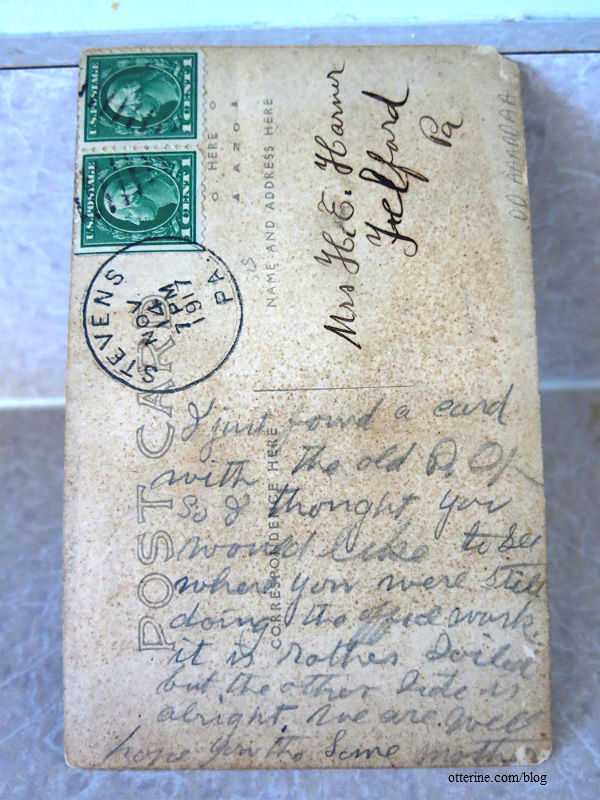
It is addressed to Mrs. H. E. Harner in Telford, PA. I found a 1907 clipping stating the engagement of Emma Clare (or Claire in another clipping) Lutz to H.E. Harner, who was a pastor. Emma’s parents were Mr. and Mrs. Charles S. Lutz.
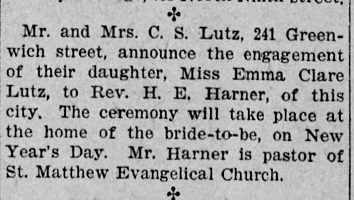 Tue, Dec 24, 1907 · Reading Times (Reading, Pennsylvania) · Newspapers.com
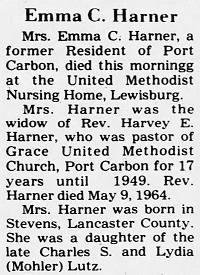
It’s hard to find the first and maiden names of wives in old clippings unless it’s an obituary or marriage notice. I found the 1972 obituary of Emma C. Harner, and it identified her parents as Charles S. Lutz and Lydia Mohler. We also finally see her husband’s first name of Harvey. All articles I had researched to this point referred to him only as H.E. Harner.
 Sat, Nov 4, 1972 · Pottsville Republican (Pottsville, Pennsylvania) · Newspapers.com
The postcard’s author, Lydia Mohler Lutz, died in 1947 at the age of 93.
 Thu, May 1, 1947 · Pottsville Republican (Pottsville, Pennsylvania) · Newspapers.com
Since we know the name of the post office in the photo, I started researching the Lancaster, Pennsylvania area. I stumbled upon a card catalog entry from The Historical Society of the Cocalico Valley. The card in question was labeled, “Stevens Post Office, Stevens, PA; Stevens Post Office with two mail carriers and delivery wagons, n.d., c. 1900.” Well, if that didn’t end up being the exact photo used for the postcard, then it would have to be from the photographer standing right next to the person who took the postcard picture! haaaaaa
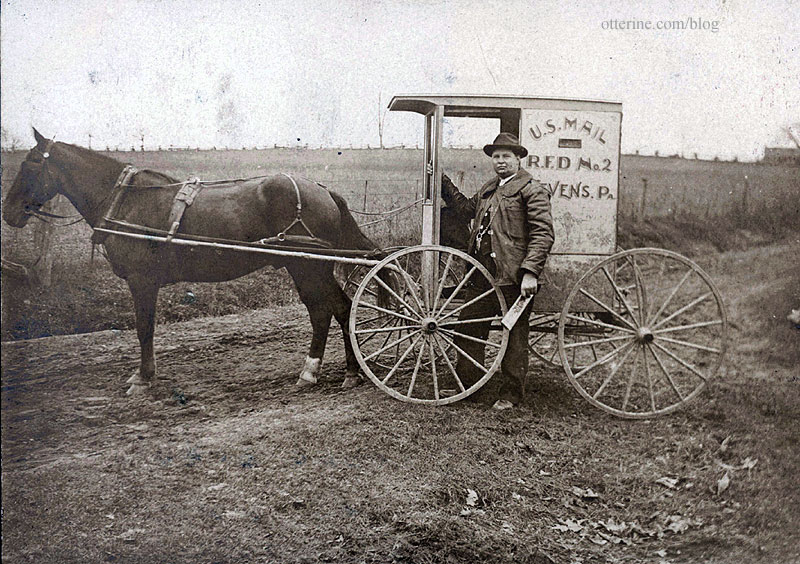
I called up the historical society, and Cynthia, the Society’s librarian, looked up the photo and also found another of a mail carrier with his wagon. I was able to get scans of both. The photo subject was indeed the same, though cropped differently. The quality was about the same as the postcard since it was a copy of the photograph and not the original print, but she was able to scan it at a high resolution to bring out even more detail.
I’m pretty sure that roof is corrugated metal, with uniform panels…or uniform panels with raised metal beams interspersed.

The mail wagon appears to be the same as in the postcard photo – route No. 2. She said there was no name written. The carrier for Route No. 2 could be the same man in the post office photo, but I’ll get to his identity in a moment.
I asked Cynthia about the large brick house behind the post office, figuring it might still be standing. She said the house was the home of J. Frank Lutz, once the postmaster of Stevens, who she thought was the publisher of the postcard. She mentioned the house is still standing though it has been renovated. As expected, the post office building is long gone.
With the Lutz name to search, I found a September 2011 newsletter from The Lancaster County Postcard Club. On page four, there is the same image from the 1917 postcard (theirs is indicated as mailed in 1910) as well as an old map from 1899 of Stevens and other photos of the area. While the newsletter writer seemed uncertain whether the person standing in the doorway was in fact J. Frank Lutz, the two carriers were definitively named as Harrison Z. Enck (route No. 1 – 28.5 miles) on the left and Harry R. Ludwig (route No. 2 – 25 miles) on the right (no names were given for the horses, unfortunately). I tried to obtain more info from the newsletter club, but they have not replied to my inquiries.
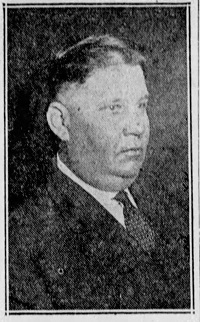
I found a photo of J. Frank Lutz dated March 7, 1924, and it could be him in the RFD postcard based on this likeness. On a side note, I had a hard time figuring out the relationship, if any, between Emma Lutz, her mother Lydia Mohler Lutz and J. Frank Lutz. It seems it was common to use the same first names across families and areas, making it difficult to differentiate who was who.
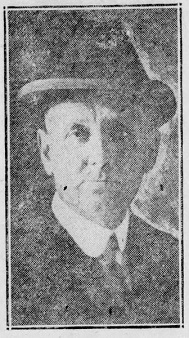 Fri, Mar 7, 1924 · Intelligencer Journal (Lancaster, Pennsylvania) · Newspapers.com
The newsletter writer mentions the building in the back left as a painting and carriage repository that was also the property of Mr. Lutz. As of the 2011 newsletter, it was noted that the shorter of the two buildings shown in the original postcard still stands as a storage shed. I was able to find the same postcard (unused) of the hardware store and adjacent buildings for a reasonable price online.

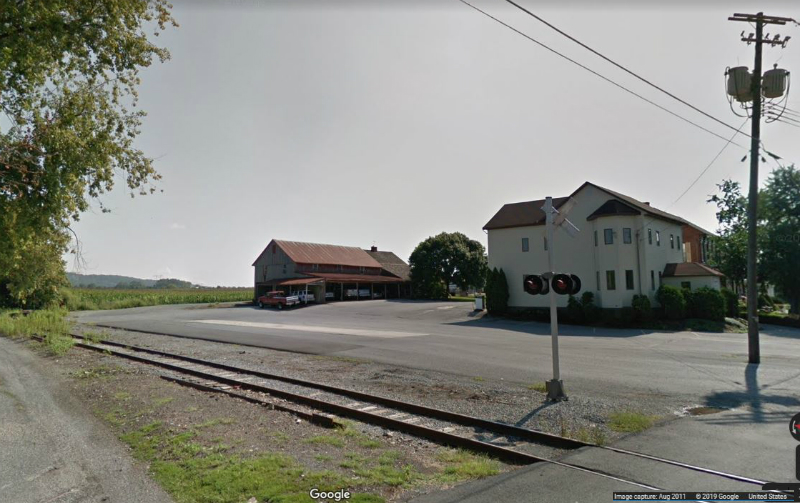
I typed the current address Cynthia gave me into google maps, and I think I found what remains of the three buildings. Maybe? Brick to siding for the house? The shed building looks very similar, and it is right on the railroad tracks. Seems like the right location.
On page five of the newsletter, there is another photo of the post office they indicate as dated 1907-1909 showing the hardware building and the post office right on the railroad tracks. Look, no window awnings! :D I was able to track that photo back to this website, but the site owner had no other information on it. The Stevens/Reamstown station description on that website mentions the Lutz Hardware Store and Carriage Repository, indicating this railroad station started as a small platform for a dairy farmer and that the building was originally owned by J.S. Heiser before becoming the Lutz Hardware Store.
It’s strange, though, because there are a few differences besides the awnings. There is no sign on the Lutz Hardware building, the post office sign doesn’t seem to mention the town name as it does in the RFD postcard, and the door is also different. The building seems closer to the railroad, or at least the easement, which can’t be seen in the RFD postcard but there is more area and a short post between the building and the utility pole in the RFD postcard. So, it’s hard to tell if this is an earlier or later photo. It seems as though it would be later since it is more likely the railroad easement would encroach on an existing building than more space being added after the railroad was in place. Regardless of the time relation to the RFD postcard, I think it’s pretty awesome to have found a second photo of the same tiny post office.

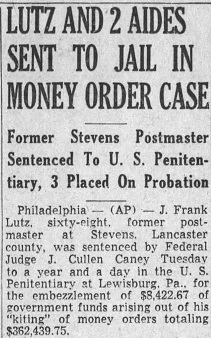
image from West2K, used with permissionI found this notation stating Mr. Lutz was born November 22, 1872 (died October 19, 1959 – aged 86) and never married. The article doesn’t mention his being a postmaster, but it does mention the hardware store and carriage repository. It seems Mr. Lutz got himself into trouble for postal money order fraud and spent some time in jail around 1941.
 Wed, Mar 26, 1941 · Intelligencer Journal (Lancaster, Pennsylvania) · Newspapers.com
I found a book called The Zartman Family by Rufus Calvin Zartman (dated January 1, 1909) showing a brief history on Mr. Enck. It references his job as a rural mail carrier.
There was a lovely write-up about Mr. Enck in a 1925 newspaper titled Traveled 200,000 Miles in 21 Years as a Rural Mail Carrier; he was noted as being 68 years of age at the time the article was written. It mentions his starting the rural route No. 1 in Stevens and says he carried over 600,000 pieces of mail without missing one. The photo in the article is noted as being of his first horse and mail wagon. Hard to tell if it matches the RFD postcard photo.
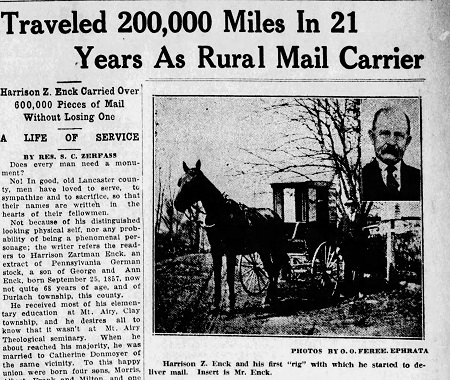 Sun, Jun 21, 1925 · Sunday News (Lancaster, Pennsylvania) · Newspapers.com
There was conflicting information on the second carrier in the original RFD postcard photo. I found a clipping from 1903 announcing the start of the two rural routes in Stevens, PA – scheduled for March 2, 1903. This clipping mentions the driver of route No. 2 as Harry H. Shirk (not Harry R. Ludwig).
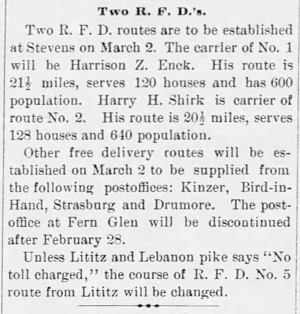 Sat, Feb 21, 1903 · The Inquirer (Lancaster, Pennsylvania) · Newspapers.com
In a May 13, 1922 Letter to the Editor written by Harry R. Ludwig, he mentioned he had been a rural letter carrier for 16 years, which indicated a start around 1906. It’s not clear if the man in the RFD postcard and the other photo is Harry R. Ludwig or Harry H. Shirk. The 1922 letter had a photo of Harry R. Ludwig. Hard to tell without a photo of Harry H. Shirk, which I could not find, but the men in the photos do have a similar build. In my research, I found two different men with the name Harry H. Shirk, and neither was referenced as being a mail carrier so I couldn’t tell which was the right one.
 Sat, May 13, 1922 · The News-Journal (Lancaster, Pennsylvania) · Newspapers.com
Considering the rural routes in Stevens, PA began March 2, 1903 and the RFD postcard was mailed in 1917 (and the writer calls this the “old” post office), the photograph had to be taken in the time frame of 1903 to 1917. Also, the 2011 newsletter references their identical postcard as being mailed in 1910, which would narrow it down to 1903-1910. Articles pertaining to Harry R. Ludwig (written by Mr. Ludwig himself) indicate he began his RFD career in 1906. My guess is the photo was taken right when the RFD routes started in 1903 or soon after, and so it’s likely not Harry R. Ludwig in that photo. But, could he be the man in the other RFD No. 2 photo? The wagon is certainly more worn in that photo than the original RFD postcard. I guess we’ll never know.
In a clipping from May 2, 1921, it was noted that Mr. Ludwig fractured his arm cranking his automobile. I wonder if he ever injured himself using a horse wagon.
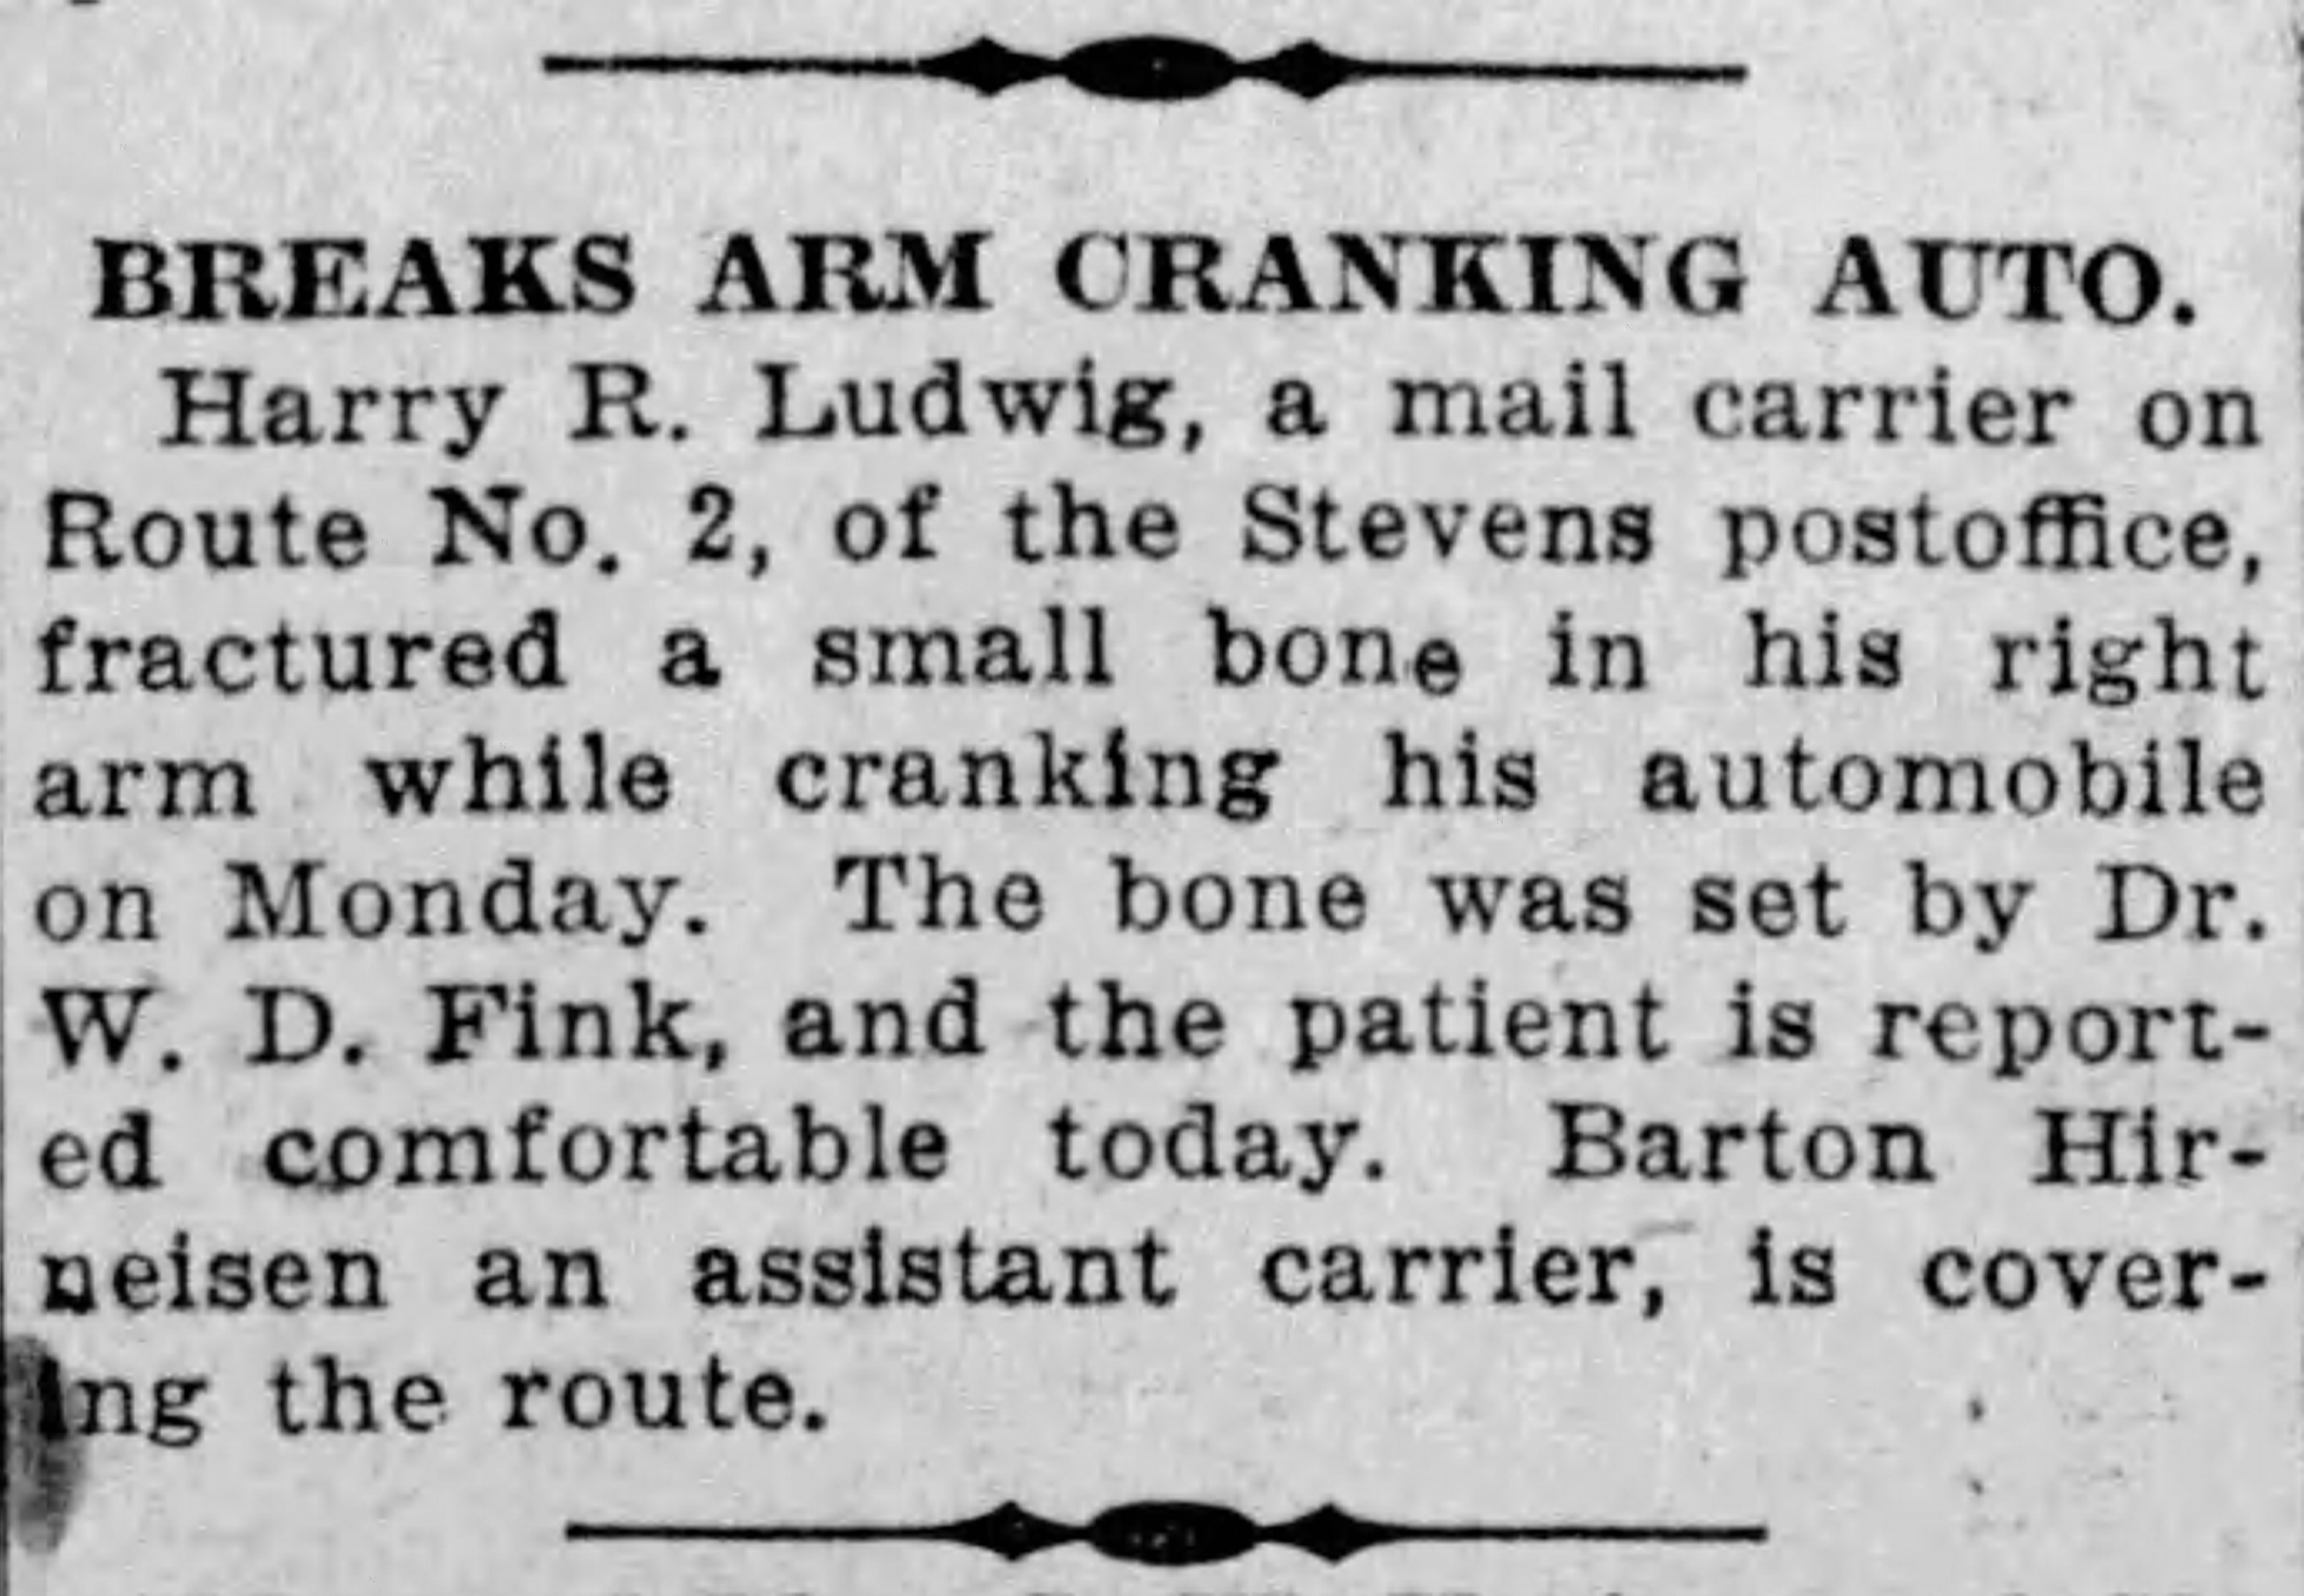 Mon, May 2, 1921 · The News-Journal (Lancaster, Pennsylvania) · Newspapers.com
Mr. Ludwig was born November 6, 1879 and died in 1927 at the age of 47.
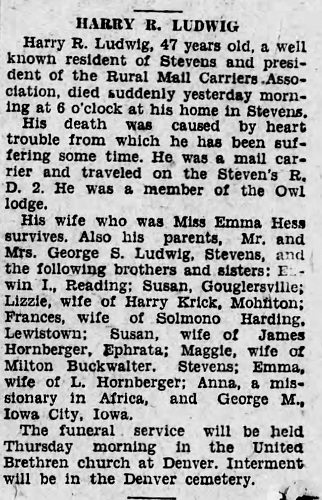 Sun, Mar 6, 1927 · Sunday News (Lancaster, Pennsylvania) · Newspapers.com
Much of historical research is guesswork, because newspapers and the like can be filled with errors, and finding the retractions and corrections isn’t always easy. But, I had a lot of fun getting this far – all starting with a simple google search that landed on an antique postcard. And, reading old newspapers is a real hoot!
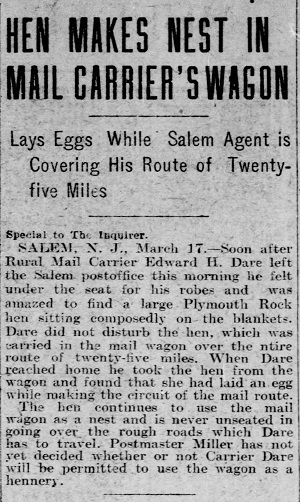 Sat, Mar 18, 1905 · The Philadelphia Inquirer (Philadelphia, Pennsylvania) · Newspapers.com
Do I usually go through this much research during a build? You can ask anyone who has been behind the scenes before to confirm, but the answer is absolutely yes! :D To me, part of the enjoyment is immersing myself in the life and times.
Categories: Ivy Hollow RFD
September 11, 2019 | 0 commentsBirds on a Branch, removing sections of knots
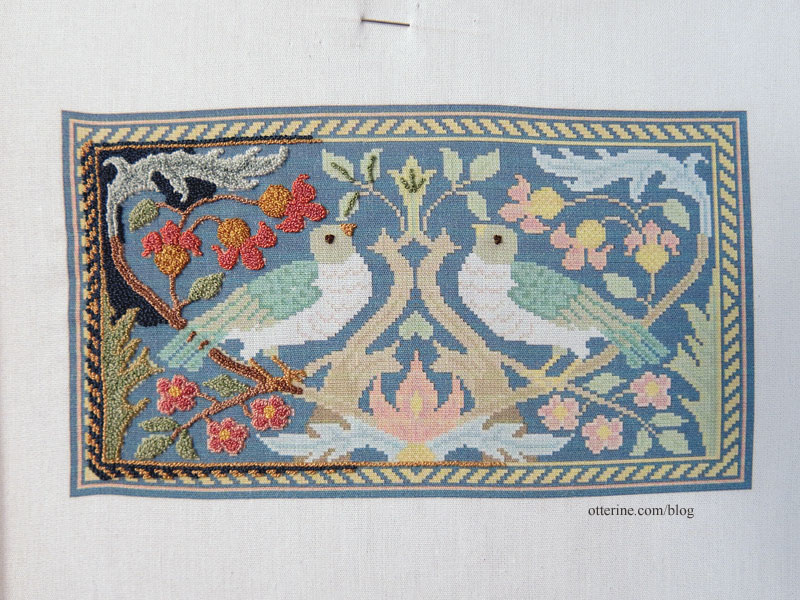
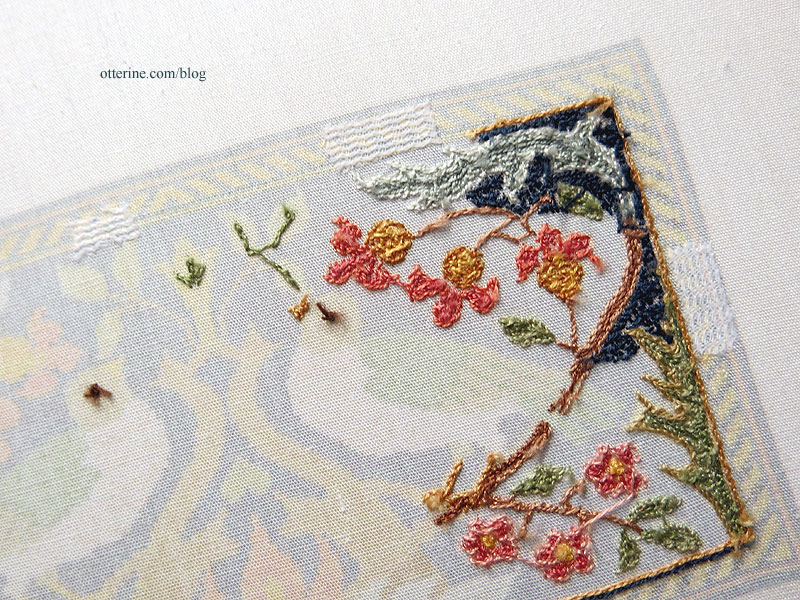
Update on the Birds on a Branch rug. I lost a bit of motivation after deciding I didn’t like the diagonal striped border. The knots were not lining up well, and it was becoming a jumbled mess the more I added. Here is what it looked like last.
I had two choices – remove the knots in the border or start over. At 11 hours of work, it wasn’t a terrible thing to restart, but I decided to try removing the knots. If I couldn’t salvage it afterwards, I would have at least tried.
You can’t just rip stitches when every stitch is a knot, because it will destroy the fabric. Instead, I took a fresh X-Acto blade, wiped it completely clean to remove any oils and slid the edge under the heads of the knots on the front side. This is as scary as it sounds.
After shaving the knots, I used packing tape to lift the threads and fuzz left. There were three places in the fabric where there was some minor damage – not true holes but very thin, worn remaining fabric.

I ironed on some fusible interfacing to the back in order to patch those areas. It’s very thin material, so it wouldn’t build up any bulk while still providing more substance for the stitches to grab onto. This would lock in the thin cotton between the stitched threads and the interfacing fabric.
I opted for a solid border, which I already like better. I might make it wider later on. The diagonal striped border would have been nice, but it was too hard to manage with freehand knots in such a small area. A vertical striped border would have been too geometric with the organic bird and branch patterns of the interior.

I didn’t count the time of the knot removal and redo, but I was able to stitch more after that was done. So, this is now at 14.5 hours of work.
——
Design notes: Birds on a Branch – Sue Bakker design, re-charted in Pattern Maker Pro and printed on cotton, French knotsCategories: Needlework - French knot rugs
September 10, 2019 | 0 commentsMail Wagon – part 9
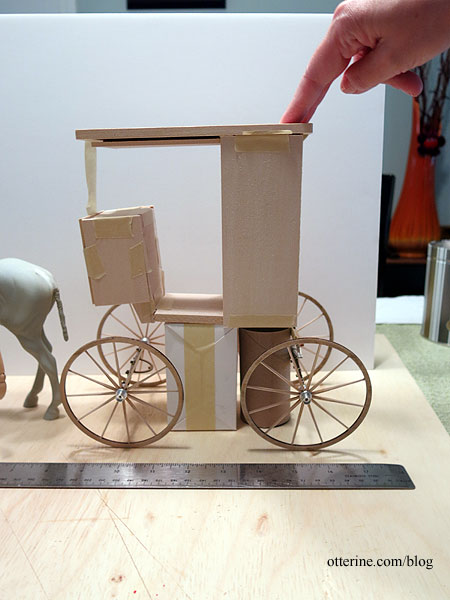
Continuing work on the mail wagon. I’m planning a basic box cabin with trimmed details, a hinged front window, and sliding side doors. I’m using 3/64″ thick basswood sheets (3″ x 24″) for the majority of the parts. It’s thinner than 1/16″ and therefore lighter in weight but still durable when trimmed.
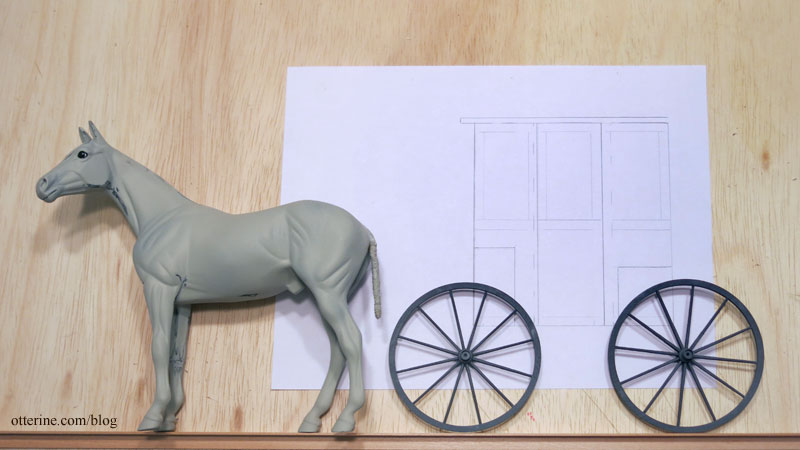
I started by drawing a quick sketch using the Rondel kit sides as a starting point, then refining from there based on measurements for average seat height, the seated height of my artist model and general proportions from the various mail wagon examples I’ve reviewed.
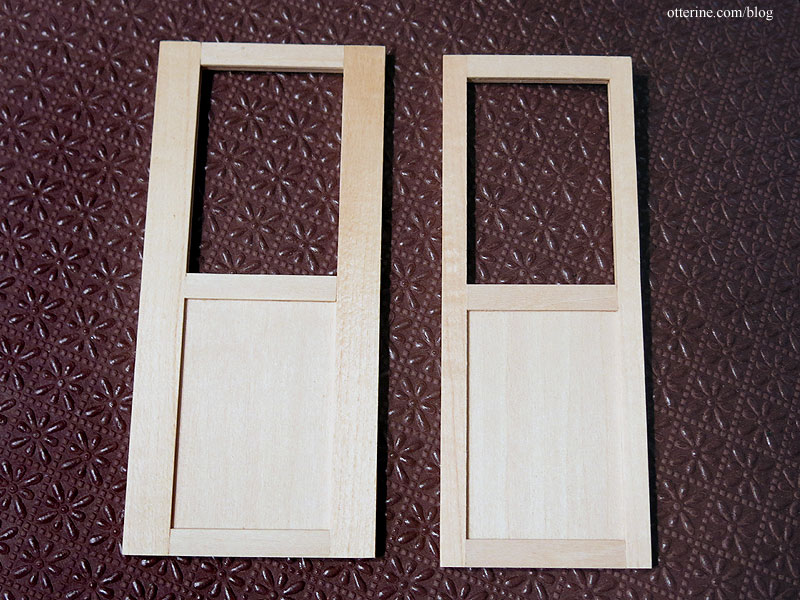
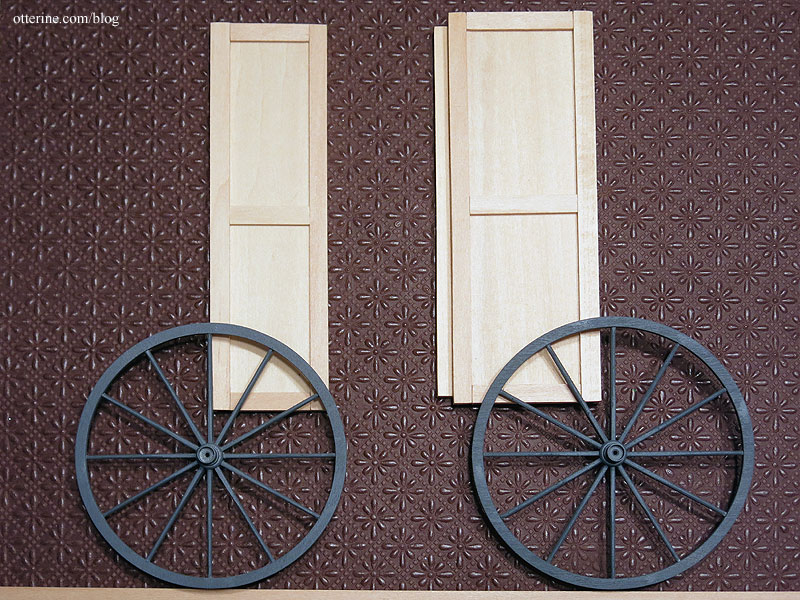
The two doors are where I will begin, then I can build the walls to enclose around them. If these don’t work, then my basic construction will change since I’ll make hinged doors instead. I’m using door frames from Northeastern Scale Lumber, cutting them down width-wise. I am sure there must be a place to get the window channel that Houseworks uses to make their windows, but I have yet to discover it.
The door frame material holds the 3/64″ thick basswood perfectly as an insert, and 3/64″ thick trim finishes the frame. The top will have acrylic sheet for the window. As I was working, I decided to make my door a little wider than my drawing for practicality. This will add a modest amount to the length of the wagon, but it seemed necessary for better proportion. Here is one door with the original width of door frame material on the side and the other with the width cut down.
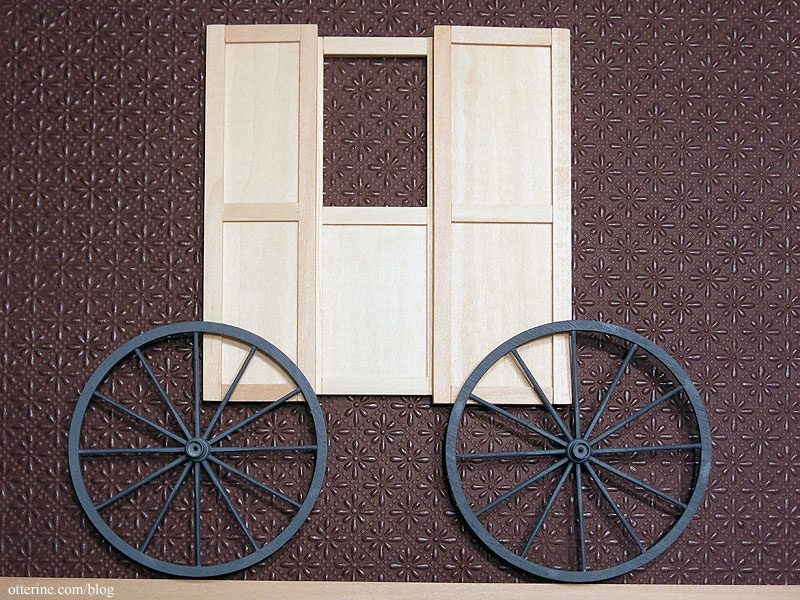
I built the side front and side back walls using the door frame material for the lead edge of the door openings as well as the tops and bottoms, cut down to size width-wise. I used 1/4″ corner trim for the front and back edges to make it easier to join the front and back of the cabin when I get to that stage.

Most of the examples I saw had no side windows, sometimes small slits to peer through, so I’ve left the side walls solid to have more room for the lettering. The cross trim on the side front and side back panels isn’t glued in place yet, since I want it to line up with the door in the end. Leaving it unattached allows for adjustment later.
Each door will slide to the back just short of its door handle.
I think this will work well, so next I will make the front, back and floor.
Categories: Ivy Hollow RFD, Model Cars, Vehicles
September 8, 2019 | 0 commentsMail Wagon – part 8
Continuing work on the mail wagon. With the front and rear axle assemblies and wheels made, I can start to build the cabin. I’ve pretty much been researching mail wagons since I started down this path, and there was no standard type of wagon over the years. RFD was such a novel thing, though horse wagons were not, it really was each man for himself. So, I get a lot of room to play.
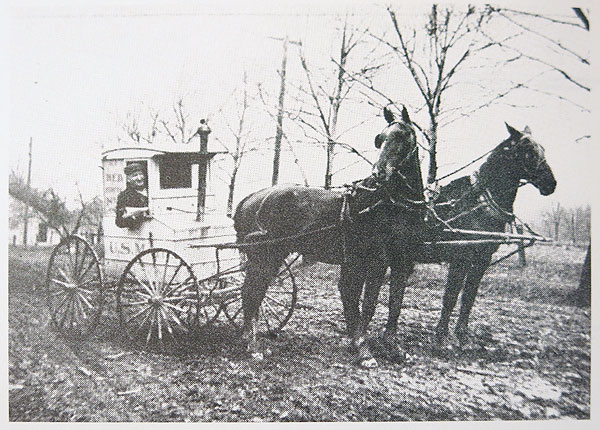
There were sliding doors and front windows that could be lowered into the front wall.
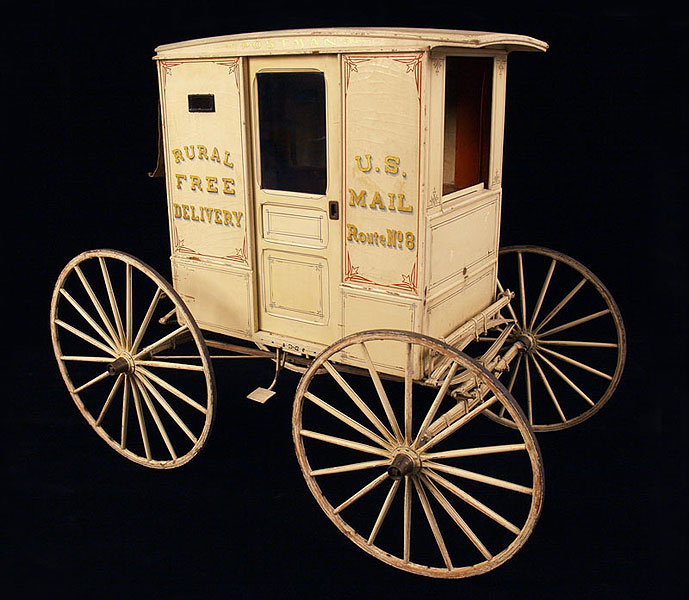
image from The Smithsonian There were hinged doors.

There were hinged windows and mail slots.
If you look at the original wagons from the postcard, there was no room in front – just the window wall.
There were built in heaters and portable heaters.
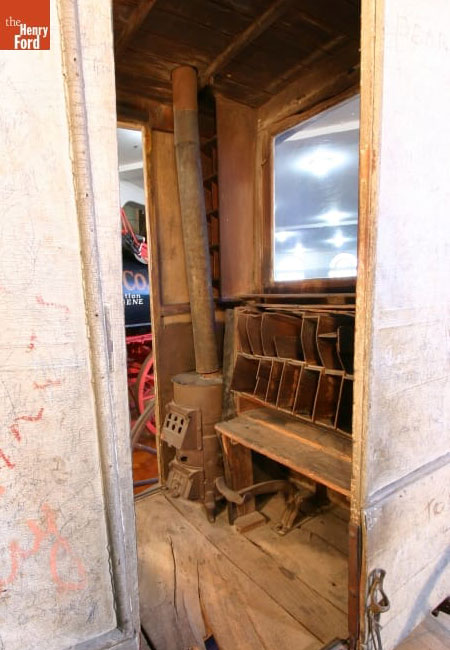
image from The Henry Ford One great source is Horse Drawn Mail Vehicles by James H. Bruns
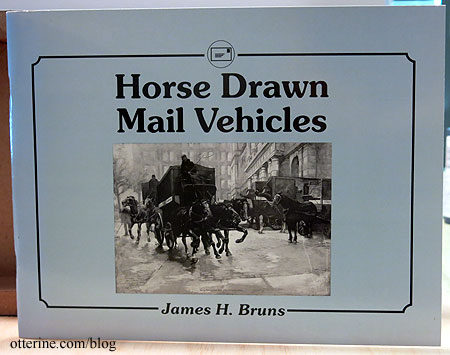
Look at this tiny thing that’s barely a box built around a chair and a heater! Where did the mail fit? I’m also pretty sure only one horse was needed. :]
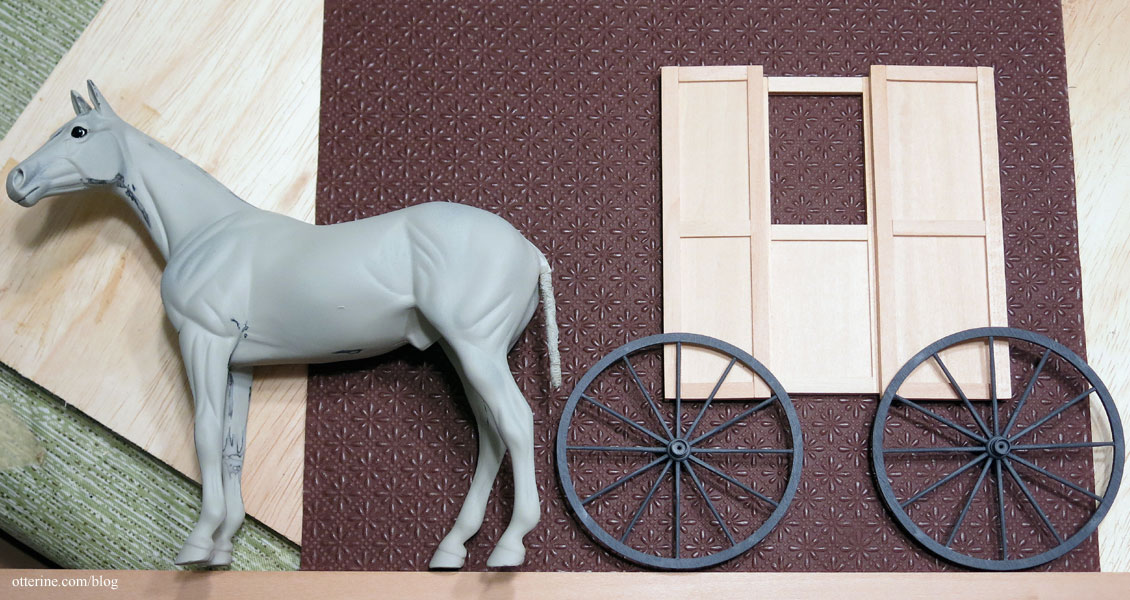
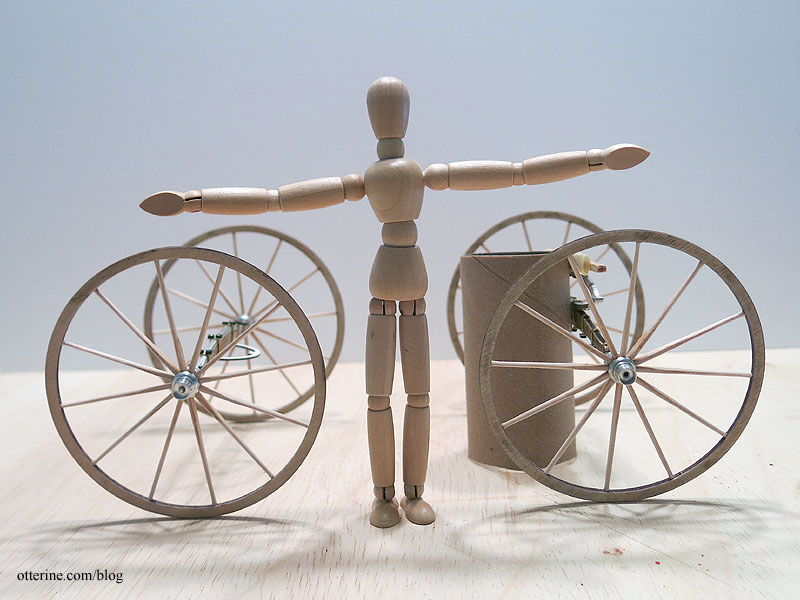
from Horse Drawn Mail Vehicles by James H. Bruns I set up my wheels and axles with Jebediah and one of my artist models. I can probably back Jebediah to the wagon a bit more, but this total span is 17 inches from his nose to the back of the wheels.
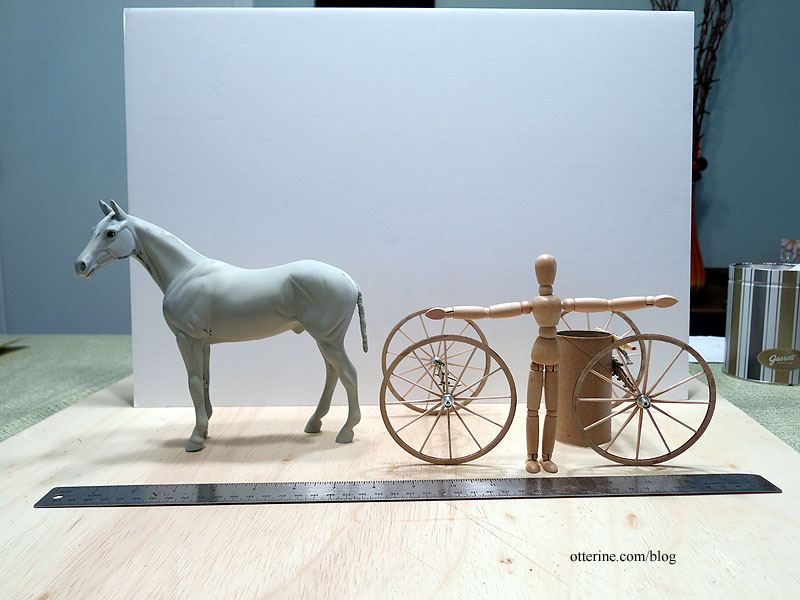
The span from the axle centers is 5.5 inches. Having a very narrow space between the wheels for the mail carrier to enter the wagon was not uncommon.
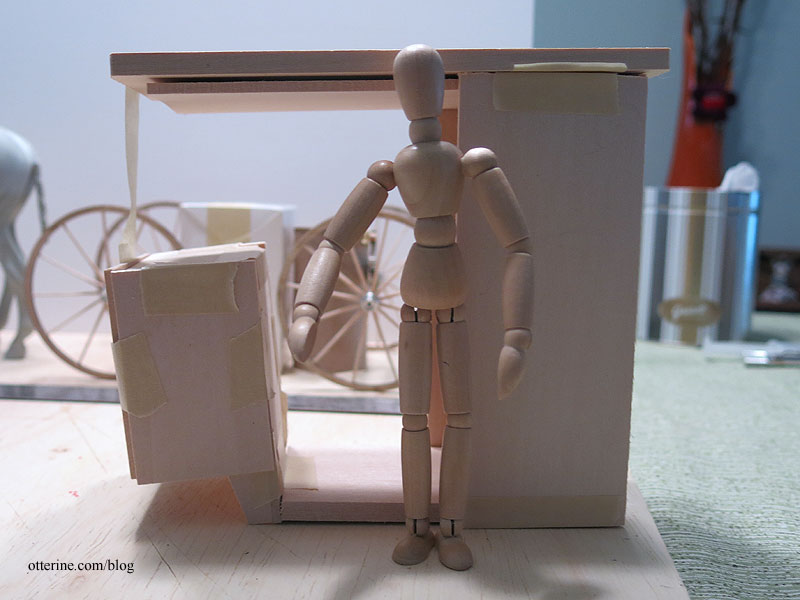
I won’t be using the Rondel kit, but here is that cabin in dry fit for size comparison (obviously not this tall).
This should be a good gauge for overall size, though.
I’ll need to make the cabin as light as possible since the axles are fairly delicate, but I can layer thin wood to get good detailing without adding a lot of weight.
Categories: Ivy Hollow RFD, Model Cars, Vehicles
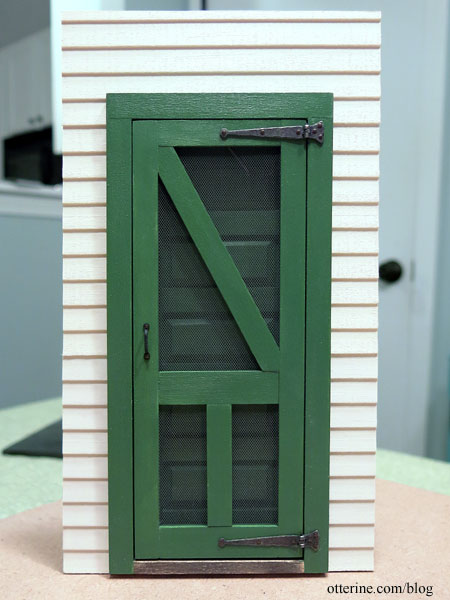
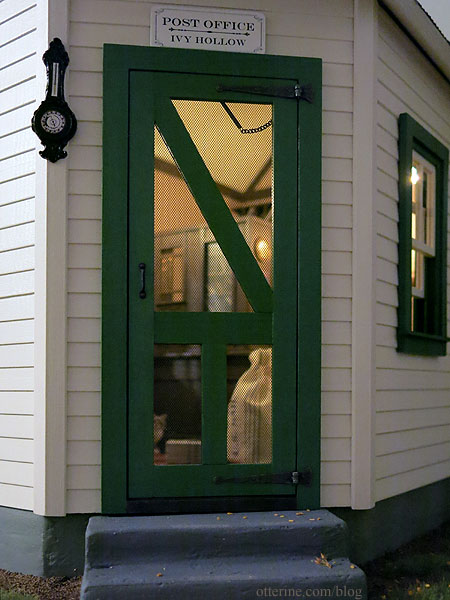
September 1, 2019 | 0 commentsIvy Hollow – screen door, part 7
Completing work on the screen door. My base wall with siding gives me a wall 3/8″ thick, so I need to pad the interior wall further. Being that this is an angled wall, it’s not as simple as it would have been on a straight wall. I have some ideas on disguising the added wall thickness modification, but more on that to come later when I glue the structure together.
I painted the frame Woodland Green to match the doors, and the threshold is stained using Bittersweet Chocolate mixed with Staining Medium by Americana. I’ll do more for the threshold once I get the porch and interior floor completed, but I wanted some color on it while finishing the doors.
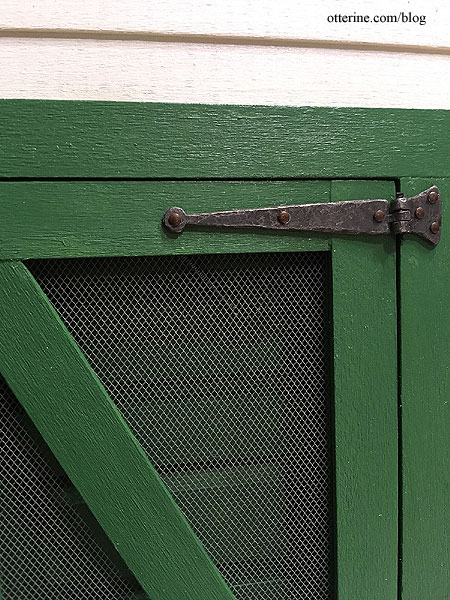
I installed working Pennsylvania strap hinges by Olde Mountain Miniatures for the screen door.
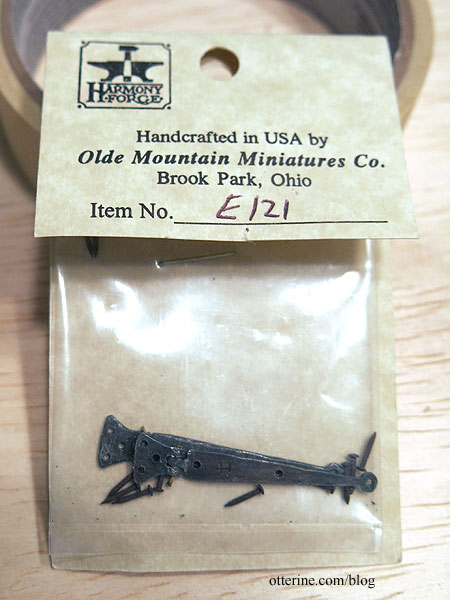
I replaced the nails from the package with tiny threaded brads by Classics.

The hinges might be a bit heavy for a screen door, but the more modern ones just didn’t look right for shape or finish. Perhaps these were reused from a broken down shed in the area. The hinges have brass pins, which I touched up with black paint once installed.
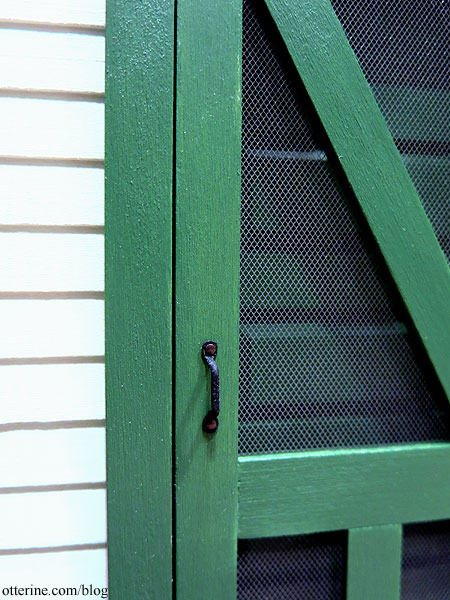
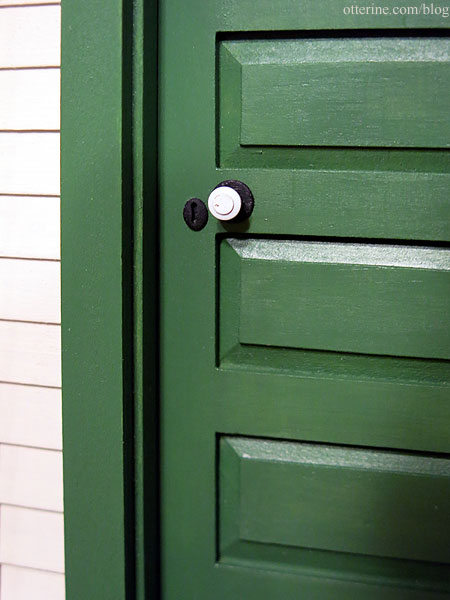
For the handles, I used window pulls by Classics, making sure to install them higher than the door knob of the solid door. Though they started as gunmetal, I painted them flat black with a satin finish. The front one has the tiny brads, but I faked the nails on the interior with glue and paint. My door wasn’t thick enough to have back-to-back nails.
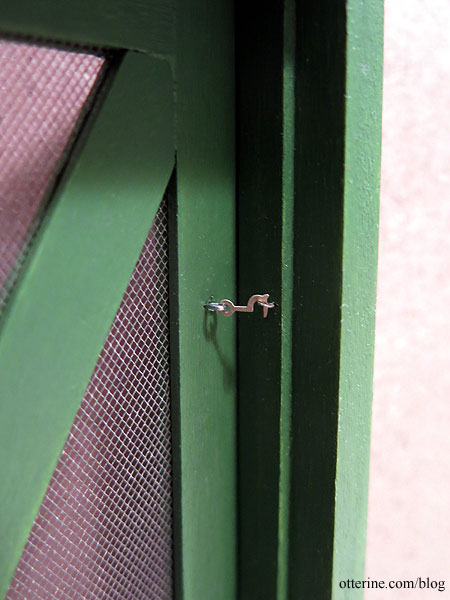
I tried to research the history of screen door hardware, but I ran into a lot of sites selling refurbished or reproduction hardware without much commentary on what was used when. The most interesting pieces were the antique spring-loaded hinges in some beautiful designs. I’m going with what I remember from my childhood farm memories – a spring and hook latch. :]
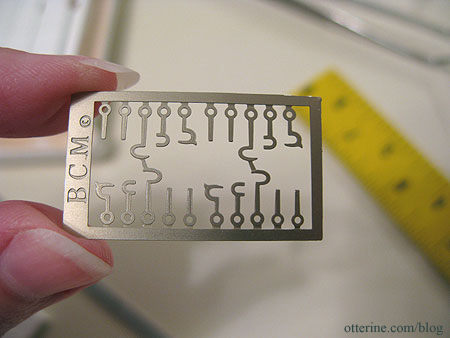
The hook latch and eyelets come from The Ironworks.
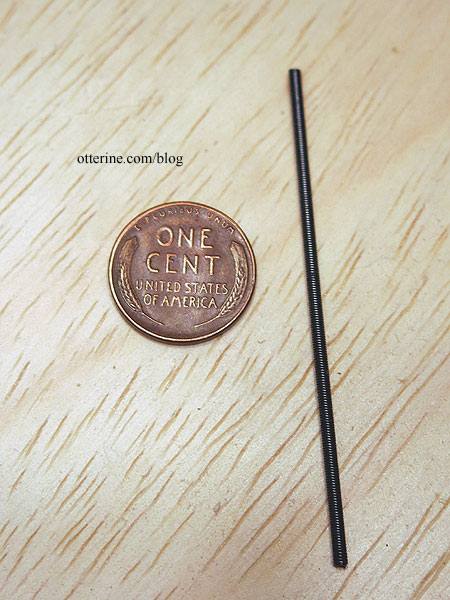
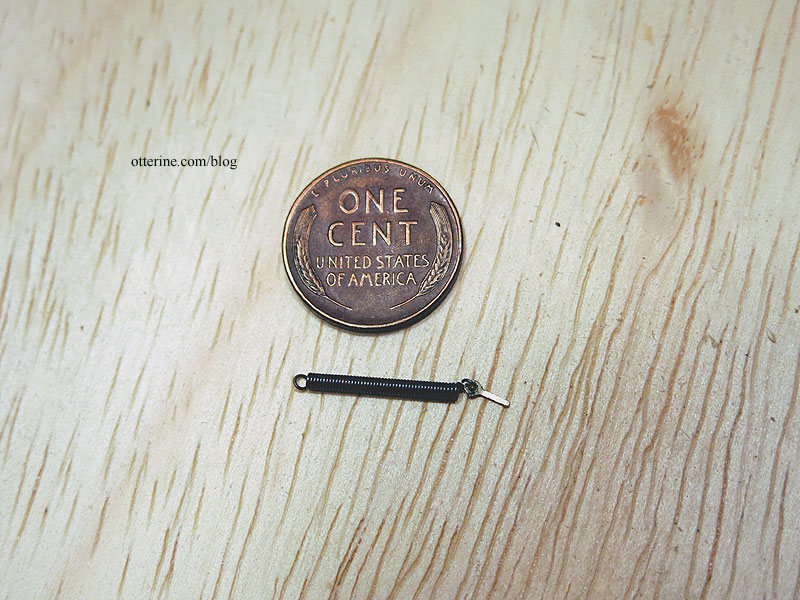
Bill sent me length of thin spring awhile back, and I put it in the bits-n-bobs box for a time such as this. I opted not to install this so that opening the screen door will actually pull the spring for two reasons. The spring is likely to stretch out of shape over time, but more to the point, the spring has a tension force greater than the strength of tiny eyelets and some glue. boioioioing!
So, we fake it! I’m actually doing a mix of a typical screen door spring and storm door stop chain. This is probably more modern, but it will add visual interest overall. I cut down the spring and used an X-Acto blade to force the end rings open to make eyelets at each end. I threaded one spring end onto one of the laser cut eyelets.
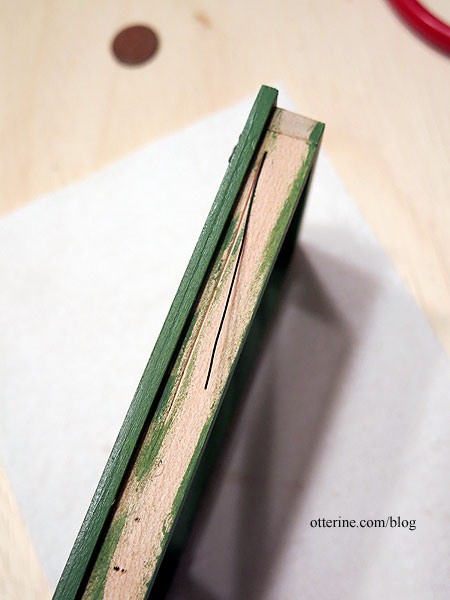
I made another eyelet at the end of a length of thin black wire, determined where the chain would connect to the door frame, drilled a hole and inserted the wire through. The length gives some added durability just in case the chain gets pulled too hard. I cut a channel for the wire and taped it in place.
The chain hooks into this eyelet as well as one end ring of the spring.
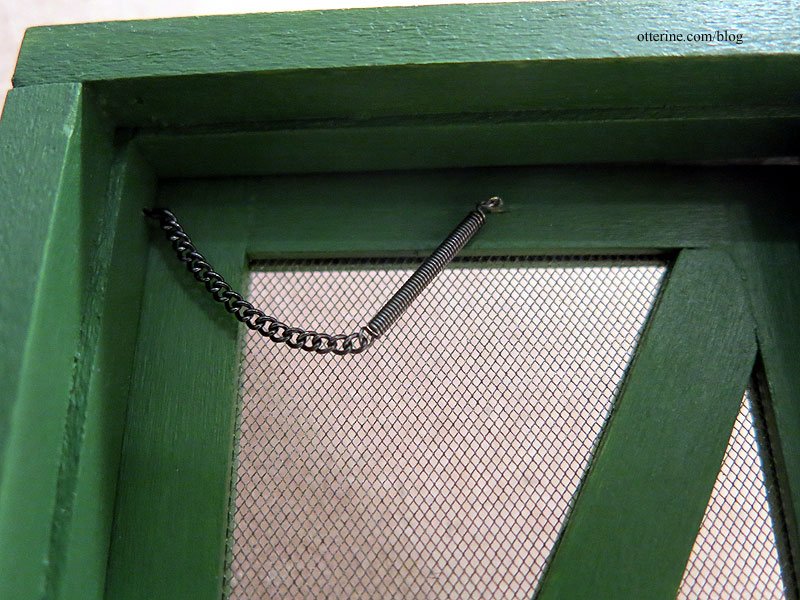
I glued the eyelet into the screen door, being careful not to drill through to the front side.
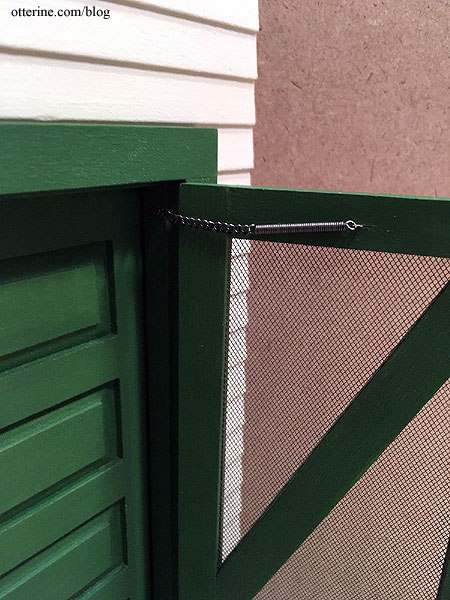
I love the way it looks, just visible through the screen. :] It will be more prominent when the solid door is open.
And, finally the hook and latch. This also has a handmade eyelet on the door with the laser cut hook and eye. This is not easy to hook, mainly for having to use tweezers to do so, but even a hook latch hanging loose adds some realism.
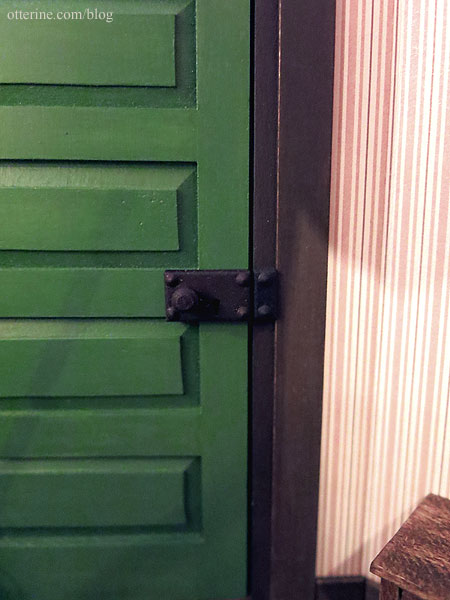
During final assembly, I added the door hardware to the solid door.
Since the lock rail and the lock box are roughly the same height, I decided to not inset the lock box for fear of making a mess of it. This hardware is so hard to see on the interior as it is, it was hardly worth the risk, but I filed the idea away for another time and another door.
It was a lot of work, but I will definitely make another screen door in the future.
Categories: Ivy Hollow RFD
August 26, 2019 | 0 comments


NOTE: All content on otterine.com is copyrighted and may not be reproduced in part or in whole. It takes a lot of time and effort to write and photograph for my blog. Please ask permission before reproducing any of my content. Please click for copyright notice and Pinterest use.


