

Realife Country Store fixtures – part 3
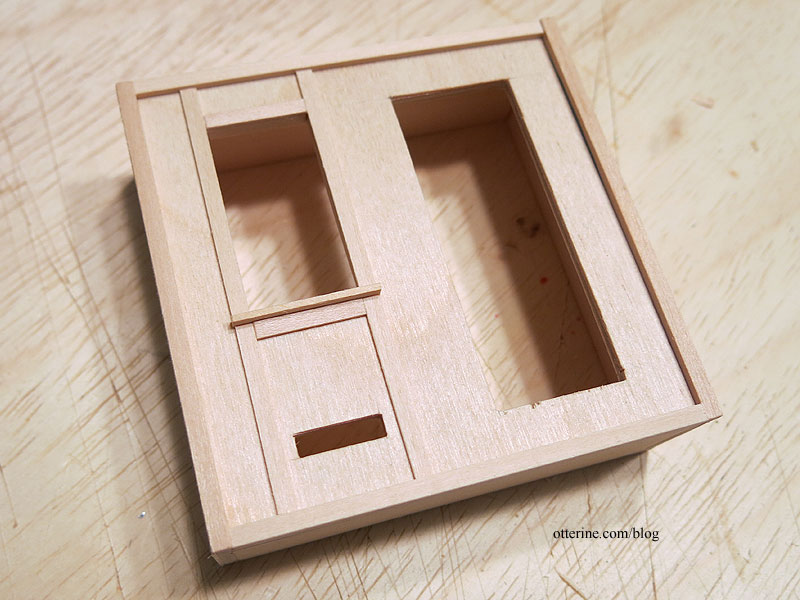
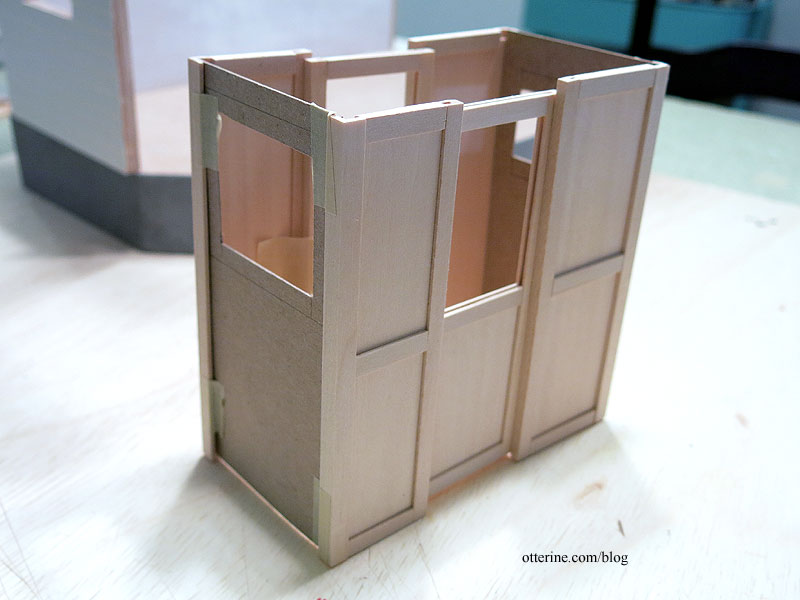
Continuing work on the Realife Country Store fixtures. I cut more away from the window opening and cut new sides to replace the warped kit pieces. I was mistaken about the window shelf – there was a ledge included in the kit. I just hadn’t cut that piece out or gotten that far in the instructions. It’s a usable piece as is, as long as I don’t break it. I trimmed the window since I had used plywood for the front (for stability). This covers the striated edges.
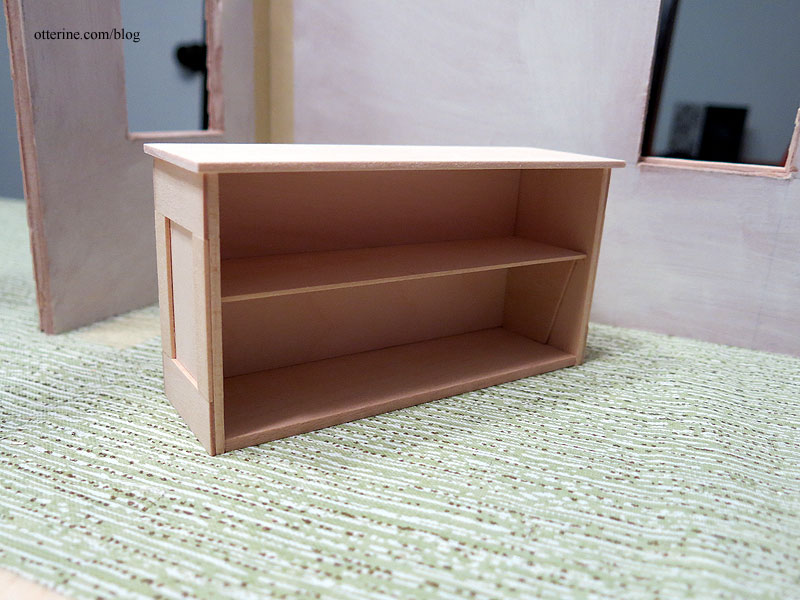
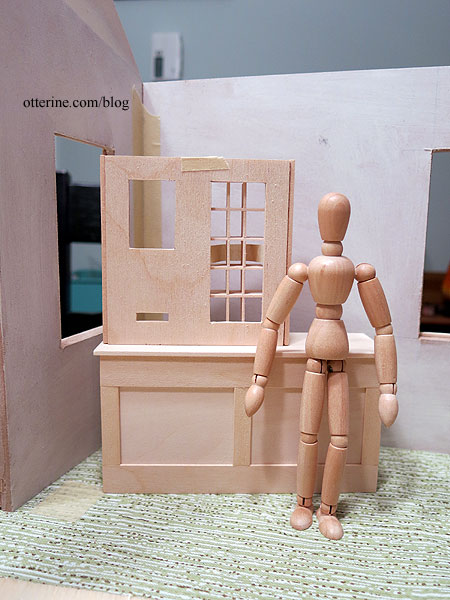
I added trims to finish the postal teller window side, revamping some of the design with trims from my stash. Just a little pizzazz. The sorter side will need to wait until I finish and install the pigeon holes.
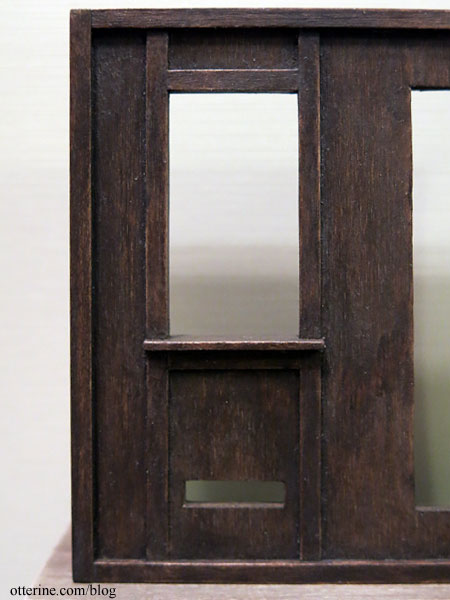
For finishing, I’ve opted for Bittersweet Chocolate mixed with Staining Medium, both by Americana. Actual stains can be harder to work with in small spaces, and the Staining Medium makes paint behave like a stain without the fumes or the long drying time. There’s the benefit of stained wood grain without as much mess. Acrylic paint also helps bind the wood fibers to make sanding between coats more effective.
I sanded after the first application and then reapplied to complete the staining portion. For any glue mishaps or large grain, I added undiluted paint. I then sealed the pieces with satin varnish, making the finish less than perfect to add some character.
Painting the pigeon holes was the worst part. Tiny brush, 15 compartments, four sides each, from the front, then the back – two coats of paint, one coat of varnish. And, they still need touching up. Oy. Good thing the tiny mail will distract. :D
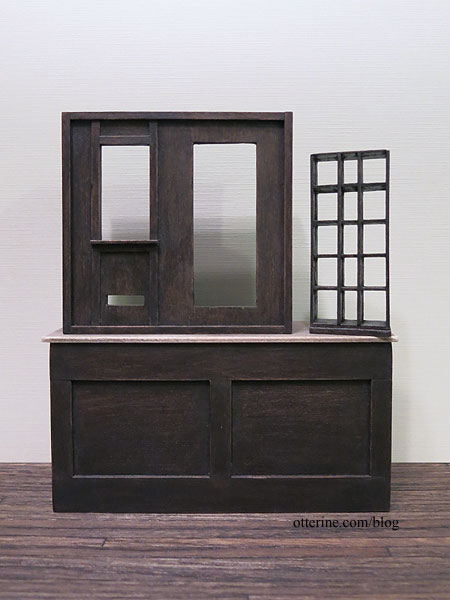
I did paint the first coat on the countertop followed by sanding, though I have work to do on that before I can finish it. It won’t be a contrasting lighter tone in the end.
Categories: Ivy Hollow RFD
September 28, 2019 | 0 commentsRealife Country Store fixtures – part 2
Continuing work on the Realife Country Store fixtures. Due to the old, warped wood in the kit, I had to cut a few new parts for the counter, including an added bottom, which was not part of the original construction. Adding a bottom gives the piece more stability. I reduced the depth overall by 3/8″ to give myself more floor space. It’s still a usable depth in scale but gives a little breathing room for my small interior. I made some adjustments to the trim for proper proportion to the final look. The trim around the base will be added after I install the flooring and baseboards.
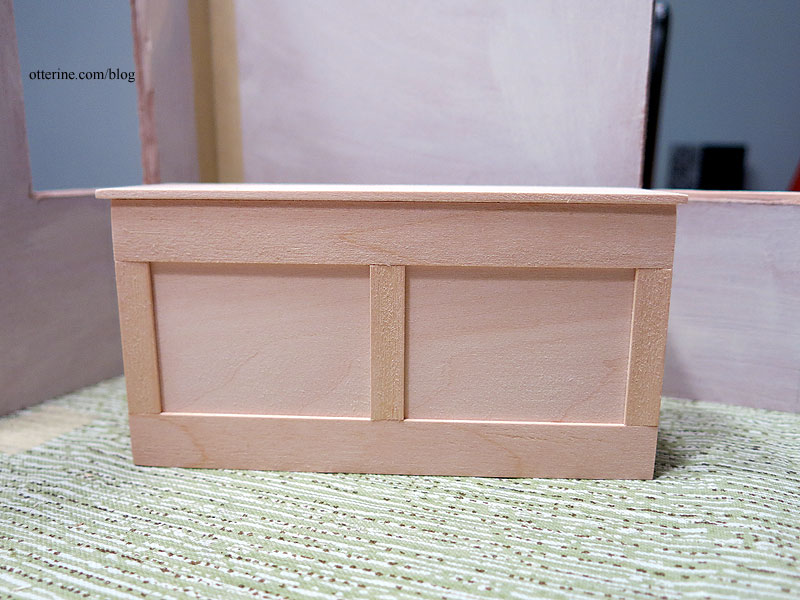
I’m thinking of adding a routed edge to the countertop, so I’ll leave that unattached for now while I brush up on my drill press class notes. Plus, I will need to have some flexibility with the placement along the window and the gate.
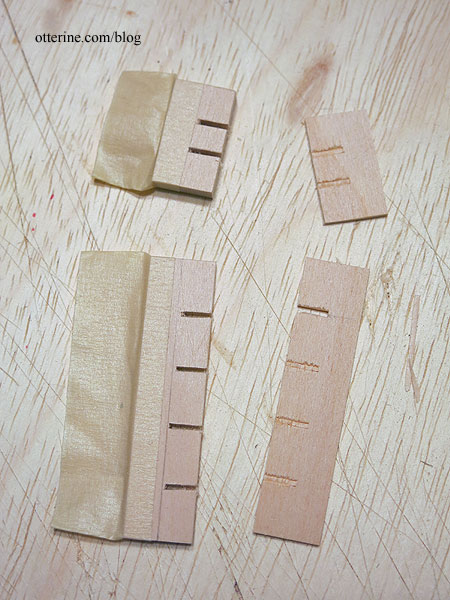
I needed to make new parts for the pigeon holes for the post box teller, because die cuts are splintery and uneven. Die cutting doesn’t work well for tiny details, and the wood was fragile beyond that.
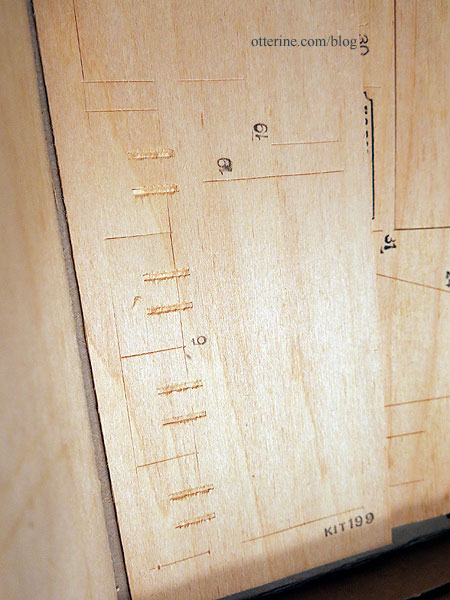
First, I cut new strips the size of the originals and marked the location of the notches. I taped the like pieces together and used the scroll saw to make the cuts. Taping the pieces together helps keep the pieces close to being the same.
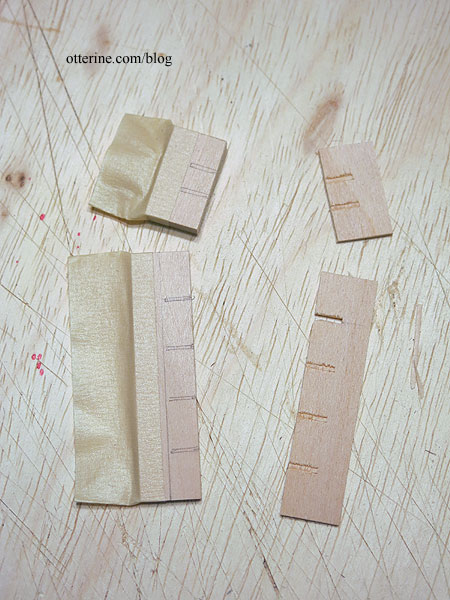
Just a little clean up, and we’re ready to go. :D
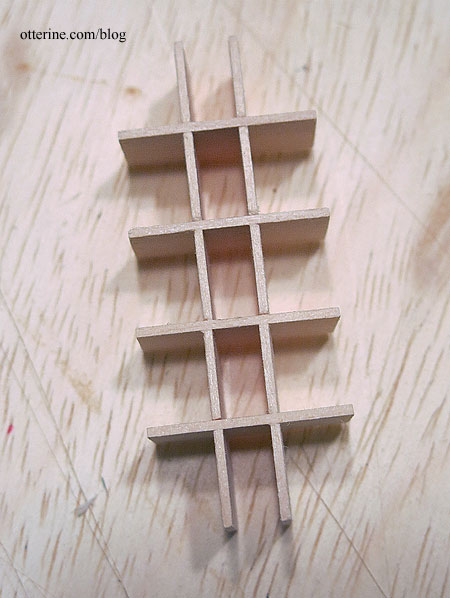
This is nowhere near perfect, but it is better than what could have been achieved with the original pieces. A laser cut version might better, though I think the pieces would still be fragile.
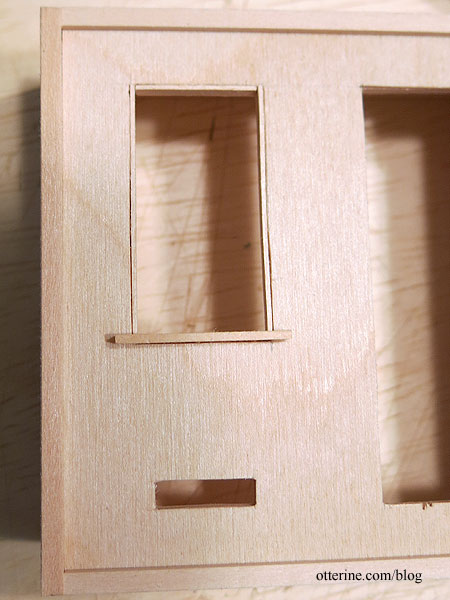
The original facade for the post box teller was split in the kit, before removing it from the die cut sheet. (The instructions even indicate this piece is prone to breakage and suggest repair.) I was originally going to repair it, until I set the dry fit on the counter just to see. Well, this low window will give our postmaster some back issues, won’t it?
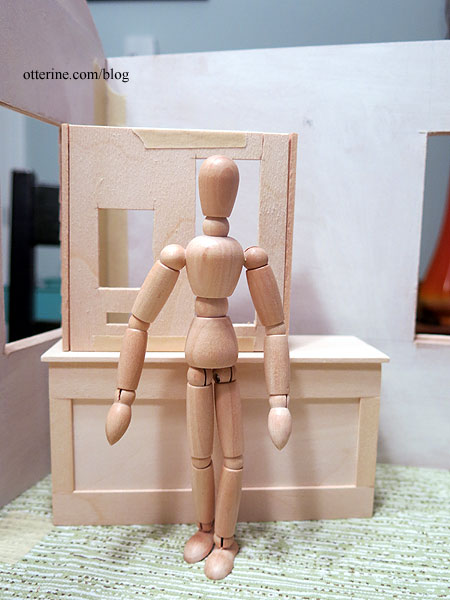
I cut a new facade from 1/8″ thick plywood, making the window in line with the top of the sorting window and leaving the letter slot in its original location. The top and sides are too warped to keep, but they work well enough for a dry fit. I might have gone a little higher than needed with the window, but it’s much better. I’ll probably cut more from the bottom portion to make the window longer and add a shelf.
Categories: Ivy Hollow RFD
September 23, 2019 | 0 commentsMail Wagon – part 10
Continuing work on the mail wagon. As you saw last time, I had primed the wagon wheels. On the hubs, I used Rust-Oleum Aluminum Primer, which is light grey. It bonds specifically to aluminum, and an aluminum primer was recommended in the instructions for the doctor’s buggy.
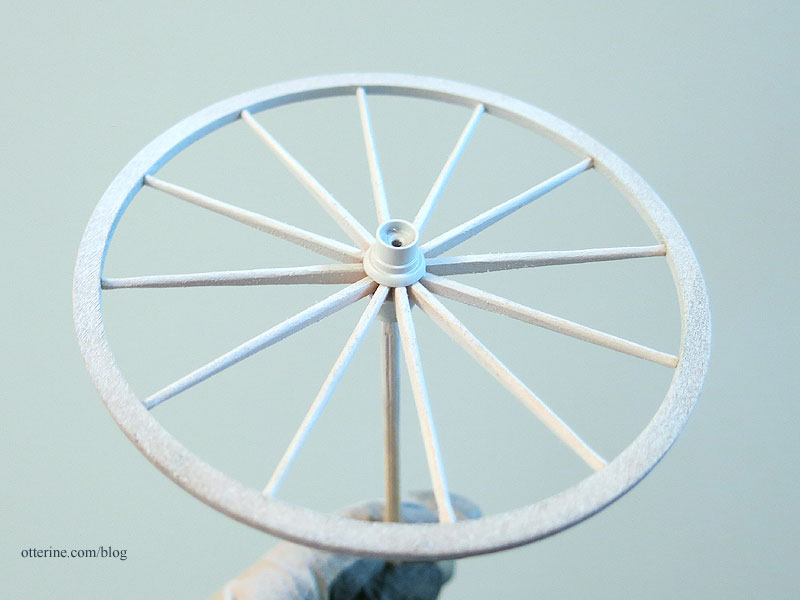
I then used plain flat grey Rust-Oleum primer. As you can see, the wheels are rather fuzzy.
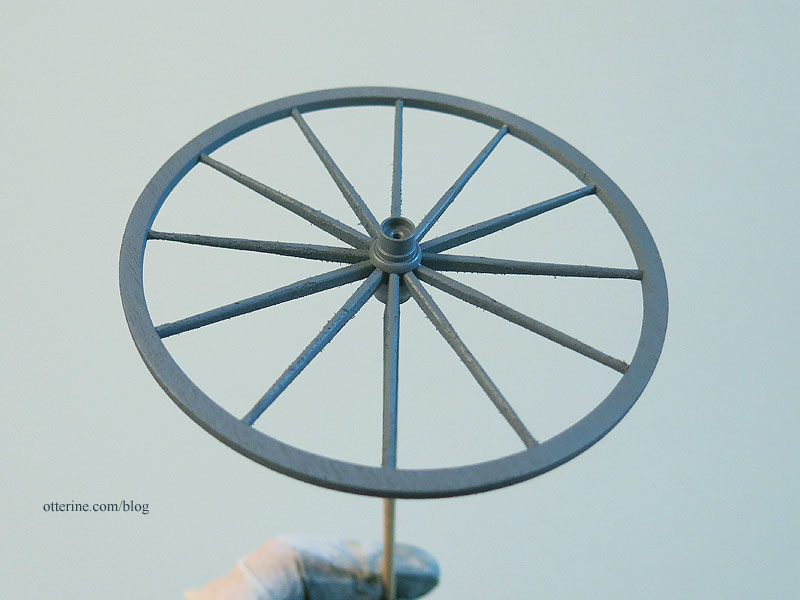
Sanding after priming a first coat always helps smooth the fibers away. Then a second quick spray of the same grey primer and they are now ready for final color when I get there….
Back to the cabin. I made a drawing for the front based on my built walls, not the previously drawing of the sides. My final measurements for the sides ended up being different from how I had drawn them.
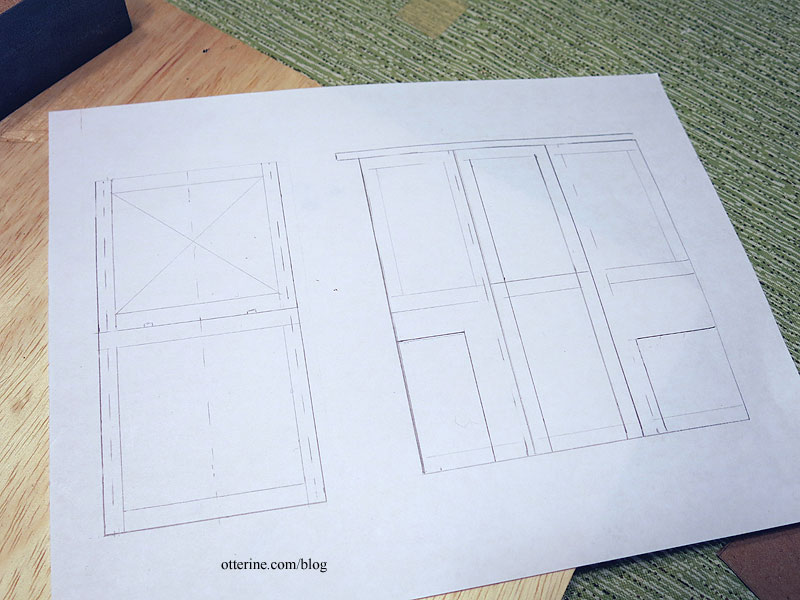
Before continuing, I cut the front and back from cardboard to get a feel for the final size. Easier to adjust here than after I started building the front hinged window.
I checked the width against the rear axle assembly, which can be adjusted to fit, but I think the cabin size is good for proportion.

Categories: Ivy Hollow RFD, Model Cars, Vehicles
September 21, 2019 | 0 commentsIvy Hollow – potbelly stove, part 4
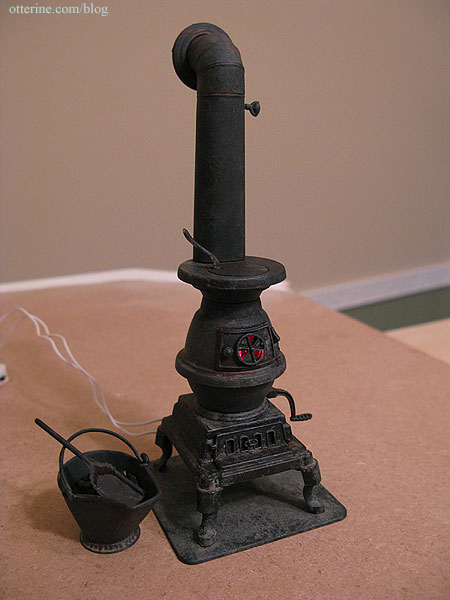
Continuing work on the potbelly stove. There’s always the kit stovepipe, which has excellent detailing, but I wanted to attempt a straight pipe up through the ceiling, which would be more in line with my inspiration photo. The rub lies in the oval opening at the rear of the stove. I can’t just take a round polystyrene tube and use it out of the package. I also don’t want to alter the kit parts just in case my alterations fail and I need to fall back on the original stovepipe. As a reminder, here is the stove built for Baslow Ranch.
Debora sent me some defunct Chrysnbon kits for parts some time ago, and one of those was the cook stove. Look here at this part. It’s an oval to round adapter.
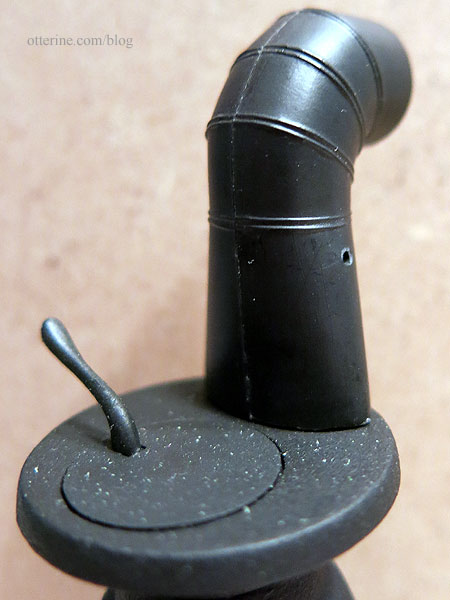
I cut the top away using the scroll saw and sanded it smooth.
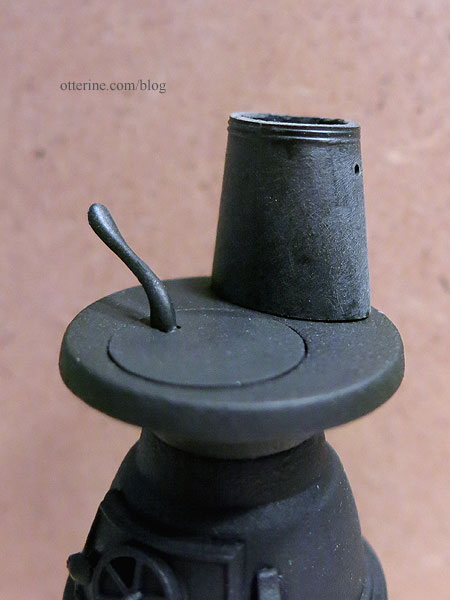
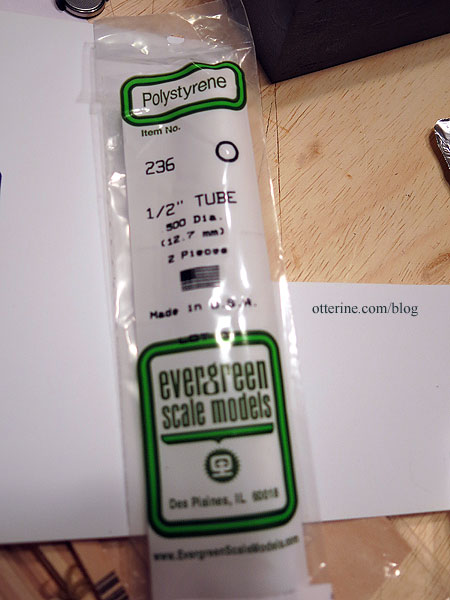
To make the stovepipe that will continue upward, I used 1/2″ polystyrene tubing.
In order to make it easier to hold the stovepipe steady while the plastic cement set, I glued three polystyrene rods inside the pipe adapter.

Once the glue set, I glued on the stovepipe, leaving the full length intact. Once I get to the roof, I’ll cut the top angle and fashion a chimney pipe for the exterior. I cut a thin band of polystyrene and glued it approximately 3 inches from the top of the adapter to make it look like the stovepipe was assembled in two pieces, which it likely would have been.
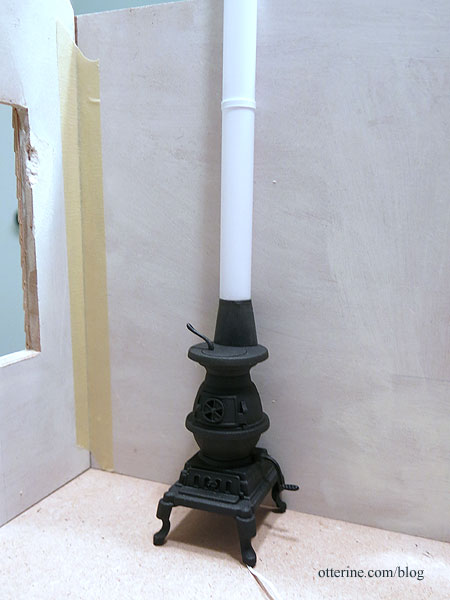
I roughed up the surface with sandpaper and spray painted it flat black. It will remain unattached until installation.
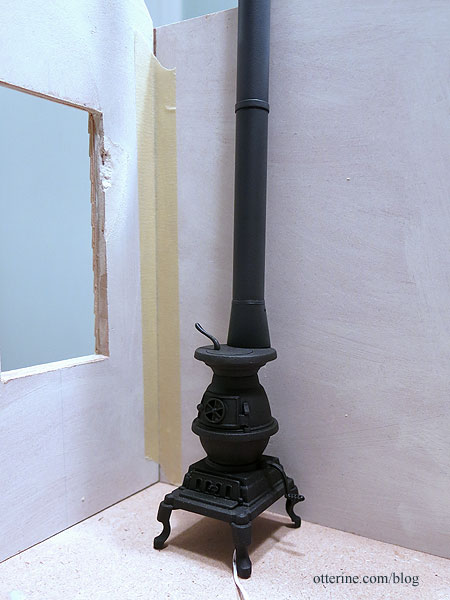
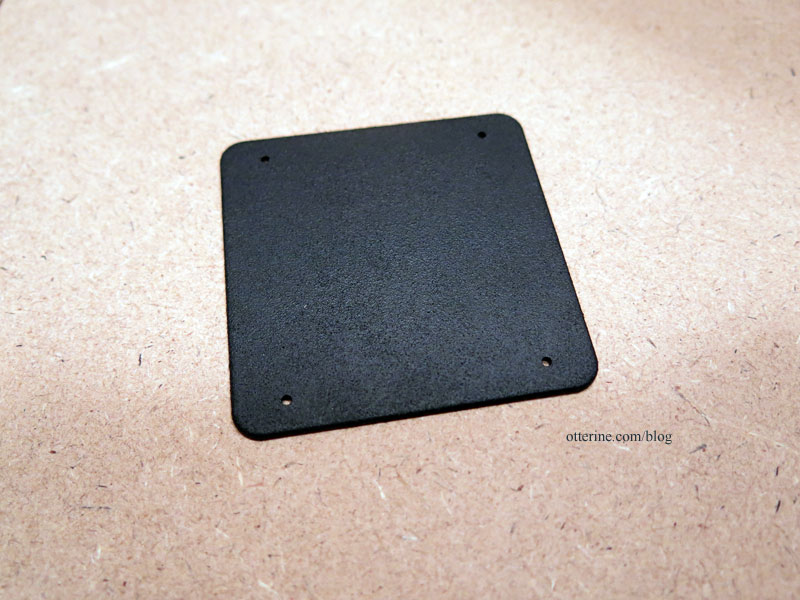
While I was painting, I finished the floor pad in the same stippled black finish as the stove.
Categories: Ivy Hollow RFD
September 15, 2019 | 0 commentsHorse Harness – part 1
Maybe that should read, “Putting Jebediah to work, part 1.” As you know, I’m using a Breyer thoroughbred horse for my mail wagon. I found it interesting that at least one pacer (harness racing horse) pulled a mail wagon in real life.
 Mail Wagon Horse Mon, Jan 19, 1914 · The Star Press (Muncie, Indiana) · Newspapers.com
After finally getting my hands on the marvelous book Making Model Horse Harness by Anne Funnell, I started reading the material and doing more sleuthing online. Anne’s business is no more, so I am doing my best to scout Rio Rondo for the things I need. They seem to be well-stocked, so I am making a shopping list while I work on a mockup.

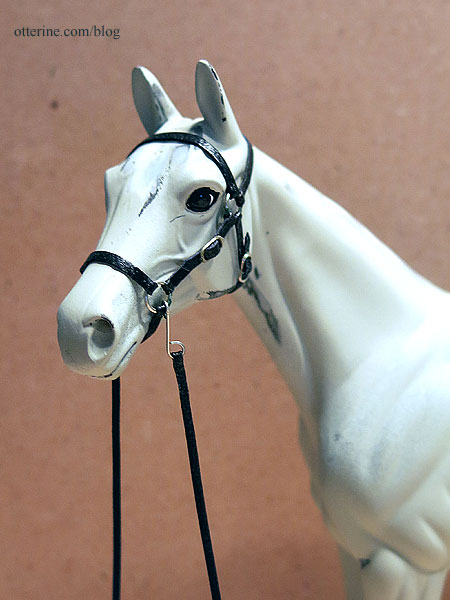
I bought this bridle from Texas Tiny at the local mini shows this past spring.
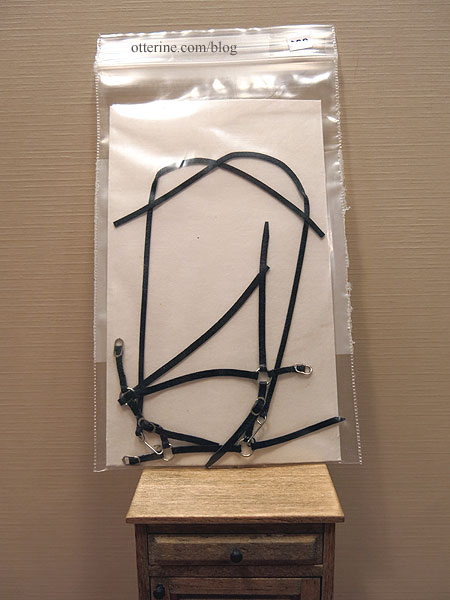
I fitted it to Jebediah to see. Yeah, it was a pain. I can see there will be more swearing in my future as I make said harness. But, it fits perfectly and is very well made. I’m not sure if I will be able to modify this one (the reins are not long enough, there’s no simulated bit and there are no blinders), or if I will have to use this as a guide to make my own with the harness.
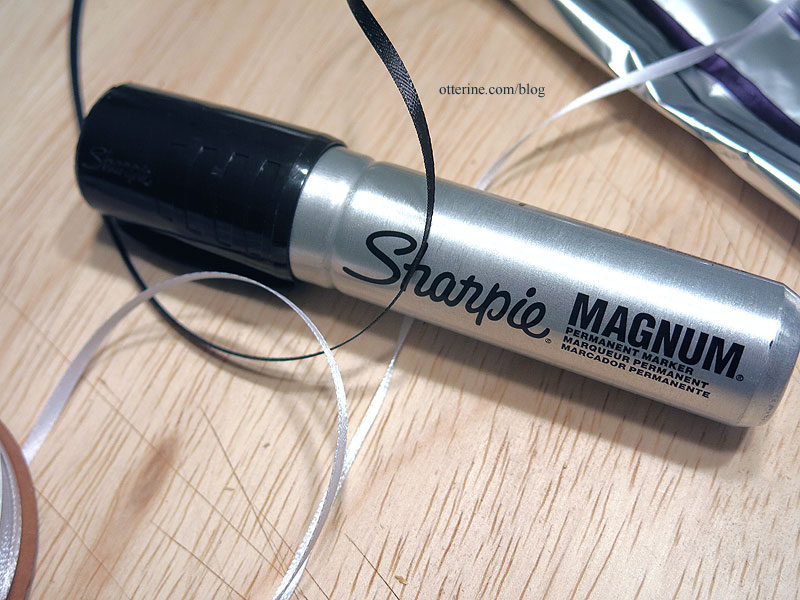
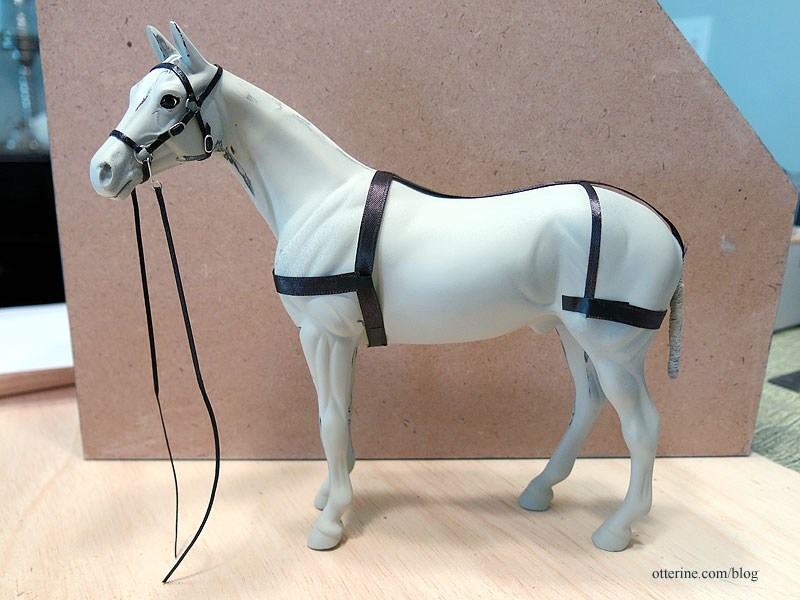
I had the idea of doing a test run with ribbon before diving into the leather and custom hardware. This would give me a feel for the parts and lengths/widths of the tack. Michaels is always hit or miss in the supplies department, but it was the closest store while out to lunch. I bought 1/8″ wide white ribbon – the two colors missing from the stock of plain 1/8″ ribbon were brown and black. I colored the white ribbon with a permanent marker and let it dry overnight. I had 1/4″ black ribbon already at home. These aren’t the precise widths I’ll need, but they are a good approximation.
I didn’t get very far, since one part really depends on another, but it was worth a shot. I need to just get the materials and start to work – trial and error. But, this attempt did help me study the drawings in better detail and estimate the amount of leather I will need. I also kept a tally of the various hardware components since the book doesn’t have a detailed listing of items with sizes. The book appears to be a companion to the kits and hardware sold by Anne Funnell, so that is understandable. If you have the kit, you need only the part number – not the size. The kit itself would have likely had a parts list with sizes and lengths noted.
I am reconsidering adding flocking to Jebediah in seeing how much handling needs to be done when attaching and tightening the buckles. I know I can get a good approximation of hair on the body with paint, and the mane and tail will no longer be plastic to help drive the realism.
Categories: Animals and birds, Ivy Hollow RFD
September 14, 2019 | 0 comments


NOTE: All content on otterine.com is copyrighted and may not be reproduced in part or in whole. It takes a lot of time and effort to write and photograph for my blog. Please ask permission before reproducing any of my content. Please click for copyright notice and Pinterest use.


