

Heritage progress – foundation, porch, cellar
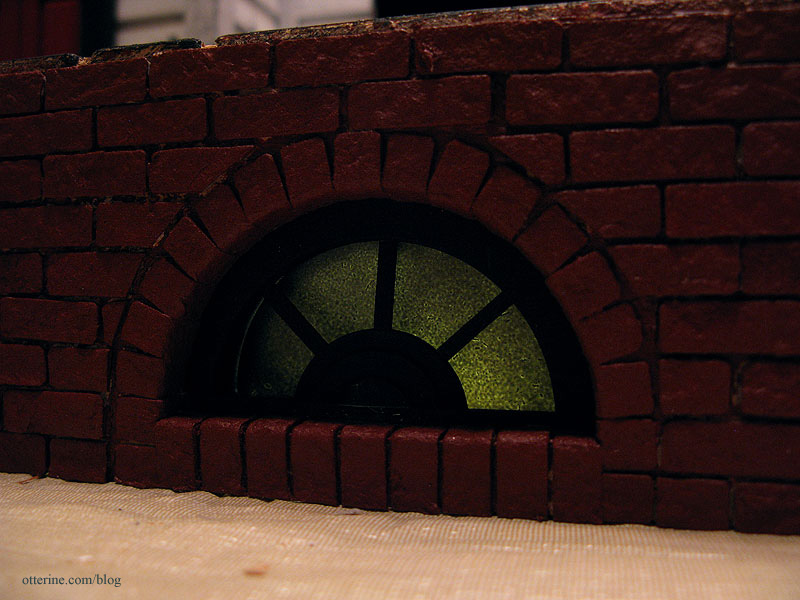
In between cutting what seems to be an endless amount of bricks for the chimney I have planned, I’ve been continuing to work on the exterior. I have only the front of the foundation covered in bricks, but I painted it to see how the coloration was going to work. I like the visual weight of the dark foundation, and the landscaping I have in mind will work well with it as a backdrop.
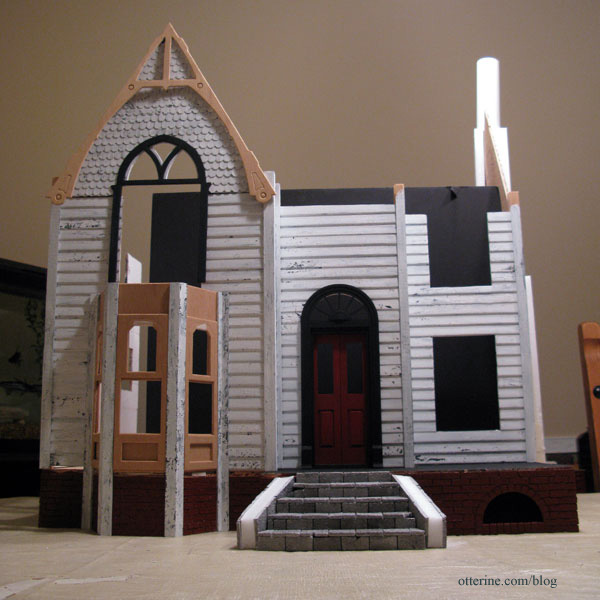
I’ve aged the gables with white paint crackled over a black-grey base as I did for the siding and the connectors. The crackle didn’t work as well on these pieces, but it still looks aged since I lifted some of the paint with a paper towel while it was wet. I probably should have put two coats of crackle medium on since the wood seemed to really soak it up.
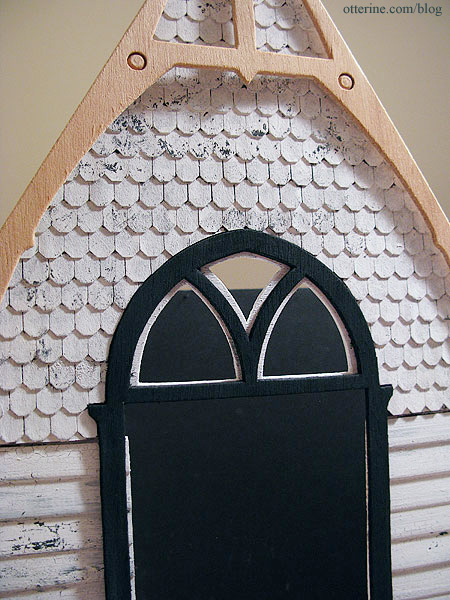
Now that the gables are also in the aged white finish, it’s really starting to look like a cohesive build. I’ve painted the gable window trim black-grey. I doubt I will leave it dark but instead crackle white paint over this layer. I like the idea of the door being the main focal point and everything else looking in a state of disrepair. Plus, I think it will start to look more whimsical instead of creepy if I make the house all black, white and red.
I’ve also painted the front porch floor black in preparation for worn out porch boards. I don’t want bare wood peeking through!
I primed the cellar windows with black paint, and I’ll probably paint them to look like rusted iron windows. Aging them with white paint will make the foundation look like a candy cane.
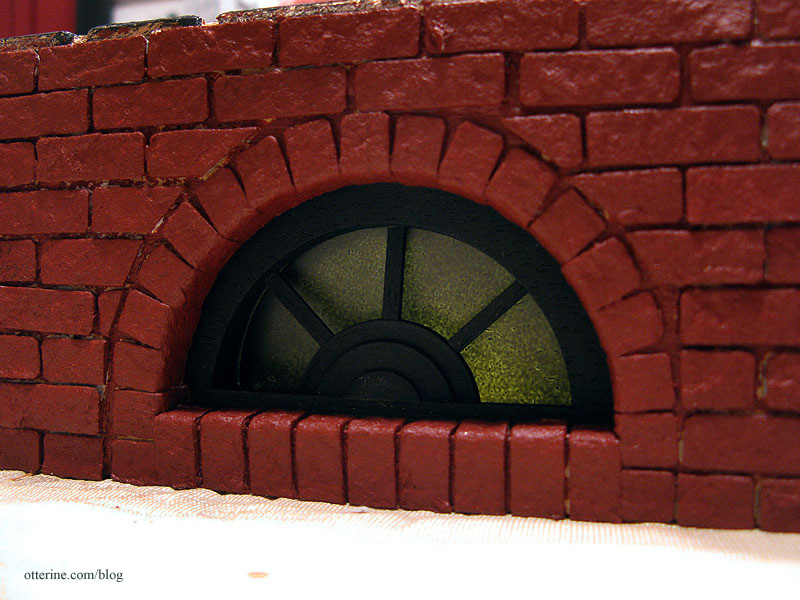
I taped an LED in warm white from Evan Designs inside the foundation. It seems a little dim in real life, though the camera picks it up well. I’ll need to figure out a good way to make the most of the basement lighting.
Categories: The Haunted Heritage
August 24, 2011 | 0 commentsHeritage – stone steps, part 1
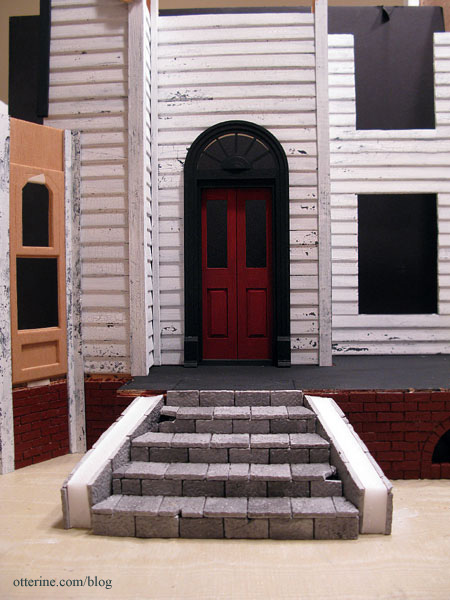
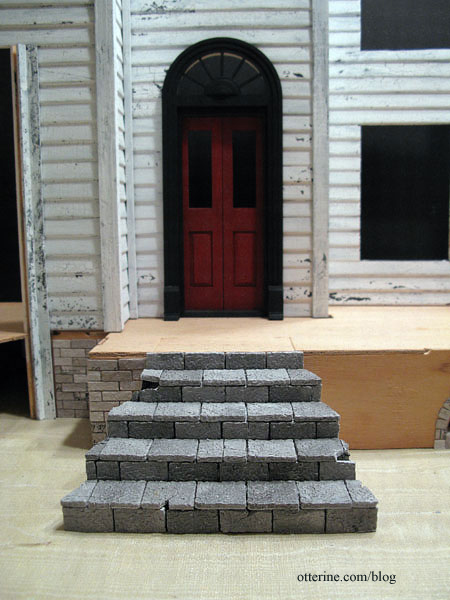
The new front stairs for the Heritage are made from a 1/2″ thick foam core base.
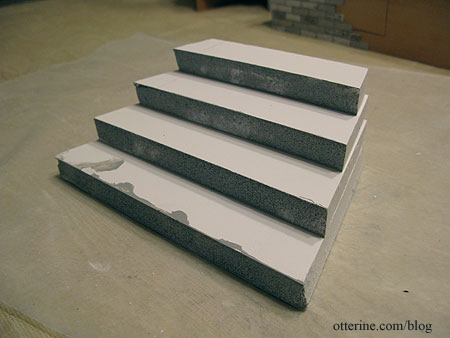
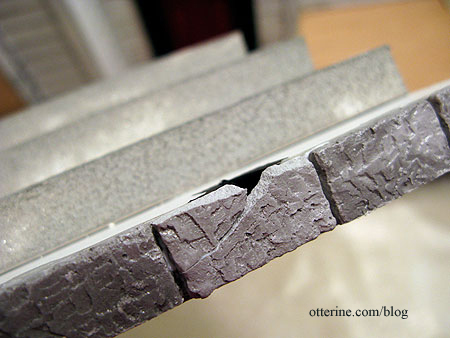
I had considered using paperclay for the stone texture, but I then remembered I already had 50 granite pavers in my stash of mini supplies. These can be easily cut with a utility knife, so I opted to use them instead. I started with the risers, cutting each 1″ paver in half.
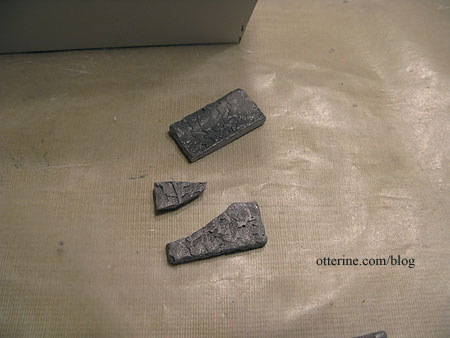
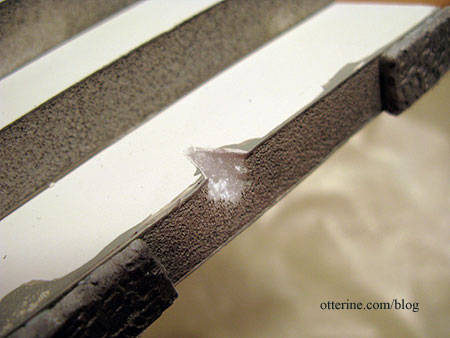
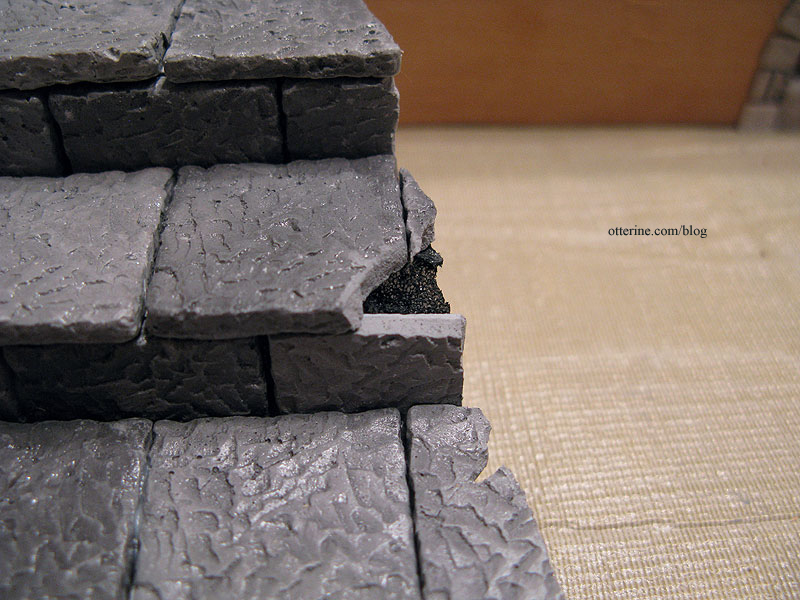
As I was getting the hang of cutting them, a couple of them broke. Perfect for my worn out old house! I gouged out the foam behind the hole in the paver and painted it black before gluing the broken pieces onto the foam base.
With the tread pavers in place, it looks awesome! :D
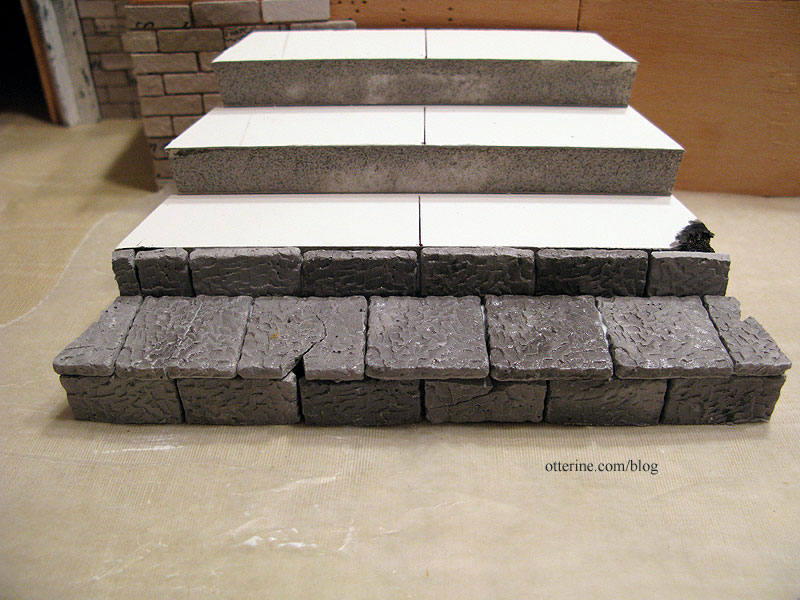
As you can see, some holes are larger than others. I can put plant matter and moss here when I get to the landscaping part.
I decided to line the top of the foundation with stone as well. I thought having brick on this section would look inconsistent and out of place. Interestingly enough, trying to break them isn’t as easy as accidentally breaking them! But, I managed to intersperse some other breaks and holes throughout.
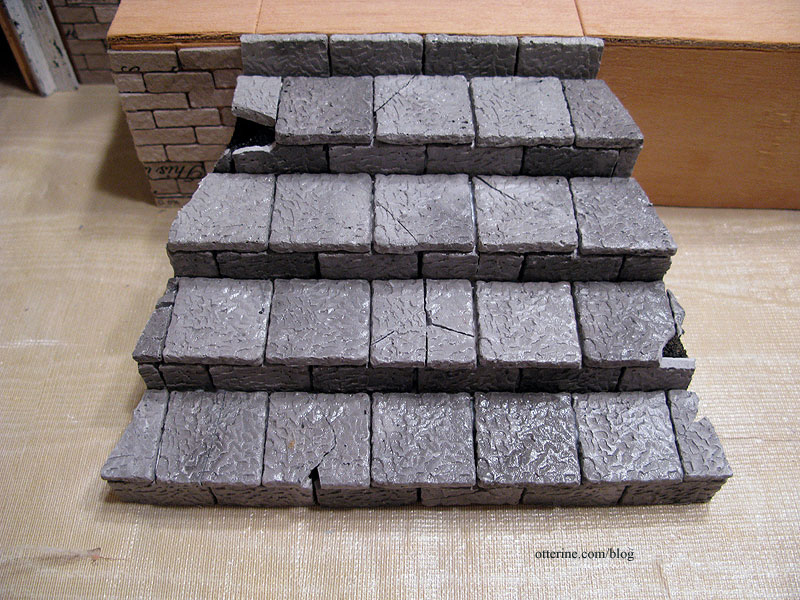
here’s still the aging process and grouting to come, but already I love the look of them!
I used the remaining pavers to cover the exposed areas of the side walls. I’ll use a different material for the tops and there will be short pillars at the ends of the side walls. The base steps and side walls are not yet glued to each other or to the foundation. I need them separate to continue working on them.
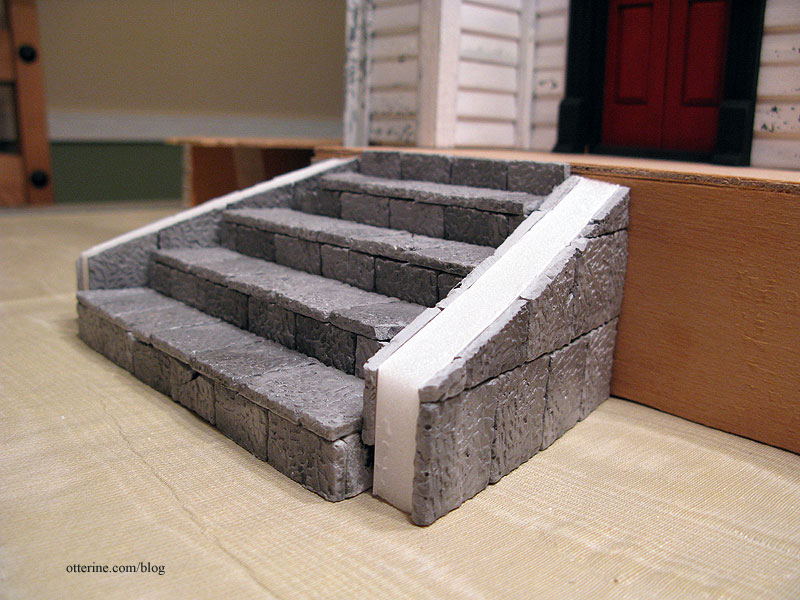
I had one full paver left over! I saved all the cut extras and shards to use later during landscaping. If I want the walkway to match the steps, however, I’ll need to get more pavers.
Categories: The Haunted Heritage
August 22, 2011 | 0 commentsPalladian Door – color
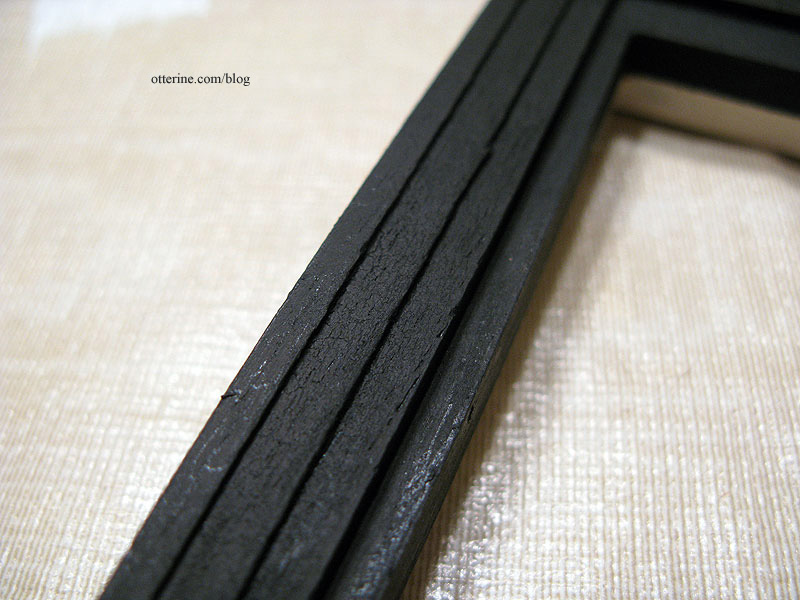
Continuing work on the Palladian door. Can you crackle black paint over a black underlayer? Well, yes you can! :D The effect is less obvious than if you use a high contrast color under your exterior color, but it still works.
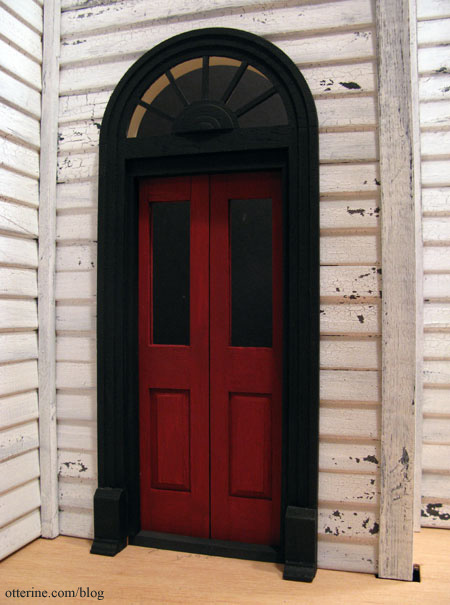
It just makes it look like old paint, which is actually what I was striving for.
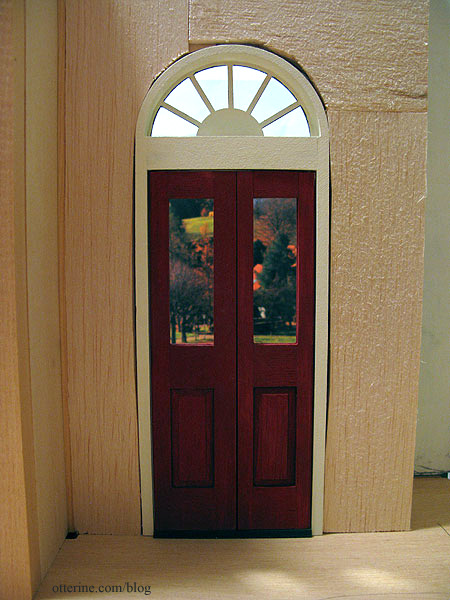
With all of the white on the Heritage, I liked how the black door surround looked in contrast even though it was originally just the dark underlayer that was meant to have white paint crackled over it. So, I decided to keep it black. I’ve also started to paint the front door, using Barn Red by Americana. It still needs another coat and some modest aging, but I love it already!
For the interior frame of the door, I used Vintage White by Folk Art. This will be the color I use for any painted wood trim inside the house. I like the grey-white of the exterior, but the interior to me should have a yellow cast from cooking, candles, fireplaces and gas lighting to show its age.
Categories: The Haunted Heritage
August 21, 2011 | 0 commentsFitting Houseworks components
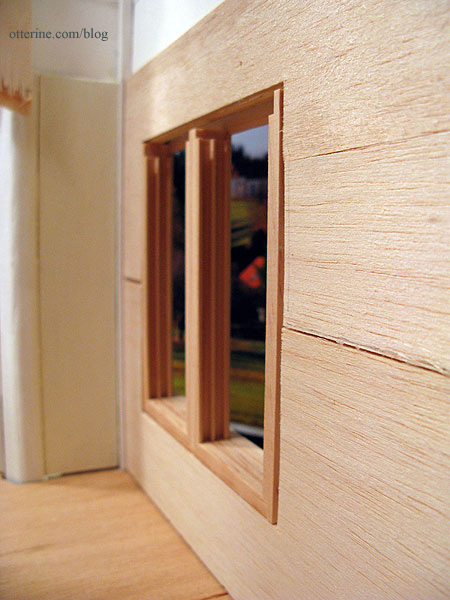
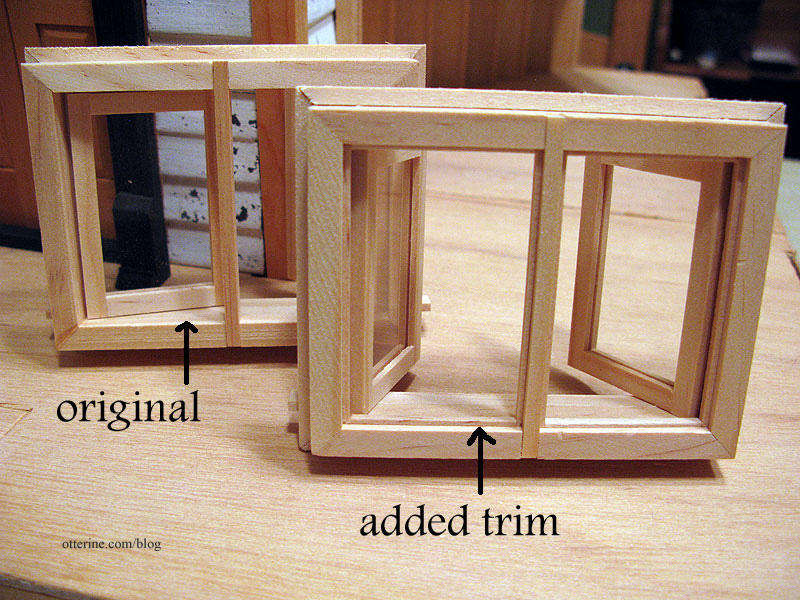
The casement window in the kitchen is a Houseworks component, and as such requires a deeper opening than the Heritage walls have. To get the window to fit properly, I added a border of 1/8″ thick strip wood under the outer frame. Here you can see the altered one compared to the original.
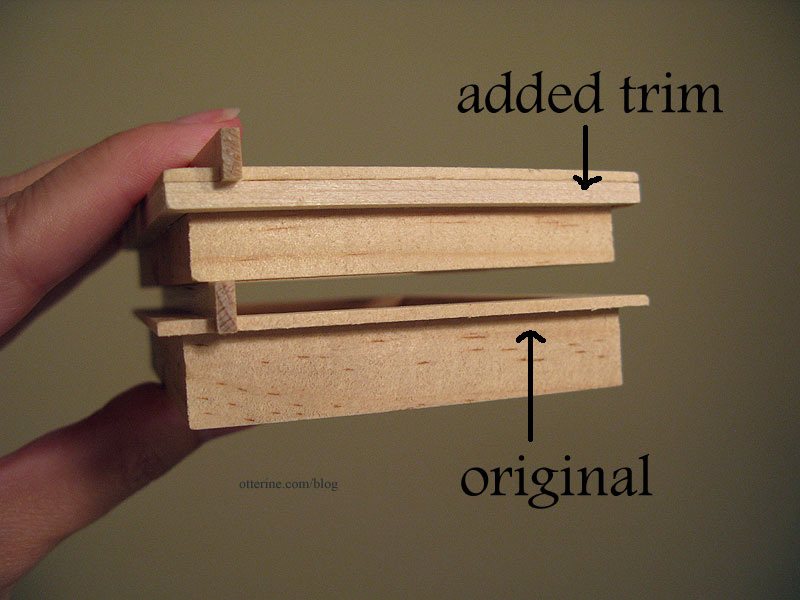
This helps the window sit outward in the opening without seeming out of scale.
This still leaves 1/8″ of overhang on the inside.
I later padded this kitchen wall when I added a new double working window. This made up the remaining part of the difference in depth between the original wall and the added windows.
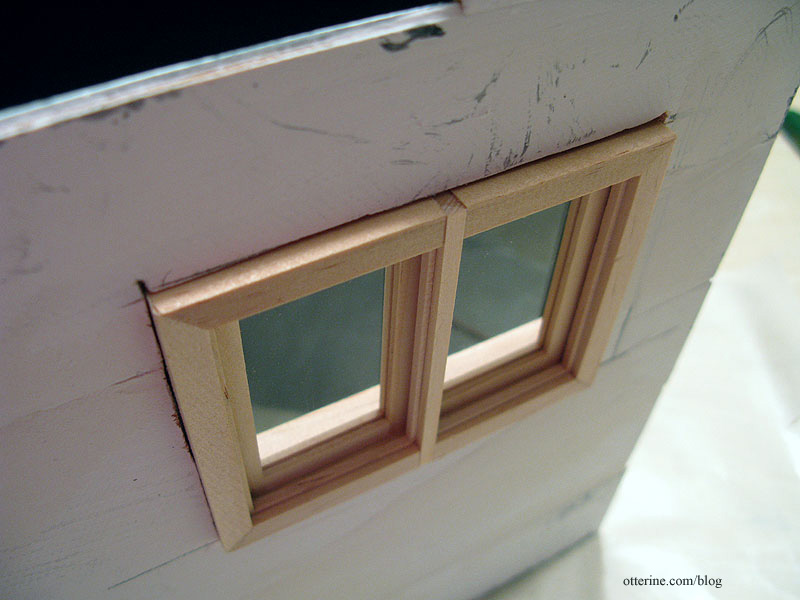
The other issue of this window happened to be something I addressed for Baxter Pointe Villa; there were gaps all along the window edges allowing light in. I added strip wood along the inner edges to block this gap, though I had to leave a bit of wiggle room for the window to move correctly.
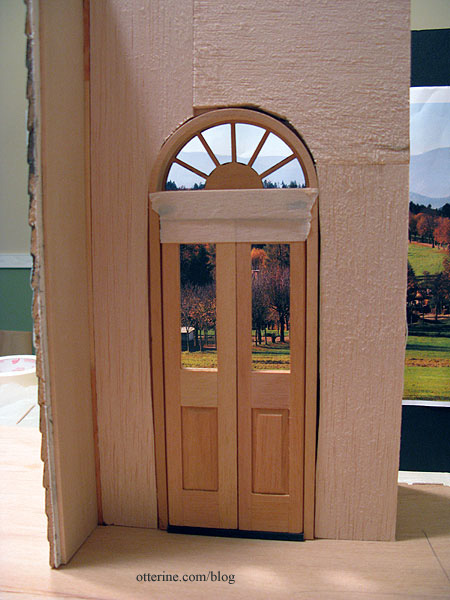
The front Palladian door was another matter. Because it has a rounded top, I would need to recreate this curve to near perfection otherwise it would look like a deliberate addition to the door, rundown house or not.
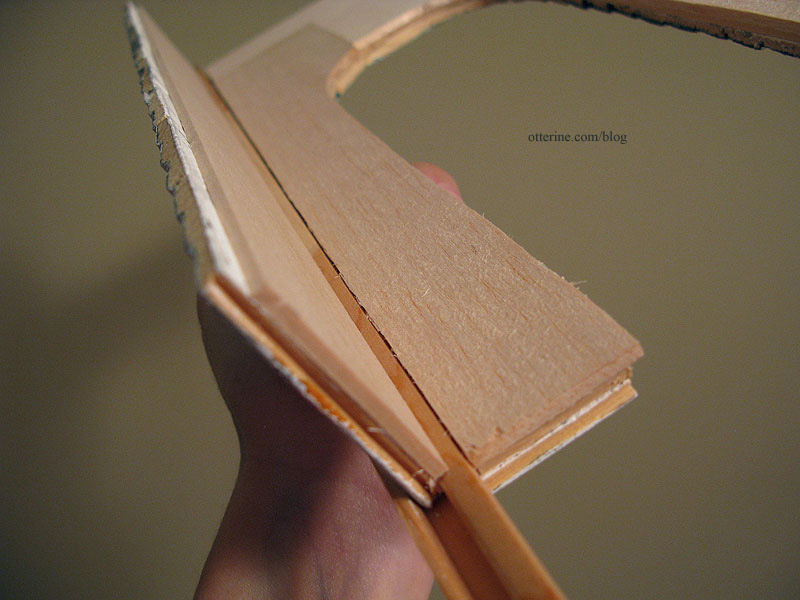
But, this wasn’t the only reason I tried something different for this particular component. I wanted to eliminate the obviousness of the connectors on either side of the front door to obtain a cleaner look to the foyer. To that end, I first lined the wall between the two connectors with 3/32″ thick basswood. This is the thickness of the connector edge leading toward the kitchen.
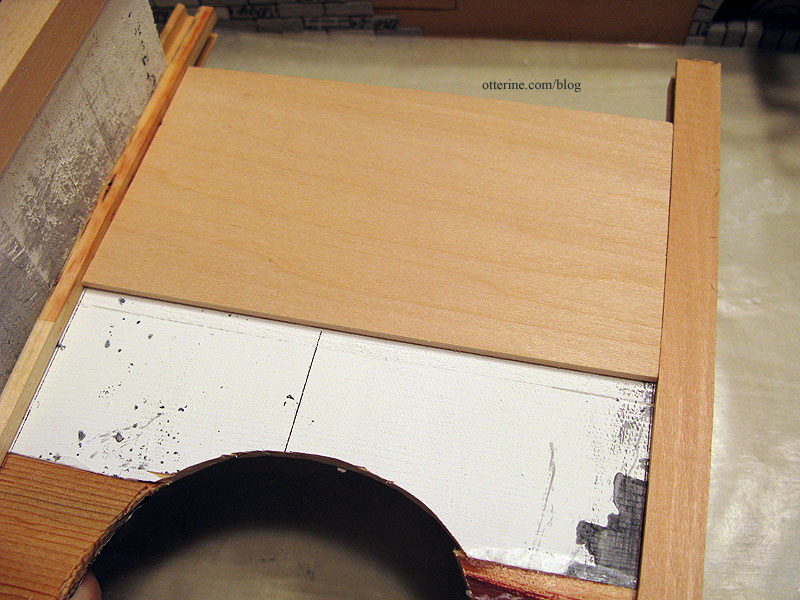
I then lined over this layer with 1/8″ thick balsa from the inner connector to the outer edge of the connector leading to the kitchen. I used bass wood and balsa since that’s what I had on hand. Balsa is also very easy to cut around curves.
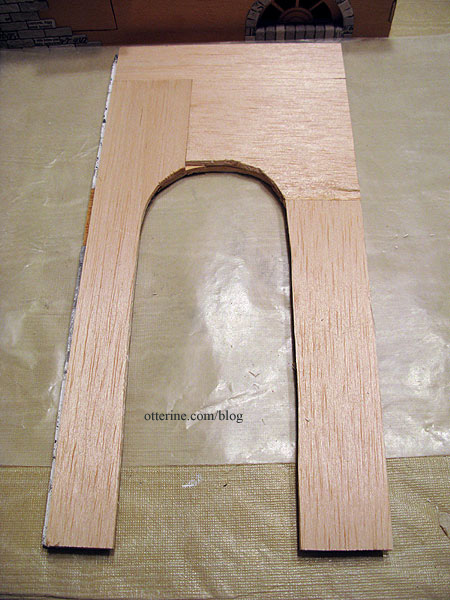
The door opening then had enough thickness to accommodate the door upgrade.
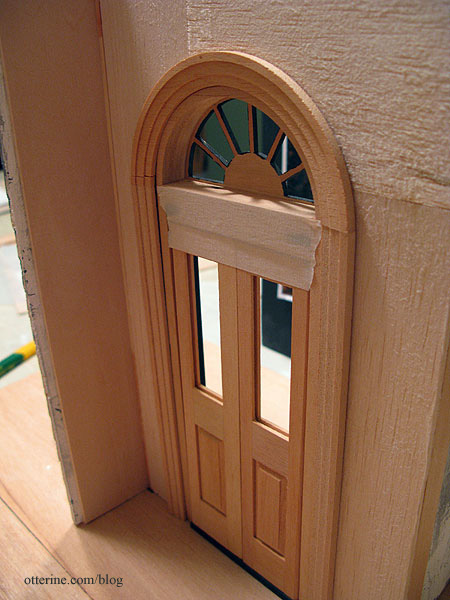
To finish off the clean lines of the foyer, I filled in the side wall in the same manner as I had for the front wall. I needed only the 3/32″ bass wood layer since the front wall was now a flat surface and I needed to match only the opposite connector.
With the interior door trim taped in place, you can already see the cleaner lines of the walls.
Padding the walls makes for a smoother surface to wallpaper. Dura-Craft walls assembled from siding pieces invariably have uneven back surfaces. For the walls I didn’t plan to pad, I spackled some of the deeper imperfections. Uneven walls work well for an aging house, but I wanted to be able to control the aged look not have it appear to be sloppy construction.

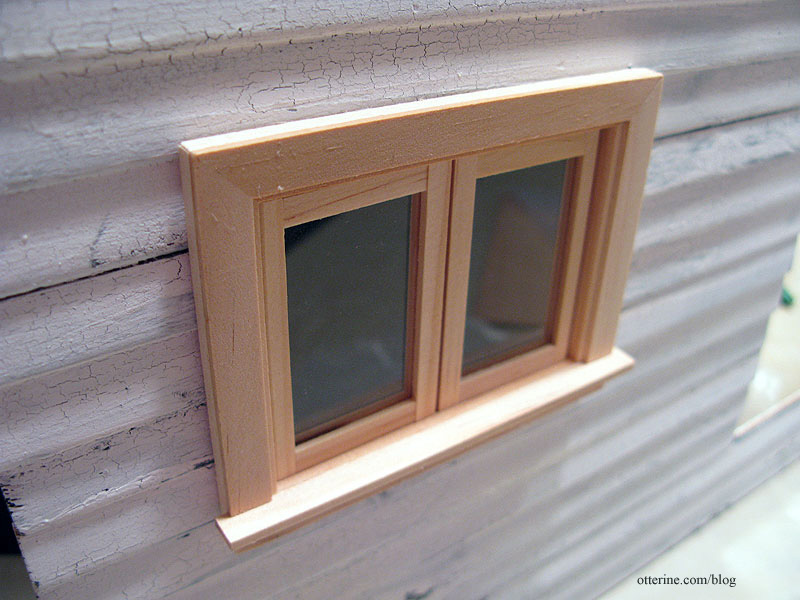
Conversely, if you have a wall that’s too thick for your component, strip wood can added. Here the window has a gap.
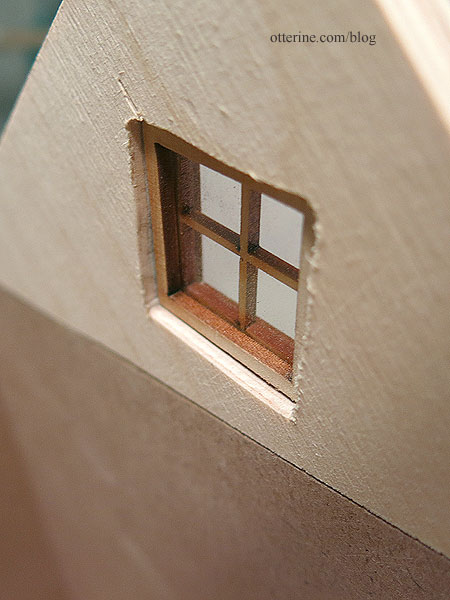
I added strip wood around the inner edge of the window to fill this gap.

Categories: The Haunted Heritage
August 21, 2011 | 0 commentsHeritage interior staircase, part 1
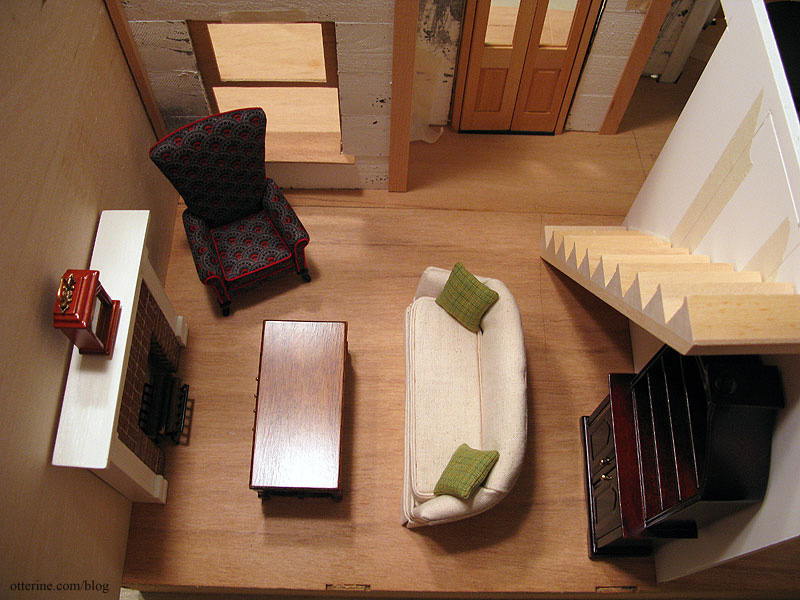
I will be using a set of Houseworks narrow stairs leading from just inside the entry door toward the open back of the house. It will take up minimal room while still allowing for a staircase, which I personally like for realism.
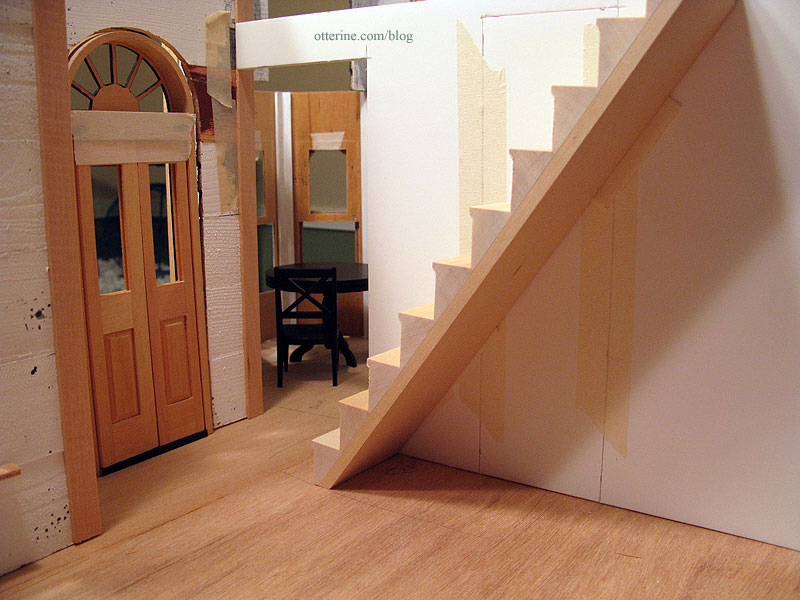
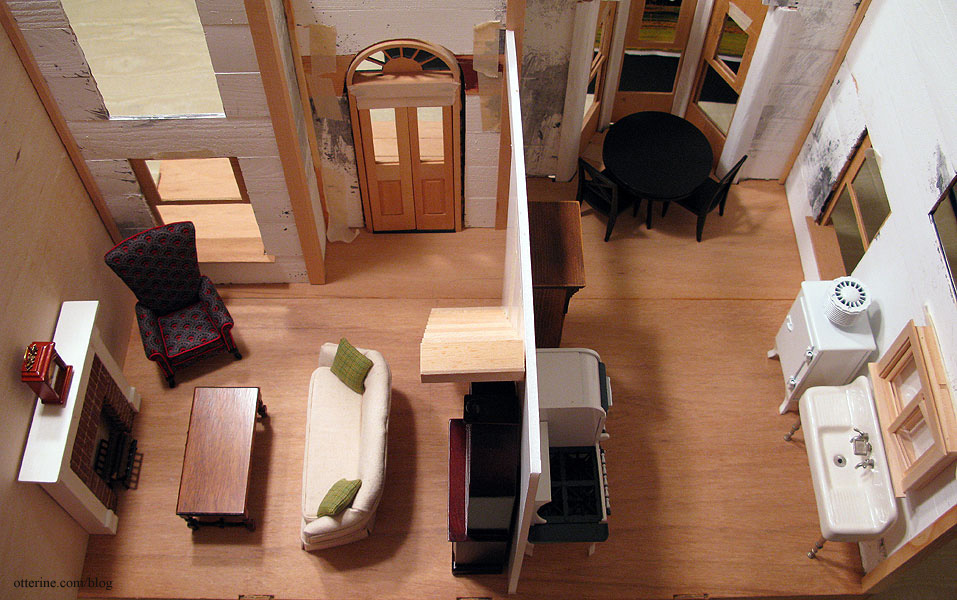
The adjacent wall will give me more wall space in the kitchen, leaving room for an old time hutch. This library cabinet is just a placeholder, but I already love the layout.
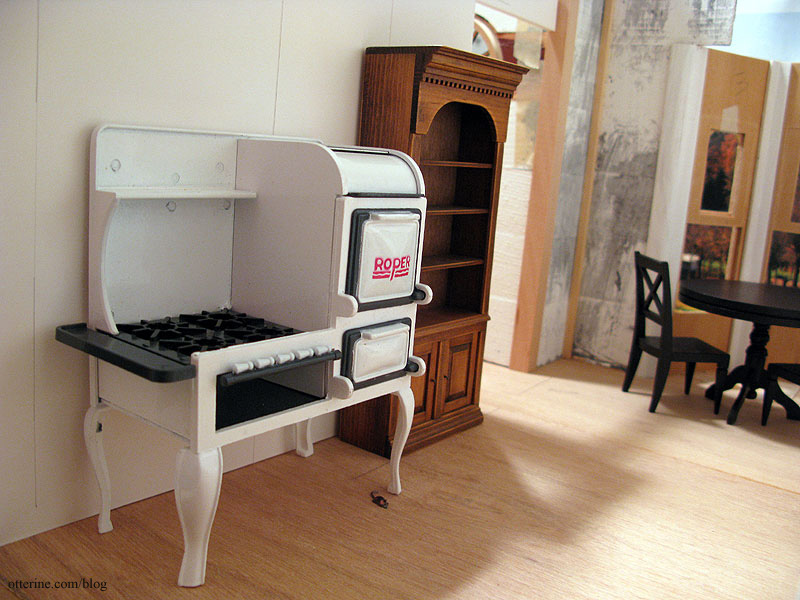
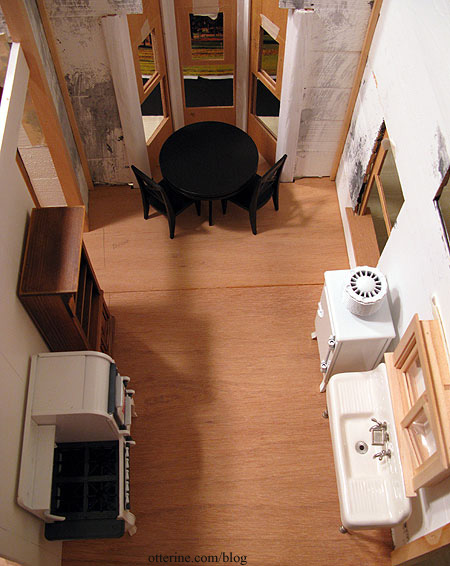
The table and chairs will occupy the bay window, and the refrigerator and sink will be opposite the stove and cabinet.
On the stairs side, the parlor layout works well and feels cozy.
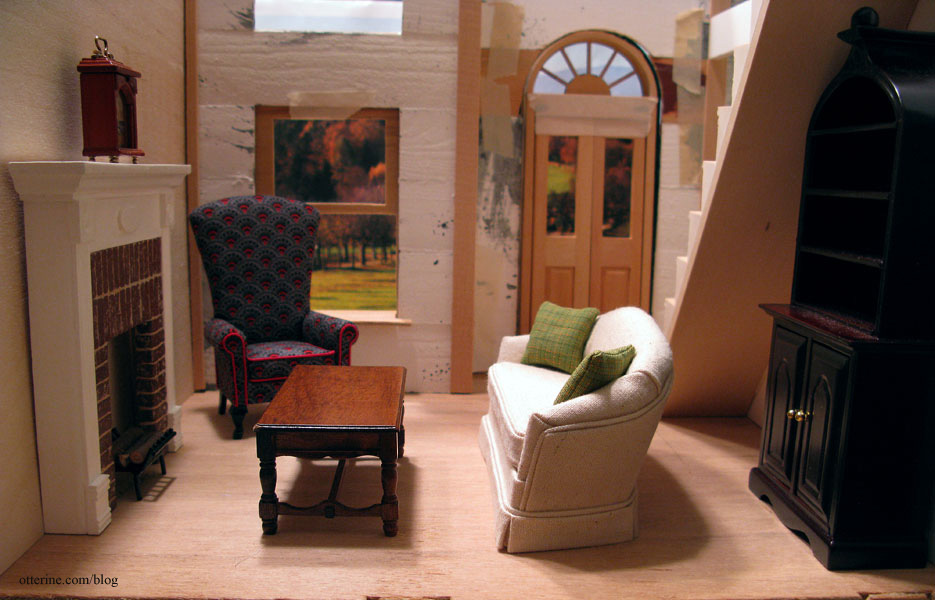
The layout makes the best use of the available space.
So, here is the first floor layout in its entirety. :D
Categories: The Haunted Heritage
August 19, 2011 | 0 comments


NOTE: All content on otterine.com is copyrighted and may not be reproduced in part or in whole. It takes a lot of time and effort to write and photograph for my blog. Please ask permission before reproducing any of my content. Please click for copyright notice and Pinterest use.


