

Fireplace for the Heritage
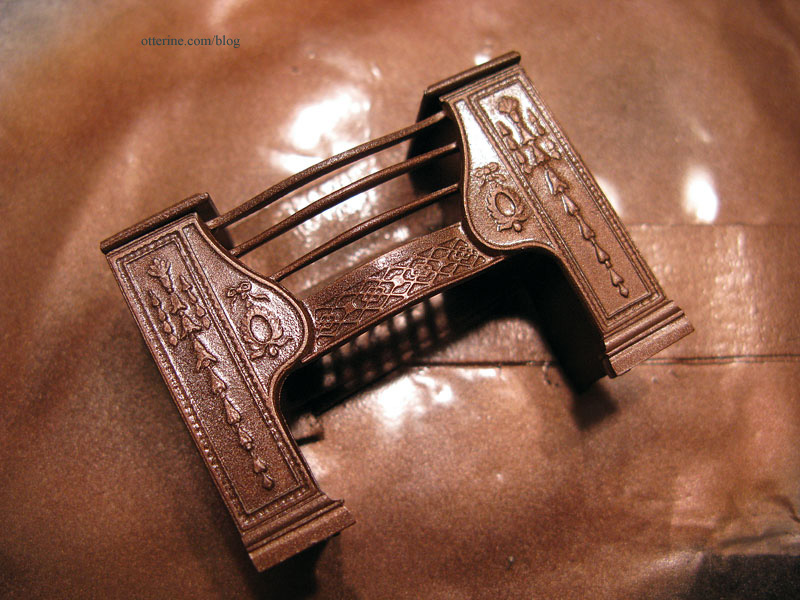
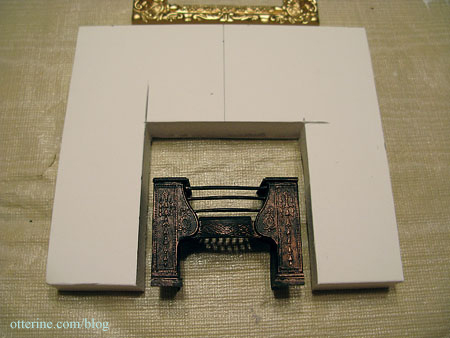
I started with the Parlour Hob Grate kit. This was my first time working with a Phoenix Model kit, though I had heard of them and had seen many other miniaturists make wonderful things from them. I have to tell you, this kit went together in about five minutes! :D I used Quick Grip glue and it held very well. (Note: I now recommend epoxy for metal kits for longevity and stability.)
I spray painted the grate Burnished Copper Metal by Rustoleum, first the back and underside, then the front and top.
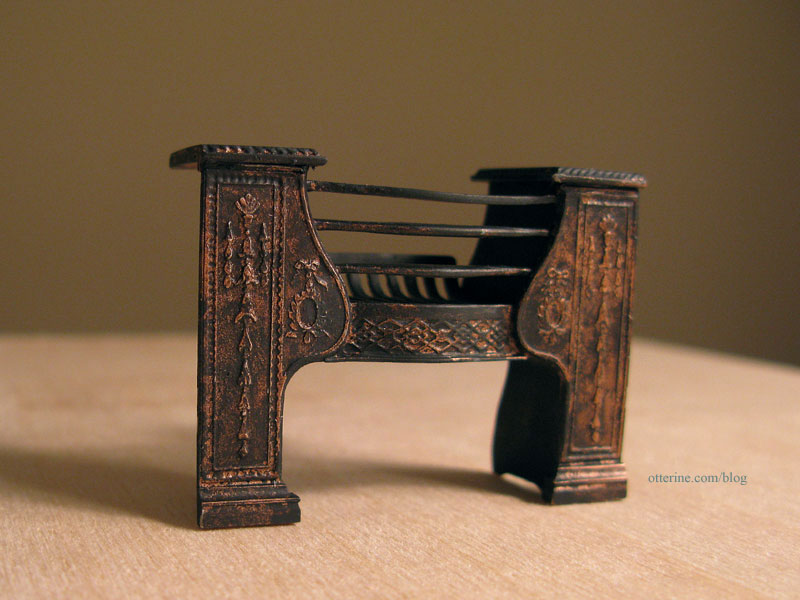
Once that was dry, I was able to wipe on layers of black and grey acrylic to get the aged look I wanted. Perhaps a shame to dirty it up so bad since it looks so pretty in the copper, but a shiny new parlor grate just won’t do in an old house. Maybe I’ll need to make another of these and leave it shiny, beautiful copper. :D
My main inspiration fireplace is this beautiful Lawbre fireplace. Even if I could afford the splurge, this piece would be too big for the parlor. So, I set out to make an interpretation of it from bass wood with a few changes in mind. I used some of this 1/2″ Alle trim from Heritage Laser Works. It’s similar to the circle link design of the original.

I’m not a huge fan of the rope detailing on the original, so I substituted other trims for that portion of the design. I made my fireplace shorter than the original and eliminated the portions of the base that angled toward the opening.
I built the structure in layers, since that seemed the easiest approach using the materials I had on hand. I started with a basic 1/2″ foam core board base with outer measurements are 4 7/8″ wide by 4 1/4″ tall.
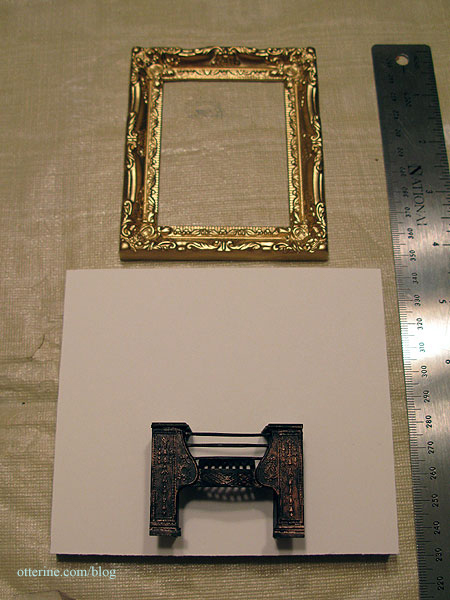
In order to figure out the size of the fireplace opening, I lined up the various trims I planned to use in order to measure accurately.
I ended up with an opening 2 3/8″ square.
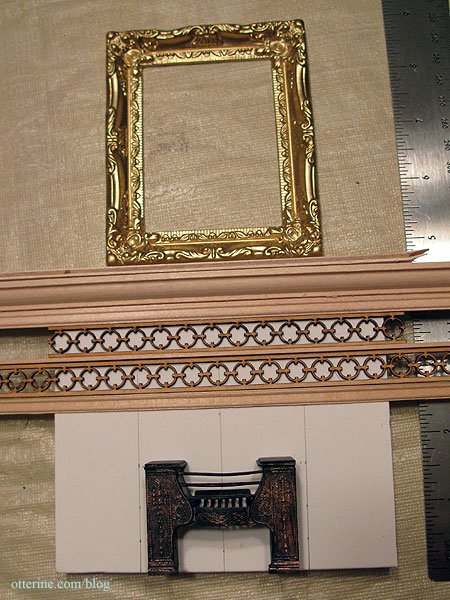
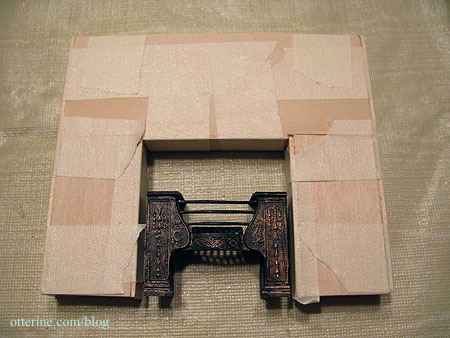
I then covered the foam core board frame with 1/16″ thick basswood on the sides and then the front.
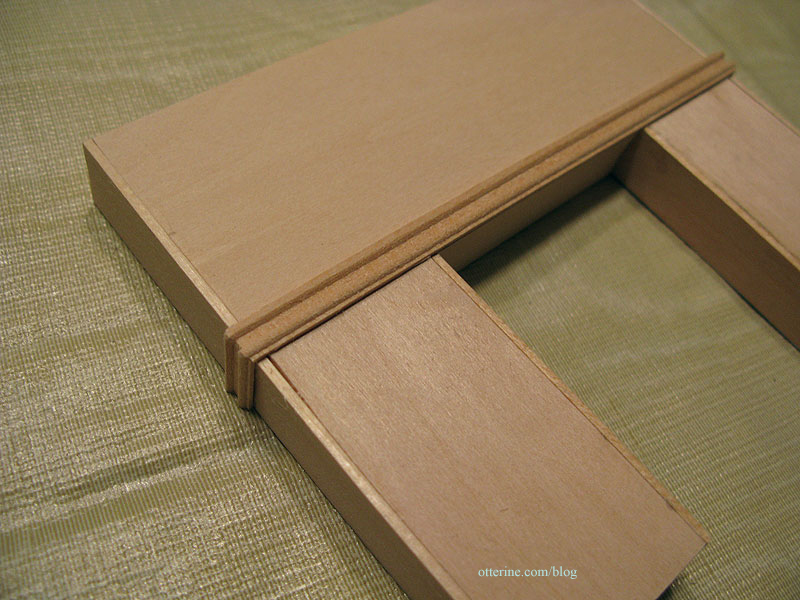
To build the top, I started with 1/4″ decorative trim, lining it up with the fireplace opening and using mitre cuts to wrap it around the sides.
I glued on two rows of the circle link trim separated by 1/16″ x 1/8″ strip wood glued in place on its short edge. I used mitre cuts on the strip wood but the circle trim is cut straight and nestled inside 3/16″ wide corner trim since there wasn’t a good match in the circle pattern at the sides.
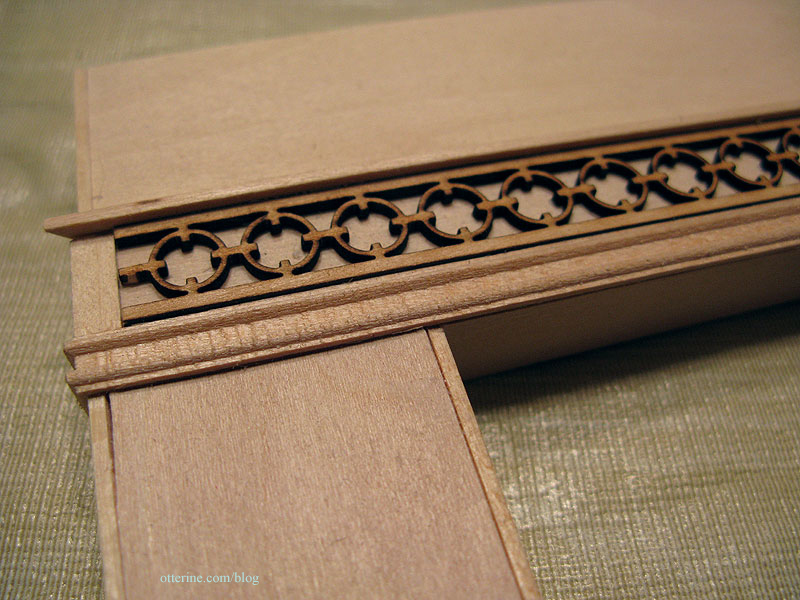
I added a layer of 1/16″ thick basswood to build up the surface above the circle trim. I used scraps since it wouldn’t show anyway.
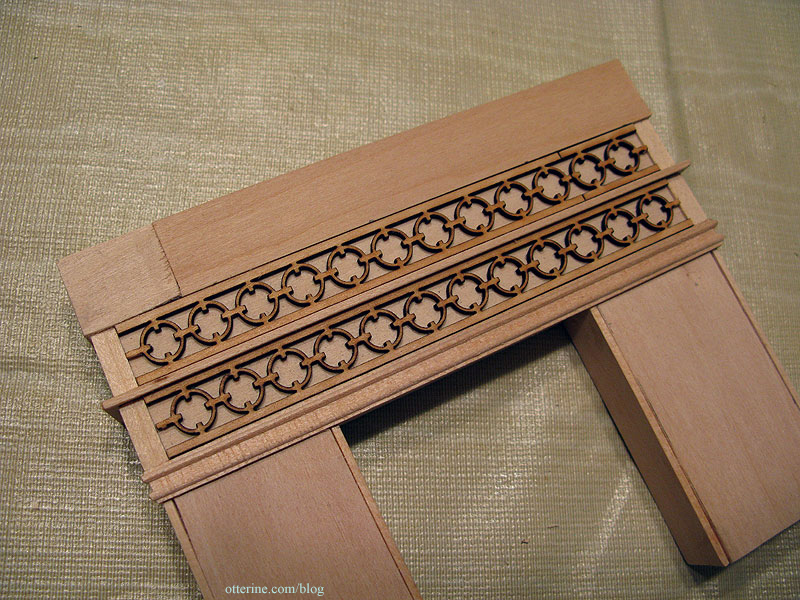
Over that, I added a row of the same decorative trim that I had used below the circle trim. I then used 3/8″ routed trim to build up the top and topped it all off with a 3/32″ thick bass wood mantle (I left the mantle separate for now until I decide on a finish).
I added the front base detail to the lower edges on either side using the routed trim, though I still have the sides left to cut. On the sides of the fireplace opening, I used the same 1/4″ trim as I had on the upper portion. On either outside edge, I added the 3/16″ corner trim.
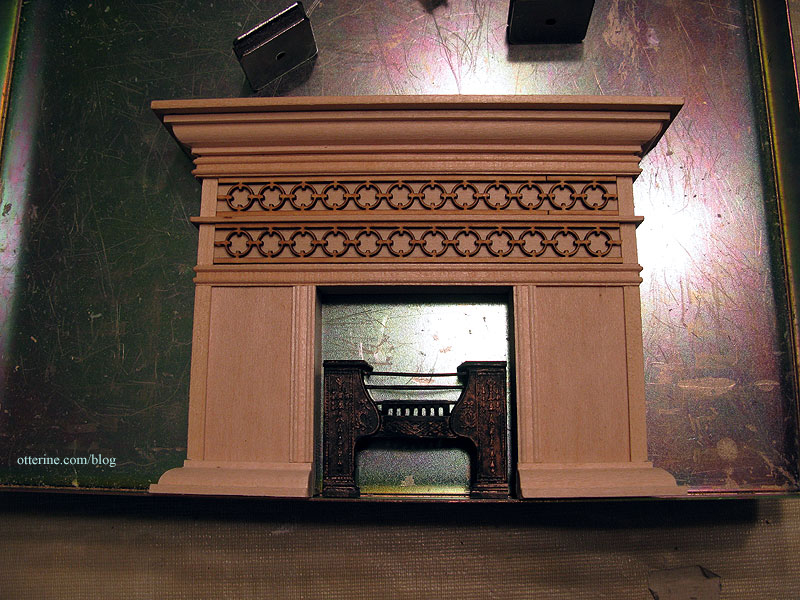
I won’t be adding the circle trim in the open areas like the original. I have other ideas. :D
I also need to think about finishing. I have a few ideas for stone and marble colorations. In the meantime, I can move on with the new parlor wall and finish the fireplace later. I’ll need a firebox soon, though. I wonder if I have any egg carton bricks around here anywhere. Ha ha! ;]
Categories: The Haunted Heritage
September 15, 2011 | 0 commentsHeritage interior staircase, part 3
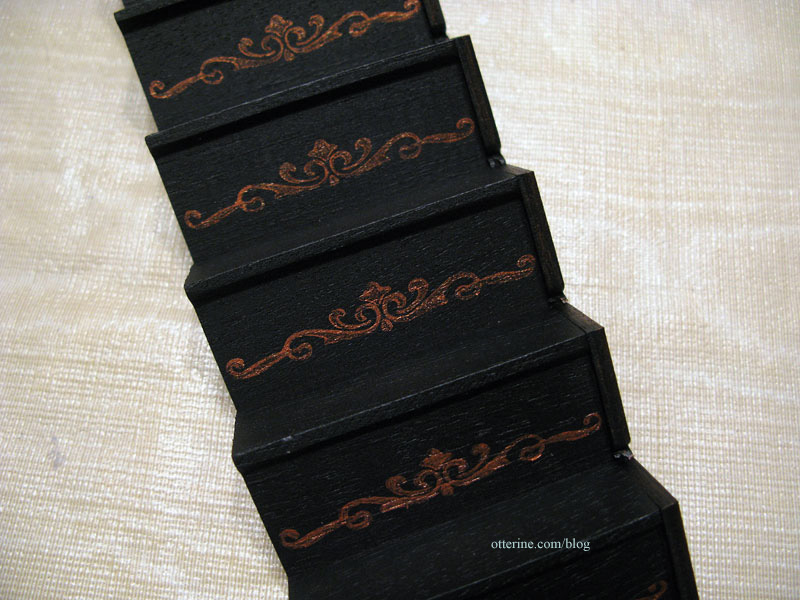
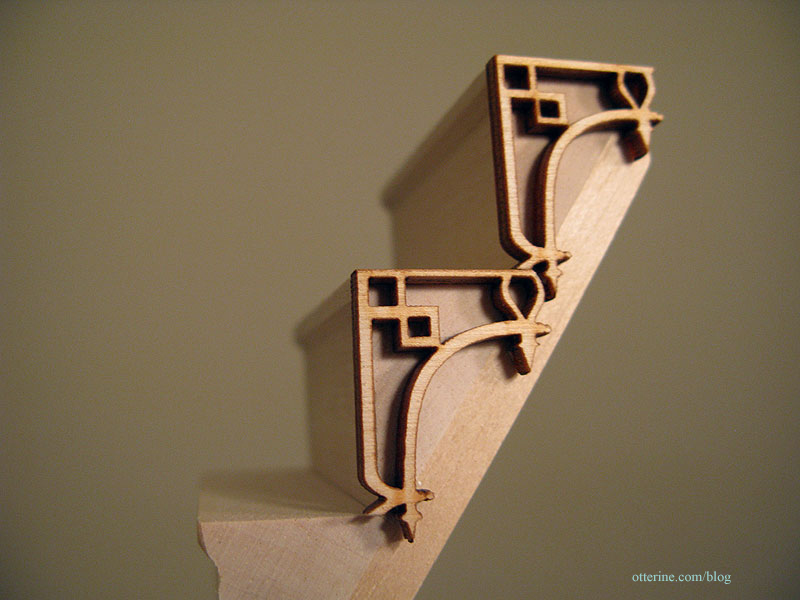
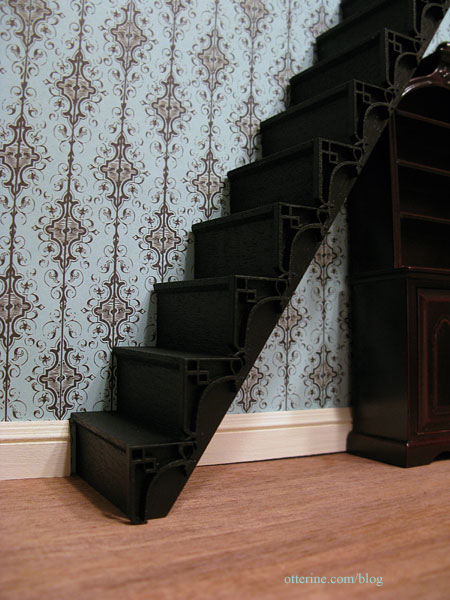
Evelyne’s suggestion from my last stairs update to dry-brush some metallic paint onto the laser cut trims to bring out the detail also brought on another idea…painted risers.
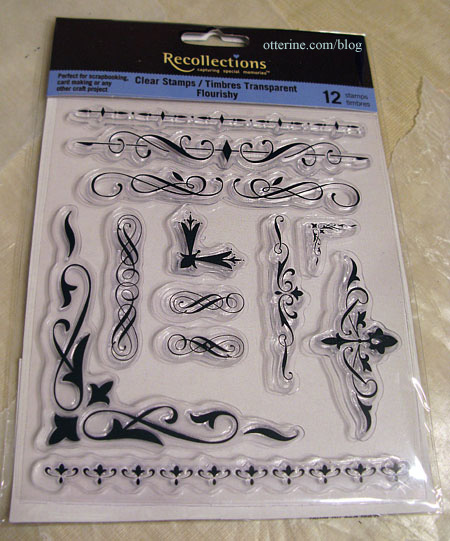
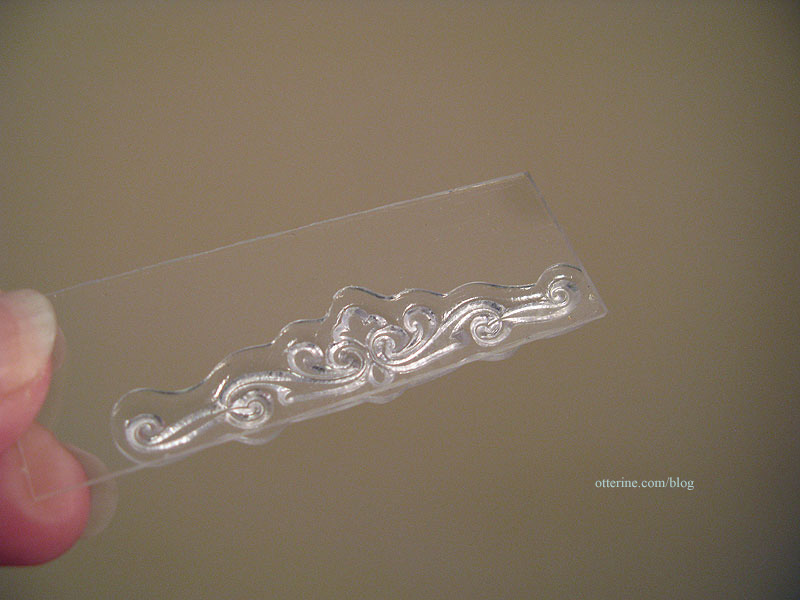
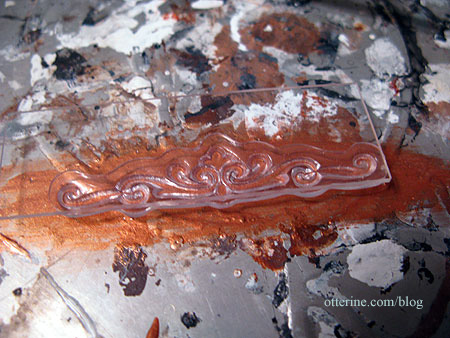
I used a scroll design clear stamp by Recollections (bought with a coupon since these are expensive).
You’re supposed to peel these rubbery stamps off the sheet and stick to a clear acrylic block to use them. I didn’t have an acrylic block (also expensive and only one coupon allowed per day) so I used the glass insert from the front door! :D
I spread some Pure Bronze paint by Apple Barrel in a pie tin with a brush and then pressed the stamp into the paint.
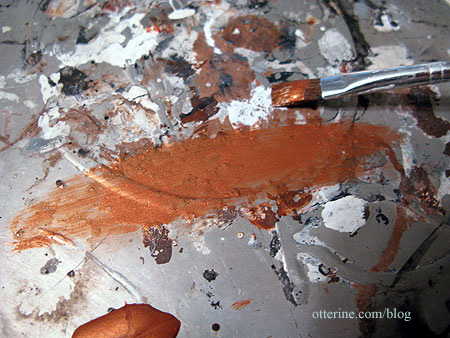
I touched up any sparse areas with the flat side of the brush.
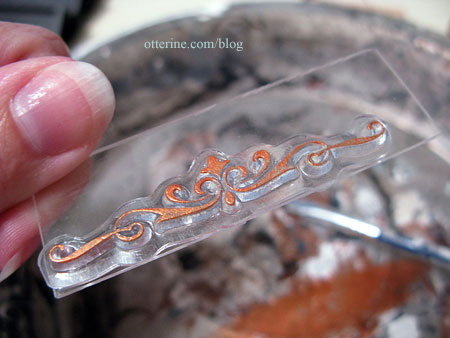
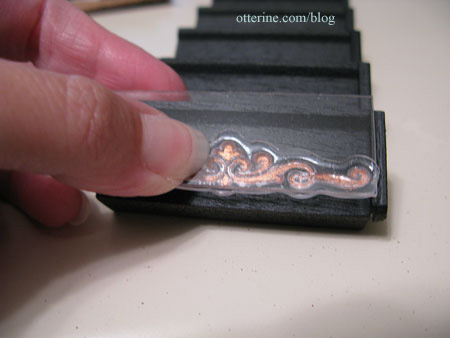
I then pressed the stamp onto the riser. The glass insert worked better as a stabilizer since it was small and I was able to line it up with the stairs as I went.
Voilà! :D
With some further practice, I probably could have gotten more even coverage from the stamp…but this worked well for old worn out stairs.
Using the same flat brush, I stippled some paint onto the laser cut trims. I must say, it looks even more fabulous! Thanks, Evelyne, for the fantastic suggestion!
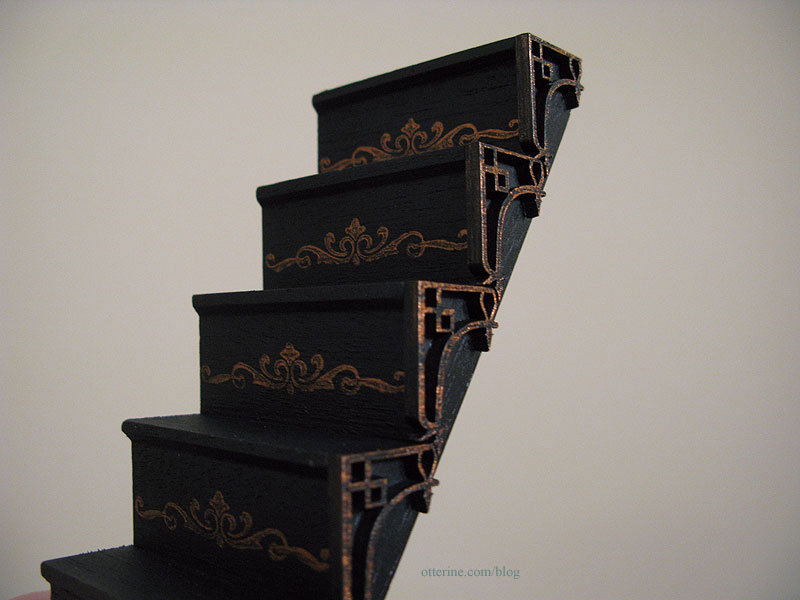
Once the stair detailing was good and dry, I used some coarse sandpaper to wear down the front edges of the treads and put in some minor indentations mimicking years of parallel footfalls.
I then used fine sandpaper to even out the obvious scratch marks and to soften the painted risers.
To fill the color back in, I used a wash of Bittersweet Chocolate by Americana and black paint. This toned down the deep black and made it look as though the heavier stain had worn away over the years. Here you can see where the red base layer comes into play. That dark stain would have penetrated the wood into the deep layers. Leaving it all light wood underneath would be out of character with worn dark wood.

And there you have it…fabulous stairs made better and older!
Categories: The Haunted Heritage
September 14, 2011 | 0 commentsHeritage interior staircase, part 2
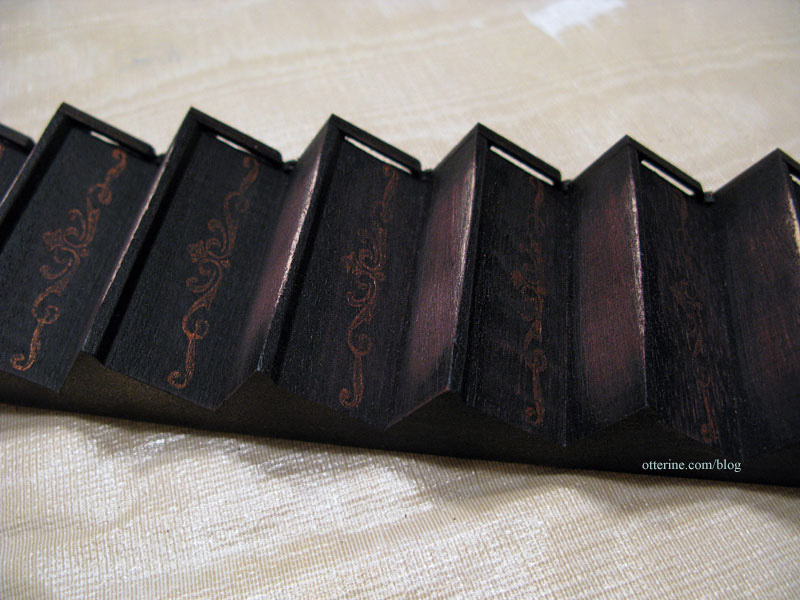
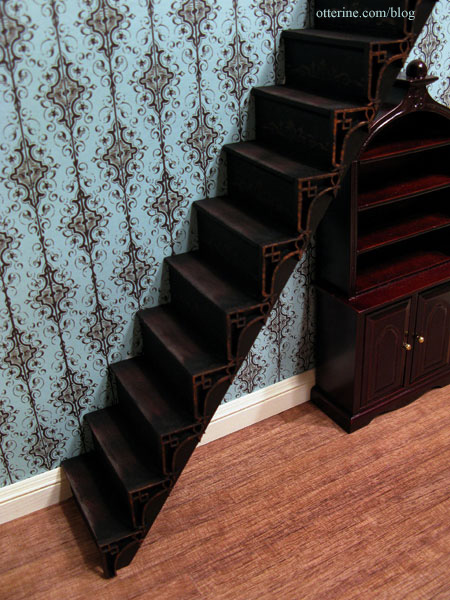
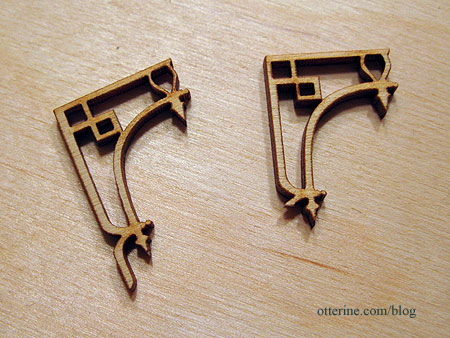
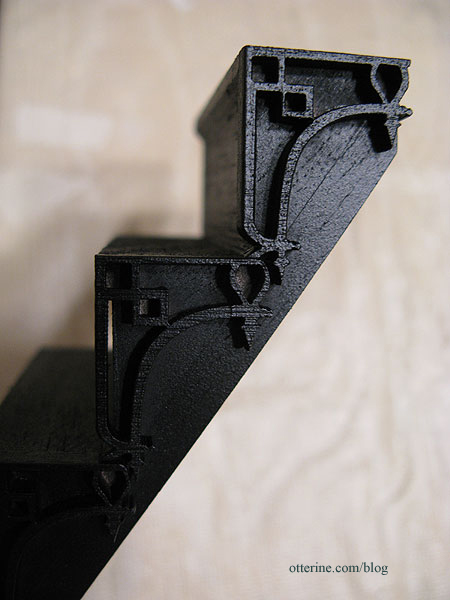
I wanted to figure out a way to make a straight, narrow staircase look interesting and perhaps a bit spooky. I first took a page from the Newport book and added laser cut corners to the side of the stairs. These are by Judy’s Create-a-House purchased from miniatures.com. The quality isn’t bad, though they were not as uniform in design and thickness as other laser cut trims I’ve used.
I had to remove portions of the pieces to get them to fit together uniformly along the side of the stairs.
I think the result looks planned and natural.

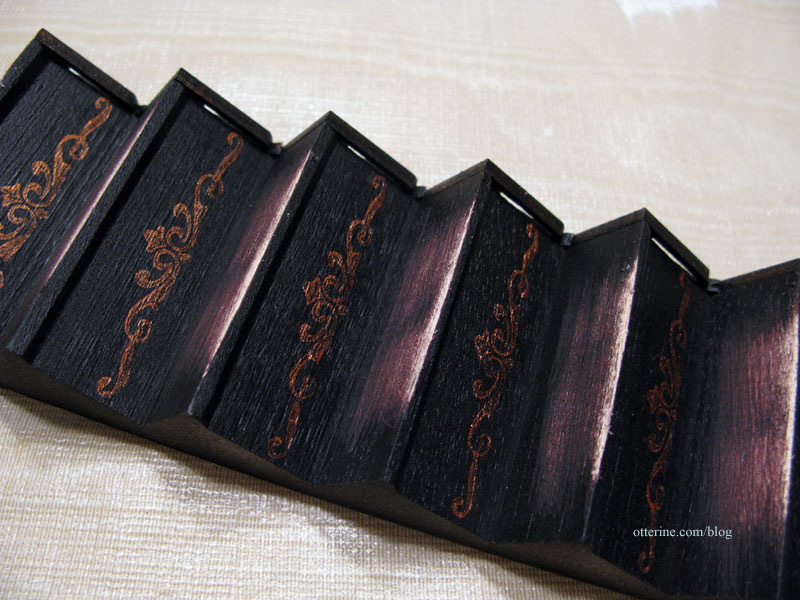
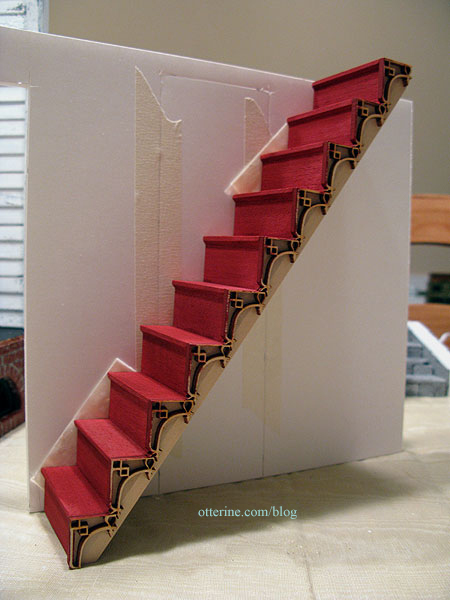
I started with a base coat of Barn Red by Americana on the risers and treads. This was mainly to keep any bare wood from showing through in the next step. It looks creepy already! Perhaps a bit too creepy. :D
Since painting laser cut trims with a brush takes forever and I planned on making the whole thing black anyway, I taped the assembly to a board and sprayed it with Krylon flat black. Interestingly, flat black ended up satin black, so no added sealer was necessary.
This left only minor touch-ups in smaller areas of the laser cut pieces to do with a brush and regular acrylic paint. Much easier and faster with the sprayed based coat!
Here it is with Turquoise Gothic Stripe paper by The Paper Studio. I’ll use this paper in the foyer and upper hallway.
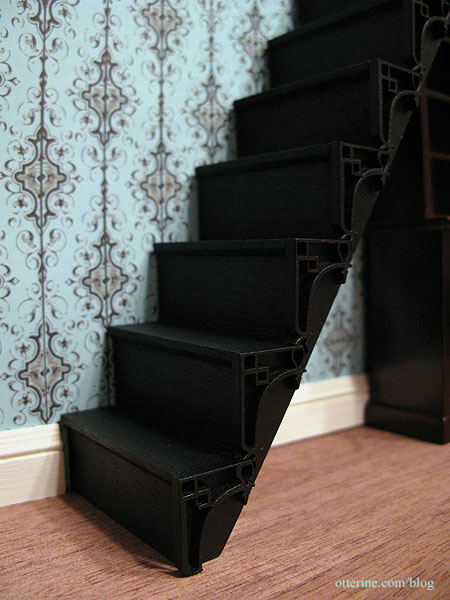
The area behind the stairs will be in the parlor and will be the deep glittery green paper by Recollections.
I wasn’t sure about having such dark stairs, but I think they’ll work wonderfully.
Categories: The Haunted Heritage
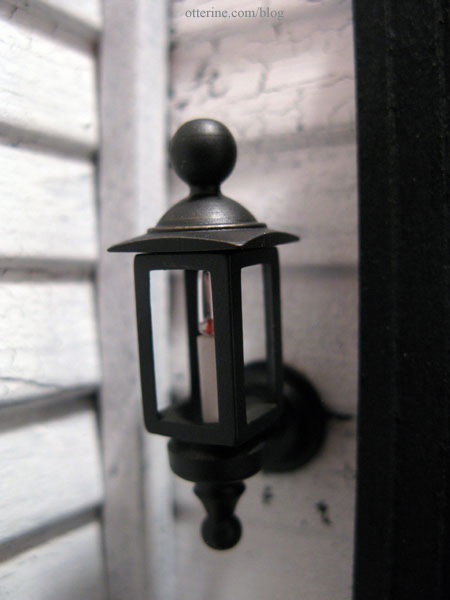
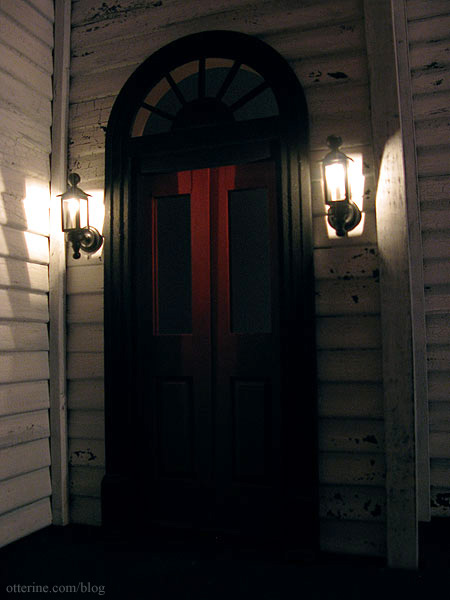
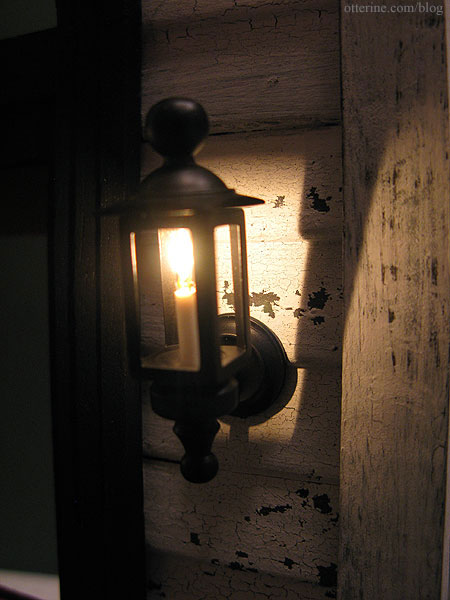
September 11, 2011 | 0 commentsFront door coach lamps
These are Clare Bell Brass Coach Lamps.

There’s nothing quite like adding light to a dollhouse to bring it to life!
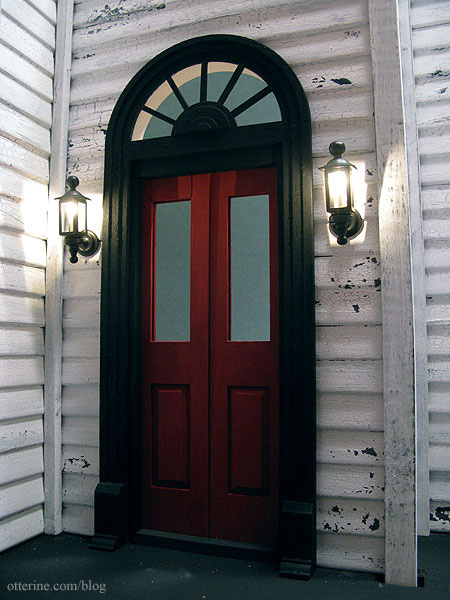
They are shiny and new and will need to be weathered, but they have a wonderful old time look about them.
I need to get to work on the glass inserts for the front door to finish off the spooky mood! :O
As I was trying to capture a detail shot of the coach lamps, the macro setting on the camera focused on the paint instead. I cannot believe how well the crackle paint effect mimics old, lifted paint – especially right below the light. It’s so exciting! :D
Categories: The Haunted Heritage
September 7, 2011 | 0 commentsMiniature Treasures: Catacombs Clock Case
I recently found my way to a blog on some of the most amazing miniatures I’ve ever seen. The artist uses old, sometimes ancient, pieces and creates wonderful works with such character. One of these works I instantly loved…his dark but beautiful debut miniature that he based on an old clock case and the French catacombs.
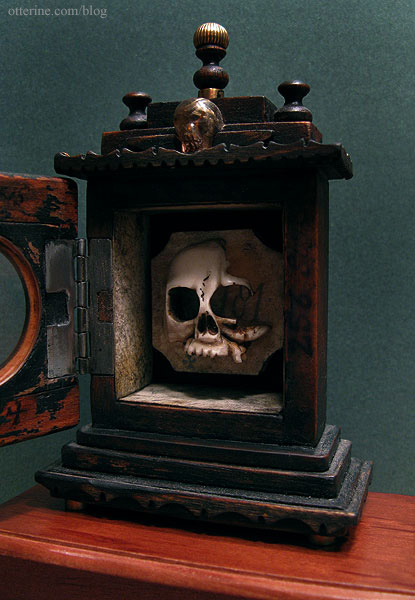
When Tony later posted on his blog that all of his works were for sale, I don’t think I could have sent that email to him any faster! :D He replied promptly, and after some email exchanges, all was set and that beautiful piece was on its way to me.
It soon arrived safe and sound. It’s just so gorgeous, so well made. I tell you – it even smells awesome!!!! :D It smells of wood and parchment and leather. The scent reminds me of ‘new car smell’ most of all.
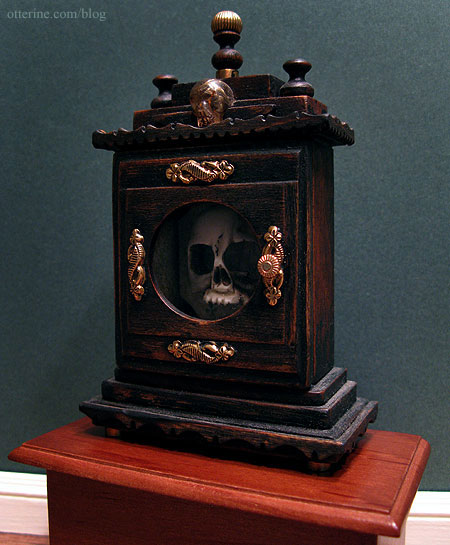
Tony used a skull carved from genuine bone, genuine 18th century vellum, optical glass from a pair of broken Victorian spectacles, a hand carved rutile quartz skull, and items from broken watches and clocks.
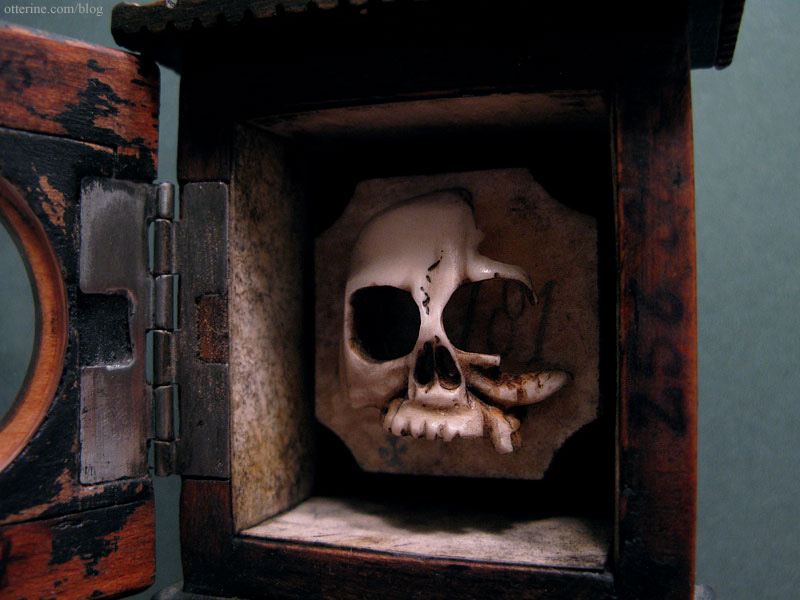
Thank you, thank you, thank you, Tony, for this beautiful work of art. I will indeed treasure it!

(As of 2024, his blog is no more, but you can find the artist here.)
Categories: Miniatures, The Haunted Heritage
September 6, 2011 | 0 comments


NOTE: All content on otterine.com is copyrighted and may not be reproduced in part or in whole. It takes a lot of time and effort to write and photograph for my blog. Please ask permission before reproducing any of my content. Please click for copyright notice and Pinterest use.


