

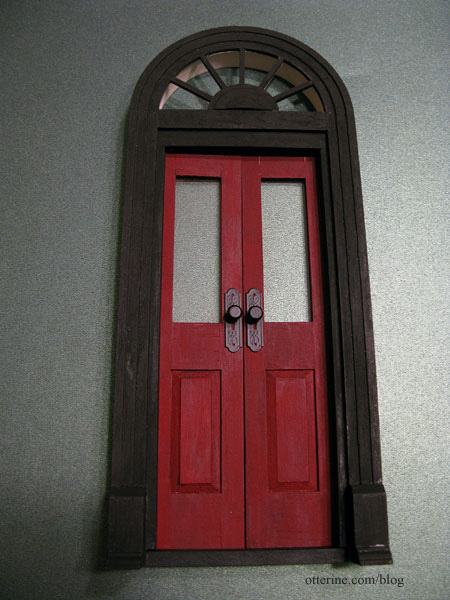
Palladian Door – glass inserts
Continuing work on the front door. I searched online for glass inserts, edited these designs in PhotoShop and resized in Word for printing. These are just paper printouts for now until I decide which one I like best, and then I’ll print on transparency film.
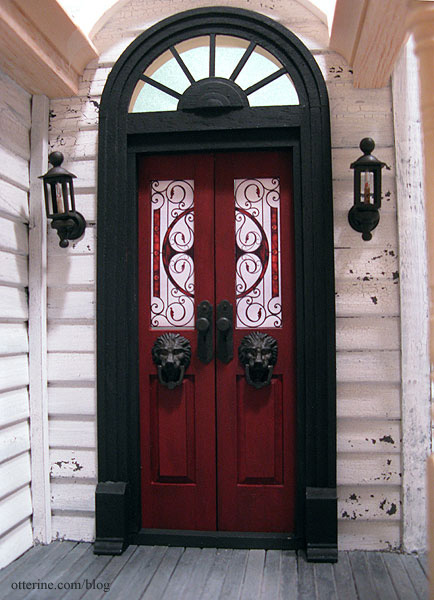
The first design is from M.D. Doors. What caught my eye immediately was the mix of wrought iron and stained glass. When I found this one, I instantly loved it and thought it would be perfect. I worried it might be too much with the red door, but I actually like this a lot.
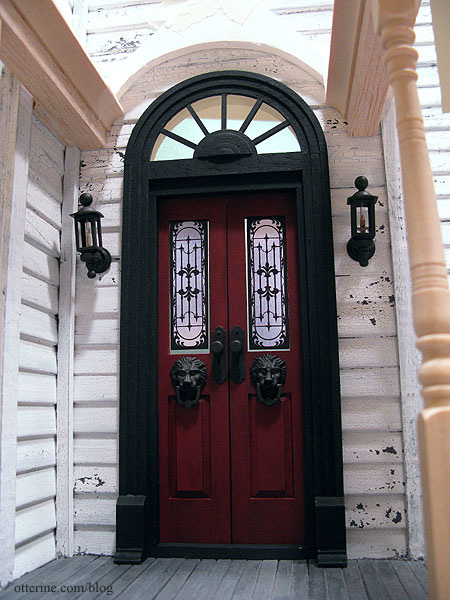
The second design is from Discount Door Inserts. I liked their Regal design with a rain glass background. This seems a bit more traditional but still good.
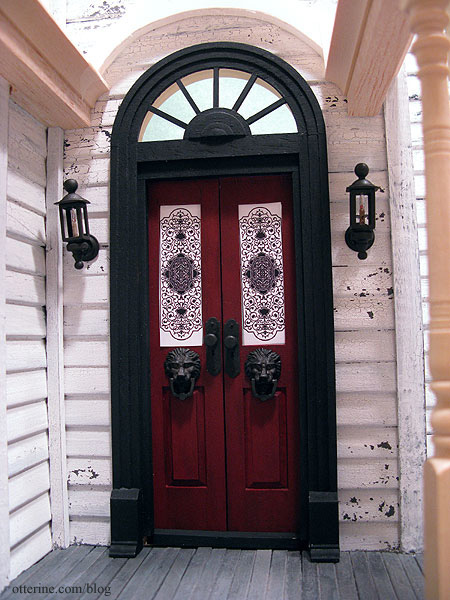
The last one isn’t a stained glass design at all but a stencil design from Modello Designs (item EasPan152). I would need to stretch these to fit the openings if I used these, but I think the dark spot in the middle competes too much with the lions.
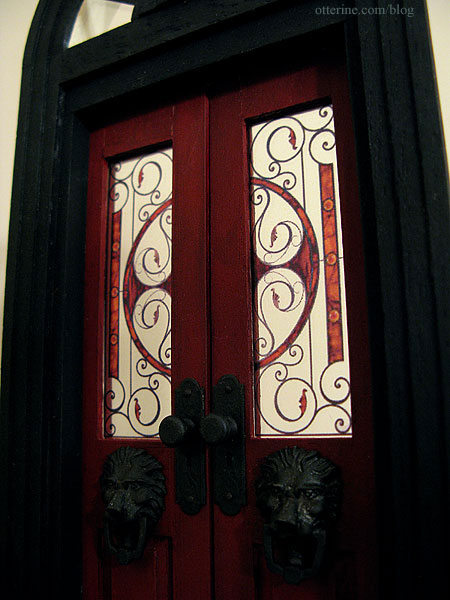
In the end, I chose the stained glass design from M.D. Doors. The inserts are printed on transparency film. The printer left some random dots on the printed image, but I think they work well. I slid them into the openings with the original door inserts right behind them. It’s not a tight fit but it works well enough to keep them in place.
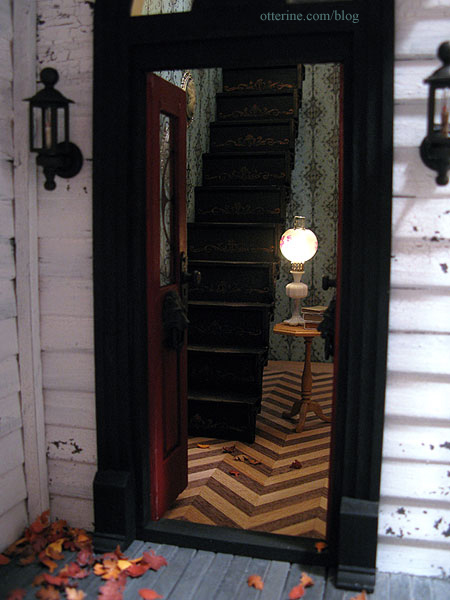
I am eager to start working on the interior, so I might be making that switch soon. I took some of the items I already had on hand and made a quick scene of the entry and foyer. I borrowed the table from the Newport, but I made the books especially for the Heritage. There will be many more to come. The lamp is by Chrysolite (not a kit) and will likely end up in the parlor.
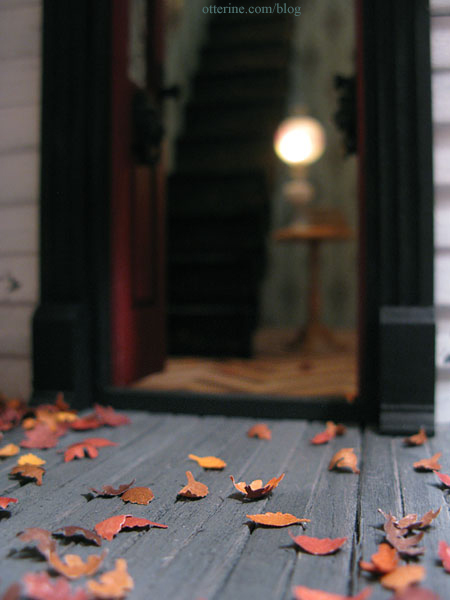
The leaves you’ve seen before, but I am continuing to work on them. I like the way they’ve been tracked into the house for this scene.
I love autumn colors and falling leaves. :D
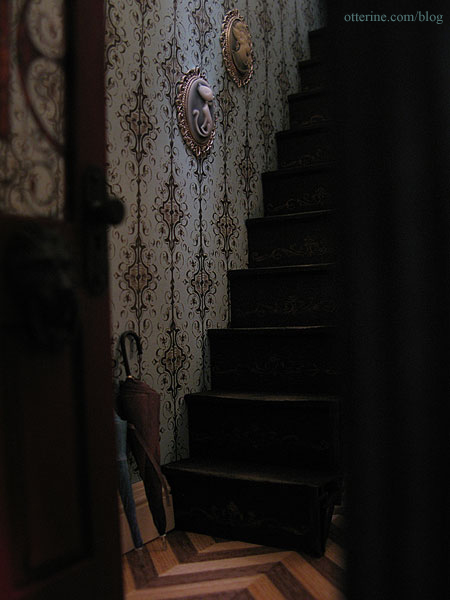
I love, love, love this wallpaper: Turquoise Gothic Stripe scrapbook paper by The Paper Studio. I bought the two cameos from Fairy Tale Fantasies. One is a kitty and the other a beautiful vintage lady. I cut the loops from the tops to use them as framed art.
The lovely umbrellas were made by Fran at Fran Made Minis. They are among my all-time favorite minis.
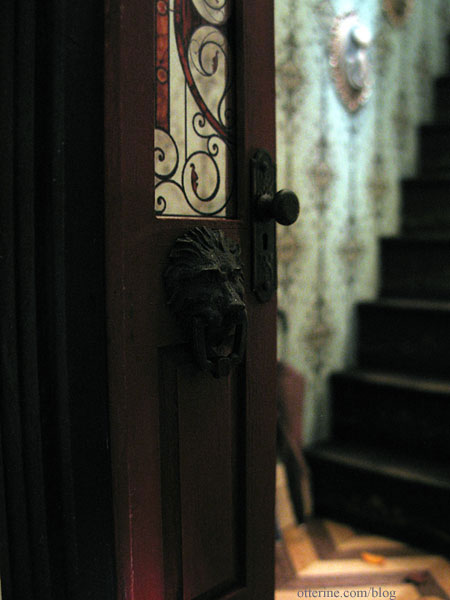
I’m glad I used the lion doorknockers after all. They fit so well with the feel of the house.
Categories: The Haunted Heritage
October 13, 2011 | 0 commentsPalladian Door – hardware
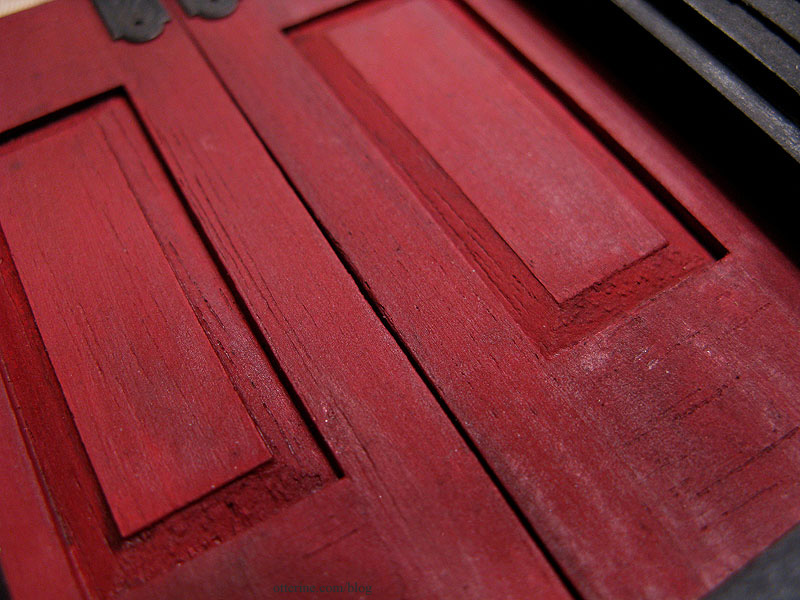
Since crackling the black paint over a black basecoat worked so well, I decided to do the same thing for the exterior of the front door – crackled red over red. I then used a paint wash of Barn Red by Apple Barrel, Black Cherry by Folk Art and black to darken up the door inside and out, adding an extra coat of this wash on the exterior. Nice, old dirty paint!
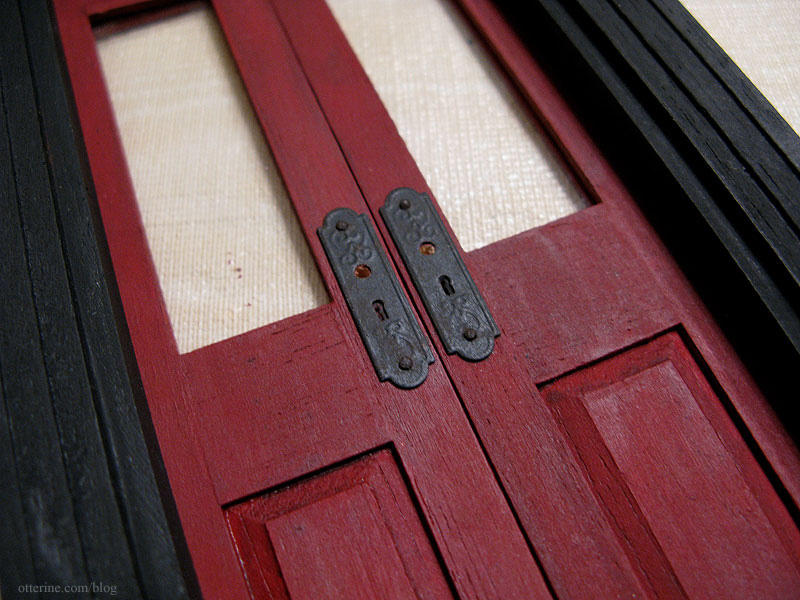
The door plates and knobs came from The Dolls House Emporium and were originally shiny brass. (Shakes head that nearly all fancy dollhouse hardware is shiny brass.) I sprayed it with flat black paint and aged it a bit with Bittersweet Chocolate by Americana. Of course, the door plates had nail holes but no nails. I used some tiny brass brads and painted them to match.
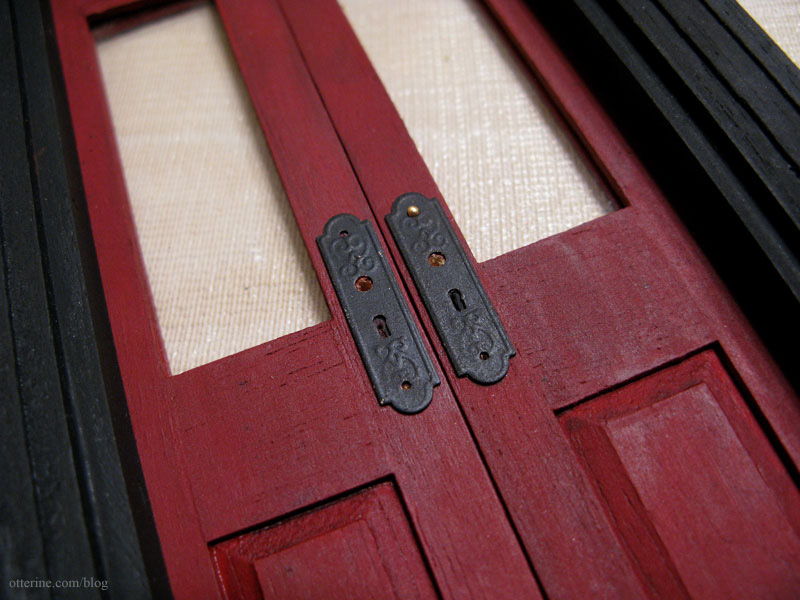
The problem is, this hardware will require a lifetime of touching up, but it looks so much better than shiny brass.
Since this is a split door, I wasn’t really sure what to do for a spooky doorknocker. I knew I wanted one, but where to put it without it looking odd shoved off to one side. Then I thought, why not two to balance?
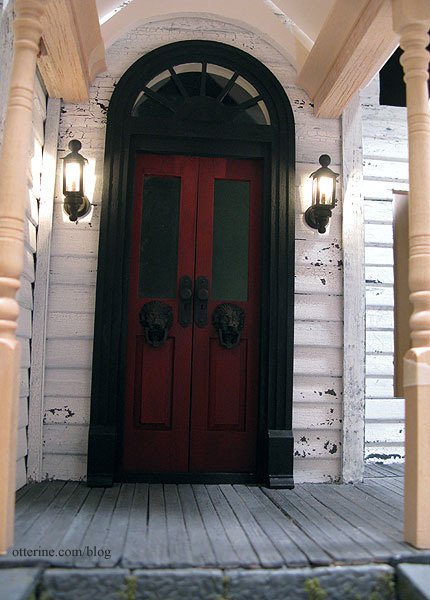
Wow! You knock on the door and promptly get devoured by lions. :D
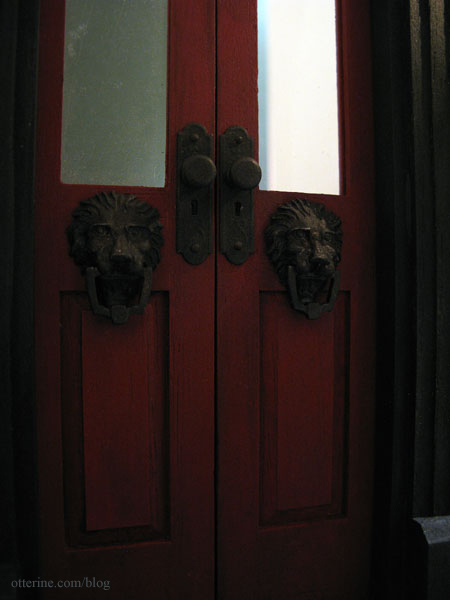
These beauties are from Sussex Crafts, and I just love the dark finish and wonderful detailing. The lions have such wonderful expressions. Linda at Sussex Crafts was a joy to do business with as well. They might be a bit large and over the top but I think that actually works for this project. They are keepers without a doubt!
Here’s the door without the lions in case you’re curious…no comparison.
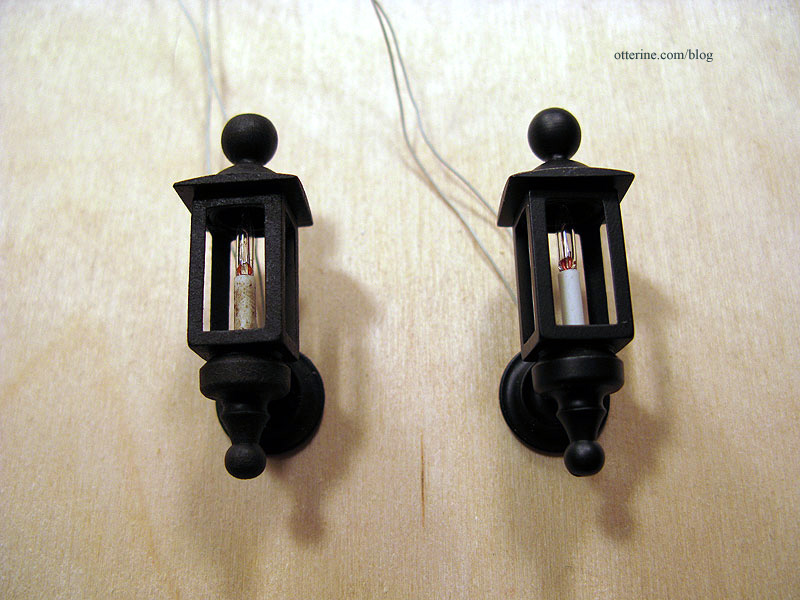
I also aged the coach lamps by stippling on Bittersweet Chocolate paint. Now they look all oxidized and dirty. :D
Categories: The Haunted Heritage
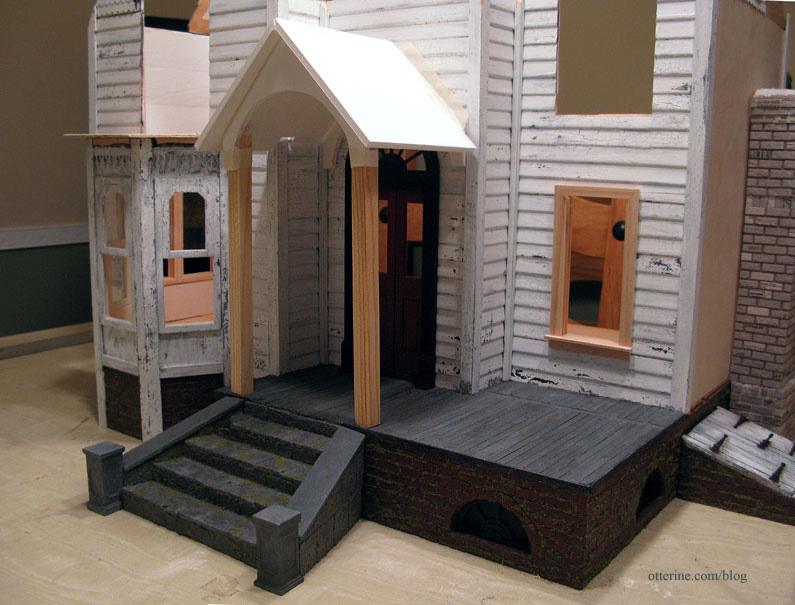
October 12, 2011 | 0 commentsHeritage – Portico, part 3
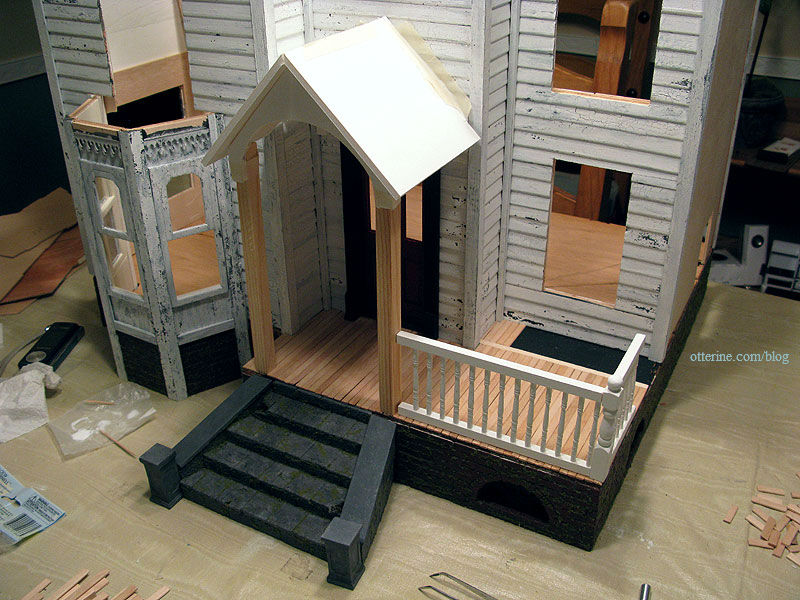
Continuing work on the portico. Mike of One Twelfth Scale Miniatures was generous enough to post his exploded drawing of the portico he made. It helped solidify the method in my mind for how I wanted to build my own.
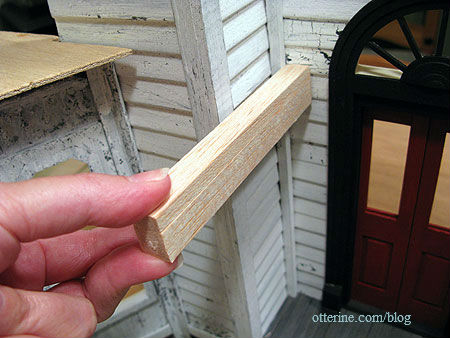
I started with 1/2″ x 1/2″ balsa wood mainly because I cut all the wood I use with hand tools and balsa is a nice soft wood. If it gets beats up (as it easily does), it won’t really matter for this particular project. I topped these pieces with 1/4″ x 1/2″ balsa to build up the height.
I then added cove molding along the tops. Yes, there will be spackling! :D

I had to add a brace on the left side where the portico touches in the inner corner of the porch.
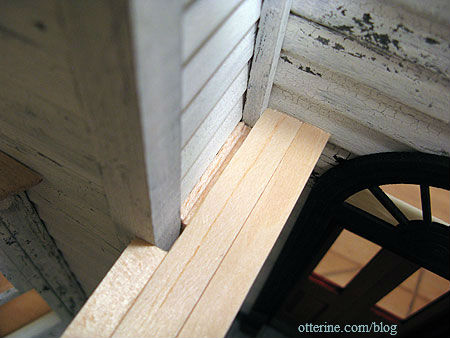
I cut the foam core back piece I had used in my mockup to fit the tops of these balsa and cove molding bases. I taped it to the house to determine the position of the portico. The front supports are Houseworks Veranda Posts cut to 7 3/8″ tall. I had to cut some from the bottom and the top to use them since the decorative turned portion is rather long.
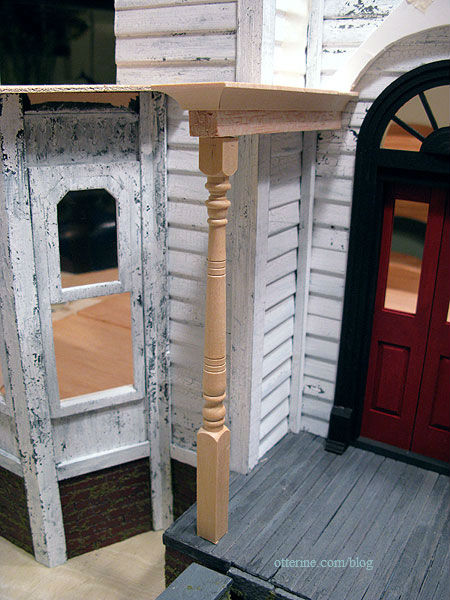
I already love it!
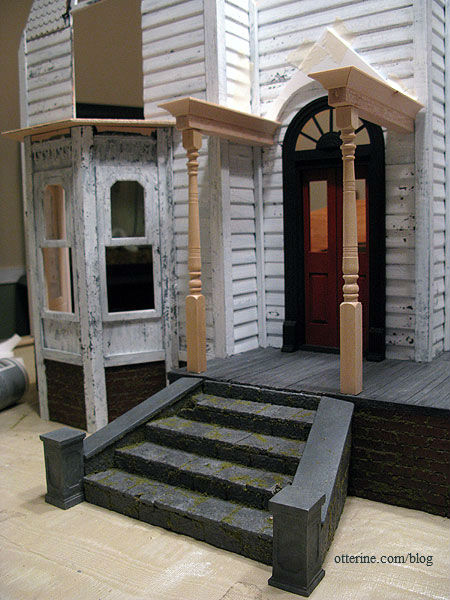
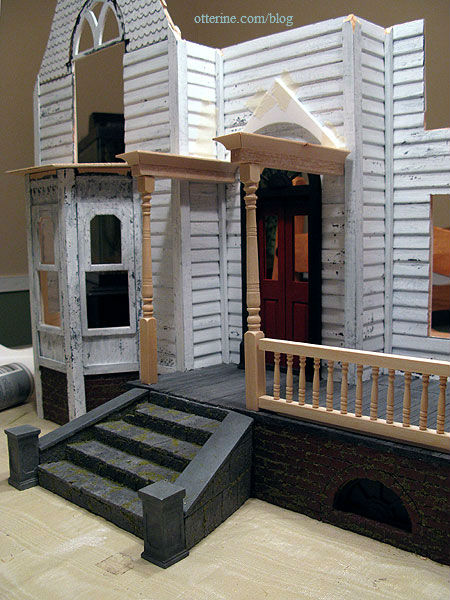
I’ll have to use short railings with these posts, but I think that actually will look nicer than the tall ones I used in my previous setup.
And, when you need an extra pair of hands, just raid the pantry! :D
Categories: The Haunted Heritage
October 11, 2011 | 0 commentsHeritage – Portico, part 2
Continuing work on the portico.
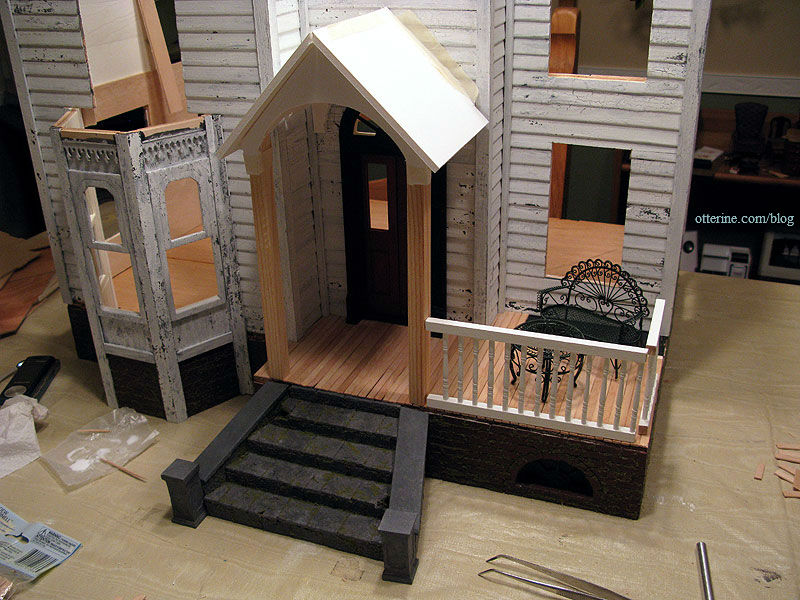
Lyssa and I had some laughs batting ideas back and forth. She was keen on raccoons living in my roof, and we both agreed a sagging roof on an old house would be wonderful. Lyssa commented, “You could leave just parts of the flat roof, indicating that the roof fell in some time ago, but the old woman had some sense to have that nonsense hauled away.” Indeed! I told her, “She did have the sense of not wanting garbage on the porch…but she’s not paying anybody $10K for a new roof! She doesn’t sit out there anyway…too many raccoons.” And, an idea formed in my head: a portico with the remaining area enclosed with railings alone, as though it were once a sunny place to sit. The raccoons in the roof…still to come.
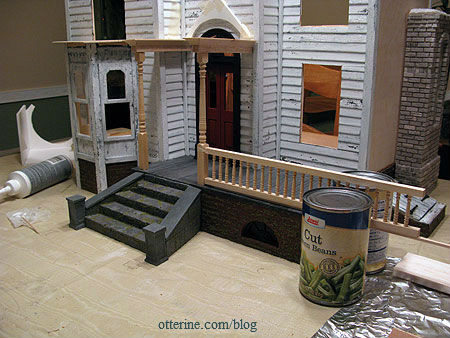
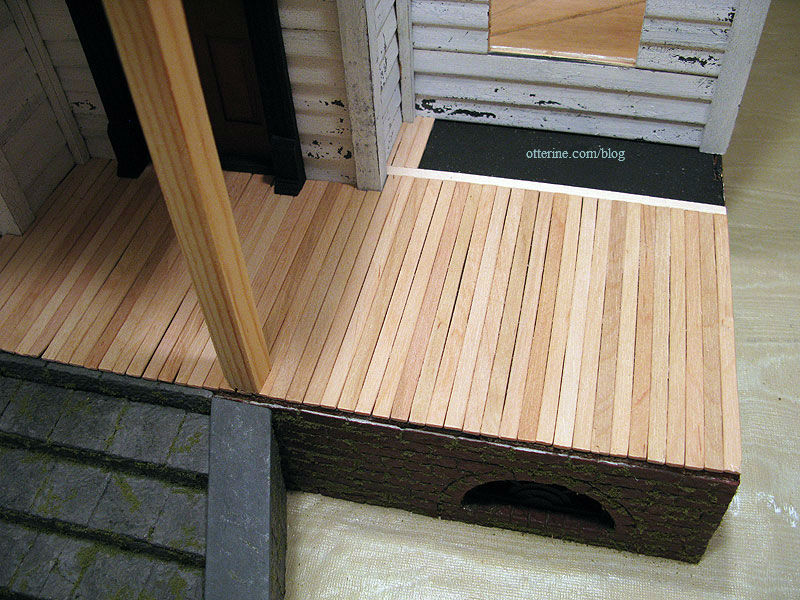
Now that the front walls are permanently in place, I was able to cut the front porch boards using skinny craft sticks. I am usually careful to weed out the warped and damaged sticks, but this time it’s their turn to shine! :D I even left some gaps and used the rounded factory edges on the outer edge of the porch. Just as I had done for Baslow Ranch, I especially wore out the boards at the top of the steps. For the rest of the boards, I roughed them up with an awl. I also didn’t weight them down as the glued dried so some of them are lifted. I think all of this adds to the worn look of the house.

I had to add a cross board made of strip wood to split a portion of the porch since the craft sticks come cut to six inches in length and the porch is deeper than that. Behind that line, I continued with skinny sticks cut to size.
I took some random parts for mocking up the sun porch, but these aren’t necessarily the items I will use.
This allows for a covered entrance and full use of the rest of the porch. And, yes, I can rust out that metal furniture and put a worn out cushion on it so the old woman can sit outside and feed the raccoons. :D
I finished applying the skinny craft sticks to the porch and then applied a paint wash of Slate Grey by Americana and black. I then followed that up with a wash of pure black. I might do some more to the porch later, but for now I just needed to get rid of the shiny new wood.
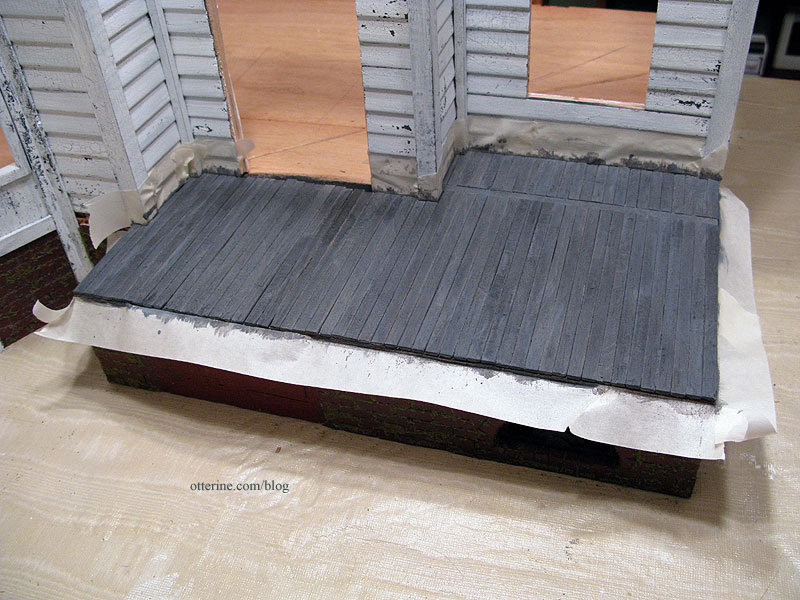
I also cut and painted the trim that lines the porch above the brick foundation.
Now it’s starting to look like the real thing to me.
Categories: The Haunted Heritage
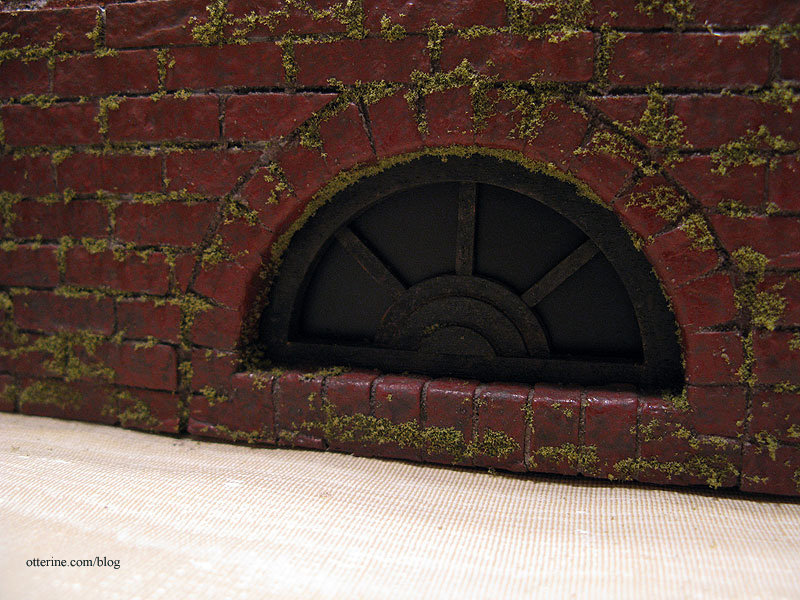
October 11, 2011 | 0 commentsMuddy, mossy foundation
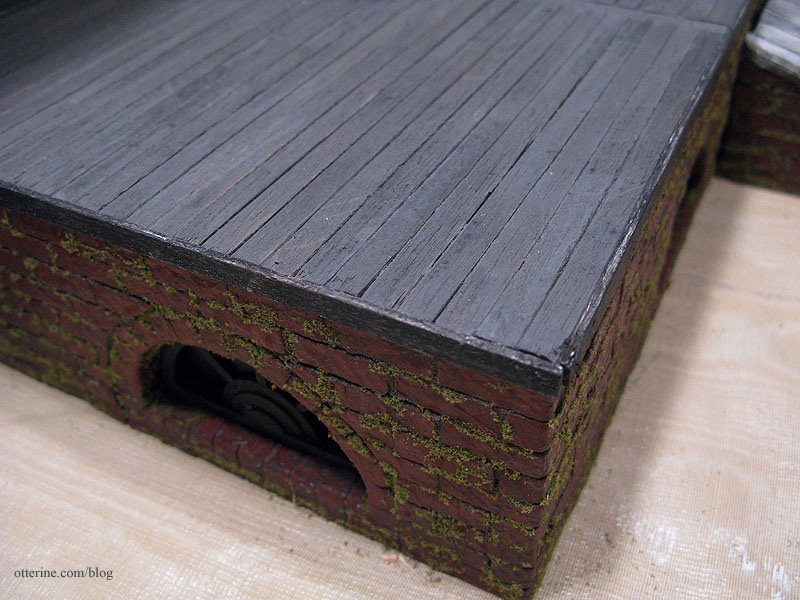
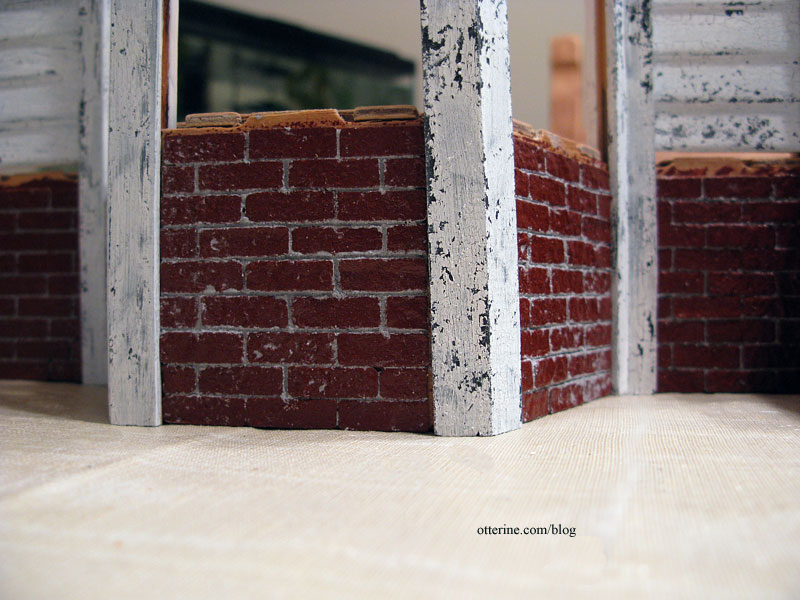
I will soon be ready to start gluing walls together permanently, so I needed to complete the foundation. After grouting, the bricks were too shiny and new to be part of an old house.
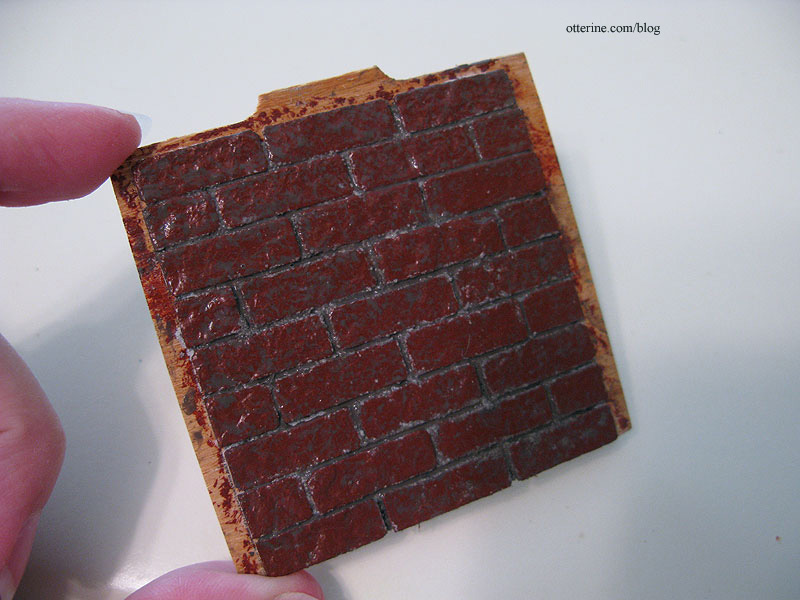
I started with a paint wash I like to call mud: Mushroom and Medium Grey by Folk Art mixed with some black paint and a bit of water.
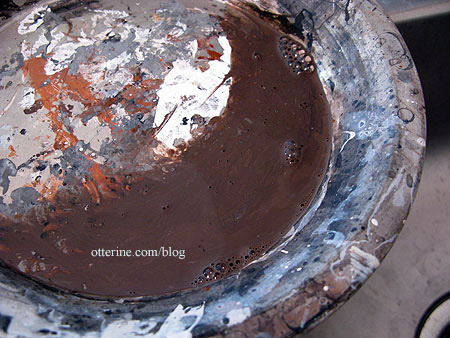
I brushed it on liberally and then blotted with a paper towel.
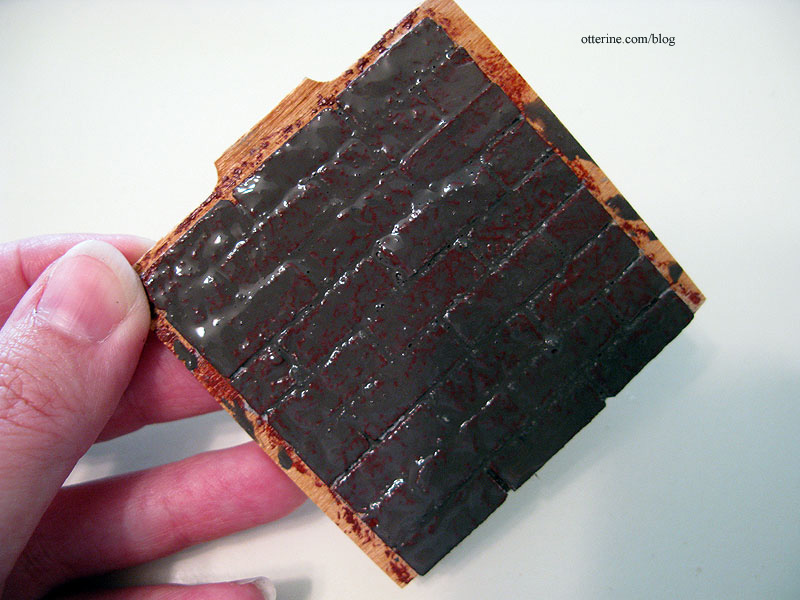
Now the grout is dirty and the shiny surface of the red bricks has been toned down.
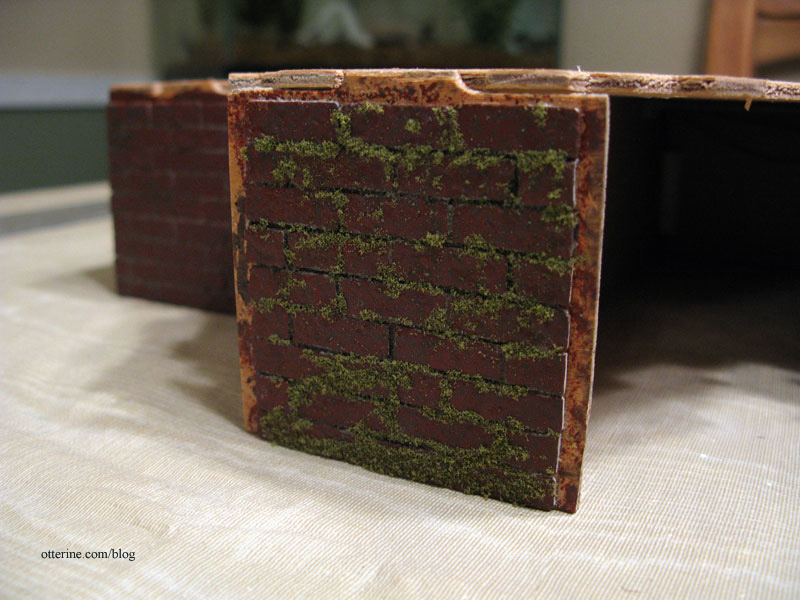
Next, I used Aleene’s clear gel tacky glue to add the moss exactly as I had done for the front steps.
Now, I think we’re getting somewhere!
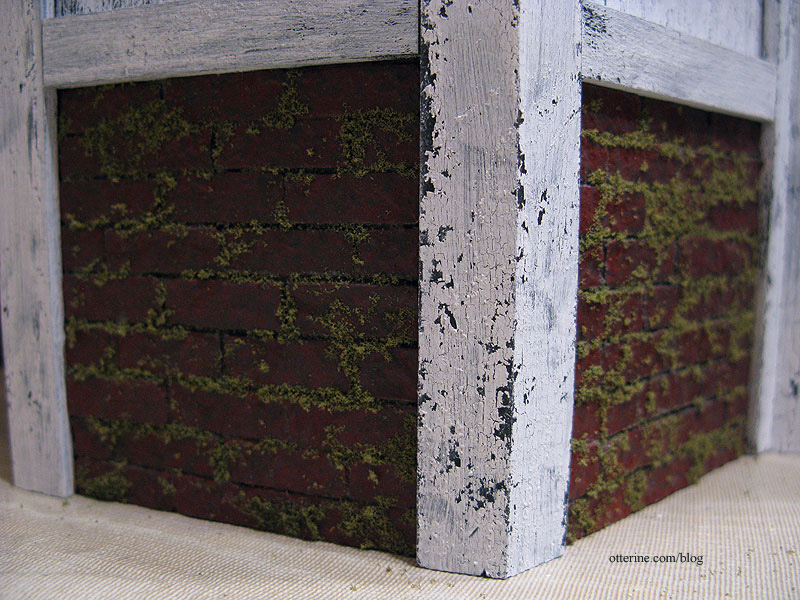
I think this really sets off the worn paint very well. :]
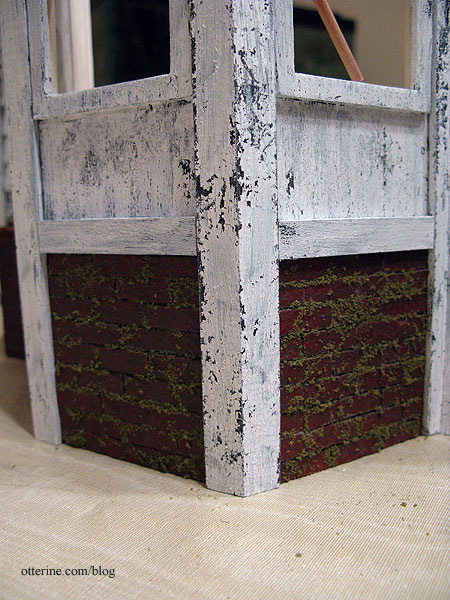
It’s now consistent with the stone steps.
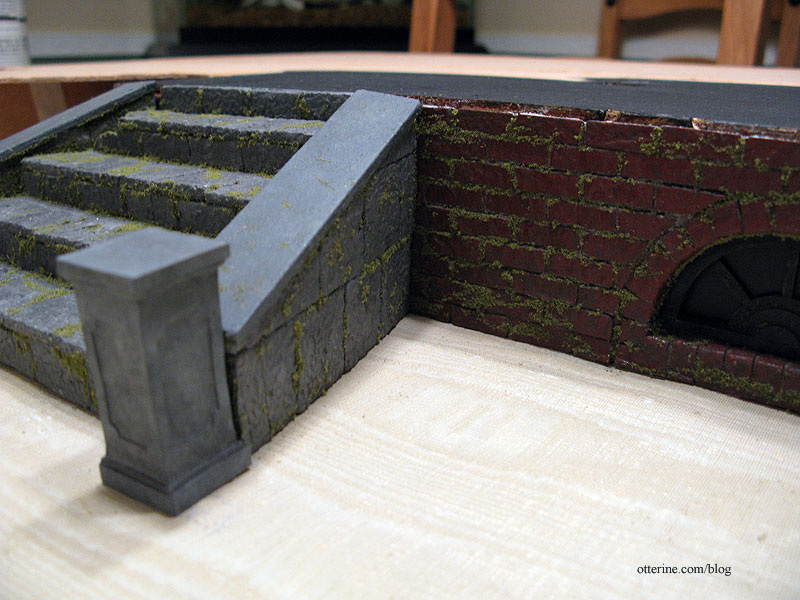
And, I love the way the cellar windows look with the moss around them.
Categories: The Haunted Heritage
October 9, 2011 | 0 comments


NOTE: All content on otterine.com is copyrighted and may not be reproduced in part or in whole. It takes a lot of time and effort to write and photograph for my blog. Please ask permission before reproducing any of my content. Please click for copyright notice and Pinterest use.


