

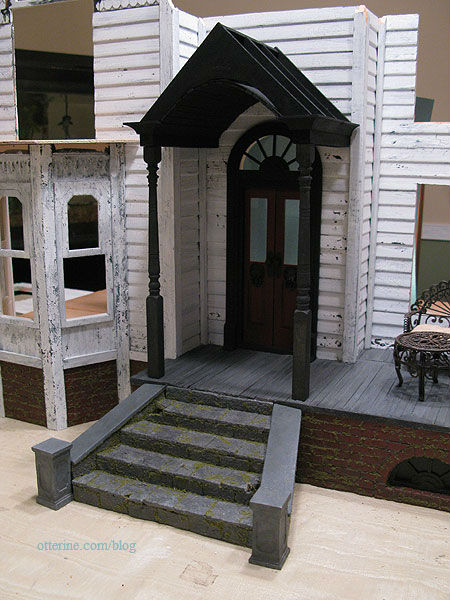
Heritage – Portico, part 7
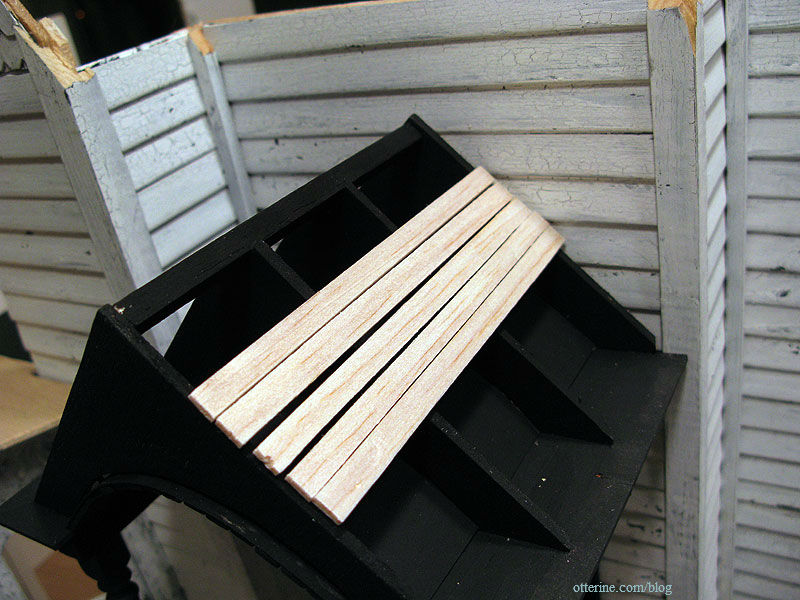
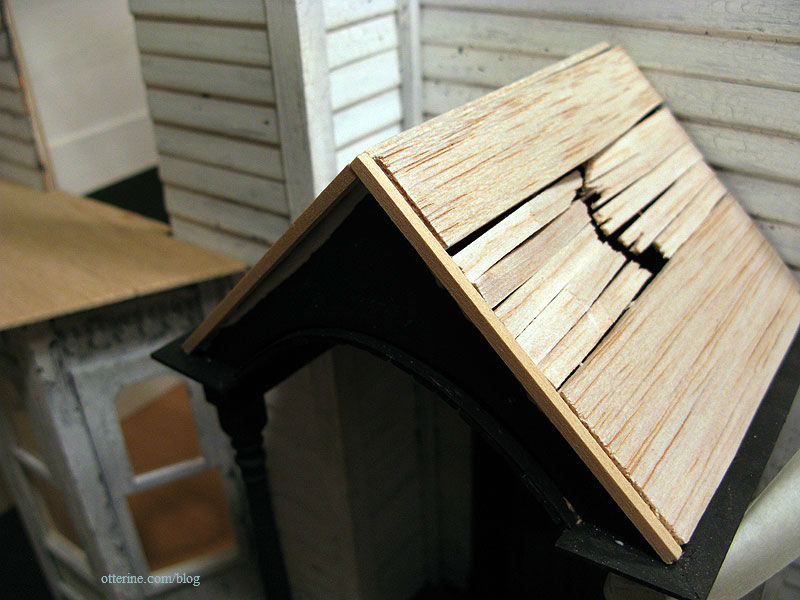
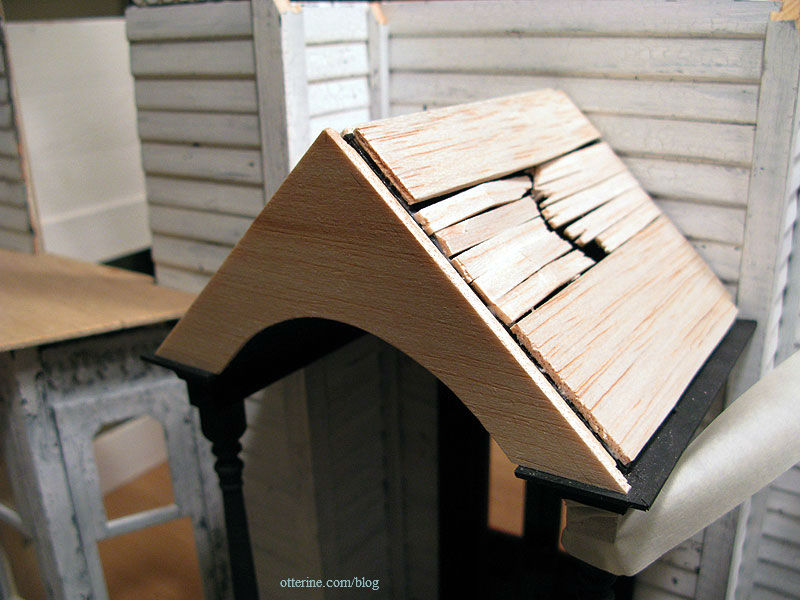
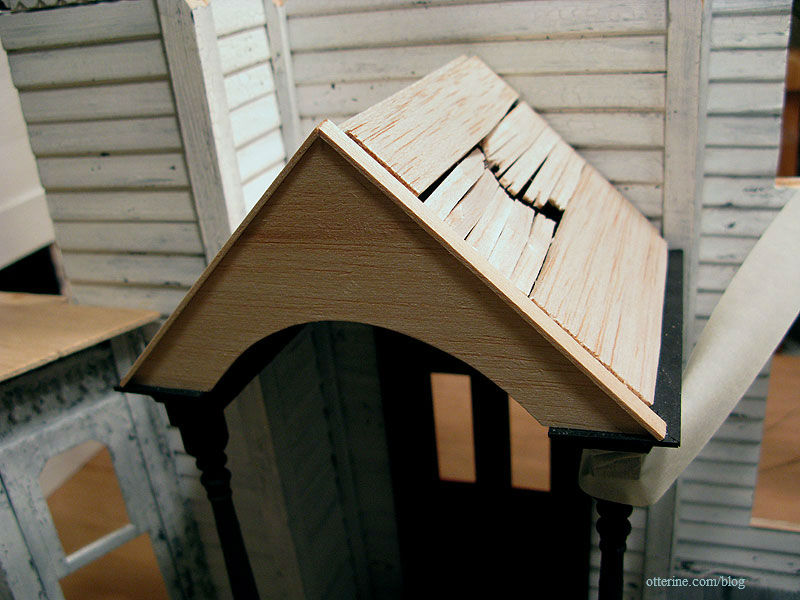
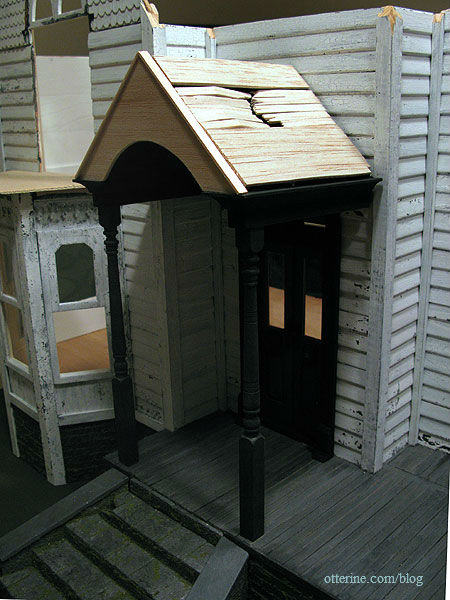
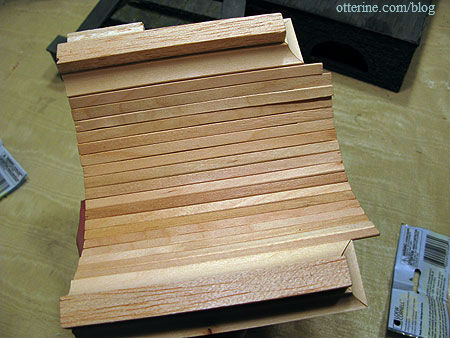
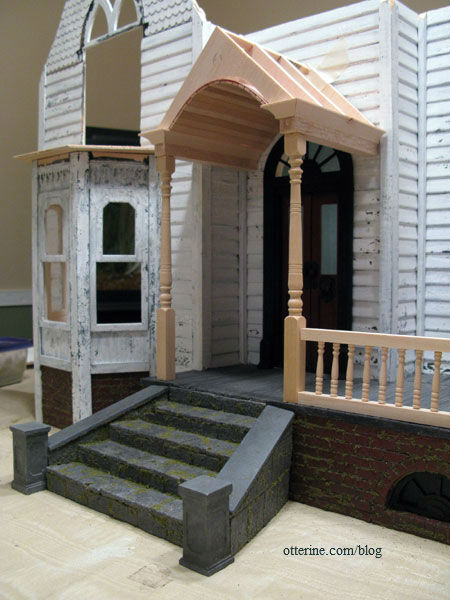
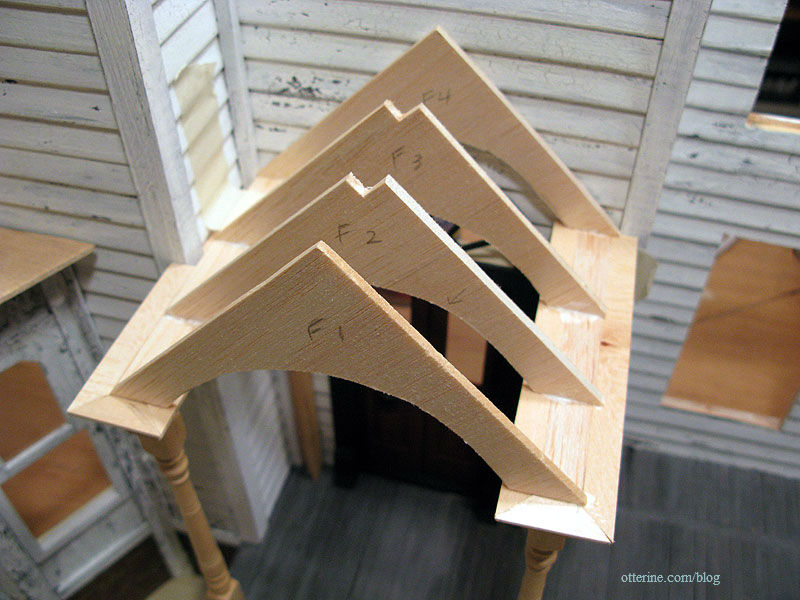
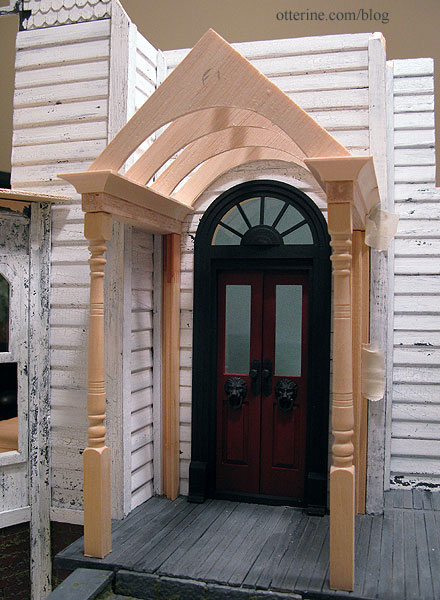
Continuing work on the portico. For the roof pieces, I used the now unnecessary porch roof piece from the original kit. It’s 1/8″ plywood that is old and brittle enough to be flexible.

I cut a rough hole to show the rafters I added. I could never have done this with new plywood given the limited tools I have.
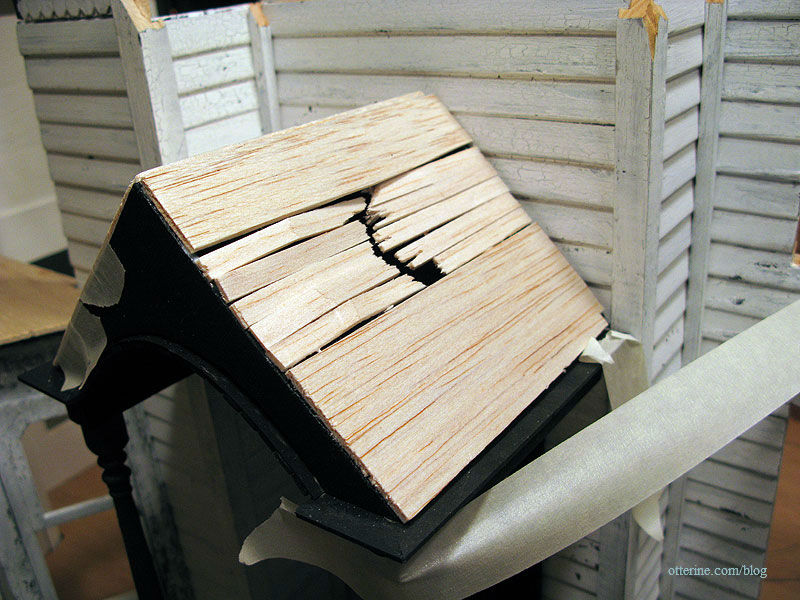
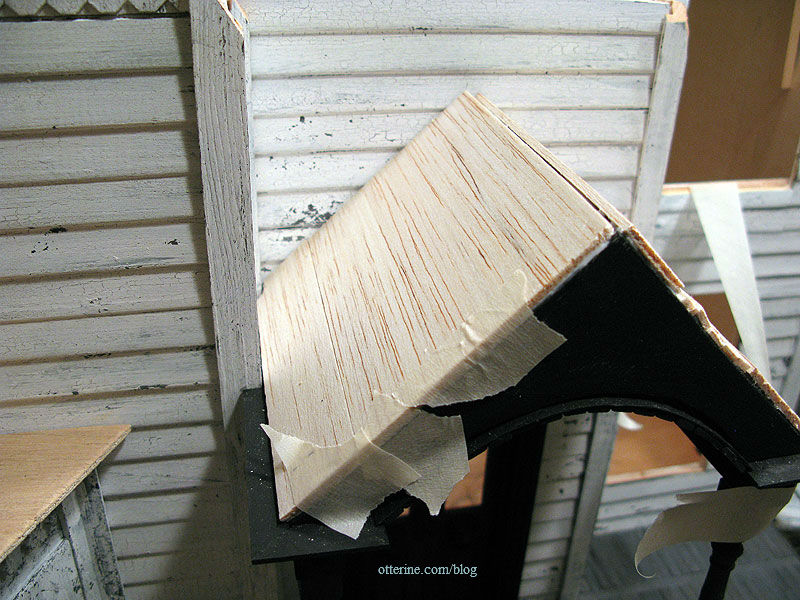
I then used wood glue to join the outer roof pieces to the portico structure. I cut the pieces with just a bit of overhang past the trim I had added earlier.
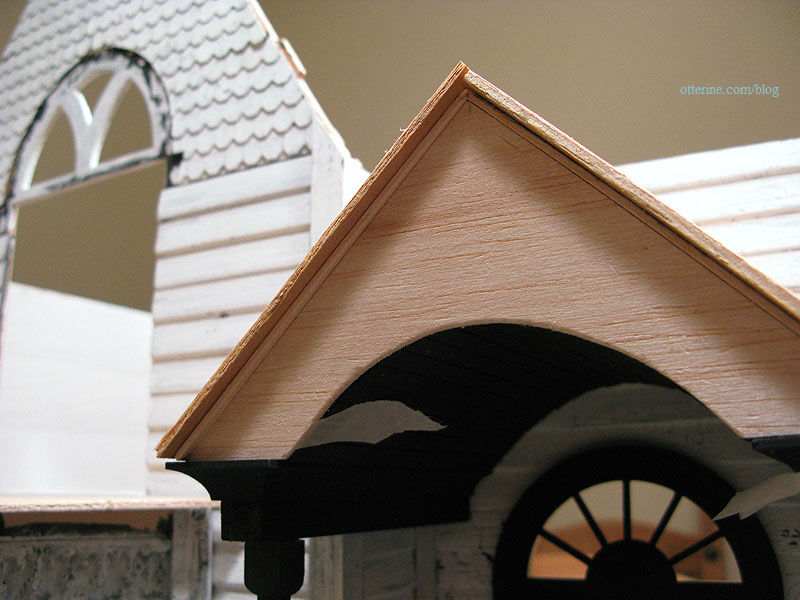
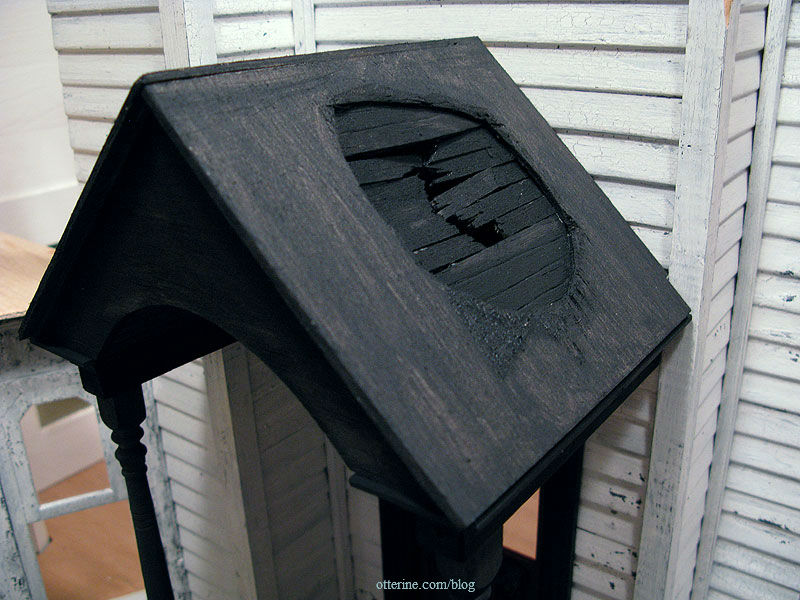
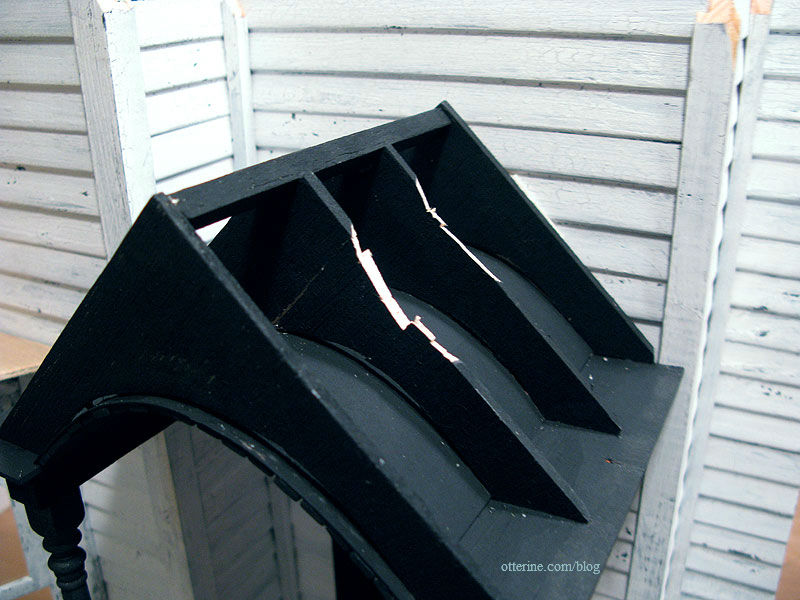
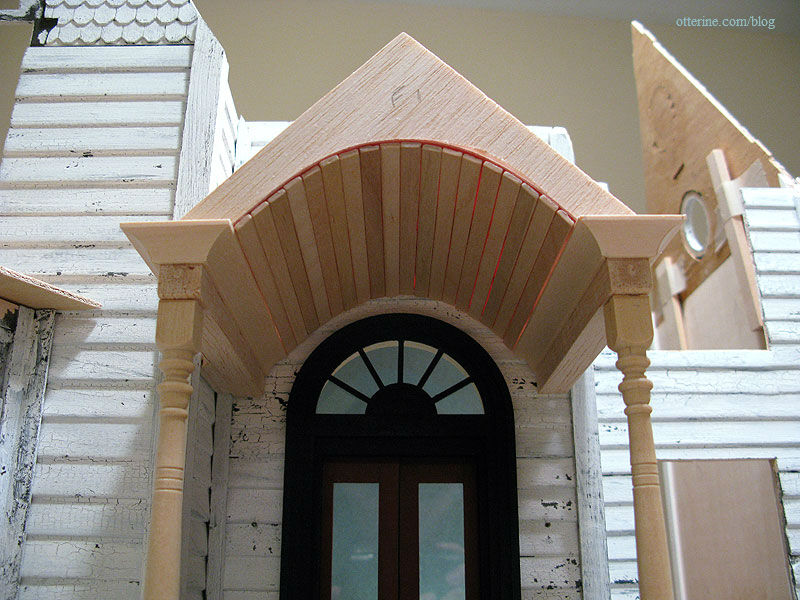
I painted the bare wood black. Again, this is all just the dark under layer. The portico and posts will be white, with dark shingles on the roof.
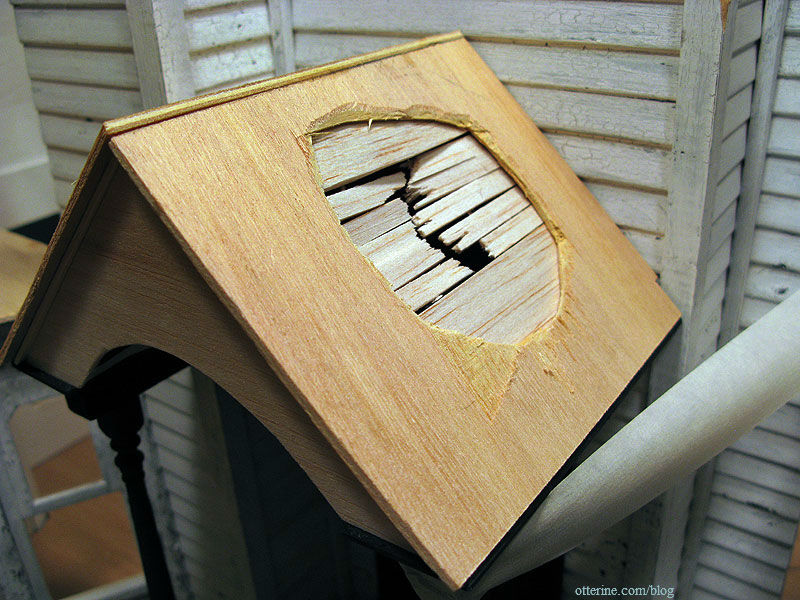
Since I wasn’t sure if the solid portions above and below the broken rafters would show during the shingling process, I added lines with a stylus to mimic the pattern of intact rafters.
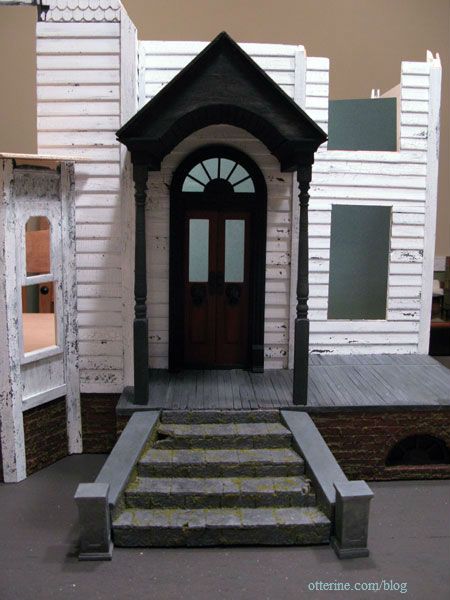
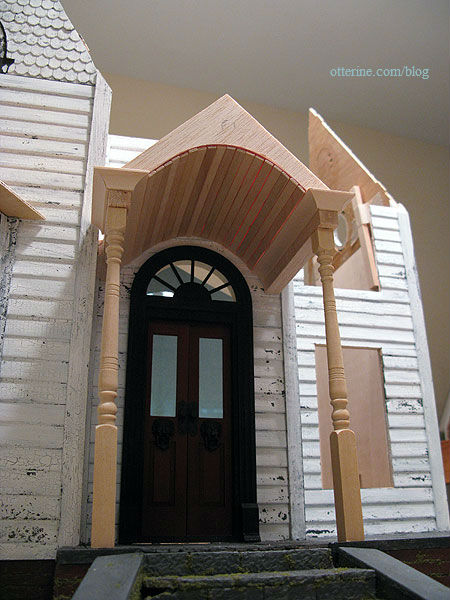
I love the line from the end of the steps to the point of the portico roof. It’s so much better than the original flat porch.
Categories: The Haunted Heritage
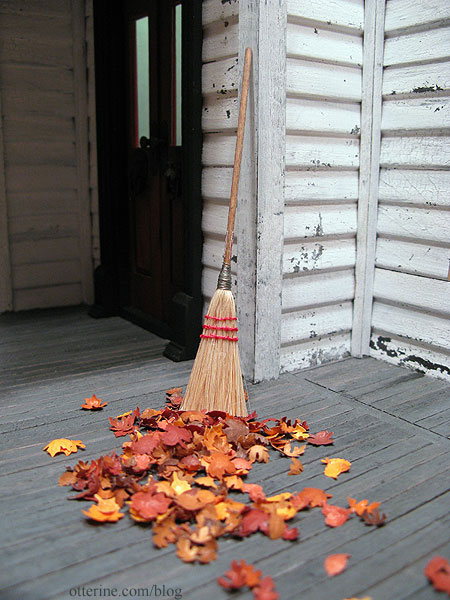
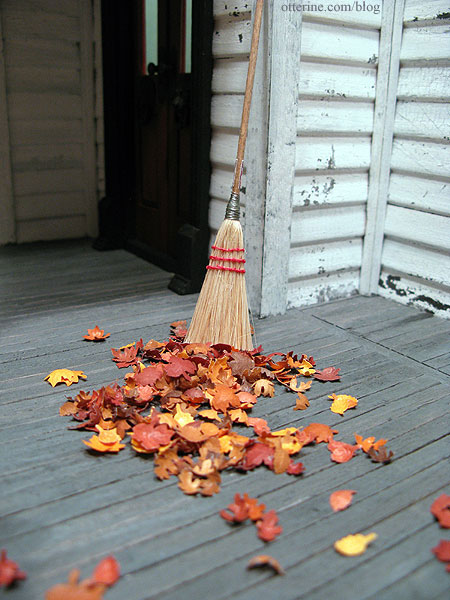
October 22, 2011 | 0 commentsLeaves!
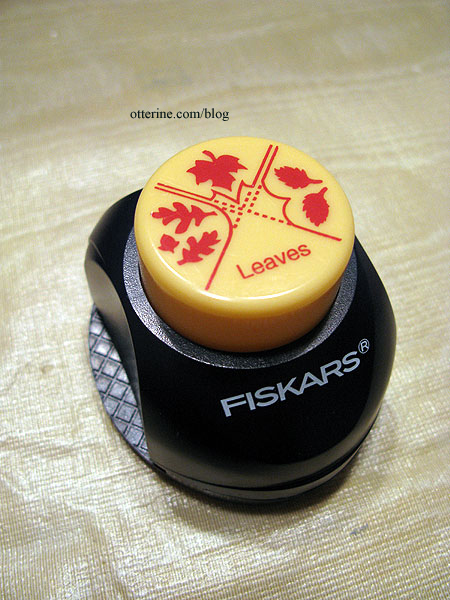
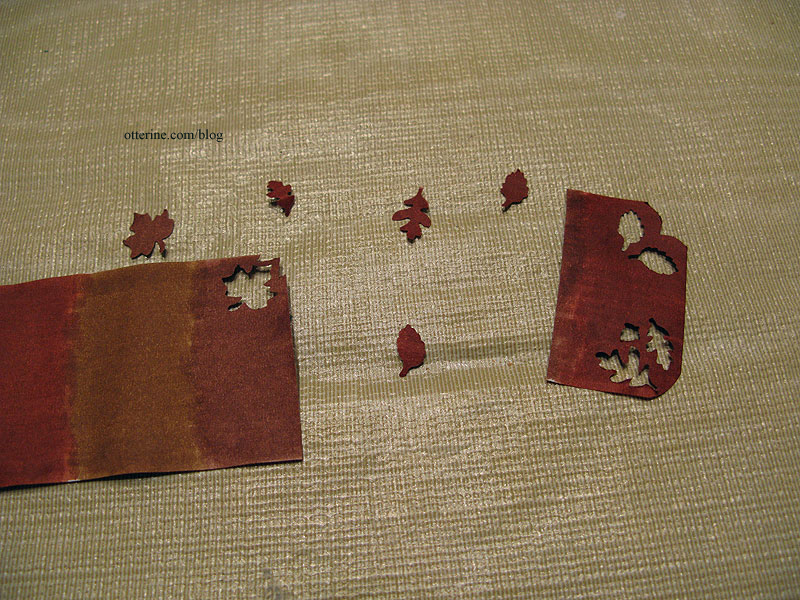
I tried another experiment, too. I want autumn leaves around in my scene, but I want them to be realistic. I ended up using regular printer paper, markers in various reds, browns, oranges and yellows, and a Fiskars leaf corner punch to get some great results.
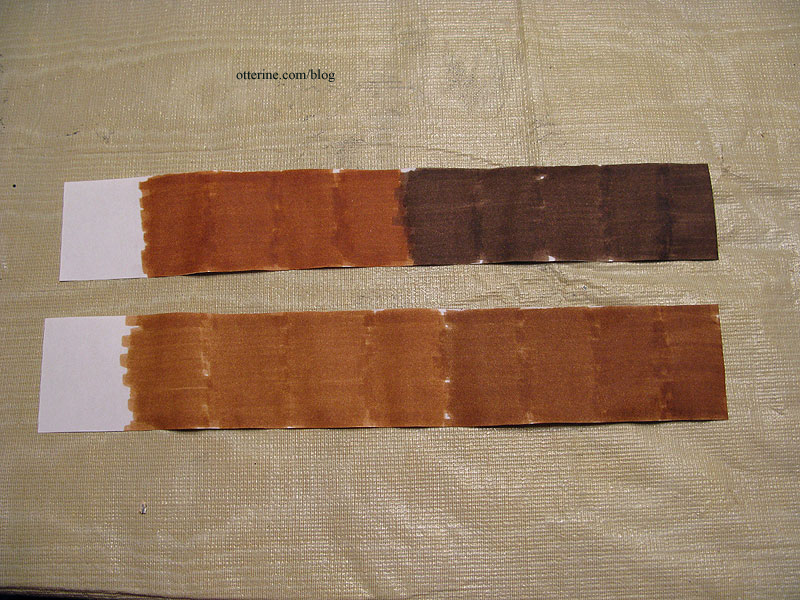
I cut strips of paper wide enough to give me two good corner punches. I colored the paper on both sides with the markers and let it dry almost completely. I then went over the paper a second time with the same color, again on both sides, and let it dry completely. I wanted a variety of colors as you can see. :]

I also made two strips of browns only.
Using all three leaf shapes, I punched out leaves from both corners at the end of the strip and then cut the paper above the holes left behind. I then punched the next section and so on. The markers had curled the paper a bit, which added some nice texture to the punched leaves.
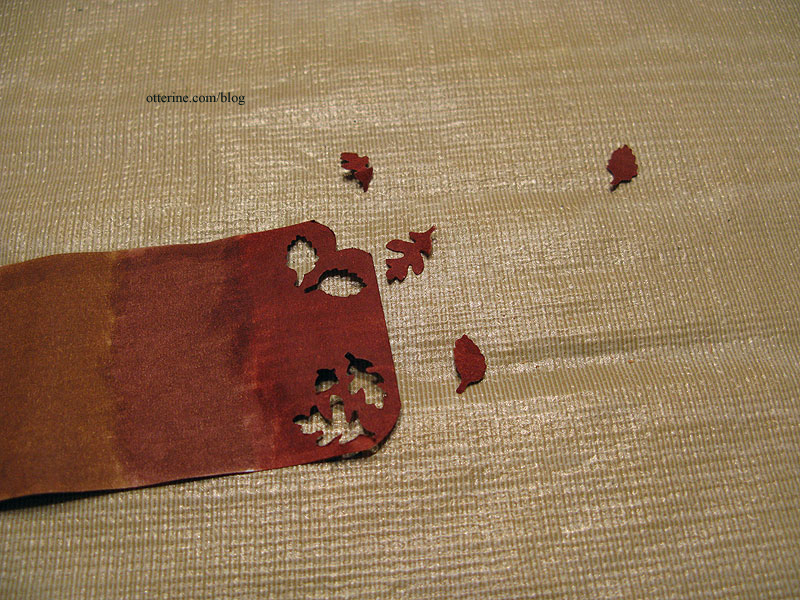
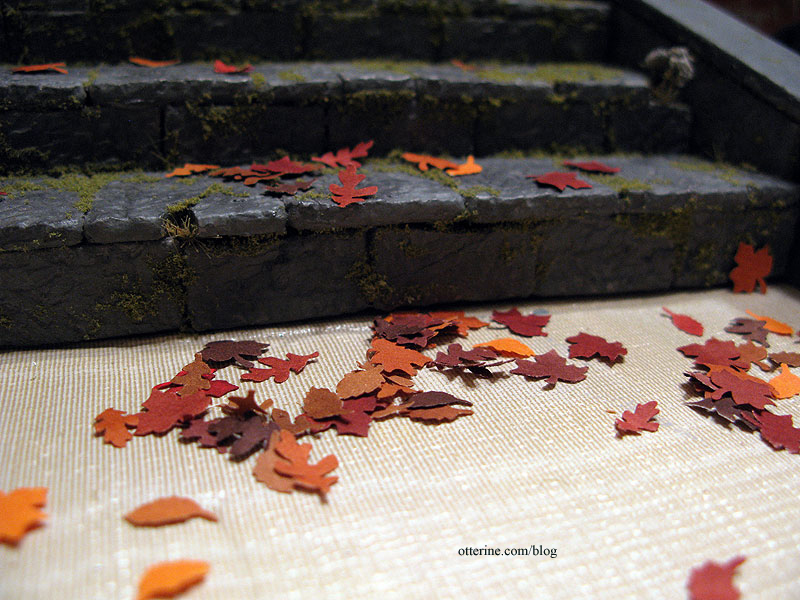
Nice little pile of leaves with good variegated color and thin texture. :D
I have more in store for these leaves to add to the realism, but it’s a good start!
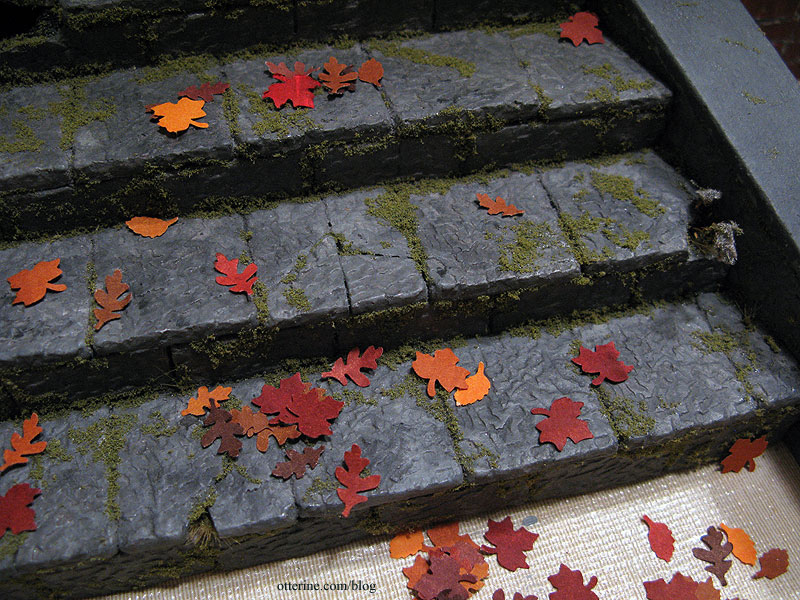
As you can see, I’ve been making all sorts of colors, some deep in hue and some faded. I absolutely love the way they turned out!

I used a ball stylus to create veins in the leaves. The stylus not only curled them but it made the top side shiny.
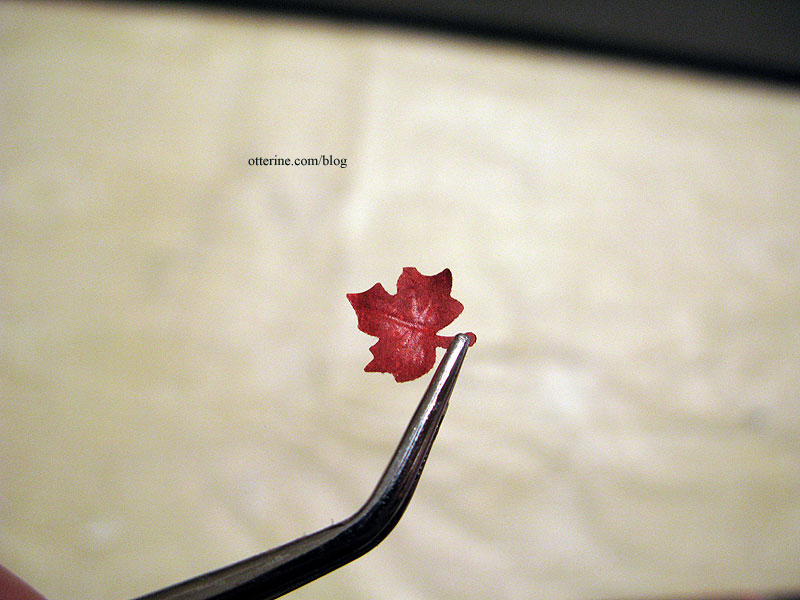
It also left raised veins on the backs.

The only thing that gives them away up close is the large stem. I could cut each one down and color it darker, but really? I have to draw the line of sanity somewhere. I’m already adding veins to each one individually.
Besides, they are very convincing when viewed as a group. :D
Categories: Flowers, plants, and trees, The Haunted Heritage
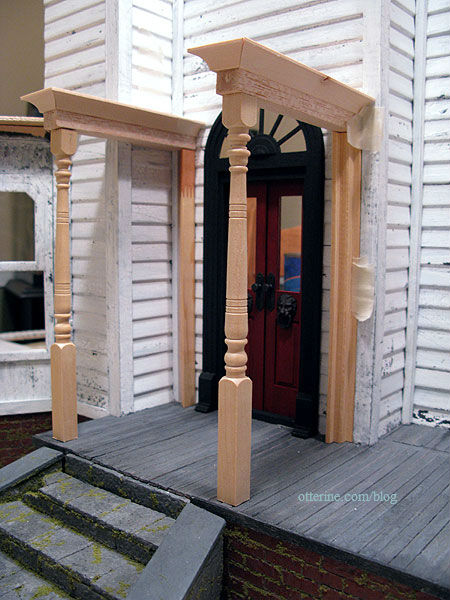
October 20, 2011 | 0 commentsHeritage – Portico, part 6
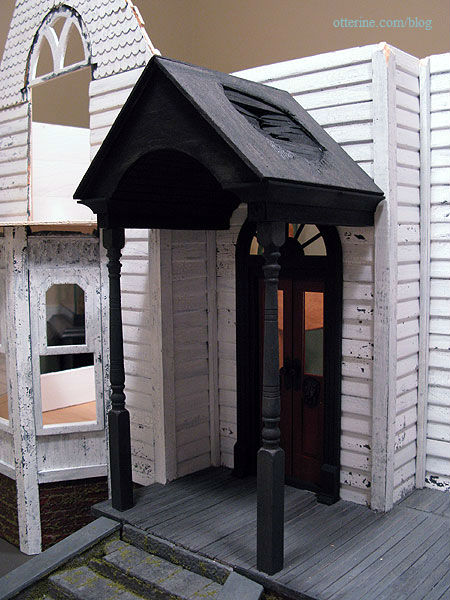
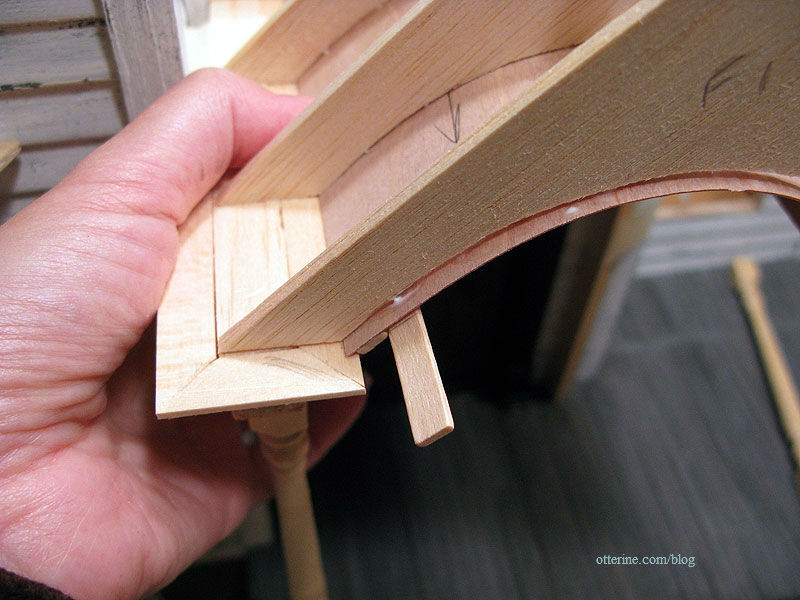
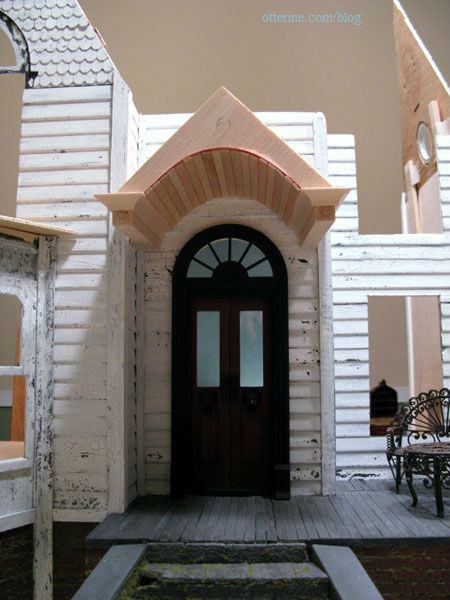
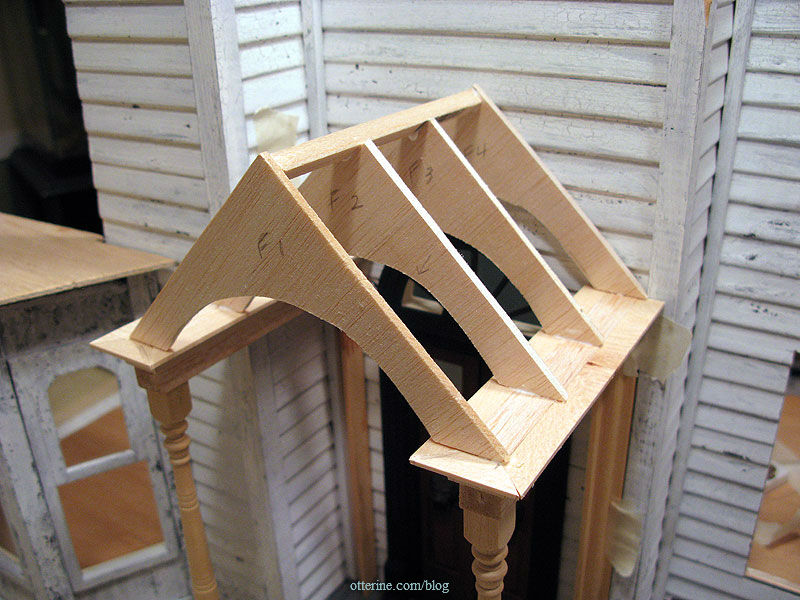
Continuing work on the portico. First, after raising the roof structure, I had to cut new front posts. Much better.
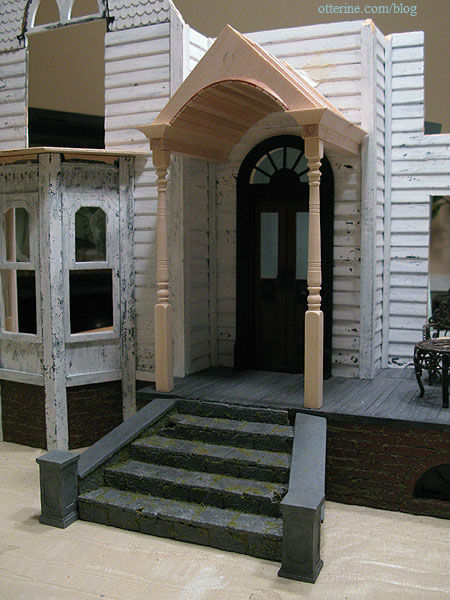
I then painted the structure black. Sinister, no? ;] It won’t stay this color. The black is merely the base layer.
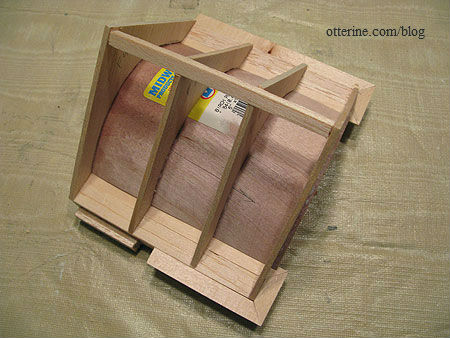
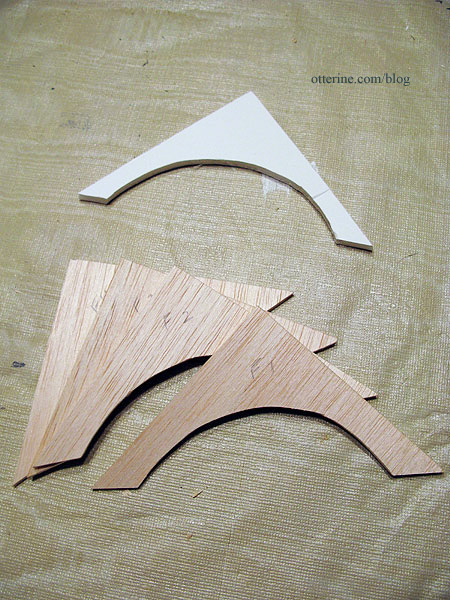
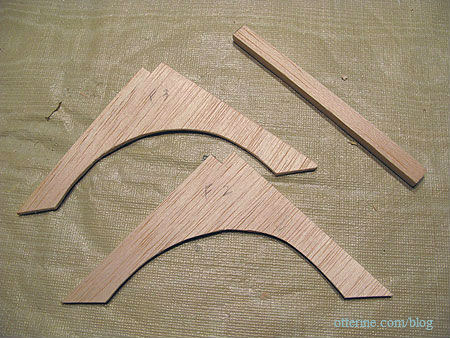
I wanted the roof of the portico to look worn and in need of some repair. I began by cutting pieces of 1/8″ thick balsa to build up the roof, one piece for each side. On the outer side of the portico, I added a section of rafters.
To get a deeper sag in the roof, I cut down the triangular roof supports. The second one broke as I was cutting but it snapped back in place.
I then broke the rafter pieces near the middle, splintering them and cutting them short on the ends to leave a gap. I left a little bit of breathing room between the rafters as well. Lyssa better get those raccoons ready!
For the side near the house, I left the first layer of wood untouched.
I added 1/8″ x 1/8″ strip wood to the frame to push the facade forward, matching the depth I had made with the ceiling boards.
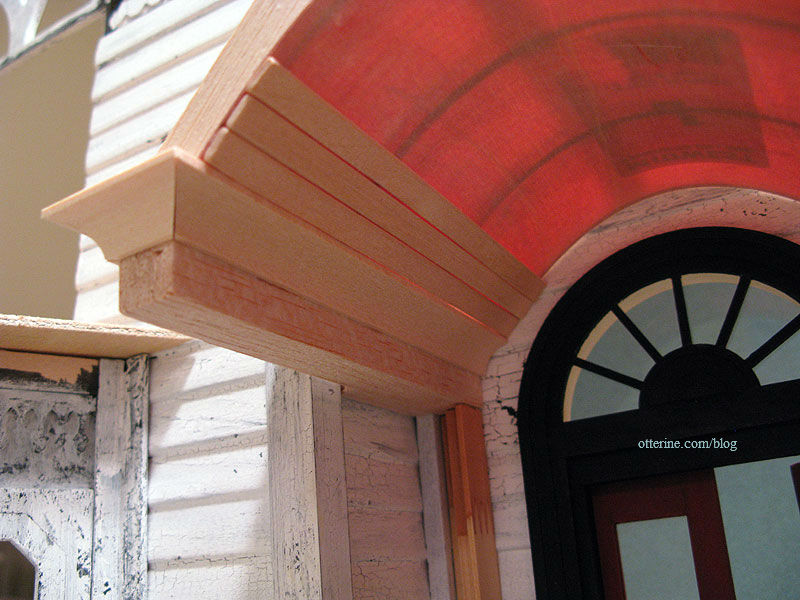
I then cut the facade piece for the front of the portico. I had planned to use bass wood but opted for 1/8″ thick balsa instead. It’s just easier for me to cut with hand tools and end up with a good curve. I was able to sand it smooth, and it’s only slightly off from the front curve of the ceiling boards.
On top of the facade, I added 1/16″ x 1/4″ strip wood to trim between the facade and the yet to be cut roof pieces.
If this all seems a bit random, it’s because it is. I really made things up as I went along. If something didn’t fit, I added or cut down. A lot of trial and error went into this portico.
For instance, once the upper trim was in place, there was a discrepancy between the level of the trim and that of the roof on the side of the house. To fix it, I added a bit of extra wood, but only at the bottom. This will cover the discrepancy on the outer edge while allowing for a sagging roof toward the top and back. I knew I wanted a sagging roof all along, but I had to figure out how to get there.

I think it’s turning out well so far. Upping the creep factor, just a smidgen.
Categories: The Haunted Heritage
October 19, 2011 | 0 commentsHeritage – Portico, part 5
Continuing work on the portico. Once the glued had dried on my arch supports, I lined the arch with 1/64″ veneer. This evened out the arch and gave me a good base for gluing the ceiling boards.
I did glue the veneer in place but let the natural arch that developed from bending the wood serve as the final shape. As my arch supports were not cut evenly, this actually improved matters. (This was prior to purchasing a scroll saw.)
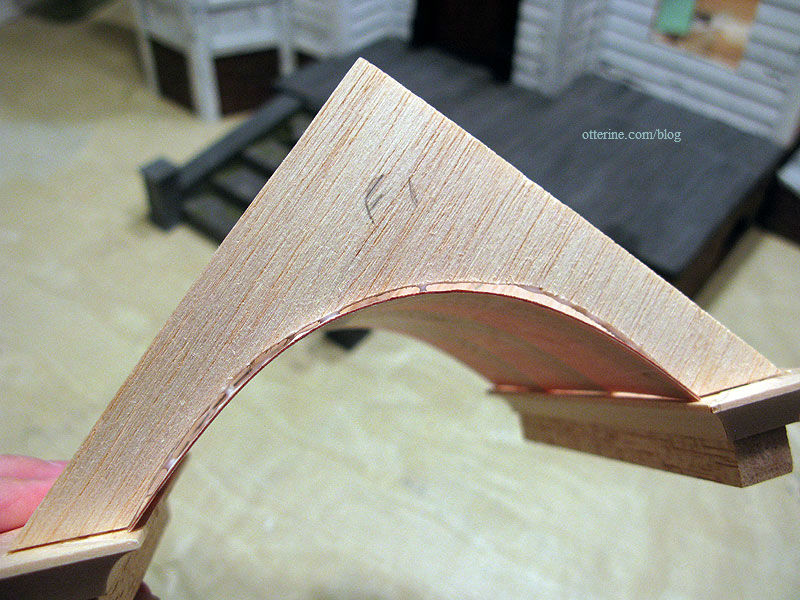
I tried to remove the sticker, but it was on firm…so I just turned it to the inside. Probably wouldn’t have shown under the boards anyway but I didn’t want to take the chance.
The ceiling boards are skinny craft sticks, just like the porch floor boards. This time, I did weed out any warped or heavily damaged ones. As it turned out, an even number of whole sticks fit perfectly in the arch. I didn’t need to cut any lengthwise.
I taped the support structure to the house and measured each board in order, one at a time. I knew they fit in this particular order, so that’s what I followed. I had to measure one at a time since there was a variation in depth needed due to the house siding.
Since I was working in place with the boards upside down, I used Aleene’s Fast Grab tacky glue.
Some light shows through, but that will all disappear once the rooftop is on.
The arch is a little flat on one side especially and doesn’t exactly mimic the door arch, but that’s most likely the result of some poor measuring on my part. Ah, well, I still like it and think I did a pretty good job for this being my first portico.
With the sun porch railing in place, it’s finally starting to look like something!
Update: I raised the whole thing to make the imperfections in the arch less obvious, and it looks like that helps. It was definitely crowding the door. I just need to cut new support posts.
Categories: The Haunted Heritage
October 15, 2011 | 0 commentsHeritage – Portico, part 4
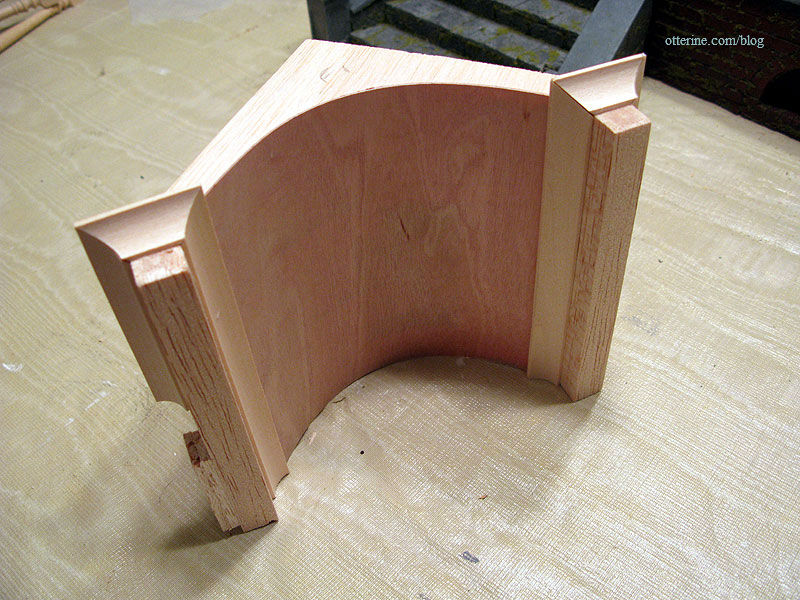
Continuing work on the portico. Using my foam core board mockup pieces as a general guide, I cut the inner arch supports from 1/8″ thick balsa sheets. I had to drag out my compass and circle template guides. Whaddya mean I can’t just eyeball it?!! Ah, well, old house or not, I wanted it to resemble a halfway decent structure. ;D
They did not end up uniform or perfect in any way, but I figured they would work well enough. I will make the facade out of 1/16″ bass wood, but I will wait until the end since I will need to add a bit to the inner curve to cover the wood that lines the interior ceiling.
I cut out two notches from the tops of the middle two arches to leave room for a front to back roof support.
I cut a couple of lengths from some broken connectors the same height as the front veranda posts. These kept the back of the main supports the same height as the front while I assembled the top portion of the portico. The veranda posts were not glued to the main supports at this time.
I then glued the arches to the tops of the main supports, spacing them out along the way.
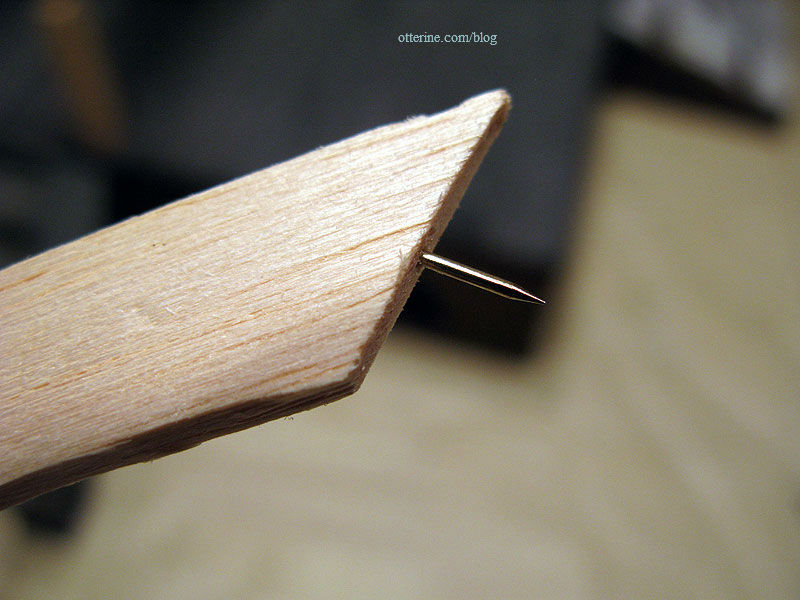
Just to add a bit of stability, I used some headless pins to secure the pieces of balsa.
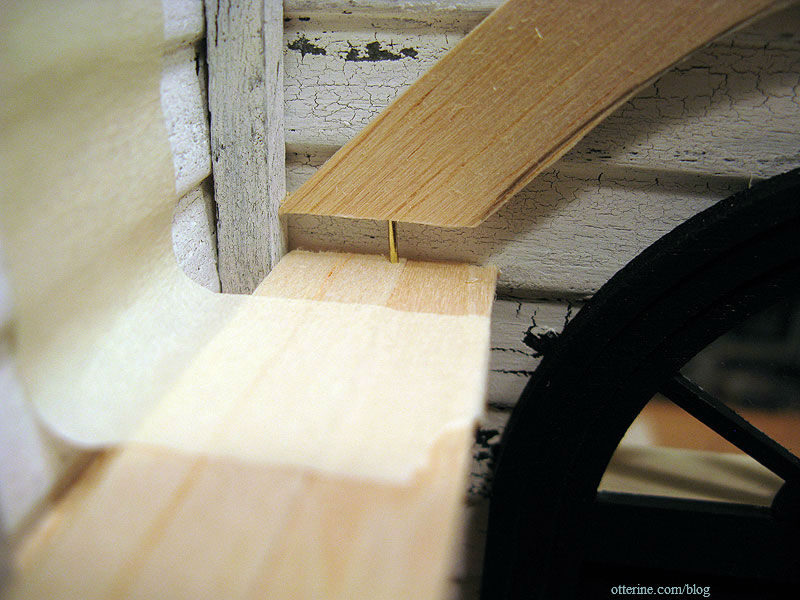
I added the front to back roof support to keep the whole thing stable at the top.
This is nowhere near square, but neither is the rest of the house! I don’t know if you can build this kit in any semblance of being square and true. Rickety old house on the hill!
Categories: The Haunted Heritage
October 14, 2011 | 0 comments


NOTE: All content on otterine.com is copyrighted and may not be reproduced in part or in whole. It takes a lot of time and effort to write and photograph for my blog. Please ask permission before reproducing any of my content. Please click for copyright notice and Pinterest use.


