

A little Halloween humor
There was a challenge posted on Very Little Humor in which a scene had to be created with mini artist models. I had bought two of these earlier this year to help me with making furniture.
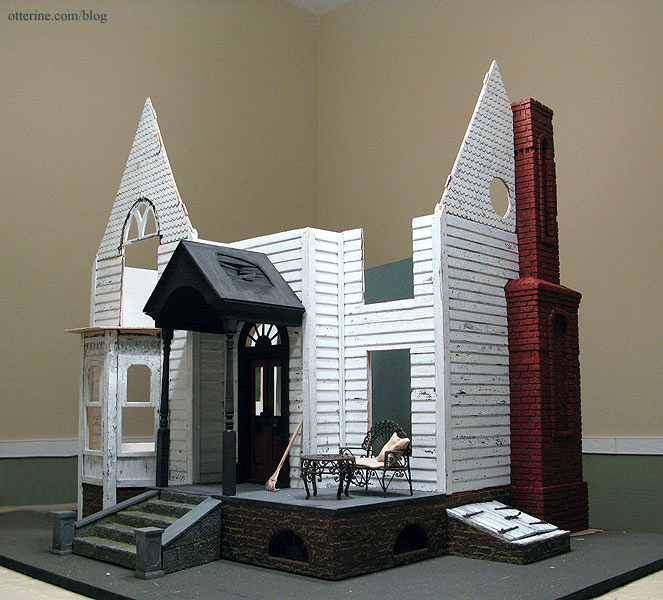
Here’s my mini scene. Since I’ve been working on the Heritage, I decided to set them up with the house while it was in dry fit. I leave the interpretation of the events up to your own imagination! :D
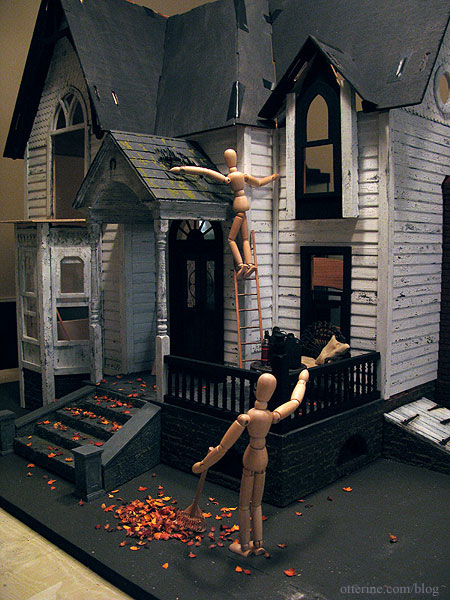
Categories: The Haunted Heritage
October 31, 2011 | 0 commentsHeritage – Portico, part 8
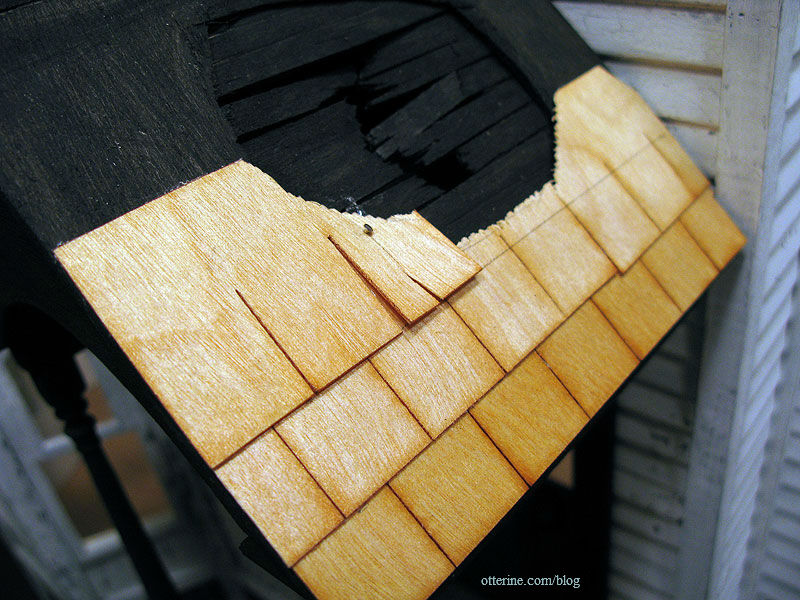
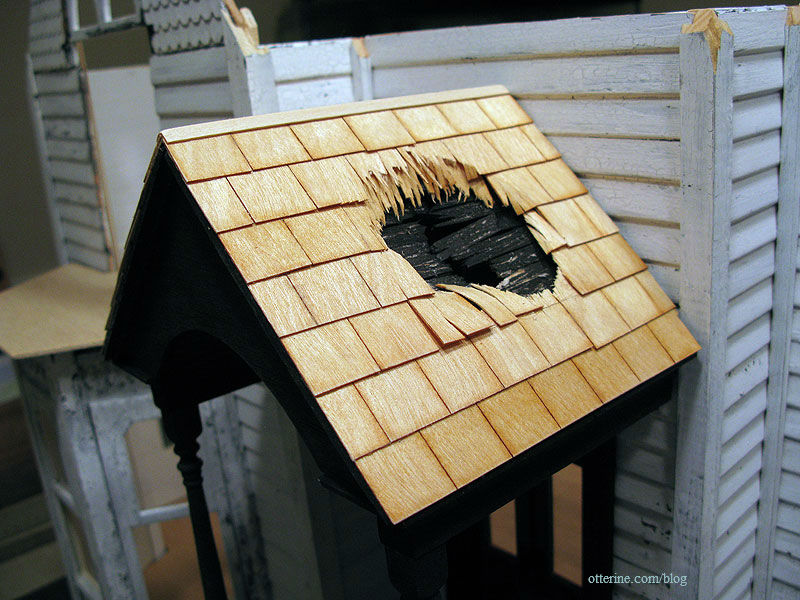
Completing work on the portico. I used Greenleaf speed shingles on the portico roof, this time in full scale. They are easily cut with scissors and bend with a bit of coaxing. I opted for Quick Grip glue since it worked so well on the half scale speed shingles on the gables.
To hold some of the shape, I stuck dressmaker’s pins through the shingles and into the soft balsa. I’ll make sure to hide any of these extra supports with the shingles in the row above them.
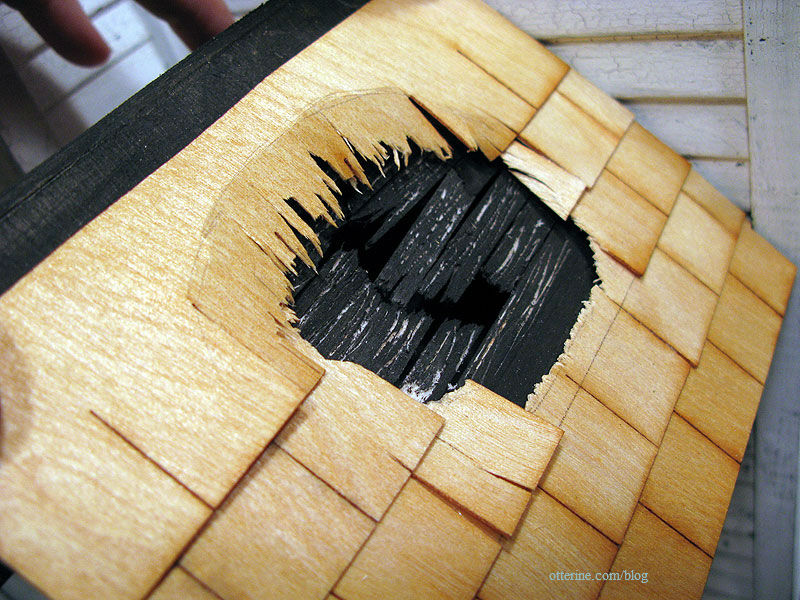
Around the hole, I shredded the edges with scissors and then broke excess pieces off with my fingers. I glued a few loose pieces around the bottom of the hole.
The house side is rather plain at the moment. The ridge cap is corner trim.
That must have been a rather large tree branch!
I painted the shingles black to start, stippled on with a stencil brush for just a bit of texture.
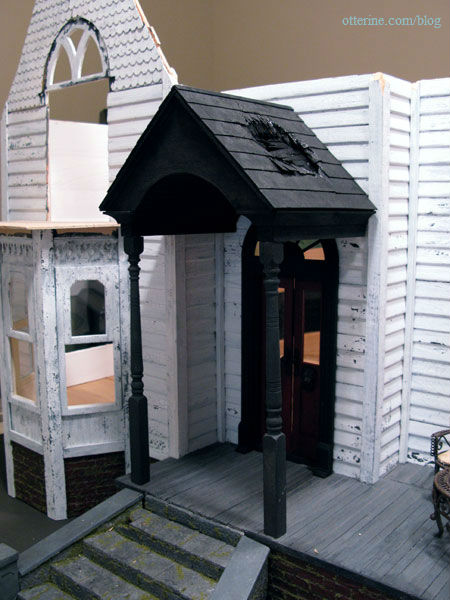
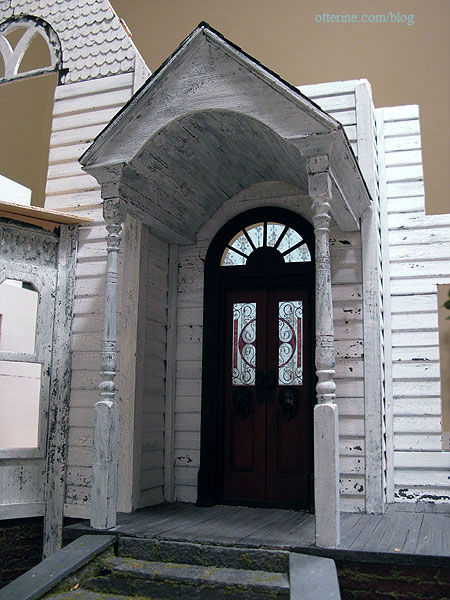
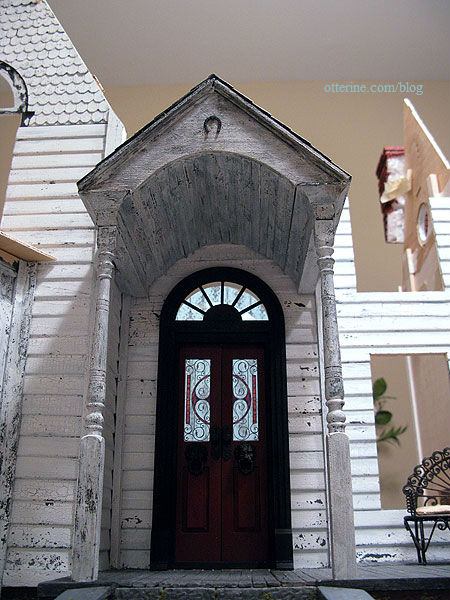
After this dried, I added the crackle medium to the main portico structure followed by white paint. It brightened up the entryway and put the focus back on the front door.
I aged the portico roof with various washes and then added some moss.
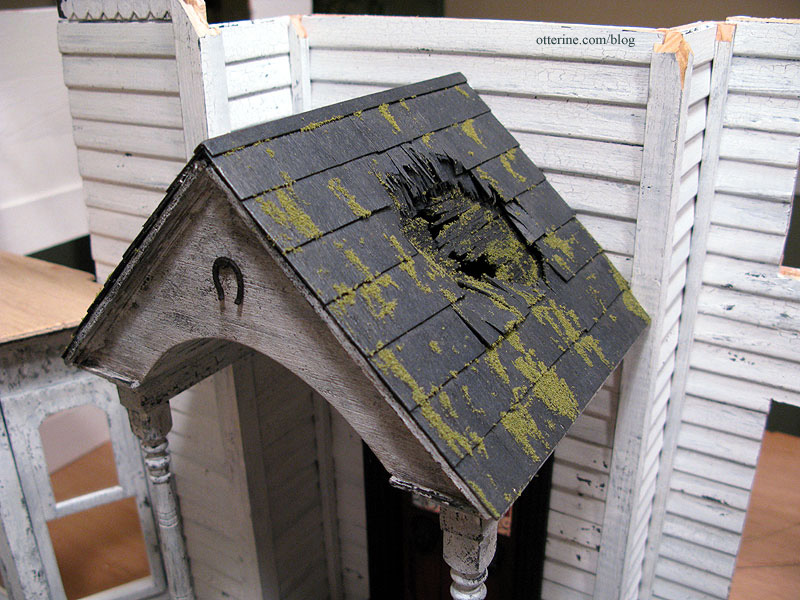
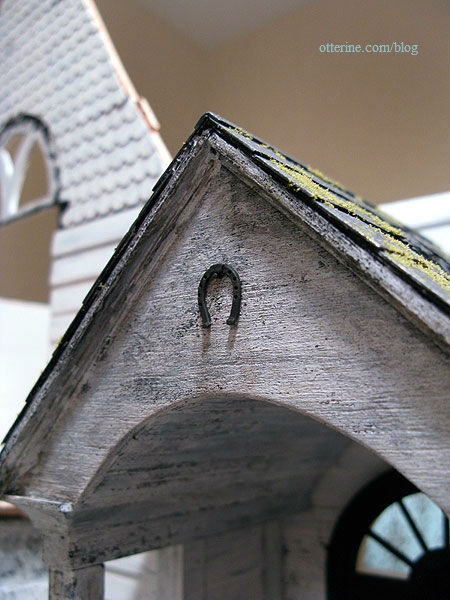
In a nod to my childhood farmhouse, I hung an aged horseshoe on a nail on the portico facade. Do you think it will bring you good luck? ;]
Just to clarify since a couple of people mentioned the upside down horseshoe was letting all the luck run out, I believe the horseshoe has an unlimited supply of good luck and it is hung upside down to shower you with this good luck as you pass under it. Chalk it up to my generally optimistic outlook. :D
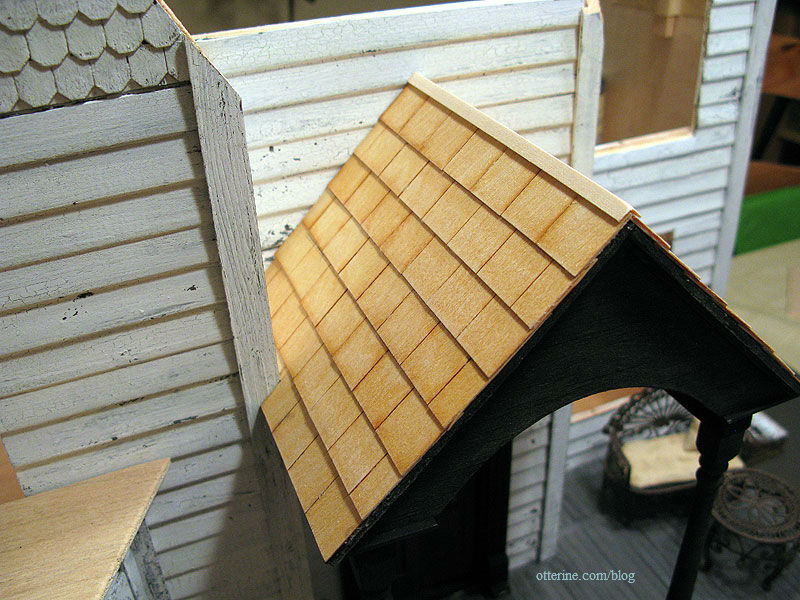
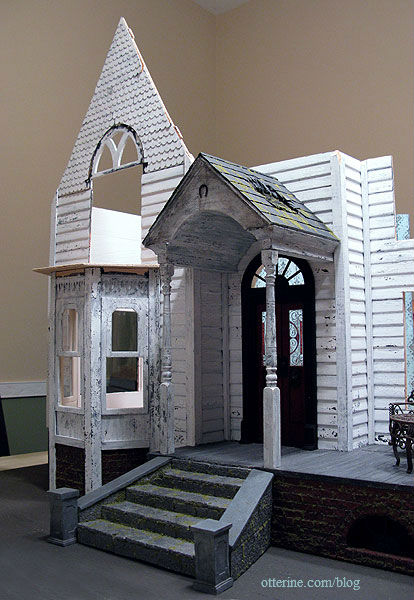
Once the entire portico assembly was dry, it was finally time to attach it to the house.
The portico tips forward, suggesting whatever caused the damage might eventually lead to its falling off the house completely.
Raccoon peeking out or not, I love the way the portico turned out.
Categories: The Haunted Heritage
October 30, 2011 | 0 commentsHaunted Heritage chimney, part 5
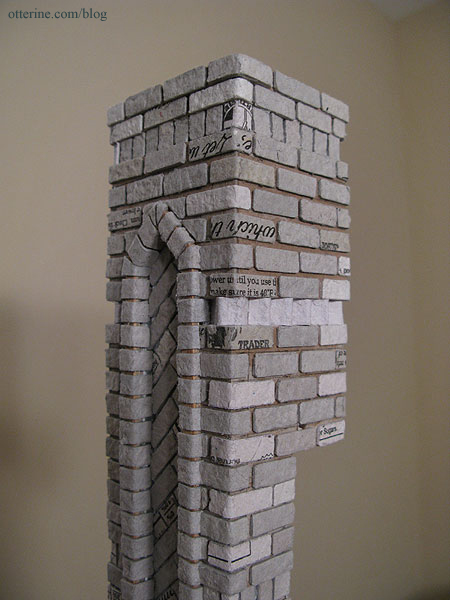
Continuing work on the chimney. I finished bricking the flat surfaces of the middle section and then had to address the row of angled bricks. The easiest way I figured I could manage the illusion of three-dimensional bricks stacked on an angle was with strip wood covered with egg carton on the exposed edge.
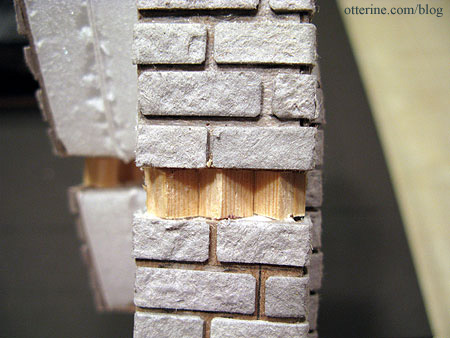
I used 1/4″ strip wood cut into pieces roughly 5/16″ tall. I glued these individual blocks into place with the corner pointing outward. I set them in just a bit to leave room for the egg carton and to offset them from the face of the brick, just in case I didn’t get them lined up perfectly, it wouldn’t show as much.
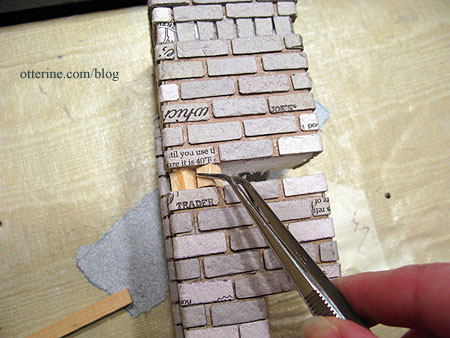
I was able to get the sides lined up evenly front to back, but there are gaps in the front and one in the back. I plan to either cut the faces long for these or put in straight half-bricks, whichever looks best.
left side, even front to back 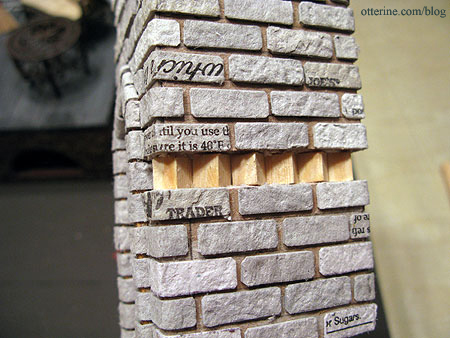
right side, even front to back 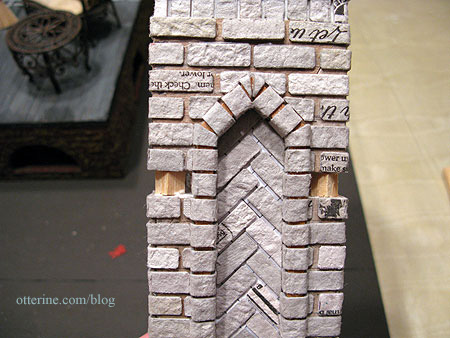
front, two gaps on either side of the herringbone portion 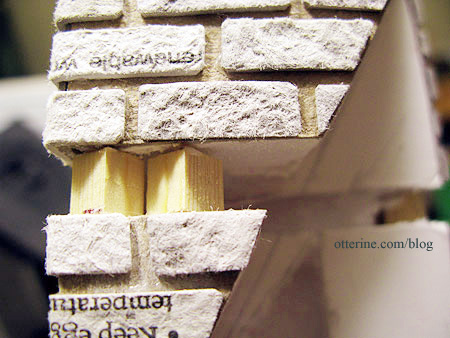
back, gap toward the roof Once the glue holding these dries completely, I’ll add the egg carton faces. Right now, I think this just might work. :D
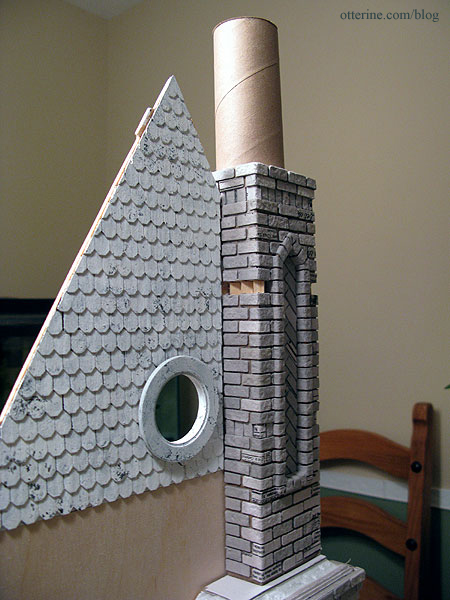
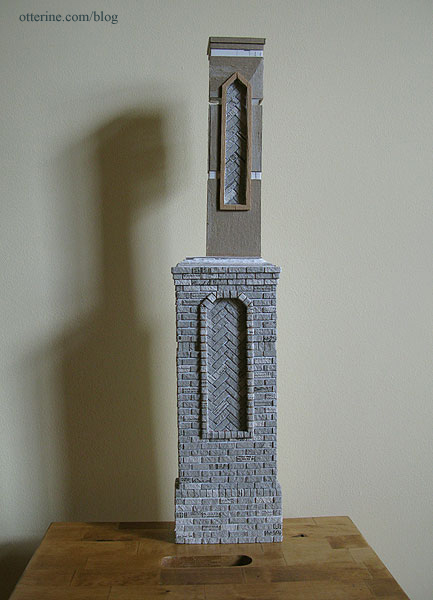
Yep, that’s a toilet paper tube on top. It might be just a little short, so I’ll likely end up using a paper towel tube cut down to the proper size.
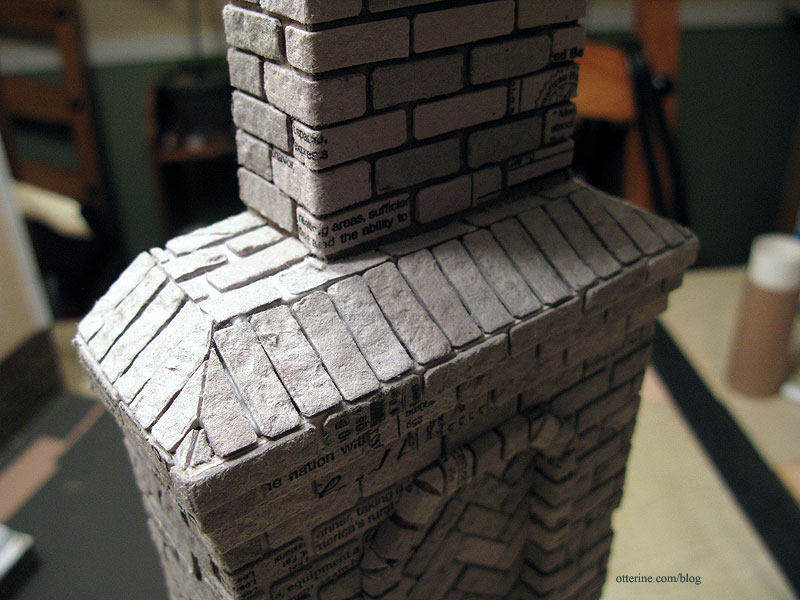
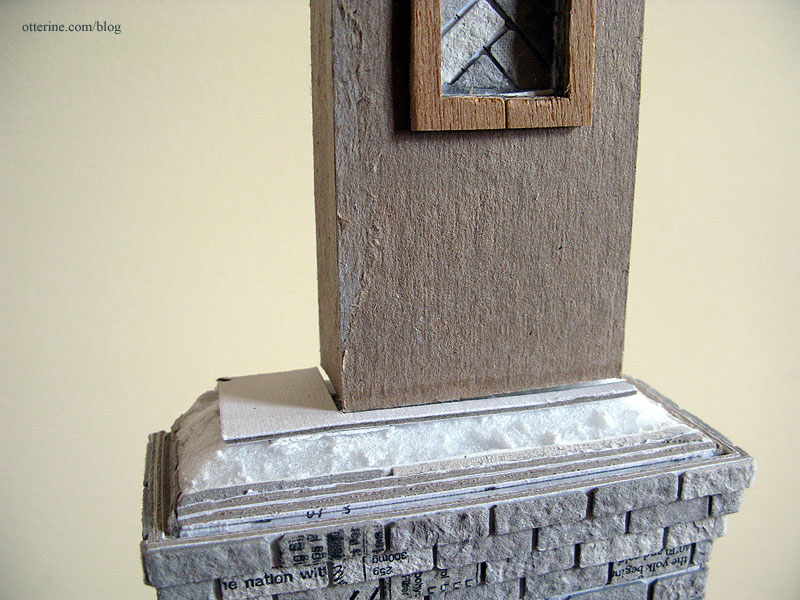
To finish the angled portion between the lower and middle portions of the chimney, I first added a row of vertical bricks all around. For this entire portion, I used a lot of glue to make sure the assembly remained secure. I finished the very top with flat bricks. The gap between the two sections seems a bit large now but once paint and grout are added this will be much less obvious.
I added the egg carton material to the angled wood supports.
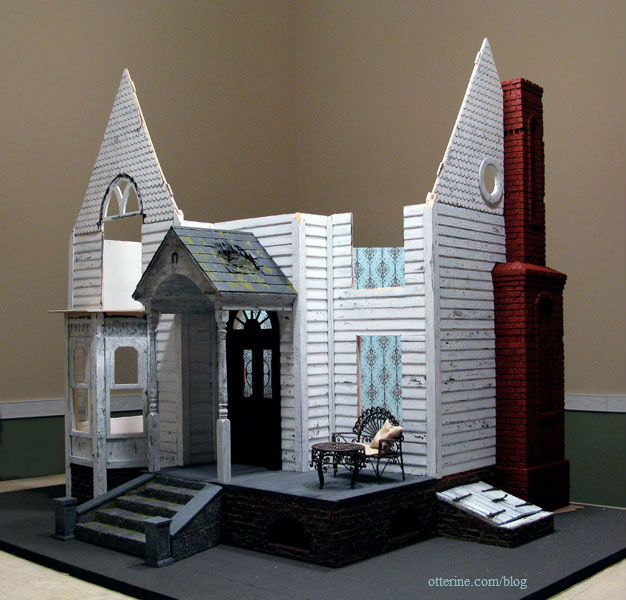
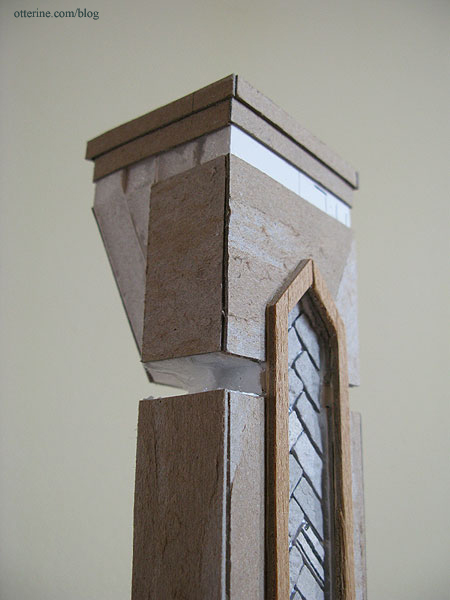
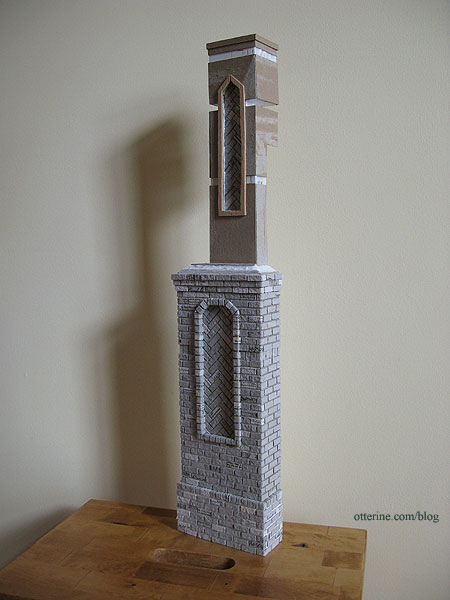
I painted the chimney Liquitex Burnt Sienna, even though I still have the topper to complete. Ok, the creep factor on this house just went through the roof! :O
With the paint added, the dimensional bricks look a lot more realistic. I’m glad I took the time to figure out how to make them work.
It’s starting to come together! :D
Categories: The Haunted Heritage
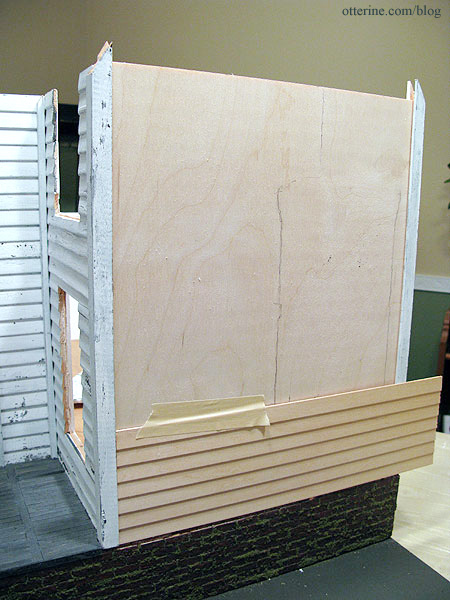
October 29, 2011 | 0 commentsReplacement side wall and siding
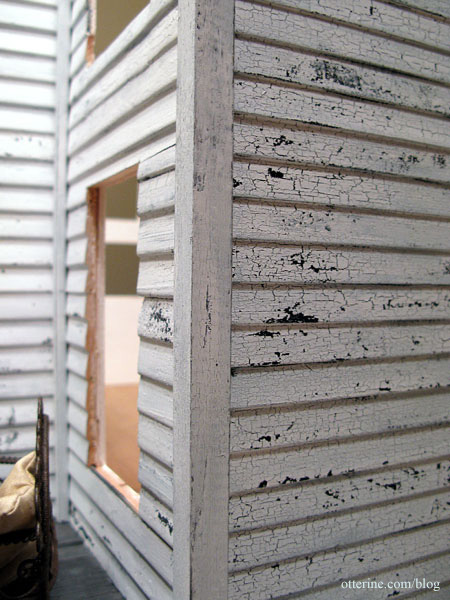
In removing the side bay window to make room for the new chimney, I had to rebuild the side of the house from scratch. I used a 1/8″ plywood base and cut 1/2″ lap Houseworks siding for the outer layer. This isn’t exactly the same as the Dura-Craft siding pieces, but I think it is close enough.
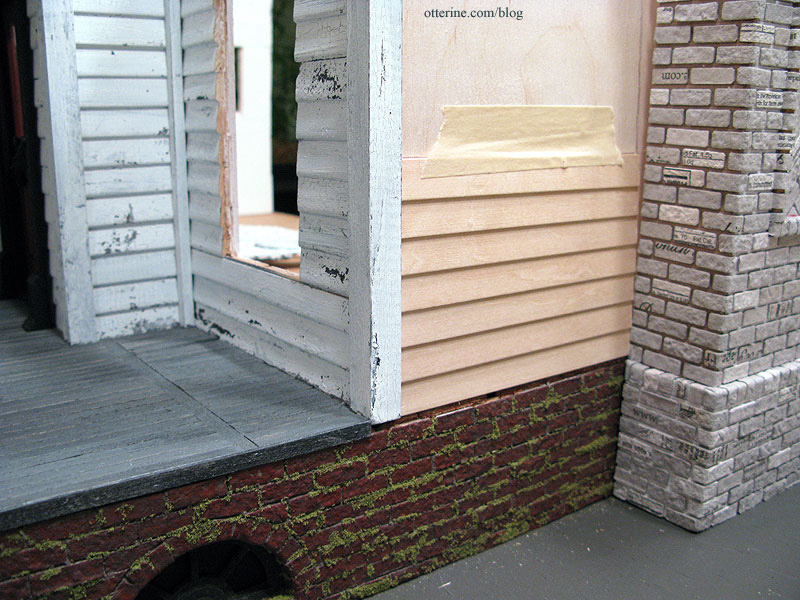
The difference is somewhat disguised by the fact that there is a connector separating the front and side walls. There will also be the rusted furniture on the front porch and weathered painting that should also draw the eye away from any discrepancies. Besides, perhaps a tree fell on the house once and the siding had to be replaced. :D
The wall connectors are made to fit the thicker Dura-Craft siding pieces, and using 1/8″ thick plywood with the Houseworks siding was just a little too thick for the openings. I glued a shim to either side of the plywood wall to make up the difference and to create a snug fit with the connectors.
This would allow the siding pieces to sit on top of the plywood right against the connectors.
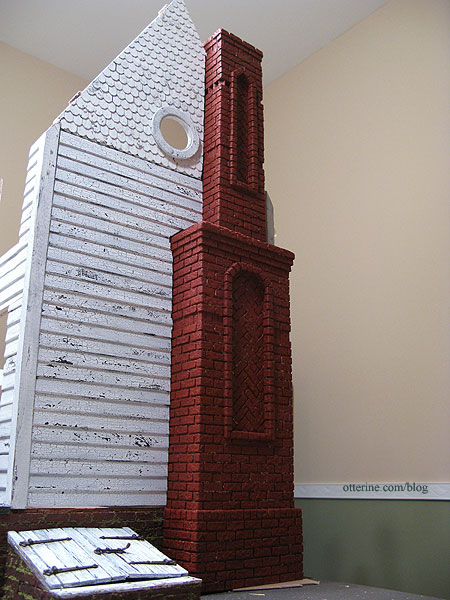
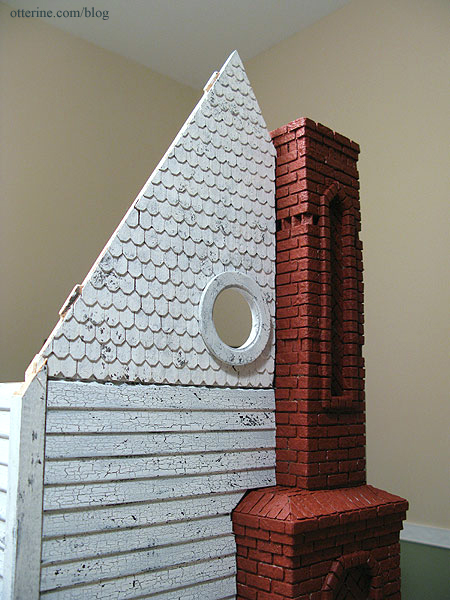
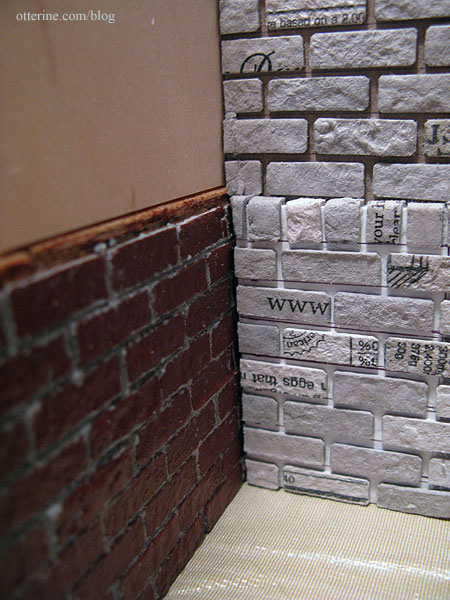
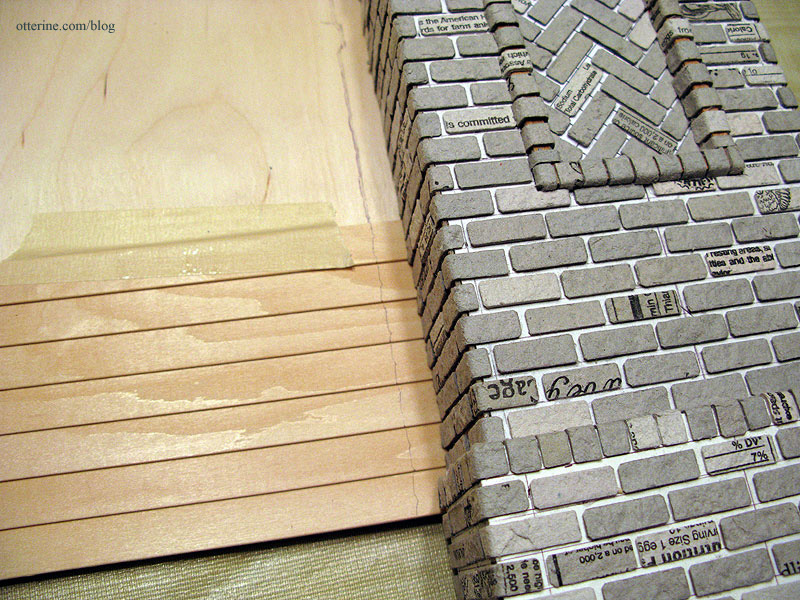
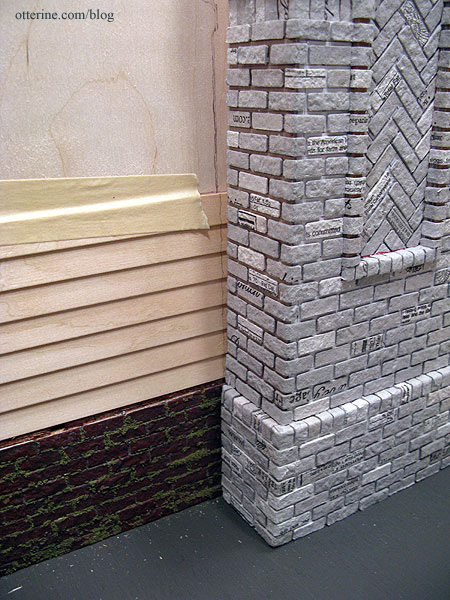
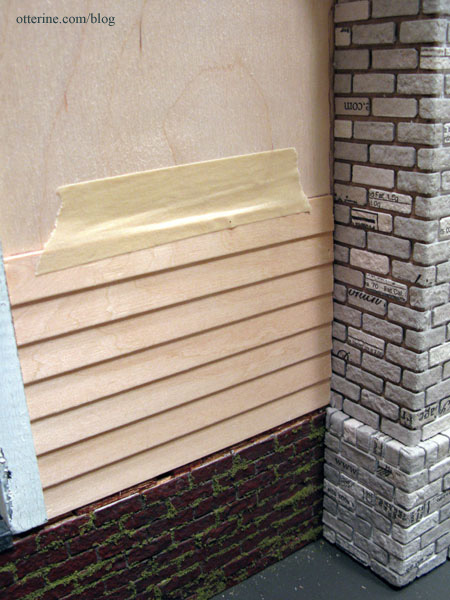
Siding should run up to the edge of the chimney, not behind it. So, I had to shave about 1/8″ off the back of the chimney at the foundation height.
Scary to take a knife to my bricked chimney? Without a doubt, but it worked. Now, the chimney sits just over the foundation. It will attach to the plywood base wall, and the siding will conform to its edges.
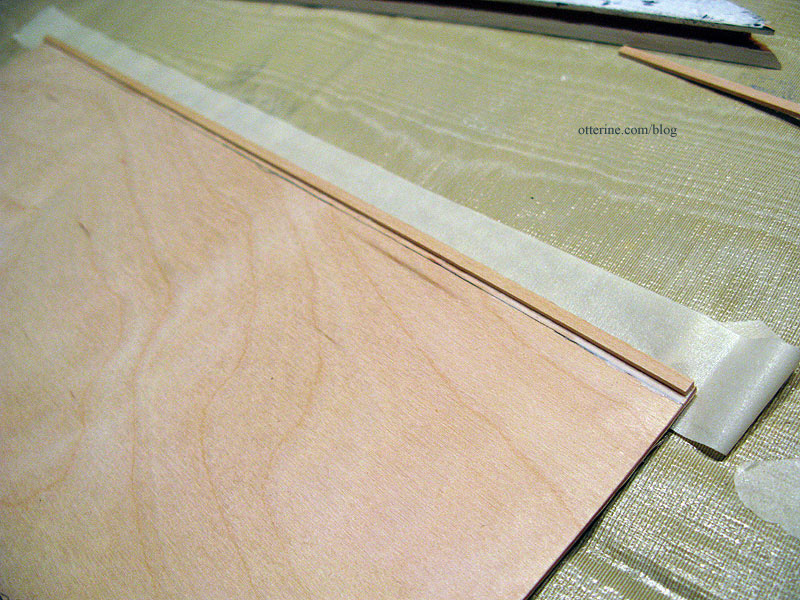
For the siding, I first taped the lower sheet to the side of the house. This wall is still removable to make it easier to work with. As you can see I already had traced around the chimney onto the plywood to help with placement.
I traced around the chimney while the board was flat, using the outline drawn on the plywood base as a guide.
I then propped the wall back up to double check the tracing, to make sure I had the chimney level.
After cutting along the line, I taped the new piece of siding onto the wall and checked the fit again.
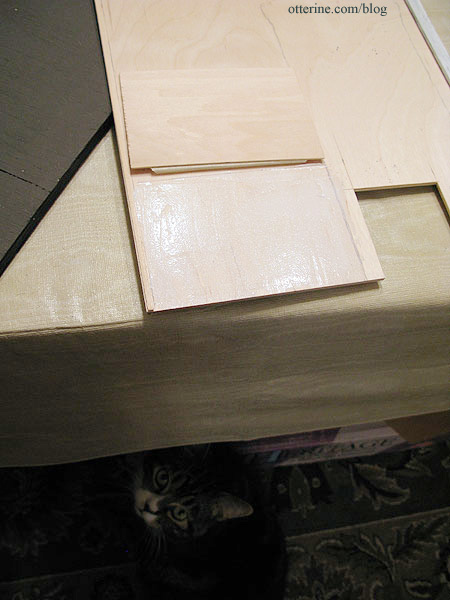
I glued this piece in place before moving onto the next. As I work on the replacement side wall and its new siding, Jasper has come to offer his assistance. :D
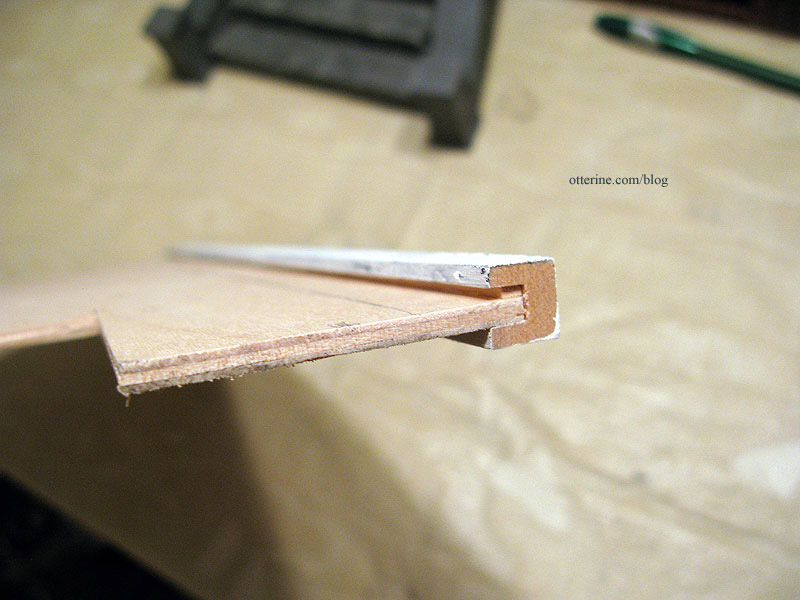
The next siding piece up has a notch cut for where the brick indents a bit on the chimney. I didn’t think to do this for the shingled gable, so I’ll likely have to patch those areas.
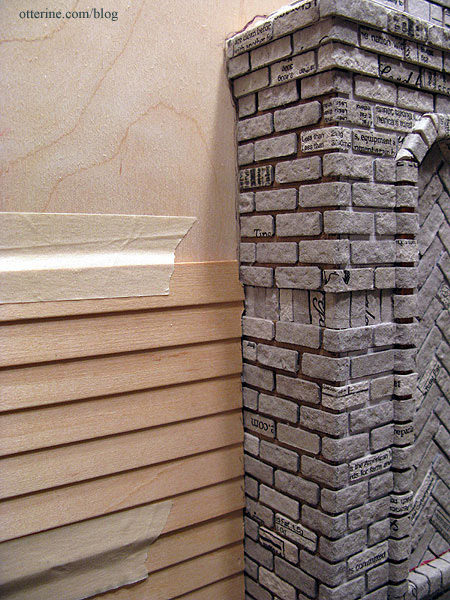
In order to finish up with the last two pieces of siding, I had to glue the lower and middle chimney sections together and will need to finish the transition between the two before permanently gluing these siding pieces in place. I went ahead and cut them, knowing if I had to adjust the fit at all, I would be cutting more away instead of needing to add. For now, the upper portion of the siding is taped in place.
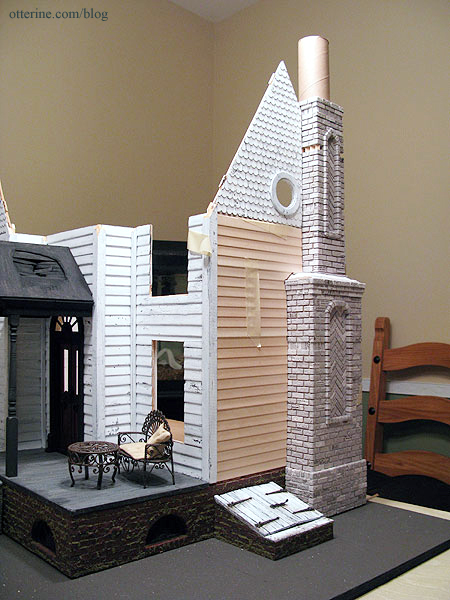
And, here is the wall with all of the siding to the left of the chimney in place. Not too many gaps. Paint should help a bit with that and what’s a creepy old chimney without some creeping old vines? Moss and ivy can always hide the more obvious flaws.
I’ll be filling in the siding and gable shingles to the right of the chimney after painting the chimney since the paint, grouting and sealing process might expand the egg carton bricks just enough to make the fit too tight. (You can see that finishing here.)
Update: I worked on the chimney portions I needed to complete in order to finish the siding. I was then able to finish cutting the siding pieces in order to glue them onto the replacement side wall and finished the wall by crackling white paint over a black under layer. As I had hoped, the mismatched siding now blends in well with the rest of the house.
Categories: The Haunted Heritage
October 29, 2011 | 0 commentsHaunted Heritage chimney, part 4
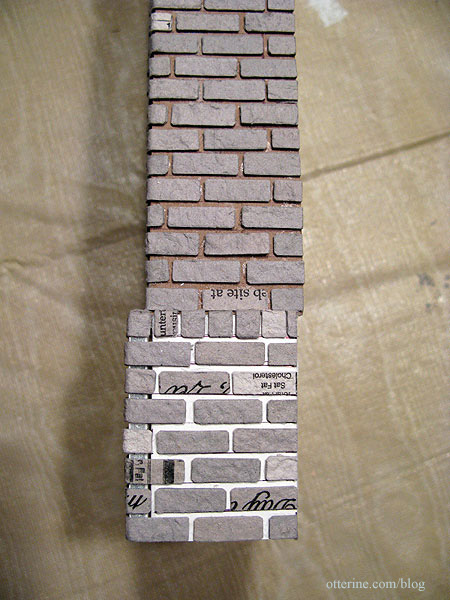
Continuing work on the chimney. I finished up the right side of the lower chimney previously but before continuing on the angled top portion of the lower section, I had to work on the middle section. The top of the lower section will be made to fit the bottom of the middle section.
I applied cardboard layers to build up the dimensional surface and completed the smaller herringbone pattern for this middle piece.
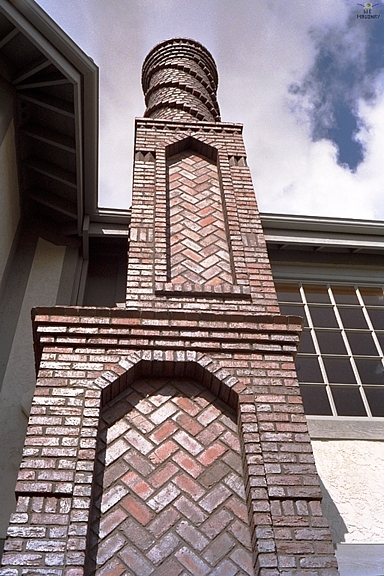
Here’s the middle section of the original W E Masonry chimney as a reminder.
There were a few different challenges to this section, including a thinner herringbone patterned section as well as two rows of bricks set at an angle: one continuing on either side of the herringbone frame and one above it. These would be somewhat easy to do with actual bricks but not with two-dimensional egg carton bricks. I decided to replace the one on top with a plain vertical row instead of the angled bricks mainly because this row hits right at the roof line and I didn’t want to risk the stability of the top.
I gouged out the row on either side of the herringbone pattern and will fill this with the angled bricks later. This portion has wall support behind it and, once filled with the angled bricks, will be perfectly stable.
I added a flat piece of cardboard on top of the lower portion to even out the surface. The middle portion is still separate from the bottom portion. I’ll be gluing them together shortly but need to brace them against the outer house wall as the glue dries to ensure a good fit with the house.
Now I am ready to brick this middle portion, then will come the topper.
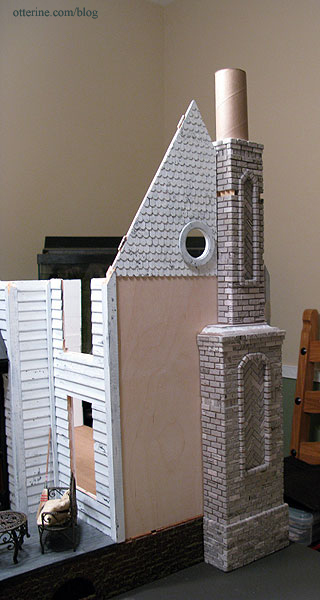
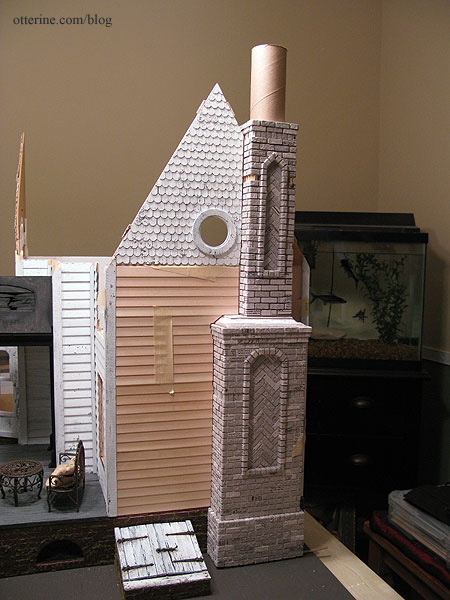
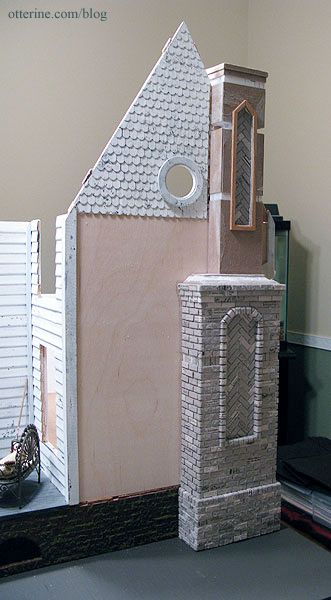
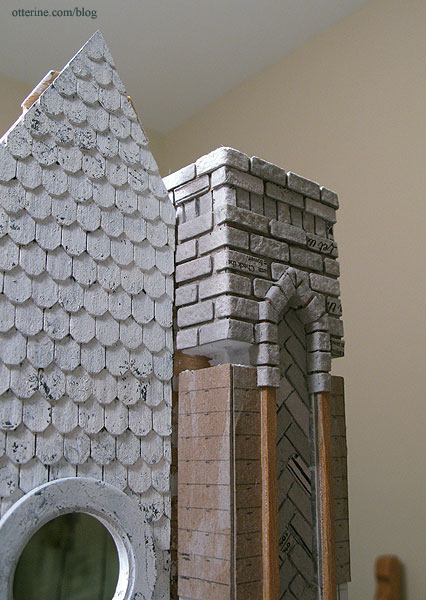
Here’s the chimney next to the house. I think it suits the house perfectly. :D
I’ve started bricking the top of the middle section. This small amount represents a few hours worth of work. Once I get through this portion, the rest should be much more straightforward.
Categories: The Haunted Heritage
October 25, 2011 | 0 comments


NOTE: All content on otterine.com is copyrighted and may not be reproduced in part or in whole. It takes a lot of time and effort to write and photograph for my blog. Please ask permission before reproducing any of my content. Please click for copyright notice and Pinterest use.


