

Foyer to kitchen pocket door, part 3
Continuing work on the pocket door. The lever I built to open and close the pocket door is great and all for my omnipotent hands, but the mini residents need to be able to operate the door as well. ;] Putting a doorknob on it doesn’t really work since it would keep hitting the door frame. What I needed was pocket door hardware.
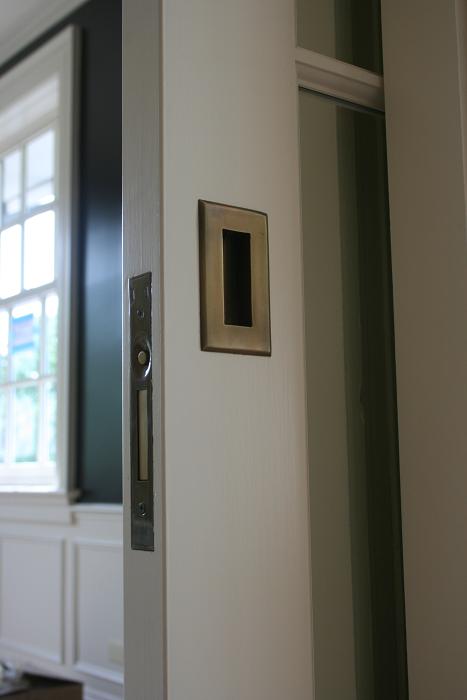
image from Wilmette Hardware Dollhouse hardware is limited to begin with, so finding scale replicas was out of the question. I liked Kathie’s idea of using paper printouts of beautiful vintage hardware, but I had another idea. Enter two 1:24 scale letter boxes, one for each side of the door. :D This is not the first time I’ve used half scale items in my full scale builds, and it won’t be the last! A special thanks to Keli for helping me track them down at The Dolls House Mall. They are a very good approximation of the original.
I’m not usually fond of brass, but considering this is a vintage house it didn’t bother me so much.
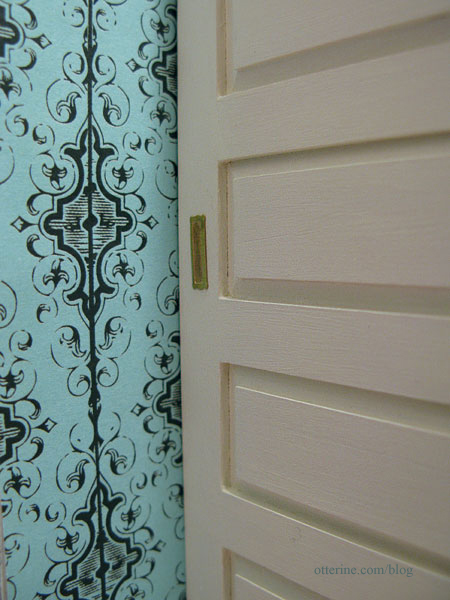
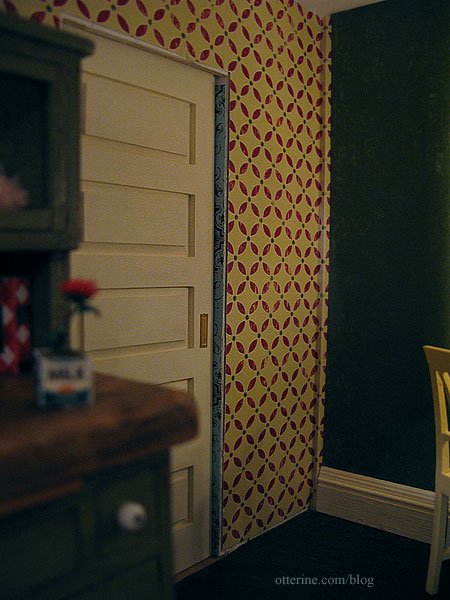
Even though they are glued to the surface and not set in, they don’t interfere with the functionality of the door since they are so thin. Once I get the rest of door and baseboard trims in place, I think they will look even more like the real thing. :D
Part 4 here.
Categories: The Haunted Heritage
January 19, 2012 | 0 commentsHeritage – kitchen lighting
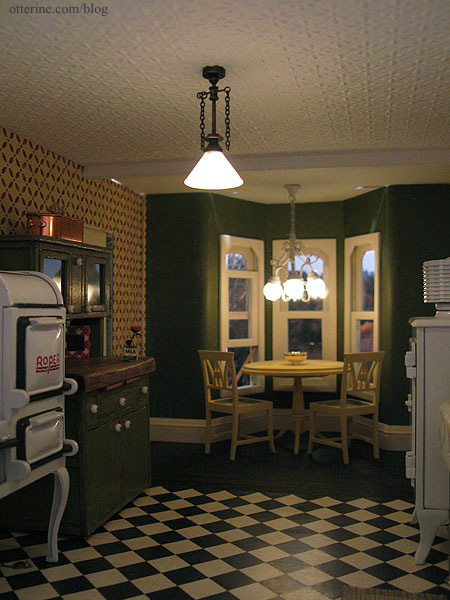
I picked up this white chandelier from Green Gables Dollhouse. I love this fixture. I used one in black for the Newport dining area. The white gives it a wonderful vintage feel without being too fussy.
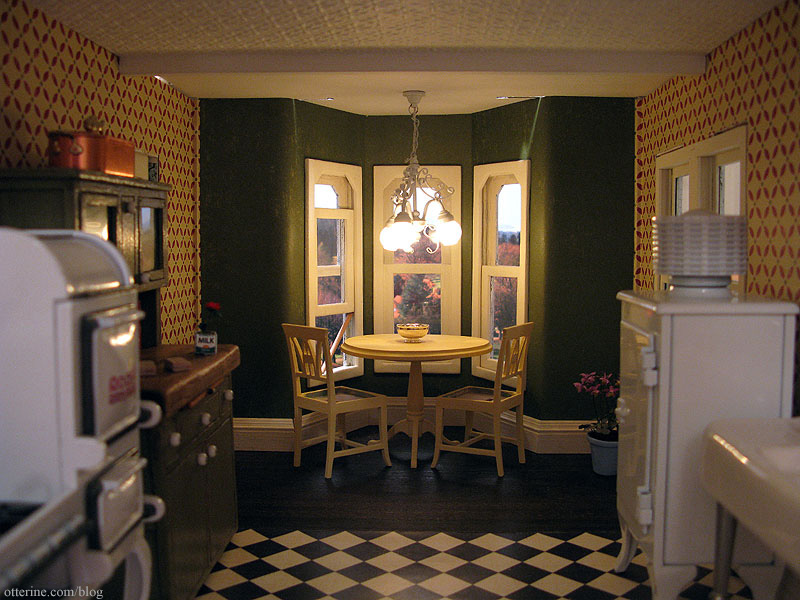
The light isn’t permanently attached. Looks like I have the positioning a little crooked. I had to shorten the chain a little since this is a shorter ceiling height than the light must be intended for. I will be covering the gaps between the ceiling and walls, as well as the holes at the bay window opening.
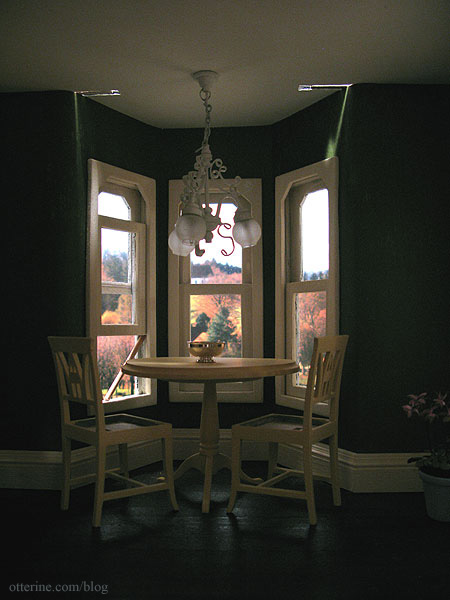
The light gives off the perfect amount of warm light to keep from losing the details I’m fussing over in the deep room. The silver Revere Bowl by Clare Bell Brass also came from Green Gables Dollhouse. I need to make some fruit for it.
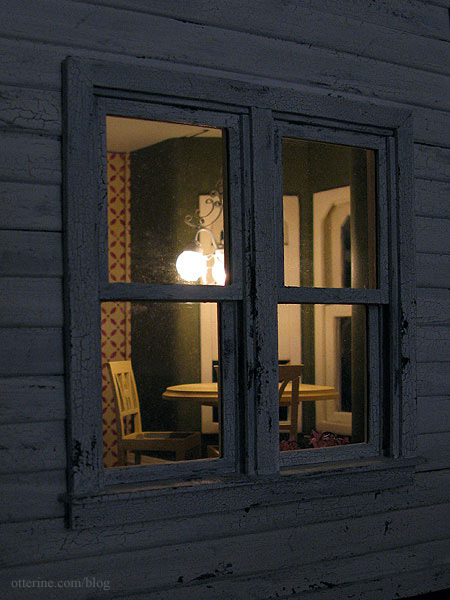
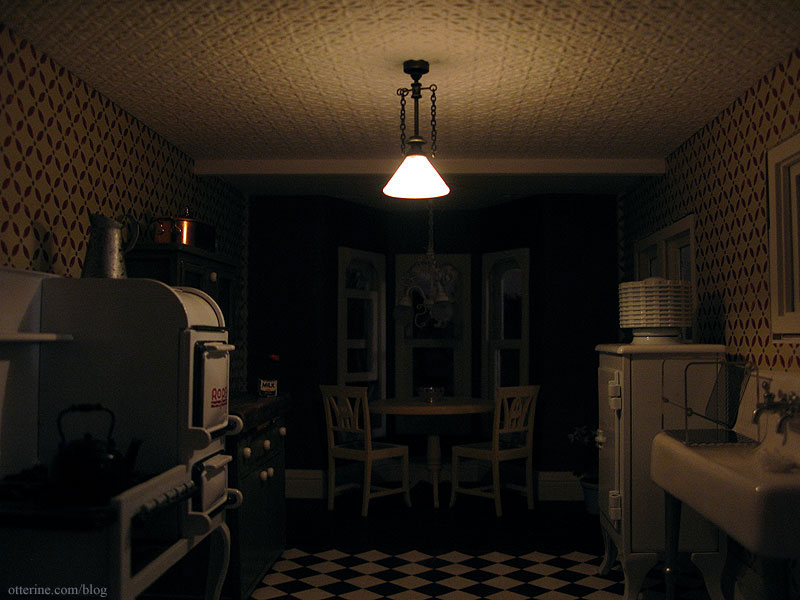
As I was sitting across the room writing this blog post, I noticed the light through the window and had to go back for one more photo.
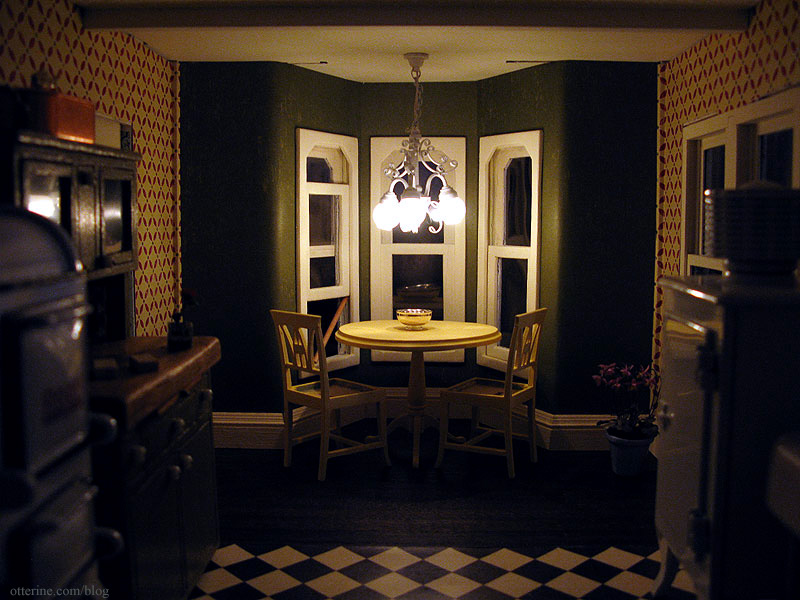
For the cooking area, I treated myself to a lovely Ray Storey pendant gas light. If I had had a larger budget, I would have bought the matching 3-arm down light for the dining table. But, the white chandelier is still a beautiful piece.
The gas light is very well made (though I neglected to straighten the top of the chain in this photo).
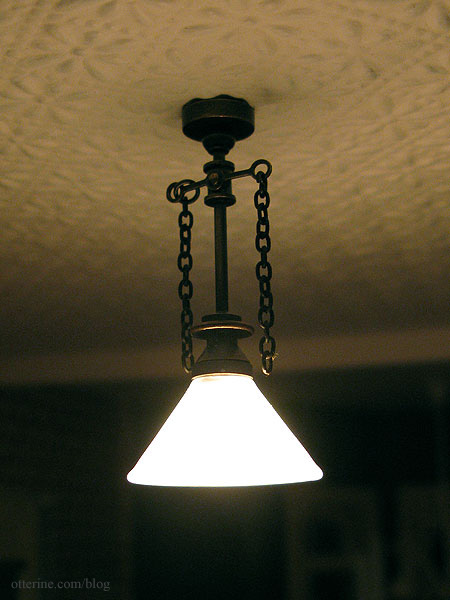
I love the way it highlights the textured ceiling. It’s the perfect vintage touch.

I don’t suppose in reality this dim fixture would do much good in the kitchen for nighttime cooking, but it casts such a wonderfully soft light over this part of the room.
Categories: The Haunted Heritage
January 18, 2012 | 0 comments3 Blind Mice show – January 2012
I am lucky to live in an area that has a mini show of some sort every few months as well as the larger Bishop International Show in April every year. This weekend, I attended the 3 Blind Mice show. :]
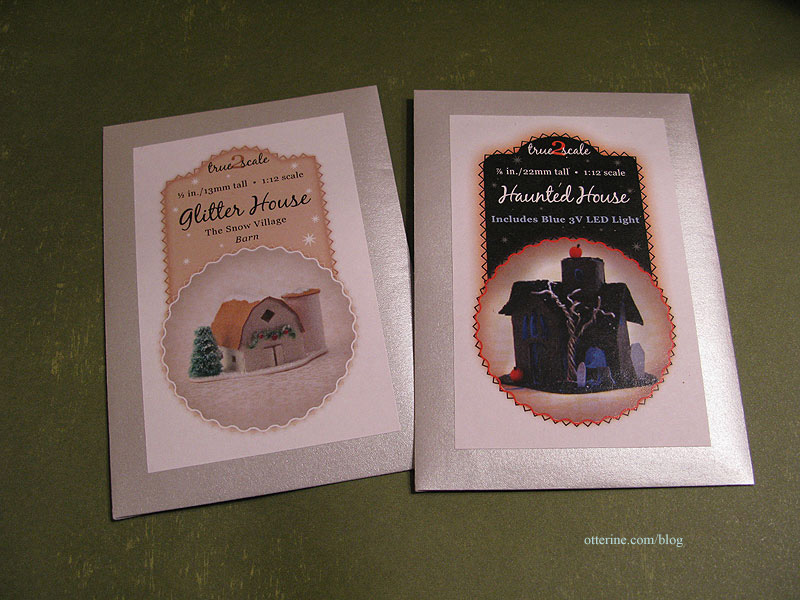
I met Carol of True 2 Scale. It was fun putting a face to a name. :D You may recall I made her milk carton flower kit for the Heritage. I picked up two of her glitter house kits – the Haunted House and the Barn. She has amazing kits, so be sure to check out her website! I already have her florist boxes and a cake box kit, though I haven’t worked with those just yet.
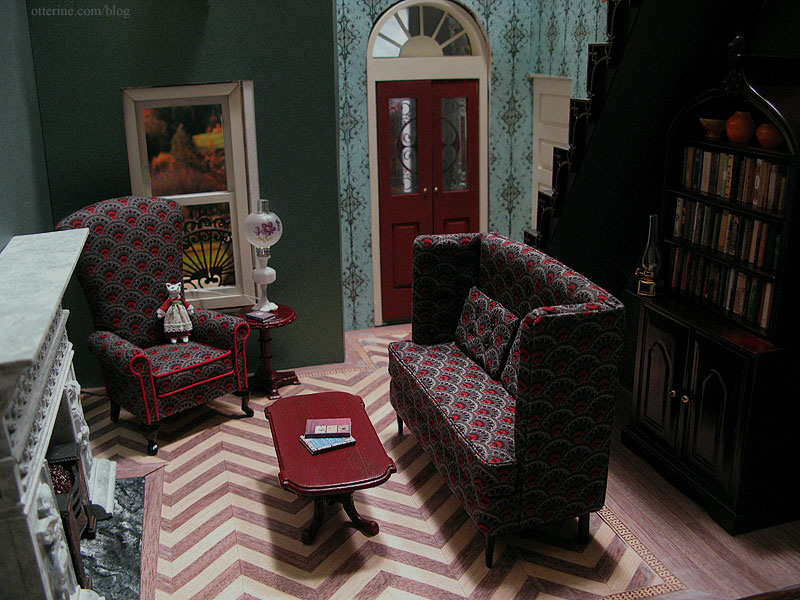
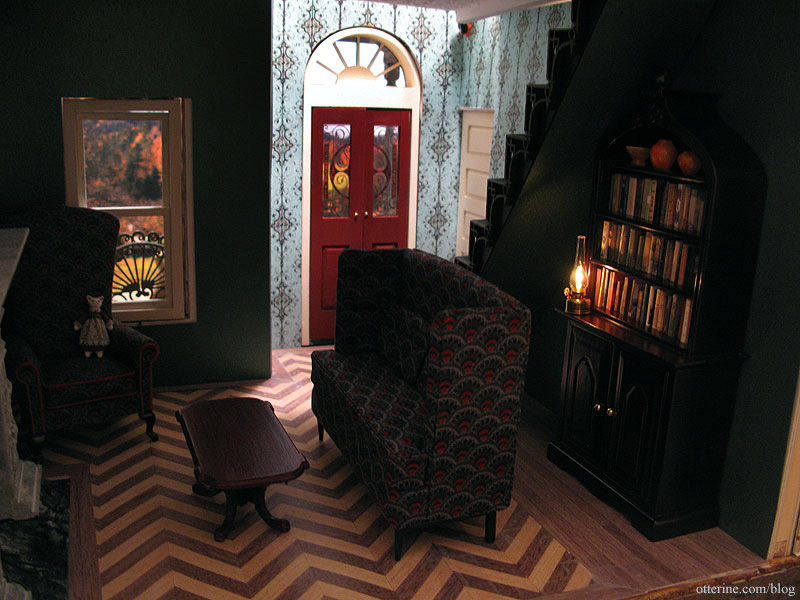
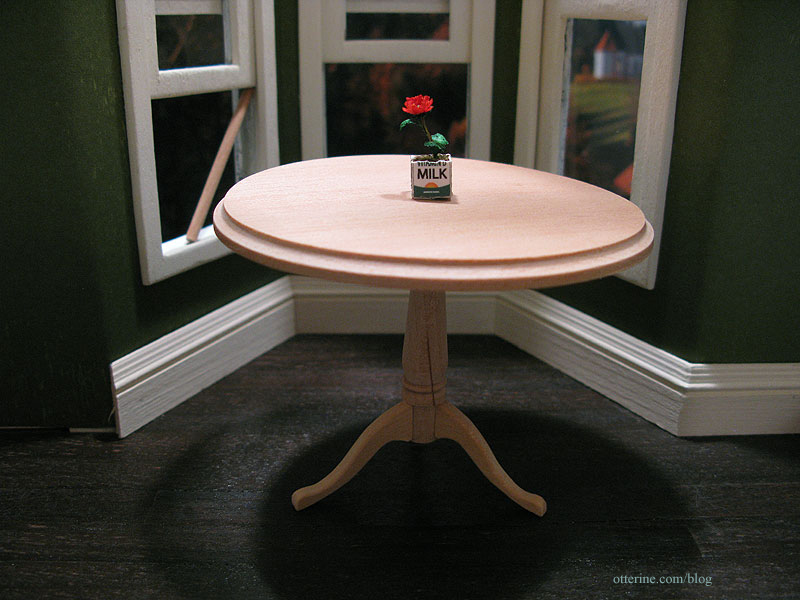
I picked up a small round side table for the Heritage parlor. I was going to make something for this space, but the color and style work well for the setting.
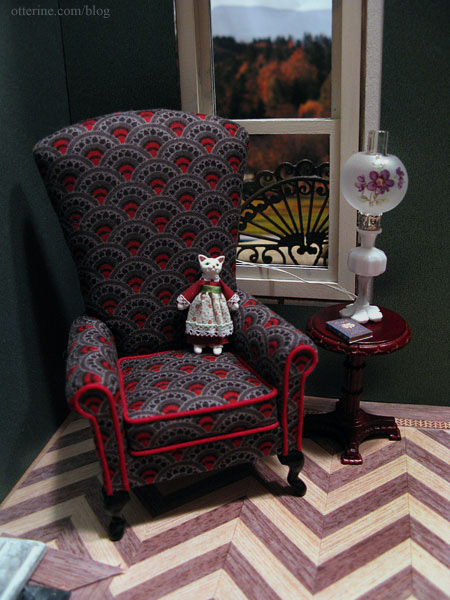
I like that it coordinates but doesn’t necessarily match the style of the coffee table. Grandma has eclectic taste like me! And, this one is the right color to start. A good buy, I must say!
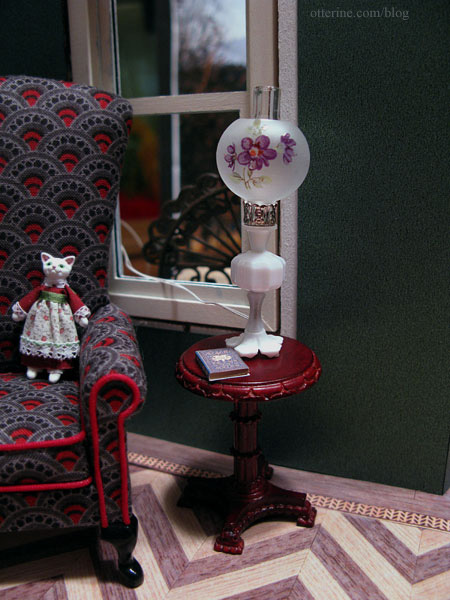
The Chrysolite table lamp I bought previously fits perfectly!
I hadn’t planned to buy much since I have most of what I need for my current project, but I did pick up an online order from Missy at Green Gables Dollhouse. I figured it was just as easy to pick it up in person at the show as to have her ship it, and we got to meet in person after talking online and on the phone a number of times. :D You’ll see those items in future posts.
Categories: Miniature Shows and Shops, The Haunted Heritage
January 14, 2012 | 0 commentsClare Bell Brass hurricane lamp
The area under the stairs in the parlor is very dark, and I don’t want to lose the detail of the bookcase after spending all that time on making books.
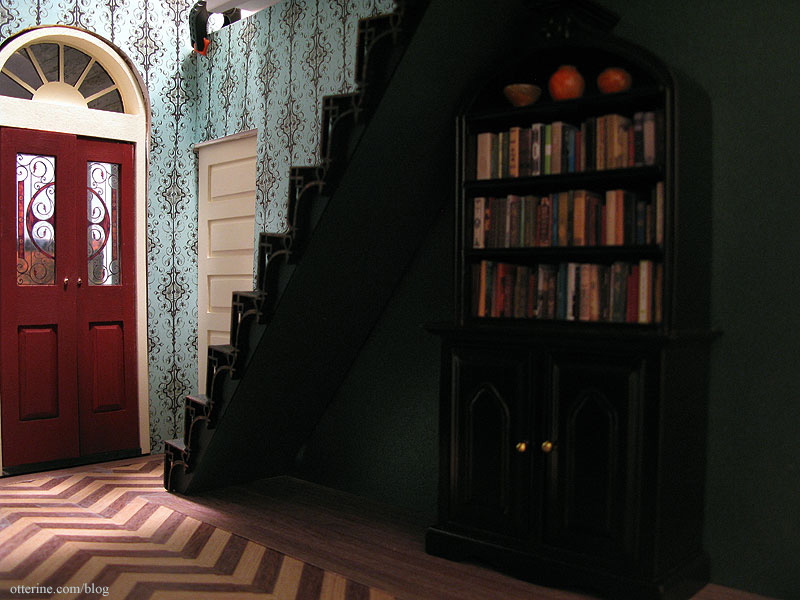
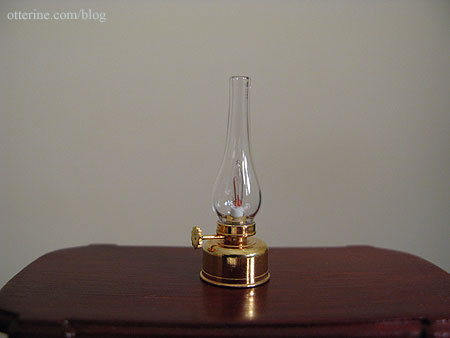
I needed a light here, but I didn’t want to clutter the space with another table or even a floor lamp. I opted instead for a Clare Bell Brass hurricane lamp. It’s one of the few brass items I find beautiful. I used one in the attic of Baslow Ranch.
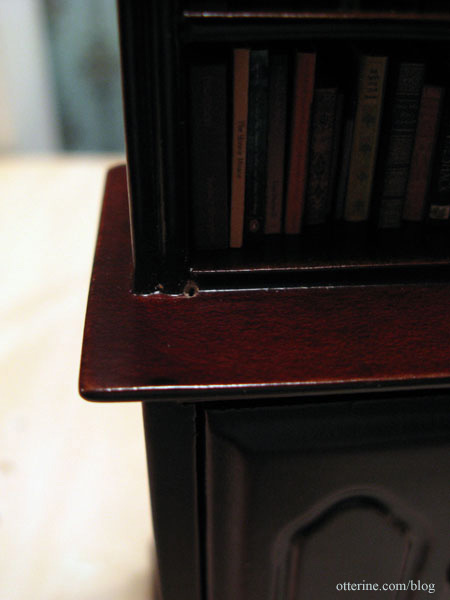
To avoid having the wire show, I drilled a tiny hole into the bookcase.
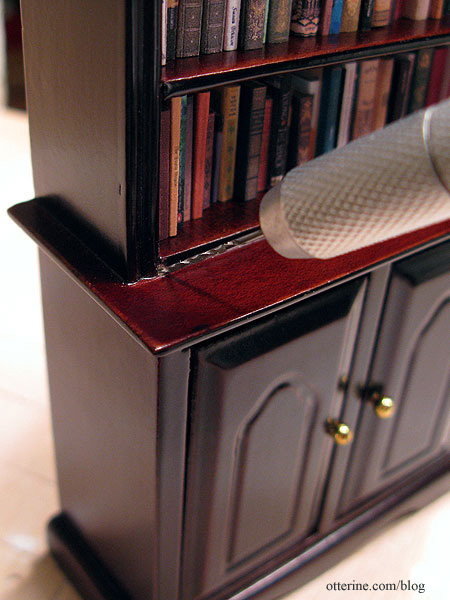
I drilled the hole in an inconspicuous place.
I also wished to avoid hard wiring the lamp for the ability to move the bookcase freely, so I fed the wire into the bottom cabinet portion and used a 9V battery, which fits easily inside the cabinet. A bit of mini hold wax keeps the lamp in place on the cabinet ledge.
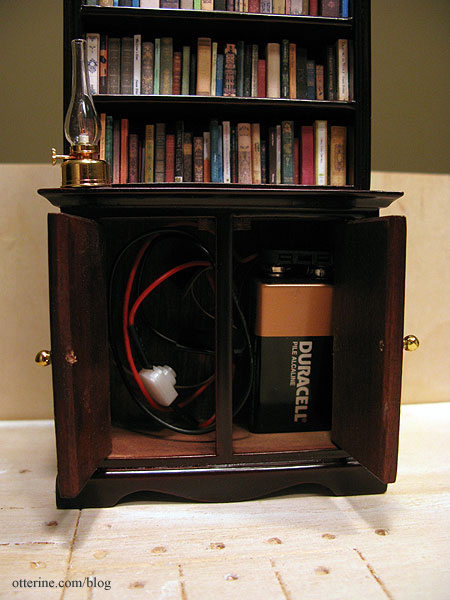
This adapter from Evan Designs has an on/off switch to easily operate the lamp without having to unplug the battery.
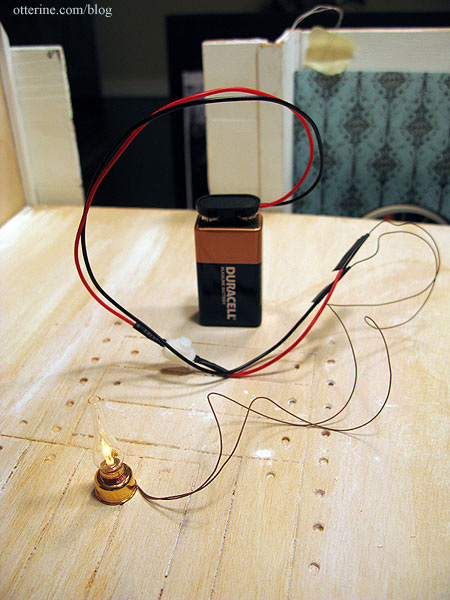
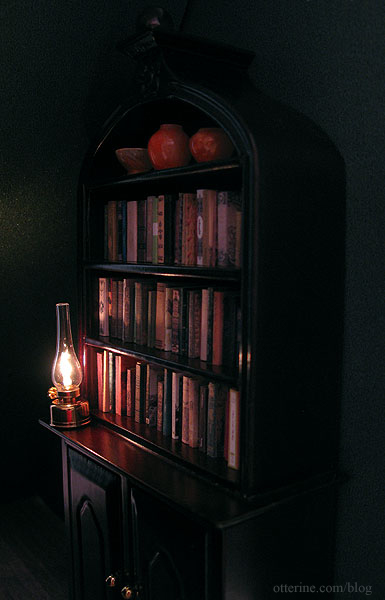
With the doors closed and the light on, you can’t tell it’s not a candle flame in miniature! :D
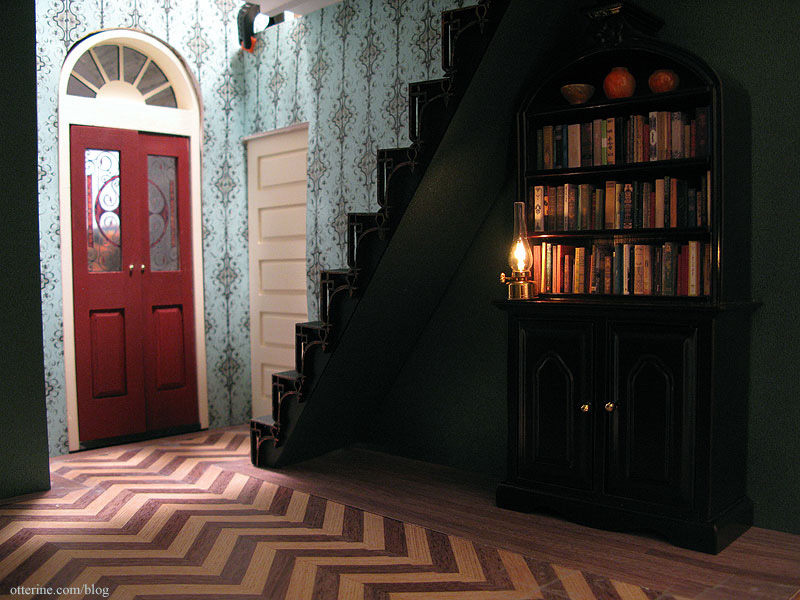
No more dark area under the stairs.
Love it!
Categories: The Haunted Heritage
January 11, 2012 | 0 commentsPerfect mitred baseboards – a tutorial
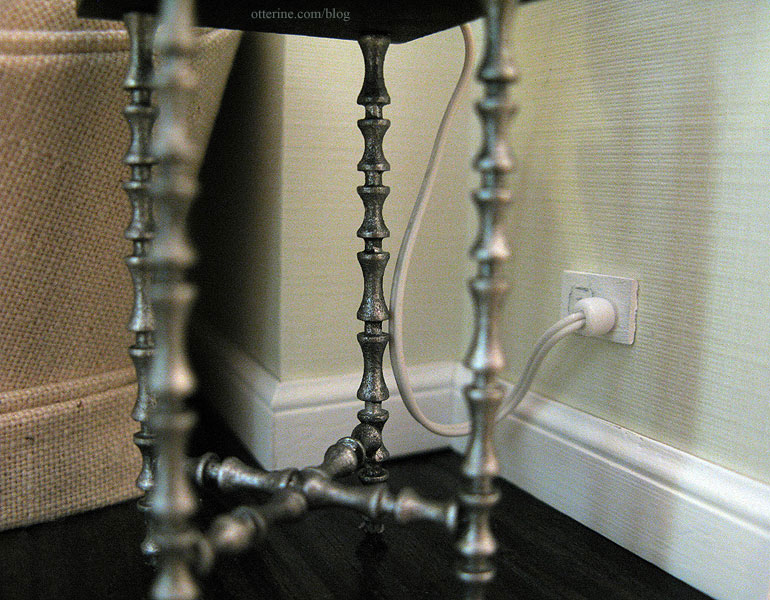
One of the best ways to achieve realism in a miniature setting is to add baseboards. But, nothing ruins that illusion more than big gaps at the joins. With a little patience, there’s a relatively quick fix to achieve perfect mitre joins, even if your cuts are off. (Note: for my tutorial on the electrical outlet, see this post.)
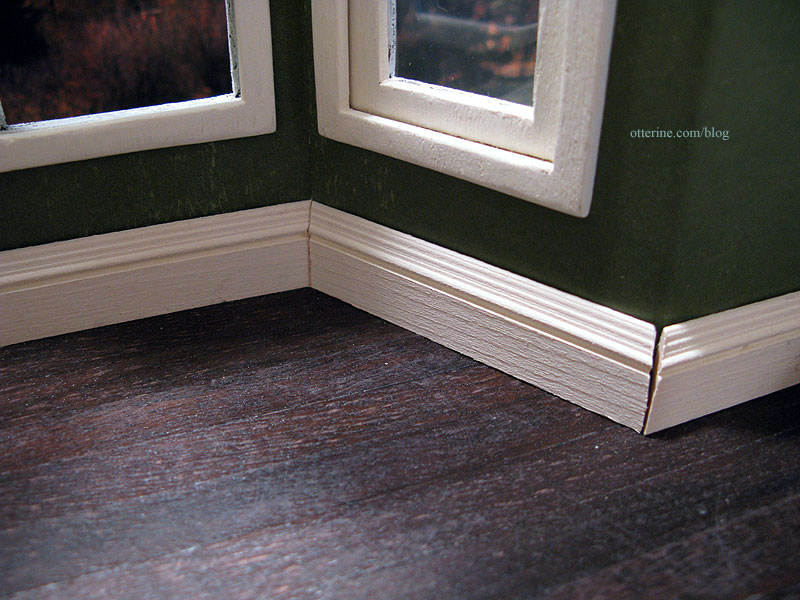
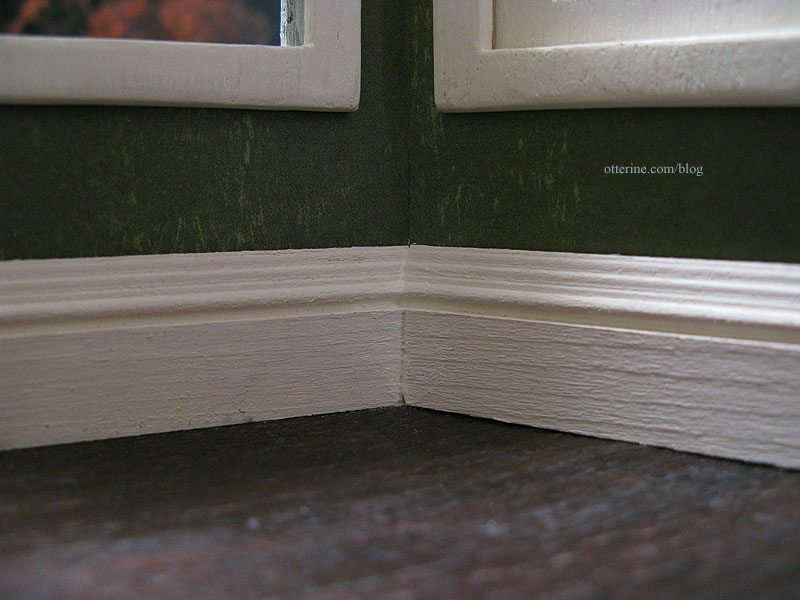
living room in Baxter Pointe Villa Here’s the process I followed in the Heritage kitchen, where the uneven angles of the bay window left rather noticeable gaps in the cut baseboard. Dollhouses are not often square, even with the best of intentions.
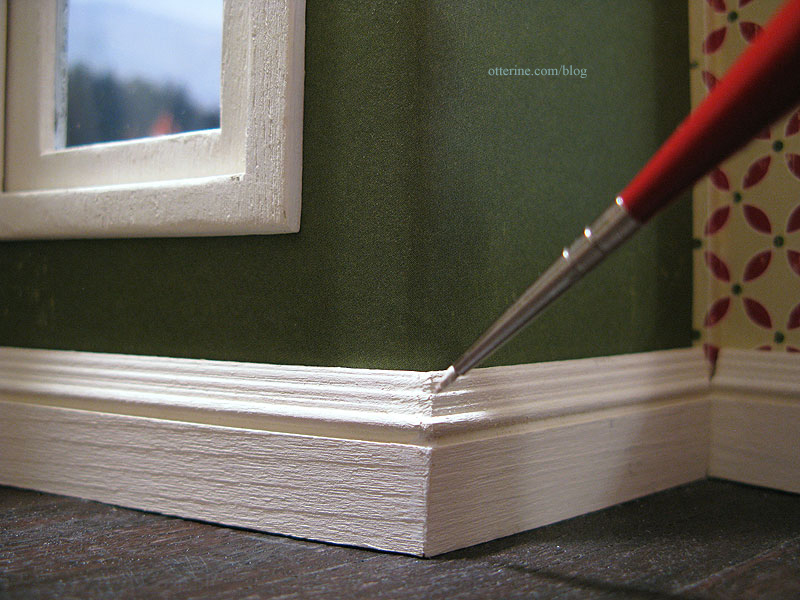
I use an Easy Cutter to make my mitre cuts in the first place, though this tutorial doesn’t cover that part of the process since I can’t photograph myself working on something that requires two hands! :D I’m starting at the point where you already have the best mitre cuts you could make. The baseboards need to be finished, cut and glued in place, matching the mitres as best as possible. I’ve left my baseboard relatively rough to reflect the age of the house.
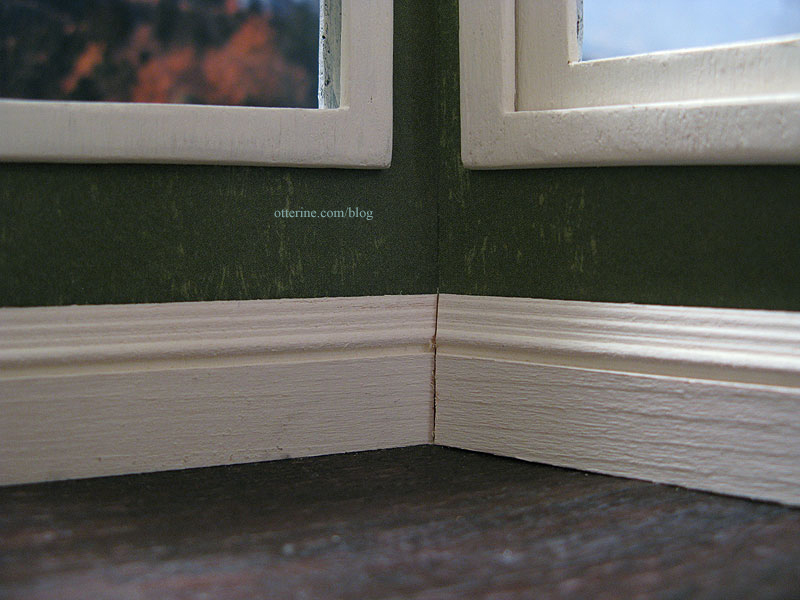
Inside corners usually have minor gaps, if any, and are the easiest to fix.
I take a tiny paint brush dipped into the same paint used on the baseboards and dab small amounts of paint into the crease.
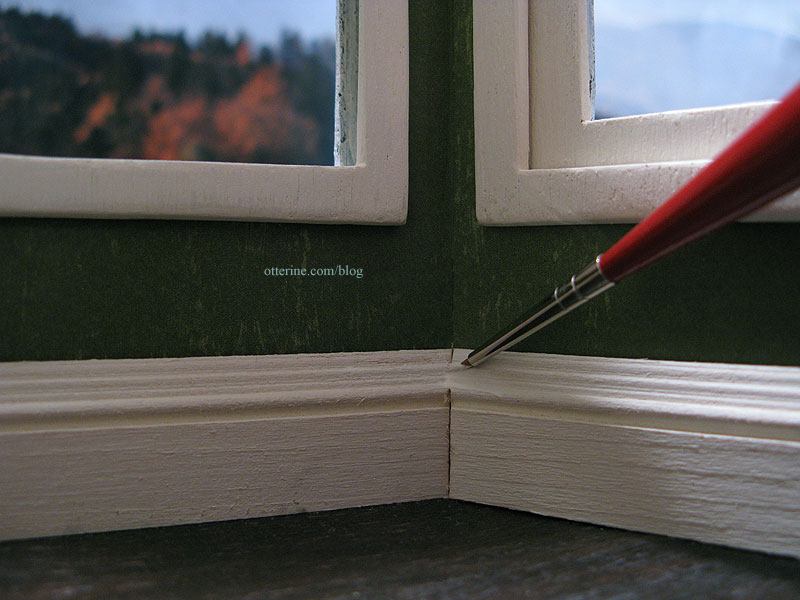
Be sure to blend the paint outward to eliminate bulk and obvious brushstrokes. In the photo, I could see I missed the very bottom – so I went back and filled that in later. :]
Be careful not to get any paint on the wall or the floor. If I get some stray marks, I usually wait until the paint has dried and gently chip off the paint from the wallpaper or flooring with the tip of an X-Acto blade. Wiping it while wet can often cause a bigger mess that’s harder to clean up.
For outside corners, minor gaps can be filled in the same way, with paint. For larger gaps, I apply spackling compound into the gap using a palette knife.
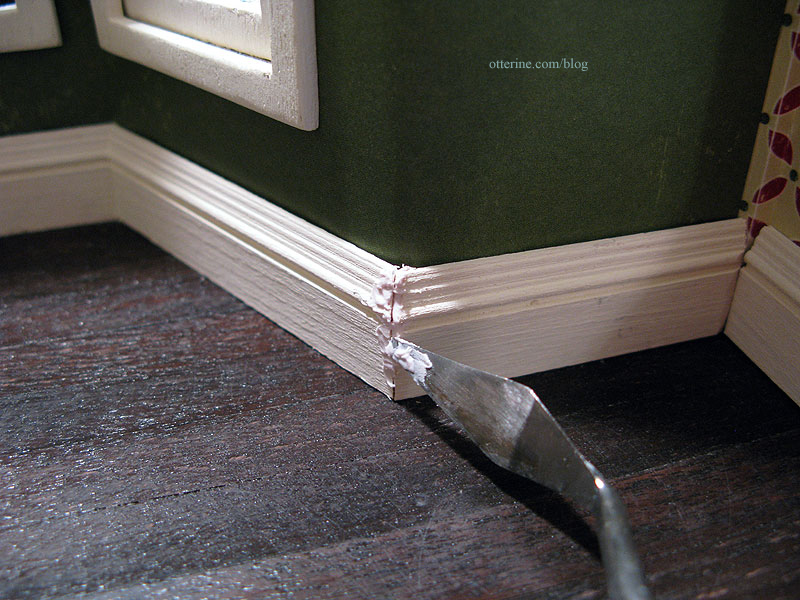
I then smooth the material with my finger and reapply as necessary. It’s better to build it up a little than to use too little.

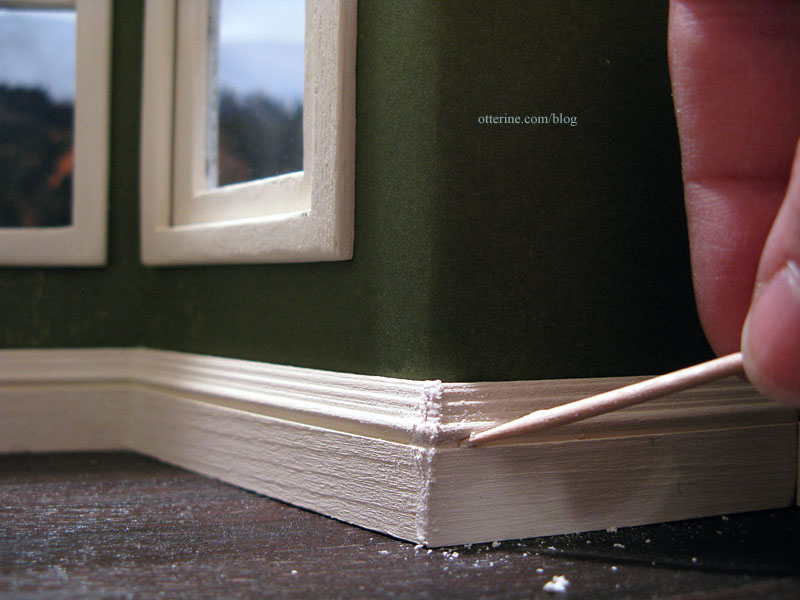
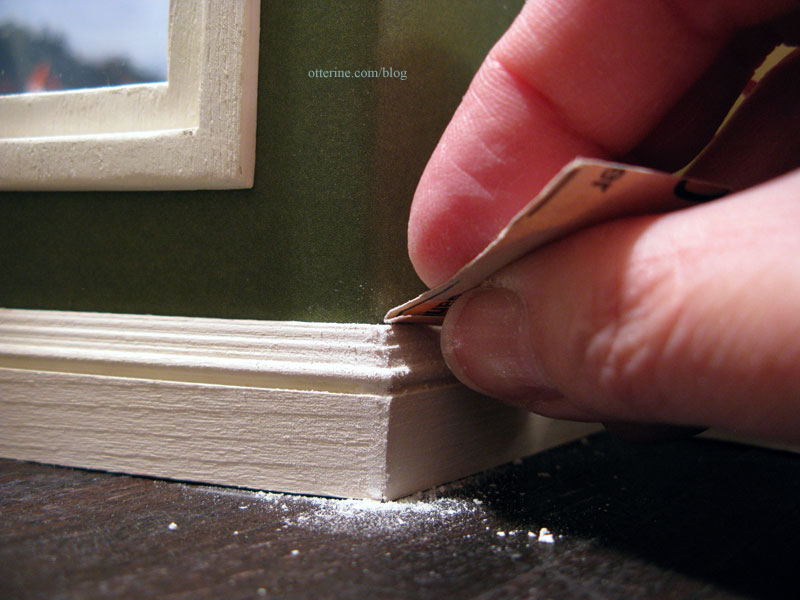
Before the compound dries, I use a toothpick to mimic the grooves of the baseboard. It doesn’t have to be perfect since sanding will take care of that.
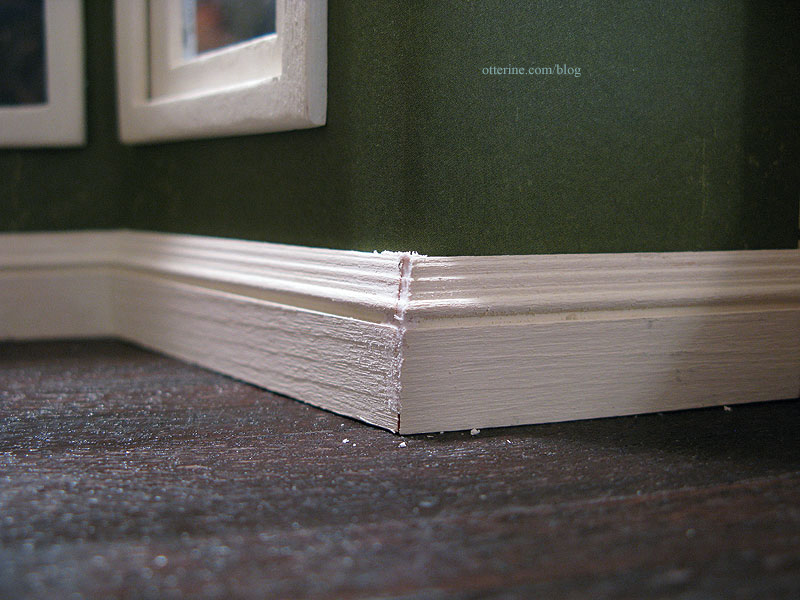
Once dry, I sand the spackling to a point at the corner. I do this by sanding the flat surface of each board toward the corner without sanding directly on the corner. I also fine tune any routed details with sandpaper in the same manner, though this time I follow around the corner.

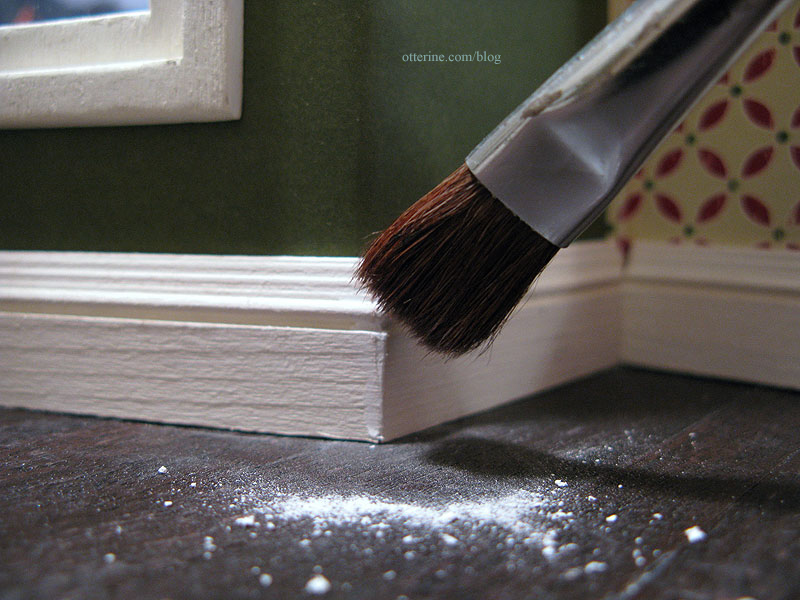
I make sure the top is level by sanding.
Using a clean, dry brush, I remove the excess dust from sanding and refine further. You can add more spackling if needed, let it dry and sand more.
I use a piece of masking tape to pick up the dust.
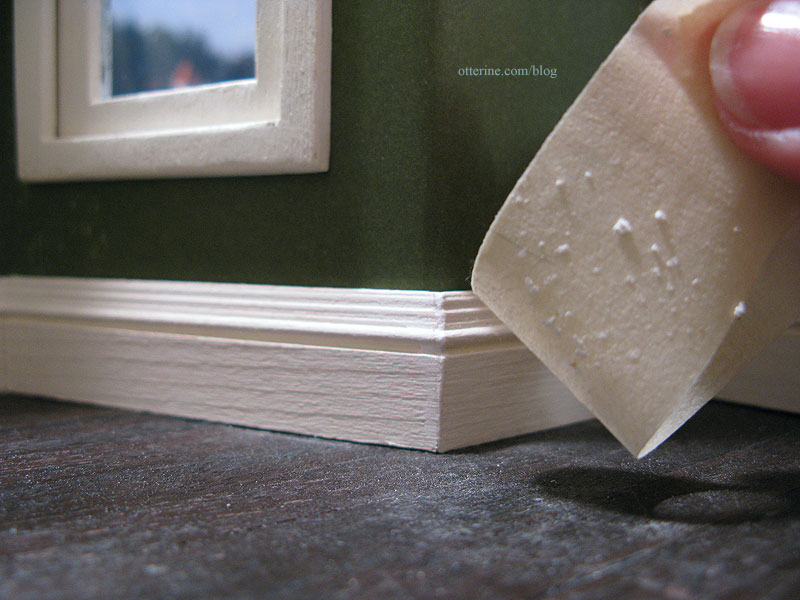
Since this is an old house, I decided to leave the baseboard a little imperfect as though the corner has been knocked into repeatedly over the years. ;]
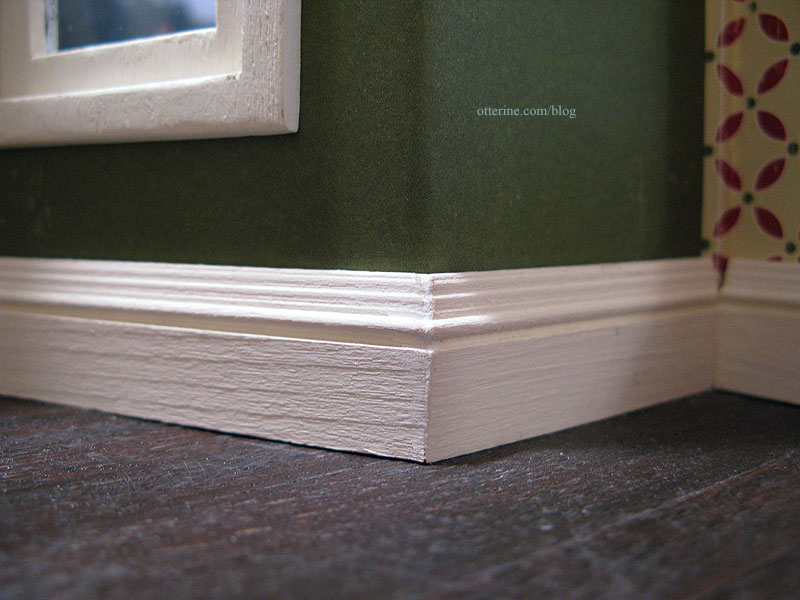
Once I have good form to the corner, I paint over the spackling compound, blending the paint along the baseboard.
Now, the gaps are nearly invisible and won’t interfere with your miniature scene.
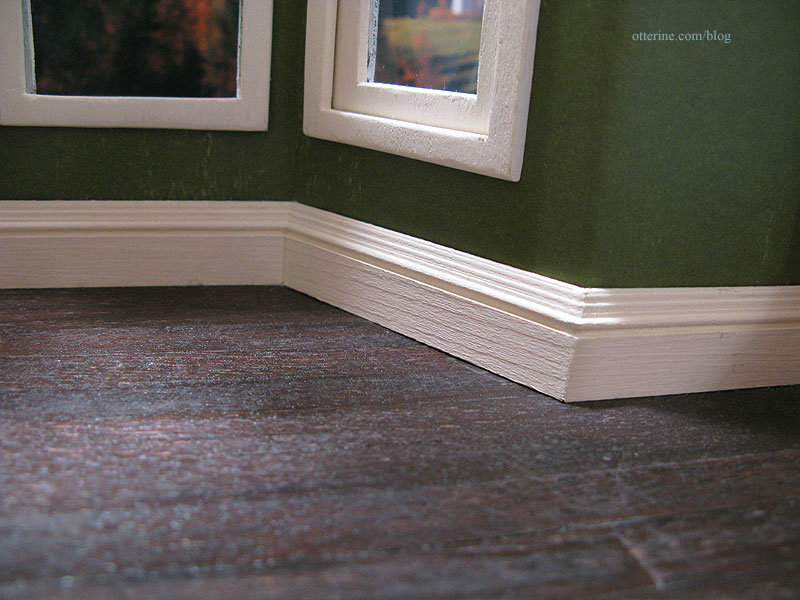
Your furniture and accessories become the focus, not bad mitre cuts! :D
This method is for painted baseboards, though it might be possible to use stainable wood filler to achieve the same results on stained wood. I’ve not tried that yet, though.
Categories: Miniatures
January 10, 2012 | 0 comments


NOTE: All content on otterine.com is copyrighted and may not be reproduced in part or in whole. It takes a lot of time and effort to write and photograph for my blog. Please ask permission before reproducing any of my content. Please click for copyright notice and Pinterest use.


