

Heritage – parlor sconces and wallpaper
The Chrysolite sconces had non-replaceable bulbs that I decided to swap out for replaceable ones. At first, I thought I would have to use candle sockets with thick wires, but I did some research and discovered and Cir-Kit Concepts makes candle sockets with varnished wires, the same type that came with the kits. :D
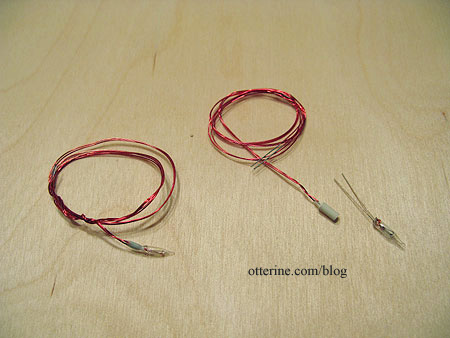
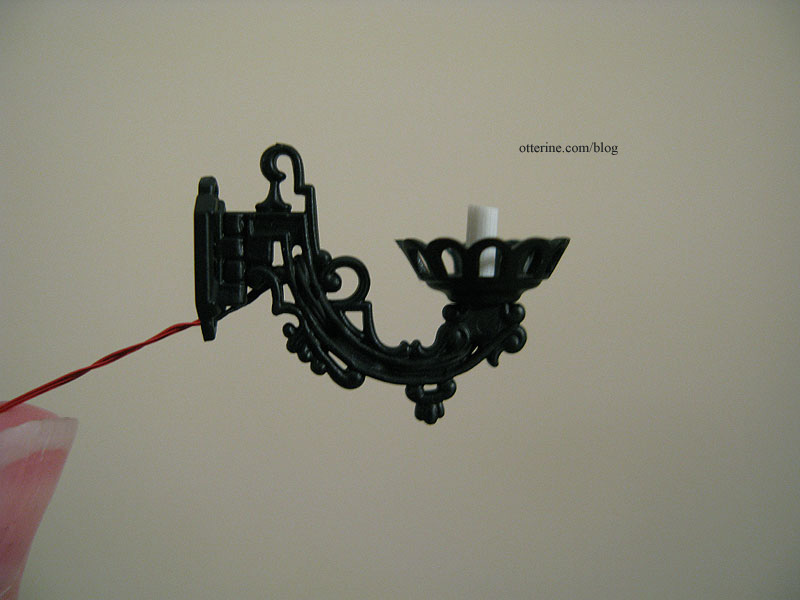
The sconces were molded in black plastic, but I still used flat black spray paint to take away the shiny plastic appearance. These fixtures have beautiful and delicate detailing only possible with plastic kits, but they don’t look at all cheap.
Threading the wires wasn’t exactly easy but there was no way I could have used regular white wire replaceable bulb sockets. The varnished wires fit perfectly.
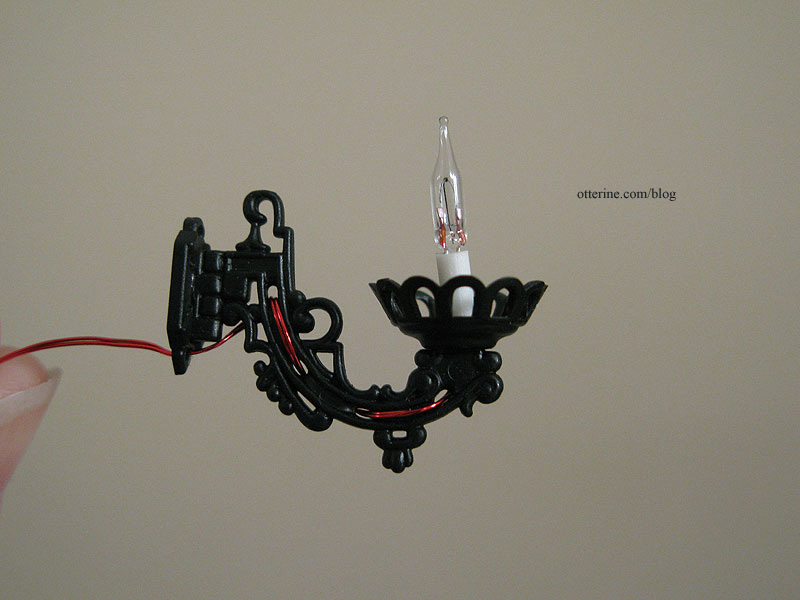
I used some black acrylic paint to cover the red wires so they wouldn’t be as noticeable.
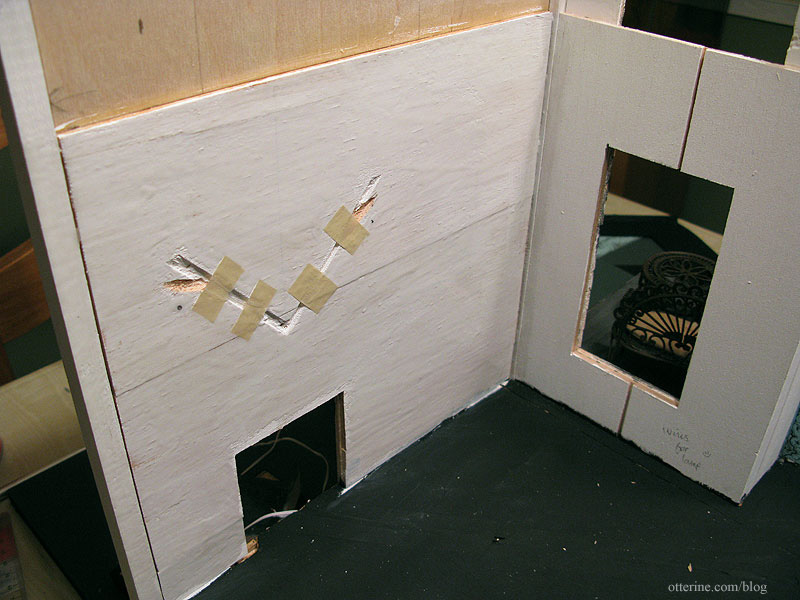
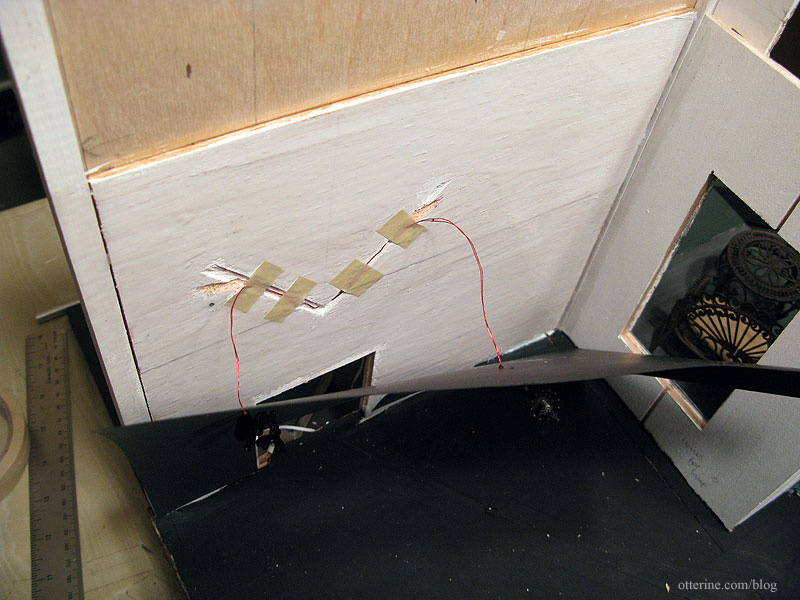
Installing these rascals involved a lot of “chicken or the egg” reasoning. I had made the channels for the wires previously. The wires will not be poked through the wall to the exterior until they reach a center point. So, part of the wires will run on the interior wall. I had to figure out how to get the sconces attached to the wallpaper, paste the wallpaper in place, and run the wires into the channels. This is why I buy extra paper! This scrapbook paper is by Recollections and is a glittery deep green with plain black on the back.

First, I made sure the wallpaper piece was cut correctly. Next, I marked where the sconce channels began behind the wallpaper. I poked holes in the wallpaper and fed the wires through, leaving the sconces loose. I did a quick dry fit, and realized I had the sconces too high. Since I didn’t want to re-cut the paper, I dropped the holes by 3/8″ (the size of the sconce back plate) so the original holes would be covered. I re-cut the channels in the wall to make up the difference.
I put a few small pieces of tape per channel to make a pocket for the wires while still allowing for movement. I figured a whole strip of tape would just stick to the wires and make it difficult to pull them through. More on that in a minute.
I then applied Yes! paste to the wall. (Note: I no longer recommend Yes paste – I use Wallpaper Mucilage instead. Yes paste has problems with longevity.)
Then came the “I hope this is going to work as well as the plan in my head” moment. I fed the wires behind the tape and out the holes in the wall. Using my third and fourth hands (bahahahaha), I somehow managed to press the wallpaper down while pulling the wires out through the holes to the outside of the wall, pausing for a second to apply some glue to the backs of the sconces so they would remain in place once the wires were pulled taut. I taped the wires on the outside of the house so they wouldn’t slip as I worked.
I then smoothed, straightened and stopped swearing. ;D I also clamped the back edge of the wallpaper to make sure it would seal tight. This was not something I wanted to have to do over. This paper doesn’t much like to stick, as I noticed when I put it on the pocket door wall.
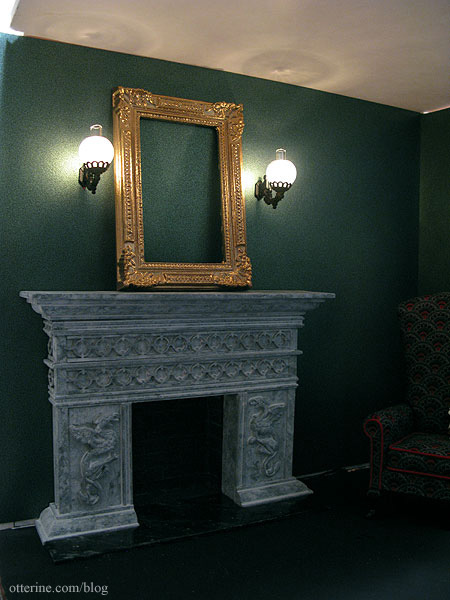
I added the glass globes, propped my mockup ceiling in place and tried out the lights with the frame (still to be aged) that will sit between them. Love!
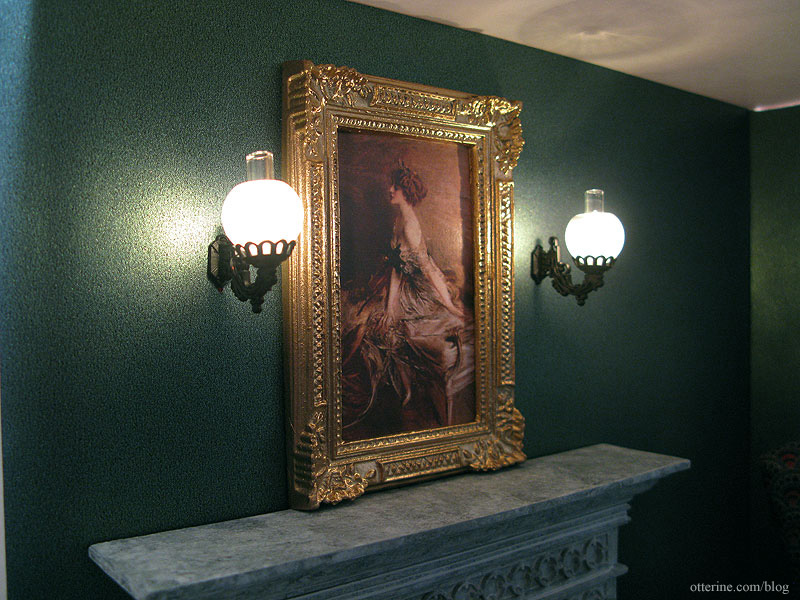
For a final treat tonight, I tried out two works of art by Giovanni Boldini. These are quick printouts on regular paper. Before using them, I will sharpen and brighten them in PhotoShop and print on Art Canvas by The Crafty PC.
The first is a 1911 portrait of Princess Marthe-Lucile Bibesco. I love this painting, though I just discovered it only two days ago when I was searching for the second painting below.
The second, and my original idea for this space, is the 1905 portrait of Elizabeth Wharton Drexel. I first saw this gorgeous painting in person during a trip to Newport, Rhode Island. It is located in The Elms, one of the magnificent mansions there. While the first painting is darker and has sharper brushstrokes, this one ties in the reds and oranges in the room and lightens the mood just a bit.
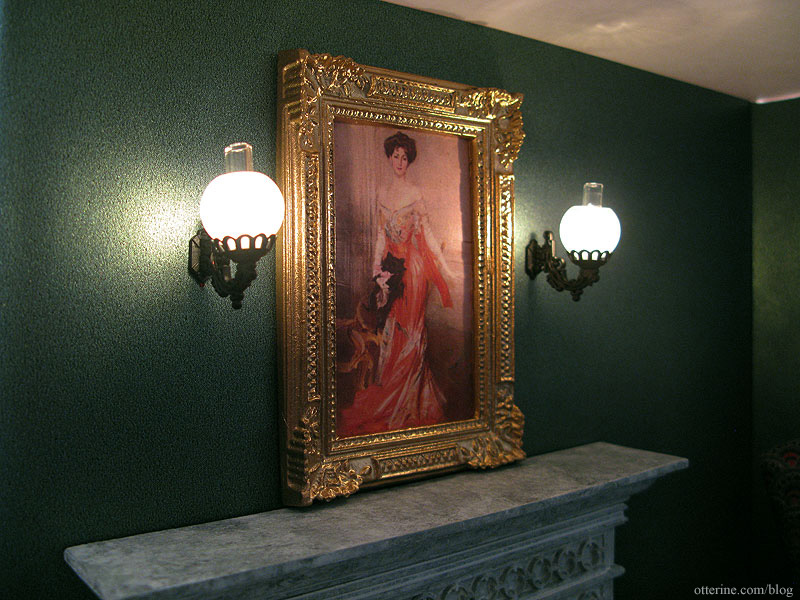
I am so torn between them. I think I’ll just have to wait until the room is all together and then try them again. Whichever painting I don’t use in the parlor can perhaps go in the bedroom, though I have another painting in mind there. (Final choice here.)
Categories: The Haunted Heritage
February 1, 2012 | 0 commentsHeritage – parlor firebox, wiring and coals
Before I could truly get to work on the parlor floor, I needed to finish up the parlor fireplace. The first order of business was gluing the final side wall into place. Before I could apply the parlor wallpaper, though, I needed to make channels for the two sconces that will sit above the fireplace.
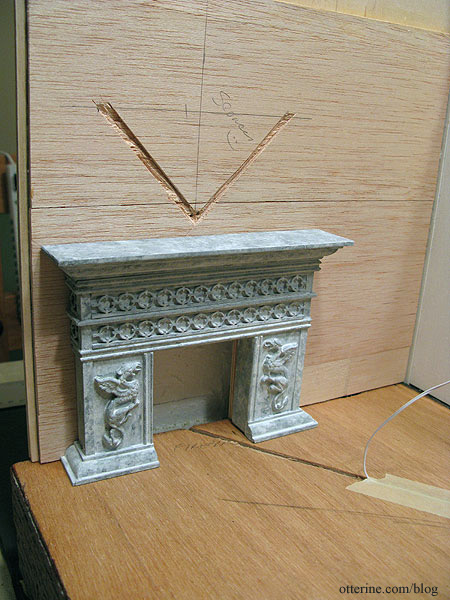
In order to know where to start the firebox, I had to make the hearth. I cut a piece of cardboard a little thicker than the parlor floor marquetry border.
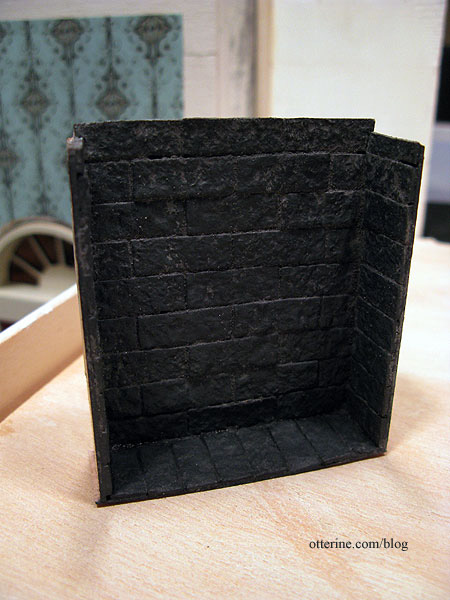
Next up was building the firebox.
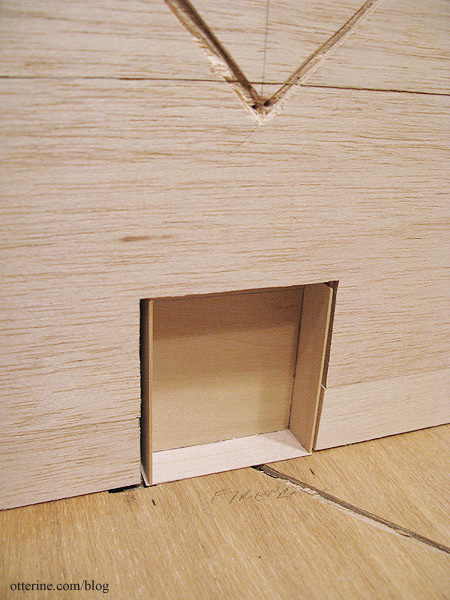
The firebox sits partially inside the chimney through a hole in the side wall.
I’m using a Phoenix Models firegrate and resin coal fire, so the box didn’t need to be very deep. The resin coal wire will exit out the back. I might end up installing a flickering unit for the fireplace, so I’ll determine the final wiring pattern later.
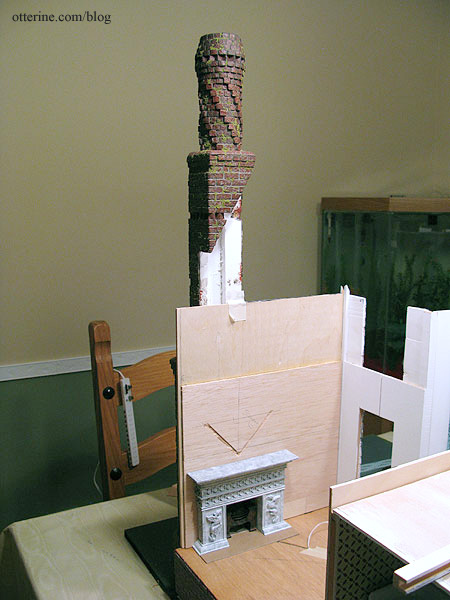
Here’s the whole set up in relation to the chimney. I don’t have the gable in place, but that’s why the back of the chimney is angled. You can really see how massive that chimney is…makes my massive fireplace look small.
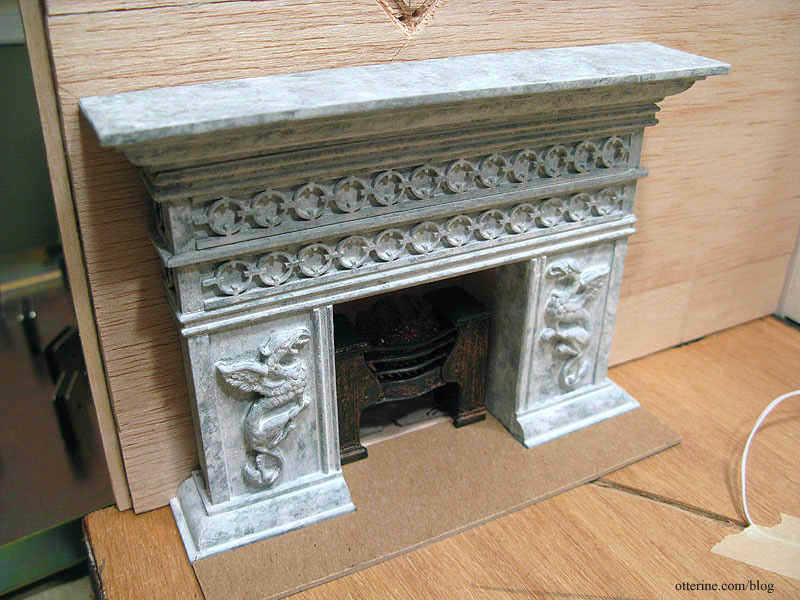
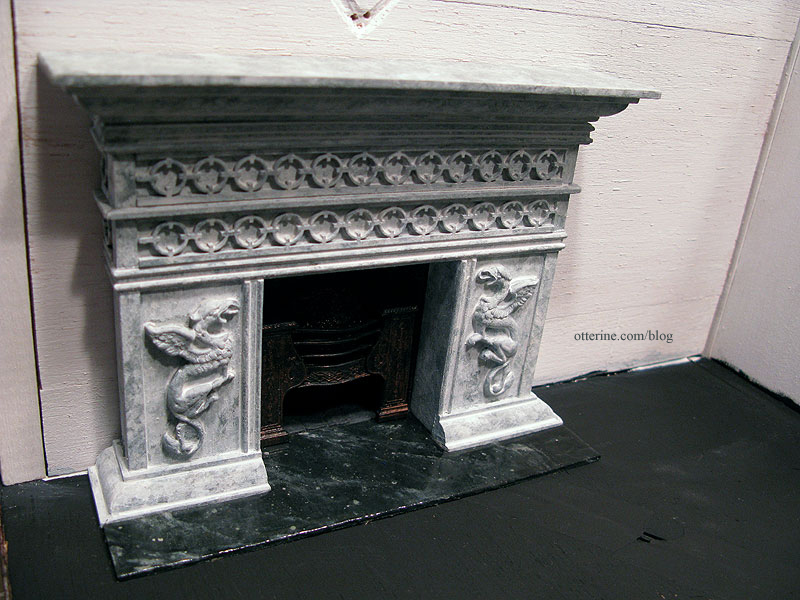
Here’s the firebox bricked, painted and grouted. It’s nice and dark from years of use.
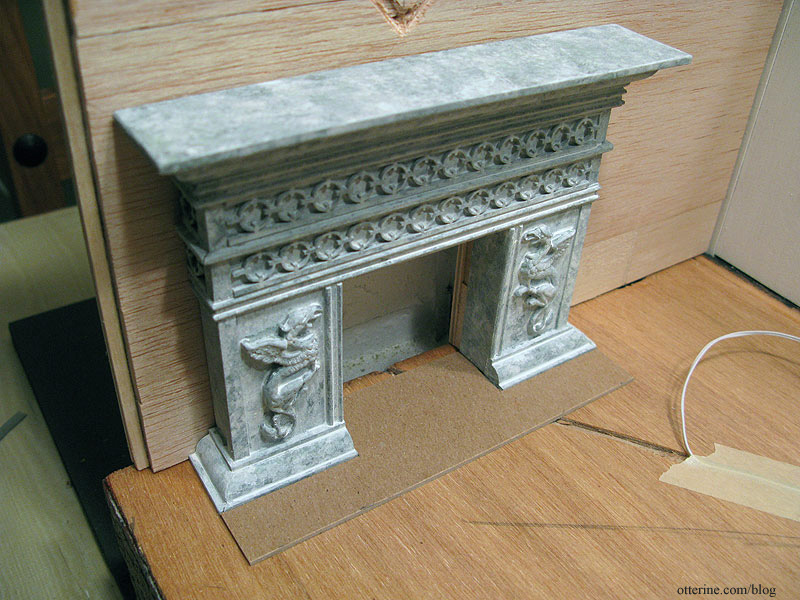
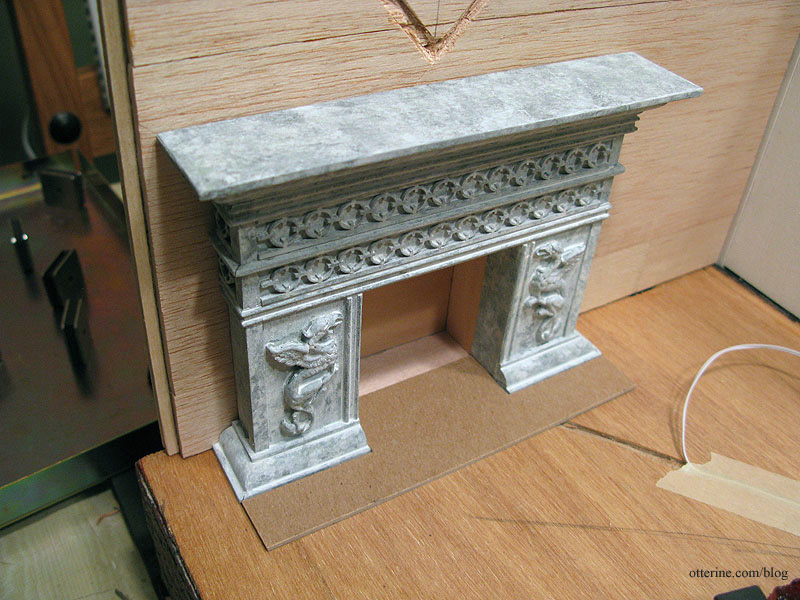
The fireplace and firebox aren’t glued in place yet, but here is how they fit together. The hearth will cover the area in front of the fireplace and into the opening to meet the firebox.
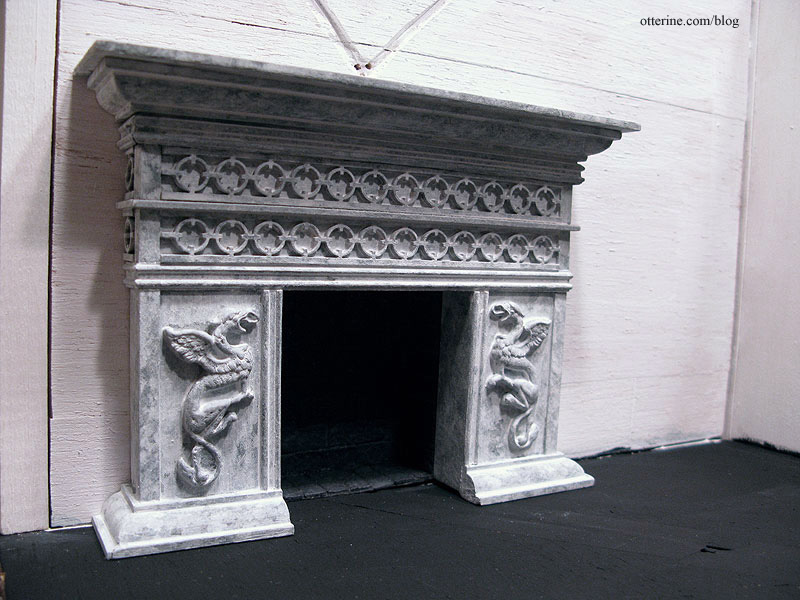
The next order of business for the parlor involved turning the cardboard hearth into marble. :D Don’t you just love alchemy?
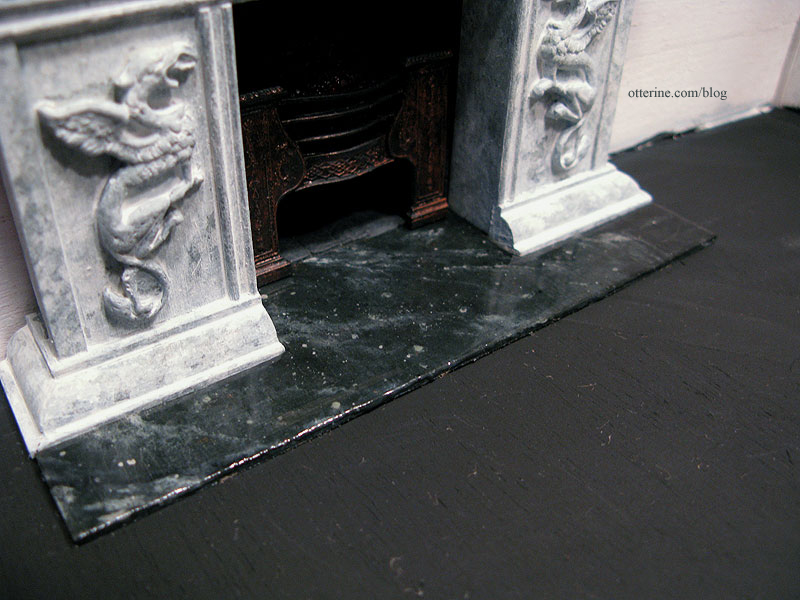
This technique is shown in the DVD by Master Miniaturists called Faux Finishes. I used a subtle dark green base with black, off-white and just a touch of metallic bronze. Once dry, I sealed with Triple Thick Glaze by Americana (so many coats I lost track). It’s by no means perfect upon close inspection, but it is rather convincing considering it started out as cardboard. :D Of course, all the painting and sealing swelled the cardboard a bit, so I had to trim it to fit again…that was scary.
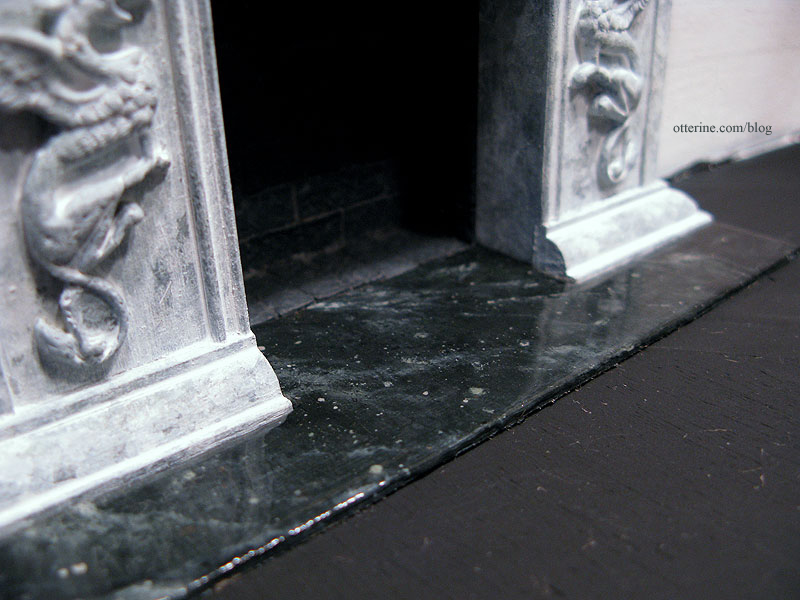
It is also only one element in a larger scene and likely won’t be the focus of the fireplace if the griffins have anything to say about it. I might also bring the hob grate forward a little more so it shows better.
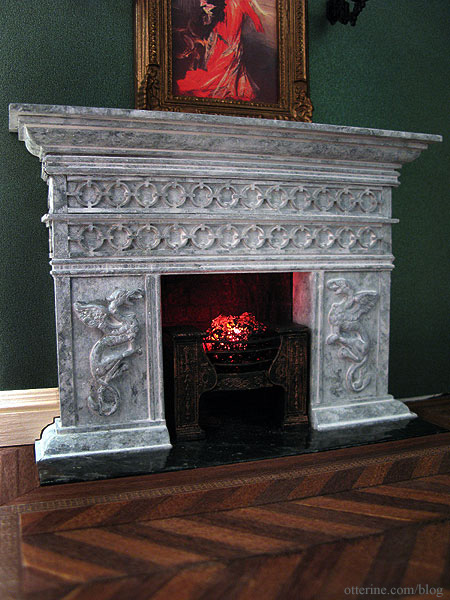
(Since the last photo, I’ve installed the wallpaper and flooring in the parlor, but I wanted to round out this post with the final detailing.) I tried out the red bulb and resin coals for the Phoenix parlor hob grate. I love the way it brings out the detailing in the fireplace, but it was a bit bright. I like the idea of sleepy embers in a warm, cozy room.
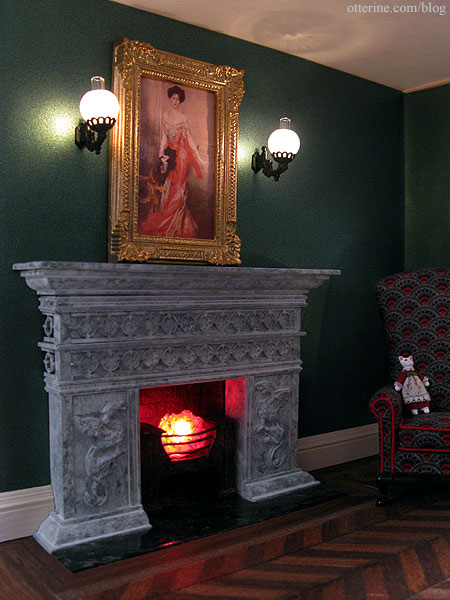
I used black acrylic paint to tone down the brightness of the resin coals. Having the light on while painting ensures you don’t overdo it and block out too much light.
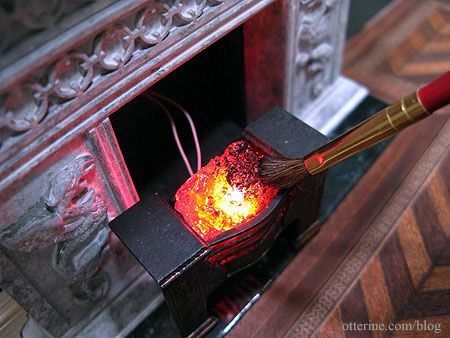
I coated the back and bottom completely so light would come only from the top and just a little from the front and sides. It’s much more realistic with a smoldering, warm glow.
Categories: The Haunted Heritage
January 29, 2012 | 0 commentsFancy parlor floor – part 1
I finally have all the supplies I need to make the parlor floor a reality. The marquetry border I am using is from eBay seller great-instruments and was advertised as being for guitar making. It is thicker than the flooring sheets, so I will need to build up the floor sheets to use with the marquetry strips.
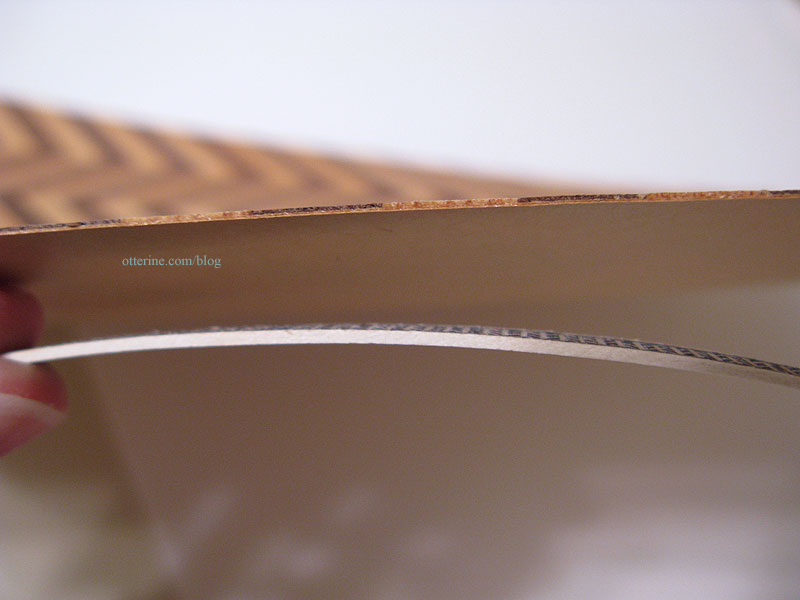
Bristol paper is 1/64″ thick and should do the trick as an underlayer for the wood sheets. I’ll work on that portion later.
This is will allow for a completely flush surface for the floor.
I usually finish my flooring before installation, so I decided to do that in this case as well even though I will be piecing it all together afterward. I just wanted to make sure I could get the coloration I was looking for before spending the time putting it all together. I also worried about getting glue on the wood surfaces which would make it harder to stain once in place.
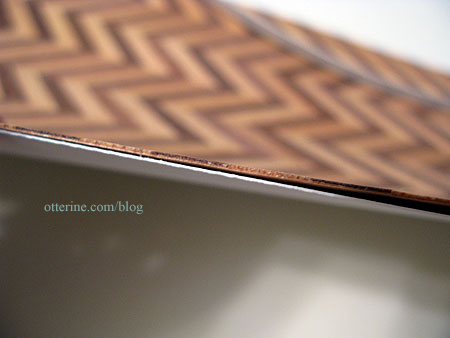
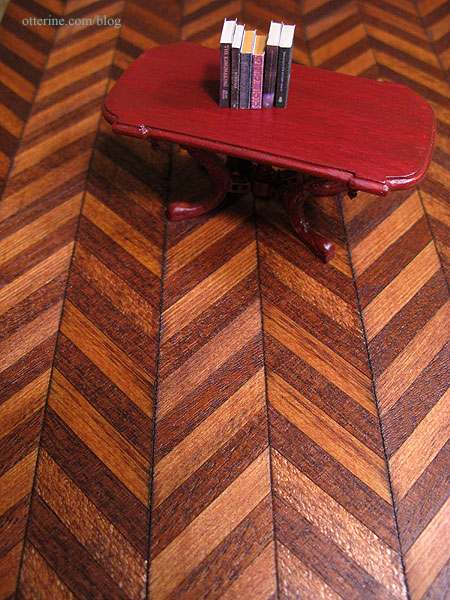
Here are the three materials in their original states. I bought the herringbone sheets from Green Gables Dollhouse and the walnut flooring at a local mini show. These are pretty common and can be readily found from online resources.
I started with the herringbone pieces first since that makes up the largest area and will set the overall tone of the room. I sanded the sheets thoroughly and then applied Minwax oil based stain in English Chestnut.
Wow, is this ever a lovely color!
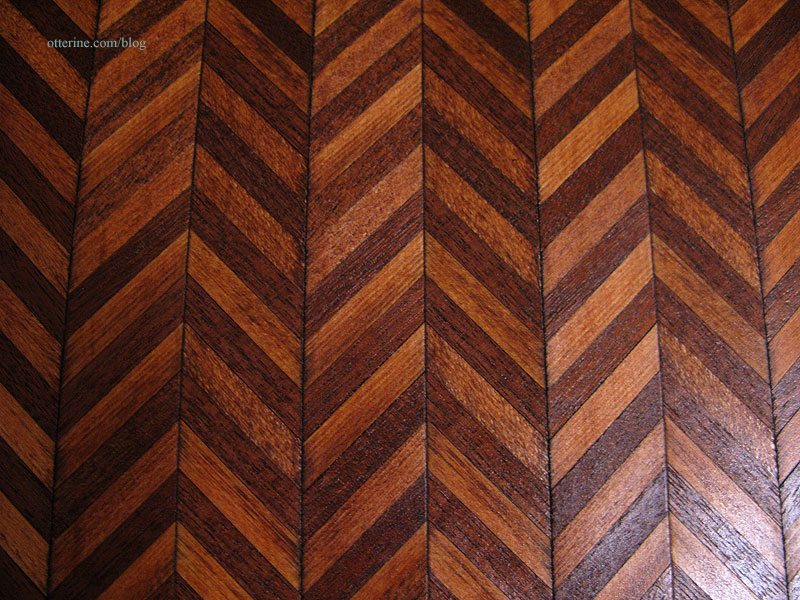
I think it is going to look fabulous with the furnishings, though I’ll need to recheck it after letting it dry completely just in case the color changes as it dries.
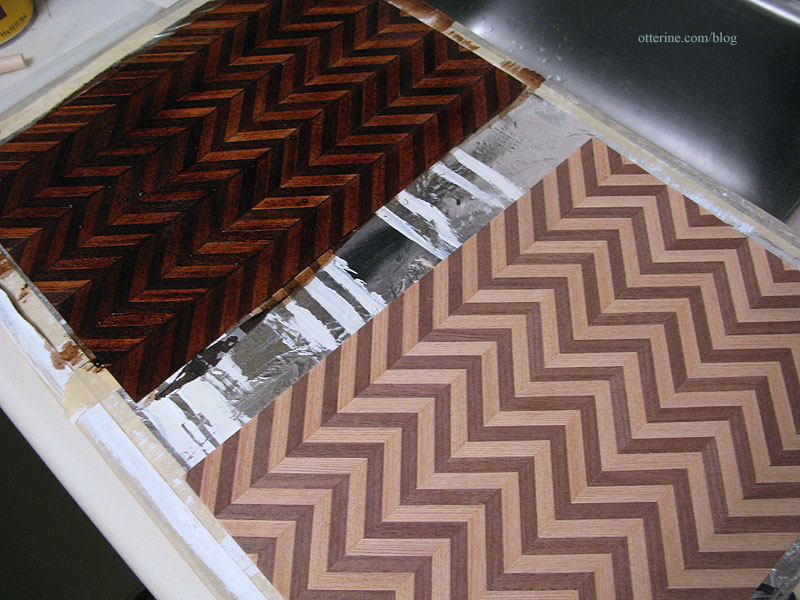
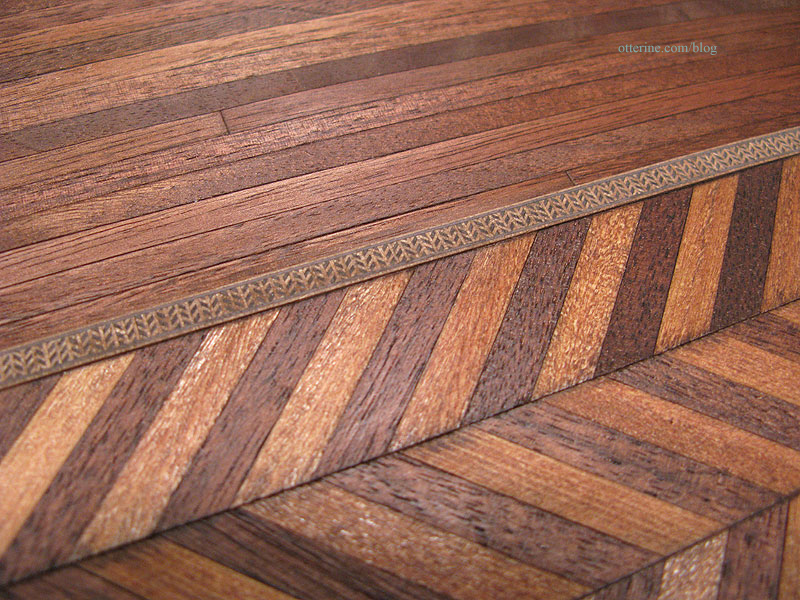
Using the same Minwax English Chestnut as I did for the herringbone portion of the parlor floor, I stained the walnut flooring sheet to coordinate. Even though I will be cutting strips out, I made a full sheet to have consistent coloration. I can always use the leftovers for the balcony on the second floor.
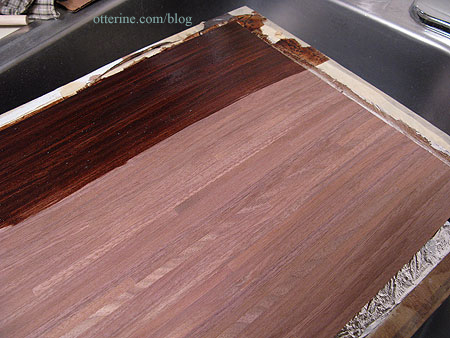
Again, it turned out beautifully.
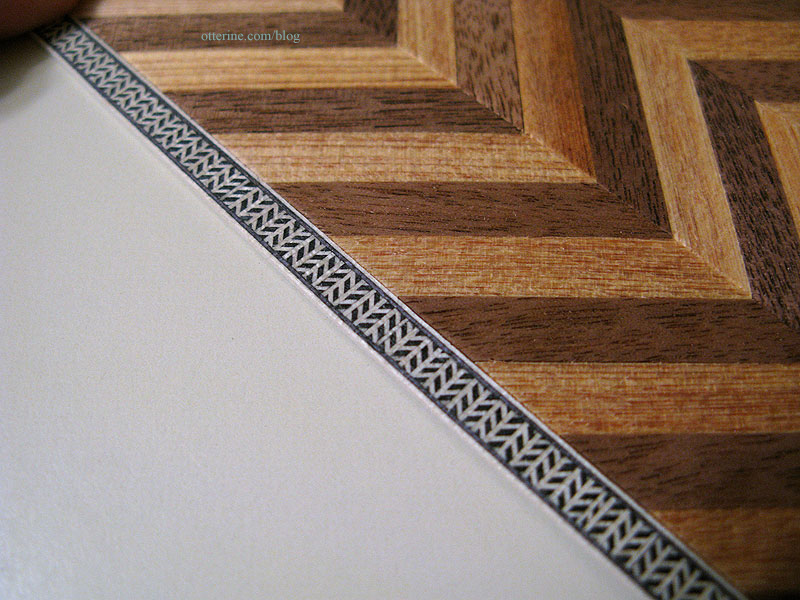
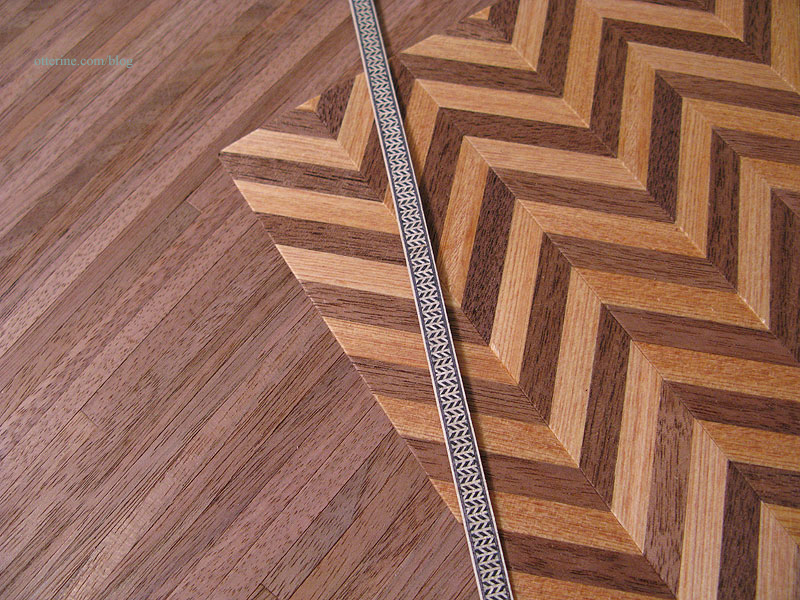
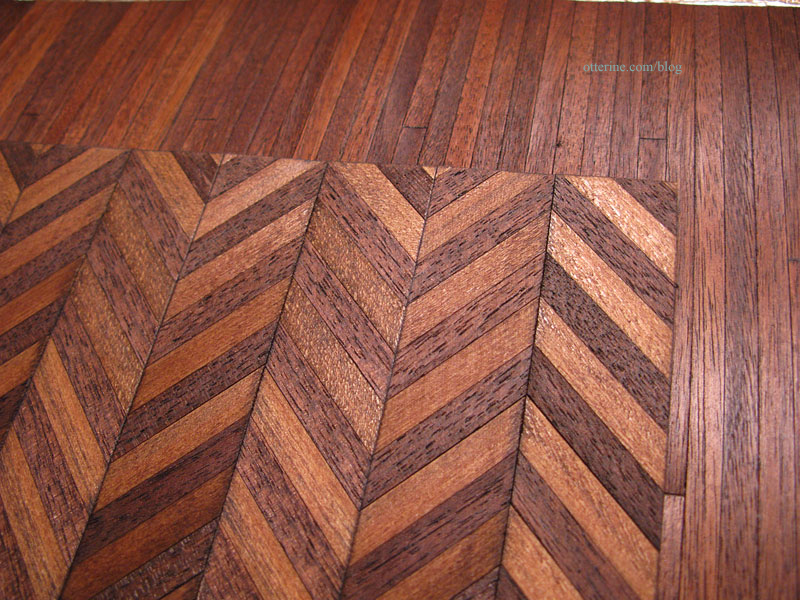
It will be the perfect frame for the herringbone center.
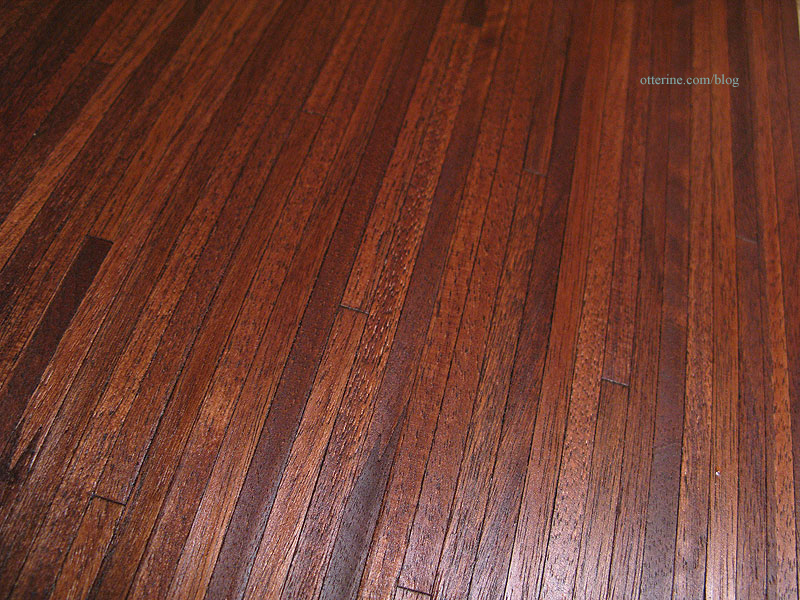
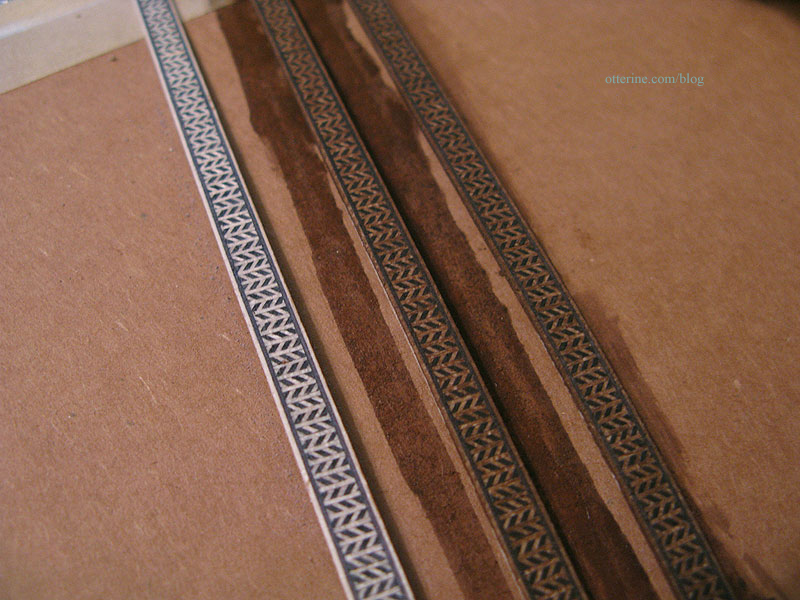
The next step in the floor finishing was staining the guitar marquetry. I wasn’t sure if the stain would take to it the same way as the flooring sheets, so I started with a small sample at the end using Minwax English Chestnut. It was too dark and lost all the beautiful marquetry detail. The original was too light, so I next tried IKEA antique stain. It warmed the color but wasn’t dark enough. So, I next tried an acrylic paint wash using Real Brown by Folk Art. It was a much better match.
Here are the results left to right.
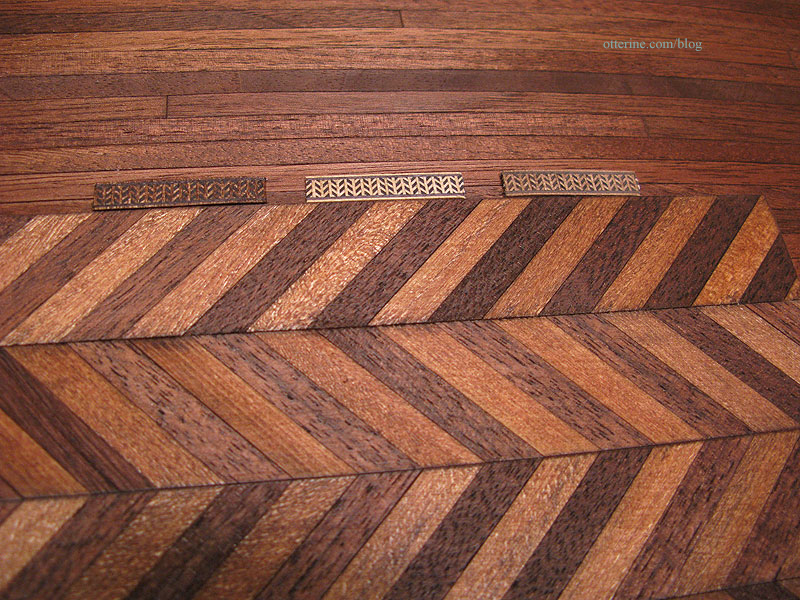
The Real Brown warmed the marquetry without losing the detail. I like how some portions took more of the pigment; it makes it look like an old floor. :D
I bought three marquetry strips each 25″ in length and ended up using the paint was on all three (minus the small test portions I had cut). I again wanted consistent coloration and any leftovers could be used on the balcony on the second floor. It would be a nice way to tie in the floor upstairs with the fancy floor downstairs.
Now I just need to let it all dry while I finish the prep work in the parlor.
Categories: The Haunted Heritage
January 28, 2012 | 0 commentsRoundy roundy wagon wheels
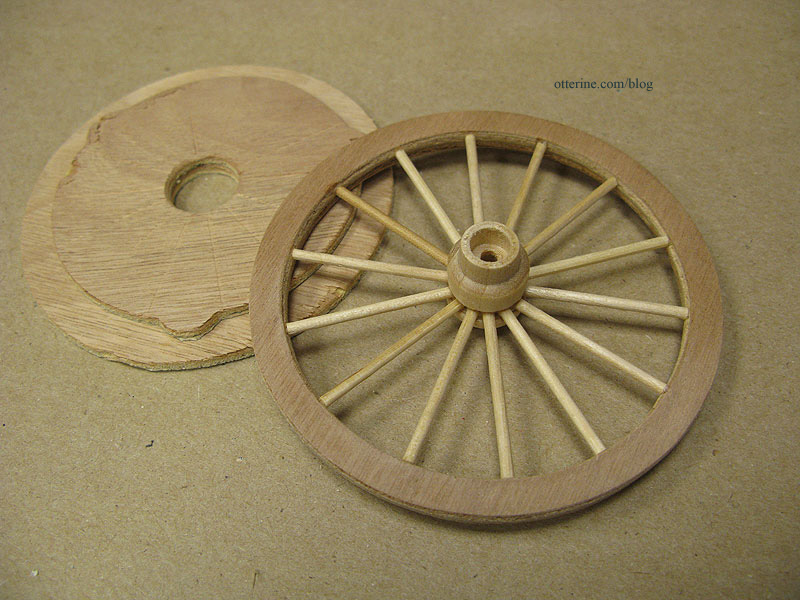
The Allwood covered wagon kit I transformed into a 1:12 scale farm wagon has an ingenious method for constructing the wagon wheels. They supply dowels you cut into spokes and the shaped inner hubs.
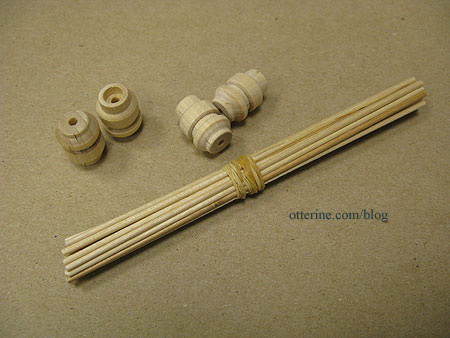
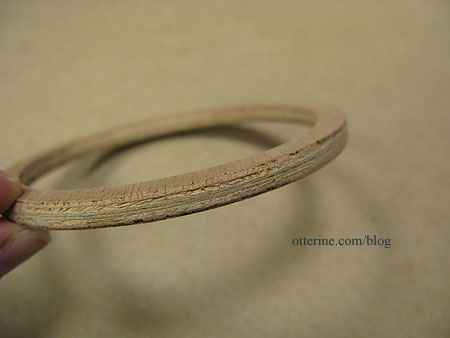
The wheels are made from two layers of diecut plywood glued together and sanded.
The ingenious part comes in the form of the jig used to line up the spokes. It is made from two layers of plywood lined up in the middle and glued together.
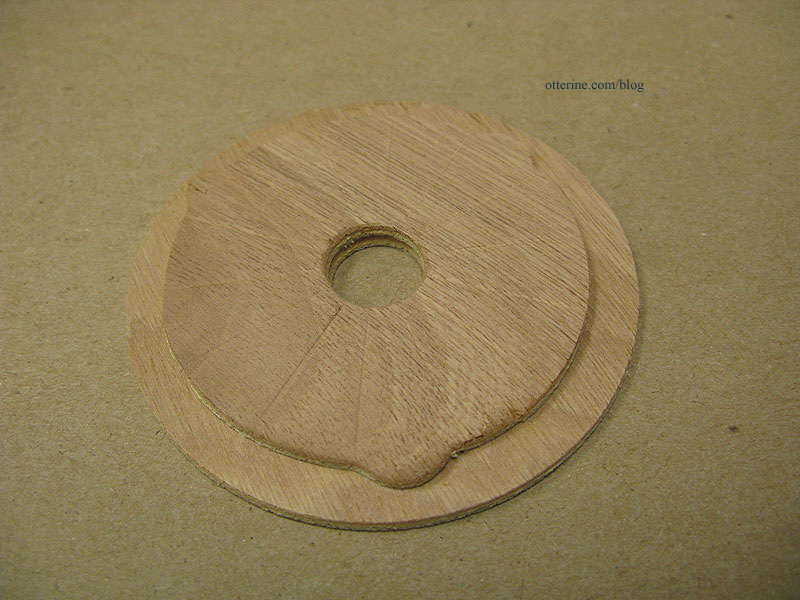
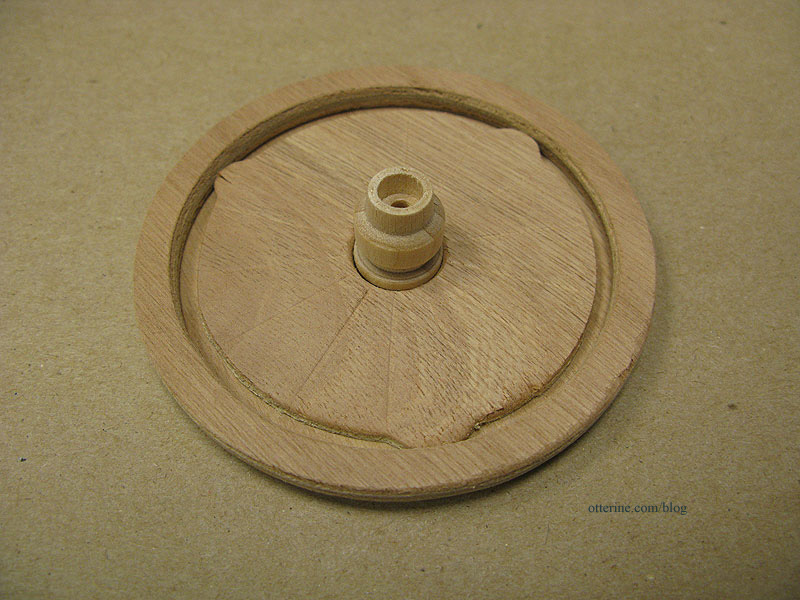
The wheel assembly fits snugly onto the jig and the hub is placed in the middle. The jig has grooves in it serving as a guide for the spokes.
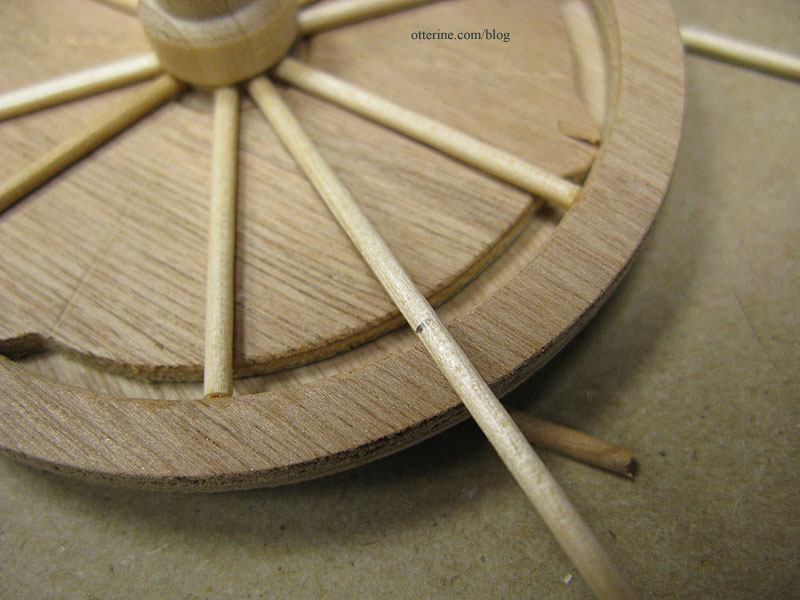
The instructions tell you to cut a whole bunch of dowel lengths to certain measurements, but I didn’t do it that way. Instead, I measured only the first one to the kit specified length and then measured the rest of the dowel lengths to fit. There was no way the standard measurements given with the kit instructions were going to work for all the spokes – some would be too long and others too short. That’s the nature of imprecise diecut parts.
Once the glue has dried, the wagon wheel pops off from the jig. :D
Categories: Baslow Ranch, Model Cars, Vehicles
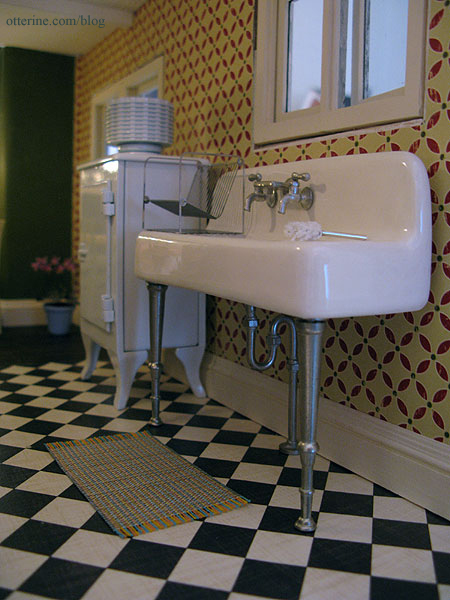
January 25, 2012 | 0 commentsHeritage – 1920s kitchen sink
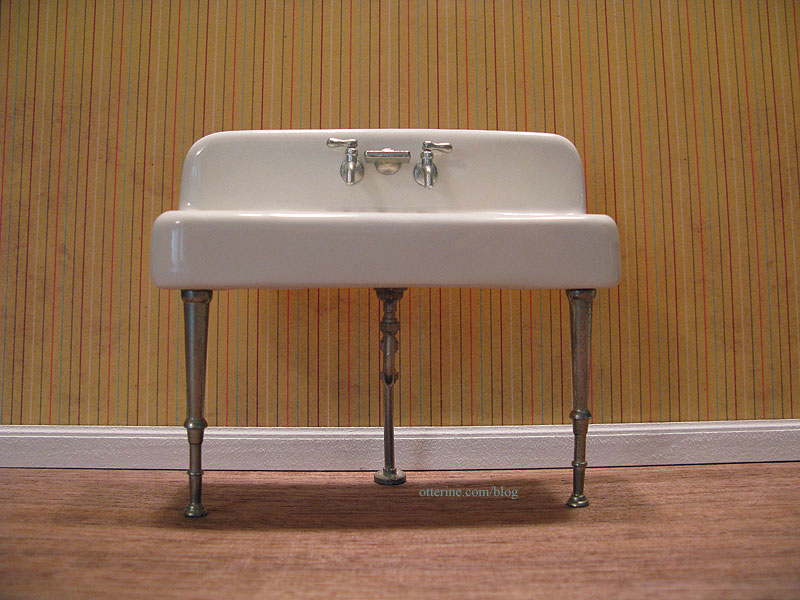
I love the 1920s porcelain Kohler kitchen sink by Jacqueline Kerr Deiber that I bought for the Heritage. But, the legs are shorter than the drain pipe, making for a rather wobbly sink that likes to tip forward…and fall down. :[
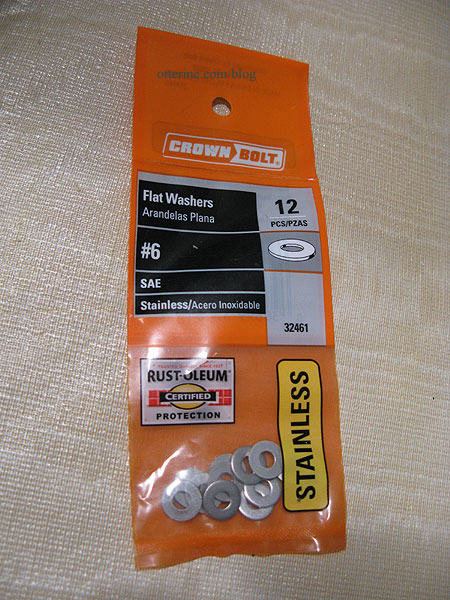
To fix this problem I bought a bag of washers from Home Depot.
I attached one washer to the sink.
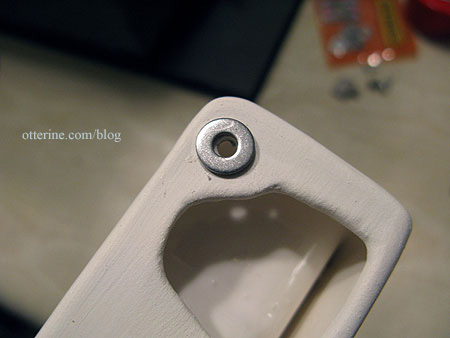
I then glued the leg into the hole. The washer blends in perfectly with the leg so it’s not noticeable as an extra piece.

Now the sink can stand up straight. :]
I received a beautiful basket from Lidi at Basketcase Miniatures. We did a post-holiday swap. :D
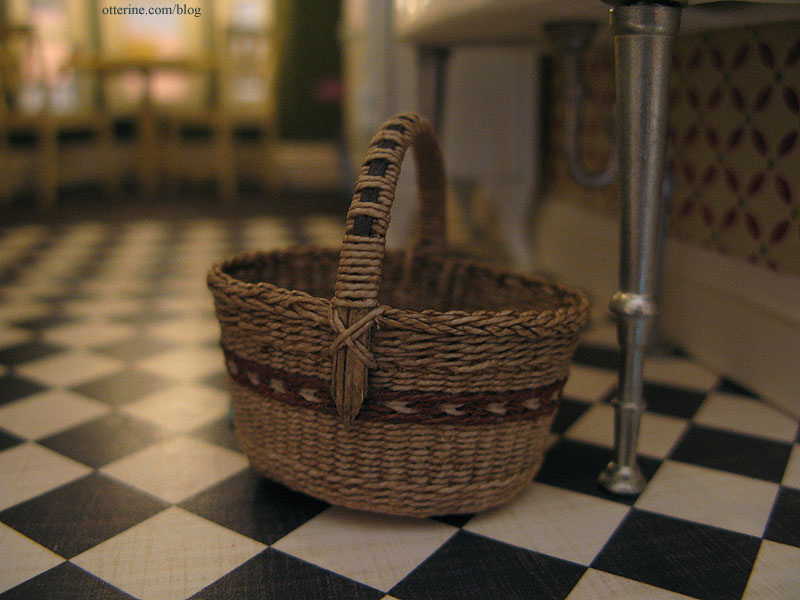
It’s so beautifully made that I just had to spend some of my mini time today playing instead of building.
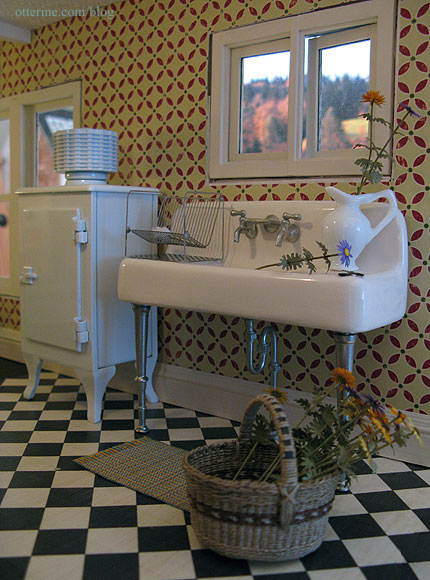
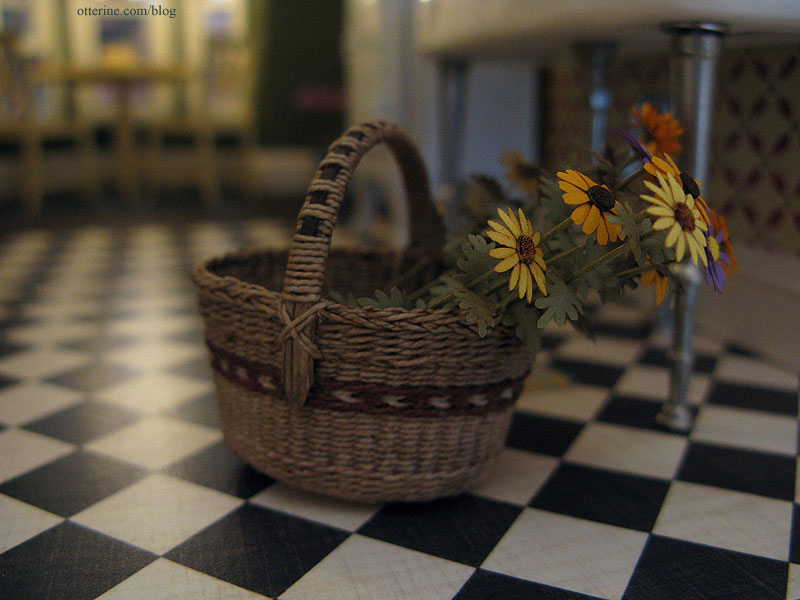
Looks like grandma has been in her garden. She picked some beautiful flowers (these were made from Bonnie Lavish kits). I love this basket!
Categories: The Haunted Heritage
January 21, 2012 | 0 comments


NOTE: All content on otterine.com is copyrighted and may not be reproduced in part or in whole. It takes a lot of time and effort to write and photograph for my blog. Please ask permission before reproducing any of my content. Please click for copyright notice and Pinterest use.


