

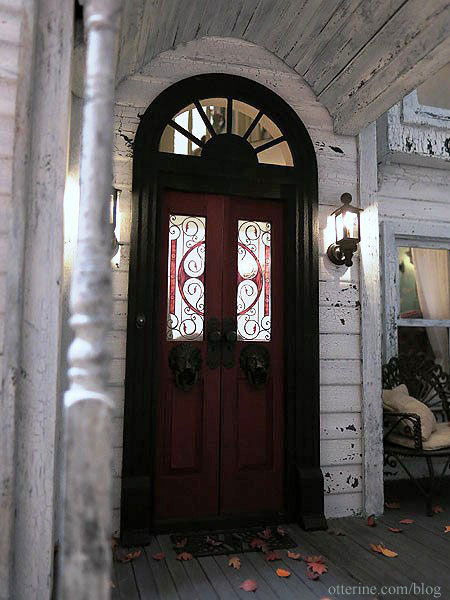
Palladian Door – installation
Continuing work on the front door. I glued the front door in place, making sure it was level and centered in relation to the portico. I then added the supplied interior trim, painted Vintage White by Folk Art. I used spackling to fill in any gaps and touched up the paint. To finish the threshold, I used a small piece of quarter round trim stained Minwax English Chestnut to match the floor.
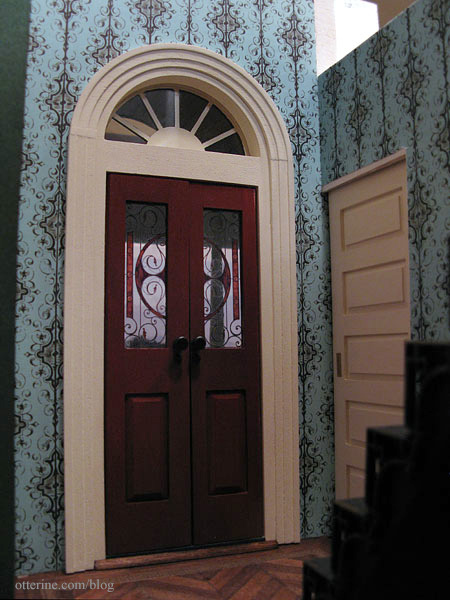
The trim had broken at some point, but I left it as is for installation. Just a hint of the break is still visible in the photo above, so I might go back and work on that some more.
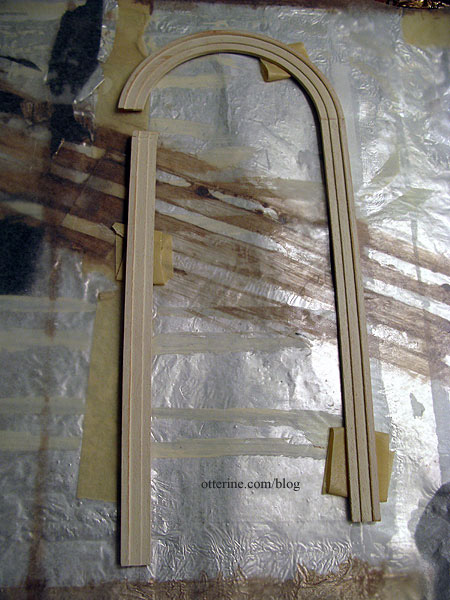
To hold the acrylic insert in the upper arch, I glued in a small strip of bass wood painted to match (shown here unpainted). This should offer enough stability to keep it from falling backwards as it is apt to do.
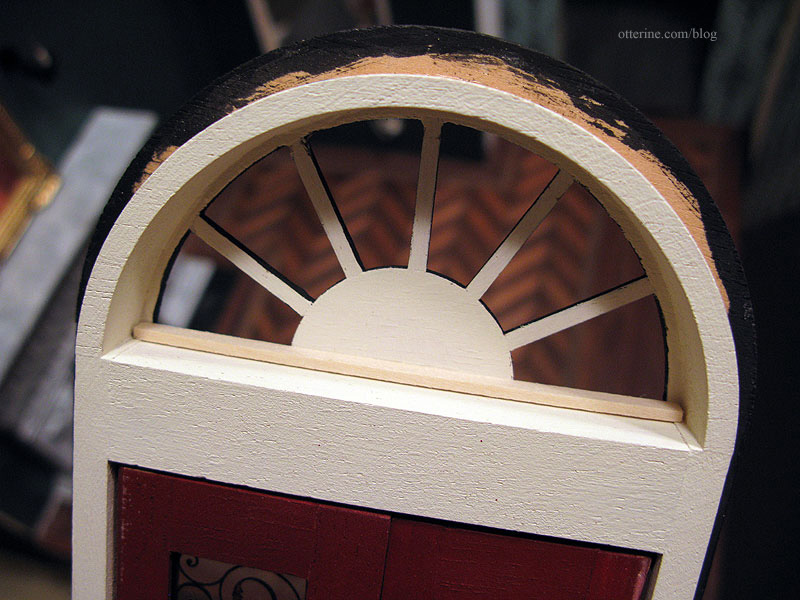
It does show a little from the outside looking in, but it’s not glaringly obvious. It just looks like a structural part of the door.
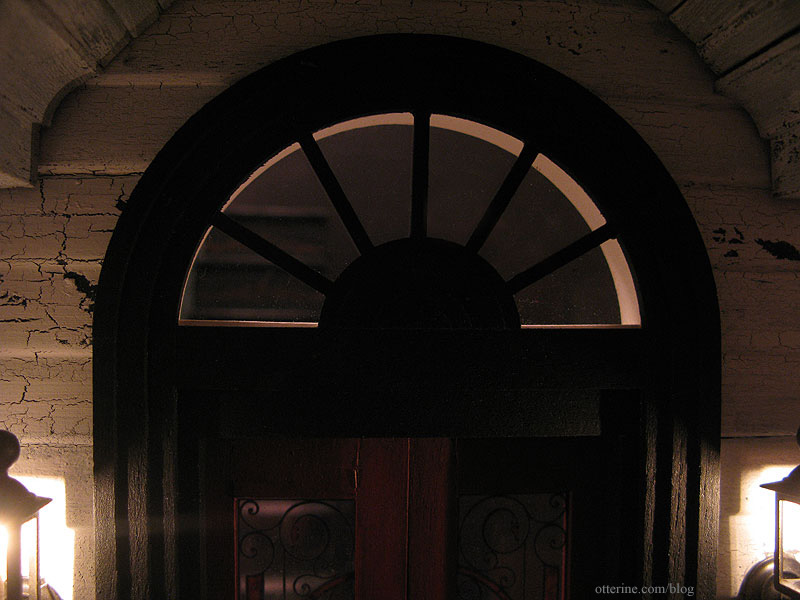
Looks rather stately.
Categories: The Haunted Heritage
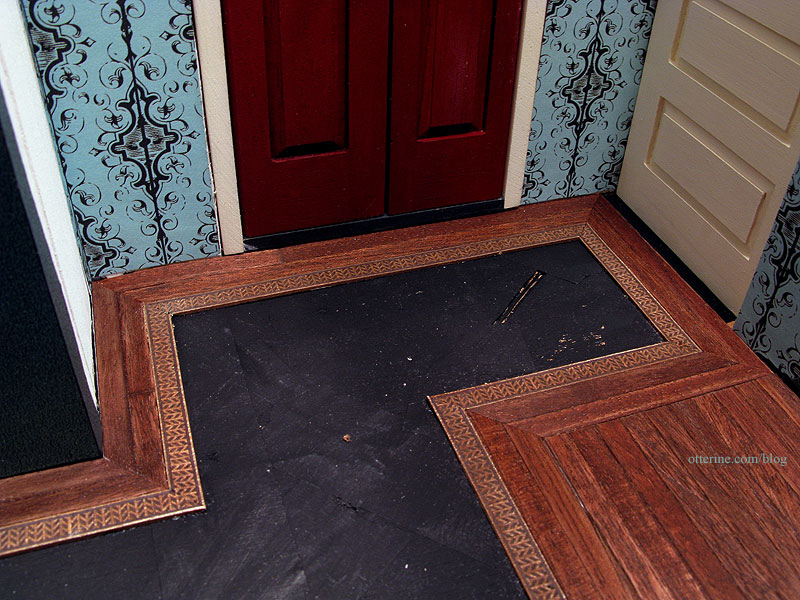
February 10, 2012 | 0 commentsFancy parlor floor – part 3
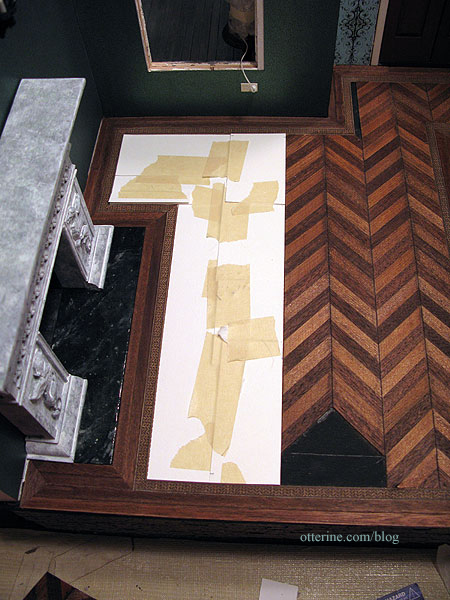
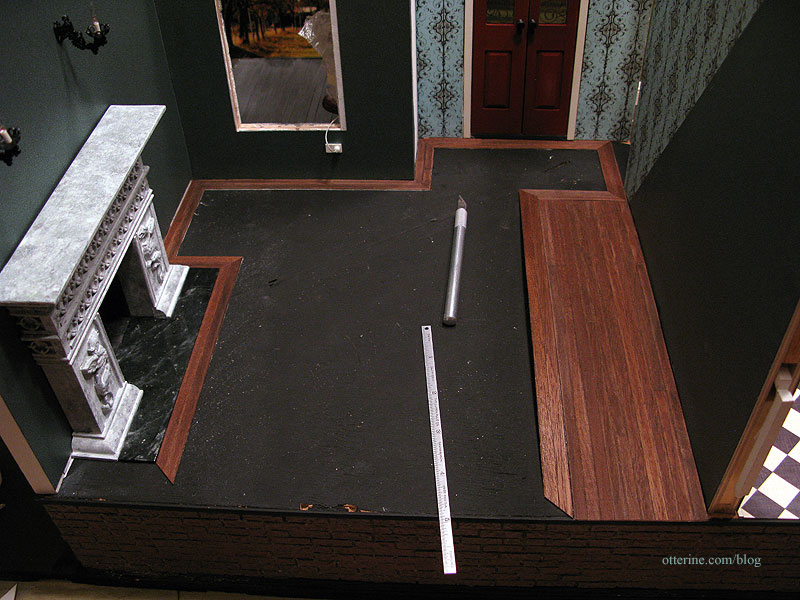
Completing work on the fancy parlor floor. I used pieces of leftover bristol paper to make a template of the area inside the marquetry border.

I started with the entryway even though it is the smaller of the two open areas because I wanted the herringbone pattern to be centered here. Furnishings will cover the larger area in the parlor so its pattern is less important. I measured to find the center and marked the line on the paper template.

I aligned the marked center with the herringbone pattern and taped the template to the herringbone flooring sheet.
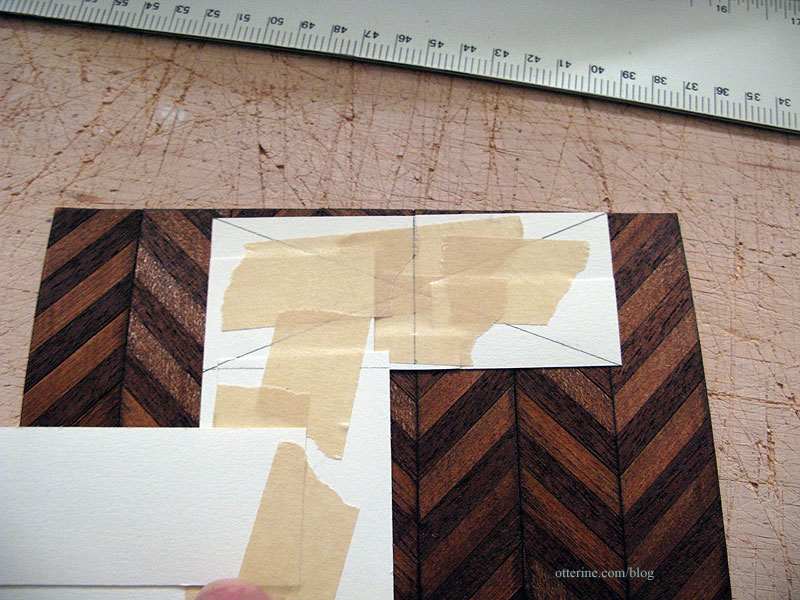
I cut the flooring using the template and then adjusted the fit using scissors to trim small areas.
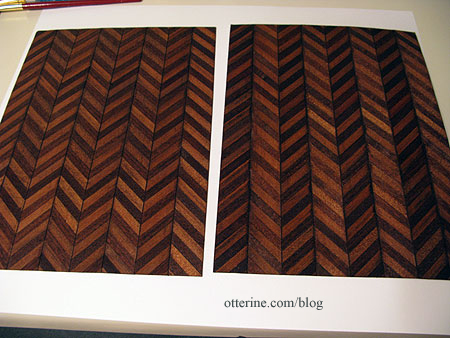
A small portion of the herringbone floor is longer than the pre-made sheets. To splice pieces together to make for longer strips, I cut the ends of the pieces following the diagonal pattern and then used those cut pieces as templates. This creates a seamless connection.
After gluing the main piece in place, I adjusted my paper template for the remaining open area.
The floor is by no means perfect, but I think that’s better for my old house. :] This was a challenge, and I am very happy with the results.
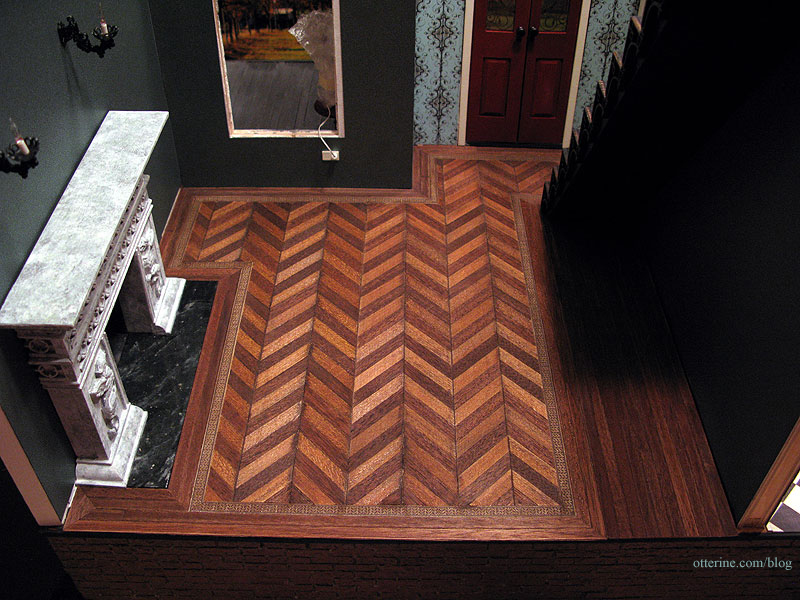
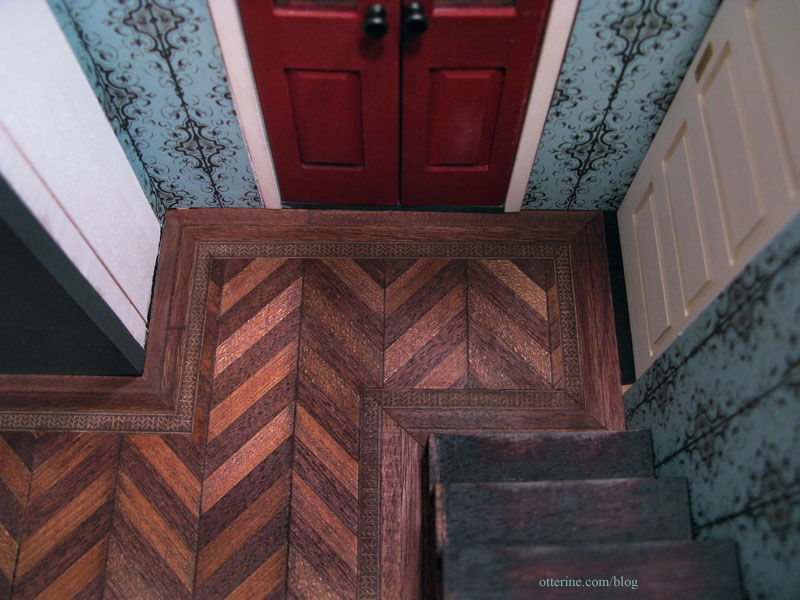
I especially like the way the pattern works in the entryway at the bottom of the stairs.
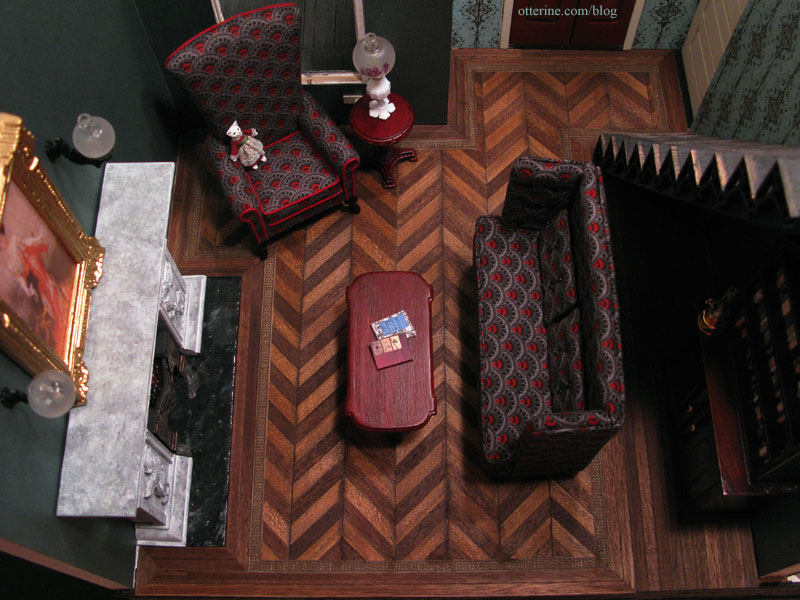
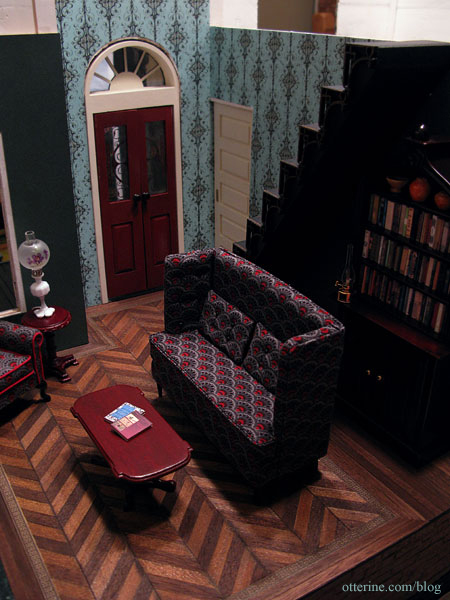
With the furniture in place, it’s really starting to look like a vintage parlor.
Once the baseboard trim is in place, I think it will really be striking.
I need to find or make a rug for the middle of the room, but I don’t want to cover too much of the floor I spent so much time bringing to life.
Categories: The Haunted Heritage
February 5, 2012 | 0 commentsFancy parlor floor – part 2
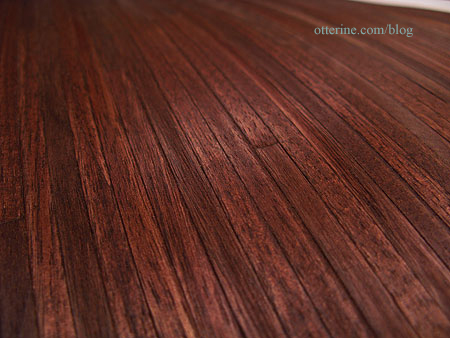
Continuing work on the fancy parlor floor. I accidentally got some glue on the herringbone wood surface when I was gluing it to the bristol paper backing. I sanded the area lightly and got a wonderful sheen. So, I decided to sand the entire surface of the herringbone and plain wood sheets in the same manner before starting the fancy parlor floor. A happy accident. :D I doubt I will seal the wood further since the stain I used said it also seals, and I don’t want too high of a gloss for my old house.
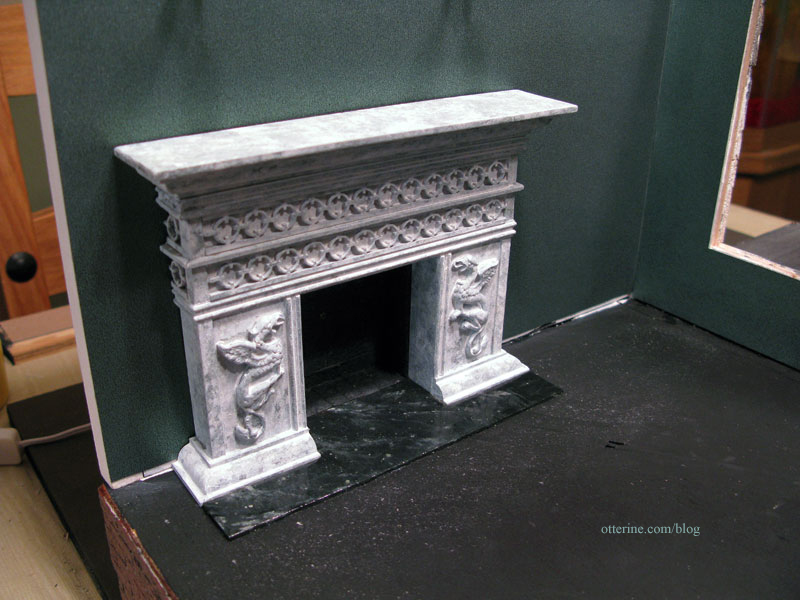
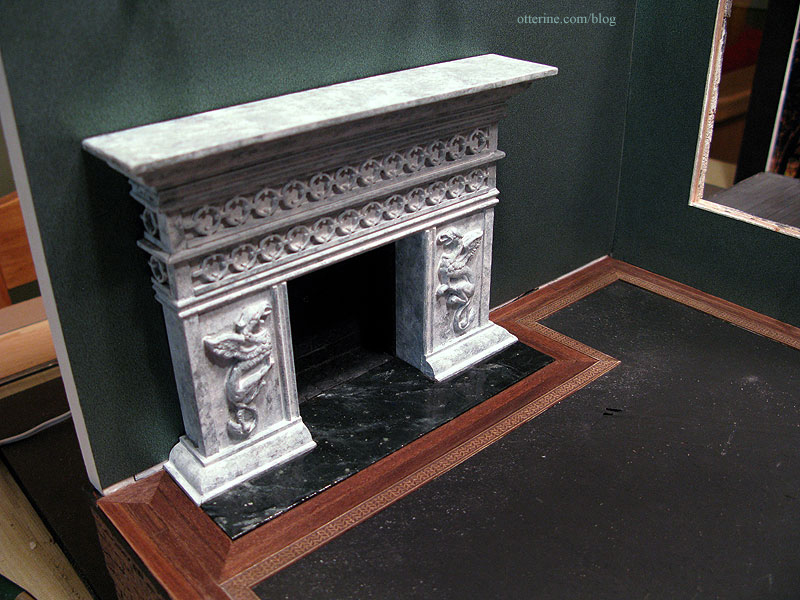
I placed my paper mockup floor in the room again and marked the areas for the fireplace and hearth. I thought this might help for reference later on.
Since the floor pattern will flow around the hearth, I glued the firebox, fireplace and hearth permanently into place.
I also finished the back edge of the foundation. I opted for a long strip of bass wood painted black since I thought this would blend well with the dark floors in both the parlor and the kitchen as well as the brick foundation and not create a stark white outline across the bottom.
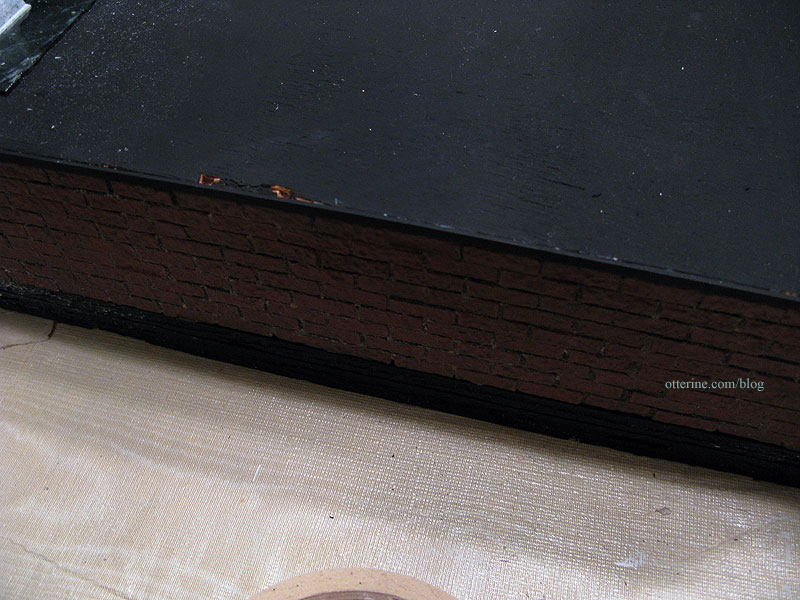
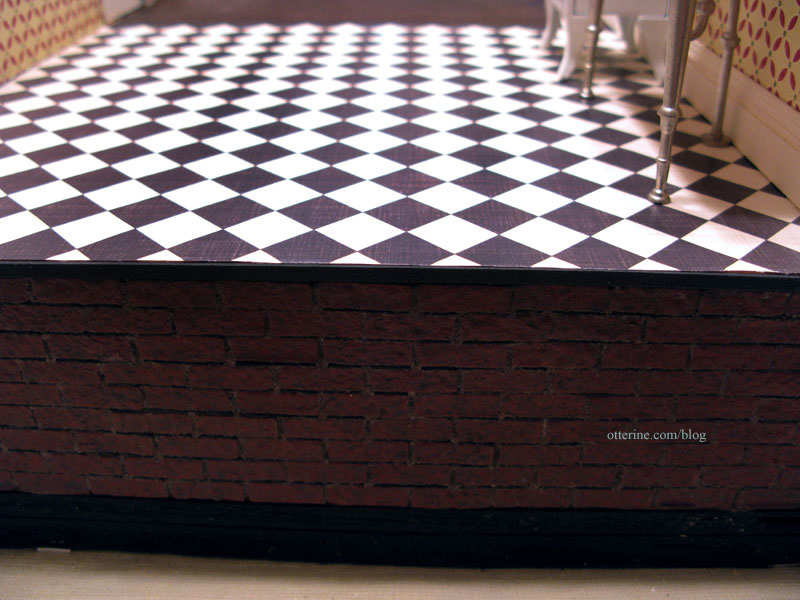
You might have noticed that I didn’t add moss to the foundation toward the back of the house. I omitted the moss here since the interior is decidedly less rundown than the exterior so I thought it matched the visual style better, and I wanted to keep the amount of moss accidentally blown into the interior of the house to a minimum.
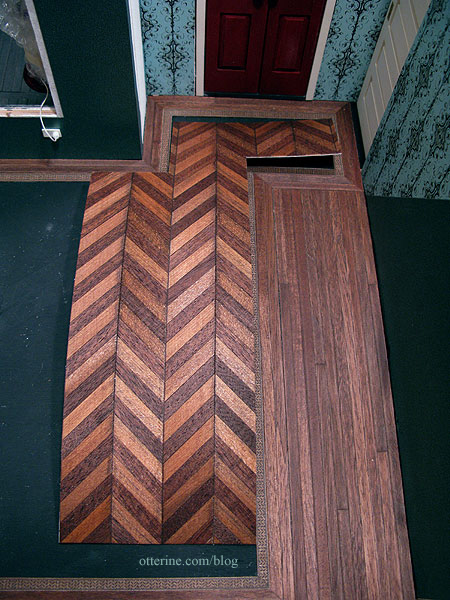
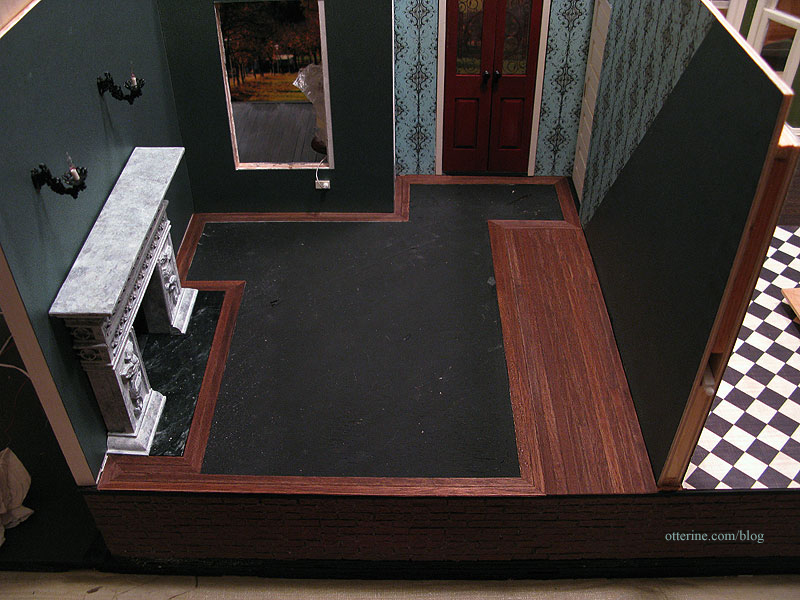
Starting with the plain border around the room, I cut strips that were two boards wide from the flooring sheet previously stained. Since one area builds out from the placement of the previous one, I glued the pieces down as I went. I used Aleene’s Quick Dry glue with some supplemental dots of super glue gel.
In another “chicken or the egg” moment, I decided to leave the stairs out while finishing the floor. I didn’t think the added thickness of the flooring would negatively impact fitting the stairs for two reasons. First, if the second floor balcony is to have the same flooring as the parlor and entryway, the thickness of the flooring on the upper floor will make up for the bit the stairs are raised from the first floor. Second, I really wanted to keep the ability to weight the flooring down as I worked on it. Having the stairs glued in place would make that much more difficult. I did make sure there would be enough room for the narrow door at the top of the stairs by measuring where the stairs should end on the first floor.
I added the plain flooring block to the area behind where the stairs will be and continued the border around it.
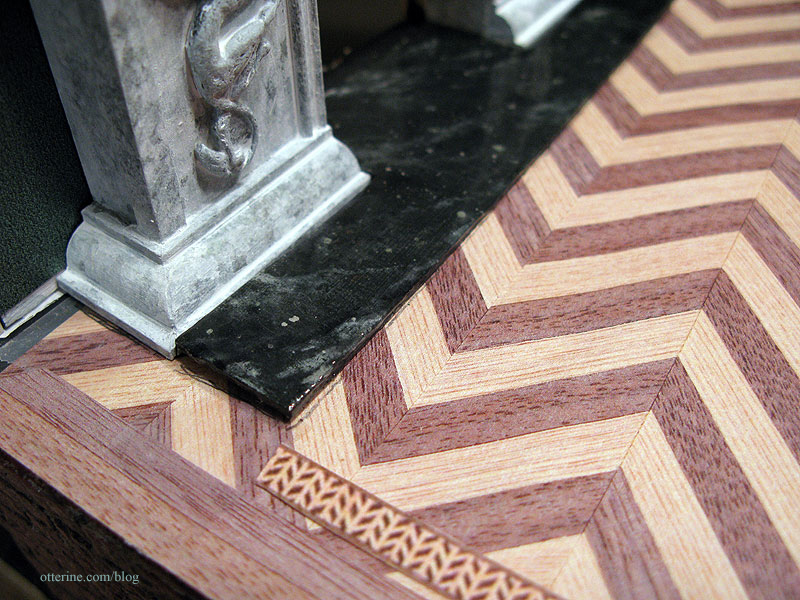
Even though the fireplace and hearth aren’t square I needed to make sure the inner edges of the plain border were, so I used triangle as a guide.
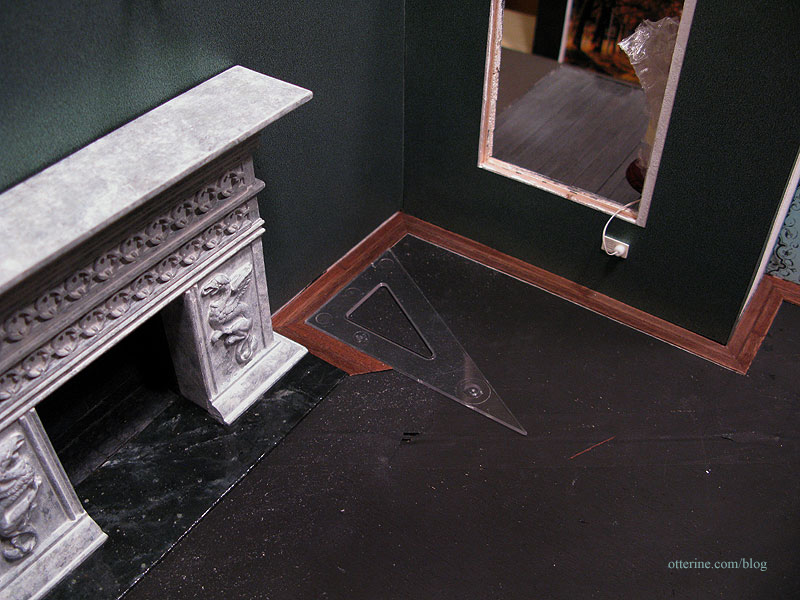
I’m not going to take credit for it, but the hearth sits exactly 4 board widths from the back edge. I won’t be able to continue the herringbone pattern here, but the even number of boards makes for a clean finish and an interesting detail.

Overall, I’ve been elated with the results so far.
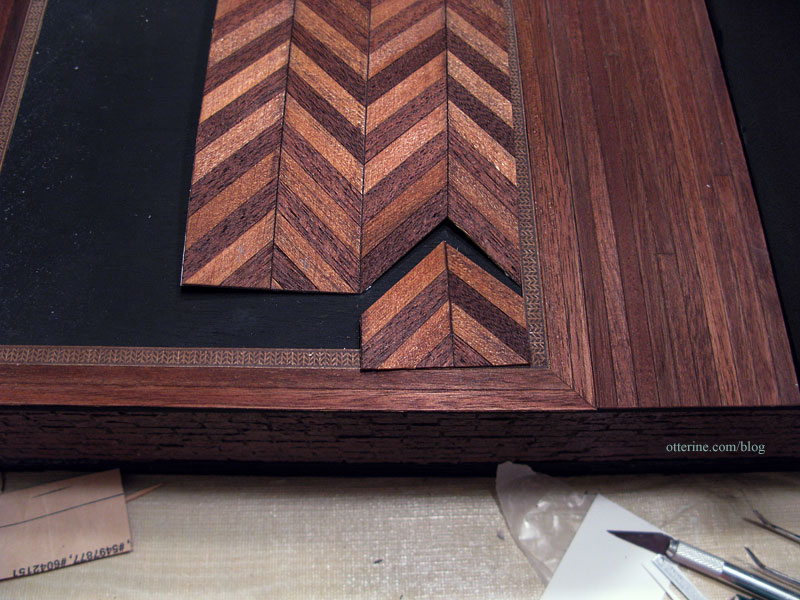
After completing the plain wood border, I added the marquetry border.

I really love the way this floor is turning out. :D
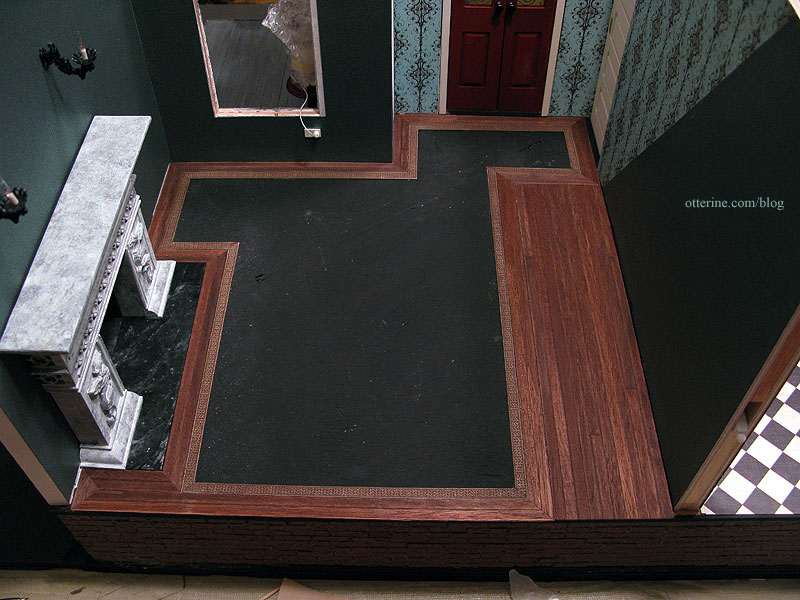
It frames the hearth so well.
I’ll be using plain wood flooring to finish the threshold under the pocket door, between the parlor and kitchen.
I’ve also glued the flooring sheets to the bristol paper to bulk up their thickness, leaving them under magazines until I am ready to use them, need to make sure they bond well and lay flat.
Categories: The Haunted Heritage
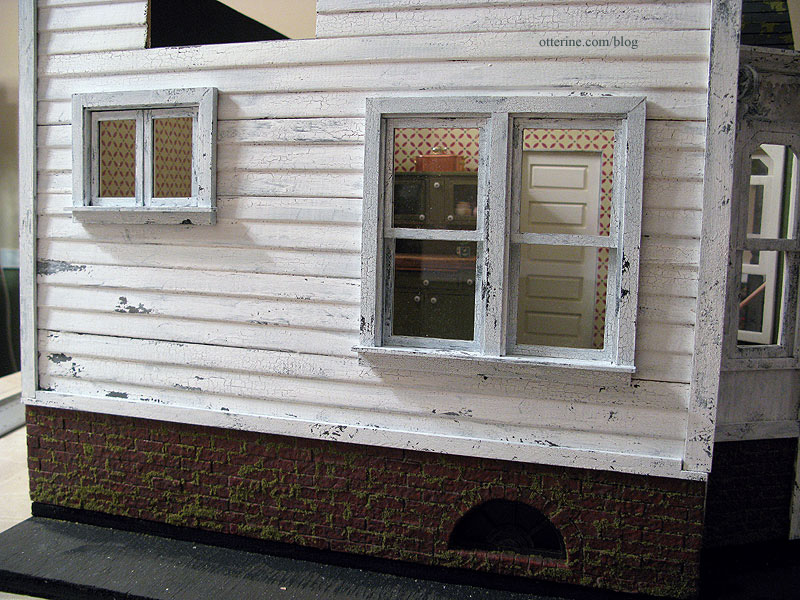
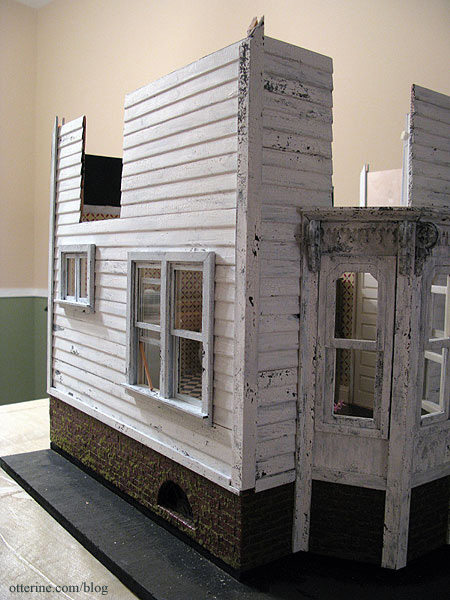
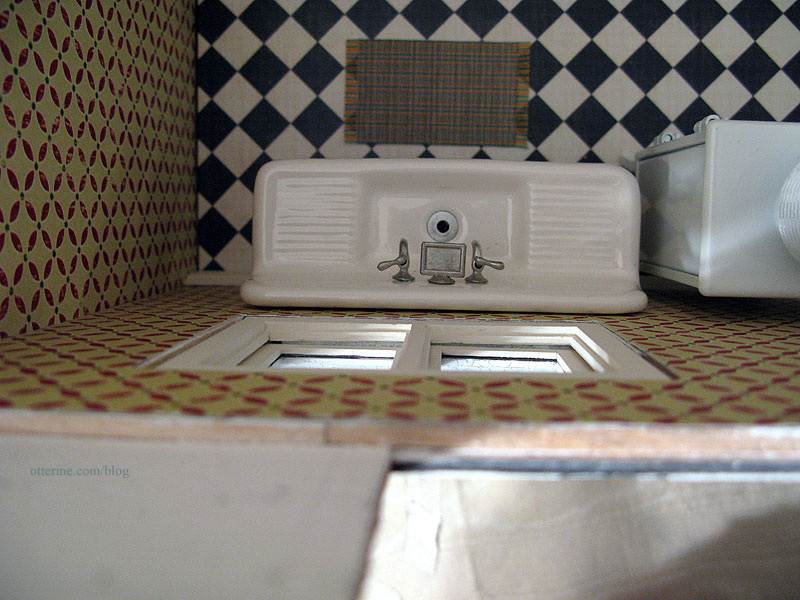
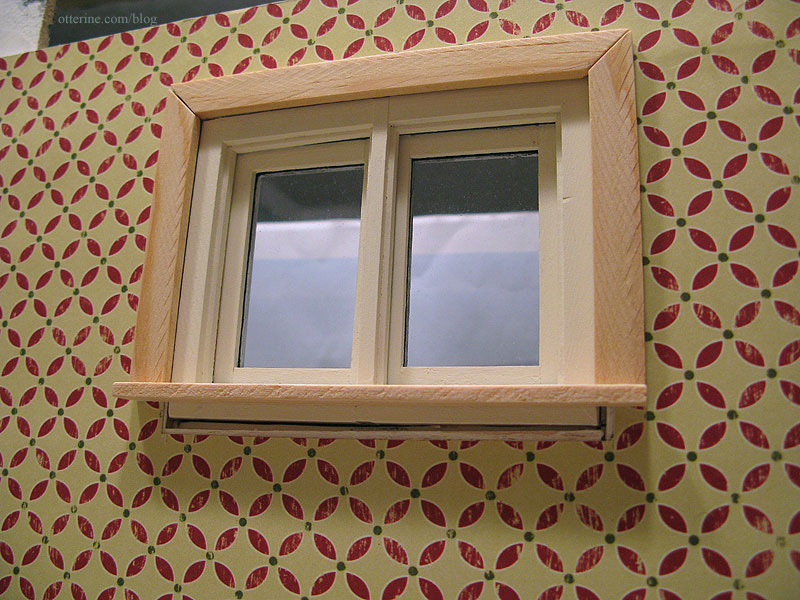
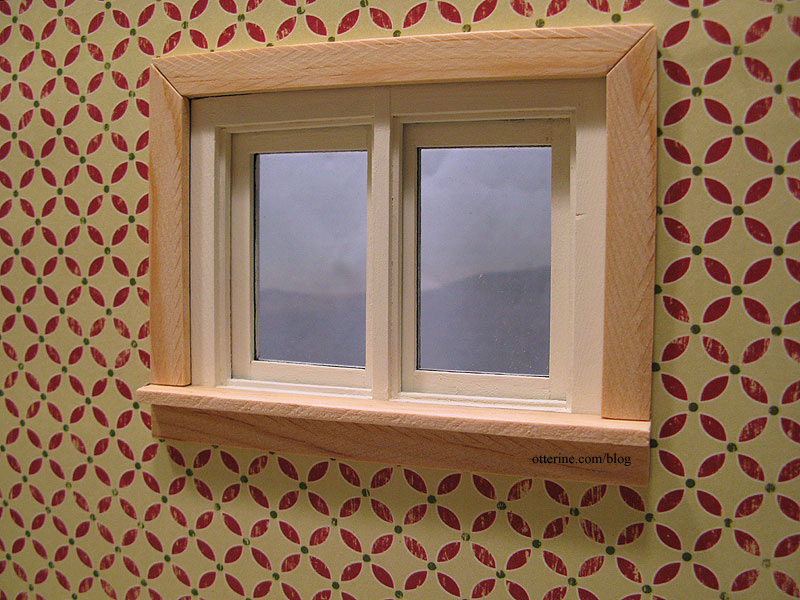
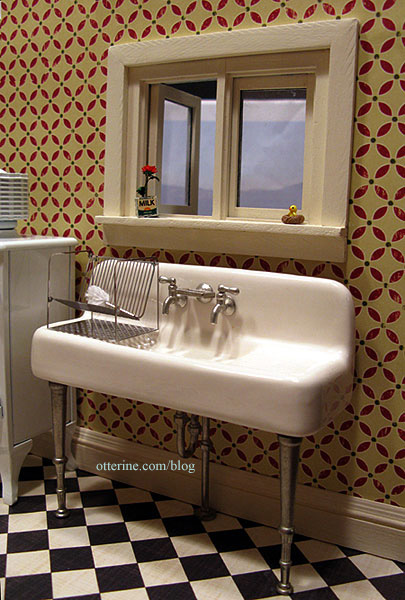
February 4, 2012 | 0 commentsHeritage – Kitchen working windows
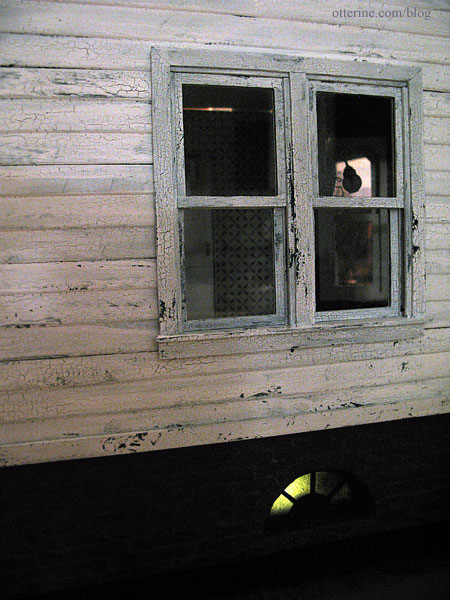
Today, I worked on the Houseworks working windows for the kitchen. I had already given them their first coat of paint and applied the crackle medium to the exterior some time ago. I can fiddle with windows and painting tiny parts only so long, then I have to move on. So, they’ve languished in the “to do box” since then.
They have their original acrylic inserts, which I will worry about aging later in the build though right now they are appropriately dusty.
For the large double window, I glued the top window pieces in place, and the lower portions are loose enough to require dowels to prop them open. That makes three windows like that in the kitchen, the other being one of the bay windows.
I’m so glad I added the casement window above the sink. I think it’s the perfect addition for a farmhouse.
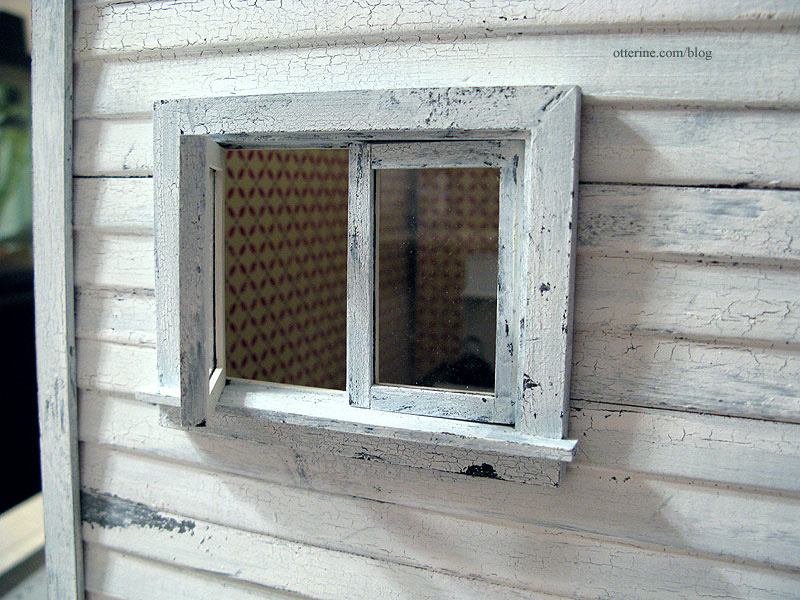
Building up the outer edges of the window trim not only helped make up some of the difference between the thickness of the wall and the depth of the working window, it also makes the windows look more realistic in construction.
The padding I added to the inside wall makes up the rest of the difference in wall thickness so the interior surfaces of the windows are flush with the wall surface. This will make adding the interior trim much easier.
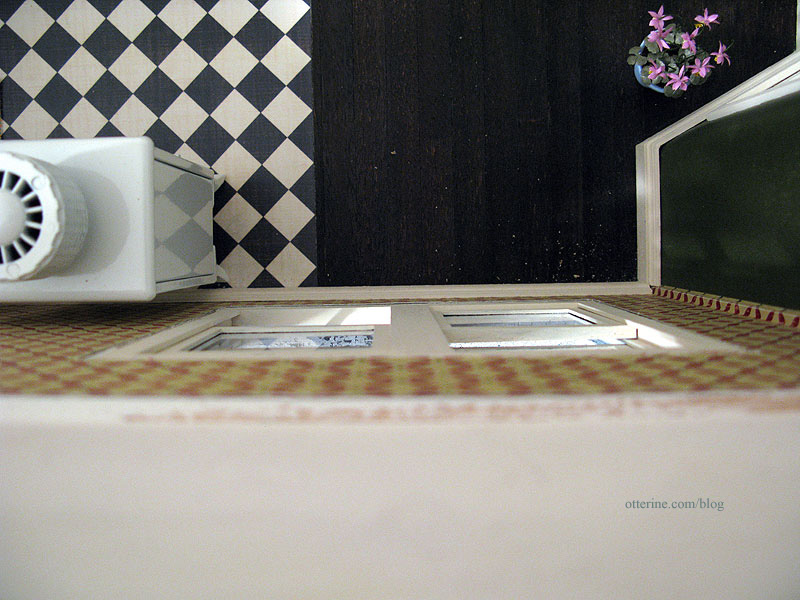
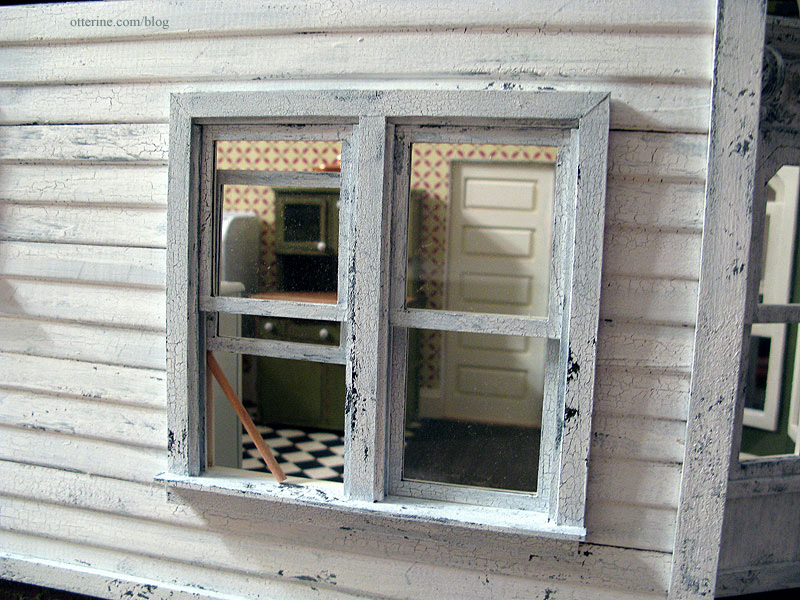
When I take photos where the open back will show through the windows, I often prop up a spare piece of matching wallpaper to make the room feel whole. Here you can it in place.
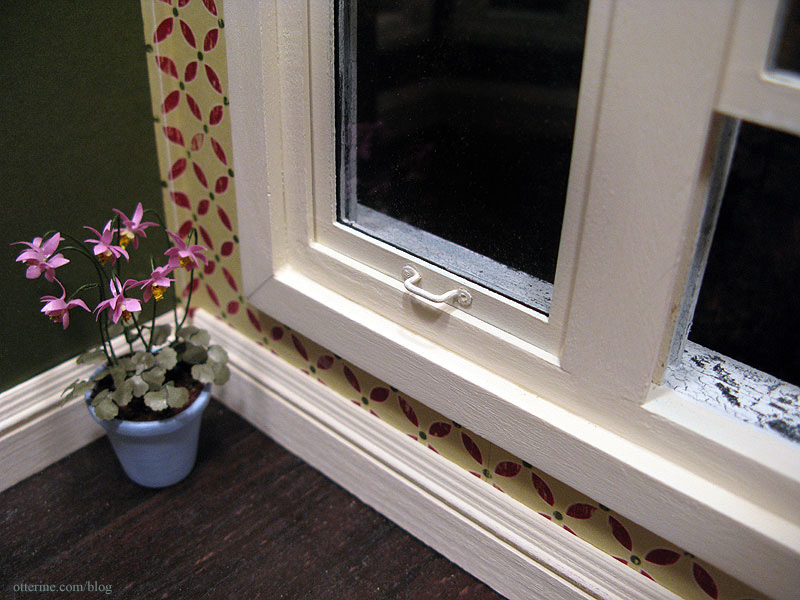
The Houseworks double working window came with pre-cut trim, so I painted and used those pieces as is. There were a few gaps, so I filled and painted just as I did for the baseboards. The flowers are by Michelle of Little Rabbit Miniatures.
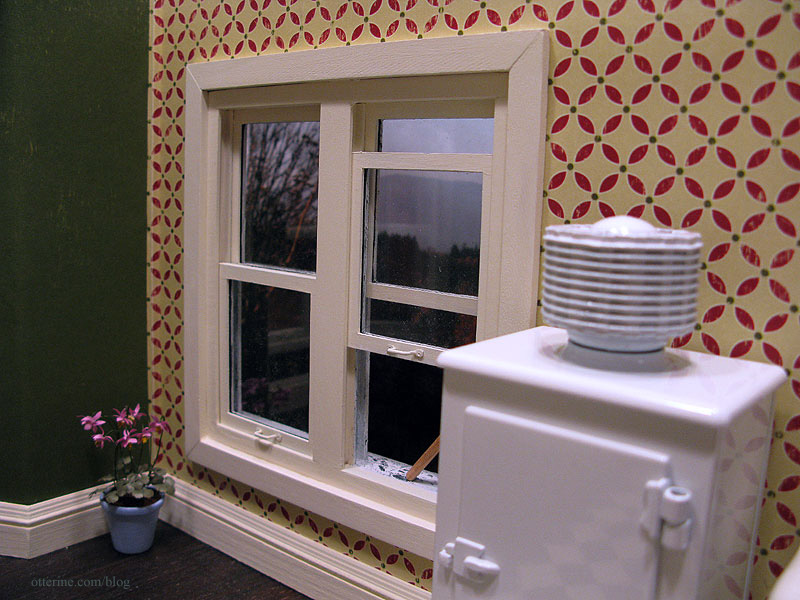
I used brass window handles but I painted them Vintage White by Folk Art to match the windows. I usually use spray paint when I change the color of brass hardware, but old houses often have painted over hardware…done by hand. My old farmhouse was like that.
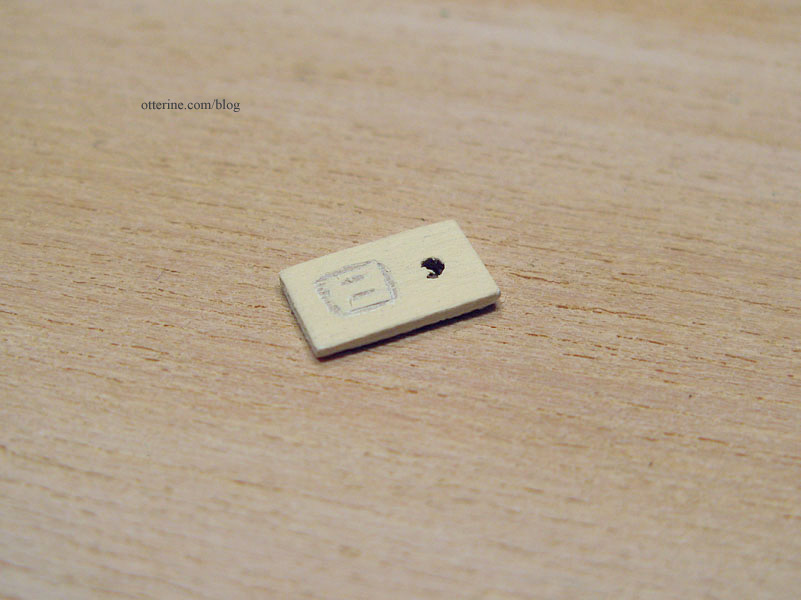
The casement window didn’t have interior trim included, so I made my own using some crappy trim wood from the Heritage kit to get a more aged look to the trim. I wanted to have a small sill for plants and knickknacks. I started with the top piece, cutting the mitred corners with an Easy Cutter. I cut the sides to end at the bottom of the window opening.
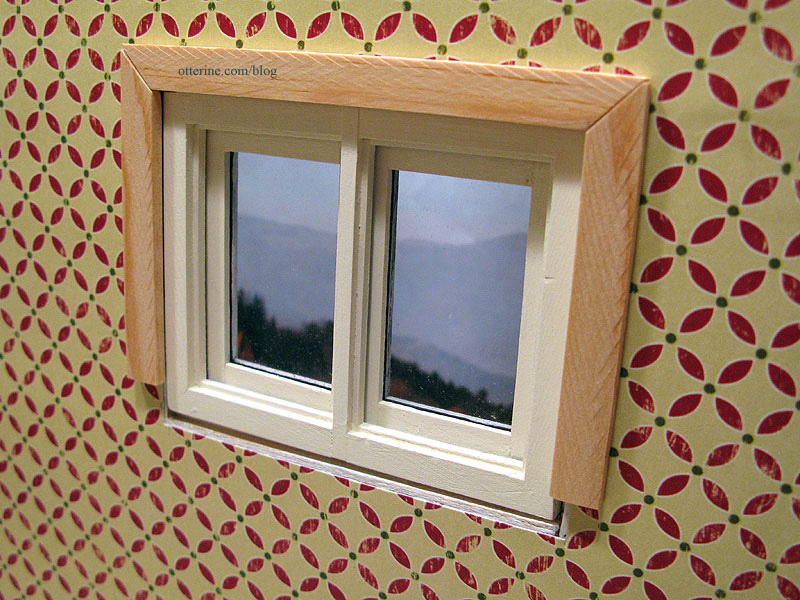
I then marked a straight board held on its side to serve as the sill.
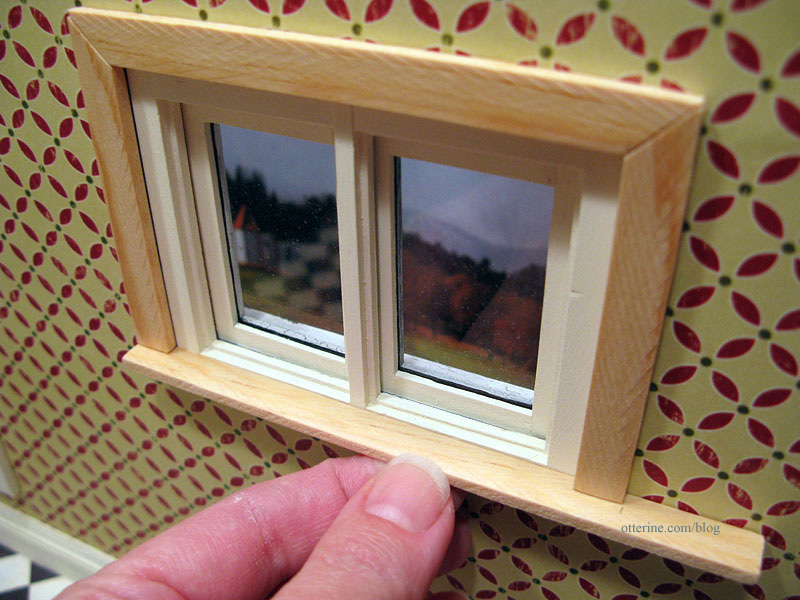
In order to cover the gap remaining on the bottom, I cut a rectangular piece identical to the sill piece though it will sit flat against the wall.
After painting, sanding, gluing, filling and touch-ups, the window trim is complete and the sill is the perfect place for the milk carton flower.
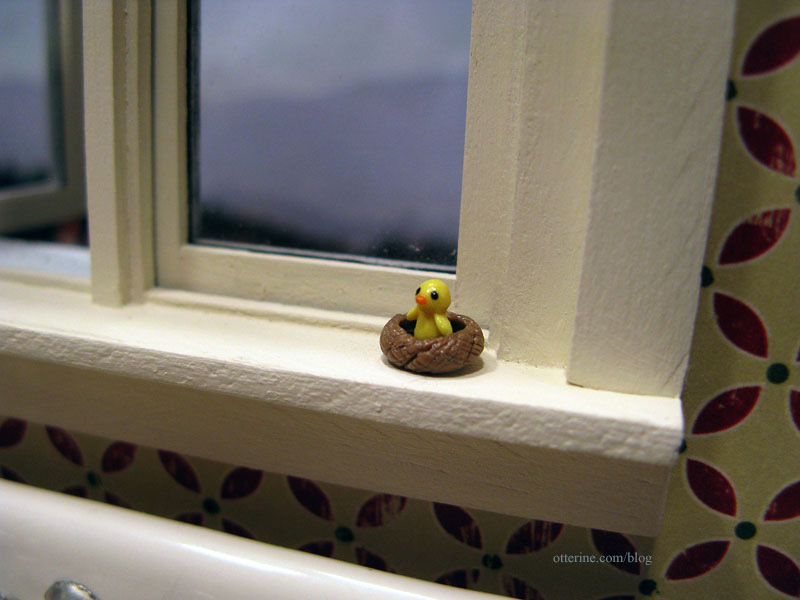
Hmm…I think I need some half-ripe tomatoes, too.
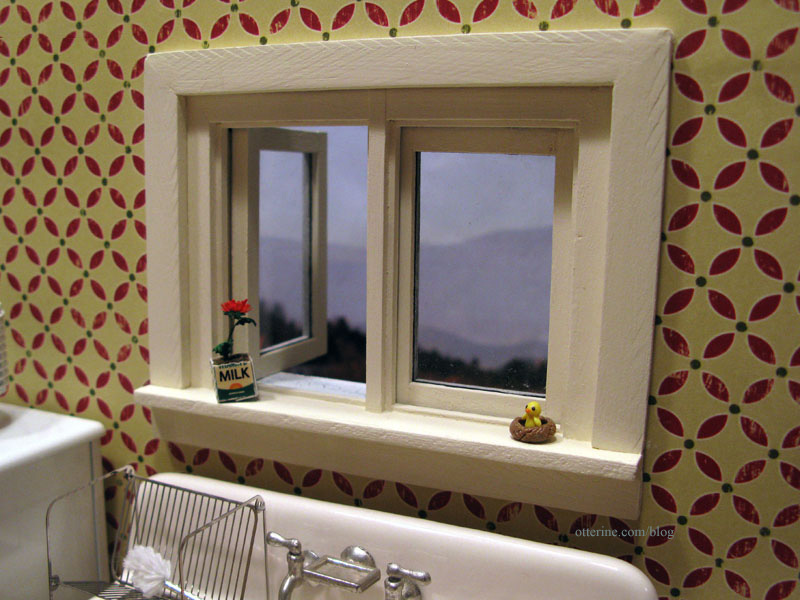
The little chick in the nest is another creation by Cathy Rohal, the same artist who made the peacock box I showed in an earlier post. Too stinkin’ cute! And, tiny! :D
Categories: The Haunted Heritage
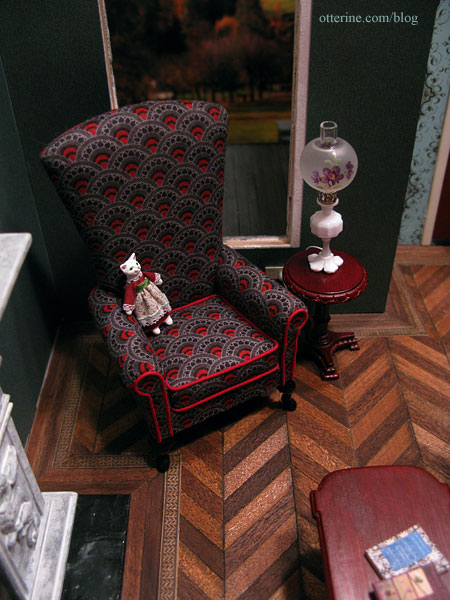
February 3, 2012 | 0 commentsHeritage – parlor table lamp
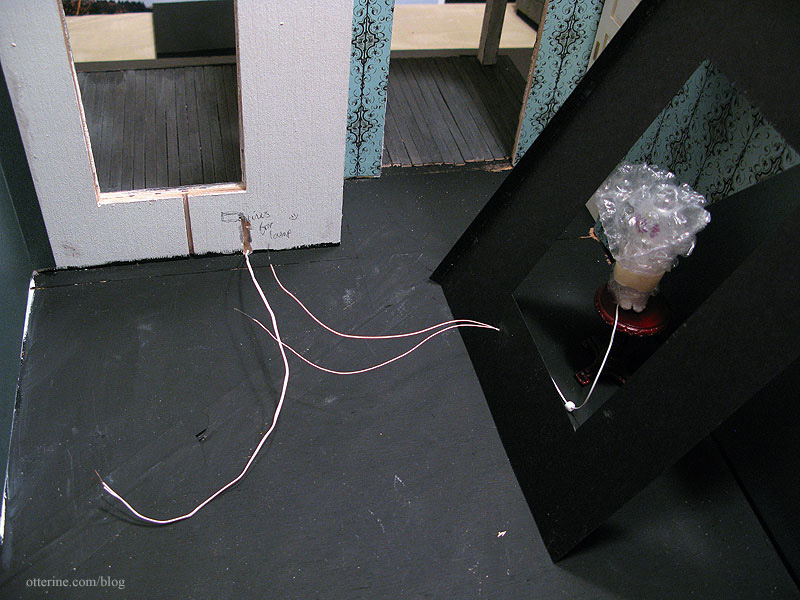
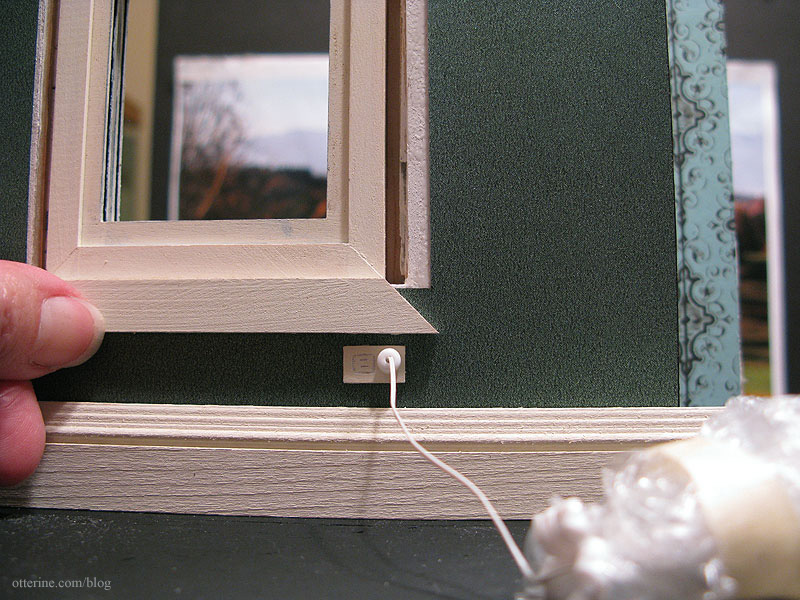
There was one more lamp to wire before I could finish the wallpaper in the parlor: the Chrysolite table lamp, which is the only Chrysolite light fixture I bought that wasn’t a kit. I used my usual faux outlet method for table lamps; I made a wall outlet. The outlet is made of wood with a hole on the side where the lamp will “plug in” and a drawn on empty outlet next to it.
I poked the wire extension through the floor from the open foundation and into the channel I made for the lamp wire. I used a white bead for the plug. Both the outlet and bead will be glued in place after the wallpaper is up so I still have the ability to adjust the positioning.
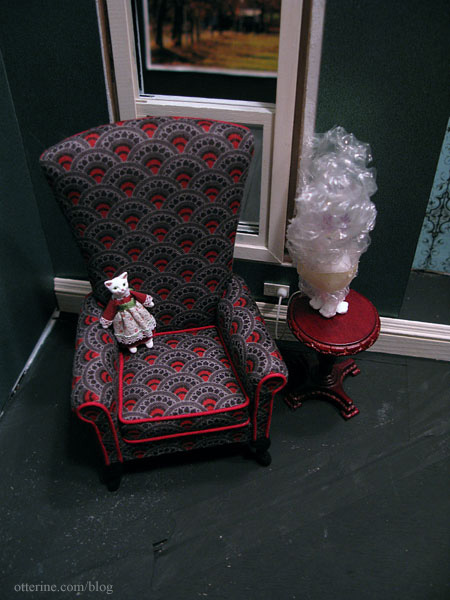
I wrapped the lamp in bubble wrap while working to keep from damaging the globe. The lamp is attached to the table with a bit of mini hold wax.
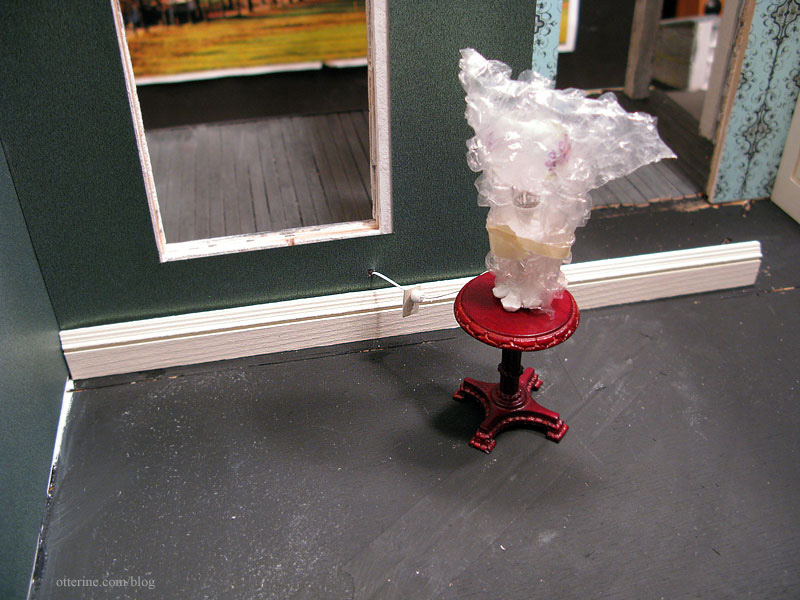
I used a scrap of baseboard and held the window trim in place to make sure I glued the outlet to the wall in the right place. I then glued the bead to the outlet.
It will be mostly hidden by The Chair, but I still like the way it looks! The lamp and table will sit on the front porch while I work on getting the floor in, so I’ve left the bubble wrap in place.
I also drilled a hole in the foundation for the cellar LEDs and the lamp wire. The chimney will cover this area. Thinking about it now, I could have dropped the front door coach lamp wires into the foundation instead of making wire channels. Ah, well.
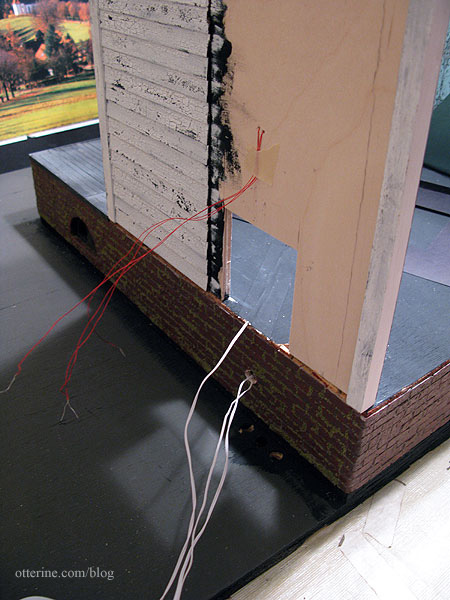
Since all other wiring will come from the second floor and higher, no more wires will run through the foundation. Well, if I decide to put in a flickering fireplace unit in the cellar doors, I might need to fish some wires through the foundation, but it would be right next to the chimney and I can figure that out later. :D So, I glued the house to the elevated base I had previously attached to the landscaping board.
Speaking of the cellar, check out this creepy shot. :O
Categories: The Haunted Heritage
February 2, 2012 | 0 comments


NOTE: All content on otterine.com is copyrighted and may not be reproduced in part or in whole. It takes a lot of time and effort to write and photograph for my blog. Please ask permission before reproducing any of my content. Please click for copyright notice and Pinterest use.


