

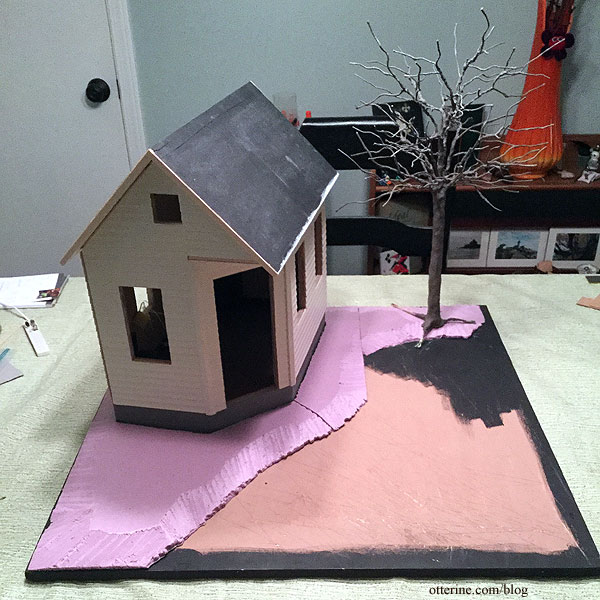
Ivy Hollow – tin roof
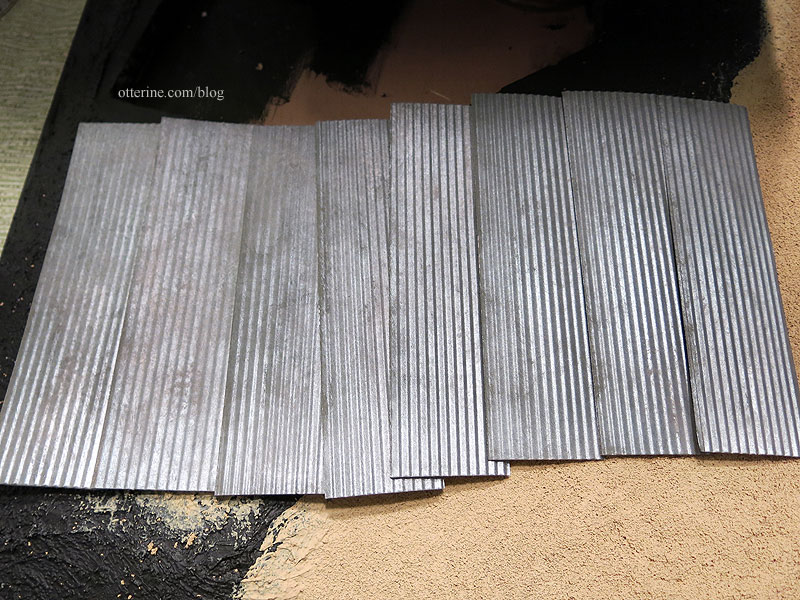
I’ve made a rusted roof in the past, but this time I needed something that wasn’t new but wasn’t too old. I used QUICKUTZ We R Memory Keepers adhesive backed metal sheets. Back in 2010, I purchased a similar material in a 12-pack from Hobby Lobby. I would say the current ones are very similar in quality though fewer sheets come in the pack for a higher price.
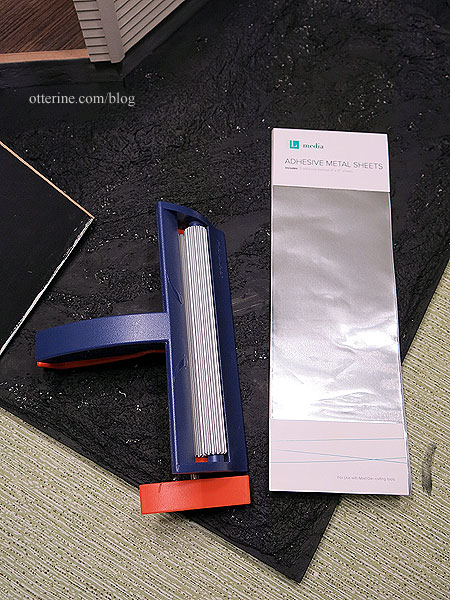
I used a paper crimper by Fiskars, though they have others on the market now that will make wider sheets. I was able to make my old one work for my current project.
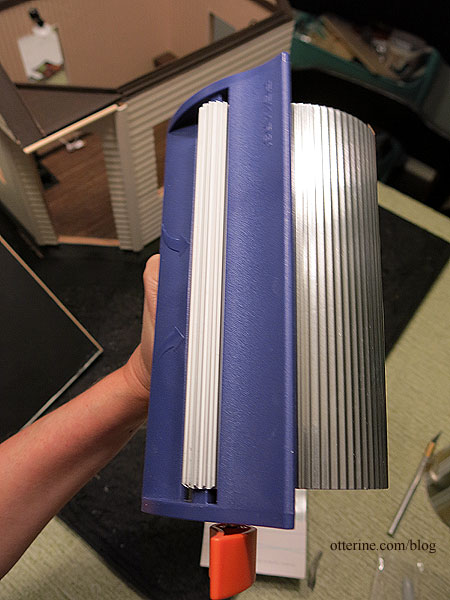
The material is very shiny as is.
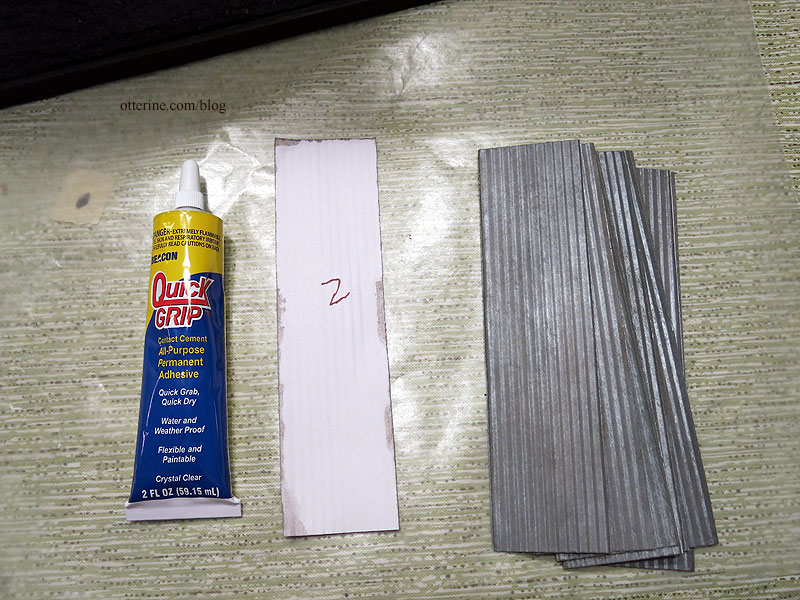
I used Rust-Oleum Self Etching Primer once I had the pieces measured and cut.
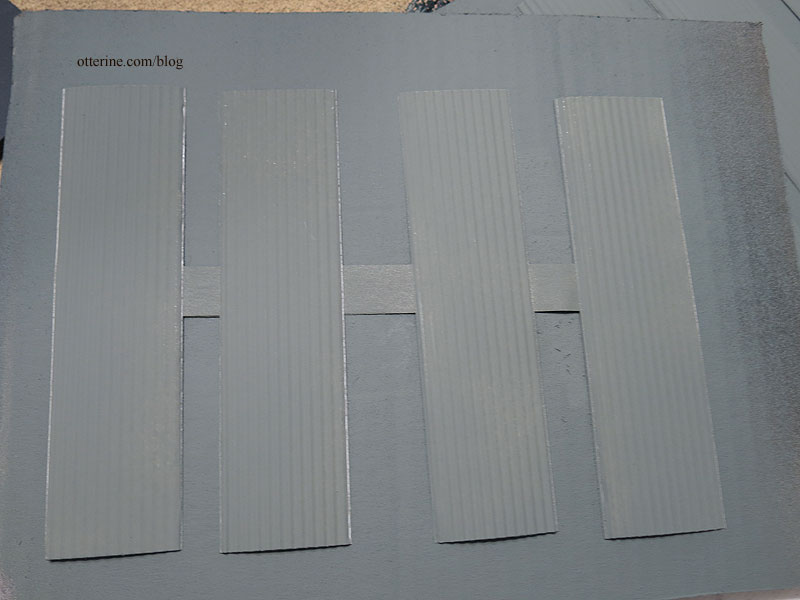
Once that was dry, I stippled on a layer of Liquitex silver and then a layer of Neutral Grey mixed with Staining Medium, both by Americana.
I had labeled the prepared sheets and used Quick Grip as the main adhesive. It’s not the easiest glue to use, but it gives you some time to work. I supplemented the glue with Aleene’s Quick Dry and super glue gel.
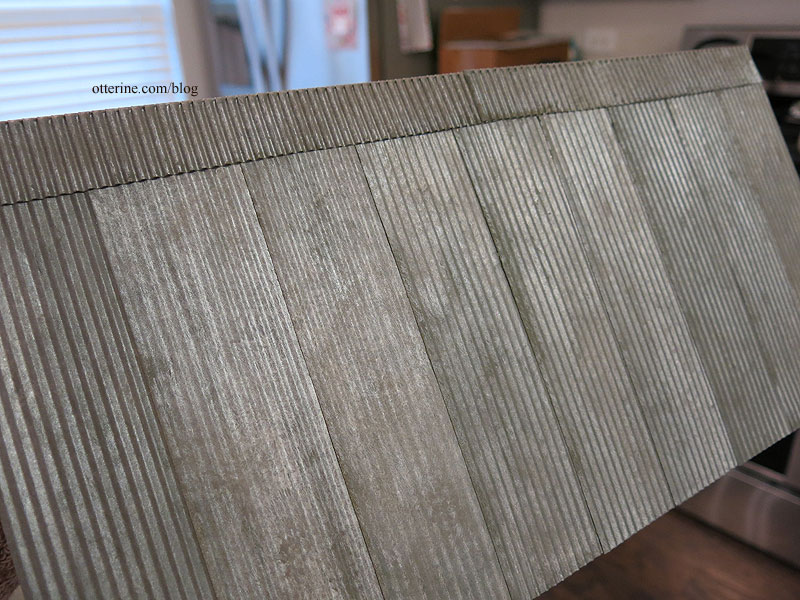
I like the middle ground finish – not new, not old. :]
Categories: Ivy Hollow RFD
December 9, 2019 | 0 commentsIvy Hollow – landscaping, part 1
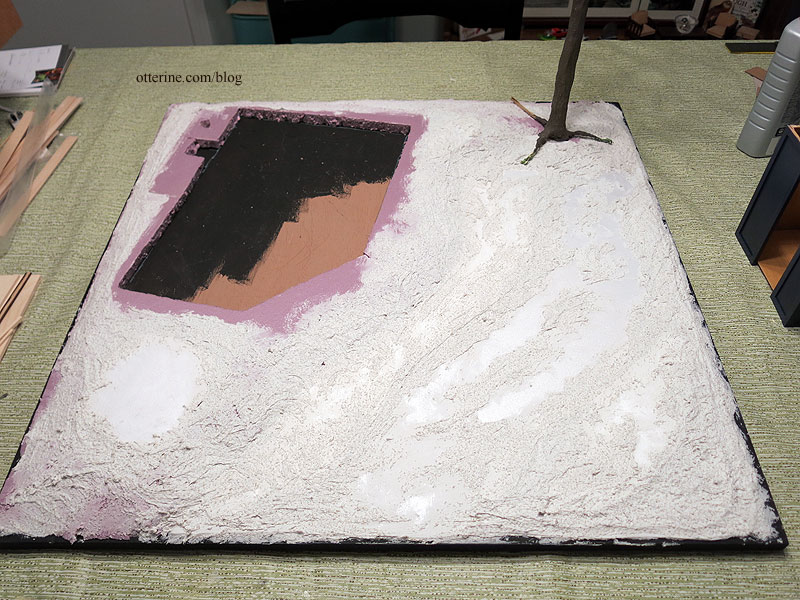
Landscaping takes overnight drying in stages, so I figured I had better get started. I fit the building, tree, mail wagon cabin and Jebediah on the board to figure out the best layout. I traced the foundation and tree base, then added a small electrical shed outline behind the building. I used tracing paper to make patterns of those markings since the next steps would cover the original outline. Can you tell I’ve been using the base board as a second cutting board? :D

I used an awl to transfer the markings onto 1/2″ thick builders foam.
This thicker foam encloses the structure and makes the tall foundation more in proportion to the building. I tapered the outer edge of the foam.
I used Weldbond glue to attach the foam to the primed base board.
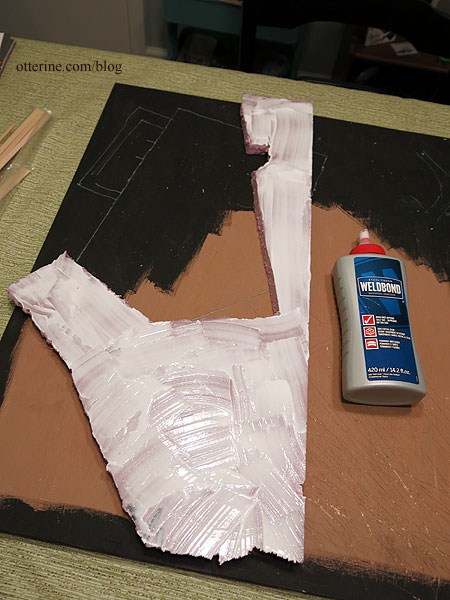
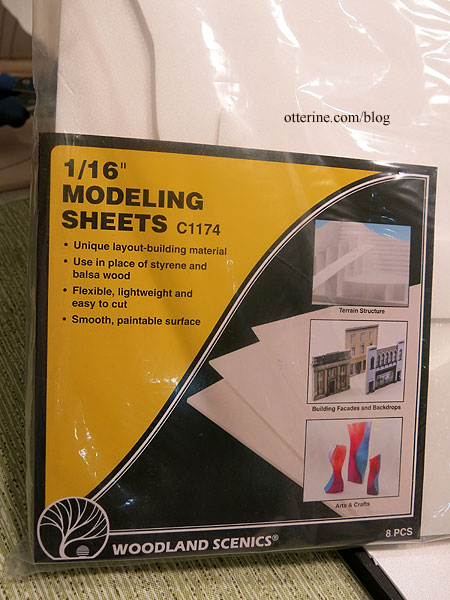
I cut pieces of 1/16″ thick foam sheets by Woodland Scenics to fill in the lower area and add some dimension.
It’s like a topography map. :]
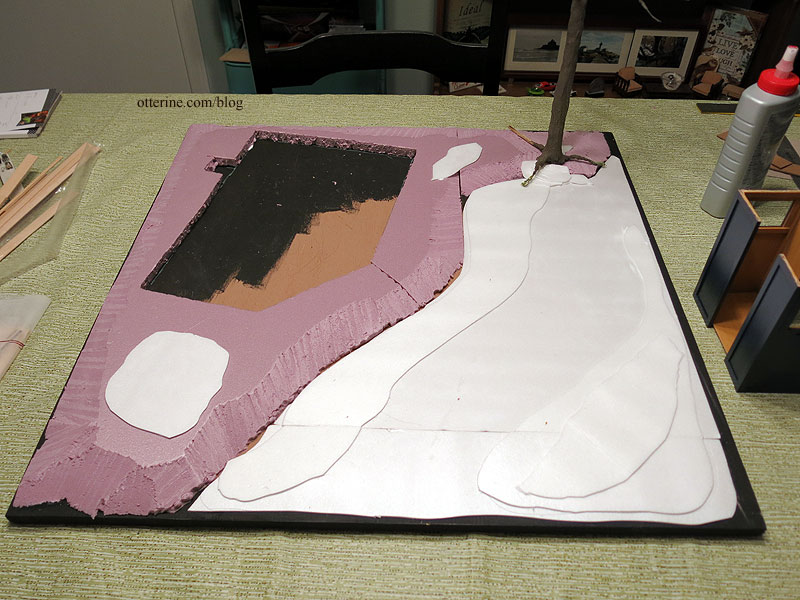
I used pre-mixed stucco patch (bought at Home Depot) to smooth the transitions between the layers of foam. The stucco layer doesn’t have to be perfect, just enough to eliminate hard angles and give the ground a natural feel.
Categories: Ivy Hollow RFD
December 1, 2019 | 0 commentsMail Wagon – part 12
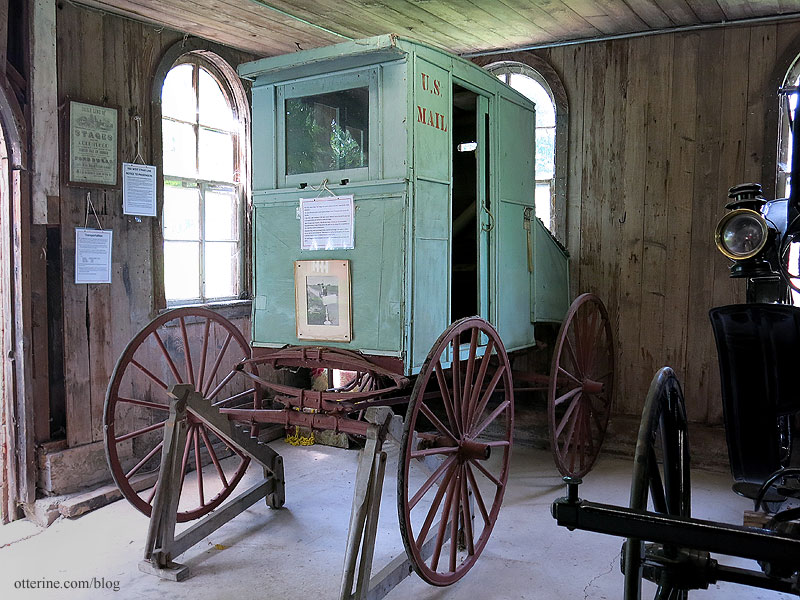
Continuing work on the mail wagon. Here’s a reminder of the mail wagon from the Galloway House and Village in Fond Du Lac, Wisconsin. Since its interior is the only one I’ve been able to photograph up close, I’m modeling many of my details after it.
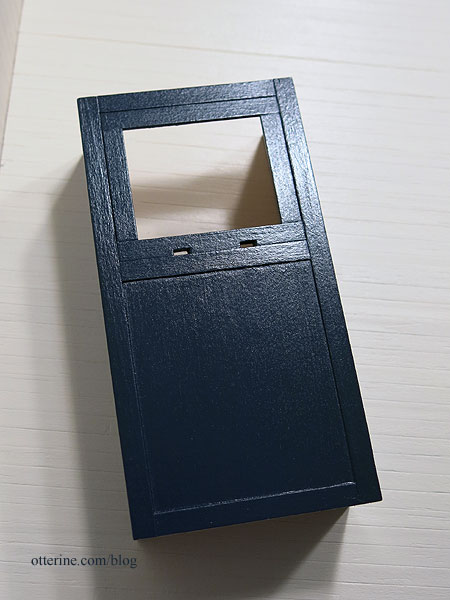
I chose Deep Midnight Blue by Americana for the exterior. I sealed the paint first with a satin spray sealer that must have been old, because it would not dry. I followed that up with a semi-gloss sealer, which ended up looking better overall. I had to wait a few days for it to full cure before I felt comfortable taping or clamping the surface.
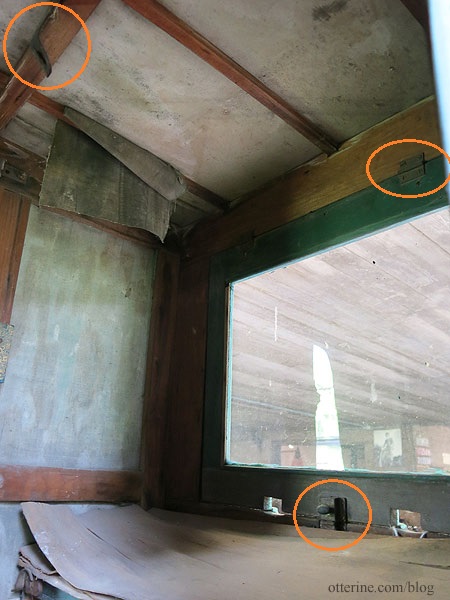
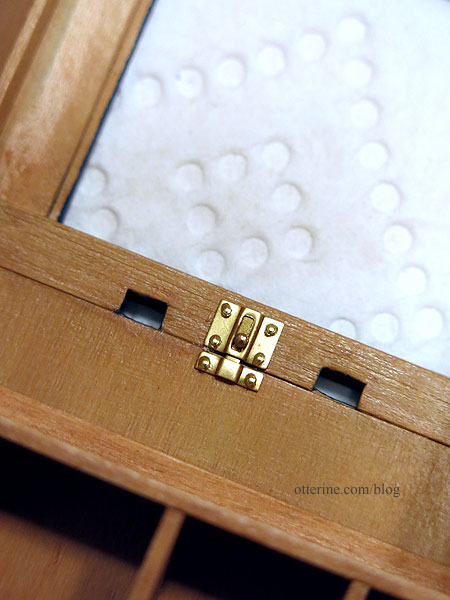
The interior of my inspiration has interesting hardware details.
In the beginning, postal carriers were photographed with satchels, but I’ve always liked the look of the sorters inside some mail wagons I’ve seen, including my inspiration. There wasn’t a lot of room, but I was able to add a few cubbyholes. These wouldn’t necessarily be reserved as one per household on the route but a way to sort along the way.
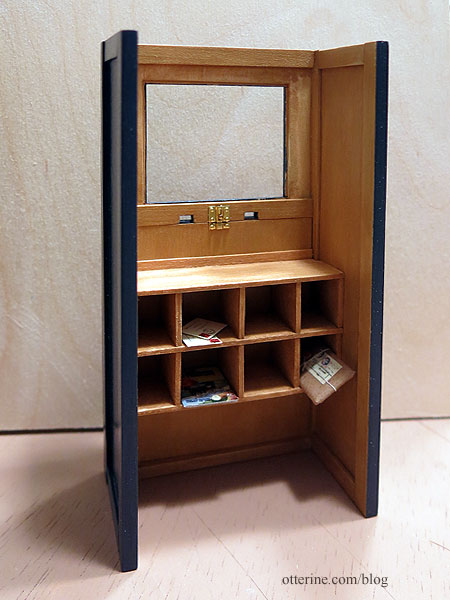
I added a window lock from my stash of interesting hardware (not sure where I even got them or the manufacturer). The lock bar actually slides, though it doesn’t matter much for my non-working window. I’m thinking the hook on the top would hold the window open, maybe? I’ll definitely add small hinges to complete the look of my non-operating front window.
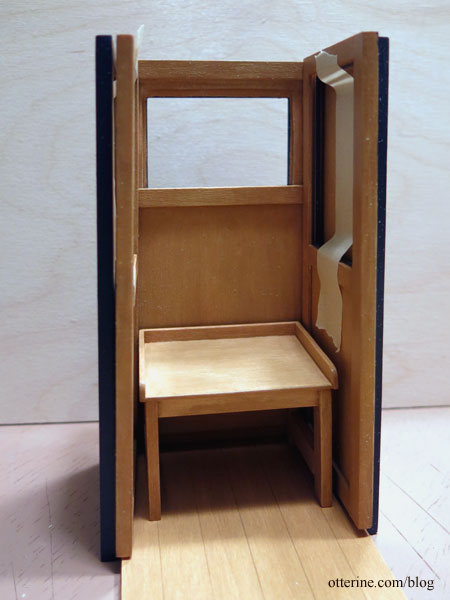
Next up, a comfortable bench seat. This had to be built with the doors held in place to make sure there was clearance for the doors on either side. I’ll make a padded cushion for a softer ride. :D
Categories: Ivy Hollow RFD, Model Cars, Vehicles
November 30, 2019 | 0 commentsIvy Hollow – mailbags
We have to receive our mail in bulk at the tiny post office, mostly likely by rail. I printed and sewed a simple mailbag design.

It’s one thing to put actual letters in tiny envelopes that will never be opened; it’s entirely different to hide all that work away in a mailbag that will never be opened. But, I needed to be mindful of the weight and shape overall. I started with faux letter bundles.

I then made wood parcels.

I arranged the parcels in the middle and bottom, filling in the letter bundles around them.
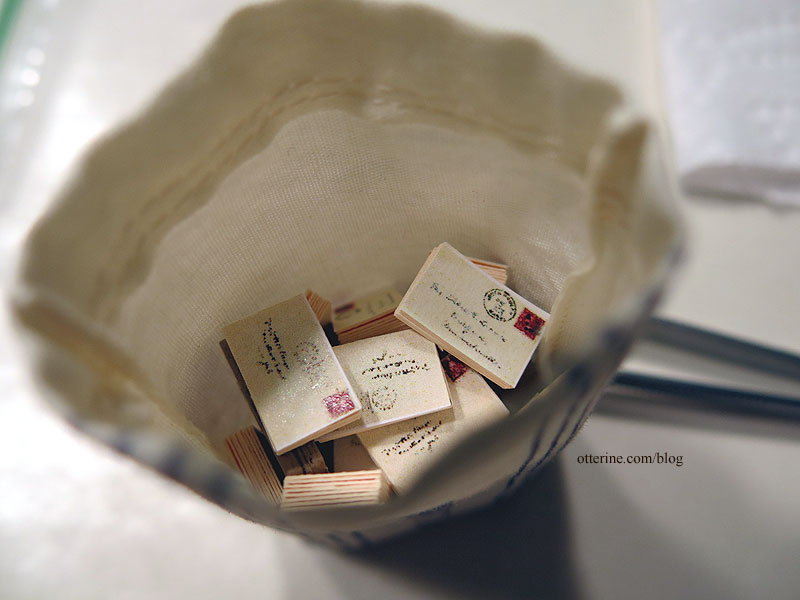
I used a double layer of regular sewing thread to draw the bag closed and tied a bow.

Though it’s hard to tell in the photo, the fabric is just thin enough that the colors and patterns of the faux mail add to the realism of what’s inside.
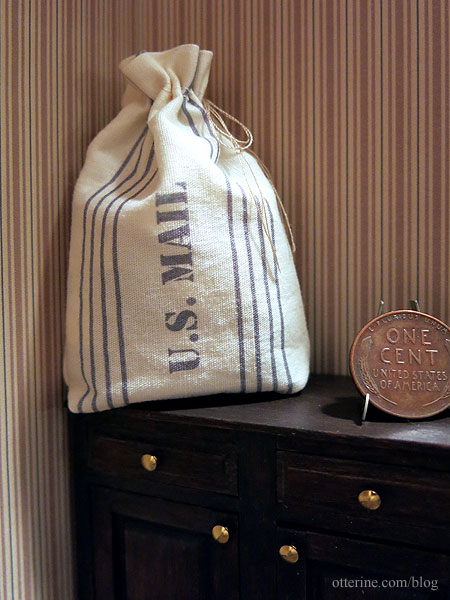
You’ll be happy to know I am not making dolls in satchels to represent the children sent parcel post (article one, article two). haaaaa!
Categories: Ivy Hollow RFD
November 28, 2019 | 0 commentsIvy Hollow – gate
I made a gate from scrap wood and Tiny Turnings, making it up as I went along.
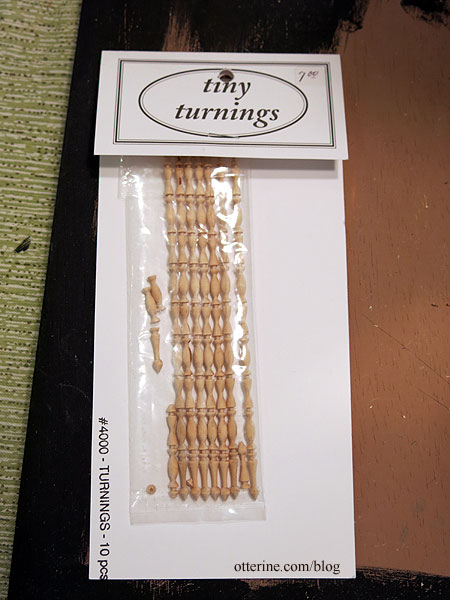
I thought the spindles probably could have been closer together, but it turned out well so I went with it.
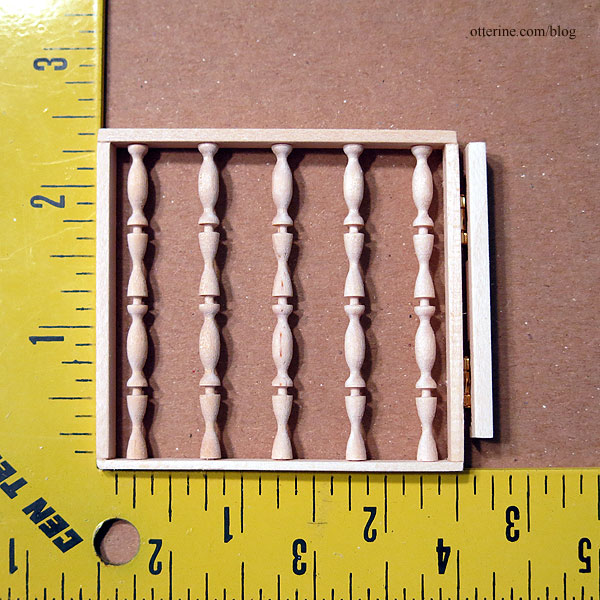
The stain is Minwax Dark Walnut. I used brass Houseworks hinges to make it operational.
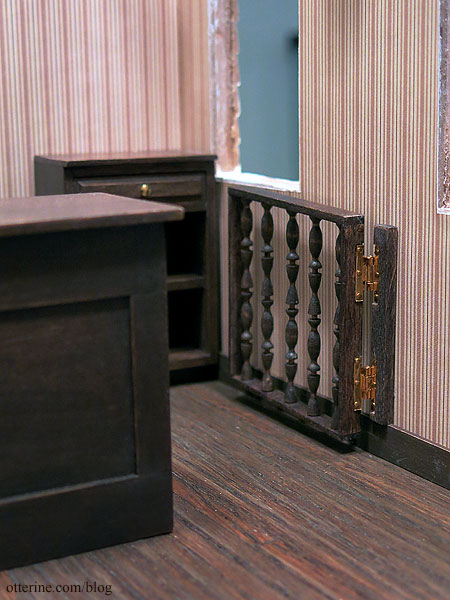
Right now, I have it propped in place with wax. Once I have the final layout, I’ll add a stop on the side of the counter to keep the gate from swinging too far.
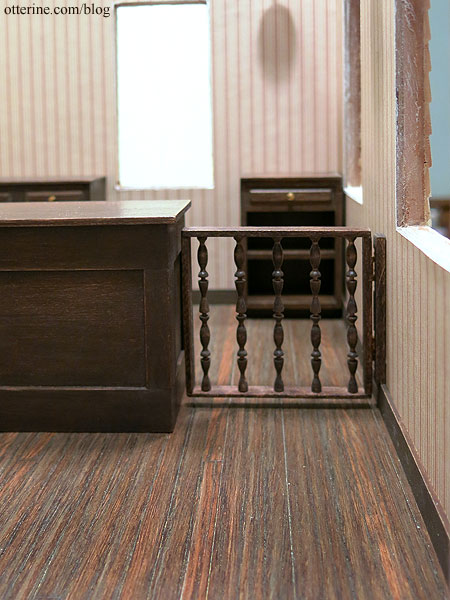
In the end, I like that the spindles are sparse – allows more to be seen through it.
Categories: Ivy Hollow RFD
November 26, 2019 | 0 comments


NOTE: All content on otterine.com is copyrighted and may not be reproduced in part or in whole. It takes a lot of time and effort to write and photograph for my blog. Please ask permission before reproducing any of my content. Please click for copyright notice and Pinterest use.


