

Heritage – grandma’s neglected lawn, part 1
While I do have more builders foam in larger sheets, I thought I’d use up the numerous leftover scraps. They were just languishing in a bag and this would clear up some workspace. :D
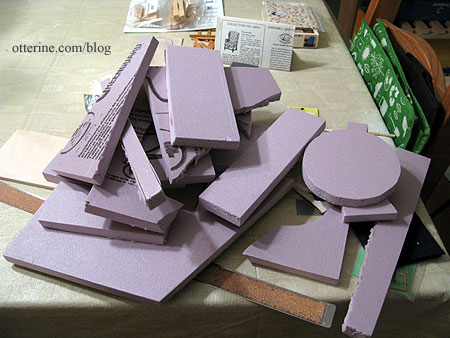
I started cutting a puzzle of pieces to make the uneven ground surrounding the house.
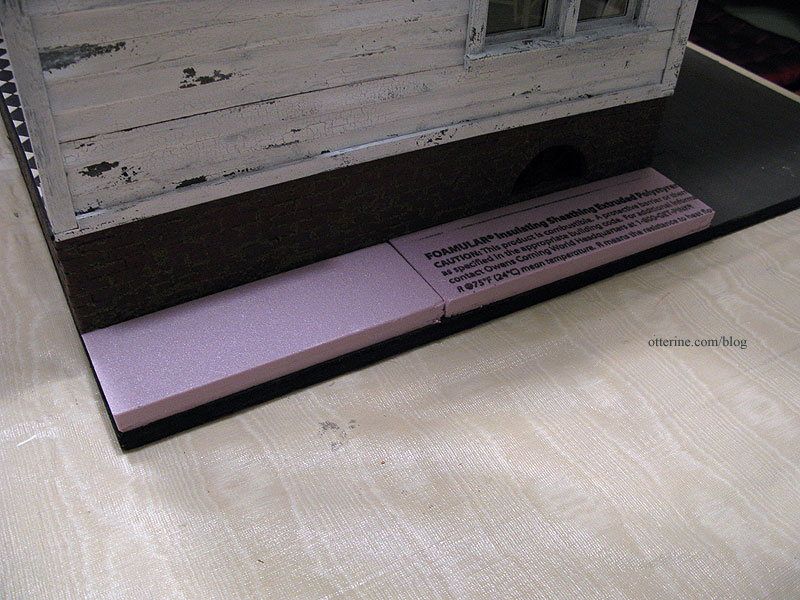
If you recall, I had glued the house foundation onto cut pieces of 3/8″ plywood to allow room between the brick foundation and the base board.
You can see the edges of the plywood below the foundation.
The builders foam is 1/2″ thick, but I planned to sculpt it anyway. I cut random amounts from the foam pieces, angling the slope down sharply around the outer edge of the base board. Yes, that’s Grahame and Woodrow playing ball on the bay window. :D
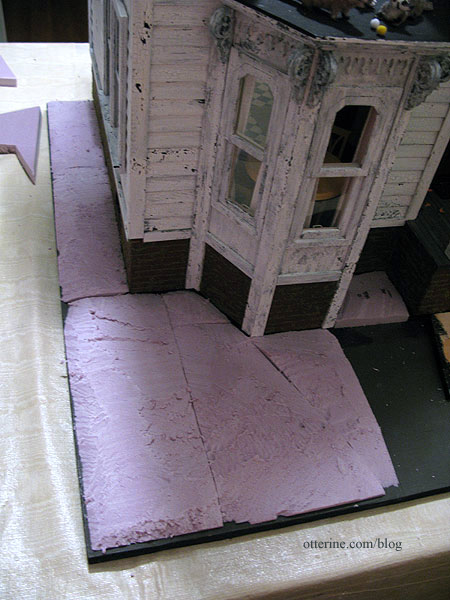
No wonder grandma never mows the lawn…she’d break her ankle! It doesn’t matter if the pieces aren’t a perfect fit. I can fill in those gaps with either scraps of foam or a bit of stucco patch.
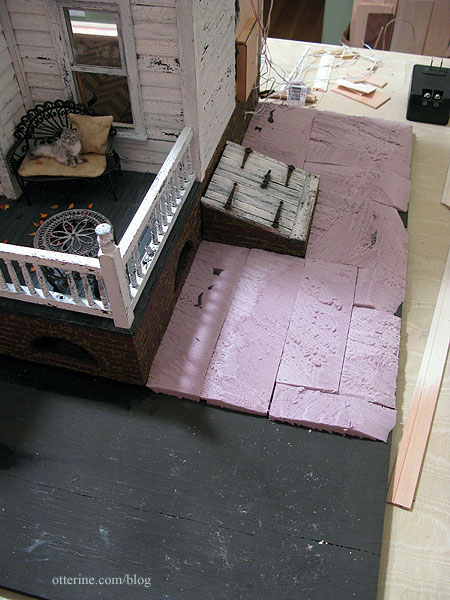
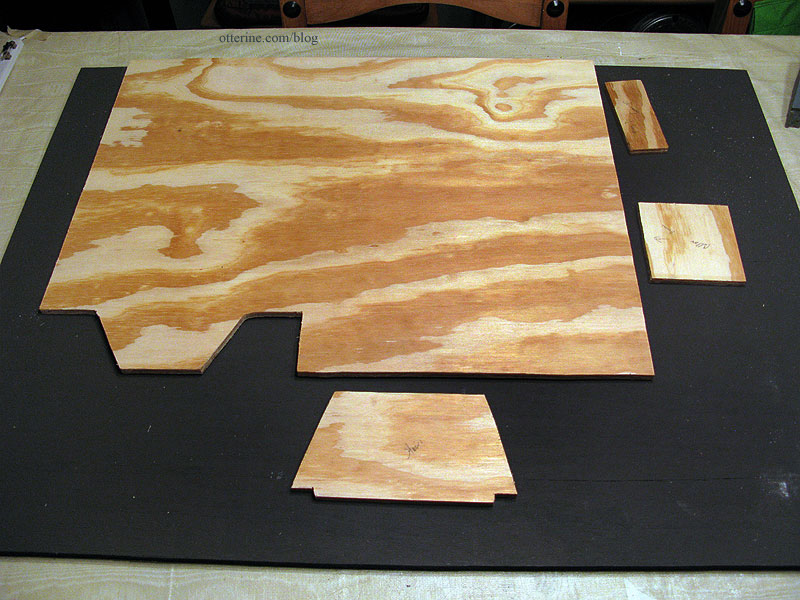
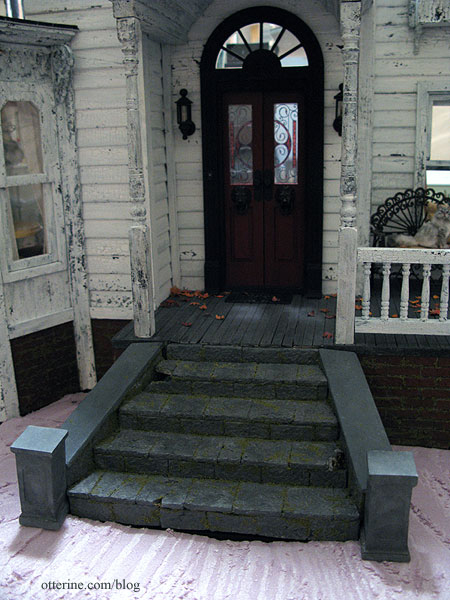
After using up most of the scraps, I cut a new piece for the larger remaining area, tracing out the base for the stone steps.
I saved the circular scrap from the tower for building up the area that will hold The Tree. Actually planting The Tree is going to take some work since part of the roots will be exposed and part will terminate under the surface.
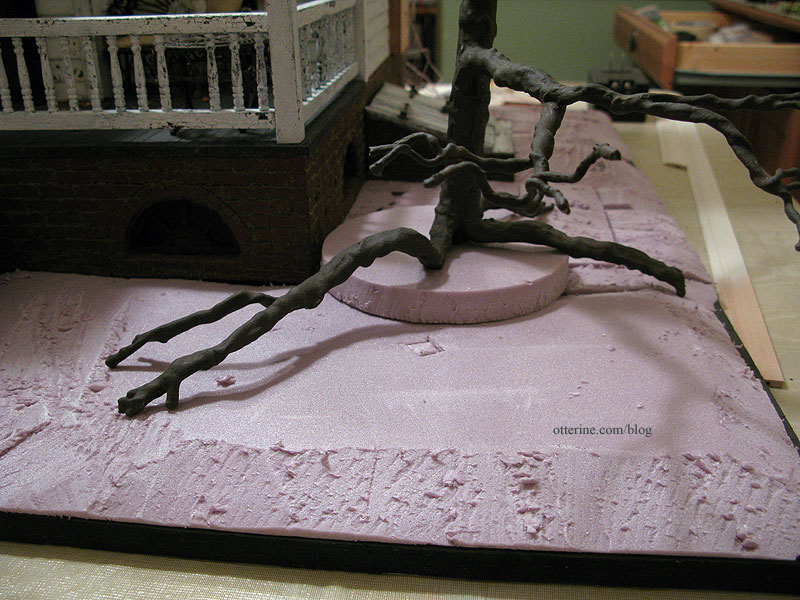
I have the trunk fairly close to the house so that the branches stay within barrier of the base board. The side is less of a problem than the front. I keep one side of my landscape boards no wider than 25″ so the houses will fit through the doorways in my real life house.
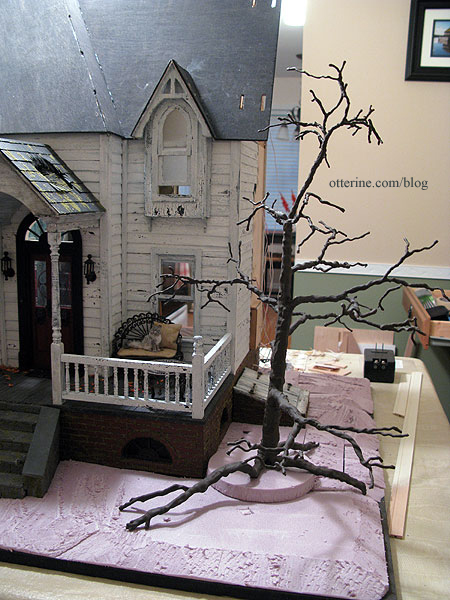
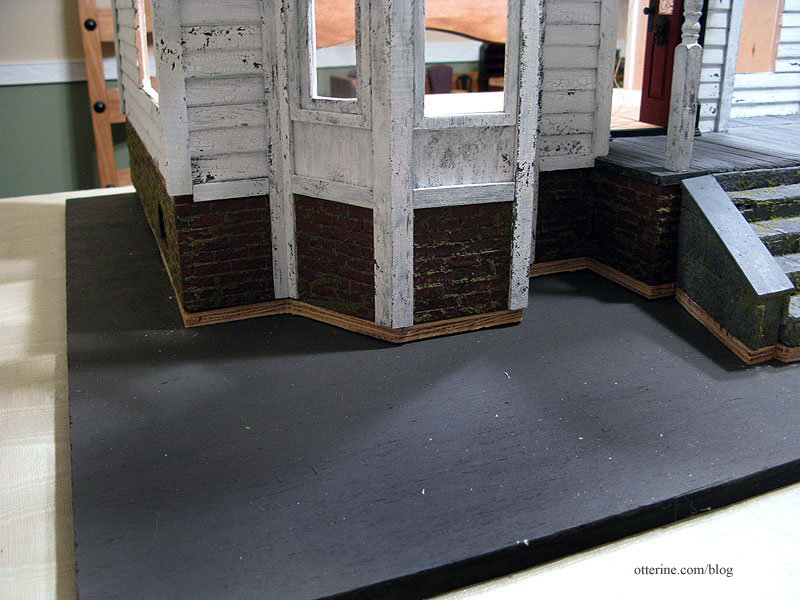
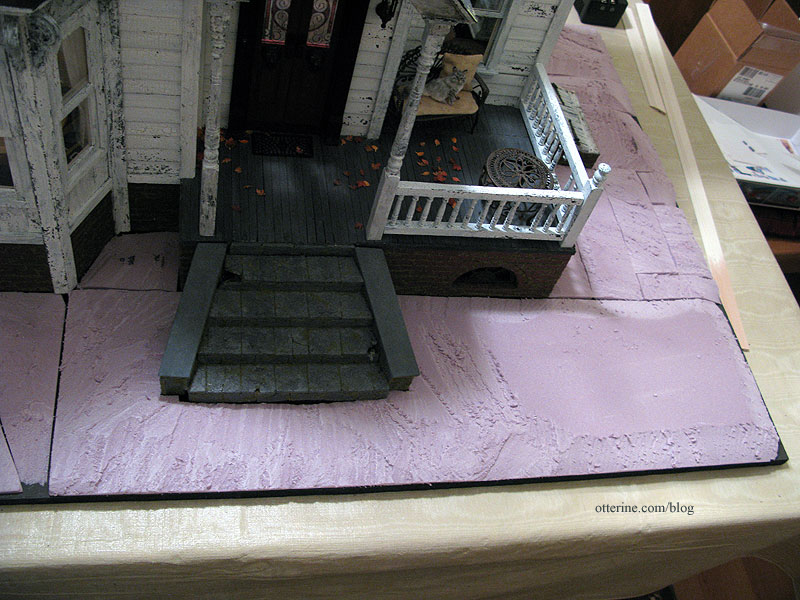
I’ve cut the area in front of the steps lower to make room for the pavers that will be placed in front, but I can see it’s not very even. I’ll have to adjust that a little. Having broken, weedy pavers is one thing, but we don’t want a death trap at the end of the stairs. Grandma isn’t foolish.
Continued in Part 2.
Categories: The Haunted Heritage
September 17, 2012 | 0 commentsHeritage – hallway vignette
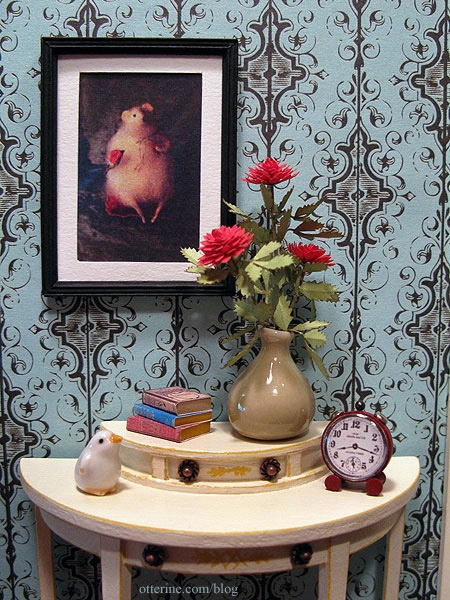
The balcony railing is still a work in progress so this upstairs ‘room’ isn’t yet complete, but I have finished the vignette that will sit to the left of the bathroom door.
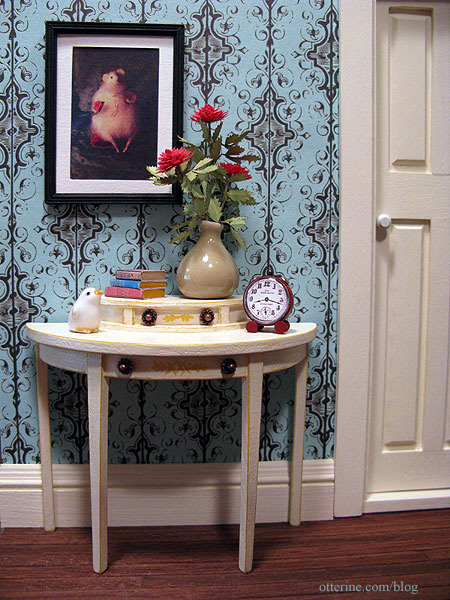
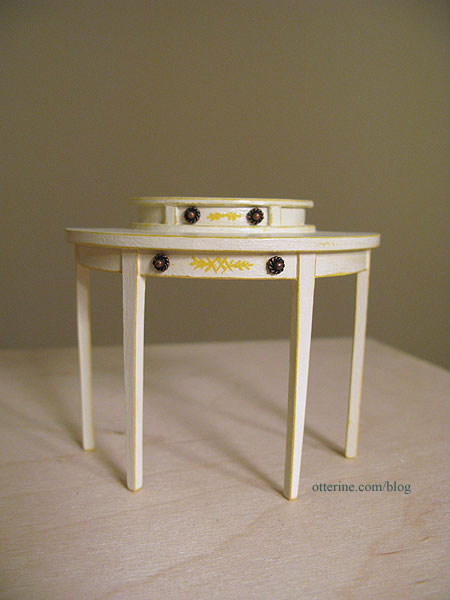
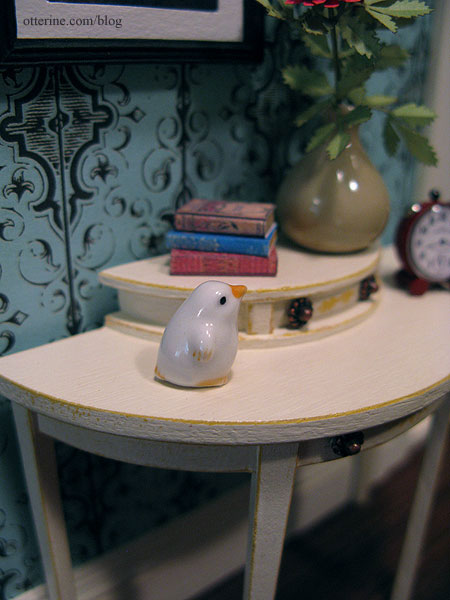
The table is a House of Miniatures Hepplewhite Side table with hand painted designs and added elements inspired by a real life sized antique table.
The books are some of the many I made while filling the parlor bookcase.
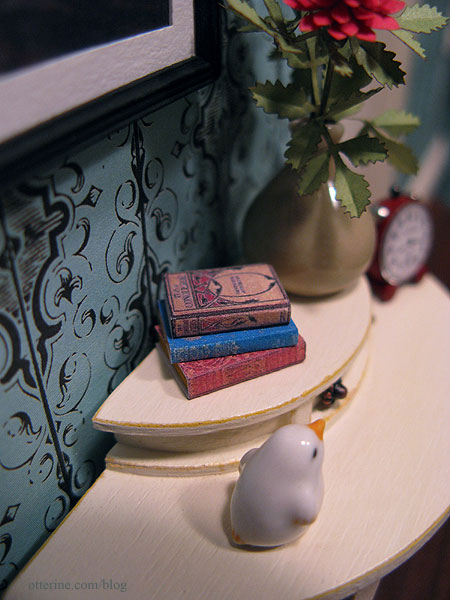
The vase and bird figurine were purchased awhile ago, but I’m no longer sure of the vendor. The red dahlias were made from a Bonnie Lavish kit.
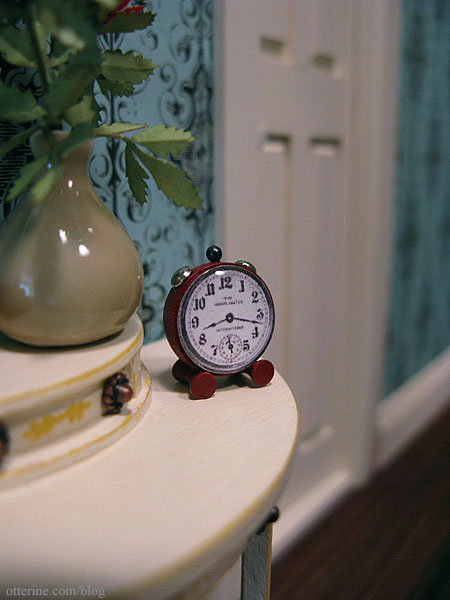
I made the tiny red alarm clock from bits and bobs. The face is a printed image from The Graphics Fairy with a clear cabochon sticker to simulate glass. I had made a set of vintage table clocks for another miniaturist through my etsy shop, and I liked the red one so well I knew I would need one for the Heritage.
The artwork is a photograph from artisan Natasha Fadeeva. She makes the most amazing little animals. I just swoon over her mice!!! :D I contacted her about using the vintage mouse photos in the Heritage, and she graciously gave me her permission. I haven’t yet framed the other.
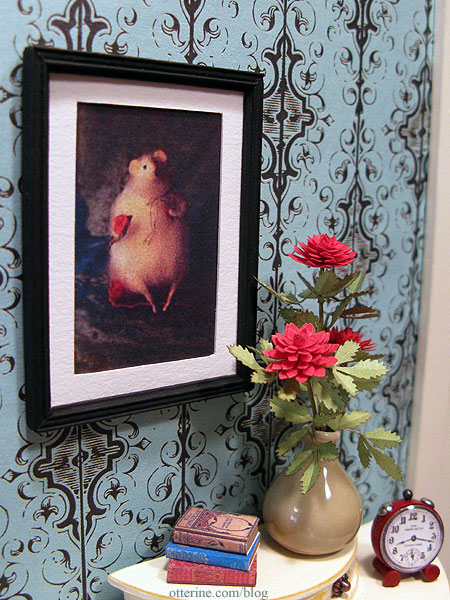
I love the red and round theme of this vignette. :D
Categories: The Haunted Heritage
September 16, 2012 | 0 commentsHeritage interior staircase, part 4
Continuing work on the interior staircase. This was my first time putting together a stair railing. The narrow stairs kit came with balusters, but I prefer the look of rounded posts to flat ones. I purchased a miscellaneous miniatures lot awhile ago that included the windows I used for the cellar as well as several packages of posts. The ones I’m using are Real Good Toys 3013A spindles.
There’s one thing that can be counted on when working with miniatures…you will knock into something held together with nothing but glue and it will crumble back into the pieces from which it was made. :\
To help aid with this inevitability, I drilled pilot holes and added pins to the connections between the stairs and the posts. This is also helps keep things aligned when working with multiple parts that need to be glued all at the same time. It’s a tip I learned on the Greenleaf forum.
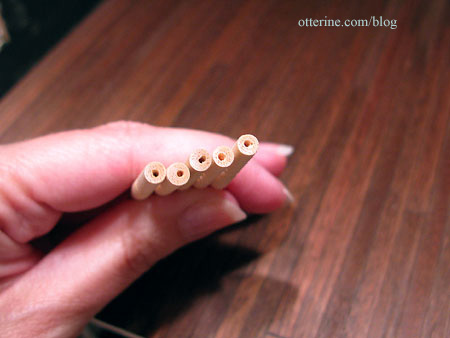
I used eyelet headpins mainly because I had an excess of them on hand. I used super glue gel to supplement the Aleene’s Quick Dry glue to insert the headpin into the drilled holes. I then cut the headpin to roughly 1/2″ (this is longer than I need but I will wait to cut them down until later).
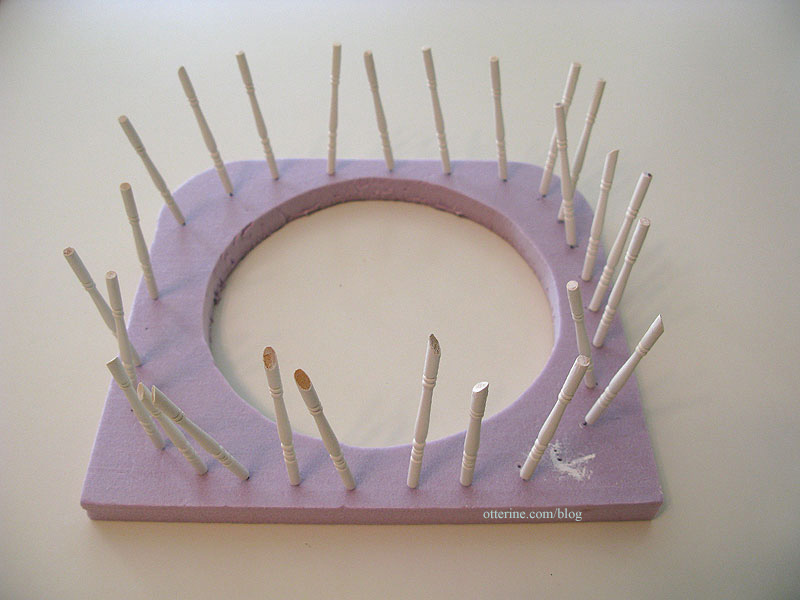
This allowed me to stick the spindles into a scrap of builders foam for painting.
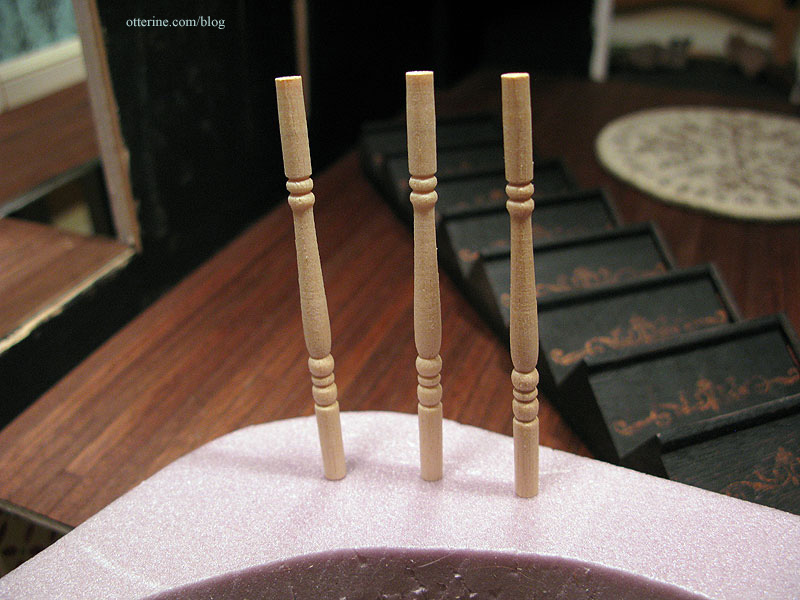
For the stair spindles, I used the kit baluster to mark the angle needed.
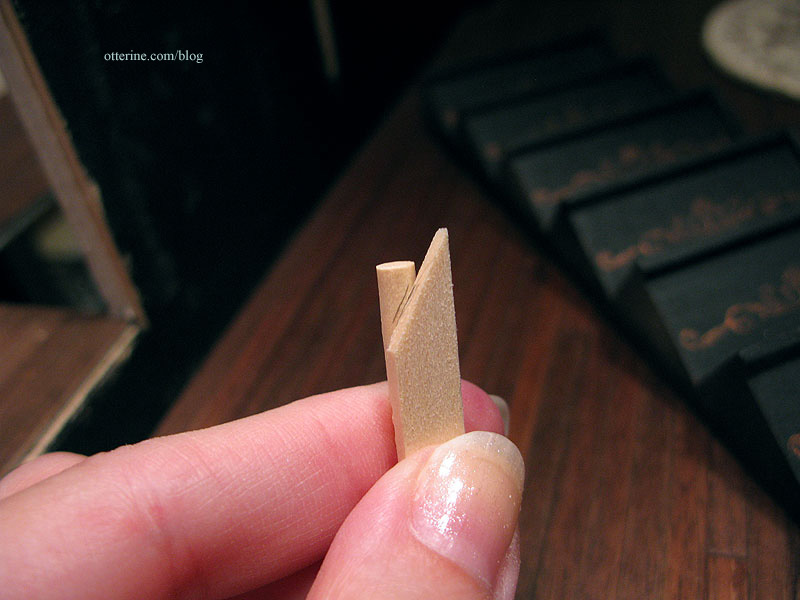
I then cut the top of the rounded spindle to match.
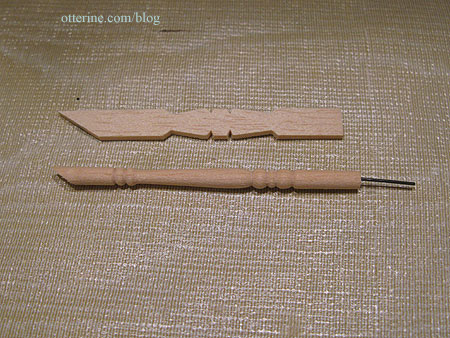
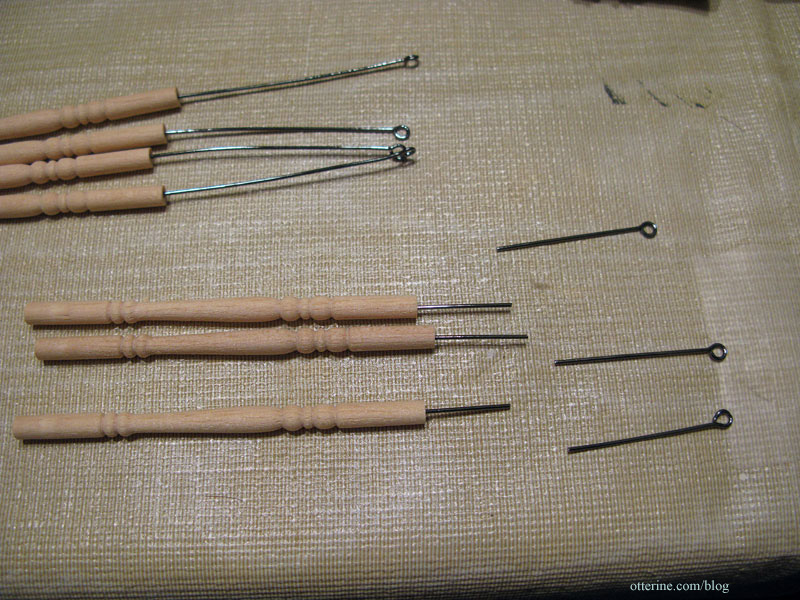
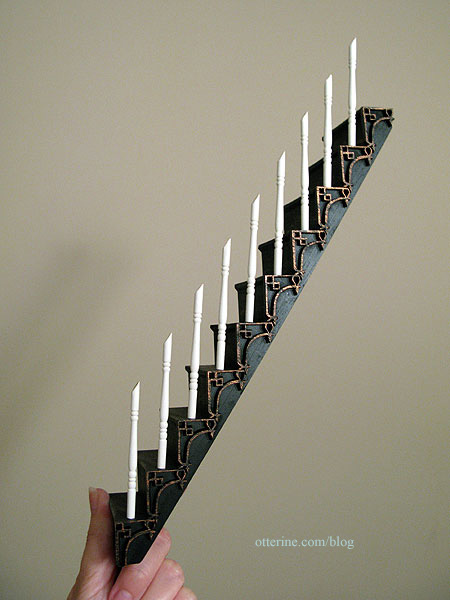
I painted the posts Vintage White to match the rest of the trim, sanded once and then painted a final time. Here are all the posts for the balcony as well as the ones for the stairs. Why do all this tedious work more than once?
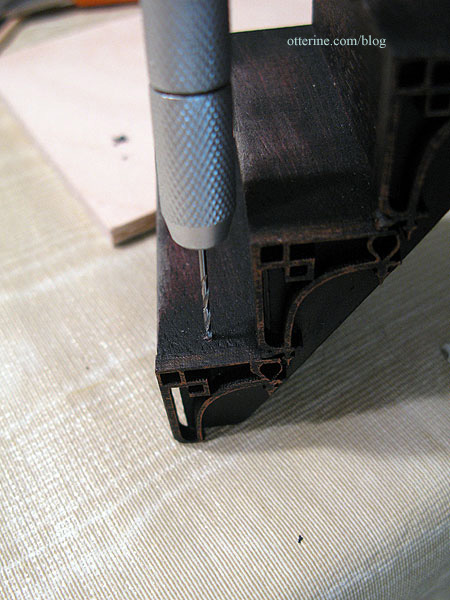
Since drilling a tiny hole into the end of a round dowel doesn’t often end up right in the center, I chose to drill the corresponding holes in the stairs one at a time. After trimming the pin, I lined up the spindle with a stair and pressed the pin to make a mark.
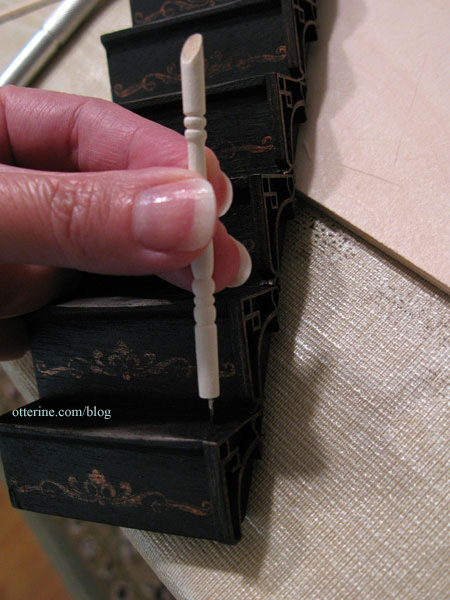
I drilled a hole into the stair at that mark.
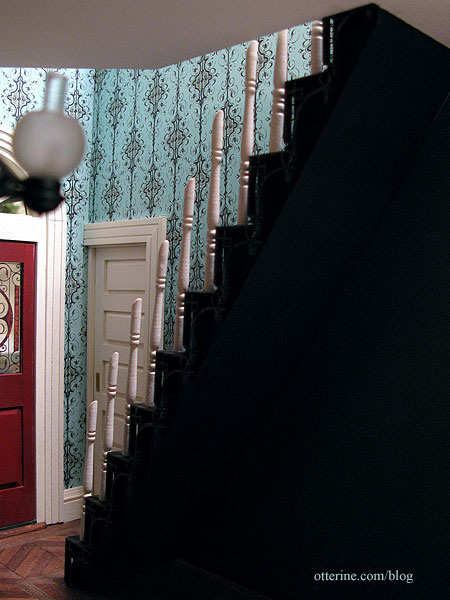
Using super glue gel and Aleene’s Quick Dry, I attached the spindle to the stair then repeated all the way up. I’ve left the top one off for now since I will need to make sure I am able to attach the stair railing to the balcony railing on the upper floor. That’s probably best to do once I have the stairs glued in permanently. For now, the staircase is still removable and will be until I absolutely have to glue it in place.
I tried to sand down the lifted grain during the painting process, but bumps remained or recurred near the tops of some of the spindles no matter how much I sanded. I hope these will be less noticeable once the final railing is in place.
Categories: The Haunted Heritage
September 15, 2012 | 0 commentsThe Aero Squadron Lounge – structure, part 1
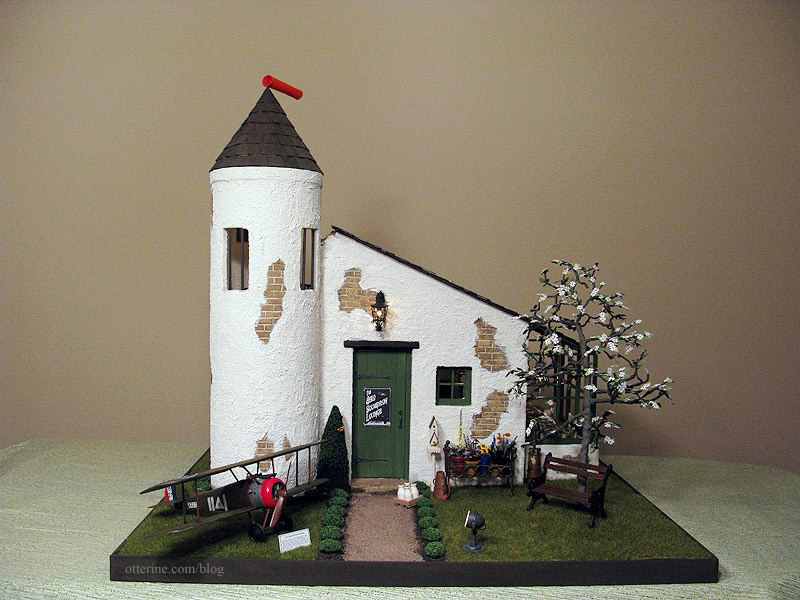
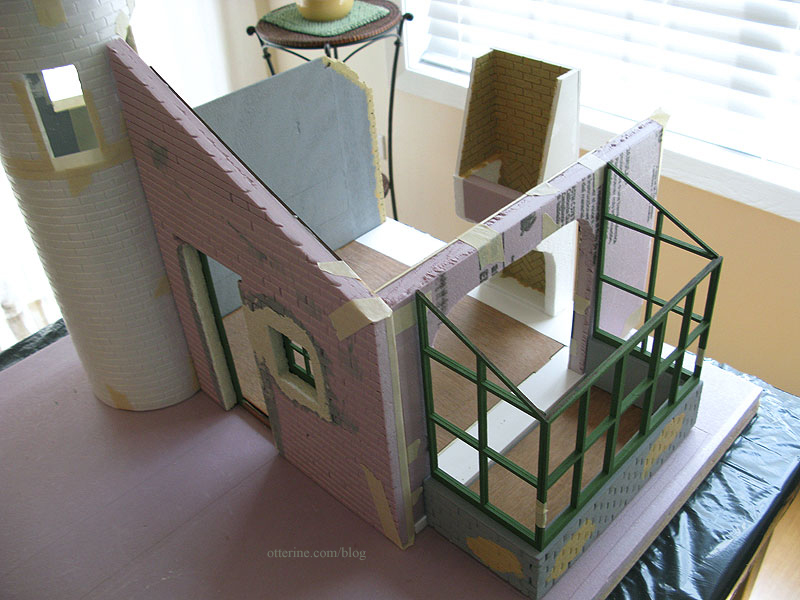
To build The Aero Squadron Lounge, I made only a few changes to the basic Greenleaf kit but they dramatically changed the look of the building.
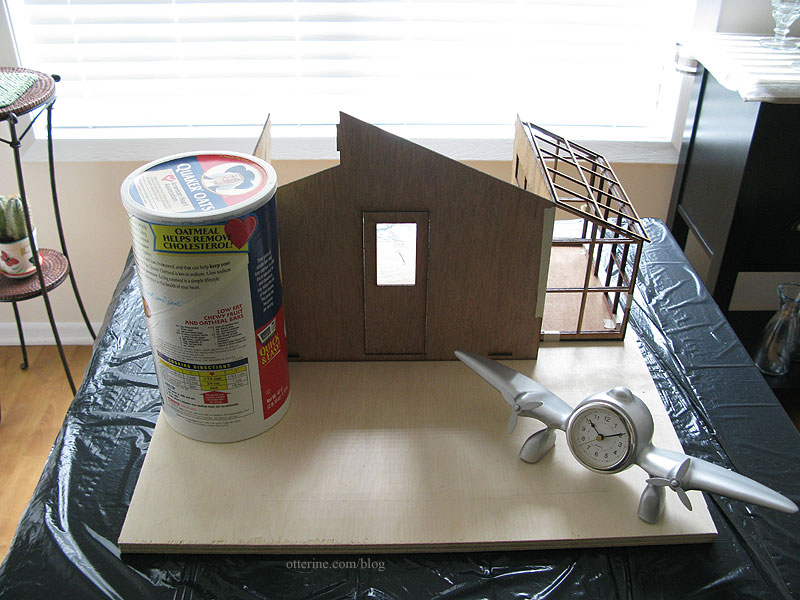
the original dry fit for concept I added a tower made from a 5″ diameter mailing tube which required cutting off a portion of the front and side walls to make an opening for it. I also cut a large arch in the opposite side wall that originally had a row of windows near the top and used the scraps from these cuts to add 2″ in height to the main kit. This photo was taken before I determined I needed more floor space and before adding height to the tower.
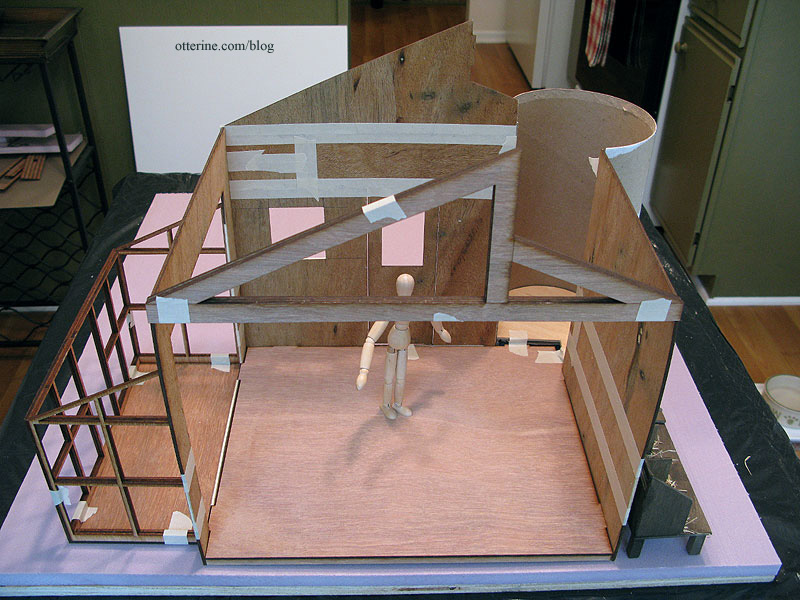
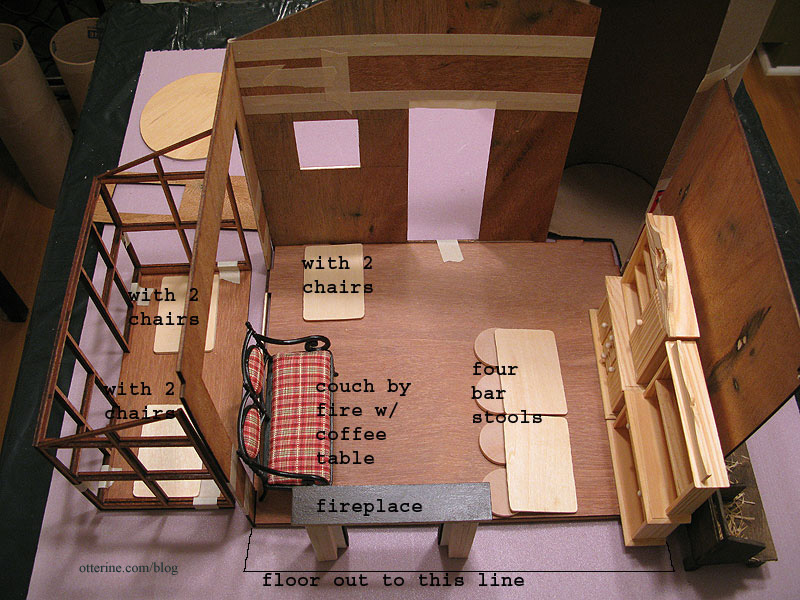
After figuring out the furniture placement, I realized the building was too small for all that I wanted to include. It’s fun looking back at the layout photos and seeing that I included everything I wanted to in the first place.
I built the floor from the base kit, adding cross support beams underneath to straighten out the warp in the floor. I didn’t get a picture of that part, unfortunately. Using a double layer of foam core board, I added 1.5″ inches to the width of the room and 2″ to the depth in the back. I also added a partial circle to serve as the tower floor.
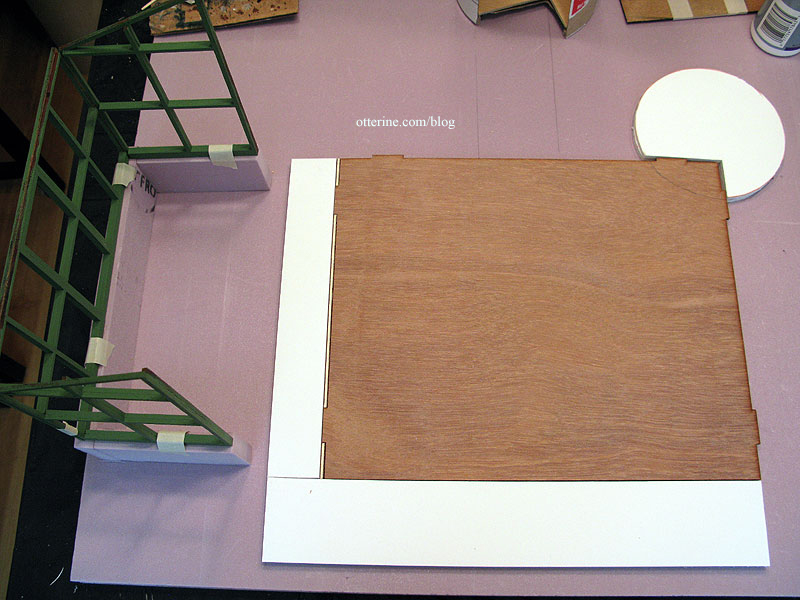
I covered the exterior of all three walls with 1/2″ thick builders foam, taking into consideration the extra floor space. I added scrap wood to pad any excess foam showing beyond the kit walls.
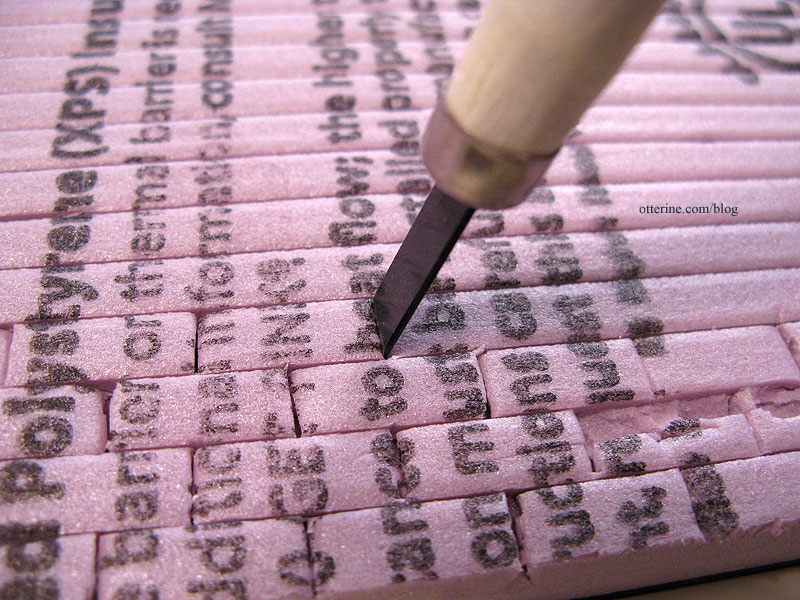
I learned the process I used to make the stone from a Scenery & Terrain Making website (as of 2024, the link is defunct). On the exterior of the building, I measured a grid of stones each measuring 5/16″ by 3/4″ on the entire surface even though I planned to add stucco to most of the build. I wanted my brickwork to be consistent. As it turned out, in some portions where the stucco is thinner, you can see the texture of stone underneath. I rather like the extra push of realism it brings.
I first measured and marked lines 5/16″ apart.
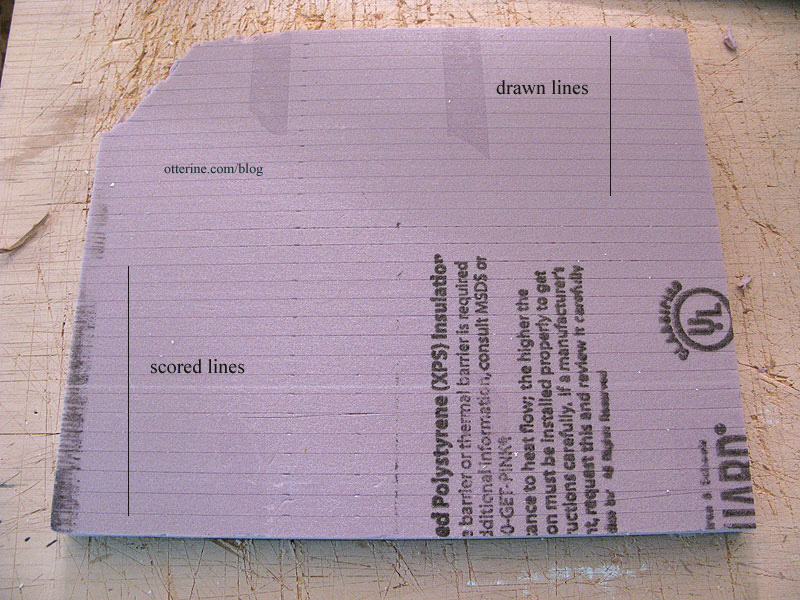
I then scored the drawn lines with a special adjustable X-Acto knife that allows you to cut into a surface at a controlled depth. You turn the knob to allow more or less of the blade to sink into the material. This kept the back of the sheet whole while allowing me to carve the stonework on the front.

Here’s a close-up of the scored lines. Every once in awhile my blade wandered. It wasn’t a problem since I planned to stucco over the stone and could easily cover mistakes. Besides, broken out stone would only add to the age of the building had I left it exposed.

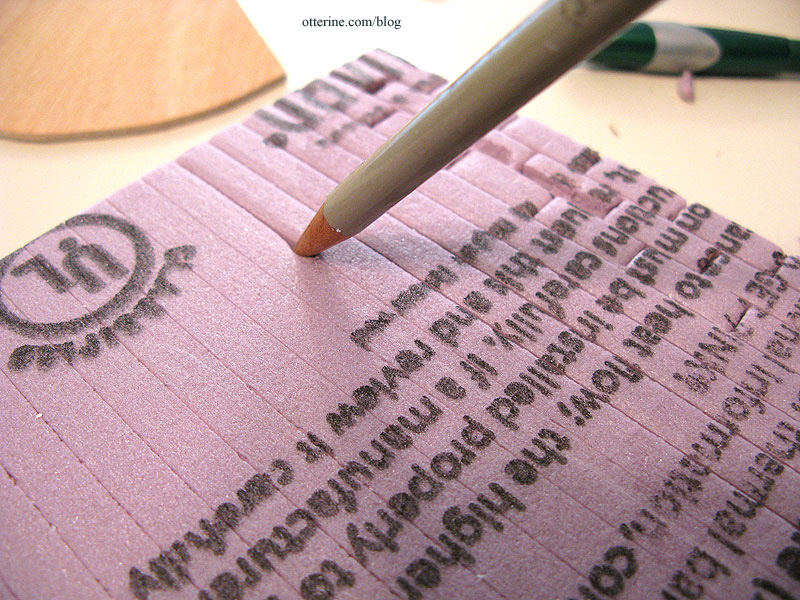
Using a dull wood pencil, I followed those cuts to make grout indentations.
The vertical grout lines were made with a cutting tool from a set bought at Michael’s to press and cut the vertical lines forming the individual stone blocks.
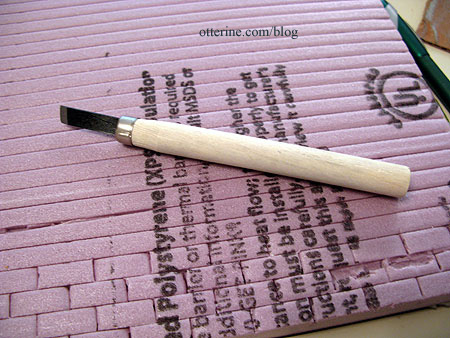
I just lined the blade up between the horizontal lines and pressed until it broke the front surface without cutting through the back. I used the dull wood pencil to indent these lines, too. Yes, it was a lot of work but much less work than using egg carton stone.
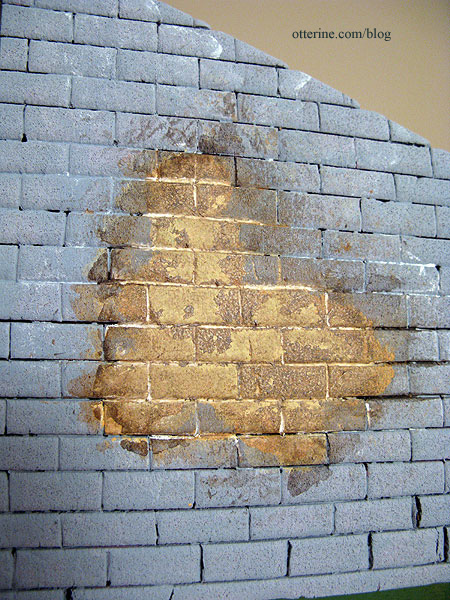
I primed all of the exposed foam with grey gesso and then painted random areas where the stone would be fully exposed using Camel by Americana as a base coat. Here is the side wall showing the back edge cut and painted. I still wasn’t decided on whether this would be an open back or a 360° build, so I prepared the wall to have an entire edge of exposed stone. I ended up doing the bombed back and the stone along the straight edge was covered with stucco in the end.
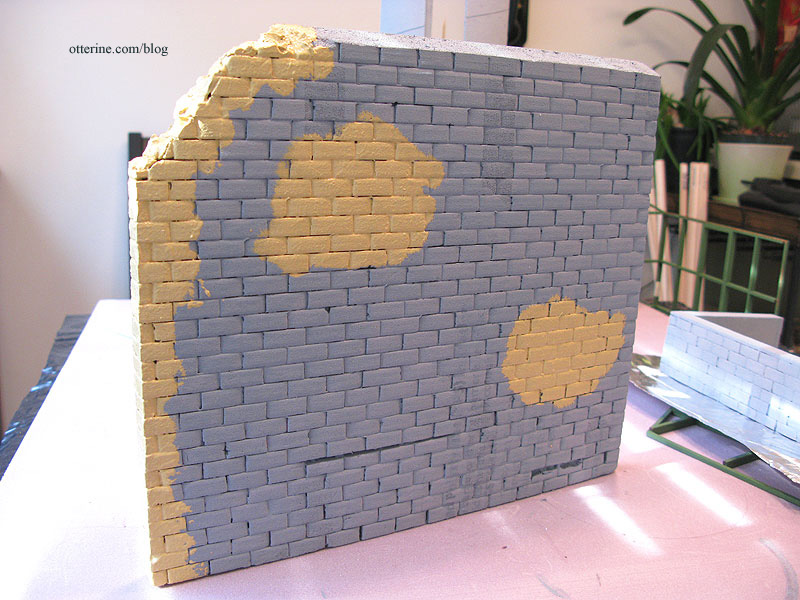
I grouted the exposed stone areas with spackling compound and then added paint washes to perfect the coloration. I also experimented with texture medium, though much of it fell away during the paint wash application. Still, it adds a little something.
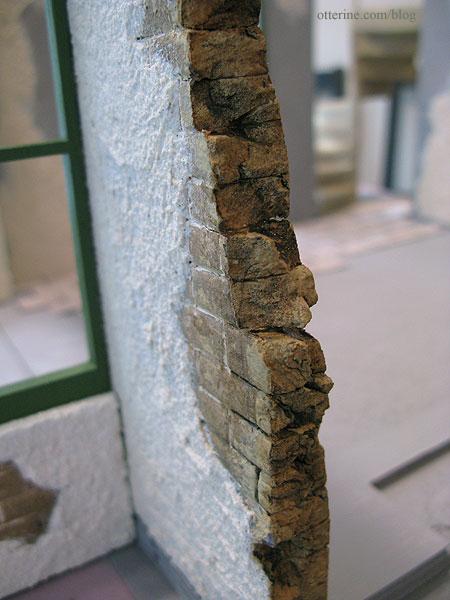
For the back edge where there would be broken walls, I used flat nosed pliers to rip pieces off at random. I then continued the previously scored grout lines around the edges to make individual stones. I grouted random portions and applied the same painting technique as I had done for the exposed stone on the other walls. I couldn’t believe just how much the foam looked like real stone.
Before attaching the foam to the front wall, I added a window using leftover parts from Baxter Pointe Villa, last year’s Spring Fling entry. I hadn’t used the short front wall from that kit, and on it were two laser cut windows. I cut around the windows and used the two pieces to make one whole window in the new build.
I cut out a recess in the foam and set one of the window pieces into it. This window piece was between the outer foam and the kit wall. For the other window piece, I cut an opening in the front kit wall and glued it in place.
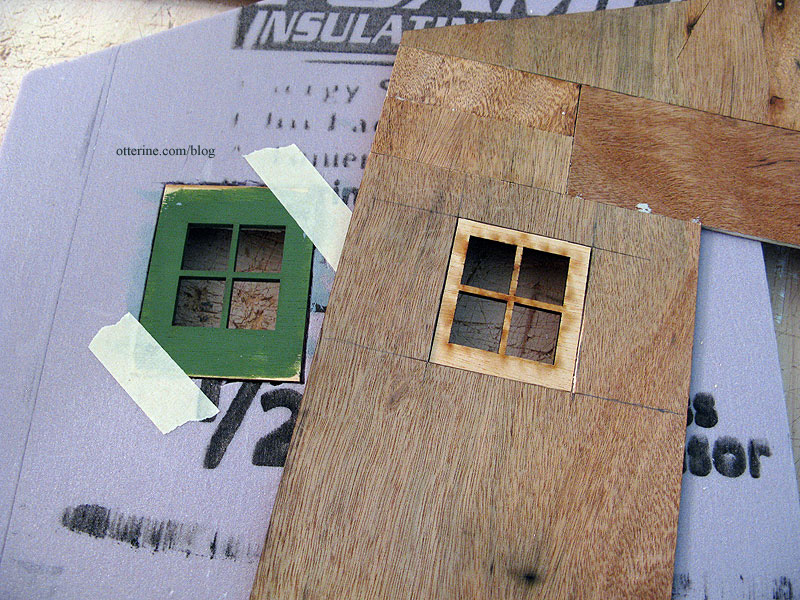
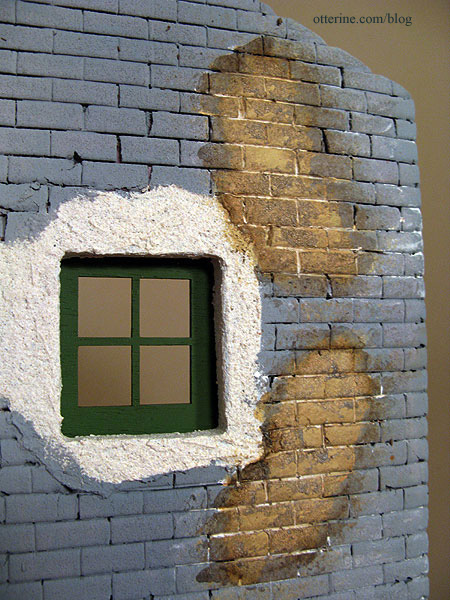
I painted both window sections Clover by Folk Art. I also applied the stucco to the foam around the window opening and painted the stucco Warm White by Americana before gluing the window in place. I didn’t think I would be able to apply the stucco or paint without getting it on the green window.
From the outside, it is a deep set window. I left the glass out of all the windows in this build, because really…what sort of weather are we trying to keep out? Have you seen the condition of the roof? ;D
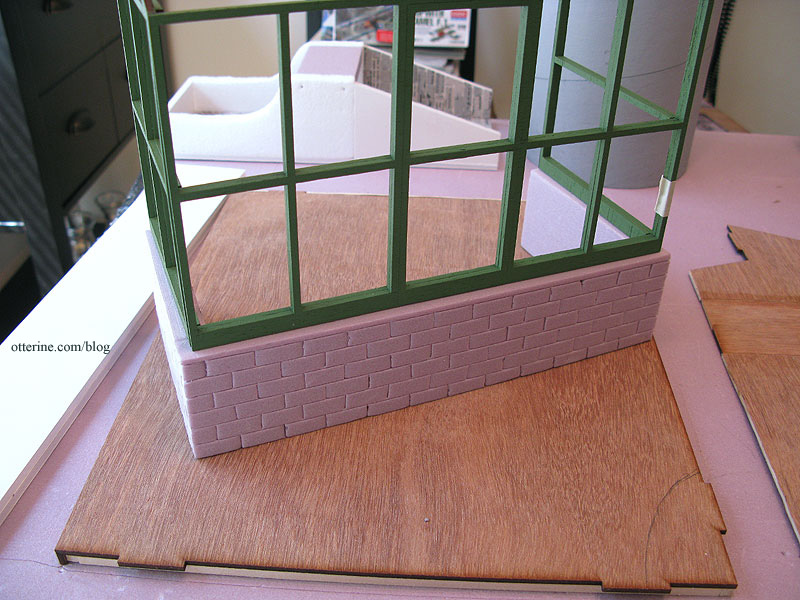
I used the greenhouse addition with the Spring Fling kit, though I’ve eliminated the working door. I added 2″ of builders foam to serve as a base for the greenhouse and built a new floor for it using a double layer of foam core board (floor not shown here). The paint is Clover by Folk Art.
I got ahead of myself and glued the pieces together before scoring the stone into the foam. It was a little more challenging to score the lines on a three-dimensional piece, but I managed.
Continued in part 2.
Categories: The Aero Squadron Lounge
September 15, 2012 | 0 commentsMiss Charlotte
This pretty little mouse doll comes from PamelaJunksMinis, the same artist who made Miss Kitty for the Heritage. I’ve named her Miss Charlotte.
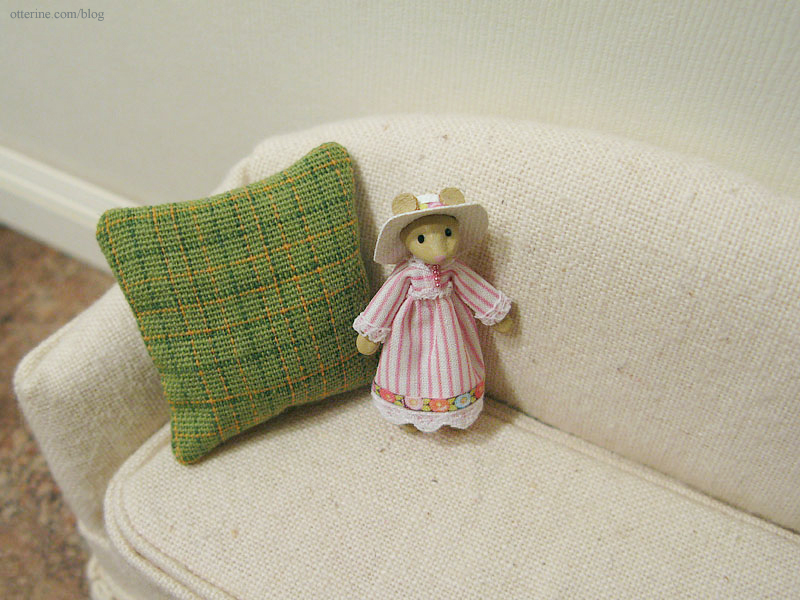
I know my limitations when it comes to making tiny clothing and painting tiny pretty faces. I didn’t even consider making them myself from her kits. I gladly paid for completed animals.
Categories: Animals and birds
September 13, 2012 | 0 comments


NOTE: All content on otterine.com is copyrighted and may not be reproduced in part or in whole. It takes a lot of time and effort to write and photograph for my blog. Please ask permission before reproducing any of my content. Please click for copyright notice and Pinterest use.


