

Heritage – bedroom swinging windows, part 3
Continuing work on the swinging windows. I have a separate post for details on finishing the top of the bay window roof.
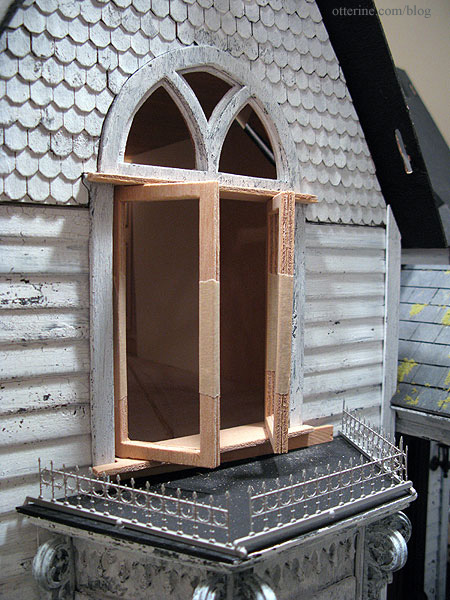
I crackled white paint over the outside and finished the interior with Vintage White by Folk Art. I glued in the acetate, and now the two window assemblies for the front swinging window are complete.
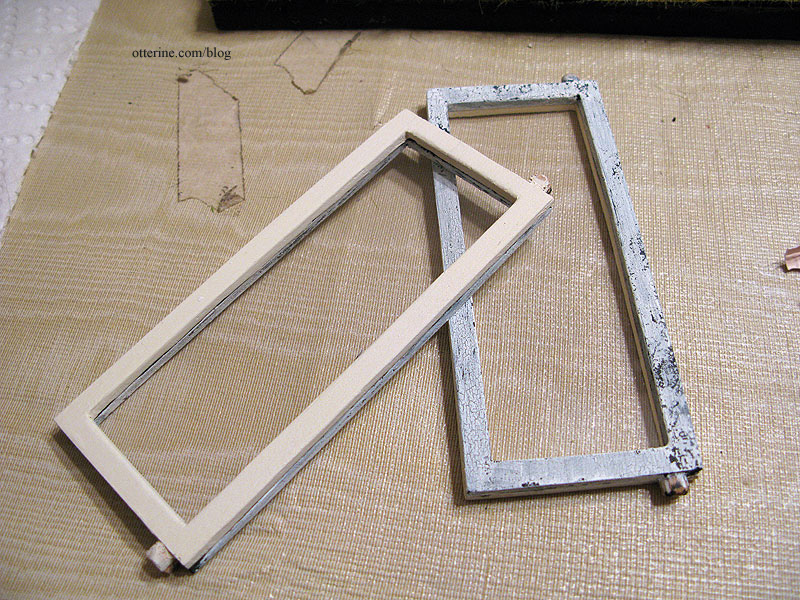
I tacked some acetate in place on the interior trim piece to complete the look of this portion of the window.
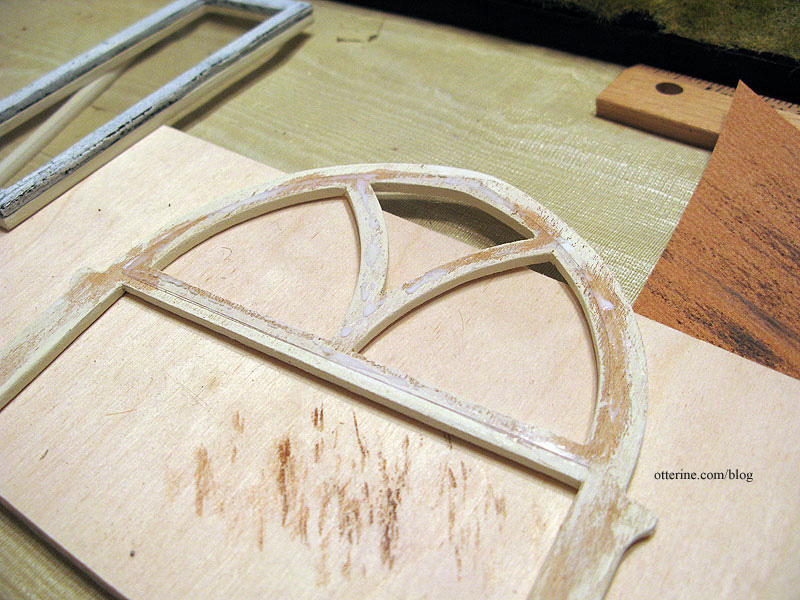
I touched up the white paint along the upper edges of the bay trim, added a paint wash of grey. I then glued the exterior arch window trim in place.
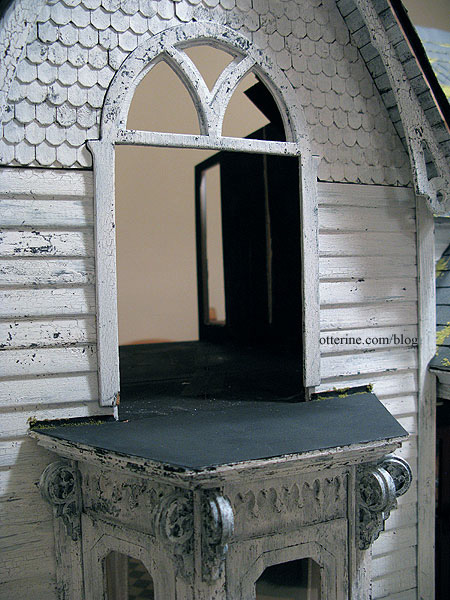
I put the swinging window together in mockup form and braced it underneath with a temporary board. This board is supposed to be painted to match the exterior, but I like the way it blends into bay roof in black so it will likely stay as is. None of it is glued in place.
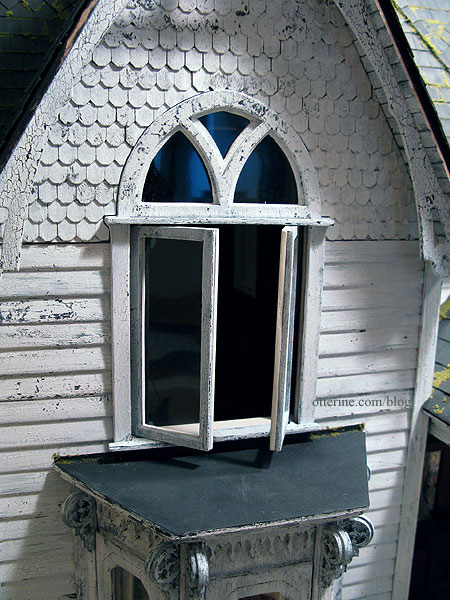
Of course, even with all the careful planning, the windows don’t really close all the way…together, that is. They are too tight when both are closed. I like them partially open anyway, so it doesn’t really matter. I can close one or the other, or leave them both slightly open. At least they work and look mostly convincing.
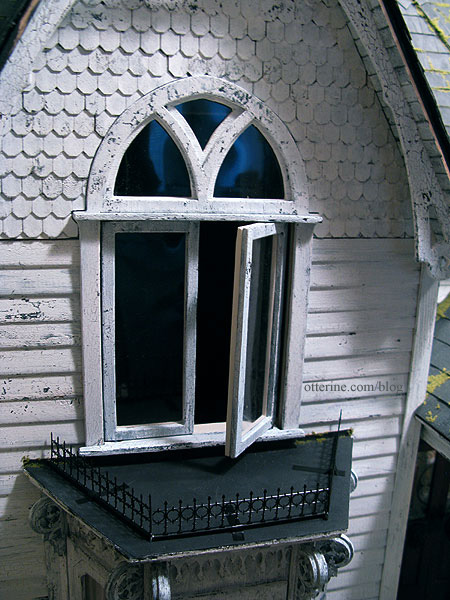
I need to finish the bedroom wallpaper before I can install permanently.
Categories: The Haunted Heritage
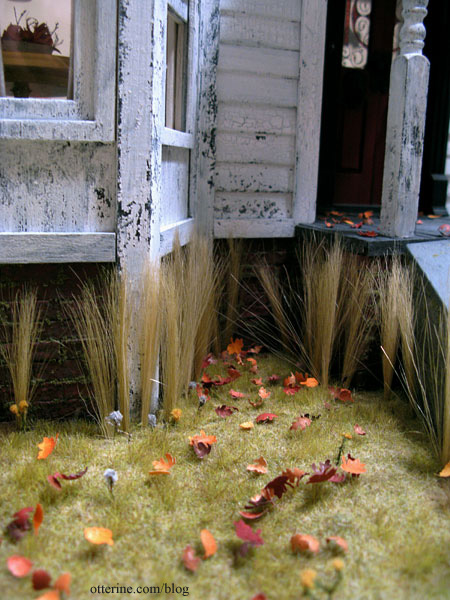
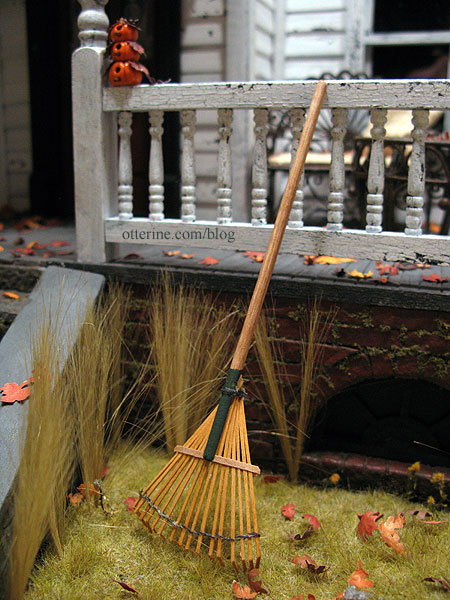
October 28, 2012 | 0 commentsHeritage – grandma’s neglected lawn, part 6
Continuing work on the lawn. I added a bunch of Woodland Scenics Field Grass tufts that I made for Baxter Pointe Villa but never ended up using. These were made from two colors of grass, with the ends dipped in clear gel glue and set to dry on waxed paper.
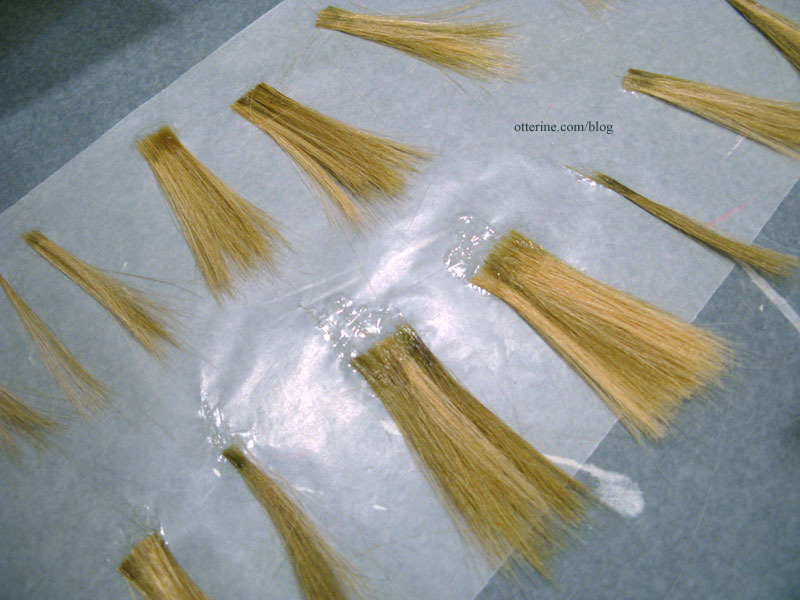
Once dry, I peeled them from the waxed paper and put them in a storage container.
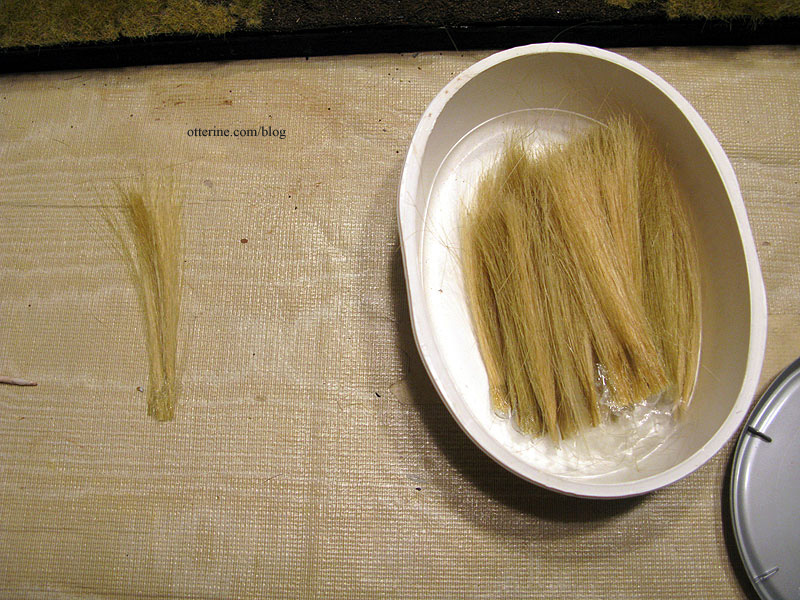
For the larger tufts, I clipped the glued portion into smaller tufts and glued them into holes made with an awl. It gives a nice overgrown appearance. I saved the rest for later when I install the chimney and fence. I still have some loose grass, too, so I can always make more if I need it.
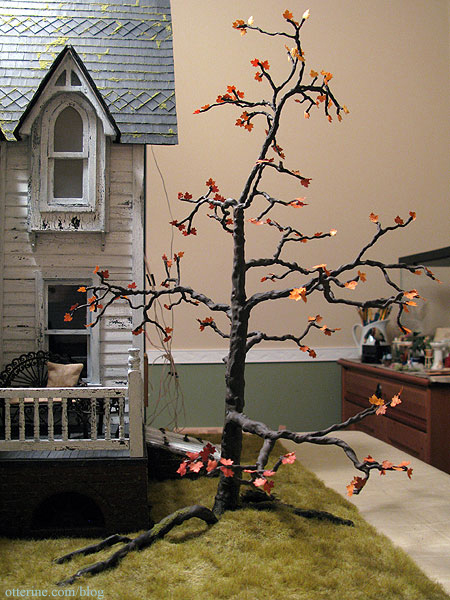
It’s time for a sprinkling of leaves. :D
The rake is by Sir Thomas Thumb. Grandma needs a weed wacker!
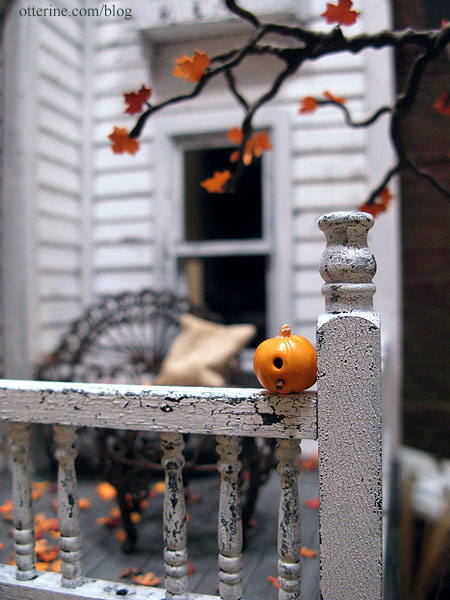
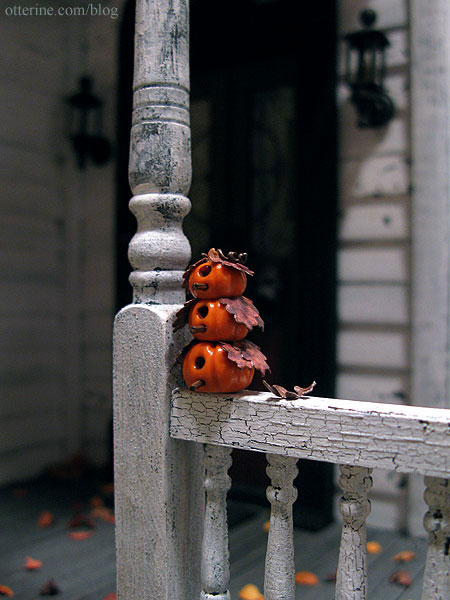
I’ve started setting up a few autumn minis in preparation for my Halloween photos, though I still have a few things to make and finish up. These birdhouses are from Whimsy Cottage Minis.
This one Lyssa gave to me. :D
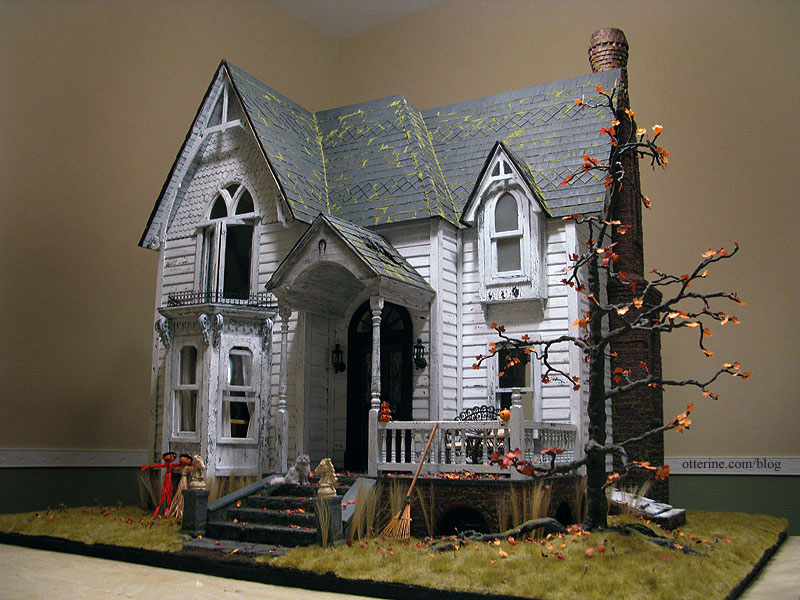
There’s Ophelia, as you know, and the lovely horse statues are from Katie’s Clay Corner.
I think we’re getting somewhere now.
Categories: The Haunted Heritage
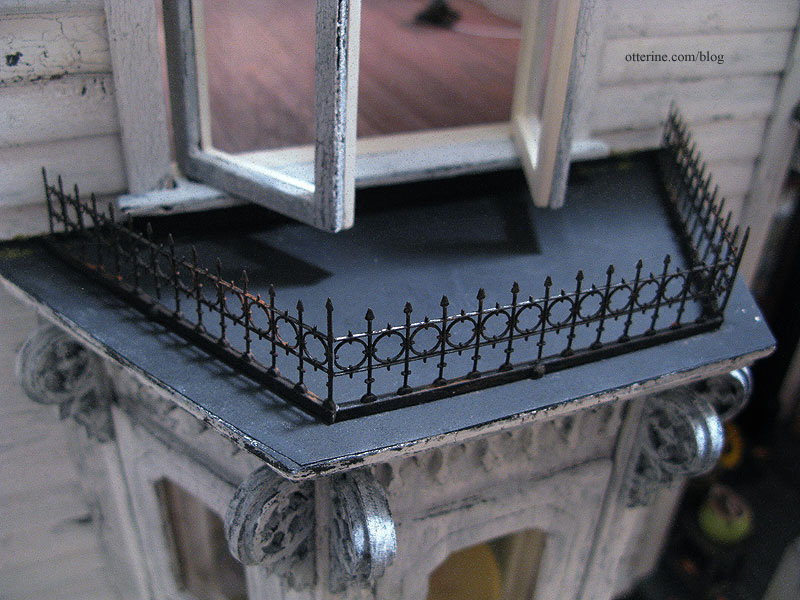
October 27, 2012 | 0 commentsHeritage – front bay window, part 6
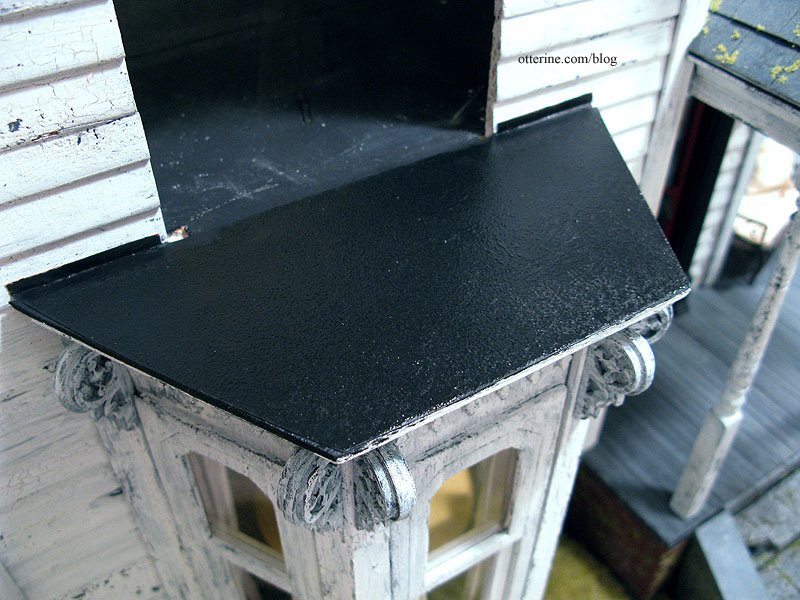
Finishing the top of the front bay window. The top of the bay window needed finishing. I had used sheet cork painted black for the parapet on Baxter Pointe Villa, but it was too thick of a material to use here. I did a test sample of 320 grit sandpaper painted black and loved it! So, I glued the sandpaper to the bay window roof first.
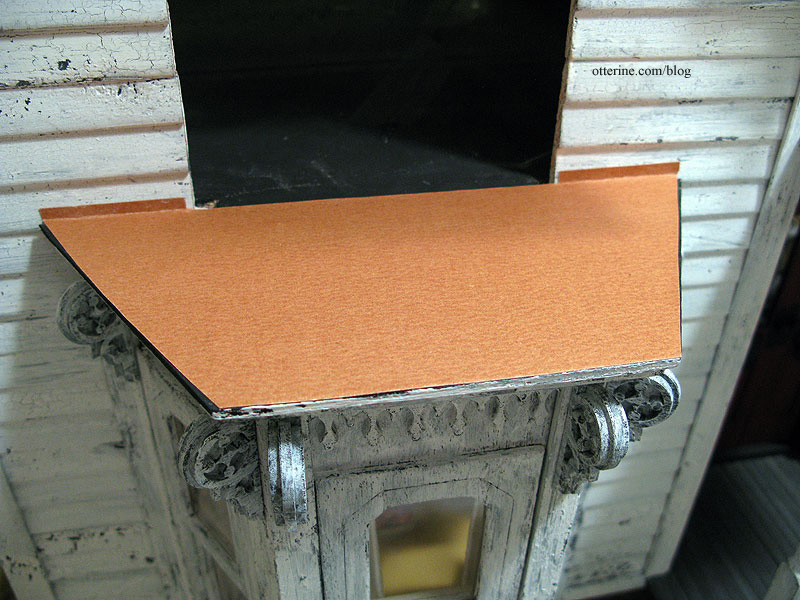
I then slathered on black paint.
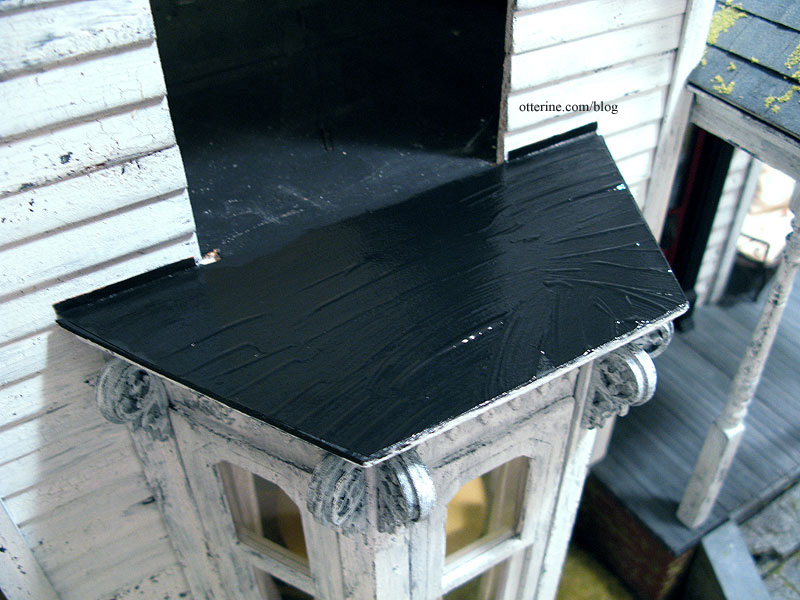
A paper towel blotted over it evened out the texture and color. Here it is still shiny from the wet paint.
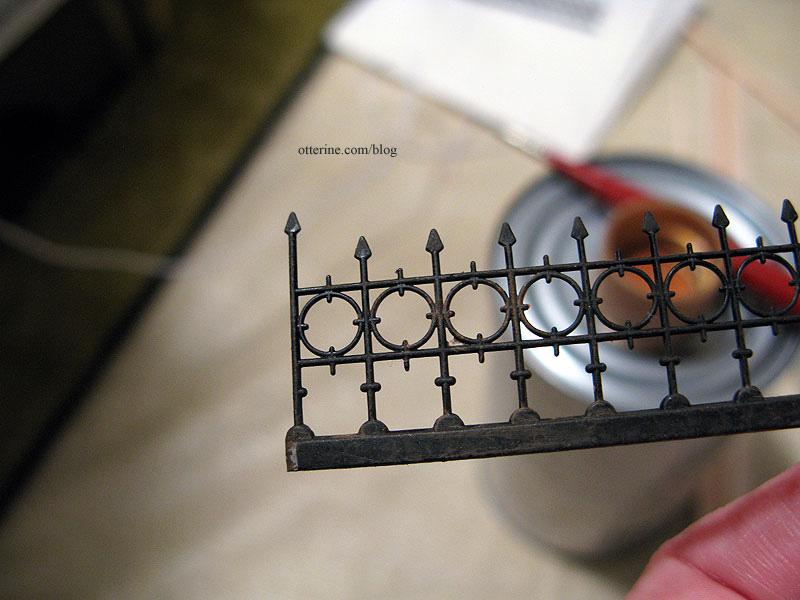
To finish the edge, I used quarter scale widow’s walk railings by Grandt Line. The railings are very delicate but look suitable in scale for the bay window.
I spray painted them flat black to start and then trimmed them to fit end to end, shown here unattached.
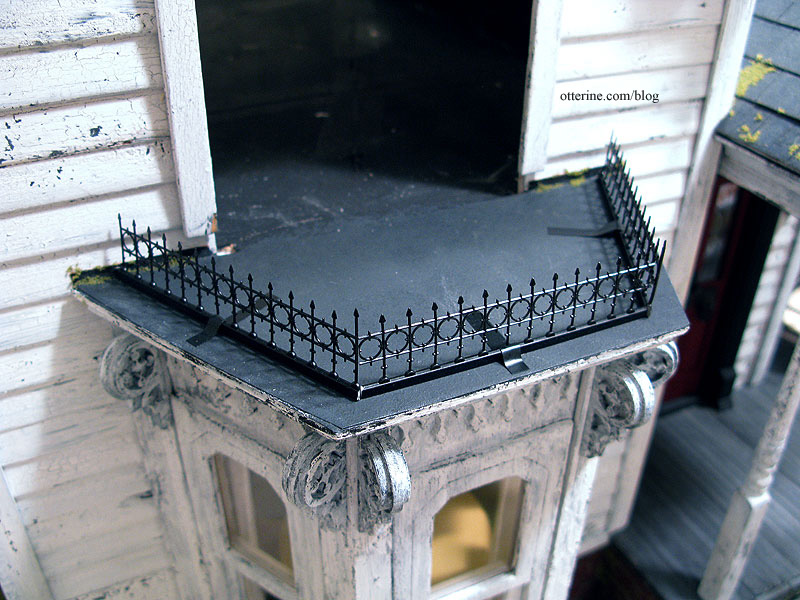
To age them, I dabbed on some Bittersweet Chocolate and Terra Cotta by Americana. Rusty old iron was created.
I attached them with a combination of super glue gel and tacky glue. These are so delicate that I am certain they will need to be repaired or replaced at some point in the future. I painted six to use three, so I’ll store the extras.
Categories: The Haunted Heritage
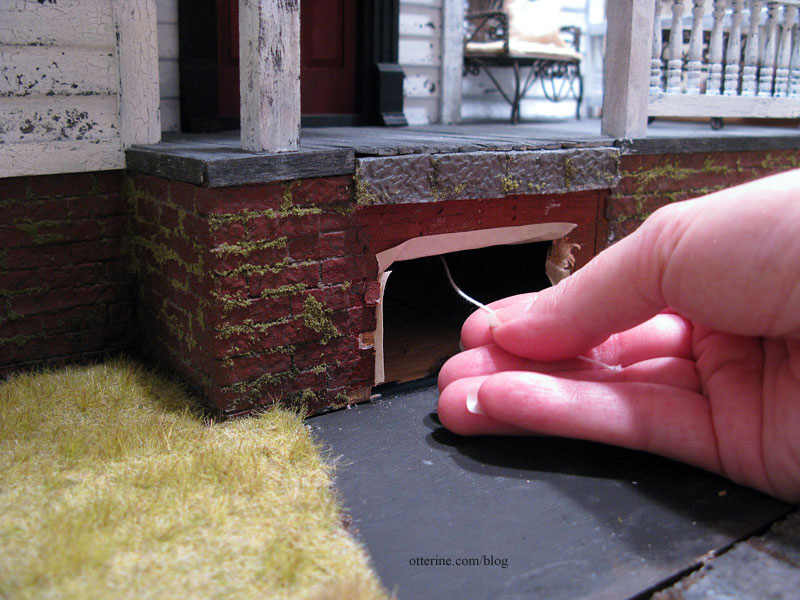
October 27, 2012 | 0 commentsAdding a wire after it’s too late
Well, it’s never too late to add a wire really, but sometimes it’s not worth the effort or deconstruction in order to add it after everything is already in place. But, in this instance, I was lucky.
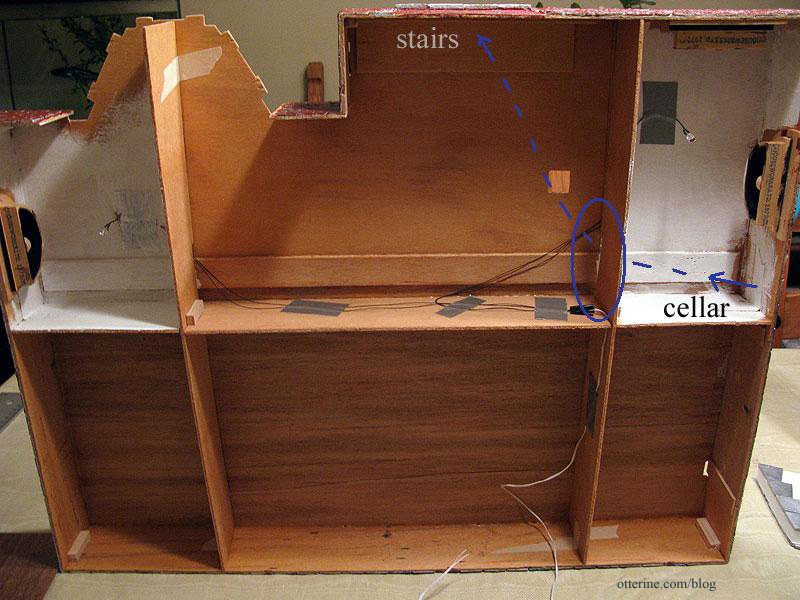
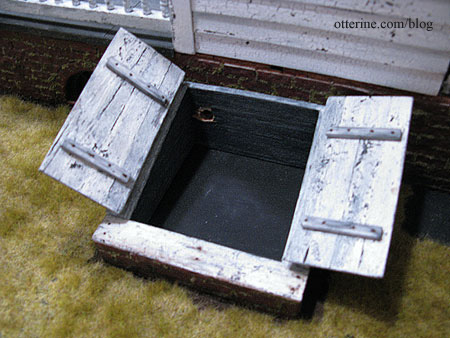
When I originally made the cellar unit with working doors, they were to hold any flickering fireplace unit I might add to the parlor at a later date. Now, I thought, it would be a great place to hide the battery switch for the light I needed on the front porch. After consulting my photos of the basement supports and lighting configuration in an earlier post, I saw that it was workable. I cut a hole in the foundation behind the stairs to access the basement. ;]
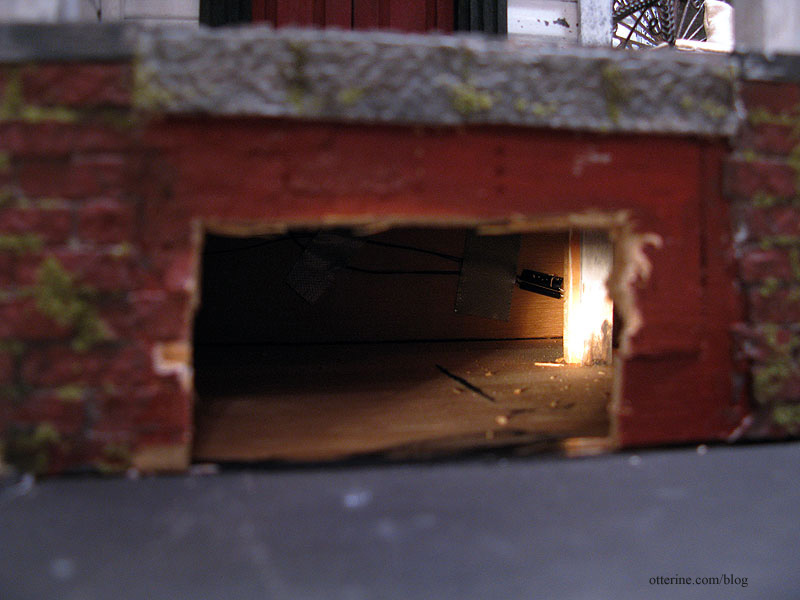
the creepy crawlspace :O I had already planned to keep the front steps removable since I might want to change the outer décor from time to time. Having a hard-wired light bulb sticking out of the stone steps isn’t ideal for that reason. Initially, I thought I would just hide the battery and its on/off switch in a crawlspace hole behind the stairs, but then I would have to remove the steps every time I wanted to turn the light on and off. The cellar is a much better solution.
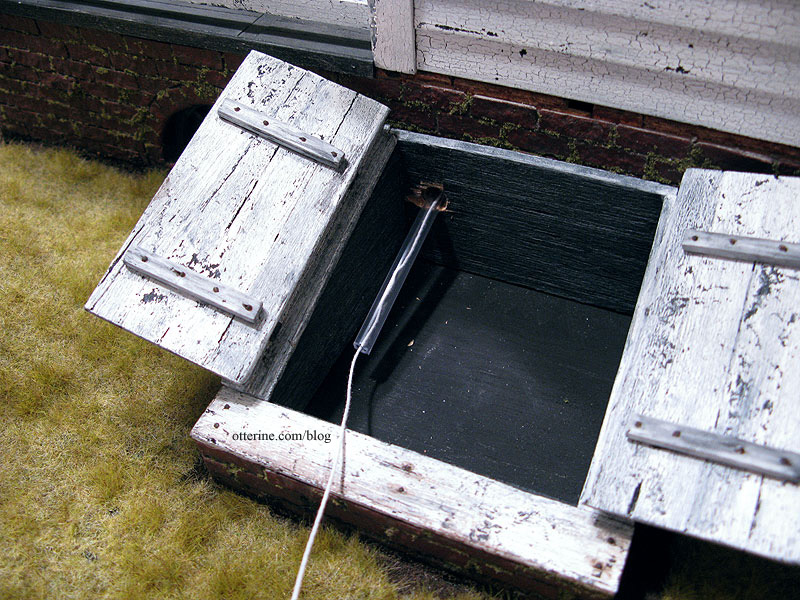
Here is the path of the wire and the thin gap I needed to aim for.
A hole drilled in the back of the cellar provided access to the adjacent compartment.
I used a bit of plastic tubing angled up toward the basement ceiling and fed a length of floral wire through it. I used floral wire since it is more rigid than electrical wire and therefore moves more easily through the tube.
After a little fishing (and a little swearing), it broke through the gap. I tied the end of the floral lead wire to electrical wire and started the feed through the tube.
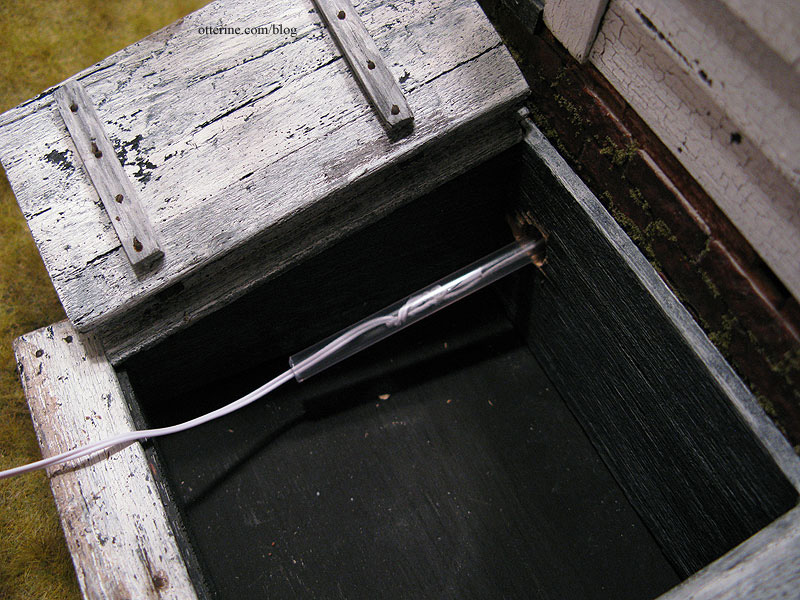
Now to retrieve the floral lead wire from inside the crawlspace.
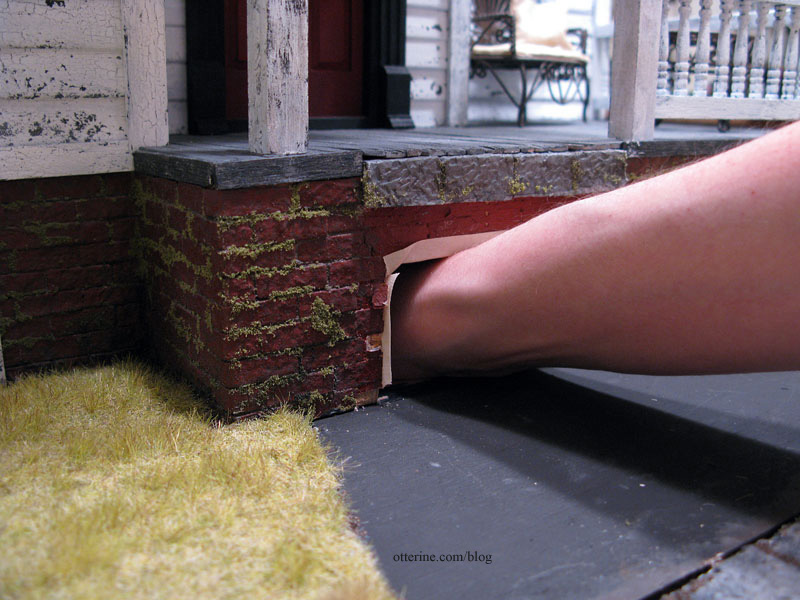
Yes, my hand fits in a hole 2 3/4″ wide x 1 1/2″ high. :D I first lined the hole with masking tape to save myself from splinters, though.
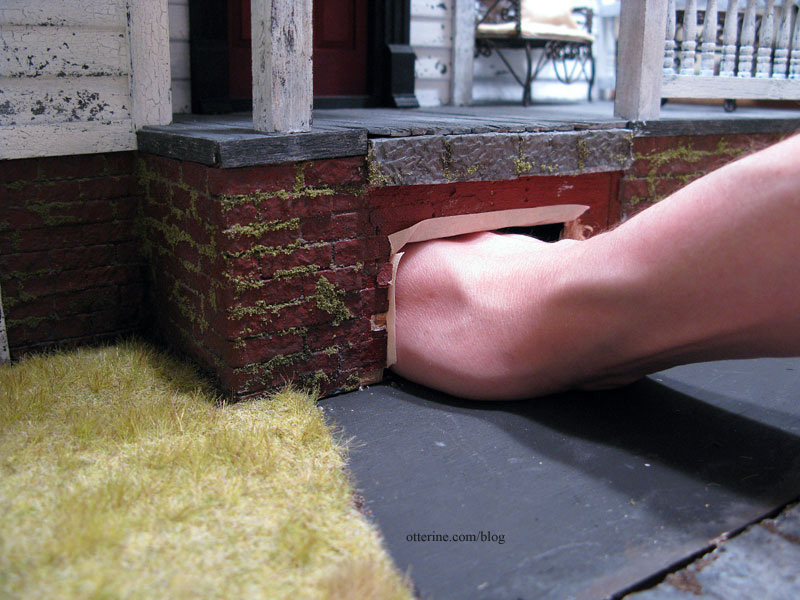
And, there it is! Hooray!
I pulled the floral wire until the electrical wire came through the crawlspace hole.
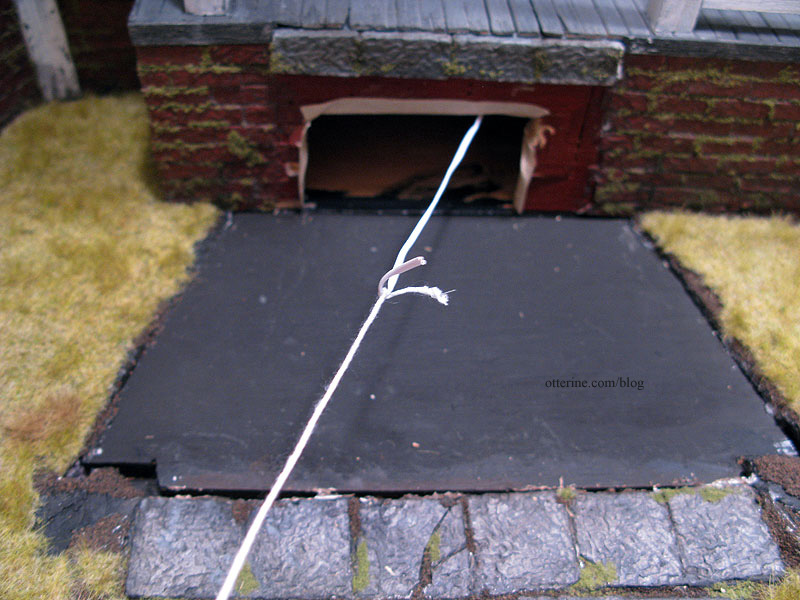
I removed the floral lead wire from the front end and the tube from the cellar end, leaving the electrical wire ready to use.
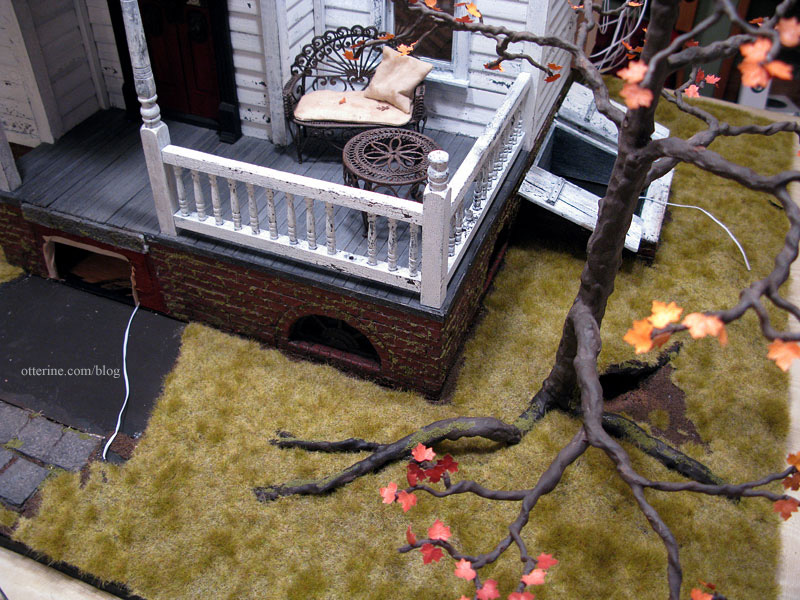
What’s the wire for? You can probably guess…but Blake and Lyssa aren’t allowed to say. :D
Categories: The Haunted Heritage
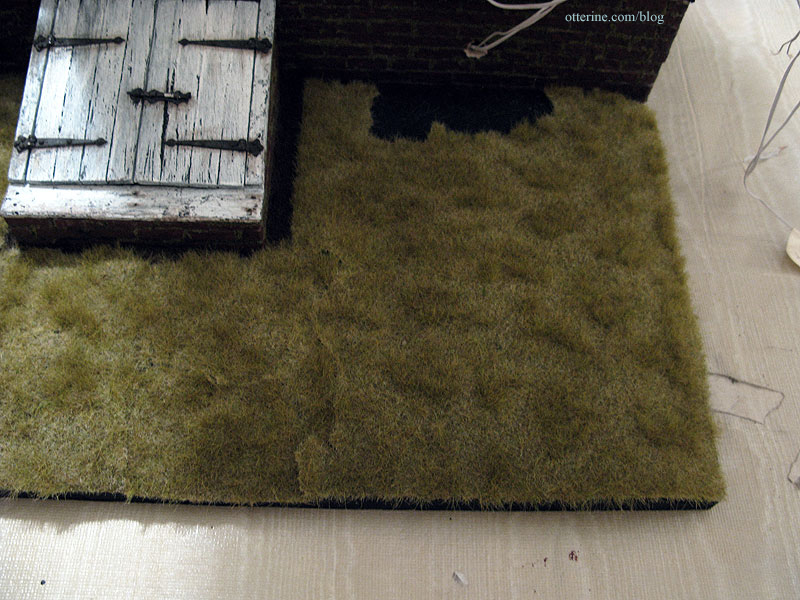
October 22, 2012 | 0 commentsHeritage – grandma’s neglected lawn, part 5
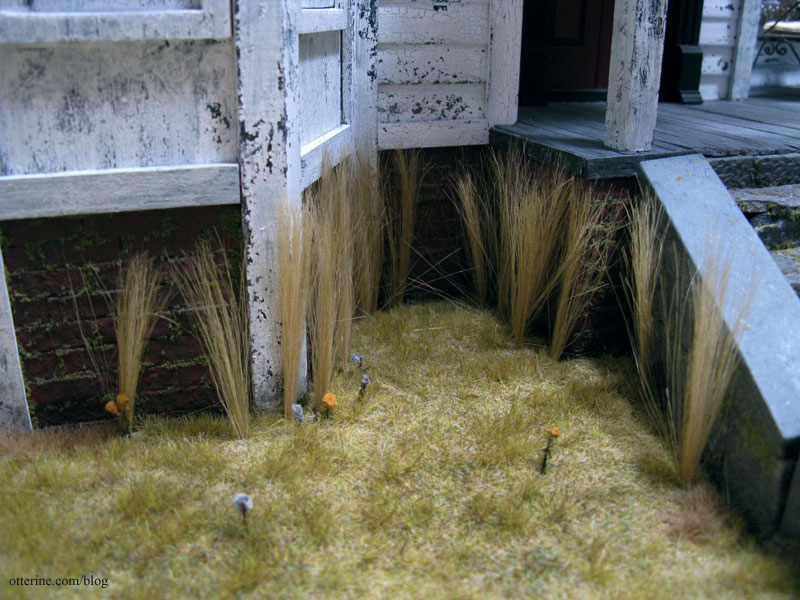
Continuing work on the lawn. Around The Tree, there was a whole lot of winging it. I first glued in a few larger pieces of the Savannah TuftGrass by Heki, including leftovers from the left side of the lawn, and then just patched and patched and patched. Here is a work in progress shot. I applied the grass in the same manner as I had done for the left side.
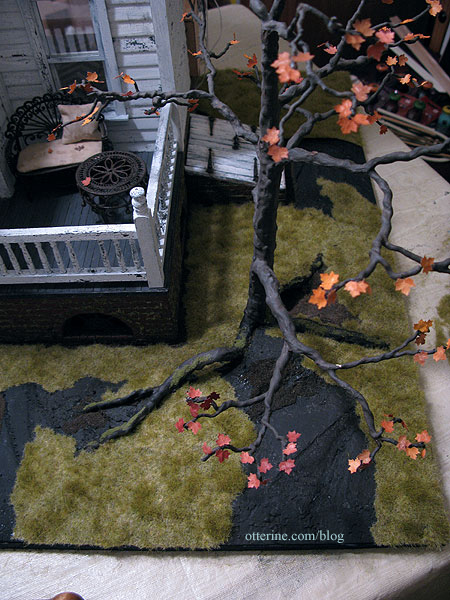
I have a large piece set aside for the back corner where the chimney will be. That will remain unglued until much later.
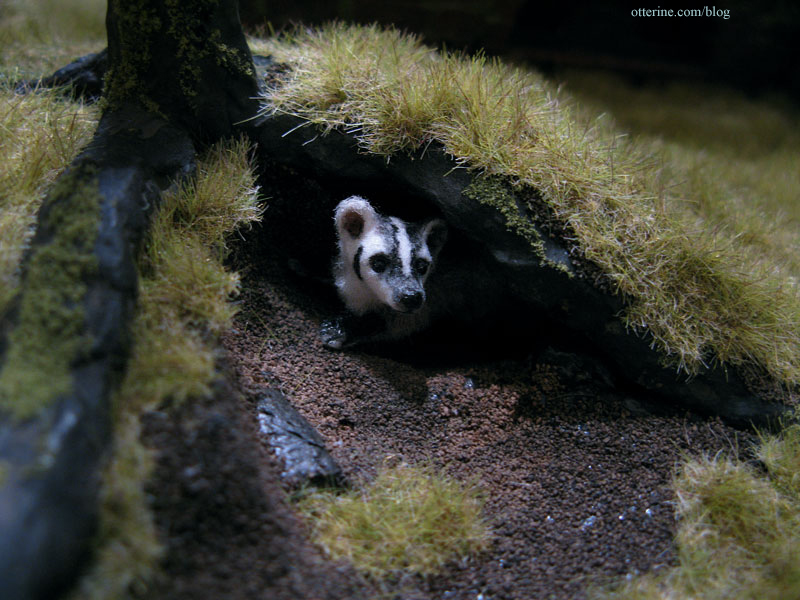
I love the way the burrow looks with the grass in place. Before it was somewhat obscured by the dark base all around it, but now it stands out amongst the green. :D
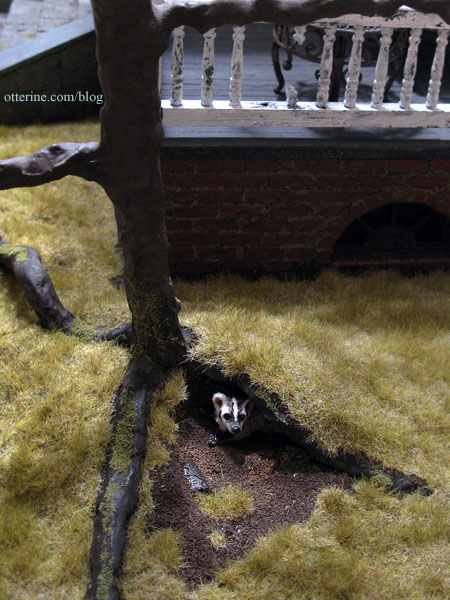
The roots also stand out more now.
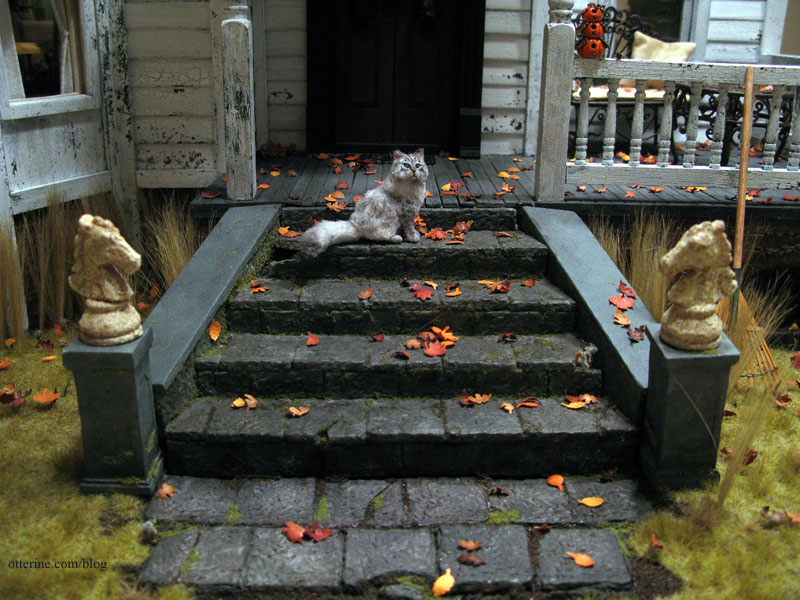
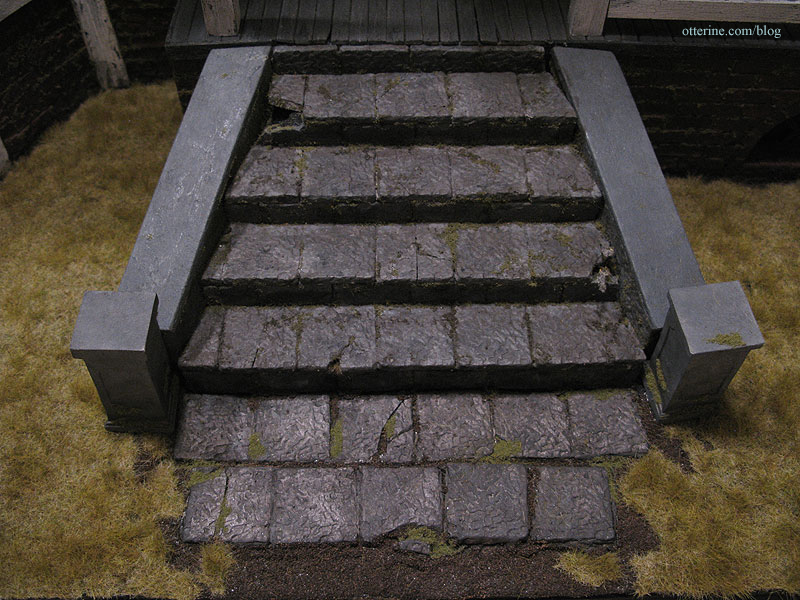
Since the stone steps are mossy, I added moss to the walkway pavers and the pedestals. :] The stone step assembly and pedestals will remain removable even after completion of the build.
While I was at it, I gave the tree trunk and roots a little moss covering here and there. I might add more to fine-tune the landscape but wanted to get at least the base coat on. I think I need mushrooms, too. I’ll have to work on that. (Here they are!)
I have yet to add the rest of the goldenrod flowers since I was battling a headache today. But, I love it so far.
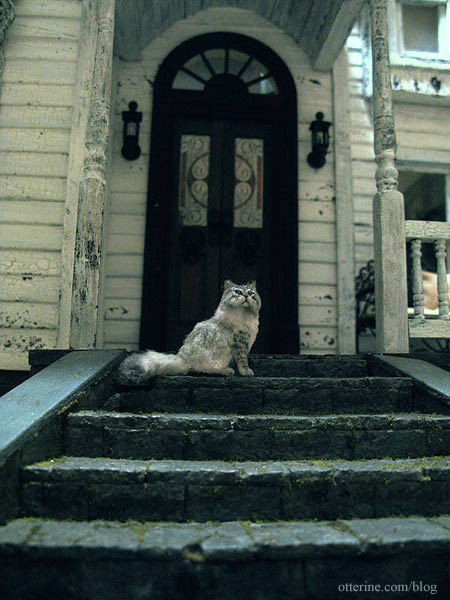
Pretty Ophelia. :D
Categories: The Haunted Heritage
October 21, 2012 | 0 comments


NOTE: All content on otterine.com is copyrighted and may not be reproduced in part or in whole. It takes a lot of time and effort to write and photograph for my blog. Please ask permission before reproducing any of my content. Please click for copyright notice and Pinterest use.


