

The Artist’s Studio – The Deck – introduction
The Artist’s Studio is a relatively straightforward build, though the window wall will certainly pose some challenges. The biggest challenge I’ve set for myself is replicating in miniature this beautiful deck from Trex.

Of course, the real life version is larger in proportion than what I can build in miniature and still keep a reasonable base size. To that end, my deck will be more an “inspired by” build than a replica.
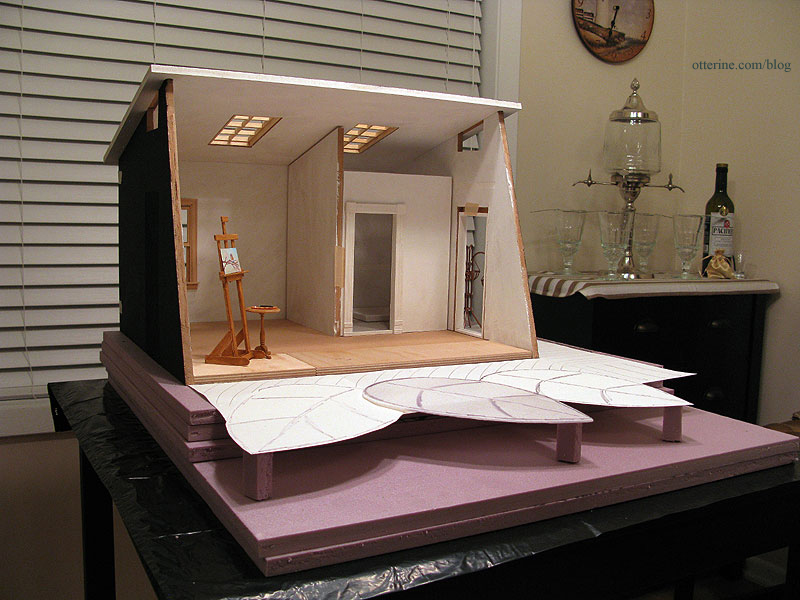
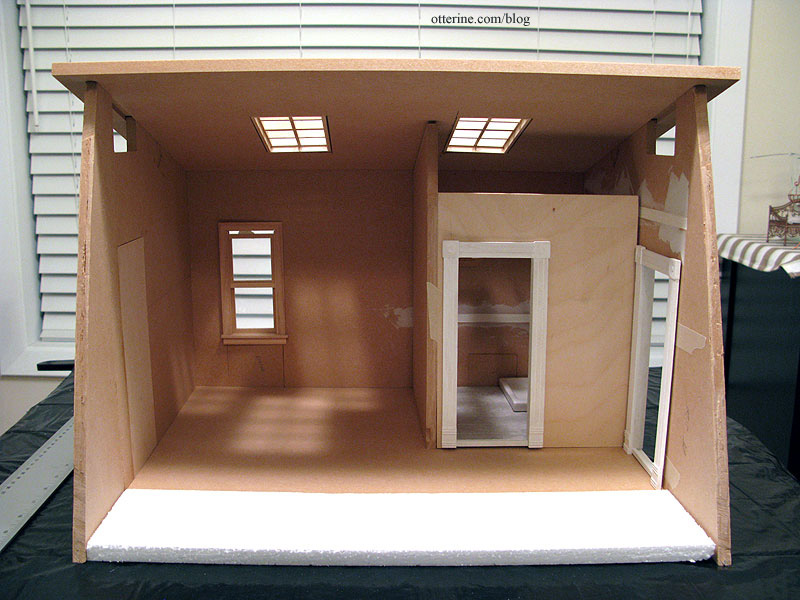
I started with a paper and foam mockup to get the general feel of the layout and size.
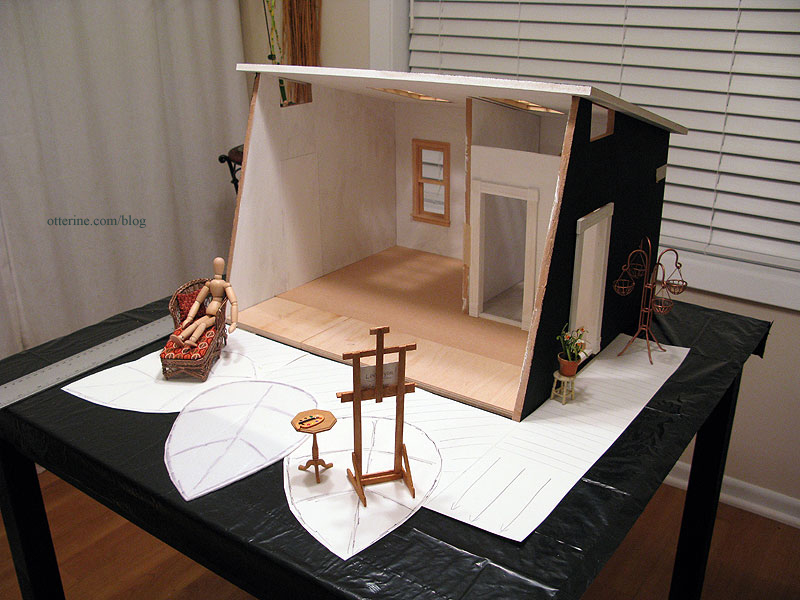
My baseboard needed to be around 24″ x 28″ to accommodate what I wanted.
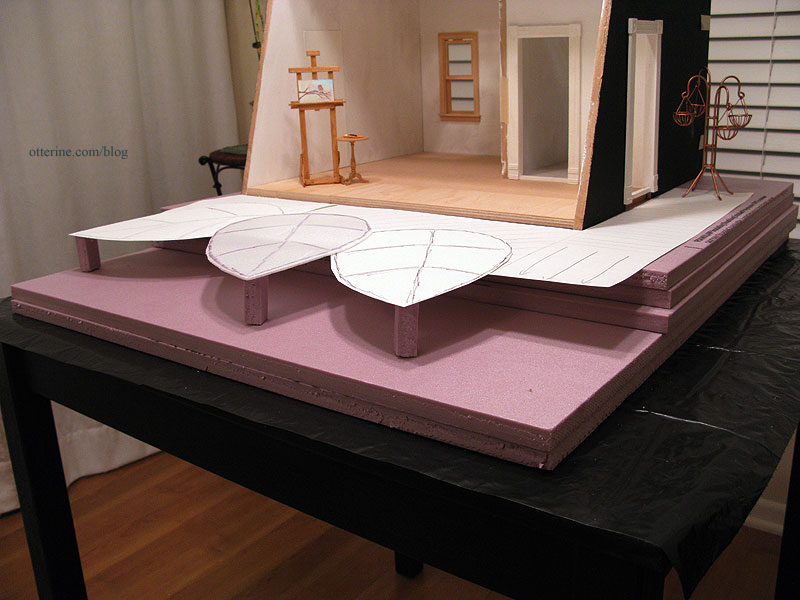
I then used the leftover builders foam from The Aero Squadron Lounge to build up the ground under the Studio and deck. The arrows on the right indicate steps that will follow the slope of the landscape.
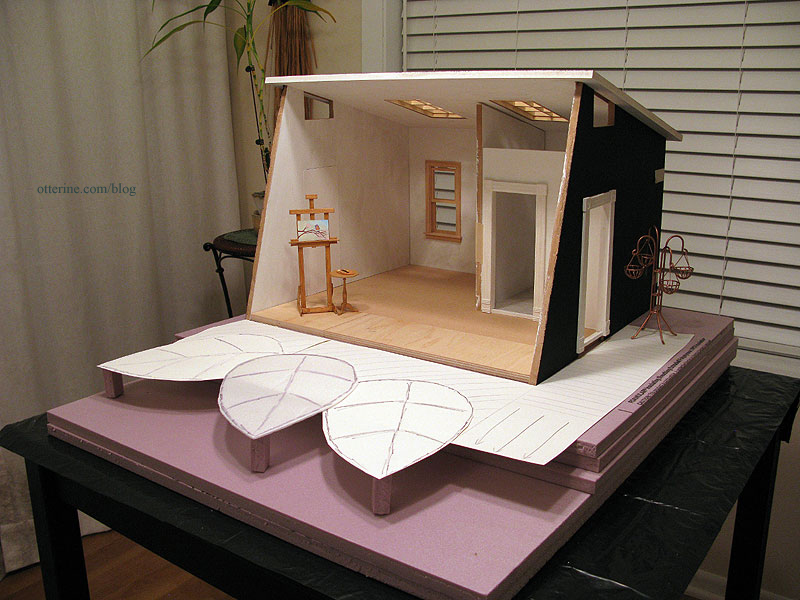
This initial layout had the lead edge of the deck 1 1/2″ off the ground. I have the option of cutting away one of the two foam boards in the front to make it a 2″ elevation instead. I now just need a wood base to hold it all.
There will be a small area on either side of the Studio for landscaping but the building itself will sit on the back edge of the landscaping base.
I consulted with Elga since she knows woodworking. She helped me figure out the best way to cut the various curves and suggested some types of wood. Looks like that jeweler’s saw class might come in handy after all…though I hear a few of you telling me I need a scroll saw. :D
Categories: The Artist's Studio
November 27, 2012 | 0 commentsMoo Cow Cookies!
I tried another cookie design…tiny moo cows! :D They are iced in black and white, each one a unique freehand creation.
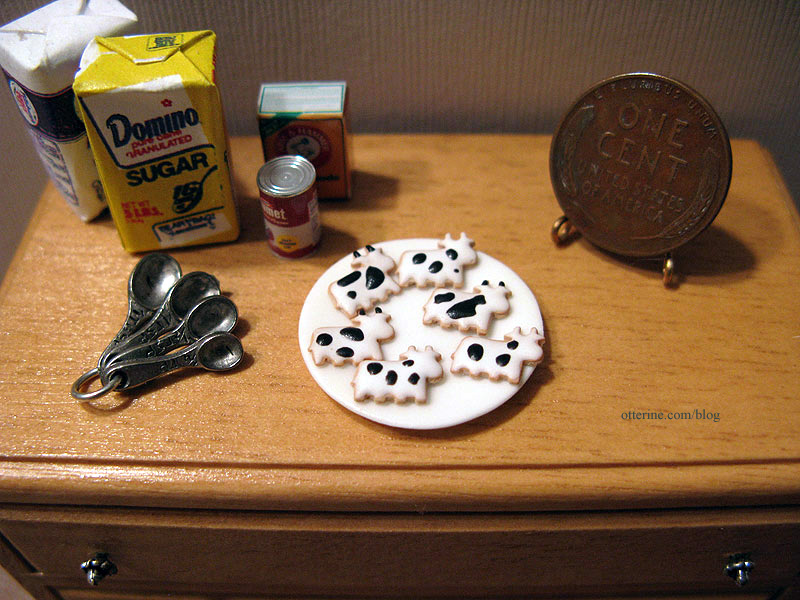
I posted this set in my etsy shop.
Categories: Miniatures
November 26, 2012 | 0 commentsThe Artist’s Studio – primed
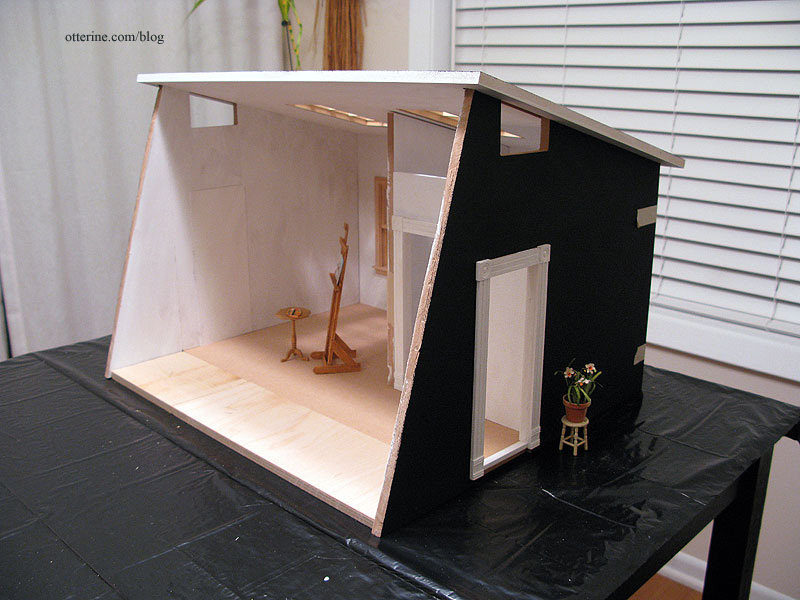
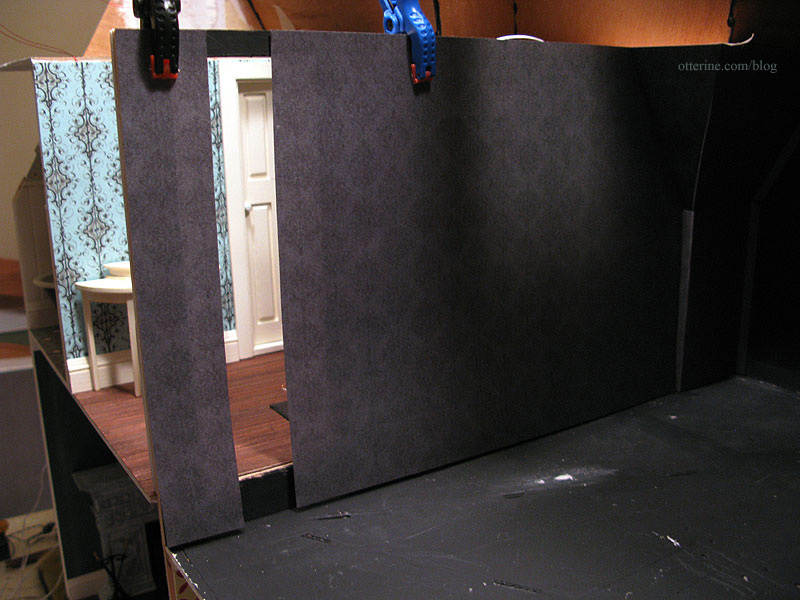
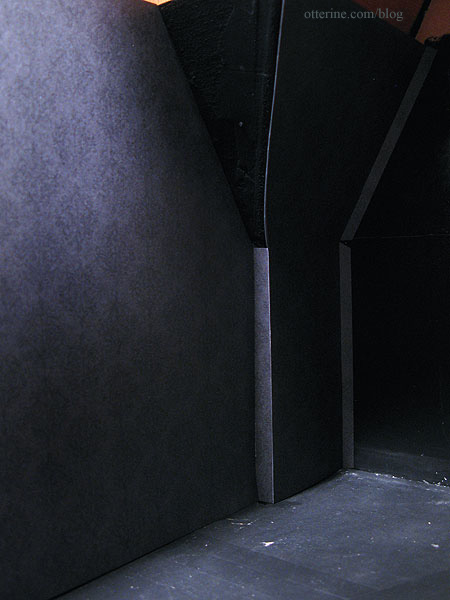
Continuing work on the structure. I primed the front and back of each board except the floor since that is still in the planning phase. I used white on the interior and black on the exterior. I always prime first one side and then the other in the same painting session to keep any warping to a minimum.
The white portion will need a second coat, but I also have to fill in the loft notches some more since the spackling shrank as it dried. The extra floor boards are in, too! :D
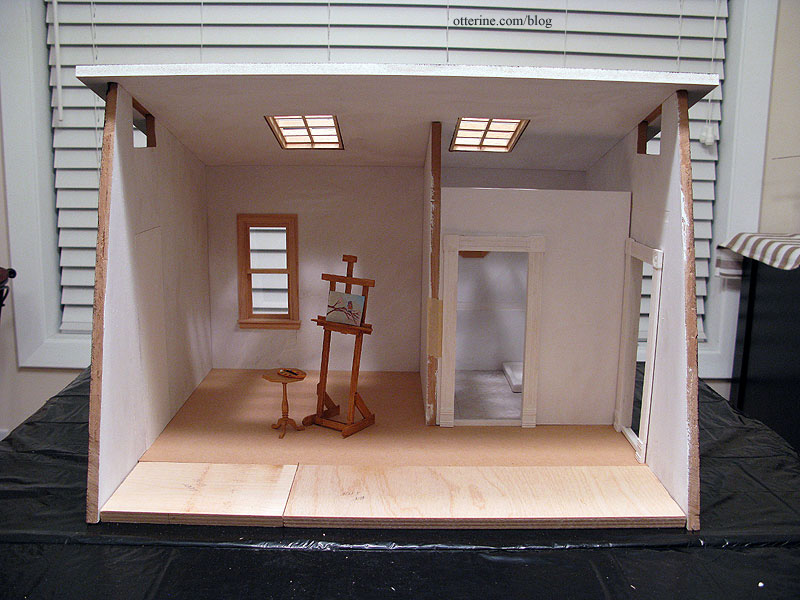
It might seem like I’m flying through this build, but this thing will stay in dry fit for some time. This is usually how my Spring Fling builds go…lots of prep and dry fit for months. The Studio will be glued together relatively early in the build, but there will be a lot of work to do besides.
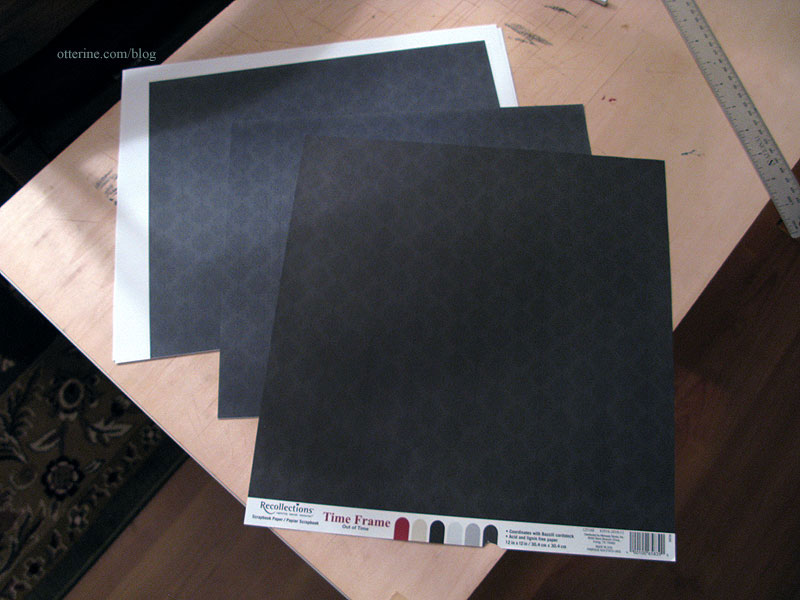
I bought three papers for the interior, all drawing papers in large size sheets. The side walls are longer and taller than standard scrapbook paper sheets, so this will eliminate the need to piece the wallpaper. I have successfully applied wallpaper with seams before, but why bother if you don’t have to? And, solid papers tend to show seams more readily. I will be using the back side as the right side surface since the texture is softer.
I bought Daler-Rowney Dreadnought Grey as well as Canson Pearl Grey and Ivory. The ivory is for the bathroom and the greys are for the main hall and living area. I loved the Dreadnought Grey in the store but worried it might be too dark for the interior, so I bought the Pearl Grey just in case. I might use a two-tone treatment.
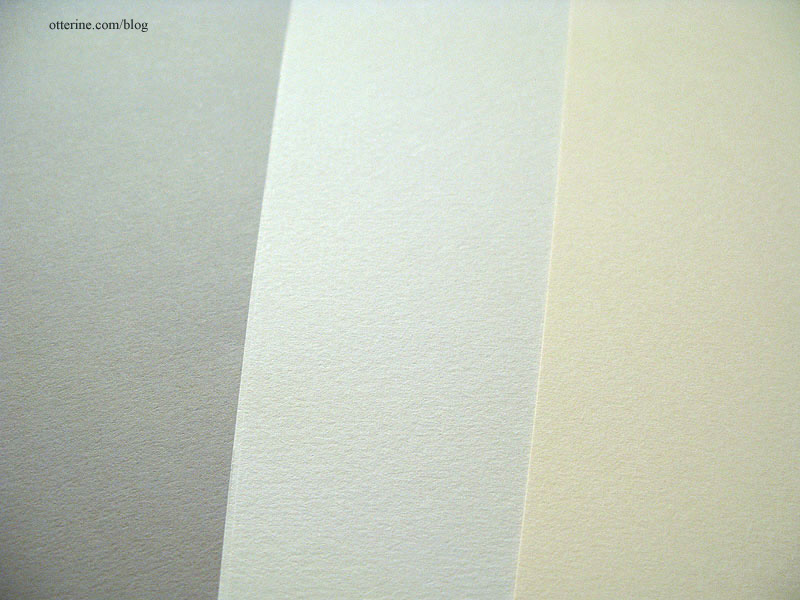
I think it’s rather fitting to use drawing papers for an artist’s studio, don’t you?
Categories: The Artist's Studio
November 25, 2012 | 0 commentsThe Artist’s Studio – modifications, part 2
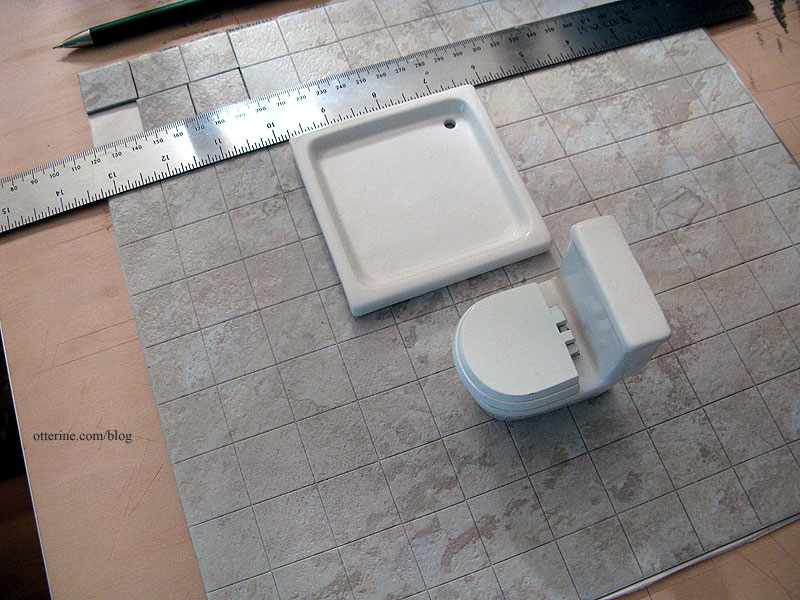
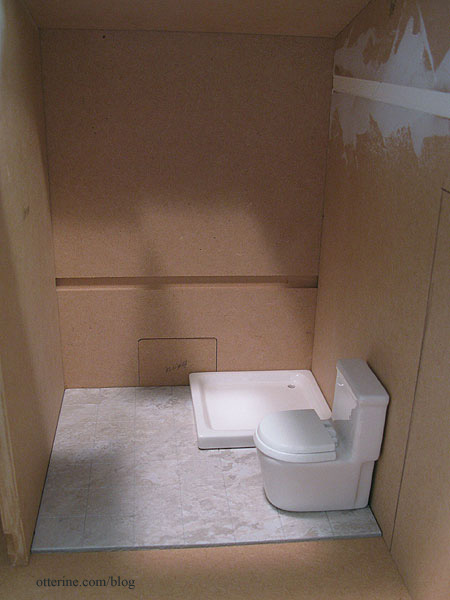
Continuing work on the modifications. For the bathroom in The Artist’s Studio, I used Greenleaf vinyl tiles. I have split these before to do a diagonal layout, but I prefer the way they look when used whole, without splitting between the tiles. The drawback to this is sometimes these sheets have obvious large patterns that cross many tiles. I put the shower floor and toilet onto the full sheet of tiles to see where I could get the cleanest layout.
I split the tiles along these lines and cut through the paper backing. I tested out the fit while keeping the paper backing on for now. I won’t be ready to install the tile for some time.
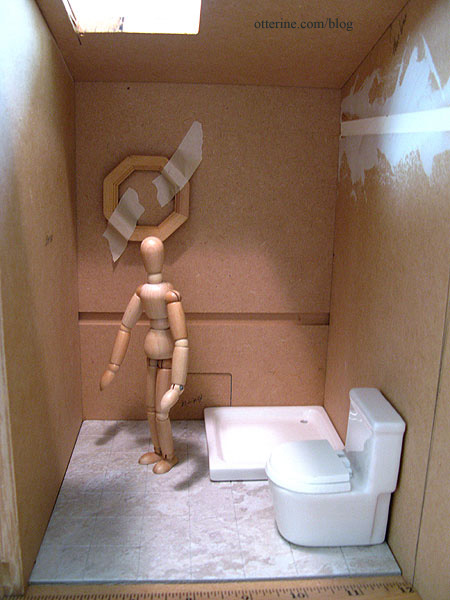
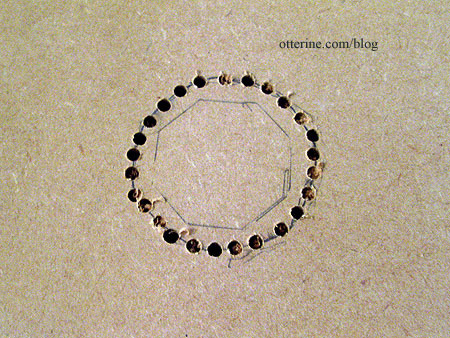
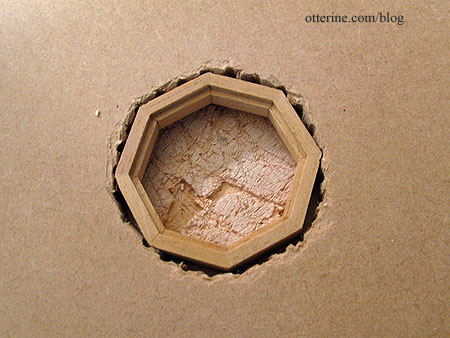
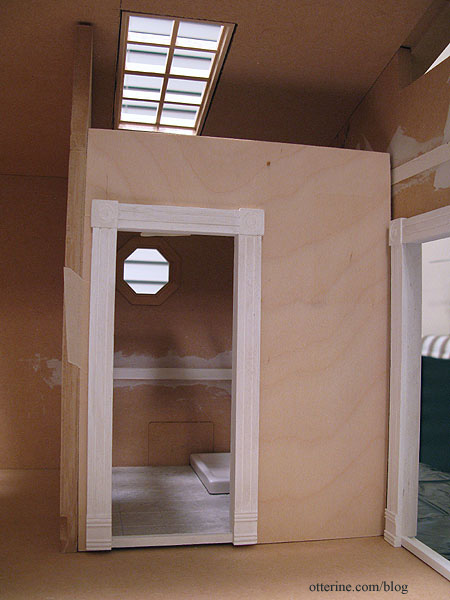
Another project for this long weekend was cleaning and organizing. When I went through the box of components, I found a Houseworks octagon window. I decided to use this in the bathroom for some visual interest. My model helped me determine a good height.
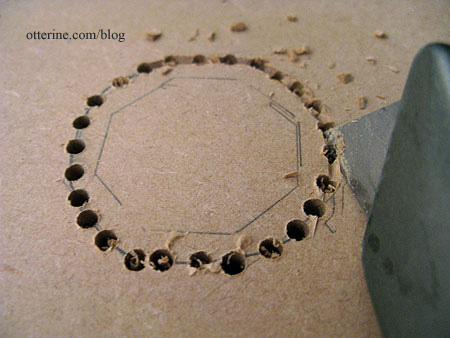
To make the opening, I drilled holes all around the template line. I’m using a power tool!!! :D
There were some excess splinters where the drill punched through on the back, so I cleaned them up with a straight blade…the kind you use to remove stickers from glass.
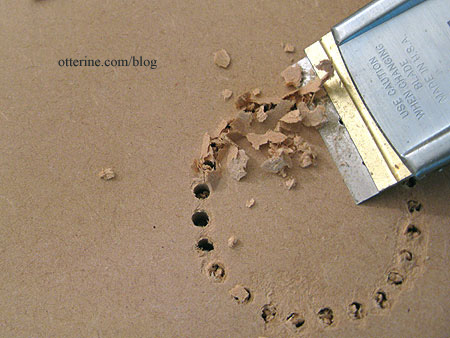
I then chipped out the sections between the holes, once around each side and then more where needed.
Hmm…the popped out insert kinda makes me want a Reese’s peanut butter cup. ;]
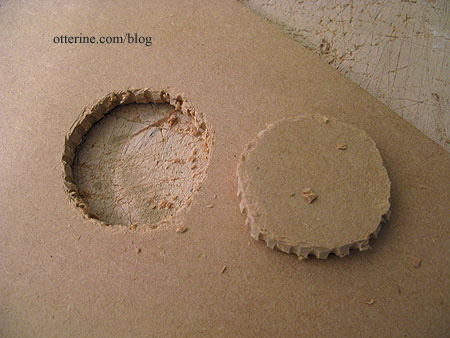
I cleaned up the hole with my utility blade and then checked the fit. Marvelous!
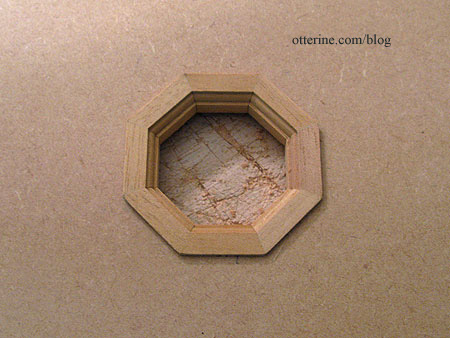
It’s a good snug fit, too, to keep the window aligned properly.
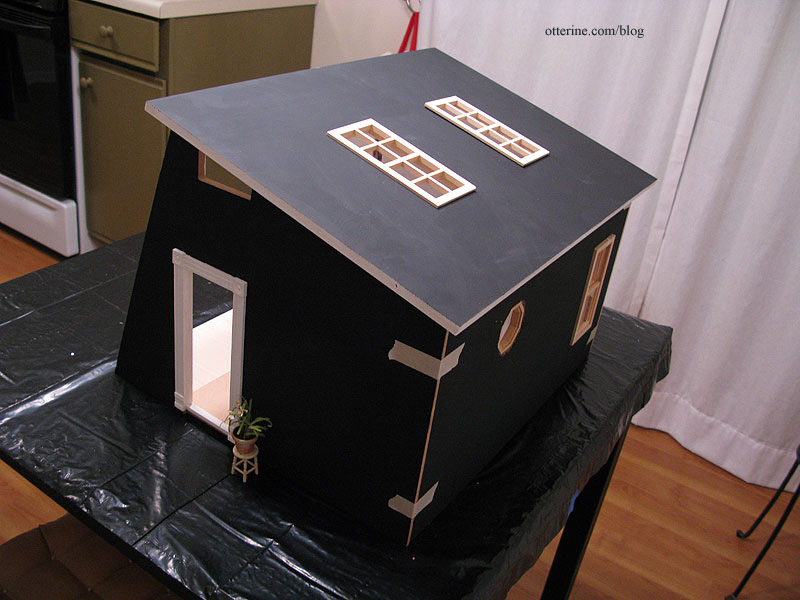
I filled in the original door opening with sheets of balsa and basswood since I had it on hand. I’ve put in a spare piece of foam for the front floor until I get the cut pieces of 3/8″ plywood back from my parents (they have better power tools). :D

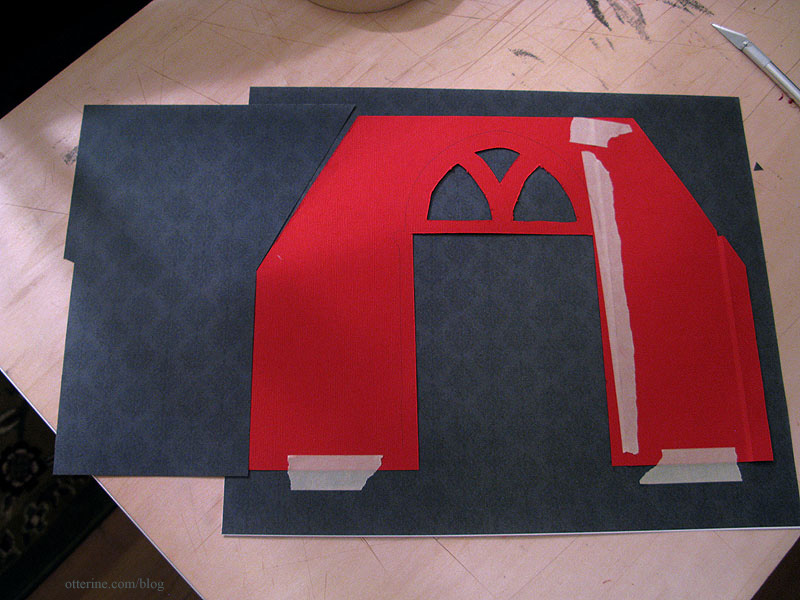
I cut the new door opening on the other side and made the removable bathroom wall from 1/4″ plywood.
I glued in the plugs on the back wall and filled in the remaining loft support notch.
Next, I need to plan the deck so I can buy a piece of wood for the landscape base.

Categories: The Artist's Studio
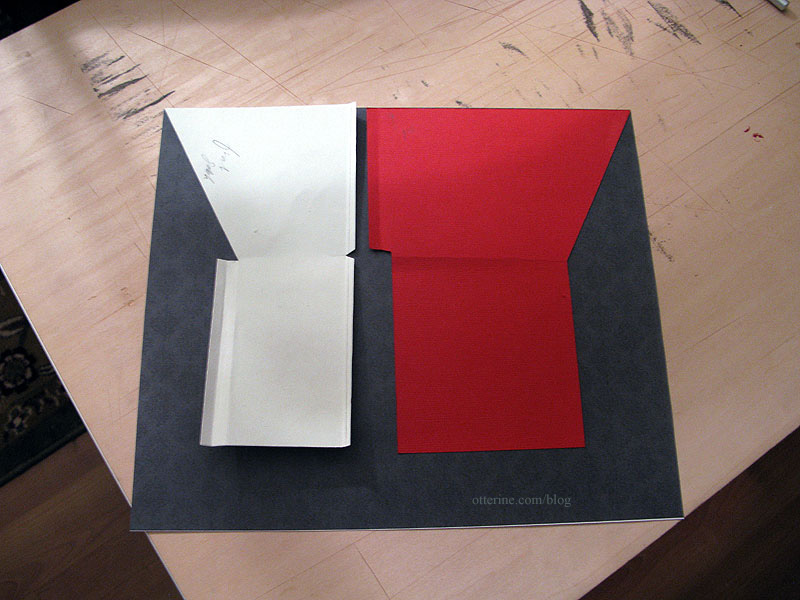
November 24, 2012 | 0 commentsHeritage – bedroom wallpaper, part 2
Continuing work on the bedroom wallpaper. Time for a test run with photocopies of the original scrapbook paper – Out of Time by Recollections.
Using the original plain paper templates, I cut the photocopies and fit the pieces into the room. The two angled walls at the front of the room need taller pieces than the straight wall templates.
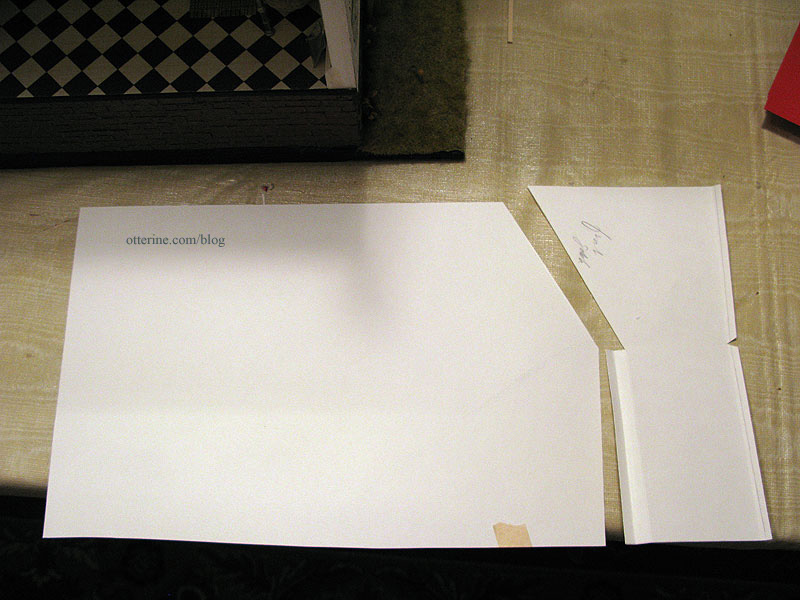
I cut the two angled templates first, using only one sheet of scrapbook paper, aligning the top of the templates with the top edge of the scrapbook paper copy.
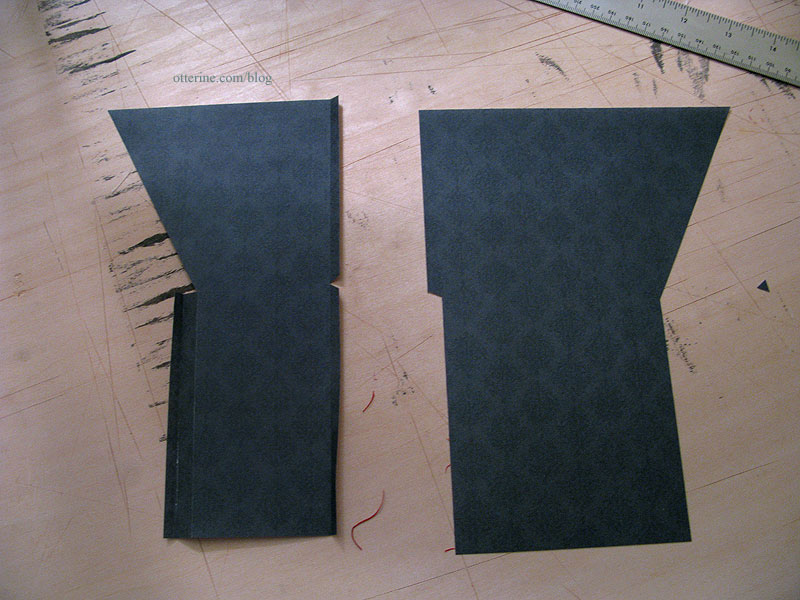
I lined up the next full sheet of paper with the left side angled piece. I had to cut about 1/4″ from the side of the full sheet to get the pattern to match.
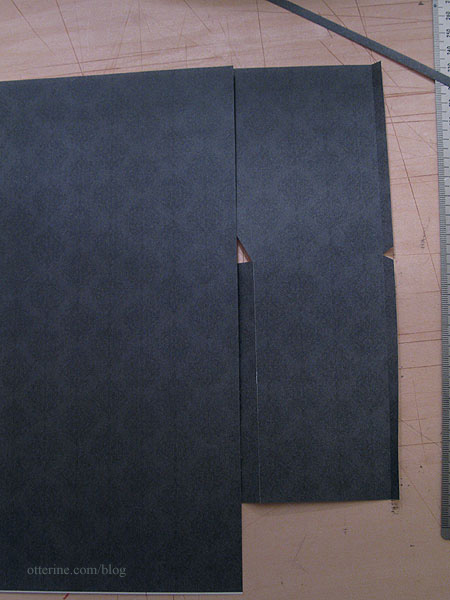
I taped the long wall template onto the printed paper copy along the bottom since this area will be cut off. The excess at the top will be removed as well, but I didn’t want to risk tearing the paper on that edge. Baseboard trim will cover any mishaps along the bottom.
Since there is a door opening at the back end of this wall and the door trim will cover the uppermost part of the wall above the door, I just split this long piece through the middle of the doorway. For now, I will leave the two pieces whole without the door opening since larger pieces are easier to work with.
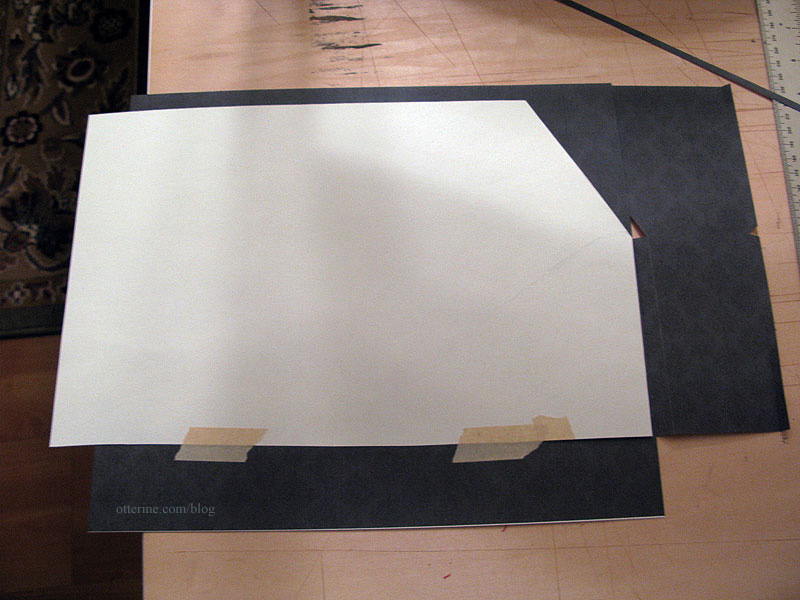
The two pieces fit well.
I cut the right side window wall template next. It lines up well with its adjacent angle wall piece, but I couldn’t take a photo of the pieces in place since the paper kept falling down.
I used the waste piece from the large window opening to cut the left triangle piece that completes that wall.
It all works! Hooray! Unlike solid cardstock papers, printed papers often have a white paper core. When you score along the paper to make a crisp edge, the white core can show. I will have to use a pencil or marker to darken these edges using scraps to test out what method will work best.
I used another waste piece to make the other triangle piece for the right wall. Again, no picture of it in place.
As noted, the two side angled pieces had to be cut from one sheet due to my limited paper supply. Since it wouldn’t be possible to have the pattern continue along the front wall and match both side walls, I decided to center the front window wall template onto its own sheet of printed paper. Visually, it will make sense and, as long as the pattern flows horizontally, you shouldn’t be able to notice the pattern doesn’t match vertically in the corners.

Of course, I’m going through all this trouble for a paper that is so dark it’s hard to even tell there’s a pattern. You can see it more readily with the paper copies since I upped the contrast to see what I was doing. :D Nevertheless, it’s great practice for other patterned papers, and I wasn’t sure how it would work over all without this test run.
I used the equivalent of four sheets of scrapbook paper, and I have five originals. This gives me a tiny bit of breathing room in case something goes wrong in the actual paper application.
With all adjustments made and these cut pieces showing the best possible fit and pattern placement, I will use these secondary templates to cut the final scrapbook paper pieces.
Continued here.
Categories: The Haunted Heritage
November 23, 2012 | 0 comments


NOTE: All content on otterine.com is copyrighted and may not be reproduced in part or in whole. It takes a lot of time and effort to write and photograph for my blog. Please ask permission before reproducing any of my content. Please click for copyright notice and Pinterest use.


