

New minis
Even though I don’t have a build started for this beautiful bed, it’s hard to pass up pieces that speak to me. I’ve noticed that if I skip over something, it tends to be sold out and out of production by the time I’m ready for it. I picked up this lovely bed from Regent Miniatures (a new name for a long time supplier on eBay).
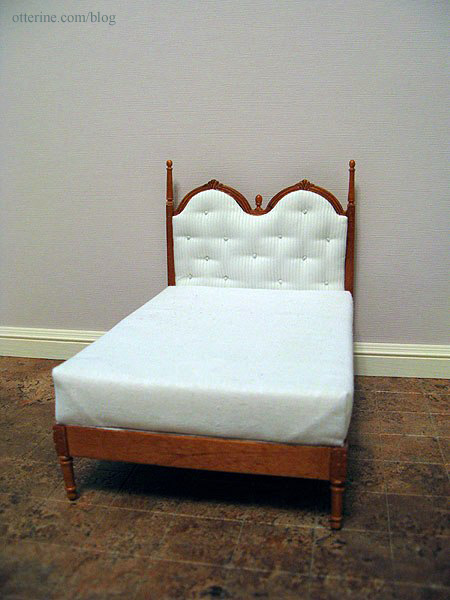
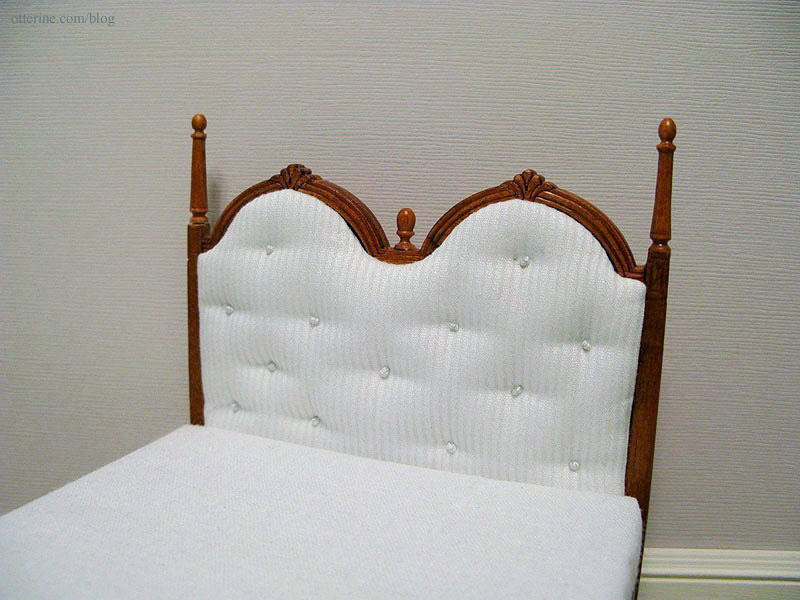
It has wonderful vintage styling with crisp white upholstery.
I also had a recent business trip to Vancouver, British Columbia where I had a couple of days for personal touring, too. It was my first time there, and I definitely want to go back.
I had brought some needlework with me, but it was pretty much a non-stop series of events between meetings, meals and activities. During my off weekend, I stopped at Ross’ Miniatures in North Vancouver. Mary was so helpful and friendly. I was able to find a number of interesting and vintage items.
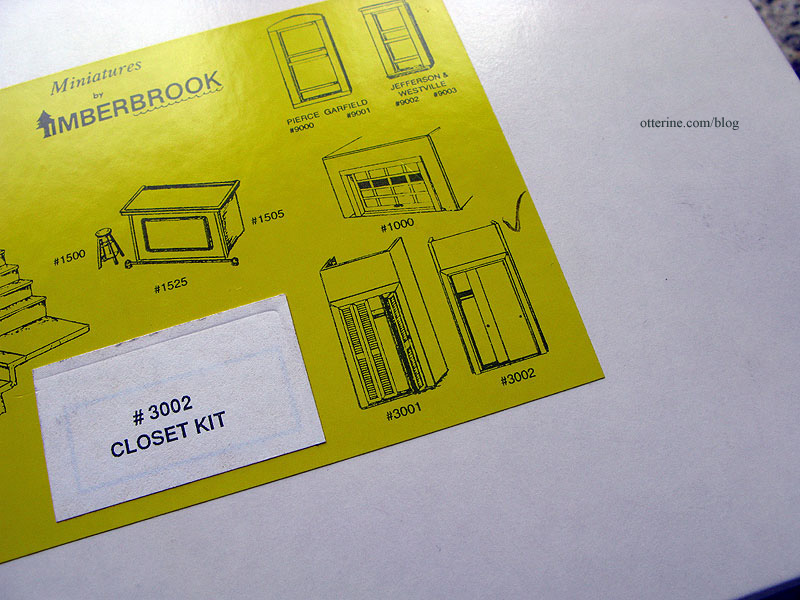
This Timberbrook closet kit comes with working sliding doors and wood pieces to make an enclosed closet.
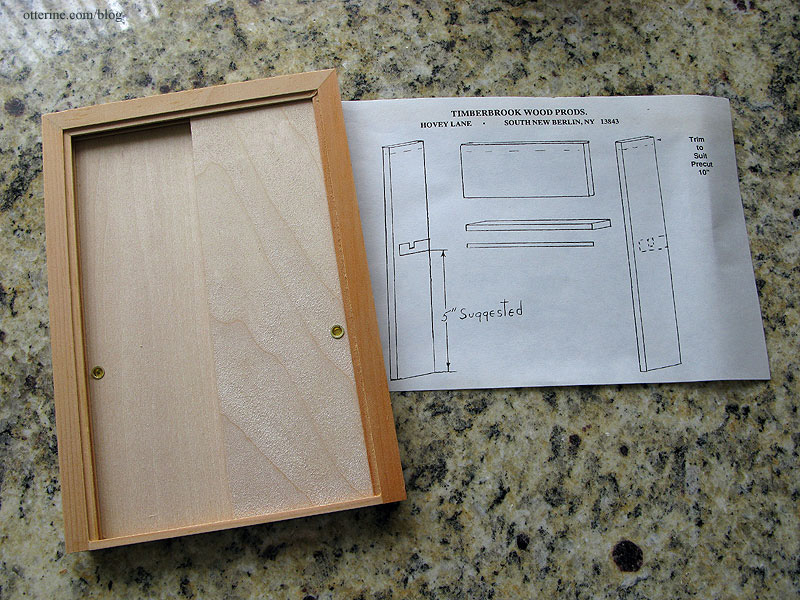
These are no longer made and hard to find.
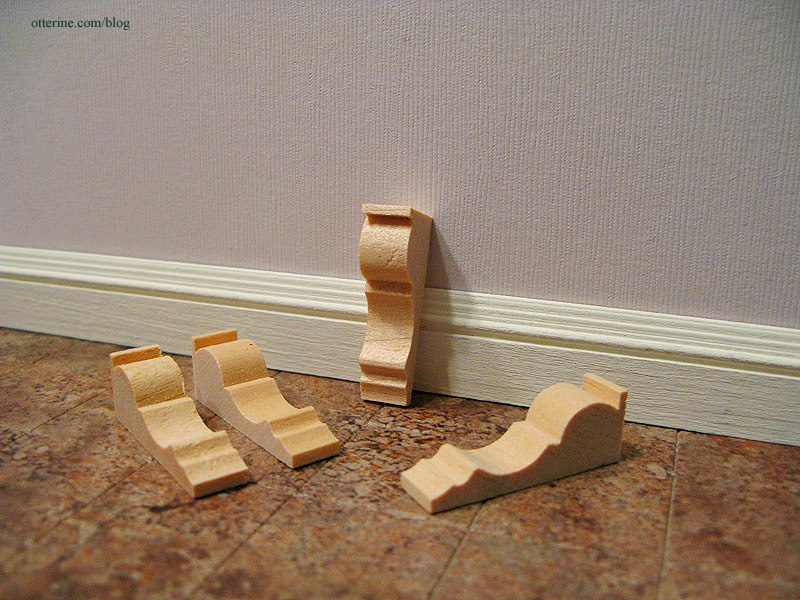
I bought a number of packages of brackets for The Brownstone. The ones that came with the kit require assembly and since I plan to add to the overall structure, there would not be enough of them to go around.
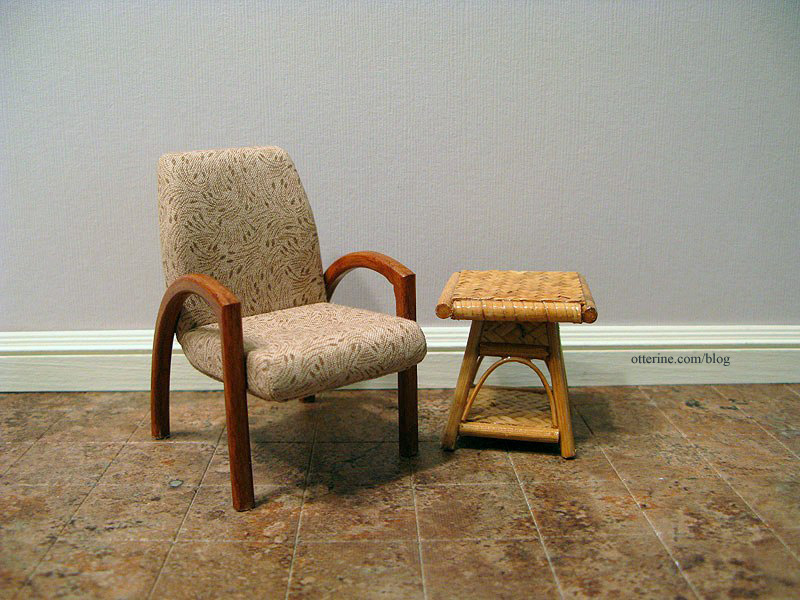
I found a contemporary chair and side table. I’ve never seen anything like these before.
While I was away, some fun new minis from Blake at A Bohemian Bazaar arrived at home. They are so well made and so tiny!

Categories: Furniture, Miniature Shows and Shops
June 29, 2013 | 0 commentsFrom way back when…
I just received two Tinysaur kits that I ordered back in the Mesozoic Era…okay, February, but I was getting worried these would never arrive. There’s a mad backorder delay for these critters! :\ The Evolution Store kept in contact with me and let me know as soon as they were back in stock. I picked up the T-Rex and Stegosaurus.
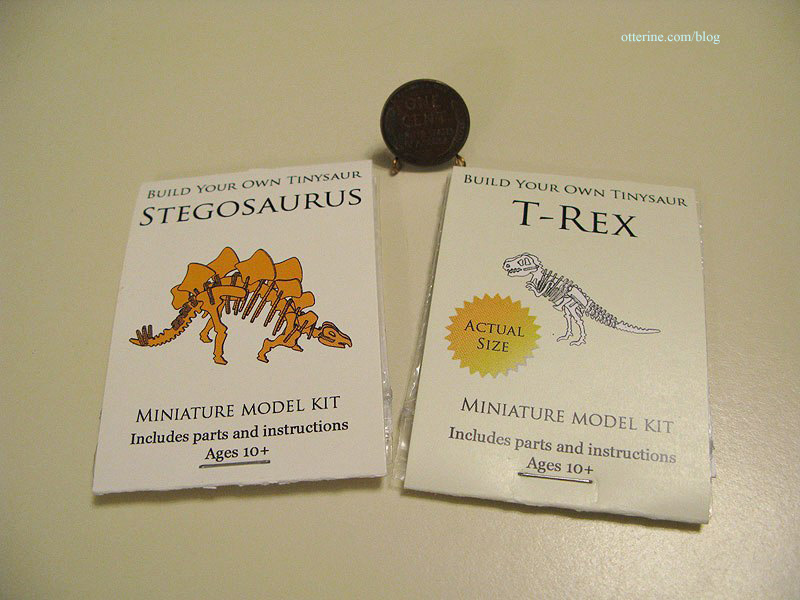
April has assembled the T-Rex before, which is where I first spotted these delightful mini kits. I put together one of the regular size wood models back when I was young, so it’ll be a nice trip down memory lane assembling these for my mini houses.
I was feeling a bit feisty today, so I decided to wait until another time when I had more patience. :D I mean, look how small the T-Rex head is!!! :O
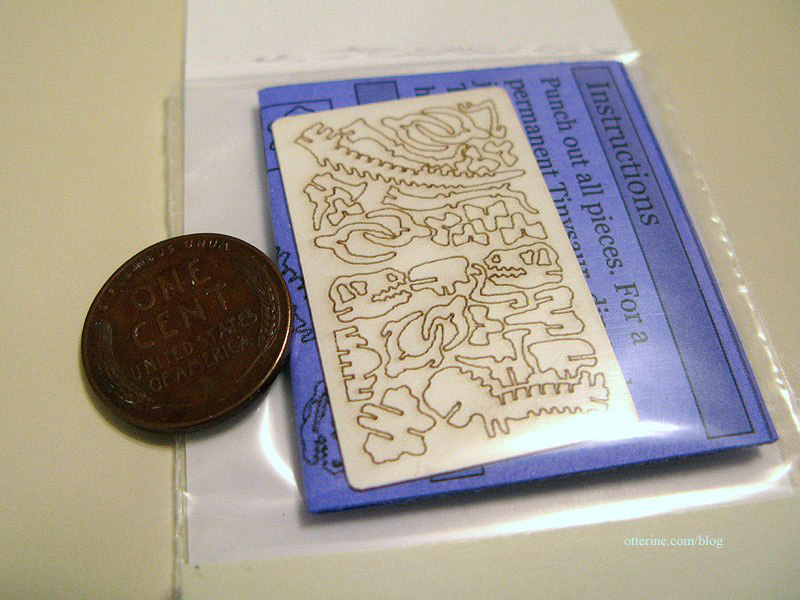
The Stegosaurus certainly has a lot of parts…oh, my!
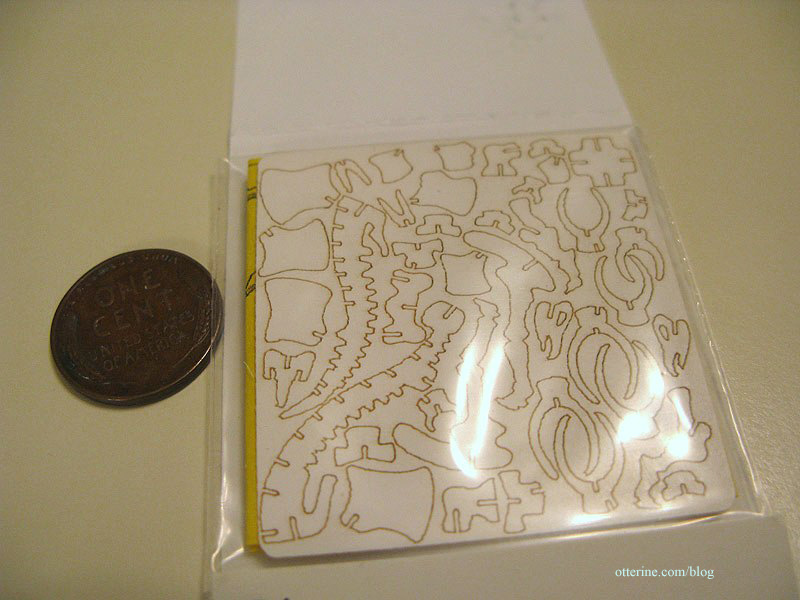
You can also find these Tinysaur kits here. For my final assembly of the T-Rex, click this post.
Categories: Miniatures
June 11, 2013 | 0 commentsPrairie Rug – part 1
I’ve been meaning to give punchneedle a try since I bought the fine rug for the Haunted Heritage from Katie Arthur. I love doing cross-stitch but it does have its drawbacks for absolute realism in mini. French knot rugs offer the best illusion of rugs in scale, but they are also time consuming. Punchneedle seems to be a good compromise.
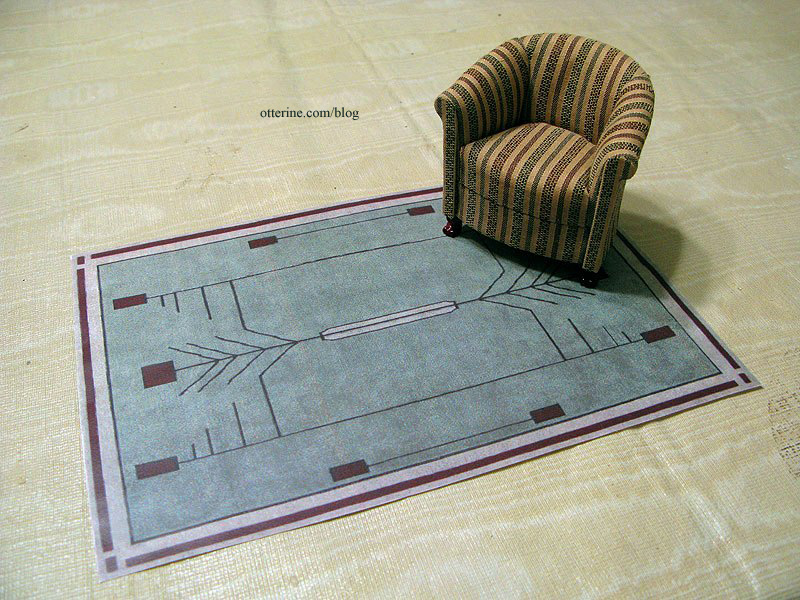
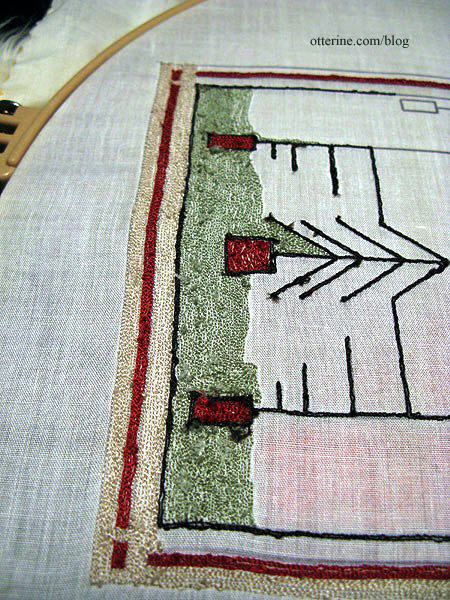
I found this beautiful Prairie rug on Mitchell’s Interiors and printed it out at 9″ x 6″ as a large area rug. It would be gorgeous in French knots but that would take forever! :O
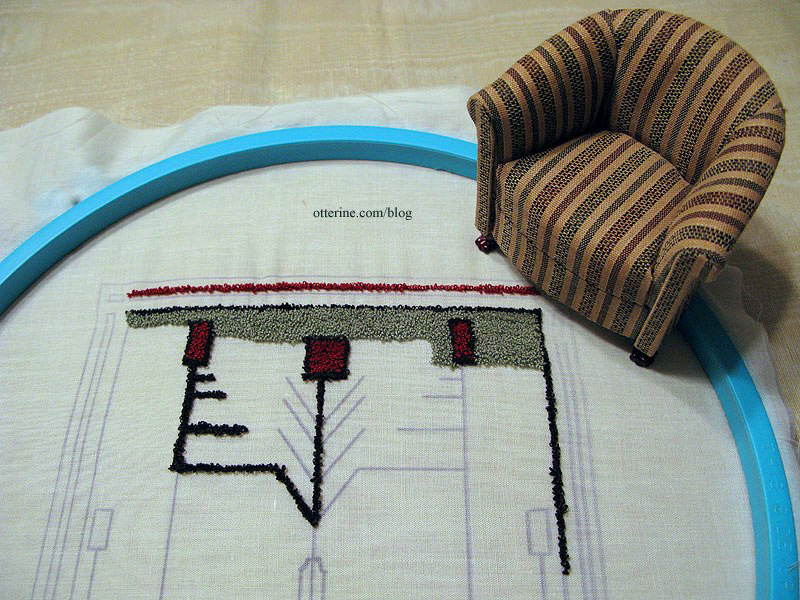
Click this post for instruction on getting from a printed image to a pattern on fabric ready for stitching. The area shown in the pic below took 3.5 hours to stitch, and at this point I am still going slowly to make sure I maintain good coverage on the background. It’s relatively easy to go back and add more loops in, but I figure it’s worth taking it slower and not having to rework areas later on. As you can see, it’s much faster than French knot work or cross-stitch. And, the more you fill in, the better it looks.
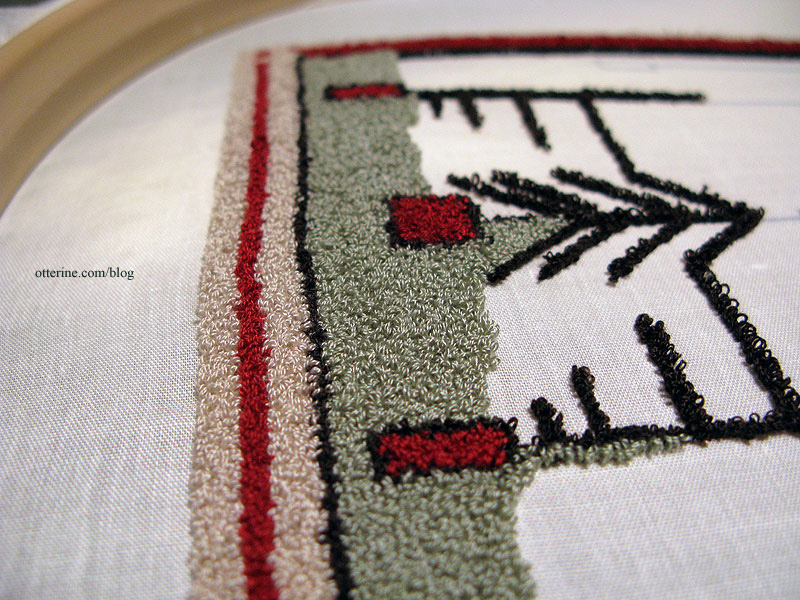
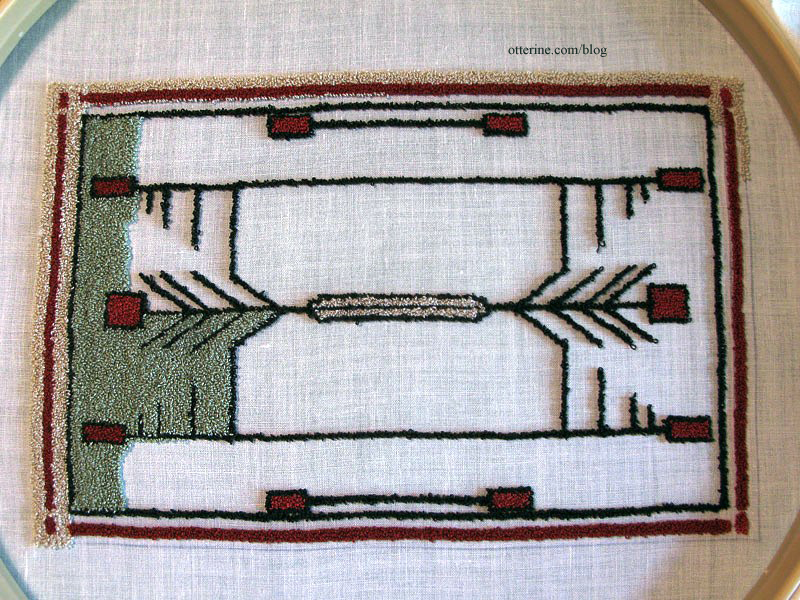
Here’s the rug at 9.5 hours of work. I’ve found the loops to be mostly consistent as I learn the process. Having the tighter hoop has made a world of difference, too. For the few loops that stick up too far, I just clip them with sharp embroidery scissors. As long as you don’t pull, there’s no risk of them coming out. You can also keep punching until you run out of thread, so you will have the occasional long thread hanging on the front side. These can be cut also, just don’t pull on them.
On the back, you can see the initial green areas where I worked are less clean and orderly. I’m getting the hang of working with the needle and cutting my strings longer. Holding your work up to the light helps to see if there are any thinner areas of stitching you need to fill in.
And, below at 14 hours of work with a lot more filled in.
Categories: Needlework - French knot rugs
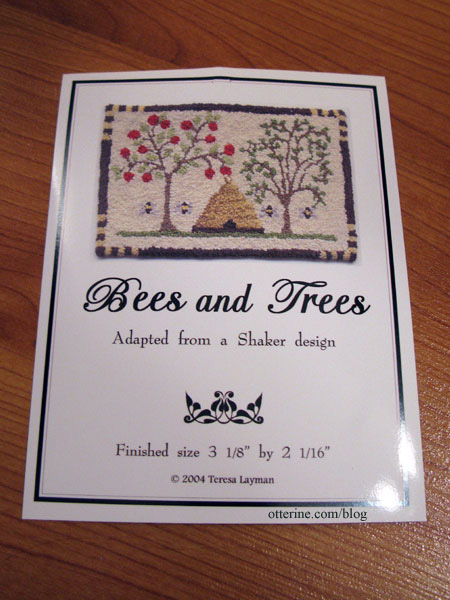
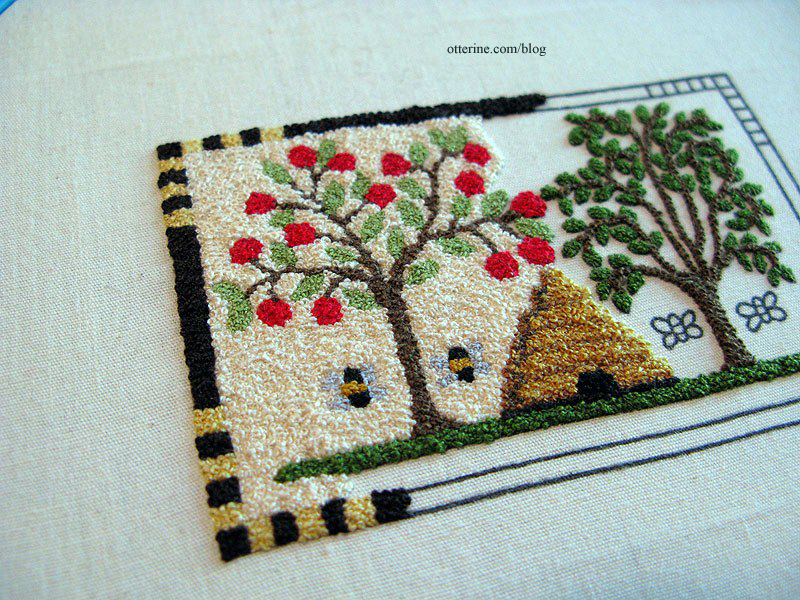
June 9, 2013 | 0 commentsBees and Trees rug – introduction
I opened the package and sorted by yarns for the Teresa Layman Bees and Trees French knot rug. I had most of the suggested colors on hand but substituted a few like colors for the missing ones.
It actually uses a combination of Colonial knots and French knots, neither of which are familiar to me. I know I did a lot of them incorrectly at the start, but you can’t tell. Below is 2 hours of work, though I am sure to become more proficient as I go along.

I’ve never tried one of these but think French knot rugs provide the best illusion of proper scale in miniature. I bought three of her kits at the 3 Blind Mice show, but opted for this one to start. They are all similar in complexity, but this is the smallest of the three.
Update: I’ve managed to work a little each day, and the Bees and Trees rug is probably halfway done if you were to transfer the stitching from the right tree over to the empty spot on the left. I’m at 19.5 hours of work below.
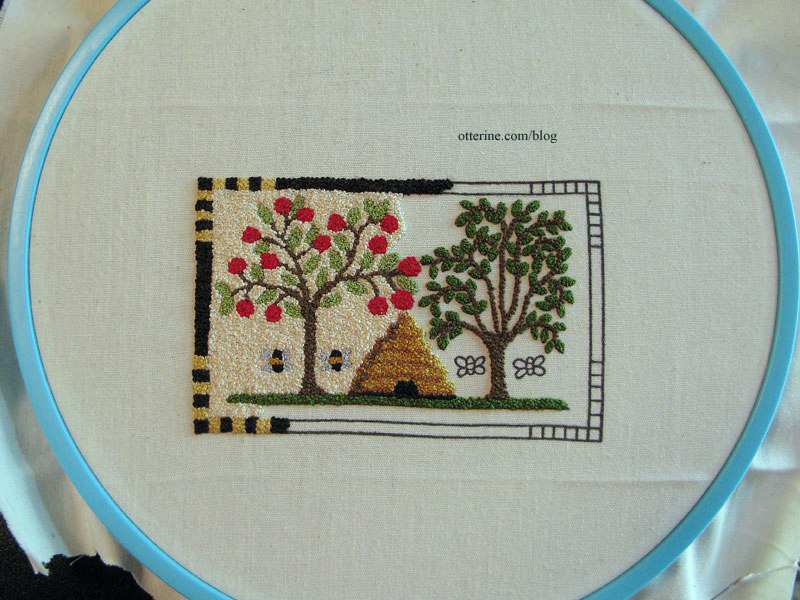
I love the way these knotted rugs look in mini…such great texture. I departed from the kit instructions just a little. For smaller areas that called for Colonial knots, I used French knots instead since it seems a softer texture. I might just be doing the knots wrong, but I find the Colonial knots are slightly larger than the French knots. I’m also using a combination of the two to fill in the background for the same reason…the French knots can get into smaller spots around the trees and other details and they can fill in between the Colonial knots. (Note: going forward, I’ve used French knots exclusively since it’s a more consistent texture for the way I stitch.)
Categories: Needlework - French knot rugs
June 9, 2013 | 0 commentsThe Brownstone…the beginning
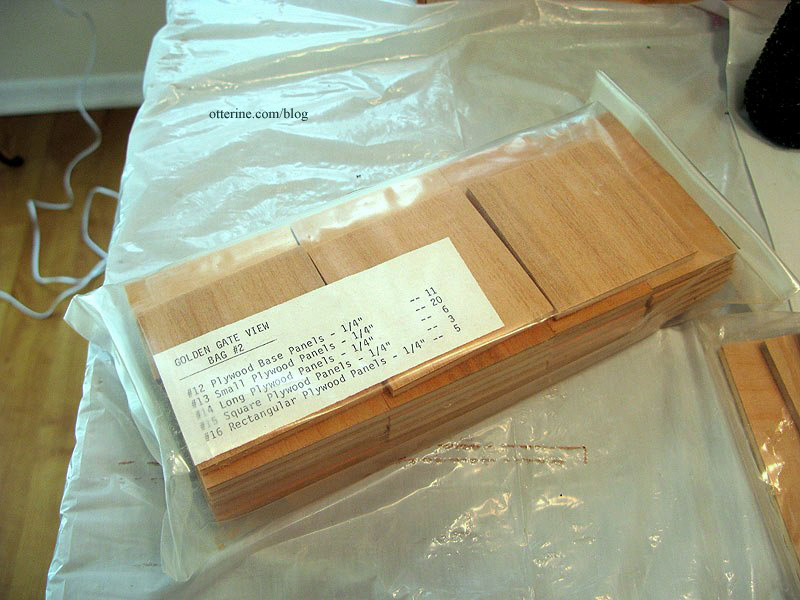
Back in January, I took some photos of the kit pieces since there was some buzz about the Golden Gate View dollhouse kit on the Greenleaf forum.
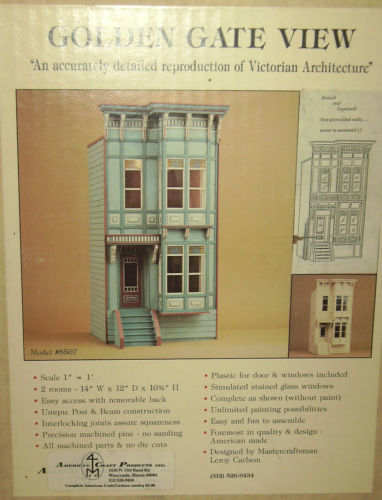
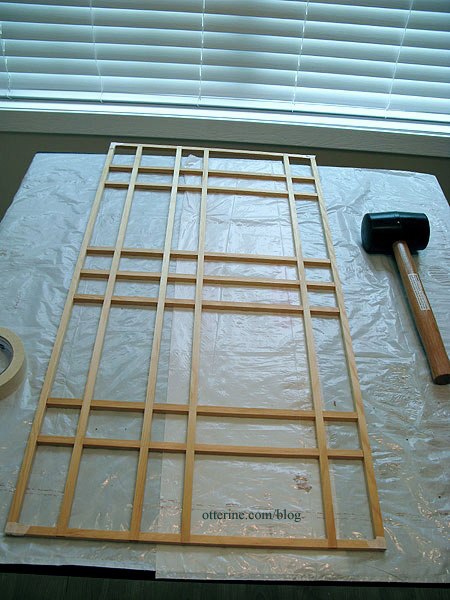
Golden Gate View kit photo I put it back in the closet, but today I took it back out to take some more detailed measurements. The front wall is made from notched trim pieces with the inserts for windows and walls assembled separately.
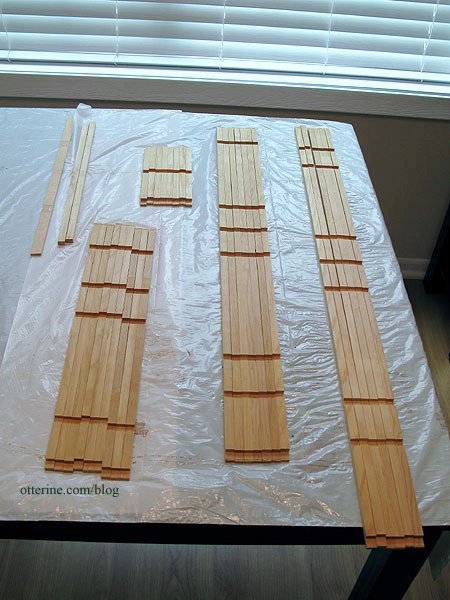
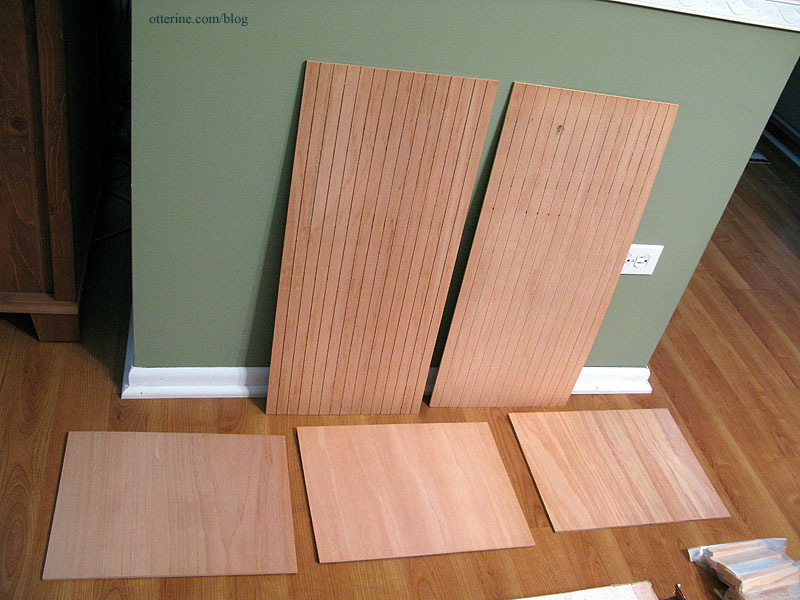
The side walls are detailed with vertical siding lines. As you can see, it’s a relatively straightforward kit as far as basic structure goes. It seems some Golden Gate View kits were made differently with studs in the walls, but mine is just plywood.
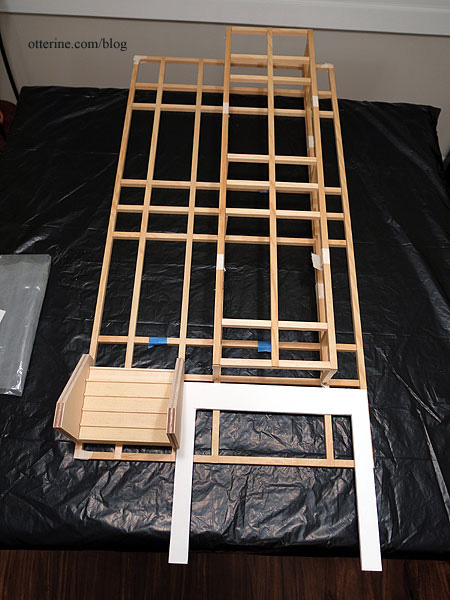
After studying the instructions, I taped together the front wall trim pieces to get a feel for the kit.
And then the bay window structure.
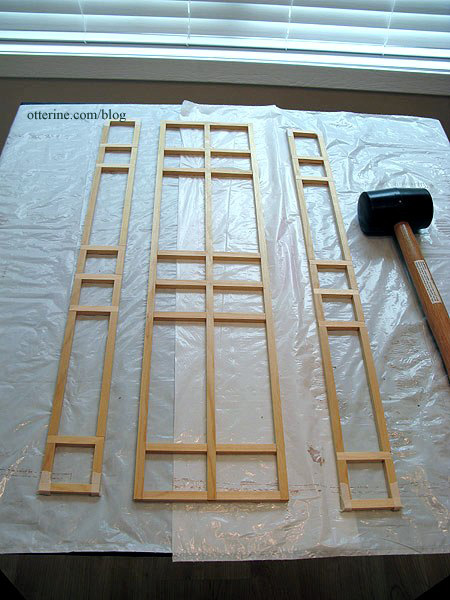
The blue marked pieces are to be cut away during assembly.
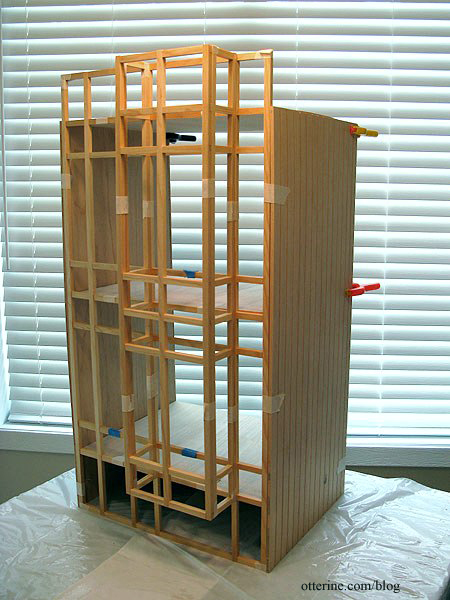
Also, the pieces didn’t fit the way the instructions indicated. The instructions show the side walls fitting behind the front assembly, but the floor boards don’t fit properly when you do that. In order for the kit pieces to fit, you have to have the side walls on the outside edges of the front wall. Then the floor boards fit precisely and cleanly. It throws off the design of the front, though. So, I can either cut new floor boards or mask the outer corners with trim.
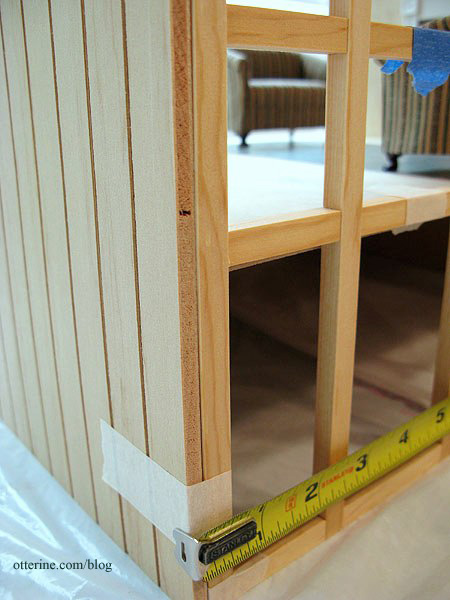
The kit box has incorrect measurements in general and based on the above error. The building in my dry fit is 14″ deep from the outer plane of the front bay window to the back of the building, 15 3/8″ wide with the side walls attached to the outside of the front wall instead of behind it, 29 1/4″ tall at the highest point in front, and 26 3/8″ tall on the side walls.
There are inserts to complete the wall structure. I would think it prudent to use these as spacers when assembling the front wall and bay window to make sure it all fits precisely, but the instructions don’t have you do this. I will likely do it, though and number the pieces as I go along. The instructions also have you add these inserts later after you’ve built the structure, but I think it makes more sense to have a flat surface behind them. So, in essence, I’m pretty much tossing the instructions at this point. Haaa!
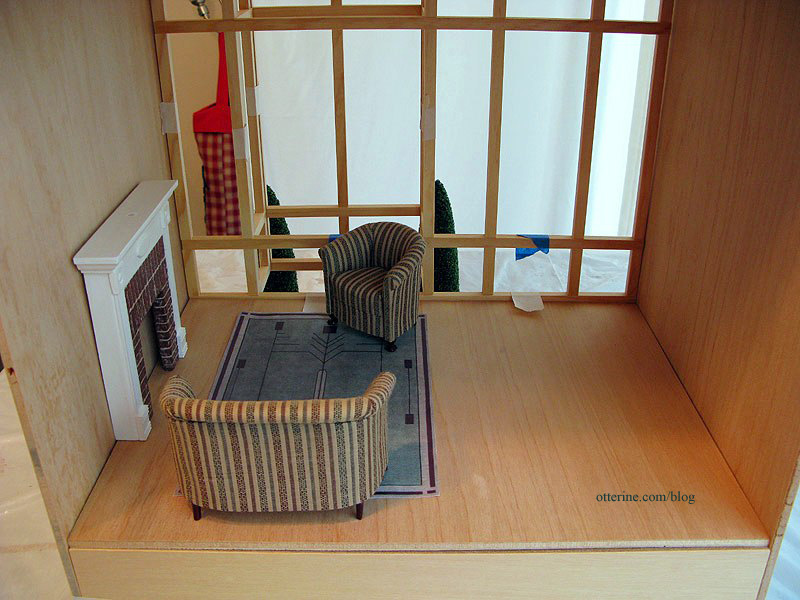
The first floor room is roughly 4 1/2″ off the ground. There is no support for it whatsoever…just glued in place on the front and side walls. I will be adding beam structure for sure. The room measures just under 15″ across, just over 10 5/8″ high and 11 1/4″ deep, not including the bay window extension.
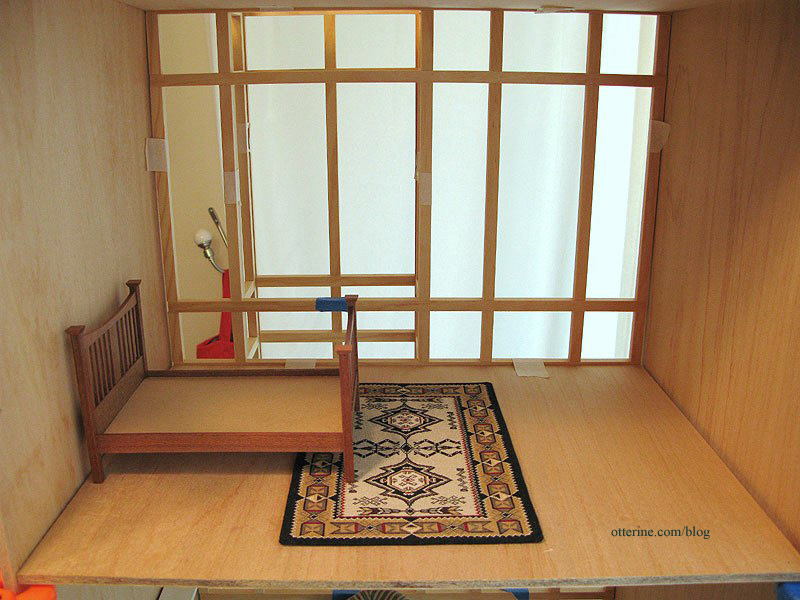
The second floor room has the same measurements. Both nice large rooms
But, two rooms is really not going to work for a realistic brownstone home. At a minimum, I would want a foyer with full staircase, parlor with fireplace, kitchen, bedroom, and bathroom. I would love to add a powder room and/or mudroom.
Option 1 is to build a side addition toward the back to allow more room on the inside, like in this example below. You can barely see the left addition from the front, so it doesn’t ruin the lines of the facade but adds room inside.
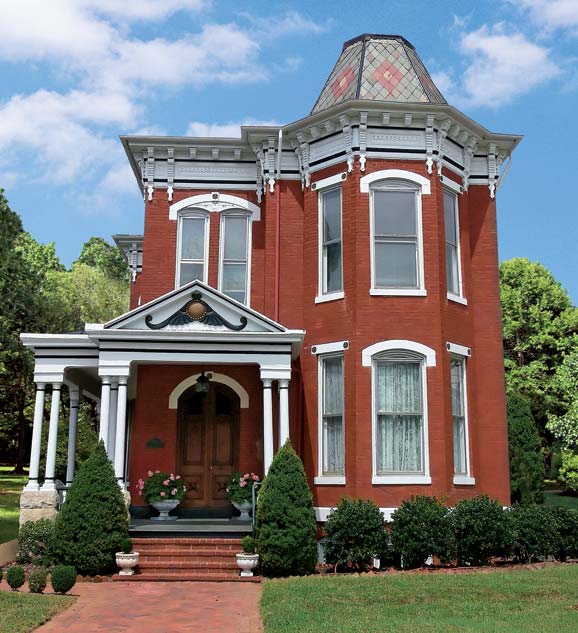
image from Old House Online Option 2 is to add a garage underneath since there is already roughly 4 inches of dead space under the first floor already and adding another 4-5 inches in height would be straightforward.
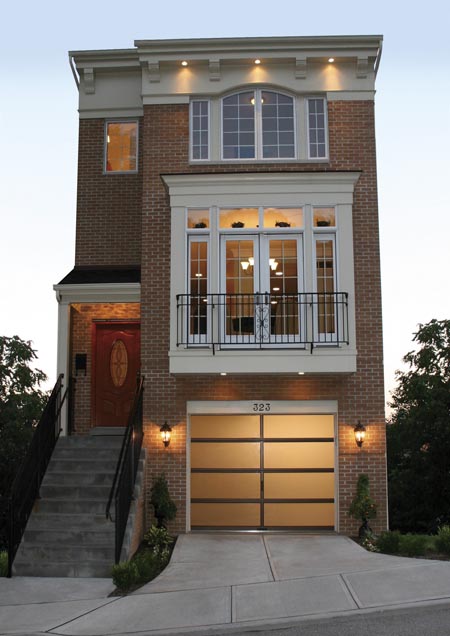
image from Clopay Option 3 is to make this a side opening dollhouse to get more depth like a real life row house. That’s where I stalled. I’m just not falling in love with the idea of a side opening house. Apparently I’m a traditionalist when it comes to dollhouses. I like the idea of the garage and need the extra space inside, so I am almost decided on adding to the width with a side extension and adding height for the garage.
I made a mockup for the garage door kit to test the fit for the 1950 Beetle in a previous post.
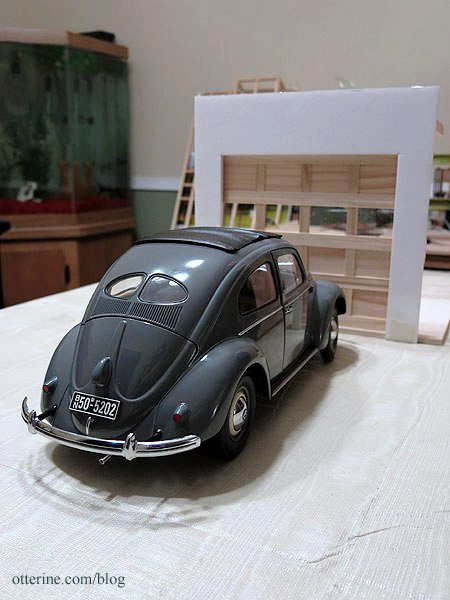
The garage facade and opening required to fit the garage door worked well under the bay window portion, but this did not take the front stairs into consideration. Now, I know I will have to make a new set of stairs since the original kit pieces will be too short with the added height to accommodate the garage, but I will keep them roughly the same width. I would have to move them over to fit the garage door, and this throws off the line of the front door.
I popped off the bay window section and moved it over. I will have to add to the right of the bay window section, mimicking the construction of the original pieces (I added some strip wood below to show that addition). Now, the garage door is centered under the bay window and there is enough room to center the stairs and front door.
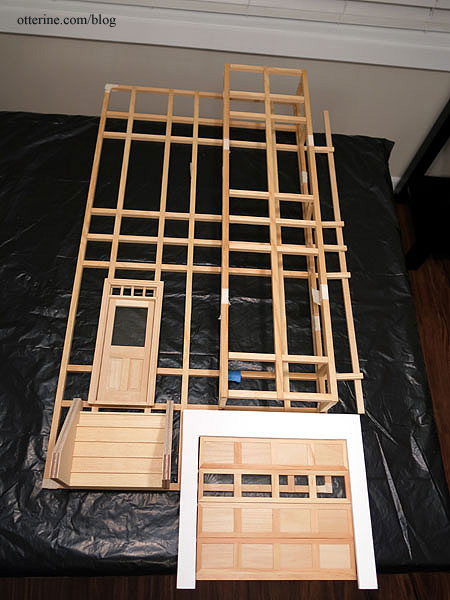
I think I’m on to something here.
Categories: The Brownstone
June 8, 2013 | 0 comments


NOTE: All content on otterine.com is copyrighted and may not be reproduced in part or in whole. It takes a lot of time and effort to write and photograph for my blog. Please ask permission before reproducing any of my content. Please click for copyright notice and Pinterest use.


