

Heritage – gutters and downspouts, part 1
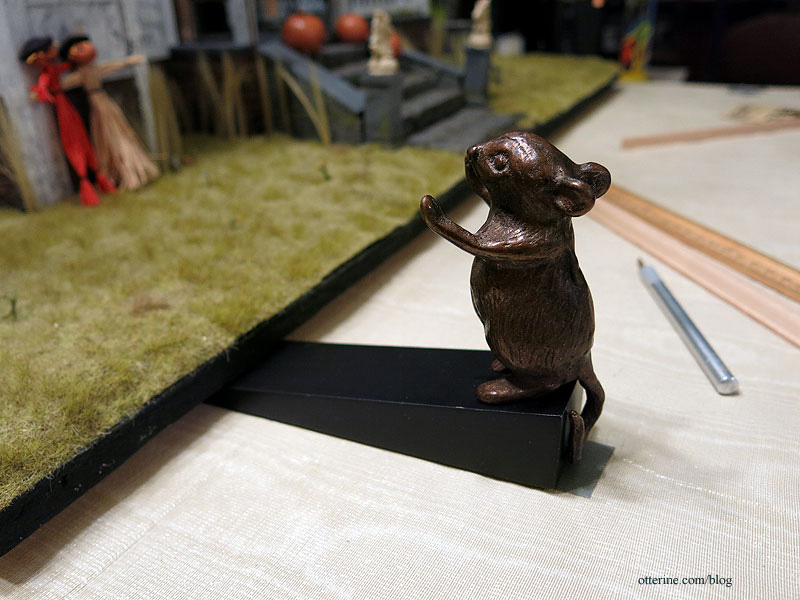
When you’re working on a house that sits on a turntable, you need a little help. Whoa, Heritage!
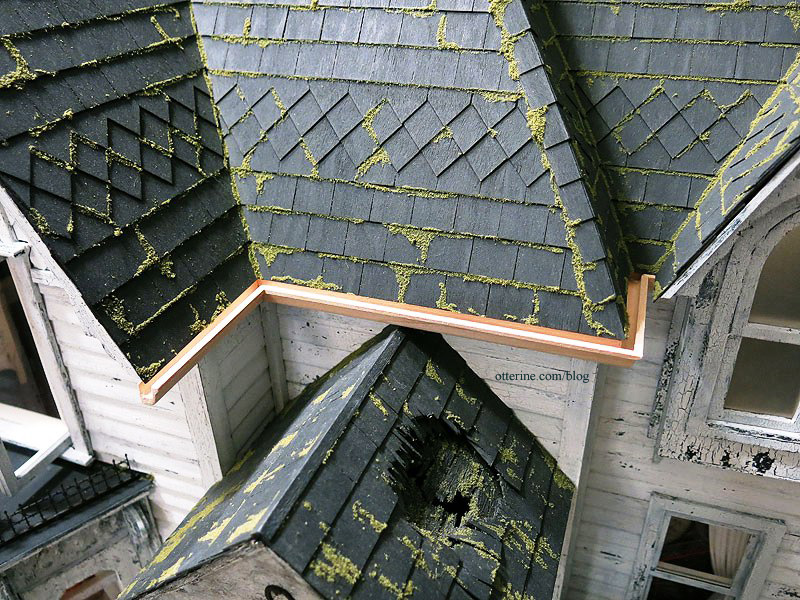
The Heritage kit included gutters and downspout materials. One length of gutter-shaped wood and one long dowel. These were acceptable, but I went with different parts.
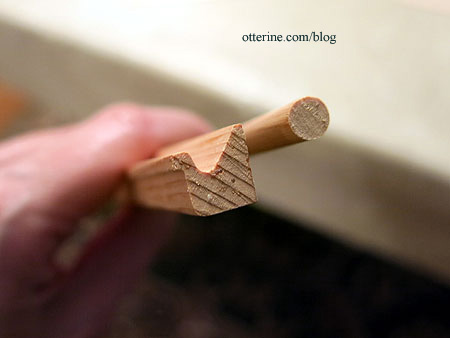
I bought gutter shaped wood from All Small Miniatures the day I went there for the asphalt shingles for The Artist’s Studio. It’s shaped differently and it is lighter in weight. Considering there will be very little surface area for gluing, I thought the lighter weight material would work better in the end.
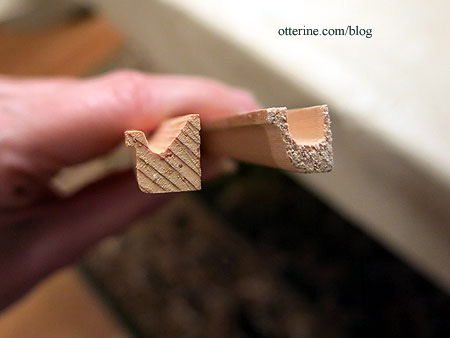
I cut the lengths I would need using my scroll saw. The corner joins weren’t the cleanest fit mainly because this house is so rickety. :D But, I was able to sand them to fit well enough. A little spackling here and there, and it won’t be an issue in the end. The ends will also be capped before painting.
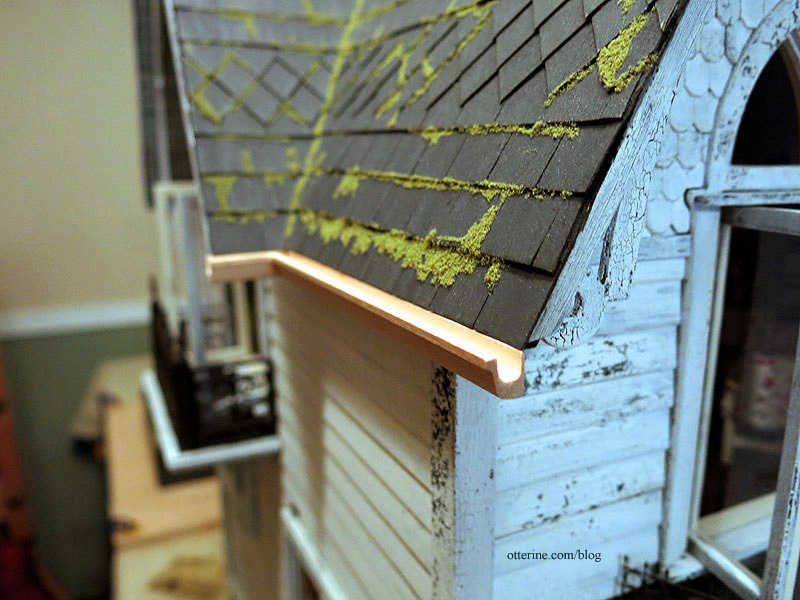
I had to forego putting gutters on either side of the dormer, because the area between the main roof and the left side of the dormer didn’t allow for a full turn. Putting it on the right side only would have brought more attention to the problem.
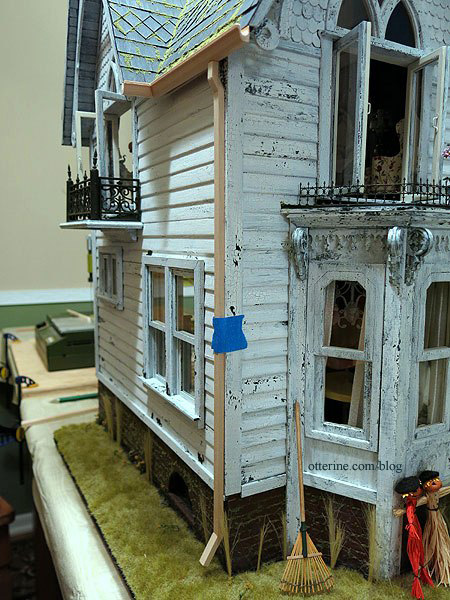
I formed the downspouts by cutting 1/8″ x 1/4″ wood. These will be sanded to shape before painting.
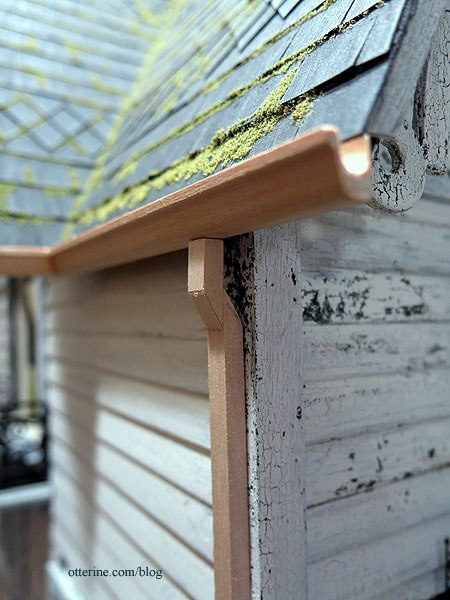
I thought this was a more realistic approximation than round downspouts.
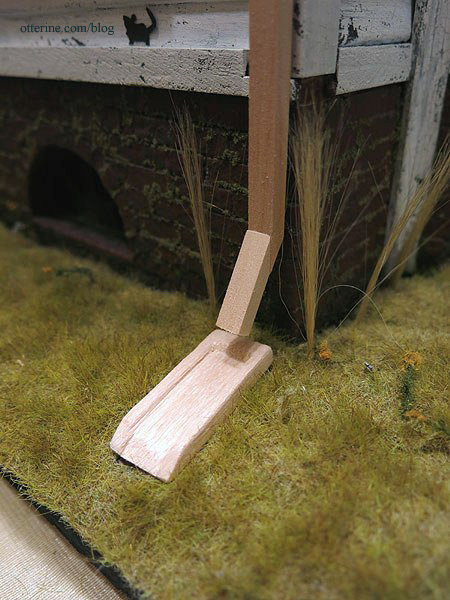
The splash blocks are balsa, shaped by sanding. I had to cut away some of the landscaping to get them to sit flat on the ground.
Update: part 2 here.
Categories: The Haunted Heritage
August 3, 2013 | 0 commentsFramed photos add a personal touch
When I bought Ophelia from *Reve*, there was a photo in the listing that I loved. I asked the artist if I could use the photo, and she graciously said yes. I edited it in PhotoShop and printed a teeny tiny copy for a vintage looking frame I had.
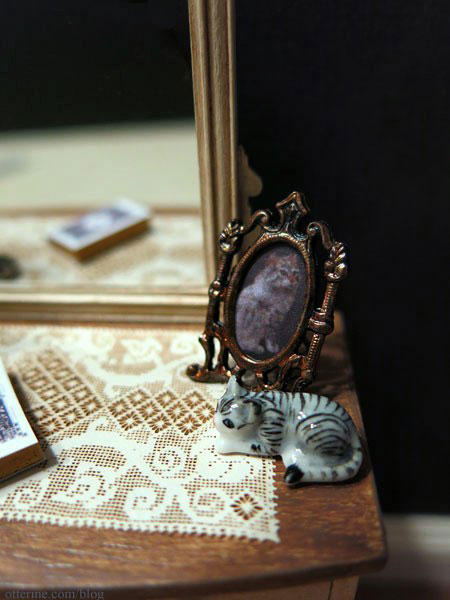
This photo of Ophelia is one I took.
I loved it so much I decided to print it for framing as well. This one is a little larger to keep the details visible.
The bedroom is hard to decorate with its odd angled corner walls, so this is the perfect size for the space.
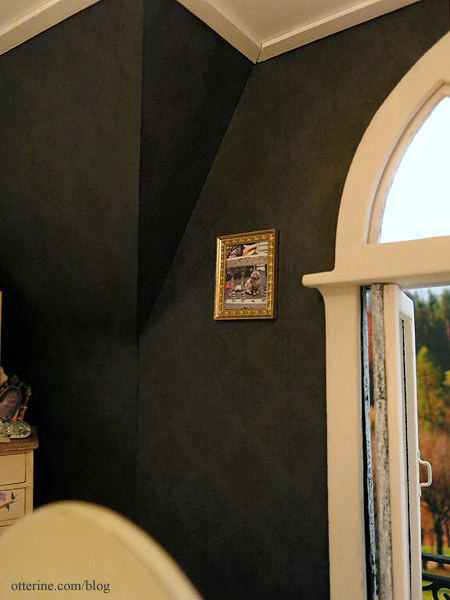
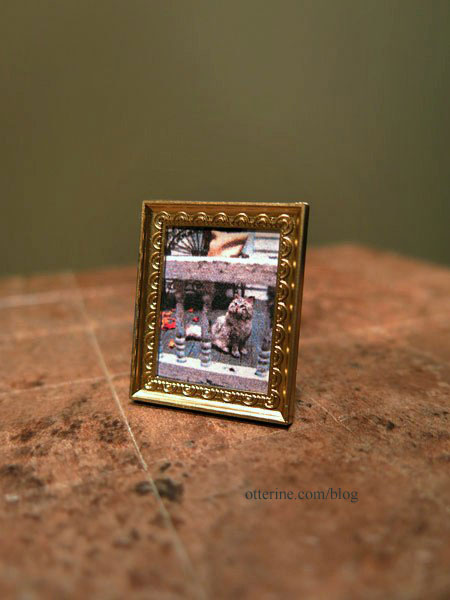
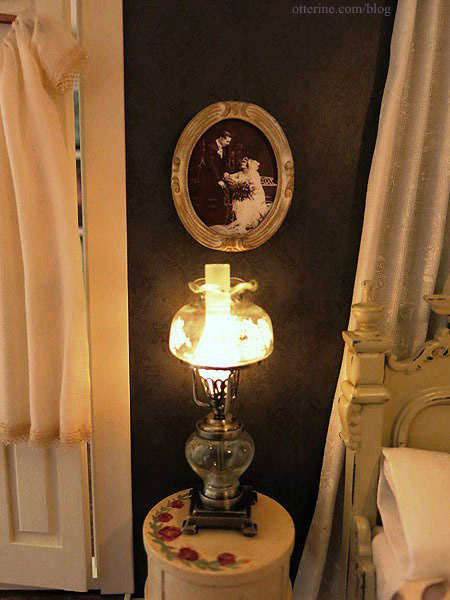
After repairing the bubble in the bedroom wallpaper, I needed a photo to fill the oval frame that would mask the repair seam. I thought a 1920s wedding photo would be perfect, but I didn’t have any in my own family to use. I searched online and found this wonderful photo from Rick Zolla, who granted me permission to use it for the Heritage. :D I edited it in PhotoShop – adding some background to the left of the man and at the top of the photo, then feathering the border into an oval shape.
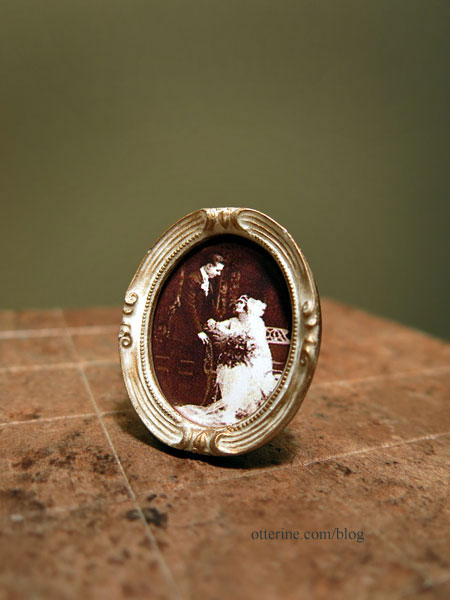
It fits perfectly with the ambiance of the room.
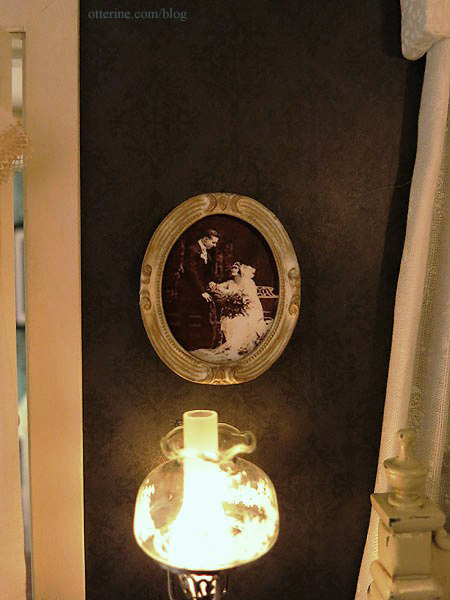
I love the relaxed pose and setting…such a great image! Thank you, Rick!
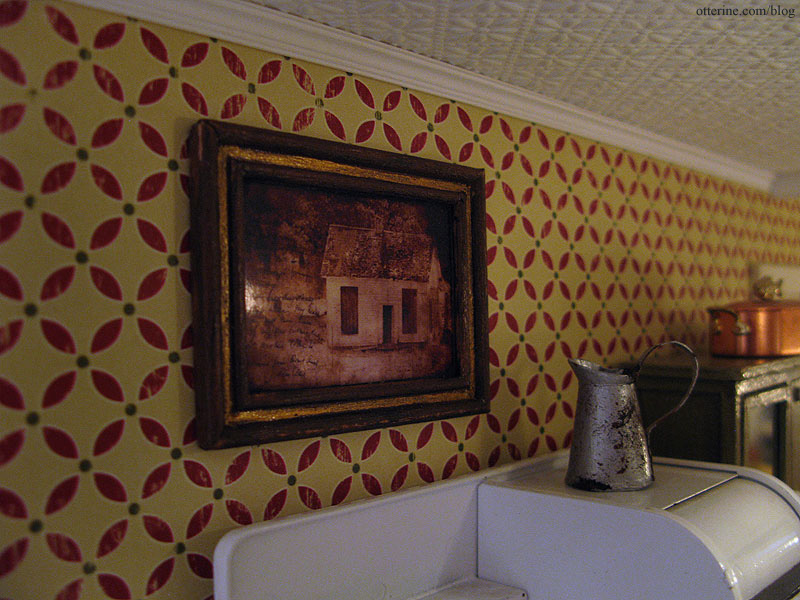
Kelly recently told me she and I share a love of photography, and she was so generous to send me one of her miniature works for the Heritage. It’s titled Ghosts of the Past. How perfect! :D
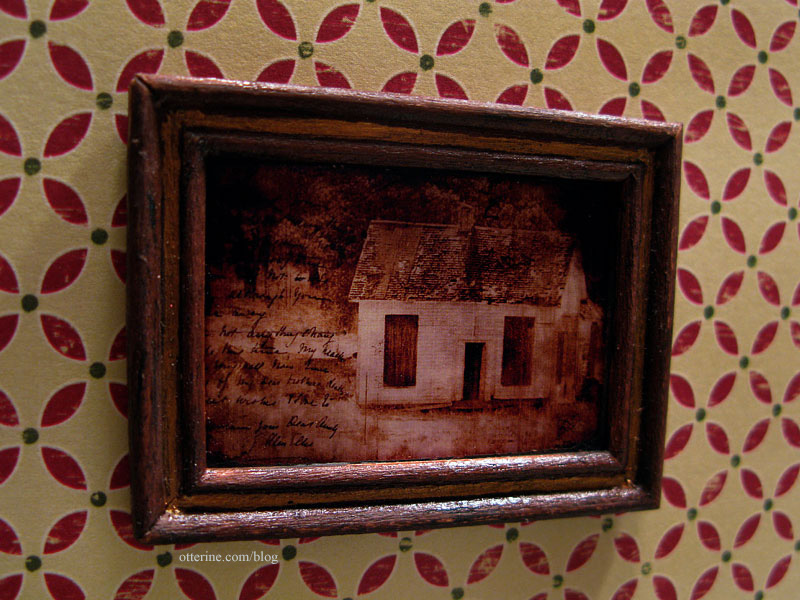
I think it works wonderfully in the kitchen. Maybe it’s an old faded photo of grandma’s childhood home. The lovely pitcher is from Caterina.
Categories: The Haunted Heritage
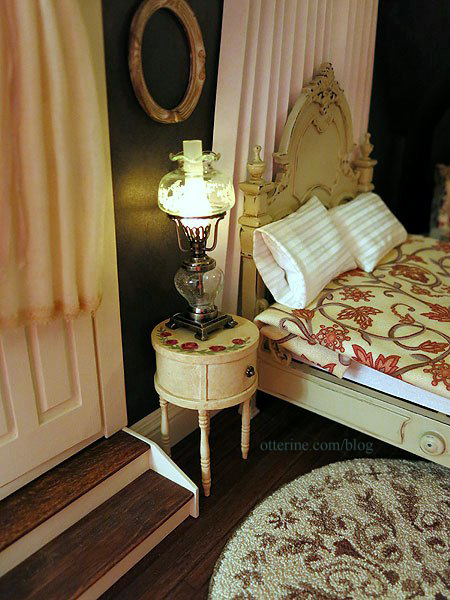
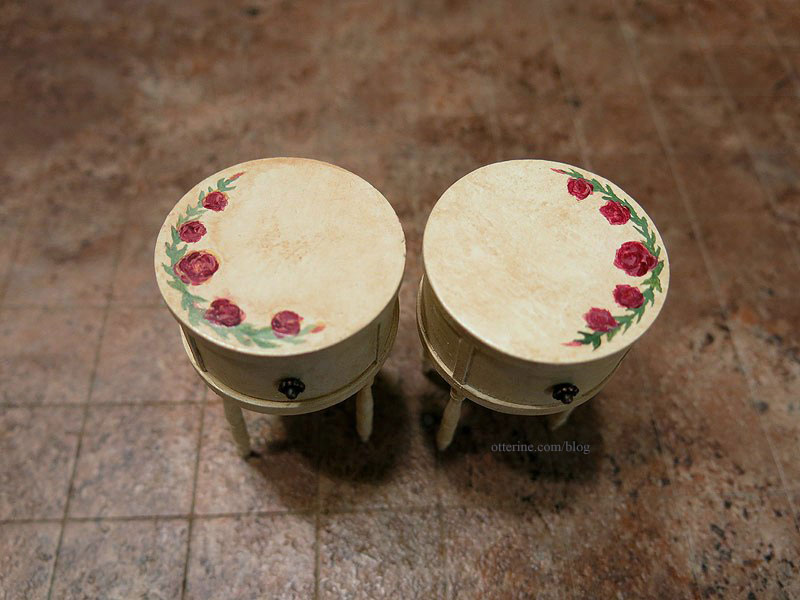
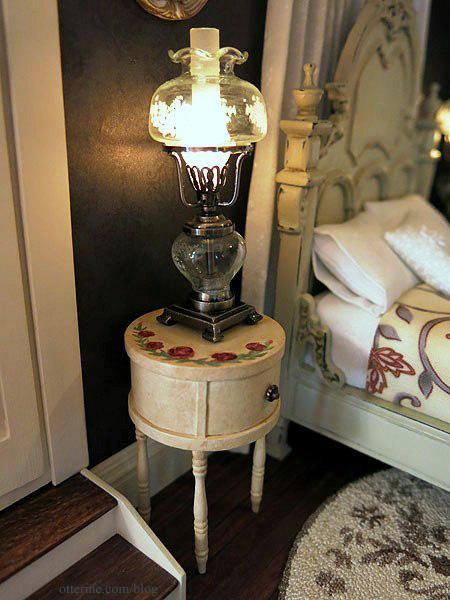
August 2, 2013 | 0 commentsAntique drum nightstands, part 2
Continuing work on the antique drum nightstands. Instead of matching the painted bow front dresser, I chose a different design for the nightstands.
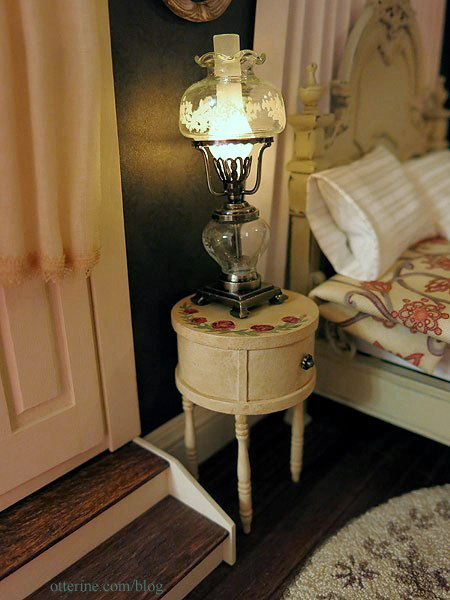
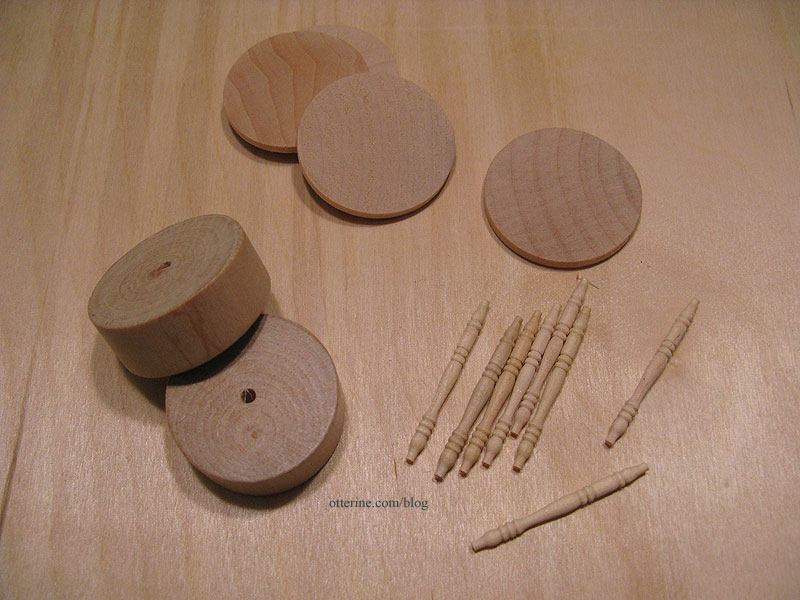
As a reminder, the nightstands were made from the round stands that came with my artist models, 1 1/2″ x 1/8″ wood circles and Houseworks 1 9/16″ long spindles.
I painted them with a base coat of Tapioca by Folk Art then added an aging wash of light brown. I then painted the green vines, followed by red and yellow for the roses.
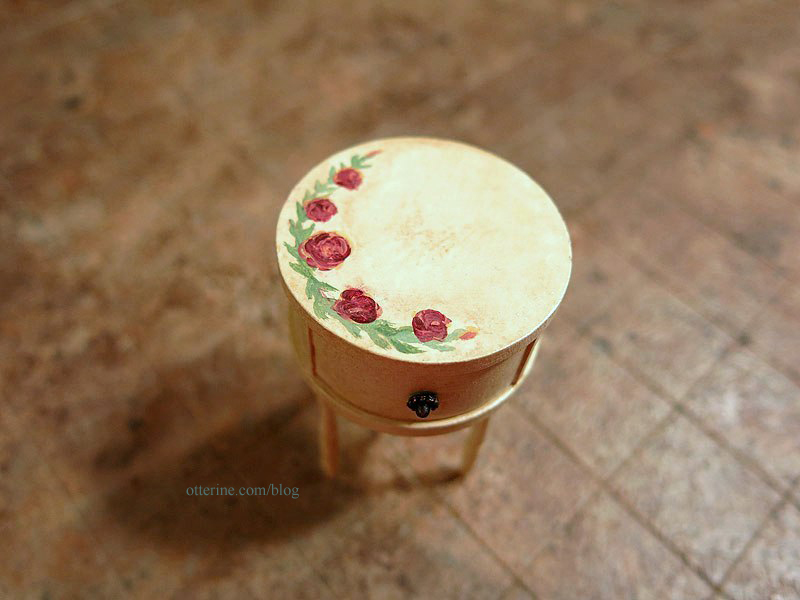
The knob is the fancy end of an antique copper headpin. I love the way it turned out.
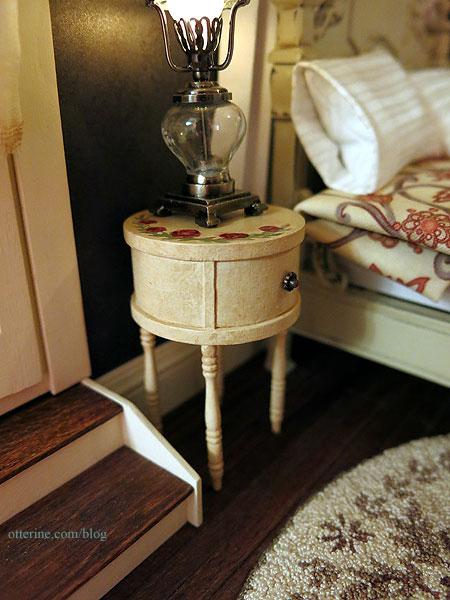
It fits in well with the rest of the furnishings.
I finished painting the second nightstand, and they are a pretty close match to one another.

I opted for doing mirror image painting so they would look more like a planned set than two of the same table.
There’s not much room on them for anything besides the lamps, but it all seems to work well together.
With these completed, this room is almost finished! :D
Of course, it hasn’t been fully accessorized yet, so stay tuned!
Categories: Furniture, The Haunted Heritage
August 1, 2013 | 0 commentsRepairing buckled wallpaper without redoing the entire wall
If you recall from a previous post, I noticed that the Heritage bedroom paper had buckled in a few places on the long wall after using Yes paste. After posting a question on the Greenleaf forum for suggestions, I received two great ideas. (Note: I no longer recommend Yes paste – I use Wallpaper Mucilage instead. Yes paste has problems with longevity.)
One suggestion for fixing the paper involved using a glue syringe. I would cut a small slit in the paper, lift the edge and inject glue under the paper. I would use a credit card or similar flat edge to distribute the glue and even out the paper. To disguise the slit in the paper, I would just hang a framed photograph or small painting. The other suggestion was to form a curtain behind the bed. I’ve seen fancy valances and partial canopies that fasten to the wall and have draped fabric hanging down to the floor.
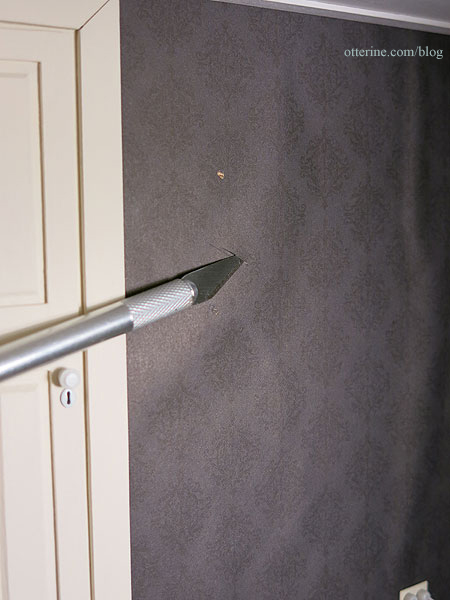
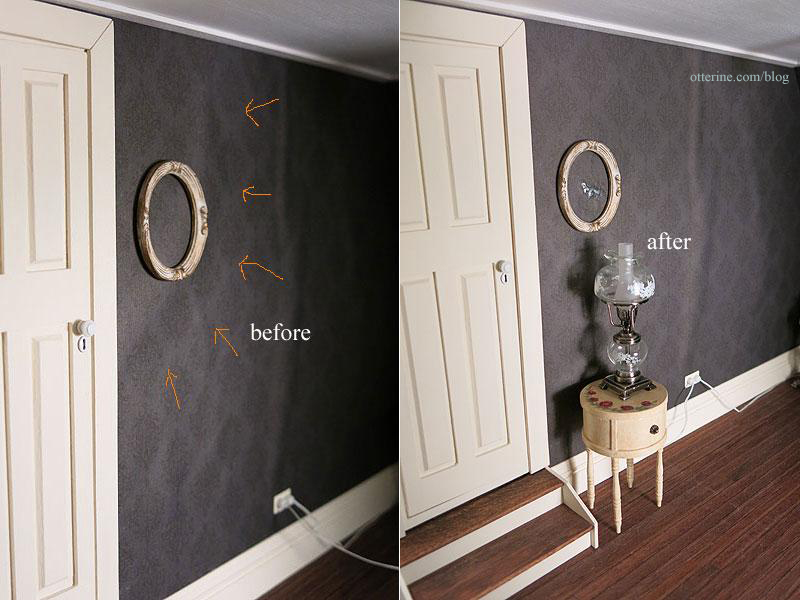
First, I worked on repairing the one large bubble between the bed and the door. I used a bright light to make sure I was getting the right spot.
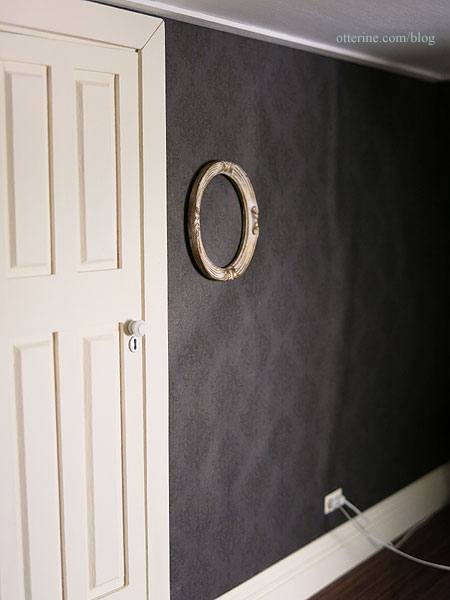
I kept my oval frame in place to show where the cut would need to be. I used a brand new blade to make a clean cut in the paper about 1/2″ long.

The dot above the cut is the mini hold wax I used to hold the frame in place. I left it to make sure I put the frame back in the same spot after the repair.
I put some Aleene’s Quick Dry glue into my syringe.
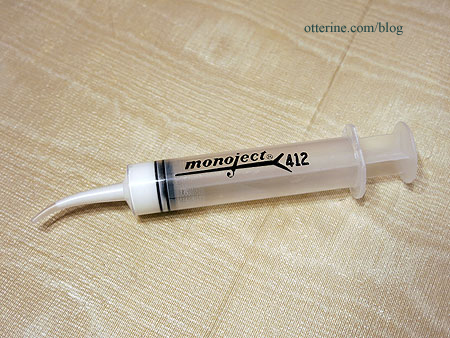
I lifted the edge of the paper and inserted the syringe tip. I squeezed out a good amount of glue into the bubble.
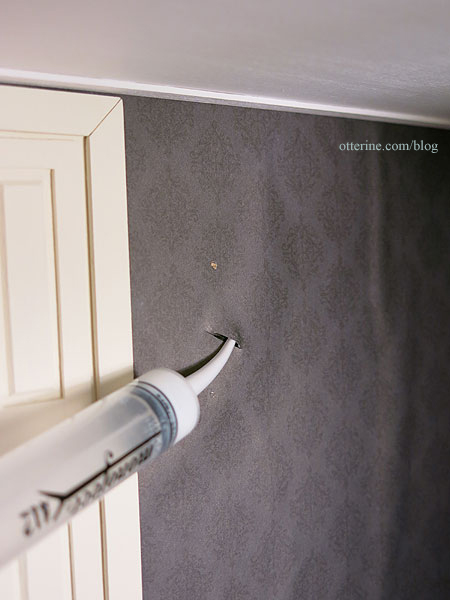
Using a plastic gift card, I smushed (technical term there) the glue around inside the upper portion of the bubble. I then repeated the process for the lower portion.
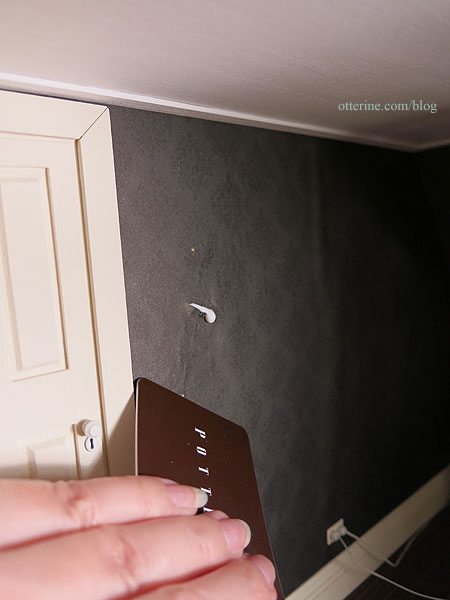
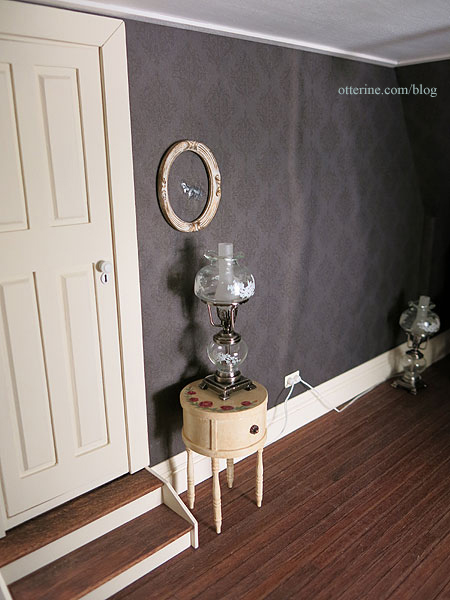
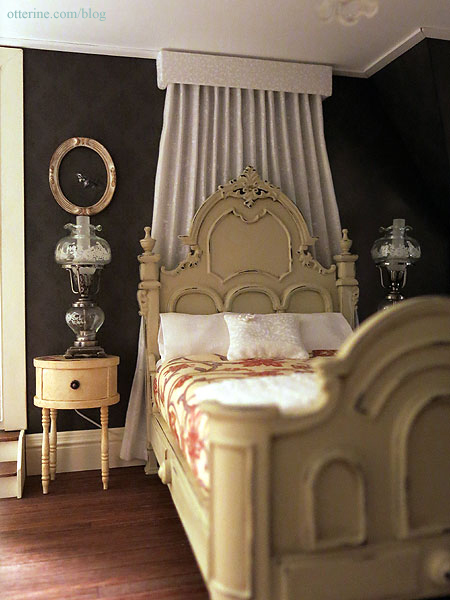
I used the back of my fingernail and lightly rubbed the surface in a circular motion to even out the texture. It’s not perfect by any means, but it looks so much better than it did. There was one spot where there was something under the paper, so it marred the front just a little. The tall lamp covers that without a problem. The seam will be behind the oval frame and hidden. I just need something for the frame…I’m thinking a 1920s wedding photo. :D
Success!
For the larger vertical bubble and the small one right next to it, I used the wall curtain idea instead of attempting to inject glue into the bubbles. I mocked up a drapery panel with plain white paper even though I wasn’t sure about using a light colored fabric behind the light colored headboard. But, I loved it instantly, and it was just quickly folded paper! The drapery would be less stark since the fabric I had in mind was relatively sheer.
The drapery panel also creates the perfect balance with the two floor-to-ceiling windows on the other two walls.
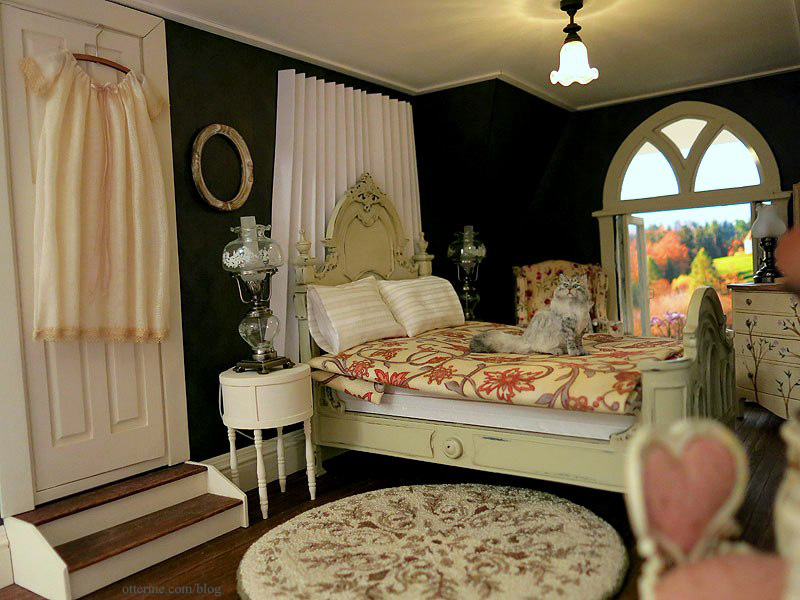
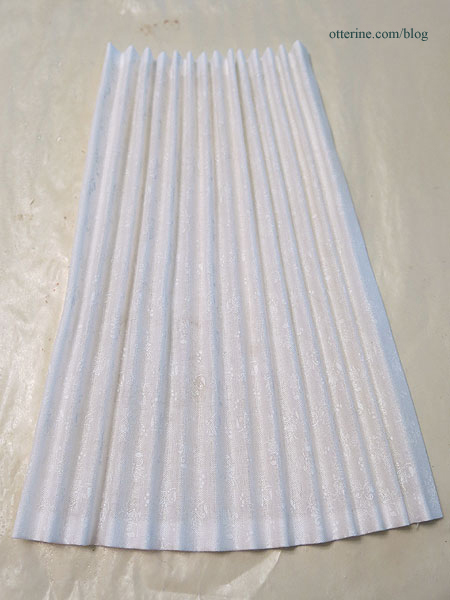
I made the wall panel a few days ago using the Millie August Magic Mini pleating tool. I made the pleats with the tool and then sprayed them with Aleene’s Stiffen Quik to set my final arrangement.
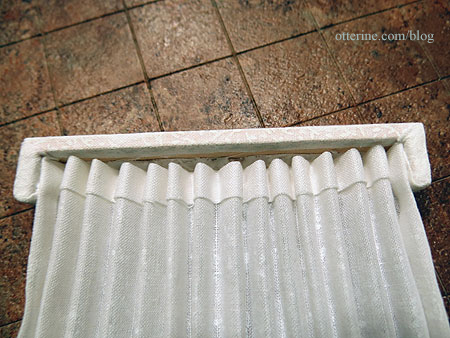
I made a pelmet for the bedroom curtain (top) smaller than the one I made for the parlor (bottom).

I painted it white and then covered it with the same fabric I used for the accent pillow on the bed. I hadn’t needed to paint the pelmet in the parlor since the fabric was darker. I glued the curtain inside the pelmet.
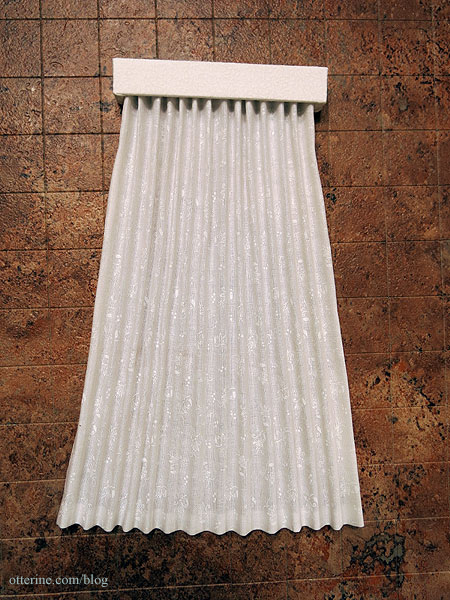
I used mini hold wax to attach the pelmet to the wall. If I ever need to remove it for cleaning or replacement, I won’t risk damaging the delicate paper on the wall.
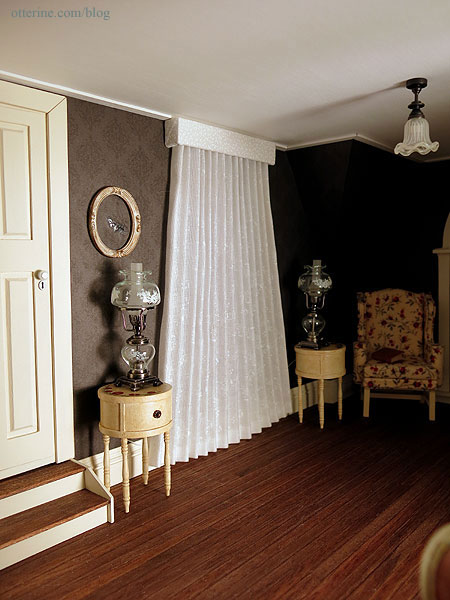
The bubbles are covered, and the panel adds a wonderful design element. I would never have done this without the wallpaper problem, so I suppose it’s another one of those happy accidents. :D
Categories: The Haunted Heritage
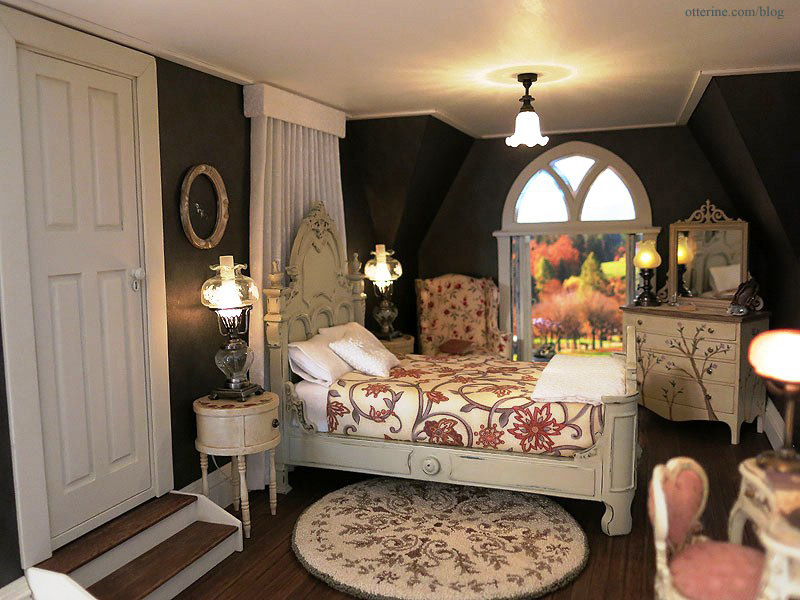
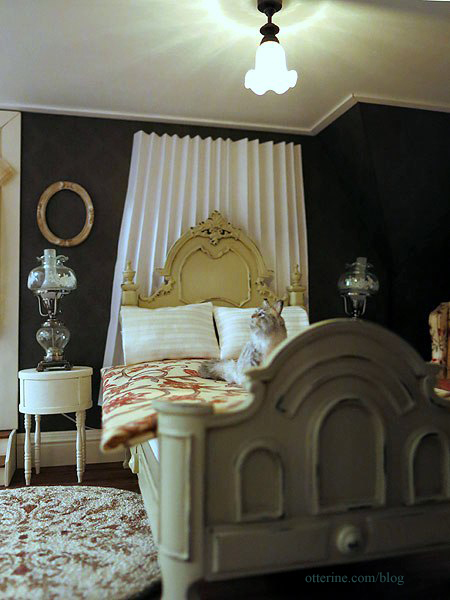
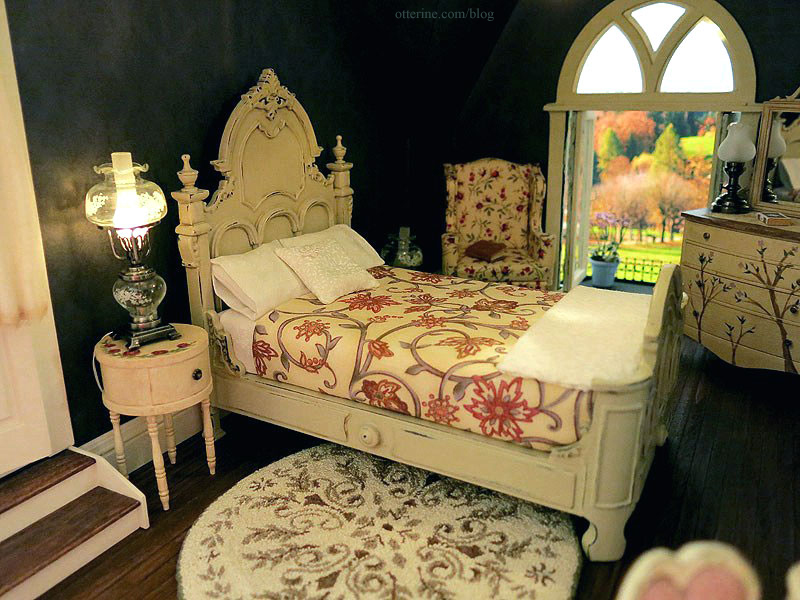
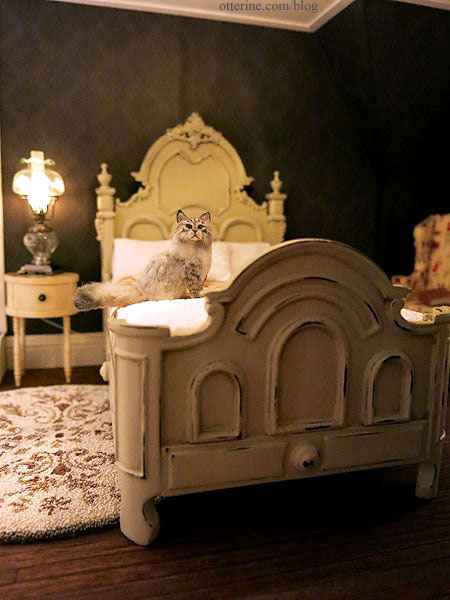
July 31, 2013 | 0 commentsBespaq bed makeover, part 2
The Bespaq bed makeover is done!
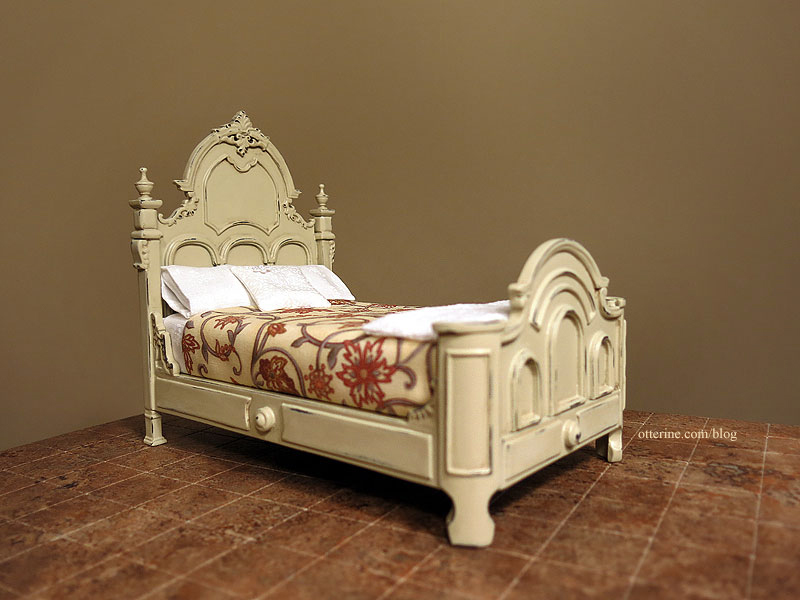
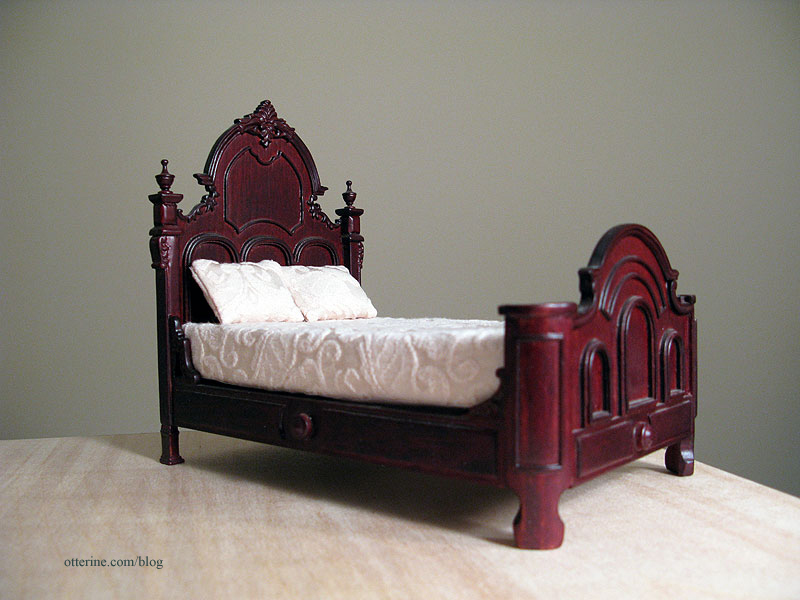
This is where the bed started.
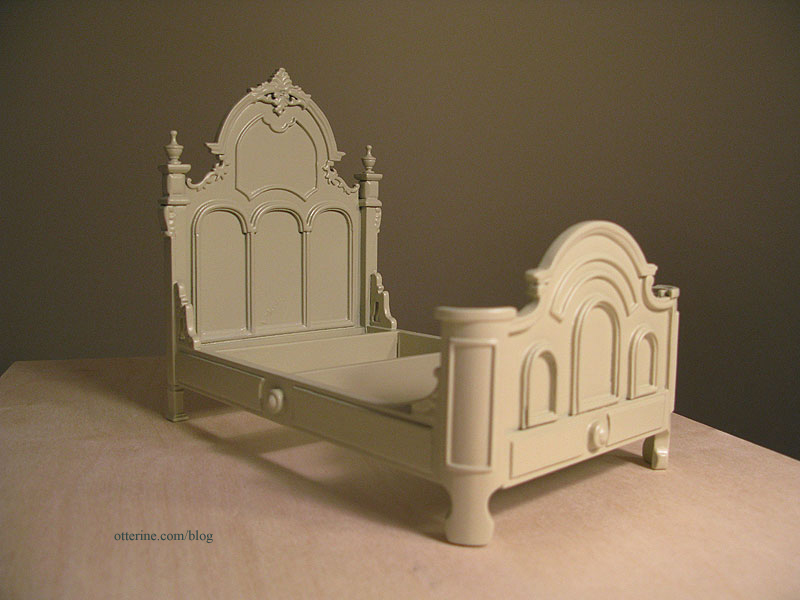
Then primed (grey) and painted with Krylon Almond in satin finish.
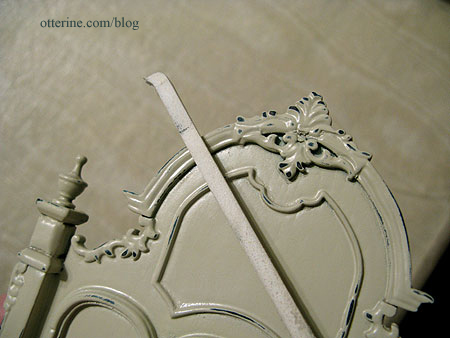
Then aged by sanding.
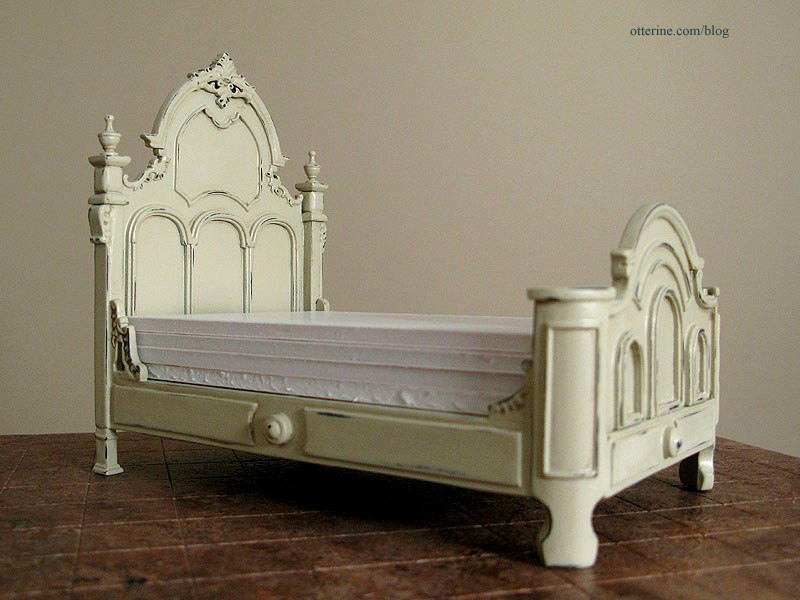
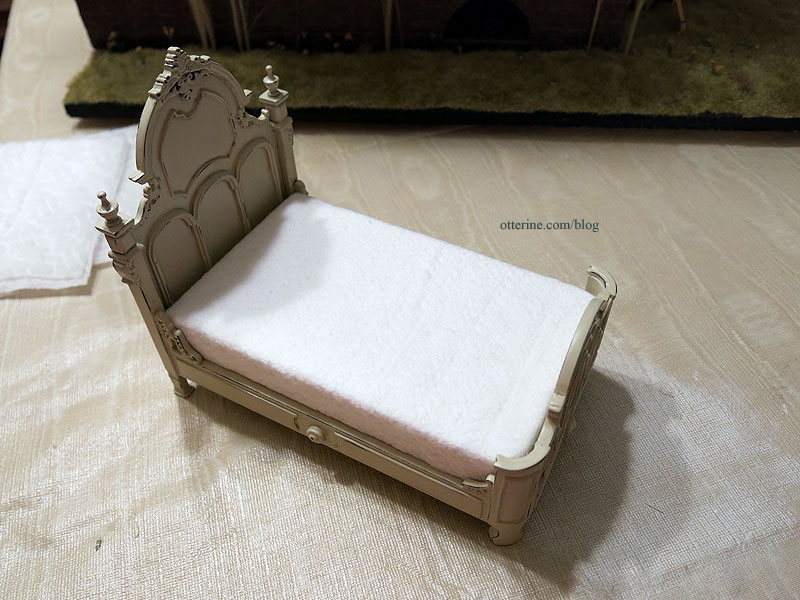
I cut new foam core board pieces to replace the original mattress.
I started the bedding, first by applying a layer of millinery batting to the foam core board mattress base.
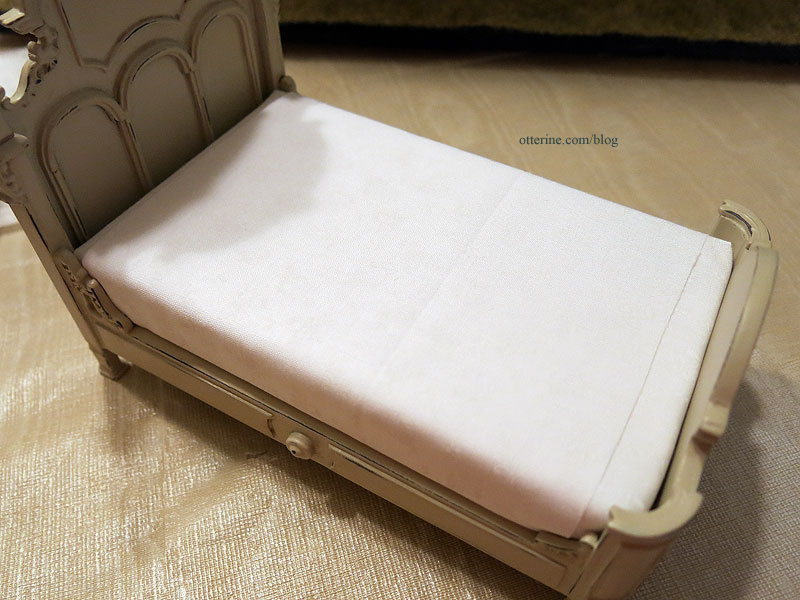
I added sheets made from sheer white floral fabric. Since there would be a coverlet, I opted to keep the top sheet short to cut down on the bulk.
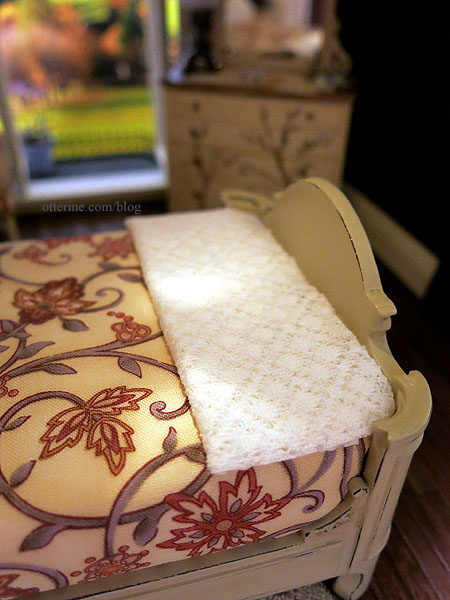
I sewed the coverlet from the fabric April sent to me, adding a plain white backer. I would like to try my hand at an unmade bed, but in the interest of time I went with my standard treatment.
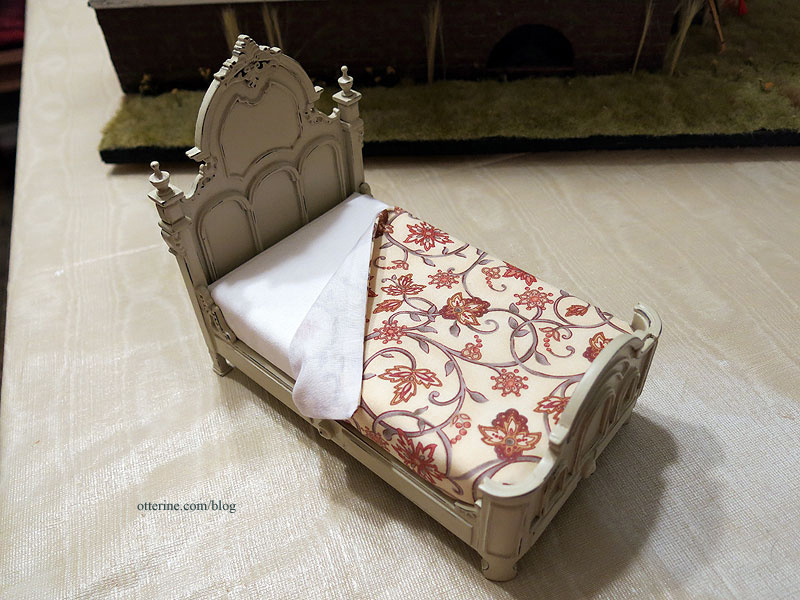
I like the way it pulls in the colors of the other furnishings, and the large scale of the flowers balances out the busier patterns throughout the room.
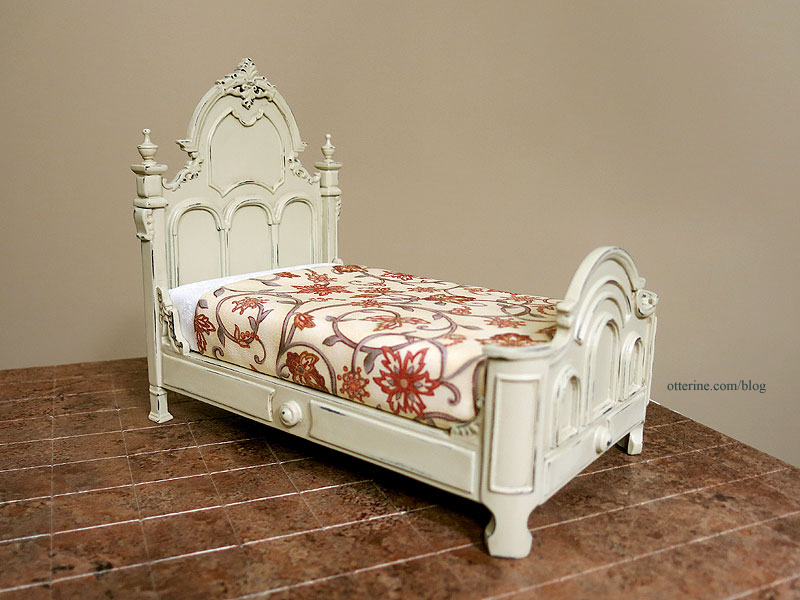
I sewed some pillows and made pillowcases from the same sheer white floral fabric as the sheets. I added one small white printed floral pillow to complete the bedding. It has a tiny venise lace flower attached in the corner.

I made a small lace throw from some open weave fabric. It is full sized to cover the entire bed when opened, but I’ve pressed it flat to sit at the end of the bed as an extra blanket for those chilly autumn evenings.
Hooray for a successful makeover! :D
Now, who wants to take a cat nap with Ophelia?! :D
Categories: Furniture, The Haunted Heritage
July 30, 2013 | 0 comments


NOTE: All content on otterine.com is copyrighted and may not be reproduced in part or in whole. It takes a lot of time and effort to write and photograph for my blog. Please ask permission before reproducing any of my content. Please click for copyright notice and Pinterest use.


