

The Haunted Heritage – Grandma’s fine parlor
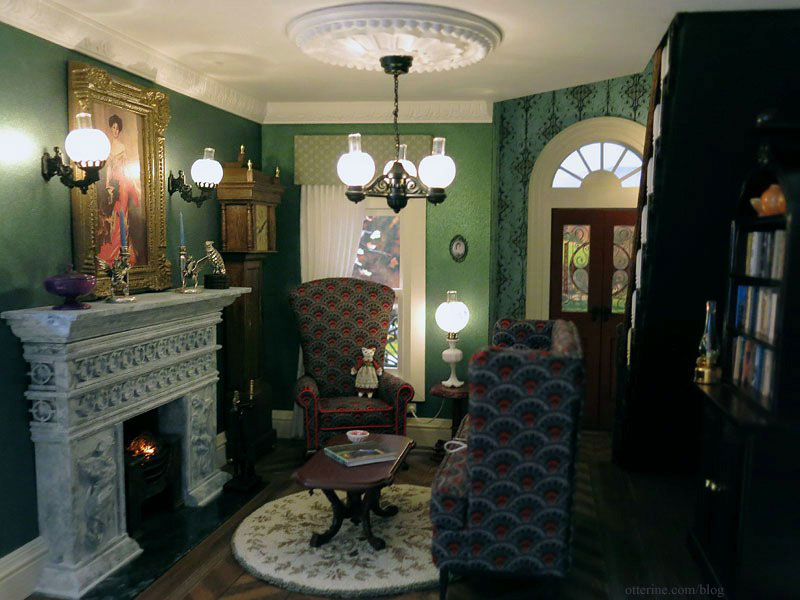
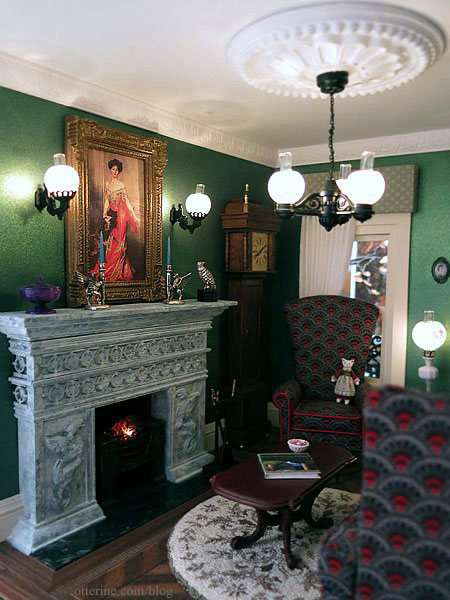
Grandma’s fine parlor is the other first floor room in The Haunted Heritage. There are so many elements of this room that I just adore. My real life home is much simpler in its décor, but I do so love the high society vintage style here.
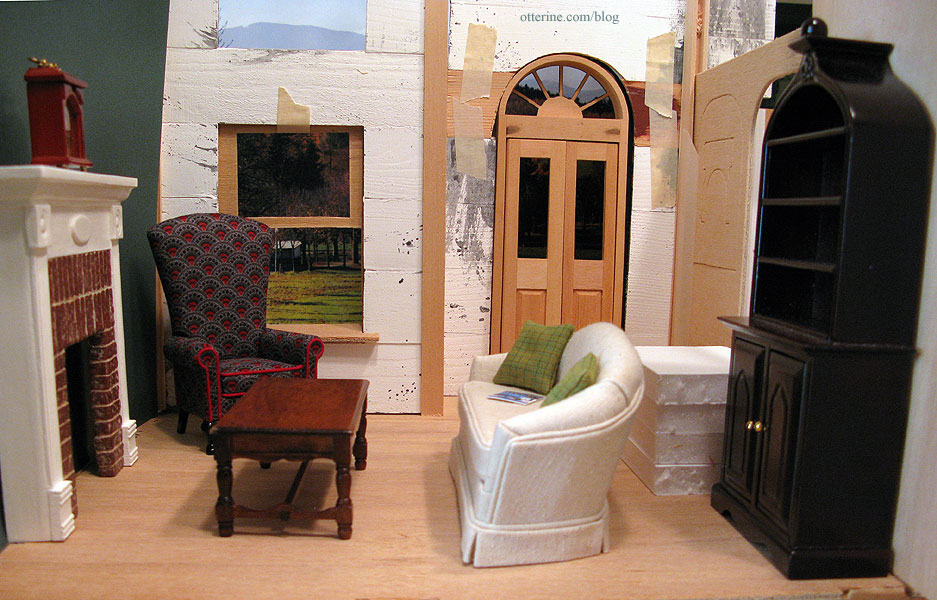
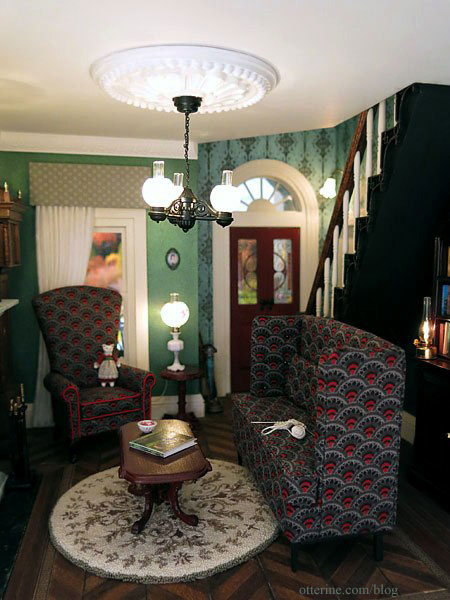
This is the first dry fit to determine furniture placement. Nothing really changed in the end other than the staircase.
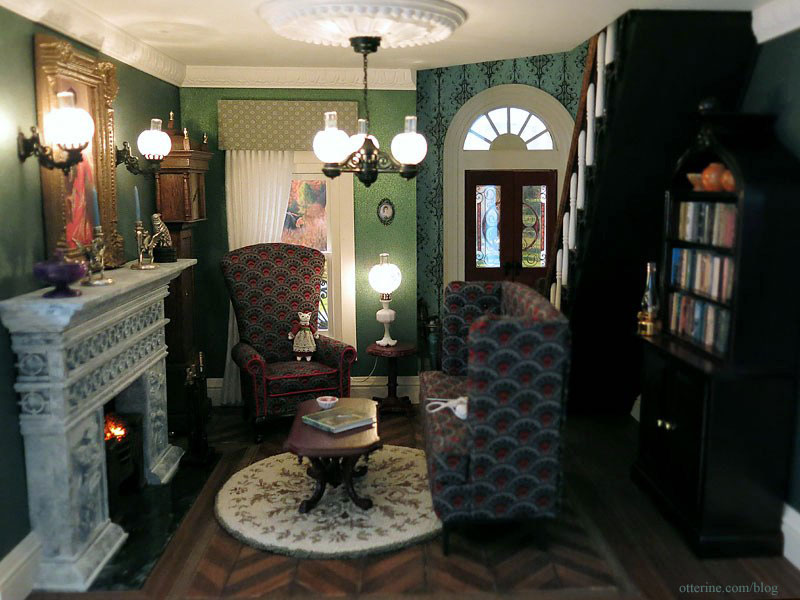
The fancy parlor floor was a labor of love but so worth the effort.
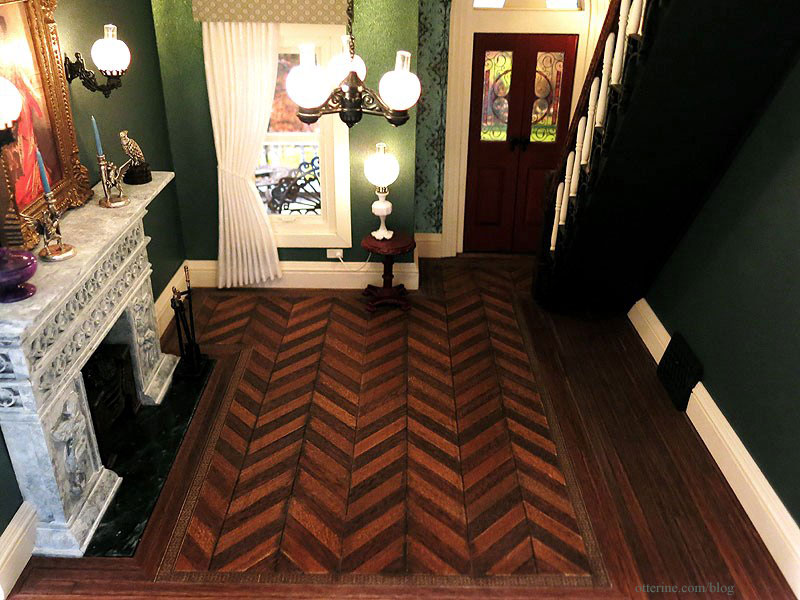
It adds just the right amount of extravagance to a room filled with subtle color and high-end ornamentation.
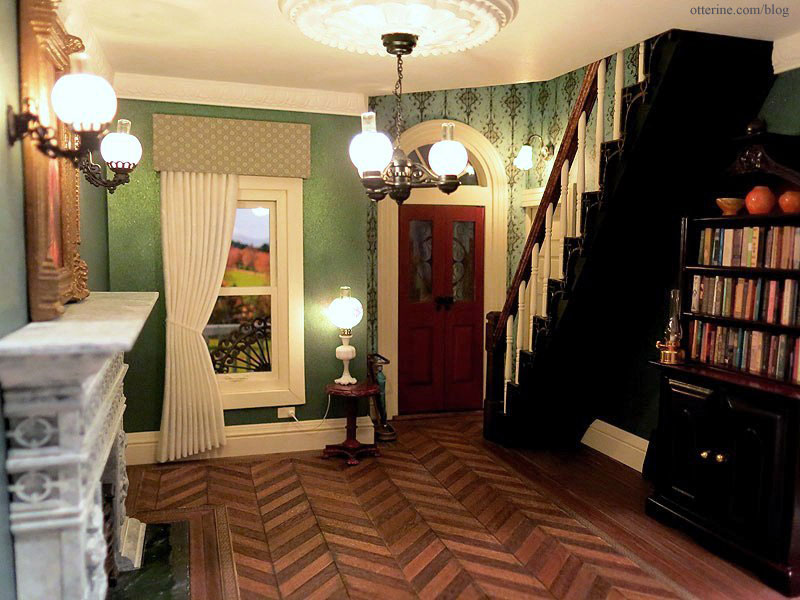
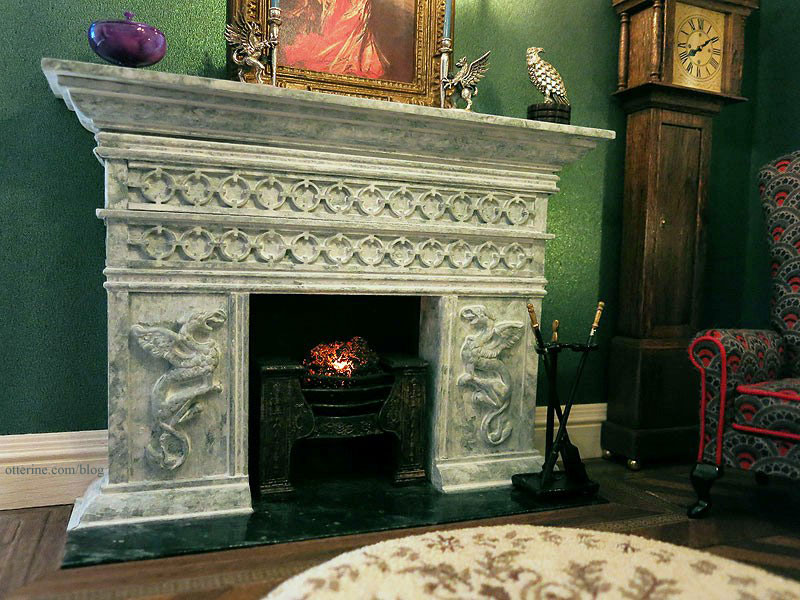
On the left side of the room is a large fireplace.
On the opposite side, the stairs lead to the second floor.
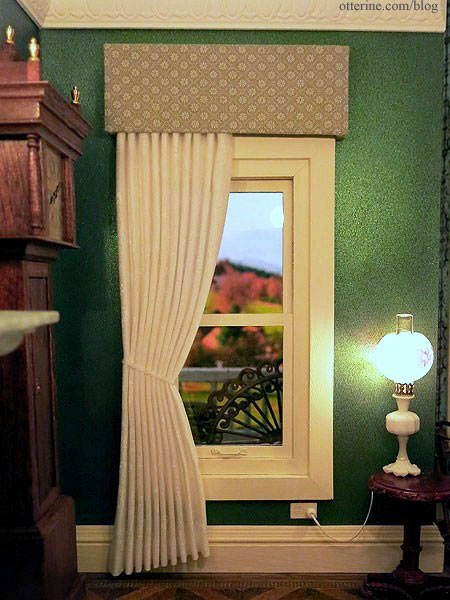
All the lights in this room are Chrysolite except the Clare Bell brass hurricane lamp on the bookshelf.
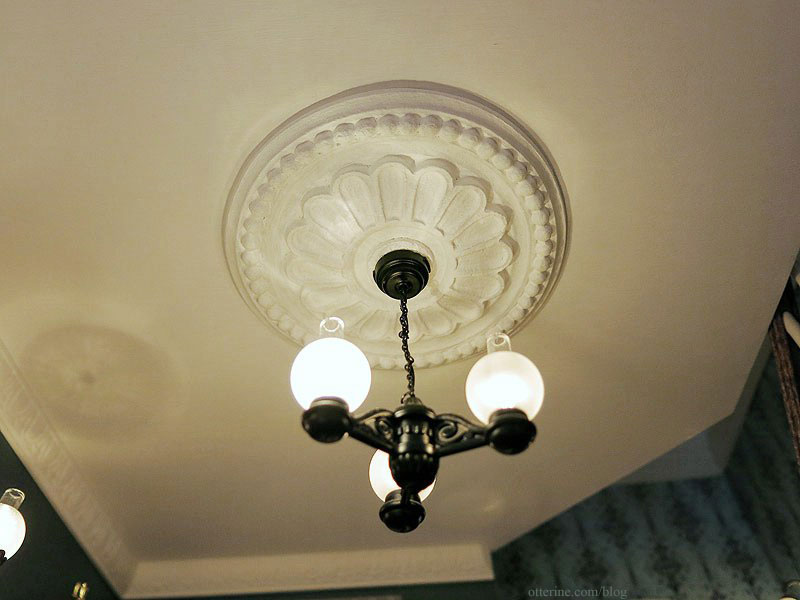
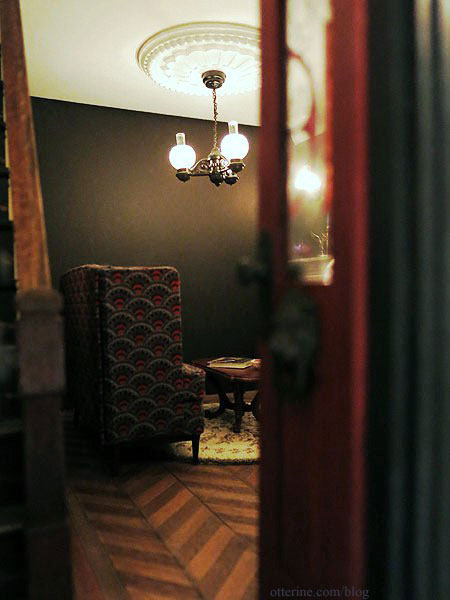
I assembled the wall sconces above the fireplace as well as the gaslight chandelier. At first I thought the ceiling medallion was too much, but I love the way it frames the chandelier. This particular chandelier is a little temperamental since I wired it to have replaceable bulbs. The slightest movement makes the globes teeter. It’s not easy to adjust three of them with two hands. Haha! :D
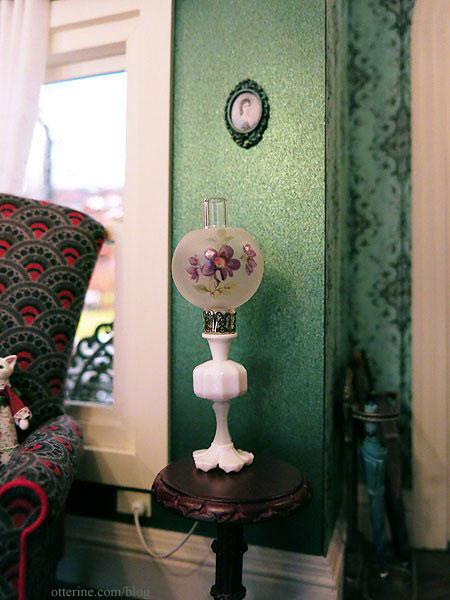
The table lamp was purchased already assembled and is wired with one of my signature faux outlets. The side table is a Bespaq piece purchased at a local mini show.
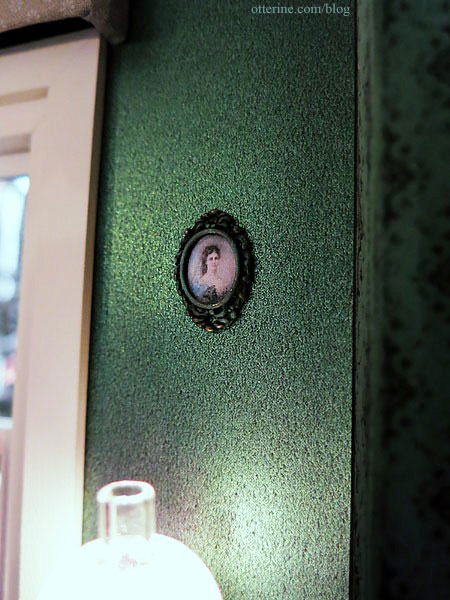
The frame was a gift from Annie at Thyme Soul Miniatures. I bought a grouping of her miniatures which you’ll see in upcoming posts. This frame is the perfect little something for the space.
The white stone griffin fireplace was made from foam core board, wood trims and polymer clay, then painted to a faux stone finish. I love how spooky the fireplace looks in low light.
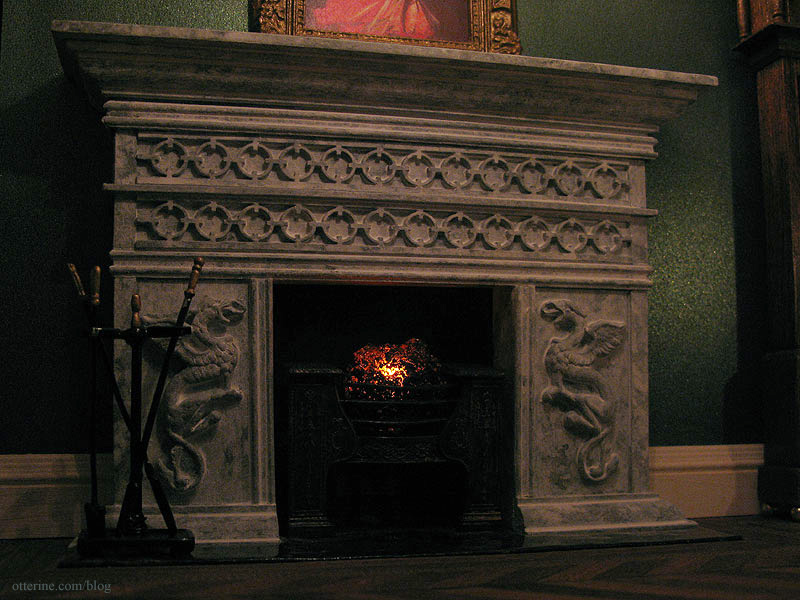
The marble hearth started out as cardboard.
It was partially inspired by a Lawbre fireplace and the griffins were cast from molds made from metal earrings.
A close-up of one of the griffins.

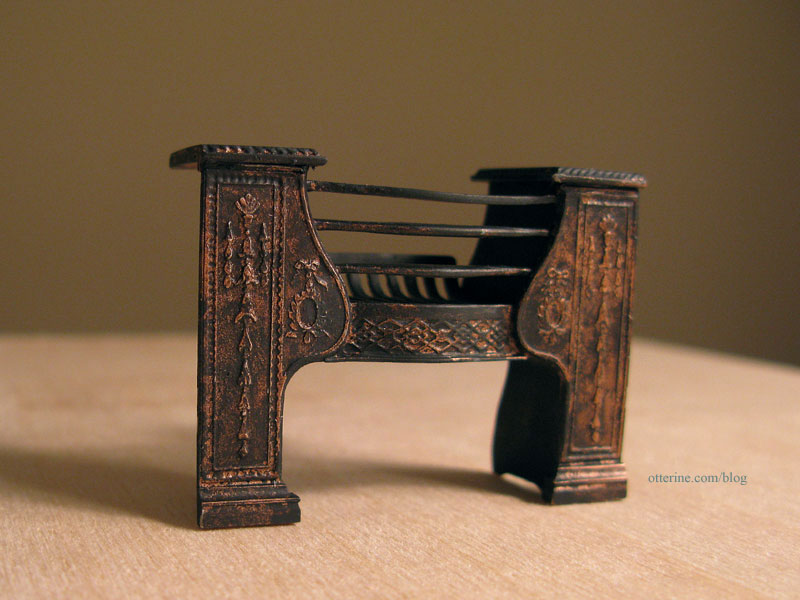
The resin coals are held by the Phoenix Parlour Hob Grate. I painted it Burnished Copper Metal by Rustoleum, then aged it with layers of black and grey acrylic to get the look I wanted. I installed a flickering LED to light the resin coals.
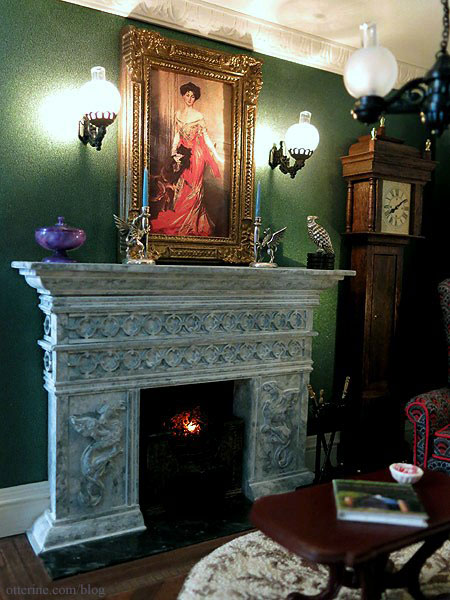
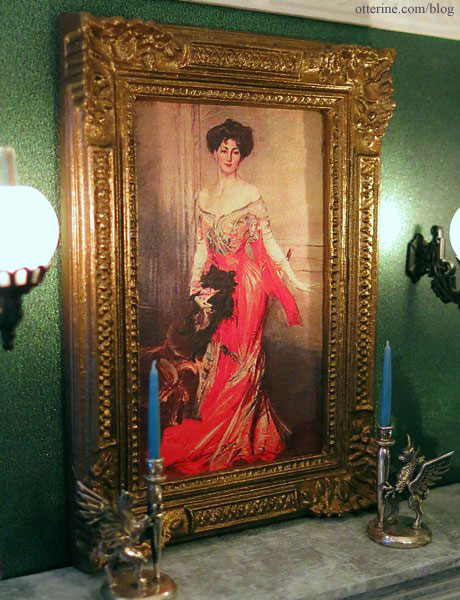
The painting above the fireplace is by Giovanni Boldini of Elizabeth Wharton Drexel, 1905. I printed the image on regular paper and painted the purchased frame to tone down the original gold finish.
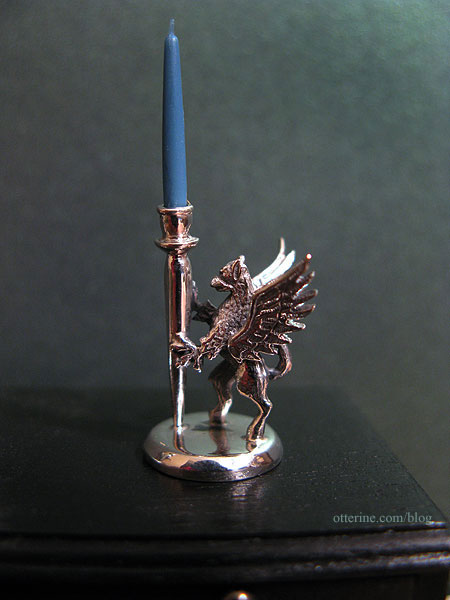
One of the finest (and most expensive) miniature purchases to date: a pair of sterling silver griffin candlesticks. These were crafted by Don Henry for Small Treasures Miniatures.
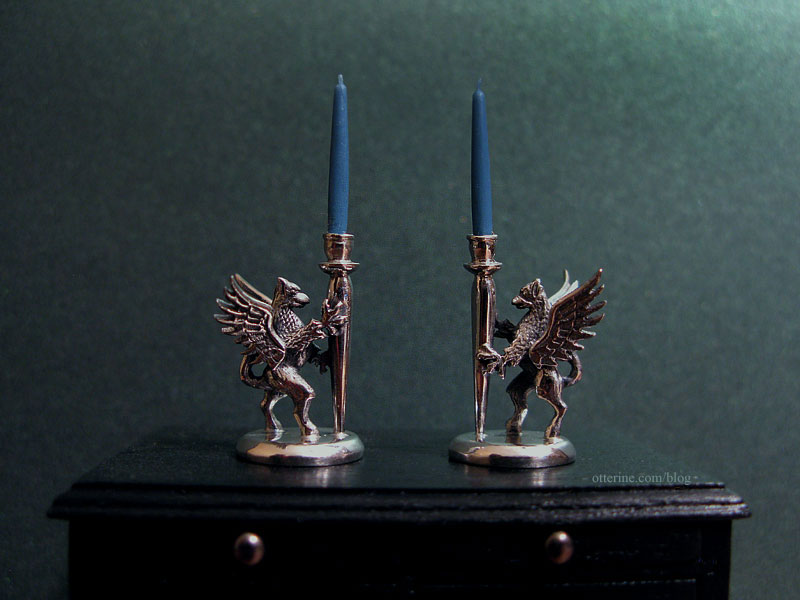
The detailing on them is incredible. They stand just 15/16″ tall without the candles.
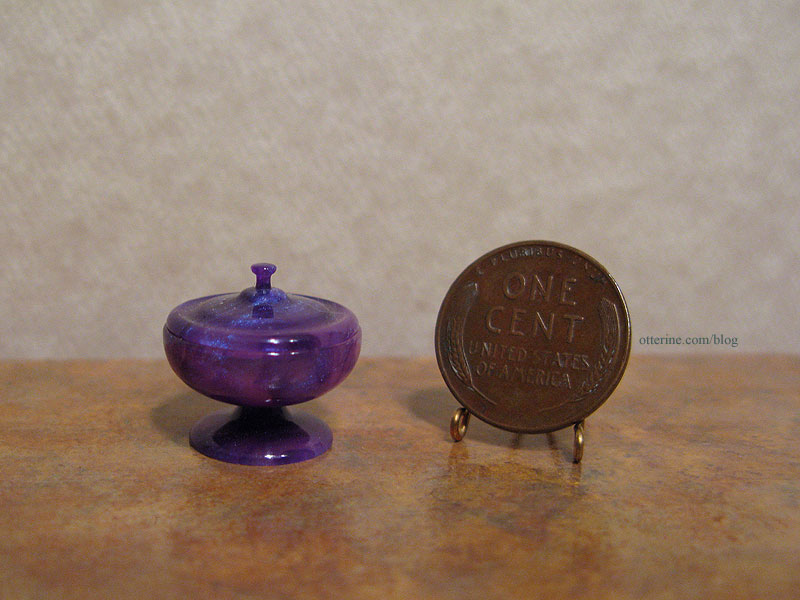
The purple lidded dish is from CW Lubin Wood Turning.
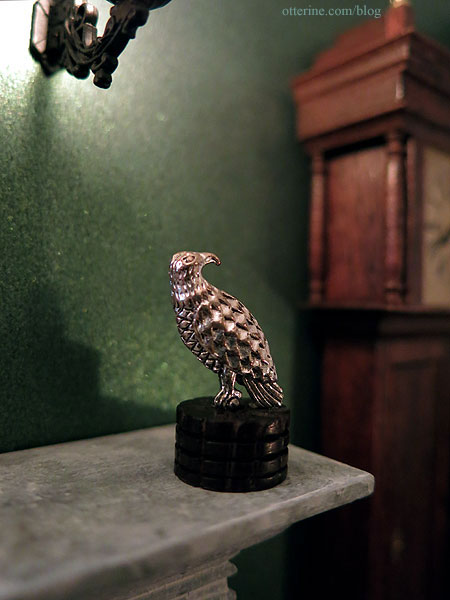
I made the bird statue a long time ago from a wood bead and jewelry charm with the loop removed.
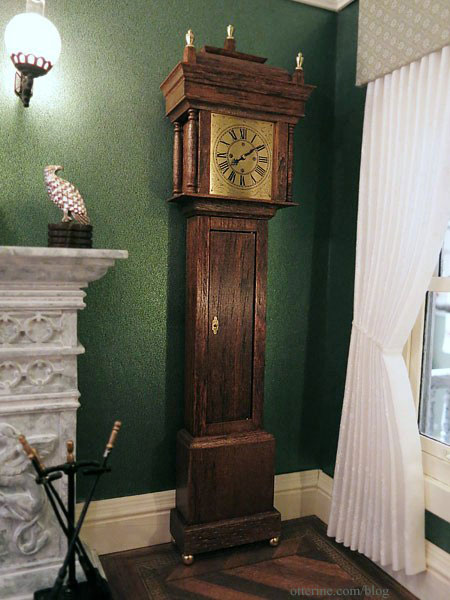
The beautiful Bagnall clock was made from a House of Miniatures kit.
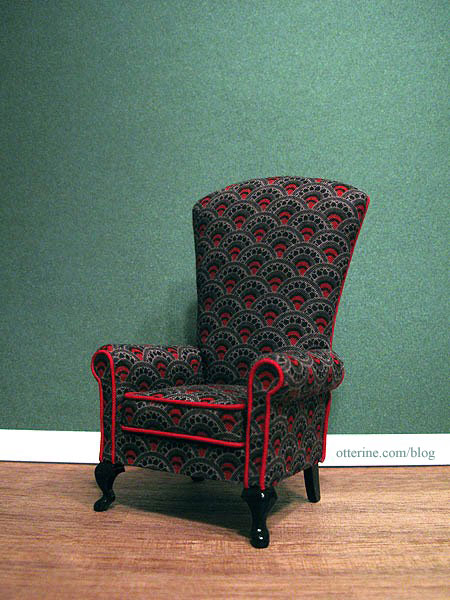
The Chair was made by Kris of 1 Inch Minis.
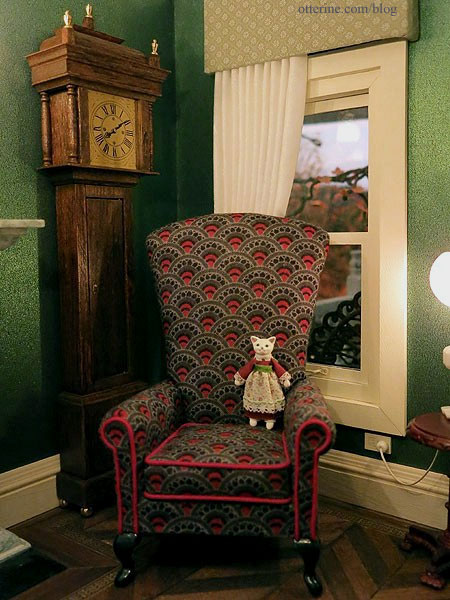
Buying this piece set this whole project in motion. :D
I opted for a single side swept curtain for the sole purpose of not hiding that little outlet I took the time to add. Though The Chair will block both the curtains and the outlet for the most part, anyone who looks for the details will find them.
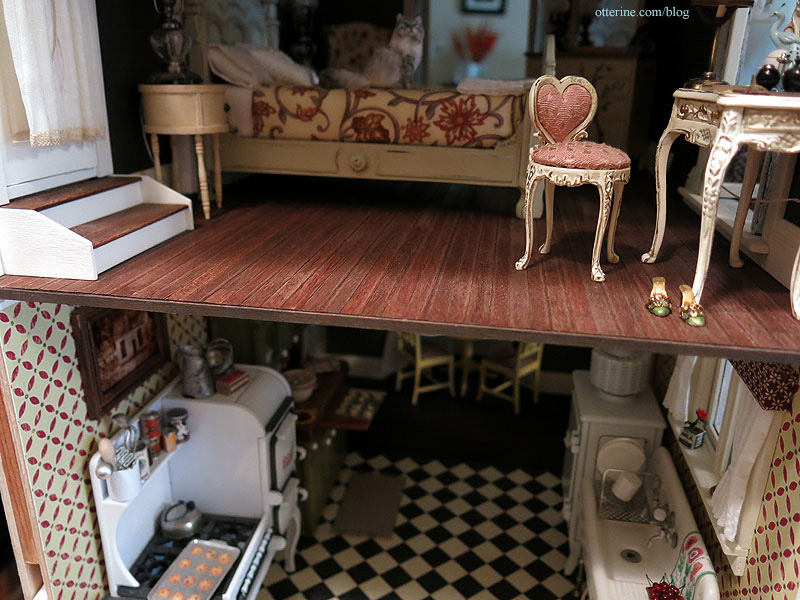
Miss Kitty was made by Pamela of PamelaJunkMinis.
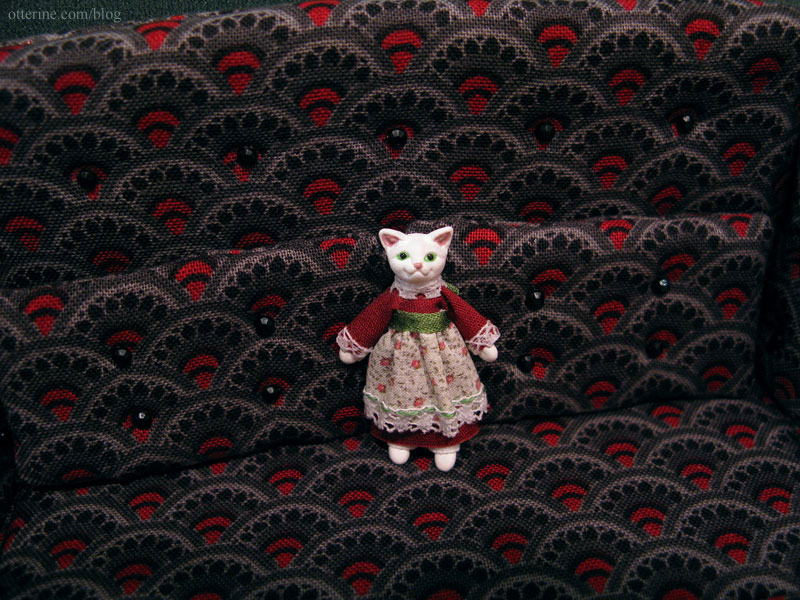
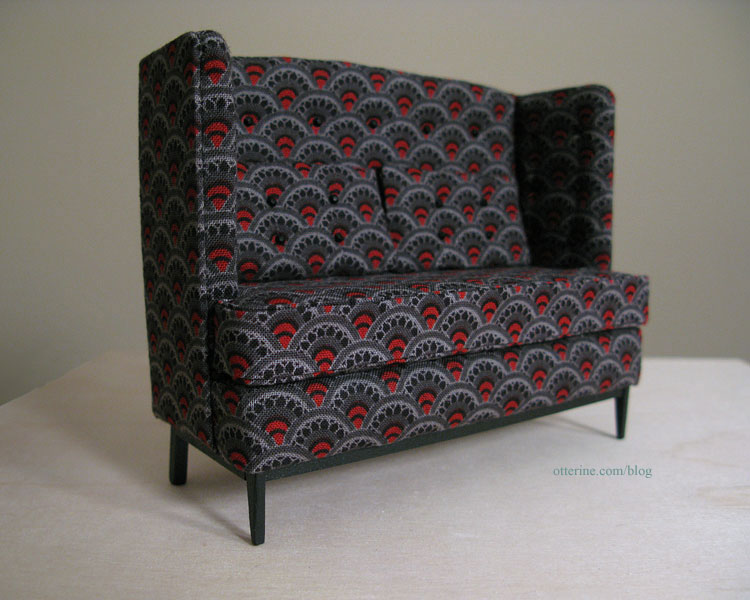
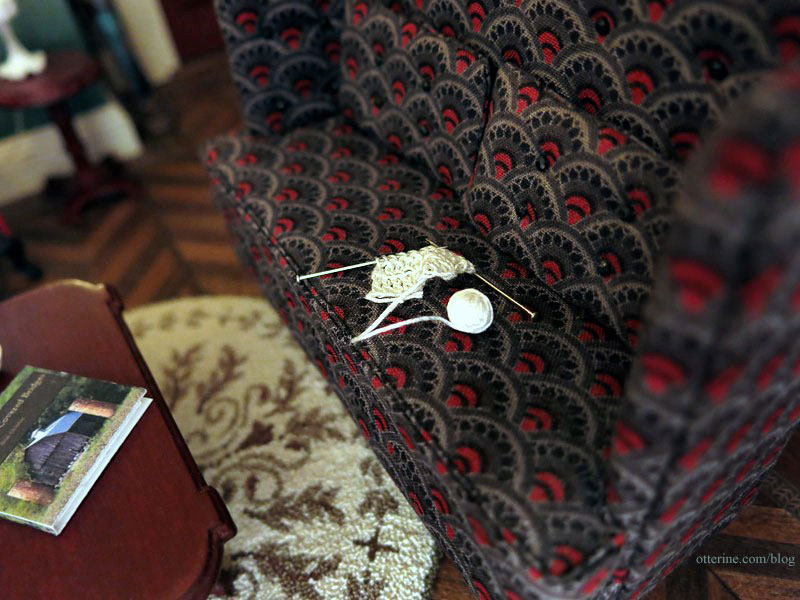
The Sofa was my second “from scratch” upholstered piece and made to match The Chair. :D
The knitting was purchased from Small Talk at a local miniature show.
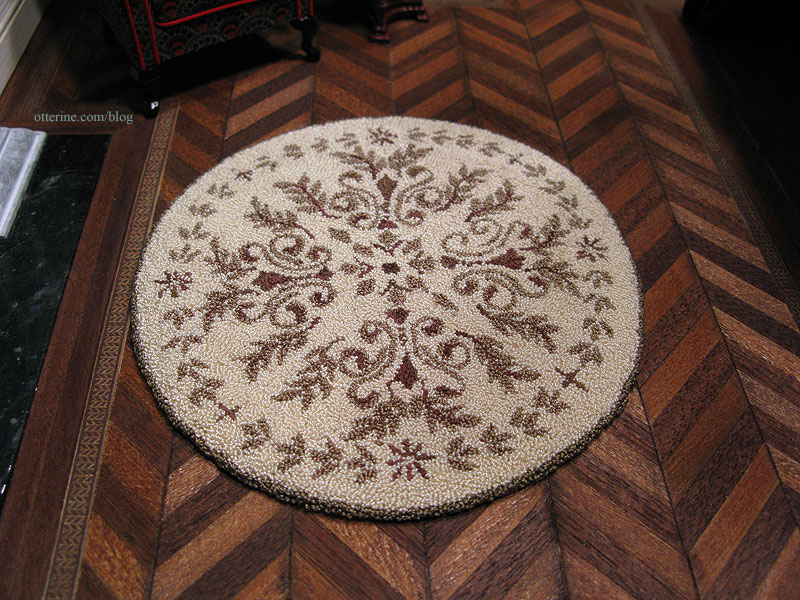
The beautiful rug is by Katie Arthur of Dollhouse Littles. The texture of it is amazingly lifelike. This rug will live in the bedroom going forward, but I haven’t found or made one to replace it just yet, so I’ve borrowed it for the photos.
The coffee table is a refinished Bespaq piece. I made the book, but the candy dish was purchased.
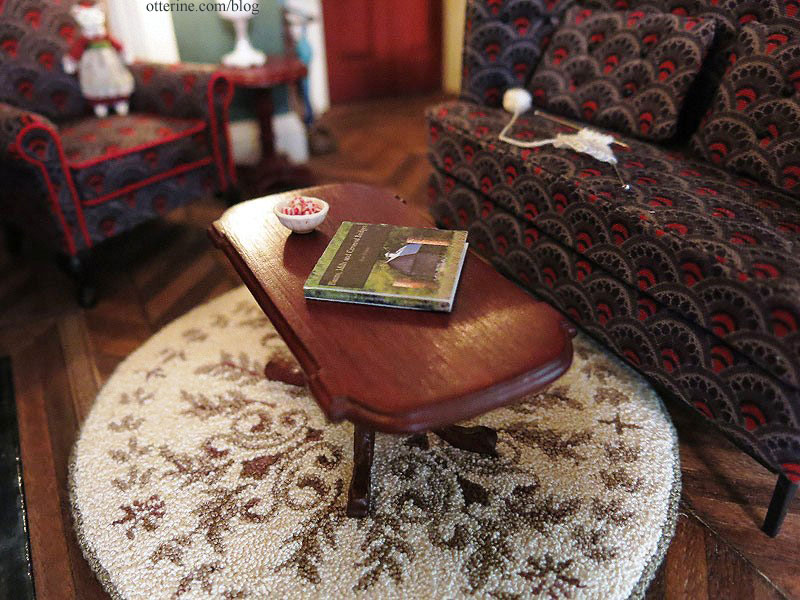
Jane of MiniFanaticus made the tiny candies for me in a swap.

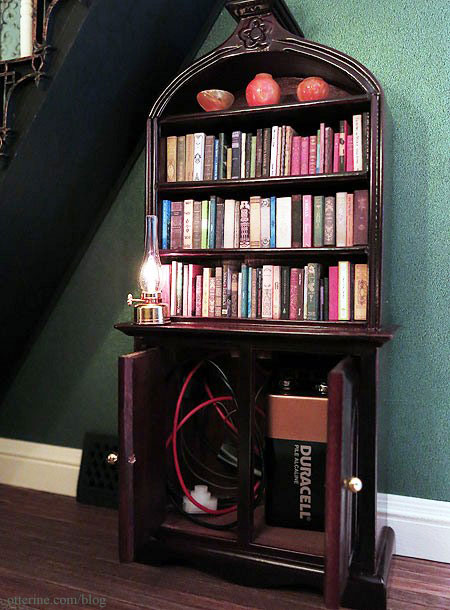
The bookshelf was purchased, but I made all the tiny books that line the shelves. The top shelf holds a matched set of orange acrylic turned items from CW Lubin Wood Turning, two vases and a bowl. They were advertised as quarter scale or half scale items, but I often find those smaller scale items look wonderful in full scale scenes. I arranged the two shorter items on either side of the taller vase to make the most of the space on the top shelf.
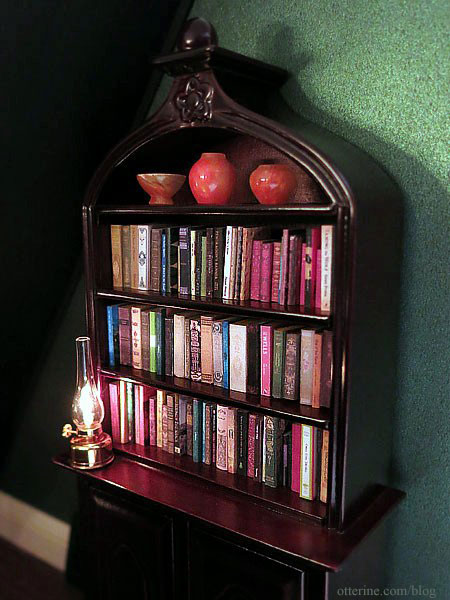
The hurricane lamp is battery operated.
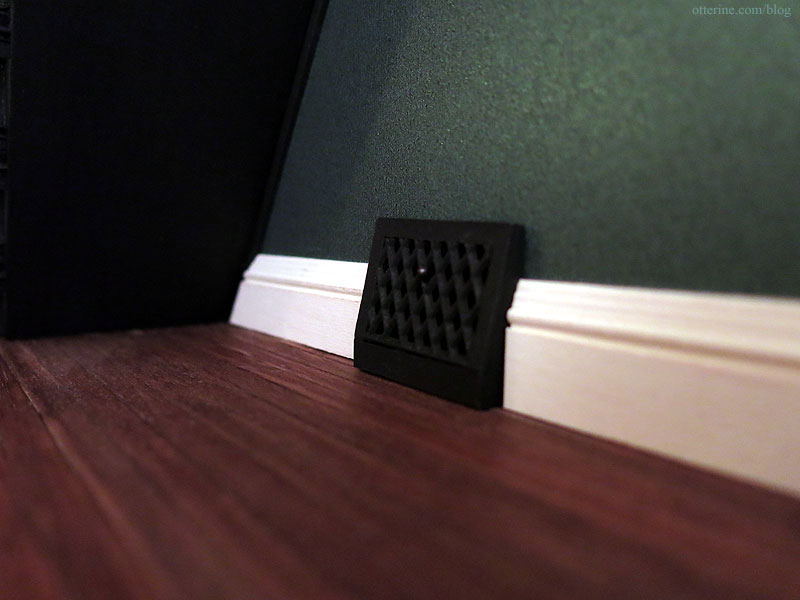
I added a baseboard heat register (my bash of a tutorial by Kris at 1 Inch Minis).
Next time you are invited for tea, don’t let the bedraggled exterior of the Heritage scare you away. :D
Categories: The Haunted Heritage
August 10, 2013 | 0 commentsThe Haunted Heritage – 1920s inspired kitchen
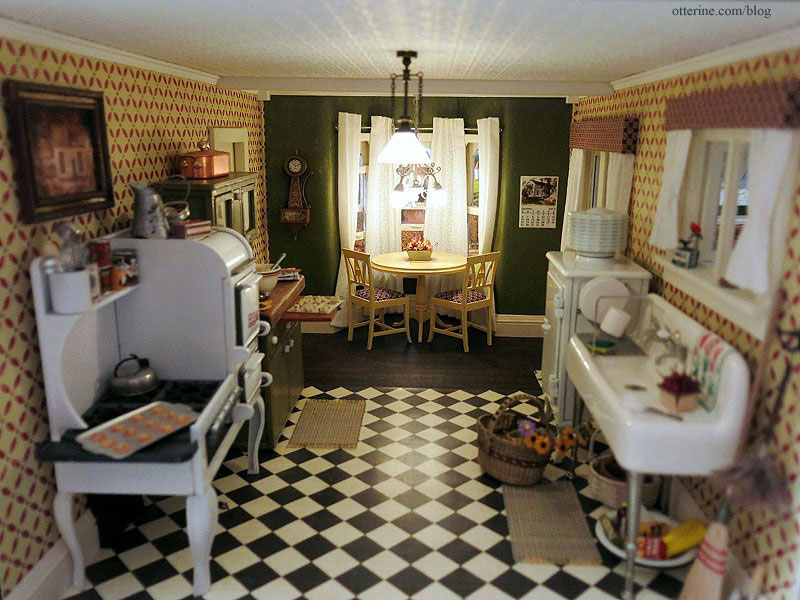
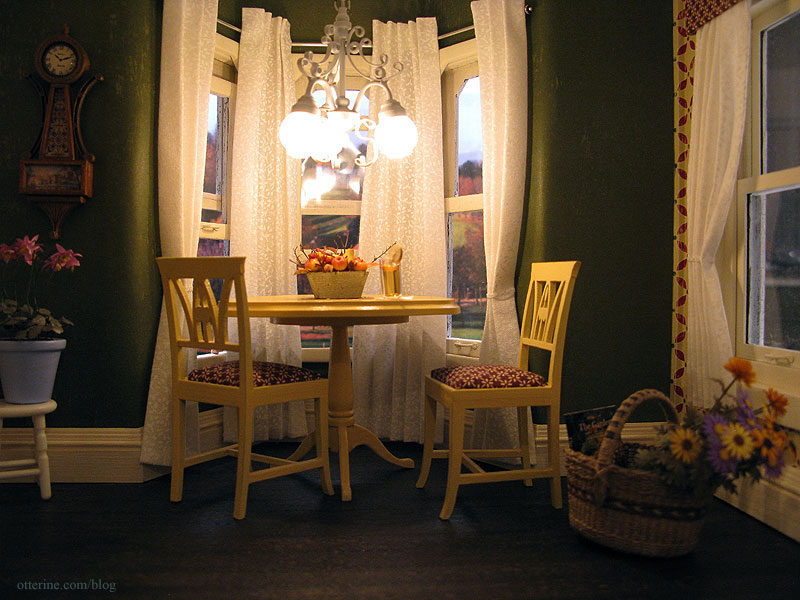
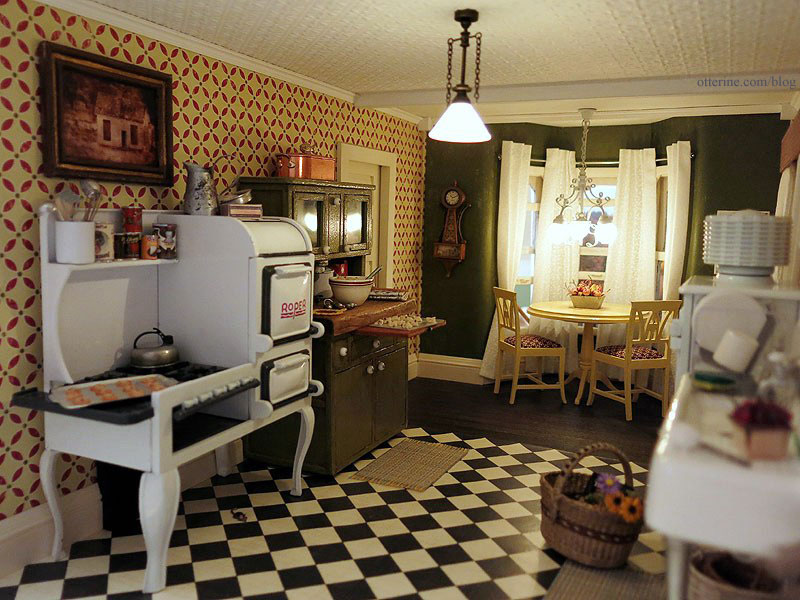
The 1920s inspired kitchen was the first room I completed in The Haunted Heritage. It’s a large room with a dining area and vintage kitchen appliances. I tried to avoid adding too much clutter, just a few added accessories really make a difference. Feels like home.
The furniture arrangement didn’t change much from the original dry fit layout trial.
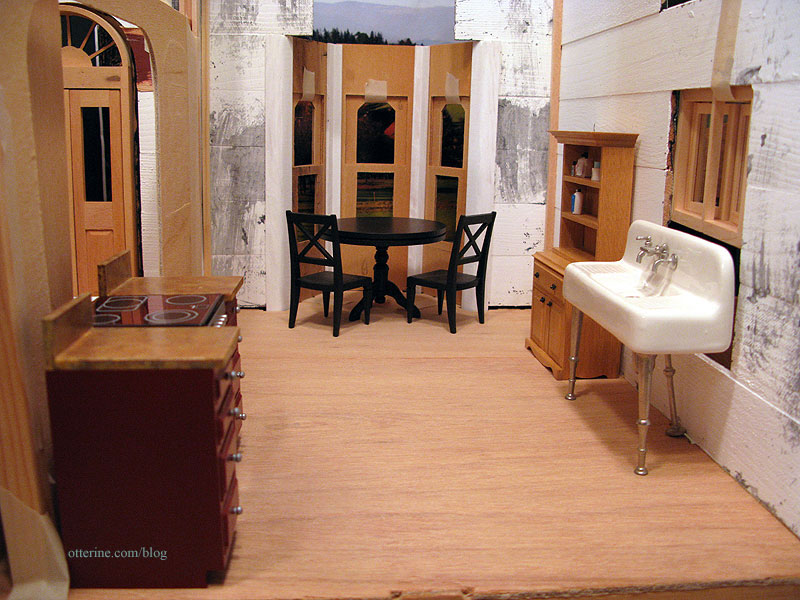
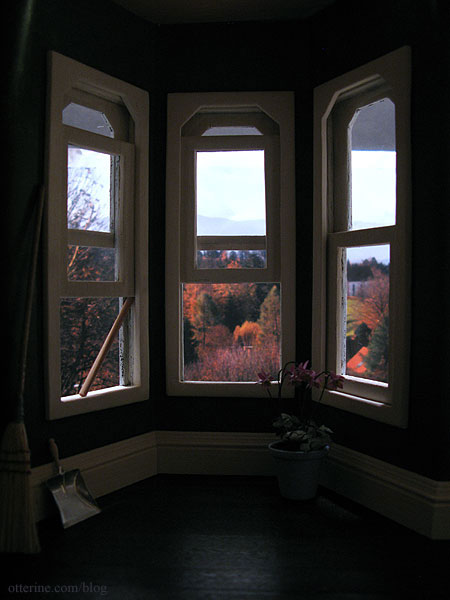
Structurally, I upgraded the side window with a Houseworks working window and added a casement window above the sink.
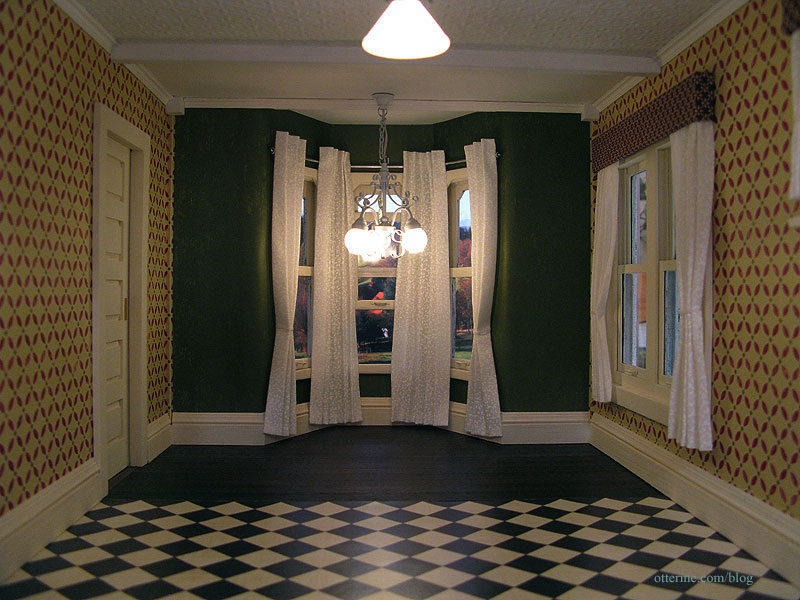
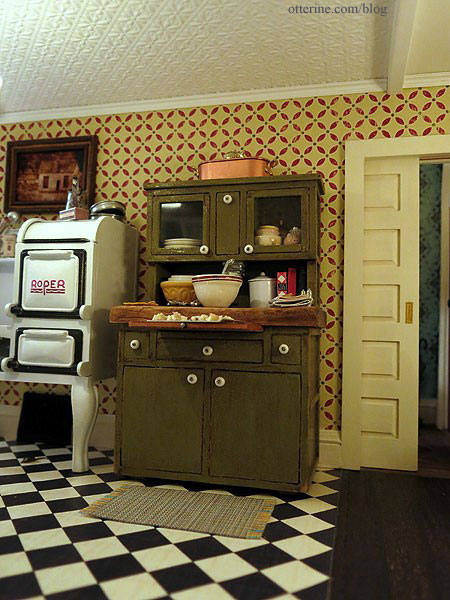
The tile flooring is Cream Diamonds by The Paper Studio, and the wallpaper in Geometric Fa La La by Making Memories. The back of the wallpaper is aged green, so I used that in the bay window section.
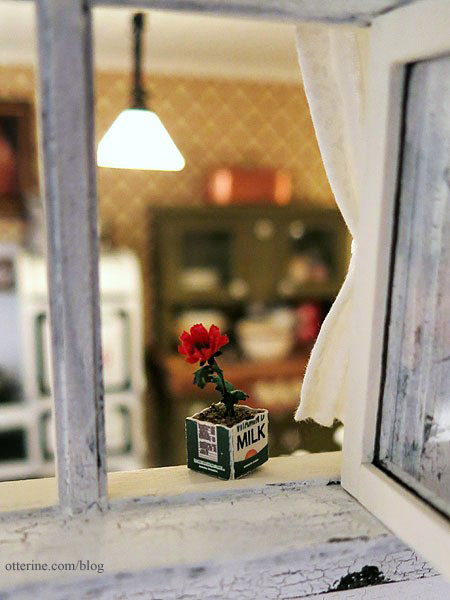
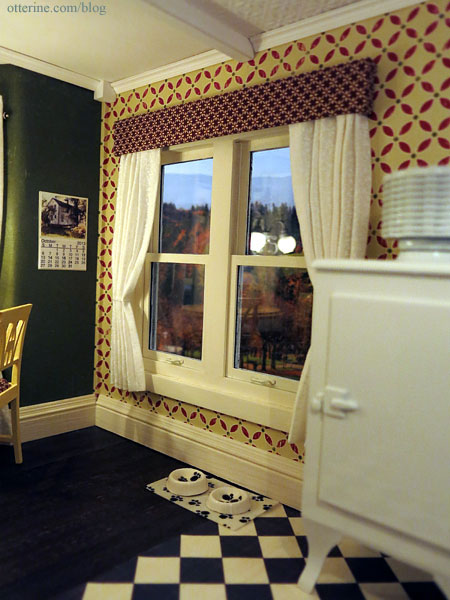
I went with subtle white patterned curtains and simple fabric pelmets for the window treatments. It softens the look of the room without being over the top. The potted flowering plant is from Michelle.
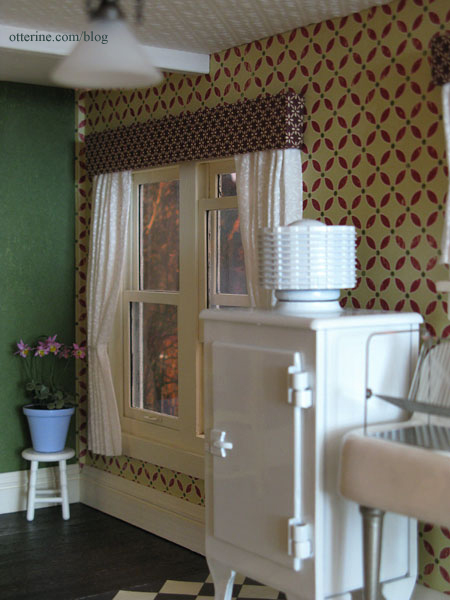
The casement window curtains ended up being a little too short, but I liked them well enough to leave them as is.
The front bay window is part of the original kit, and considering the age of the kit wood I was happy with the way it turned out.
One window assembly is completely glued together and the window is shut since the wood for these pieces was beyond repair. The second window is set partially open, and though the window slider isn’t glued in place, the wood for this assembly is not in the best condition and doesn’t allow for very fluid raising and lowering of the window. The third window, however, works so well that I need a dowel to keep it propped open! How positively wonderful! It’s just like a real life old house – one window is painted shut, one window sticks and one window won’t stay open!!! :D
The curtains in the bay window have a custom made rod to hold them in place.
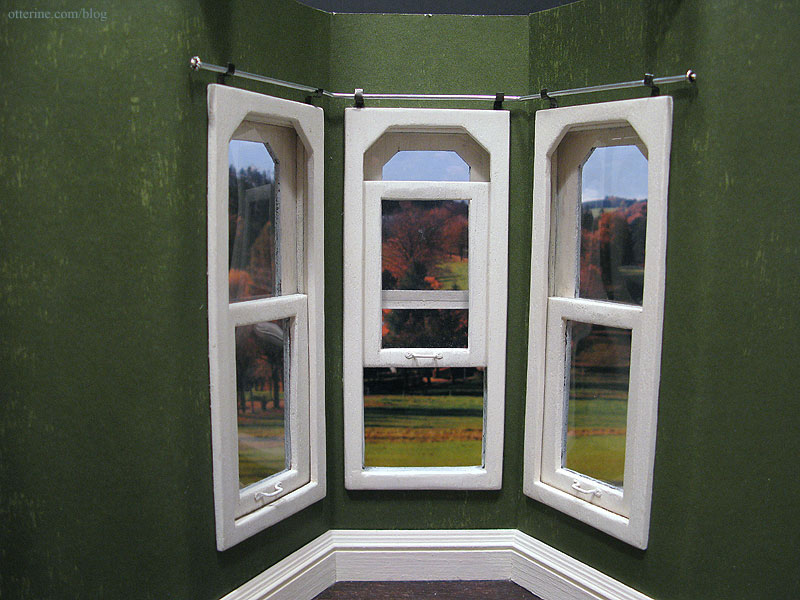
I used fairy lace tiebacks on the outer panels but I liked the look of the inner panels left straight. This way, grandma doesn’t have to reach over the table to untie them every time she wants a little privacy. ;D
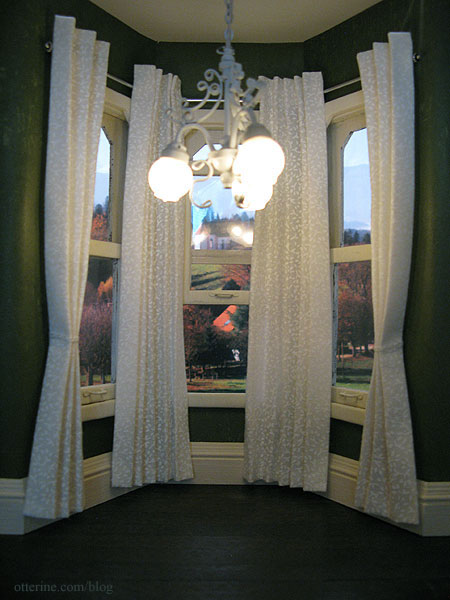
With the table and chairs in place, it really sets the mood. First, with the curtains in focus.

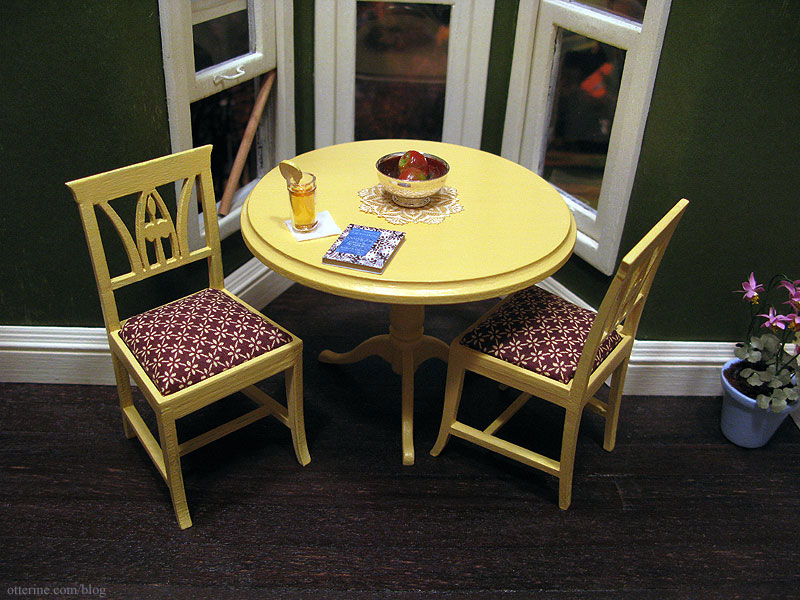
And, then with the furniture in focus.
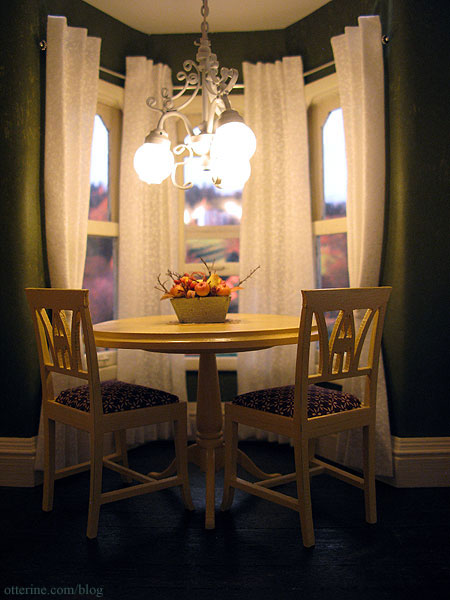
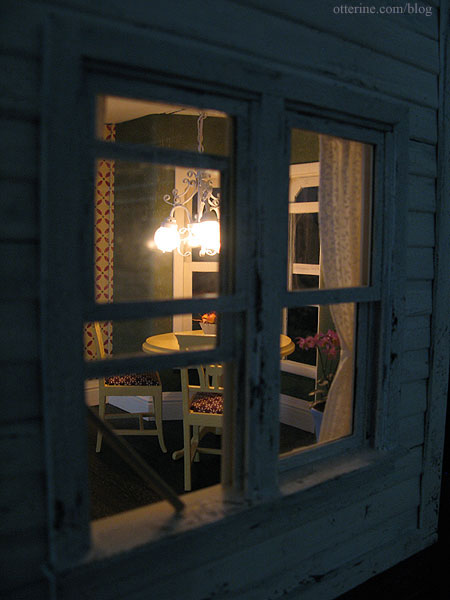
I love through-the-window photo views. :] The autumn fruit basket is from Hungarian Miniatures.
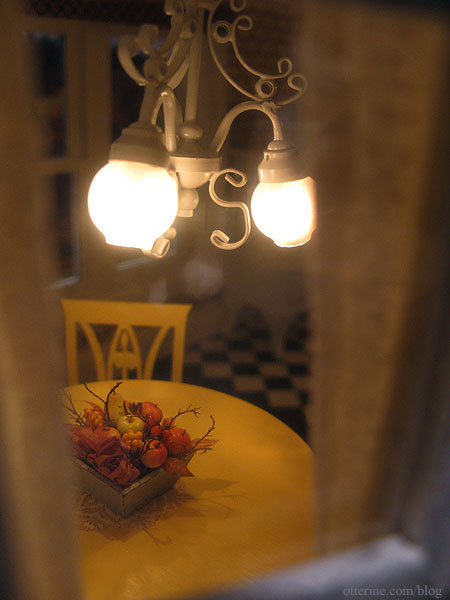
In this photo, I feel as though I can hear the crickets and see fireflies outside.
I replaced the interior wall, adding a working pocket door. There is a lever that operates the door from the open back so you don’t have to reach inside to open the door. It has a leather and Tyvek hinge to fold flat when the door is open.
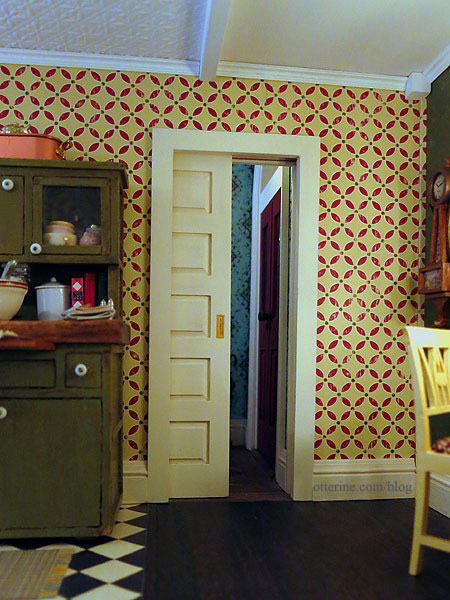
I really love the way the crown molding completes the room.
My original thought for heating the Heritage beyond the parlor fireplace was to place painted radiators in the rooms. Even though the rooms are somewhat spacious, radiators do take up a decent amount of space. Then I ran into a fantastic tutorial by Kris at 1 Inch Minis: gravity baseboard registers. Perfect!
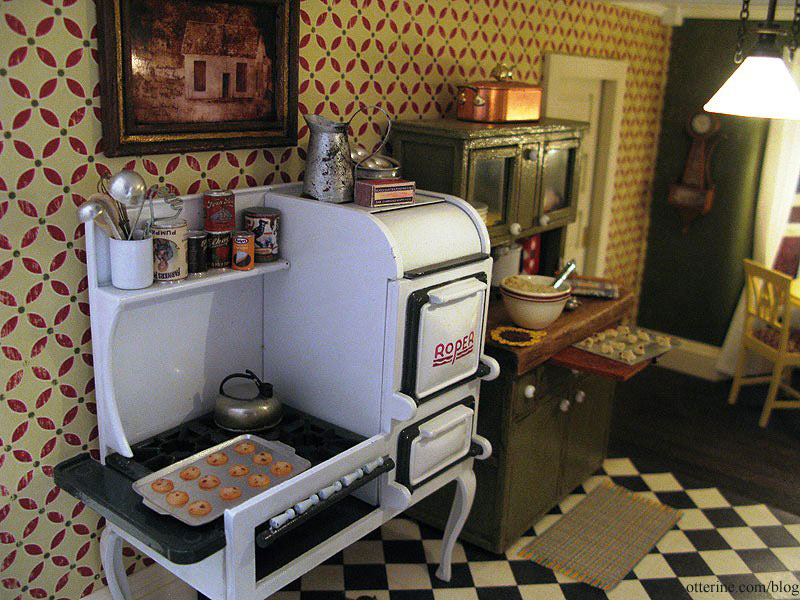
I used diamond canvas instead of square and added a metal headpin for the lever. I placed the heat register under the Roper range so it could be seen, though it’s one of those details that’s mainly for me. It’s not strikingly obvious, but I am glad it’s there.
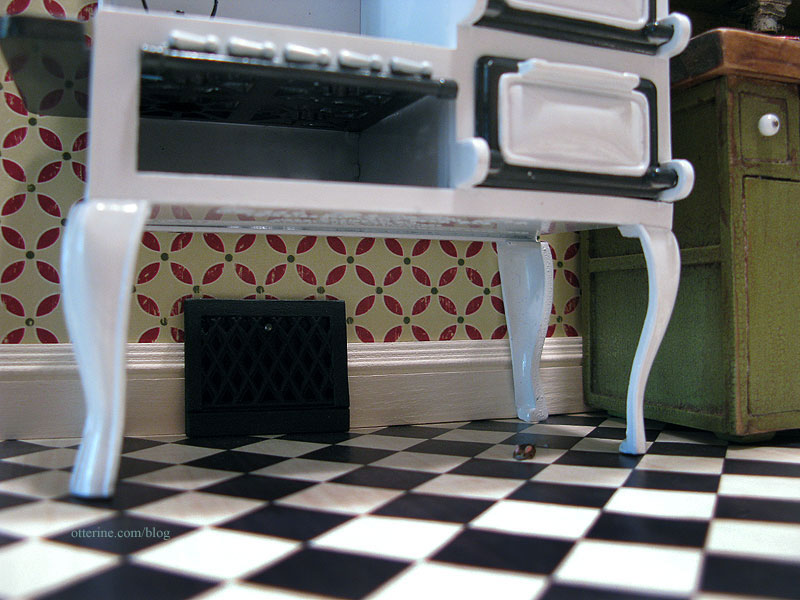
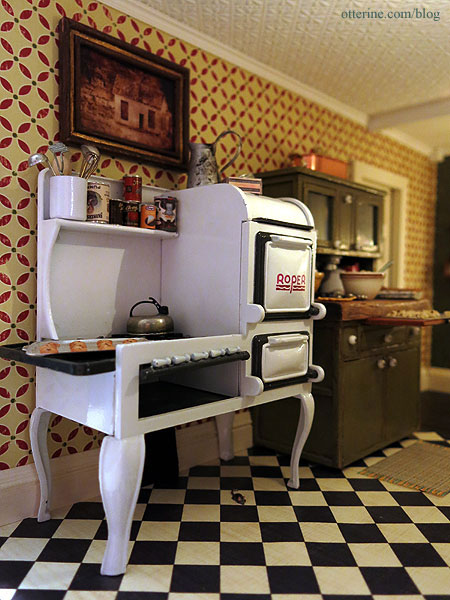
The cast metal Roper range is by Jacqueline Kerr Deiber. It’s a heavy piece with lots of character.
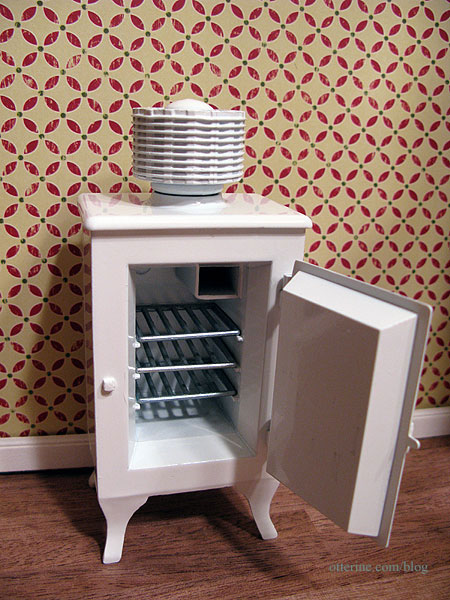
The metal Monitor Top Refrigerator was also designed by Jacqueline Kerr Deiber. It has wonderful lines and is also very heavy.

I love the shelves and the ice box. :D
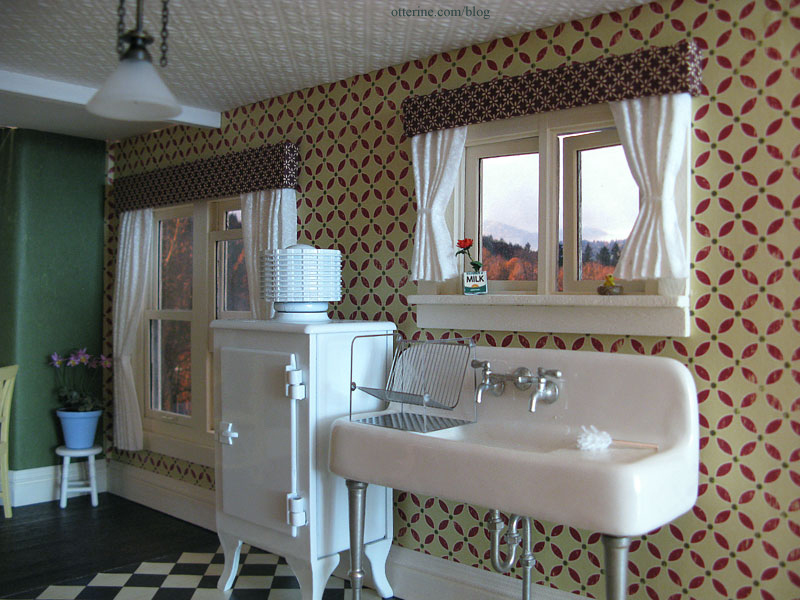
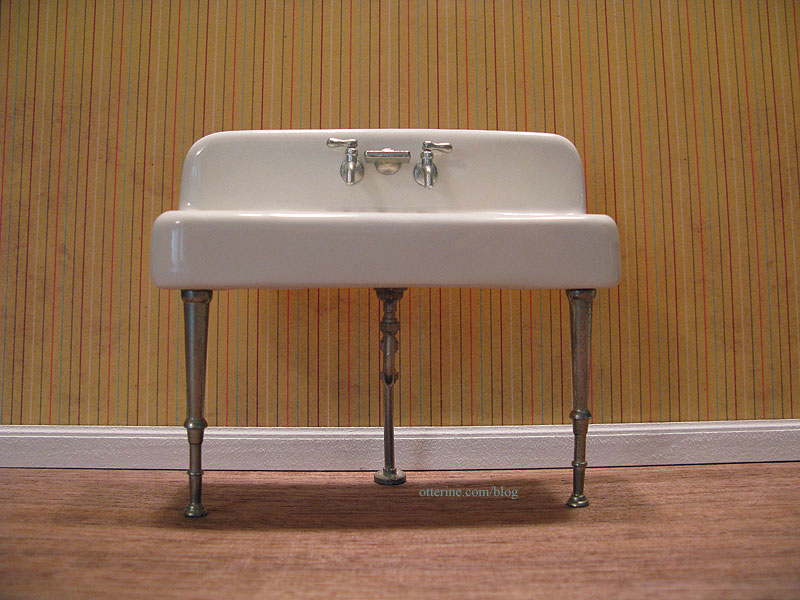
The kitchen sink is one of my favorite minis! The dish drainer is from The Dolls House Mall and it came with a mop, too. The laser cut stainless steel has wonderful detail and looks great for scale.
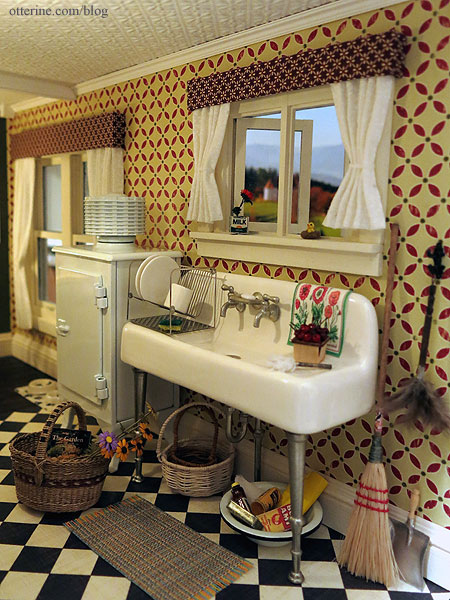
It’s a 1920s porcelain Kohler kitchen sink by Jacqueline Kerr Deiber. I’ve always liked the look of this sink but never thought I’d build a house to use one.
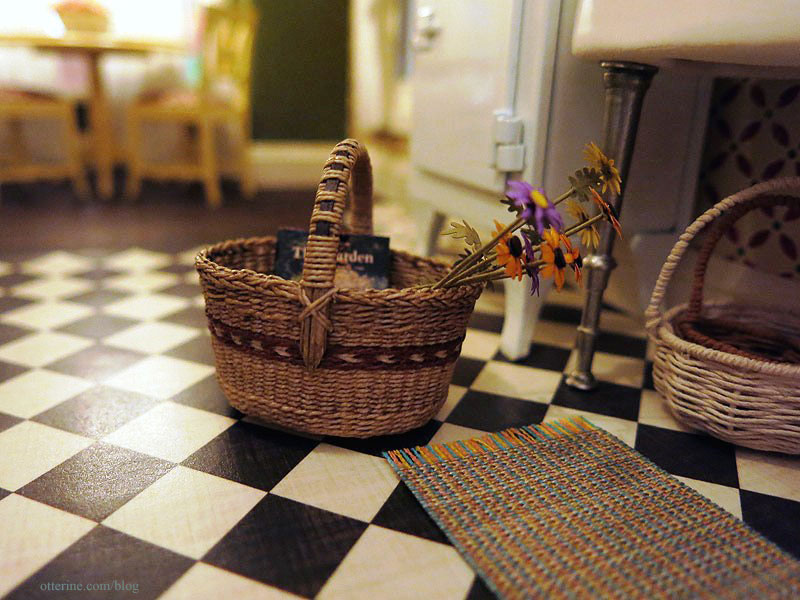
Grandma has her cleaning supplies and some extra baskets under the sink. Lyssa made the beautiful white and brown baskets
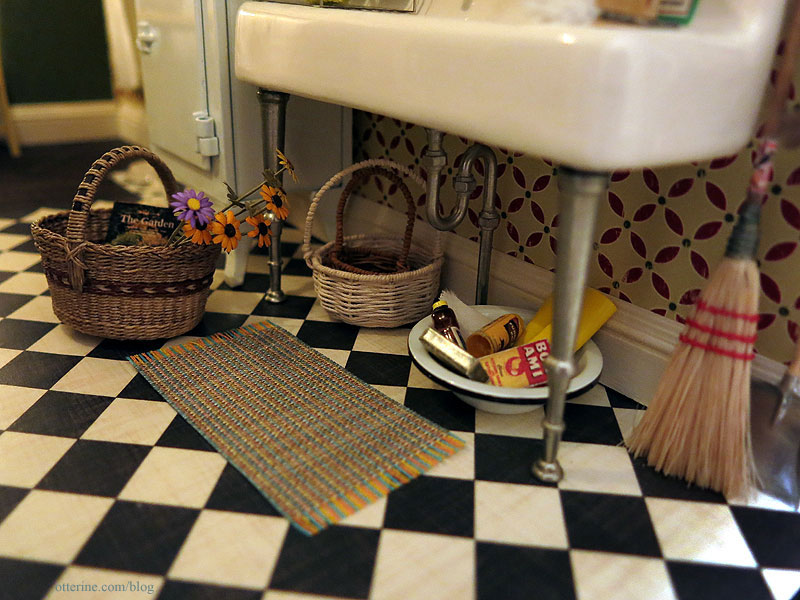
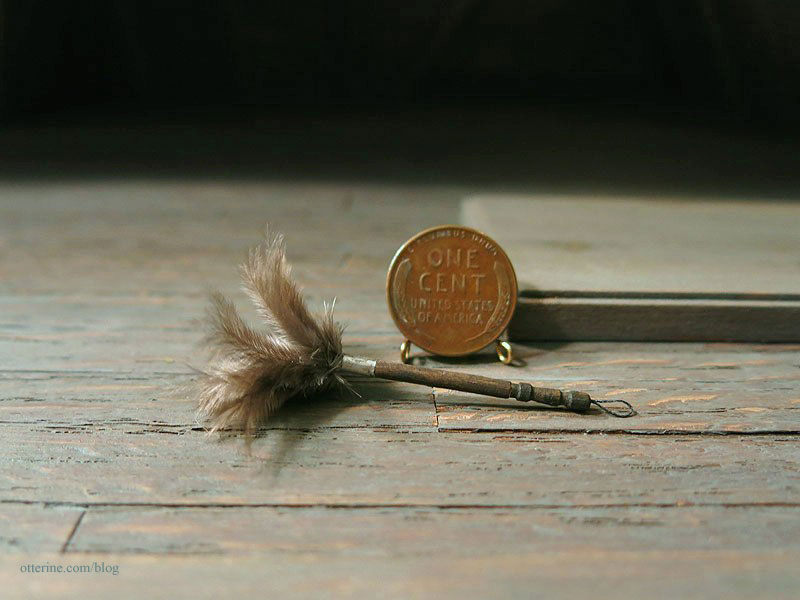
I made the duster from a Silly Sisters tutorial. I added a cord loop on the end for hanging.
The chick in the nest was made by Cathy Rohal.
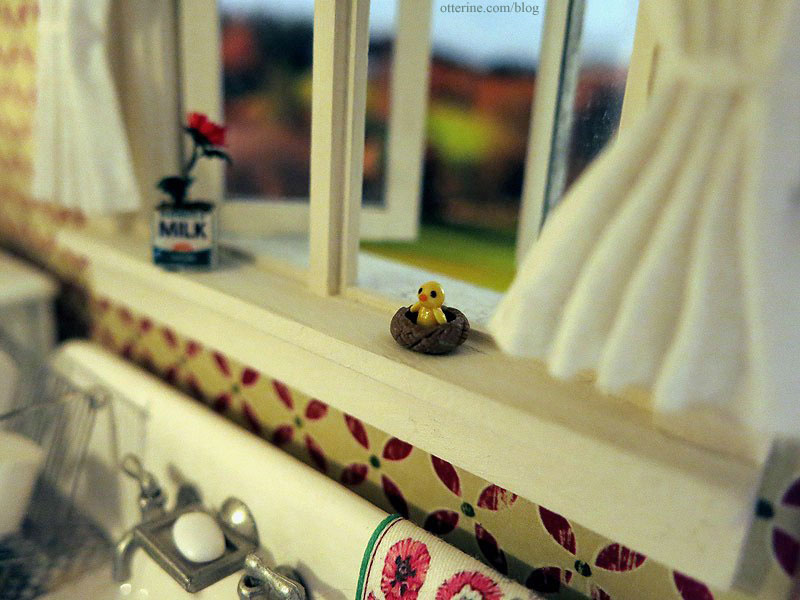
The flower in the milk carton was made from a true2scale kit.
The pint of perfect cherries is from The Garden Path, purchased at a local mini show.

This wonderfully made basket is from Lidi, and I made the Bonnie Lavish flowers from kits.
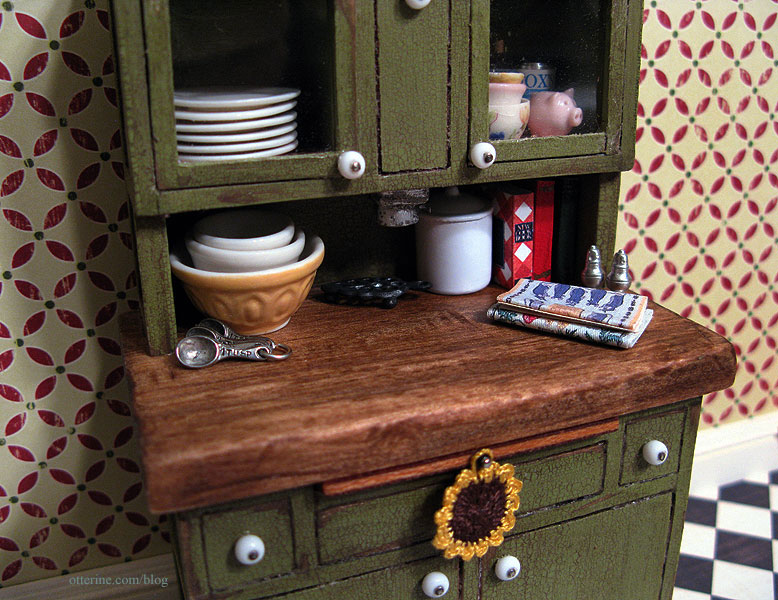
Keli made this amazing Hoosier cabinet for me – such a wonderful and generous gift.
I had to set up the vignette outside of the kitchen to get a photograph of the details since the kitchen is a little tight to fit the camera. The tea towels throughout the kitchen are from Marlene.
I won a lovely cookie baking set from Creating Dollhouse Miniatures. The pieces are so well made and realistic.
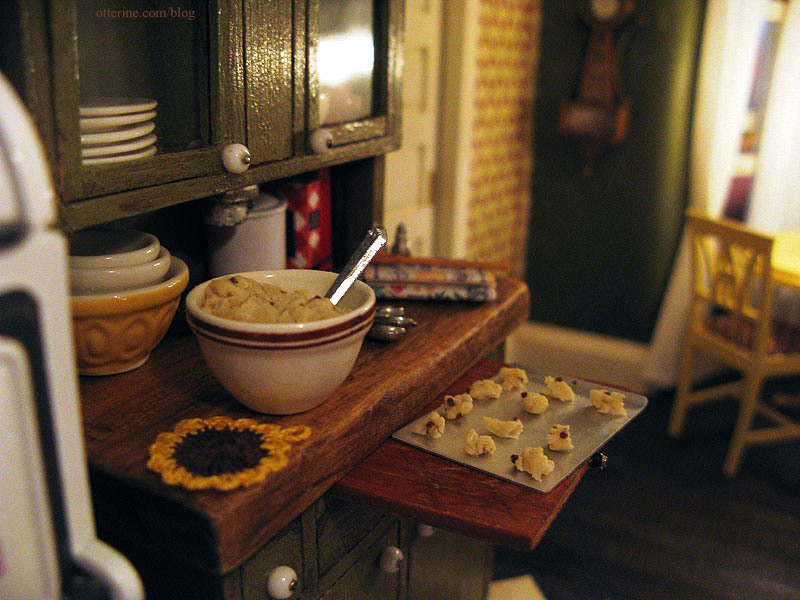
My mom makes the best chocolate chip cookies. No kidding. Every family gathering has people hoarding the cookies she brings, even though she brings dozens! I know chocolate chip cookies, and these minis are just like hers! :D
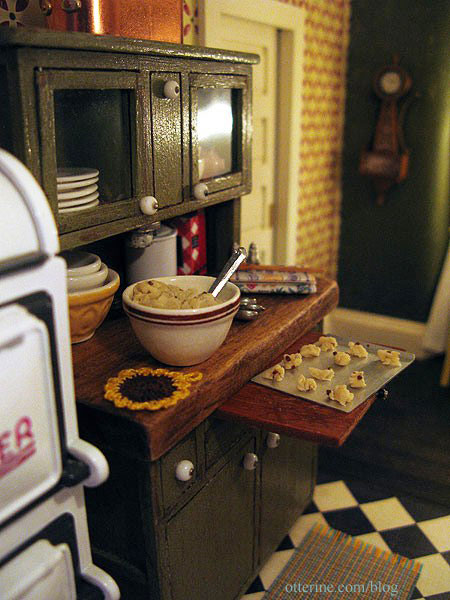
Cookies in progress certainly warm up a kitchen, don’t they?
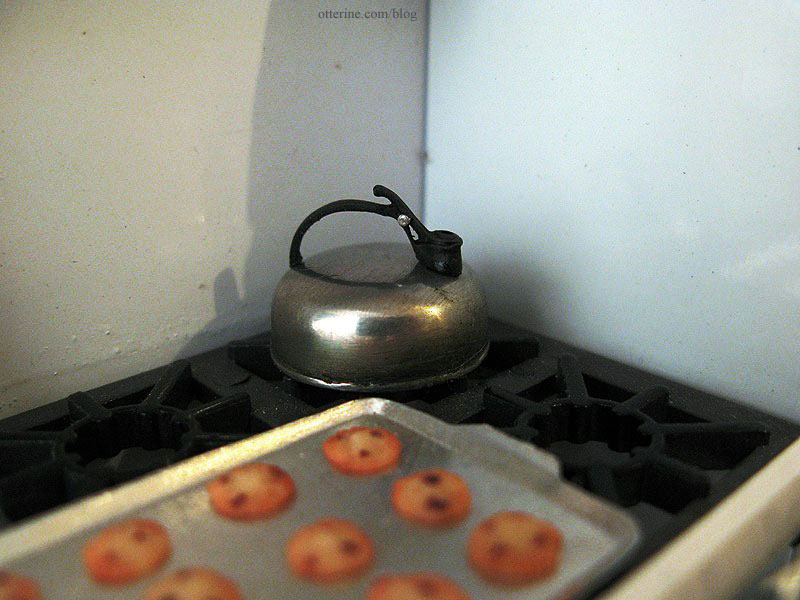
The whistling tea kettle is by Ulus Miniaturas – purchased from Mainly Minis. We had one of these in real life at my childhood farmhouse. Mom still has it and uses it, too!
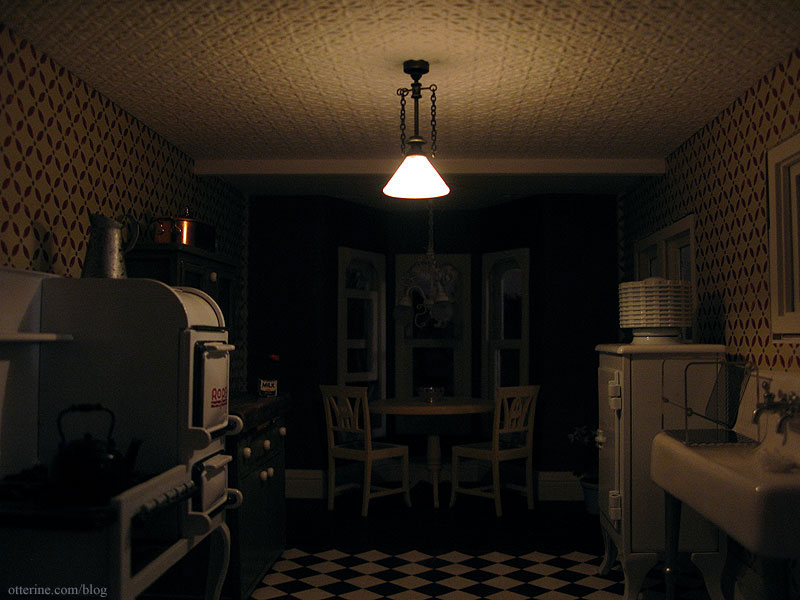
There is a white ceiling fixture above the dining table. Here’s a post on the kitchen lighting details.
The kitchen area has a lovely Ray Storey pendant gas light. If I had had a larger budget, I would have bought the matching 3-arm down light for the dining table. But, the white ceiling fixture is still a beautiful piece. The gas light is very well made. I love the way it highlights the textured ceiling. It’s the perfect vintage touch to the textured ceiling.
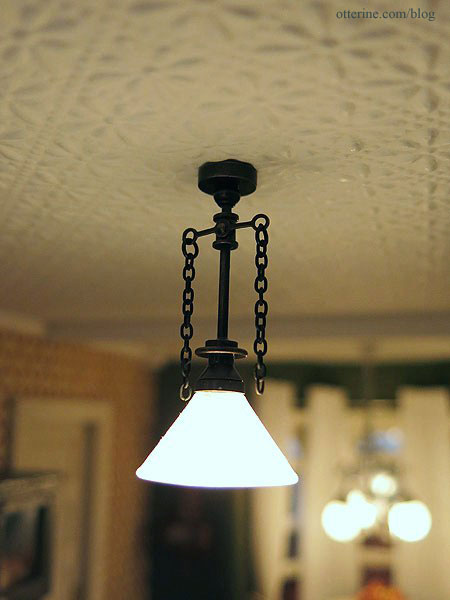
I don’t suppose in reality this dim fixture would do much good in the kitchen for nighttime cooking, but it casts such a wonderfully soft light over this part of the room.
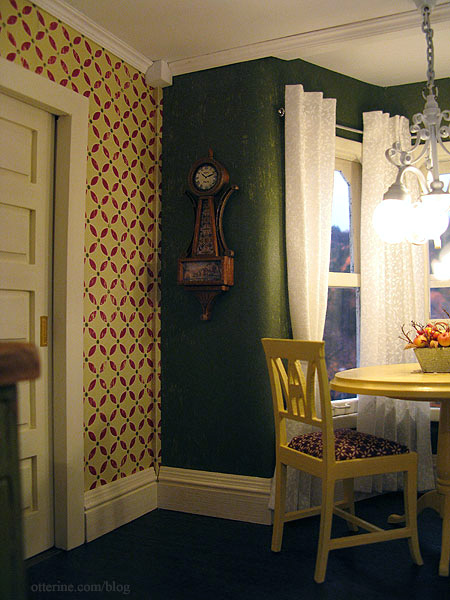
In the bay window nook, there’s just enough room for a small table and chairs. The dining table was made from a House of Miniatures kit, and the Lilje chairs kit came from Art of Mini. For the upholstery, I chose a brown and ivory print. I think it is close enough to the dark red to tie in well with the wallpaper.
The banjo clock was made from a Cynthia Howe Miniatures kit. Love it!!!! :D
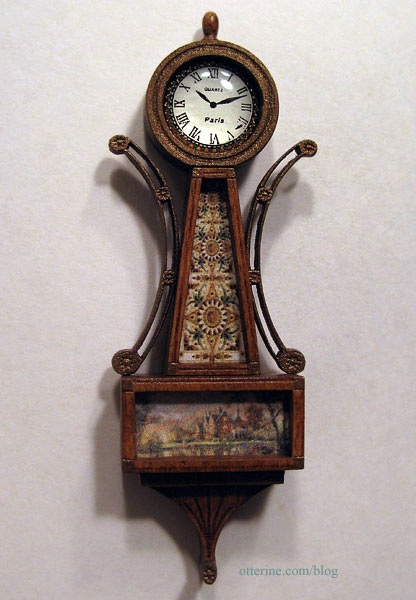
The artwork fits the kitchen décor perfectly, and the cabochon clock face is very realistic. My grandparents had lovely vintage clocks in their home, one of which now hangs in my real life kitchen.
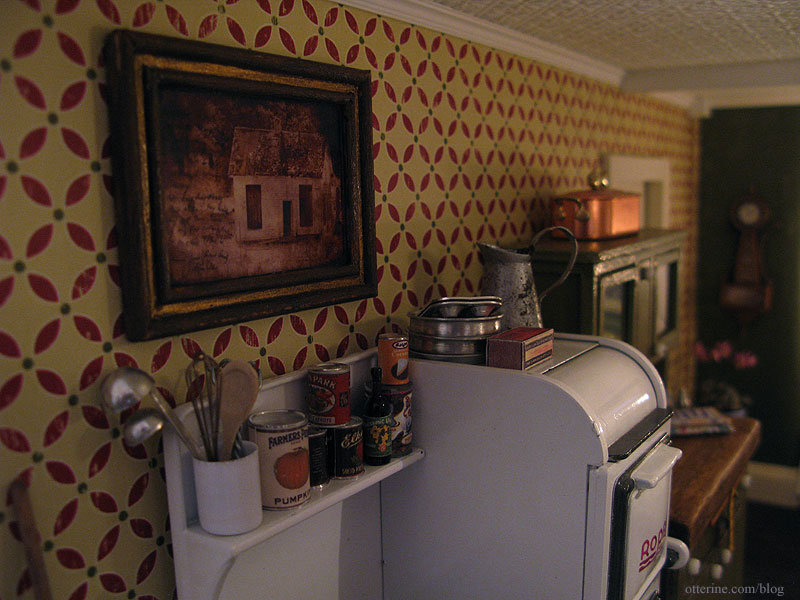
Kelly made this wonderful artwork called Ghosts of the Past. I think it works wonderfully here in the kitchen. Maybe it’s an old faded photo of grandma’s childhood home. :] The lovely pitcher is from Caterina.
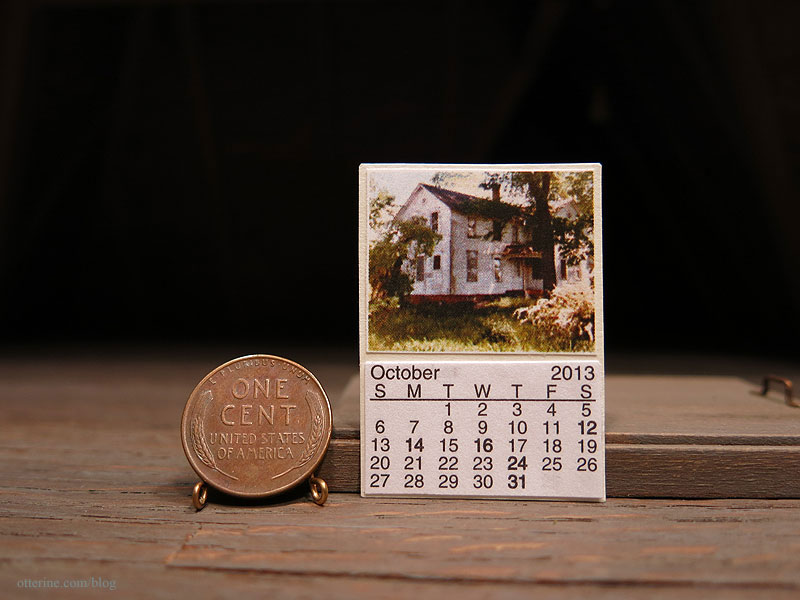
I made a wall calendar using the image of my childhood home, the lovely place from my dreams that inspired this build.
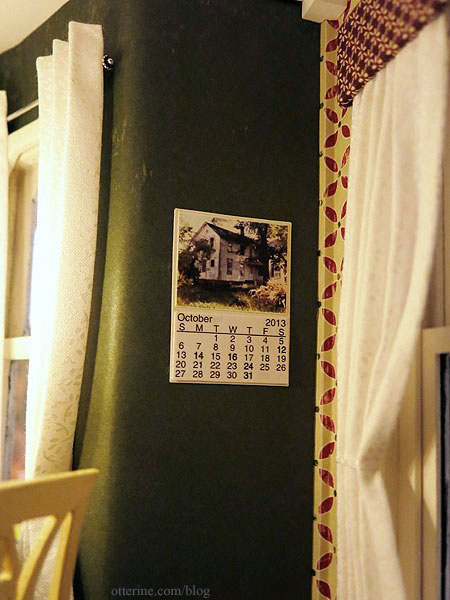
The tiny paper months of October, November and December were cut from a mini desk calendar and pasted to a piece of cardstock along with the printed photo.
The cat bowls are from D’s Miniatures and Collectibles, and I made a mat for them from paw print fabric.
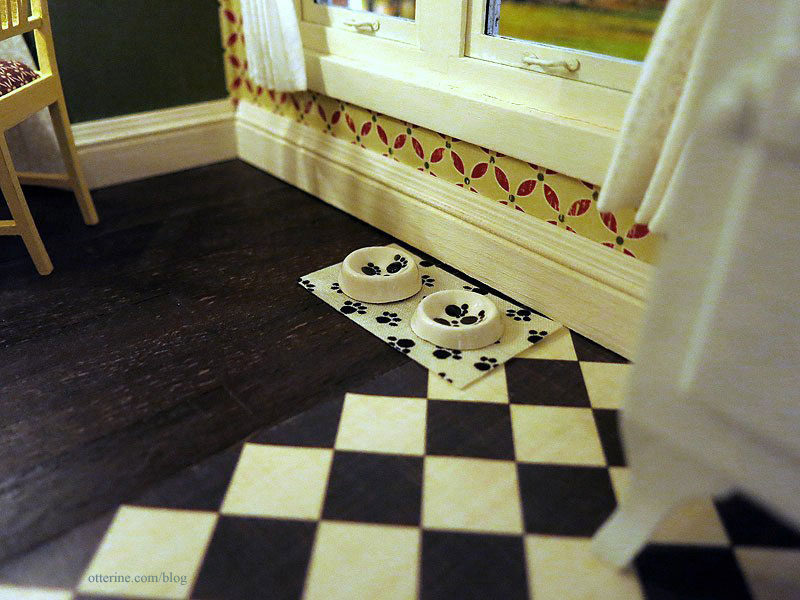
They are under the side window ready for Ophelia.
I love the way this room turned out…now let’s have some cookies!
——
For The Haunted Heritage pictorial recap post, please click here. Click here for a full list of Heritage posts, including how I made things and the materials used.Categories: The Haunted Heritage
August 9, 2013 | 0 commentsHeritage – open back trim details
One of the small things that can make a big difference is finishing the back edges of an open dollhouse. I haven’t needed to do much besides paint these edges in the various houses I’ve built because the wood was nice and clean, or I covered it with another material that eliminated the need for finishing. For The Haunted Heritage, there was channel trim on the outer edges but none on the inside edges. Additionally, some of the inside edges were warped or comprised of multiple layers of wood, like the pocket door wall.

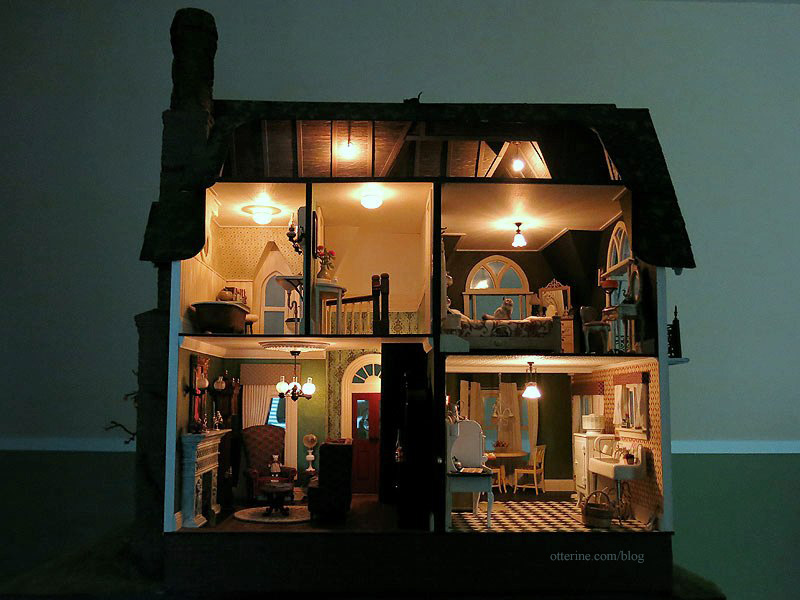
You can see from my previous post on the attic, that the second floor ceiling board is rather uneven. This is due to the fact that I made the board from three pieces, the bathroom wall might be slightly shorter than the bedroom wall, and the parlor ceiling is sagging ever so slightly. Being an old house, it actually works in my favor, but I wanted to tone it down when looking at the open back.
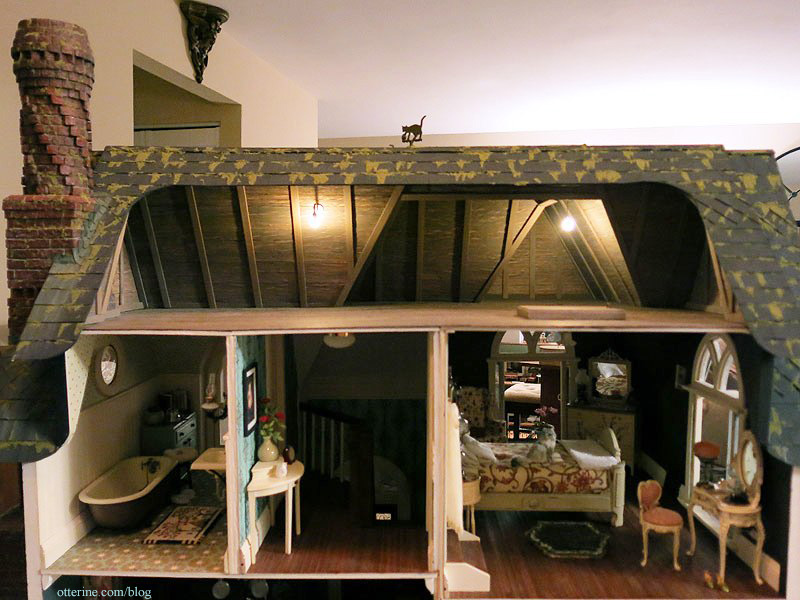
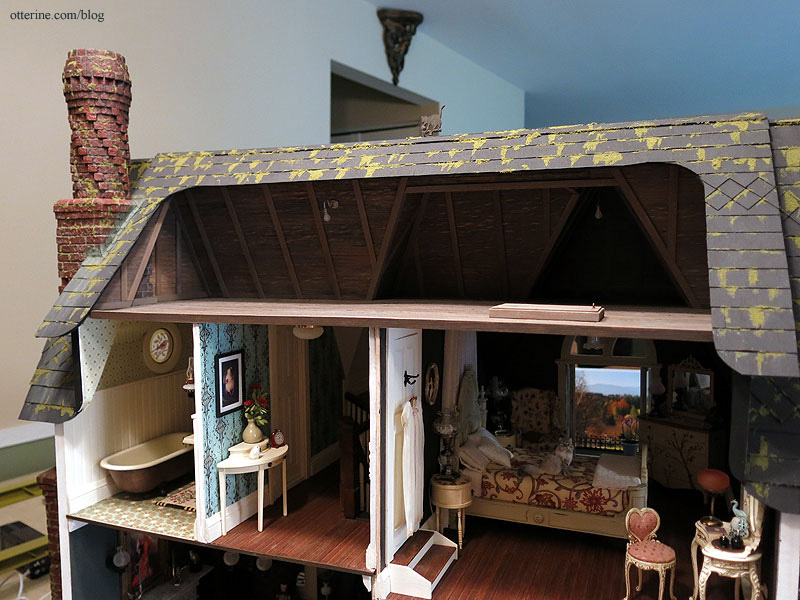
Using one long strip of corner trim across the back edge of the attic floor helps disguise the minor warp between the three boards that make up the second floor ceiling. The back surface of the trim is painted dark brown, but I painted the top portion to match the attic floor.
For the remaining back edges, I used various widths of basswood to make a clean finish.

I painted these dark brown to be less obvious when the open back is viewed as whole.
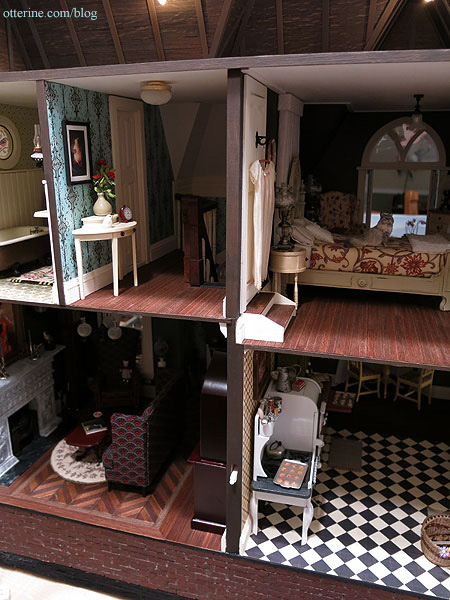
Dark brown allows the edge to fade into the background so the focus remains on the rooms and furnishings.
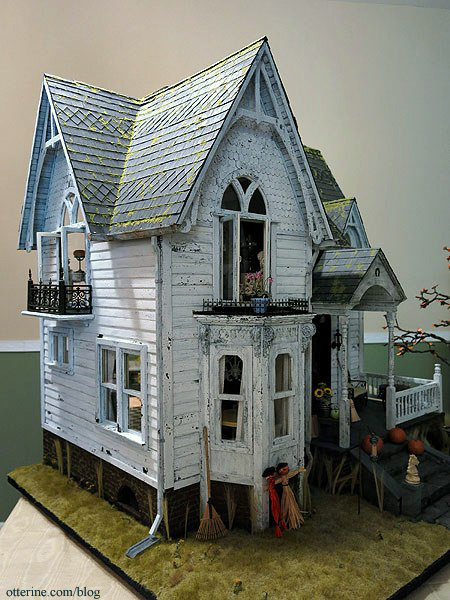
Over the next week or so, I’ll be posting room by room finished settings of The Haunted Heritage. Of course, no dollhouse is ever completely finished, but it’s time for me to wrap this one up and move on to the next great thing! :D
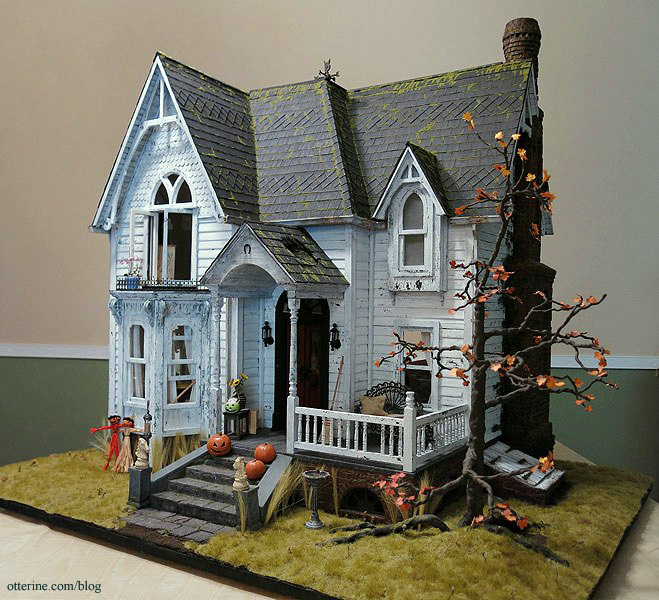
I love the silhouette of the black cat on the roof. :D
Categories: The Haunted Heritage
August 8, 2013 | 0 commentsGrandma’s attic – faux slats and rafters, part 4
I continued working on the faux slats and rafters for the attic. Once the back roof pieces were in place, I could finish up the rafters and trim. To save myself aggravation and ruined trim wood, I used paper strips to measure. I learned to cut the long pieces first since if they are too short, you can still cut your shorter pieces from those lengths. I cut each piece a little long so it would need just a bit of sanding to fit in place. The paper patterns worked especially well.
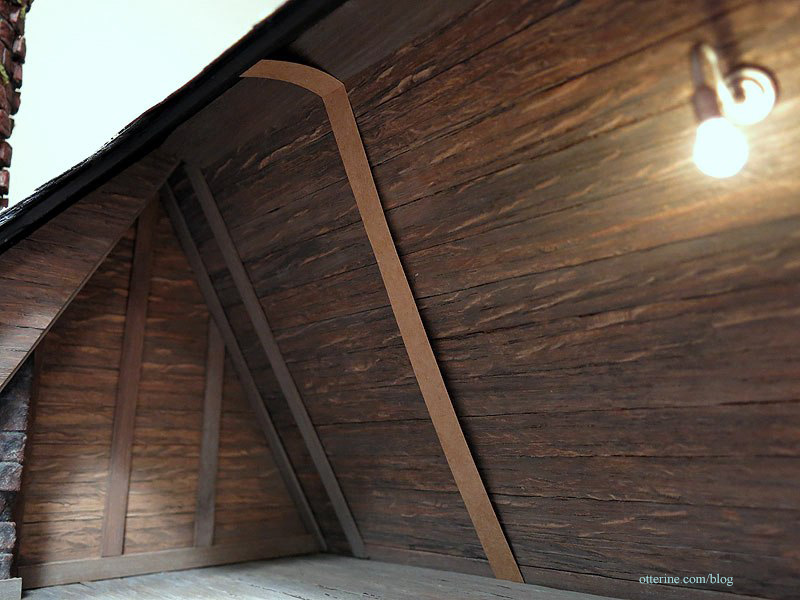
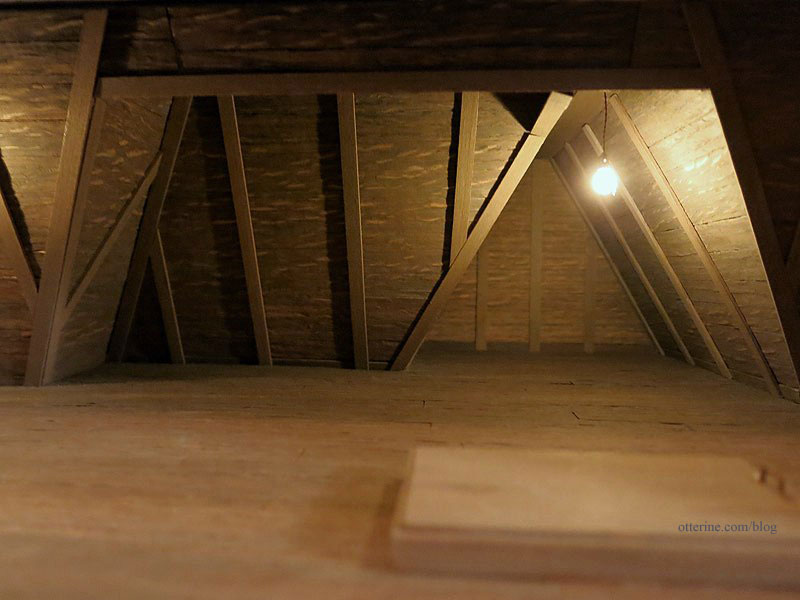
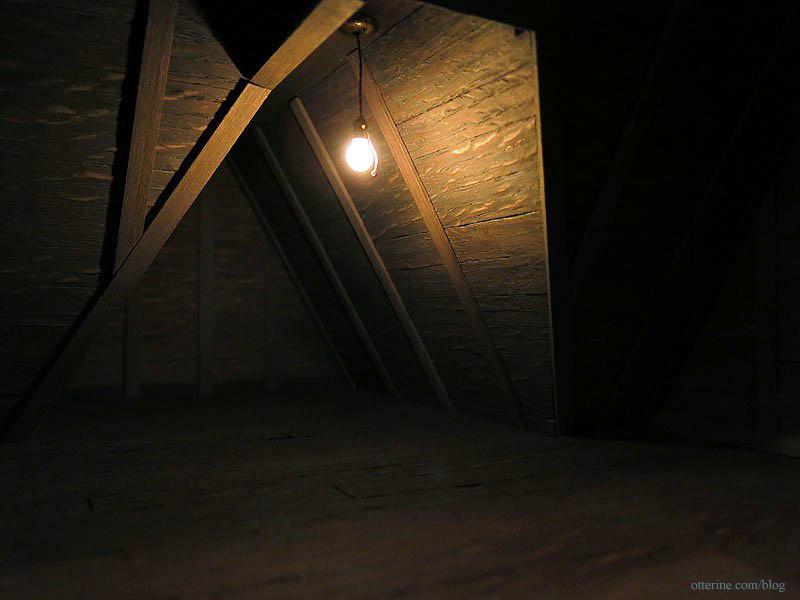
The layout I used was mainly to give the illusion of structure without much concern for how rafters would actually be placed for support. I needed to finish the edges of the cross boards and corners, and this configuration accomplishes just that. In fact, I can see in these photos that I missed the short vertical boards above the main cross beam in the middle. I have enough scraps to fix that.
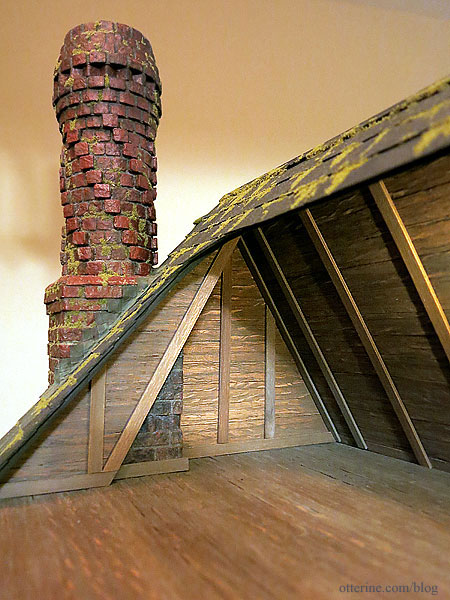
Love the tiny bit of chimney in the attic. :D
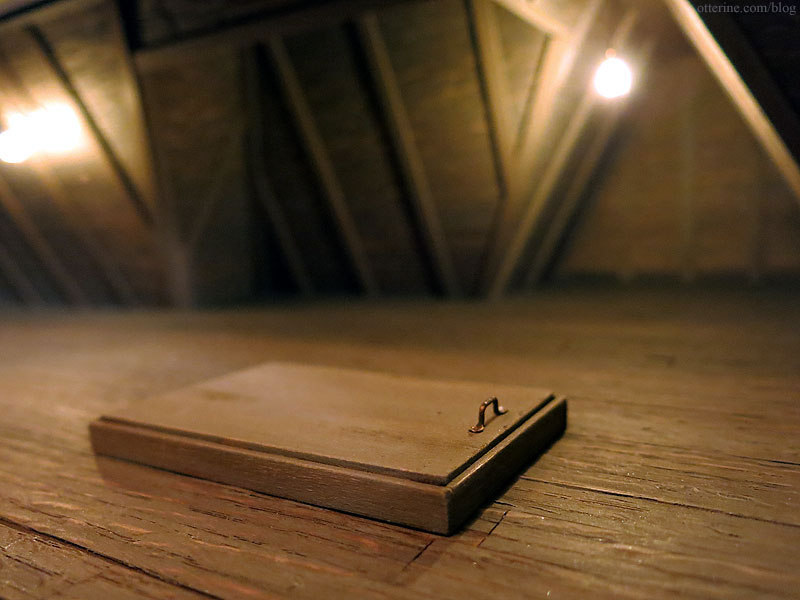
The last item in the attic was the faux stairs. I put one of these in Baslow Ranch based on the Greenleaf tutorial. I altered the upper portion a little, making the door taller than the sides.
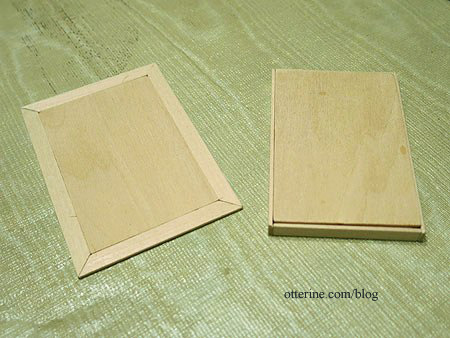
It’s not yet glued in place since I need to determine where the lower door will be on the second floor. Most likely, it will end up installed in the bedroom since that room has the largest ceiling expanse. I had originally planned to have this in the bathroom but there was no room there to realistically have stairs that pull down. The same issue arose in the hallway. That leaves the bedroom. It’s a small detail and should be not at all obtrusive.
I love the atmosphere of this space.
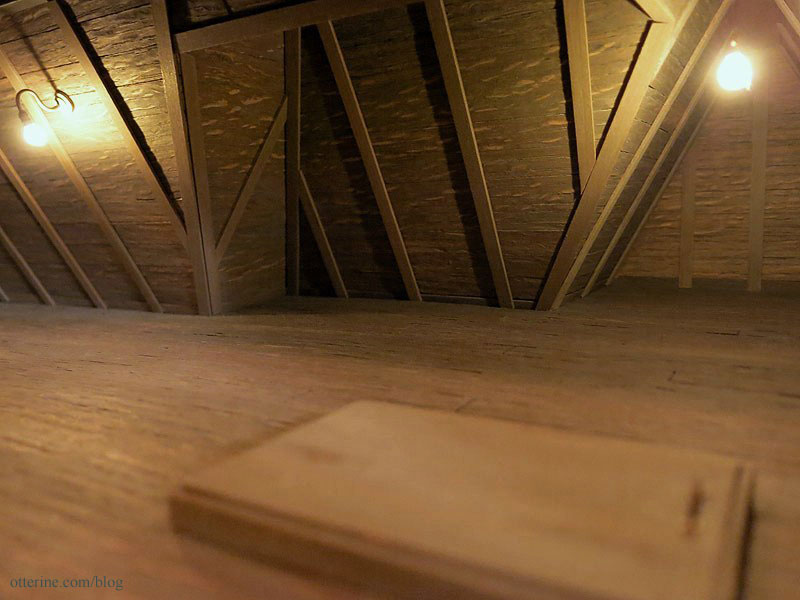
Even empty it exudes character. Hmm…looks like I need another vertical board in the front gable, too.
Overall, it’s really taking shape.
Categories: The Haunted Heritage
August 5, 2013 | 0 commentsHeritage – gutters and downspouts, completed
Finishing work on the gutters and downspouts. The original kit intended for only the left side to have a downspout yet there would be gutters all around the front.
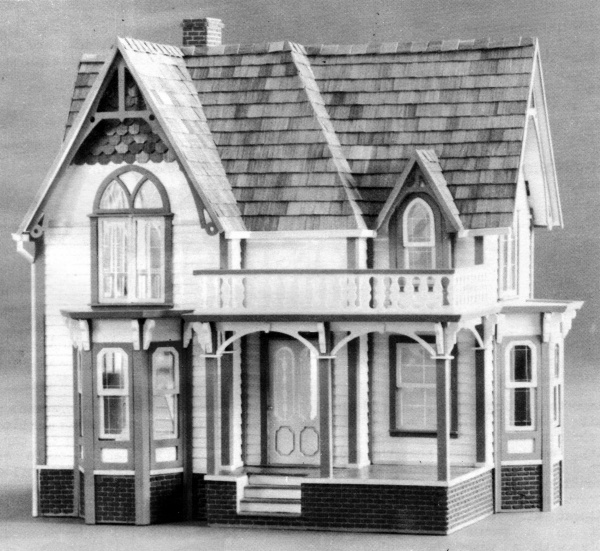
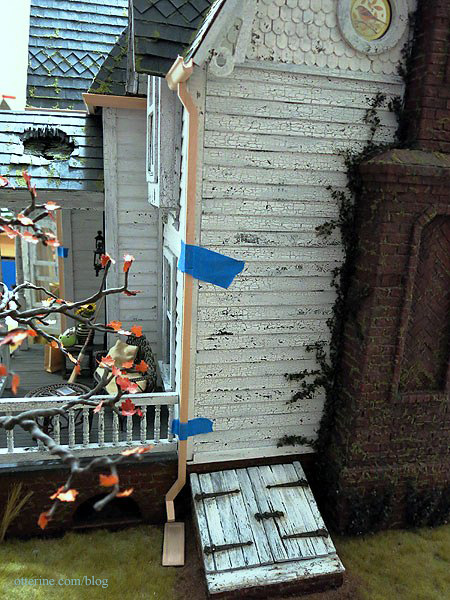
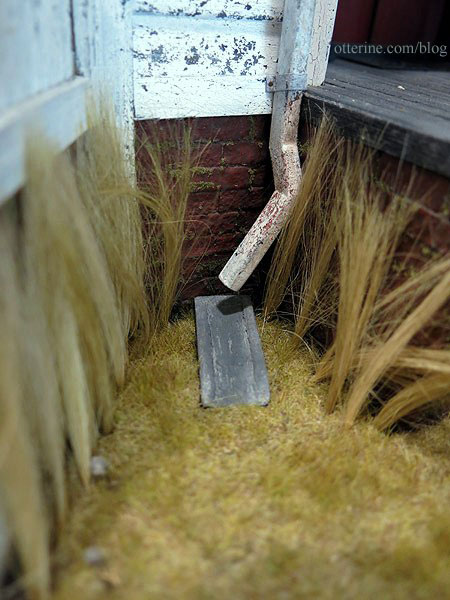
Well, that wouldn’t do! Water would be pouring over the sides all over the entryway and porch. The middle gutter required a diverted end to move away from the house and empty into the splash block.
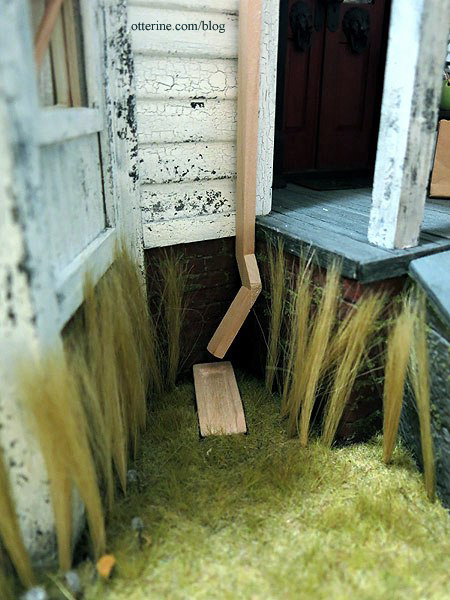
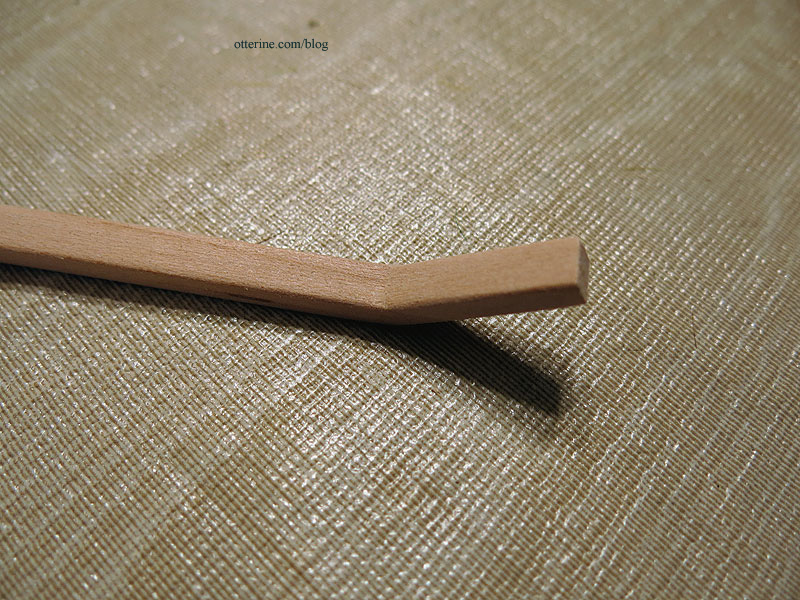
I found a website with a flat bent downspout to help me figure out the shape I needed.
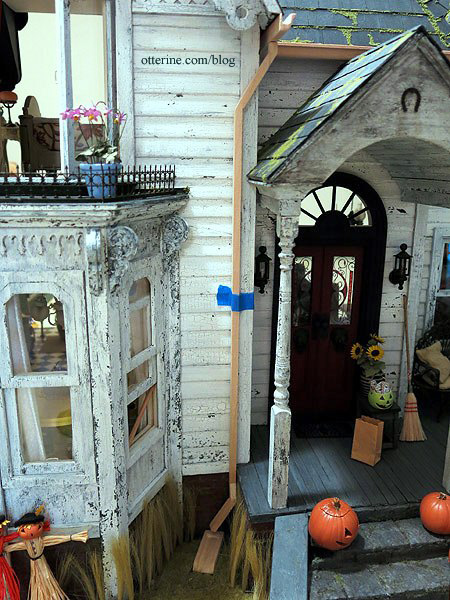
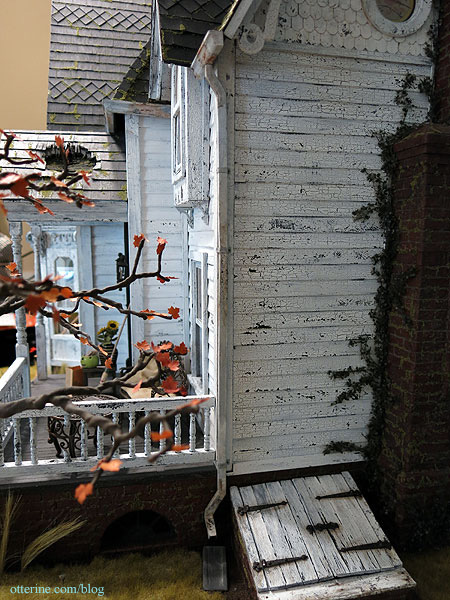
The last gutter required some demolition. The cellar doors had to be moved over about 3/4″ closer to the chimney. There was room, but it was a pain prying the assembly off the base. I built things securely. Anyway, I took no photos of the process since I worked fast to put it all back together. I glued some new dirt cover over the bare spots and then needed to wait for that glue to dry. I still have landscaping to finish besides, so it’s not much of a big deal, just a speed bump.
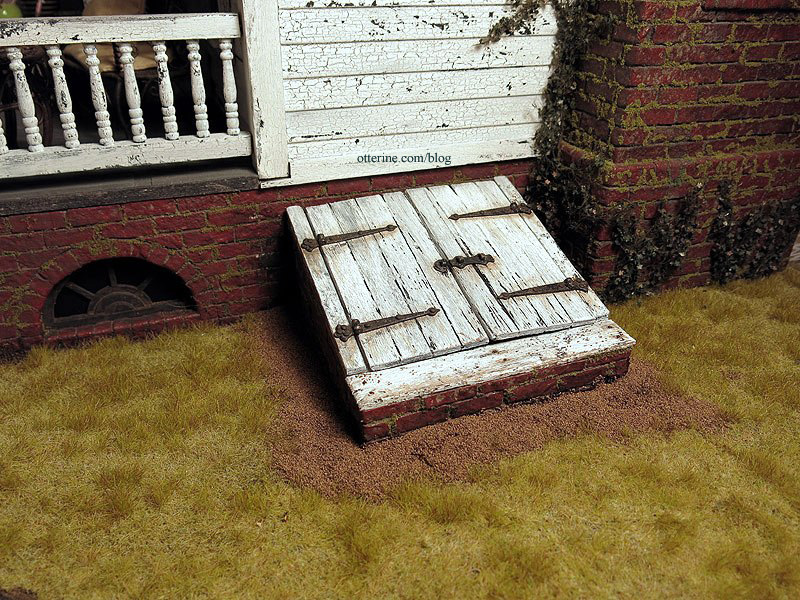
With the cellar doors moved, the final side downspout could be finished without looking like a wet noodle stuck to the wall. :]
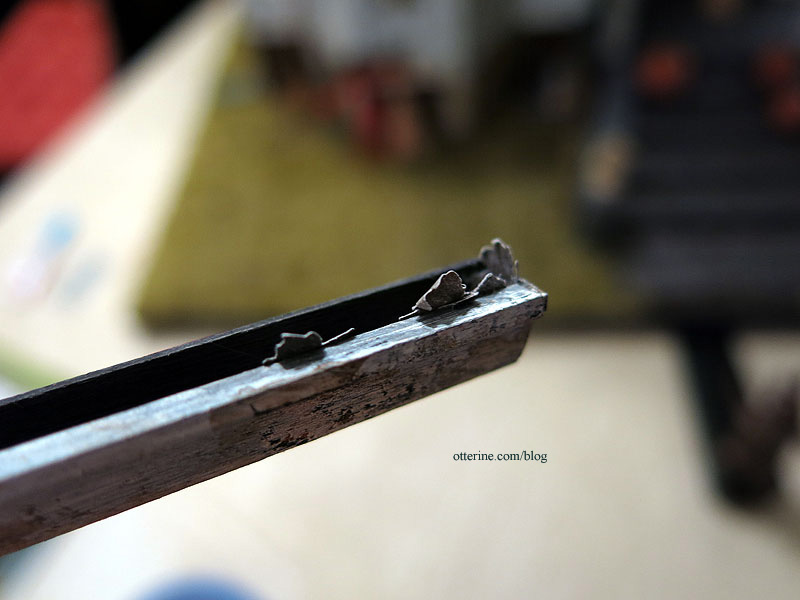
To make the end caps for the gutters, I added pieces of cardstock cut to shape.
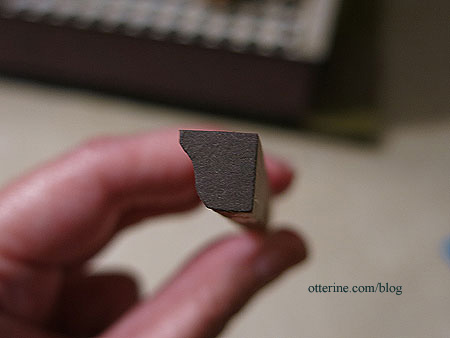
I sanded the edges and turns of the downspouts to be more rounded.
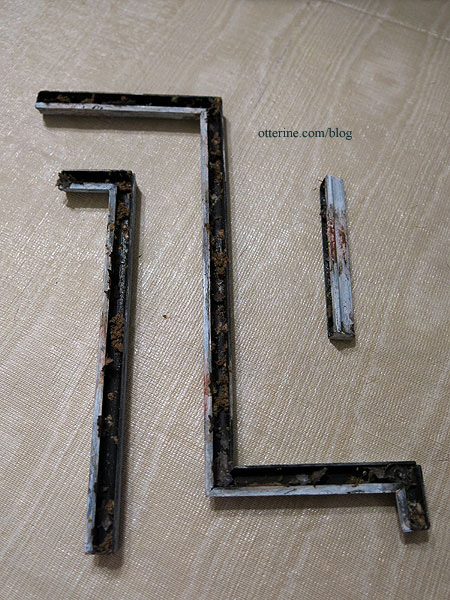
To give them a bit of age, I first painted some spots Terra Cotta by Americana, followed by crackle medium. The rest of the pieces were painted black. They look like coral snakes! :D
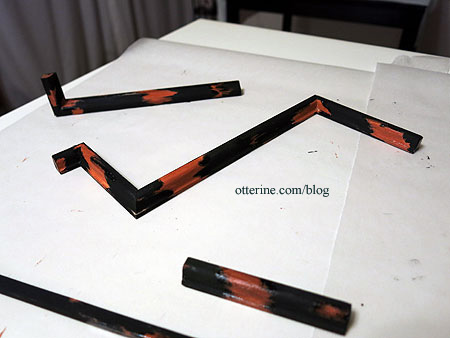
When I painted white over the assemblies, the black paint toned down the brightness of the white overall, and the paint flaked where there was crackle medium.
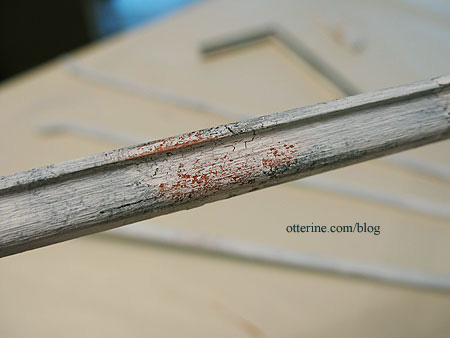
With a slight terracotta and brown wash, it became rusted flaked paint. :D
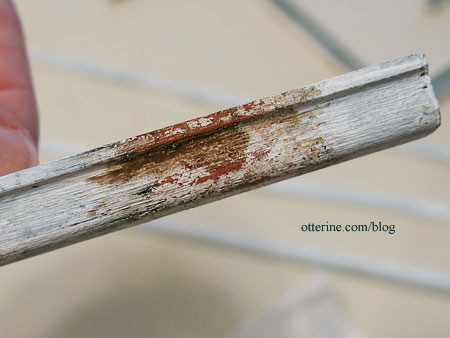
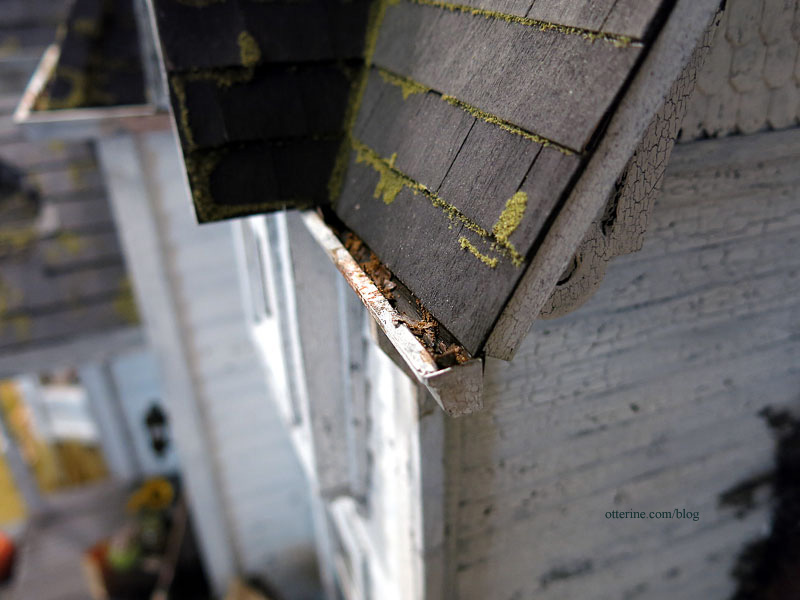
I added an aging wash to the whole thing and then dirtied up the inner track since these are old gutters. I painted some scraps of paper with the leftover paint washes and let them dry.
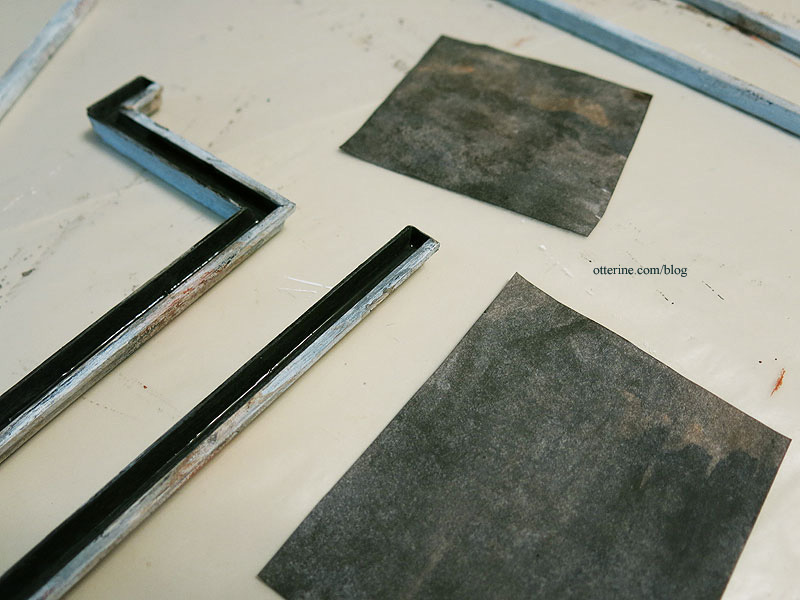
I punched as many maple leaves as I could from the scraps.
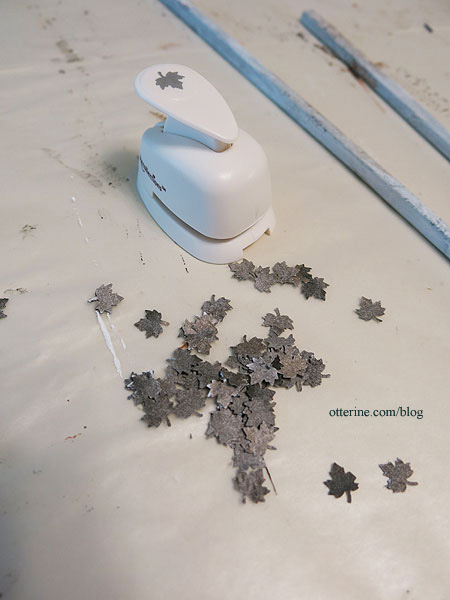
I smashed the leaves and glued them into the track, some sticking out over the top edge.
I glued in some moss material besides.

I then added a final brown wash. Voilà! Good and dirty gutters. :D
I glued the assemblies to the house, and the downspouts helped hold the gutters in place while the glue dried.
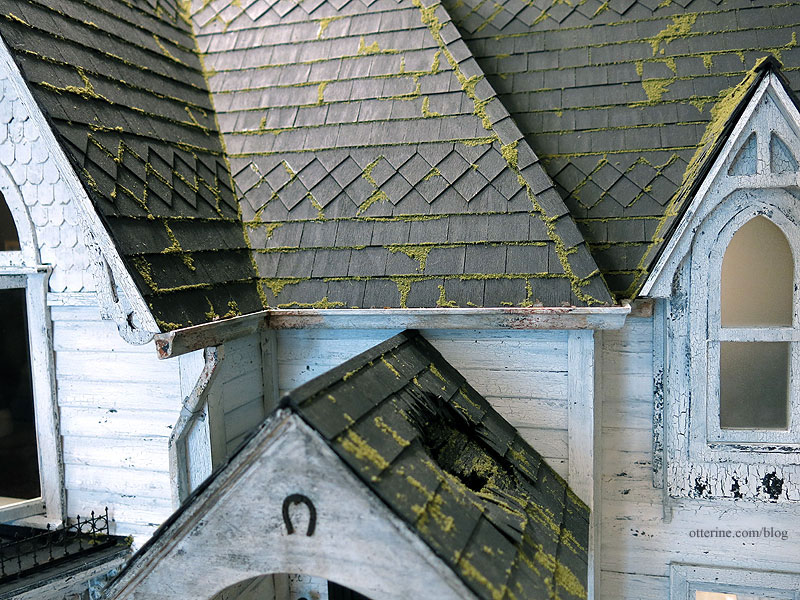
The bottom ends of the downspouts aren’t easily seen, but I did paint them black to give the illusion of being hollow.
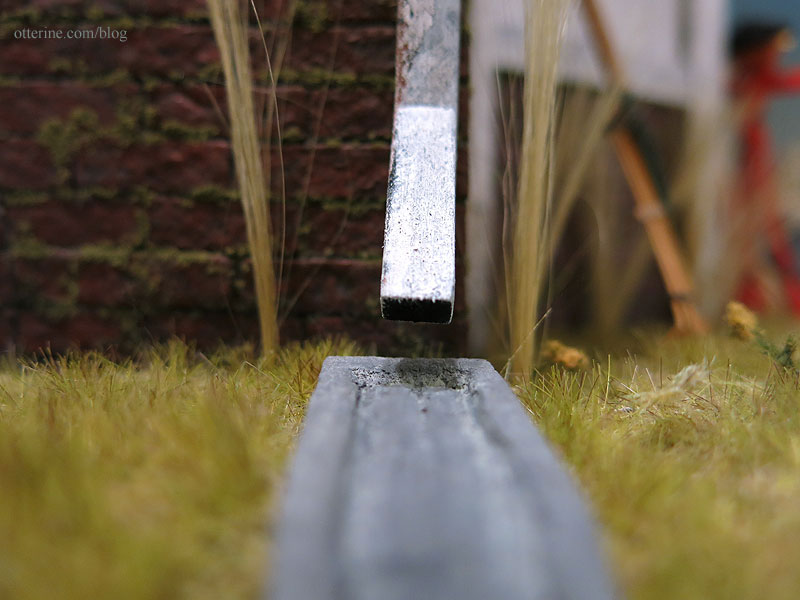
I painted the splash blocks to look like concrete.
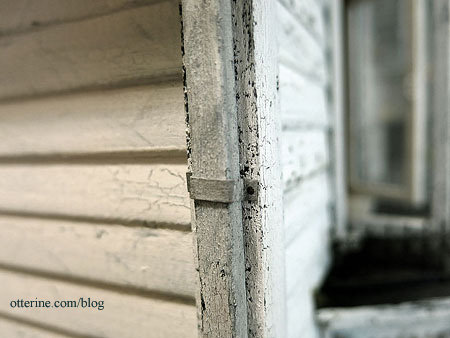
The straps are cardstock. I cut them long so I would be able to work with them during the final fitting.
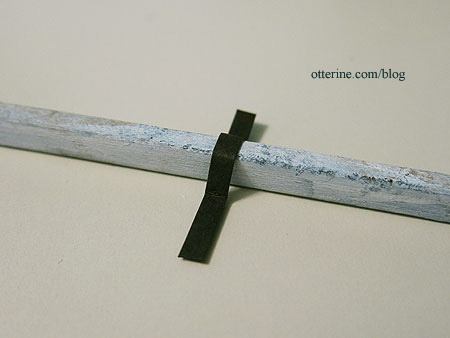
I painted the paper with a grey wash and then glued them in place. The nails are just painted dots. The straps are mostly decorative since the downspouts are glued in place.
It really adds that little something, no?
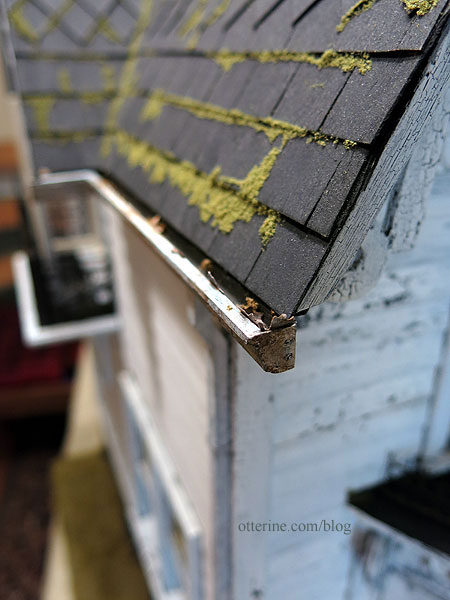
Grandma has no leaf screens, so looks like she’ll need some yearly help getting these cleaned up. :D
Left assembly.
Middle assembly.
Right assembly.
Almost done with the exterior! Hooray! :D
Categories: The Haunted Heritage
August 4, 2013 | 0 comments


NOTE: All content on otterine.com is copyrighted and may not be reproduced in part or in whole. It takes a lot of time and effort to write and photograph for my blog. Please ask permission before reproducing any of my content. Please click for copyright notice and Pinterest use.


