
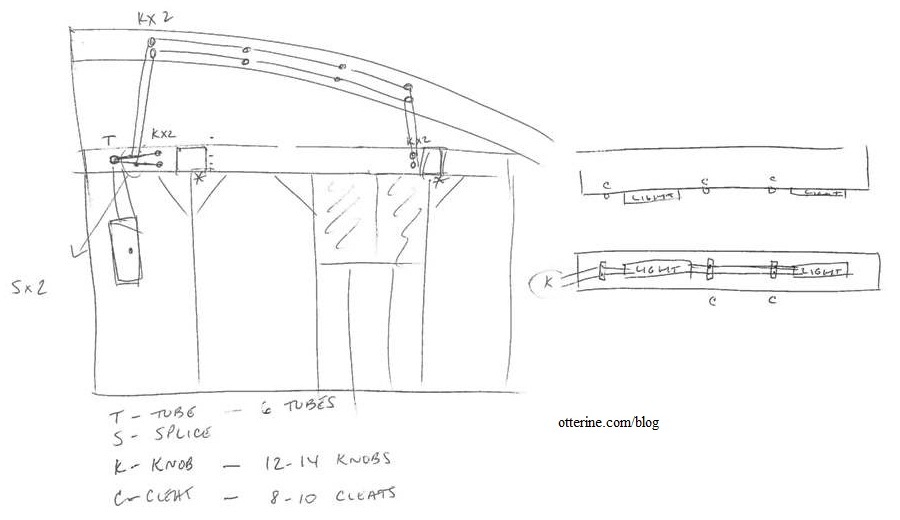
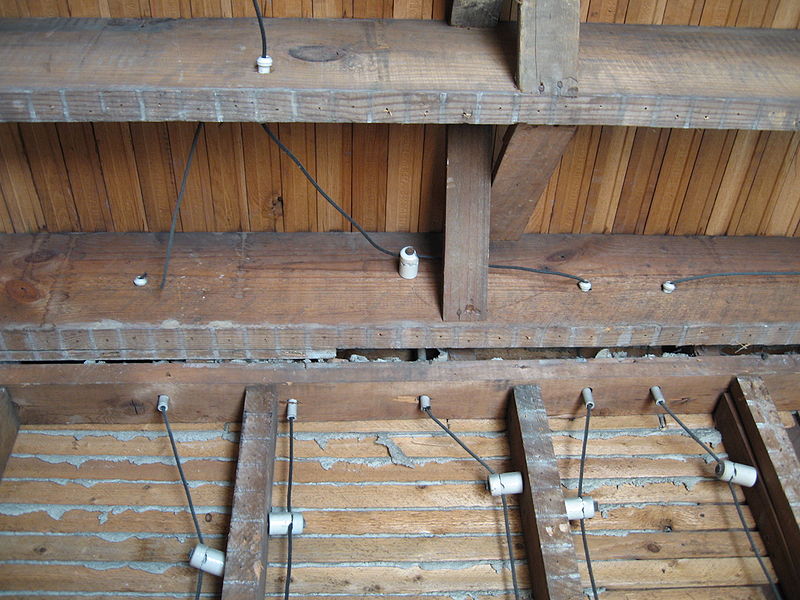
With the 12V lights wired, I continued the knob and tube system along the side wall. This was my initial map (I changed the cleats to knobs in the last post).
I started with the lower cord from the back cross beam. The process is the same as it was for the cross beam knobs: headpin through the upper knob portion, through the cord, into the lower knob portion and glued to the wall.
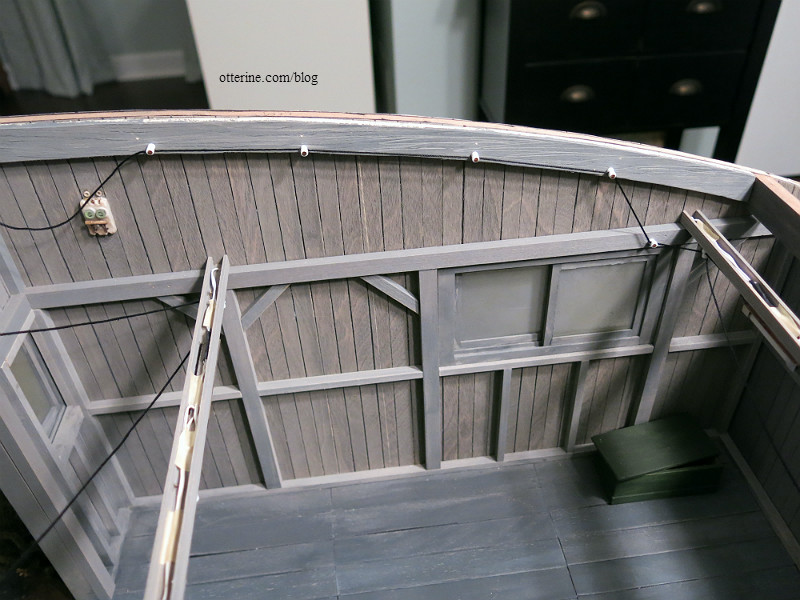
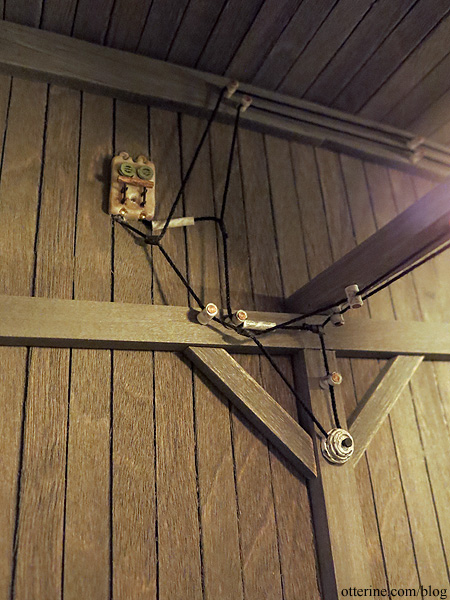
Once that track was in place, I addressed the upper cord from the back cross beam. After reaching the front of the barn, I had to splice the cord wires together. I used masking tape then painted it black.
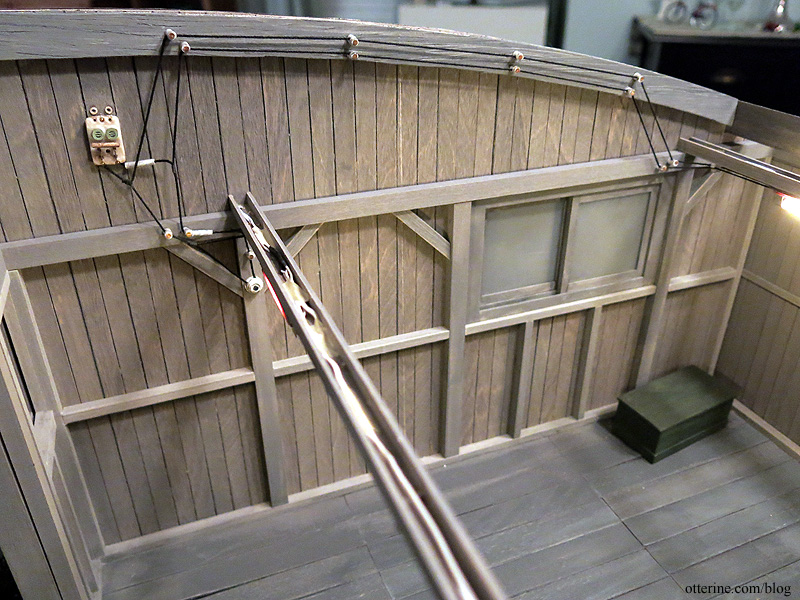
Those four splices required an unusually high amount of curse words to fall into place. Anytime the two cords touched, I slipped a cut of plastic tube onto the cord. One splice is damn close to a knob nail — likely a scary feature of many a real barn. :O
As I mentioned before, much of this exposed work would have been done with cleats instead of knobs, but I like the look of the knobs and perhaps the builder just used whatever he had the most of in the old barn. Here’s an excellent video on knob and tube from Edison Tech Center.
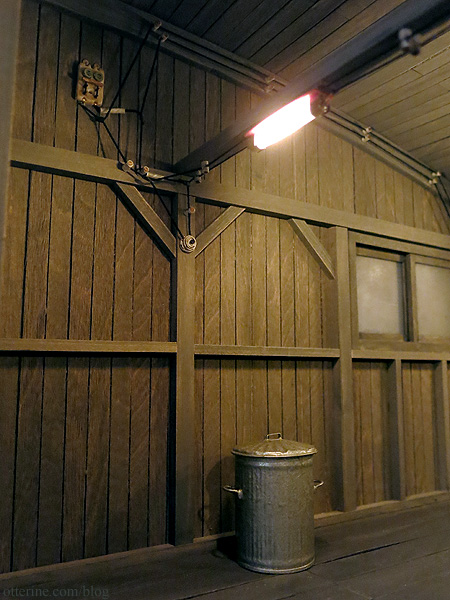
I led the wires down the wall to a key switch (made from a bell push from Sussex Crafts and a wood disc). I will add the “safety feature” rope to yank in case of disaster closer to the end since it will just be in the way when I attach the exterior electrical wires to the fuse block.

It may seem low, but it’s only because there’s nothing to show the spatial relation of the barn. :]

To age all of this madness, I scraped some chalk pastel dust into a bowl and then dusted it onto the cord. It toned down the true black of the cord material. I used some grey and brown paint mixed with Americana Staining Medium to dirty the knobs and tubes.

This whole setup is damn scary, so it’s a good thing it’s just for show. ![]()
A lot of this was guesswork since much of the knob and tube wiring examples I found are modern inspection photos of improper splicing with modern wiring. But, I think I managed to capture the essence of it, no? :D
Only a few things are left for the actual barn structure — barn doors, exterior electrical work, landscaping and roof. I think I’ll leave the roof off until I am done with the car, which will have to wait for spray painting weather. So, I’ll work on the barn doors next.


