
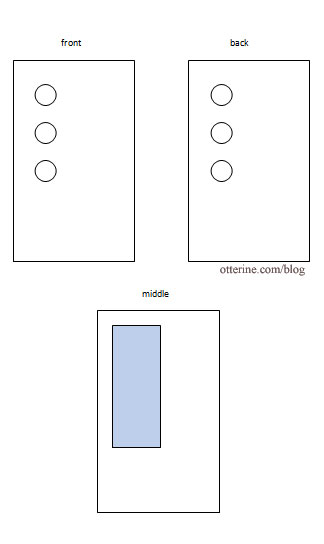
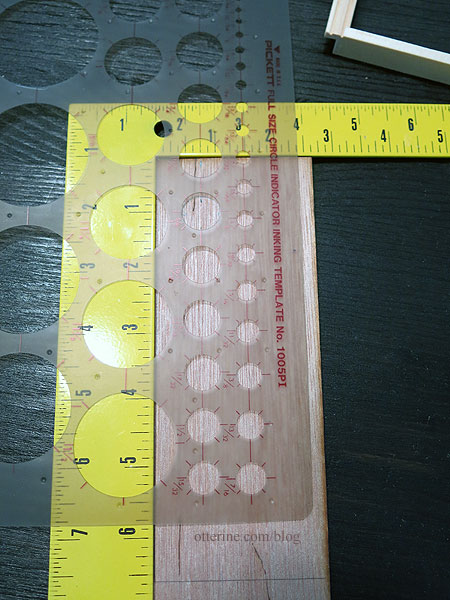
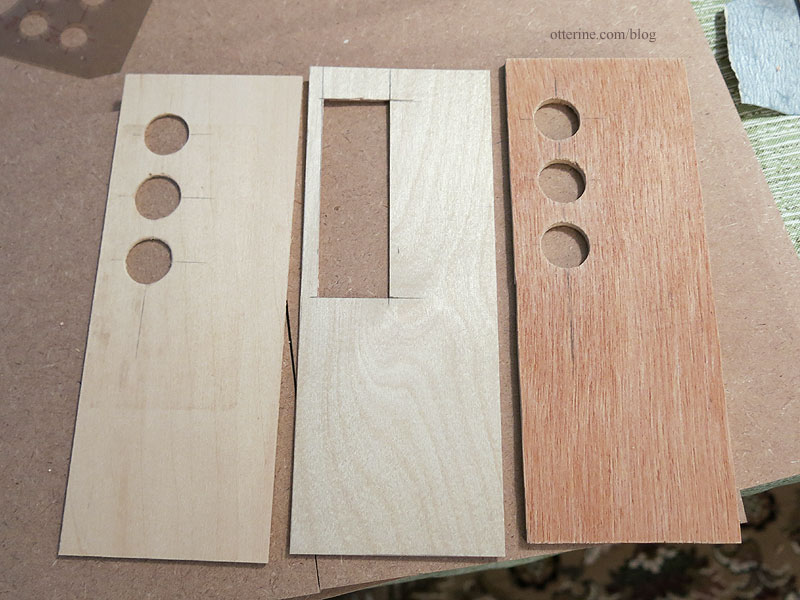
I want a custom door for the Creatin’ Contest build, so today I tackled cutting the basic pieces. The door will have three circular windows, so I opted for a layer cake building method — a front piece with the three holes, a thinner middle piece with a section cut out for the acrylic insert, and a back piece with the three holes.
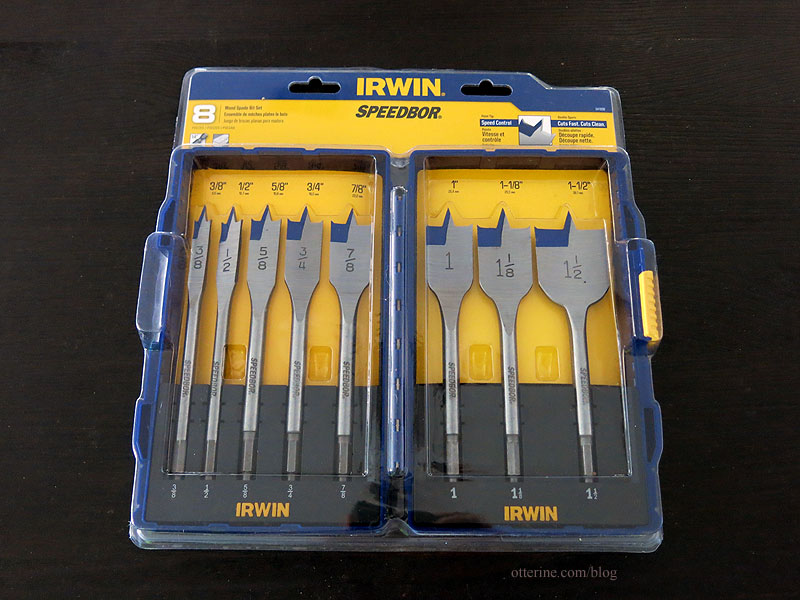
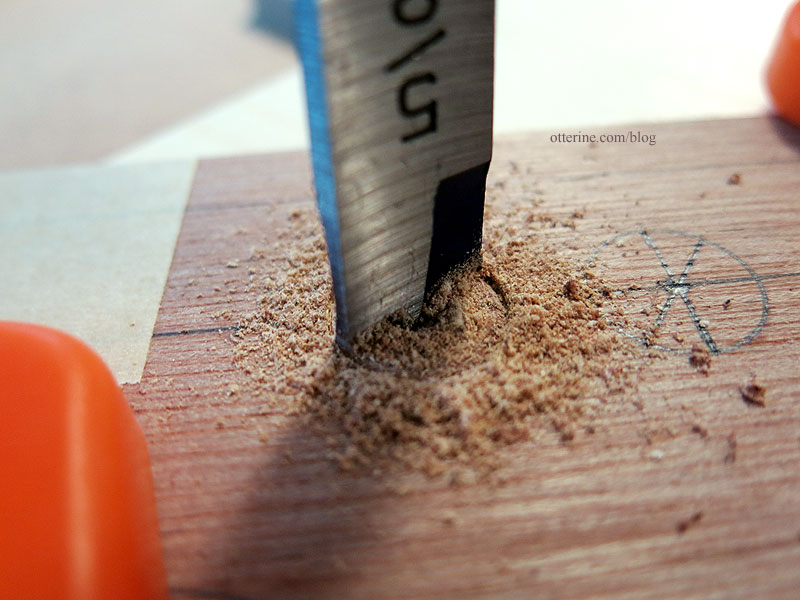
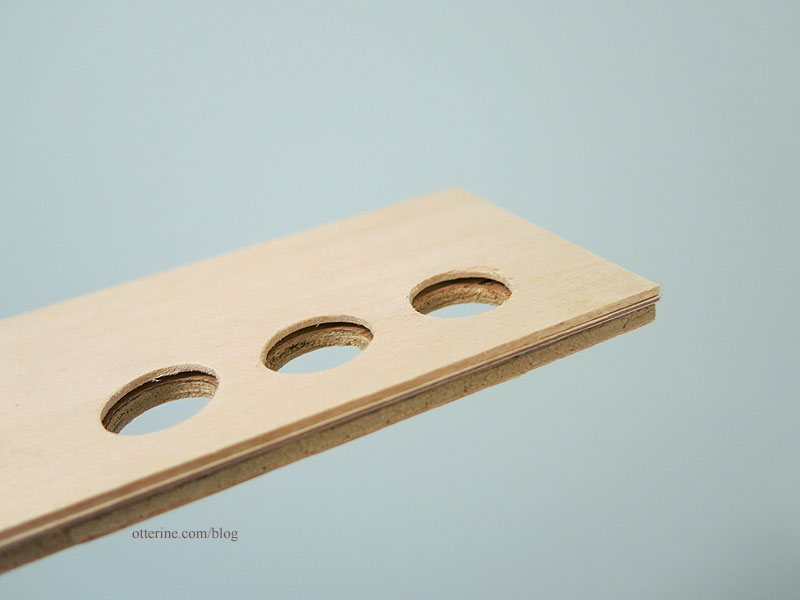
Since the windows will measure 5/8″ in diameter, I needed a tool other than the circle cutting guides for the Dremels. I bought a set of spade bits at the local Ace Hardware.
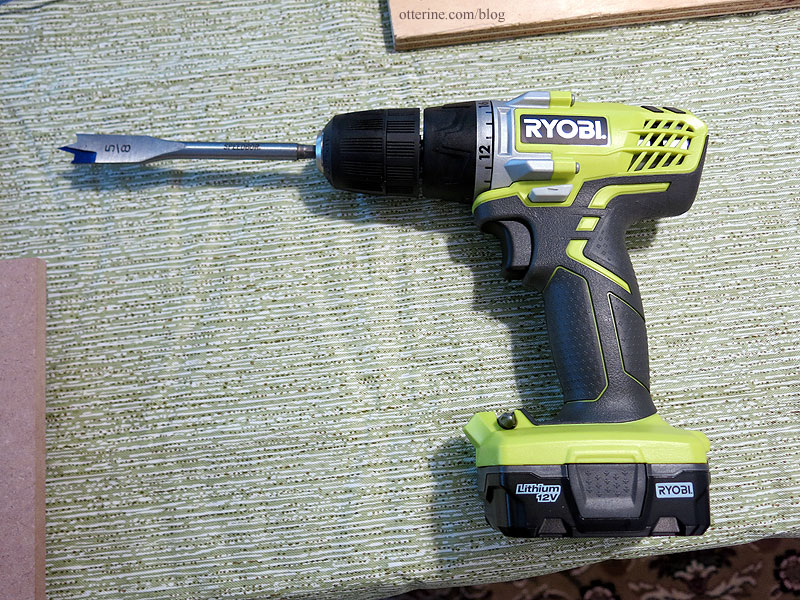
These fit into a standard drill.
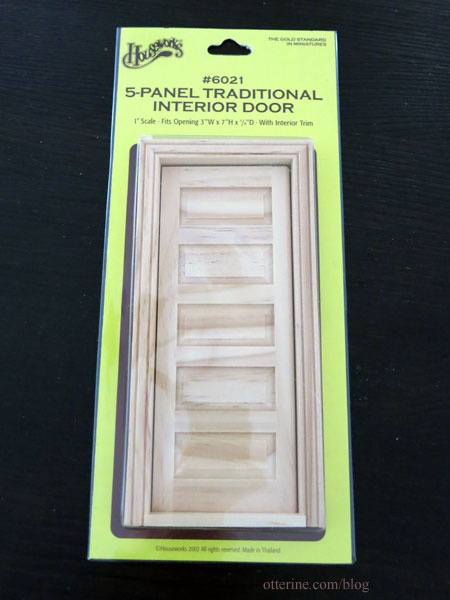
I didn’t feel like building a door frame, so I started with a Houseworks door. The insert here won’t go to waste since I’d like to make another working pocket door at some point.
Using a circle template, I drew my layout on the top board. This was made from a spare piece of 1/8″ Greenleaf kit plywood.
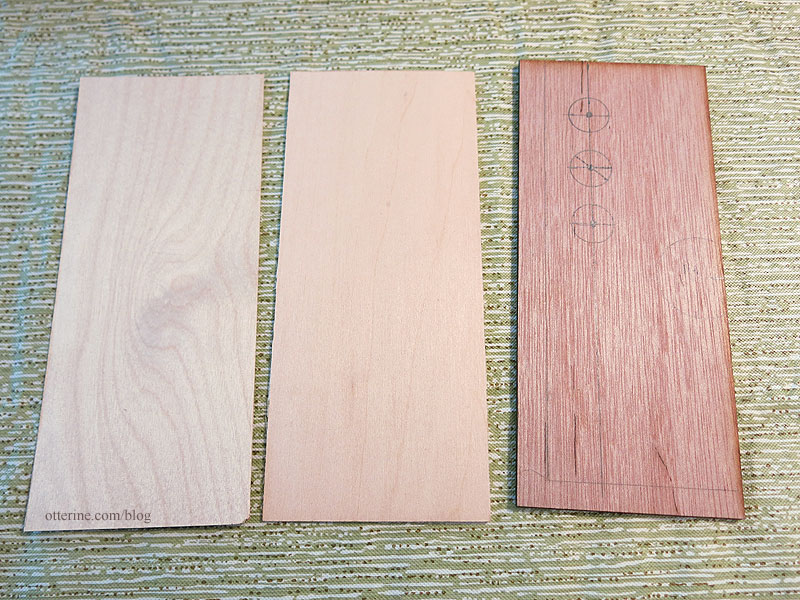
The back piece was made from 1/16″ basswood and the middle piece from 1/32″ birch veneer. Shown below from left to right: middle, back and front.
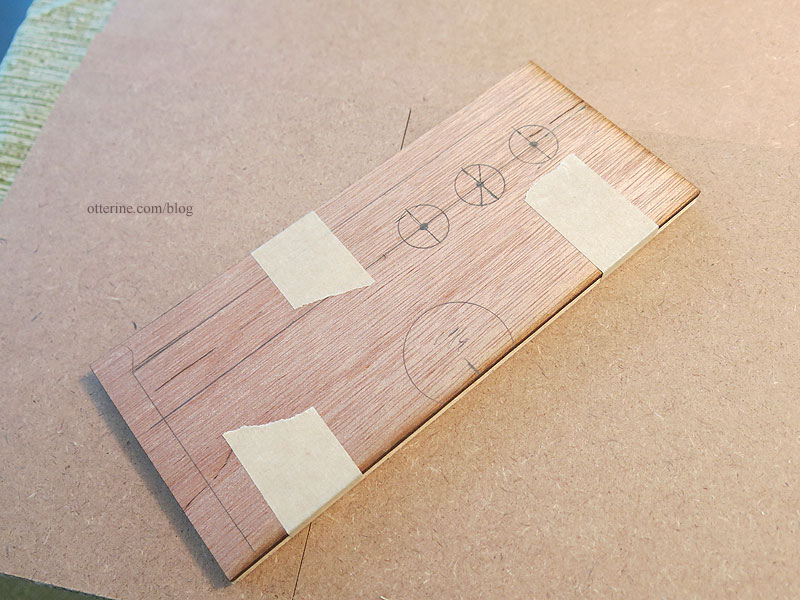
I taped the pieces together to cut all three at once.
The spade bits are great because they have a sharp center tip that makes it easy to line up more than one circle cut.
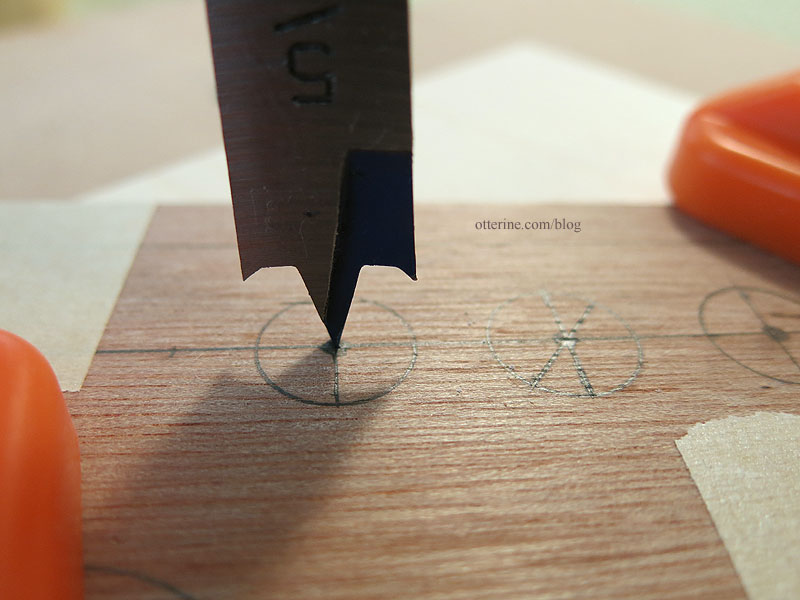
The pointed spurs on the edges cut the circular edge as the middle point drills down.
I vacuumed the dust and bits and it looked good from the top.
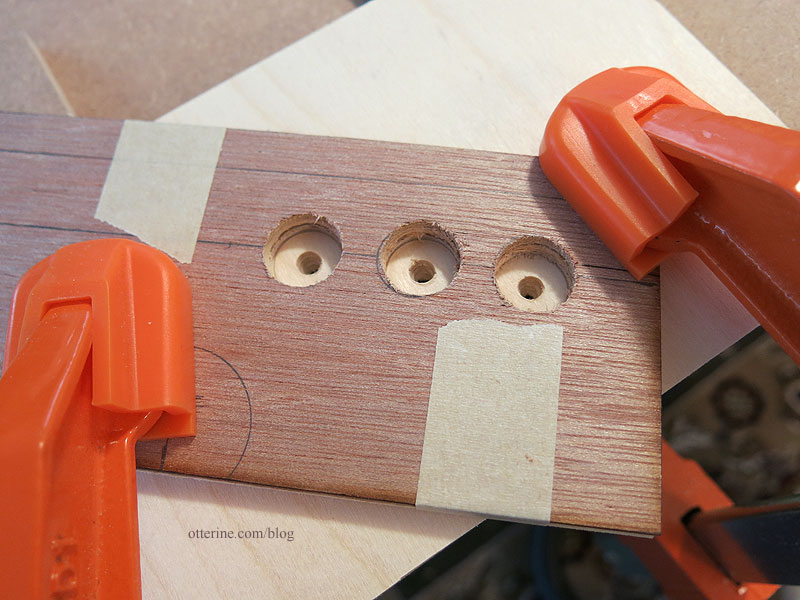
While I did use a spare board under the bottom piece to save the wood from splintering, it was the middle basswood piece that didn’t end up working. :\ It was the softest wood of the three.
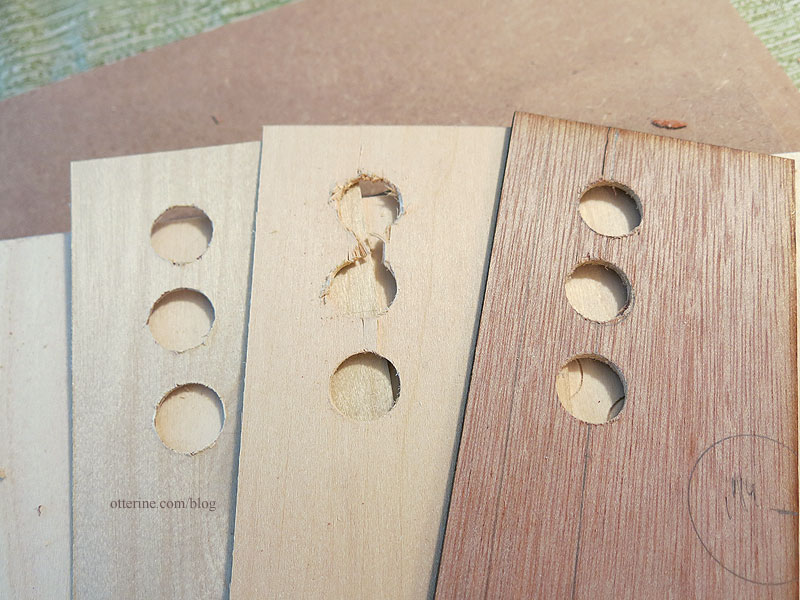
I also messed up the plywood piece and had to redo it, but that wasn’t related to using the spade bits. I cut another front piece from a spare part from Walnut Bay Light. :D

I cut another piece of basswood and cut it on its own, which worked a little better. I then used the Houseworks door to mark the outer edges of the door. I waited to do this until after the holes were cut just in case the circles didn’t work, just to save time, and I’m glad I did.
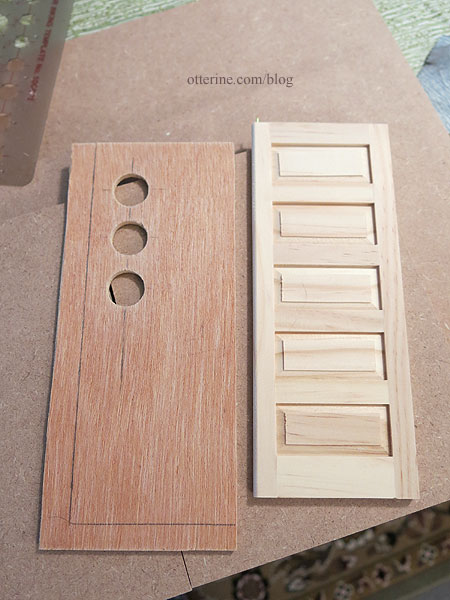
I then cut around the circles in the middle layer so I have to use only one piece of acrylic for the window inserts.
As expected, all three pieces will need some cleaning up during construction, but I’m on the right track now. :D
So far, so good. :]


