
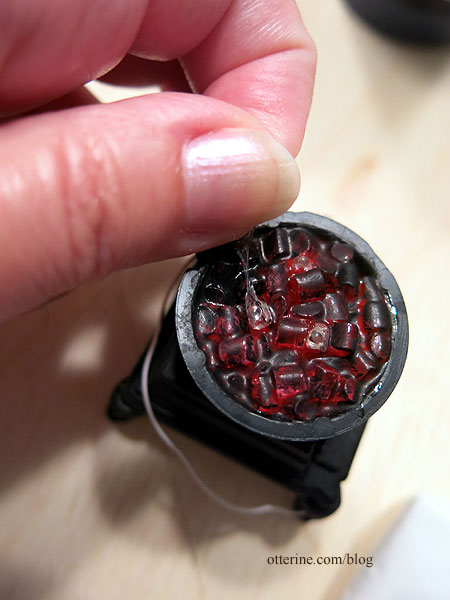
Continuing work on the potbelly stove. I left the glue and ice cubes to dry for roughly a day and a half. The glue turned out not clear/not white, which was just fine. There were a couple of bare spots, so I glued in a couple of ice cubes with super glue gel. I super glued the wire into the groove of the front leg. This will be painted black and go through the floor then to the power strip in back, sight unseen once the stove is installed.
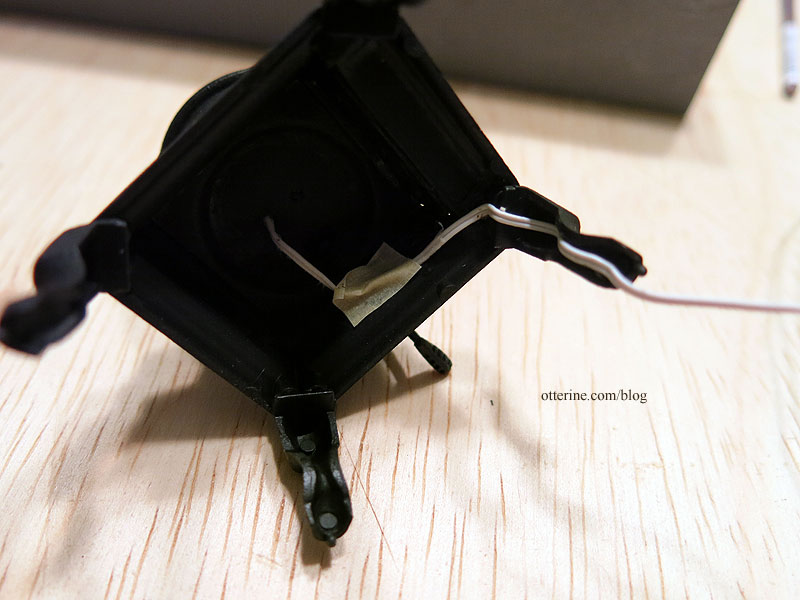
I added some texture to the inside of the stove where it might be seen. I glued the front door shut, though the kit does allow for a swinging door. I find it simpler to just keep it closed with the damper glued in the open position to see the lights inside. The stove lid is removable, though.
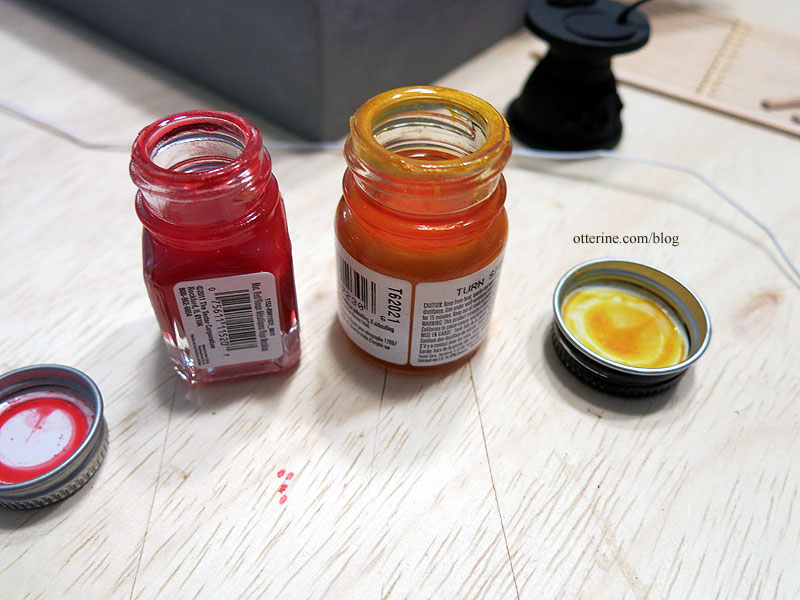
I used Testors model paints to add red and orange over the top of the ice cube/glue surface and let that dry completely. The trick is not to shake or stir the paint but use the transparent colored liquid after the paint has settled. This was taught to me by the helpful folks at the local HobbyTown USA.
Mmm…watermelon candies! :D
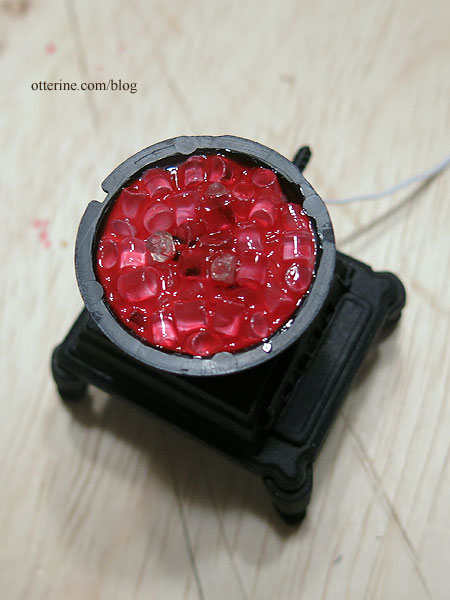
Working slowly with a small paintbrush and the lights on, I painted the surface flat black in spots. It’s easier to add more paint than take it away.
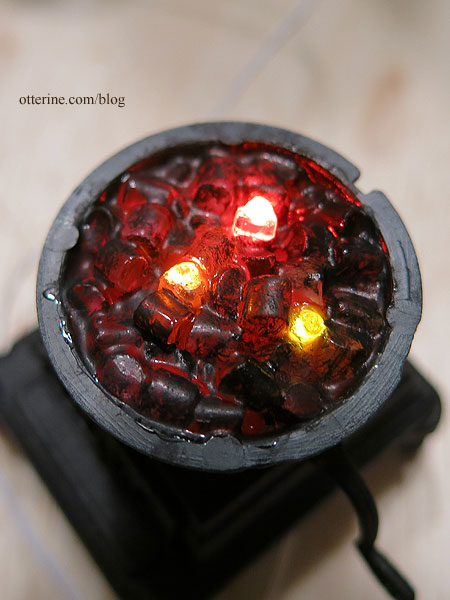
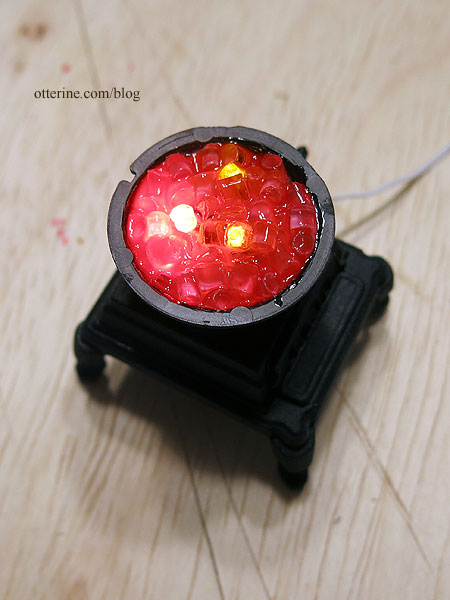
I carefully removed the masking from the bulbs. The yellow LED was a bit too bright in relation, so I toned it down with the Testors paint. If I were to do this again, I would make the third flickering bulb orange instead of yellow.
I fine-tuned the surface with greys and a bit more black, covering the tops of the LEDs to mask them.

It might seem too dark in the photo, but the effect in real life is lovely.
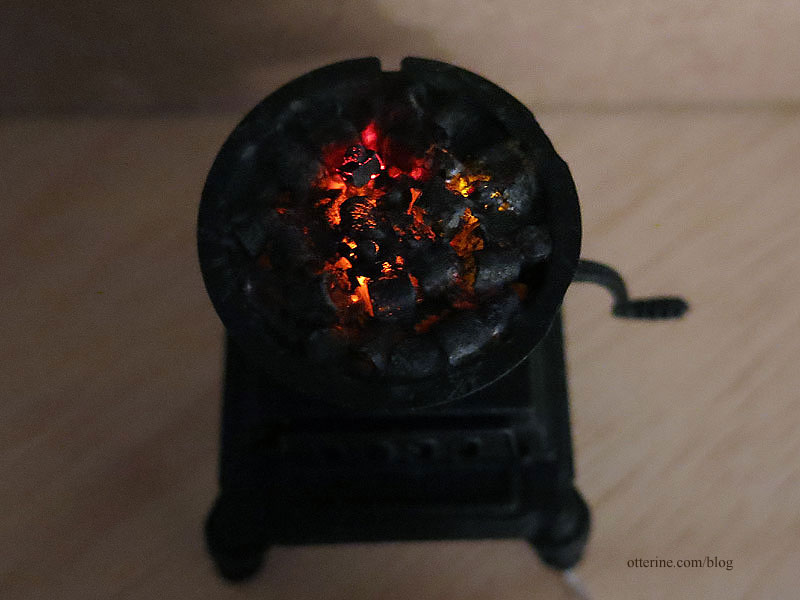
Glowing embers…
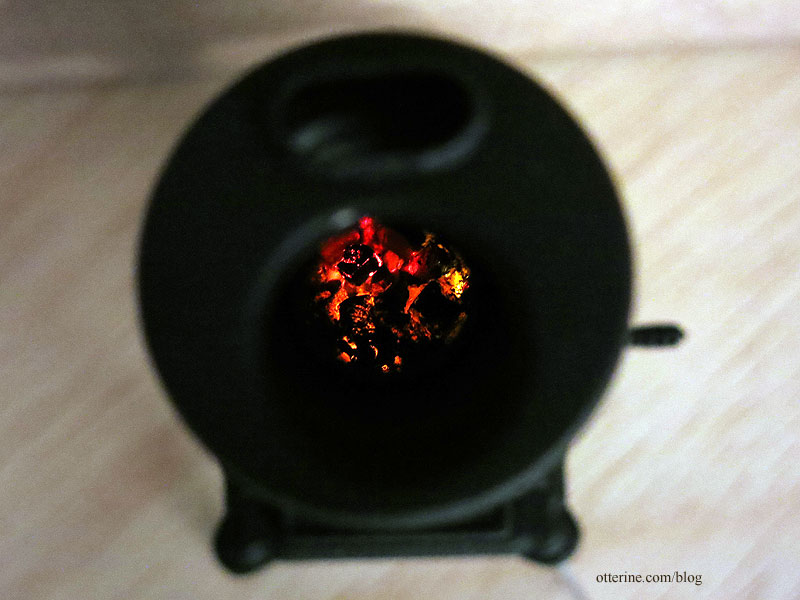
Of course, you really won’t be able to see much of them once the stove is in place, but I know they are there…and the next time I need embers, this is the method I will use.
Next up is the stove pipe and adding a smidgen of dust.


