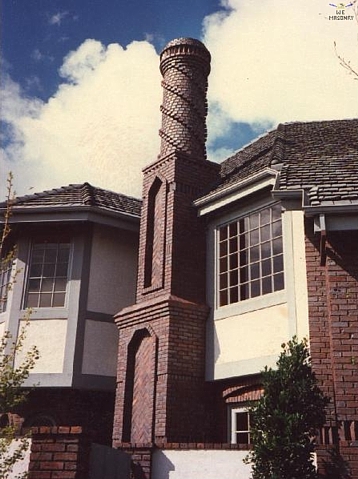
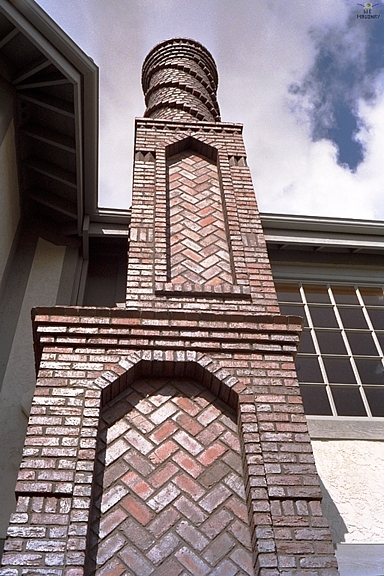
My mission, that I have chosen to accept, is to attempt a variation on this W E Masonry chimney for the haunted Heritage. (The website links to the original W E Masonry project seem to be defunct as of 2024. I couldn’t locate an updated location for this business.)
I will build the base from foam core board and cover it in egg carton bricks.
To that end, the side bay window has got to go. The first order of business in eliminating that window was fixing the foundation. I had glued the bay window floor on with wood glue, but it still came off pretty easily. I then used scraps from the die-cut boards to fill in the open space and to create backer boards to hold the piece in place.
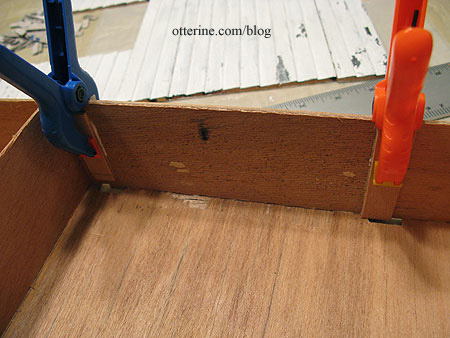
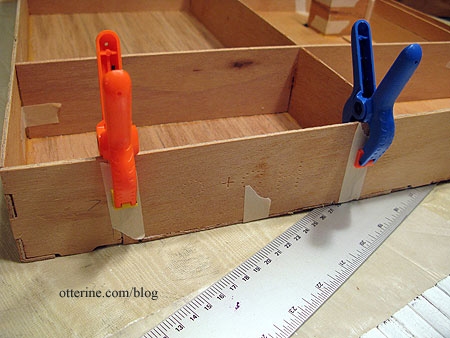
The next step involves basically redoing the entire side wall of siding. Since Dura-Craft houses are made from specifically designed siding pieces, this wasn’t going to be easy. With the suggestion from Mike, I made a new wall from 1/8″ plywood which I will later cover with Houseworks 1/2″ lap siding. (I will cut this wall to an accurate fit once I start gluing the walls to the foundation.) I figured it was better to do the whole wall instead of trying to piece it since any discrepancies between the two types of siding would be pretty evident. Since this is a side wall, any slight difference in appearance between it and the front of the house won’t be as noticeable, especially with the corner connector dividing the two planes.
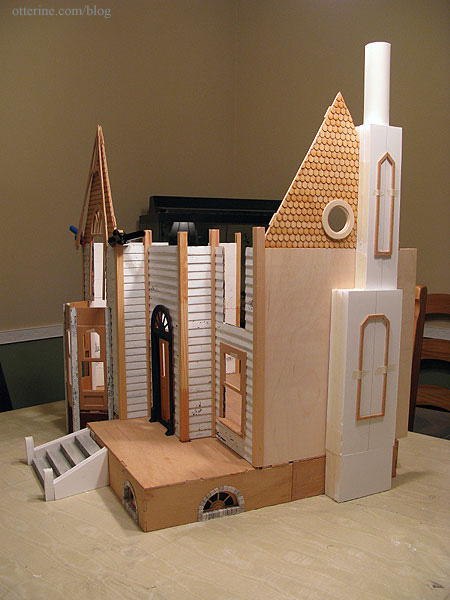
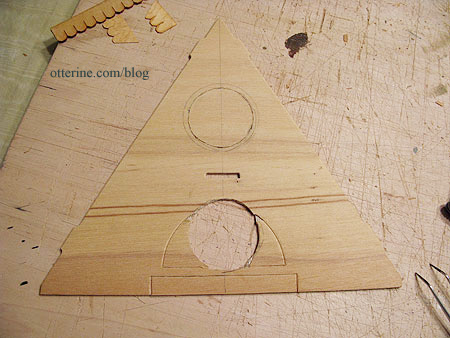
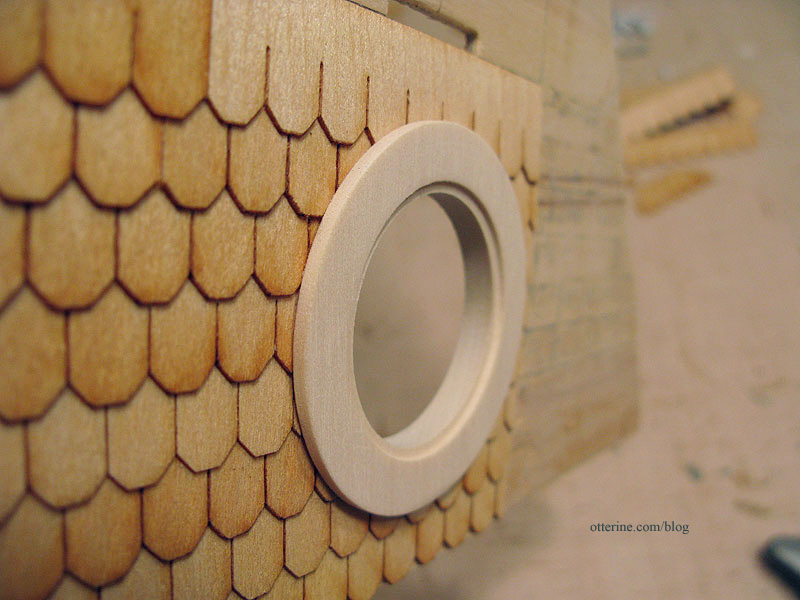
While redoing this wall, I also eliminated the swinging window that was to be above the bay window. In its place, I used the round window. Nothing says spooky like a round window on an old rundown house.
To do this, I left the die-cut parts intact on the gable window and filled in the bottom opening with the scrap that was meant to be cut from the gable. I then cut the round window shape. I was originally going to have this round window be in the attic (oh so creepy), but the gable trim would have partially blocked it. I just didn’t like the way that looked…so I moved it down to the second floor. After shingling the entire gable as I had done for the other two (those have the swinging windows intact), you won’t see where the gable is pieced.
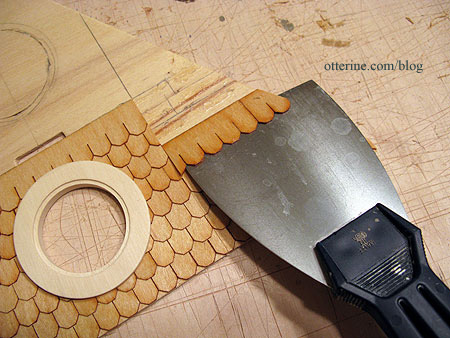
Of course, after I started to shingle the gable I realized I probably should have waited until after I built the chimney so I could shingle around the chimney instead of behind it. So, I cut along the shingles and used a spackling knife to lift the rows before the glue set permanently.
It still didn’t seem like enough, so I cut it back a bit more. This is the minimum distance I would want from the window to the chimney. I will shingle the other side of the gable to the right of the chimney once I have the chimney built.
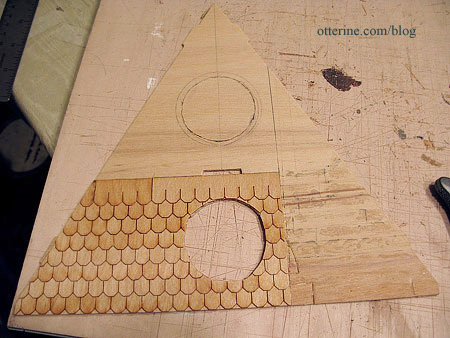
I also shingled up to the circle opening and set the window on top of the shingles since this window is made for 3/8″ thick walls. I’ll still need to fill in a bit on the other side for a good fit.
I put the house back into a quick dry fit to check things.

I used some 1/2″ foam core board and drawing paper rolled into a tube to make a quick mockup of the chimney I want to recreate. I used the spare bay window parts for the detailing since they had the right shape. I still need to build up the base to achieve all the detailing of the original, but I like the overall shape with the Heritage. I think it adds a lot to this side of the house now that the bay window is no more.