Since I want to glue the roof in place and have the back open, I needed to figure out how to hinge a wall. Nothing is glued in place just yet so I can engineer on the fly. I have cut 3/8″ square basswood support beams for the back sides and new beams for the ceiling. I’ll likely be cutting the back wall as one piece, so the beams will give it something to abut when closed.

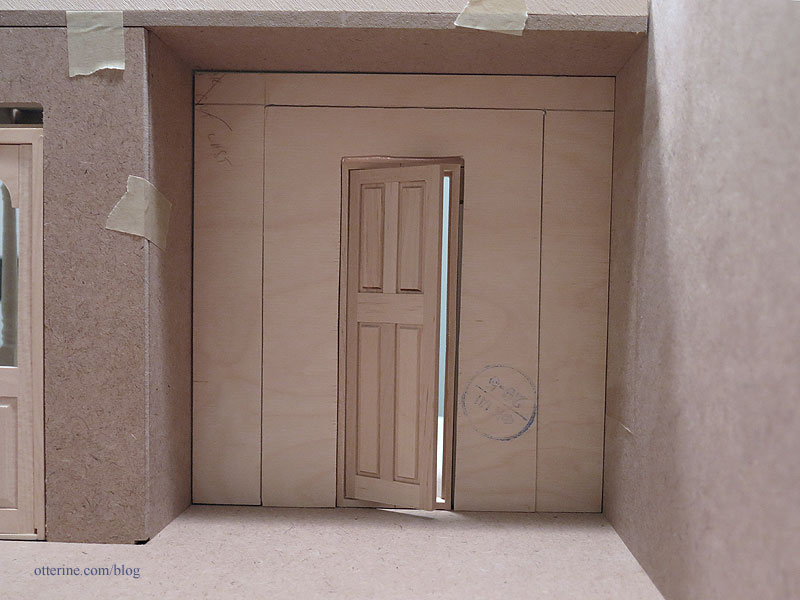
I’m also making a small room up front under the gable. I cut a 1/4″ thick plywood board to fit the space and then planned my trims and door. I’m using a Classics narrow door since other interior doors looked too big proportionally.

A blog reader asked about how I cut the skylight holes, so here is a link to an old post I did on making cuts without power tools. I still use this method a lot, and it works really well on mdf especially. Here are the cuts in process.
However, now I often finish the cut with my scroll saw to get a cleaner final cut. The scroll saw can and does wander, but these holes are fully enclosed by the door or window they house, so it’s not a huge deal.

On the other hand, if you use a component that is smaller than the existing hole, you need to fill it. I typically use strip wood.

Since I want the door to open into the main room, I needed to pad the edges of the door casing (here’s an old post on that technique). I didn’t need it to be neat since this side of the door won’t be seen. I’ll make any minor adjustments once I’m ready to install the insert wall.

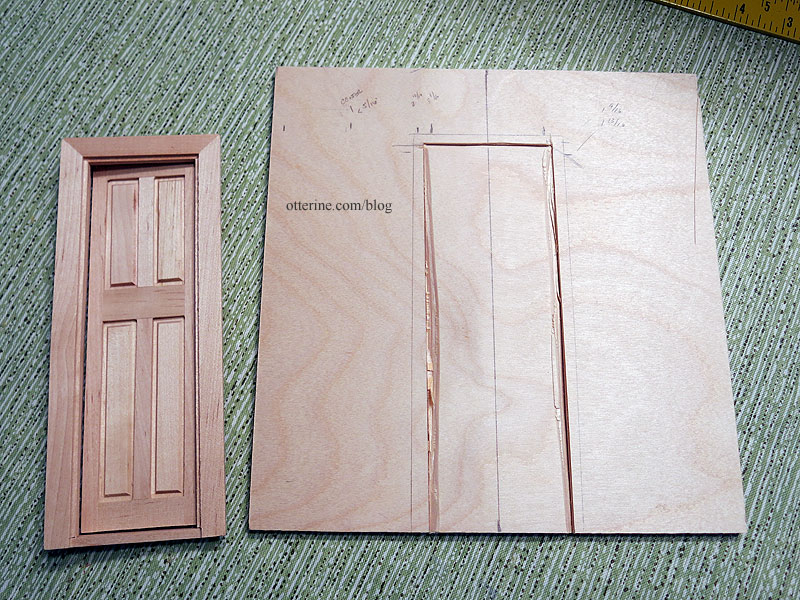
I want to be able to access the front room more than the narrow door will allow, so I will be making the insert wall removable. This is a bit of hassle since I don’t want the board to have gaps all around it nor do I want to continually risk scuffing the floor and ceiling moving it around. So, I will cut the wall into two pieces – one will be a permanent part of the structure and one will be fully removable with the door acting as the handle. This will make a lot more sense once I get the trims cut and in place, but here is the plan in dry fit. The outer side panels and upper panel will be permanent, but the door and its two adjacent panels will be one removable unit.

I mulled over this design a few days, and changed it slightly for the final. After measuring multiple times to make sure I had a suitable plan for the removable wall, I marked and cut my insert board using my scroll saw. Again, I tried to get the cuts as straight as possible, but the trims will disguise any imperfections.

The trims will be cut after I have installed the frame portion and the wallpaper (on order), but this is now the plan. It seems a better balance than the initial plan.

It will be a larger opening in the end (sorry for the poor quality on this pic, but the camera kept focusing through the opening).

Should work well. :D