
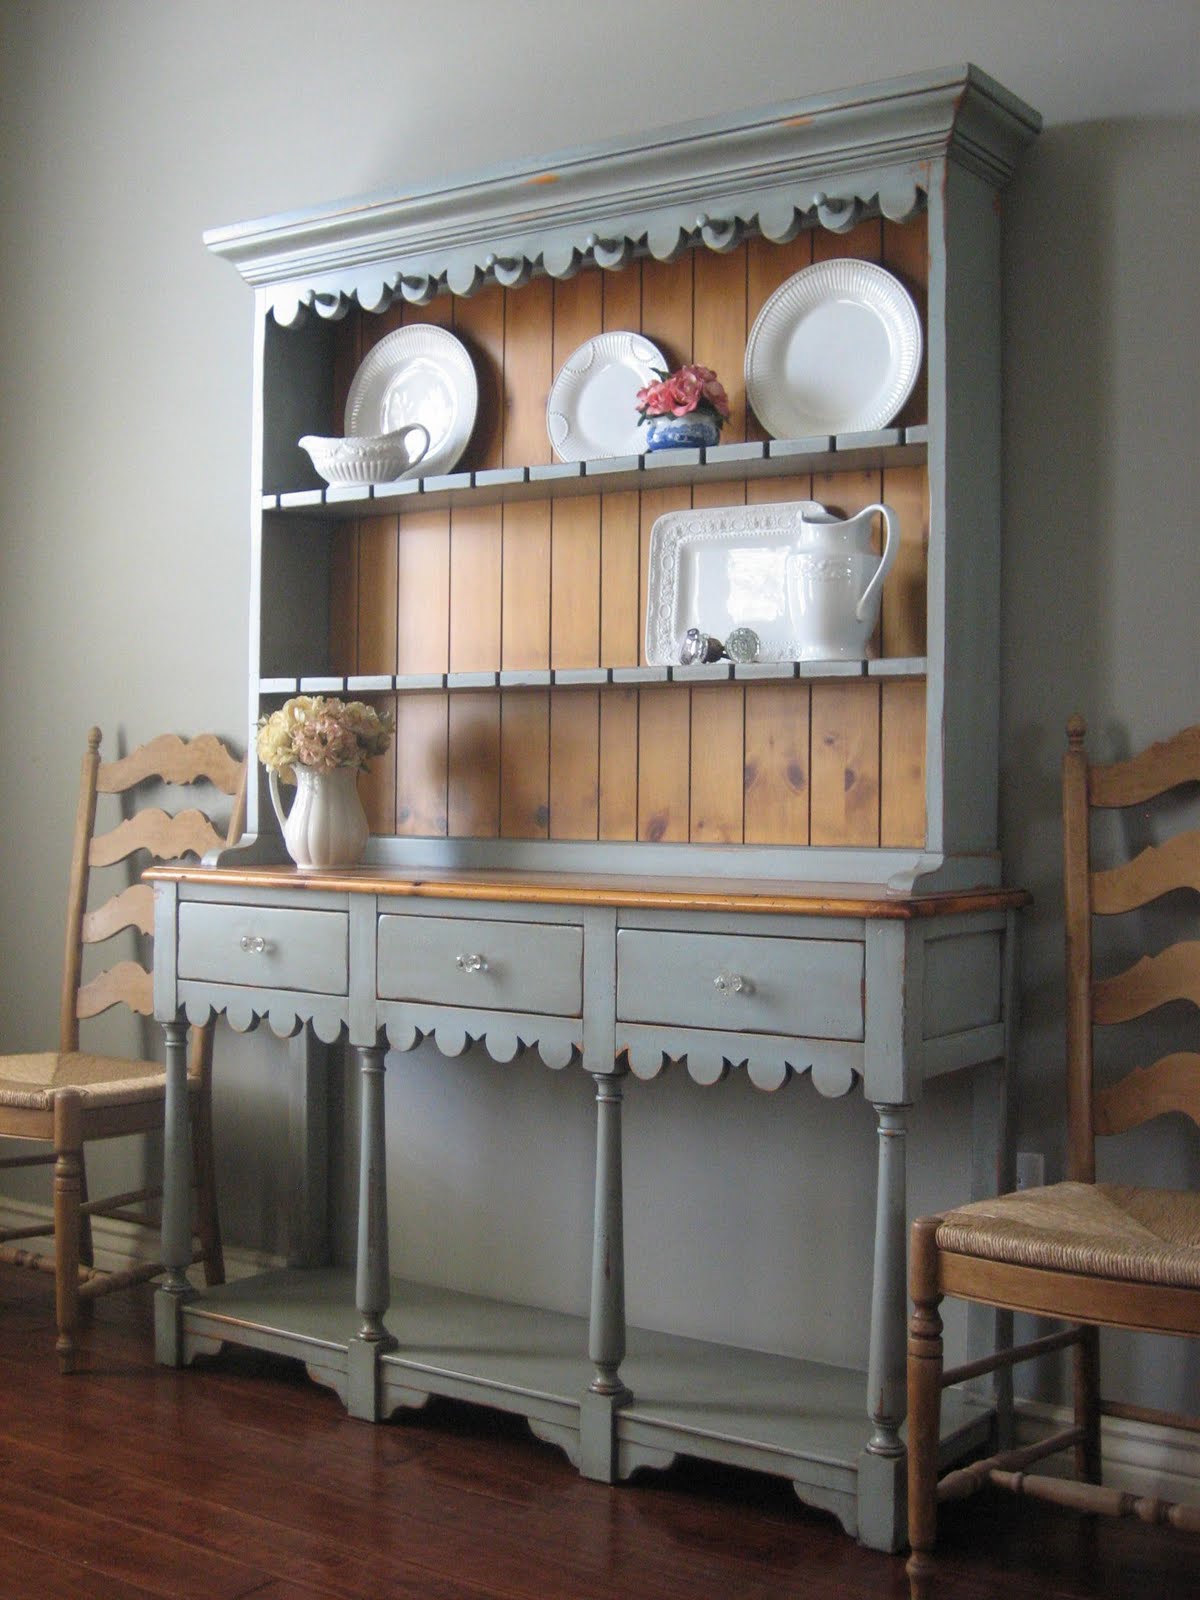
I have started my miniature reproduction of a farmhouse hutch I found on European Paint Finishes. Here’s the original farmhouse hutch for reference.
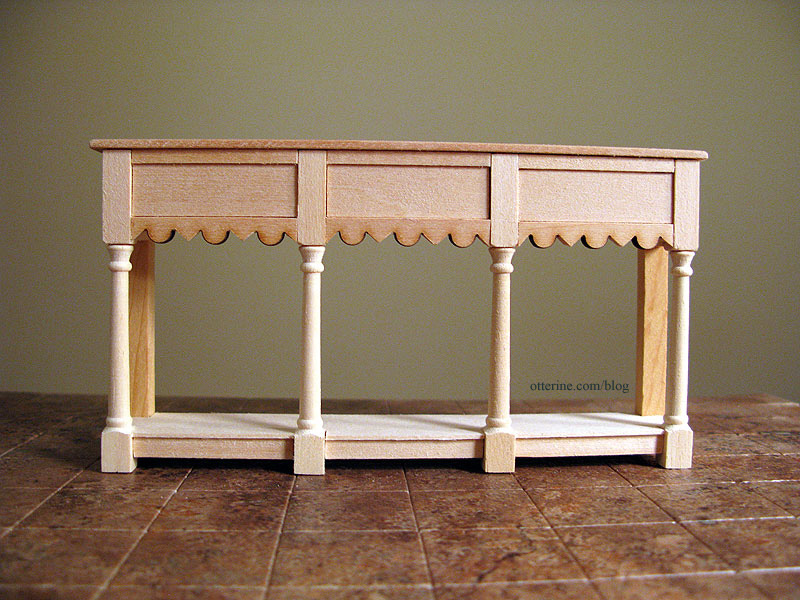
I have the base assembled and ready for paint and stain. The counter top is separate since I plan to stain it and paint the rest.
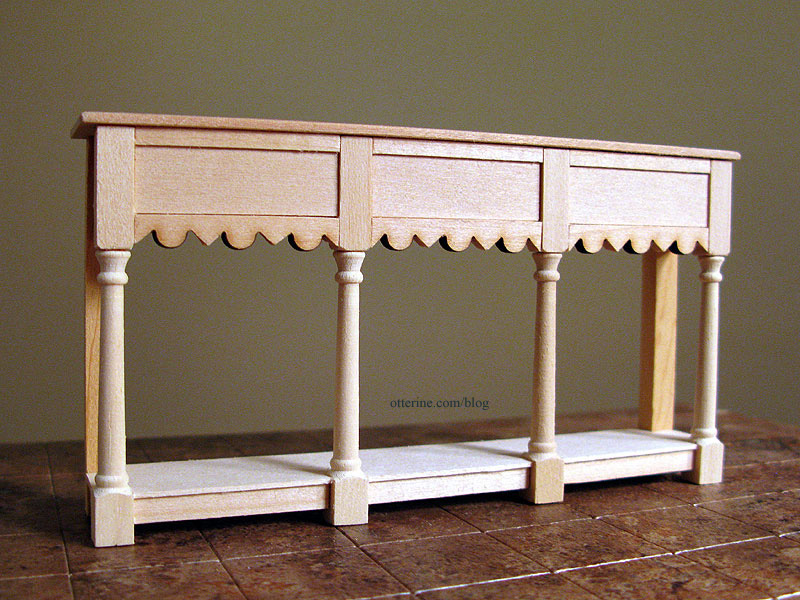
The drawers in my version are not functional, so I’ve recessed the front portions for now. I will make faux fronts to “float” in these openings to make the drawers more convincing.
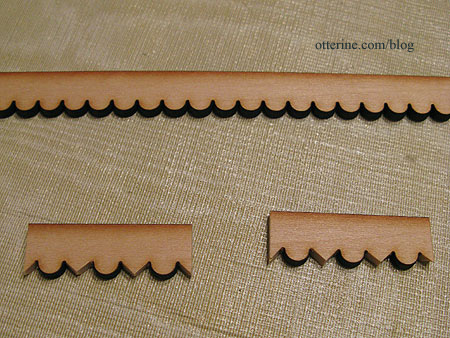
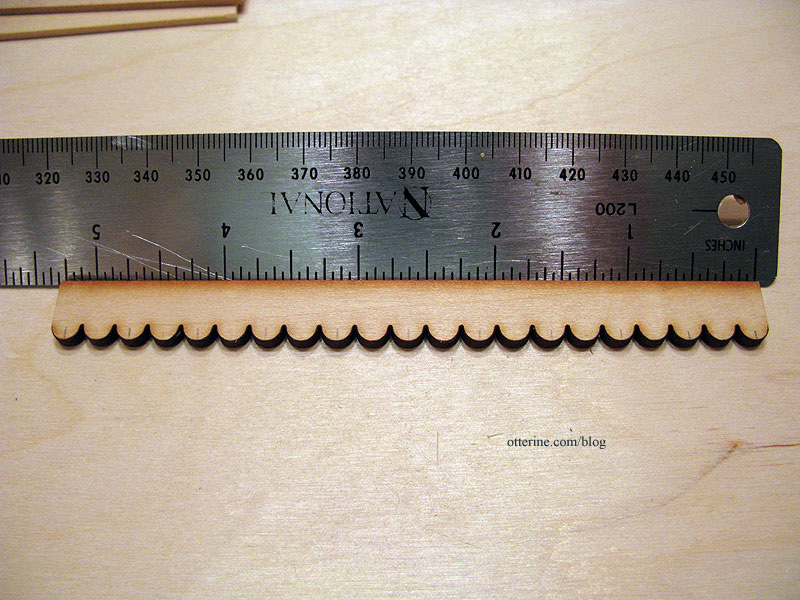
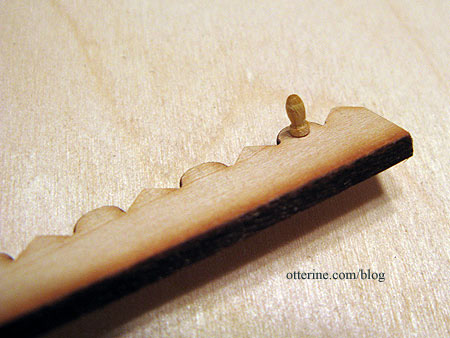
I used laser cut scallop trim from Heritage Laser Works, cutting every other scallop to a point to mimic the original. Mine has three complete scallops instead of four like the original to maintain the look of proper proportions.
Below is a more detailed shot of the original. The hutch is shown on a similarly colored wall, so at first I thought the bottom was enclosed on the back. It’s actually open between the back two square posts.
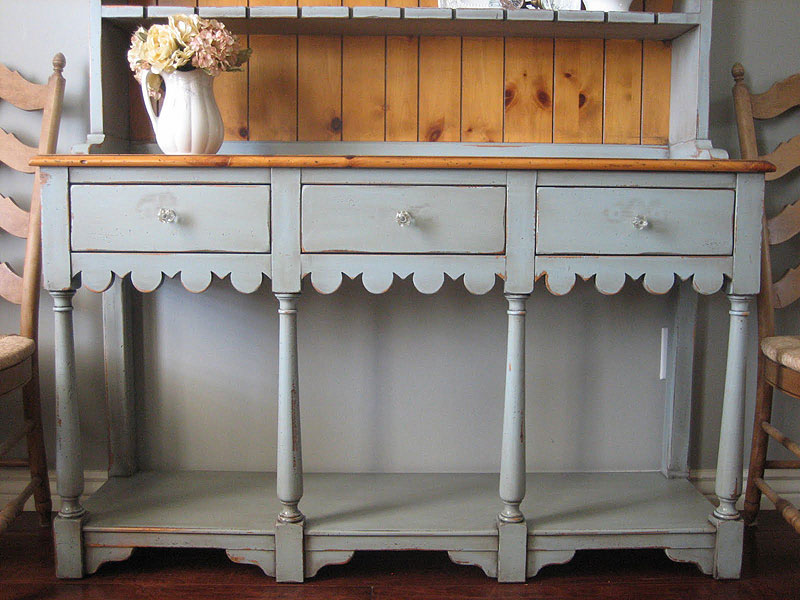
The front posts are Houseworks newel posts cut to fit. I may or may not add the bottom brackets. I have an idea how to make them, but they will be tiny and perhaps more trouble than they’re worth. I was trying to keep the height down on the overall piece and haven’t left much room for them.
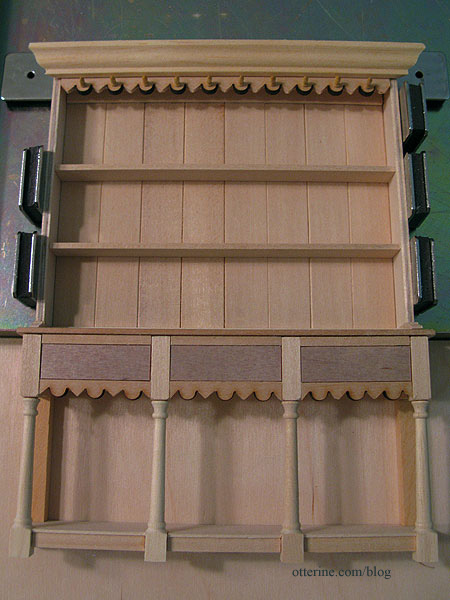
This part of the hutch measures 5 3/4″ W x 3″ H x 1 1/16″ D.
I forgot to mention that Patie of minisx2, where I found that delightful and whimsical modern cabinet, sent me some Dura-Craft wood from my want ad and included two bundles of cut wood for projects. It’s very nice wood, unlike what I’ve been finding in the craft and hobby stores lately. I’ve used it for the counter top of the base and the back of the hutch top.
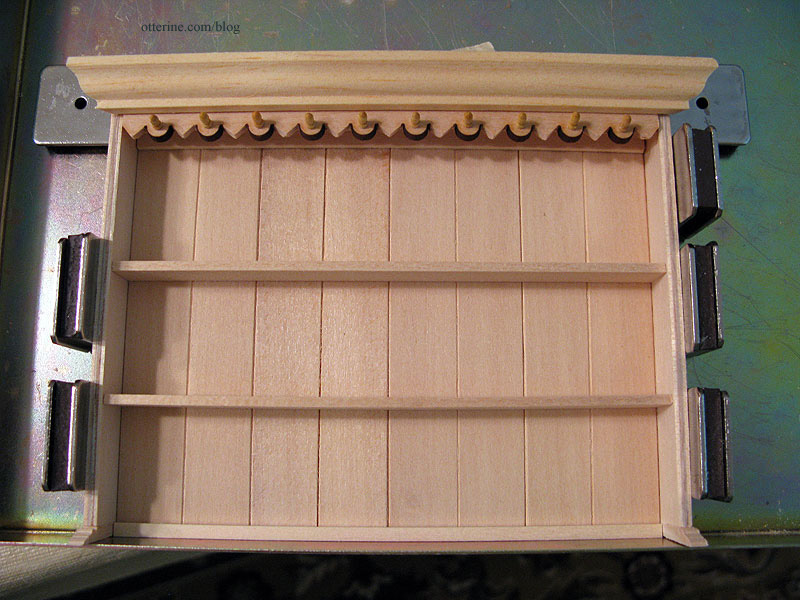
Very little of the top is glued since the back will be stained and the rest painted, so it’s being held together with magnets in my gluing jig. Here’s an approximation of what it will look like with lower portion. As you can see, I’ve cut the veneer inserts for the faux drawers.
My first measurement for the top had to be the scallop trim since I needed complete scallops all the way across. Having them uneven, with one chopped off on one side and another whole on the opposite side would have offended my sensibilities. ;D
I order wood trims and parts from Manchester Wood Works quite often, and they include a small sample bag of various wood trims. I use these samples all the time when I just need a little bit of something to add to a project.
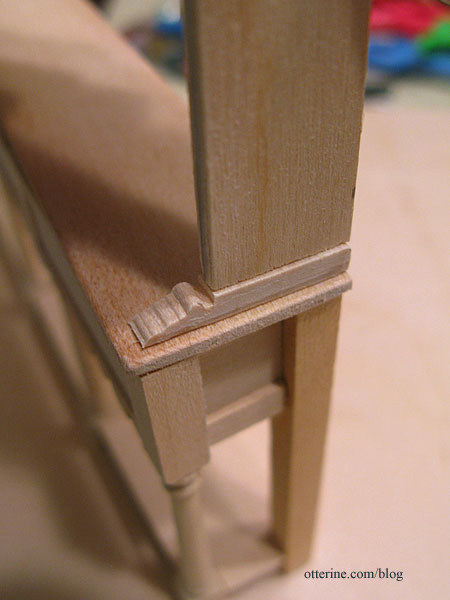
To create the decorative bases for the side panels, I used 1 1/16″ tall baseboard trim – a sample from Manchester Wood Works. I am guessing this might be for play scale. I’ve used half scale and quarter scale items in my full scale builds before, too. I cut thin cross sections, then measured the depth I would need based on my side panels.
Now I have wonderfully decorative bases without having to carve them individually. This was the method I had planned to use to make the lower brackets, but the space is just too small. Until I delve into quarter scale building, cutting wood that small just eludes me. :D
The pegs on the upper trim are model ship belaying pins. Just a quick drilled pilot hole and some glue, and there you have it!
Here is a close up of the original hutch top.

I ended up with 1 1/4″ spaces between my shelves to accommodate what the hutch will eventually hold. I’ll cut sides for the crown molding on top after it is all painted, stained and assembled. Things have a way of shifting during the building process and I find it’s best to fit that final trim at the end. I still need to add the notched details on the shelves, but I’m taking a break from the project for now. I can fiddle with these things only so long.
The hutch top measures 5 1/2″ W (not including the crown molding) x 4 1/2″ H x5/8″ D (not including the decorative bases), making the total unit 6 1/4″ W (with the crown molding) x 7 1/2″ H x 1 1/16″ D.


