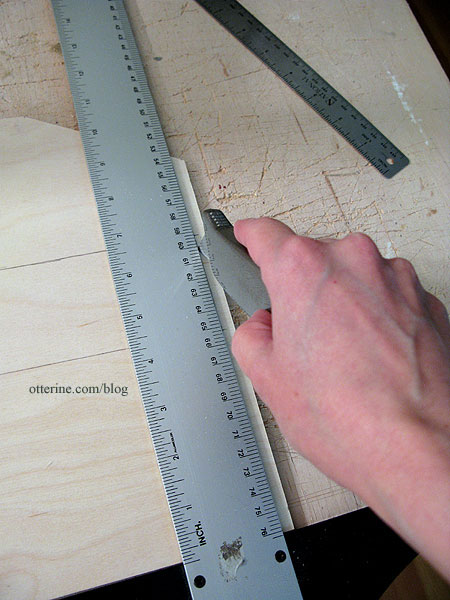
Power tools are noisy, need appropriate space for setup and are a little intimidating to me. So, I use a standard utility knife with either a metal ruler or metal T-square to make my plywood cuts (technique learned from Real Good Toys). This is my cutting board on an old TV tray.

I use this method on everything from 1/64″ thick wood veneer to 3/8″ thick plywood, though the latter takes some doing. For boards up to 1/8″ thick, I cut on one side only. For thicker boards, I make cuts on both sides to meet in the middle. Here is that process.
I’ve photographed the process along the way with staged photos…meaning I am not actively cutting in these photos. I can’t hold the camera and photograph myself cutting, because cutting requires two hands, one to steady the board and ruler and the other to cut the board.
First, I make my guidelines on one side of the board. This is the doorway placement for the bathroom-to-hallway door on the new 1/4″ thick plywood wall, which I cut using this method. The top cut has already been started in this photo.

With a sharp blade in my utility knife, I cut along the lines using the T-square to start. This makes sure the lines are square with the bottom edge….no crooked doors allowed.

Once I have a deep line, I switch to the metal ruler because I can position the board and the ruler in a more comfortable position for me. You might find using only the T-square works best for you.

I cut part of the way through the board by making repeated cuts along the same lines. I then mark these cuts on the opposite side of the board.

I measure on the opposite side from where the cuts began and transfer the guidelines. I don’t do this in the beginning just in case my cuts are off a little from my initial guidelines on the first side.

I then repeat the cutting process with the T-square or metal ruler (or first one, then the other) on the new side. I flip the board back and forth, repeatedly cutting deeper into the grooves until the cuts meet in the middle. The board then separates and you are left with a reasonably clean edge.

If there is any excess wood on either side, I use the utility knife to clean up the edges.

I use 60 grit sandpaper to smooth out the edges, and we are ready to test out the door.

I obviously wouldn’t use this to scratch build an entire house from 3/8″ plywood, but it’s a usable method for the small amount of cuts I usually make during a build. Thicker boards take some elbow grease and patience — and a few breaks in between cuts, but this method gets the job done. :D


