The chandelier was plated in a brass finish, which is not to my taste.
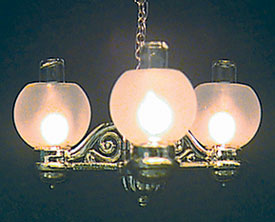
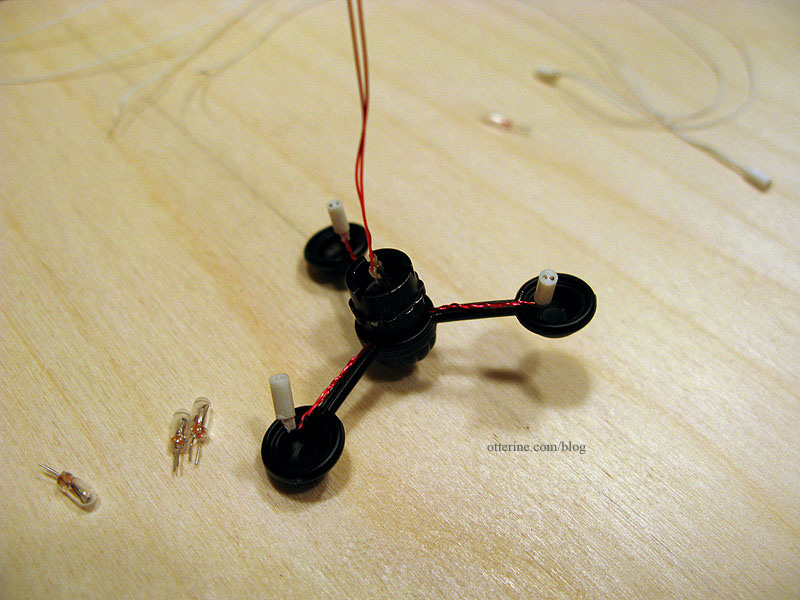
I taped the pieces to a board and sprayed all the pieces flat black. The chandelier kit version I chose had replaceable bulbs but with white wires that were relatively thick. I used candle sockets with varnished wires instead.
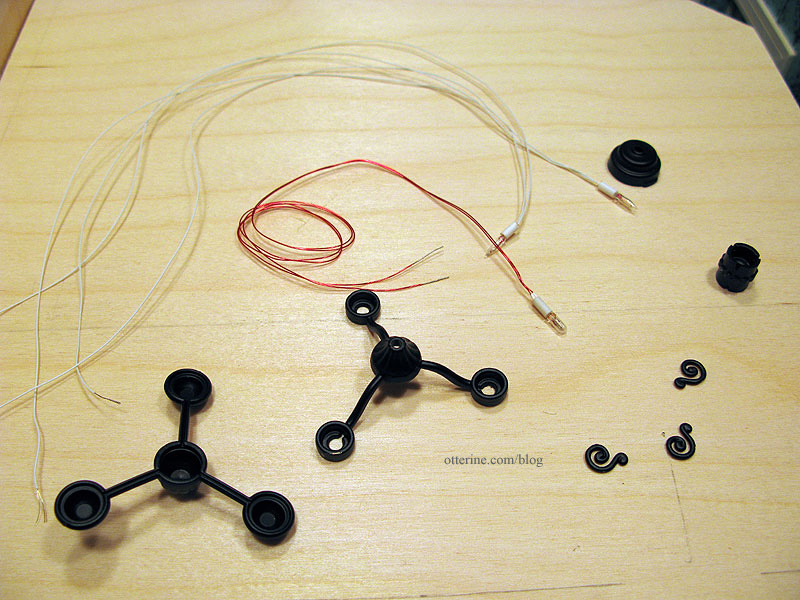
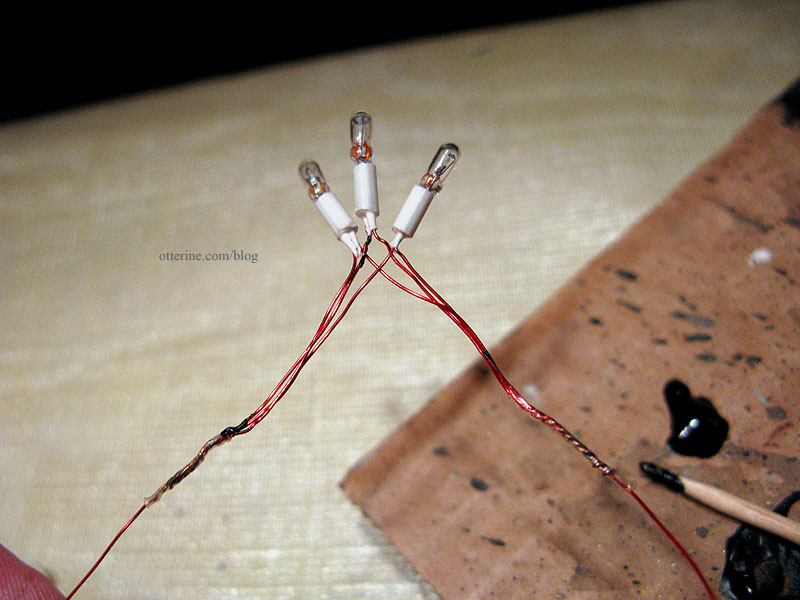
The sconces were very easy to put together, but this contraption took some doing. You basically cut two of the bulb wires short to attach to the longer third, twist all the wires together and feed this spidery assembly through the plastic pieces. Right. Soldering was suggested, but I’ve never done any soldering and certainly don’t have the supplies to do so.
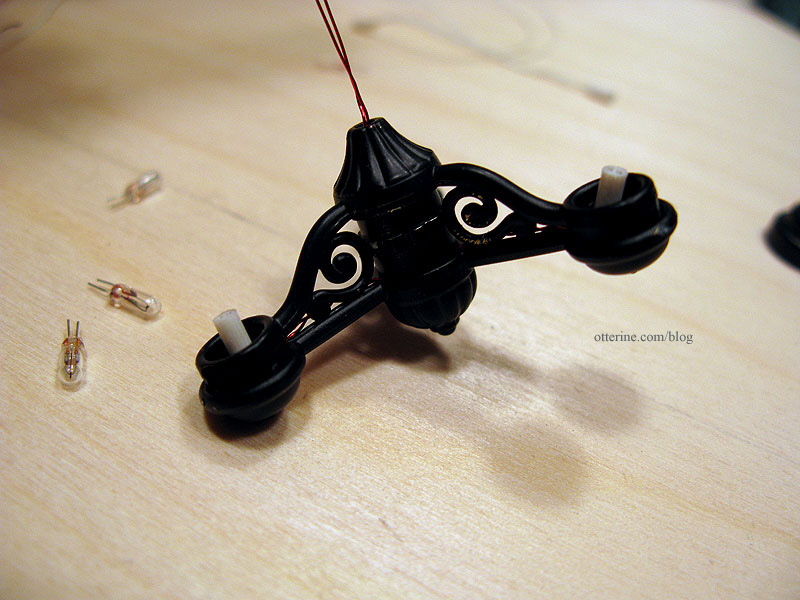
I used shrink tubes to keep the wires together, but in fiddling with them some of the varnish came off the wires in places not covered by the shrink tubes. I bought a jar of liquid electrical tape some time ago but had yet to try it out. I figured this was the best time to test it out. I put a small dab on my “glue” board and applied it to the wire connections with a toothpick. There were no instructions on the bottle, mind you.
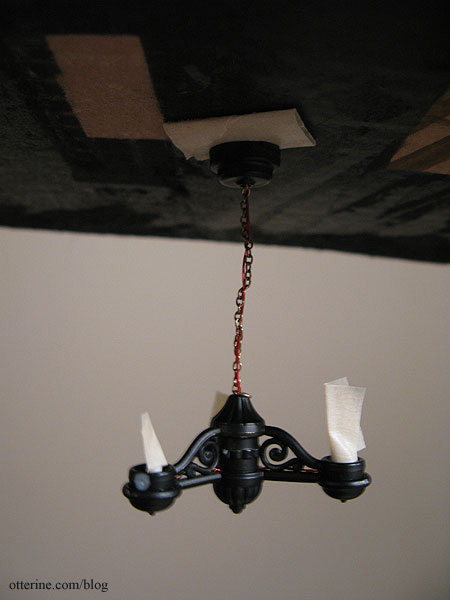
You’re supposed to feed half of the wires through the top channel and the other half through the bottom channel. After three failed attempts, I twisted the wires for each bulb together and fed them through the bottom channel.
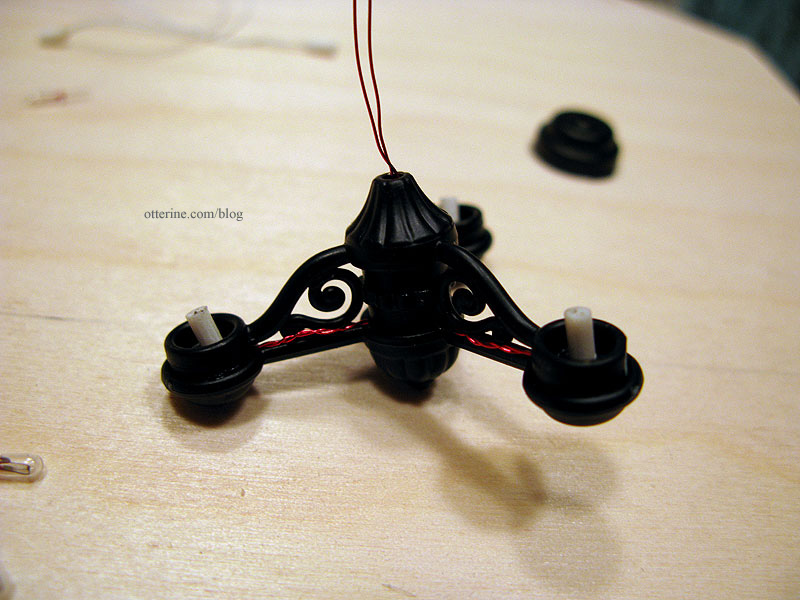
This meant I had to run the wires around the scroll details which were supposedly “snap in place” wire holders. I glued the scrolls in place.
I’ll install the chandelier so the wires face the front wall. I’ll also paint them black to match as I had done for the wall sconces.
I tested the bulbs repeatedly during the process to make sure they were all working. They are temperamental, but they work! Here’s the chandelier in place without its chain, which is at the moment brass in color. I am going to attempt to spray paint it when I do the touch-ups on the chandelier paint.
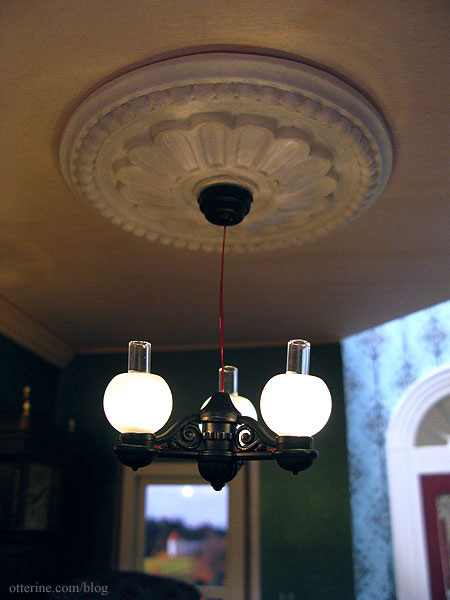
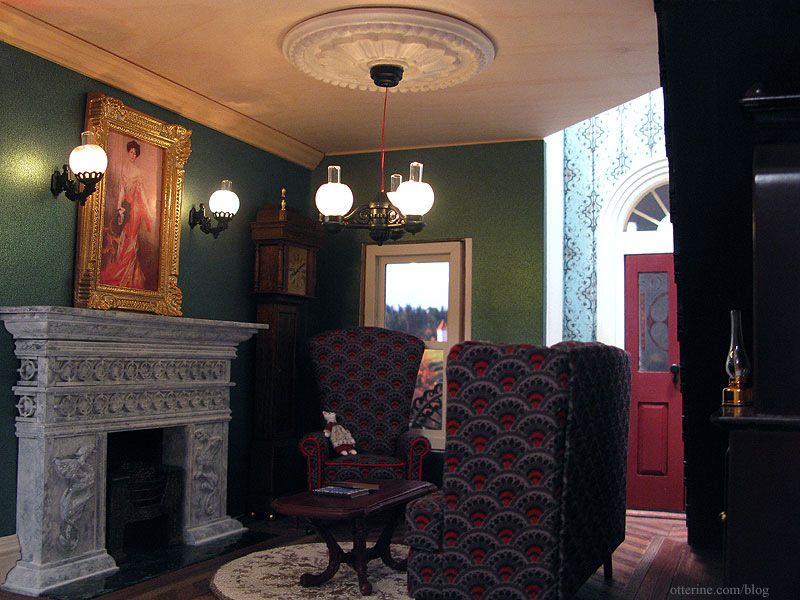
I love it with the large medallion!

I placed a piece of large crown molding in for mockup purposes, too. The one I plan to use is about the same size but a little fancier.
I next added the chain to the chandelier, using half of the length provided in the kit.
Once assembled, I suspended the fixture from a piece of cardboard and sprayed painted the chain and wires as well as a few of the areas marred by the construction process. I had a few areas of brass chain and red wire still showing, so I touched those up with black acrylic paint and a tiny paintbrush.
It’s a little crooked here, but the nice thing about the varnished wires is the fact that they are more rigid than the typical white wires. You can bend and position them, and they stay put. This helps combat the fact that this plastic chandelier is too lightweight for gravity to hold it straight.
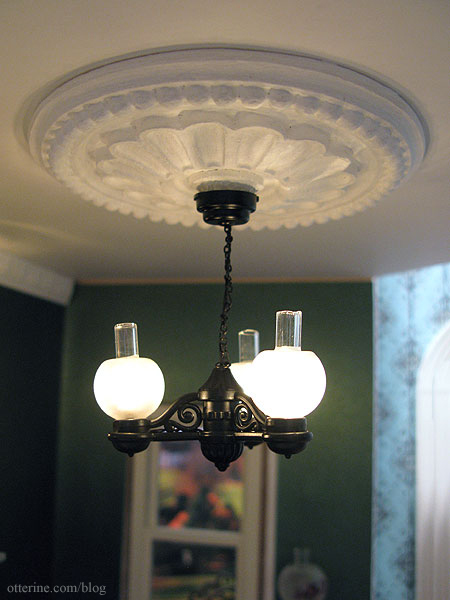
Painting the ceiling, medallion and crown molding all white really helped unify the look. I think it’s going to work really well for this room.

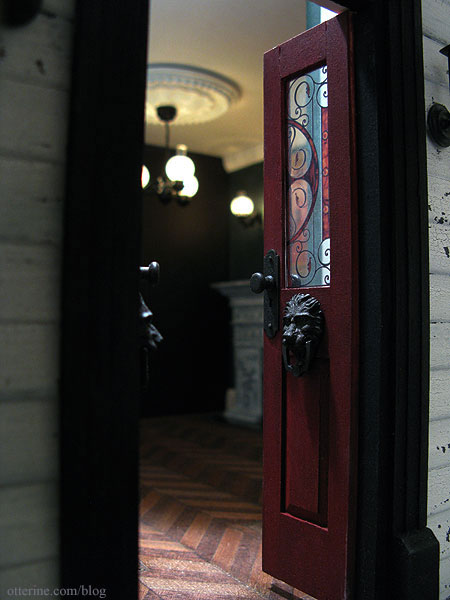
You can’t see much through the front door, but I like this photo. :D