


NOTE: All content on otterine.com is copyrighted and may not be reproduced in part or in whole. It takes a lot of time and effort to write and photograph for my blog. Please ask permission before reproducing any of my content. (More on copyright)

Categories:
Watson Mill – sails, part 3
Continuing work on the windmill sails. I’ve done some research on windmills and a fair bit of virtual sightseeing, but I am by no means an expert. I am also not planning a precise model, though there are some remarkable works out there. The first one I ran into is a 1:30 scale mill kit by Amati. The model has a hub made from wood that looks fairly straightforward for me to recreate for my own model. I’ve been using an offset alignment on the mock-up hub mainly for ease of use, but I plan to have a hub setup more like the real life mills (and this Amati model).
Another fabulous resource is Penterbak, where you find many different scale models with exacting details. It’s in Dutch and google translate works only so well, but you can see from the photos alone just how much work went into these. The hub on the windshaft here is remarkable and gives me some ideas on how to dress it up.
Finally, let’s learn some terminology. There’s a wealth of information in the online publication of The Dutch Windmill by Frederick Stokhuyzen (link no longer active), though I admit I skipped around to parts I needed. There’s also this awesome website with a video by The Yorktown Windmill Project showing how to make a common sail. (They also have a great page on the conical roof, which I have done in miniature in the past.)
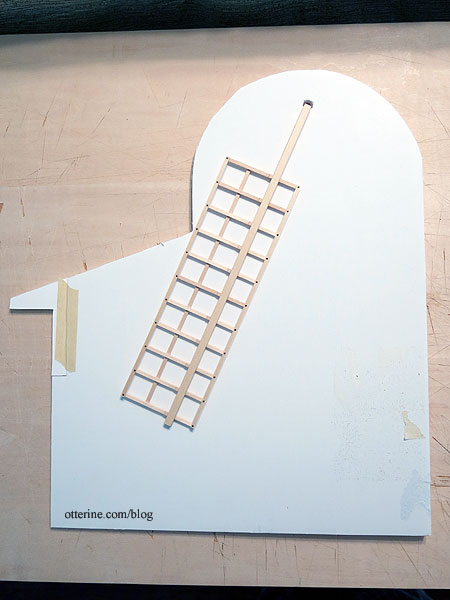
After seeing this real life example, I decided to change my design to match. My sails won’t have the gentle curve of the true sails unless the wood warps so let’s hope it warps in the right direction.
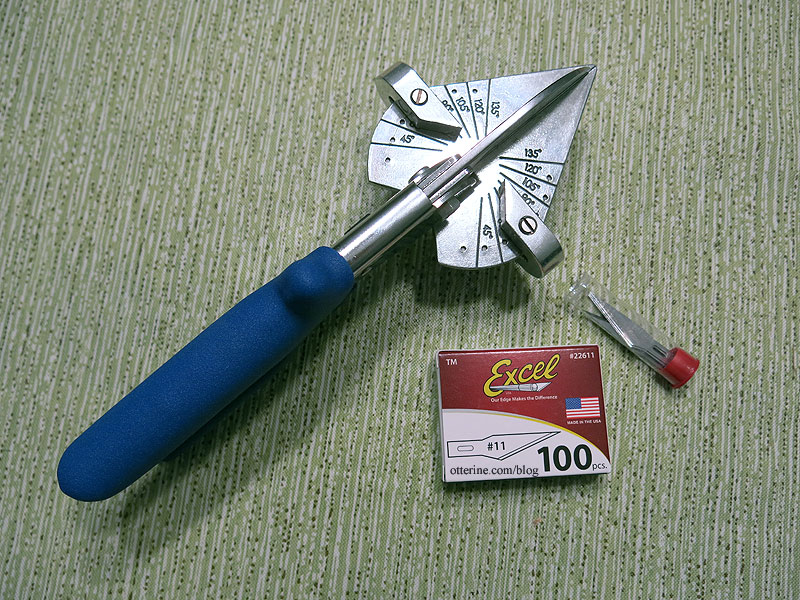
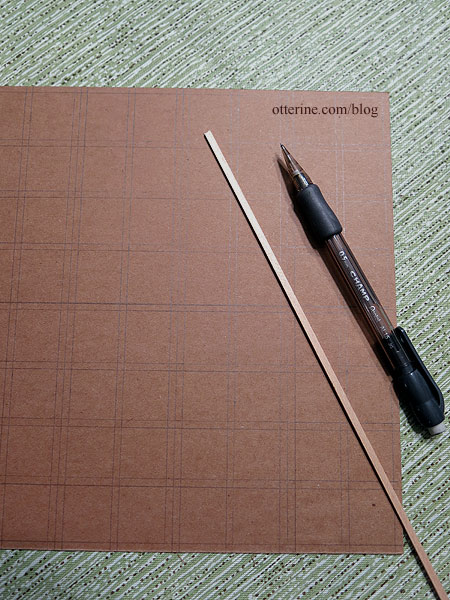
In the Bruce Hirst model, he used 1/8″ square strip wood, but mine will have mainly 1/16″ x 1/8″ strip wood. The adhesives used were Elmer’s Wood Glue supplemented with super glue gel. The Easy Cutter Ultimate was a lifesaver here. Mom also gave me a box of 100 X-Acto blades for Christmas. Maybe that will be enough.
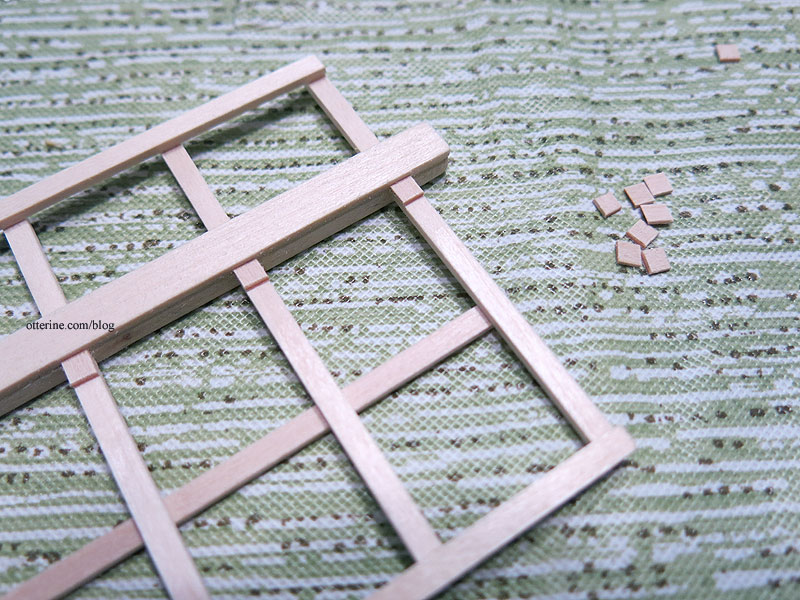
I cut four 12″ lengths of 1/4″ x 1/8″ strip wood to make the whip (center shaft of the sail). This is longer than I will need, but I wanted extra just in case. Instead of trying to cut holes in the whip to form mortises, I notched the pieces every 3/4″ from the end.
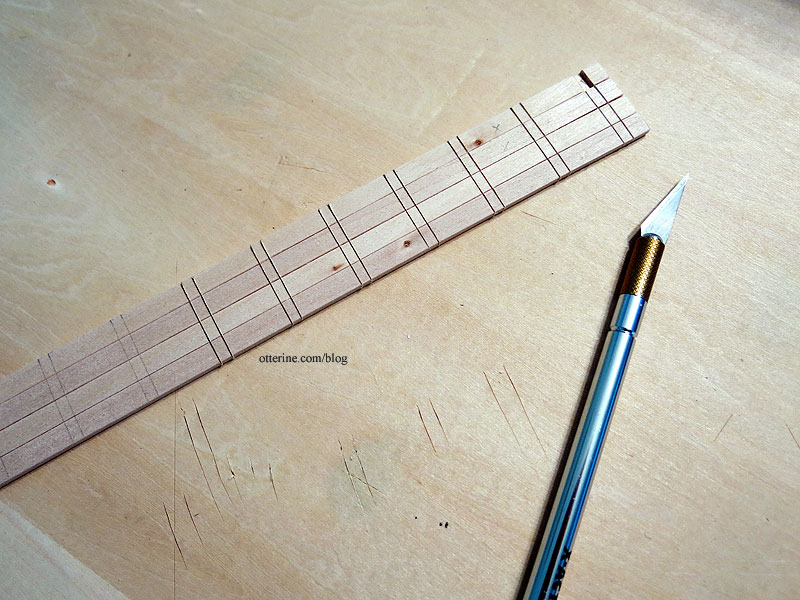
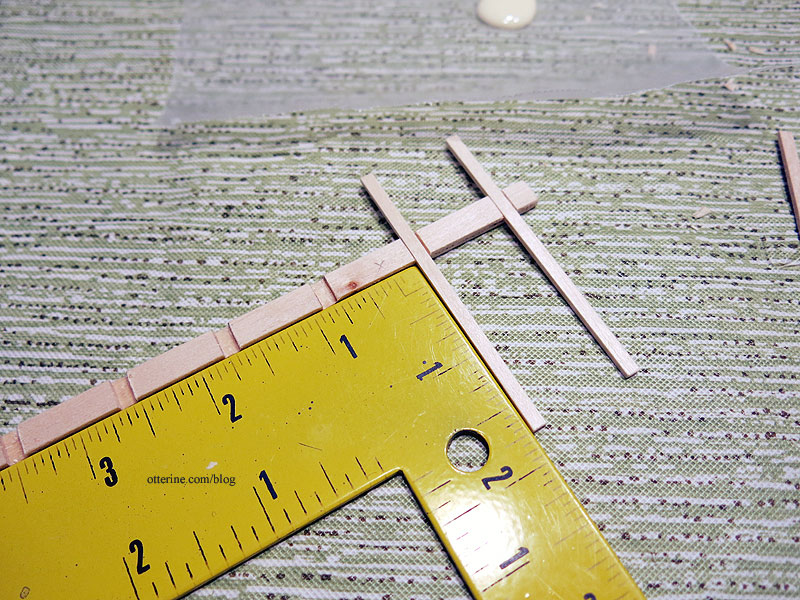
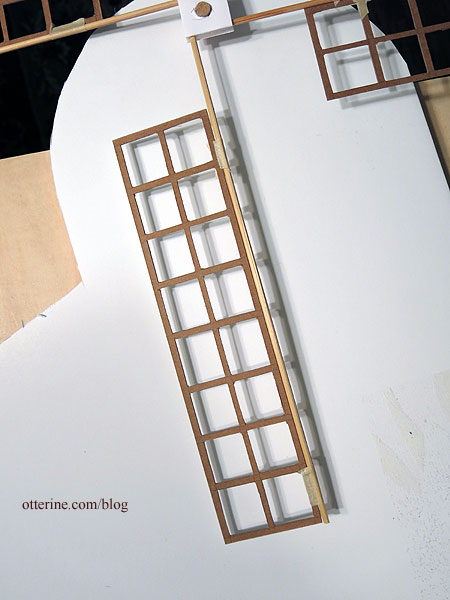
Time to cut 44 sailbars, 11 per sail, at a length of 2.75″ each. This is more than I had in my cardboard mockup, but it should add stability. I also cut 12 hemlaths (outer vertical strips), 3 per sail, at a length of 9″ each. Again, this is slightly longer than my mockup, but it made for easier math.
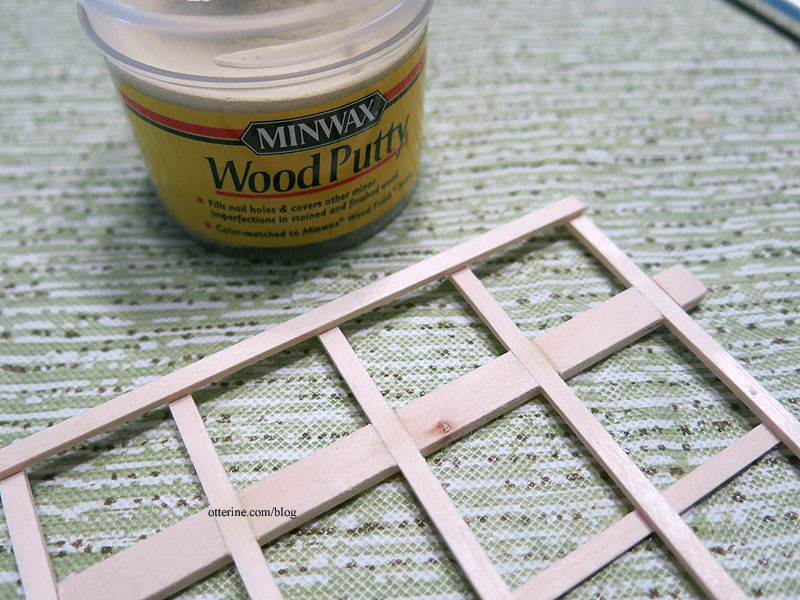
Since I was cutting by hand, there were some gaps. I used Minwax Wood Putty in natural pine as filler. Could I have been more precise? Maybe, but I get in a hurry for tedious portions of a project. Once it’s all stained and aged, it will all blend in.
A corresponding piece of 1/4″ x 1/16″ strip wood encloses the notches to make the mortises in the whip. I cut and added the little blocks (don’t know the term) that keep the sailbars uniform along the whip. This makes me lament all the times I’ve discarded tiny bits of wood. Who knew?!! They add detailing that makes the sails seem more realistic.
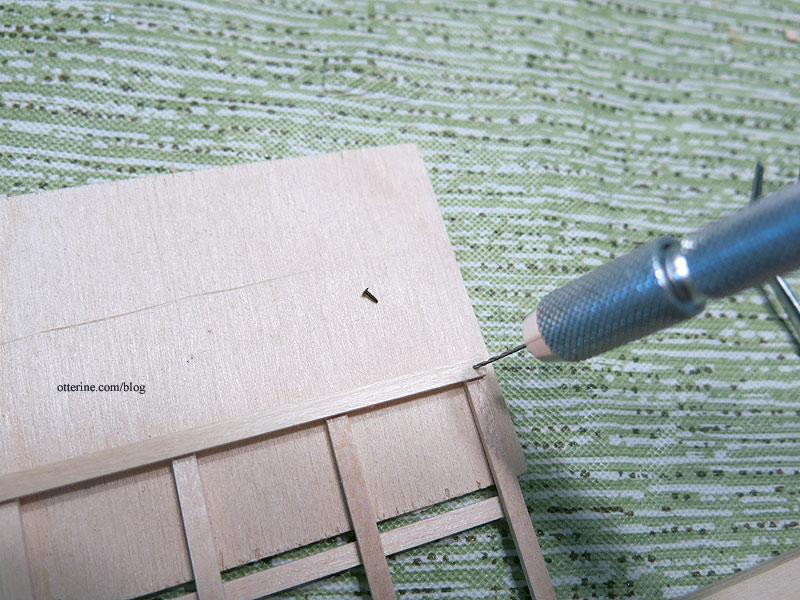
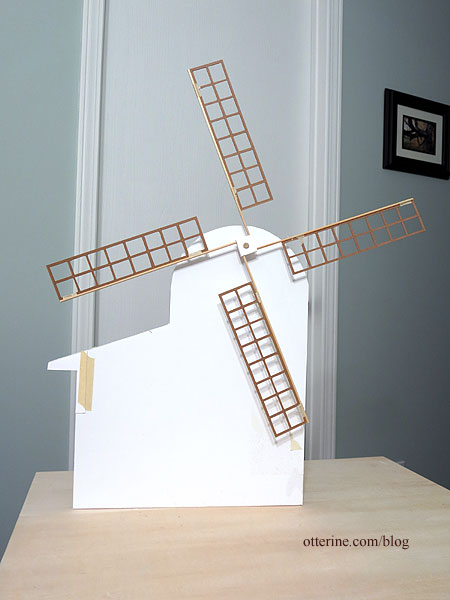
This might have been a bit of overkill for a model, but I also used nails in addition to the glue. I don’t need these suckers popping apart later on down the line, and since they will be motorized it’s likely worth the extra time and effort. I did drill pilot holes so I wouldn’t split the boards.
I am going to leave the final finishing as far as stain goes until after I have all the parts fabricated just in case something breaks along the line and needs to be redone.
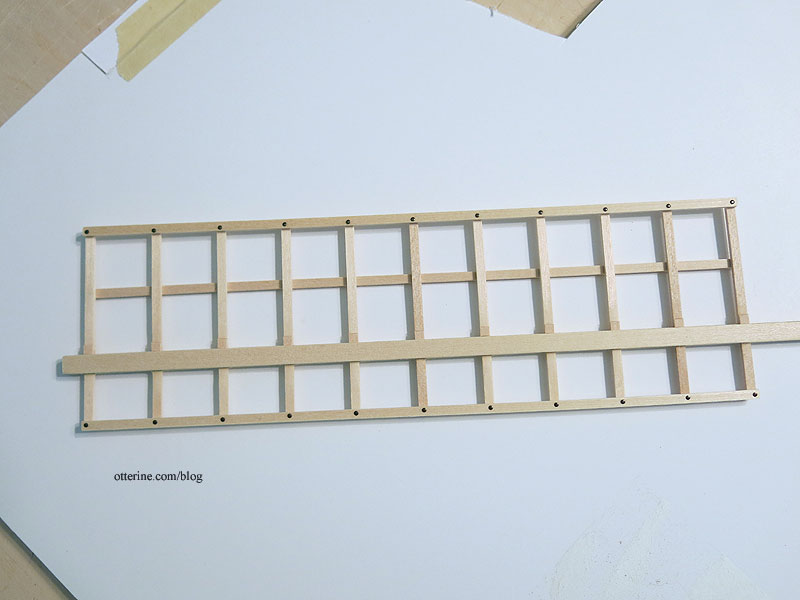
One sail down, three more to go. :]
Categories: Watson Mill
January 15, 2017 | 0 commentsWatson Mill – sails, part 2
Continuing work on the windmill sails. I did a foam core board mock-up the last time I worked on the mill. These gave me the measurements I needed for each sail.
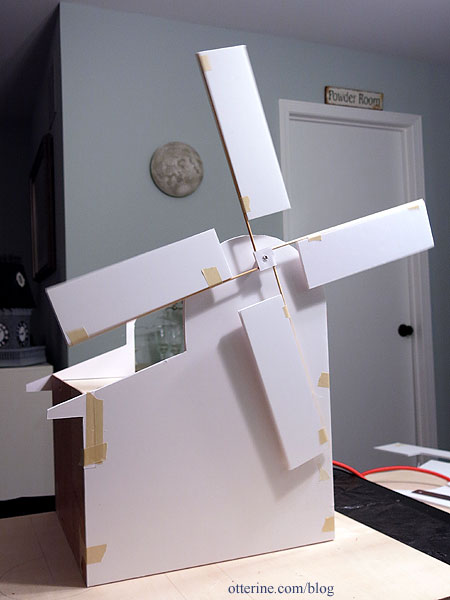
Before I do all the work of cutting tiny pieces of wood to make a true sail frame, I wanted to mock them up further. I used cardboard scraps to make a grid approximation for the sails.
I wasn’t especially careful in cutting so it went reasonably fast. I taped the new grid sails to the bamboo skewers and inserted those into the hub.
I put the sails on the foam core mock-up front to see if these still look good for size. Yep, I think that’ll do. :]
Categories: Watson Mill
December 29, 2016 | 0 commentsWatson Mill – sails, part 1
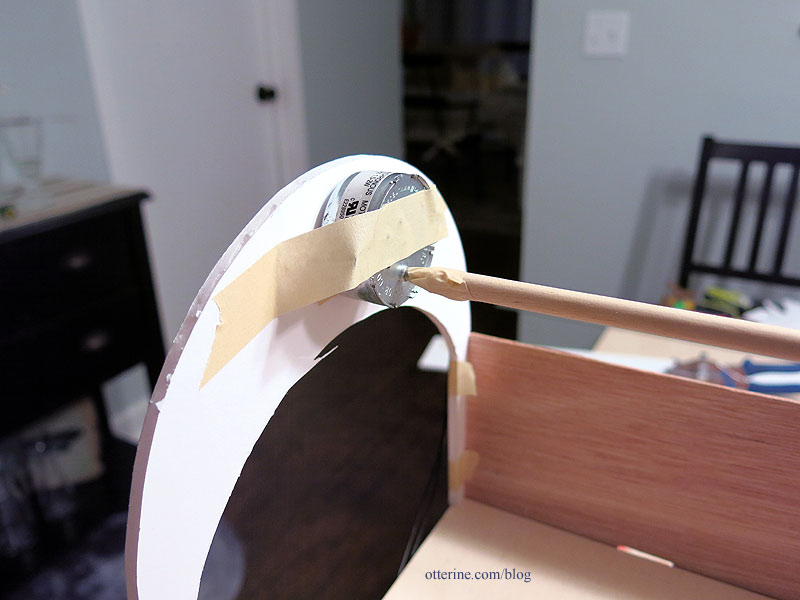
I cut a front wall from foam core board to determine the setup for the sails. I don’t want to drill a hole, have to move it and be left with patching issues on the wood board. I mocked up a back wall for now as well and taped the motor in place. I can make adjustments to this wall as needed.
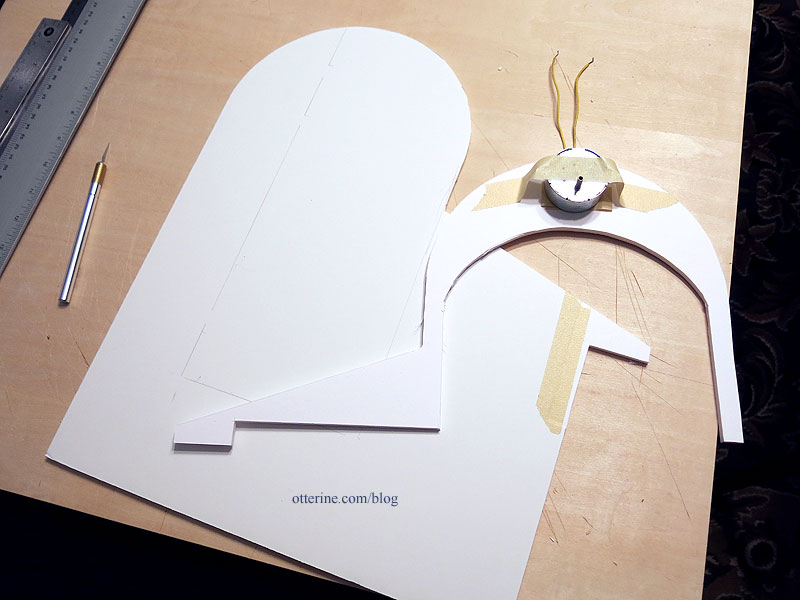
I’m using a wooden dowel for mockup purposes, taped to the motor. I might end up using this material in the end, but for now I’m just testing.
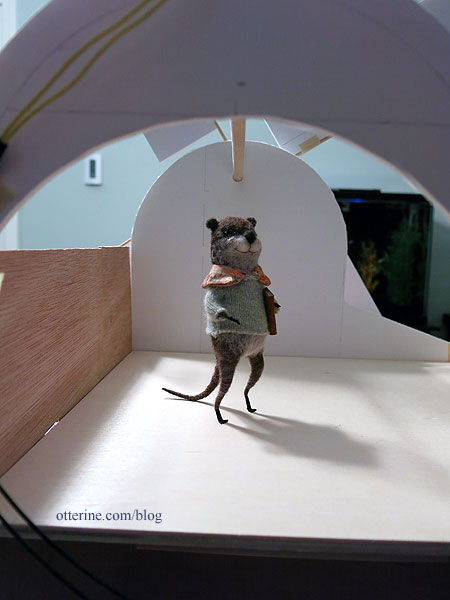
It’s still a good height for Gustav.
I made a sail hub from a scrap of foam core board and used bamboo skewers as the lead edges of the sails. These have 10″ of exposed length. I cut foam core sails by eyeballing the first one and then cutting the rest to match — these are 8.5″ long x 2.5″ wide. All of this is probably lighter in weight than my final sails will be, but it will at least give me an idea of scale and proportion. I think this has a good balance overall.
Turn on the motor…. So far, it looks as though my motor is able to handle the job effortlessly. (This video was taken with my old camera, but it gets the point across.)
Now, I need to create the sails.
Categories: Watson Mill
March 15, 2016 | 0 commentsWatson Mill – motor, part 1
Before I even begin to build, I need to figure out how to power the sails for Watson Mill. The mechanical setup will determine how much I alter the open back to disguise the power source.
As I mentioned, this tutorial from Bruce Hirst used a motor from Micromark. The main reason I did not go with the Micromark motor is the fact that it has a large cord attached. This is useful in that you have to do no wiring, but hiding a cord of that size with an on/off switch and plug would have been difficult. It would have required large holes or notches in the building and landscaping board. Addressing any possible problems in the future would be difficult as well.
I also wasn’t sure I would have the room or the need for the Lego gears shown in the tutorial. The space needed for these would also mean closing up even more of the back. Therefore, I might be connecting the sail shaft directly to the motor to limit the space needed from top to bottom on the back wall.
So, I chose this motor (this link might no longer be accurate as of 2024) from Winbell’s Store on aliexpress. It runs slightly faster at 5RPM vs the 2.5RPM in the tutorial but it is also 1 5/8″ in diameter as opposed to 2″ in diameter for the Micromark motor.
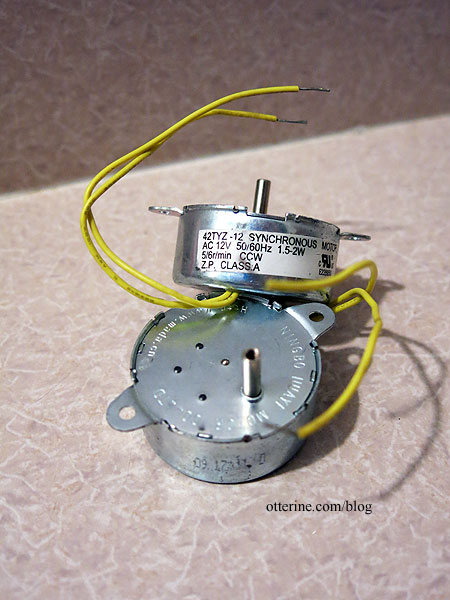
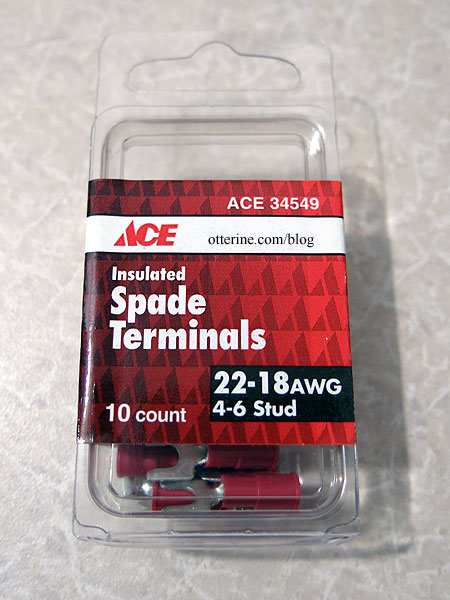
Being AC instead of DC (no, don’t ask me to explain the difference just accept that there is one), the motor will run on a separate line from the dollhouse 12V DC system. I bought this transformer to power the motor. All that will be required is to splice on some length of wire and add forked spade connectors to the ends. You can spin the wire directly to the transformer, but the connectors just make for a cleaner and more secure assembly.
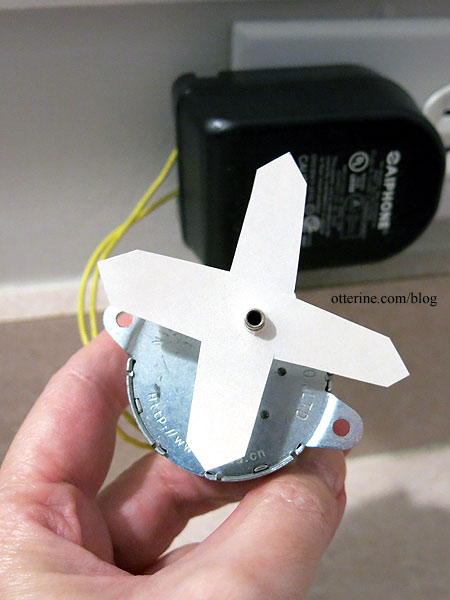
Here I’ve added a paper cutout just to show that the motor does spin and in which direction.
A quick video. :]
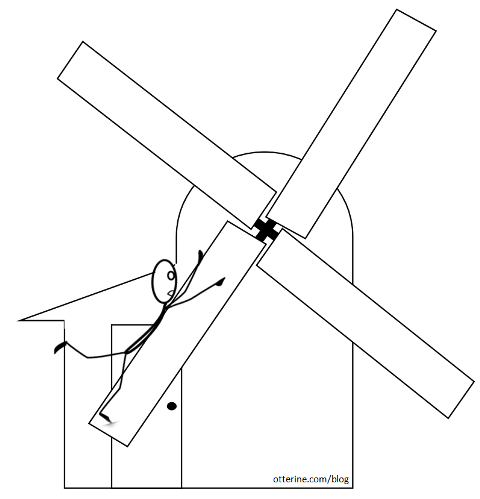
Seeing that this motor turns counterclockwise makes a difference in how the sails will be built. Even though the wind won’t power them, I want the sails to be built to correctly correspond to direction. Here is clockwise, and here is counterclockwise. You can see the difference in the lead edges and angles. Bruce Hirst has the correct configuration for clockwise sails, but I will be building mine opposite to suit the spin of my motor.
I’ll need to build the sail structure first to make sure my motor can handle the work before starting the mill itself…a bit of reverse engineering. :] I don’t want to do all the work just to find out I need a different motor in the end. Let the engineering begin!
Categories: Watson Mill
February 17, 2016 | 0 commentsWatson Mill – introduction
Greenleaf Dollhouses held their Spring Fling contest for a number of years, including some years before miniatures became an everyday thing for me. The 2009 kit had an arch roof and an interesting shape. I bought one some time ago for a someday project just in case they went out of production.
Jen Barrick’s Loganberry Mill was one of the first miniature houses that drew me into the hobby. She dropped the scale down to half scale and made the most amazing sail set. It’s truly an inspirational build from the inner mechanisms to the realistic landscaping.
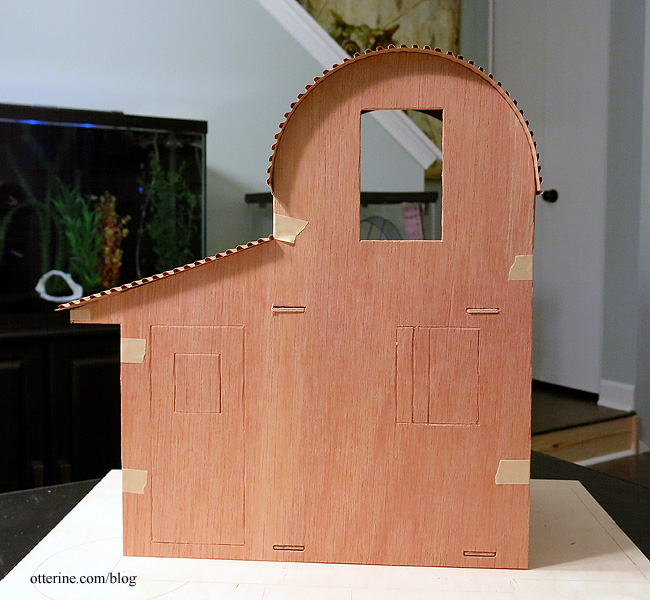
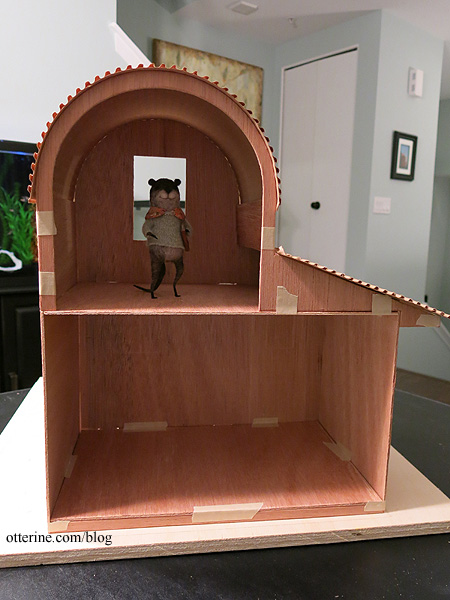
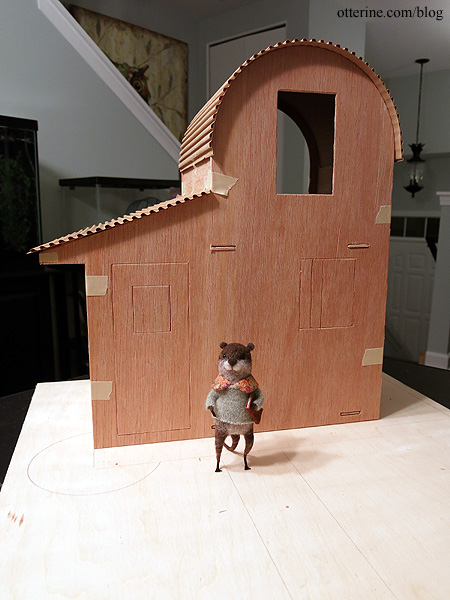
So, this is where I start…with an idea for my own take on the kit…Watson Mill. The kit is simple yet elegant in design, a cozy place. I punched out the upper window even though I will be adding sails here, because the kit had trim pieces die-cut there that were falling out. I’ll just have to patch it. I won’t be using the cardboard roof pieces, but they complete the dry fit.
I will definitely need to move the door to one of the side walls so I’ve left it and the lower window intact for now. We don’t want to send anyone ass over tea kettle. :O
I will keep the full scale aspect and make this more of a fantasy build in the vein of Roland’s Retreat. That saves the hassle of adding a full kitchen and bathroom. This will also be a mill rehab with most of the inner workings of a proper mill long gone and replaced with the cozy decor of its current resident, Gustav. He’s independently wealthy, so he dines out all the time anyway. There might be room for snacks and a tea kettle.
Gustav is an otter with a thirst for knowledge and culture. He loves the written word, so I foresee a good deal of books to be made. I can’t go stealing them from grandma at the Heritage, after all.

With his simple tastes, we’ll need a place to sleep and a place to read….maybe a stove to keep warm, too. Since the upper room is small, I can make a daybed for the space. This will leave room for a short dresser and a bedside table. I prefer the realism of stairs in my builds, even in the realm of fantasy, so he will also need a ladder between the floors. While I do love this rug from dalesdreams, I think a fox rug might look nice here in the bedroom. ;D
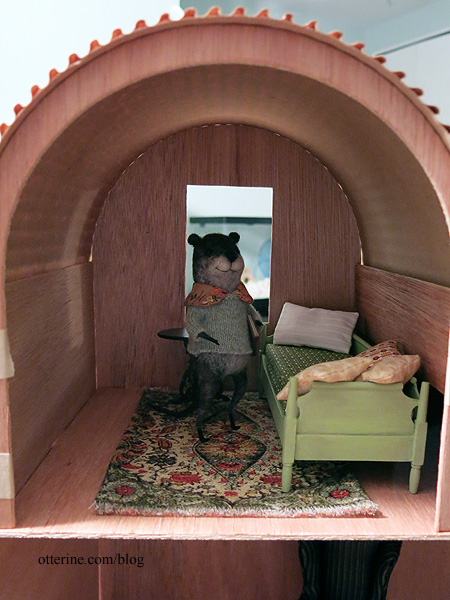
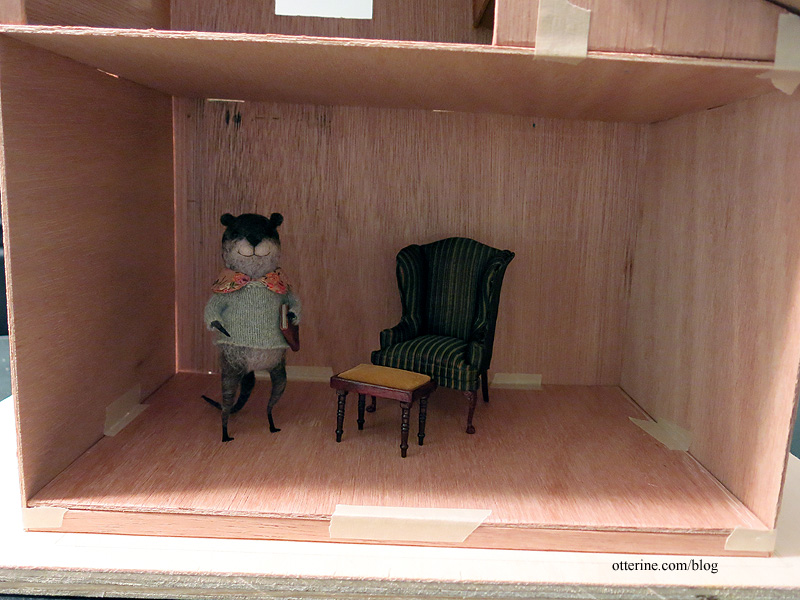
I think this Bespaq chair might stay. I have two of them, so we will see if there ends up being enough room for Gustav to be the social type.
For the exterior finishes, I am drawn to both wood shake and brick, so I might end up with a mix of the two if I can’t decide. I will likely build up the ground as Jen did to make the landscape more interesting. I’d also like to add an arched door to keep with the storybook feel.
As for the sails, they are going to have to actually spin, right? :D Bruce Hirst has some great instruction on how he made his working mill, so that will be a great starting point. I have the challenge of an open back structure so I will need to be creative in disguising and setting any mechanical details. I will have to close up at least the arch near the upper back. The mechanism will have to be addressed fairly early since that will determine if I have to adjust the height of the second floor space.
First, though, I will determine if I want more depth to the kit to make the rooms larger. That’s very straightforward since I’ll just need wider side walls. I will likely have to cut an additional front wall as well to have a good thickness for a working window and to brace the sails. I’m 99% sure I want more depth since there are a couple of things I’d like to add that will require a larger lower room. The kit is relatively small to start, so there’s plenty of room to add while staying with my current landscaping board. So, I’ve put the kit in dry fit so I can stare, think, plan and play.
Categories: Watson Mill
December 29, 2015 | 0 comments
NOTE: All content on otterine.com is copyrighted and may not be reproduced in part or in whole. It takes a lot of time and effort to write and photograph for my blog. Please ask permission before reproducing any of my content. (More on copyright)