


NOTE: All content on otterine.com is copyrighted and may not be reproduced in part or in whole. It takes a lot of time and effort to write and photograph for my blog. Please ask permission before reproducing any of my content. (More on copyright)

Categories:
Watson Mill – circle library, part 3
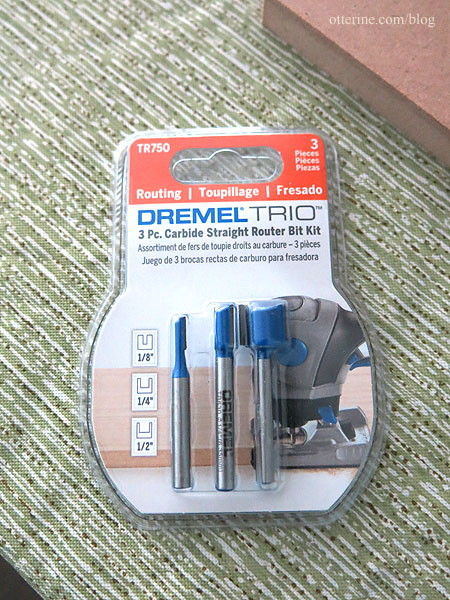
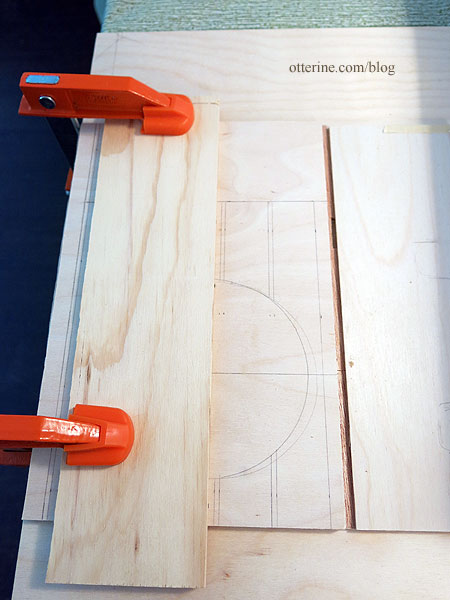
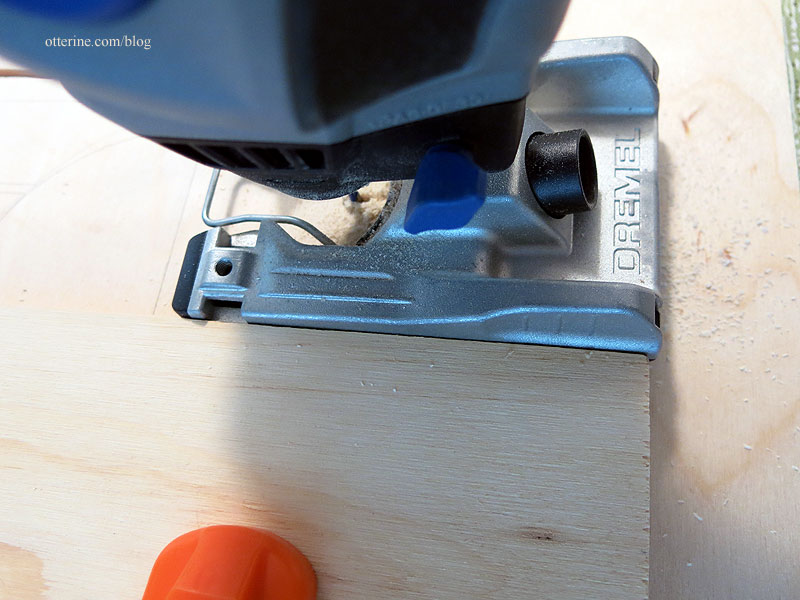
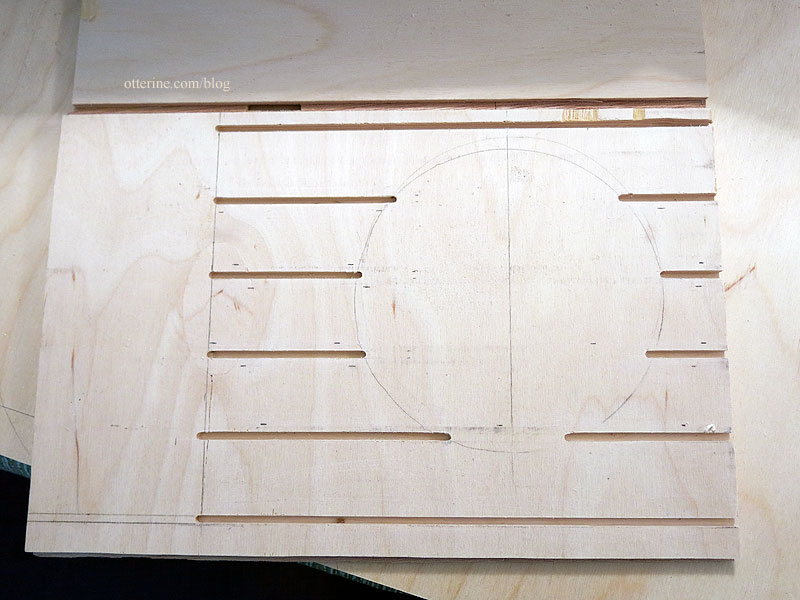
Continuing work on the circle library. With the ladder moved to the front wall, I now have 8 3/4″ of library wall space not including the two vertical end boards that will close it on the sides. I marked the final position of the center circle. This gives me a bit of shelf space to the right but allows me more room on the left to play. The left will be more visible anyway. To build the shelves, I cut 1/8″ wide channels in the plywood wall using the Dremel Trio.
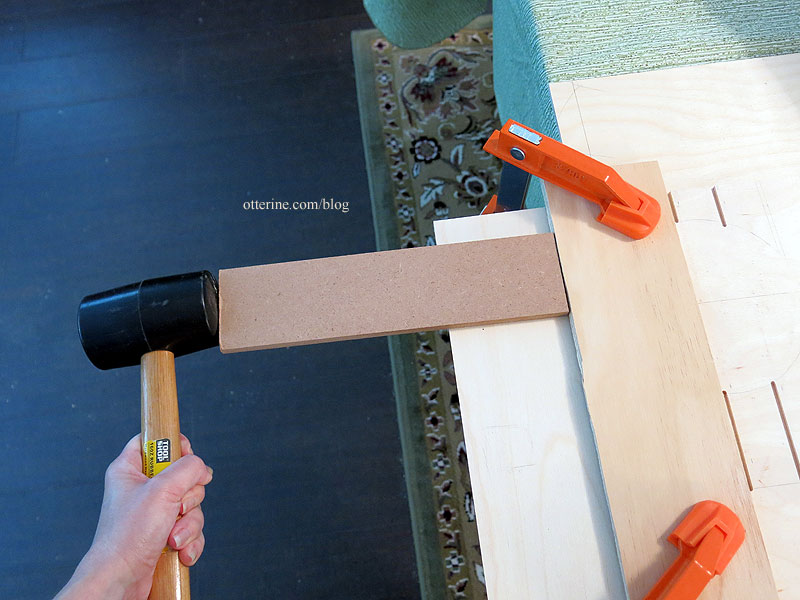
Since I didn’t trust the wall edges to be straight, I used a fence board clamped in place.
You can plunge cut with the Trio, which is a great feature. You can start anywhere along your line.
The bit made a channel slightly too narrow, so I tapped the fence board with a rubber mallet for a second run, widening the final channel to the proper width needed to fit the 1/8″ shelves.
The top channel is rough because there was something catching the bit in the wood and it was close to the edge. Once the ceiling is in, I will add trim to enclose the top space to keep it from being a dust-catcher space that’s difficult to clean, so the rough cut didn’t matter much. These might not be square to the floor or ceiling after the build is in place, but they are reasonably parallel to one another.
The channels provide a sturdy hold for each shelf cut from 1/8″ basswood. I started with 1″ wide basswood strips and cut them down to end up with a roughly 3/4″ deep shelf. I hand cut the angles around the circle supports. Not easy.
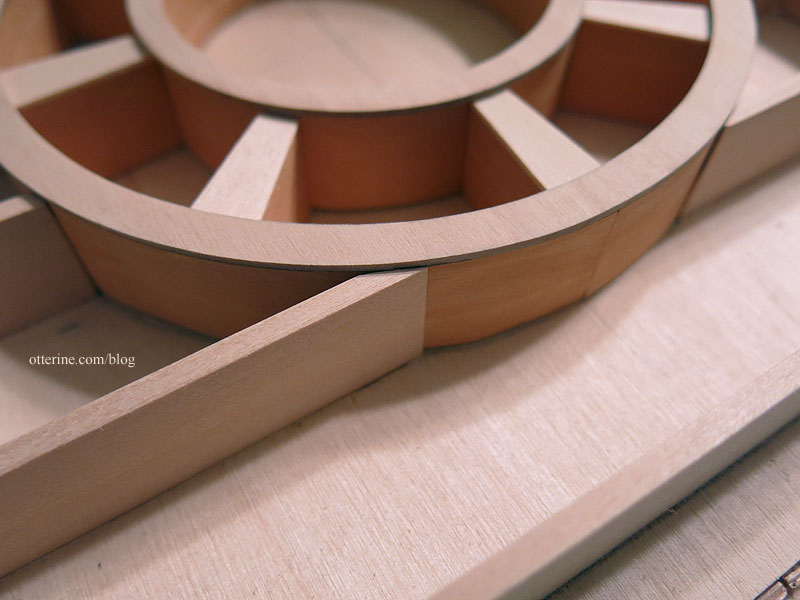
The two end boards are slightly deeper than the shelves. For the top, I cut a piece of 1/4″ strip wood for stability for the eventual final trim. I still need to cut the support piece for the bottom of the circle, but I am tapped out for the night. :D
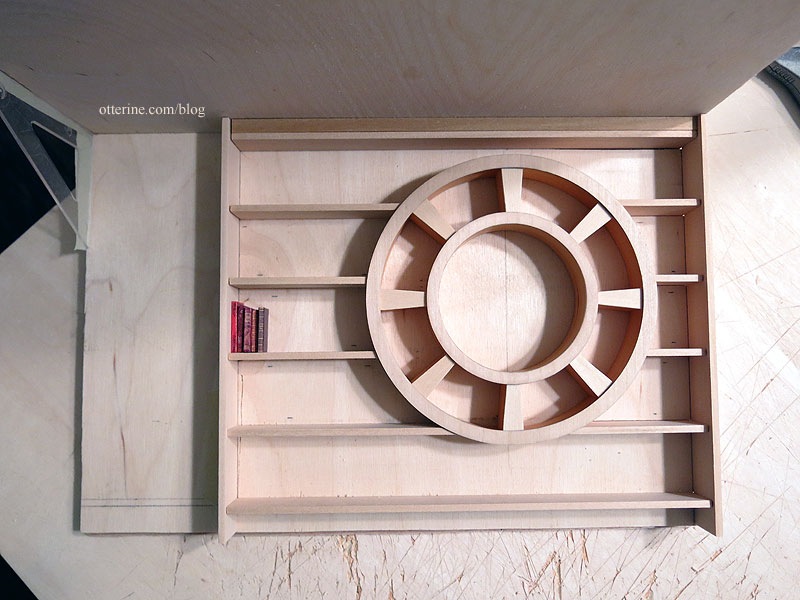
The space under the bottom shelf will be enclosed by trim or baseboard in the end, and I left a bit of clearance on the bottom for flooring thickness.
Next up, covering the plywood back between the shelves and cutting the mirror for the center.
Categories: Watson Mill
May 21, 2017 | 0 commentsWatson Mill – circle library, part 2
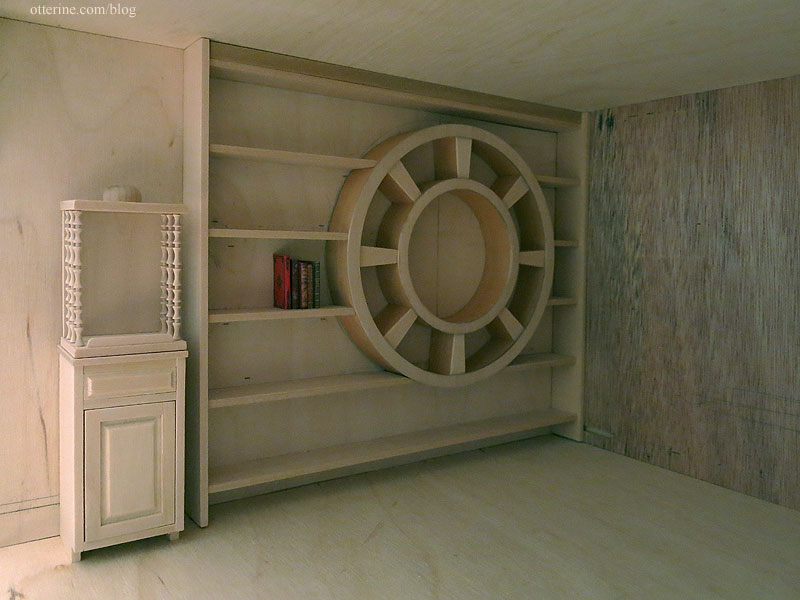
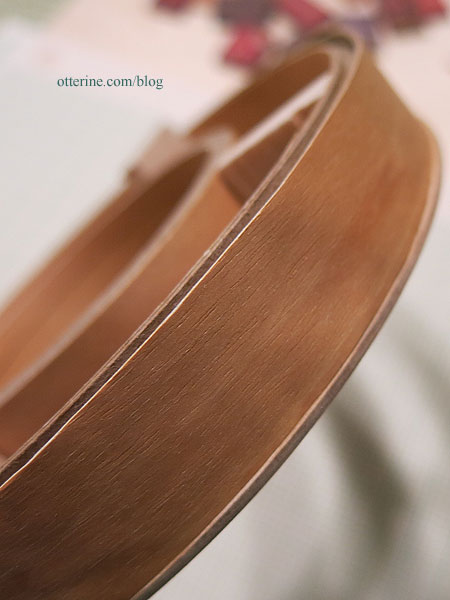
Continuing work on the circle library. The wood veneer buckled on the outer surfaces of the circle supports. I didn’t have enough to redo both circles, so I redid only the smaller one. I hope once the books are in place it won’t show. I also will have straight shelves abutting the large circle, so that might help, too.
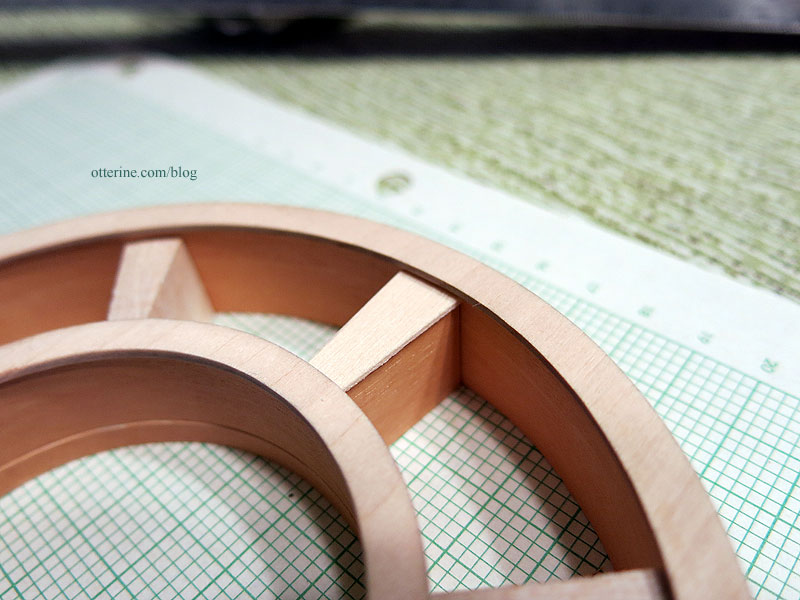
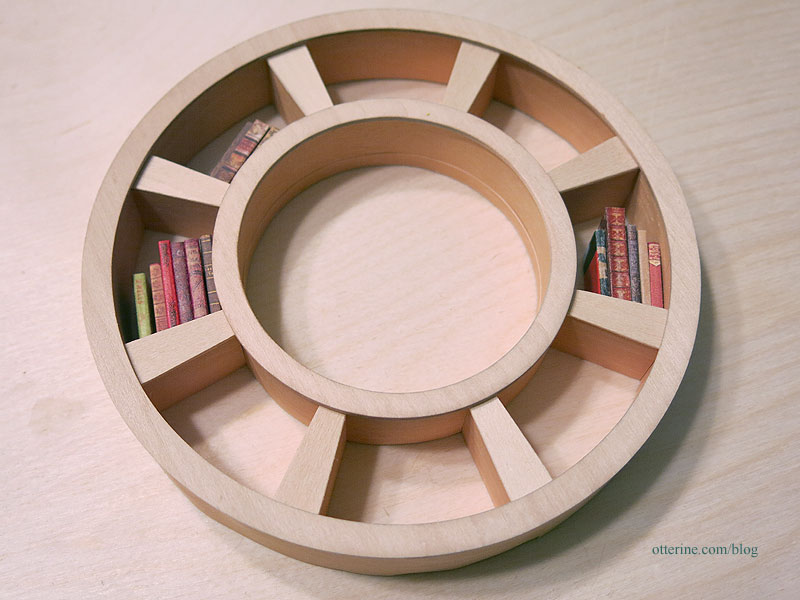
The original inspiration had 18 dividers, but my version has only eight for balance and fit. I used scrap wood to try out the look first.
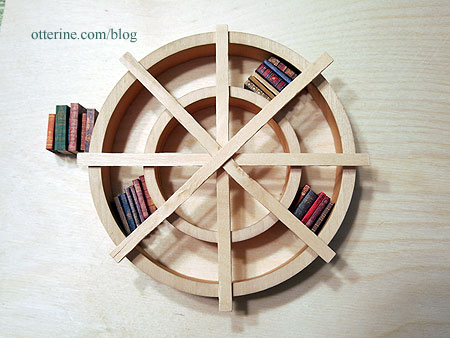
I made angled dividers to match the original. I covered the sides of the angled inserts with peel and stick wood that I had left over from the Model T Van build. I used additional adhesive just to make sure the bonds will hold over time. I again used the Elmer’s stainable wood glue. To finish the front edges, I cut shapes from 1/32″ basswood to match the laser cut circles.
I think this is a good approximation of the original. :]

Next up, the long straight shelves.
Categories: Watson Mill
May 20, 2017 | 0 commentsWatson Mill – Vintage Lundby and pulleys
I searched through my collection for items to add to the mill. I ran across this vintage Lundby piece I picked up a few years ago. (Note: this might actually be a Lisa of Denmark piece.)
Being a slightly smaller scale, it has never worked well in any build to date. The mill, however, provides a perfect spot for it.

Its hinge pins show on the top surface, but I can cover that well enough with a runner.

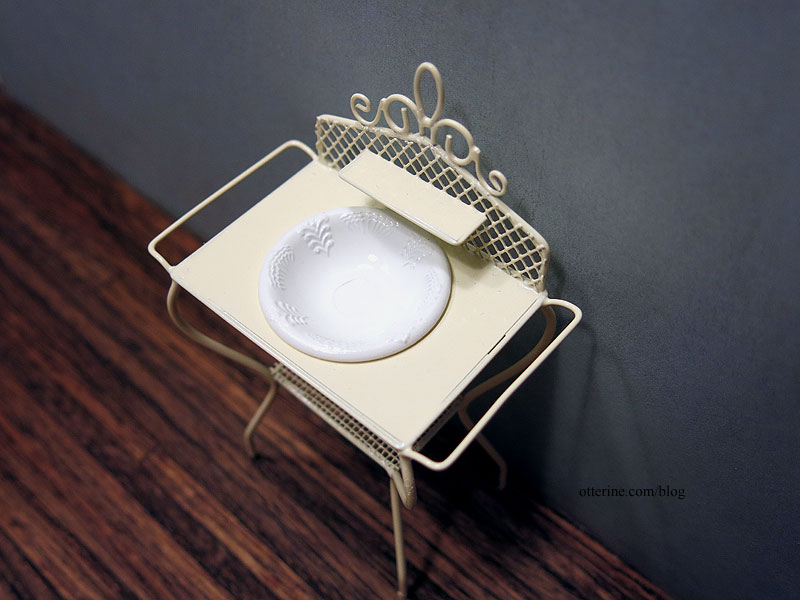
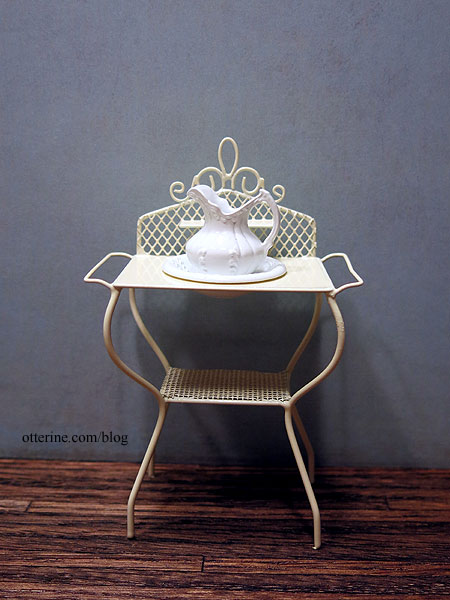
I bought this pale yellow metal wash stand from The Dolls House Emporium some time ago mainly because I liked the shape and color (looks like they don’t have it anymore). It didn’t come with a bowl, but I didn’t have a home in mind for it anyway so it went into storage.
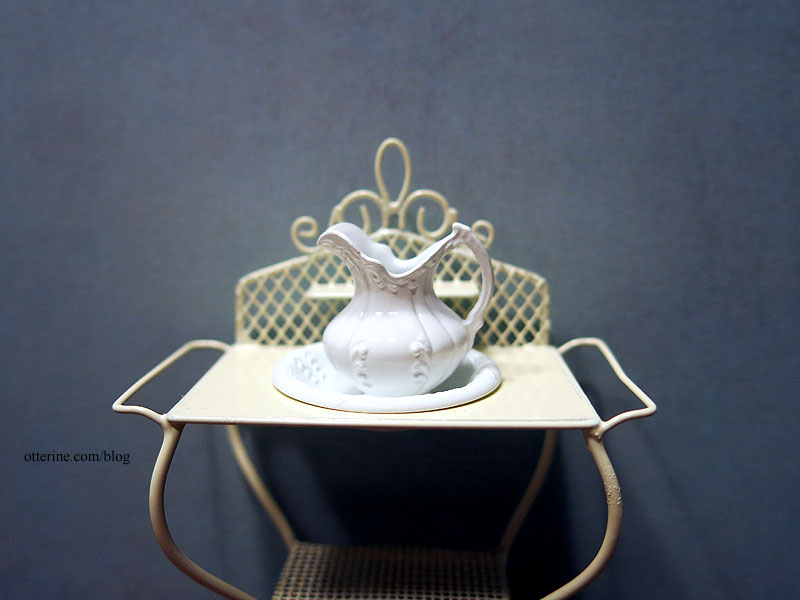
I’ll be using this for the upper room of the mill and needed to find a bowl. The small shelf in the back and the size of the hole limited what would fit. The ceramic bowls I had were either too small around and fell through the hole or were too tall and wouldn’t fit under the shelf. Debora said she had the Chrysnbon chamber set and would send me the bowl and pitcher. They are plastic but very well detailed. They also were a perfect fit.
I sprayed them with white gloss spray paint followed by several coats of gloss sealer.
They look fairly convincing as porcelain if you don’t look inside the pitcher to see the mold lines.
Thank you, Debora, for helping Gustav stay clean and fresh! :D
I also received the model ship single sheave blocks I had ordered from the UK from Maritime Models. Yep, they actually work. These will be perfect for my dumbwaiter pulley system. So wee.
At the 3 Blind Mice show, they always have a tray of inexpensive little items to choose from with your entry fee. I thought this was perfect for Gustav. Always so much to do!

Ever feel like you’re being watched? hmm

Categories: Watson Mill
May 11, 2017 | 0 commentsWhat’d you call me?
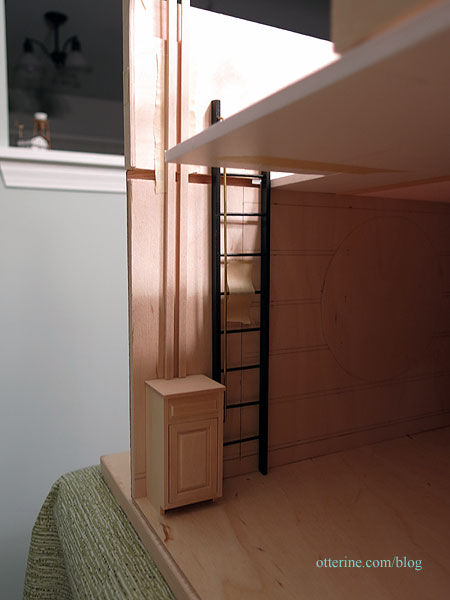
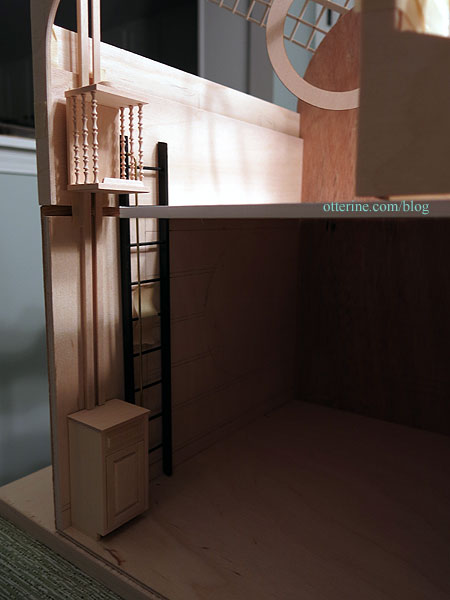
A dumbwaiter, that’s what. :D As I mentioned previously, Gustav will have only a ladder leading to the upper room, so it would be cumbersome for him to bring up late night milk and cookies while maintaining safe practices on the ladder. I rigged up a bucket on a rope for the purpose of mockups, but the final setup needed to be more elegant, like a functional dumbwaiter.
I’ve had dumbwaiters in my idea file for some time now. There’s a great example of the mechanism here at Old House Online. The basic premise is relatively straightforward with just a lot of wood construction. I was planning to put the ladder to the upper room near the open back, so I’ll construct the dumbwaiter beside the ladder toward the open back so I can operate it without having to reach in through the house. Parlor tricks are so much better when there’s no fuss.
The problem is, a fully enclosed dumbwaiter would block a significant part of the modest back opening, especially on the upper floor. So, I shall make a compromise between the bucket on a rope and an enclosed dumbwaiter. I’ll have an open dumbwaiter car running on a track along the wall with a pulley system. This way, the car will move smoothly up and down to carry milk (or Scotch) upstairs and yet take up less visual space overall.
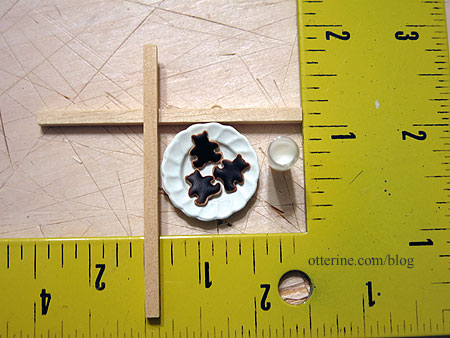
I started with the car measurements. To carry milk and cookies, the tray needed to be roughly 1 1/8″ deep x 1 1/2″ wide.
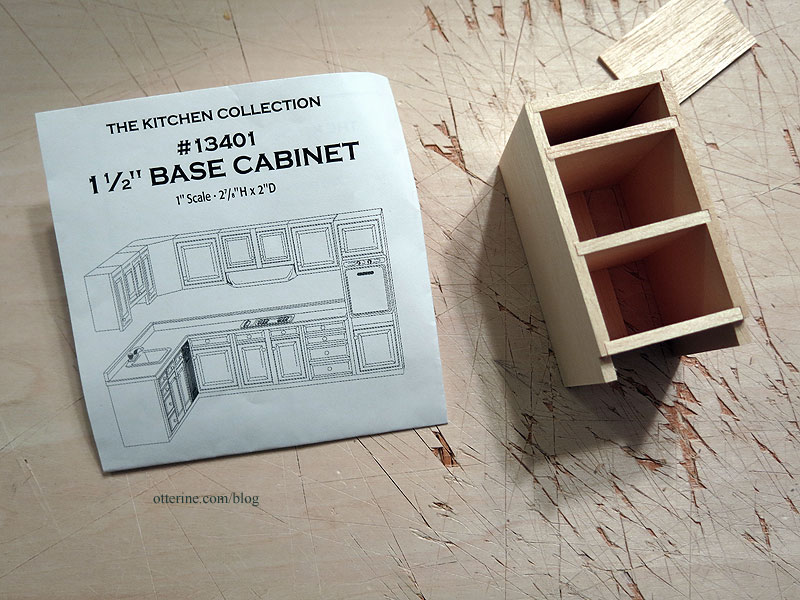
The car should rest at counter height when on the lower floor, so I bashed a 1 1/2″ Houseworks base cabinet by cutting down the depth. This also gives Gustav some storage in his small home.
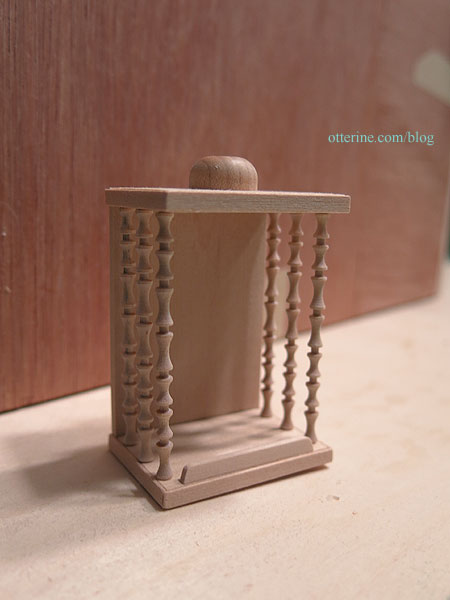
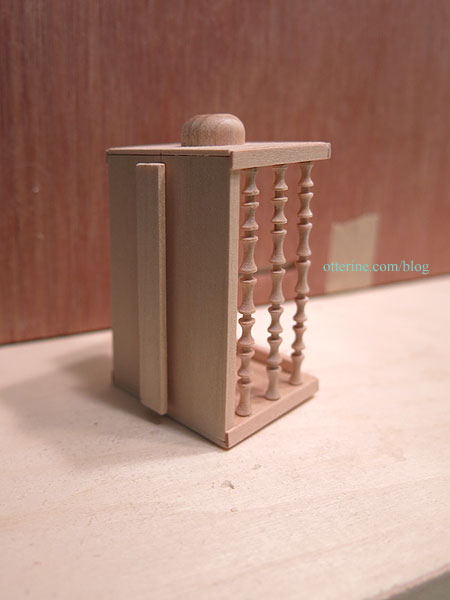
I built a fancy car from tiny turnings and basswood.
I added a slider bar to the back of the car.
The track was formed from strip wood to make two channels facing one another. When I install the tracks after decorating, I plan to leave space enough at the top so I can slide the car off the track for cleaning, repairs or replacement.
The plate doesn’t quite fit anymore, so I’ll just use a slightly smaller one.
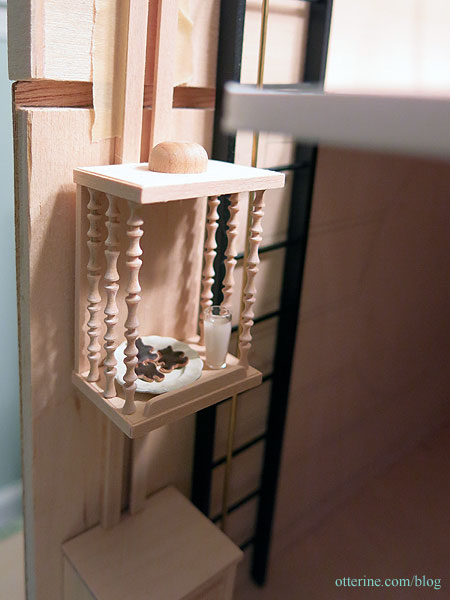
I love the way it looks so far, though. In fact, it’s such a nice element, I will try one more time to move the ladder so the dumbwaiter can be more easily photographed away from the open back edge.
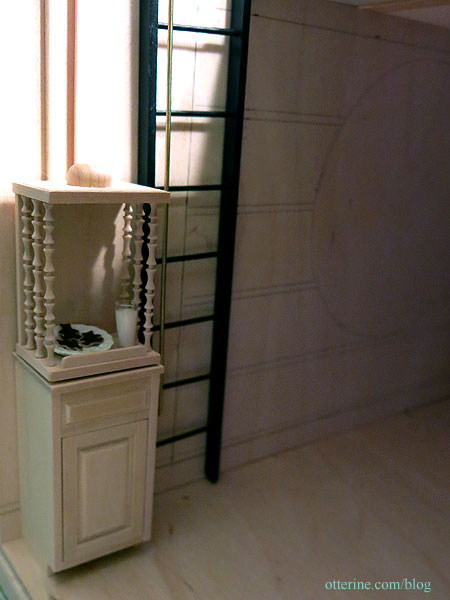
Pulley rigging and final stain finishes to come later, but it’s already better than just a bucket on a rope. :D
Categories: Watson Mill
May 2, 2017 | 0 commentsGustav’s Mill
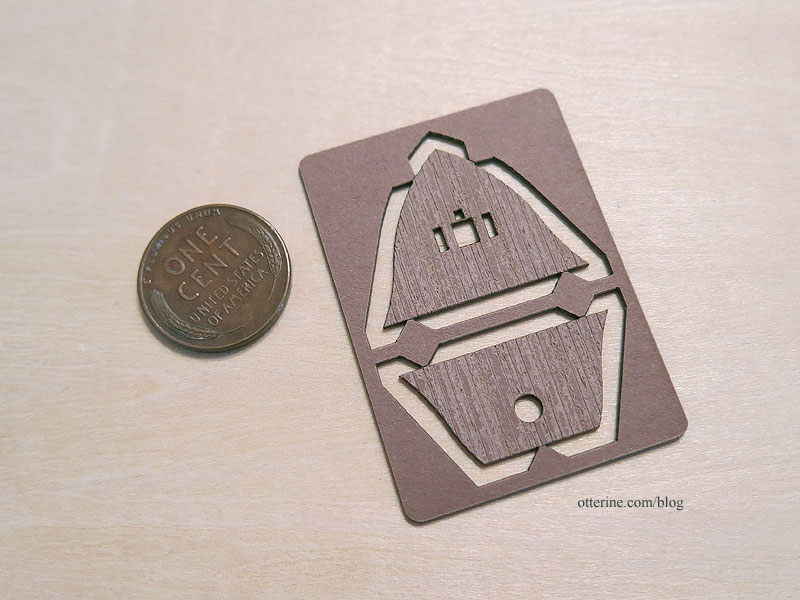
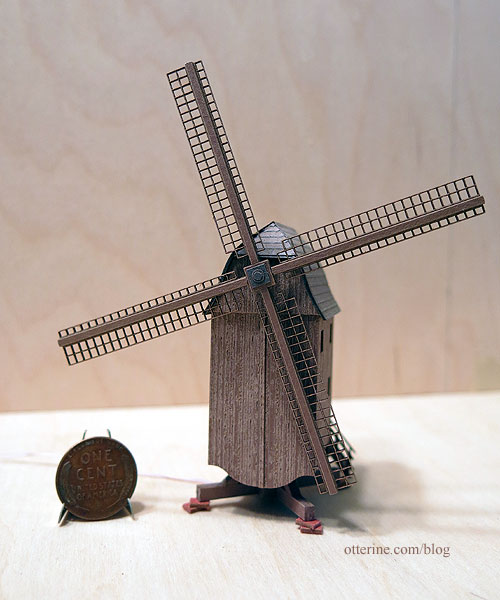
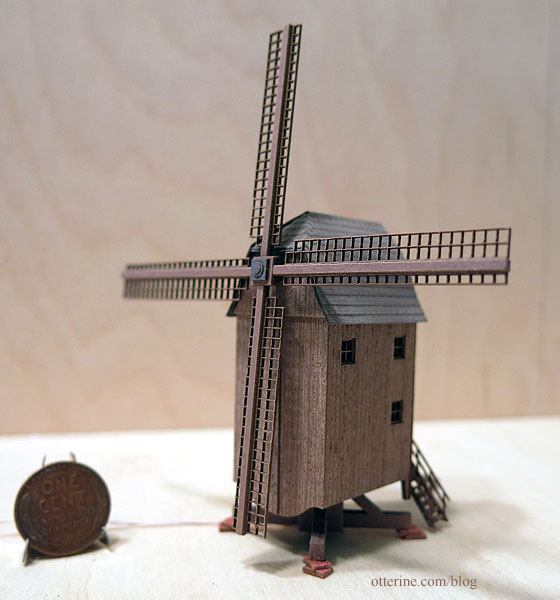
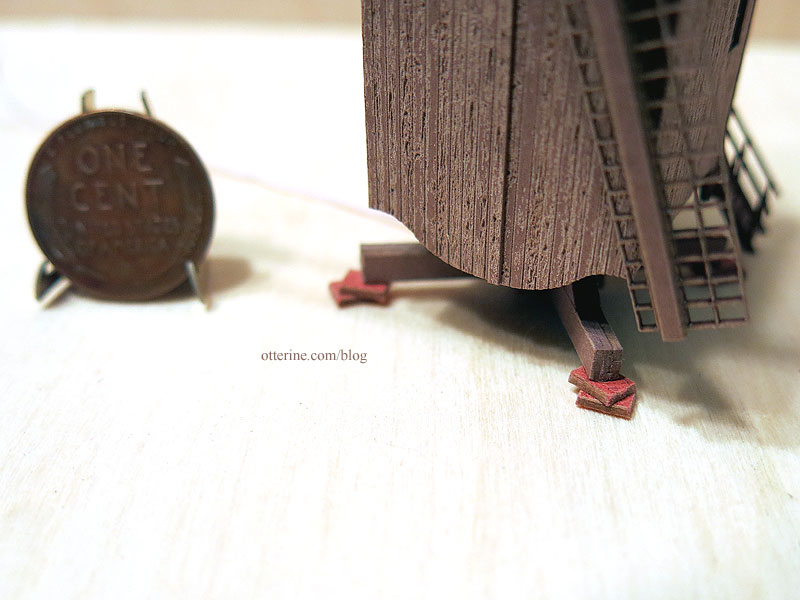
One of the reasons I cut new walls to make Watson Mill larger on the inside was to accommodate Gustav’s hobby. Turns out, in addition to avid reading, he’s a miniaturist. :D In researching mini mills, I found this delightful Archistories Windmill “Marienfehn” in Z scale.

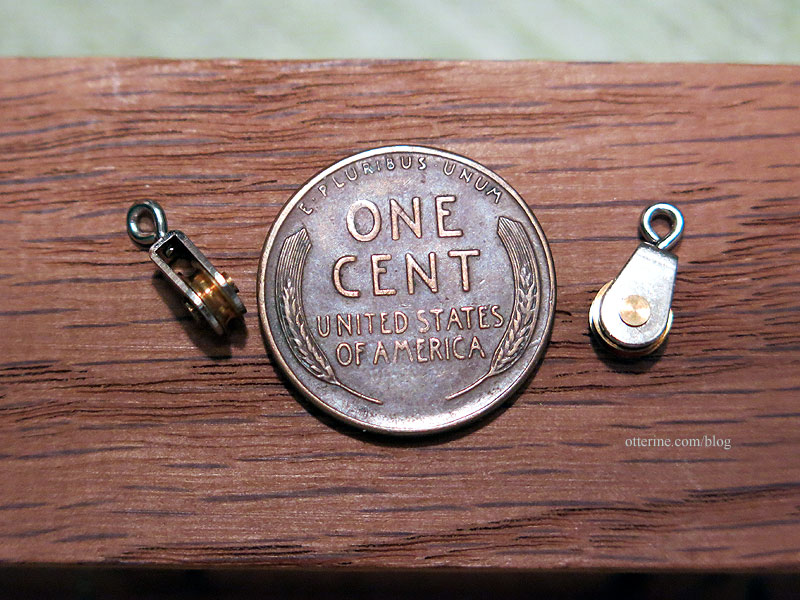
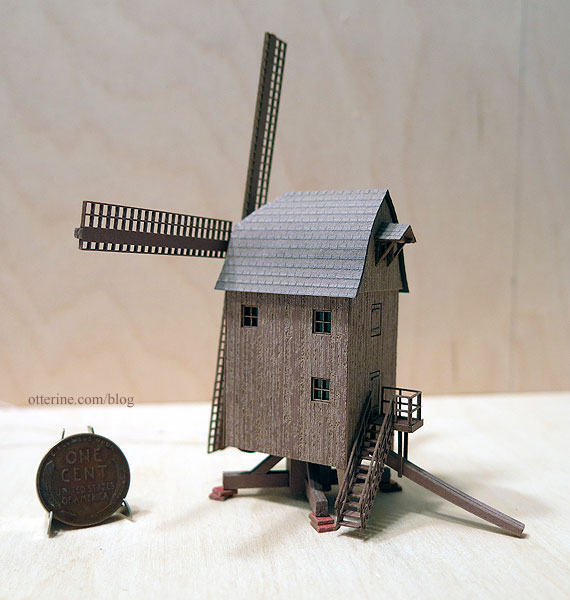
Here’s a penny to show the size of the pieces. There’s excellent detailing as well. The pieces seem to be made from some kind of chipboard material, and they recommend the use of wood glue. There are 10 pages of illustrated instructions, but it seems fairly straightforward.
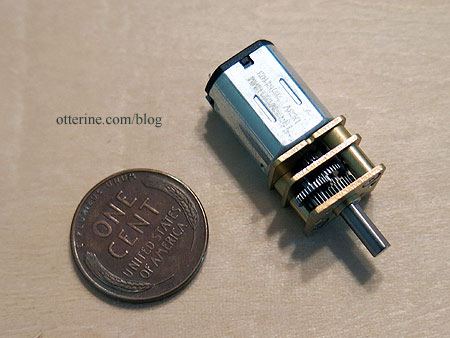
There’s even a motor for it. Yep, the sails go roundy roundy. :D It’s a DC 3V motor, so this should work with a battery holder and switch. I can build a work table to disguise the switch underneath.
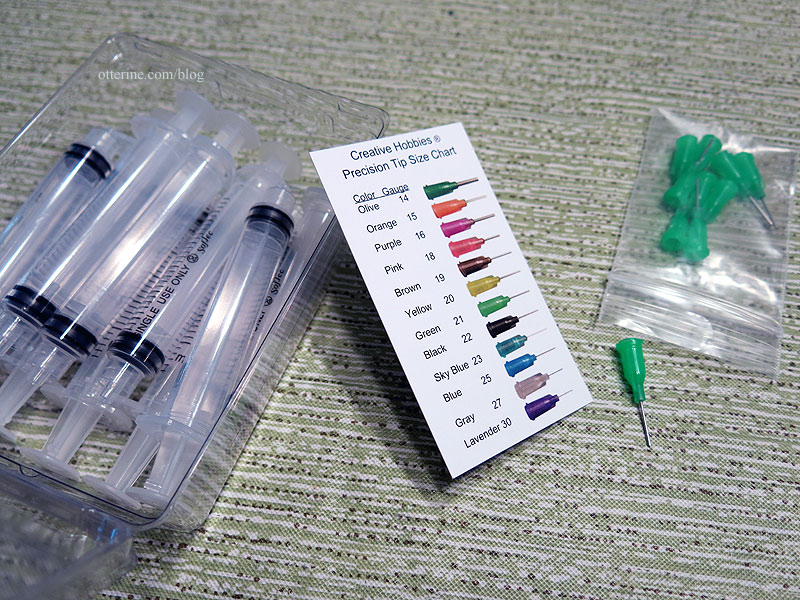
I bought some 21-gauge tipped glue syringes since the portions to be glued are so small. Elmer’s wood glue worked well with them.
The kit goes together easily since the parts are so accurate. The instructions are clear with good drawings.
The motor does work with a 3V battery holder. There are two diodes included to slow down the revolutions per minute (from 33rpm to 15 rpm according to the instructions). Those will be added later once I get the display table built for it. The motor has a quiet wind-up toy sound that’s rather satisfying.
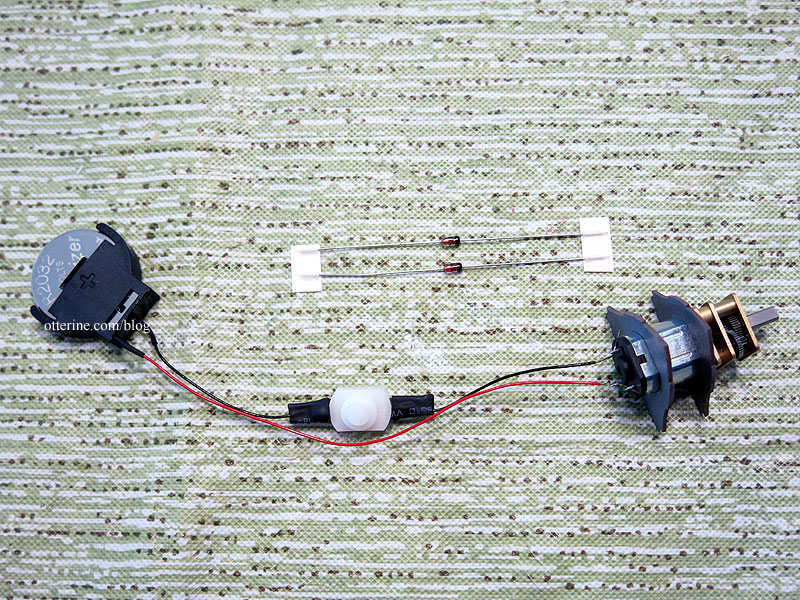
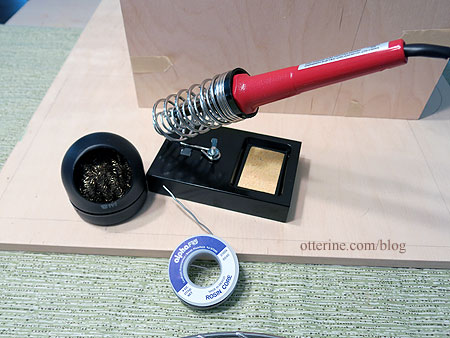
I got out my soldering materials to attach long wires to the motor. I left a lot of length so I can have more to work with later.
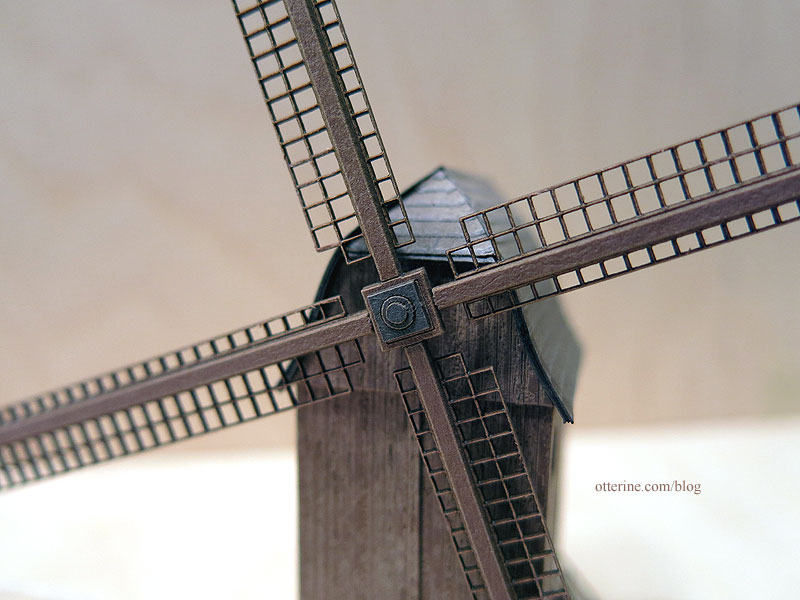
The X brace has been left unglued. I plan to make a modest landscape for the display, so I’ll add it once I get that in place.
I didn’t take many photos during the building process since the tiny dabs of glue dry too fast. :] The sails are also just lightly glued right now. I’ll add a stronger adhesive once I’m done. I want to be able to remove the sails during the landscaping process.
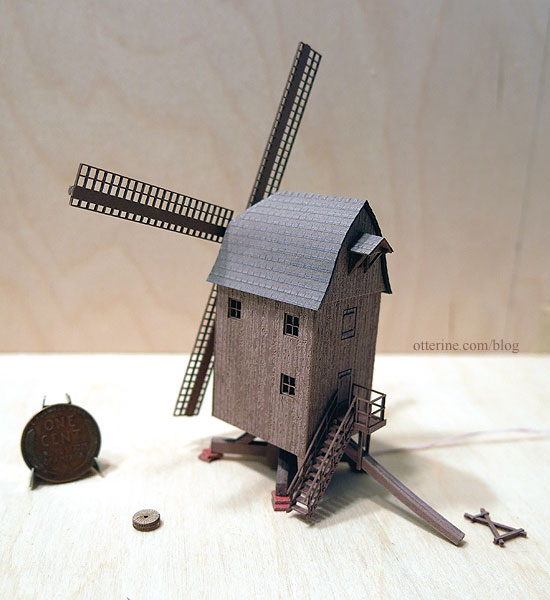
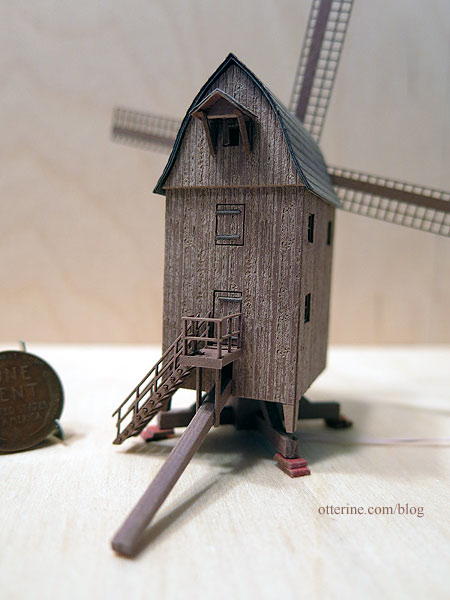
The tiny doors can be displayed open, but I like them closed. There was no breathing when handling those tiny hinge accents.
The hub looks so big and solid, but the centers are thin black paper circles applied with needle tip tweezers.
I love the wee windows. Yes, they have “glass” in them.
One of my favorite parts are the red stone slabs. Just a pop of color in the mix. You can also see the fine siding texture here.
Of course, I know you want a movie.:D This was taken with the two diodes taped in place, so this is the final speed of the sails.
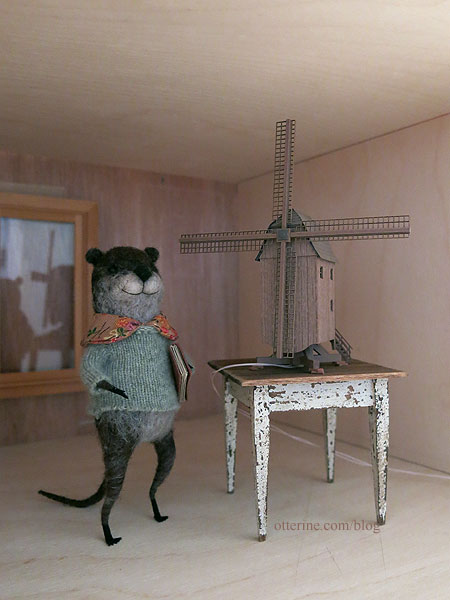
Unfortunately, Gustav’s Mill is too large for Watson Mill’s interior. So, we’ll just say Gustav built it to display elsewhere, a museum or gallery. :]
Categories: Micro Scale Models, Watson Mill
April 18, 2017 | 0 comments
NOTE: All content on otterine.com is copyrighted and may not be reproduced in part or in whole. It takes a lot of time and effort to write and photograph for my blog. Please ask permission before reproducing any of my content. (More on copyright)