

Gustav’s Mill
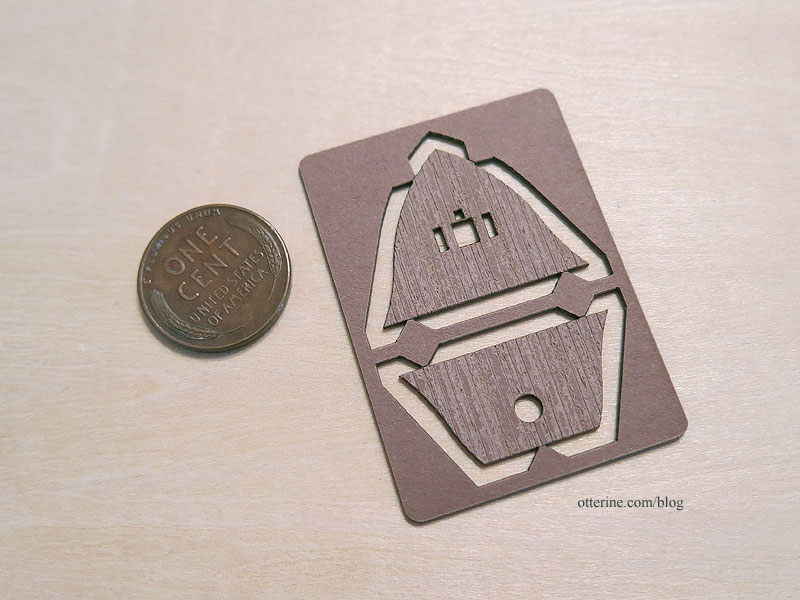
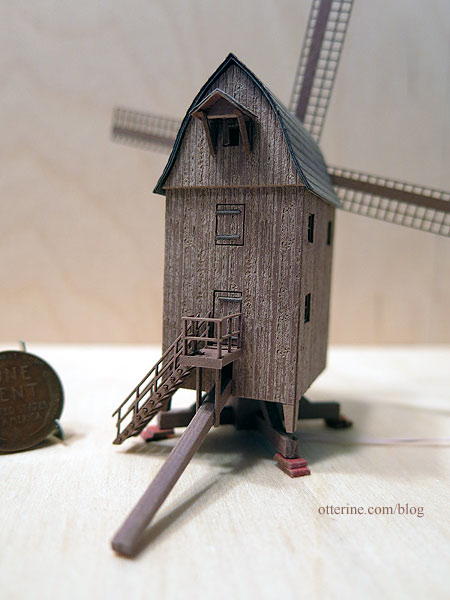
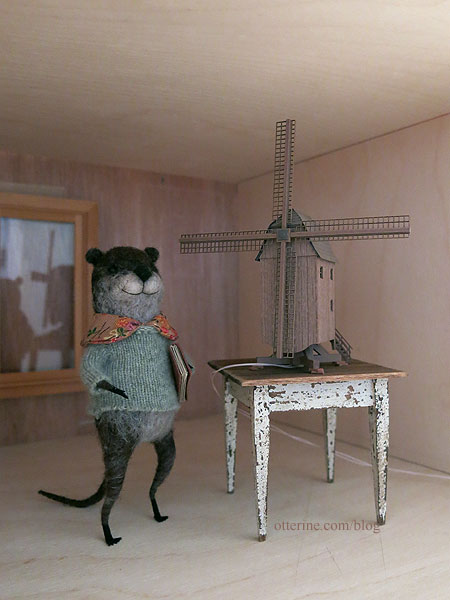
One of the reasons I cut new walls to make Watson Mill larger on the inside was to accommodate Gustav’s hobby. Turns out, in addition to avid reading, he’s a miniaturist. :D In researching mini mills, I found this delightful Archistories Windmill “Marienfehn” in Z scale.

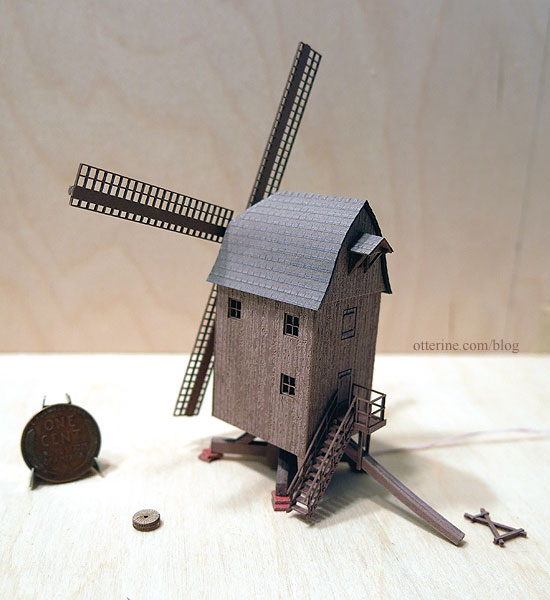
Here’s a penny to show the size of the pieces. There’s excellent detailing as well. The pieces seem to be made from some kind of chipboard material, and they recommend the use of wood glue. There are 10 pages of illustrated instructions, but it seems fairly straightforward.
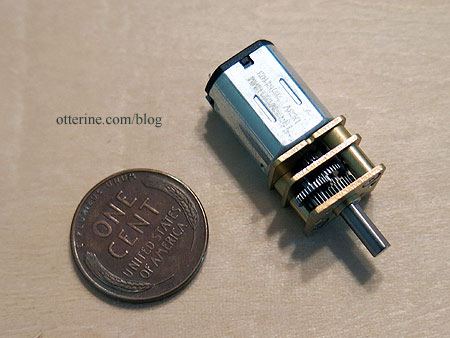
There’s even a motor for it. Yep, the sails go roundy roundy. :D It’s a DC 3V motor, so this should work with a battery holder and switch. I can build a work table to disguise the switch underneath.
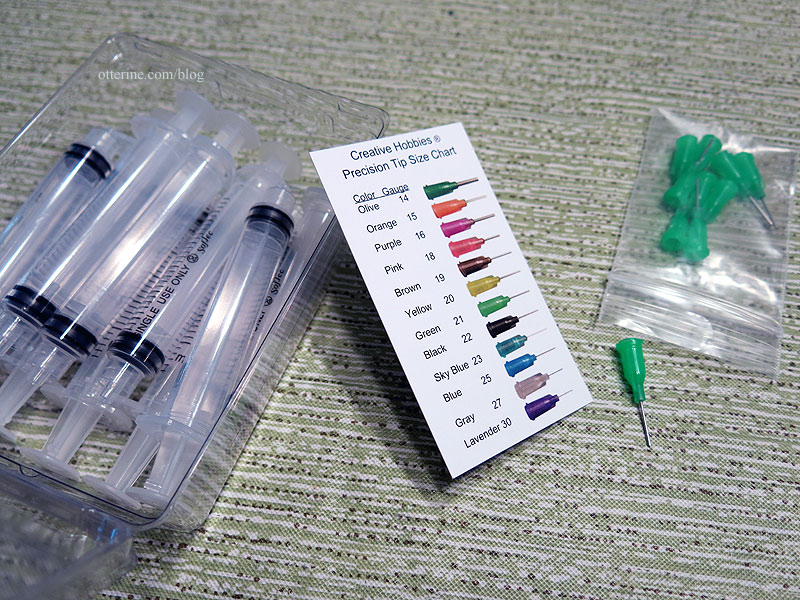
I bought some 21-gauge tipped glue syringes since the portions to be glued are so small. Elmer’s wood glue worked well with them.
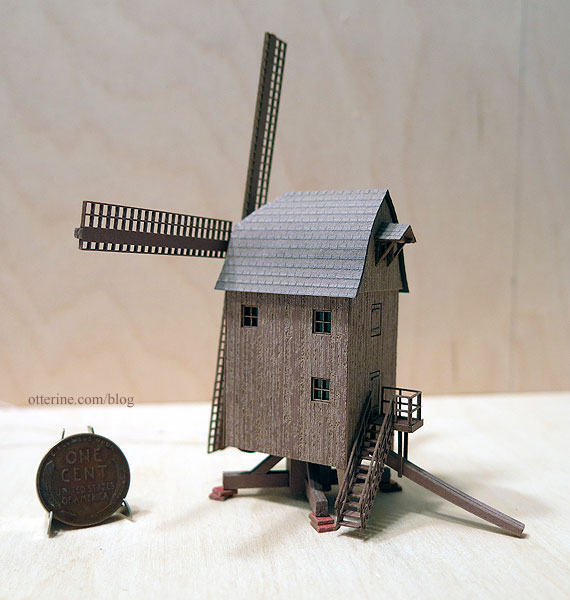
The kit goes together easily since the parts are so accurate. The instructions are clear with good drawings.
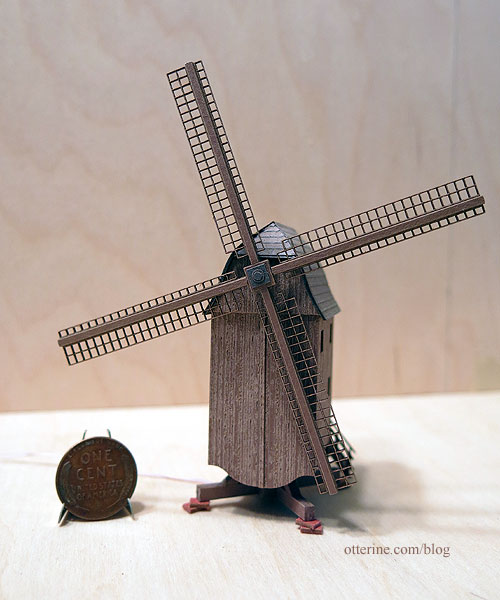
The motor does work with a 3V battery holder. There are two diodes included to slow down the revolutions per minute (from 33rpm to 15 rpm according to the instructions). Those will be added later once I get the display table built for it. The motor has a quiet wind-up toy sound that’s rather satisfying.
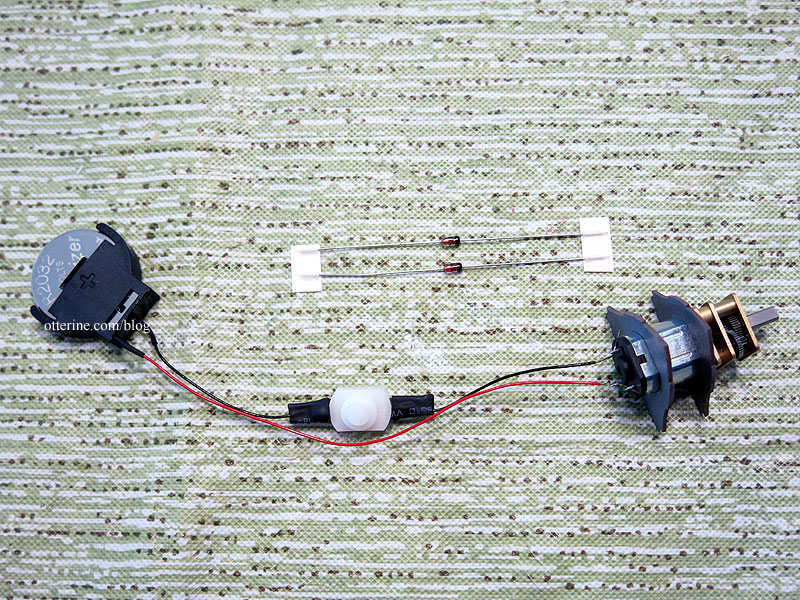
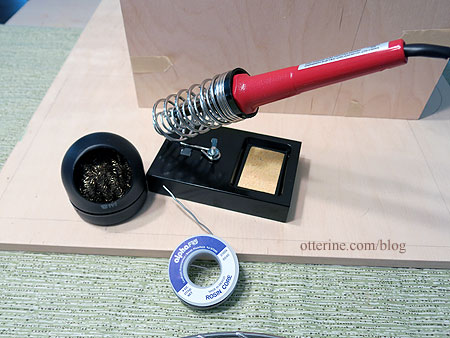
I got out my soldering materials to attach long wires to the motor. I left a lot of length so I can have more to work with later.
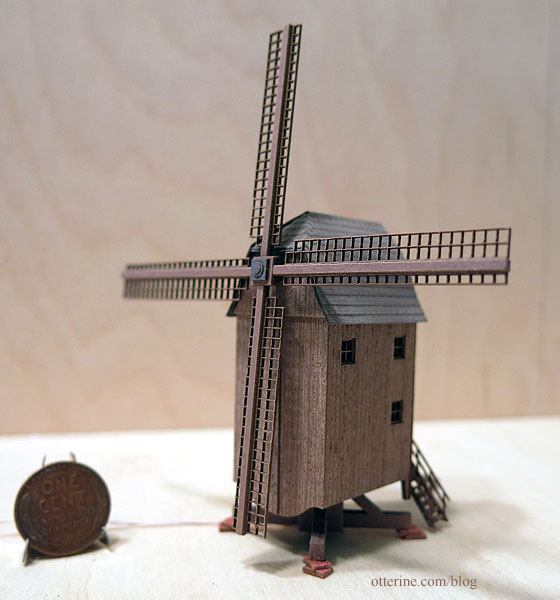
The X brace has been left unglued. I plan to make a modest landscape for the display, so I’ll add it once I get that in place.
I didn’t take many photos during the building process since the tiny dabs of glue dry too fast. :] The sails are also just lightly glued right now. I’ll add a stronger adhesive once I’m done. I want to be able to remove the sails during the landscaping process.
The tiny doors can be displayed open, but I like them closed. There was no breathing when handling those tiny hinge accents.
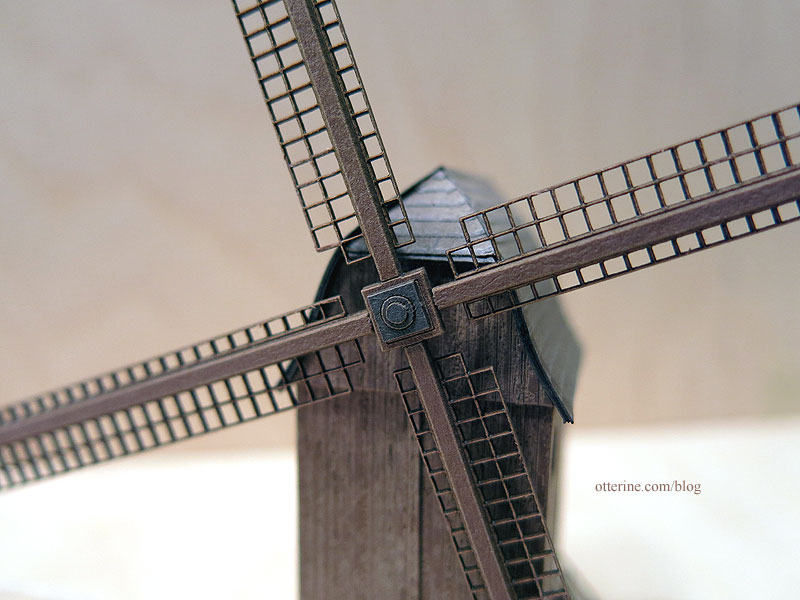
The hub looks so big and solid, but the centers are thin black paper circles applied with needle tip tweezers.
I love the wee windows. Yes, they have “glass” in them.
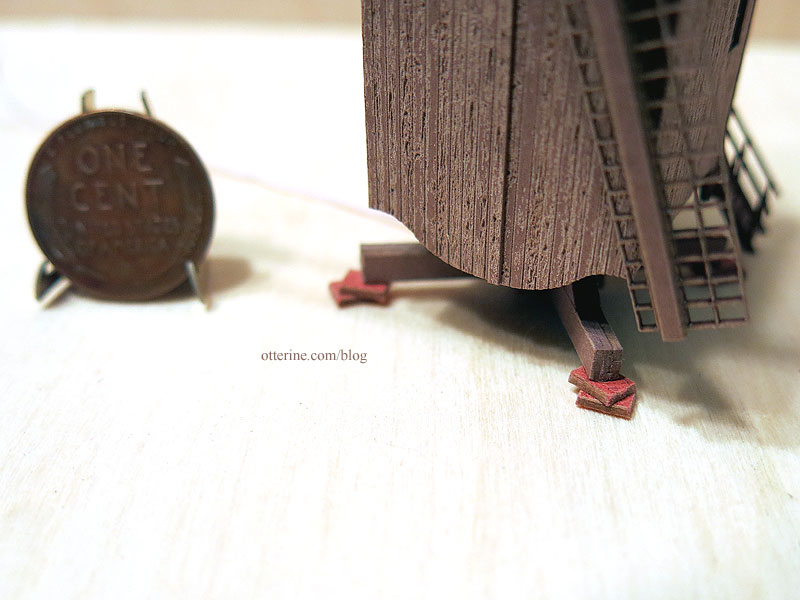
One of my favorite parts are the red stone slabs. Just a pop of color in the mix. You can also see the fine siding texture here.
Of course, I know you want a movie.:D This was taken with the two diodes taped in place, so this is the final speed of the sails.
Unfortunately, Gustav’s Mill is too large for Watson Mill’s interior. So, we’ll just say Gustav built it to display elsewhere, a museum or gallery. :]
Categories: Micro Scale Models, Watson Mill
April 18, 2017 | 0 commentsWatson Mill – door and windows, part 1
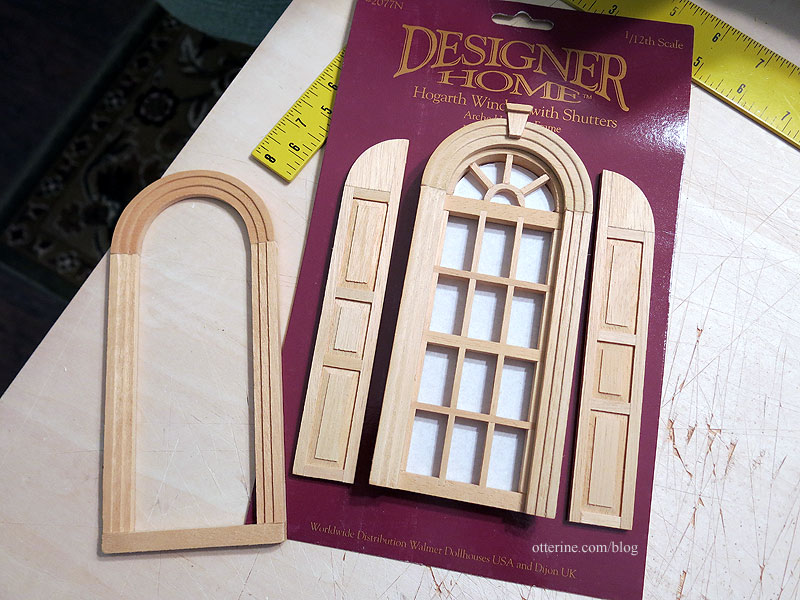
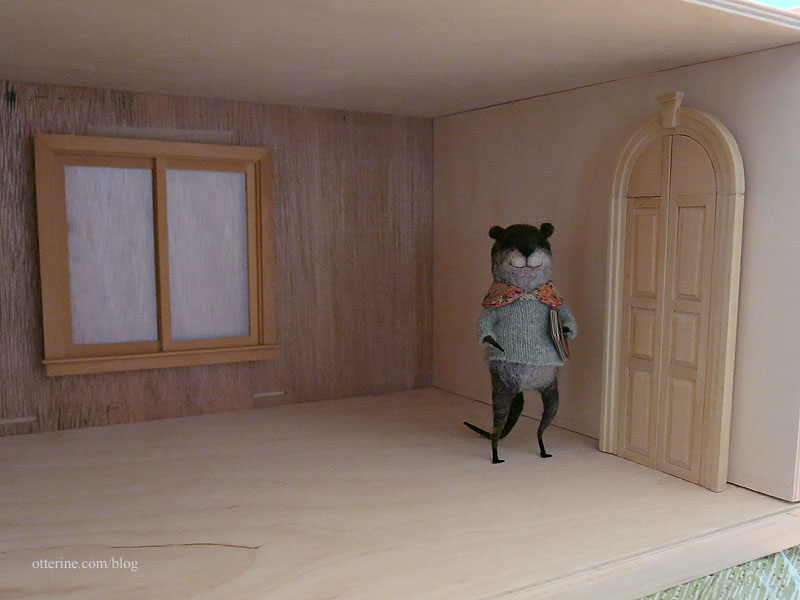
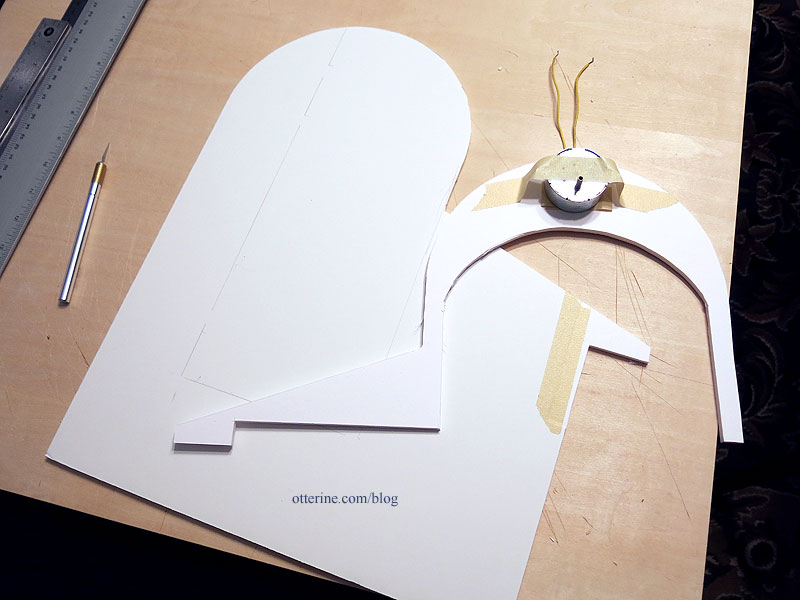
I wanted an arched door for Watson mill to keep with the curved aspect of the facade, and as mentioned before the door opening had to be moved to the side to avoid the sails. There’s a relatively low ceiling on the first floor at 7 3/4″ tall, which knocks out the ability to use the lovely Palladian door that stands just under 9″ tall. I also didn’t want to overpower Gustav’s modest stature with an enormous door. Enter the Designer Home Hogarth window with shutters. I bought this new old stock window at a local miniature show. I have only the one, but if I am meant to find more in the future then it will happen.
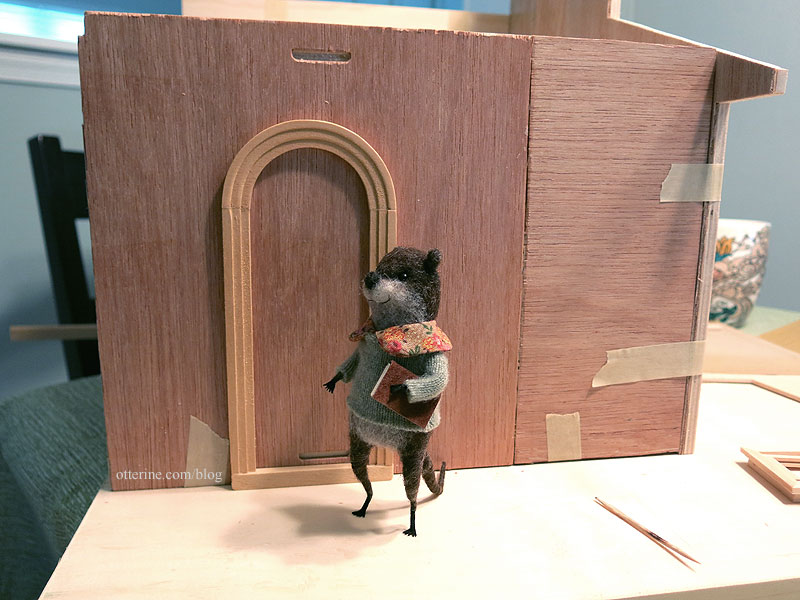
Using the trim as a guide, I measured the future door against the wall for comfortable otter accessibility. Check!
I cut the inside bits on the scroll saw.
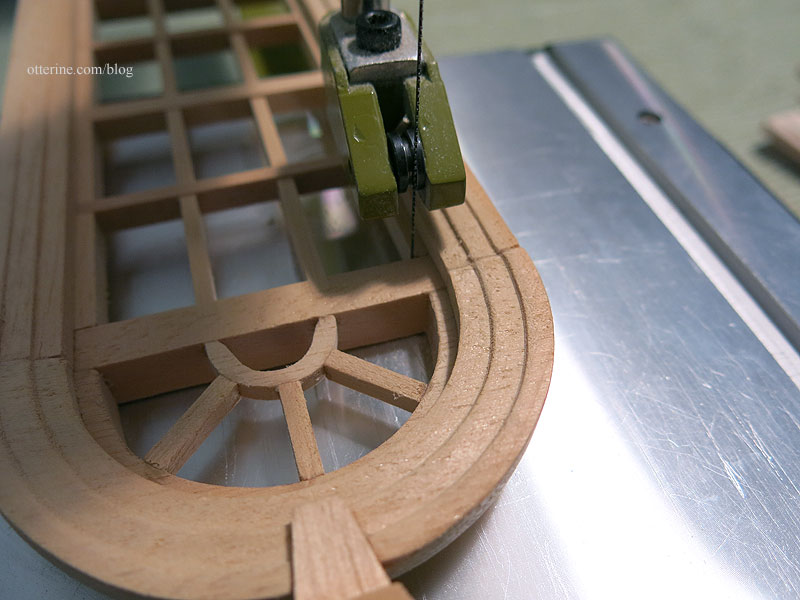
Pieces of strip wood were added to fill in as needed.
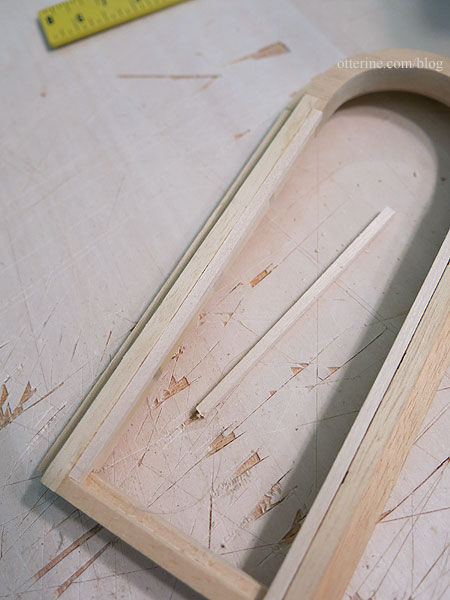
I filled, filed and sanded (and sanded). More sanding will be required during painting as well.
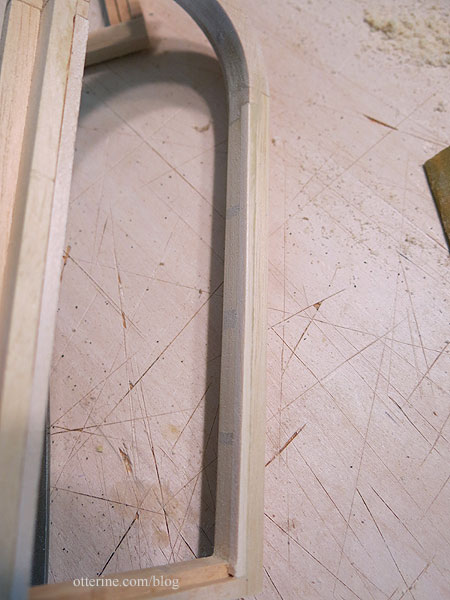
Since doors open in, the frame will be reversed with the fancy trim on the inside. I’ll look for some fancy long hinges and an interesting door latch. An oval side window might look good here as well.
On the outside, there will be a nice deep entryway.

Of course, with all the filler and residual tabs, the frame will need to be painted instead of stained. I won’t cut the opening until later, after I’ve built a few things for the interior and tried out some layouts. These sorts of choices and trials are why I keep my houses in dry fit for so long.
Categories: Watson Mill
April 16, 2017 | 0 commentsWatson Mill – circle library, part 1
I’ve taken the plunge and purchased a crafting machine. :] I opted for the Cricut Explore One. (I’ve since upgraded to a Cricut Maker.)
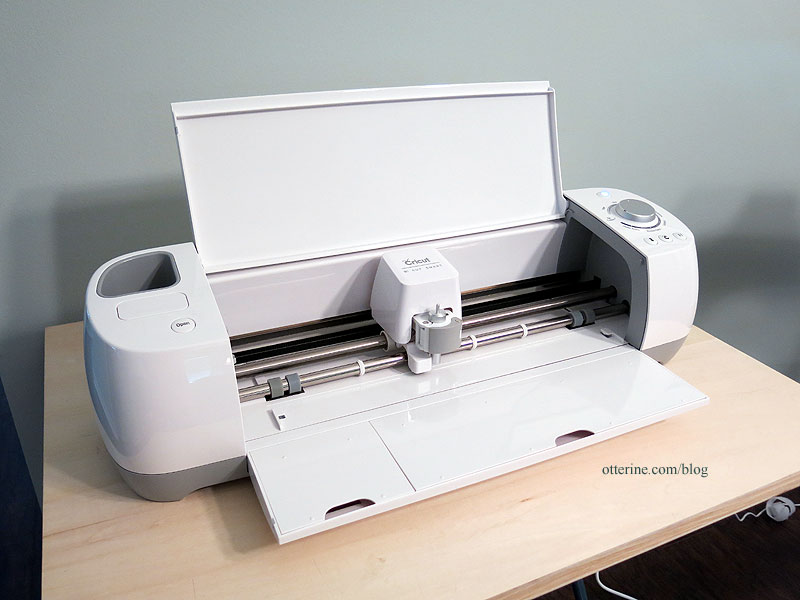
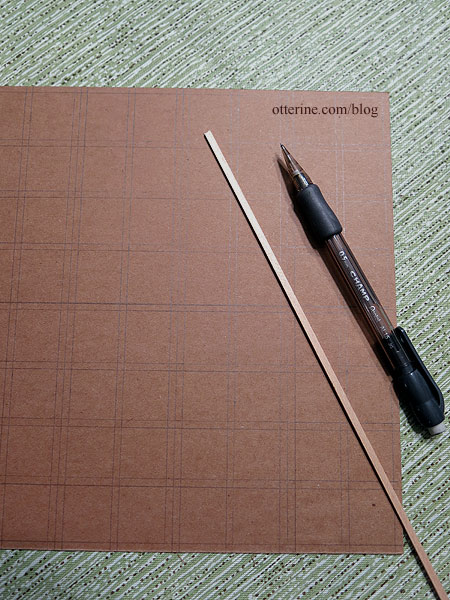
I fired it up today to help cut some consistent 5/8″ wide cardboard strips.
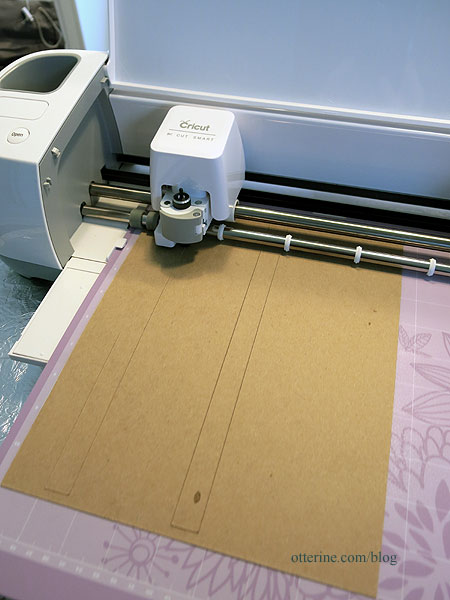
So much faster and easier than measuring and cutting by hand. Plus, no variation in widths. :]

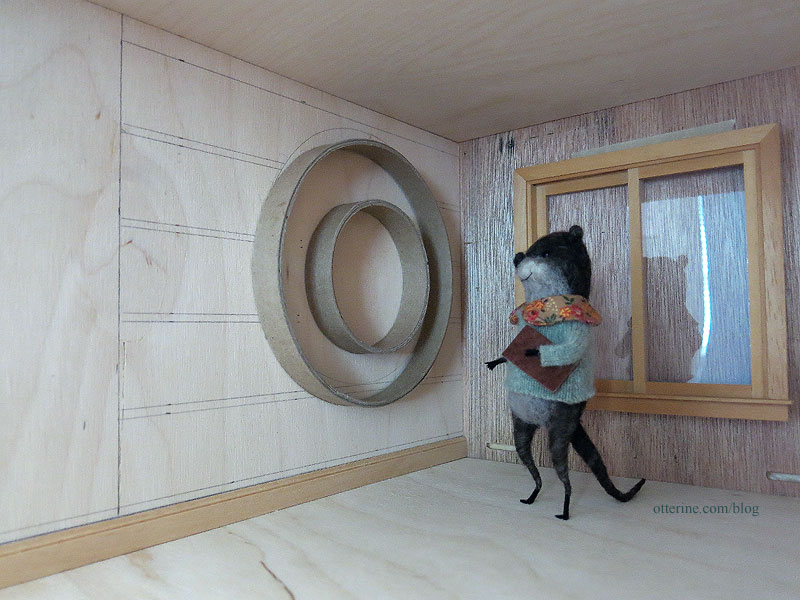
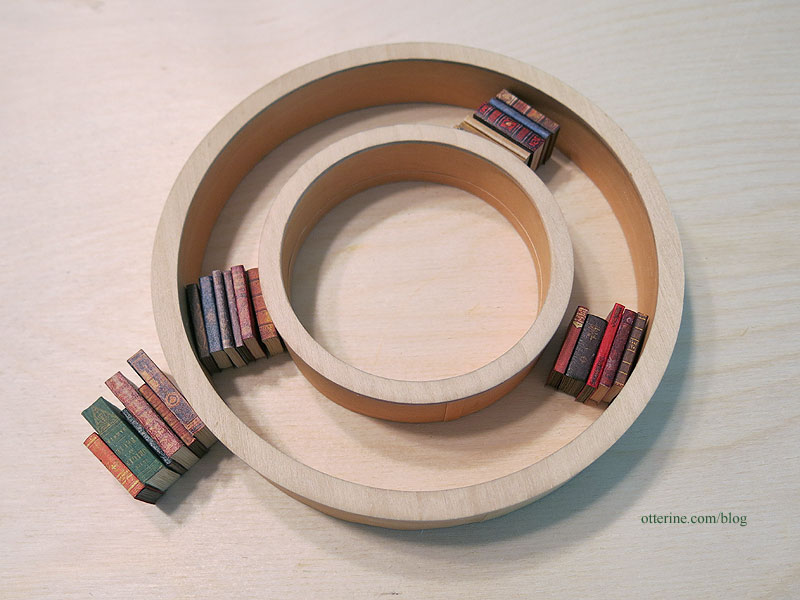
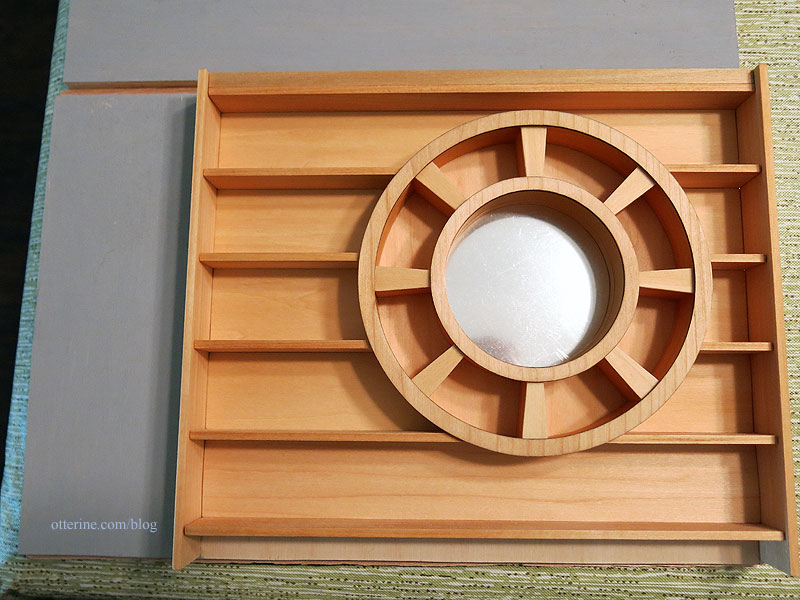
What did I need all these strips of cardboard for? To make the starting base for a circular bookshelf. I moved the circles down and over after my first dry run, so my lines are a little off. I’ve marked tall shelves so I can make large books, which take up more room and will require me to make fewer of them. There will also be room for knickknacks. Gustav seems to approve.
Here’s my inspiration photo (no discernible source, unfortunately). While I can’t put in a bay window due to the rotating sails, I can put in a regular window to let in more light and a spring breeze.

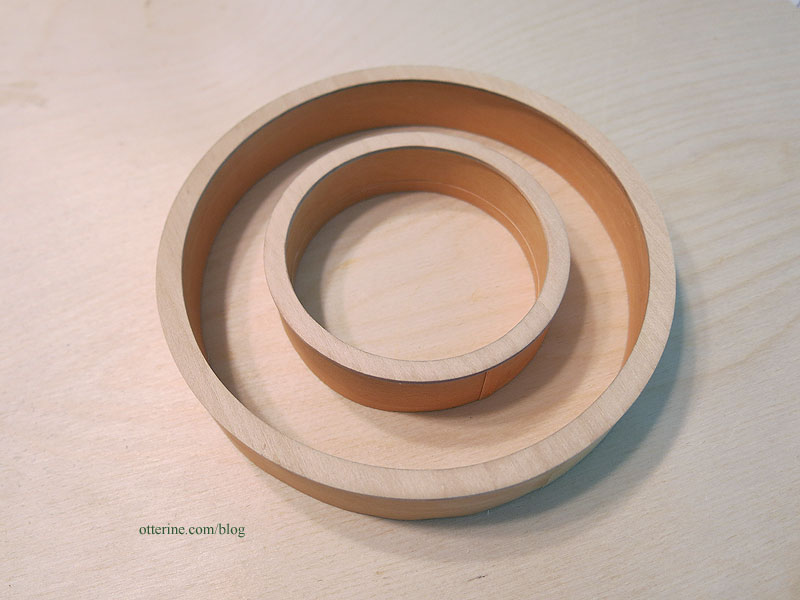
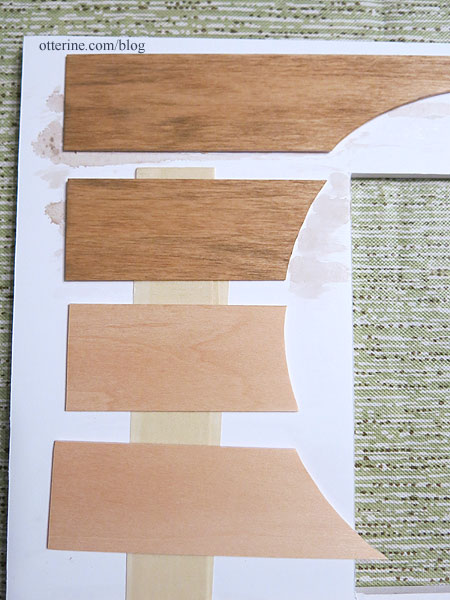
I added more cardboard around the circle supports to increase the depth to 3/4″ since I determined my 5/8″ depth was too narrow for the books I’ve been making. I was able to use the existing supports since they were shallower than the new depth and will be fully enclosed by the new outer strips. I then covered the cardboard with peel and stick wood that I had leftover from the Model T Van build. I used additional adhesive just to make sure the bonds will hold over time.
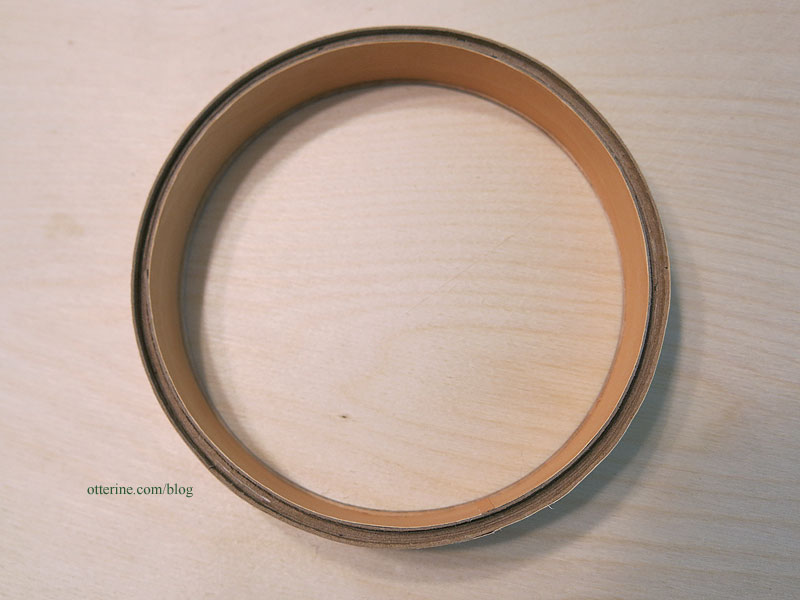
I put the joins at the bottom, covering the upper one that will be seen with a piece of peel and stick wood.
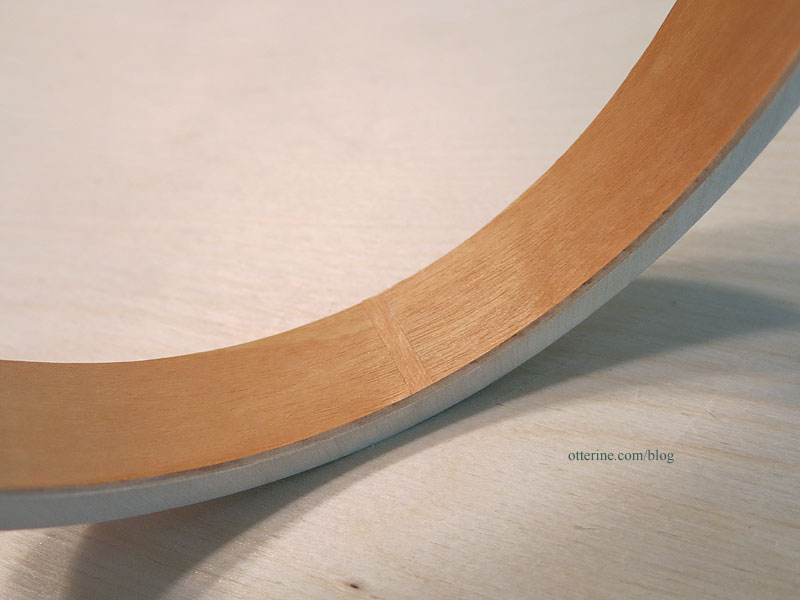
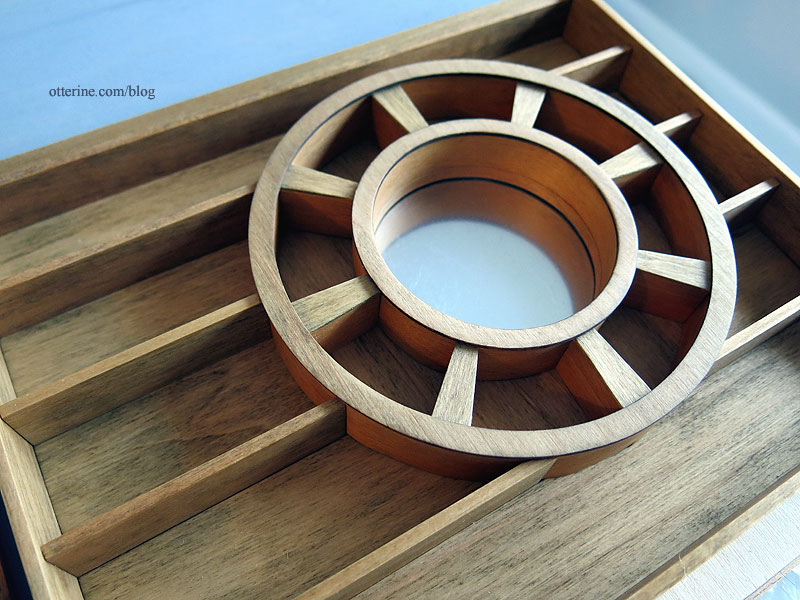
Cyd helped me out by cutting laser cut circles for finishing. I sanded away the charred edges and then glued it to the support structure.
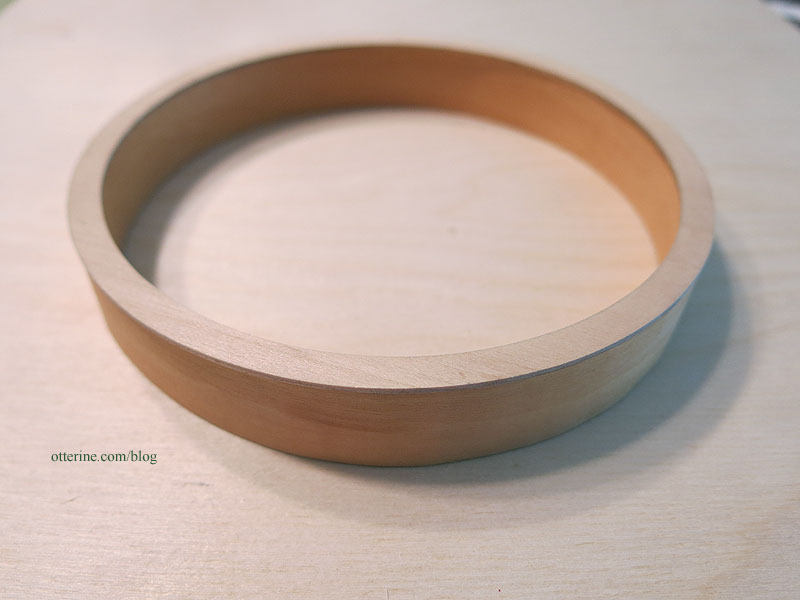
My supports are not uniform circles, so the laser cut trims help disguise any imperfections.
Books will help, too. :]
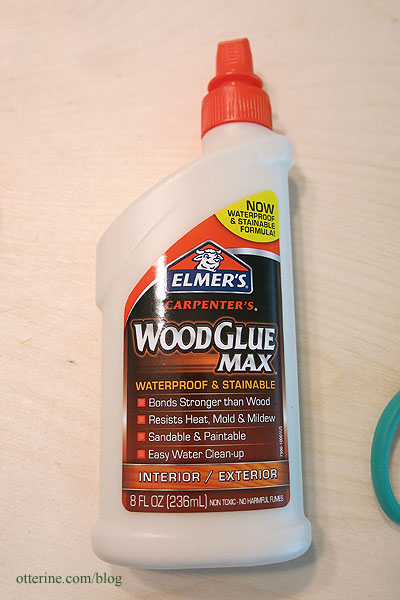
I know I’ve gotten glue on the wood, but I was smarter later and used Elmer’s wood glue that’s supposed to be stainable. We’ll see.
Categories: Watson Mill
April 15, 2017 | 0 commentsWatson Mill – sails, part 5
Continuing work on the windmill sails. It’s time to figure out the hub and shaft portion for the sails. I’ve developed a hub inspired by the 1:30 scale mill kit by Amati and this windmill build by Penterbak.
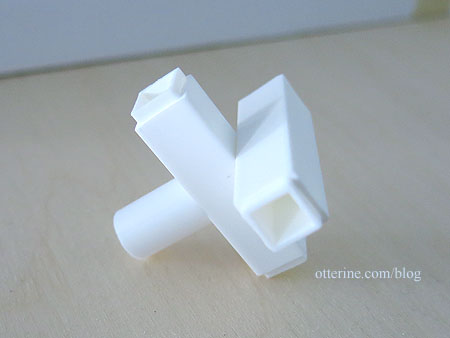
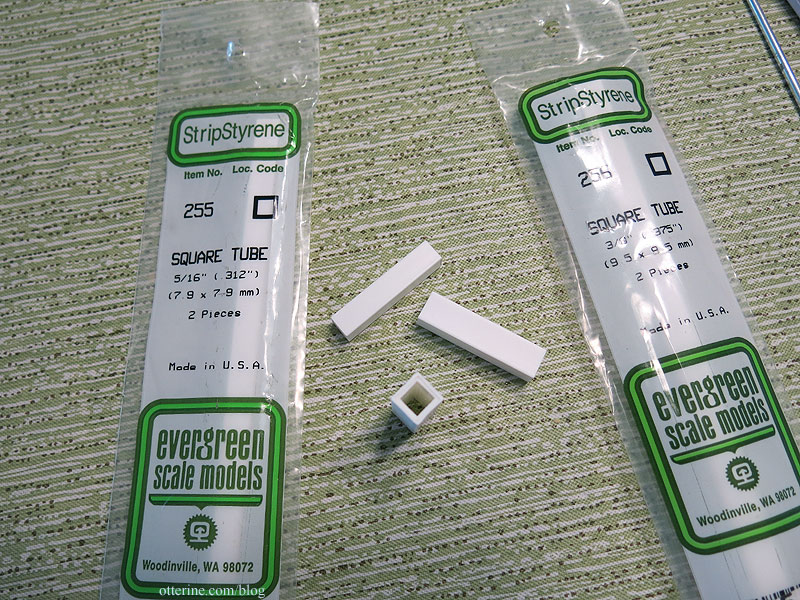
I decided to build my hub from styrene (plastic) instead of wood because I worried about longevity and solidity during operation. I used square tubing from Evergreen, glued in a cross formation using Testors cement.
I will likely add further detailing before painting. I’m giving some thought to a few ideas. I cut the excess wood from the ends of the whips. Shims were required to make the whips square where they entered the hub as was sanding to fit, my least favorite phrase in mini making. However, a tight fit in the hub means no glue or pins are required to keep it all in place. If I need to replace anything, just pull it apart at the hub. On the back, I glued a cap cut from round tubing to connect to the shaft. This is the only place it’s a little loose, but I have a couple of ideas for a solution.

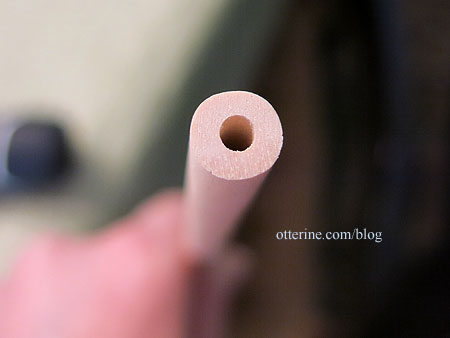
The shaft is a 5/16″ diameter wood dowel with a hole drilled in the center on one end.
The motor has a threaded shaft, so my friend and I went to the hardware store to find a suitable screw to fit.
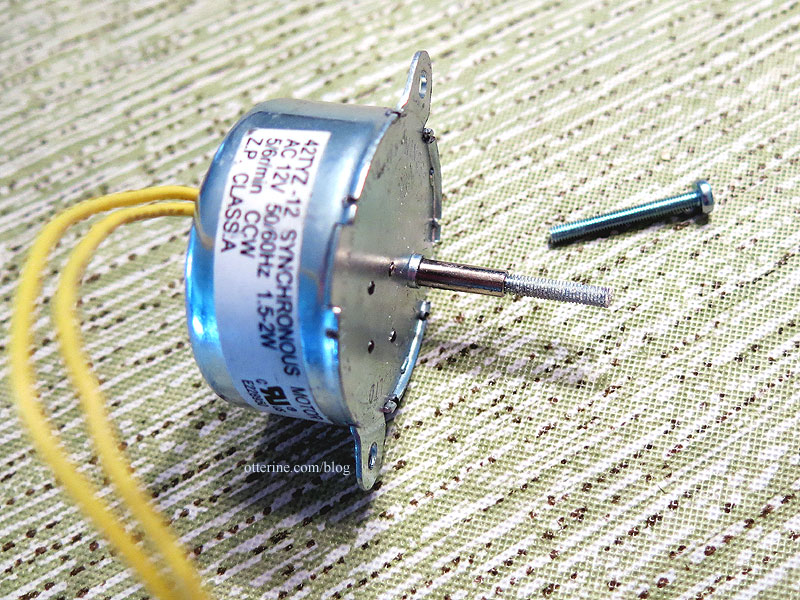
Another friend cut the heads from a few of the screws so I could attach one end to the wood shaft, and now I have a few spares for the future (or for the other motor in my stash).
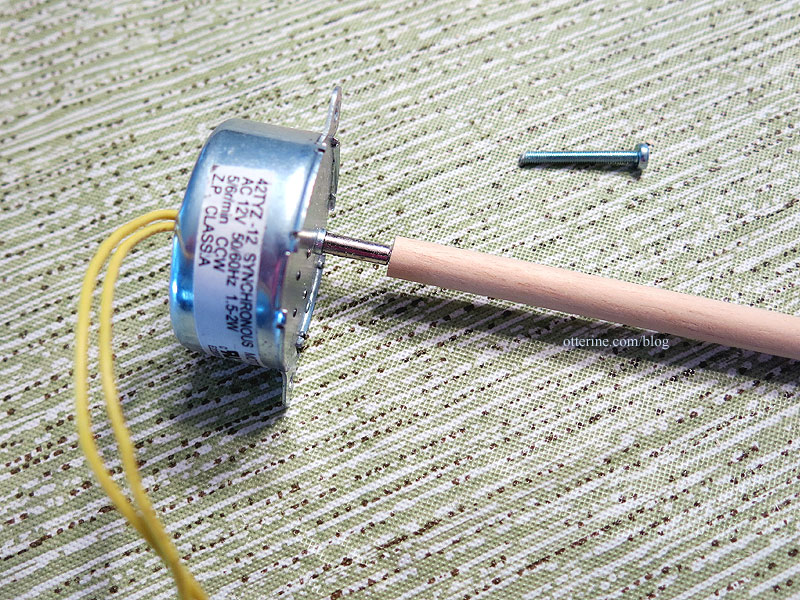
Right now, nothing is glued or taped or pinned, and it works well. I might add a bit of adhesive later as needed, but I do want the parts easy to separate for transport or replacement. Interestingly, the inner portion of the square tubing was angled a bit, so the sails are now tipped slightly. Works in my favor since they are like this in real life. :]
Categories: Watson Mill
April 11, 2017 | 0 commentsWatson Mill – sails, part 4
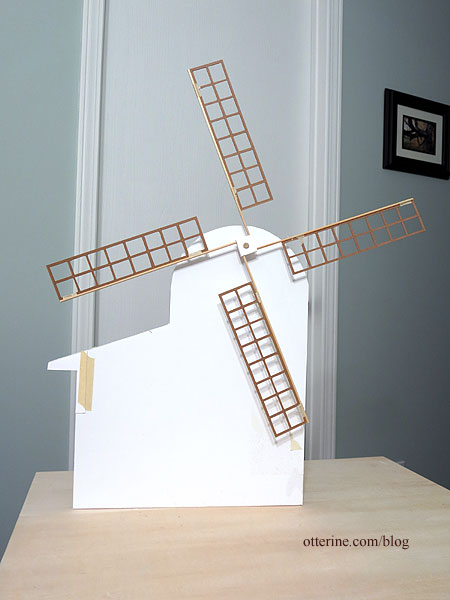
Continuing work on the windmill sails. Just a short update that is long on work hours. I now have four completed sails and will move on to the hub and shaft next. I had such a hard time getting motivated to do the last three sails after completing the first. Yes, I can stand the “tedium” of needlework for hours, but this insanity just pushed me over the edge. I am glad to move on now.
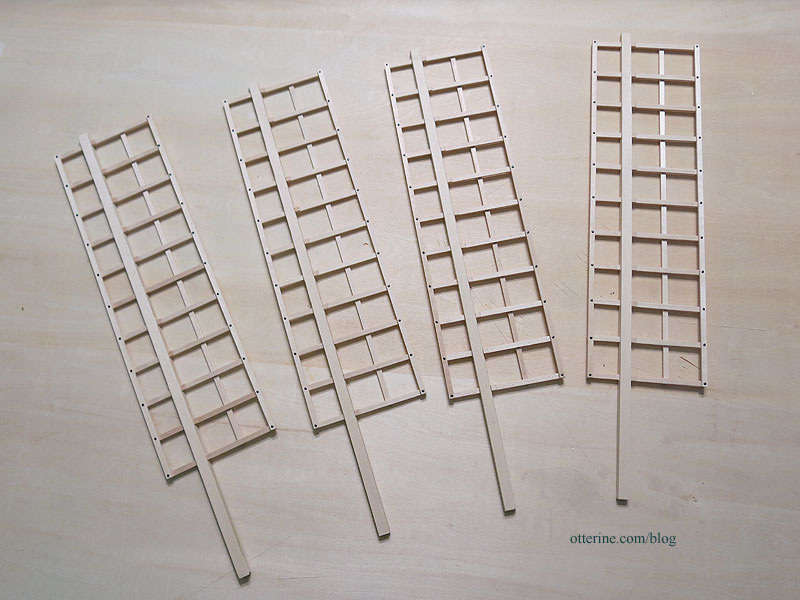
I think these are just the right size for the facade.

There was a question about whether these weigh more than the mockup versions and if the motor would be able to handle the extra weight. Interestingly enough, the wood sails weigh the same as the foam core board mockup sails (1.1 ounces on my postal scale). Of course, the cloth I add later will increase the weight, but the motor should be able to handle it without issue.

Categories: Watson Mill
March 26, 2017 | 0 commentsTribal Foxes Rug – 110.75 hours, stitching complete
I’ve finished stitching the Tribal Foxes rug with a total stitching time of 110.75 hours. I just need to bind the edges and complete the final finishing. This was done in full cross stitch with single thread over 32 count Jobelan.

Categories: Needlework - French knot rugs, Watson Mill
March 18, 2017 | 0 commentsWatson Mill – sails, part 3
Continuing work on the windmill sails. I’ve done some research on windmills and a fair bit of virtual sightseeing, but I am by no means an expert. I am also not planning a precise model, though there are some remarkable works out there. The first one I ran into is a 1:30 scale mill kit by Amati. The model has a hub made from wood that looks fairly straightforward for me to recreate for my own model. I’ve been using an offset alignment on the mock-up hub mainly for ease of use, but I plan to have a hub setup more like the real life mills (and this Amati model).
Another fabulous resource is Penterbak, where you find many different scale models with exacting details. It’s in Dutch and google translate works only so well, but you can see from the photos alone just how much work went into these. The hub on the windshaft here is remarkable and gives me some ideas on how to dress it up.
Finally, let’s learn some terminology. There’s a wealth of information in the online publication of The Dutch Windmill by Frederick Stokhuyzen (link no longer active), though I admit I skipped around to parts I needed. There’s also this awesome website with a video by The Yorktown Windmill Project showing how to make a common sail. (They also have a great page on the conical roof, which I have done in miniature in the past.)
After seeing this real life example, I decided to change my design to match. My sails won’t have the gentle curve of the true sails unless the wood warps so let’s hope it warps in the right direction.
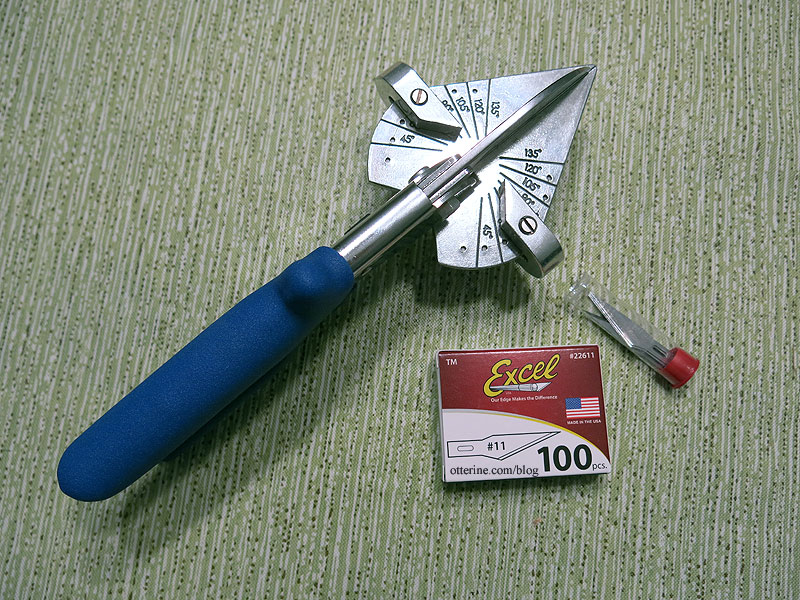
In the Bruce Hirst model, he used 1/8″ square strip wood, but mine will have mainly 1/16″ x 1/8″ strip wood. The adhesives used were Elmer’s Wood Glue supplemented with super glue gel. The Easy Cutter Ultimate was a lifesaver here. Mom also gave me a box of 100 X-Acto blades for Christmas. Maybe that will be enough.
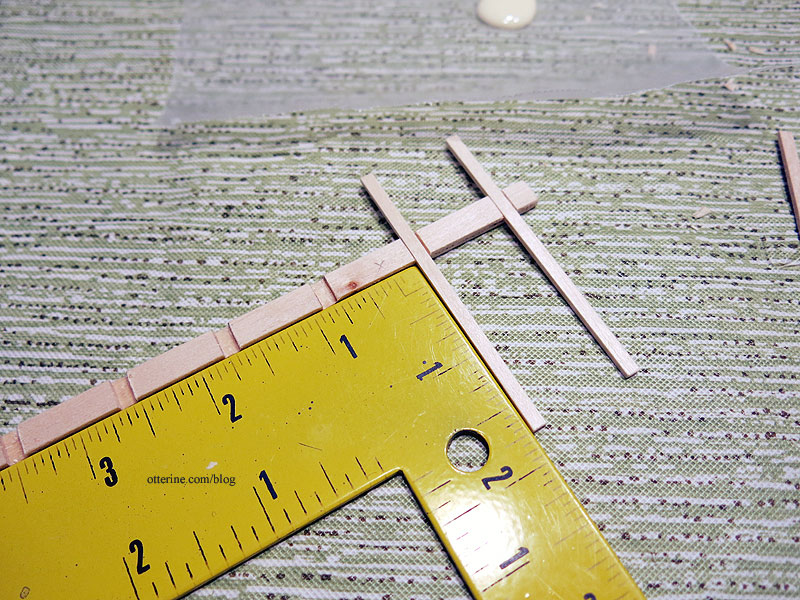
I cut four 12″ lengths of 1/4″ x 1/8″ strip wood to make the whip (center shaft of the sail). This is longer than I will need, but I wanted extra just in case. Instead of trying to cut holes in the whip to form mortises, I notched the pieces every 3/4″ from the end.
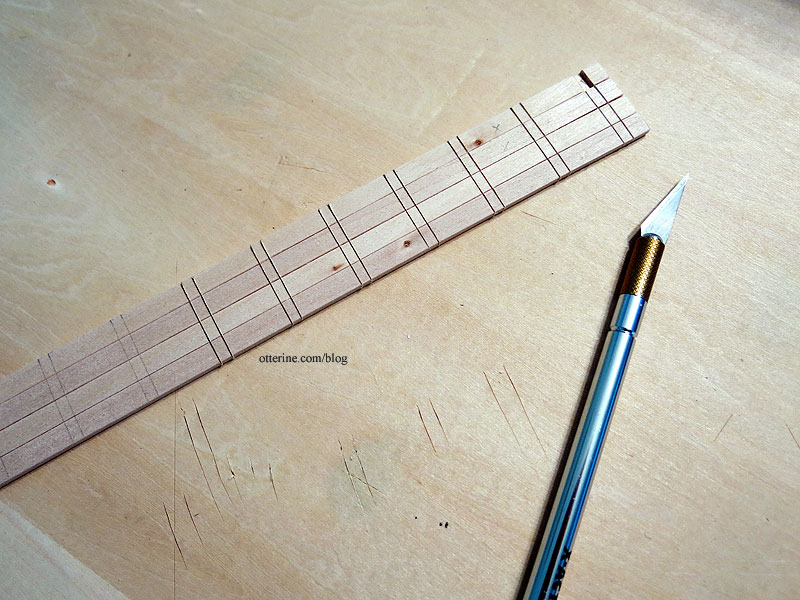
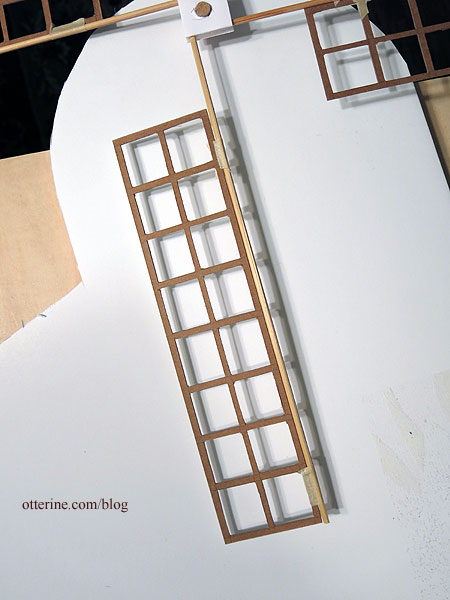
Time to cut 44 sailbars, 11 per sail, at a length of 2.75″ each. This is more than I had in my cardboard mockup, but it should add stability. I also cut 12 hemlaths (outer vertical strips), 3 per sail, at a length of 9″ each. Again, this is slightly longer than my mockup, but it made for easier math.
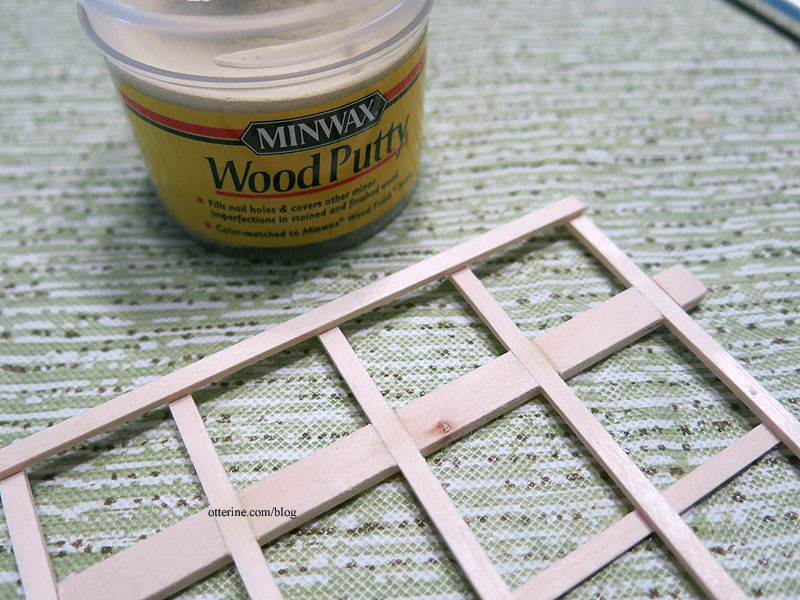
Since I was cutting by hand, there were some gaps. I used Minwax Wood Putty in natural pine as filler. Could I have been more precise? Maybe, but I get in a hurry for tedious portions of a project. Once it’s all stained and aged, it will all blend in.
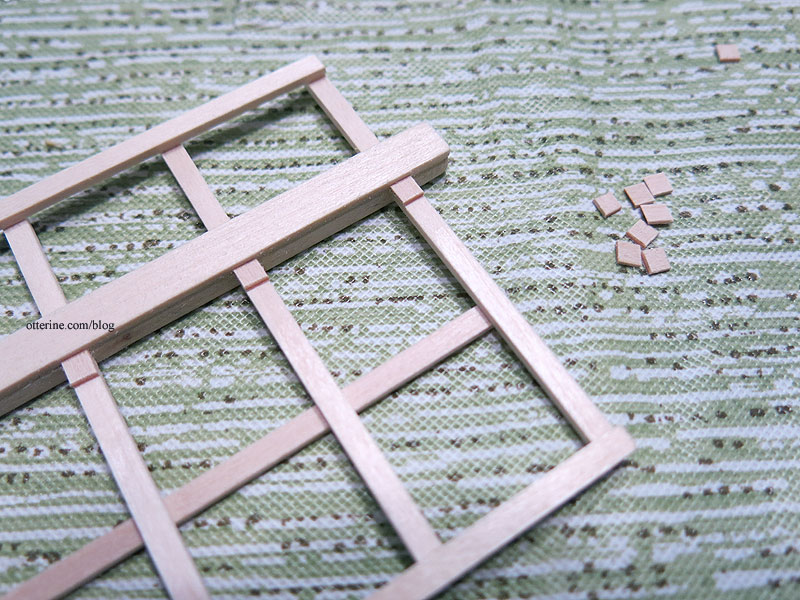
A corresponding piece of 1/4″ x 1/16″ strip wood encloses the notches to make the mortises in the whip. I cut and added the little blocks (don’t know the term) that keep the sailbars uniform along the whip. This makes me lament all the times I’ve discarded tiny bits of wood. Who knew?!! They add detailing that makes the sails seem more realistic.
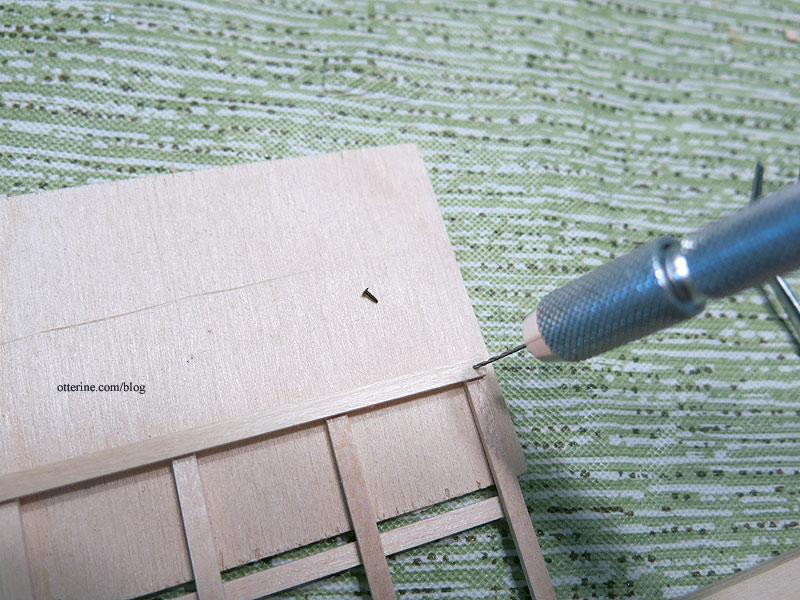
This might have been a bit of overkill for a model, but I also used nails in addition to the glue. I don’t need these suckers popping apart later on down the line, and since they will be motorized it’s likely worth the extra time and effort. I did drill pilot holes so I wouldn’t split the boards.
I am going to leave the final finishing as far as stain goes until after I have all the parts fabricated just in case something breaks along the line and needs to be redone.
One sail down, three more to go. :]
Categories: Watson Mill
January 15, 2017 | 0 commentsWatson Mill – sails, part 2
Continuing work on the windmill sails. I did a foam core board mock-up the last time I worked on the mill. These gave me the measurements I needed for each sail.
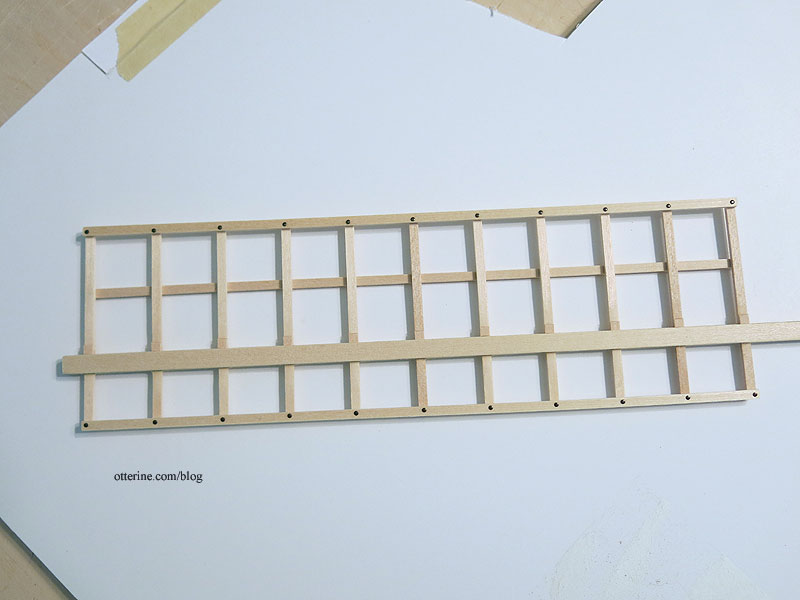
Before I do all the work of cutting tiny pieces of wood to make a true sail frame, I wanted to mock them up further. I used cardboard scraps to make a grid approximation for the sails.
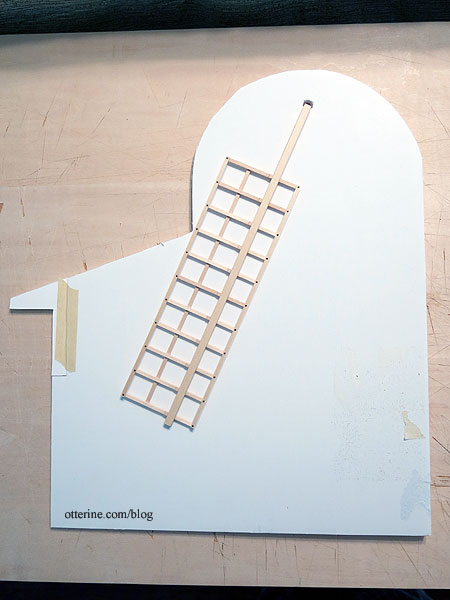
I wasn’t especially careful in cutting so it went reasonably fast. I taped the new grid sails to the bamboo skewers and inserted those into the hub.
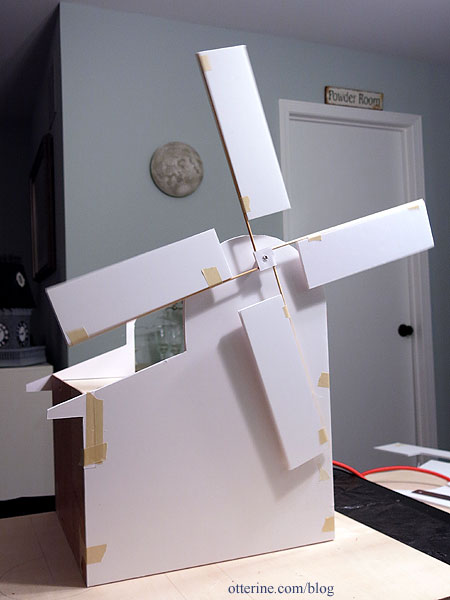
I put the sails on the foam core mock-up front to see if these still look good for size. Yep, I think that’ll do. :]
Categories: Watson Mill
December 29, 2016 | 0 commentsWatson Mill – sails, part 1
I cut a front wall from foam core board to determine the setup for the sails. I don’t want to drill a hole, have to move it and be left with patching issues on the wood board. I mocked up a back wall for now as well and taped the motor in place. I can make adjustments to this wall as needed.
I’m using a wooden dowel for mockup purposes, taped to the motor. I might end up using this material in the end, but for now I’m just testing.
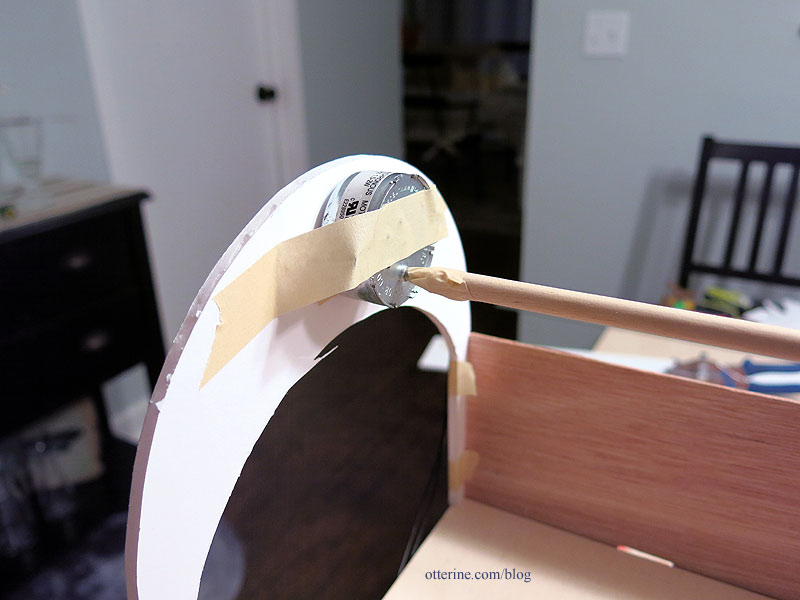
It’s still a good height for Gustav.
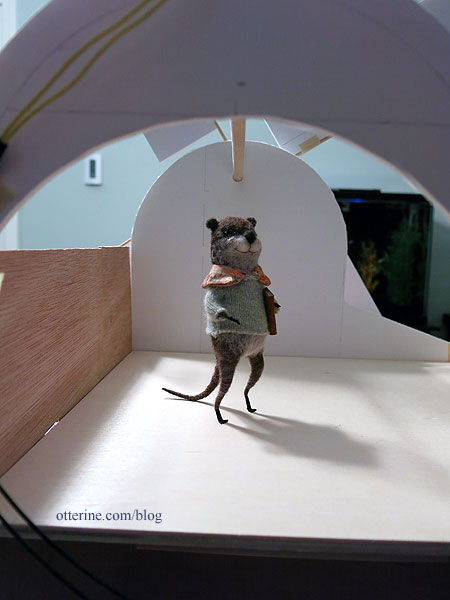
I made a sail hub from a scrap of foam core board and used bamboo skewers as the lead edges of the sails. These have 10″ of exposed length. I cut foam core sails by eyeballing the first one and then cutting the rest to match — these are 8.5″ long x 2.5″ wide. All of this is probably lighter in weight than my final sails will be, but it will at least give me an idea of scale and proportion. I think this has a good balance overall.
Turn on the motor…. So far, it looks as though my motor is able to handle the job effortlessly. (This video was taken with my old camera, but it gets the point across.)
Now, I need to create the sails.
Categories: Watson Mill
March 15, 2016 | 0 commentsWatson Mill – motor, part 1
Before I even begin to build, I need to figure out how to power the sails for Watson Mill. The mechanical setup will determine how much I alter the open back to disguise the power source.
As I mentioned, this tutorial from Bruce Hirst used a motor from Micromark. The main reason I did not go with the Micromark motor is the fact that it has a large cord attached. This is useful in that you have to do no wiring, but hiding a cord of that size with an on/off switch and plug would have been difficult. It would have required large holes or notches in the building and landscaping board. Addressing any possible problems in the future would be difficult as well.
I also wasn’t sure I would have the room or the need for the Lego gears shown in the tutorial. The space needed for these would also mean closing up even more of the back. Therefore, I might be connecting the sail shaft directly to the motor to limit the space needed from top to bottom on the back wall.
So, I chose this motor (this link might no longer be accurate as of 2024) from Winbell’s Store on aliexpress. It runs slightly faster at 5RPM vs the 2.5RPM in the tutorial but it is also 1 5/8″ in diameter as opposed to 2″ in diameter for the Micromark motor.
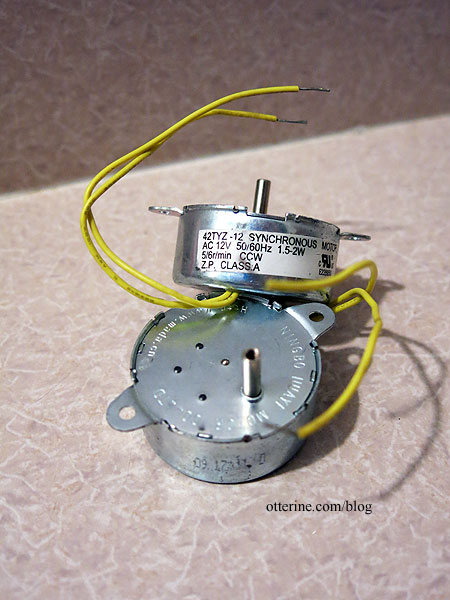
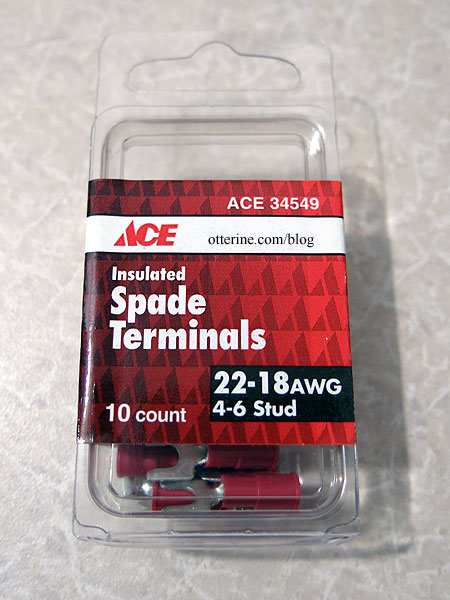
Being AC instead of DC (no, don’t ask me to explain the difference just accept that there is one), the motor will run on a separate line from the dollhouse 12V DC system. I bought this transformer to power the motor. All that will be required is to splice on some length of wire and add forked spade connectors to the ends. You can spin the wire directly to the transformer, but the connectors just make for a cleaner and more secure assembly.
Here I’ve added a paper cutout just to show that the motor does spin and in which direction.
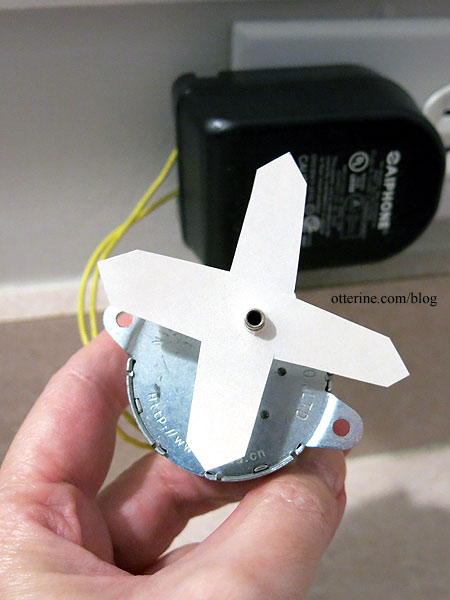
A quick video. :]
Seeing that this motor turns counterclockwise makes a difference in how the sails will be built. Even though the wind won’t power them, I want the sails to be built to correctly correspond to direction. Here is clockwise, and here is counterclockwise. You can see the difference in the lead edges and angles. Bruce Hirst has the correct configuration for clockwise sails, but I will be building mine opposite to suit the spin of my motor.
I’ll need to build the sail structure first to make sure my motor can handle the work before starting the mill itself…a bit of reverse engineering. :] I don’t want to do all the work just to find out I need a different motor in the end. Let the engineering begin!
Categories: Watson Mill
February 17, 2016 | 0 commentsWatson Mill – introduction
Greenleaf Dollhouses held their Spring Fling contest for a number of years, including some years before miniatures became an everyday thing for me. The 2009 kit had an arch roof and an interesting shape. I bought one some time ago for a someday project just in case they went out of production.
Jen Barrick’s Loganberry Mill was one of the first miniature houses that drew me into the hobby. She dropped the scale down to half scale and made the most amazing sail set. It’s truly an inspirational build from the inner mechanisms to the realistic landscaping.
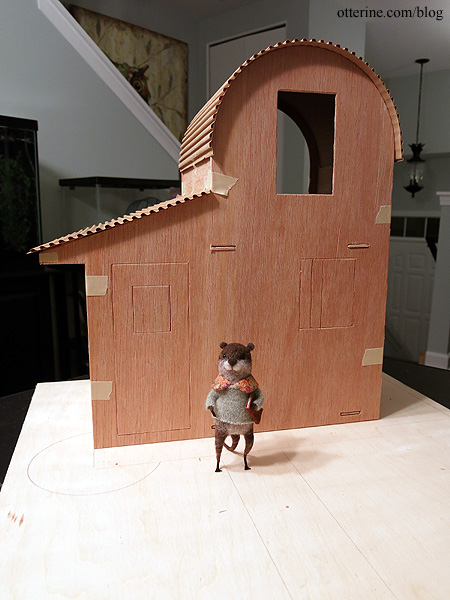
So, this is where I start…with an idea for my own take on the kit…Watson Mill. The kit is simple yet elegant in design, a cozy place. I punched out the upper window even though I will be adding sails here, because the kit had trim pieces die-cut there that were falling out. I’ll just have to patch it. I won’t be using the cardboard roof pieces, but they complete the dry fit.
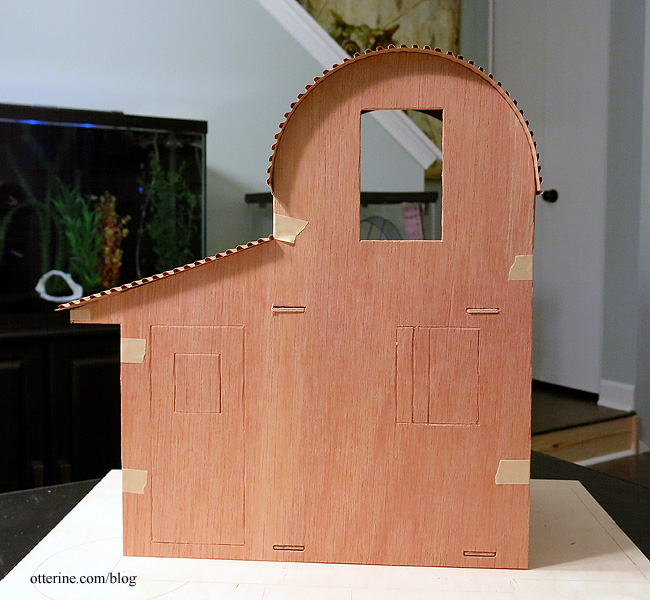
I will definitely need to move the door to one of the side walls so I’ve left it and the lower window intact for now. We don’t want to send anyone ass over tea kettle. :O
I will keep the full scale aspect and make this more of a fantasy build in the vein of Roland’s Retreat. That saves the hassle of adding a full kitchen and bathroom. This will also be a mill rehab with most of the inner workings of a proper mill long gone and replaced with the cozy decor of its current resident, Gustav. He’s independently wealthy, so he dines out all the time anyway. There might be room for snacks and a tea kettle.
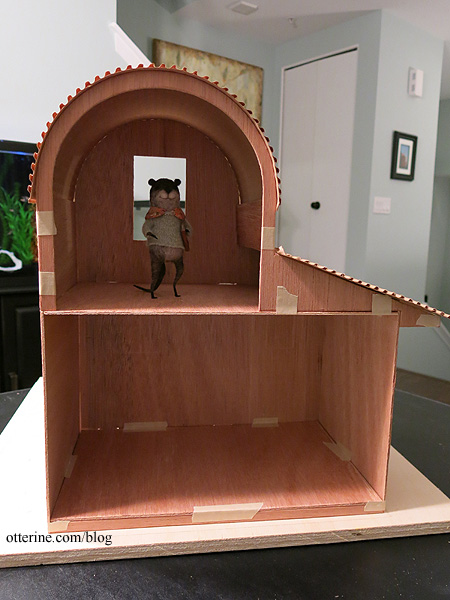
Gustav is an otter with a thirst for knowledge and culture. He loves the written word, so I foresee a good deal of books to be made. I can’t go stealing them from grandma at the Heritage, after all.
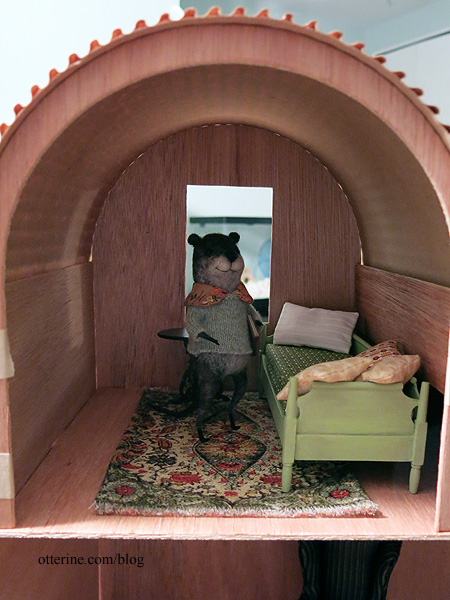
With his simple tastes, we’ll need a place to sleep and a place to read….maybe a stove to keep warm, too. Since the upper room is small, I can make a daybed for the space. This will leave room for a short dresser and a bedside table. I prefer the realism of stairs in my builds, even in the realm of fantasy, so he will also need a ladder between the floors. While I do love this rug from dalesdreams, I think a fox rug might look nice here in the bedroom. ;D
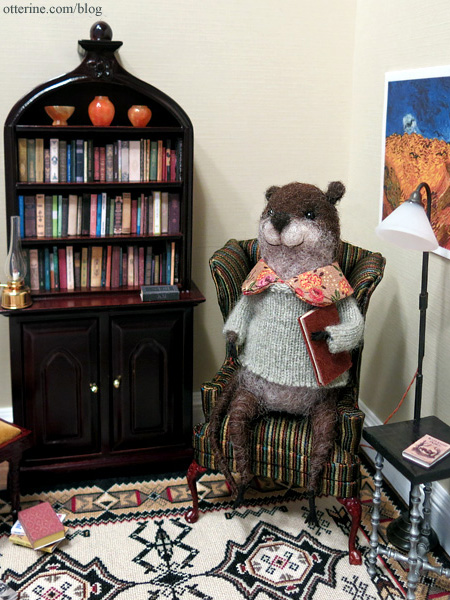
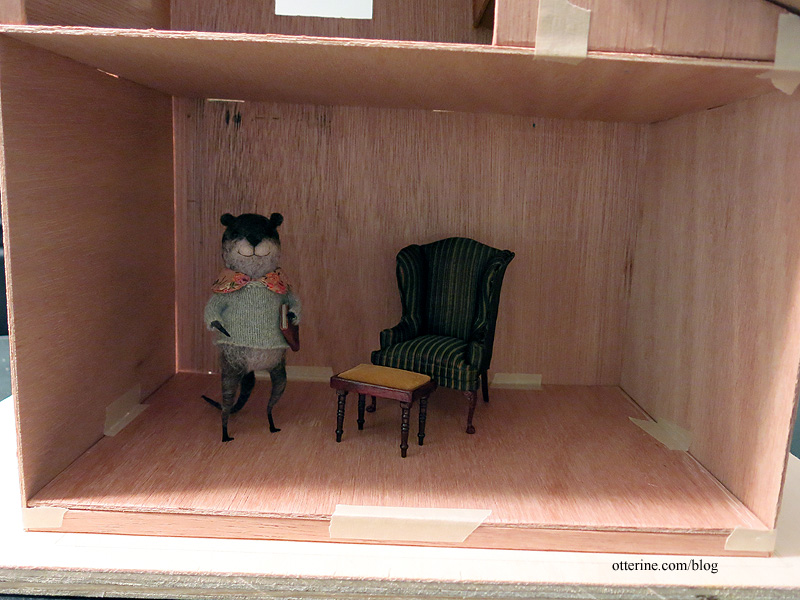
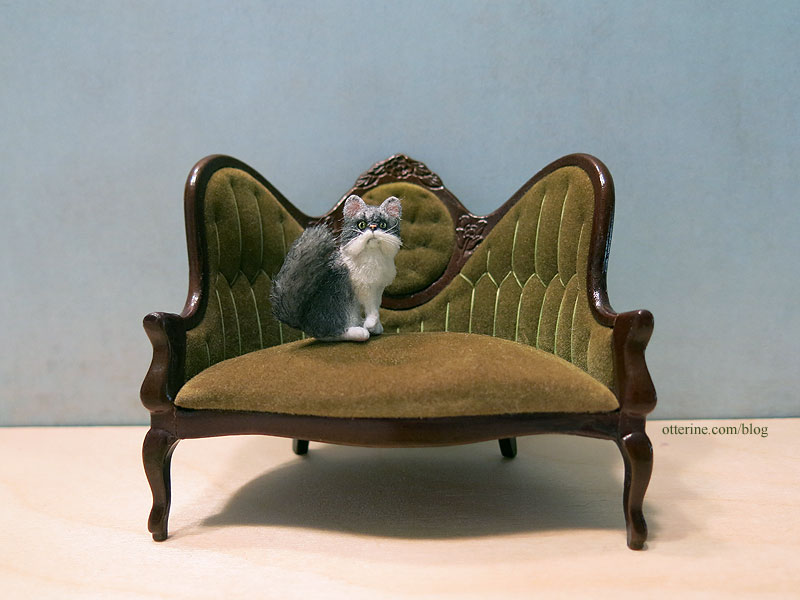
I think this Bespaq chair might stay. I have two of them, so we will see if there ends up being enough room for Gustav to be the social type.
For the exterior finishes, I am drawn to both wood shake and brick, so I might end up with a mix of the two if I can’t decide. I will likely build up the ground as Jen did to make the landscape more interesting. I’d also like to add an arched door to keep with the storybook feel.
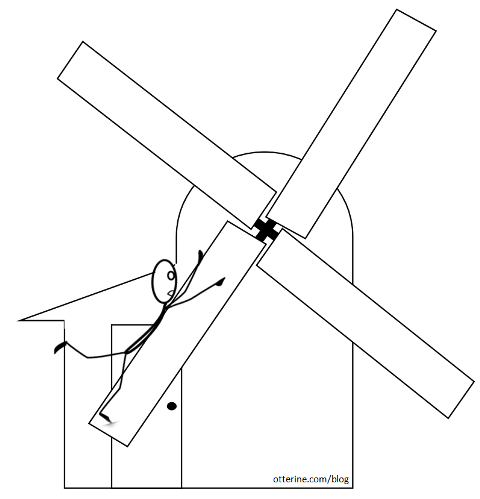
As for the sails, they are going to have to actually spin, right? :D Bruce Hirst has some great instruction on how he made his working mill, so that will be a great starting point. I have the challenge of an open back structure so I will need to be creative in disguising and setting any mechanical details. I will have to close up at least the arch near the upper back. The mechanism will have to be addressed fairly early since that will determine if I have to adjust the height of the second floor space.
First, though, I will determine if I want more depth to the kit to make the rooms larger. That’s very straightforward since I’ll just need wider side walls. I will likely have to cut an additional front wall as well to have a good thickness for a working window and to brace the sails. I’m 99% sure I want more depth since there are a couple of things I’d like to add that will require a larger lower room. The kit is relatively small to start, so there’s plenty of room to add while staying with my current landscaping board. So, I’ve put the kit in dry fit so I can stare, think, plan and play.
Categories: Watson Mill
December 29, 2015 | 0 commentsTribal Foxes Rug – introduction
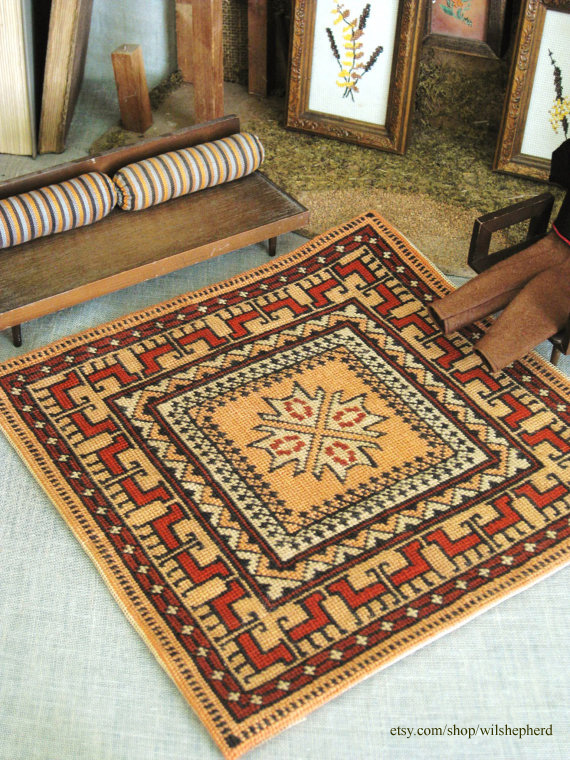
When I’m scouting around the internet looking for inspiration and vendors, I often find random bits that I wasn’t looking for but like to save for later. One such item was a vintage needlepoint rug I found from Wil Shepherd. This particular one is large at 12.5″ square, more suited to playscale than 1:12 scale. I love the colors and the red critters marching along the edges. Given their color and dog-like shape, I’m going to call them foxes.
He had two other rugs listed. There was a maroon and tan one, and I recognized it as the “Holbein” rug from the booklet Miniature Needlepoint Rugs for Dollhouses by Susan McBaine (might have to stitch this one, too). The other was the same as the modern Navajo rug from the same booklet.
Of course, the one I liked most of the three was not in this booklet or any of the others I thought to look through. I was not to be thwarted, so I charted it myself. If anyone does recognize it, I would love to be able to give credit to the designer.
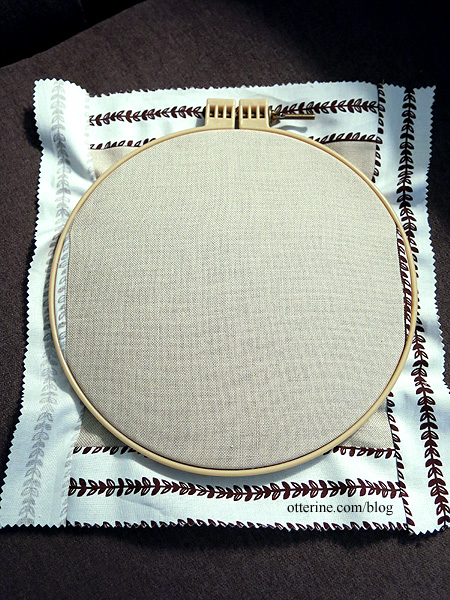
I’ll work in my usual 32 count on Jobelan, which should give me a rug just under 5″ square when finished. Perfect for 1:12 scale. I’m thinking full cross-stitch this time around, so it will be a good amount of hours for this one. My fabric piece measured 9″ square, a bit too small for my hoop, so I sewed strips of scrap cotton to the edges.
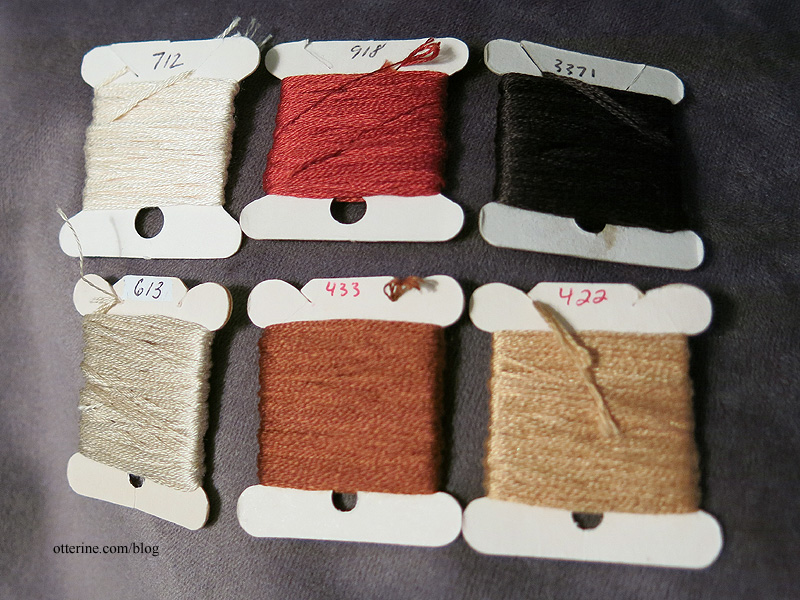
I have my colors chosen – nice and simple.
While I was drawn to the colors of the original, I wanted a bit more contrast and less yellow in my version. Below is how it looks at 23 hours of work. I am stitching full cross stitch with single thread over 32 count Jobelan.
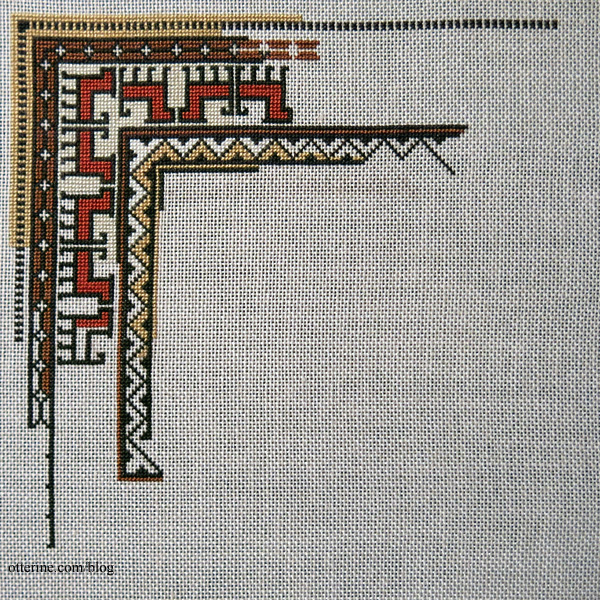
Once I reached the inner border, I decided to redesign the center. I had never been sold on the busy pattern of tiny crosses and dots in the border, and I liked the foxes so much I added four more in the middle.

I reproduced the dark border and added detailing that mimicked the dashes in the outer border to frame the foxes.

Categories: Needlework - French knot rugs, Watson Mill
December 28, 2015 | 0 comments


NOTE: All content on otterine.com is copyrighted and may not be reproduced in part or in whole. It takes a lot of time and effort to write and photograph for my blog. Please ask permission before reproducing any of my content. (More on copyright)

Watson Mill – circle library, part 5
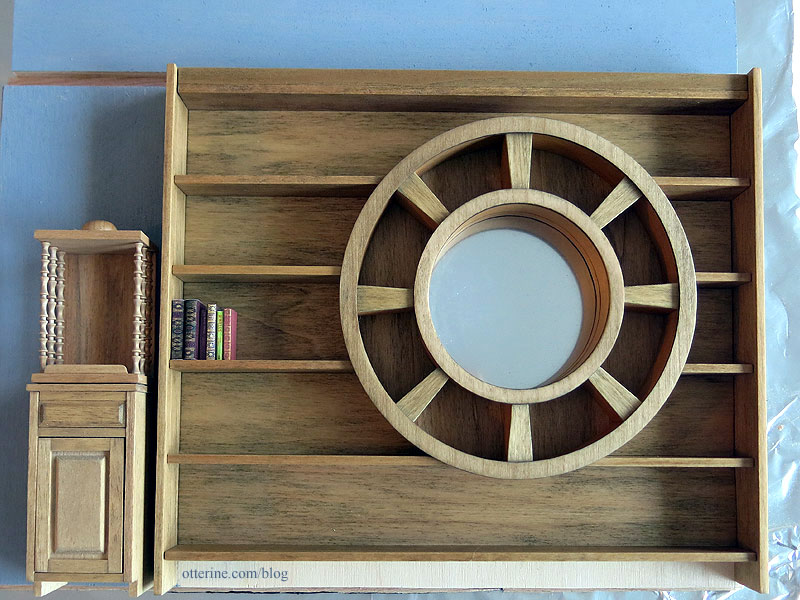
Continuing work on the circle library. As a recap, here is where the circle library was last time: finished but bare wood.
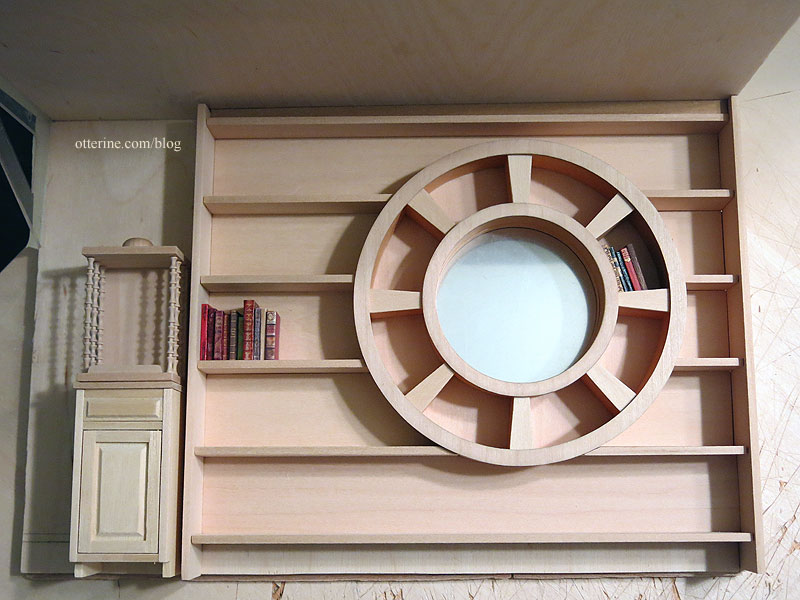
The walls have been primed with grey gesso, which is in the same color range of the wallpaper I’ve chosen. Here’s what that paper looks like.
I had planned to stain the library Minwax Natural after my test sample seemed to bring out the grain while leaving the color minimally changed. Well, in a large area, that didn’t really work so well. It turned rather orange, like raw salmon cutlet orange. The edges of the circles darkened significantly as well.
I knew it was going to bother me, so I opted for a second coat of stain, this time using Minwax Driftwood. I had nothing to lose really since I wasn’t going to leave it orange so I would be redoing parts if not all of it whether the attempts to fix it worked or not.
The green in Driftwood balanced the red in Natural, and the end result is darker but a better color overall. The darker edges of the circles no longer seem out of place. It actually looks like it was made from reclaimed wood, which makes a lot of sense for an old mill. :] A happy accident.
The dumbwaiter and its cabinet have a first coat of stain but aren’t finished.
Categories: Watson Mill
July 4, 2017 | 0 commentsWatson Mill – tulips
What else could Gustav need for Watson Mill but tulips? Debora made me tulips for my birthday last year, and I have had them in mind for the Mill.

She offered to make some more, and they just arrived. :D So beautiful! Thank you, Debora!

I have two paper kits, which will add another 6 tulips to the bunch.

Categories: Flowers, plants, and trees, Watson Mill
June 29, 2017 | 0 commentsWatson Mill – main room furnishings, part 3
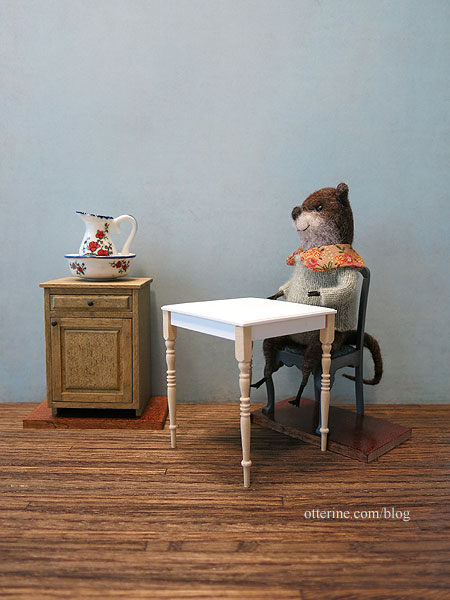
Continuing work on the main room furnishings. Elizabeth suggested measuring the table height with Gustav in the seat, so that’s where I started in determining whether to cut down the table legs. I put the cabinet in the scene as well, since counter height and table height should have a slight difference. With the original legs, the table seems a tad high.
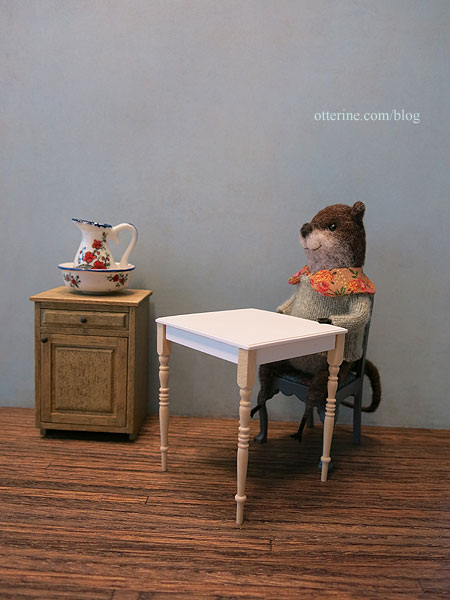
Since you can’t put the wood back on after cutting, I opted to place wood samples under the cabinet and chair to see how a 3/16″ reduction in the table legs would work. It seems a better proportion, and a modest 3/16″ reduction at the top of the legs would mean the table keeps its appealing tall, skinny profile for the most part.
I needed to prep the table for whatever process I ended up using for the enamel tabletop design, which is likely to be delicate once applied. The less I have to handle the table after, the better. I started by wet sanding the top and discovered this is a very porous material, almost like cast plaster. I primed the entire piece with white craft paint and tidied up the glue spots from the manufacturer. The primer showed the flaws and air holes, so I filled and filed before giving it another coat of white.
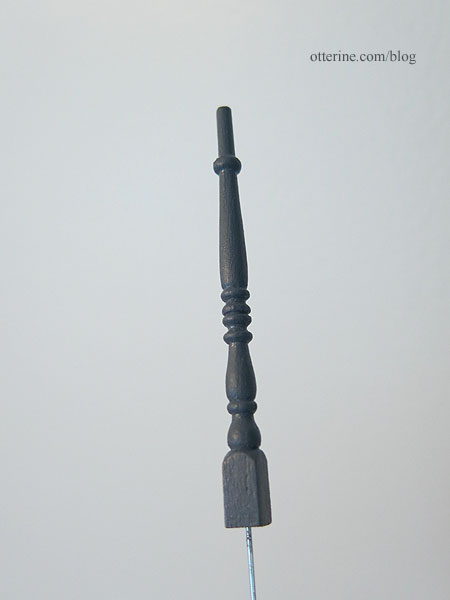
I masked and painted the apron with Zinc by Americana to coordinate with the chairs. I cut and painted the table legs, too, but left them separate so I could work on the tabletop without fear of breaking the legs.
Time for the enamel tabletop. The material I opted for was water slip decal, using Testors Decal Bonding spray since I had that on hand.
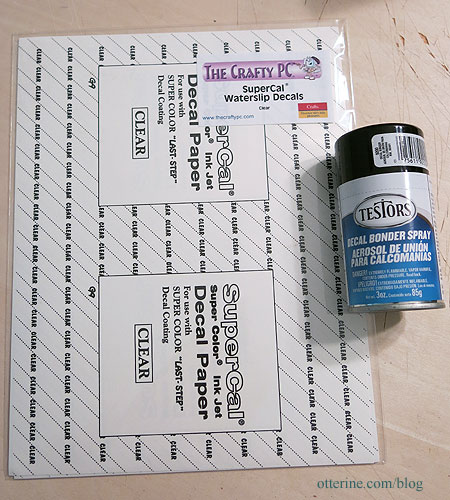
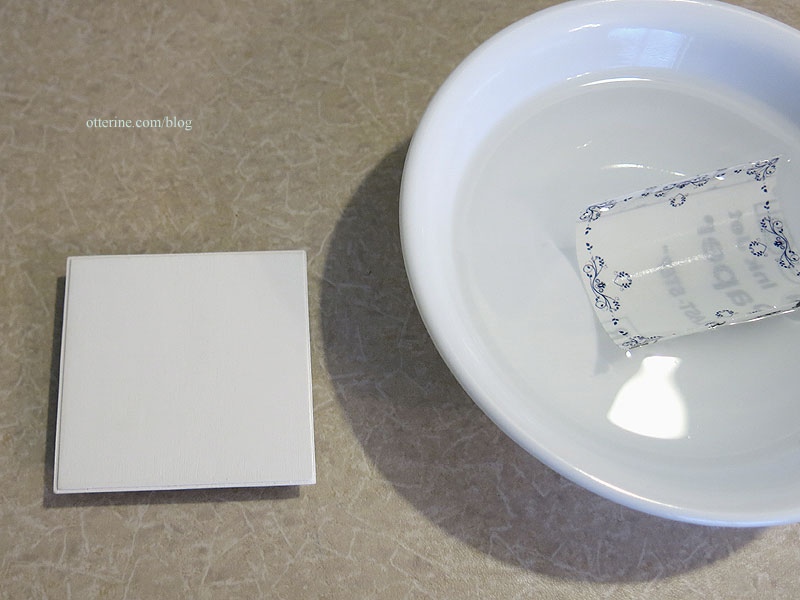
Because my design is so small, my intent was to cover the entire table with the film since there would be no way to cut around the tiny details. This should provide a uniform surface without a halo around the border design. It’s not easy to place a large decal. You have to give it a little more time in the bowl to loosen from the backing paper. Here it is on foam core board. It has a lovely gloss sheen on its own, but I wasn’t sure how delicate it would be without sealing. I opted for Testors Gloss Lacquer Overcoat since it had worked so well evening out over the Model T paint. Overall, the test sample was a success.

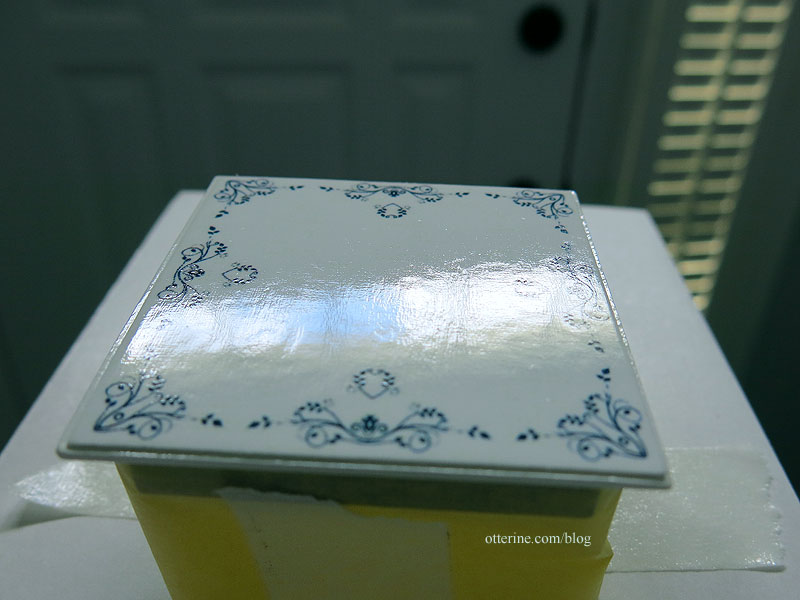
I then moved on to the final table.
I probably should have sanded the surface more beforehand, but it was too late. Even after the gloss sealer, the cross-hatch painting imperfections showed through. I guess it’s just an old, well-loved tabletop. I always trust the happy accidents, and the surface is not very noticeable in photographs unless you try to capture it.
I glued the legs on with white glue supplemented with super glue gel so they would grab fast but remain movable for a few minutes. Once dry, I touched up the paint between the apron and the legs then tried out the final table with the chairs and Gustav. I think we have a winner! :D

Categories: Watson Mill
June 25, 2017 | 0 commentsWatson Mill – main room furnishings, part 2
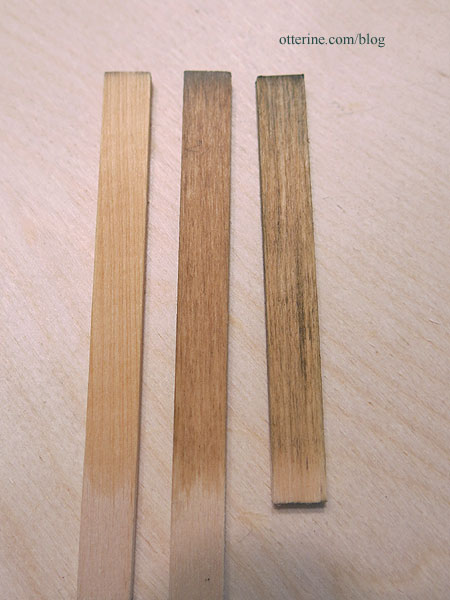
Continuing work on the main floor furnishings. I tried out some new Minwax stains I picked up at Lowes. This is Natural, Fruitwood and Driftwood (left to right) used on basswood scraps. Natural gives the grain a lift and a slight warm tone. I might use this on the circle library since it will seal the wood without changing the aspect much. Fruitwood is a lovely light color that coordinates well with Natural, so I will likely use this on the dumbwaiter and its cabinet. Driftwood has a green grey cast and works well with the grain.
I cut down the depth of the Houseworks 2″ kitchen cabinet by 1/4″ since it was a tad too deep and used Driftwood stain with satin varnish. The knobs are wood painted black. A beautifully rustic cabinet. :]
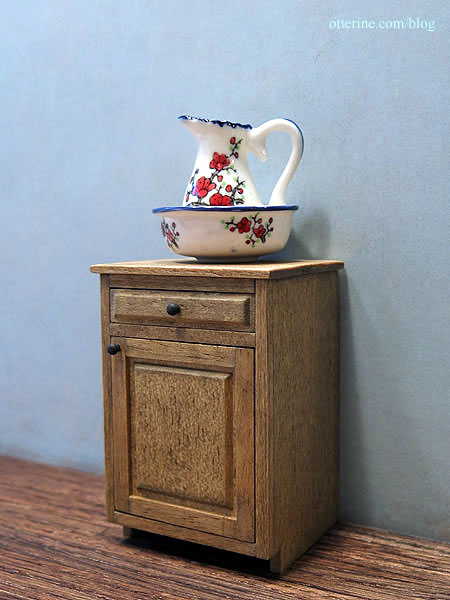
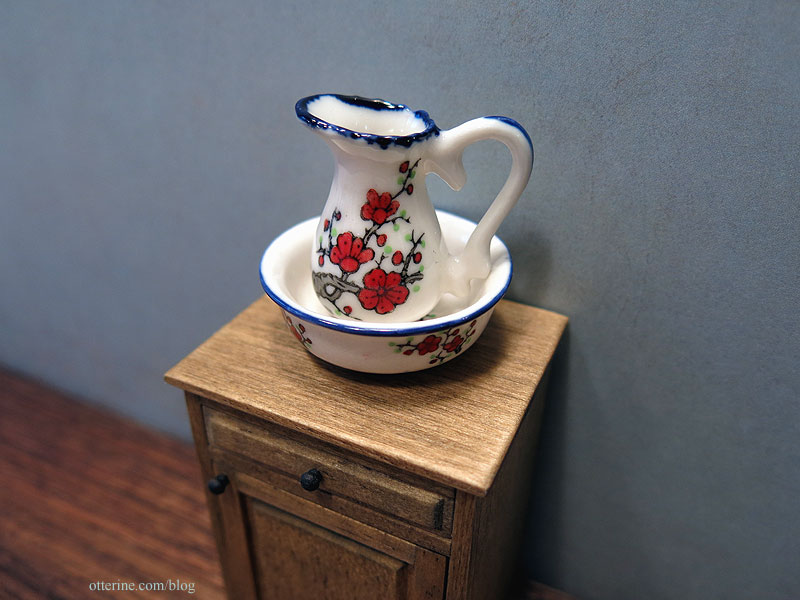
The pitcher and bowl are from my stash of minis. It’s a favorite that I had been hoping to use in the mill but it wouldn’t fit upstairs. Problem solved. It’s now a kitchen wash set.
I painted the kitchen chairs Zinc by Americana. What I like about this dark grey is the blue cast to it, which should go well with the enamel tabletop. I’ve been trying out processes for the tabletop, so more on that later. In case that doesn’t work out, it will still be a lovely color with a plain white tabletop. :]
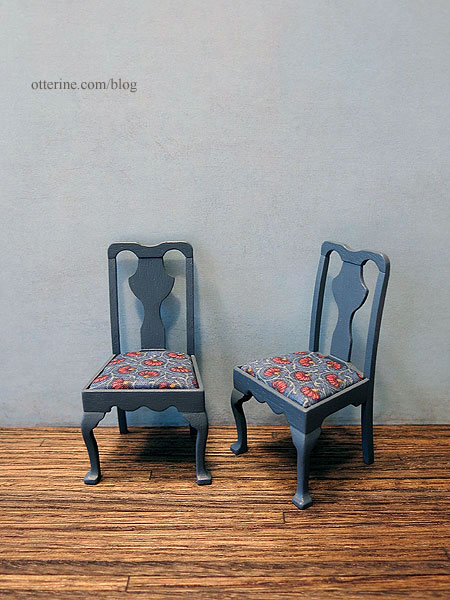
I finished with Delta Ceramcoat Satin Varnish and upholstered with a cotton print from my stash.
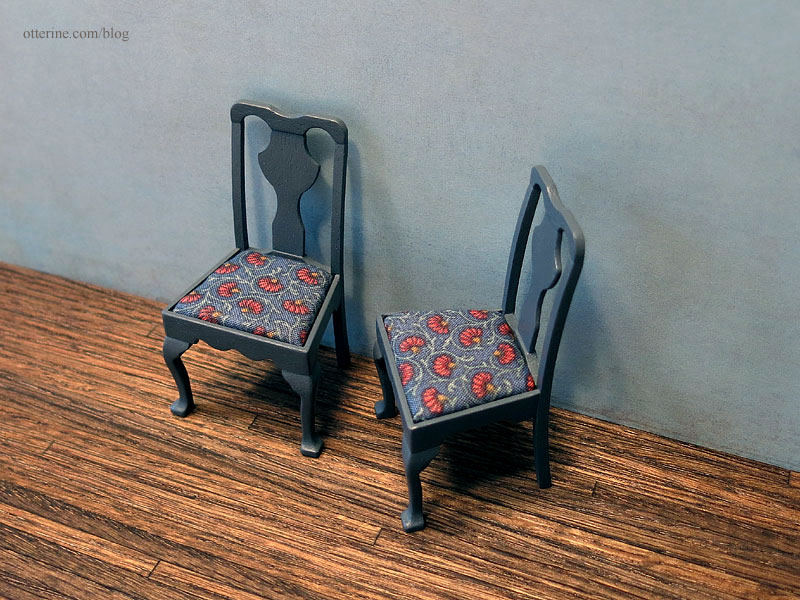
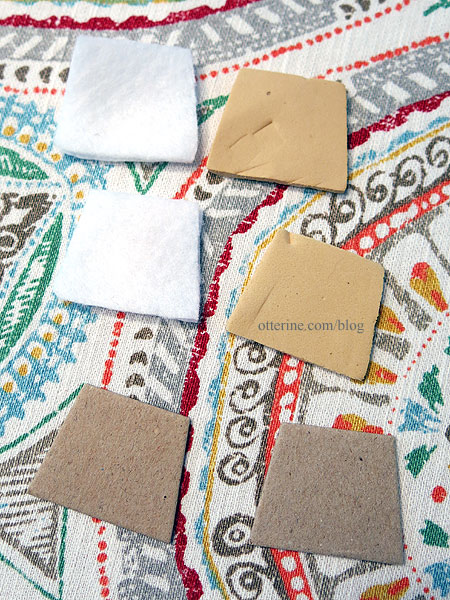
I replaced the damaged foam from the kit with two layers of white felt. The seats aren’t glued in since they fit well enough with tension alone. I can easily clean or replace as needed.
Categories: Watson Mill
June 23, 2017 | 0 commentsWatson Mill – foundation
It might seem strange to start the landscaping with the mill in dry fit, but this will help me visualize how the mill will look in the end. I want a relatively steep landscape for the mill, considering the base board is 20″ square. I used layers of 1/2″ thick builders foam. I used a freshly cut whole piece for the bottom layer, but the other layers were made from scraps to use up the scraps. I used Weldbond glue to attach the layers and then pressed it flat with magazines overnight.
I’m 95% sure I want to do a wood shake exterior on the mill. I made a support system from 1″ plywood strips, adding a couple spare pieces of mdf that will help hold it in place when I glue it later on.

I cut pieces for the increase in slope to the door and added a rounded step at the top. Some of this might change in the end, but it helps to have it roughed in for now.

These pieces will stay loose until later on so I can further shape them for the final landscaping.
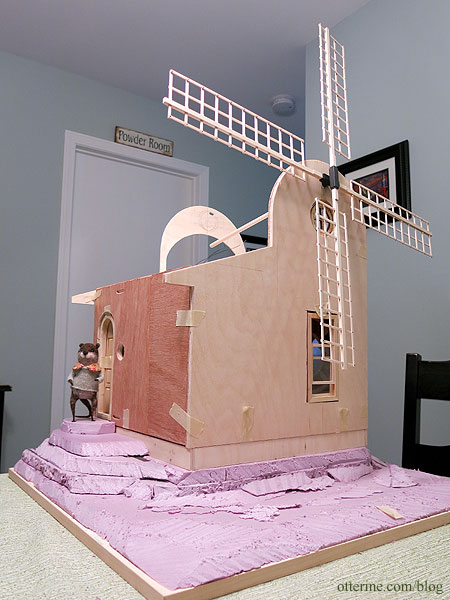
In the front, I want a bit of relatively flat land for some fun features to be revealed later. I think this is a good start, very tall and stately. :D

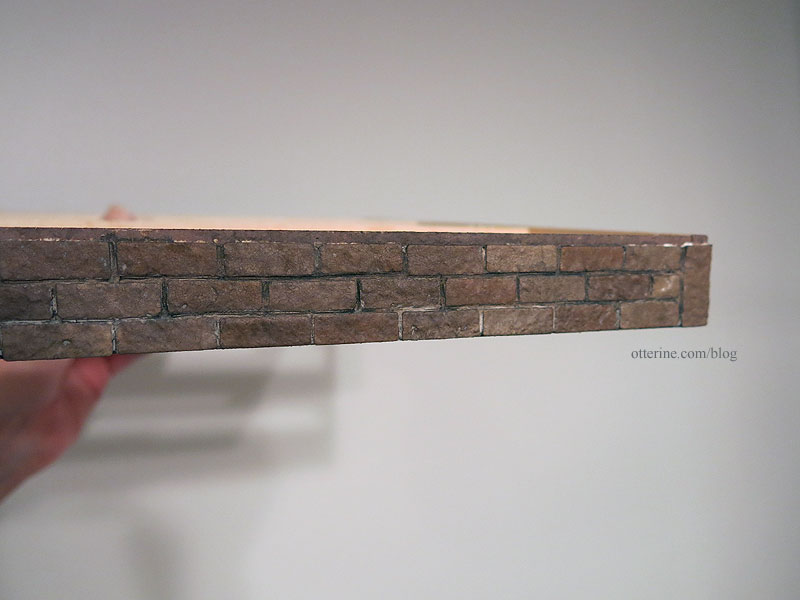
I had egg carton bricks on hand, so I didn’t bother to reinvent the wheel. Most of the time, I will measure my board and determine how many bricks across I need and adjust the measurements accordingly. It’s a small foundation, so I didn’t think it would matter much once landscaping is in. Since my bricks didn’t end well at the corners, I opted for corner stones cut to fit.

I chose brown based bricks instead of my usual brick red. :]

I started with an even brown base.

I then stippled on the other colors to create variations before sealing with Delta Ceramcoat Matte Varnish (which always dries shiny with how it is applied).

After it dried, I grouted with spackling.

I added a couple of dark brown and black washes to tone down the grout, then finished off with a spray of Testors Frosted Glass to dull the finish. There will be more aging during the landscaping process, but I love how it looks so far. You can still see the subtle color differences.
Categories: Watson Mill
June 16, 2017 | 0 comments
NOTE: All content on otterine.com is copyrighted and may not be reproduced in part or in whole. It takes a lot of time and effort to write and photograph for my blog. Please ask permission before reproducing any of my content. (More on copyright)