

Watson Mill – update 2021
I’ve been working on Watson Mill off and on since the end of 2015, building several other mini structures in between bouts of mill construction. I am back to the mill once again.
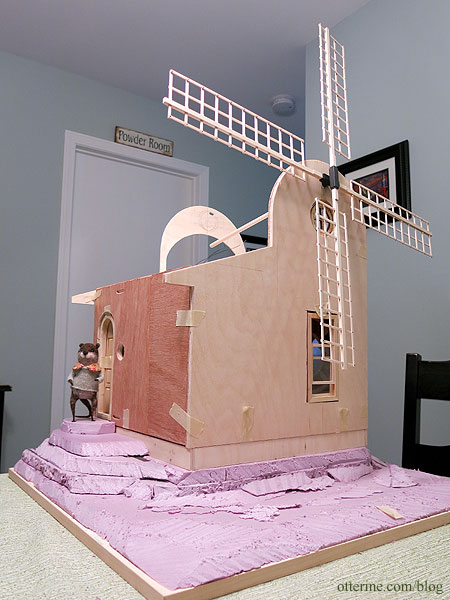
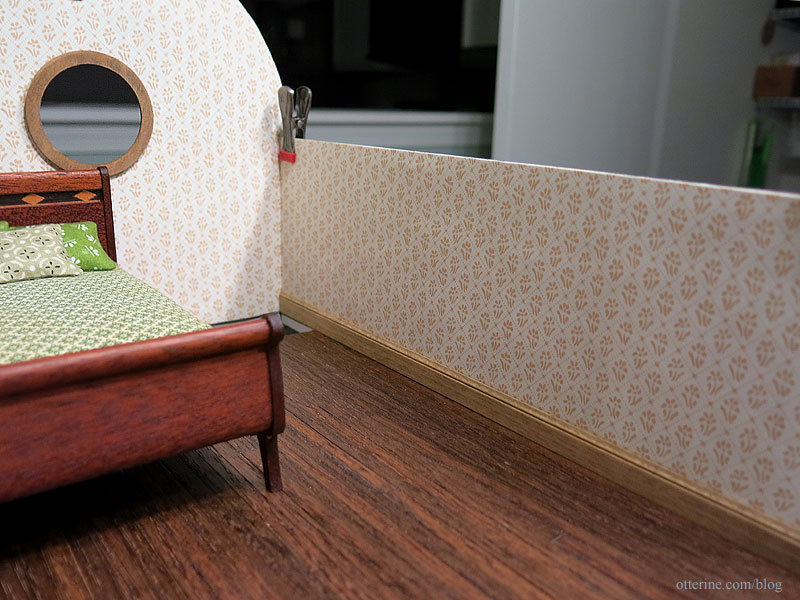
I had the structure covered while in storage in my workroom, so the dust didn’t build up. The wallpaper in the bedroom buckled, though, from the fluctuations in humidity. I should have glued the thin, vintage paper to a backing paper to make it more substantial before gluing in place. I don’t think I have enough to redo it, unfortunately. I would love to find the wallpaper again, but that’s a long shot. It’s vintage MiniGraphics called Gallery Flower. There were at least two colors of this paper, and this is a lighter beige.

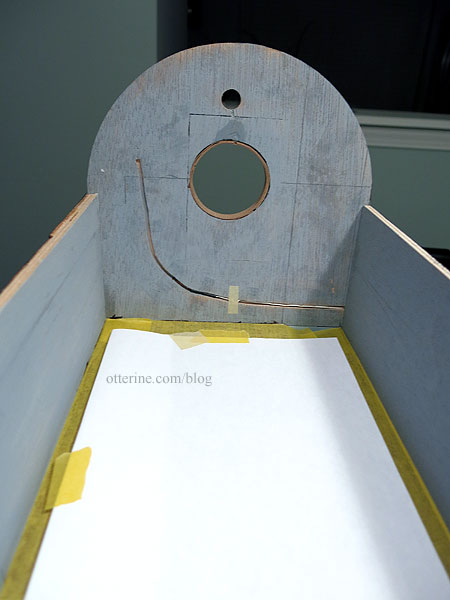
After masking the edges of the wood floor, I wet the paper surface to weaken the glue.

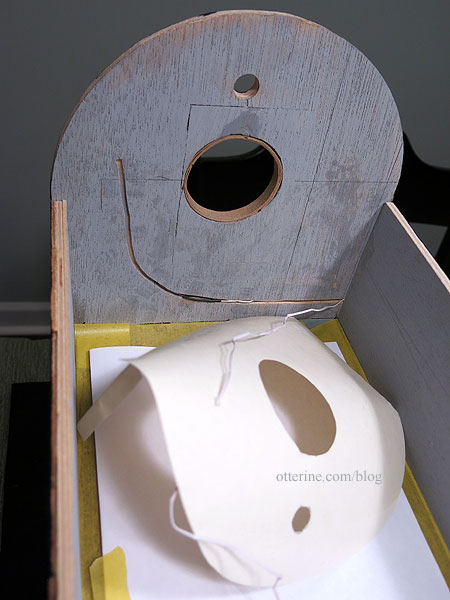
I used a palette knife to scrape the paper away. It was rather easy work with such thin paper.

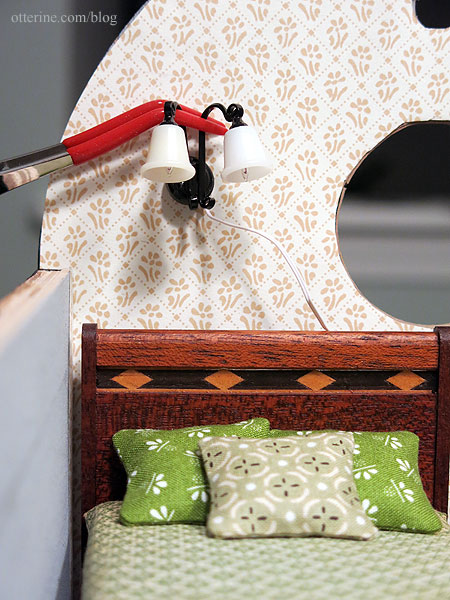
When I removed the wallpaper from the bedroom, the wall light did not survive. There’s no way to rewire it, and of course it’s discontinued. By miracle of miracles, I found another light and more of the vintage paper. More to come….
Categories: Watson Mill
April 25, 2021 | 0 commentsÉdouard
My dear friend Martha sent me a lovely gift in the mail. She painted a portrait of Gustav‘s father Édouard for Watson Mill. So delightful! I can clearly see the resemblance and an inherited fashion sense!
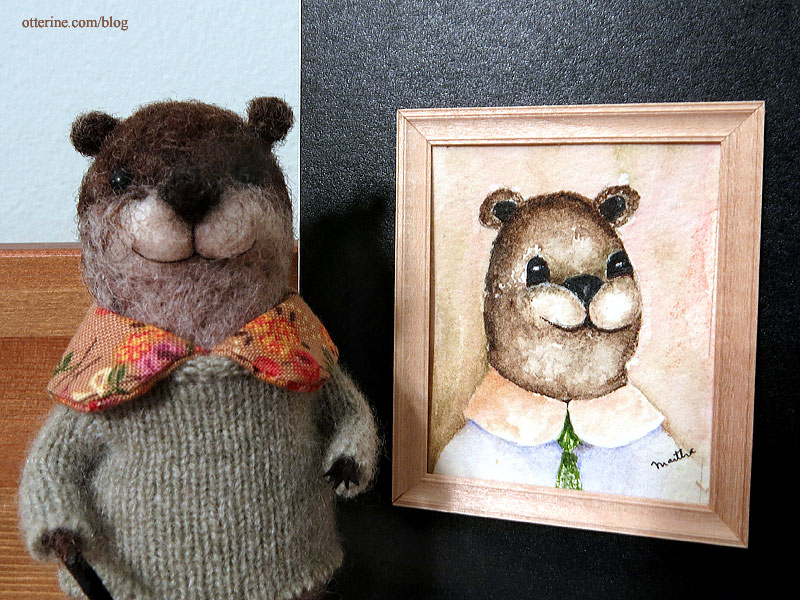
Thank you so much, Martha! I will treasure your thoughtful gift. :]
Categories: Art and paintings, Watson Mill
August 13, 2018 | 0 commentsWatson Mill – ladder, part 1
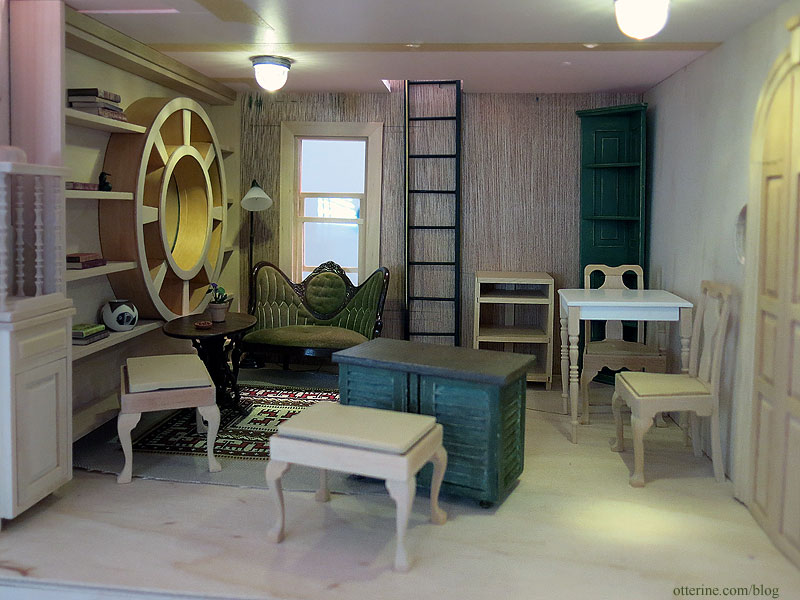
The ladder to the bedroom will sit on the front wall between the library window and the kitchen cabinet. The next choice is to determine the type of ladder.
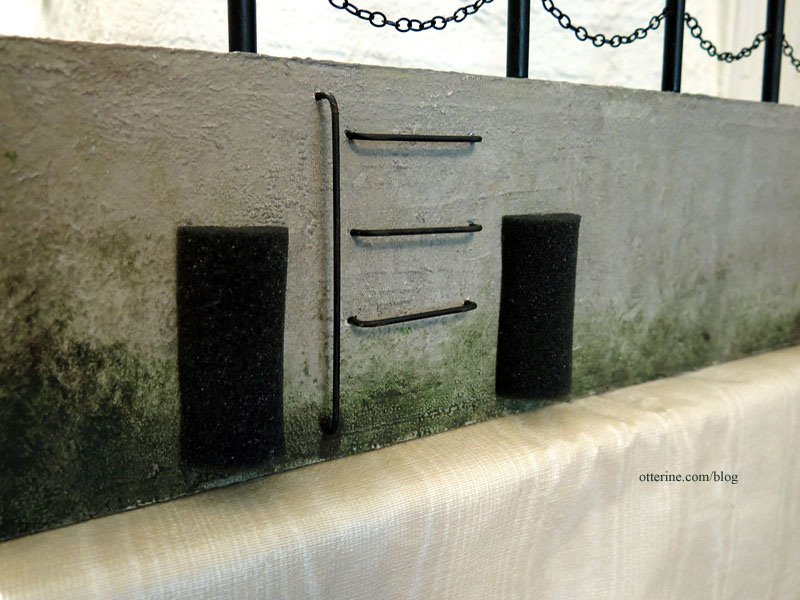
I considered a simple set of metal rungs and a railing like the dock ladder I made for Walnut Bay Light. These are bent brass rod painted black. The hardest part with these is getting each rung uniform. These take up the least amount of room but are also hard to use. Is Gustav up to the daily workout challenge?
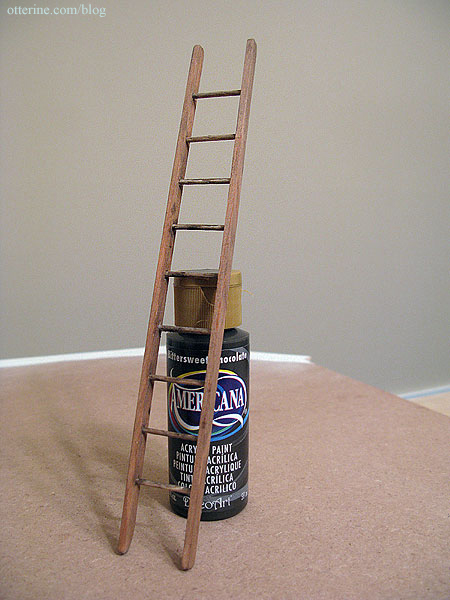
I considered a wood ladder like the one from Baslow Ranch.
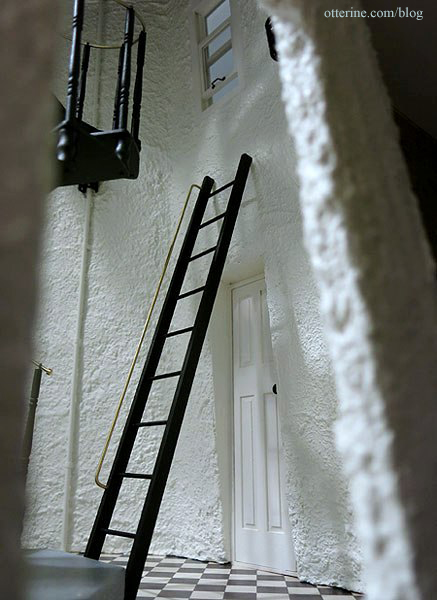
Or the moveable ladder from Walnut Bay Light, which has a railing built in. They take up a bit more floor space away from the wall due to the angle but are also thin enough to blend into the background. I used this one in the mockup shots for Watson Mill.
I think I will go for a mix of the two – rungs on the wall upstairs to give Gustav something to hold onto while moving to and from the upper room and a wood ladder leading up from the first floor. It will add a nice visual element to the build without taking up too much space. And, I will attempt to make the wood ladder moveable so it can be pushed against the wall to open up the floor space. More on that to come…off to engineer.
Categories: Watson Mill
January 19, 2018 | 0 commentsWatson Mill – bedroom wallpaper
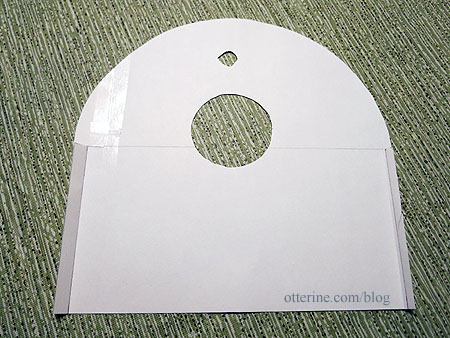
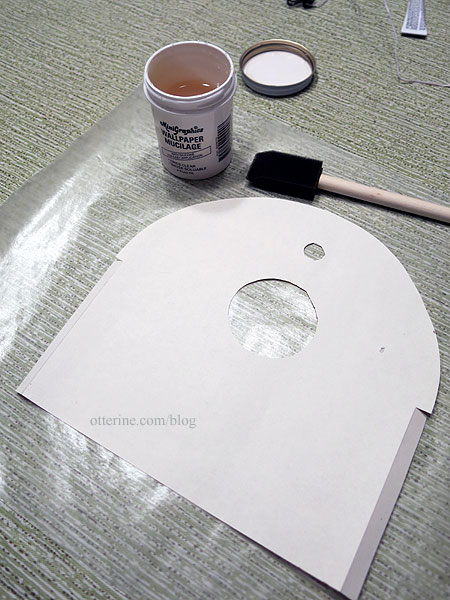
I lucked out with a great find at the recent Wee “c” Miniatures Show 2017 – a vintage paper from Mini Graphics called Gallery Flower. Since it came rolled, I pressed it flat on the table for a couple weeks before using. I had traced the wall outlines before assembly, so these helped me make paper templates to check the fit before cutting the final paper.
There were only two sheets of the paper in the roll, so I had to be careful with my cuts. I was able to get the three pieces needed to cover the bedroom from one sheet, leaving a couple of small scraps and one full sheet in case of disaster during installation. The light paper color will help keep the room from becoming a dungeon once the roof is on.
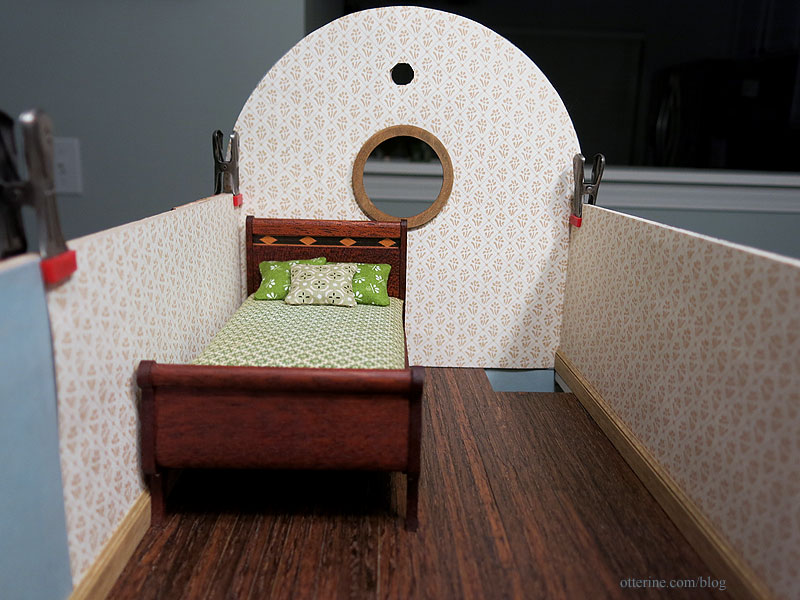
The upper floor will have stained baseboards, so I propped them in place to check the color and fit. They are lighter than the flooring but don’t clash since the paper is light.
Time to install the wall sconce in the upper bedroom while wallpapering — it will make sense in a minute. I had made the channels for the wires previously. The sconce wires will not be poked through the wall to the exterior but instead will run on the interior wall to the open attic space. The downstairs floor lamp wire runs on the outside, up to the bedroom wall channel. I put a small piece of tape over the interior channel to help hold the wires while still allowing for movement. A whole strip of tape would stick to the wires too much and make it difficult to pull them through. This will matter more for the next step than it did for the floor lamp. I masked the floor prior to working as well to prevent glue mishaps.
The bedroom sconce wires run through this curved channel, which will be covered by wallpaper. I had to get the sconce attached to the wallpaper, paste the wallpaper in place, and run the wires into the channel all in one step. I marked where the sconce channel began behind the wallpaper. I poked a hole in the wallpaper and fed the wires through, leaving the sconce loose. (My small tape piece isn’t shown here since this was my dry fit trial.)
Of course, I first double checked the height. :]
I then applied Wallpaper Mucilage to the paper.
I fed the wires behind the tape and through the channel. Using my third and fourth hands (bahahahaha), I pressed the wallpaper down while pulling the wire through the channel, pausing for a second to apply some glue to the back of the sconce so it would remain in place once the wires were pulled taut. I then smoothed, straightened and stopped swearing. ;D Here you can see the side tabs that soften the joins in the corners.
The two side pieces of wallpaper were much easier to install. I applied the paste to the paper and then eased them in place, overlapping the tabs from the front wall. I taped the tail end of the wires in the open attic space then used my color-coded wires to electrify and label the sconce.
The upper room will have baseboard trim and a table lamp, but I need to address the dumbwaiter gate and ladder railings first. So, that’s a wrap for today.
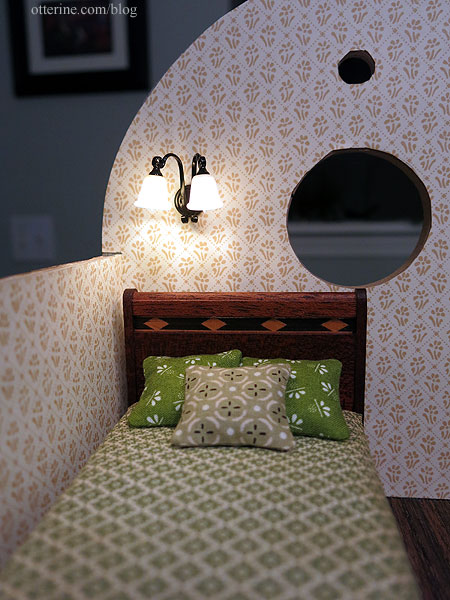
Update: this thin paper ended up buckling, even using the mucilage. I will line the replacement paper with a backing material and redo the application.
Categories: Watson Mill
January 17, 2018 | 0 commentsWatson Mill – building progress
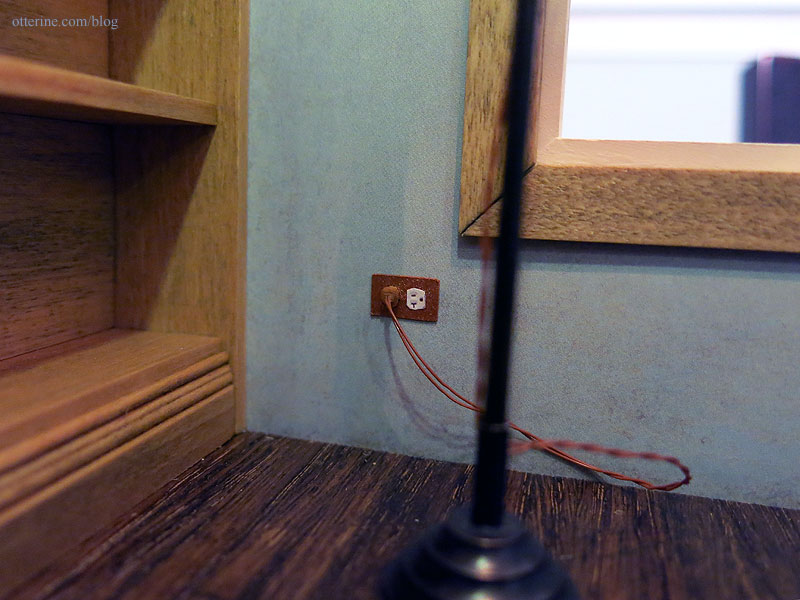
The Ray Storey floor lamp wire runs on the outside, up to the bedroom wall channel. I had made the channels for the wires previously. To install the floor lamp, I made one of my usual faux wall outlets from copper card stock. I have only one more lamp requiring an outlet, but I made four to have matching decorative outlets as well.
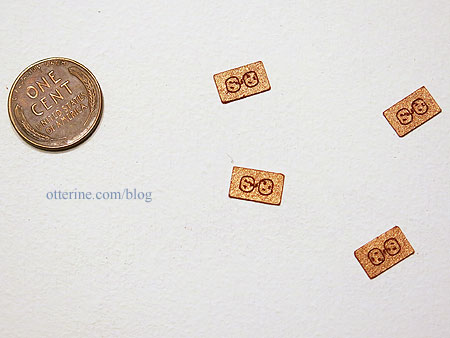
I finished the wire with a false plug, added a receptacle cut from stickers, and ran the wire up the outside.
I glued the ceiling board in place. To help with stability, I added strip wood on the upper floor where the wiring space will be.
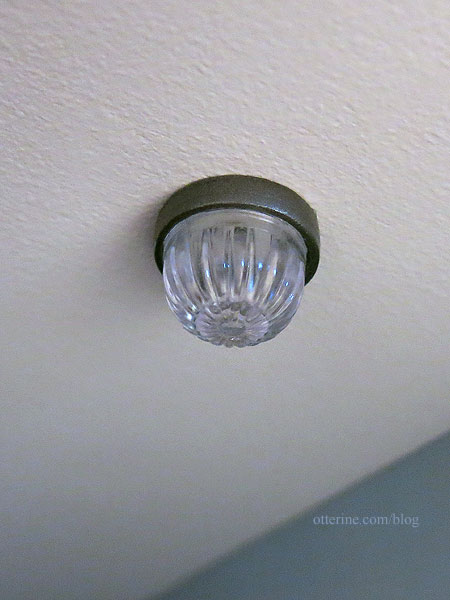
I installed the two ceiling lamps from the first floor and ran the wires into the attic space. These are new old stock ceiling light kits by Illinois Hobbycraft. I spray painted the metal rings Krylon Antique Bronze.
Since I put the wallpaper in prior to putting in the ceiling board, I needed some small crown molding to finish the upper edges. I stained this Minwax Driftwood to coordinate with the other finishes.

I checked the fit of the upper flooring and cut the holes for the two openings before gluing it in place. I had previously stained the red oak flooring with Minwax Dark Walnut, sealing with two coats of Delta Ceramcoat Matte Varnish. Next up was installing the small side wall to complete the bedroom space.
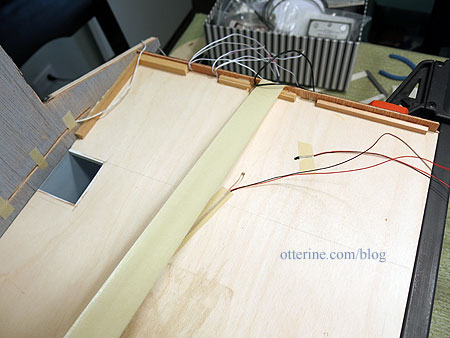
Here you can see the wiring from the floor lamp running through the bedroom channel. I put a few small pieces of tape over the interior wiring channel to make a pocket for the wires while still allowing for movement. The bedroom sconce wires still need to be added to this channel. A whole strip of tape would stick to the wires too much and make it difficult to pull them through.
I stabilized the wall with pieces of mdf. As you can see, the attic space will provide good access to the wiring.
Categories: Watson Mill
October 10, 2017 | 0 commentsWatson Mill – door and windows, part 3
Continuing work on the door and windows. I spray painted four doorknobs and two keyholes in antique bronze since the area for door handles was so narrow. I had to put the knobs a little off center from one another due to the draft strip down the middle.
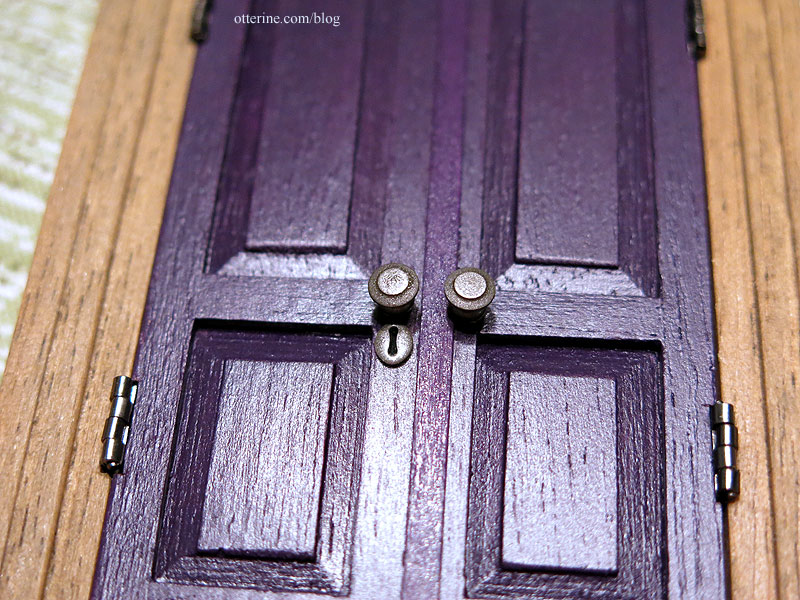
I love the way it turned out, though. :D

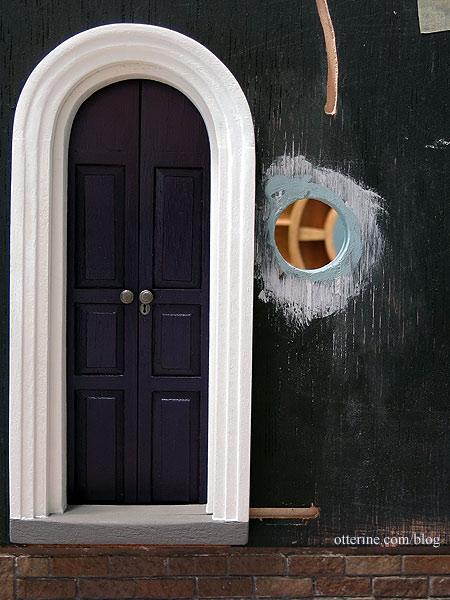
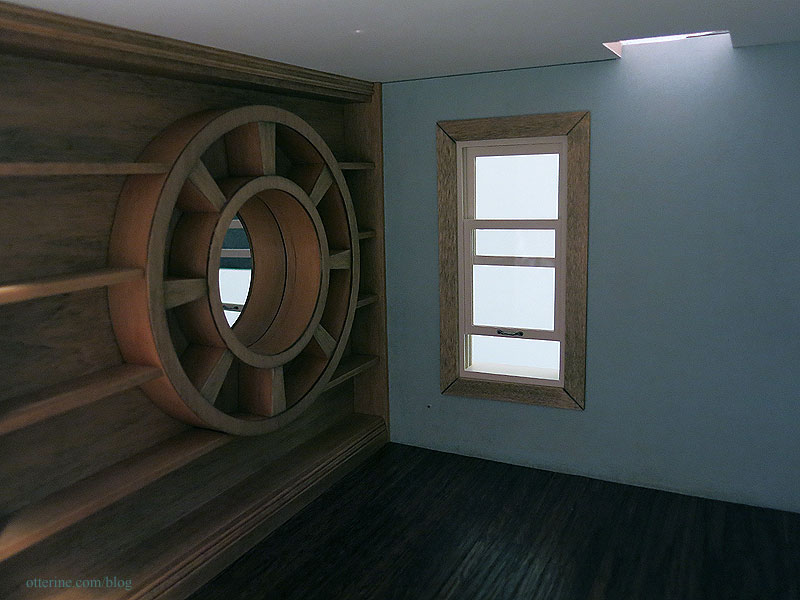
Right now, I have the outer trim held on with putty since I’ll need to use the curve to mark the shingles as I round the top. I tried to fix the bad sanding job on the curved portion, but I’m still not happy with it. (I found another of these vintage windows, so I can replace the outer trim.)
The threshold for the door was painted Neutral Grey after a good sanding to droop the middle as though it has been worn over the years. I’ll add some subtle aging once I do the landscaping.
The window I bought from Hobby Lobby would not go back together correctly, even though I was careful to keep the parts in the right order. I won’t put a wonky window in a build I’ve been so carefully planning. I painted a Houseworks window in replacement, using stained trim for the interior. The corner joins are somewhat pronounced from the stain, but it won’t matter with the window coverings and furniture placement.
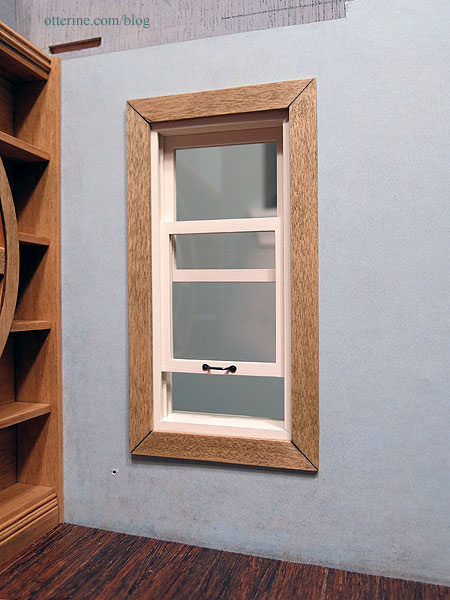
I had to pad the exterior frame with strip wood since the thickness of the wall is 3/8″ but these are meant for 1/2″ thick walls.
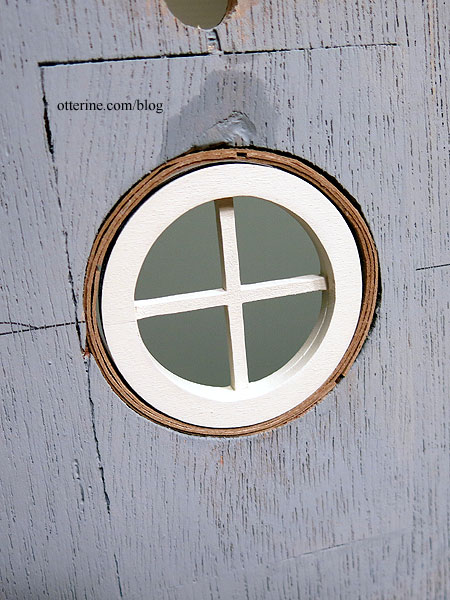
As noted previously, I had to repair the window opening for the round upper window due to a wandering Dremel. I cut strips of cardboard and lined the hole until I had a suitable diameter to hold the window in place. This fix will be covered by wallpaper on the interior and wood shingles on the exterior.
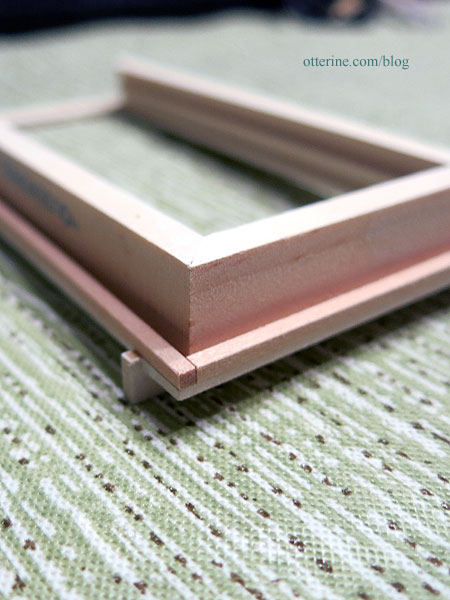
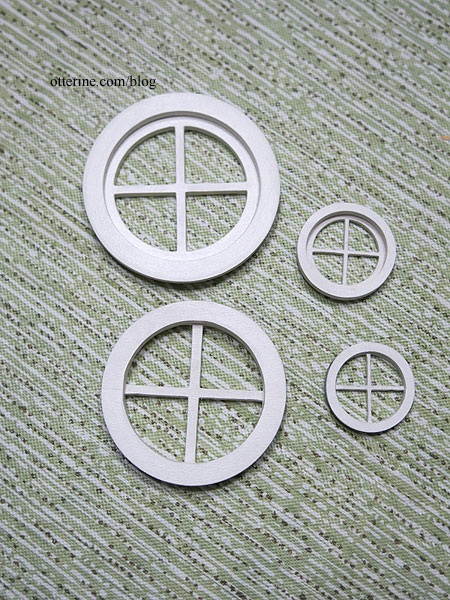
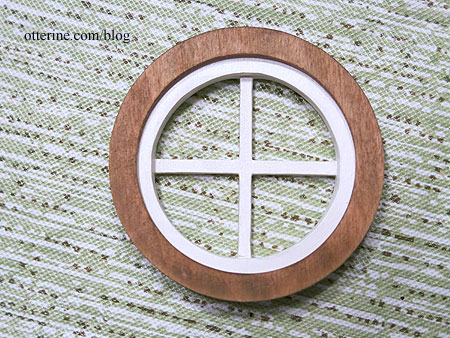
While I love the 2 1/4″ Simplicity Window from Heritage Laser Works, the front wall is 3/8″ thick. Each window comes with one 1/8″ thick center mullion piece and two 1/32 thick outer trim pieces. I bought three windows to have the parts needed to address the thicker wall. I will use two center mullions, one on each side of an acrylic window. I cut the cross bars from the third mullion piece to finish out the required thickness.
I glued three of the outer trim pieces together to make a thicker exterior trim piece then glued the two remaining outer trim pieces together to make the interior trim piece.

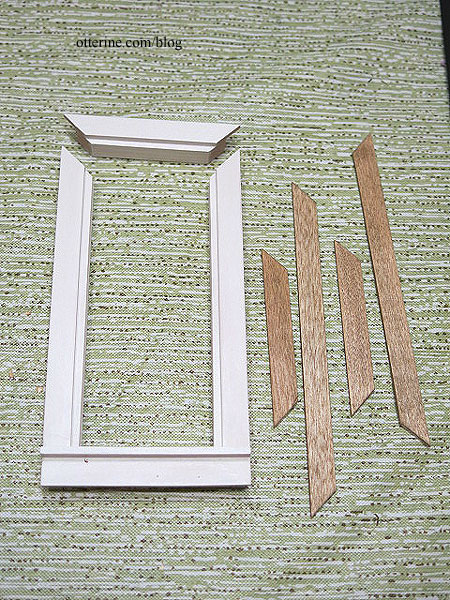
For the 1 1/8″ Simplicity Window from Heritage Laser Works, a little more work will be involved since the pieces aren’t as thick. But, to start, as with the larger round window, I glued four of the outer trim pieces together to make the exterior trim piece then glued the two remaining outer trim pieces together to make the interior trim piece.
I glued the outer trims to one mullion piece for each window. I won’t glue the windows in just yet since I want to use them as guides for cutting the shingles to fit. I painted these Americana White Birch in satin.
The interior trim is stained Minwax Driftwood.
I think I am ready to get the ceiling installed, then lighting, then back to the dumbwaiter and the ladder.
Categories: Watson Mill
September 27, 2017 | 0 commentsWatson Mill – door and windows, part 2
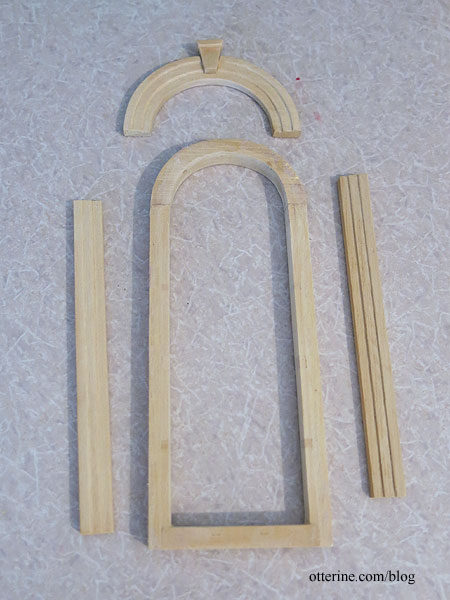
In my perusal of windmills online and from my own stash of vacation photos, I’ve found that the windows and door frames are often rust red or white. Check out this beautifully converted home, for example. I’ve opted for Americana White Birch in satin instead of true white. Painting frames instead of staining makes life easier all around. I don’t have to split between interior and exterior colors, and the filling on the arched door conversion won’t show.
I microwaved the window purchased from Hobby Lobby to take it apart since it was not the kind that already comes in parts for easier painting. White trim on the interior would be a bit stark, so I stained the interior trim Minwax Driftwood to coordinate with the circle library. The tiny bit of white showing will be fine and not as intrusive as large white frames. I need to finish the sashes, so this isn’t back together just yet. (Note: this window was later scrapped due to warping issues.)
To make life easier, I also microwaved the door frame to separate the interior trim. I was then able to work with all the pieces without masking.
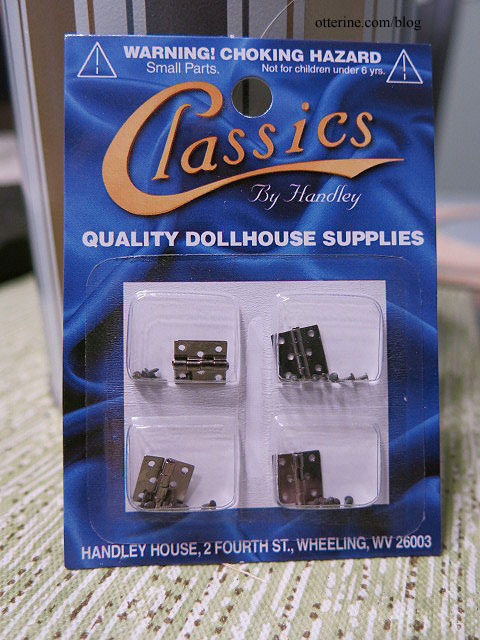
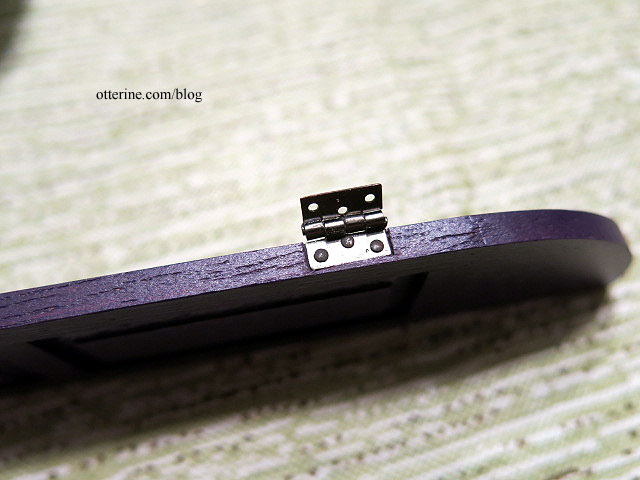
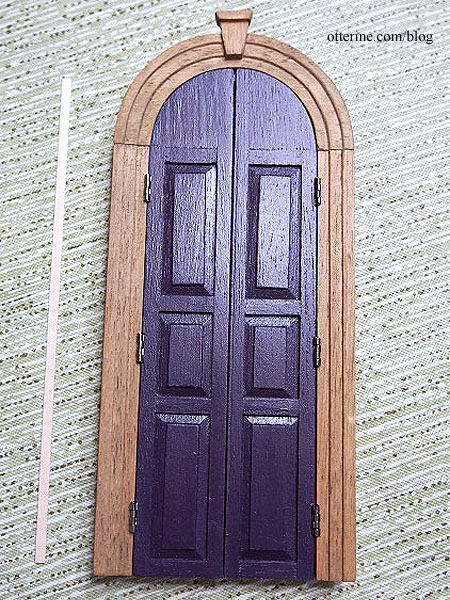
As for the door color, I fell in love with this inspiration photo. To achieve a close approximation, I used two coats of Aubergine by Folk Art followed by two coats of Purple Pansy by Anita’s. I finished it off with Krylon satin spray. The hinges are by Classics.
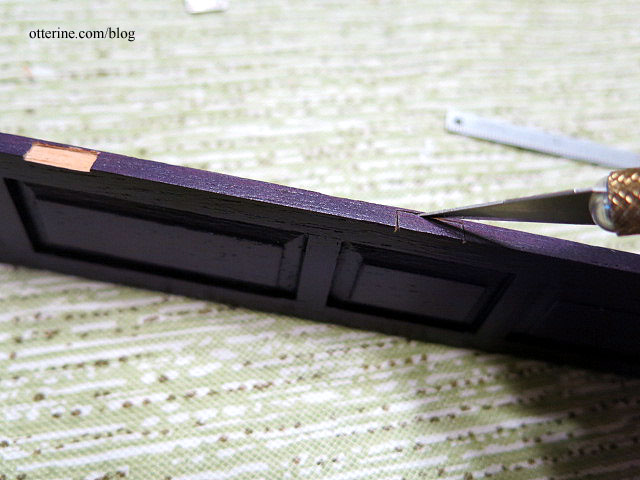
I cut mortises in the door panels to hang the doors like the real deal using a very sharp X-Acto knife to cut and shave the wood a little at a time. The mortises on the door ended up a little large, but both the door and hinges are dark so it will be less noticeable.
I matched up the two sides to get the hinges as even as possible.
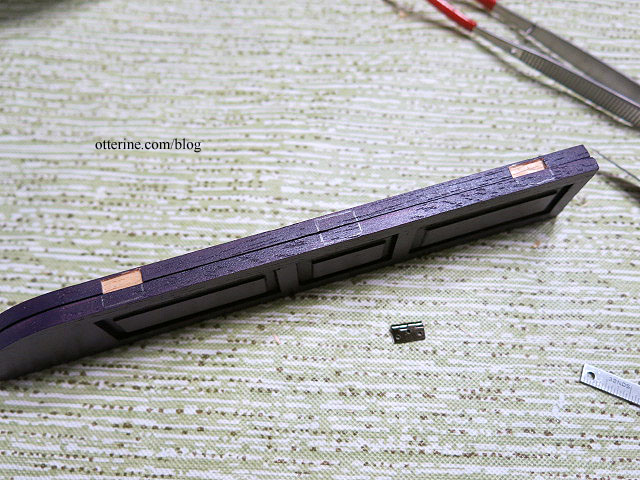
I painted the cut portions purple to blend better.
I used Aleene’s Quick Dry supplemented with super glue gel to hold the hinges in place.

I let that set, then drilled pilot holes for the nails.
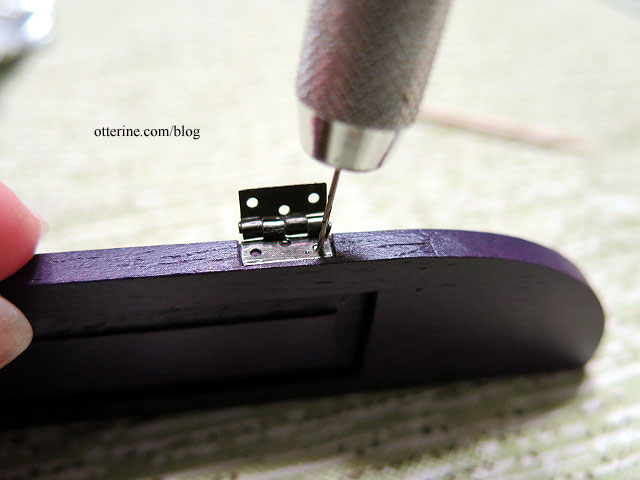
I added a dot of super glue gel to the nails except the one closest to the working portion. I didn’t want to risk getting any glue on the mechanism.
I set the completed door panel into the frame along with the one without hinges. I marked the hinge placement on the frame, then cut mortises to fit.
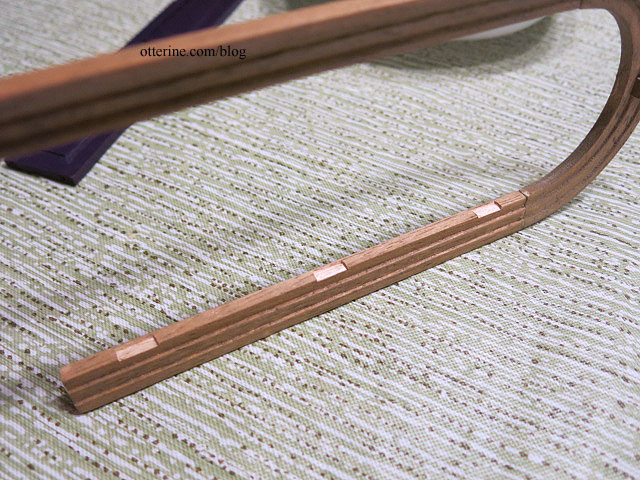
These turned out better after practicing on the door panels. I followed the same process for attaching the hinges to the frame.
After cutting the remaining frame mortises, I glued the trim back to the frame.

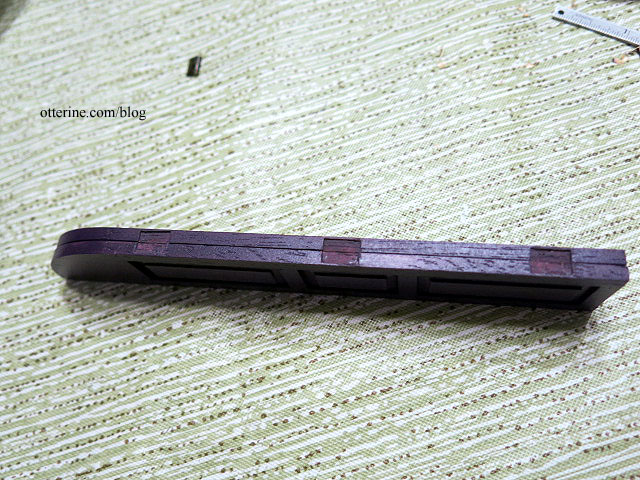
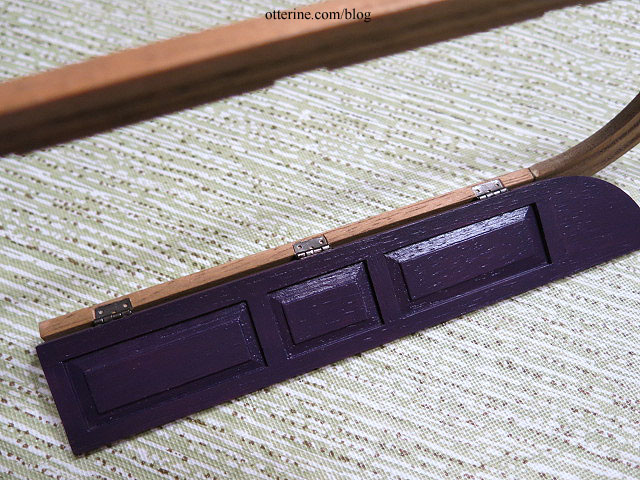
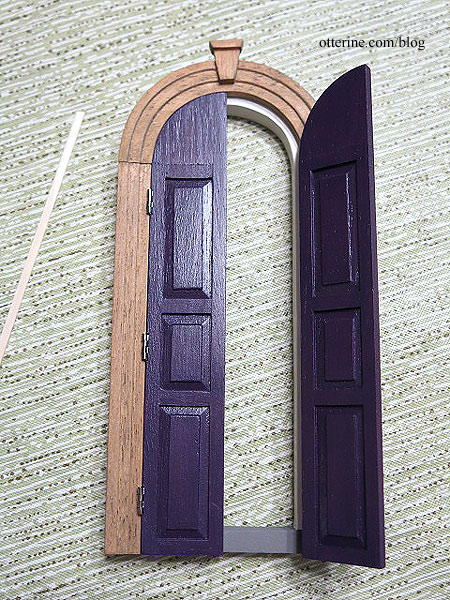
Tiny hinges are fiddly and temperamental, but the door turned out pretty well considering it started as a window with shutters. As expected, there was a gap between the door panels. If I had built the doors from scratch, I could have made a rabbet join down the middle. Instead of trying to reverse engineer that sort of thing from a ready-made component, I will just add a thin strip of wood painted to match down the middle on the interior.
The left panel hinges are fairly tight and don’t want to stay completely closed, so I might end up adding an interior bolt. We’ll see after I get the knobs in place.
Categories: Watson Mill
August 24, 2017 | 0 commentsWatson Mill – I’ve got the shakes again
It apparently takes many years to forget what a right proper pain it is to wood shake an entire house.
It’s a lovely finish though, and very forgiving especially on an old mill. Instead of dark cedar, this time I will be using light wood shakes that I can stain to look weathered. These are from the defunct and partial Tudor Queen Anne kit. No sense in buying supplies when I have some languishing in storage. They are thin and rather uniform, which makes life easier.
First was determining the size of the individual shingles. True to scale shingles looked out of place for Baxter Pointe Villa, so I hand cut the 1,700 shingles by length and width to work best for proportion. Considering the mill structure is even smaller, I figured I would have to do the same. The 1/2″ by 3/4″ measurements used for Baxter Pointe Villa seemed like they would work for the mill as well.
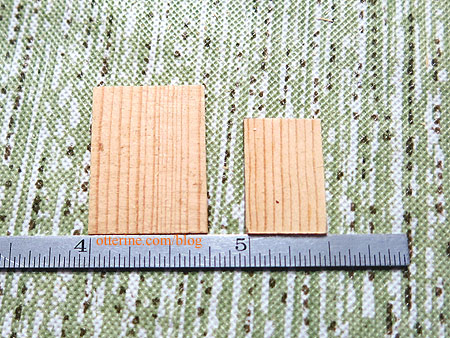
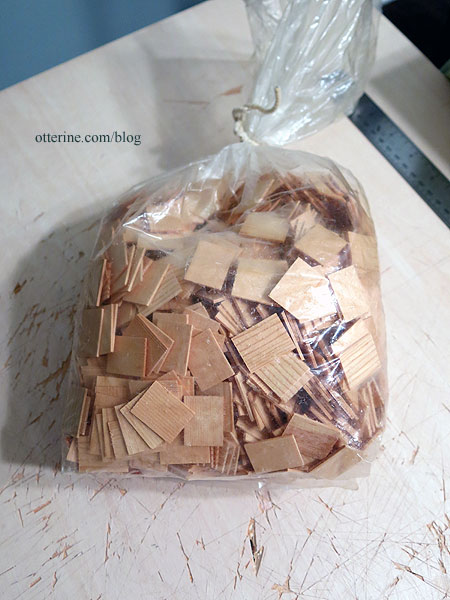
I did a rough calculation and will need approximately 1,635 shakes. Not that far off from the amount needed for Baxter Pointe Villa, but there are fewer windows and no chimney for Watson Mill. After counting the bag, I discovered I have only 1,617 shakes. :O No margin for error. But, if need be, I will use other shakes for the small back wall. Houseworks makes nice light wood shakes that will work well enough to finish out the set. I will start here, though.
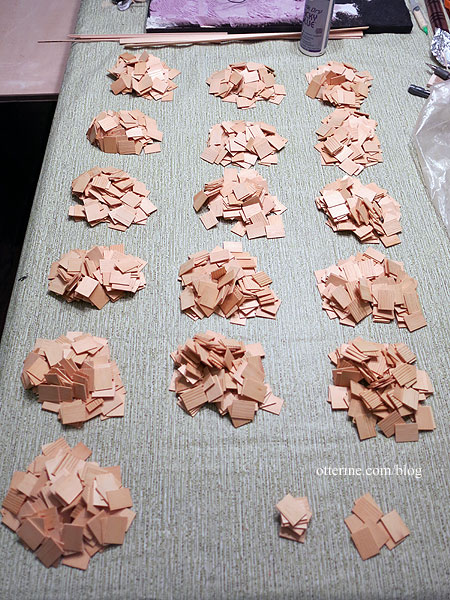
Cut, cut, cut. Once this bear of a task is done, I’ll stain the shingles before application. I’ll also have to finish the windows and door so I can get those installed prior to shingling.
Categories: Watson Mill
August 9, 2017 | 0 commentsWatson Mill – circle library, part 6
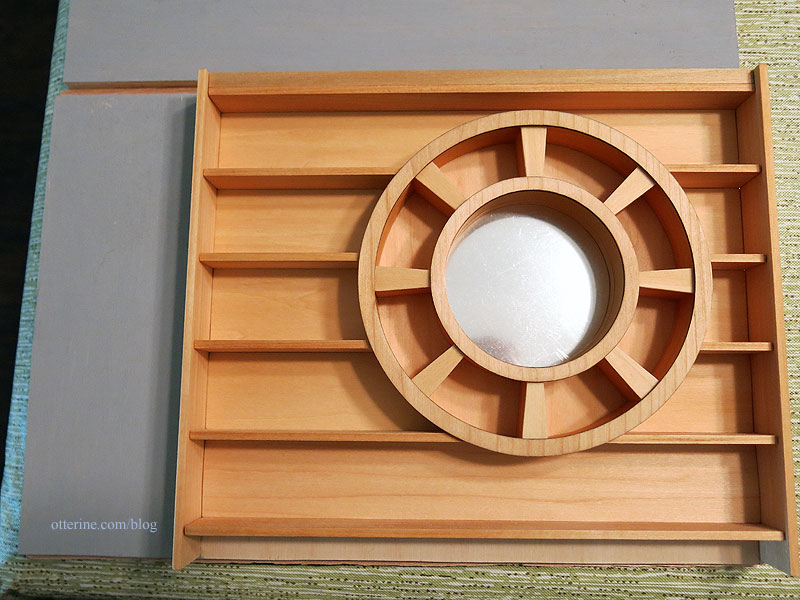
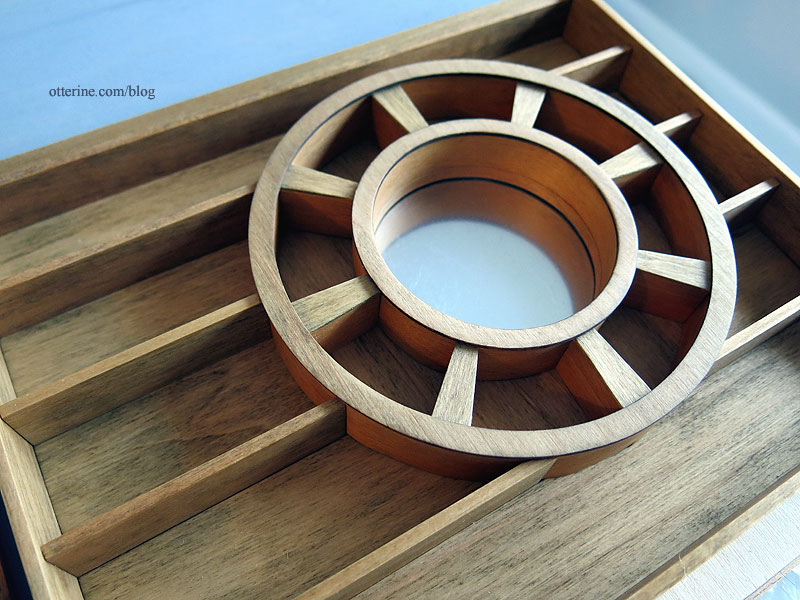
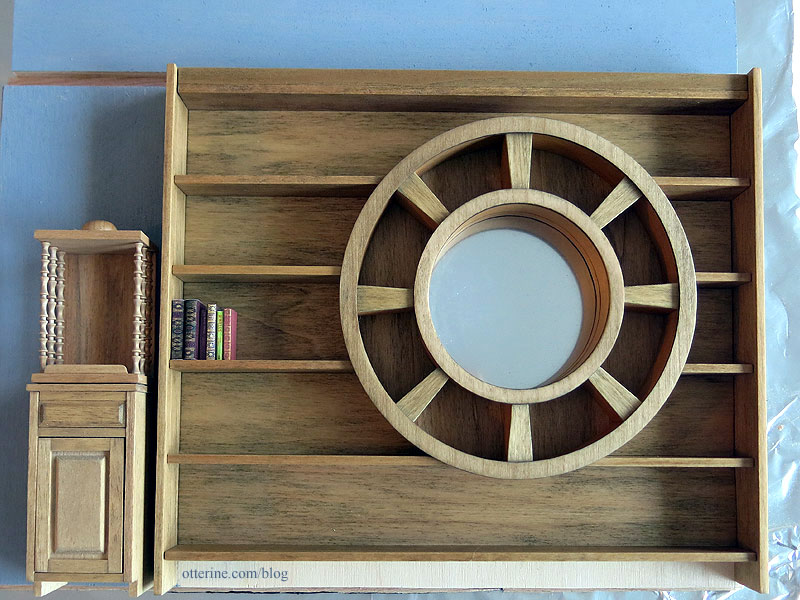
Continuing work on the circle library. I finished gluing the circle library boards and backing sheets, cut some paper shims for behind the mirror, removed the protective covering and pushed the circle in place.

The circle can be taken out to clean or replace the mirror as needed since it is held in place by tension alone.

After getting the walls up and the wallpaper in, I could address the final trims. I added a fancy routed trim for the top to cover the plain brace there. I added a piece of baseboard I believe I got from Debora when she was cleaning out some full scale supplies. I sanded the ends to curve toward the side trims since the baseboard was a little too thick for the space. After adding the final side trim, it was all done! Just need to fill it.
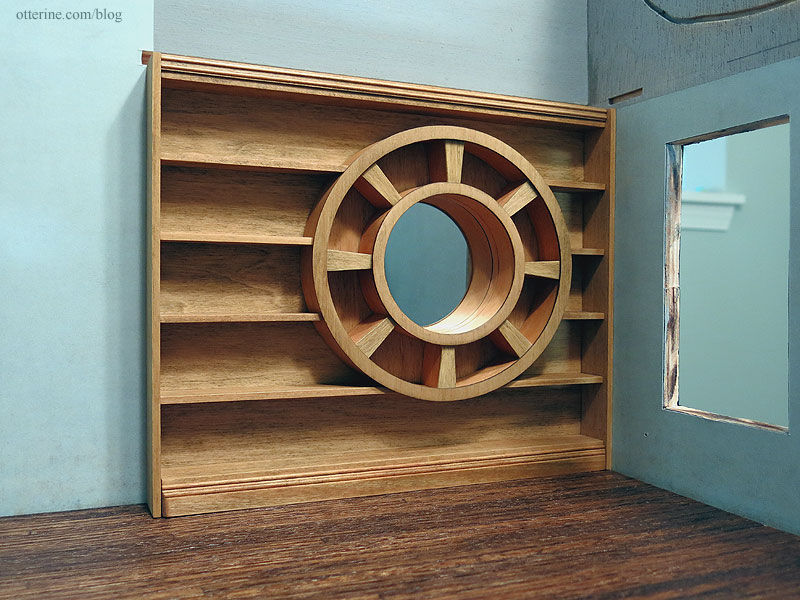
And, for final reference, here is the original again. I skipped the long curved trim for lack of space. Besides, I like mine as is. :]

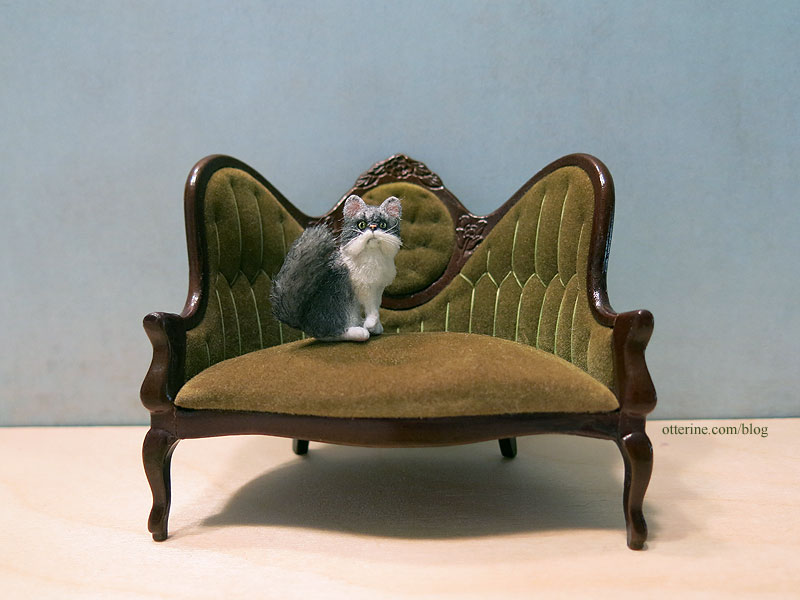
no discernible source And, now for your dose of cute. Here’s Jasper in his new kitty bed. As many of you with cats know, they tend to like the box more than what comes in it. As I was unpacking the plush house, he was all eager to hop in the big cardboard box. He was just about to when I set the plush house on the ground off to the side. He made a beeline right into the plush house. Success! I even had to carry him upstairs in it (it has a handle), because he refused to come out.

Categories: Watson Mill
August 7, 2017 | 0 commentsWatson Mill – electrical plan
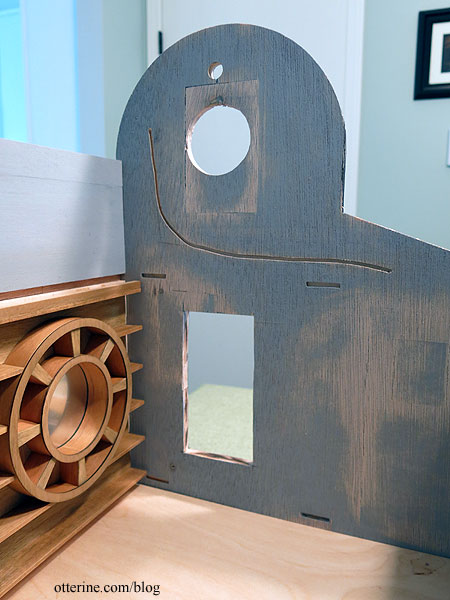
Before I could apply the wallpaper, I had to figure out my wiring plan. I’ll need two lines, one AC and one DC, since the windshaft motor and dollhouse lighting differ. Ceiling light channels are simple enough, but I needed to know which direction I was headed. I like to build in some access to the lighting, so I opted to head toward the empty space covered by the angled side roof. I can make this a removable roof panel easily enough, so my wiring will gather here.
I made a channel on the front wall for the bedroom wall sconce. I’ll drill a hole for the table lamp later on during furniture placement, but I did drill a hole for the floor lamp in the lower room.
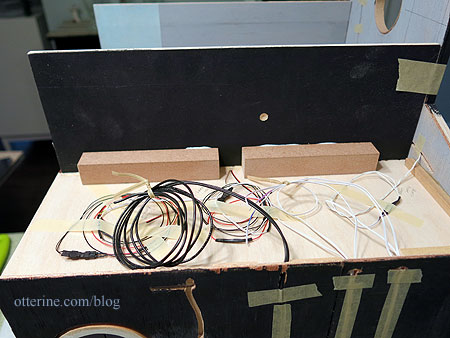
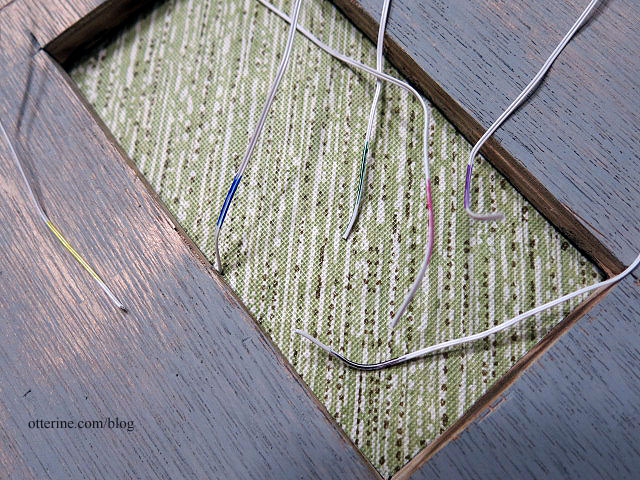
I made a channel for the coach lamp on the exterior heading up. I’ll likely use aluminum tubing to make conduit for the motor, hiding the wiring in plain sight, so I’ll wait on drilling final holes for that. This plan requires five dollhouse lighting wires and two motor wires in the tiny attic space (the floor lamp wiring will be buried in the landscaping foam without leading up to the attic space). I always add an extra dollhouse lighting wire in case inspiration strikes later, so I’ll up that to six wires in the attic space. I made three vertical channels on the side wall to run long wires from the attic space down the wall, through foundation and the landscaping foam, then out the back.
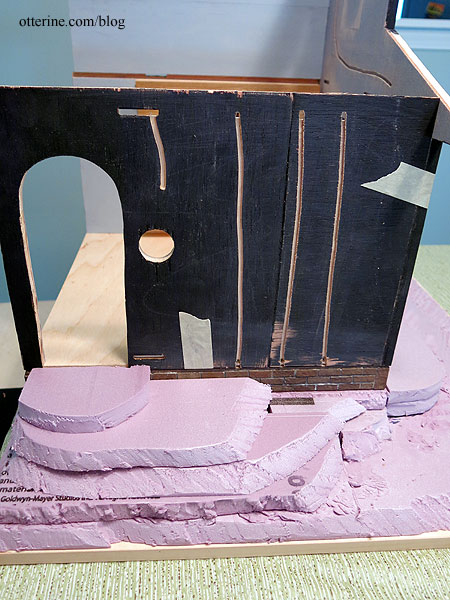
Getting out of dry fit for me always entails a lot of prep due to the chicken-or-egg scenarios that pop up along the way. Before I could glue the brick foundation in place, I needed to address part of the landscaping since I didn’t want to risk marring the brickwork. I used stucco patch to even out the builders foam slopes on three sides, leaving the door wall until later. I painted the finished portions black brown afterward.
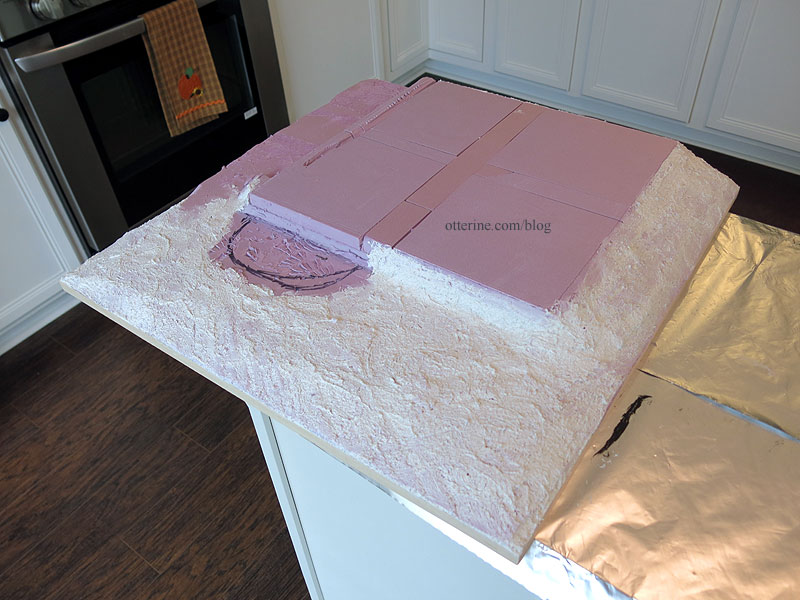
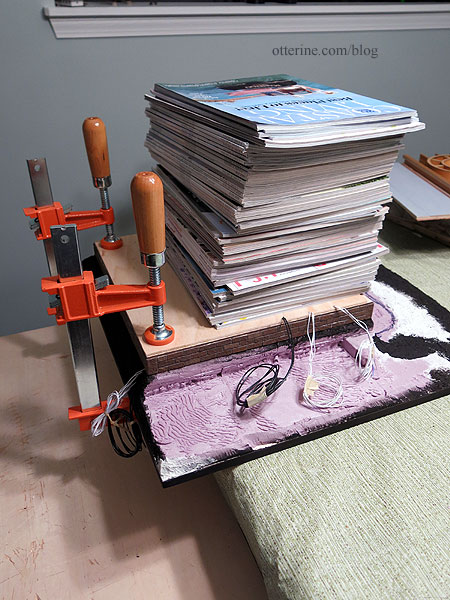
I glued the brick foundation to the builders foam using Weldbond glue and weighted it under magazines overnight. The next night, I ran my wires for the attic space through the foam and out the back.
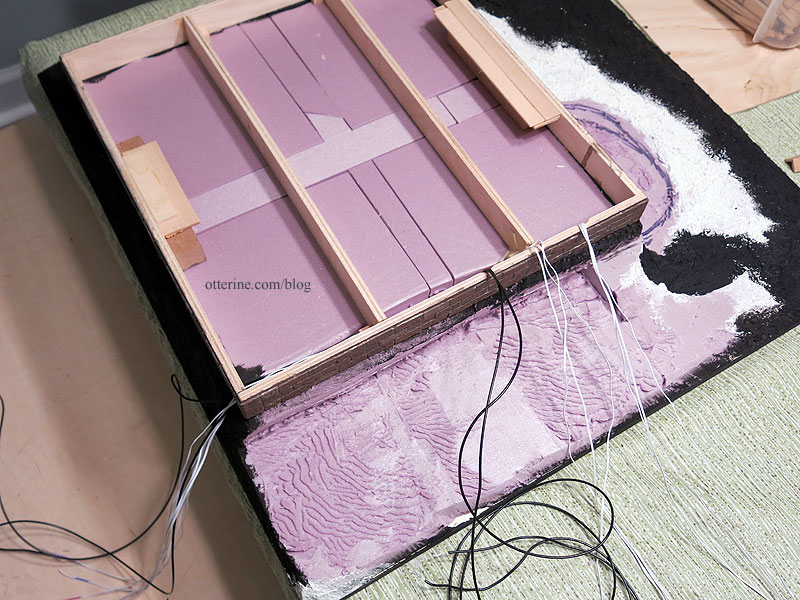
I used Sharpies this time to mark the ends so I didn’t have to guess which wire was which later on.
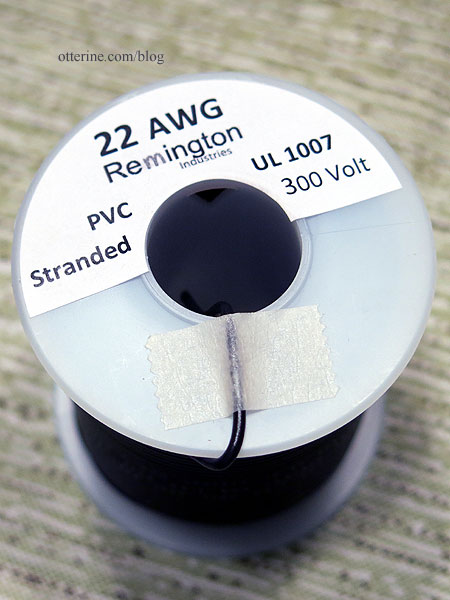
I didn’t bother for the motor wires since there are only two of them. I am using 22 gauge wire because it matches the lead wires from the motors.
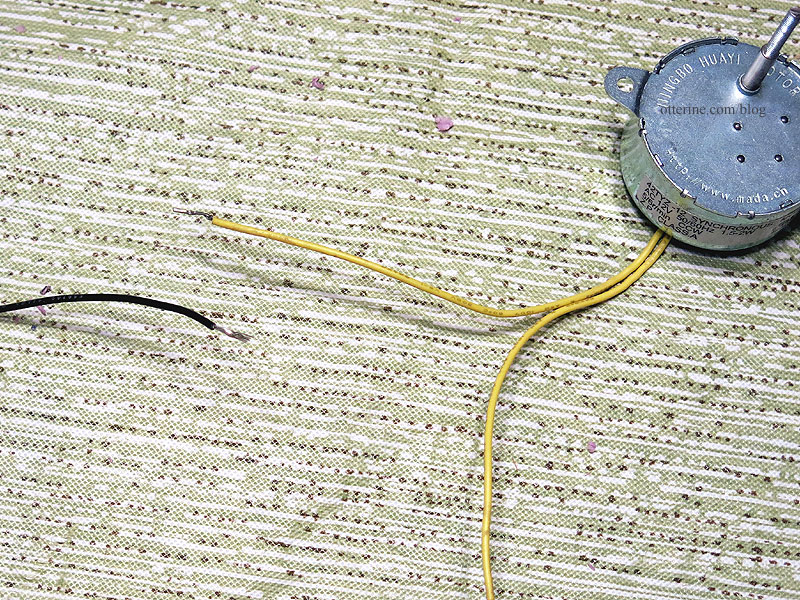
I left a lot of lead for the motor wires but will still likely use an extension cord for the transformer. I ran the wire bunches through holes in the floor board that correspond to the side wall channels. To keep things from getting unruly, I taped the wires into looped bunches. For the wires coming out the back, I used twist ties since tape residue will wear off on the wires if you leave it too long. The taped bunches will be used right away.
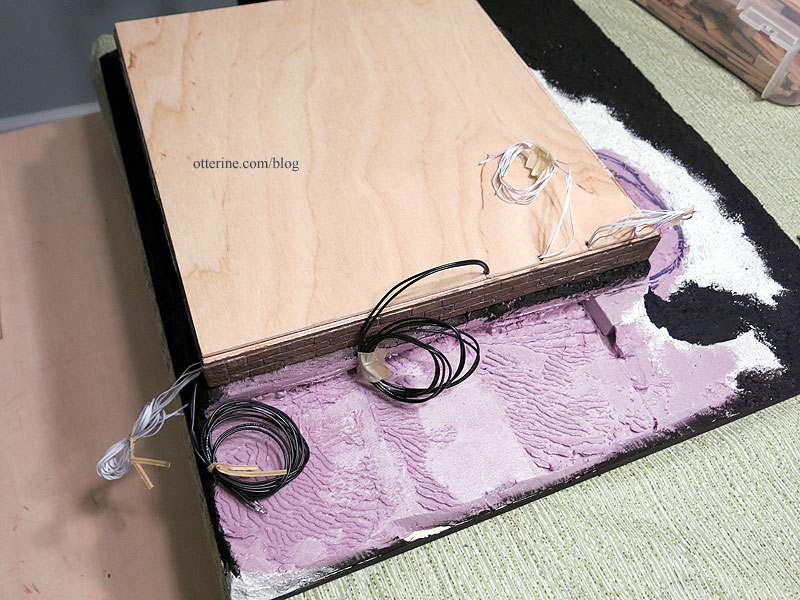
I then glued the bottom floorboard in place and weighted the assembly with magazines and large Jorgensen 6″ bar clamps. More drying time….
Categories: Watson Mill
August 2, 2017 | 0 commentsWatson Mill – circle library, part 5
Continuing work on the circle library. As a recap, here is where the circle library was last time: finished but bare wood.
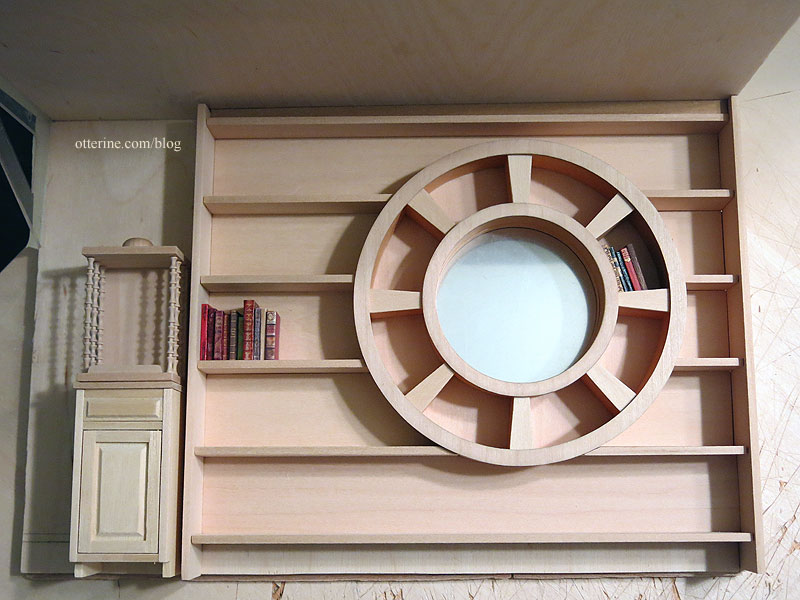
The walls have been primed with grey gesso, which is in the same color range of the wallpaper I’ve chosen. Here’s what that paper looks like.
I had planned to stain the library Minwax Natural after my test sample seemed to bring out the grain while leaving the color minimally changed. Well, in a large area, that didn’t really work so well. It turned rather orange, like raw salmon cutlet orange. The edges of the circles darkened significantly as well.
I knew it was going to bother me, so I opted for a second coat of stain, this time using Minwax Driftwood. I had nothing to lose really since I wasn’t going to leave it orange so I would be redoing parts if not all of it whether the attempts to fix it worked or not.
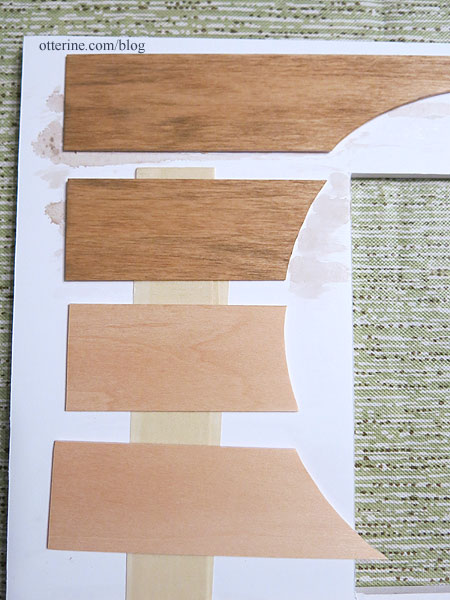
The green in Driftwood balanced the red in Natural, and the end result is darker but a better color overall. The darker edges of the circles no longer seem out of place. It actually looks like it was made from reclaimed wood, which makes a lot of sense for an old mill. :] A happy accident.
The dumbwaiter and its cabinet have a first coat of stain but aren’t finished.
Categories: Watson Mill
July 4, 2017 | 0 commentsWatson Mill – tulips
What else could Gustav need for Watson Mill but tulips? Debora made me tulips for my birthday last year, and I have had them in mind for the Mill.

She offered to make some more, and they just arrived. :D So beautiful! Thank you, Debora!

I have two paper kits, which will add another 6 tulips to the bunch.

Categories: Flowers, plants, and trees, Watson Mill
June 29, 2017 | 0 comments


NOTE: All content on otterine.com is copyrighted and may not be reproduced in part or in whole. It takes a lot of time and effort to write and photograph for my blog. Please ask permission before reproducing any of my content. (More on copyright)

Watson Mill – update 2021
I’ve been working on Watson Mill off and on since the end of 2015, building several other mini structures in between bouts of mill construction. I am back to the mill once again.
I had the structure covered while in storage in my workroom, so the dust didn’t build up. The wallpaper in the bedroom buckled, though, from the fluctuations in humidity. I should have glued the thin, vintage paper to a backing paper to make it more substantial before gluing in place. I don’t think I have enough to redo it, unfortunately. I would love to find the wallpaper again, but that’s a long shot. It’s vintage MiniGraphics called Gallery Flower. There were at least two colors of this paper, and this is a lighter beige.
After masking the edges of the wood floor, I wet the paper surface to weaken the glue.
I used a palette knife to scrape the paper away. It was rather easy work with such thin paper.
When I removed the wallpaper from the bedroom, the wall light did not survive. There’s no way to rewire it, and of course it’s discontinued. By miracle of miracles, I found another light and more of the vintage paper. More to come….
Categories: Watson Mill
April 25, 2021 | 0 commentsÉdouard
My dear friend Martha sent me a lovely gift in the mail. She painted a portrait of Gustav‘s father Édouard for Watson Mill. So delightful! I can clearly see the resemblance and an inherited fashion sense!
Thank you so much, Martha! I will treasure your thoughtful gift. :]
Categories: Art and paintings, Watson Mill
August 13, 2018 | 0 commentsWatson Mill – ladder, part 1
The ladder to the bedroom will sit on the front wall between the library window and the kitchen cabinet. The next choice is to determine the type of ladder.
I considered a simple set of metal rungs and a railing like the dock ladder I made for Walnut Bay Light. These are bent brass rod painted black. The hardest part with these is getting each rung uniform. These take up the least amount of room but are also hard to use. Is Gustav up to the daily workout challenge?
I considered a wood ladder like the one from Baslow Ranch.
Or the moveable ladder from Walnut Bay Light, which has a railing built in. They take up a bit more floor space away from the wall due to the angle but are also thin enough to blend into the background. I used this one in the mockup shots for Watson Mill.
I think I will go for a mix of the two – rungs on the wall upstairs to give Gustav something to hold onto while moving to and from the upper room and a wood ladder leading up from the first floor. It will add a nice visual element to the build without taking up too much space. And, I will attempt to make the wood ladder moveable so it can be pushed against the wall to open up the floor space. More on that to come…off to engineer.
Categories: Watson Mill
January 19, 2018 | 0 commentsWatson Mill – bedroom wallpaper
I lucked out with a great find at the recent Wee “c” Miniatures Show 2017 – a vintage paper from Mini Graphics called Gallery Flower. Since it came rolled, I pressed it flat on the table for a couple weeks before using. I had traced the wall outlines before assembly, so these helped me make paper templates to check the fit before cutting the final paper.
There were only two sheets of the paper in the roll, so I had to be careful with my cuts. I was able to get the three pieces needed to cover the bedroom from one sheet, leaving a couple of small scraps and one full sheet in case of disaster during installation. The light paper color will help keep the room from becoming a dungeon once the roof is on.
The upper floor will have stained baseboards, so I propped them in place to check the color and fit. They are lighter than the flooring but don’t clash since the paper is light.
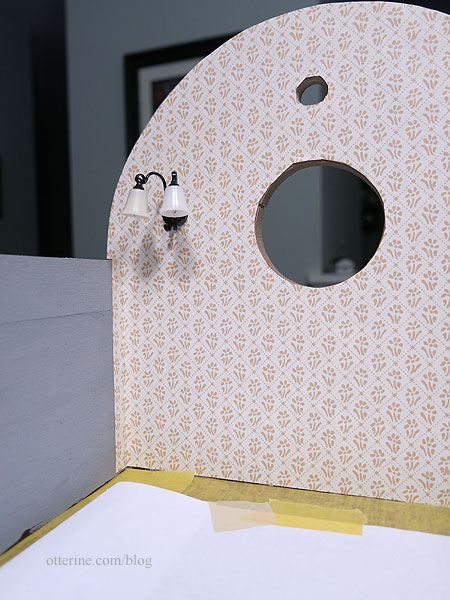
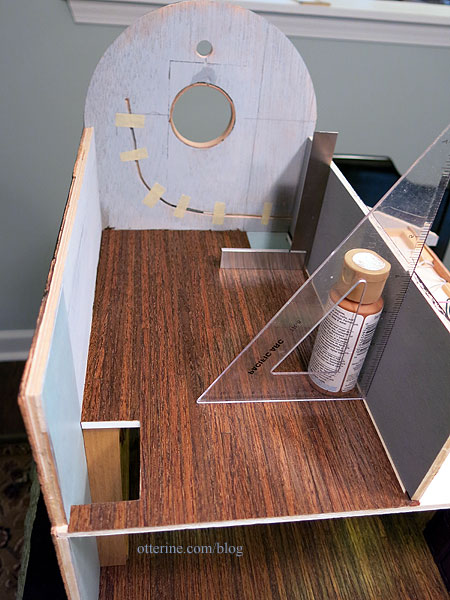
Time to install the wall sconce in the upper bedroom while wallpapering — it will make sense in a minute. I had made the channels for the wires previously. The sconce wires will not be poked through the wall to the exterior but instead will run on the interior wall to the open attic space. The downstairs floor lamp wire runs on the outside, up to the bedroom wall channel. I put a small piece of tape over the interior channel to help hold the wires while still allowing for movement. A whole strip of tape would stick to the wires too much and make it difficult to pull them through. This will matter more for the next step than it did for the floor lamp. I masked the floor prior to working as well to prevent glue mishaps.
The bedroom sconce wires run through this curved channel, which will be covered by wallpaper. I had to get the sconce attached to the wallpaper, paste the wallpaper in place, and run the wires into the channel all in one step. I marked where the sconce channel began behind the wallpaper. I poked a hole in the wallpaper and fed the wires through, leaving the sconce loose. (My small tape piece isn’t shown here since this was my dry fit trial.)
Of course, I first double checked the height. :]
I then applied Wallpaper Mucilage to the paper.
I fed the wires behind the tape and through the channel. Using my third and fourth hands (bahahahaha), I pressed the wallpaper down while pulling the wire through the channel, pausing for a second to apply some glue to the back of the sconce so it would remain in place once the wires were pulled taut. I then smoothed, straightened and stopped swearing. ;D Here you can see the side tabs that soften the joins in the corners.
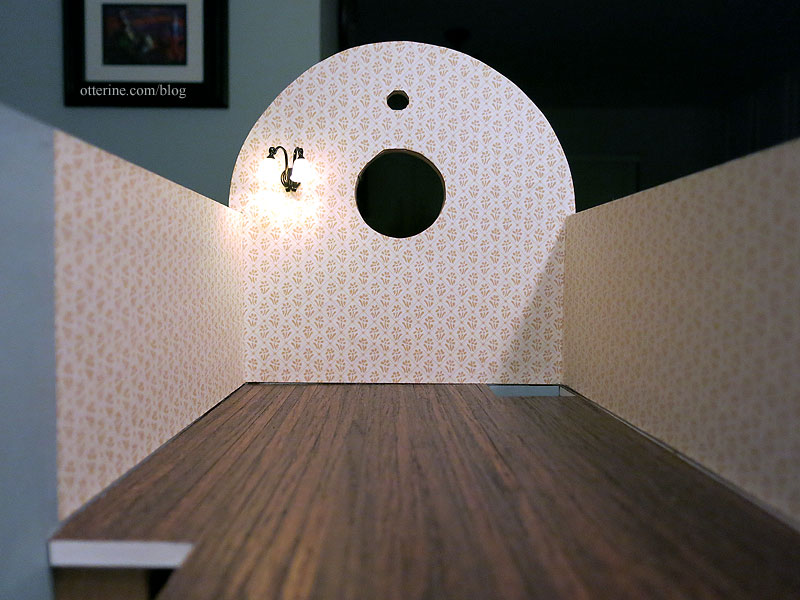
The two side pieces of wallpaper were much easier to install. I applied the paste to the paper and then eased them in place, overlapping the tabs from the front wall. I taped the tail end of the wires in the open attic space then used my color-coded wires to electrify and label the sconce.
The upper room will have baseboard trim and a table lamp, but I need to address the dumbwaiter gate and ladder railings first. So, that’s a wrap for today.
Update: this thin paper ended up buckling, even using the mucilage. I will line the replacement paper with a backing material and redo the application.
Categories: Watson Mill
January 17, 2018 | 0 commentsWatson Mill – building progress
The Ray Storey floor lamp wire runs on the outside, up to the bedroom wall channel. I had made the channels for the wires previously. To install the floor lamp, I made one of my usual faux wall outlets from copper card stock. I have only one more lamp requiring an outlet, but I made four to have matching decorative outlets as well.
I finished the wire with a false plug, added a receptacle cut from stickers, and ran the wire up the outside.
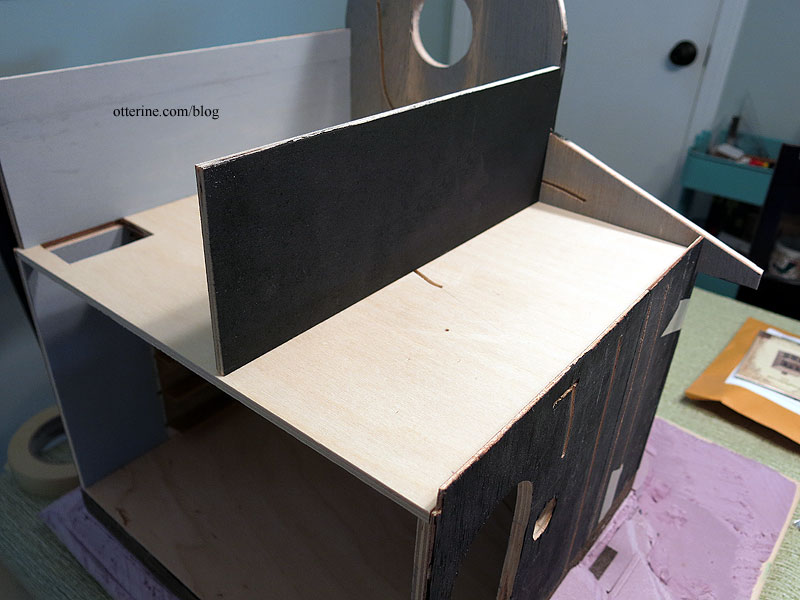
I glued the ceiling board in place. To help with stability, I added strip wood on the upper floor where the wiring space will be.
I installed the two ceiling lamps from the first floor and ran the wires into the attic space. These are new old stock ceiling light kits by Illinois Hobbycraft. I spray painted the metal rings Krylon Antique Bronze.
Since I put the wallpaper in prior to putting in the ceiling board, I needed some small crown molding to finish the upper edges. I stained this Minwax Driftwood to coordinate with the other finishes.
I checked the fit of the upper flooring and cut the holes for the two openings before gluing it in place. I had previously stained the red oak flooring with Minwax Dark Walnut, sealing with two coats of Delta Ceramcoat Matte Varnish. Next up was installing the small side wall to complete the bedroom space.
Here you can see the wiring from the floor lamp running through the bedroom channel. I put a few small pieces of tape over the interior wiring channel to make a pocket for the wires while still allowing for movement. The bedroom sconce wires still need to be added to this channel. A whole strip of tape would stick to the wires too much and make it difficult to pull them through.
I stabilized the wall with pieces of mdf. As you can see, the attic space will provide good access to the wiring.
Categories: Watson Mill
October 10, 2017 | 0 comments
NOTE: All content on otterine.com is copyrighted and may not be reproduced in part or in whole. It takes a lot of time and effort to write and photograph for my blog. Please ask permission before reproducing any of my content. (More on copyright)