

Train Cabin book nook – part 3
Continuing work on the train cabin book nook. Affiliate discount link at the bottom of this post.
After taking a break from the train cabin to work on The Wishing Fountain for Halloween, I’m back to it. I started assembling some more of the cabin’s finished parts. If I’m feeling distracted or not sure about what I want to work on, I tend to jump around a lot in a project. The way the instruction booklet is presented, it’s very easy to do different parts and put them all together later. You do need to make sure you aren’t enclosing an area you need to access later, but assembling parts and accessories still makes progress on the project.
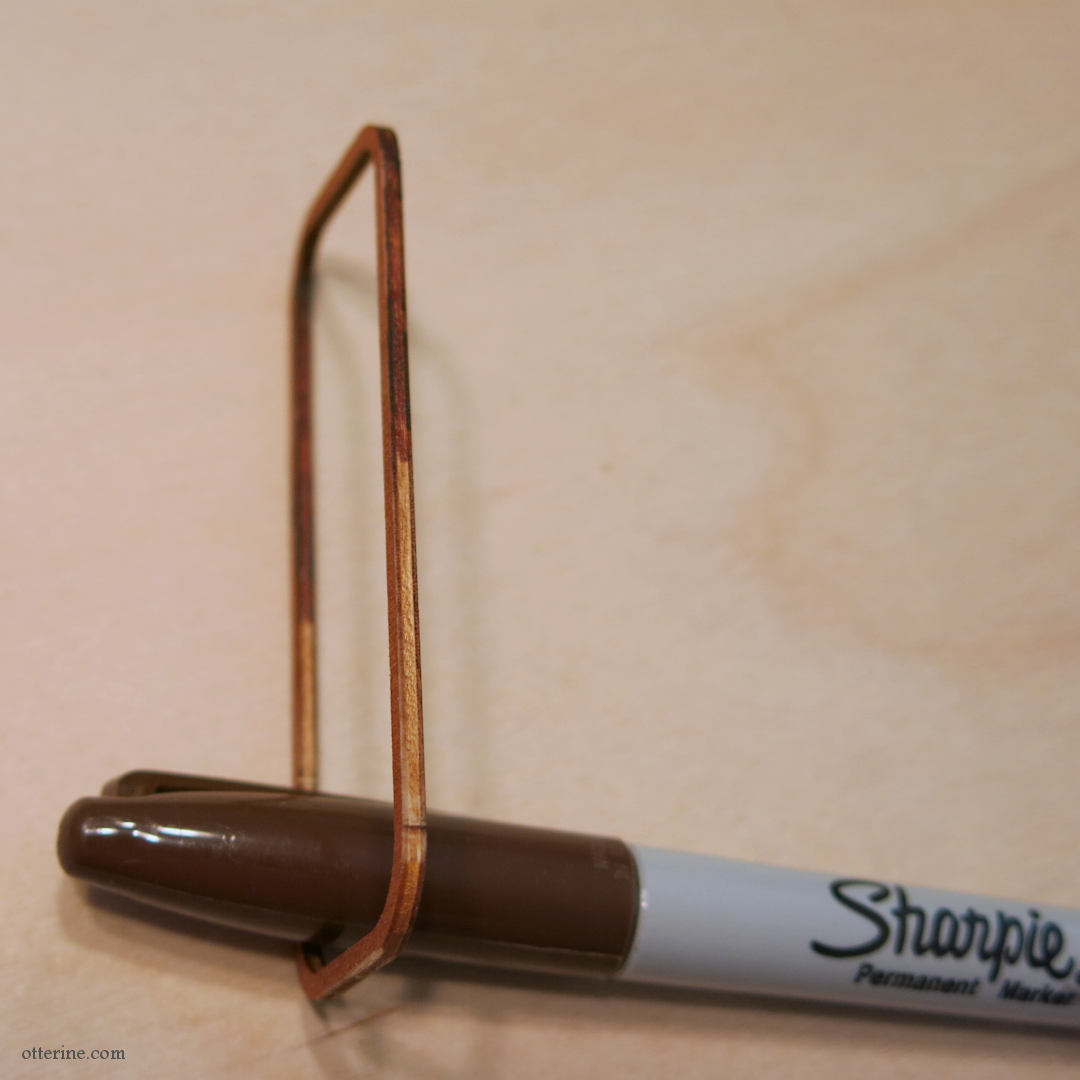
Some of the trim parts come stained for you, but when they are separated from the sheet, you have to sand the nubs left from the laser cutting process. That can leave lighter parts that can show from certain angles. I used a brown Sharpie to darken all the edges for a more uniform look.
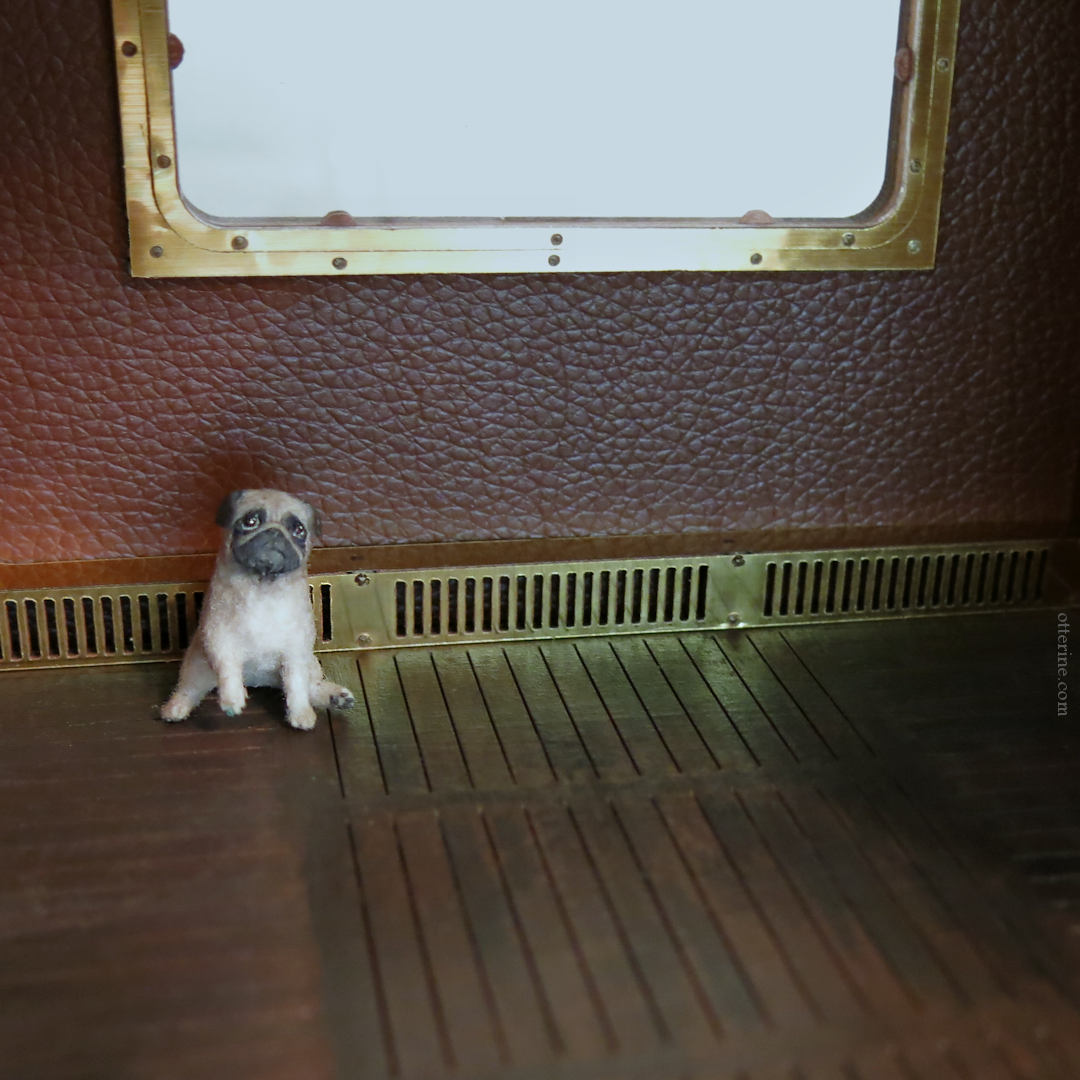
I like that you can pick and choose what to include and what to customize. My favorite detail is the floor heater. :D It’s such a simple detail that brings the cabin to life!
I encountered a stubborn buckling of the leather that developed in the curve above the window.
To fix this issue, I took the cabin apart and cut a thin strip out of the leather to smooth out the bubble that formed when the ceiling board is bent into shape.
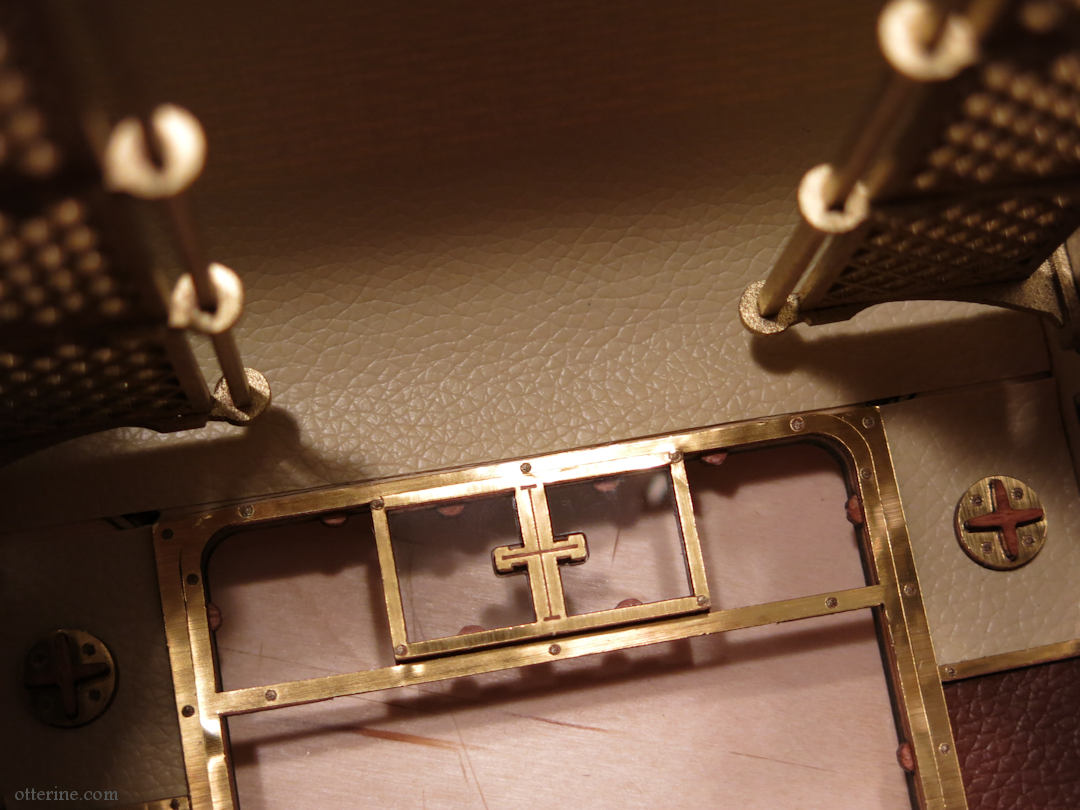
To disguise the cut and subsequent gap, I stained a piece of strip wood and glued it in place. Looks a bit like a structural element.
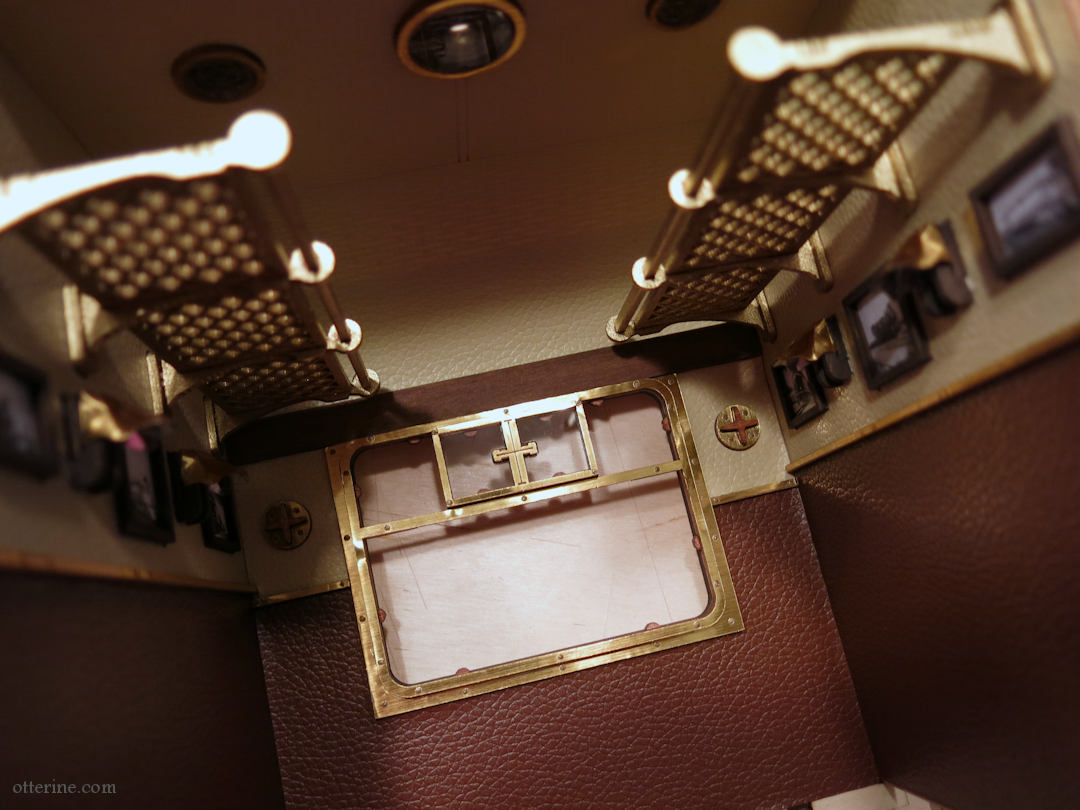
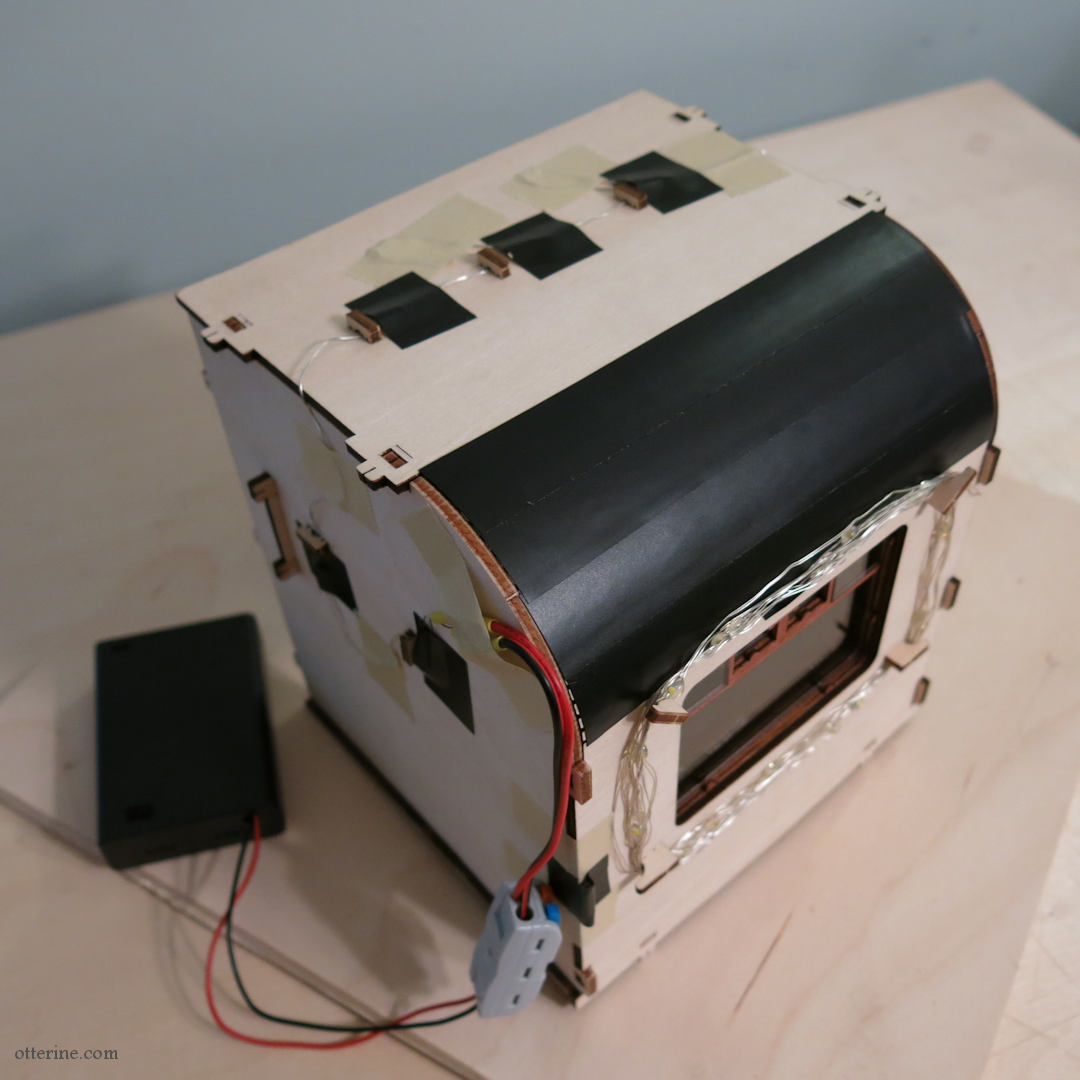
I love the ceiling light finishes and know this is going to look magical once the LED lighting is installed. Speaking of, be sure to take your time when unwinding the LED strand. The wire can get fiddly, and you don’t want to damage the lines. I used an empty tape insert to wind the wire around for easier handling while installing.
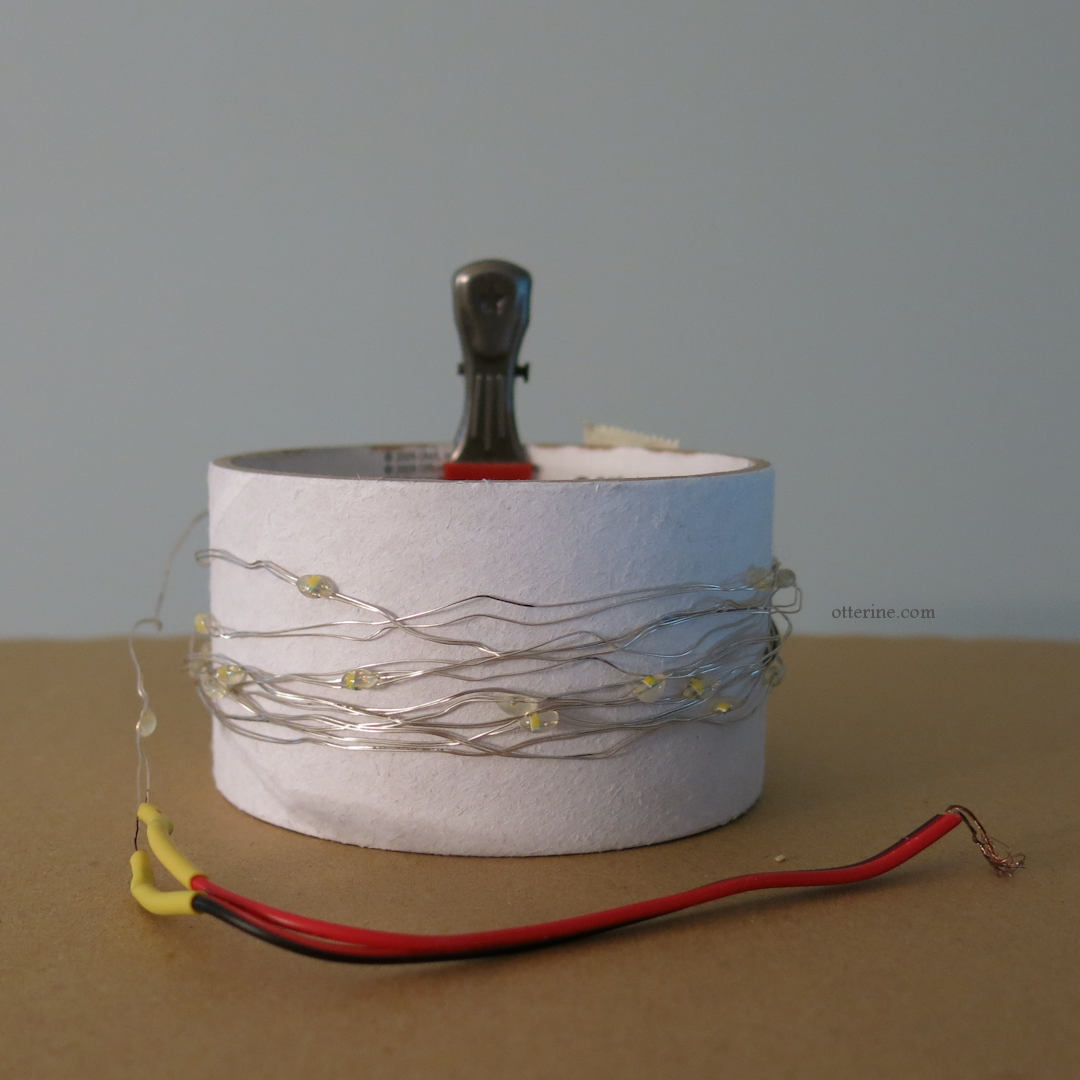
I used electrical tape to block some stray light and masking tape to secure the wires.
While I love the overall aesthetic, I don’t like the way the wall lights have gaps at the top. This is partially due to operator error since I found the shades difficult to manage. I have some ideas brewing…more to come.

——-
I have a discount code for 10% off your purchase at Anavrin (I will receive an affiliate commission when you use my link. This link should give you the discount, but the actual code is OTTERINE1224)
Categories: Train Cabin
November 10, 2024 | 2 commentsTrain Cabin book nook – part 2
Continuing work on the train cabin book nook. Affiliate discount link at the bottom of this post.
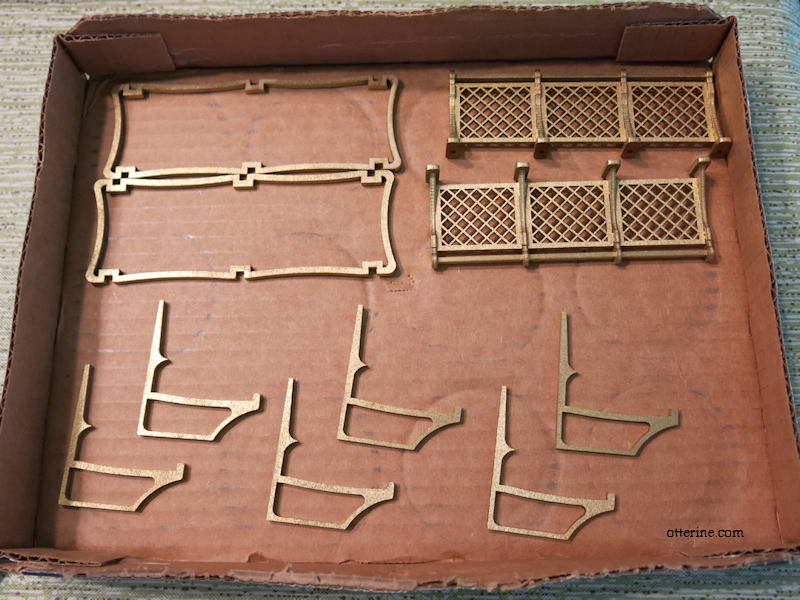
I spray painted the seat supports and the assembled luggage racks in a soft gold. The kit comes with gold colored metal sheets to finish the pieces in shiny brass, but I opted to leave those off during the process. Just a personal preference. I will be using the metal sheet in other places in the kit.
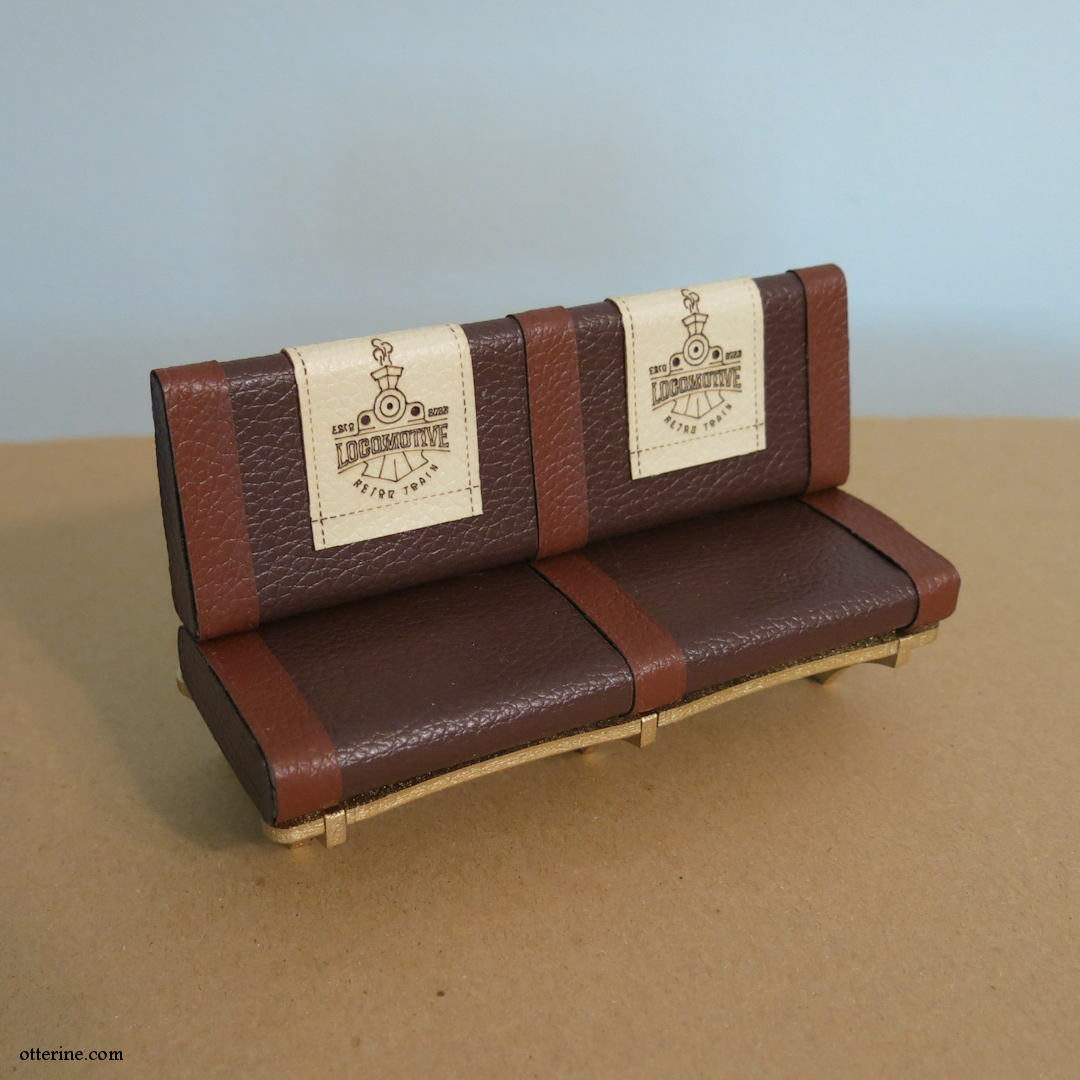
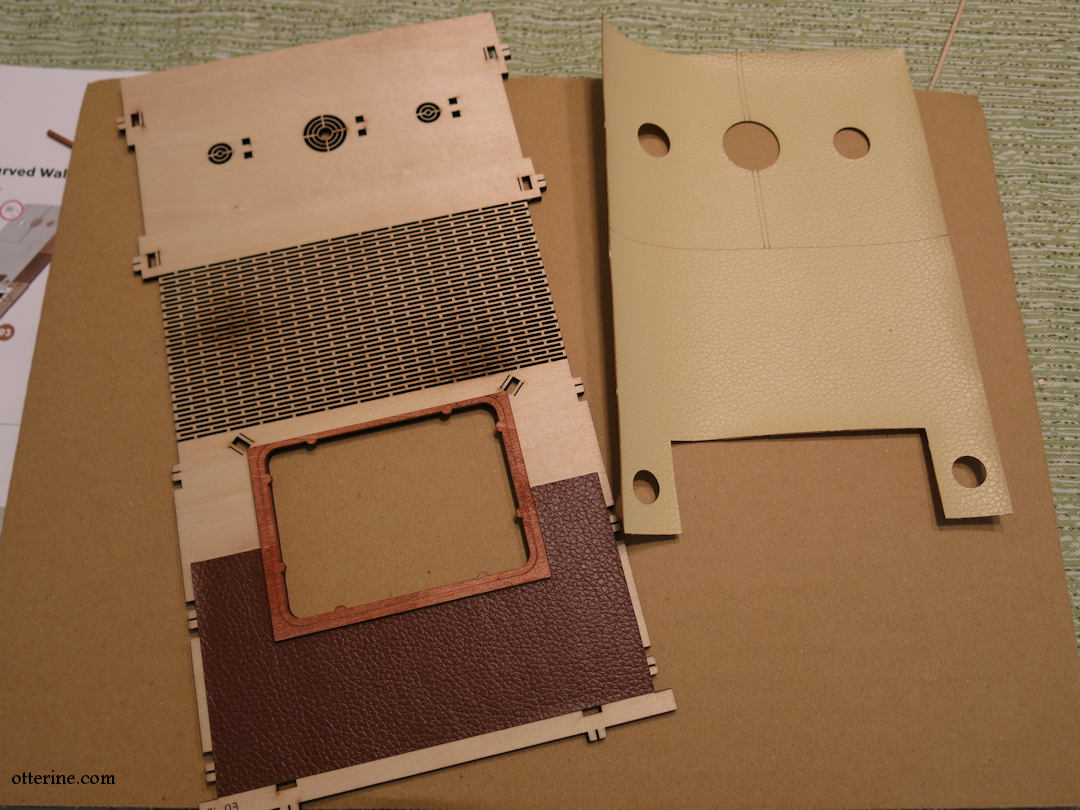
I then added the pre-cut leather to the seats I built previously. The quality is nice, and the pieces are self-adhesive. I did add a little supplemental glue where needed. (One note about the leather, though. Since the kit is laser cut, there will be some soot from the process. Be sure to wash your hands when handling the lighter color leather pieces during assembly.)
The kit includes artwork on regular printer paper for the wall frames. I used Wallpaper Mucilage to affix the black and white photos to white card stock to make them easier to handle.
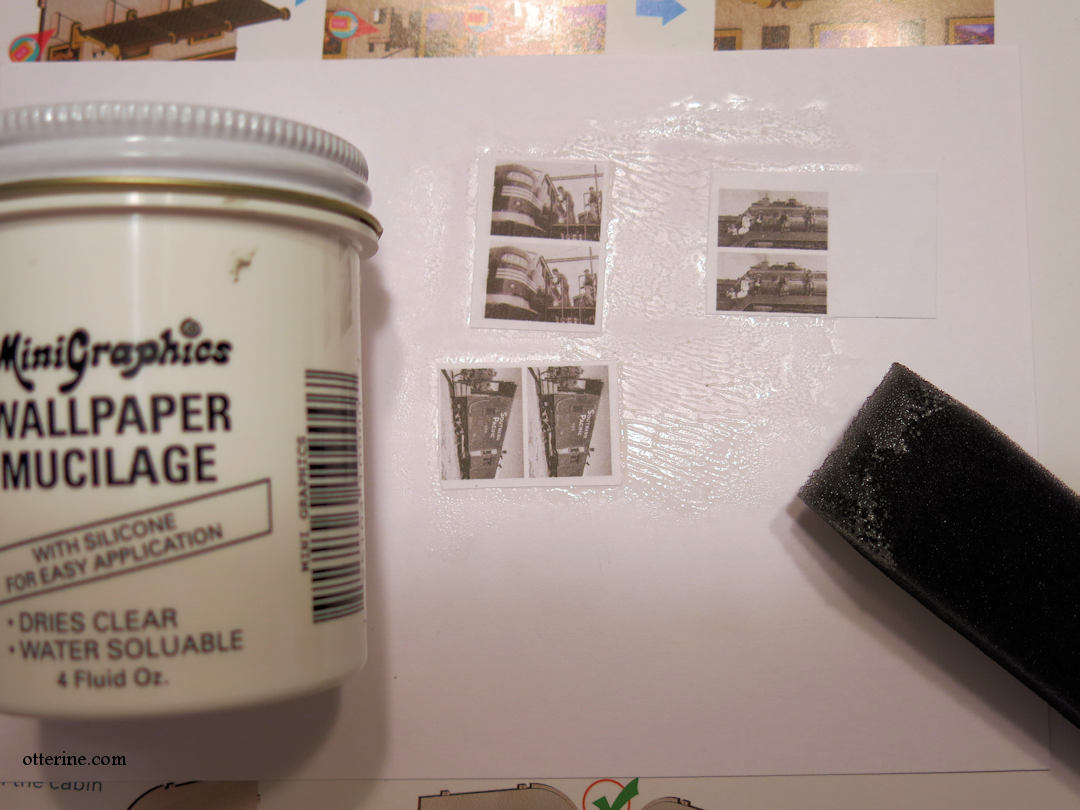
After cutting them, I realized there wasn’t a black and white photo for the larger size frame, so I googled suitable images to fill in since I wanted all black and white photos for consistency. I painted the frames dark brown and left off the kit’s gold accents. With the leather installed on the side walls, I started putting it all together.
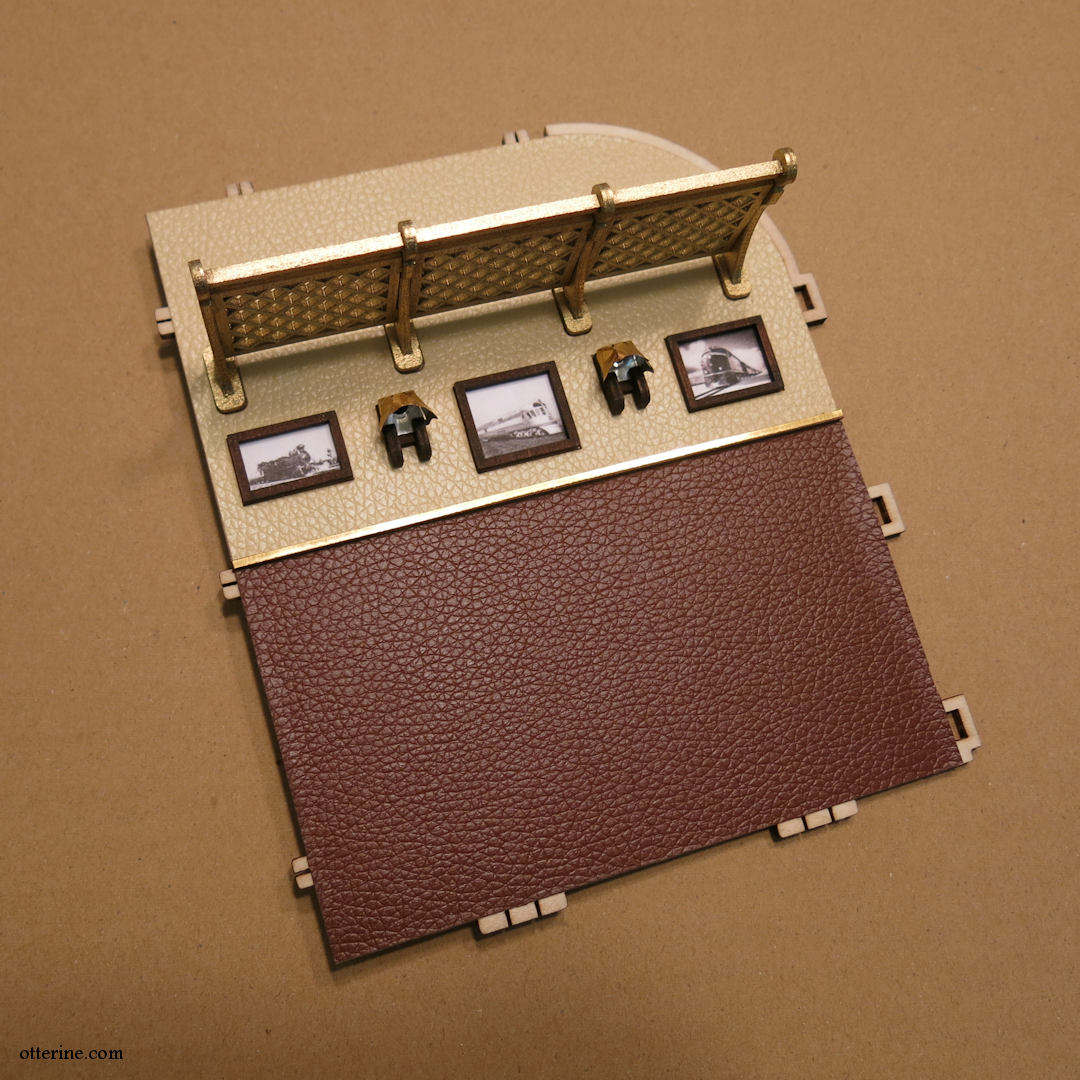
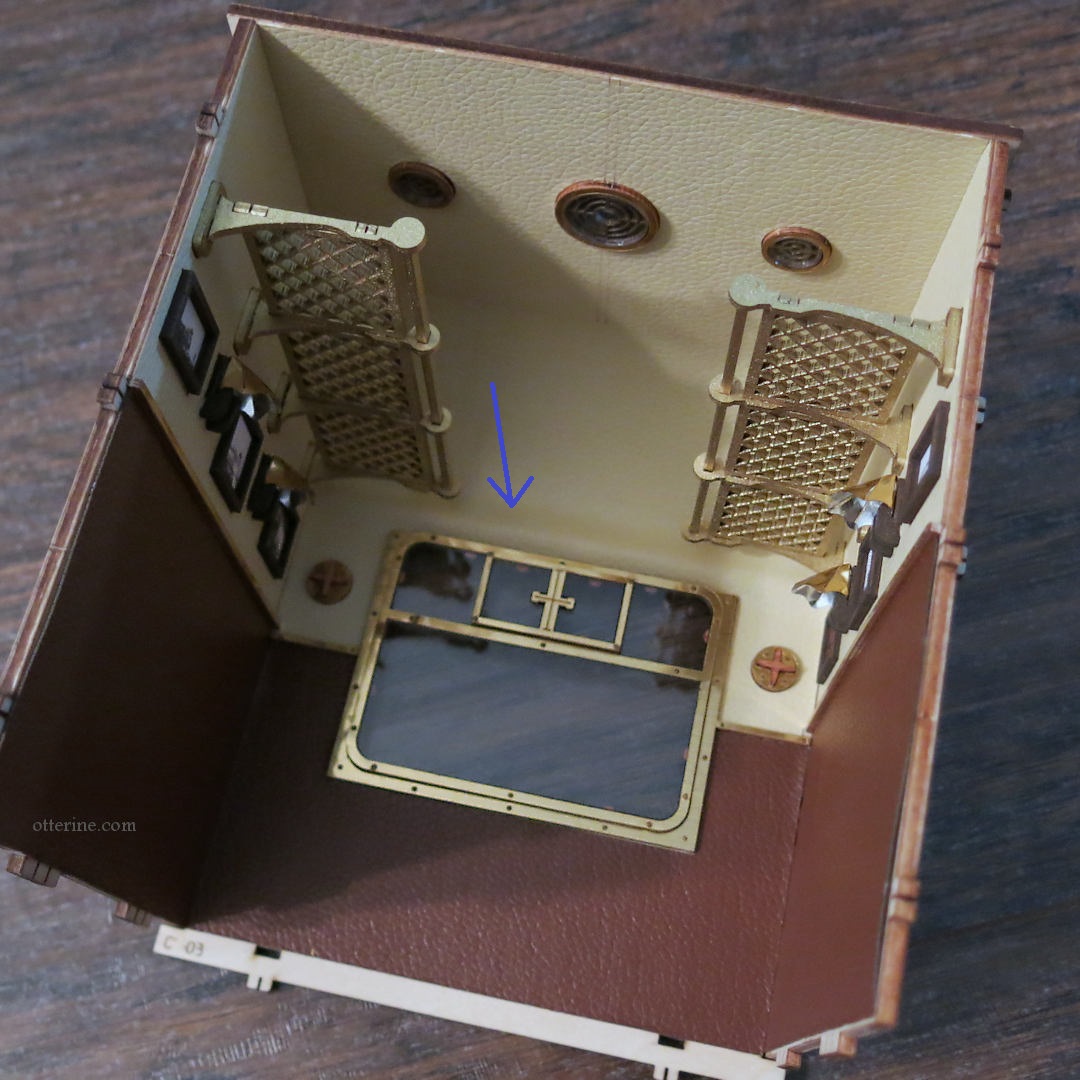
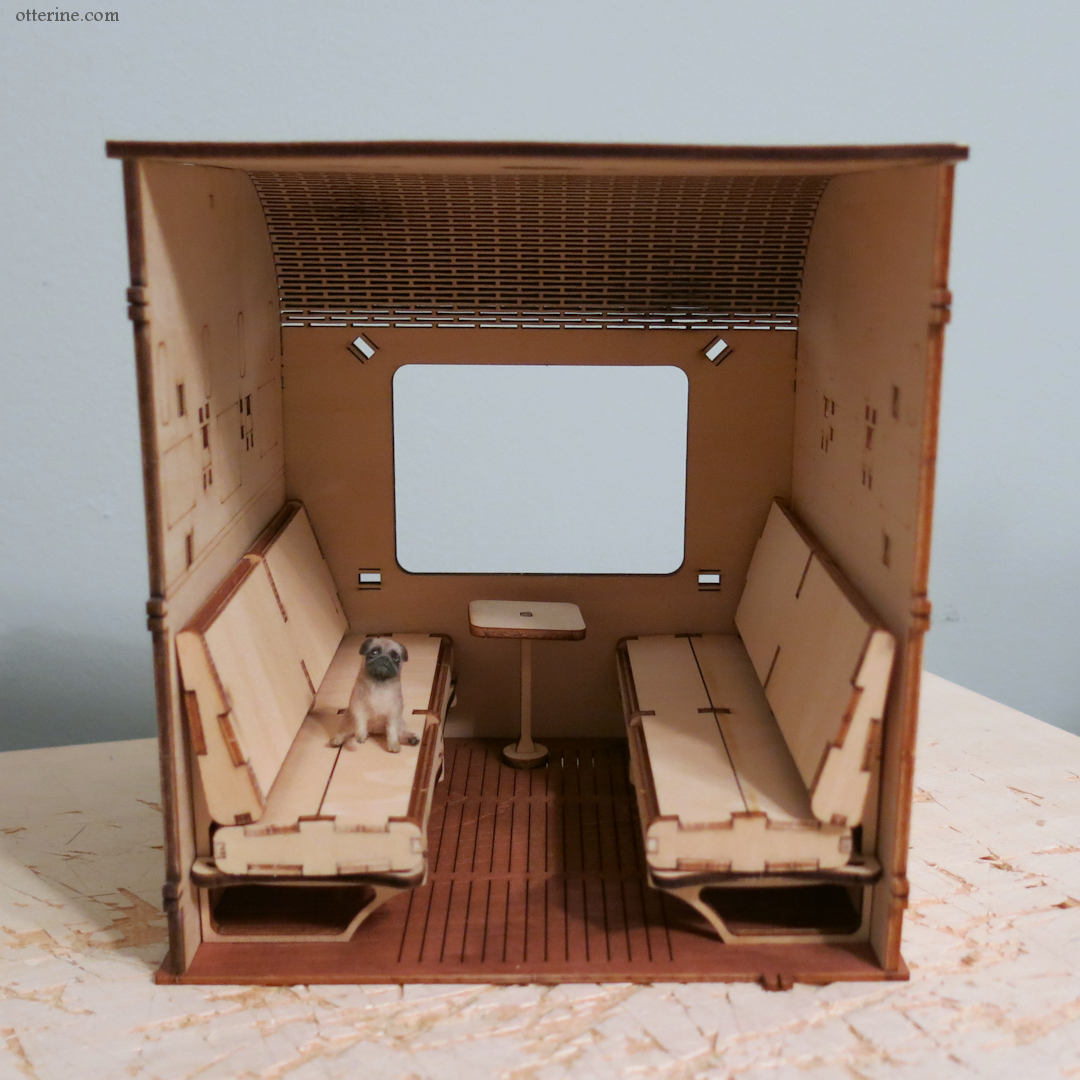
For the curved back wall assembly, I departed from the instructions slightly since I found it easier to glue the window frame piece 98 in place first, then add the leather pieces. This ensured a good fit and proper placement of the leather on the wall/ceiling and around the window.
——-
I have a discount code for 10% off your purchase at Anavrin (I will receive an affiliate commission when you use my link. This link should give you the discount, but the actual code is OTTERINE1224)
Categories: Train Cabin
August 16, 2024 | 1 commentTrain Cabin book nook – part 1
Starting work on the train cabin book nook. Affiliate discount link at the bottom of this post.
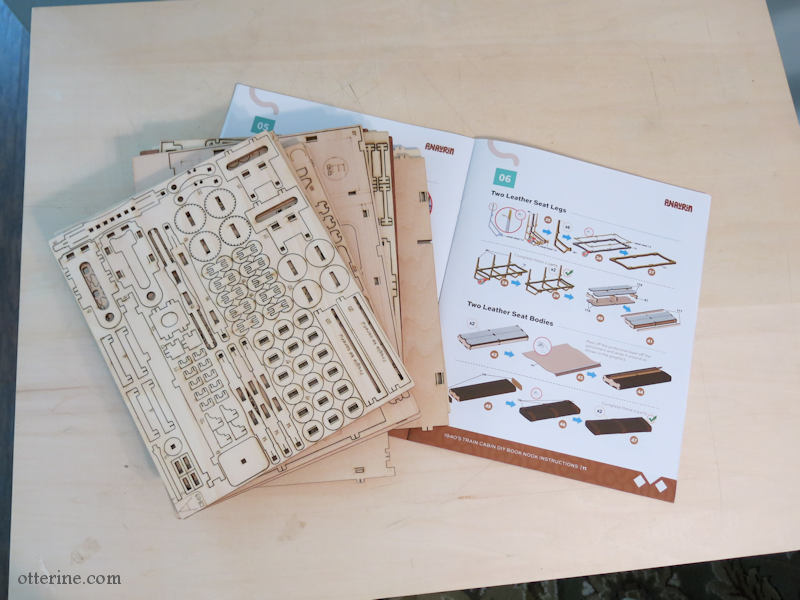
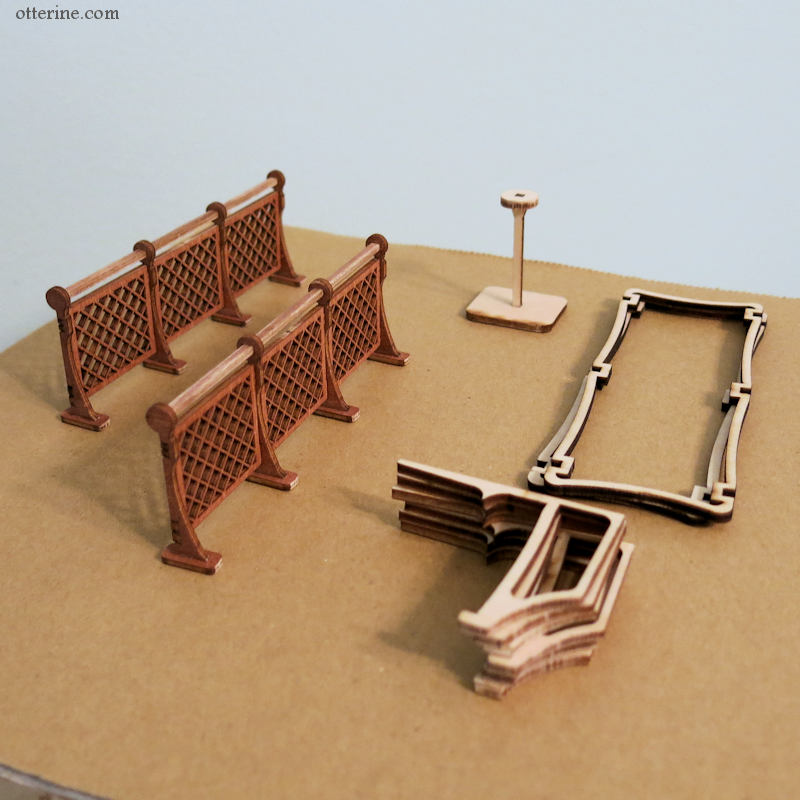
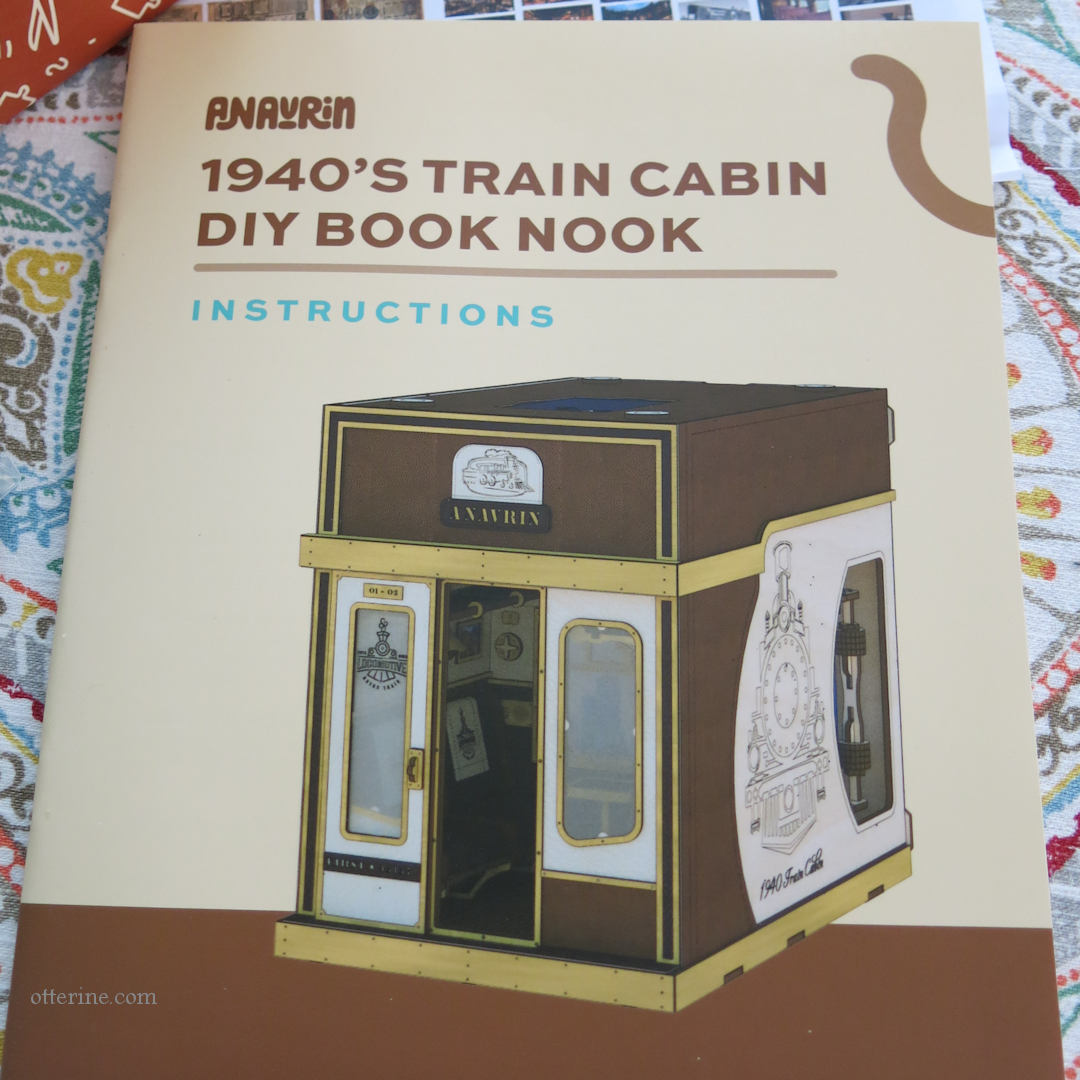
There are a lot of parts to this kit, but the instructions seem clear and thorough.
The the first half of the instructions involve the working mechanism to create the moving landscape seen through the window. Since I don’t need the landscape portion finished to work on the interior, I skipped ahead. I have some ideas on changing the interior, so I wanted to do some dry fitting to see what was what.
The kit pieces are precise so far, and I needed to use needle files and sandpaper to get the tabs and slots to fit without forcing connections and risking breakage.

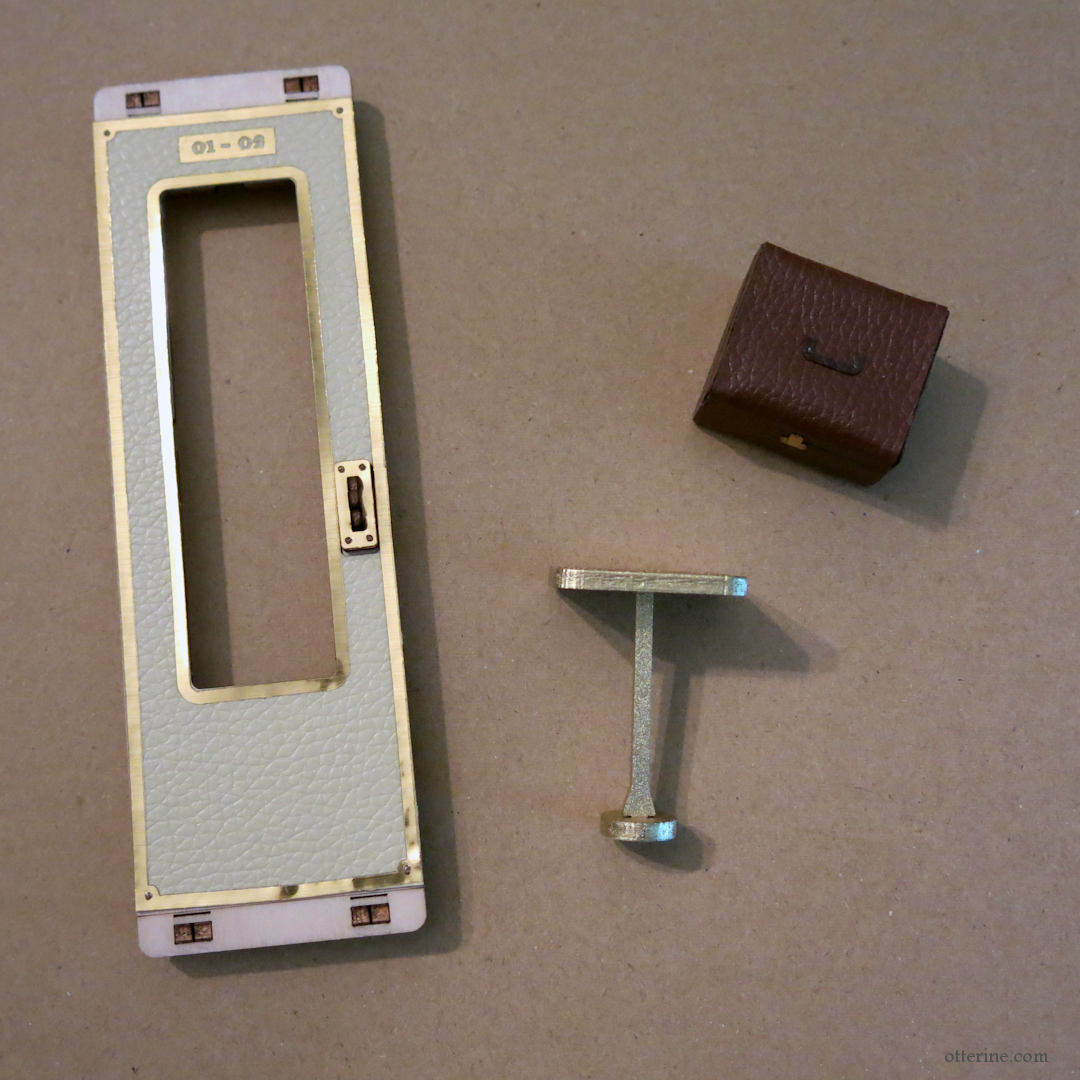
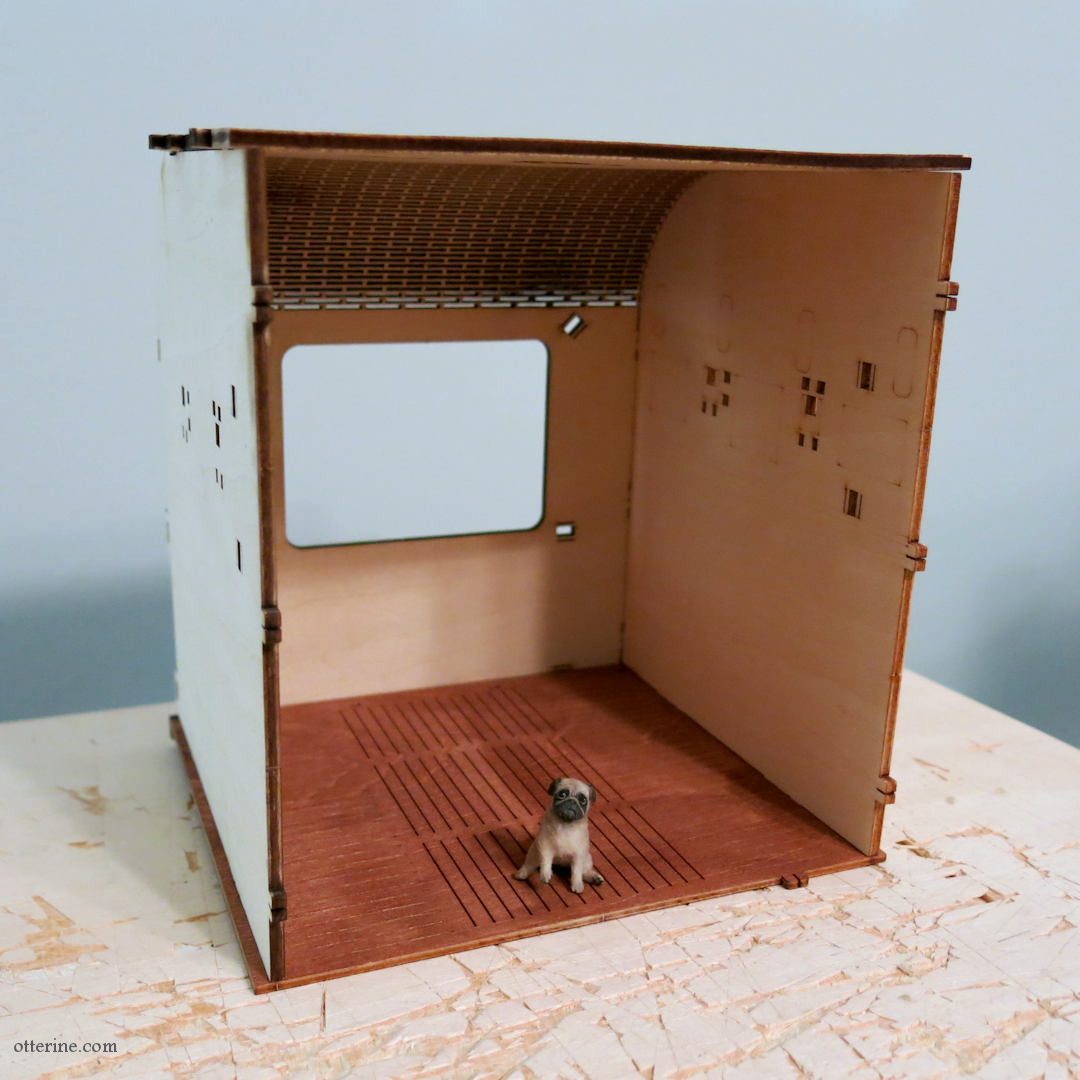
The project is roughly 1:24 scale, and I have very little experience beyond plastic model cars in this scale. But, I do have a tiny pug named Pierre from Marina. Since there’s a pet carrier included in the kit, I think Pierre will have to do a fair amount of modeling along the way.
After dry-fitting the seats and table, I think my alterations are going to be minimal. If I were to scratch build, I would have room to change things more. I’m not at all disappointed, since I was fairly certain making alterations would be limited by the precision of the kit itself.
I put together some assemblies to set aside for spray painting. Note: I’m not using some of the brass metal sheet detailing as I go. I will use some but not all.
The flooring comes stained, but I wanted to make it a deeper brown. It also had some large, obvious grain. I used Staining Medium mixed with Bittersweet Chocolate, both by Americana. For the larger grain streaks that still showed, I used undiluted paint.
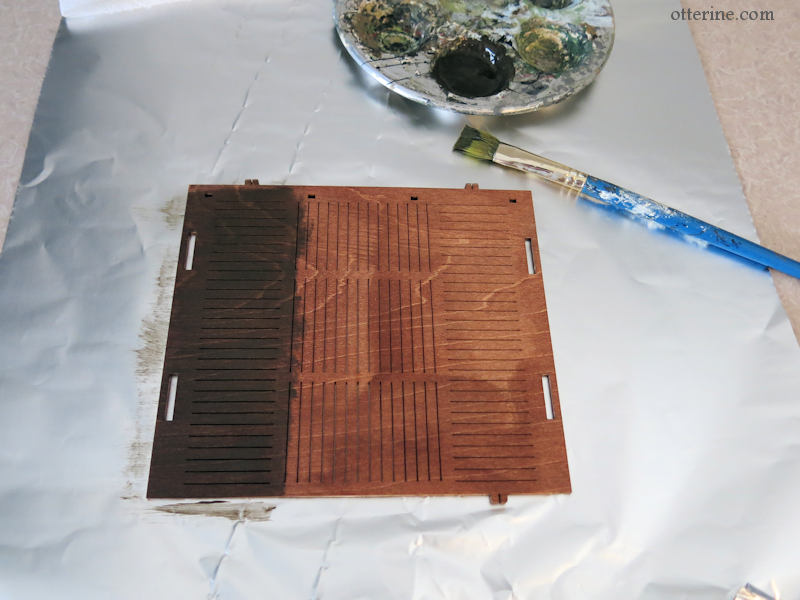
Once dry, I polished lightly by rubbing the surface with a bit of brown paper bag then sealed with satin varnish by Delta Ceramcoat. It’s now a deeper color with the obvious grain hidden.

——-
I have a discount code for 10% off your purchase at Anavrin (I will receive an affiliate commission when you use my link. This link should give you the discount, but the actual code is BRAE63636)
Categories: Train Cabin
May 27, 2024 | 1 commentTrain Cabin book nook – introduction
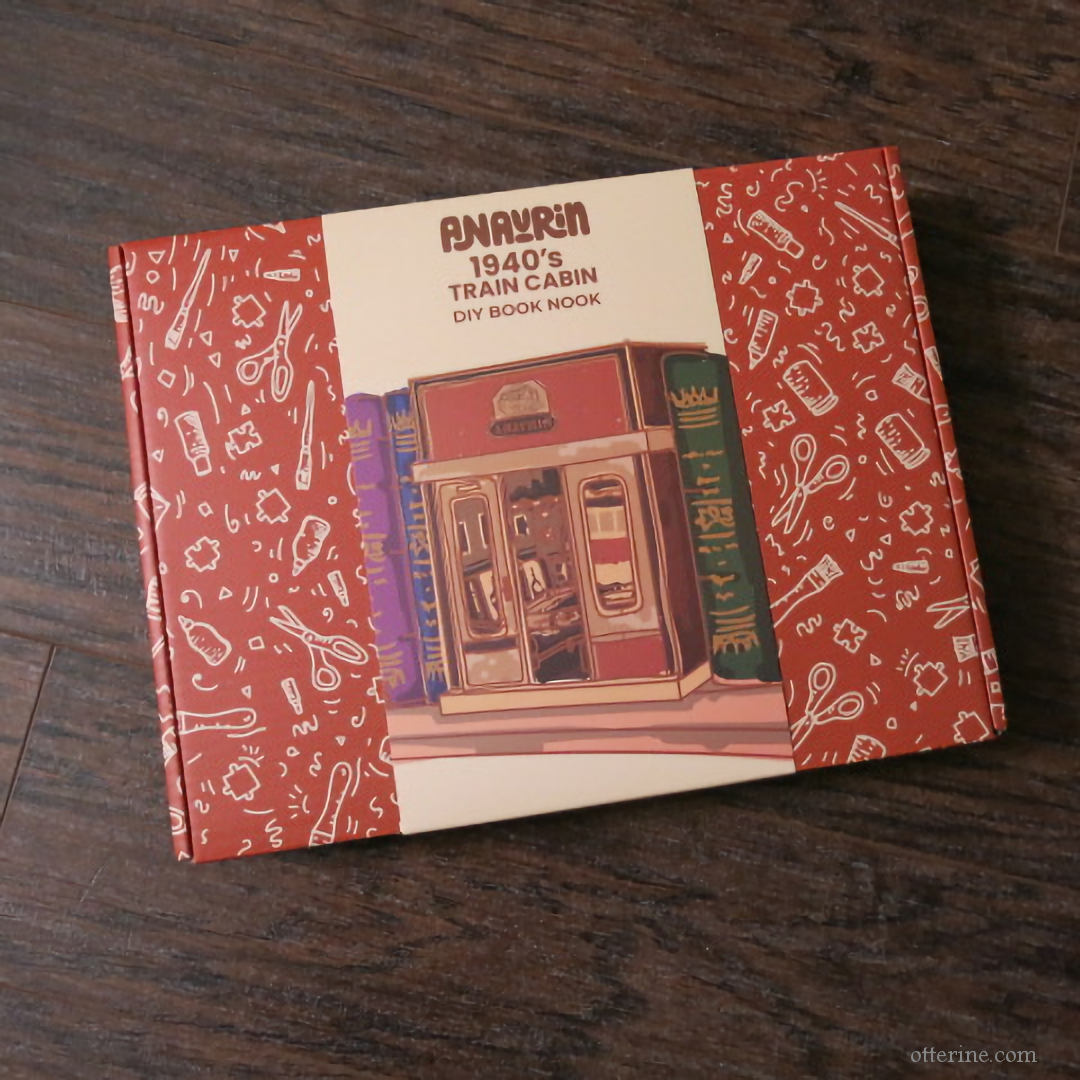
I was gifted this lovely 1940’s Train Cabin kit by Anavrin. I have loved this book nook since I first saw it, but other projects have taken center stage. When Anavrin contacted me about doing a build for my blog in exchange for the kit, I was overjoyed.
As part of the deal, I have a discount code for 10% off your purchase at Anavrin (I will receive an affiliate commission when you use my link. This link should give you the discount, but the actual code is OTTERINE1224) They have this and many other book nook kits.
I asked if I had to build it to spec, and they told me I could do what I liked. Music to my ears! I have a few ideas on how to change it up to make it my own, so it will take me a bit longer than just building it right out of the box.
Everything you need is included, but I am sure to reinvent and reuse and add.
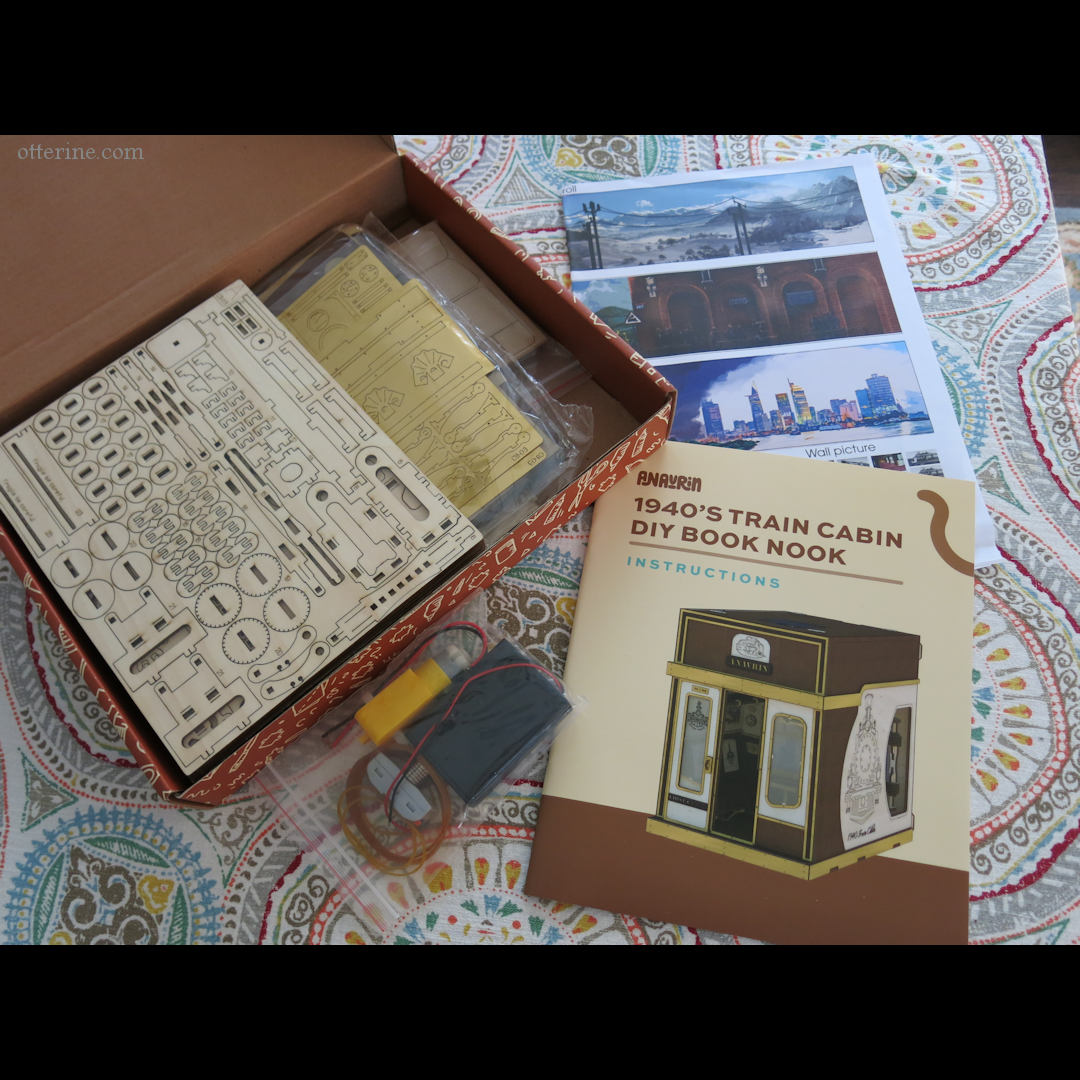
I have a few more things in the hopper, but I hope to start on this build next month.
Categories: Train Cabin
April 24, 2024 | 4 comments


NOTE: All content on otterine.com is copyrighted and may not be reproduced in part or in whole. It takes a lot of time and effort to write and photograph for my blog. Please ask permission before reproducing any of my content. (More on copyright)

Train Cabin book nook – part 3
Continuing work on the train cabin book nook. Affiliate discount link at the bottom of this post.
After taking a break from the train cabin to work on The Wishing Fountain for Halloween, I’m back to it. I started assembling some more of the cabin’s finished parts. If I’m feeling distracted or not sure about what I want to work on, I tend to jump around a lot in a project. The way the instruction booklet is presented, it’s very easy to do different parts and put them all together later. You do need to make sure you aren’t enclosing an area you need to access later, but assembling parts and accessories still makes progress on the project.
Some of the trim parts come stained for you, but when they are separated from the sheet, you have to sand the nubs left from the laser cutting process. That can leave lighter parts that can show from certain angles. I used a brown Sharpie to darken all the edges for a more uniform look.
I like that you can pick and choose what to include and what to customize. My favorite detail is the floor heater. :D It’s such a simple detail that brings the cabin to life!
I encountered a stubborn buckling of the leather that developed in the curve above the window.
To fix this issue, I took the cabin apart and cut a thin strip out of the leather to smooth out the bubble that formed when the ceiling board is bent into shape.
To disguise the cut and subsequent gap, I stained a piece of strip wood and glued it in place. Looks a bit like a structural element.
I love the ceiling light finishes and know this is going to look magical once the LED lighting is installed. Speaking of, be sure to take your time when unwinding the LED strand. The wire can get fiddly, and you don’t want to damage the lines. I used an empty tape insert to wind the wire around for easier handling while installing.
I used electrical tape to block some stray light and masking tape to secure the wires.
While I love the overall aesthetic, I don’t like the way the wall lights have gaps at the top. This is partially due to operator error since I found the shades difficult to manage. I have some ideas brewing…more to come.
——-
I have a discount code for 10% off your purchase at Anavrin (I will receive an affiliate commission when you use my link. This link should give you the discount, but the actual code is OTTERINE1224)
Categories: Train Cabin
November 10, 2024 | 2 commentsTrain Cabin book nook – part 2
Continuing work on the train cabin book nook. Affiliate discount link at the bottom of this post.
I spray painted the seat supports and the assembled luggage racks in a soft gold. The kit comes with gold colored metal sheets to finish the pieces in shiny brass, but I opted to leave those off during the process. Just a personal preference. I will be using the metal sheet in other places in the kit.
I then added the pre-cut leather to the seats I built previously. The quality is nice, and the pieces are self-adhesive. I did add a little supplemental glue where needed. (One note about the leather, though. Since the kit is laser cut, there will be some soot from the process. Be sure to wash your hands when handling the lighter color leather pieces during assembly.)
The kit includes artwork on regular printer paper for the wall frames. I used Wallpaper Mucilage to affix the black and white photos to white card stock to make them easier to handle.
After cutting them, I realized there wasn’t a black and white photo for the larger size frame, so I googled suitable images to fill in since I wanted all black and white photos for consistency. I painted the frames dark brown and left off the kit’s gold accents. With the leather installed on the side walls, I started putting it all together.
For the curved back wall assembly, I departed from the instructions slightly since I found it easier to glue the window frame piece 98 in place first, then add the leather pieces. This ensured a good fit and proper placement of the leather on the wall/ceiling and around the window.
——-
I have a discount code for 10% off your purchase at Anavrin (I will receive an affiliate commission when you use my link. This link should give you the discount, but the actual code is OTTERINE1224)
Categories: Train Cabin
August 16, 2024 | 1 commentTrain Cabin book nook – part 1
Starting work on the train cabin book nook. Affiliate discount link at the bottom of this post.
There are a lot of parts to this kit, but the instructions seem clear and thorough.
The the first half of the instructions involve the working mechanism to create the moving landscape seen through the window. Since I don’t need the landscape portion finished to work on the interior, I skipped ahead. I have some ideas on changing the interior, so I wanted to do some dry fitting to see what was what.
The kit pieces are precise so far, and I needed to use needle files and sandpaper to get the tabs and slots to fit without forcing connections and risking breakage.
The project is roughly 1:24 scale, and I have very little experience beyond plastic model cars in this scale. But, I do have a tiny pug named Pierre from Marina. Since there’s a pet carrier included in the kit, I think Pierre will have to do a fair amount of modeling along the way.
After dry-fitting the seats and table, I think my alterations are going to be minimal. If I were to scratch build, I would have room to change things more. I’m not at all disappointed, since I was fairly certain making alterations would be limited by the precision of the kit itself.
I put together some assemblies to set aside for spray painting. Note: I’m not using some of the brass metal sheet detailing as I go. I will use some but not all.
The flooring comes stained, but I wanted to make it a deeper brown. It also had some large, obvious grain. I used Staining Medium mixed with Bittersweet Chocolate, both by Americana. For the larger grain streaks that still showed, I used undiluted paint.
Once dry, I polished lightly by rubbing the surface with a bit of brown paper bag then sealed with satin varnish by Delta Ceramcoat. It’s now a deeper color with the obvious grain hidden.
——-
I have a discount code for 10% off your purchase at Anavrin (I will receive an affiliate commission when you use my link. This link should give you the discount, but the actual code is BRAE63636)
Categories: Train Cabin
May 27, 2024 | 1 commentTrain Cabin book nook – introduction
I was gifted this lovely 1940’s Train Cabin kit by Anavrin. I have loved this book nook since I first saw it, but other projects have taken center stage. When Anavrin contacted me about doing a build for my blog in exchange for the kit, I was overjoyed.
As part of the deal, I have a discount code for 10% off your purchase at Anavrin (I will receive an affiliate commission when you use my link. This link should give you the discount, but the actual code is OTTERINE1224) They have this and many other book nook kits.
I asked if I had to build it to spec, and they told me I could do what I liked. Music to my ears! I have a few ideas on how to change it up to make it my own, so it will take me a bit longer than just building it right out of the box.
Everything you need is included, but I am sure to reinvent and reuse and add.
I have a few more things in the hopper, but I hope to start on this build next month.
Categories: Train Cabin
April 24, 2024 | 4 comments
NOTE: All content on otterine.com is copyrighted and may not be reproduced in part or in whole. It takes a lot of time and effort to write and photograph for my blog. Please ask permission before reproducing any of my content. (More on copyright)