

Watson Mill – cutting holes
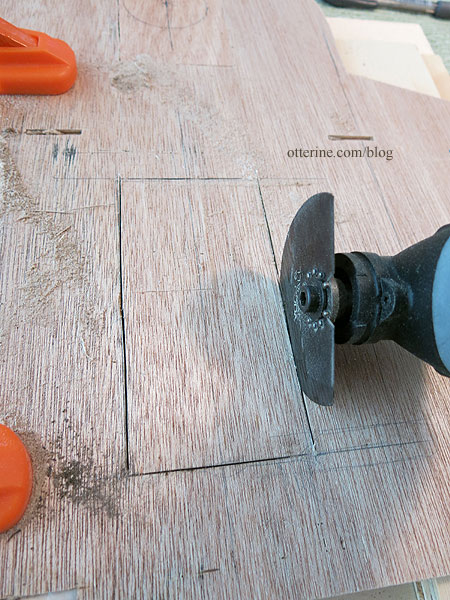
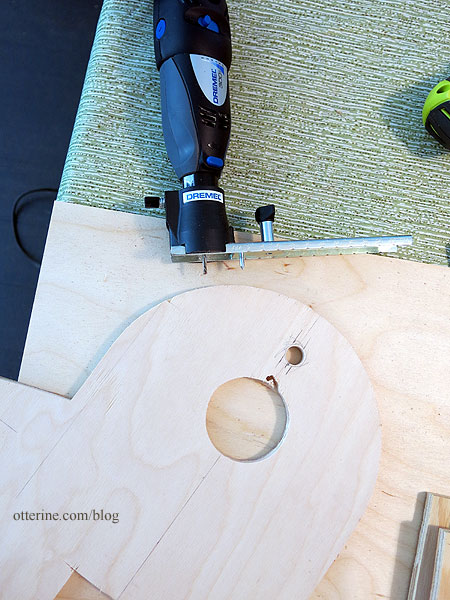
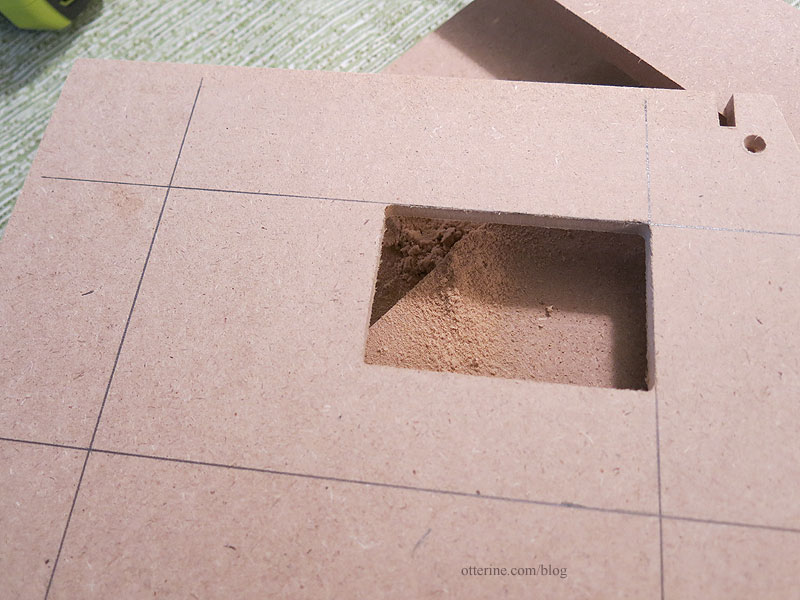
Time to cut the window, door and ceiling openings. I started with the simplest of the openings — straight cuts. I centered the lower front window under the windshaft and positioned it relative to the circle library for balance. I cut the opening with the Dremel Multi-Max using a 3″ wood/drywall blade. I like that it’s a straight blade so the cuts are relatively straight, but you have to watch you aren’t cutting at an angle. The vibration is heavy, though, so it can be hard to hold a long time as it makes your hands numb.
I cut holes in the ceiling board for the dumbwaiter and ladder with the Dremel Multi-Max. These edges will be lined with wood trim during finishing.
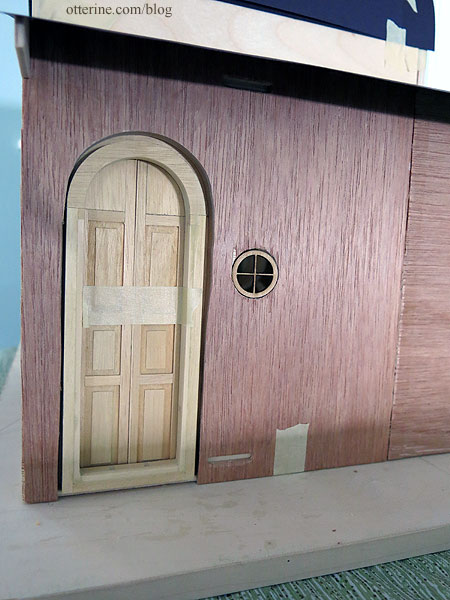
I positioned the arched door far to the back to leave as much space forward as possible while still having some room toward the back. I cut the straight sides with the Dremel Multi-Max and then cut the arch with the scroll saw. I made it larger than necessary to have some room to move it slightly. I also decided to put a tiny round window next to the door so Gustav can see who’s-a-knockin’ at the door. :D This the 1 1/8″ Simplicity Window from Heritage Laser Works.
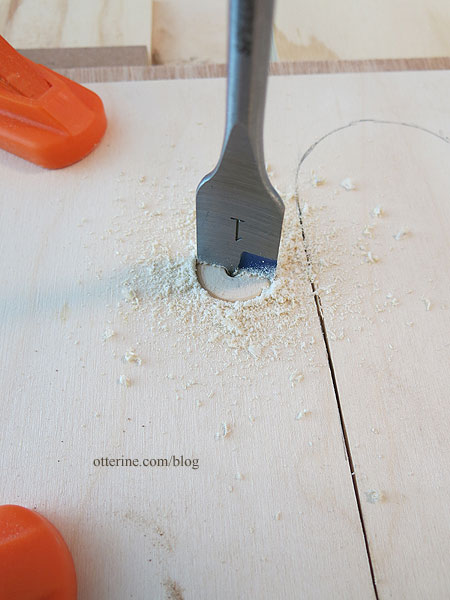
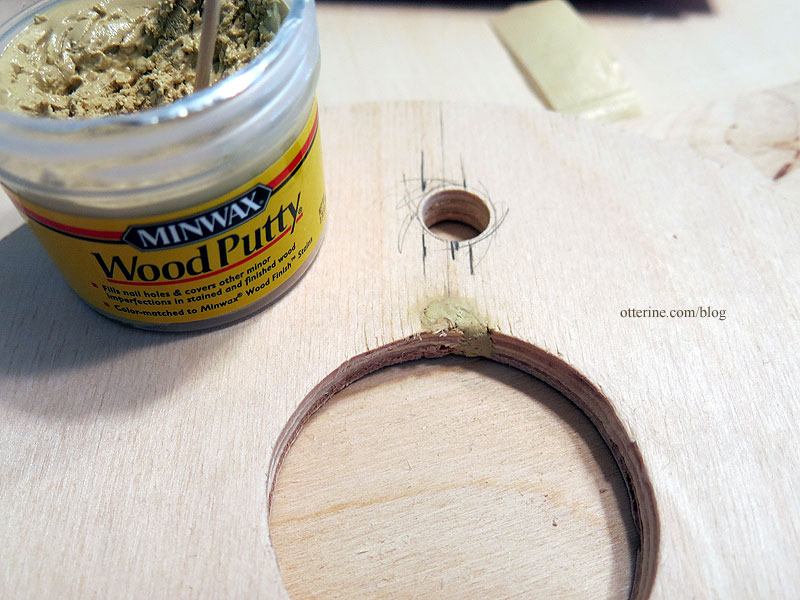
For this hole, I used a 1″ spade bit.
I’ve cut circular openings with the standard Dremel before, so that’s what I’ve used for the bedroom window, which is a 2 1/4″ Simplicity Window from Heritage Laser Works.
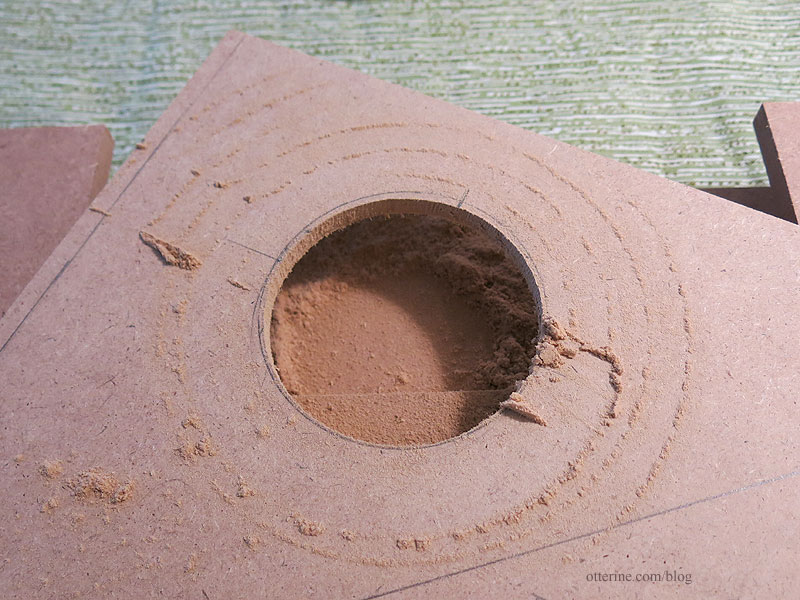
In my class with Tom Walden, I learned to make multiple passes with the Dremel to get a clean cut. That was my issue the first time I tried cutting circles; I tried cutting too much thickness at once. My issue this time was not checking the knob holding the pivot point in place after the first cut. The vibration loosened it, so it was cutting a larger circle than I wanted. I didn’t notice this until it was full on traveling outside the circle.
This is a fairly simple fix, though, so I just shrugged. I still swore, mind you. :D I filled the wayward hole with wood putty. I’ll wrap some cardboard circles to fill in some of the diameter of the hole. It will all be covered by interior and exterior finishes in the end.
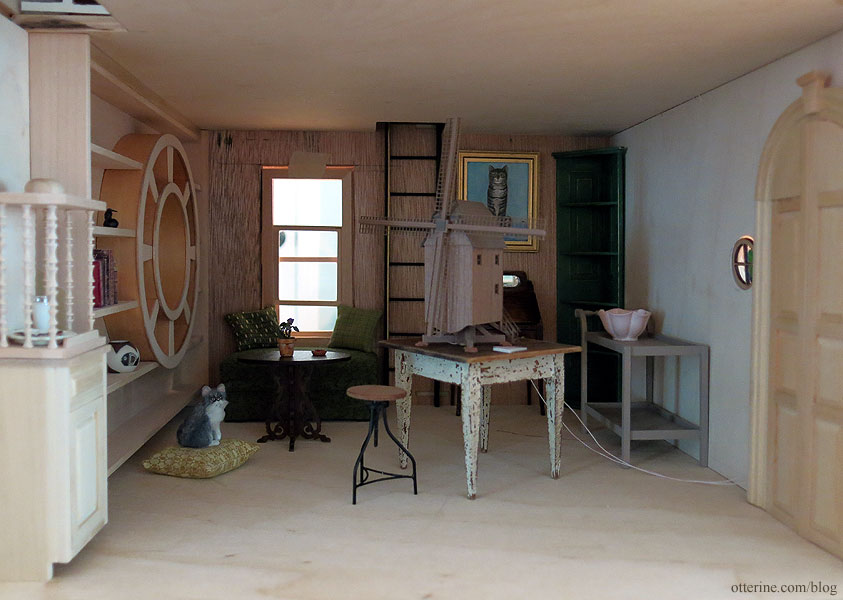
There will be interior lighting, but I wanted to see how these openings effect the natural flow of light inside the mill. Back into dry fit. While another front window would be lovely, it would cut down on wall space, which is at a premium as is. I’m planning some shelves above the trolley, which may be replaced since it is a rather wide piece for the space.
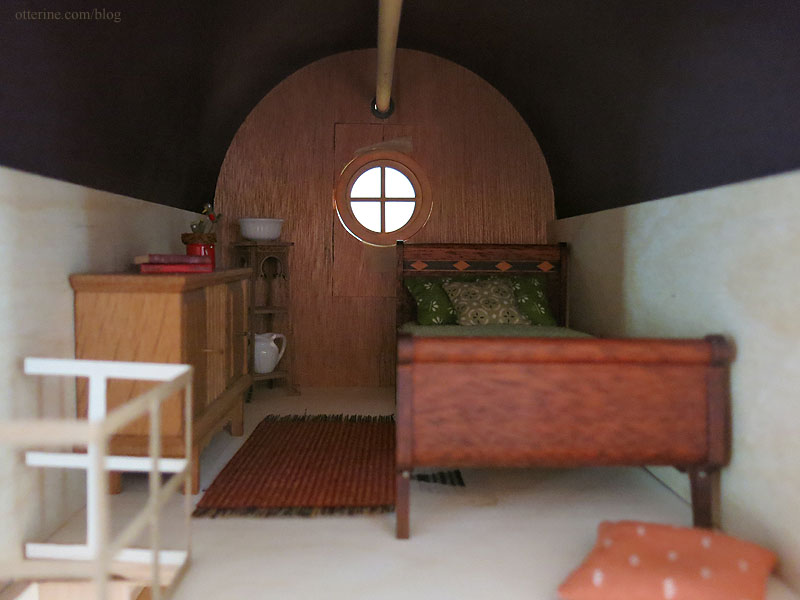
Since the white paper I was using for the roof allowed light in, I tested the dry fit with black paper this time around. The bedroom is dark, but I think it’s cozy. With some added lamps, I think it will be just fine. Plus, the ceiling won’t be black in the end. I’ll skip adding any side windows here, therefore preserving wall space for decorating.
Categories: Tools, Watson Mill
May 27, 2017 | 0 commentsDremel circle cutter and edge guides
Today was power tool day. I mentioned how loud the cutting part was when I cut some plywood circles, so I bought a pair of quality ear plugs.
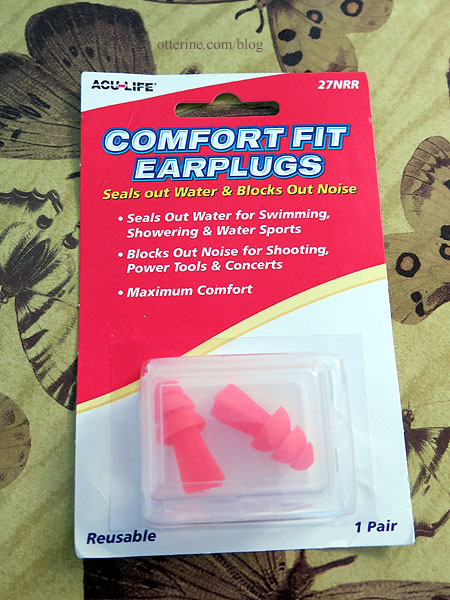
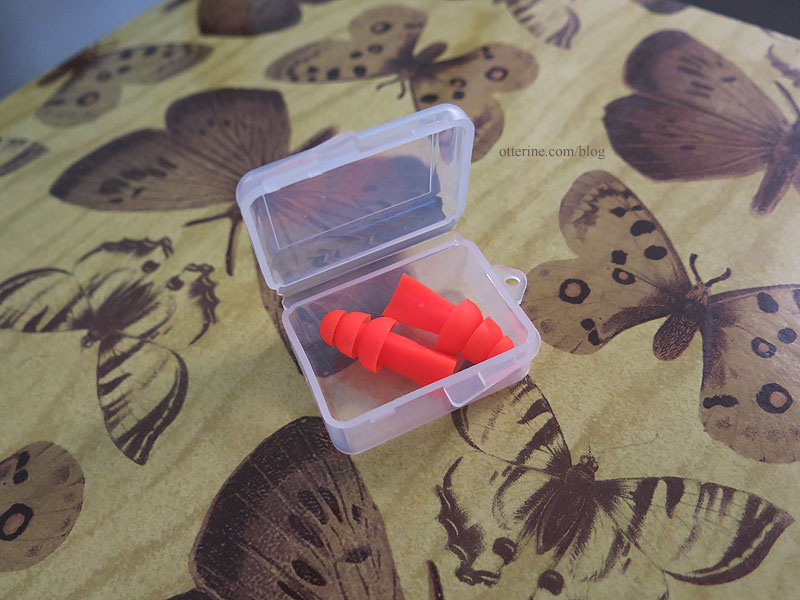
They come in a little plastic case for safe keeping. I can highly recommend these — there was zero discomfort in cutting today. Mushroom trees!
Here is the Dremel 678-01 Circle Cutter and Straight Edge Guide, which makes circles from 3/4″ to 12″ in diameter.
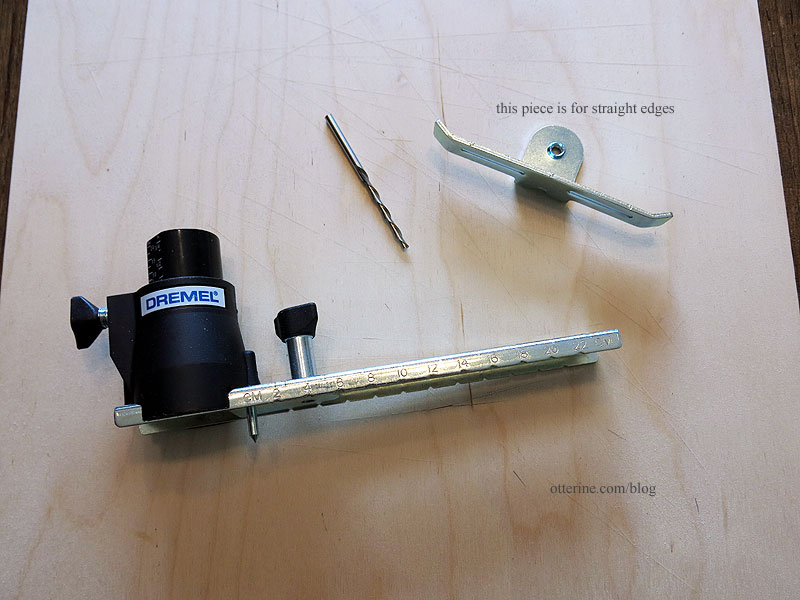
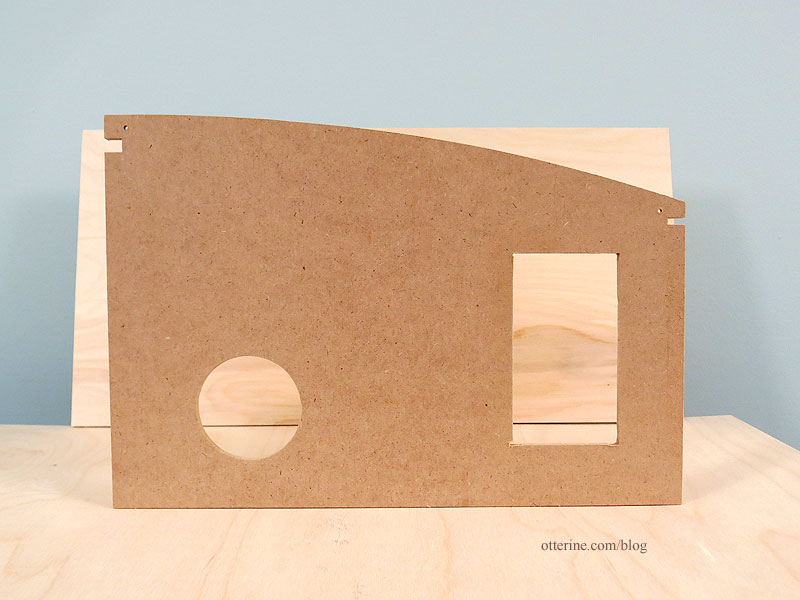
I used this to make a circular hole in one of the side walls of the Creatin’ Contest kit (Otter Cove).
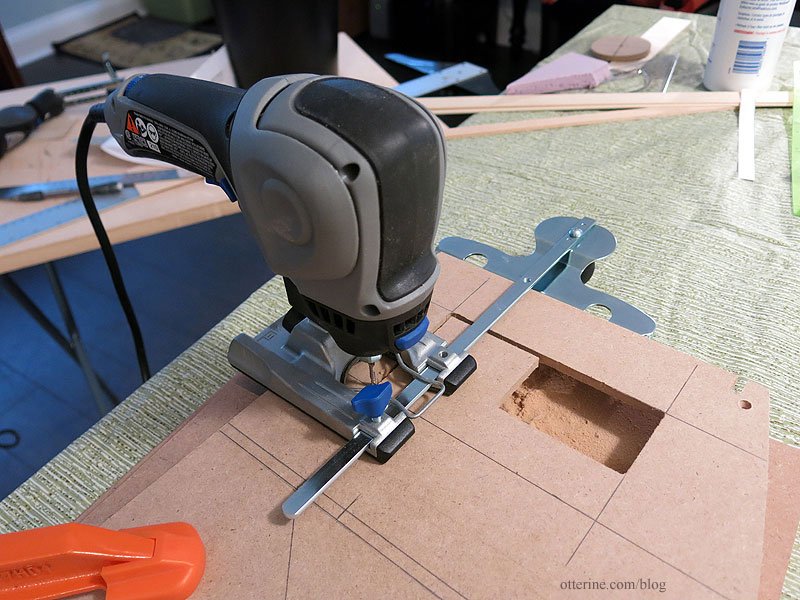
I wanted to make the existing window opening larger, so I thought that would give me the opportunity to try out the edge guide.
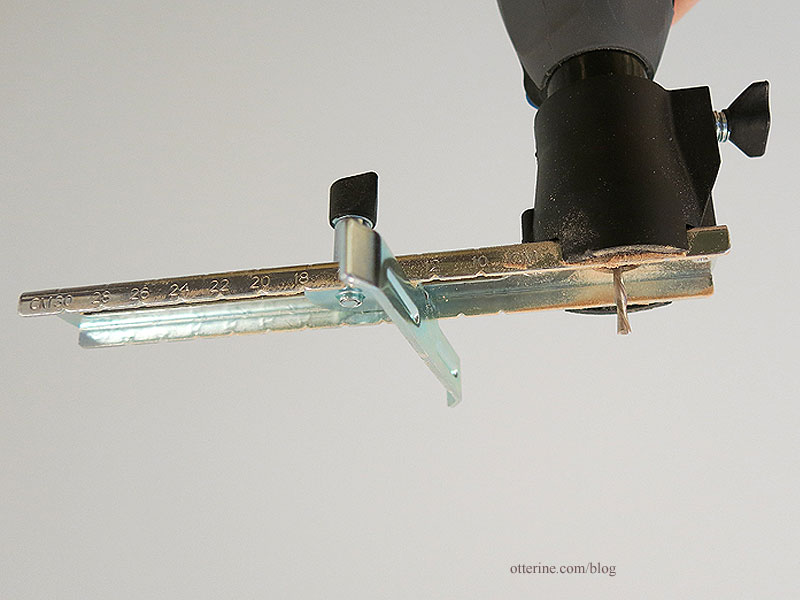
Here is the edge guide attached to the Dremel.
I set up the guide to follow the straight edge, using the existing window opening as a guide.
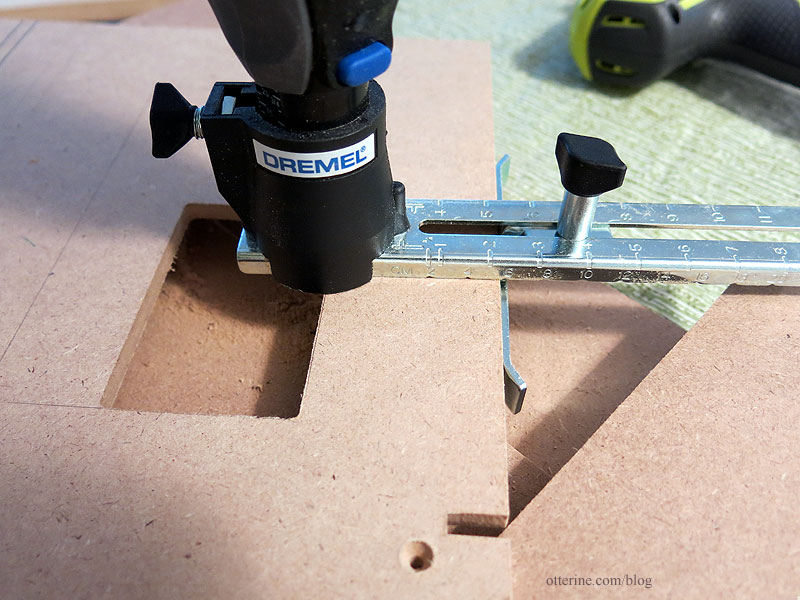
I cut to the end and then turned the tool to follow the next edge.
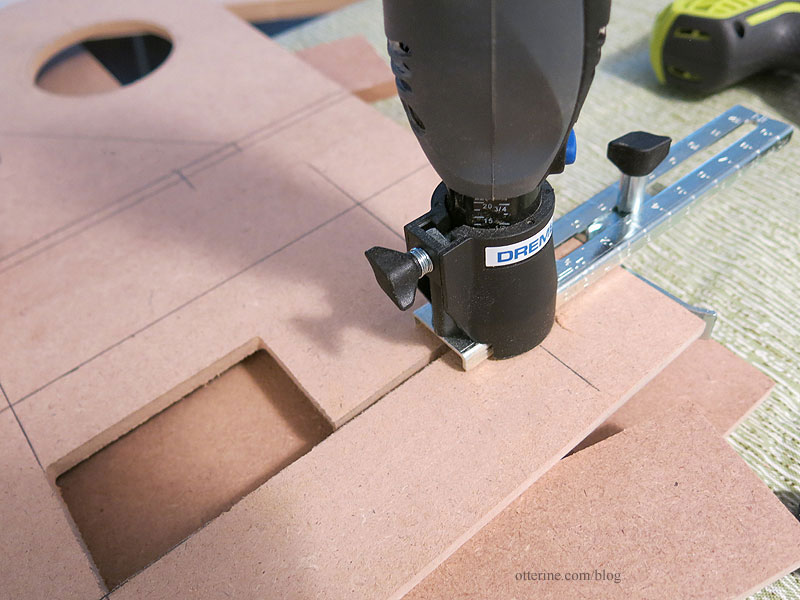
The remaining two cuts were too far in for this particular edge guide to work, so I moved over to the Dremel TR800 Circle Cutter and Edge Guide which allows for cuts farther away from the edge. The clamps I used to hold my boards in place are Jorgensen 6″ bar clamps, and they are heavy beasts. :D
I personally think the Trio edge cutter is easier to work with since the cutting area is open and you can easily see where you’re going, but both did what they were meant to do.
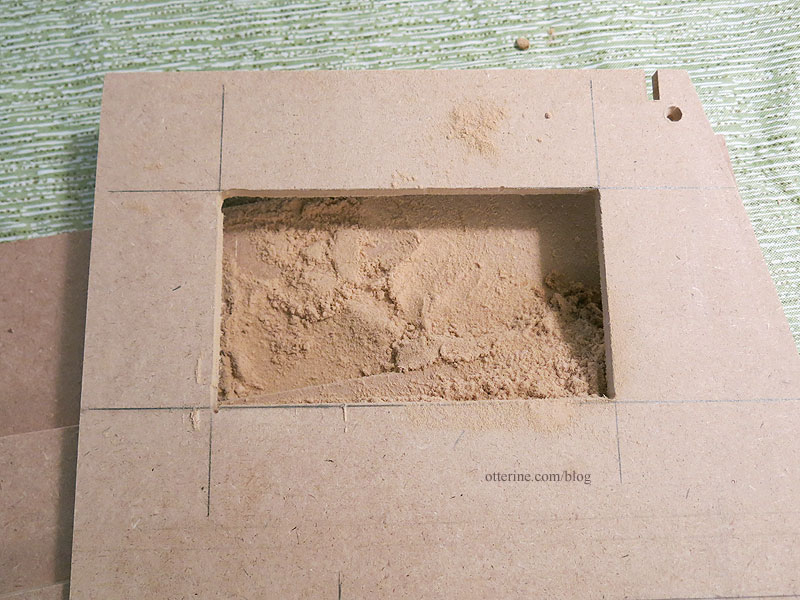
It’s not a perfect end cut, but considering it was my first time using the attachments I think it worked well. There will be final finishes anyway, so the rough openings are all I needed. With practice, it will go more smoothly as it did with the circle cutting.
That’s looking good! :D
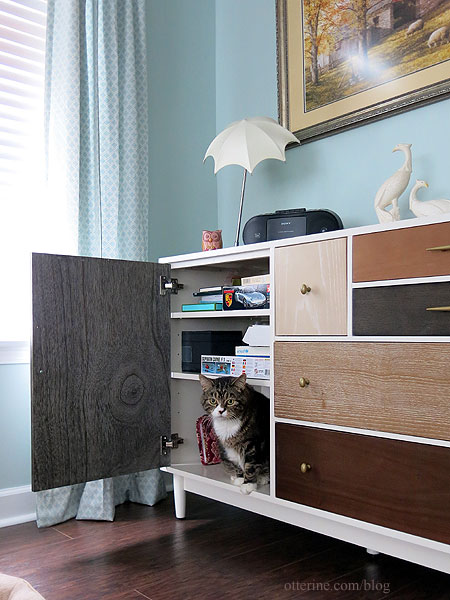
I’ve mentioned previously that Jasper stays out of places that are occupied. This is what happens when you empty a cabinet space and forget to close the door.
Categories: Tools
February 21, 2015 | 0 commentsCutting circular openings
I recently picked up a new attachment for my Dremel rotary tool: a circle cutter and straight edge guide. In this post, I’ll show you its circle cutting capabilities. This makes circles from 3/4″ to 12″ in diameter.
I’m using scrap pieces of 1/4″ plywood here to get a feel for the tool the first time around. I’ve marked my outer circle and the center point.

I loosened the guide and adjusted the cutting bit to fit the circle.

The attachment has a pin that is 1/8″ in diameter. I drilled a hole on the center point using the same sized drill bit. You also use the same sized cutting bit, so a hole is needed for the bit as well.

You slip the pin into the center hole and then cut around the circle with the cutting bit.
This is my fourth practice run, and I’ve managed a reasonably clean circular opening. Just a little sanding to fine tune it is needed. Hooray! :D

It was not easy (and it’s very loud), but I am sure with practice (and earplugs) it will get better. And, you’re left with a better opening than you could achieve with a scroll saw or hand tools. (These cuts were done for Roland’s Retreat.)
Categories: Tools
September 27, 2014 | 0 commentsThrowing away the Yes paste
Yes paste is a big No for me now. I’m not sure where I read about Yes! paste being used for dollhouse wallpaper, but I wish I had never seen it. It has failed in every dollhouse I’ve made where it was used. :[
You saw my repair in the Haunted Heritage. There are other places in the Heritage where the paper has separated, but it is not noticeable.
Before:
After:
For Baslow Ranch, it’s an old building so wallpaper ripples are no issue. There is only one room with paper and while it has separated some, the gap isn’t noticeable and it’s not rippled just loose.
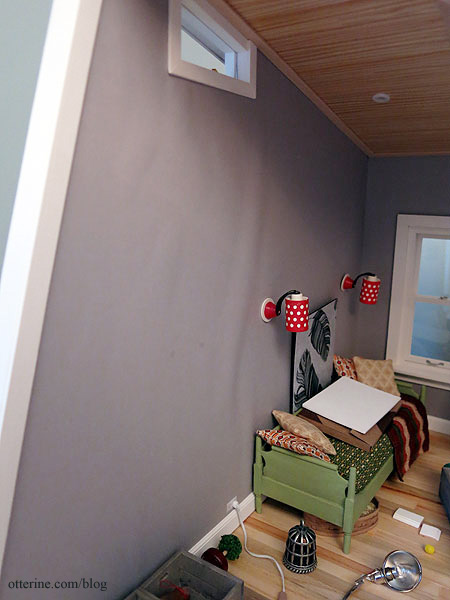
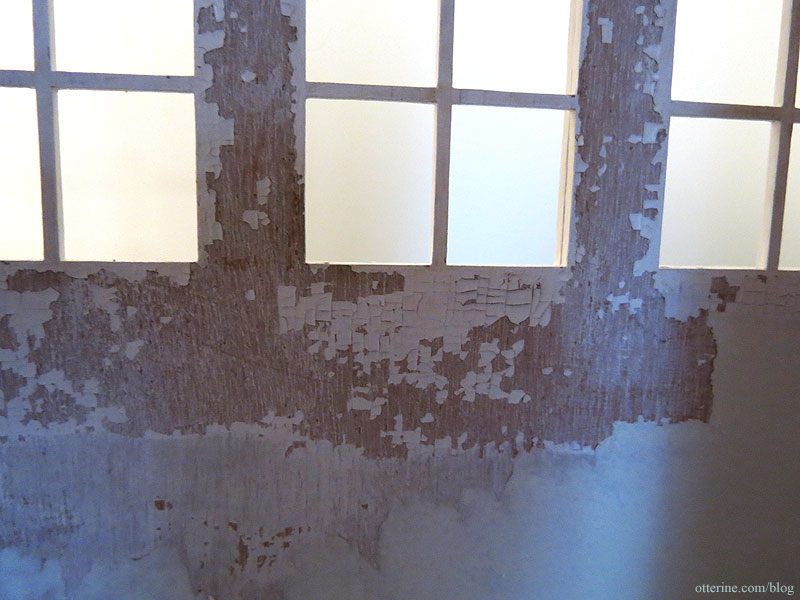
In The Artist’s Studio, however, it is very obvious and a repair on this blank wall will require removal of the old paper and redoing it using Wallpaper Mucilage. What’s bothersome is this is a very recent build and the paste failed that soon.
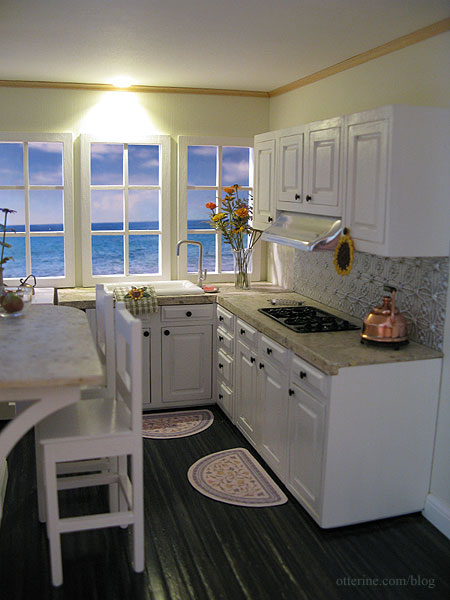
The worst of them is the Baxter Pinte Villa kitchen. This is what it used to look like.
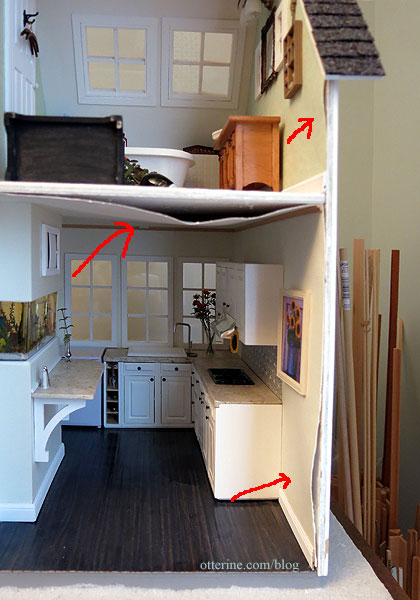
Now it is a couple of years old and most of the paper throughout remains intact. Except around the kitchen…including the walls, ceiling paper and part of the wall above in the bathroom. The bathroom repair will be easy – just slip some new, better glue under the edge and clamp.
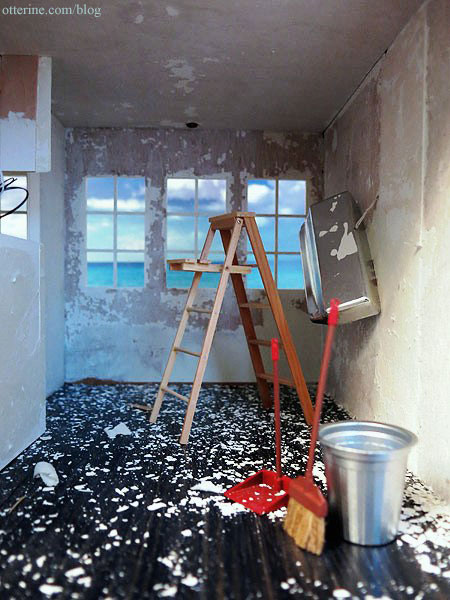
I did a complete demo on the kitchen since the whole thing needs to be redone. I am planning to list this house for sale, so it needs a kitchen redo first.
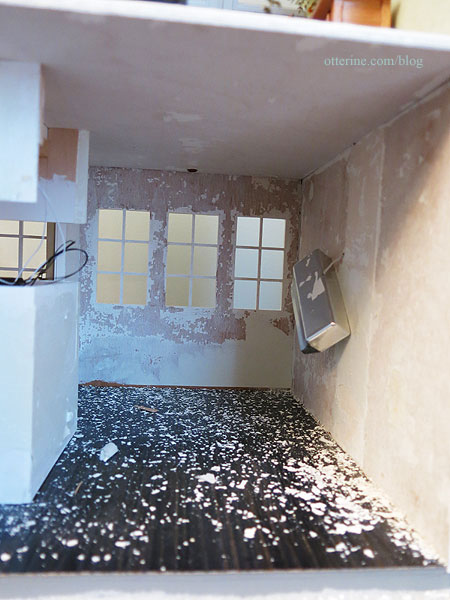
The primer paint is completely desiccated and crumbling.
Maybe that is the issue with Yes paste; maybe it doesn’t bind well to painted surfaces. Either way, it’s already in the trash can. Buh-bye, Yes paste.
Well, I guess if I am going to renovate, I should have some fun with the photos. :D
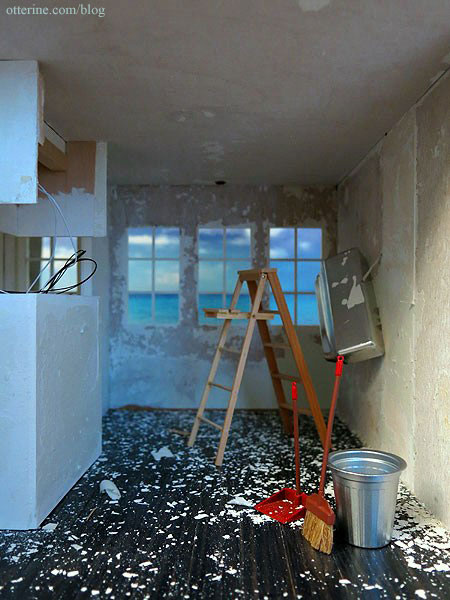
Baxter Pointe Villa is closed for repairs.
——-
Update: here is the product I use now…Wallpaper Mucilage.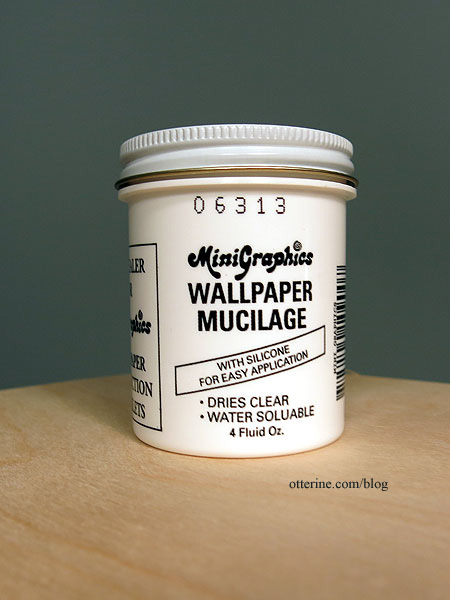
Categories: Tools
December 28, 2013 | 0 commentsWallpaper Mucilage, I love you!
Ok, maybe that’s a bit dramatic, but I definitely have a new stand-by! A couple of people here and on the Greenleaf forum recommended the wallpaper mucilage that miniatures.com carries. I ordered a jar to give it a try. Now, it is a small container for $7, but you don’t have to use very much. And, why get a huge jar if it will just dry out before you can use the whole thing?
I tried it on a scrap of paper, applying it directly to the paper instead of the wall this time. It did curl the paper a little but it wasn’t unmanageable.
I stuck the paper to my primed scrap board and it stayed put right away. I could move it a little if needed, but I didn’t have to constantly press the edges to get it to work. There was no buckling of the paper, either. This is vintage Millie August dollhouse wallpaper called Bonnie Brae. :D

To be fair, I tried the same glue-to-paper technique using the True Value real life wallpaper adhesive that some had recommended.

It really curled the paper. This would be an issue all by itself since curling makes it hard to keep the paper from sticking to itself and getting paste on the good side, but also the paper didn’t want to stick to the primed wall. I am guessing you really have to slather this on, which would be fine for thick real life wallpaper but not for mini papers.

I tried the True Value real life wallpaper adhesive on some wood flooring sheet, too. While it gave a decent hold after it dried, getting it to stick in the first place was a pain. I tried the MiniGraphics wallpaper mucilage on the same flooring, and it worked like a charm. So, I nixed the real life paste for the MiniGraphics wallpaper mucilage.
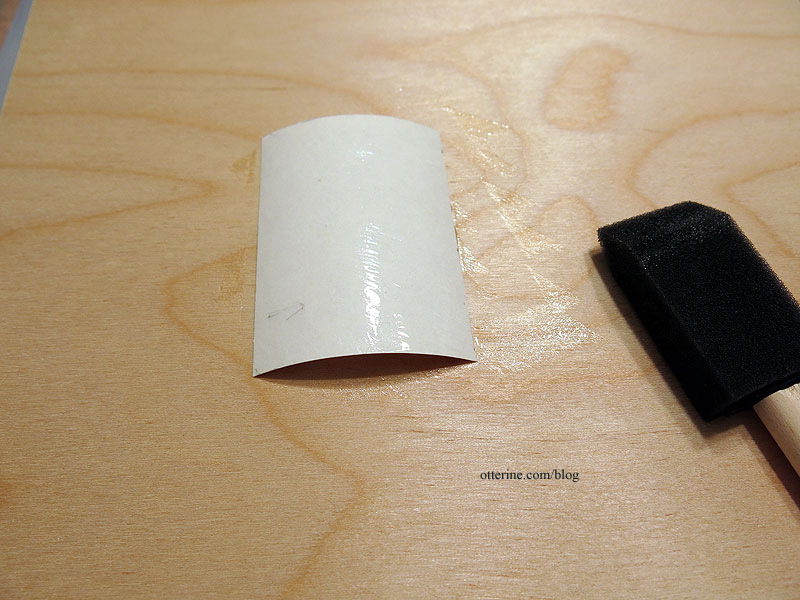
The next test was to use the MiniGraphics mucilage on a cut piece of wallpaper. I applied it with a foam brush and the curling was minimal. It stuck to the wall, allowed me to reposition (quickly) and then stayed put. No, can’t show you that part. :D
Since only time will tell if the MiniGraphics mucilage will hold up to humidity, I can’t say for sure it is foolproof. But, I ran some water over both samples and the True Value pasted paper buckled whereas the MiniGraphics pasted paper did not. That’s a good sign.
I’m not really sure why I was so insistent on using Yes paste. I’ve seen it recommended before, but now it’s no more Yes for me.
Categories: Tools
November 30, 2013 | 0 commentsHomemade glue syringe
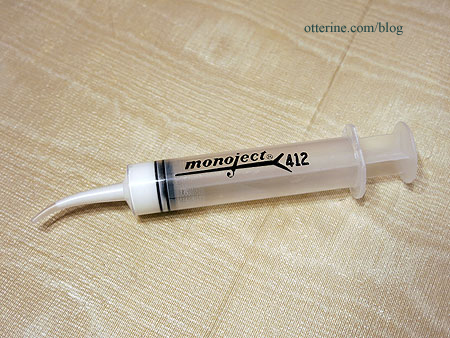
So, the other day, my glue syringe finally gave out. The rubber stopper kept getting caught in the tube. You’ve seen this delightful tool used many times.
It’s Thanksgiving Day, and I need a glue syringe. Did I remember to pick one up last night when I was running pre-crazy-shopping-days errands? No.
Now, the local Michael’s does open at 4PM today. I’m not saying I won’t have to go to the store at some point this weekend, but I am trying to avoid it as much as possible. If Thanksgiving shopping is your thing, that’s great! I wish you good parking and fabulous deals. But, I’d rather not. :D
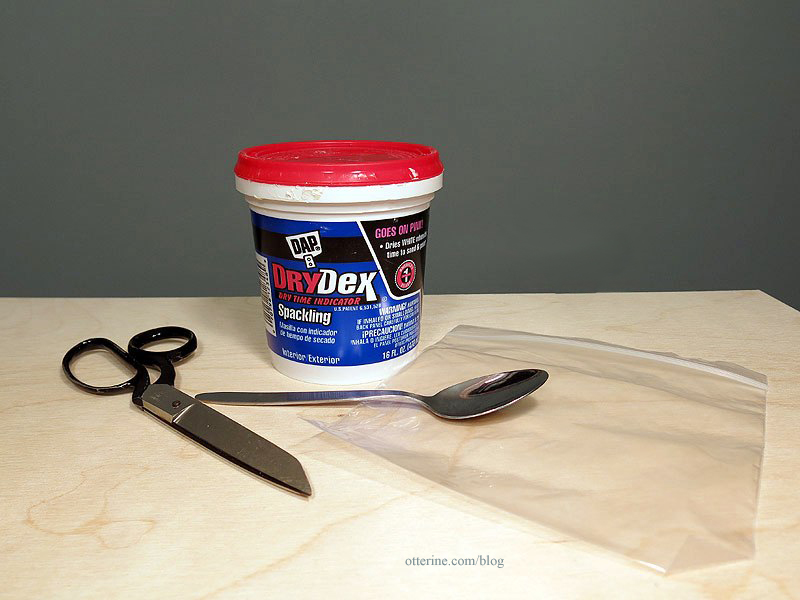
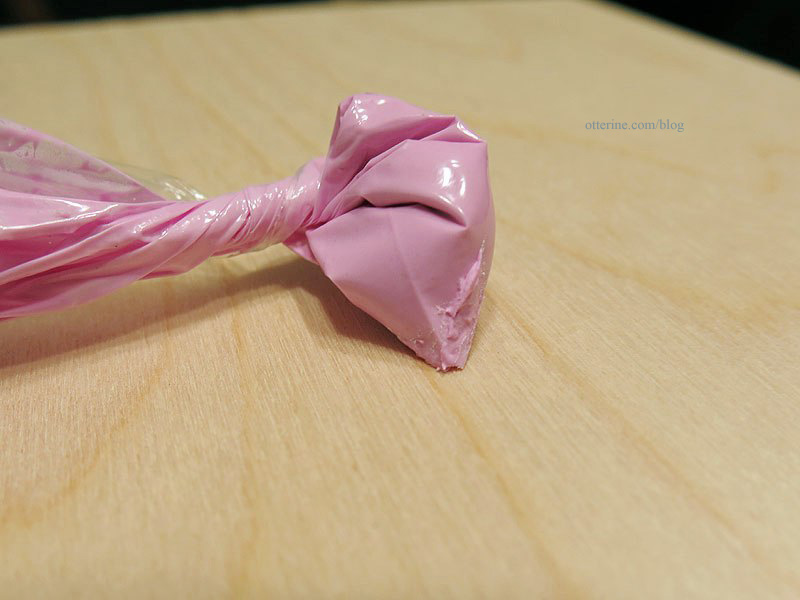
So, what to do? I gathered my scissors, a spoon, a plastic sandwich bag and the spackling tub. I don’t see any reason this wouldn’t work for glue, but I needed to apply spackling today.
I spooned some spackling into the bag and pushed the material toward one corner leaving the zip-top unsecured. I gave it a slight twist and snipped the corner. Twist some more, and the spackling came out of the tip.
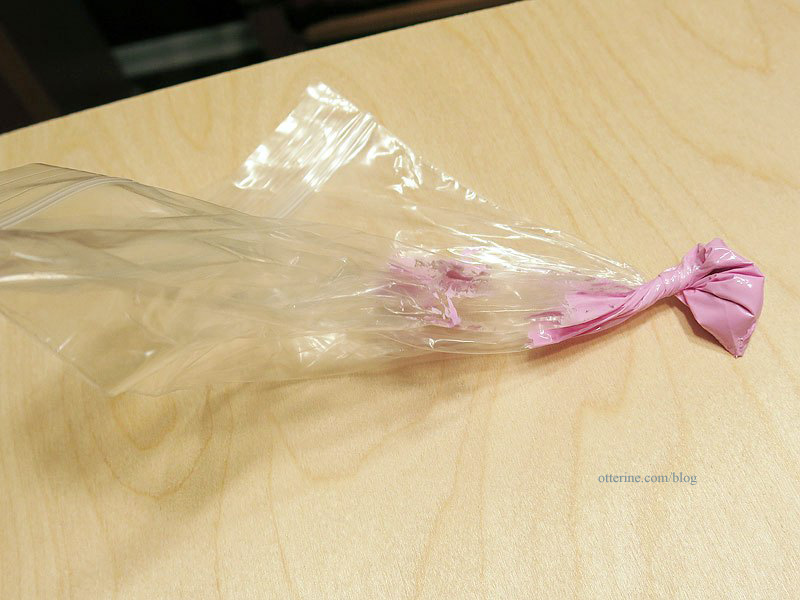
It’s basically a small pastry bag. :]
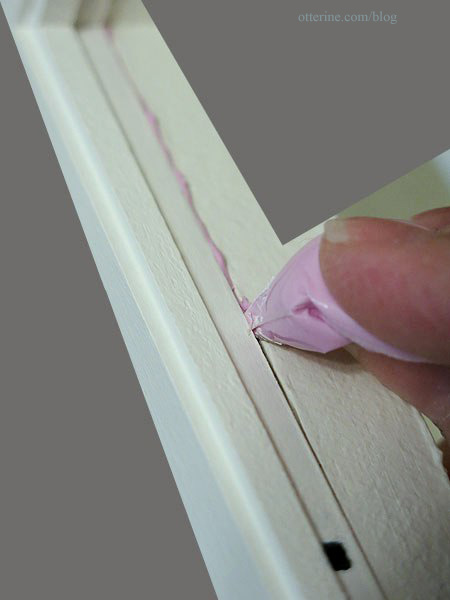
It took some getting used to and the syringe is easier to fit into tight spaces, but there was enough room for me to work with the bag on this particular area. It worked rather well, and I can keep my sanity avoiding the stores…at least for today.
What I’m not avoiding is a yummy Thanksgiving dinner! Almost time to eat! :D
Categories: Tools
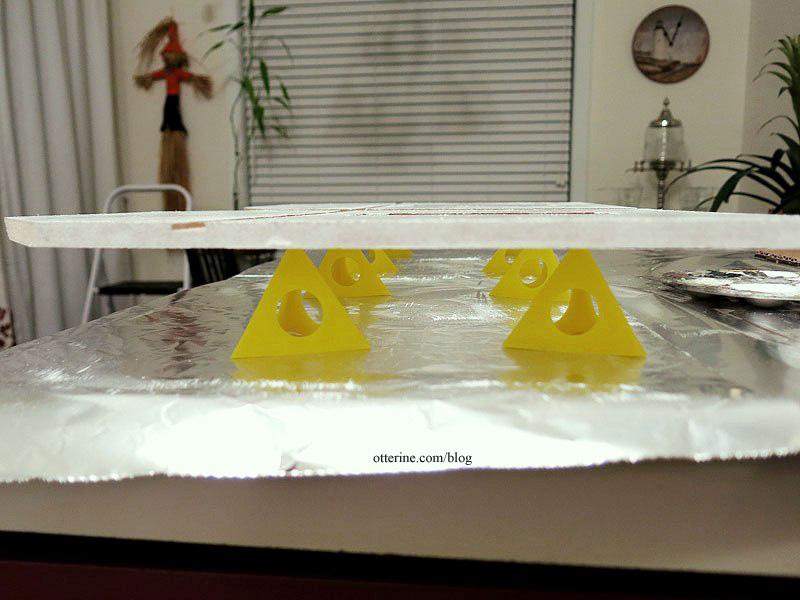
November 28, 2013 | 0 commentsPainter’s Pyramids
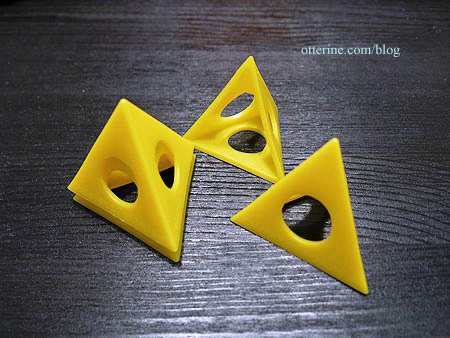
I bought a set of Painter’s Pyramids to help me while I painted my real life kitchen cabinets, but they are now in my mini tool box. :D
They are plastic pyramids with holes on the sides so you can use your fingertips to reposition them easily. They are also hollow on one side, so you can stack them for storing. A package of 10 is roughly $5, though it would make more sense for a pack of 12 since you typically use them in fours for better stability.
They now have a version with holes so you can attach them to your work surface with screws, and one of the packages I bought has this feature. For my cabinet doors, I did find the doors slid around on them a bit, but the pyramids stayed put even without the screws. I think it was the nature of the semi-gloss surface that made the doors slide around. When I used them to paint the kit walls with craft paint, there was no sliding. :]
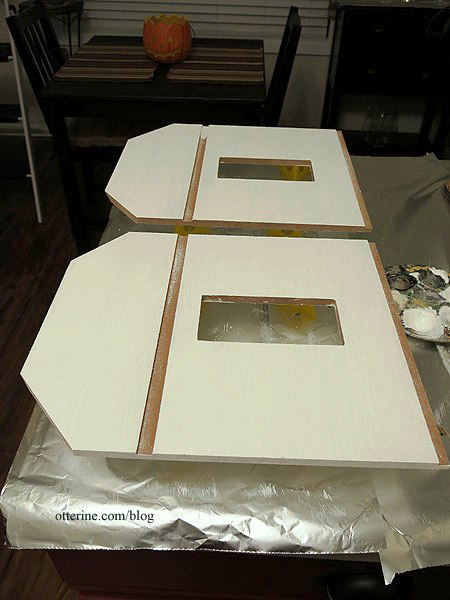
You paint one side of your board, wait until it’s relatively dry and then flip it over onto the tips of the pyramids. This means your painted surface won’t stick to the work surface. Even waxed paper and foil can stick to a tacky painted surface and pull paint away in spot. If the finish is marred at all while using the pyramids, it will be only at the points where the tips hold the board — a relatively easy touch-up.
You can work so much more quickly than you would be able to without them. And, painting both sides of the boards at the same time keeps warping to a minimum. The pyramids allow both sides to dry evenly.
Categories: Tools
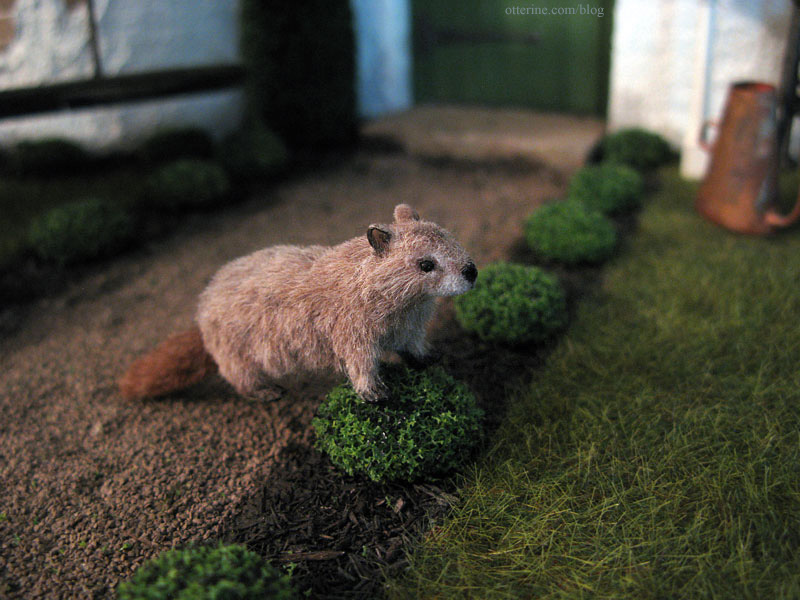
November 2, 2013 | 0 commentsHappy Groundhog Day 2013
Woodrow is ready for the day!
I have a few new things to share, the first of which is my new Proxxon scroll saw. Sexy, no? :D
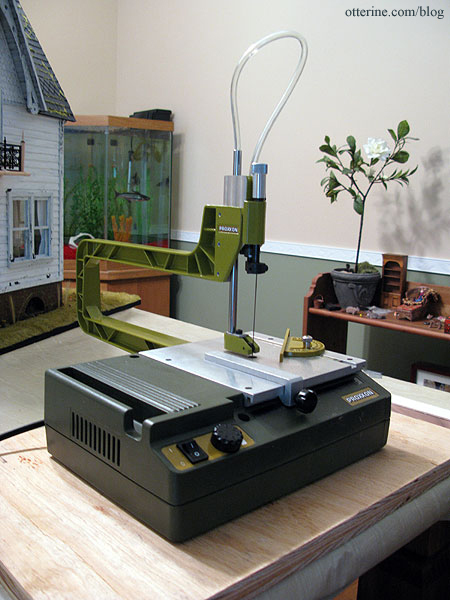
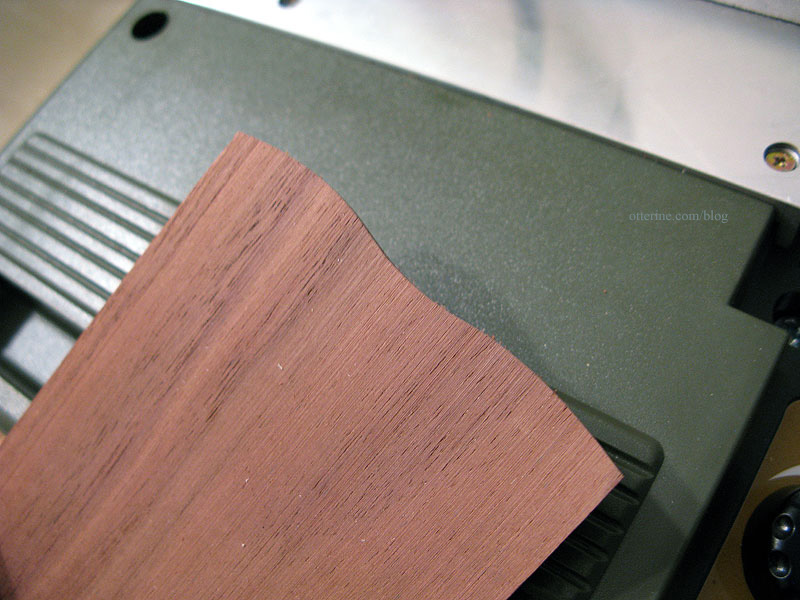
My friend, who is also a plumber, came to my rescue last weekend to fix my clogged drain, and while he was here we set up the saw. I didn’t have much time to work with it since I was finishing the trims on the Heritage, but I did make a couple of test cuts.
The cut balsa is smooth and not crushed.
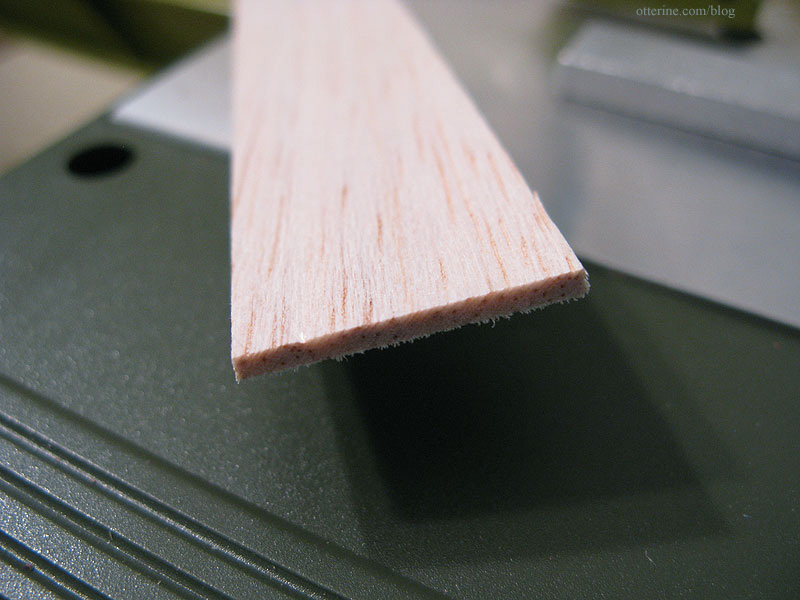
The cut walnut was easy peasy compared to cutting by hand with a blade.
Categories: Animals and birds, Tools
February 2, 2013 | 0 commentsDu-Bro Tubing Bender
I love the rush of giddy excitement when I find a new tool and it works just like it is suppose to do! :D If you’ve ever worked with brass or aluminum tubing, you know bending it without a proper tool is pretty much a game of frustration.
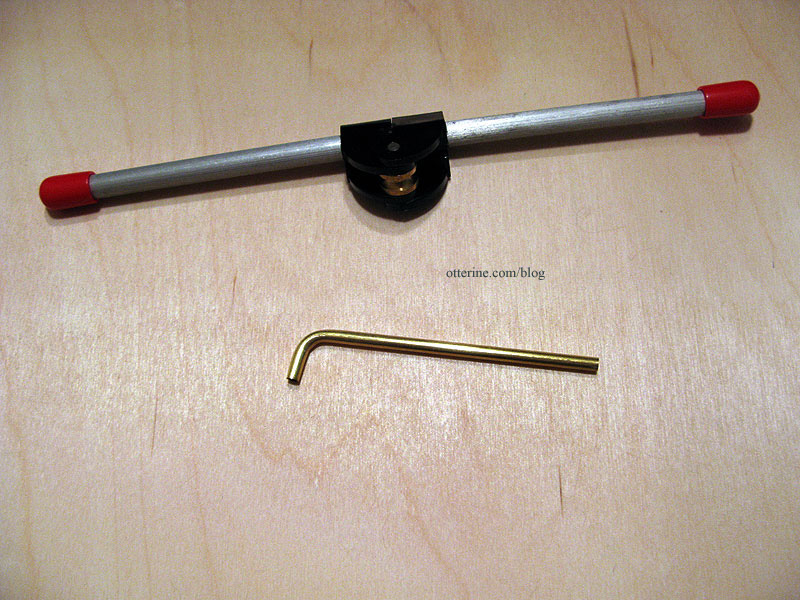
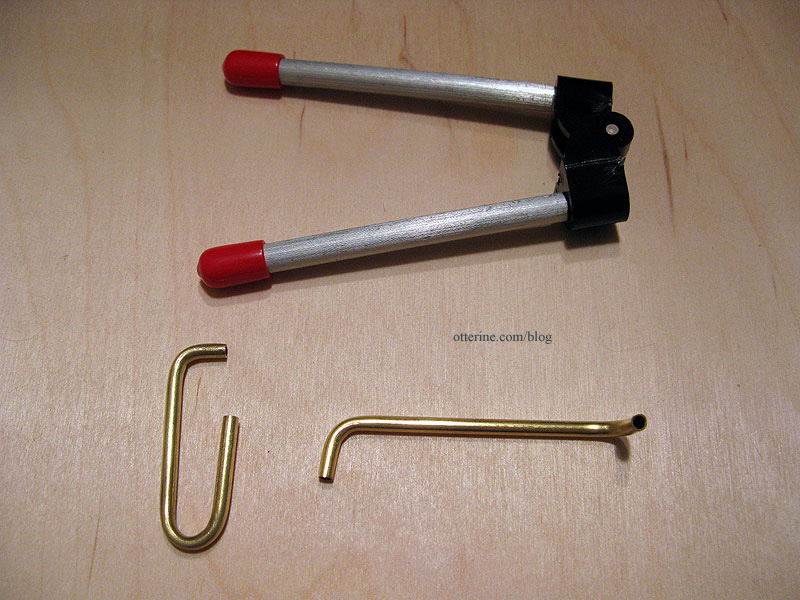
Enter the Du-Bro Tubing Bender! =hooray and flourish=
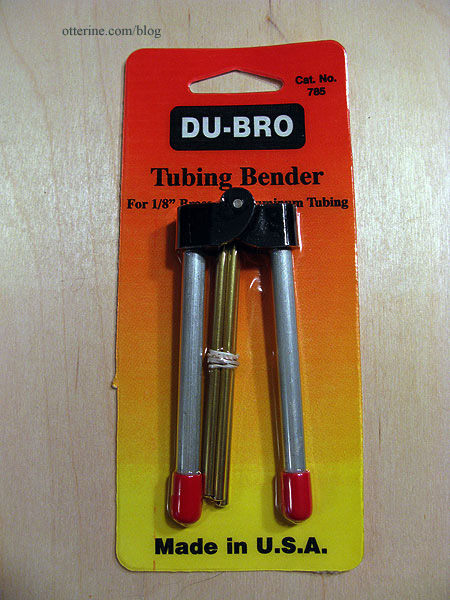
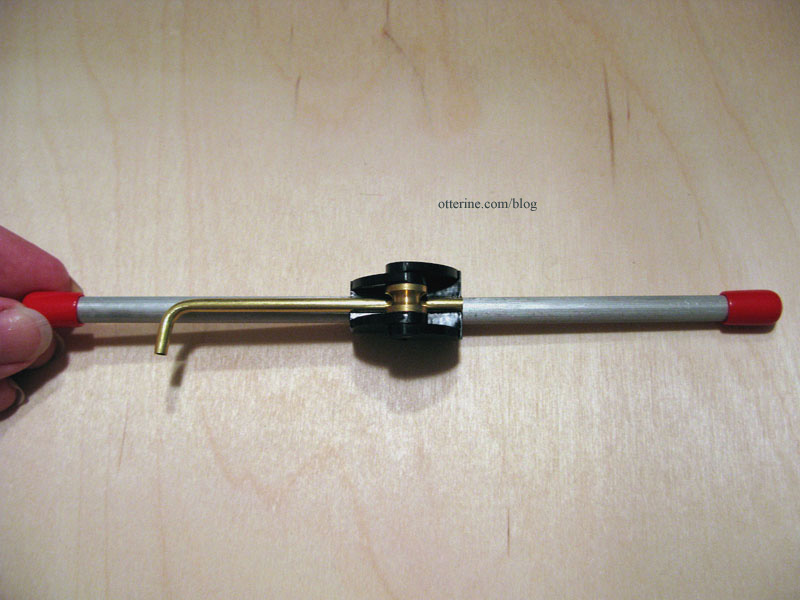
I purchased mine at a local hobby shop called Ad-Venture Hobbies. There are two sizes and this is the smaller of the two — for 1/8″ brass and aluminum tubing. It comes with a few pieces of brass so you can get the hang of it. You insert the tubing into the tool.
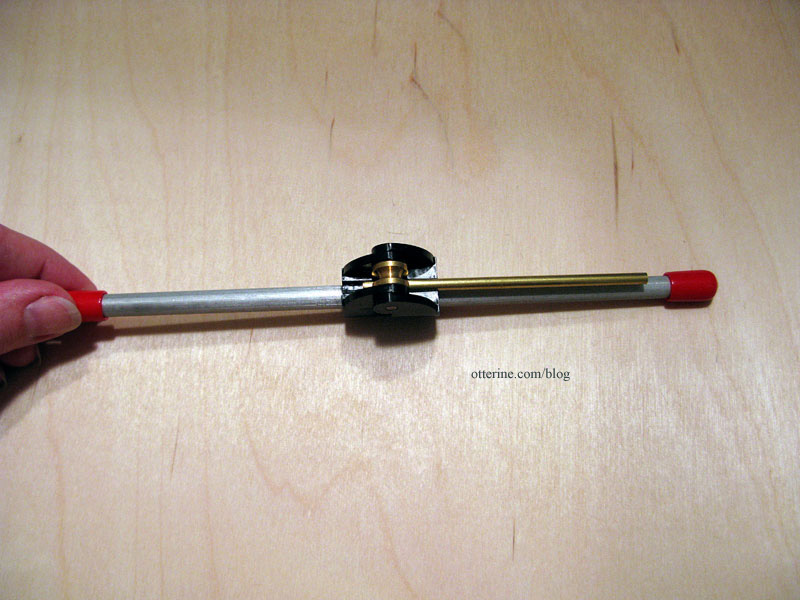
Then bend the tool – love the easy work of leverage!
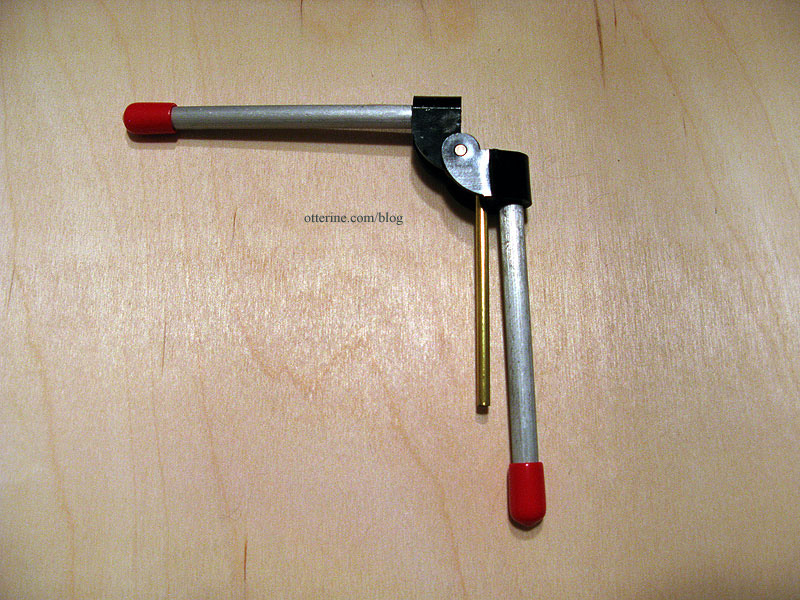
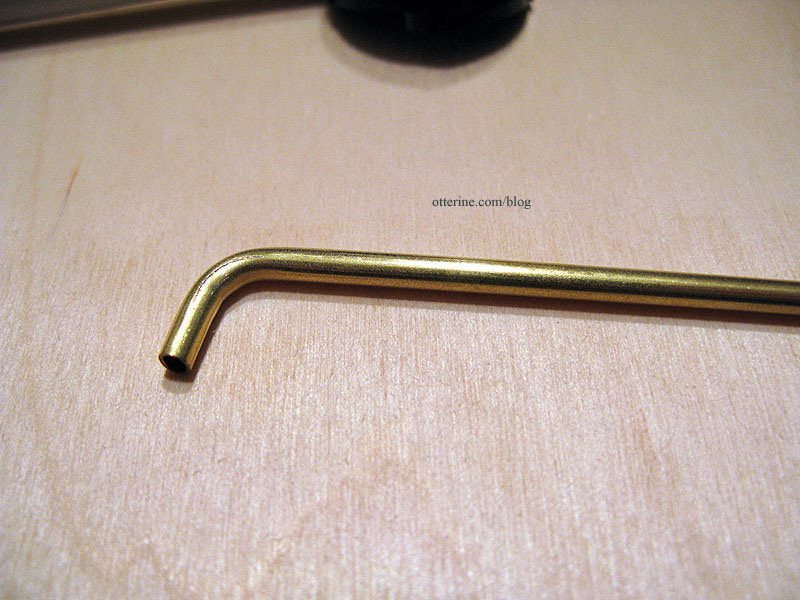
You are left with a nice bend.
No kinks in the tubing. I did try to bend a piece closer to the end, but it pulled and didn’t work as well. So, there is some limitation to it, but I think it’s a wonderful tool.
You can bend it again in another direction.
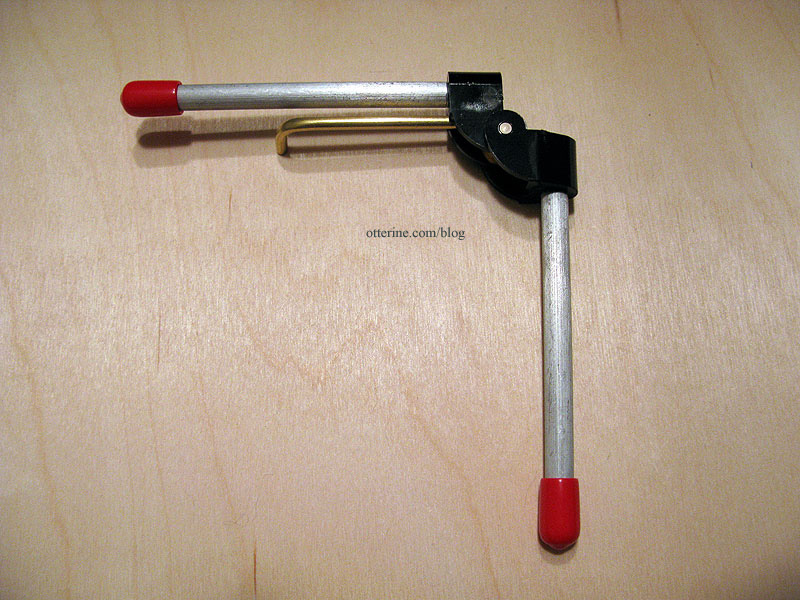
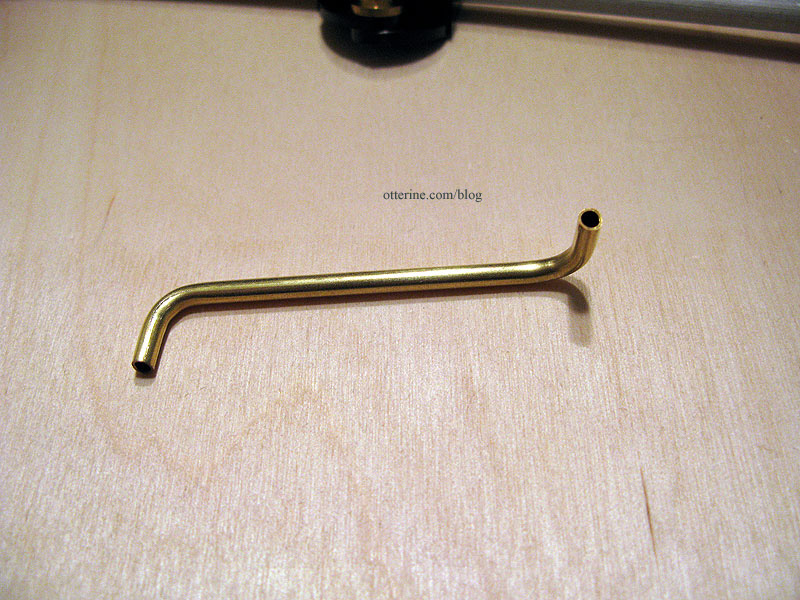
You can bend it more than 90°, too.
I tried it on a scrap piece of 1/16″ aluminum, and it worked well for the 90° angle. It was a little unruly since it’s not a tight fit in the tool but works well enough with some finagling. There is a small amount of flattening in the bend, but it looks much better than trying to do it by hand.
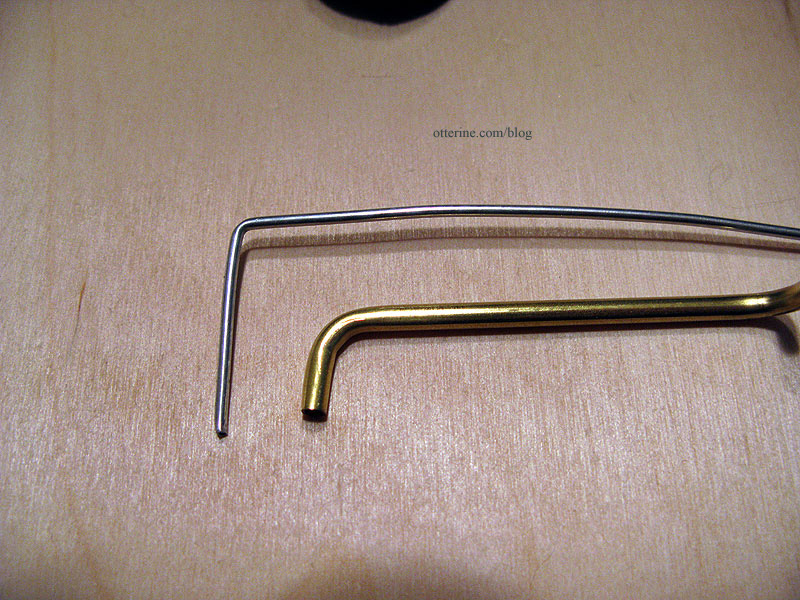
Update: I’ve tried it now with aluminum tubing, and you have to be a little more careful since the metal is softer and easier to tear. It takes some practice, but you can get it to work on aluminum. I ended up making 3-4 small bends right next to one another to stretch it out a little before doing the final bend. It’s not as clean as the brass, but it does work.
Categories: Tools
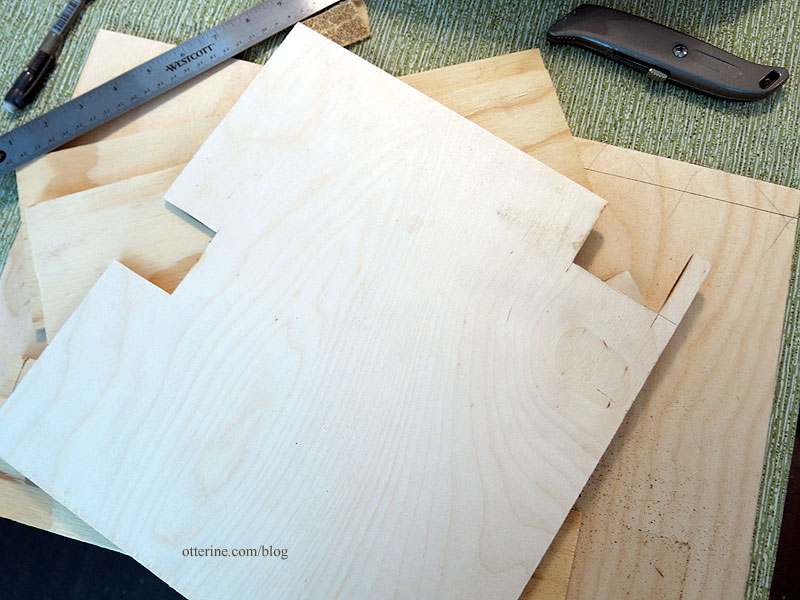
June 18, 2012 | 0 commentsCutting plywood without power tools
Power tools are noisy, need appropriate space for setup and are a little intimidating to me. So, I use a standard utility knife with either a metal ruler or metal T-square to make my plywood cuts (technique learned from Real Good Toys). This is my cutting board on an old TV tray.

I use this method on everything from 1/64″ thick wood veneer to 3/8″ thick plywood, though the latter takes some doing. For boards up to 1/8″ thick, I cut on one side only. For thicker boards, I make cuts on both sides to meet in the middle. Here is that process.
I’ve photographed the process along the way with staged photos…meaning I am not actively cutting in these photos. I can’t hold the camera and photograph myself cutting, because cutting requires two hands, one to steady the board and ruler and the other to cut the board.
First, I make my guidelines on one side of the board. This is the doorway placement for the bathroom-to-hallway door on the new 1/4″ thick plywood wall, which I cut using this method. The top cut has already been started in this photo.

With a sharp blade in my utility knife, I cut along the lines using the T-square to start. This makes sure the lines are square with the bottom edge….no crooked doors allowed.

Once I have a deep line, I switch to the metal ruler because I can position the board and the ruler in a more comfortable position for me. You might find using only the T-square works best for you.

I cut part of the way through the board by making repeated cuts along the same lines. I then mark these cuts on the opposite side of the board.

I measure on the opposite side from where the cuts began and transfer the guidelines. I don’t do this in the beginning just in case my cuts are off a little from my initial guidelines on the first side.

I then repeat the cutting process with the T-square or metal ruler (or first one, then the other) on the new side. I flip the board back and forth, repeatedly cutting deeper into the grooves until the cuts meet in the middle. The board then separates and you are left with a reasonably clean edge.

If there is any excess wood on either side, I use the utility knife to clean up the edges.

I use 60 grit sandpaper to smooth out the edges, and we are ready to test out the door.

I obviously wouldn’t use this to scratch build an entire house from 3/8″ plywood, but it’s a usable method for the small amount of cuts I usually make during a build. Thicker boards take some elbow grease and patience — and a few breaks in between cuts, but this method gets the job done. :D
Categories: Tools
April 3, 2012 | 2 comments


NOTE: All content on otterine.com is copyrighted and may not be reproduced in part or in whole. It takes a lot of time and effort to write and photograph for my blog. Please ask permission before reproducing any of my content. (More on copyright)

Watson Mill – cutting holes
Time to cut the window, door and ceiling openings. I started with the simplest of the openings — straight cuts. I centered the lower front window under the windshaft and positioned it relative to the circle library for balance. I cut the opening with the Dremel Multi-Max using a 3″ wood/drywall blade. I like that it’s a straight blade so the cuts are relatively straight, but you have to watch you aren’t cutting at an angle. The vibration is heavy, though, so it can be hard to hold a long time as it makes your hands numb.
I cut holes in the ceiling board for the dumbwaiter and ladder with the Dremel Multi-Max. These edges will be lined with wood trim during finishing.
I positioned the arched door far to the back to leave as much space forward as possible while still having some room toward the back. I cut the straight sides with the Dremel Multi-Max and then cut the arch with the scroll saw. I made it larger than necessary to have some room to move it slightly. I also decided to put a tiny round window next to the door so Gustav can see who’s-a-knockin’ at the door. :D This the 1 1/8″ Simplicity Window from Heritage Laser Works.
For this hole, I used a 1″ spade bit.
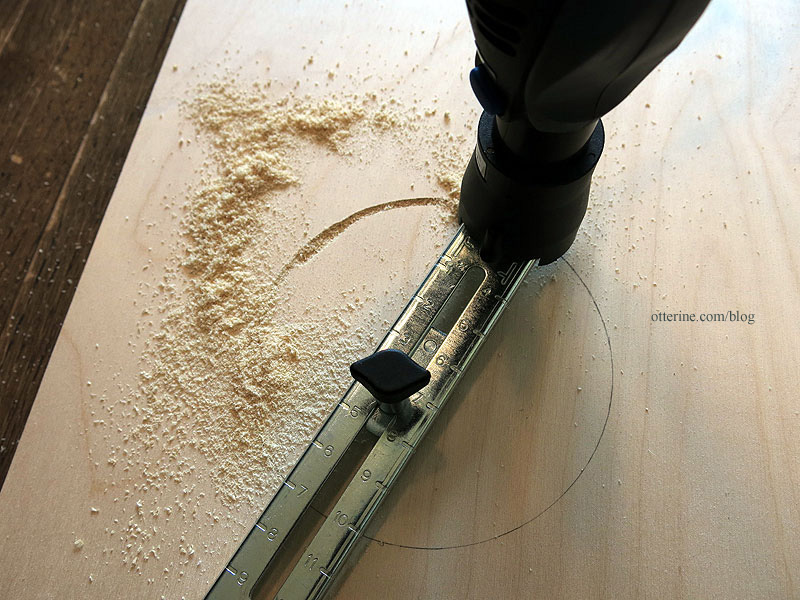
I’ve cut circular openings with the standard Dremel before, so that’s what I’ve used for the bedroom window, which is a 2 1/4″ Simplicity Window from Heritage Laser Works.
In my class with Tom Walden, I learned to make multiple passes with the Dremel to get a clean cut. That was my issue the first time I tried cutting circles; I tried cutting too much thickness at once. My issue this time was not checking the knob holding the pivot point in place after the first cut. The vibration loosened it, so it was cutting a larger circle than I wanted. I didn’t notice this until it was full on traveling outside the circle.
This is a fairly simple fix, though, so I just shrugged. I still swore, mind you. :D I filled the wayward hole with wood putty. I’ll wrap some cardboard circles to fill in some of the diameter of the hole. It will all be covered by interior and exterior finishes in the end.
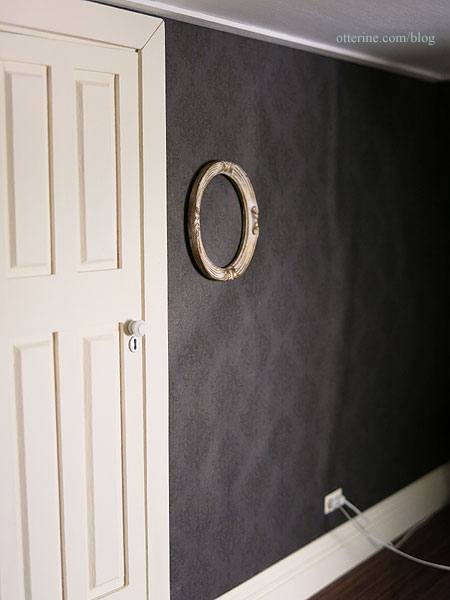
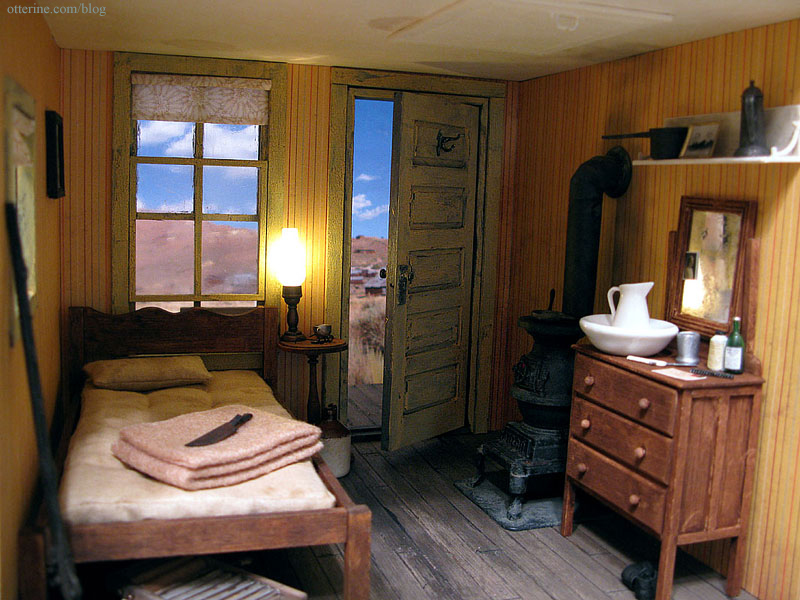
There will be interior lighting, but I wanted to see how these openings effect the natural flow of light inside the mill. Back into dry fit. While another front window would be lovely, it would cut down on wall space, which is at a premium as is. I’m planning some shelves above the trolley, which may be replaced since it is a rather wide piece for the space.
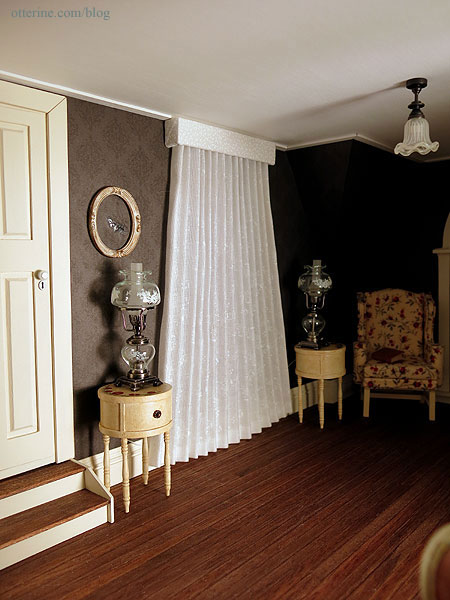
Since the white paper I was using for the roof allowed light in, I tested the dry fit with black paper this time around. The bedroom is dark, but I think it’s cozy. With some added lamps, I think it will be just fine. Plus, the ceiling won’t be black in the end. I’ll skip adding any side windows here, therefore preserving wall space for decorating.
Categories: Tools, Watson Mill
May 27, 2017 | 0 commentsDremel circle cutter and edge guides
Today was power tool day. I mentioned how loud the cutting part was when I cut some plywood circles, so I bought a pair of quality ear plugs.
They come in a little plastic case for safe keeping. I can highly recommend these — there was zero discomfort in cutting today. Mushroom trees!
Here is the Dremel 678-01 Circle Cutter and Straight Edge Guide, which makes circles from 3/4″ to 12″ in diameter.
I used this to make a circular hole in one of the side walls of the Creatin’ Contest kit (Otter Cove).
I wanted to make the existing window opening larger, so I thought that would give me the opportunity to try out the edge guide.
Here is the edge guide attached to the Dremel.
I set up the guide to follow the straight edge, using the existing window opening as a guide.
I cut to the end and then turned the tool to follow the next edge.
The remaining two cuts were too far in for this particular edge guide to work, so I moved over to the Dremel TR800 Circle Cutter and Edge Guide which allows for cuts farther away from the edge. The clamps I used to hold my boards in place are Jorgensen 6″ bar clamps, and they are heavy beasts. :D
I personally think the Trio edge cutter is easier to work with since the cutting area is open and you can easily see where you’re going, but both did what they were meant to do.
It’s not a perfect end cut, but considering it was my first time using the attachments I think it worked well. There will be final finishes anyway, so the rough openings are all I needed. With practice, it will go more smoothly as it did with the circle cutting.
That’s looking good! :D
I’ve mentioned previously that Jasper stays out of places that are occupied. This is what happens when you empty a cabinet space and forget to close the door.
Categories: Tools
February 21, 2015 | 0 commentsCutting circular openings
I recently picked up a new attachment for my Dremel rotary tool: a circle cutter and straight edge guide. In this post, I’ll show you its circle cutting capabilities. This makes circles from 3/4″ to 12″ in diameter.
I’m using scrap pieces of 1/4″ plywood here to get a feel for the tool the first time around. I’ve marked my outer circle and the center point.
I loosened the guide and adjusted the cutting bit to fit the circle.
The attachment has a pin that is 1/8″ in diameter. I drilled a hole on the center point using the same sized drill bit. You also use the same sized cutting bit, so a hole is needed for the bit as well.
You slip the pin into the center hole and then cut around the circle with the cutting bit.
This is my fourth practice run, and I’ve managed a reasonably clean circular opening. Just a little sanding to fine tune it is needed. Hooray! :D
It was not easy (and it’s very loud), but I am sure with practice (and earplugs) it will get better. And, you’re left with a better opening than you could achieve with a scroll saw or hand tools. (These cuts were done for Roland’s Retreat.)
Categories: Tools
September 27, 2014 | 0 commentsThrowing away the Yes paste
Yes paste is a big No for me now. I’m not sure where I read about Yes! paste being used for dollhouse wallpaper, but I wish I had never seen it. It has failed in every dollhouse I’ve made where it was used. :[
You saw my repair in the Haunted Heritage. There are other places in the Heritage where the paper has separated, but it is not noticeable.
Before:
After:
For Baslow Ranch, it’s an old building so wallpaper ripples are no issue. There is only one room with paper and while it has separated some, the gap isn’t noticeable and it’s not rippled just loose.
In The Artist’s Studio, however, it is very obvious and a repair on this blank wall will require removal of the old paper and redoing it using Wallpaper Mucilage. What’s bothersome is this is a very recent build and the paste failed that soon.
The worst of them is the Baxter Pinte Villa kitchen. This is what it used to look like.
Now it is a couple of years old and most of the paper throughout remains intact. Except around the kitchen…including the walls, ceiling paper and part of the wall above in the bathroom. The bathroom repair will be easy – just slip some new, better glue under the edge and clamp.
I did a complete demo on the kitchen since the whole thing needs to be redone. I am planning to list this house for sale, so it needs a kitchen redo first.
The primer paint is completely desiccated and crumbling.
Maybe that is the issue with Yes paste; maybe it doesn’t bind well to painted surfaces. Either way, it’s already in the trash can. Buh-bye, Yes paste.
Well, I guess if I am going to renovate, I should have some fun with the photos. :D
Baxter Pointe Villa is closed for repairs.
——-
Update: here is the product I use now…Wallpaper Mucilage.Categories: Tools
December 28, 2013 | 0 commentsWallpaper Mucilage, I love you!
Ok, maybe that’s a bit dramatic, but I definitely have a new stand-by! A couple of people here and on the Greenleaf forum recommended the wallpaper mucilage that miniatures.com carries. I ordered a jar to give it a try. Now, it is a small container for $7, but you don’t have to use very much. And, why get a huge jar if it will just dry out before you can use the whole thing?
I tried it on a scrap of paper, applying it directly to the paper instead of the wall this time. It did curl the paper a little but it wasn’t unmanageable.
I stuck the paper to my primed scrap board and it stayed put right away. I could move it a little if needed, but I didn’t have to constantly press the edges to get it to work. There was no buckling of the paper, either. This is vintage Millie August dollhouse wallpaper called Bonnie Brae. :D
To be fair, I tried the same glue-to-paper technique using the True Value real life wallpaper adhesive that some had recommended.
It really curled the paper. This would be an issue all by itself since curling makes it hard to keep the paper from sticking to itself and getting paste on the good side, but also the paper didn’t want to stick to the primed wall. I am guessing you really have to slather this on, which would be fine for thick real life wallpaper but not for mini papers.
I tried the True Value real life wallpaper adhesive on some wood flooring sheet, too. While it gave a decent hold after it dried, getting it to stick in the first place was a pain. I tried the MiniGraphics wallpaper mucilage on the same flooring, and it worked like a charm. So, I nixed the real life paste for the MiniGraphics wallpaper mucilage.
The next test was to use the MiniGraphics mucilage on a cut piece of wallpaper. I applied it with a foam brush and the curling was minimal. It stuck to the wall, allowed me to reposition (quickly) and then stayed put. No, can’t show you that part. :D
Since only time will tell if the MiniGraphics mucilage will hold up to humidity, I can’t say for sure it is foolproof. But, I ran some water over both samples and the True Value pasted paper buckled whereas the MiniGraphics pasted paper did not. That’s a good sign.
I’m not really sure why I was so insistent on using Yes paste. I’ve seen it recommended before, but now it’s no more Yes for me.
Categories: Tools
November 30, 2013 | 0 comments
NOTE: All content on otterine.com is copyrighted and may not be reproduced in part or in whole. It takes a lot of time and effort to write and photograph for my blog. Please ask permission before reproducing any of my content. (More on copyright)