


NOTE: All content on otterine.com is copyrighted and may not be reproduced in part or in whole. It takes a lot of time and effort to write and photograph for my blog. Please ask permission before reproducing any of my content. (More on copyright)

Categories:
Newport powder room
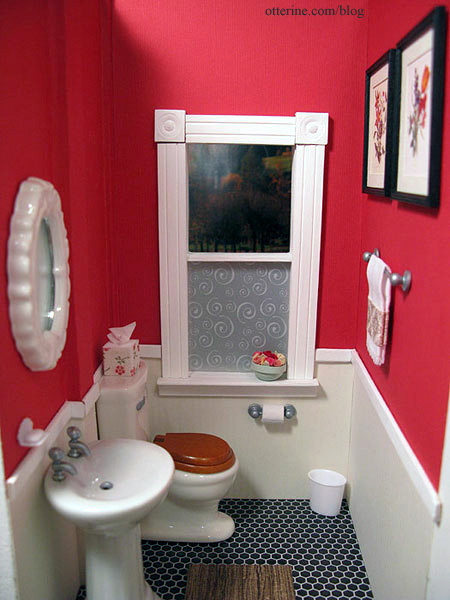
One of the best features of the Newport is its tower, but that makes for an awkward space on the inside. I thought the nook created by the tower walls had potential as a powder room.
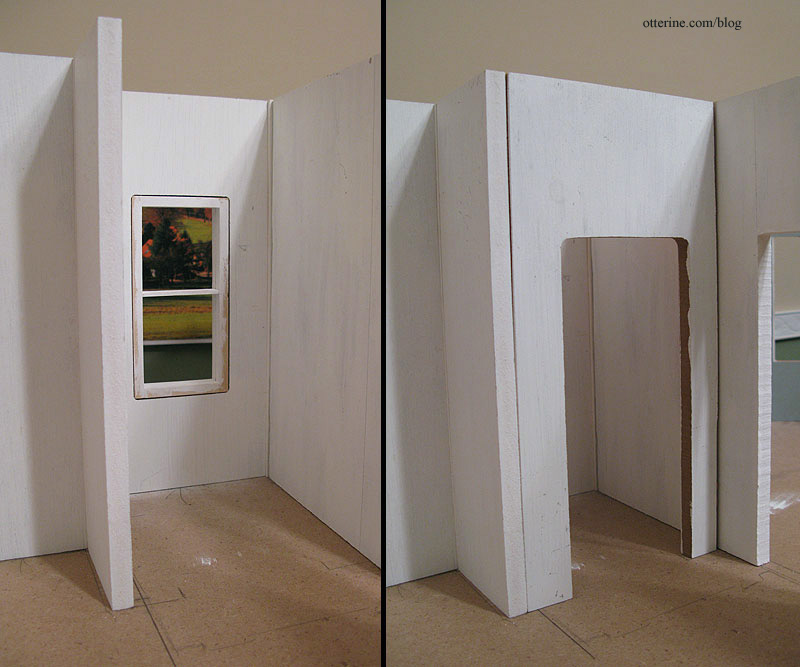
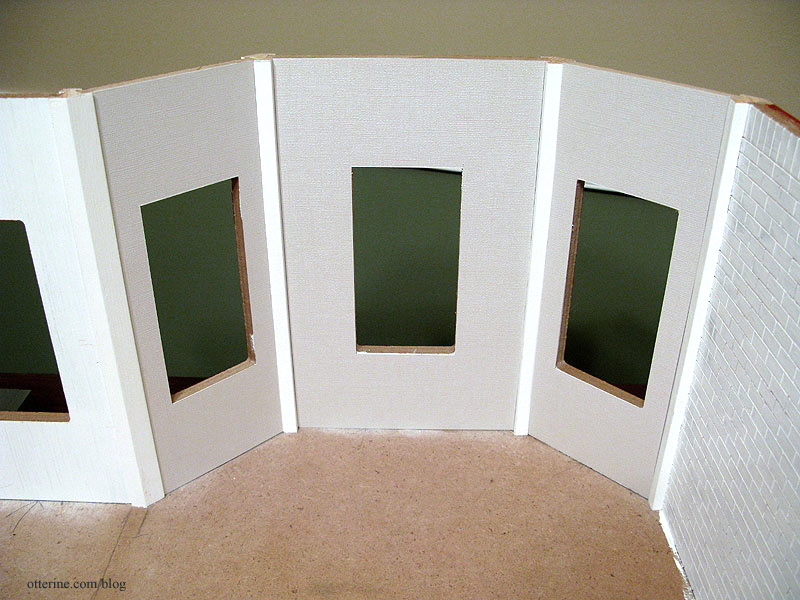
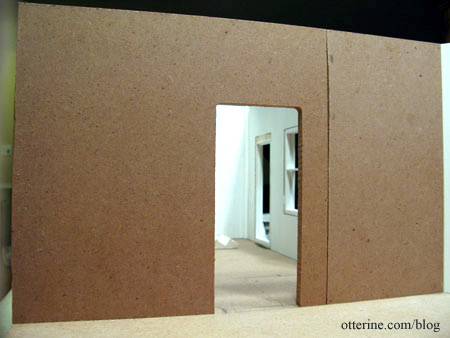
I used one of the small dividers from the original kit that was meant to divide the kitchen and dining areas. I liked the open concept of the kitchen, so these were leftover pieces to begin with. I cut down the short divider wall with one doorway to serve as the removable wall to the powder room. I wouldn’t be using this wall either since I had other plans for the second floor. I needed the wall to be removable since I wouldn’t be able to access this room once the second floor was put in place.
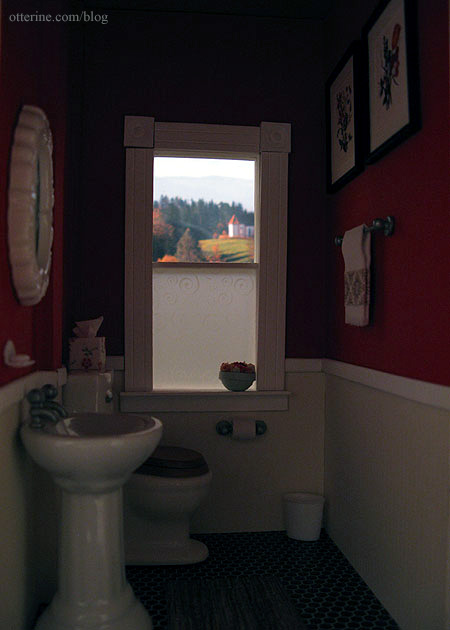
Below, the image on the left shows only the small divider wall, and the image on the right shows the removable front wall in place. The autumn scene in the background is a clipart image printed on 11″ x 17″ paper.
The walls are covered with two colors of scrapbook paper: Grenadine by Bazzill Basics on the top and Blonde Columns by ANW Crestwood on the bottom. The bottom paper has a vertical line texture that mimics wainscoting. The chair rail is made from skinny sticks. For the floor, I used a sheet of the same black hexagon tile I had used for the garage flooring treatment. The wallpaper is glued in place, but the trims are being held with Mini-Hold at the moment. I still need to cut the baseboards and touch up the trim pieces before gluing them in permanently. The rug is a scrap of silk wallpaper.
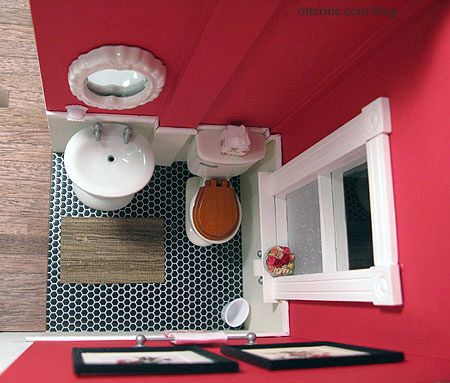
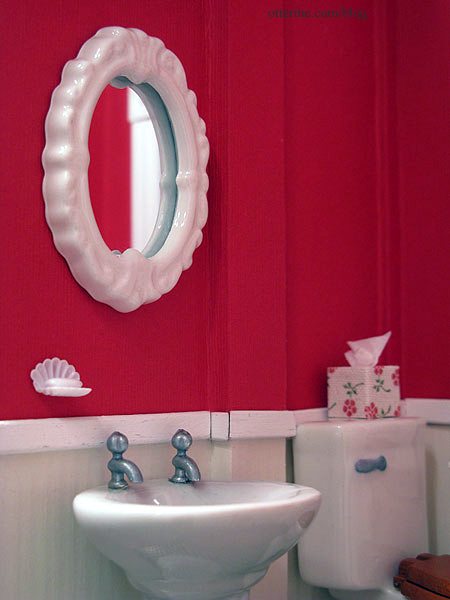
The commode and pedestal sink are from HBS; I used silver paint on the brass faucets and to add a handle on the commode. The ceramic mirror is by Town Square Miniatures; the wastebasket and soap dish with soap are from a Chrysnbon kit.
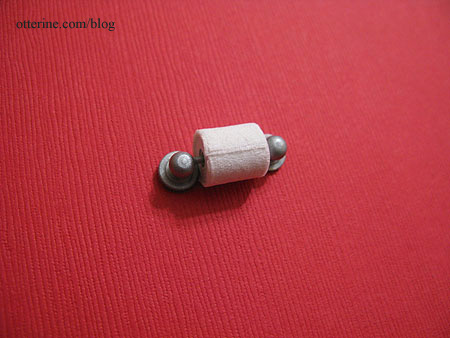
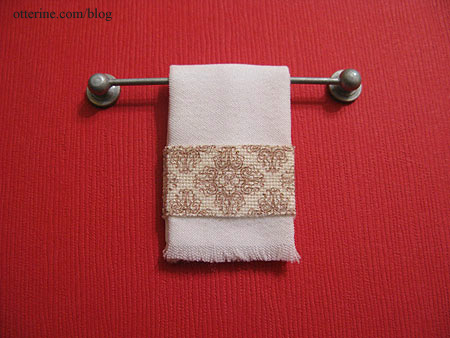
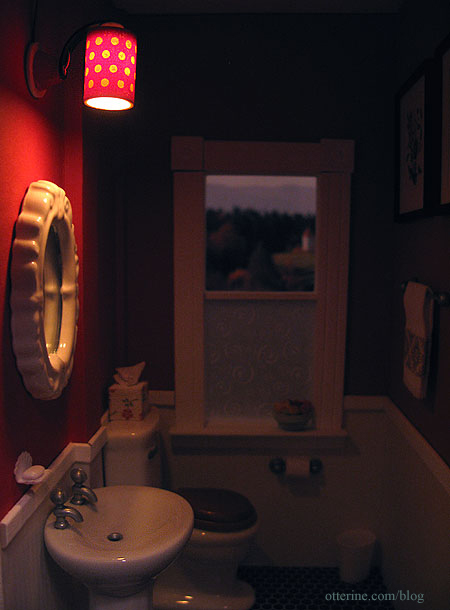
The towel bar and toilet paper holder were also brass originally. The toilet paper roll is a wood bead that came with the set. I took a bit of actual toilet paper and glued a few rounds onto the wood bead.
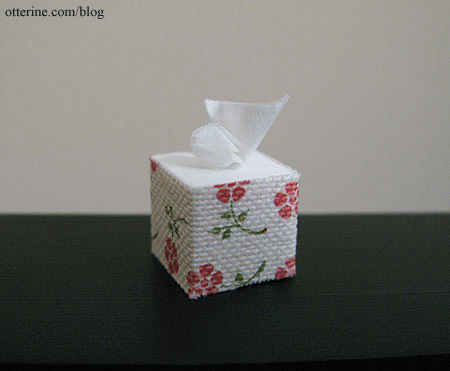
The tissue container is a 3/8″ wood block that I painted white on top and then covered around the sides using a self-stick fabric border by Martha Stewart with a bit of real tissue glued on top.
I used another self-stick border from the same pack to embellish the towel, which I made from a scrap of stretch satin (the shiny side turned inside). I used the factory selvage to serve as the fringe that shows in the front. It is folded, pressed and glued into shape but is removable from the towel bar.
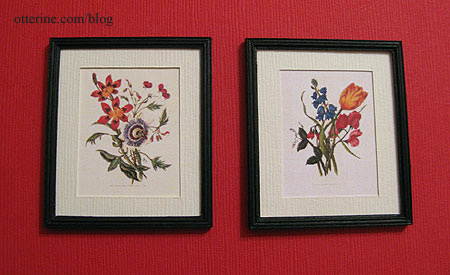
The two prints are made from artwork by Mary Lawrence: Passion Flower and Tulip. I printed the size I wanted, mounted them on balsa, cut mats from cardstock and made frames in the same manner as the bird prints.
The roses and the bowl are made from quilling paper. My grandma taught me this art, and I made these over 25 years ago.

Since the powder room window is right off the front porch, adding some privacy was necessary. To mimic the look of etched glass, I used Vellum Swirls paper by Hot off the Press to line the lower half of the window.
After getting everything in place, I decided I rather liked leaving the removable wall out so I could see the room with all its details. I decorated it with matching paper just in case, but for now I plan to leave it out. I’ll likely use strip wood to finish the edges of the room and cover the wallpaper seams between the powder room and living room when I get that far.
When I renovated my childhood dollhouse for my young cousin, I removed all but one of the original Lundby light fixtures and kept my favorite: a small red and white polka dot wall sconce. It shows its age, but I still think it’s great.
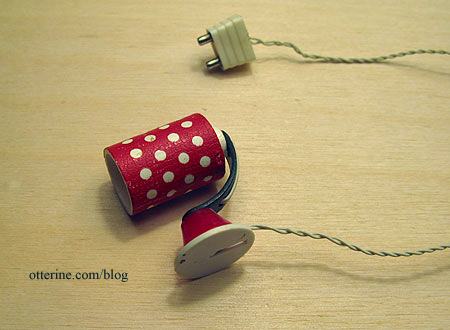
With some electrification experience under my belt, I bought a package of mini light bulbs and rewired the lamp since the bulb had burned out long ago.
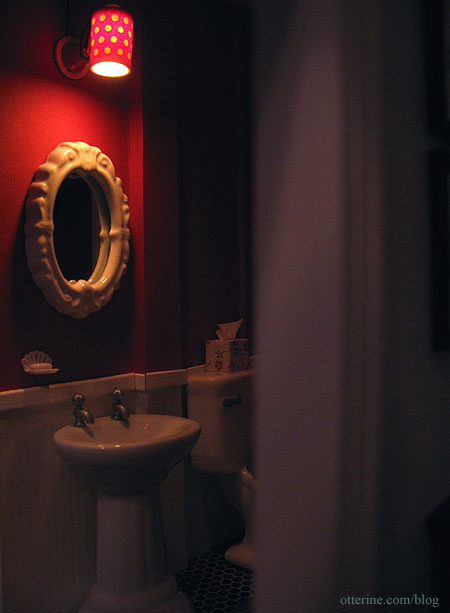
I think it’s the perfect complement to the red powder room, its slightly worn condition adding some vintage charm. :D
Categories: The Newport
February 3, 2010 | 0 commentsNewport kitchen, part 1
Though the Newport was sold eventually, I’ve compiled some of the posts I made when I first started building it.
—-
I have always liked the way exposed brick walls look in interior design. When I started planning the garage addition, I realized that very little of the outer brick wall would be seen from the front. It seemed a shame to cover it with a liner for the interior wall of the garage. So, when I assembled the first floor, I flipped the outer wall so the kitchen and dining room would have an exposed brick wall.
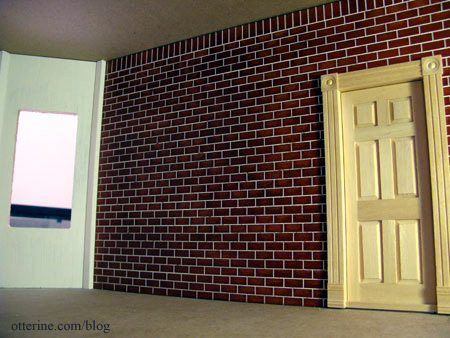
I knew I wanted painted cabinets, but I had a hard time deciding on a color scheme. I searched through countless online sites for ideas and stumbled upon something I would never have thought of: red cabinets. I like the cream upper cabinets shown in this photo I found online, so I am not sure if I will go with red for both the upper and lower cabinets for my kitchen or follow this example.

With red cabinets, the red brick wall I had originally planned for the kitchen would need to be modified. Otherwise, it would be too much red. I painted the brick white, which brightened up the entire room. For the wallpaper, I chose Bazzill Basics scrapbook paper in a light grey/white called Glass Slipper; it has an iridescent sheen to it. I needed something pale to offset the pop of red.
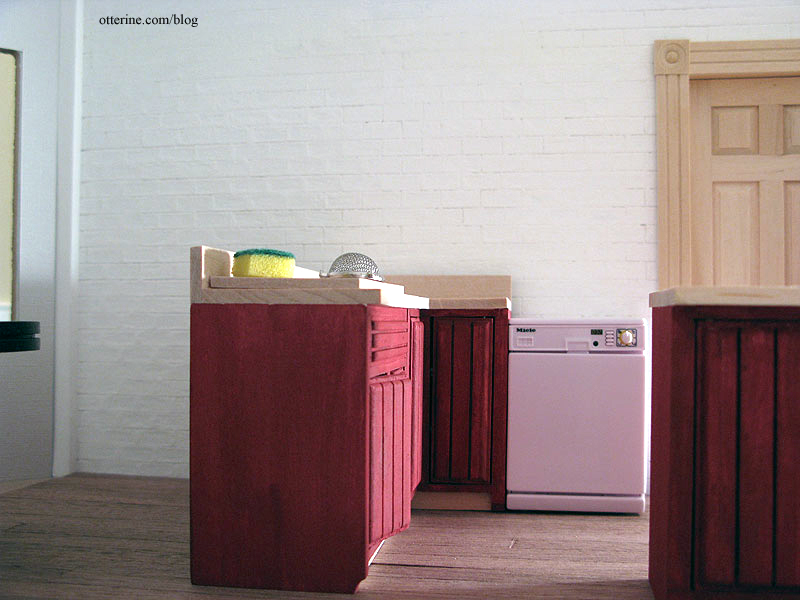
The island, sink cabinet and corner cabinets are Euro Mini’s. I filled the hardware holes, because I wanted to put them higher on the doors. It didn’t make sense for them to be so low on the doors of floor cabinets. For the sink cabinet, I wanted a different look than knobs, like the example above.

In order to have the ability to put items closer to the back edge, I cut the main single-door room divider on the opposite side into two pieces and then glued them back together to have the door opening in the middle. I used spackling to smooth out the seam so it wouldn’t show under the wallpaper.
I masked the tops and baseboards of the three cabinets and then applied one coat of Apple Barrel paint in Barn Red. I liked that the wood grain showed through, so I opted not to paint a second coat. I am still mulling over color ideas for the countertops and baseboards. Once fully painted, I will add a coat of satin sealer to give them a shine.

There will also be two or three floor cabinets with drawers, but I haven’t completed them yet. The wood floor is one possibility, but I am also considering other options. So far, I really like it.
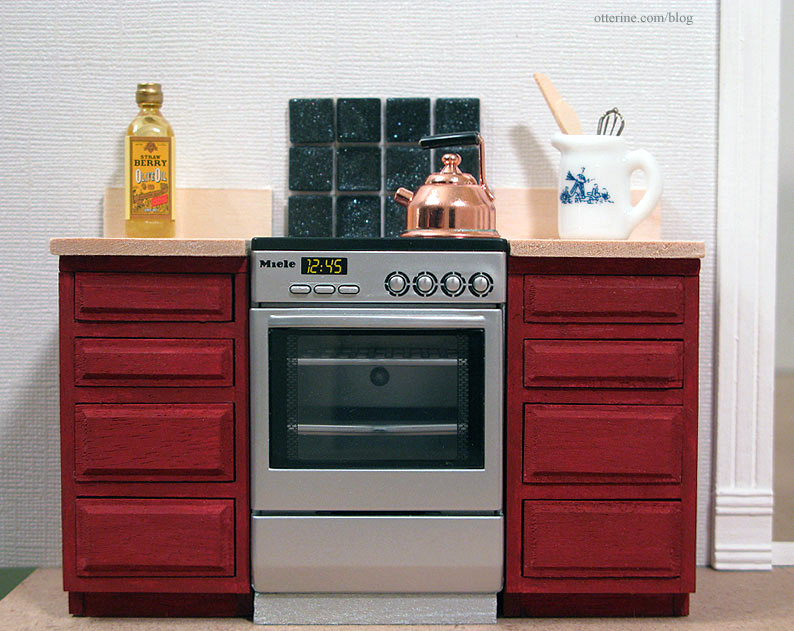
I used two base cabinets by Houseworks with four drawers on either side of the oven.Since the drawer cabinets come from a different manufacturer, I had to make a few adjustments to make them blend with the Euro Mini’s. I added a front baseboard, a thin strip of wood above the top drawer to make the front flush and cut a countertop with a backsplash.

The Miele oven is shorter than the surrounding cabinets. To fix this, I built a base out of scrap wood and gouged out holes to accommodate the feet on the bottom of the oven. I then painted the front of the base silver.
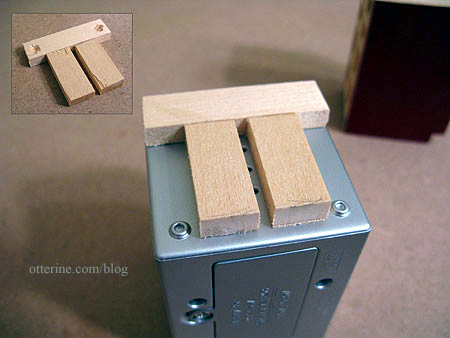
The countertops still need finishing and there will be hardware added, and now that I see this photo I might end up painting the oven base black to make it less obvious. The backsplash shown is a sheet of scrapbook stickers; they are plastic and iridescent. I don’t know if I will use these exact pieces, but I plan to add some sort of backsplash behind the oven.
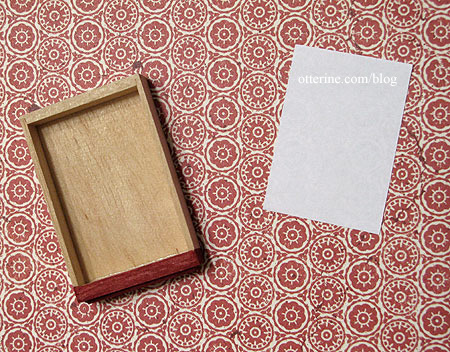
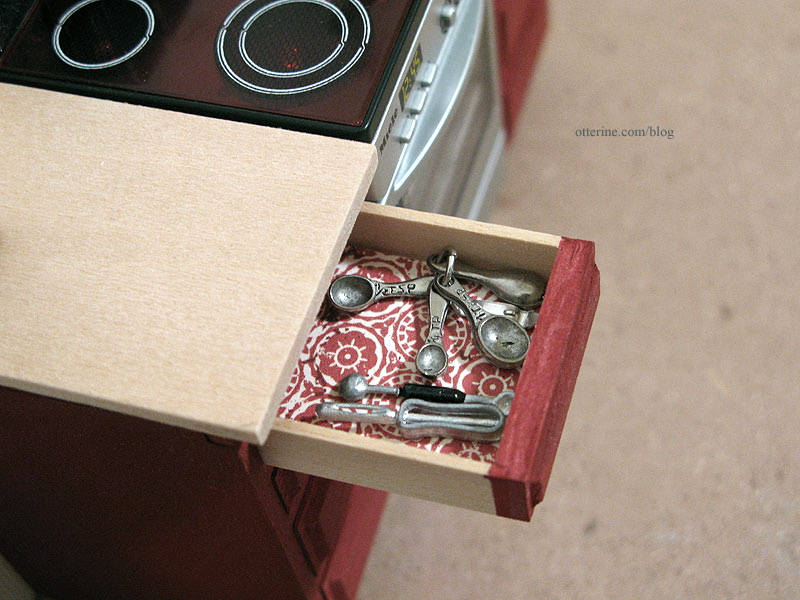
One thing I like most about this miniaturist hobby is putting in hidden elements. They aren’t necessary to make the overall room look realistic, but they are fun to add. I used scrapbook paper from BasicGrey called Vintage Tee to mimic contact paper in the drawers.
The miniatures came from eBay. I just love the look of this! :D
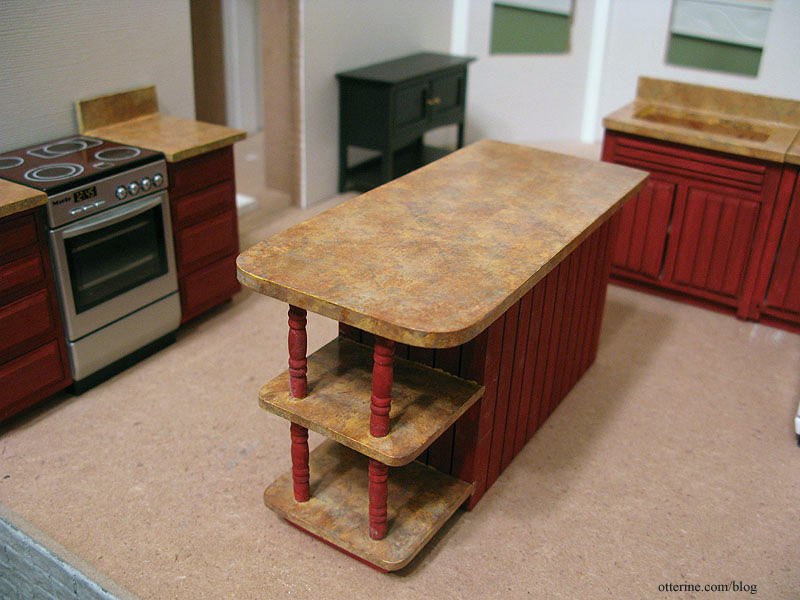
I wanted to do a faux granite finish for the countertops, so I used the technique shown in the DVD by Master Miniaturists called Faux Finishes.
I first taped off the lower portions of the cabinets with wax paper and painter’s tape.

I then gave all the countertop pieces a base coat of Moon Yellow by Americana. I then began layering different paints to get the look I wanted using a small stencil brush and a paper towel to blot the excess color. I used Nutmeg, Vintage White, Mushroom and Coffee Bean by Folk Art as well as Pure Bronze by Apple Barrel. I like this process since you can easily just go over any parts you don’t like. In fact, adding layer after layer adds to the depth of the granite finish.
After a few coats of gloss finish with steel wool application in between, I ended up with a decent countertop. I still need to clean up the places where the paint seeped under the tape and onto the red portions.
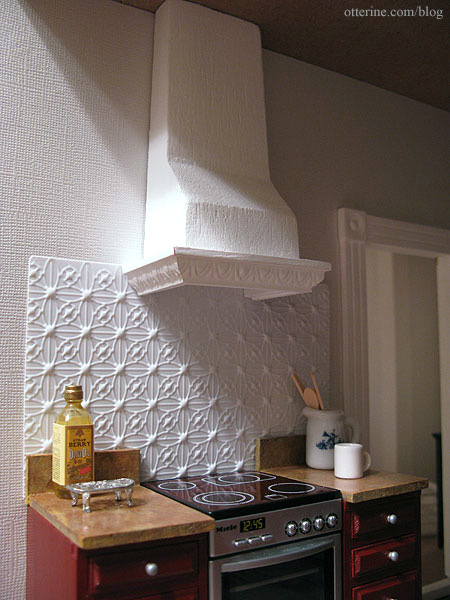
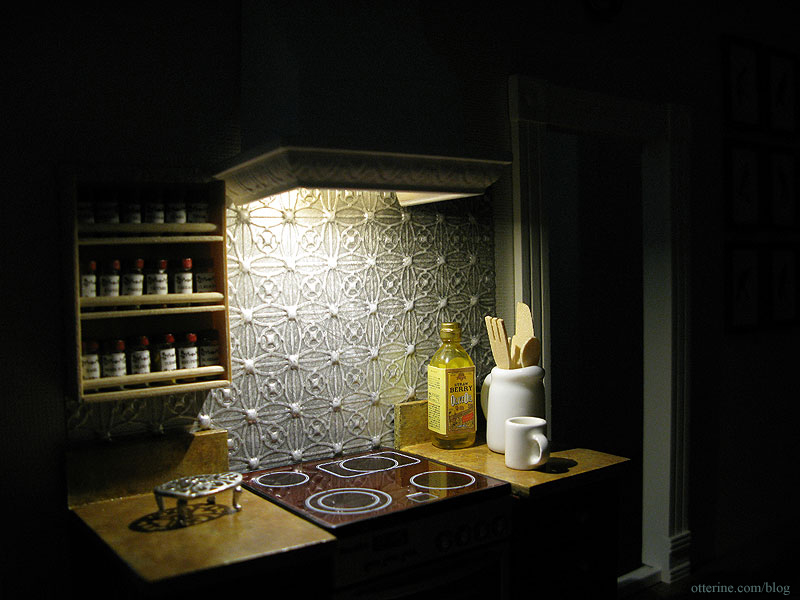
Originally I was going to make upper kitchen cabinets and a range hood for this side of the kitchen. But, after making a mockup of the range hood, I decided I liked it on its own. The range hood is made from a block of balsa and decorative wood trim. I built a lip on the bottom of the balsa base so it would look like there was a vent. I searched for more ideas online and found some nice images of tin ceiling tiles used as a backsplash. It seemed like something fairly easy to replicate since Houseworks makes a sheet of vinyl molded to mimic tin ceilings.
After mounting the range hood with tape and placing the ceiling board on, I marked where I wanted the tin tiles to end. I plan to paint the vinyl sheet and the range hood.
I had built a lip on the bottom of my range hood to give a more realistic look and to have room to add a light. I chose an LED strip in warm white by Novalyte, cutting a rough hole in the balsa to hold the light in place. These lights are compatible with 12V dollhouse lighting. I drilled a hole through to the back; the wires will run through the wall and plug into the power strip.
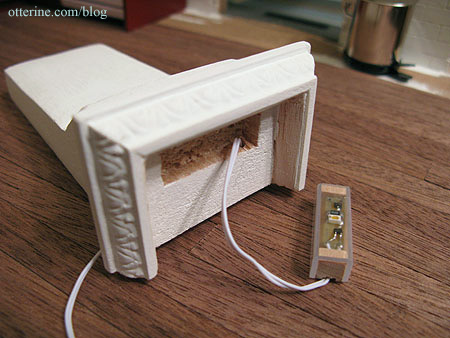
Here is the light in the mockup phase to check the fit.
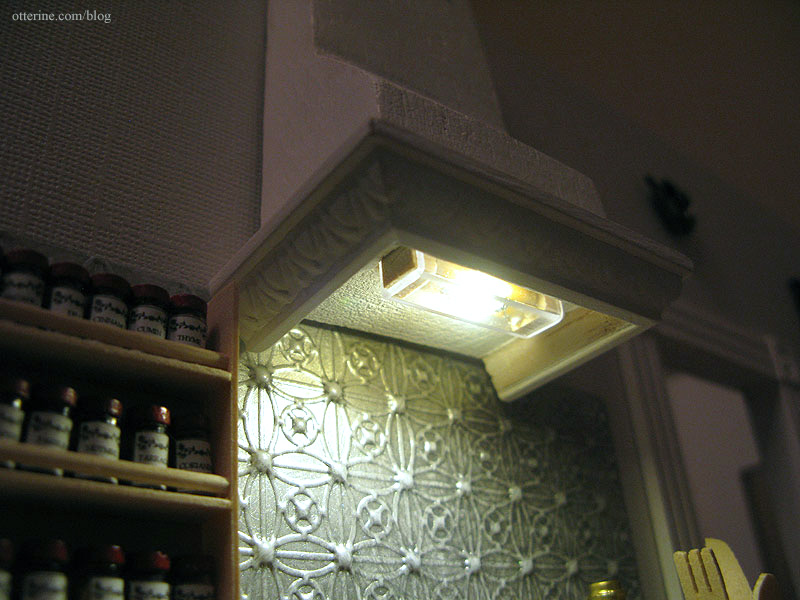
Lights out! This is exactly the look I wanted.
Categories: The Newport
January 23, 2010 | 0 commentsChristmas at the Newport
After seeing several holiday inspired dollhouse scenes, I decided to go ahead and put one in the Newport even though the house itself is far from complete.
Michael’s was having a 50% off sale on their Lemax Christmas items, so I bought what equates to an 8ft blue spruce to set up in the study. It came with a snow mound for a base, but I planned to cover it with a tree skirt and presents.

Michael’s also had ornaments and strands of garland by Merry Minis. I used a mini star ornament as the tree topper.
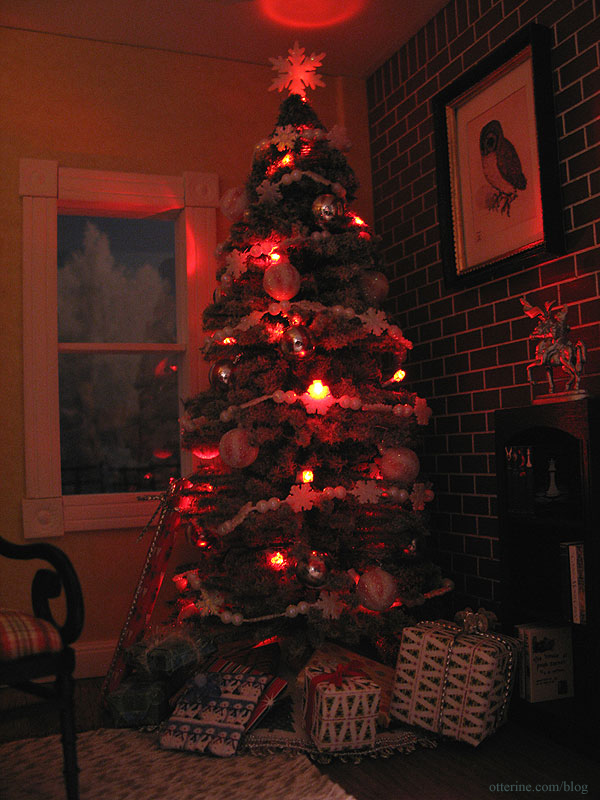
The lights are by Dept. 56, and I bought those on eBay. I made the tree skirt and gifts.
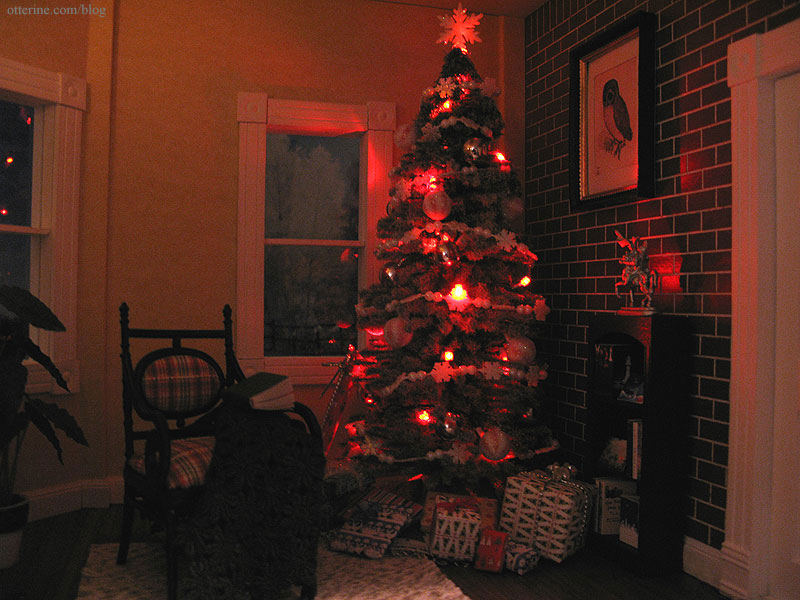
I made the throw blanket. The winter scene backdrop outside the window is an image called Winter Landscape and Trees by Icefront that I printed from Crestock.com and taped to a board to hold it in place.
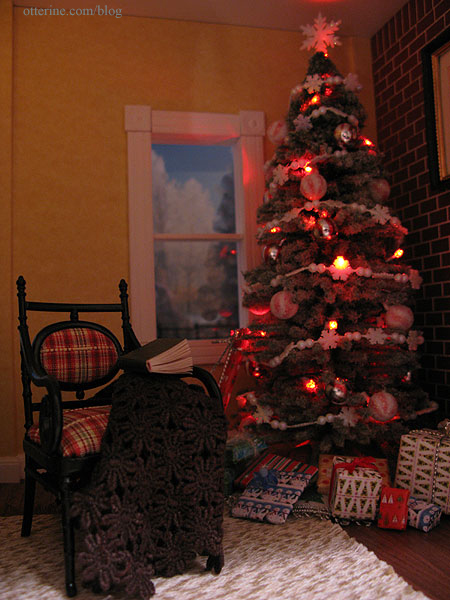
On the bookshelf are some of the Christmas cards I printed.
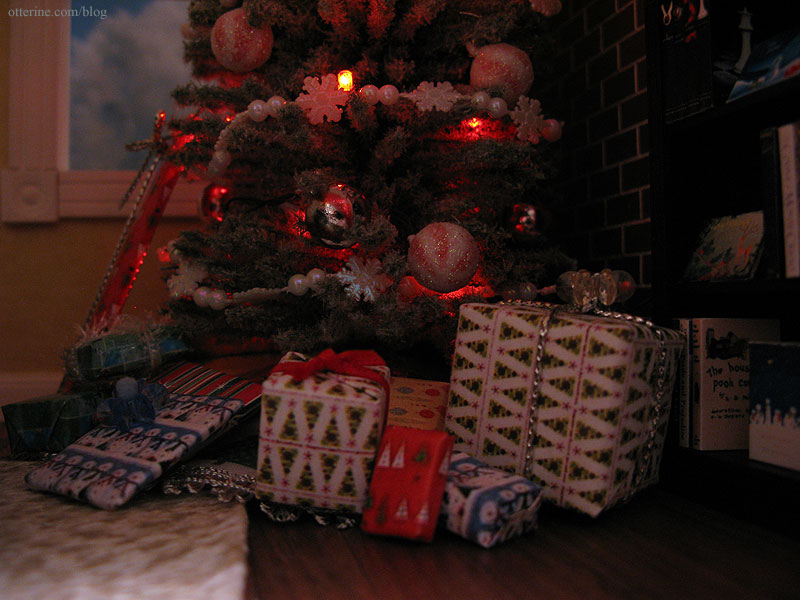
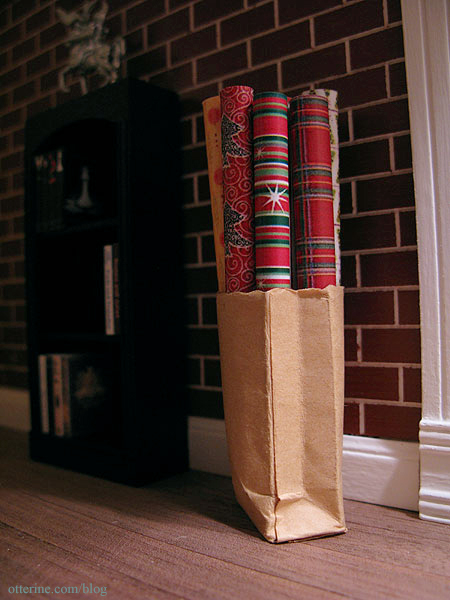
I made the Christmas wrap. I bought a bag of random minis from craigslist, and the grocery bag was part of the lot.
The garland on the mantel is from HBS; I added the red ribbon bows and cards.

The room itself is still incomplete but coming along nicely. I will continue to put things together and perhaps add some more Christmas décor before Santa comes. :D
Categories: The Newport
December 21, 2009 | 0 commentsNewport study with fireplace, part 4
Though the Newport was sold eventually, I’ve compiled some of the posts I made when I first started building it.
—-
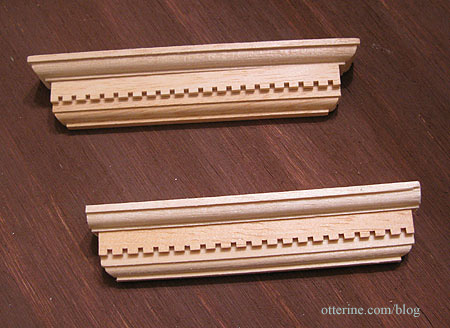
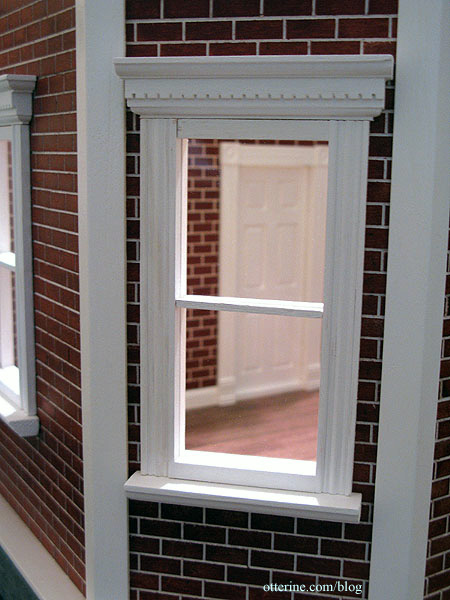
Continuing work on the study with fireplace. In order to decorate for Christmas, I had to get the study in nearly complete order. I installed the windows with newly cut acrylic inserts to replace the printed ones that came with the kit. I had previously upgraded the windows to include Yorktown pediments by Houseworks on the exterior, but these needed to be cut down for the window located on the angled wall since they were too wide to fit between the connectors. I will have to cut down the pediments on the bay areas of the main house as well for the same reason.
Here’s the view on the exterior. Even though the side pediments are cut down, they don’t look incomplete. Nothing is glued in place yet, so the gaps and imperfections will be sanded and painted further before I glue them in permanently.
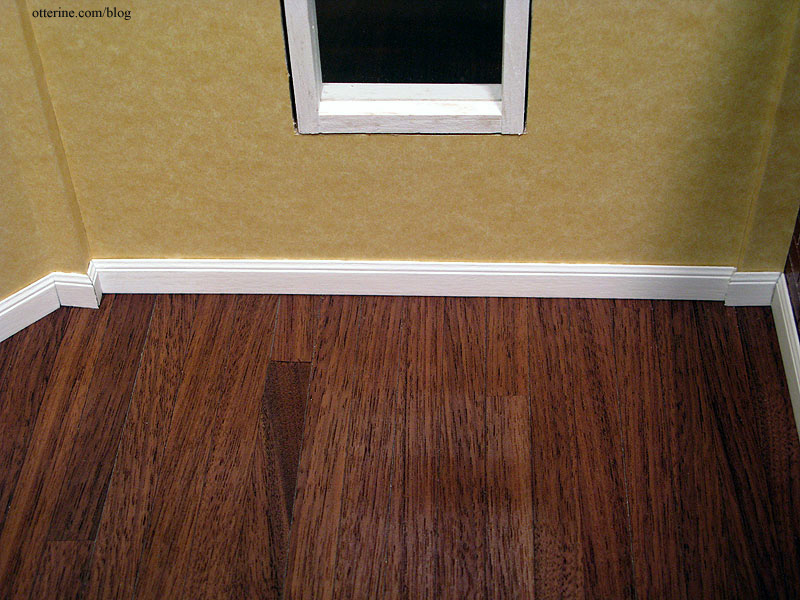
I sprayed the wood flooring with matte sealer (two coats). I like how it warmed up the color and brought out the detail of the wood grain. [Update below]
I used Houseworks baseboards along the perimeter; each board has a groove on the back to hide wires. I think this has been my least favorite part so far. The main problem is cutting around the wall connectors, which results in a lot of little pieces with angles on either end. But, it really adds a lot of realism to the room, so I just keep cutting and cutting and cutting until I get the pieces right. (In later builds, I do my best to eliminate these types of corners by padding walls or removing the interior portions of connectors.)
I used Houseworks trims around the interior of the windows to match the Traditional Block & Trim interior door, also by Houseworks. The windows and their related interior trims are not glued in place so I can remove them to continue the build without any worry of damaging them.
Update 01-15-10:
Since this post, the spray sealer has broken down and the finish has become mottled (below the old floor is shown on top of a fresh sheet of flooring). I removed the old flooring and replaced it with a new piece, but I won’t be using the same spray sealer again.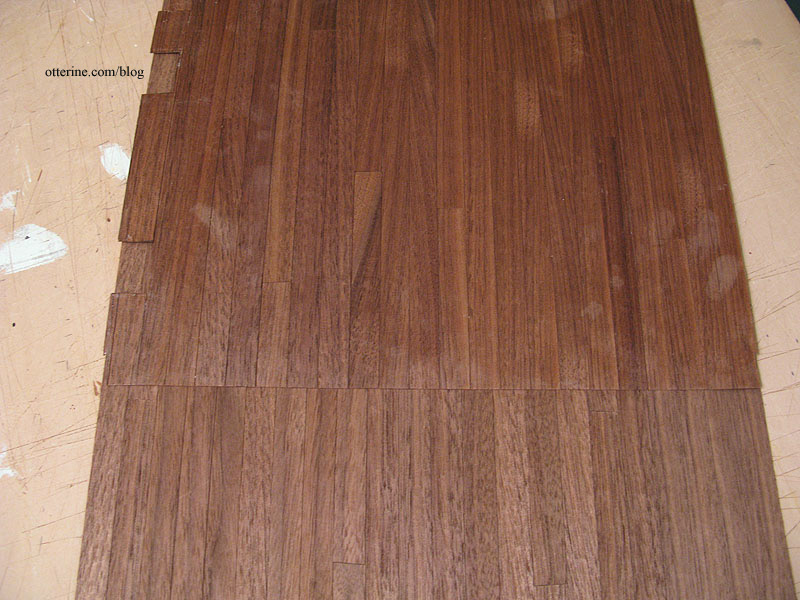
Update 02-20-10:
I sprayed the second piece of flooring for the study with Minwax Water-Based Polycrylic protective finish in clear semi-gloss, and the results were perfect. It too warmed up the wood tones and stayed even and smooth after two weeks.Categories: The Newport
December 20, 2009 | 0 commentsNewport study with fireplace, part 3
Though the Newport was sold eventually, I’ve compiled some of the posts I made when I first started building it.
—-
Continuing work on the study with fireplace. The first step of installing the flooring was to make a template of the room. I cut a rough outline and then taped bits of paper to cover any open areas. This method makes up for any warping there may be along the edges of the room.
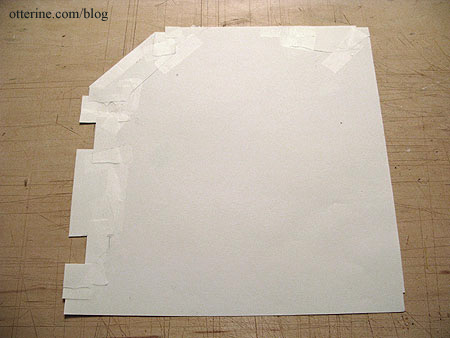
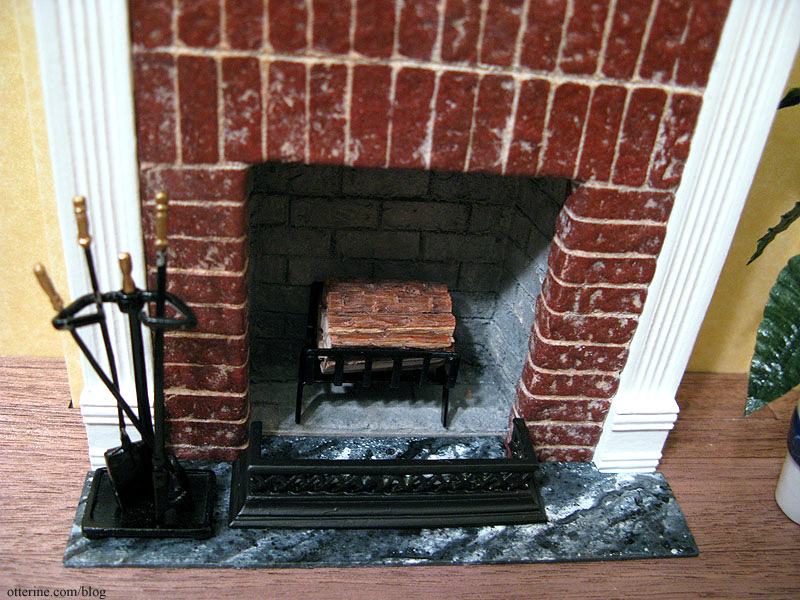
I used dark wood flooring by Handley House; it comes on a paper backing so you can cut a single piece of flooring using a template instead of laying the wood down strip by strip. I did have to piece the wood a bit by the fireplace wall since the sheet was not wide enough to cover the entire width of the room.
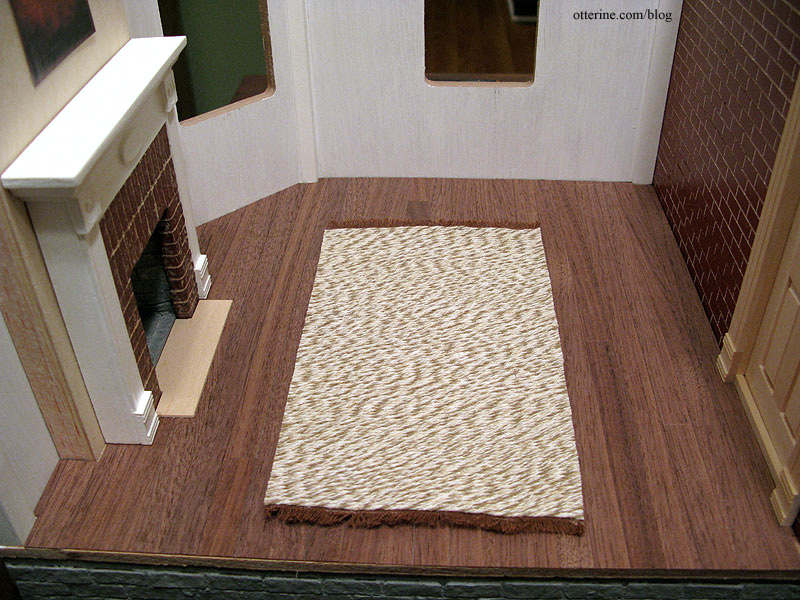
The flooring isn’t permanently affixed yet. There are a few gaps from the wall, but I think it turned out well for my first attempt at wood flooring. I painted the edges where the base floor will show to make the gaps less obvious, and there will be a baseboard around the perimeter as well.

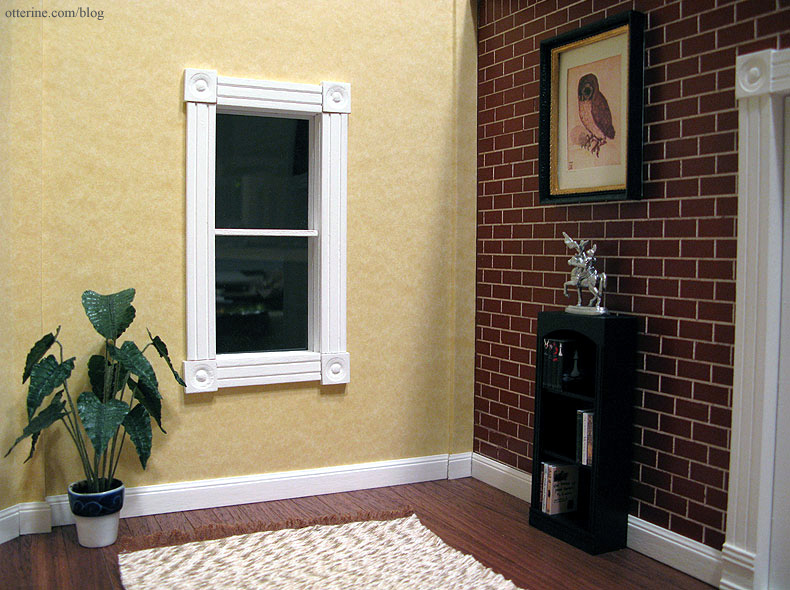
I drilled holes in the chimney breast for the sconces and then glued the assembly to the wall. I used Yes! paste to attach the wallpaper (scrapbook paper by The Paper Company called Parchment Tan). There are three separate pieces. The first one I glued in place was on the angled wall with the window. I cut it with roughly 1/4″ edges on either side to go under the other two pieces to prevent gaps along the seams. (Note: I no longer recommend Yes paste – I use Wallpaper Mucilage instead. Yes paste has problems with longevity.)
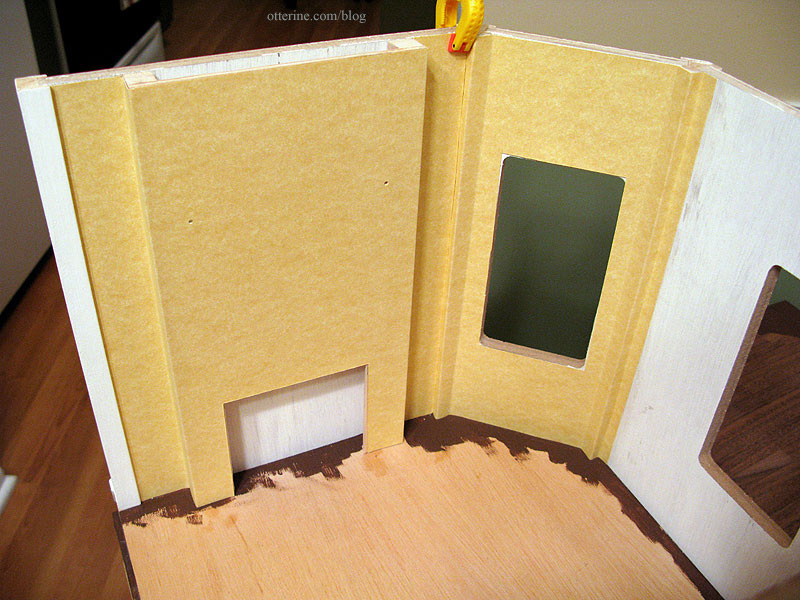
Once the wallpaper was done, I ran the wires for the sconces through the chimney breast. I plan to pull the wires up through the ceiling and run them along the floor of the second story to the power strip.

I think I am getting the hang of electrification! :D
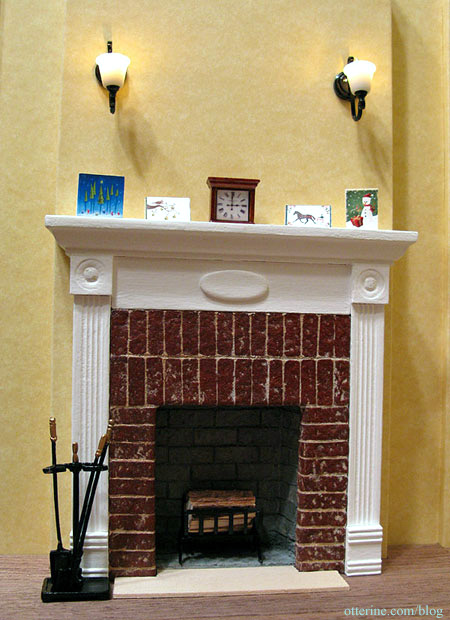
The painting above the fireplace is a cutout from a catalog I had years ago. Unfortunately, when I ripped it out, I didn’t get the full name of the artist, only the first name of Leigh. From what text is there, I think the title of the work is called Jeweled Cove (or at least begins with those words), though I haven’t been able to turn up anything on the internet about it.
I glued the paper image to a thin piece of balsa then cut and painted a wood frame to surround it. I bought the clock on eBay, and the elephants I’ve had for over twenty years.
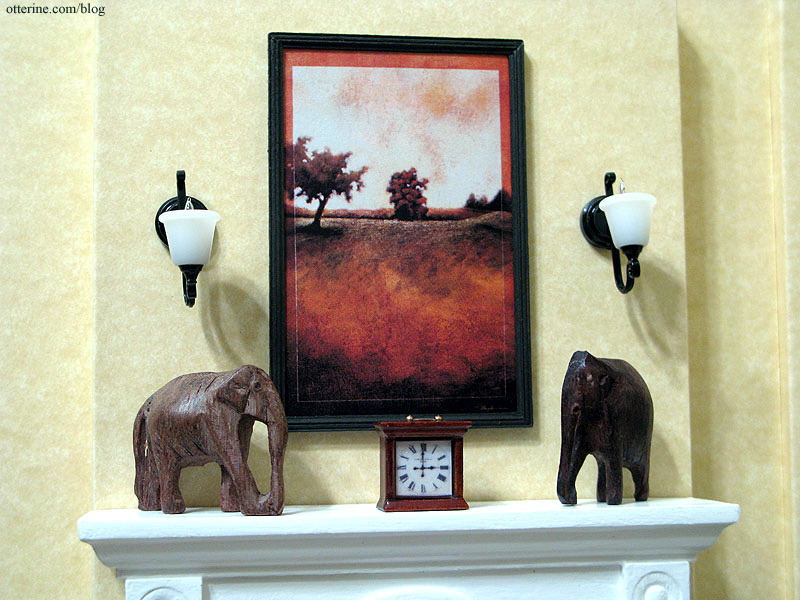
The fireplace fence is by Town Square Miniatures and was originally brass that I painted with acrylic paint to make it look like wrought iron.
Categories: The Newport
December 13, 2009 | 0 comments
NOTE: All content on otterine.com is copyrighted and may not be reproduced in part or in whole. It takes a lot of time and effort to write and photograph for my blog. Please ask permission before reproducing any of my content. (More on copyright)