

Newport – master bath cabinet
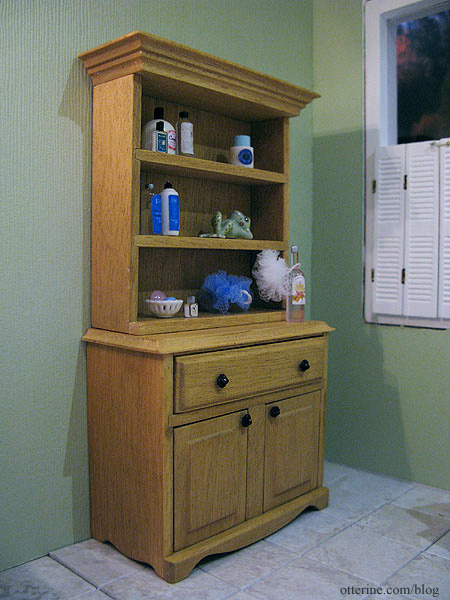
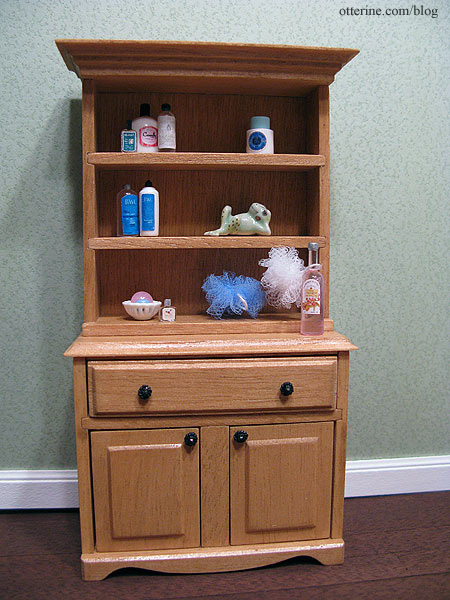
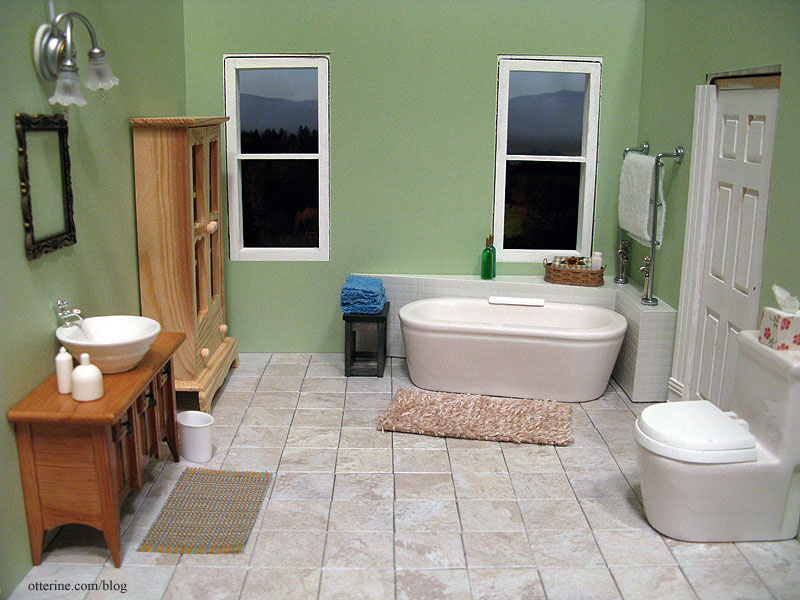
Back to work on the master bath in the Newport. Here’s the view from where I left off.
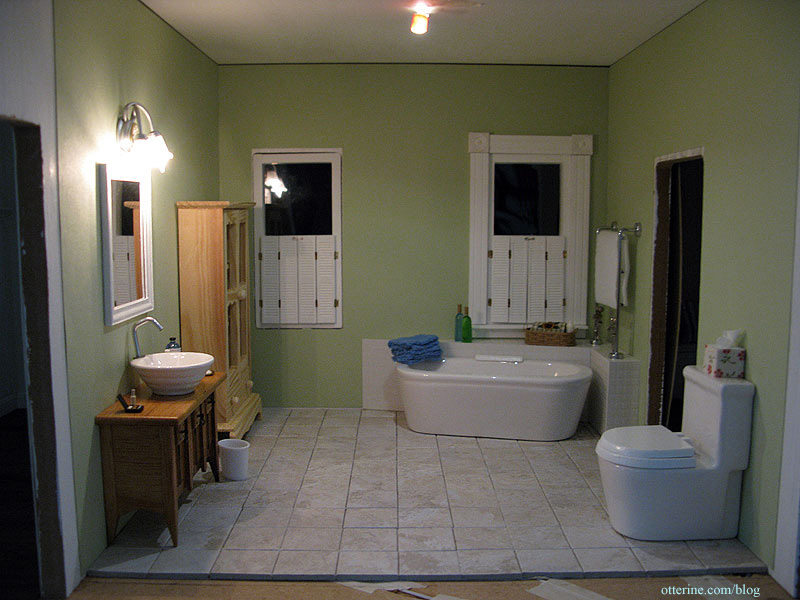
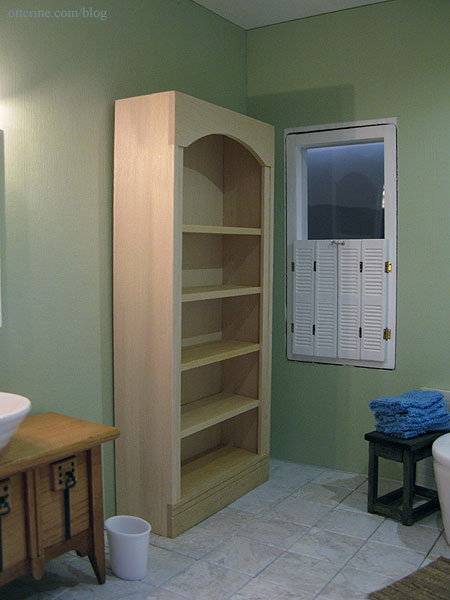
The original Michael’s cabinet (shown in the photo above) I had as a stand-in seemed too country for this more modern bathroom, so that one moved back into my supplies. I thought about using a Houseworks bookcase instead, but it was too big and open. Not everything you keep in a bathroom should be on display. ;]
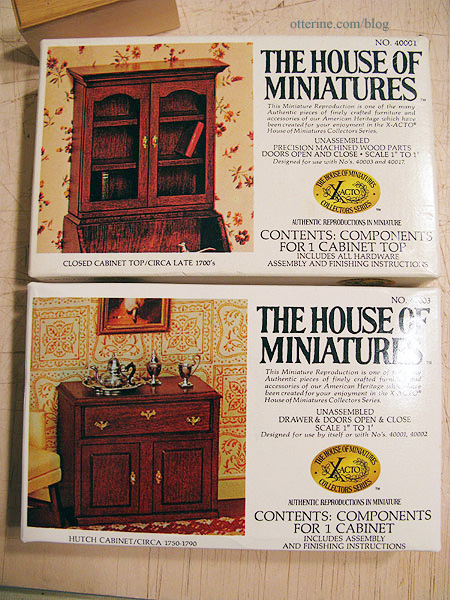
So, I put two House of Miniatures kits together to make a custom cabinet: a Closed Cabinet Top (which I left open) and a Hutch Cabinet.
I stained the pieces IKEA antique pine and sealed with Delta Ceramcoat satin varnish before assembly. I wanted to tie the cabinet in with the vanity (a Mackintosh sideboard) since there was getting to be too much white in this room. The knobs are jewelry findings painted with Testors flat black enamel.
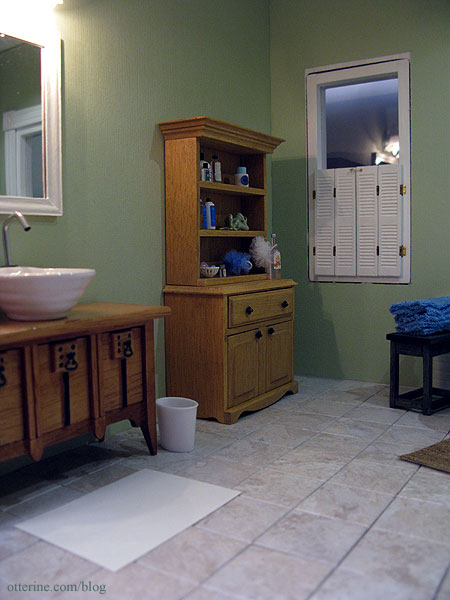
I left the doors off the top part to have some place to display minis. :]
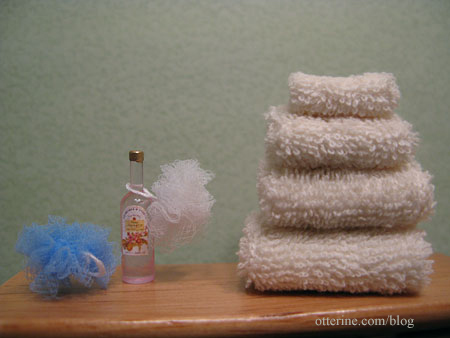
I hid a few things inside, too! I made the towel but bought the other minis.
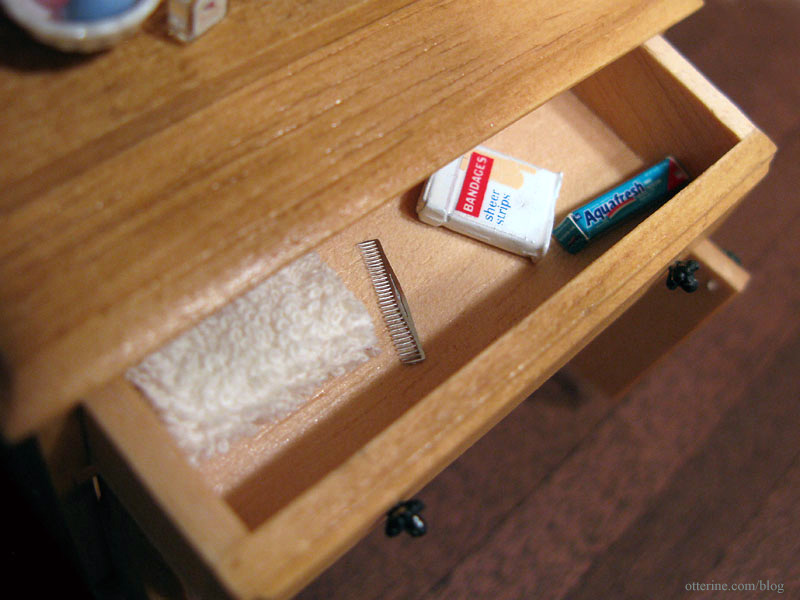
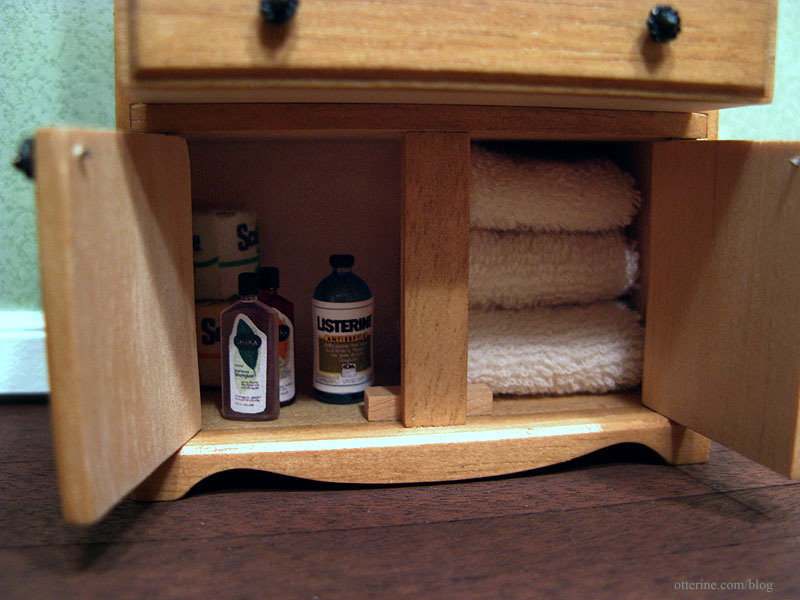
The towels were made from terry cloth from fabric.com. I had to fold a few in various ways to figure out the sizes that would fit and look true to scale in the cabinet before gluing them into their final shapes. The bottles are various types of blanks I picked up here and there (except the Listerine bottle, which I bought along with the toilet tissue).
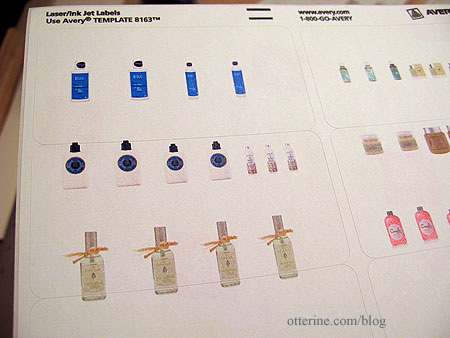
I found images of product lines I liked online and printed a few labels on white Avery sticker labels (though I still needed to supplement the adhesive with a glue stick for some). The bottle shapes and colors don’t emulate the original products exactly, but I like them! :]
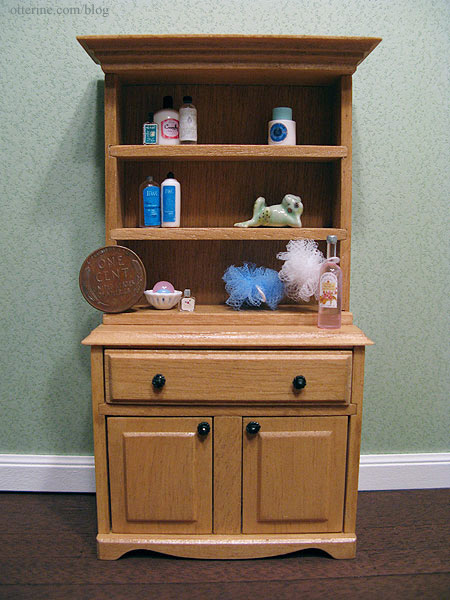
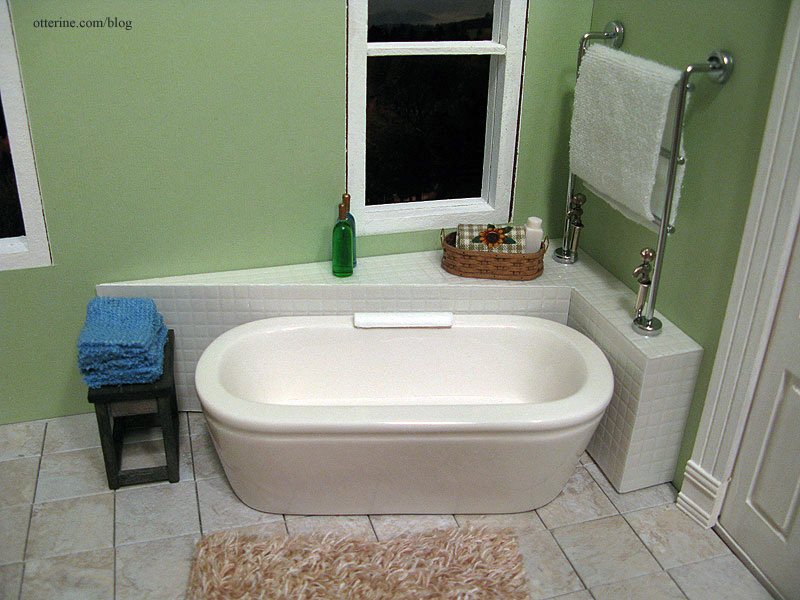
Here’s a better view from the front.
The loofah scrubbies were made from fine tulle also from fabric.com that I sewed together with white thread twisted to form a rope.
If you want to see how impossibly tiny some of these bottles are, just check out the penny on the lower shelf. That tiny clear bottle has a label that measures 1/8″ square.
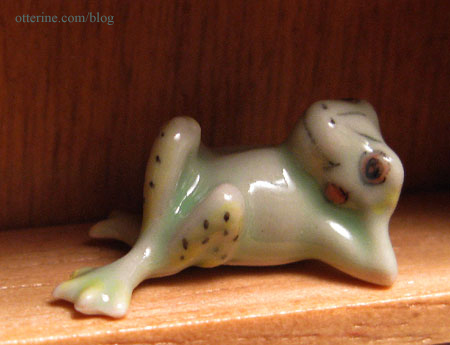
I love this little guy! :D
There will be a better setup added in time, but this is where I’ve started.
Categories: The Newport
April 27, 2011 | 0 commentsInstalling NovaLyte LED Recessed Can Lights
Someone recently contacted me with questions about installing the NovaLyte recessed can lights, so I figured while I was replying I would post a blog entry on it in case anyone else was interested in how I installed them.
Here’s the LED without the finishing ring (that’s popped in place after you install the lights). According to the NovaLyte website (no longer active as of 2024), these measure 5/16″ L x 5/16″ W with a required clearance hole of 21/64″.
Here’s the LED with the 21/64″ Dewalt drill bit I used to make the clearance holes.
The walls and floors of the Newport are 3/8″ thick, so there was plenty of room for them to fit inside the drilled holes without having to build up the floor board. With thinner materials, you’ll need to pad either the ceiling these are lighting or the floor above to hide the excess. These are cohesive units and therefore can’t be cut down.
Here’s the light in place in the floor board. The can light illuminates the room below this floor. I found that feeding the wire up through the hole and pressing it in place gives a nice flush finish with the ceiling.
I’ve cut channels for my wires since I’ve hard-wired the Newport. If you’re working with tape wire, you’ll need to figure out how to best attach them. I know absolutely nothing about tape wire.
Using the 21/64″ drill bit gives the light a nice snug fit. The dress ring is then popped onto the light to finish it.
Here’s the finished look in the living room.
Categories: The Newport
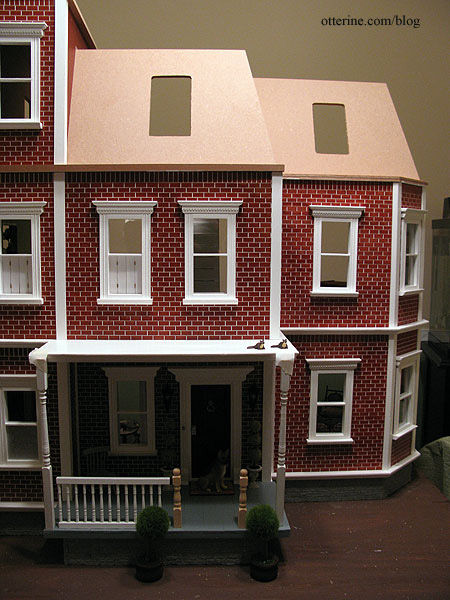
January 26, 2011 | 0 commentsThe Newport in brick a.k.a. The Beast
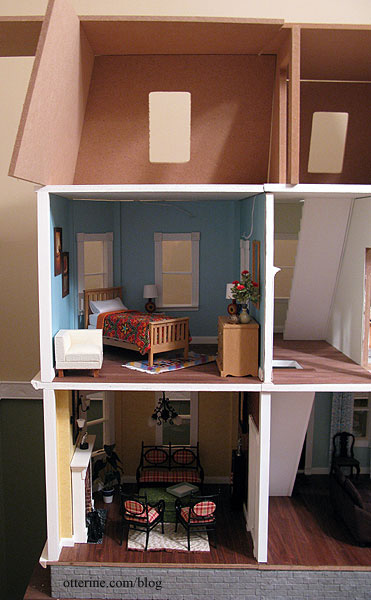
Since I’ve been making some (slow) progress on the second floor, I decided to go ahead and do another dry fit of the third floor. There will be the rooms behind the mansard roof currently planned to be an artist studio, a bathroom, a sewing studio and a secret nook. But, I enjoyed making the guest and master bedrooms so much that I might combine and/or eliminate one of the creative rooms and create another bedroom upstairs.
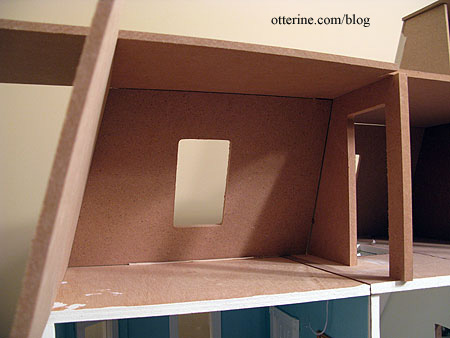
What a massive house! The rest of the roofline will also have the widow’s walk, though I will figure all that out later. The three open window holes will be dormers, and the conservatory will have a roof as well.
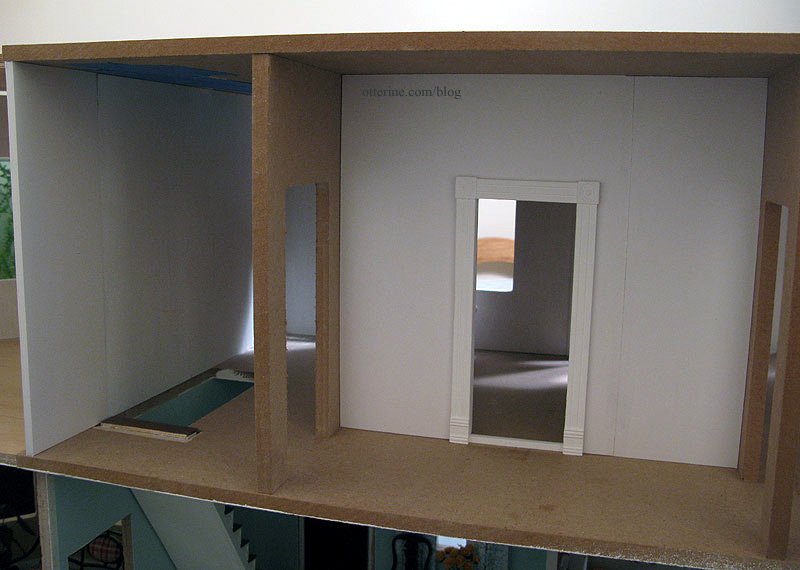
And, from the back. I’ll likely change the layout of the doors in the “tower” section, otherwise everything will be shoved into the house and nothing will be displayed toward the open back.
Just as a refresher, here is the Newport in brick (the base kit only). The two-story addition is made for the left side, but I flipped it and put it on the right side. I also bashed a Foxhall Conservatory kit to make the garage and cut a new conservatory for on top of that garage.

The two-story addition had a flat roof as purchased, so I ordered additional roof parts from the main Newport kit to create an additional rooftop room that will have a dormer matching the rest of the roofline. There will also be a railing on top of the extended front porch I added.
The extra roof pieces will be cut to fit later.
The room created with the extra pieces will be a tiny room that I want to do something special with. What, I have no idea yet. :D
Categories: The Newport
October 12, 2010 | 0 commentsNewport – master bathroom
Though the Newport was sold eventually, I’ve compiled some of the posts I made when I first started building it.
—-
The second floor rooms will be from left to right: the guest room (in the two story addition), the stairway hallway, the master bath (which is technically shared with the guest room), the master bedroom and then the conservatory (over the garage).
In order to fit the second floor stairs in that position, I had to move the far wall forward over the porch. This gave me more room inside the second floor and eliminated having a huge flat roof over the front porch extension. Adding this extra space made planning the master bath difficult. Can you actually have too large of a bathroom? :D Apparently so.
This gave me the idea of putting in a removable wall, as I had done for the powder room, creating a hallway between the stairs and the master bedroom.
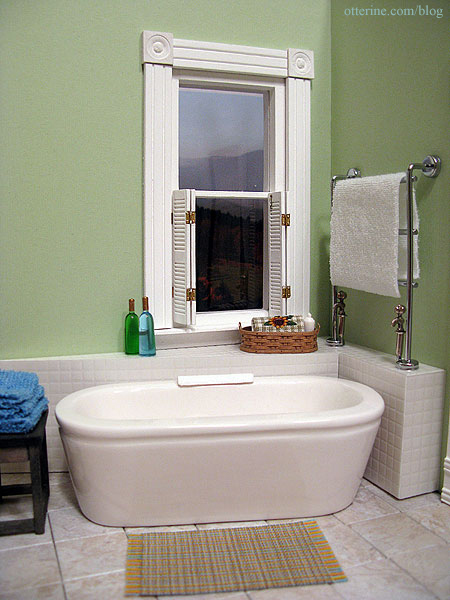
After trying different layouts, this is the final arrangement for the room. The soft green wallpaper is scrapbook paper, and the flooring was made from Greenleaf vinyl tiles (see kitchen post). I am using a modern bathtub and commode from a supplier in the UK. The rya rug was made by Glenda at Peppercorn Minis in New Zealand.
The vessel sink came from Silly Sisters in The Netherlands. The Mackintosh sideboard was supposed to be a stand-in for a kit I still need to make as the vanity, but I really like it as is! Hmm…I might need to think about this a bit more.
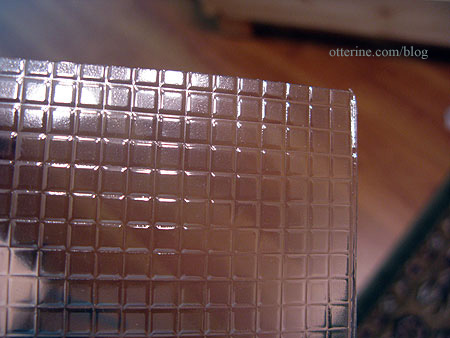
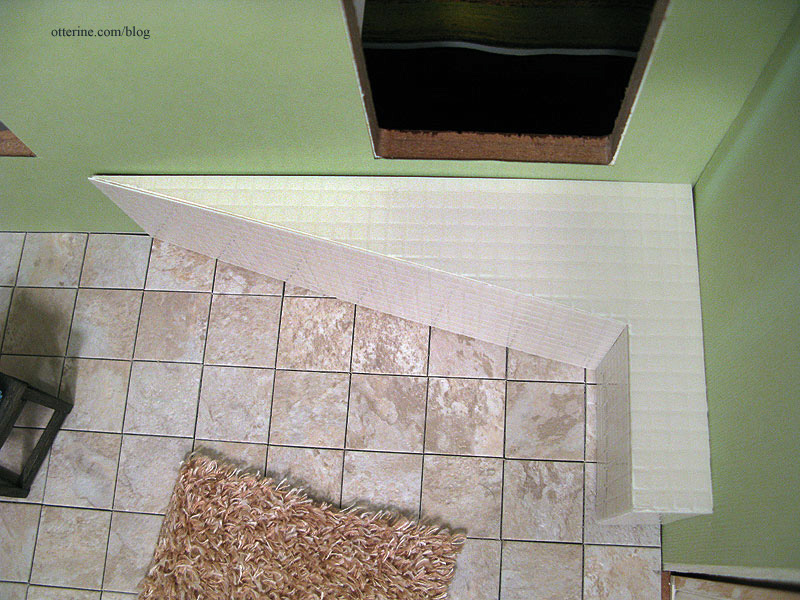
To finish the low wall around the bath, I used a clear plastic sheet embossed with 1/4-inch square tiles from miniatures.com. You paint the underside, and the top side shows as shiny tiles. I like that the surface has a little bit of texture the way real tiles would.
I cut the clear sheet to fit around the scratch-built wood base, trying to line up the tiles on the top with those on the sides. I’ve never done tile work, but it seems neater to align the tiles.
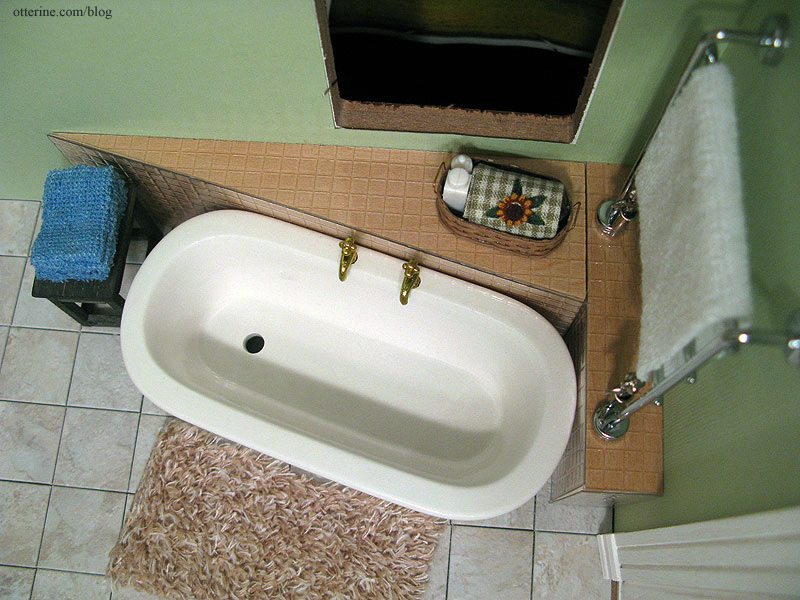
I tried a few different painting treatments on some small scraps to determine which color tiles I wanted. In the end, I decide all white was the way to go. It’s a clean, classic design. I painted the wood base all white with acrylics but used Krylon gloss white spray paint on the back of the tile sheets; it was faster, cleaner and left no brush marks on the tiles. I used regular tacky glue to adhere the tiles to the wood base.
I’ve removed the gold twin faucets from the tub and put a painted cap on the holes for now. I am still working on faucet options. If anyone ever decides to make better miniature faucets, I will be first in line!
The whole assembly is removable at the moment, just sits flush against the corner walls. Once the wallpaper is in permanently, I will glue it in place and finish the bottom edges where it meets the floor.
I modified this light from The Dolls House Emporium. It originally had a faceted bead, and I replaced it with a clock face I bought at the Bishop Show in April. I had no purpose for the clock face when I bought it; I just liked it. :D
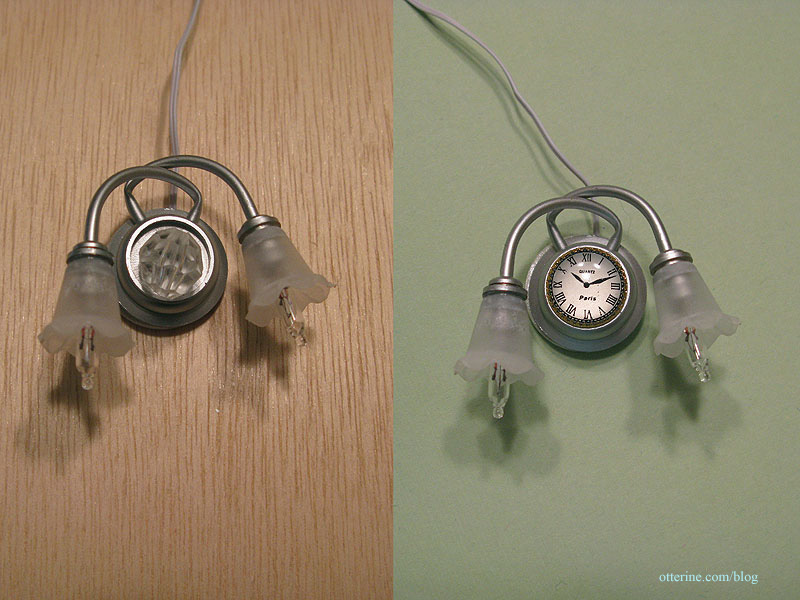
In the original setup I used a metal scrapbook frame as a stand-in mirror. I liked it, but it was a bit small for the space. I made my own vanity mirror from strip wood framing and plastic mirror sheet by Darice. I also added a modern faucet from ELF Miniatures in the UK (I painted the tip of the faucet black for added realism).

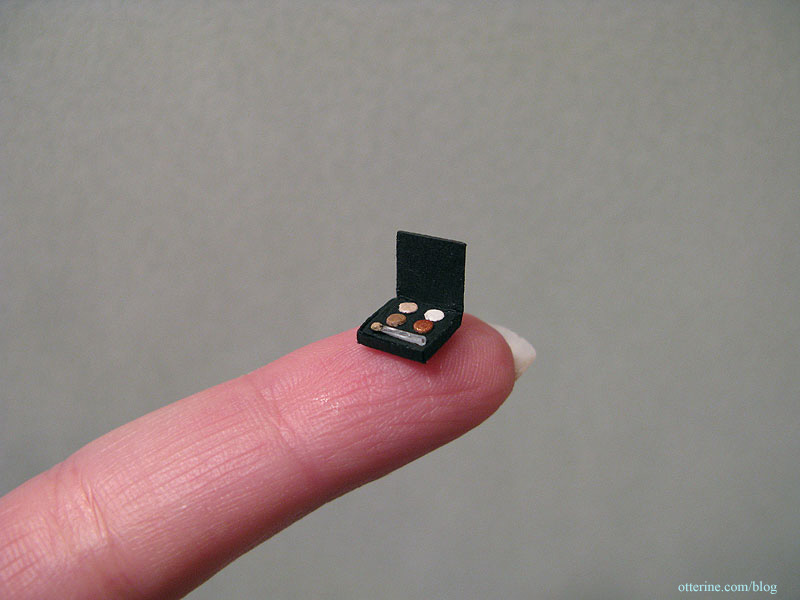
I made the eyeshadow makeup compact.
Since the light above the vanity is pretty bright for a standard dollhouse fixture, I plan to add two NovaLyte LED can lights to spread the light evenly in the room. Here is the room with one taped in place. Not quite enough light over the tub.
The working café shutters are made from half scale shutters and super tiny hinges. My tutorial ran in the September 2010 Greenleaf Gazette.
Categories: The Newport
October 5, 2010 | 0 commentsNewport – guest room
Though the Newport was sold eventually, I’ve compiled some of the posts I made when I first started building it.
—-
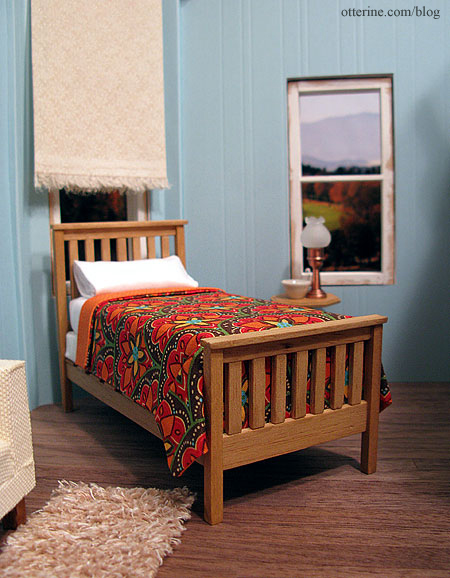
I started building the furniture for the guest room to go with the scratch built bed made from a pattern in Thirties and Forties Miniatures in 1:12 Scale by Jane Harrop and the House of Miniatures dresser. For the bedside table, I used a House of Miniatures candle stand kit. It came from a set of two; the other is in Baslow Ranch.

I like the copper table lamps in here, but I am undecided on the ceiling fixture. I tried a couple of others, and this one seemed to be the best fit for the most part other than the color. Whichever fixture I end up using, I’ll likely paint it copper to match the other two as close as possible.
The wall art prints are both by Edward Raymes: Today and Crimson Dusk (left to right). I need to make frames for them.
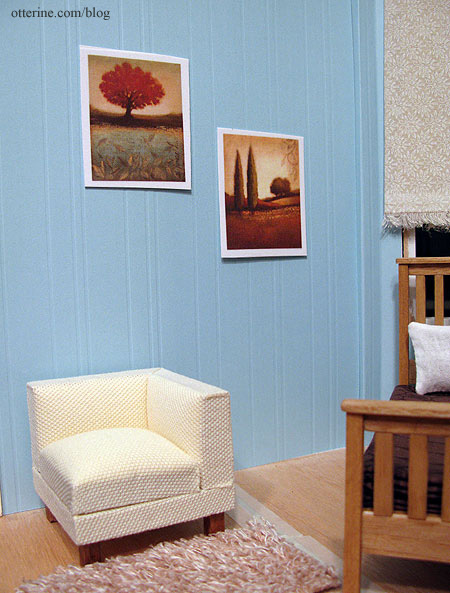
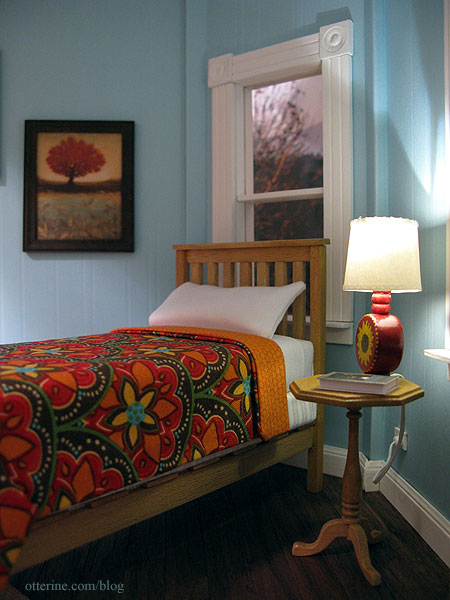
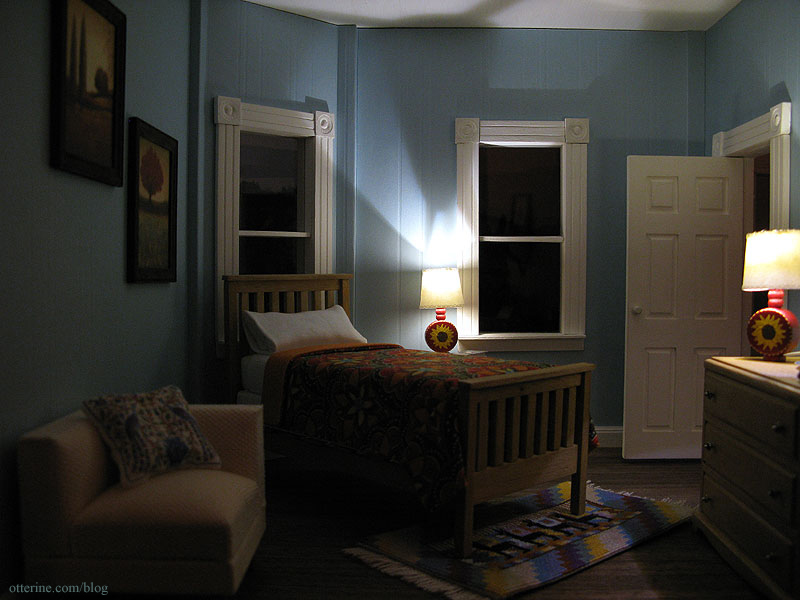
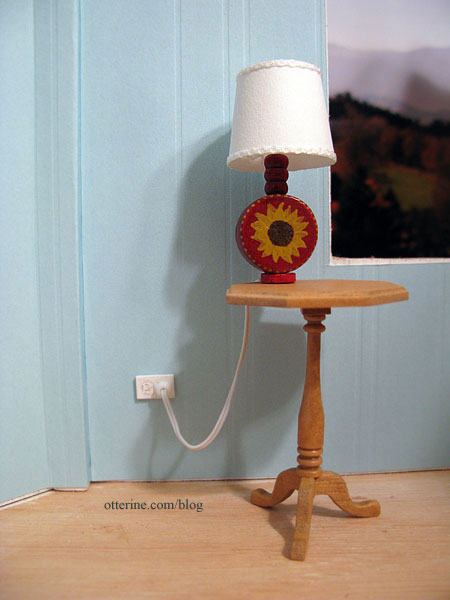
I find it amazing how the addition of baseboard, windows and trim can turn a dollhouse room into something so seemingly life-sized. The print is Today by Edward Raymes. In a previous post, I showed you how I made the mock outlet and plug for the table lamp. I made both sunflower table lamps.
Below you can see the second print by Edward Raymes called Crimson Dusk.
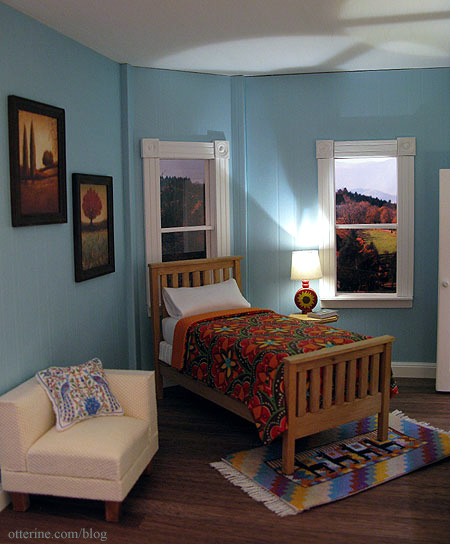
The flowers are Bonnie Lavish dahlias. I made the dresser with mirror, bed (and bedding) and side table as well as the llama rug and the peacock pillow. The only things left for this room are window treatments and a few other accessories.
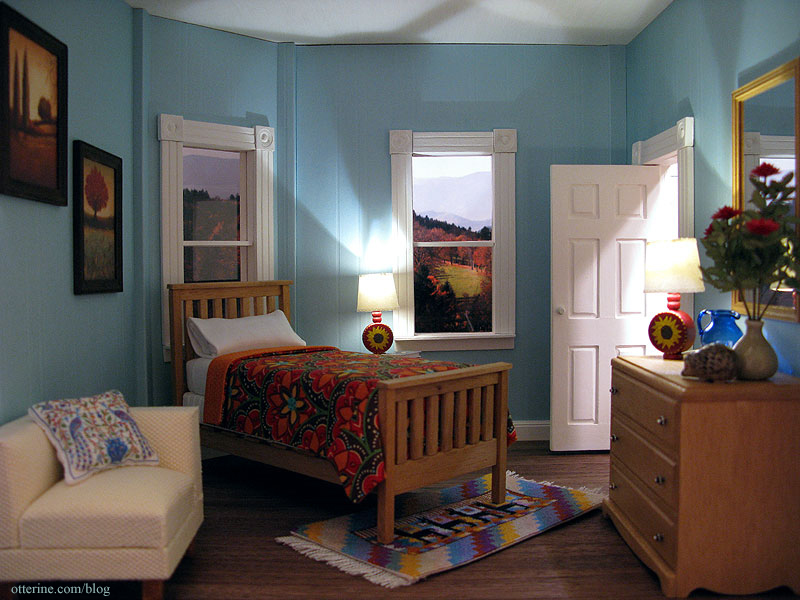
The Novalyte LEDs in the sunflower lamps cast a wonderful light that transforms the room in a nighttime scene.
Categories: The Newport
September 14, 2010 | 0 commentsHard wiring table lamps
For the usual light fixtures — wall lights and ceiling lights — the wires are usually easy to hide. Holes are drilled through boards and channels are made to hide the wires.

The same thing can be done with table lamps, but what about the times when there isn’t a piece of furniture to hide where the wire enters the wall? In the guest room, I had just this situation; the table next to the bed had a thin base. I could have pulled the wire behind the bed and hid it there, but where’s the fun in that? :D
So, I decided to make a mock outlet. First, I slipped a white bead onto the lamp wire; this will mimic a plug.

I cut a channel in the wall behind the table to feed the wire up the wall and through the ceiling (eventually, when the ceiling is put on).

I cut a small hole in the wallpaper where I want my outlet to be, making sure it was in line with the wire channel.

I used a small piece of bass wood painted gloss white to mimic the outlet cover. For the “open” outlet, I drew on the outline, indented it a bit with an X-Acto knife and then brushed a bit more paint over the drawing. On the other side, I made a hole to feed the lamp wire through.

I slipped the outlet onto the wire behind the bead and then fed the wire through the hole in the wallpaper.

I determined the length of cord I wanted and taped the wire into the channel in the wall.

I glued the wallpaper in place, glued the outlet in position on the wall and then moved the bead to sit flush against the outlet cover.
Categories: Miniatures, The Newport
September 11, 2010 | 0 commentsScratch built table lamps
One of the bigger challenges in decorating a dollhouse in a more contemporary style is the limited amount of contemporary lamps and other accessories on the market. There are some modern fixtures, but most are brass or old-fashioned. The table lamp selection can be pretty good, but I wanted to see if I could custom build my own lamps.
I had the bases all figured out just from looking at real life and miniature lamps. Stack beads, feed a wire through, etc. Even making shades from paper seemed simple enough, but it was attaching the shades to the bases that had me scratching my head.
Store bought mini lamps usually have a plastic disk holding the bottom of the lamp shade. I could use acrylic disks, but I would be limited by the pre-cut size of them. Then I happened upon the handmade lamps by M Carmen at Mini Shabby. She had used a jewelry finding to hold her shade in place, and it looked like a great idea! I left her a comment on her blog, and she was kind enough to send me the information on where she found them.
The site was Bindels Ornaments, and let me tell you, they have great items and ideas! They sell components and kits for lights and accessories in small scale. They even have pages showing you how they built bottles, lights, trays and candlesticks from jewelry findings. I bought both the three-prong and four-prong findings, but I found the four-prong worked best for this particular project.
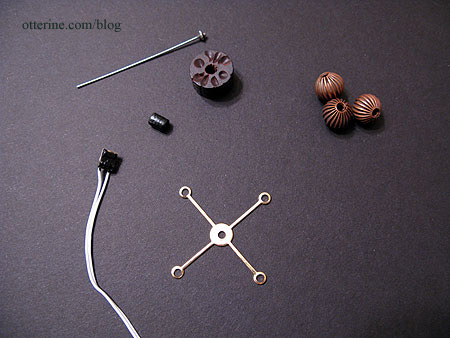
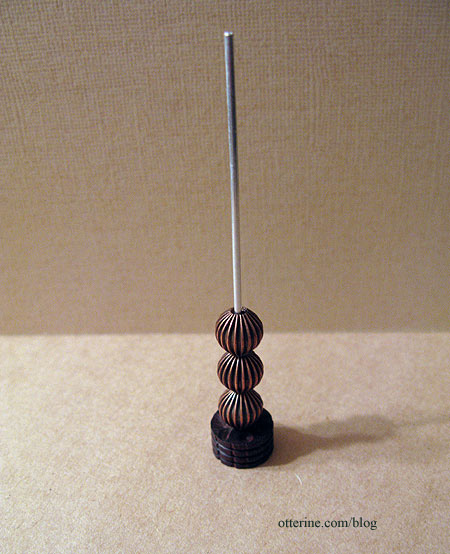
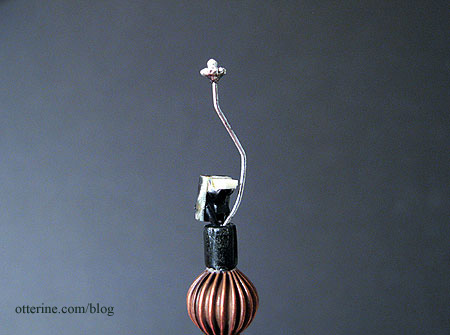
I started with a wood bead base, three copper colored beads, a NovaLyte LED and some miscellaneous jewelry findings.
I first glued the three beads together, using a metal rod to keep them lined up as they dried. It’s not very stable, but it kept them from shifting around while working with them.
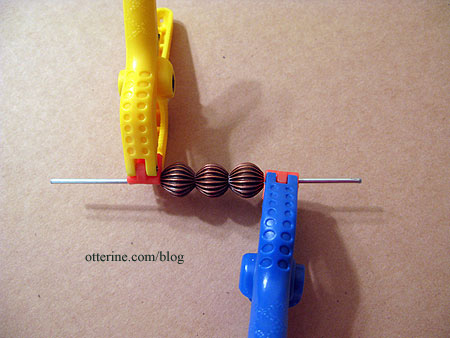
I glued the stack of three beads to the wood base. Again, the metal rod is only to keep things aligned and not glued inside the beads.
I had cut out a groove in the bottom to let the wire out the back and to keep the lamp bottom flat.
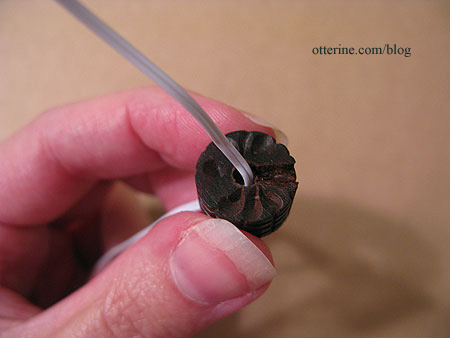
I fed a small black wood bead onto the LED wire and then fed the wire through the bead assembly.
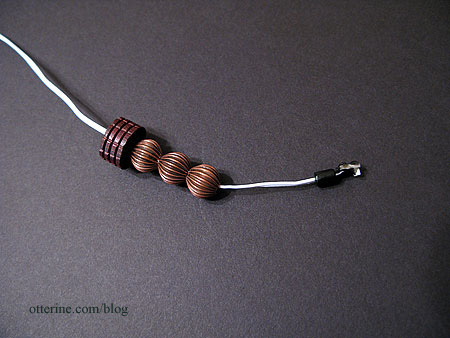
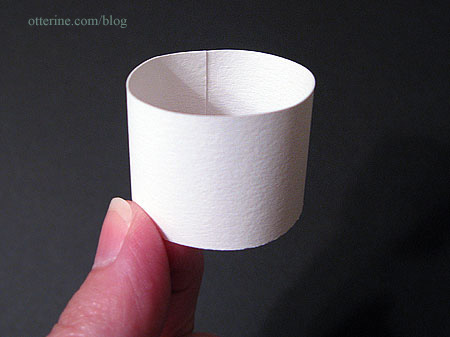
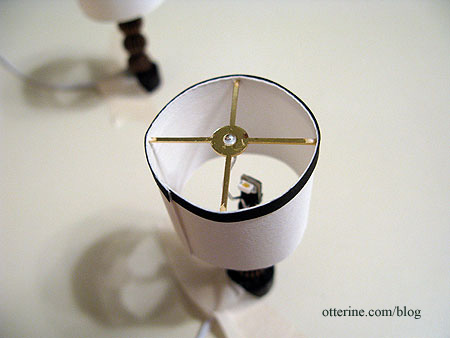
The shade is made from a strip of heavy paper 1″ wide and 4″ long, the ends lapped and glued.
I formed a holder from a fancy head pin and glued it inside the short black bead under the LED.
Unlike how M Carmen made her shade, though, I cut off the four circles on the jewelry finding and used it to support the top of the shade, not the middle. Since the four-prong holder showed when the light was on, I glued a strip of black quilling paper around the top edge of the paper shade.
Here are the two lamps on either side of the master bed.
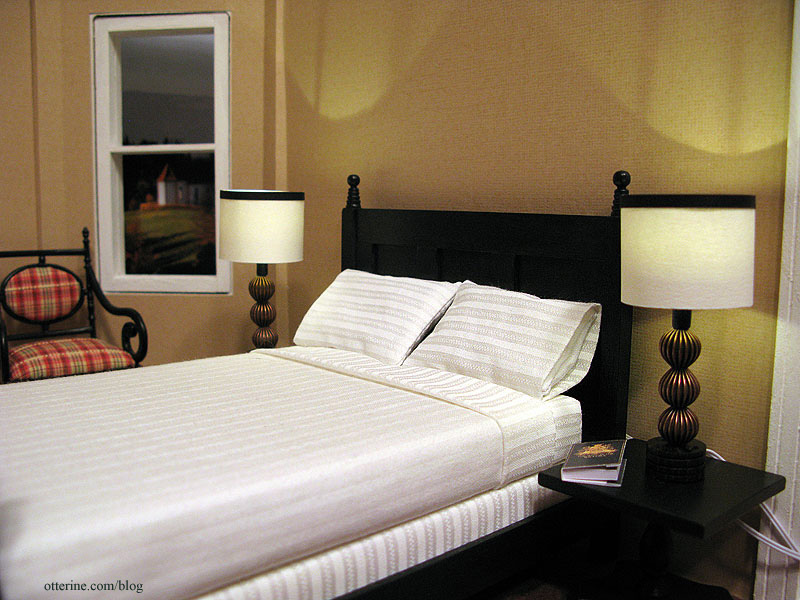
I love the way they turned out, and the LEDs provide great light not usually seen in miniature lamps.

I didn’t save any money making my own lamps since I used pricier LEDs and had to buy more materials than necessary just for two lamps, but I have unique fixtures in a more contemporary style than what’s available on the market.
Categories: Miniatures, The Newport
August 10, 2010 | 0 commentsNewport – master bedroom bed linens
In a previous post, I wrote about making the box spring for the Daisy House double bed kit I built. Tonight, I started dressing the bed. Using the same process as I had for the guest bed, I made a fitted sheet and flat sheet to cover the mattress. This time, I used the same fabric as I had for the box spring.
The pillows are made from white cotton sateen and filled with beads. Here they are uncovered.

The fitted sheet is glued in place, but the top sheet is only taped down. I am still deciding on bedding materials, so I need it to be removable for now.
I made the pillow cases a little larger this time around. I like the way they’re a little baggier than the one on the guest bed.

Anyone else feel suddenly sleepy? ;]
Categories: Furniture, The Newport
August 6, 2010 | 0 commentsNewport – upstairs hallway
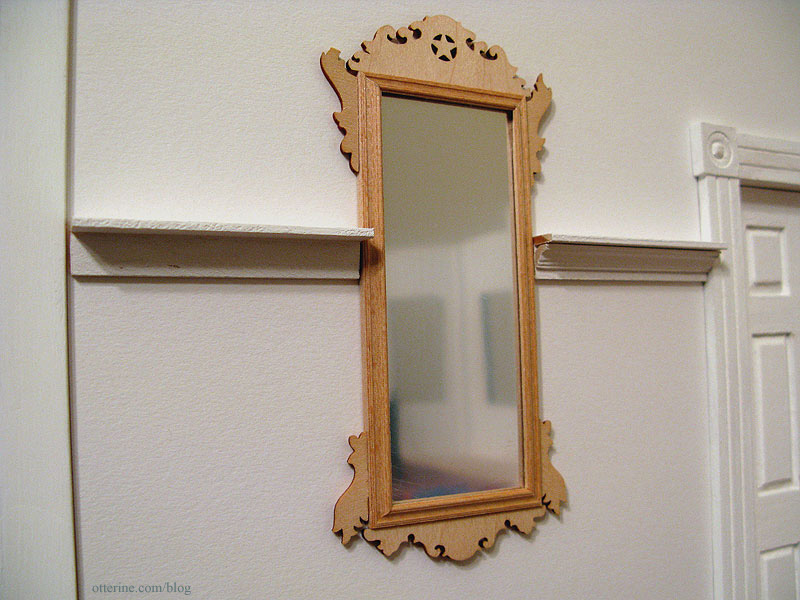
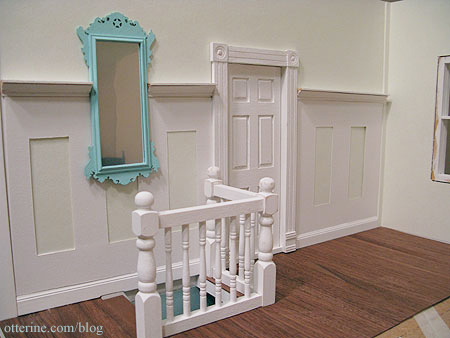
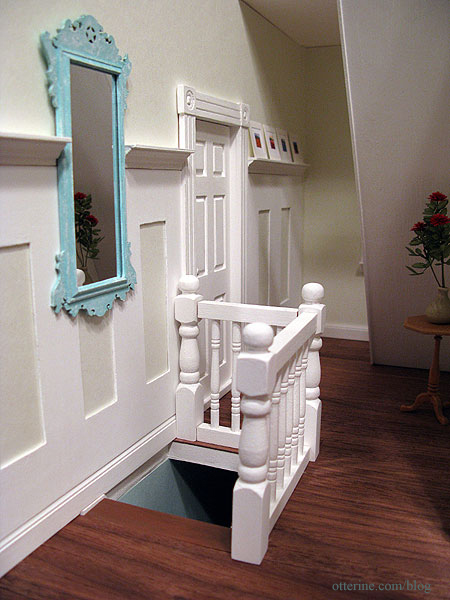
Just because it’s not really a room is no reason to ignore the hallway! In fact, I wanted to do something special with this space, and it was all due to this photo I found online at Coastal Living. This is likely an entryway, but I think it lends itself well to the hallway space in the Newport. Flipping the first floor stairs meant the second floor stairs would have to face the back wall, but it was more the mirror and wainscoting with the art shelf that drew me in.
For the walls, I used the same scrapbook paper as the garage: Swan by Martha Stewart. It’s a very pale green and allows for just enough contrast with the white wood trim. It’s also one of the few papers I’ve found that is larger than 12 inches square; that means no seaming! :D Ah, it’s the little things…. Unfortunately, the store where I got it no longer carries that size.
I used scraps of the Handley House wood flooring sheets for the hallway. It runs the opposite direction of the wood floor on the first floor, but I wanted to use up the leftovers from the first floor so they wouldn’t go to waste. I sealed it with Minwax Water-Based Polycrylic protective finish in clear semi-gloss before installation.
I created the picture rail using 3/8″ corner trim and gluing crown molding into the groove.
After centering the mirror on the left side, I did some math to figure out the best width for the vertical boards and the spacing between them. I first cut full pieces of cardboard the size of the “openings” on either side of the door. I used that template to cut pieces of paper and did my calculations and drawings on those.
Once I had an acceptable layout, I used the paper pattern to cut a piece of basswood to use for the trim. In real life, this treatment would like be done with planks instead of one continuous piece, but I wanted to eliminate the possibility of seams showing between the pieces.
I thought the mirror would be the hardest part to recreate, but I found many potential mirrors online. I ended up going with the House of Miniatures Chippendale Pier Glass kit, omitting the small table as shown in the inspiration photo since there wasn’t enough room at the top of the stairs to add it.
Assembly was a bit of a pain since I had to miter the corners myself, but I’ve had plenty of experience with that! I replaced the glass mirror and cardboard supplied with the kit with plastic mirror sheet backed with balsa. I like the lighter weight without the glass.
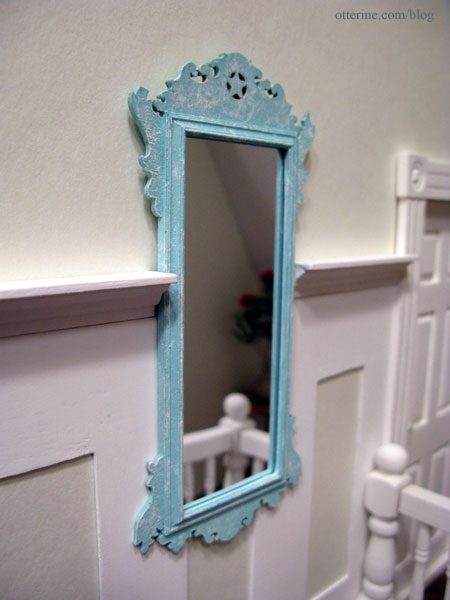
I painted the frame Robin’s Egg Blue by JoAnn Craft Essentials and then dry brushed it with white for accent.
Having worked on multiple prints of the same size before, I knew replicating the art prints would be time consuming. Each frame has to be as precise as possible since size discrepancies show so easily in a setup like this.
The four pieces of artwork I used are all by Hazel Barker: Casa Girasole, Le Jardin Rouge Provence, Champs de Lavande, and Hill Town Provence. I changed the aspect ratio of two of them to make them all square. During a big sale at Michael’s, I bought two paper punches: a one inch square and one slightly smaller square. This made for super easy mat cutting! :D
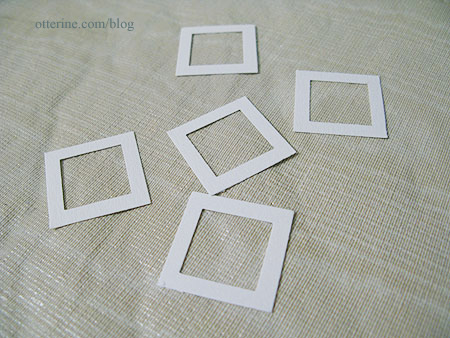
I glued the mats around the artwork before cutting them out.
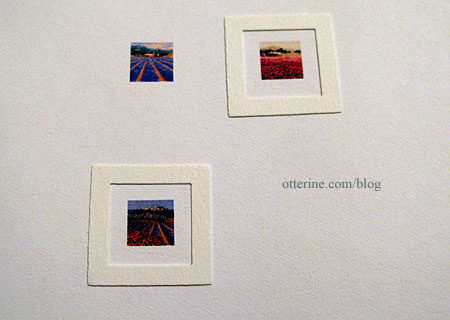
I am undecided if I need frames around them. I rather like the prints just the way they are.
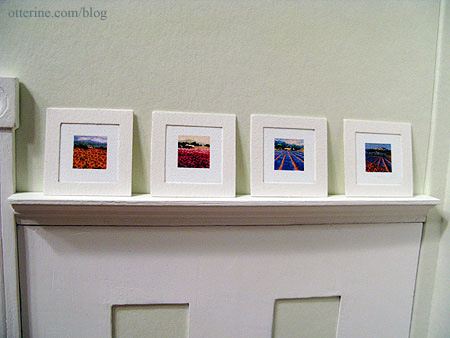
And, here’s my nearly finished hallway. The railings are not glued in place just yet, and I still need to finish the back stairs and the ceiling, and install an overhead light or two for the space. I love the way it turned out…no more boring hallway! :D
Categories: The Newport
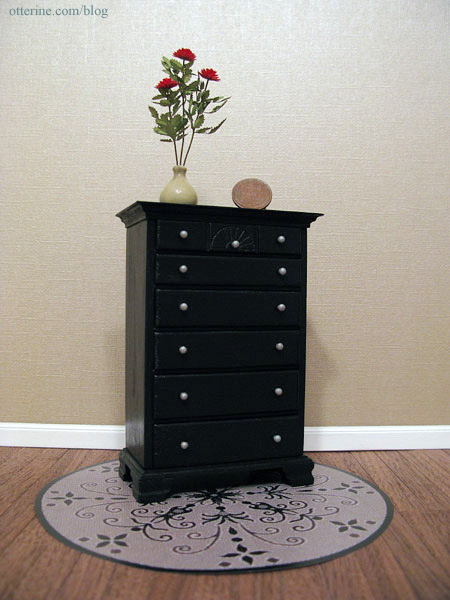
August 4, 2010 | 0 commentsHouse of Miniatures Chippendale Chest of Drawers
I’ve officially decided I love House of Miniatures kits! :D If you finish an antique piece in a more modern color scheme and update the hardware, you end up with something that works well in a contemporary setting. It’s like thrifting in mini!
Here’s the box image for the master bedroom dresser. Very traditional.
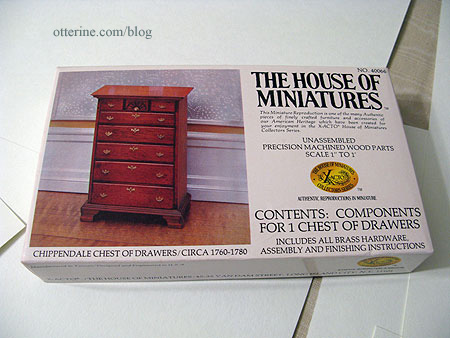
And, here is the kit after finishing. I used black paint followed by a satin varnish and wooden knobs painted silver for the hardware. The flowers are part of the Bonnie Lavish dahlias I made last week.
Categories: Furniture, The Newport
July 31, 2010 | 0 commentsNewport – guest bed, part 2
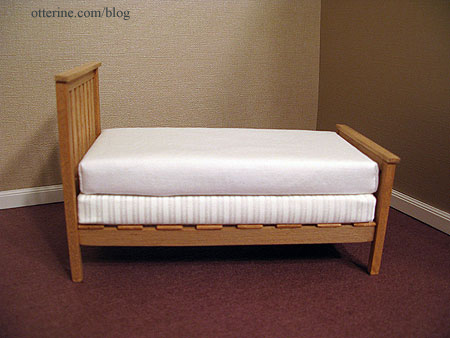
Continuing work on the guest bed. I had originally planned to follow the same method that I used for the Baslow Ranch bed but decided to make the mattress with foam core board as I had done with the box springs. I tried dressing the mattress I made for Baslow Ranch as a mockup for the guest room, but it didn’t look right. There needed to be more structure under the bed coverings, and foam core board provided that. It also allowed me to use up some of the scraps I had laying around.
I cut three layers of foam core board slightly smaller than the box springs to allow for fabric coverings.
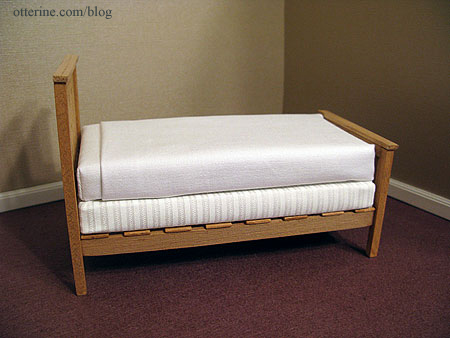
Using the thin batting I had used to stuff the Baslow Ranch bed, I covered the top and sides of the foam core board to give the mattress a softer appearance.

I pinned a scrap of white cotton sateen over the covered mattress and then sewed the corners to make a fitted sheet.
I turned it right side out, stretched it over the mattress and then glued the excess under the mattress.
Using the same fabric, I made a flat sheet, turning the edge under near the head of the bed. I didn’t sew the corners on this sheet. Instead, I folded the corners and glued the excess under the mattress.
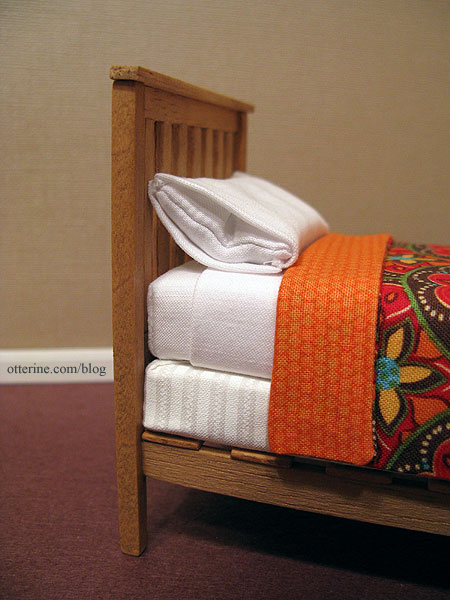
I made a blanket for the bed using two coordinating cotton prints that came in a set from Joann Fabrics. I didn’t use any batting since the double thickness seemed to have enough weight. I pressed it into shape on the bed and dabbed a tiny bit of glue where needed to keep the blanket flat on the bed.
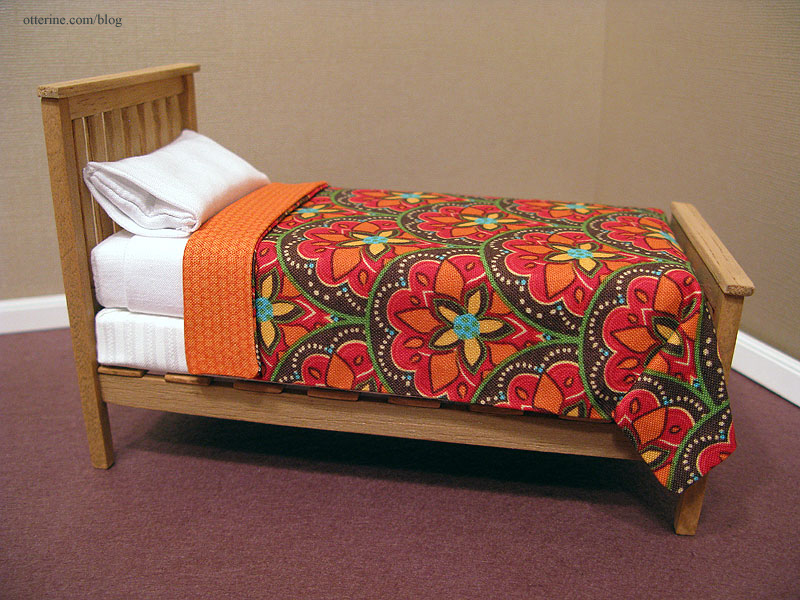
I made a pillow for the bed using the white sateen, filling it with beads. I then sewed a pillowcase out of the same fabric and squeezed the stuffed pillow into it. I like the way the pillow is bowed inside the crisp pillowcase; I think it adds a bit of realism.
My first dressed bed! Hooray!
Categories: Furniture, The Newport
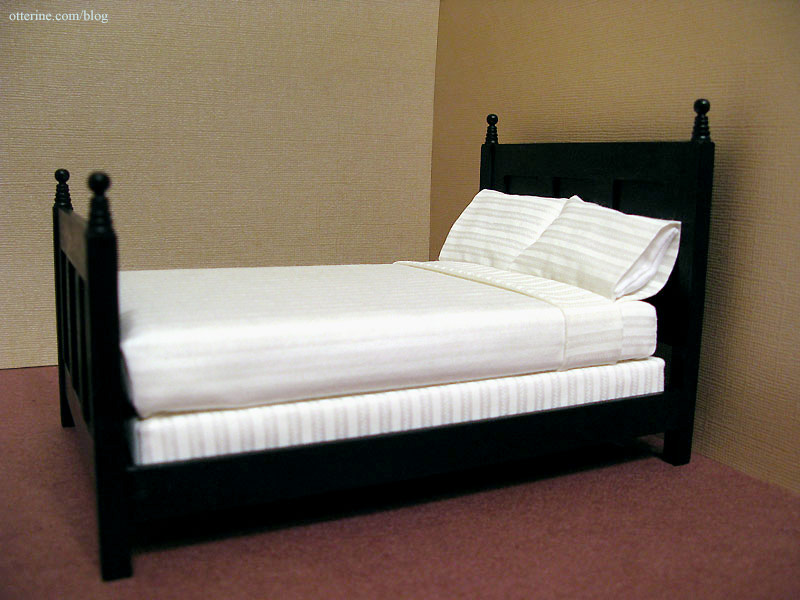
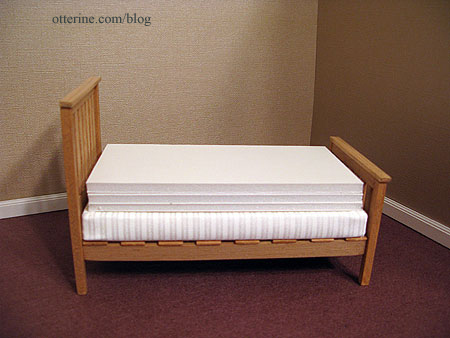
July 21, 2010 | 0 commentsNewport – master bedroom bed and box springs
I bought a Daisy House full bed kit before I knew I had the knack for scratch building furniture, but I still like it and think it was worth it. :D The wood in the kit was high quality, and it went together beautifully. The kit even comes with sandpaper, toothpicks and cotton swabs to help with assembly and finishing.
Instead of finishing the headboard and footboard with the supplied flat wood, I used the leftover carved post toppers from the House of Miniatures single bed kit I used for Baslow Ranch. I painted the bed black and sealed it with satin varnish by Delta Ceramcoat.

Interestingly enough, it looks a lot like our real life bed! :]

Even though I am mainly working on the guest room for the moment, I wanted to finish the master bed so I could complete some of the same steps needed for both beds at the same time…namely the mattresses and box springs.
For the box springs, I used three layers of foam core board glued together with tacky glue. I cut them smaller than the bed frames to leave room for fabric coverings.

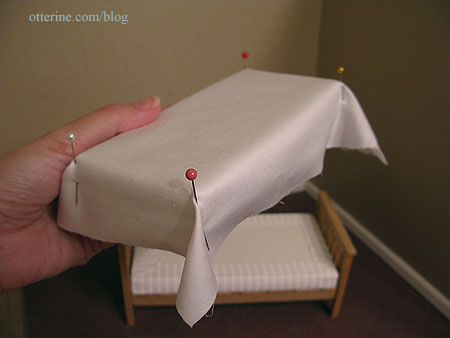
I prepared a long strip of fabric by using HeatnBond (a fabric adhesive) to create a double thickness of material. The fabric would have been too thin to use a single layer.

After gluing one end of the strip to one of the shorter ends of the foam core board stack, I wrapped the strip all the way around the bed without using any glue until I got back to where I started. I didn’t want the sides to look glued down or for the layers of board to show through.

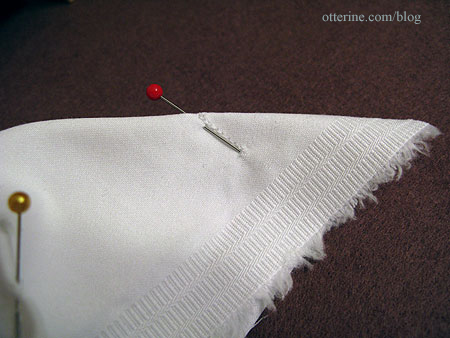
I clipped the corners on the top and bottom edges and then glued the flaps down on either side.

The result is a covered box spring pretty enough to show. The mattresses will cover the tops, so only the pretty fabric sides will show.

Categories: Furniture, The Newport
July 18, 2010 | 0 comments


NOTE: All content on otterine.com is copyrighted and may not be reproduced in part or in whole. It takes a lot of time and effort to write and photograph for my blog. Please ask permission before reproducing any of my content. (More on copyright)

Newport – master bath cabinet
Back to work on the master bath in the Newport. Here’s the view from where I left off.
The original Michael’s cabinet (shown in the photo above) I had as a stand-in seemed too country for this more modern bathroom, so that one moved back into my supplies. I thought about using a Houseworks bookcase instead, but it was too big and open. Not everything you keep in a bathroom should be on display. ;]
So, I put two House of Miniatures kits together to make a custom cabinet: a Closed Cabinet Top (which I left open) and a Hutch Cabinet.
I stained the pieces IKEA antique pine and sealed with Delta Ceramcoat satin varnish before assembly. I wanted to tie the cabinet in with the vanity (a Mackintosh sideboard) since there was getting to be too much white in this room. The knobs are jewelry findings painted with Testors flat black enamel.
I left the doors off the top part to have some place to display minis. :]
I hid a few things inside, too! I made the towel but bought the other minis.
The towels were made from terry cloth from fabric.com. I had to fold a few in various ways to figure out the sizes that would fit and look true to scale in the cabinet before gluing them into their final shapes. The bottles are various types of blanks I picked up here and there (except the Listerine bottle, which I bought along with the toilet tissue).
I found images of product lines I liked online and printed a few labels on white Avery sticker labels (though I still needed to supplement the adhesive with a glue stick for some). The bottle shapes and colors don’t emulate the original products exactly, but I like them! :]
Here’s a better view from the front.
The loofah scrubbies were made from fine tulle also from fabric.com that I sewed together with white thread twisted to form a rope.
If you want to see how impossibly tiny some of these bottles are, just check out the penny on the lower shelf. That tiny clear bottle has a label that measures 1/8″ square.
I love this little guy! :D
There will be a better setup added in time, but this is where I’ve started.
Categories: The Newport
April 27, 2011 | 0 commentsInstalling NovaLyte LED Recessed Can Lights
Someone recently contacted me with questions about installing the NovaLyte recessed can lights, so I figured while I was replying I would post a blog entry on it in case anyone else was interested in how I installed them.
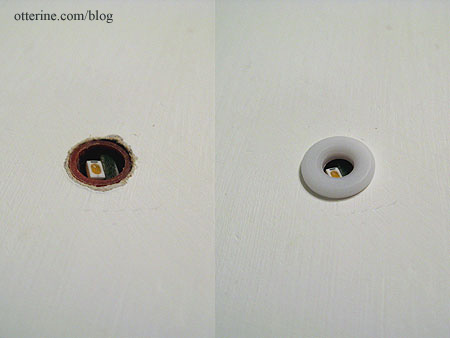
Here’s the LED without the finishing ring (that’s popped in place after you install the lights). According to the NovaLyte website (no longer active as of 2024), these measure 5/16″ L x 5/16″ W with a required clearance hole of 21/64″.
Here’s the LED with the 21/64″ Dewalt drill bit I used to make the clearance holes.
The walls and floors of the Newport are 3/8″ thick, so there was plenty of room for them to fit inside the drilled holes without having to build up the floor board. With thinner materials, you’ll need to pad either the ceiling these are lighting or the floor above to hide the excess. These are cohesive units and therefore can’t be cut down.
Here’s the light in place in the floor board. The can light illuminates the room below this floor. I found that feeding the wire up through the hole and pressing it in place gives a nice flush finish with the ceiling.
I’ve cut channels for my wires since I’ve hard-wired the Newport. If you’re working with tape wire, you’ll need to figure out how to best attach them. I know absolutely nothing about tape wire.
Using the 21/64″ drill bit gives the light a nice snug fit. The dress ring is then popped onto the light to finish it.
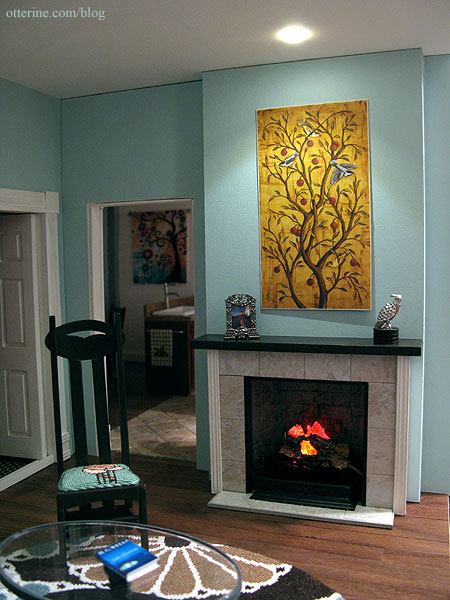
Here’s the finished look in the living room.
Categories: The Newport
January 26, 2011 | 0 commentsThe Newport in brick a.k.a. The Beast
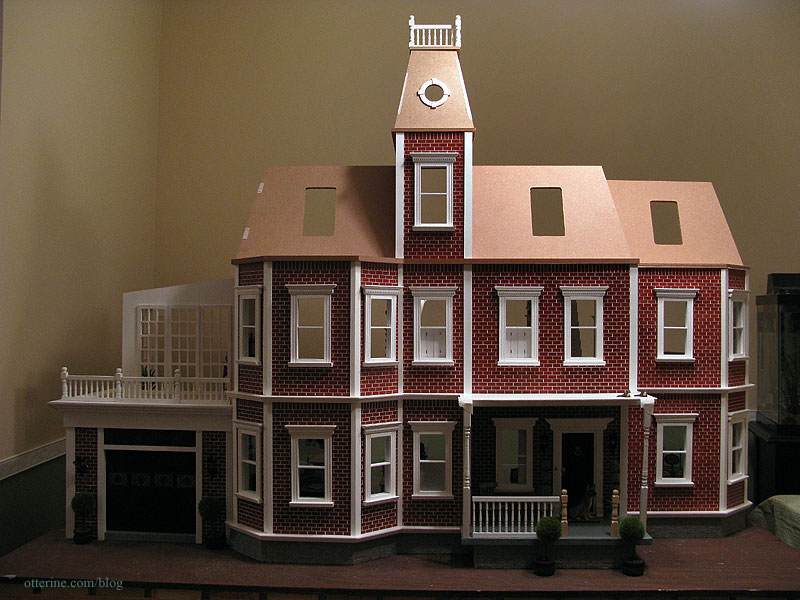
Since I’ve been making some (slow) progress on the second floor, I decided to go ahead and do another dry fit of the third floor. There will be the rooms behind the mansard roof currently planned to be an artist studio, a bathroom, a sewing studio and a secret nook. But, I enjoyed making the guest and master bedrooms so much that I might combine and/or eliminate one of the creative rooms and create another bedroom upstairs.
What a massive house! The rest of the roofline will also have the widow’s walk, though I will figure all that out later. The three open window holes will be dormers, and the conservatory will have a roof as well.
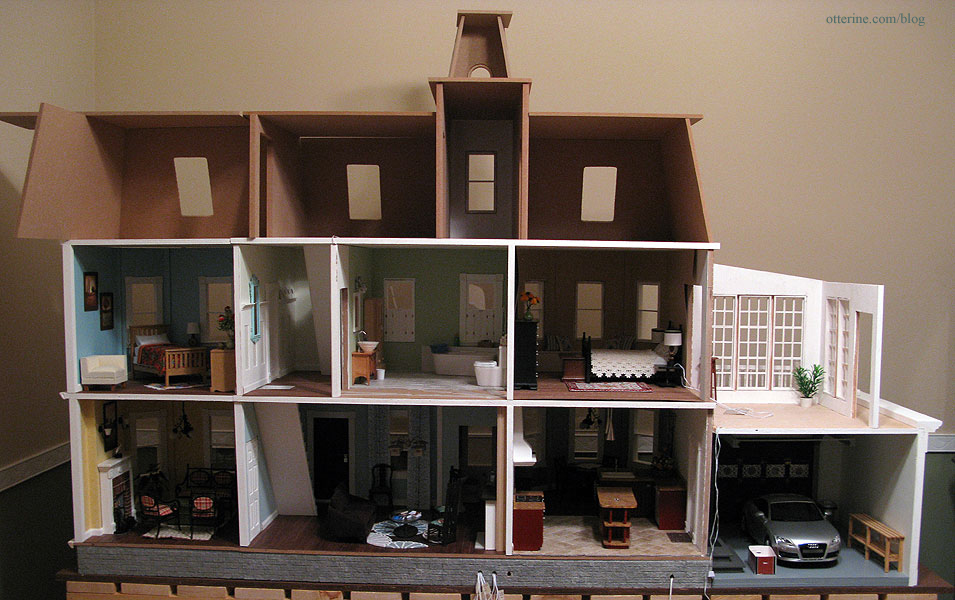
And, from the back. I’ll likely change the layout of the doors in the “tower” section, otherwise everything will be shoved into the house and nothing will be displayed toward the open back.
Just as a refresher, here is the Newport in brick (the base kit only). The two-story addition is made for the left side, but I flipped it and put it on the right side. I also bashed a Foxhall Conservatory kit to make the garage and cut a new conservatory for on top of that garage.
The two-story addition had a flat roof as purchased, so I ordered additional roof parts from the main Newport kit to create an additional rooftop room that will have a dormer matching the rest of the roofline. There will also be a railing on top of the extended front porch I added.
The extra roof pieces will be cut to fit later.
The room created with the extra pieces will be a tiny room that I want to do something special with. What, I have no idea yet. :D
Categories: The Newport
October 12, 2010 | 0 commentsNewport – master bathroom
Though the Newport was sold eventually, I’ve compiled some of the posts I made when I first started building it.
—-
The second floor rooms will be from left to right: the guest room (in the two story addition), the stairway hallway, the master bath (which is technically shared with the guest room), the master bedroom and then the conservatory (over the garage).
In order to fit the second floor stairs in that position, I had to move the far wall forward over the porch. This gave me more room inside the second floor and eliminated having a huge flat roof over the front porch extension. Adding this extra space made planning the master bath difficult. Can you actually have too large of a bathroom? :D Apparently so.
This gave me the idea of putting in a removable wall, as I had done for the powder room, creating a hallway between the stairs and the master bedroom.
After trying different layouts, this is the final arrangement for the room. The soft green wallpaper is scrapbook paper, and the flooring was made from Greenleaf vinyl tiles (see kitchen post). I am using a modern bathtub and commode from a supplier in the UK. The rya rug was made by Glenda at Peppercorn Minis in New Zealand.
The vessel sink came from Silly Sisters in The Netherlands. The Mackintosh sideboard was supposed to be a stand-in for a kit I still need to make as the vanity, but I really like it as is! Hmm…I might need to think about this a bit more.
To finish the low wall around the bath, I used a clear plastic sheet embossed with 1/4-inch square tiles from miniatures.com. You paint the underside, and the top side shows as shiny tiles. I like that the surface has a little bit of texture the way real tiles would.
I cut the clear sheet to fit around the scratch-built wood base, trying to line up the tiles on the top with those on the sides. I’ve never done tile work, but it seems neater to align the tiles.
I tried a few different painting treatments on some small scraps to determine which color tiles I wanted. In the end, I decide all white was the way to go. It’s a clean, classic design. I painted the wood base all white with acrylics but used Krylon gloss white spray paint on the back of the tile sheets; it was faster, cleaner and left no brush marks on the tiles. I used regular tacky glue to adhere the tiles to the wood base.
I’ve removed the gold twin faucets from the tub and put a painted cap on the holes for now. I am still working on faucet options. If anyone ever decides to make better miniature faucets, I will be first in line!
The whole assembly is removable at the moment, just sits flush against the corner walls. Once the wallpaper is in permanently, I will glue it in place and finish the bottom edges where it meets the floor.
I modified this light from The Dolls House Emporium. It originally had a faceted bead, and I replaced it with a clock face I bought at the Bishop Show in April. I had no purpose for the clock face when I bought it; I just liked it. :D
In the original setup I used a metal scrapbook frame as a stand-in mirror. I liked it, but it was a bit small for the space. I made my own vanity mirror from strip wood framing and plastic mirror sheet by Darice. I also added a modern faucet from ELF Miniatures in the UK (I painted the tip of the faucet black for added realism).
I made the eyeshadow makeup compact.
Since the light above the vanity is pretty bright for a standard dollhouse fixture, I plan to add two NovaLyte LED can lights to spread the light evenly in the room. Here is the room with one taped in place. Not quite enough light over the tub.
The working café shutters are made from half scale shutters and super tiny hinges. My tutorial ran in the September 2010 Greenleaf Gazette.
Categories: The Newport
October 5, 2010 | 0 commentsNewport – guest room
Though the Newport was sold eventually, I’ve compiled some of the posts I made when I first started building it.
—-
I started building the furniture for the guest room to go with the scratch built bed made from a pattern in Thirties and Forties Miniatures in 1:12 Scale by Jane Harrop and the House of Miniatures dresser. For the bedside table, I used a House of Miniatures candle stand kit. It came from a set of two; the other is in Baslow Ranch.
I like the copper table lamps in here, but I am undecided on the ceiling fixture. I tried a couple of others, and this one seemed to be the best fit for the most part other than the color. Whichever fixture I end up using, I’ll likely paint it copper to match the other two as close as possible.
The wall art prints are both by Edward Raymes: Today and Crimson Dusk (left to right). I need to make frames for them.
I find it amazing how the addition of baseboard, windows and trim can turn a dollhouse room into something so seemingly life-sized. The print is Today by Edward Raymes. In a previous post, I showed you how I made the mock outlet and plug for the table lamp. I made both sunflower table lamps.
Below you can see the second print by Edward Raymes called Crimson Dusk.
The flowers are Bonnie Lavish dahlias. I made the dresser with mirror, bed (and bedding) and side table as well as the llama rug and the peacock pillow. The only things left for this room are window treatments and a few other accessories.
The Novalyte LEDs in the sunflower lamps cast a wonderful light that transforms the room in a nighttime scene.
Categories: The Newport
September 14, 2010 | 0 comments
NOTE: All content on otterine.com is copyrighted and may not be reproduced in part or in whole. It takes a lot of time and effort to write and photograph for my blog. Please ask permission before reproducing any of my content. (More on copyright)