

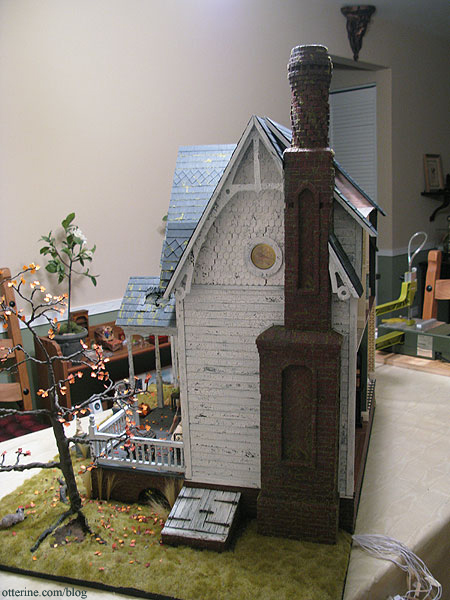
Heritage – grandma’s neglected lawn, part 3
Continuing work on the lawn. Now that The Tree is planted, Grahame’s burrow is in place and the stone walkway is in, I can start landscaping.
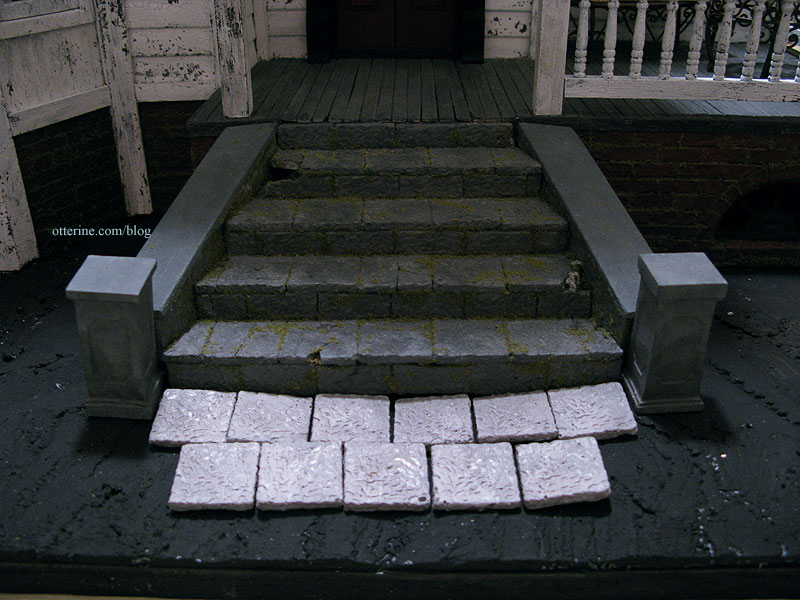
The pavers attached with a mix of spackling and glue held tight! Hooray! In fact, if I had to remove them, I think they might take the foam base with them. :D
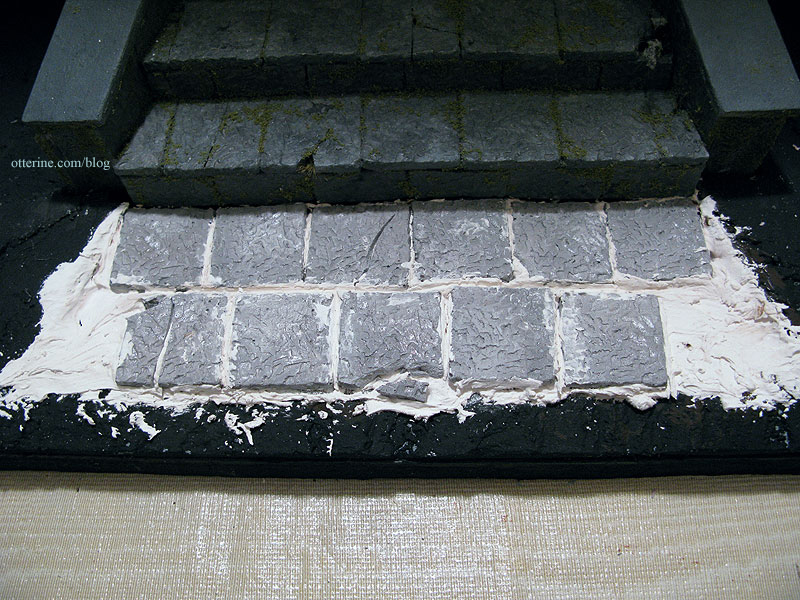
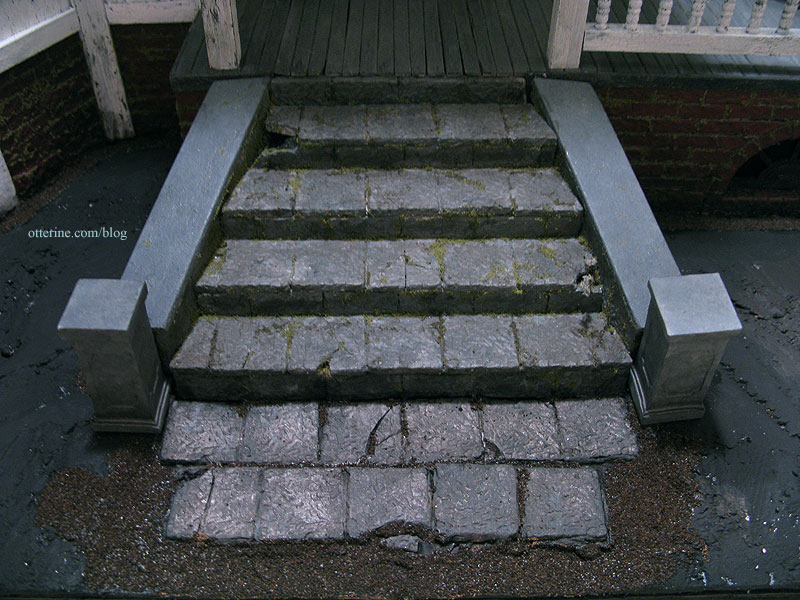
I added paint washes to stain the grout and to darken the stones, which also brought out the cracks. Moss will be added later to the walkway pavers so the coloration looks a little off on them at the moment.
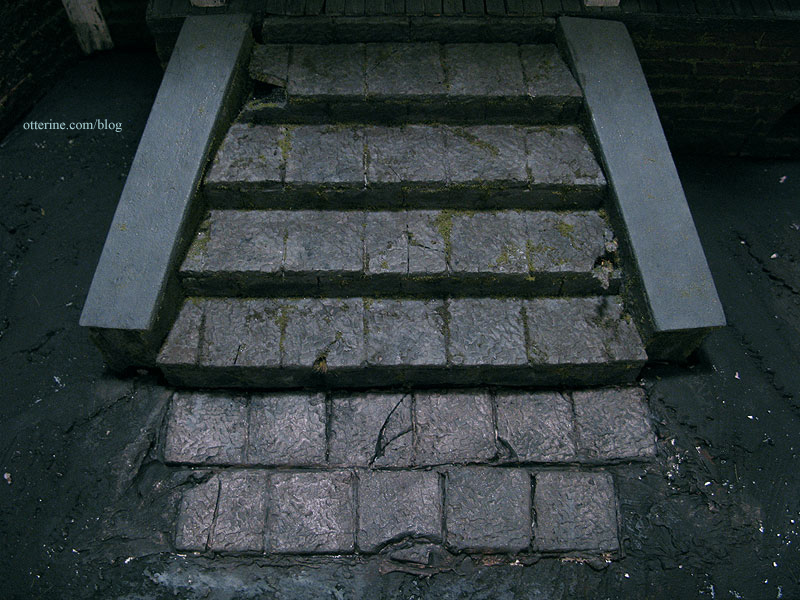
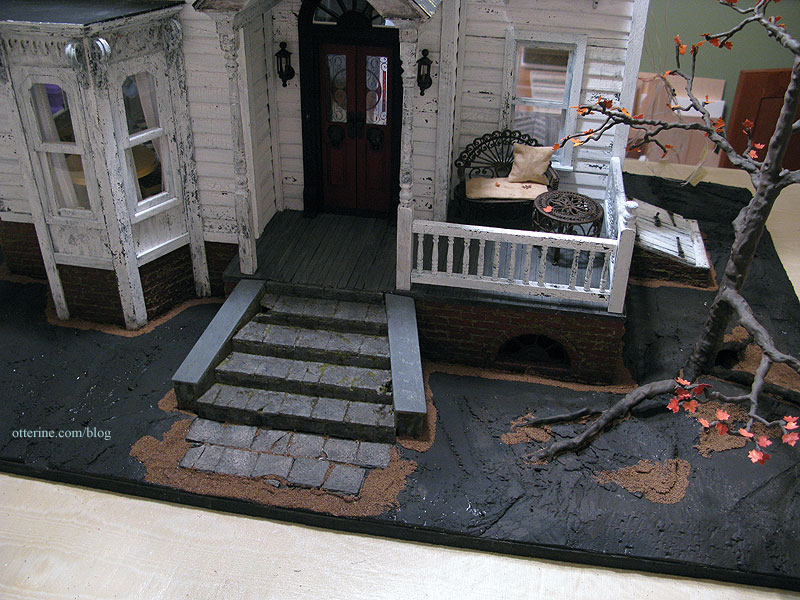
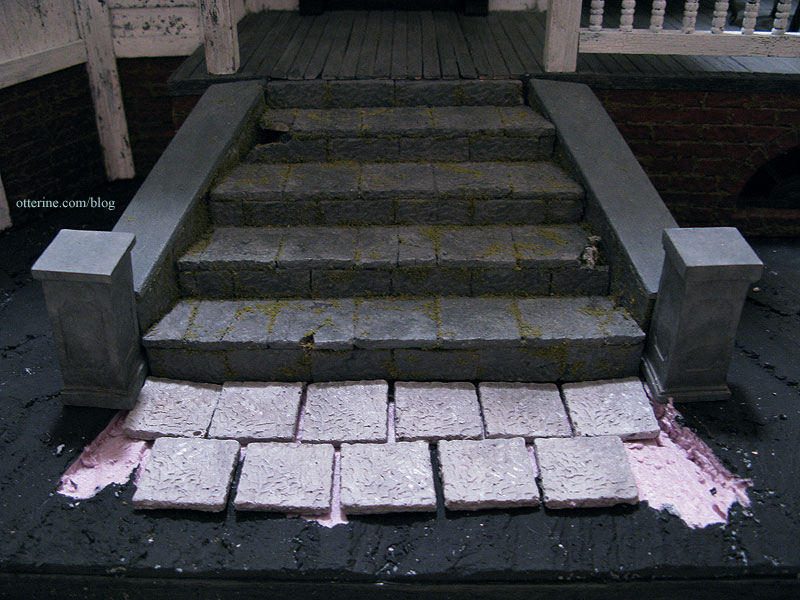
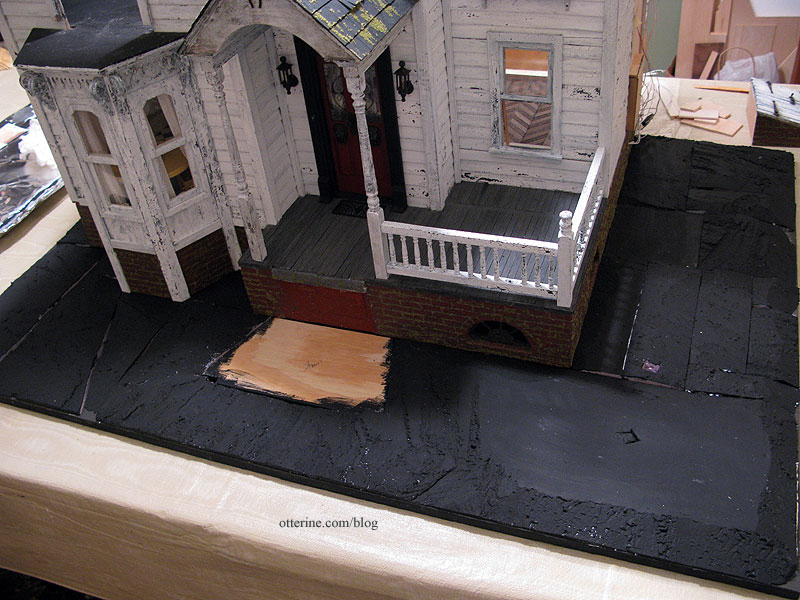
I then dirtied up the lower portion of the brick foundation, the pillars and stairs with a brown and black paint wash.
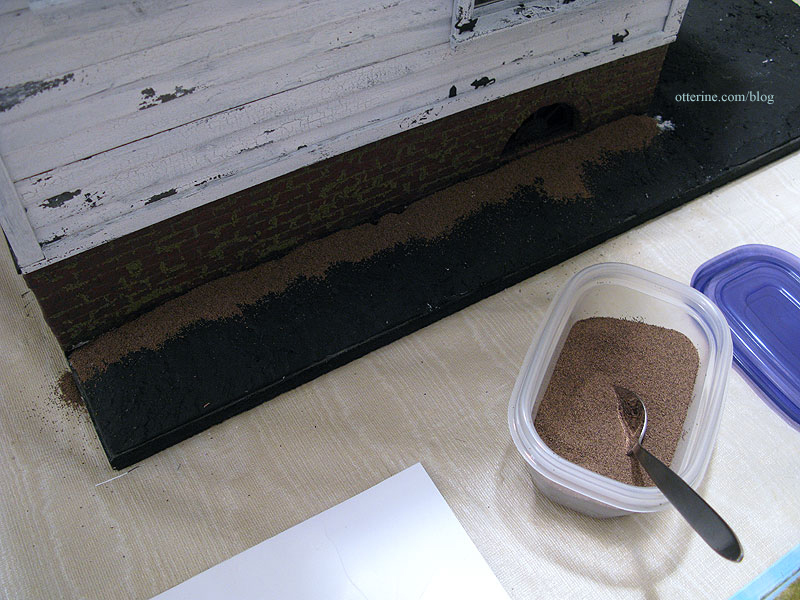
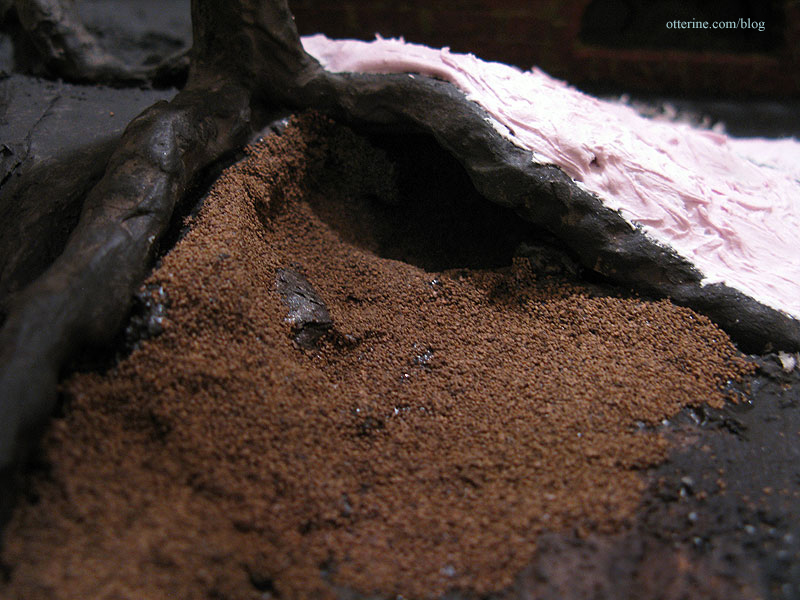
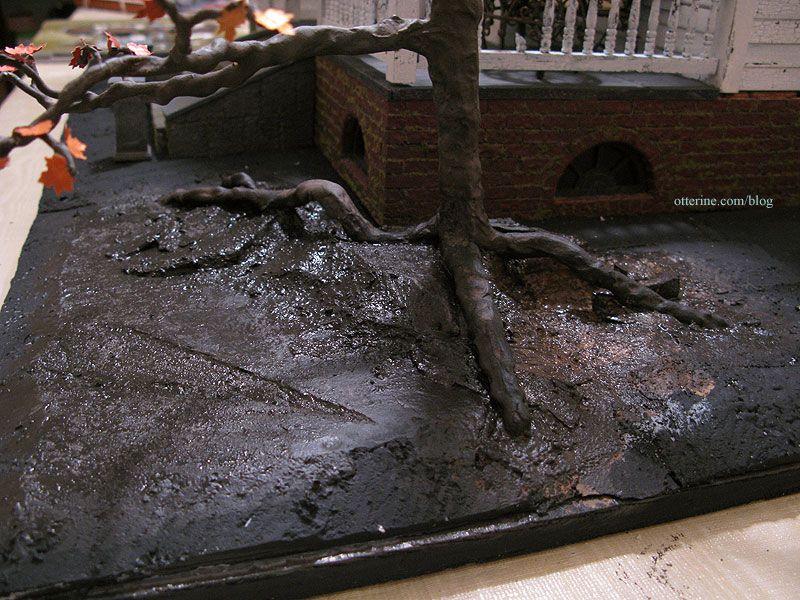
Instead of having the grass go all the way to the house, I decided to have dirt showing along the foundation. After spreading a layer of glue with a brush, I added the Ballast Fine Dark Brown by Woodland Scenics. I worked in small sections so the glue wouldn’t dry out before the ballast could be added. (Note from 2024: I would now use Scenic Cement for projects such as these but didn’t know about it in 2012.)
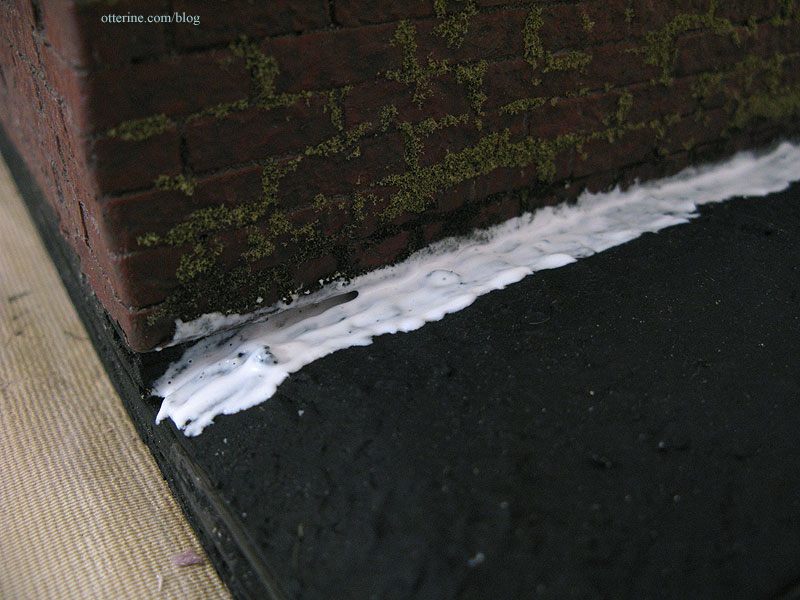
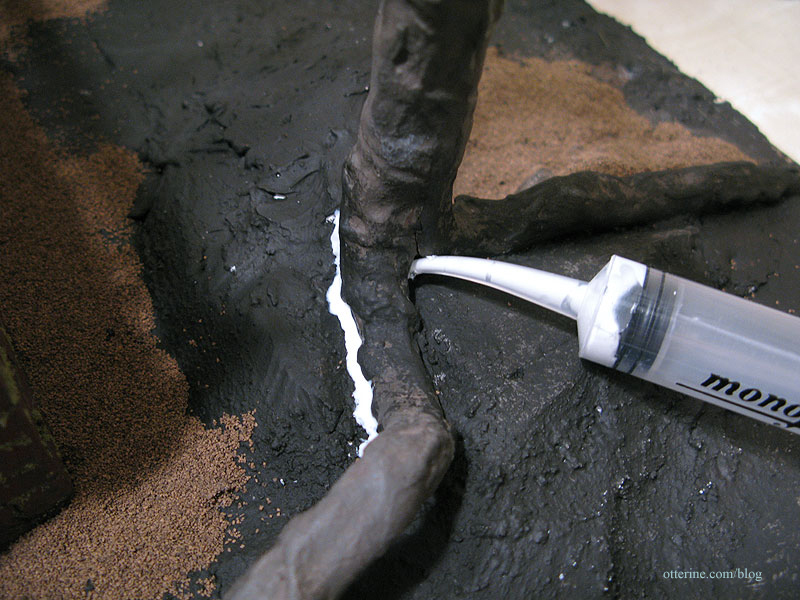
I used a glue syringe to fill part of the lines between the stone pavers.

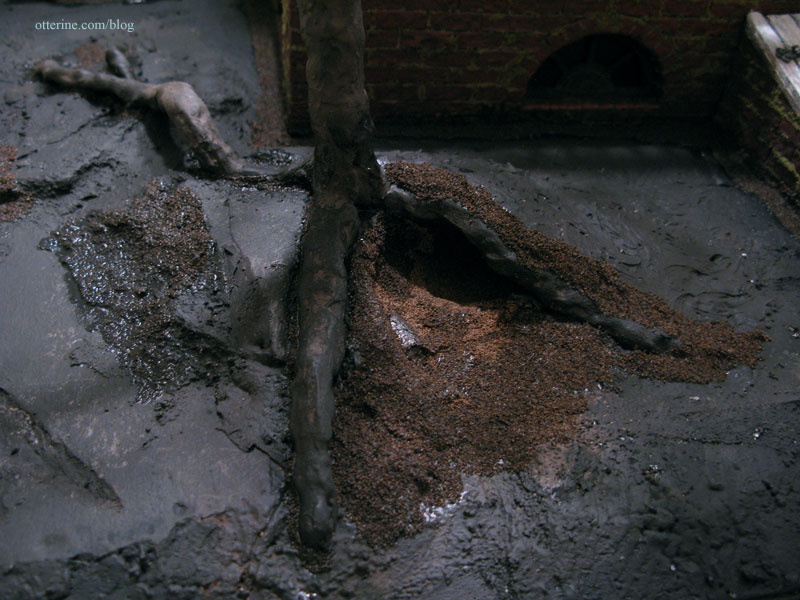
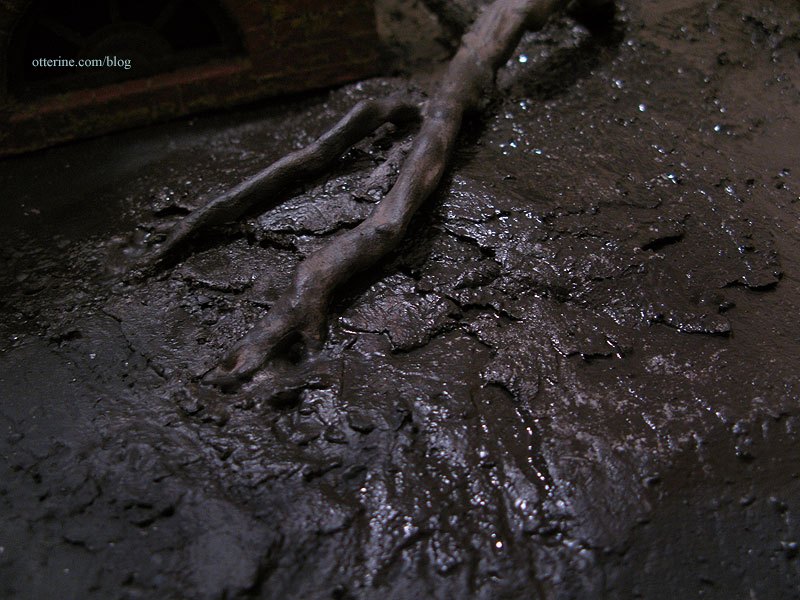
I used the syringe to fill the areas around the roots.
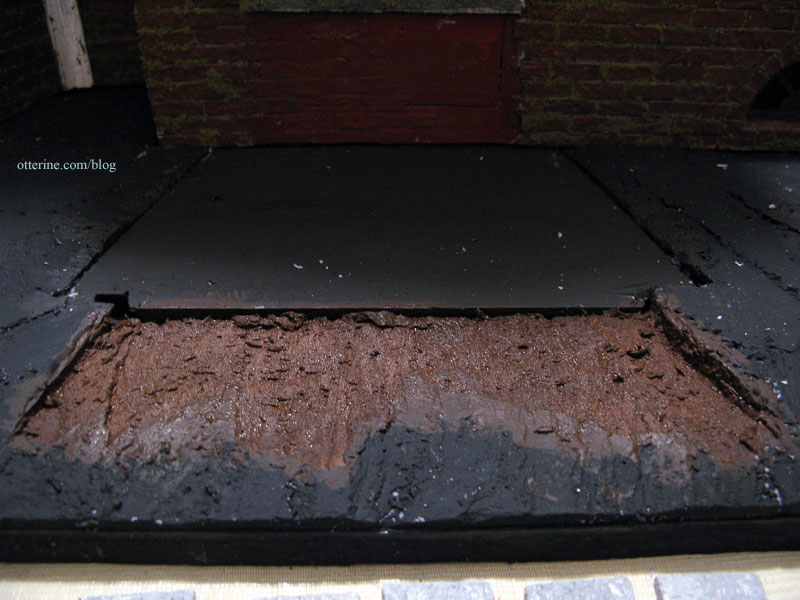
I glued the cellar doors onto the base board but didn’t add the ballast dirt on the main wall behind them. I’ll have to complete this portion of the landscaping after the chimney is installed, which can’t be done until all of the wiring in the house is complete.

I let it set for quite awhile before brushing the excess back into the container, then vacuuming the remainder. I have a good amount of ballast dirt around The Tree and the house, but I can always add more when I get to the grass portion of the lawn.
I added a dark wash of brown and black to the dirt, though this may lighten in color as it dries.

I think the front walkway looks fabulous so far. :D
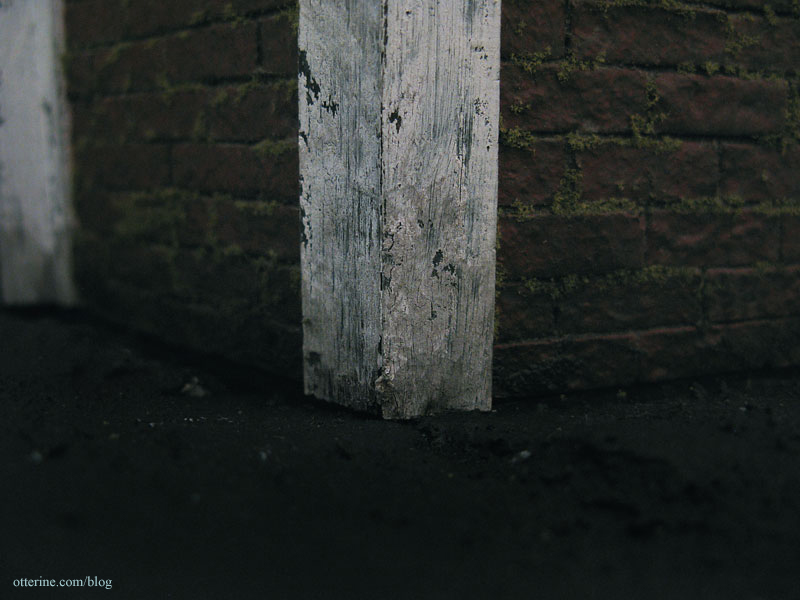
I left Grahame’s burrow the original lighter color inside so it would remain visible. Besides, that dirt has been dug out and is fresher. :]
I’ll need to let this dry completely before moving on to the lawn.
Categories: The Haunted Heritage
October 20, 2012 | 0 commentsHeritage – stone walkway
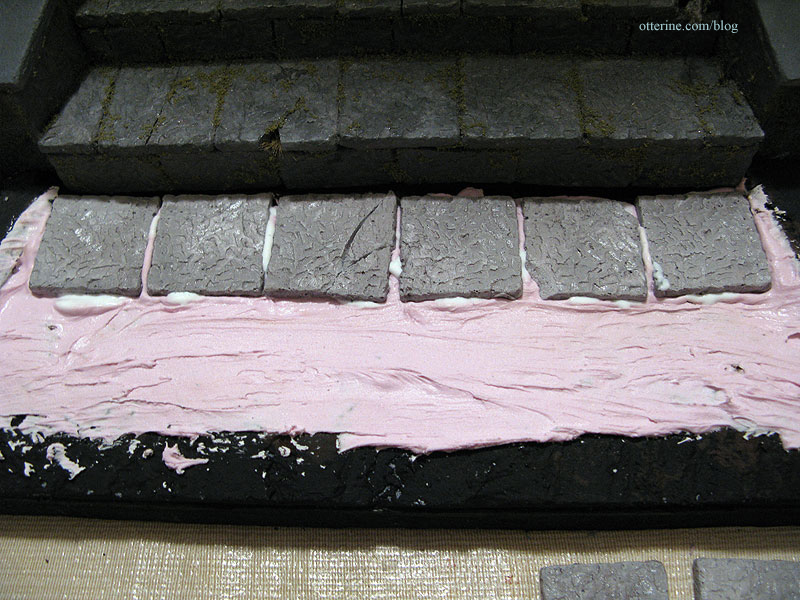
To plan for the walkway at the bottom of the stone steps, I placed loose pavers in a rough layout to see what would look best.
When I cut the foam base for the walkway, it ended up being a little more breakneck than I wanted. :D I used a knife to even out the ground and replaced the stones. Much better.
I primed the newly cut area and the wood base for the stairs.
I added some spackling compound to further even out the ground. To save time in grouting, I decided to add the pavers while the spackling was still wet. I added glue to the bottom of each stone and then pressed it into the spackling.
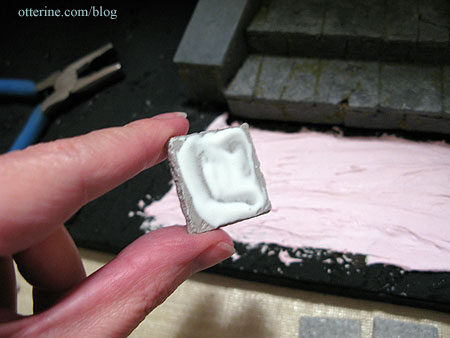
I consulted with Lyssa earlier today, and she agreed my spackle-plus-glue technique should work. We’ll see if we’re both full of beans! :O Of course, if they do pop out, I can just glue them back in place.
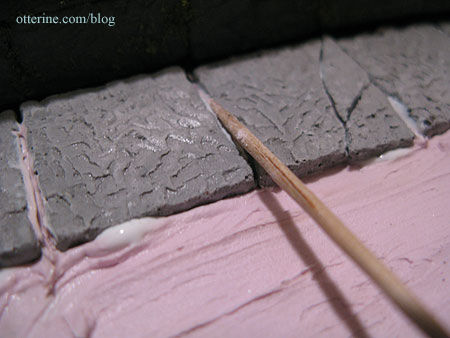
I used a toothpick to smooth the excess spackling and glue into the grooves between the pavers.
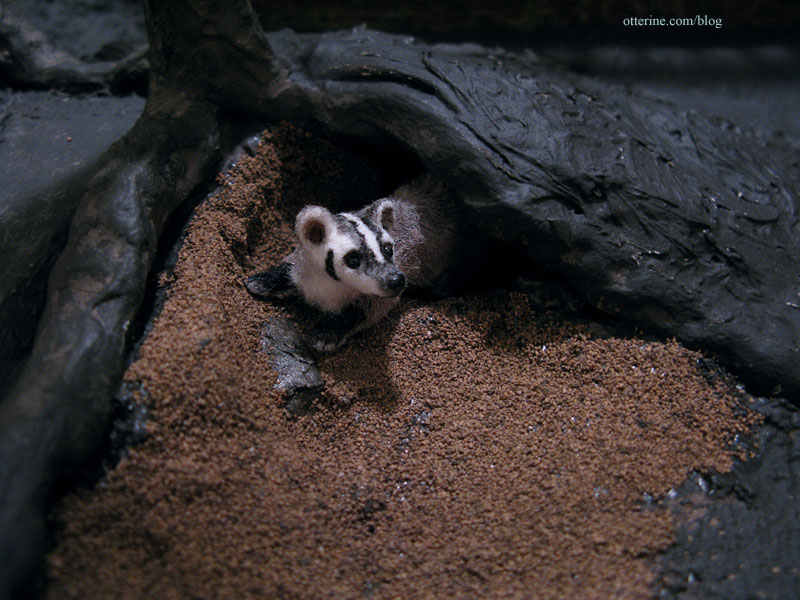
Grahame has come to inspect.
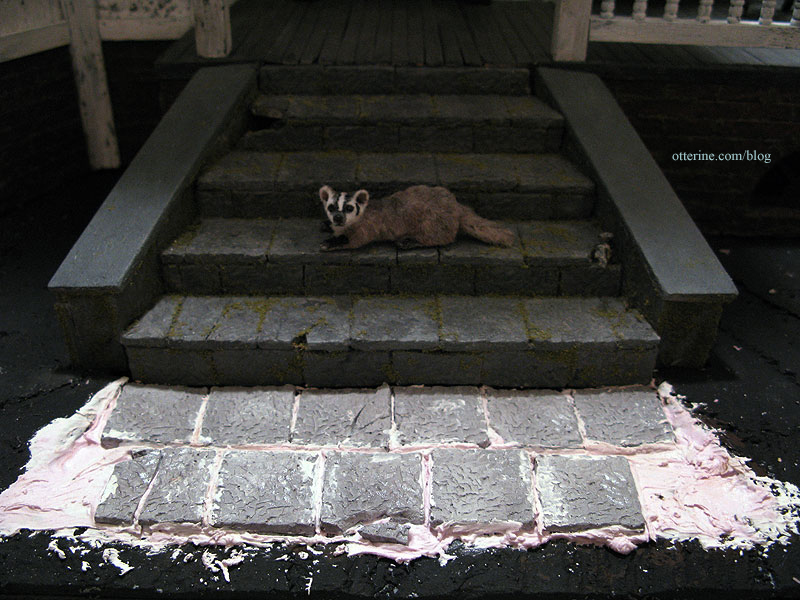
As you can see, I broke a few pavers to match the steps.

Categories: The Haunted Heritage
October 19, 2012 | 0 commentsHeritage – Planting The Tree, part 4
Continuing planting The Tree. I apologize for the few blurry pictures. :\ I was trying to work quickly and still take photos.
I used Ballast Fine Dark Brown by Woodland Scenics for the earth portion of the landscaping. I’ll add more later in other areas, but I mainly needed to finish the interior of the burrow. I probably should have used a finer material for good scale approximation, but it was important that the landscaping materials not be “dirty” or have the ability to rub off easily for the simple fact that I would be placing Grahame inside the burrow and didn’t want anything to stain or mar his fur. I was afraid anything with a powdery texture would do just that. During the painting and finishing portion, I had him far away from the mess.
I started with Aleene’s Quick Dry glue put on with a brush.
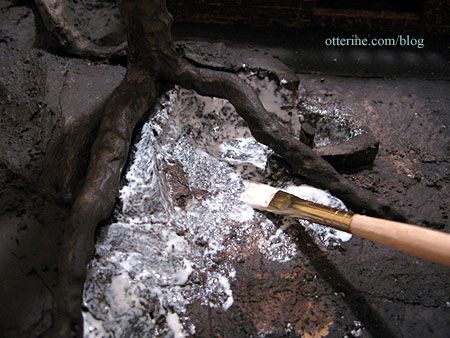
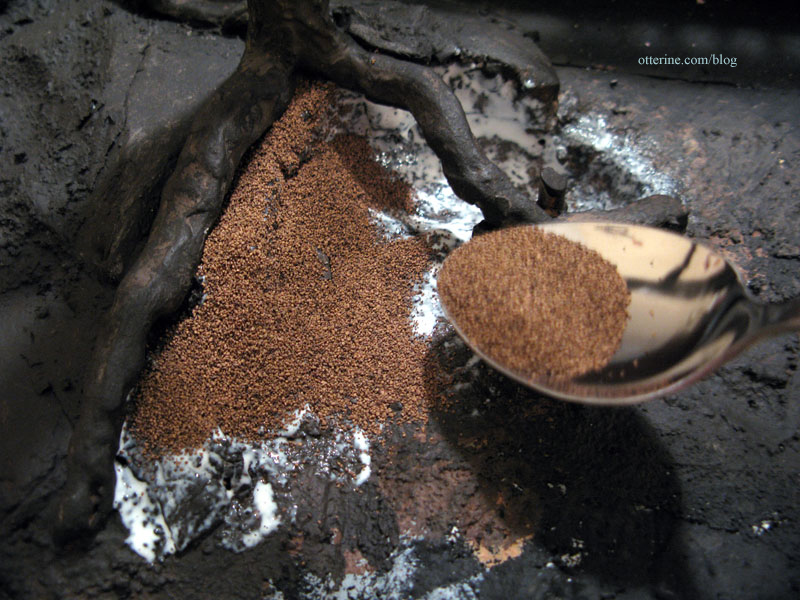
Using a spoon, I added the ballast to the glue.
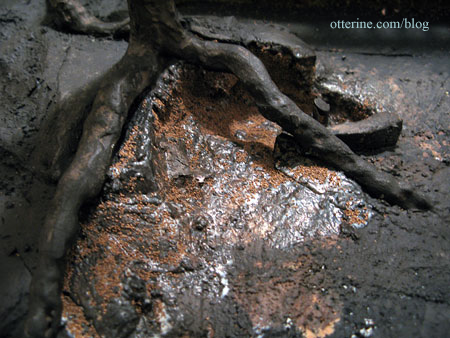
And, it didn’t work at all! Hahahahaha. Quick Draw McGraw glue is right! Hardly any ballast stuck and I was left with shiny dirt. Well, I guess I now know how to create slippery waterfront rock.
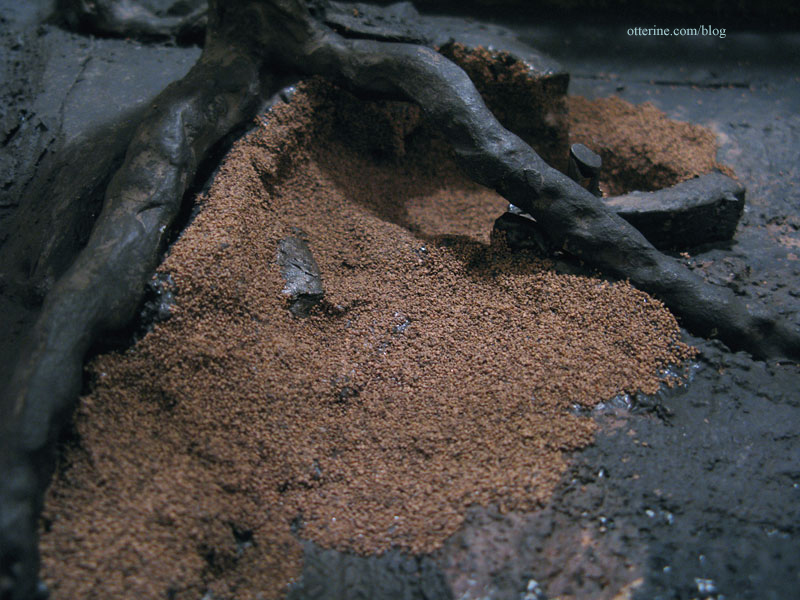
I applied Weldbond this time, and in smaller sections, and spooned more ballast over the areas. After letting it set while I had a snack, I brushed away the excess and vacuumed what the brush couldn’t remove. Success!!! I had left one ledge of foam bare, because I thought it looked like a rock. (Note from 2024: I would now use Scenic Cement for projects such as these but didn’t know about it in 2012.)
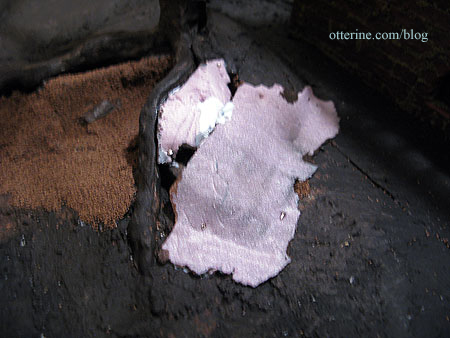
Prior to gluing them in place, I had painted the mesh and some foam pieces to be used to complete the upper portion of the burrow. I don’t think the interior of the burrow will be readily seen, but this will keep any silver metal or purple foam from showing on the off chance you can see inside once it’s complete. I painted more foam than I needed since I wasn’t sure of the configuration I would need.
I glued the piece of foam that contoured to the tree root first and then added a very thin piece of foam to enclose the back. The painted sides are facing down over the burrow.
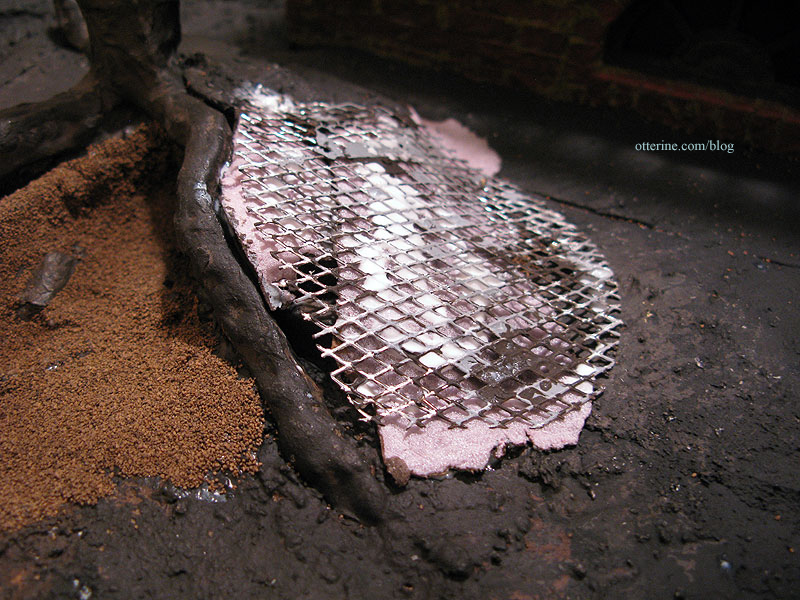
I adjusted the shape of the mesh and glued it in place, again painted side down. I used straight pins throughout this whole process.
I glued the remaining foam on top of the mesh then stuck my finger into the burrow to make sure there was nothing sharp or intrusive sticking out. :]
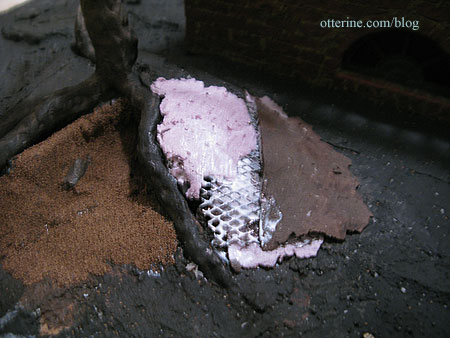
There was no more stucco left, so I spread spackling compound to even out the edges and gaps for this final portion of the landscaping.
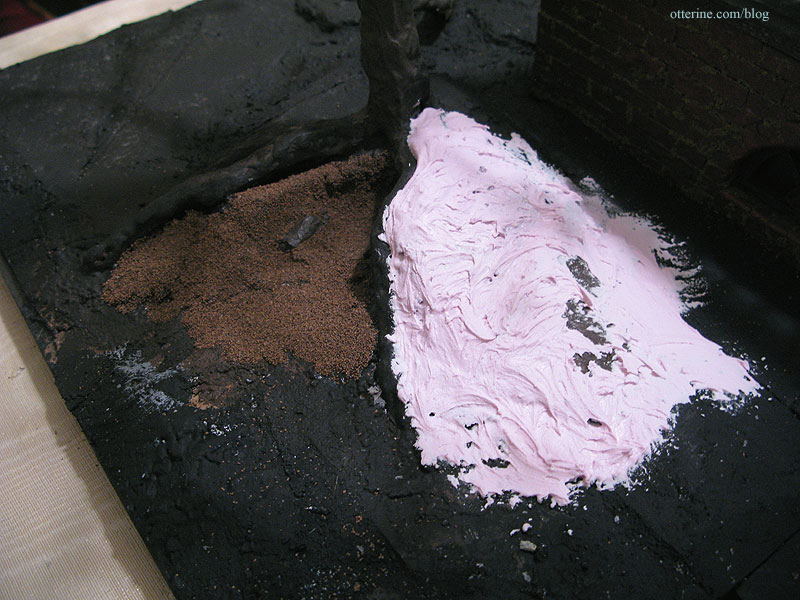
I am really resisting the urge to put Grahame in that burrow!!! But, I don’t want to risk getting any wet glue or stucco on him.
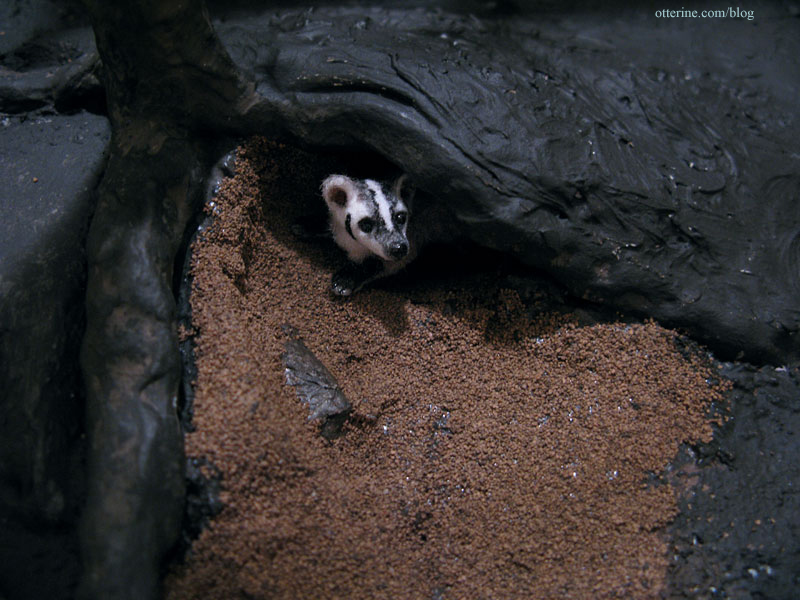
After letting this all dry completely, I primed and painted the spackling. He certainly does look right at home.
And, he goes way back in there! :D I love it so far!
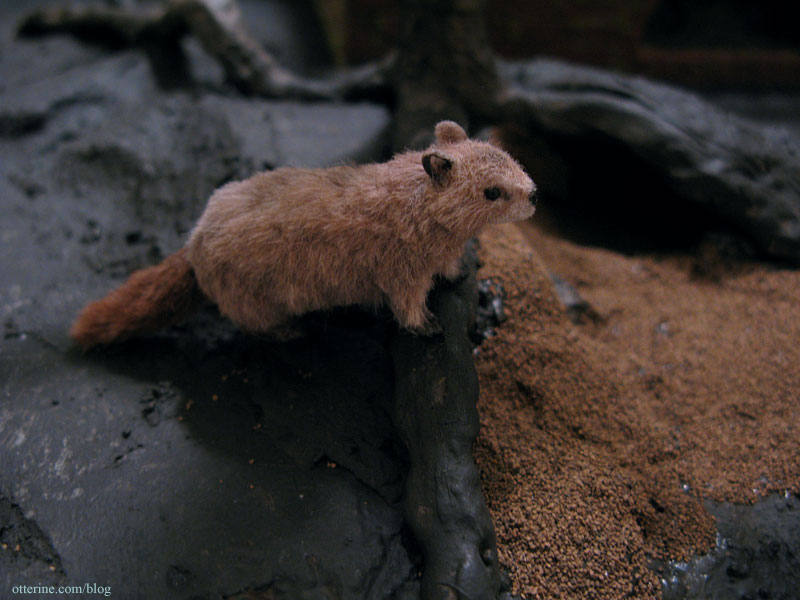
Woodrow came to check things out, but that is a Grahame-sized burrow. It’s too short for Woodrow. Good thing he’ll have his own home elsewhere.
Categories: The Haunted Heritage
October 18, 2012 | 0 commentsHeritage – Planting The Tree, part 3
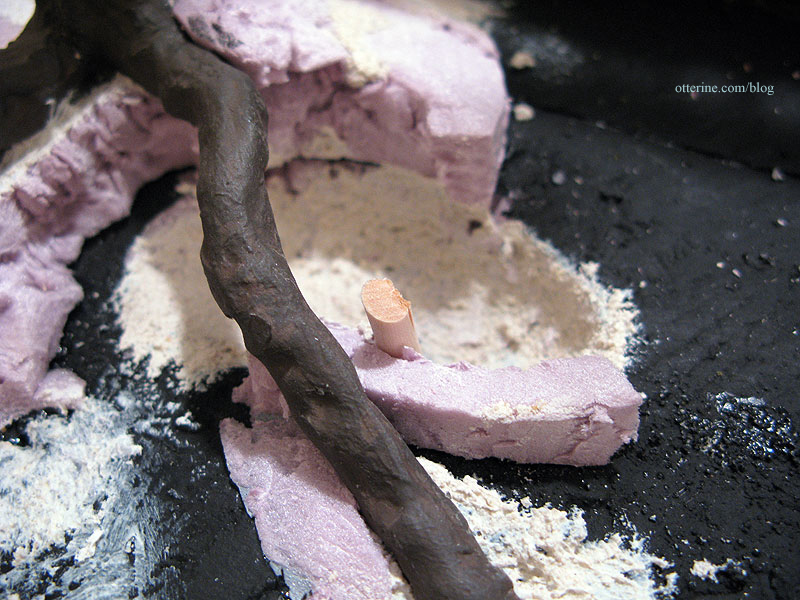
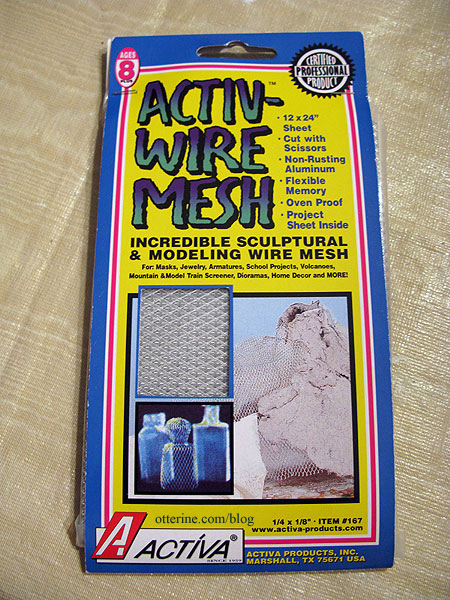
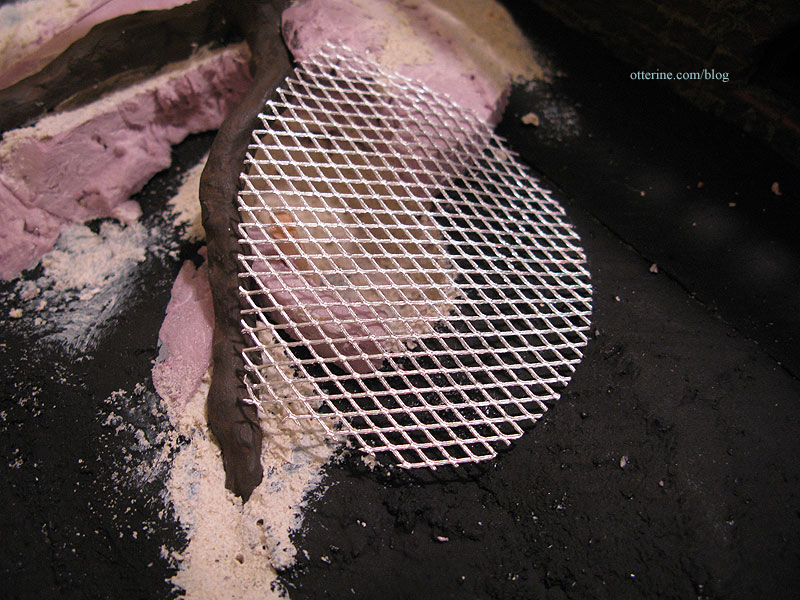
Continuing planting The Tree. To keep the burrow ceiling from collapsing during the landscaping process, I cut a dome of Activ-Wire Mesh supported by a wood pole. Grahame has a degree in structural engineering, apparently. :D Here the pole is glued in place though the mesh is still loose so I can paint inside the burrow.
I primed the foam and stucco with gesso. I did try to keep the amount of gesso on the roots to a minimum, but it wasn’t especially important. There would be more layers of paint as well as landscaping materials to cover any wayward marks.
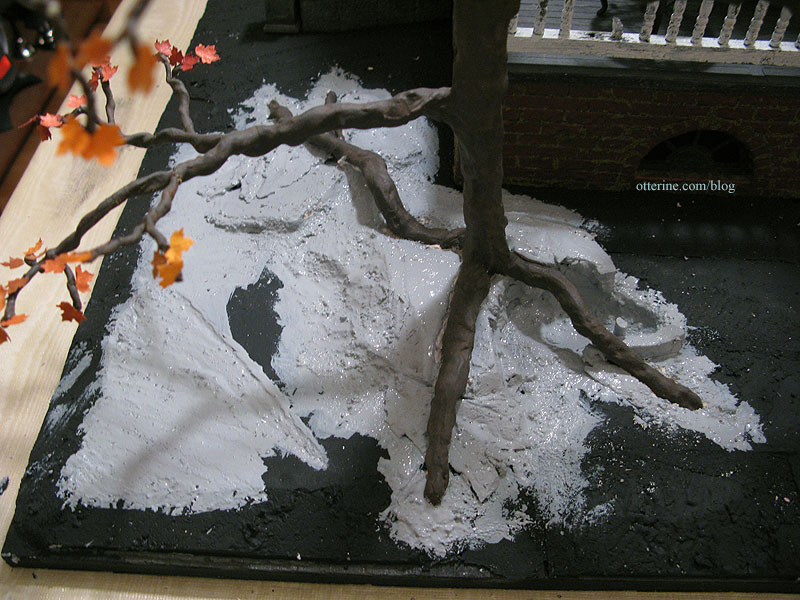
The burrow for Grahame needed some preliminary finishing before creating the top and sealing off access to it. I stippled on layers of brown paints inside and around the burrow until I achieved a good base color. I painted the rest of the area with a mix of brown and black, wiping the excess from the roots as I worked. The paint is thick and will need to dry overnight.
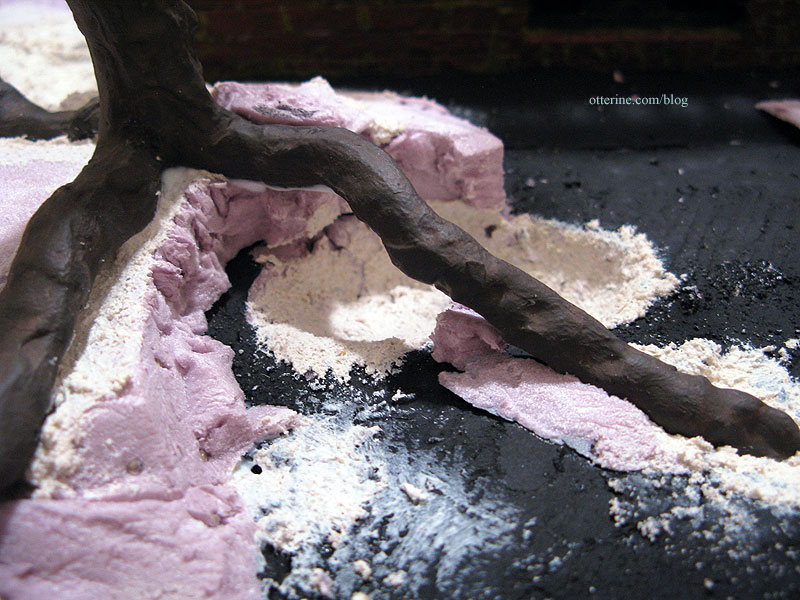
The foam slivers under the front roots look like rock. Something to keep in mind for future landscaped settings.
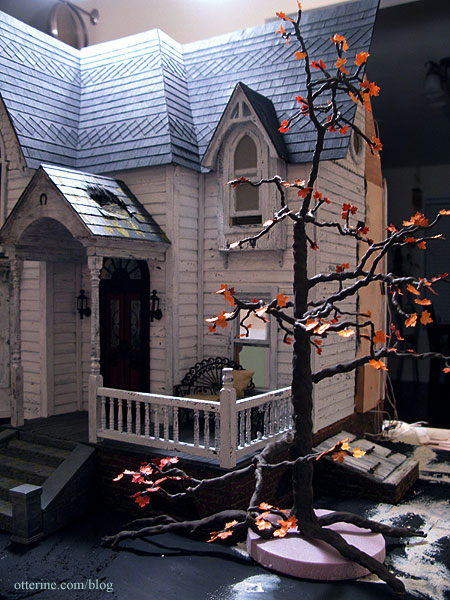
The Tree looks well planted but somewhat precarious, as though it might uproot and chase after trespassers. :O
Categories: The Haunted Heritage
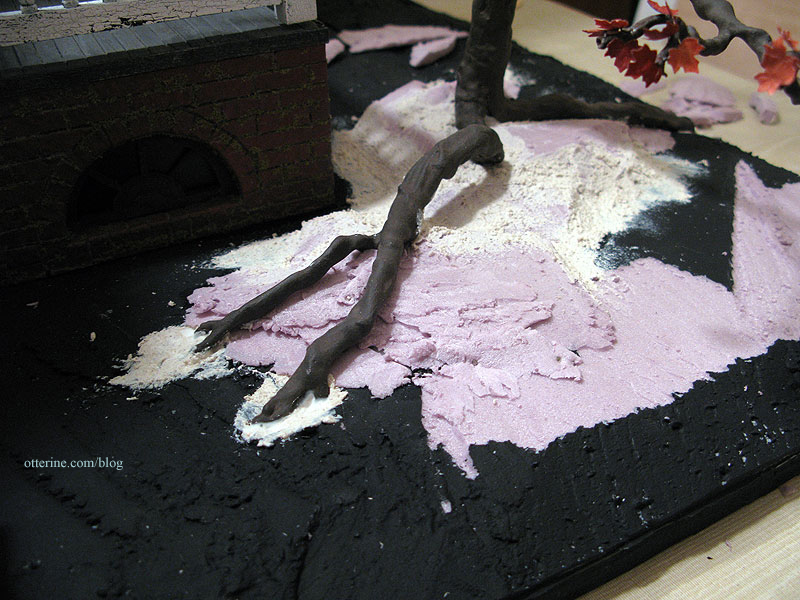
October 17, 2012 | 0 commentsHeritage – Planting The Tree, part 2
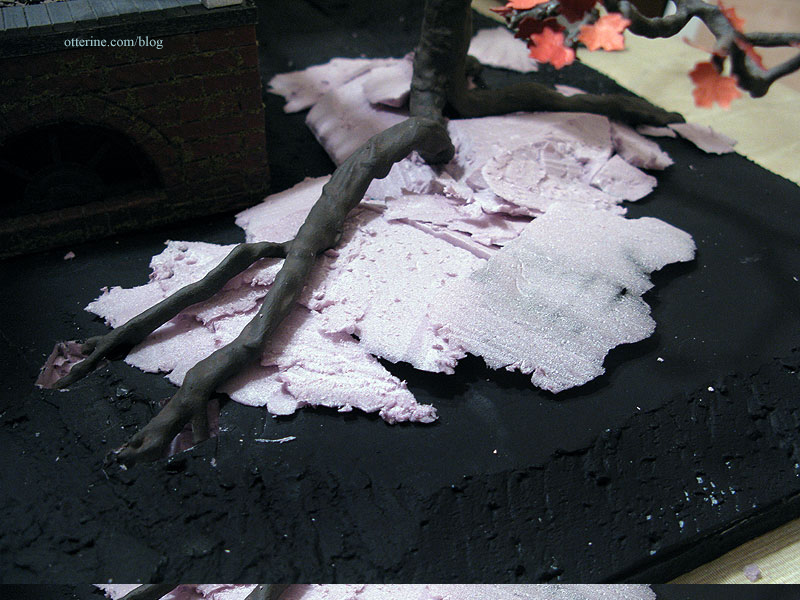
Continuing planting The Tree. I glued the circular tree base onto the landscape base. I used straight pins to hold the foam and will leave them in permanently. Before gluing The Tree in place, I added stucco to the root channels and smoothed the burrow. I’m working with the stucco while it remains pliable.
I added stucco to the holes I made for the root tips.
When I glued The Tree into place, the stucco squeezed under the roots and around the root tips for a smooth fit. :]

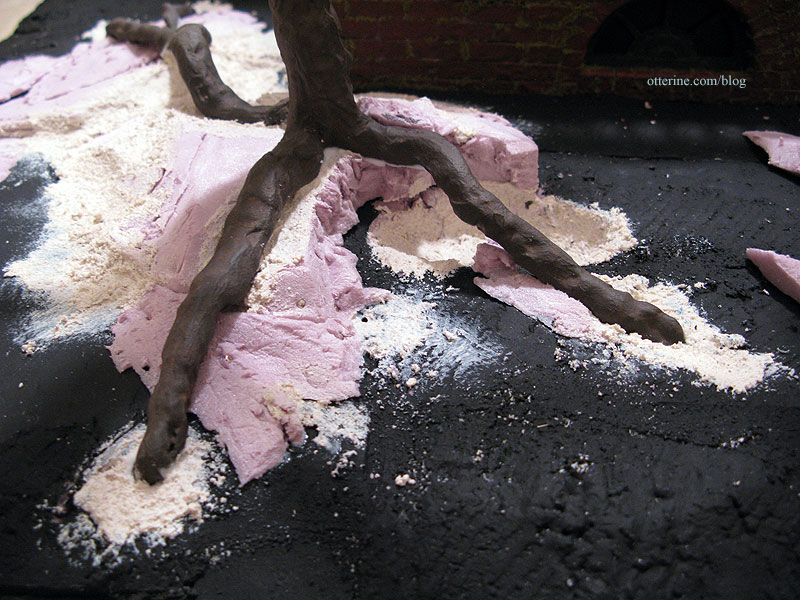
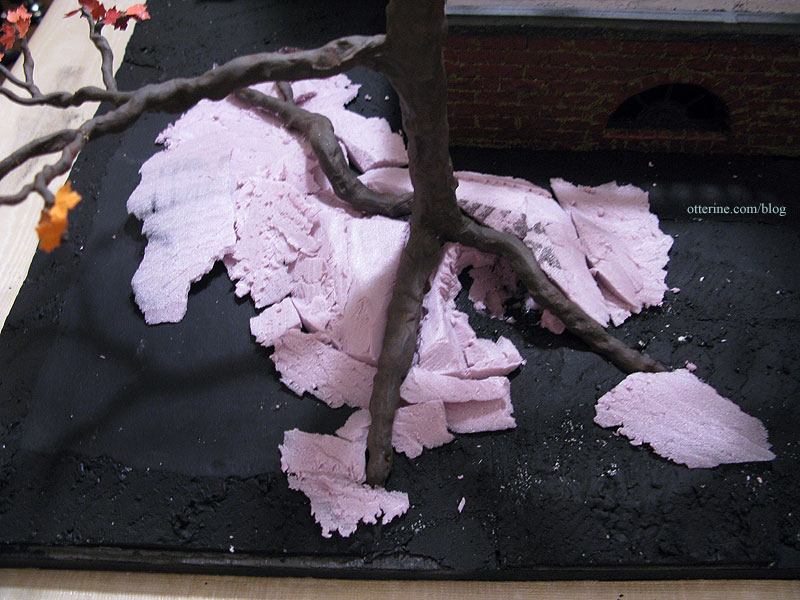
I used a toothpick to shape the stucco further. I then glued in the foam scraps under and around the roots, again using straight pins to hold the foam in place while the glue dries.
More stucco added, and the surface is relatively even now.
This was as far as I could go tonight. The burrow floor needs to be painted before I can close it up, so I have to wait for the stucco to dry.
Categories: The Haunted Heritage
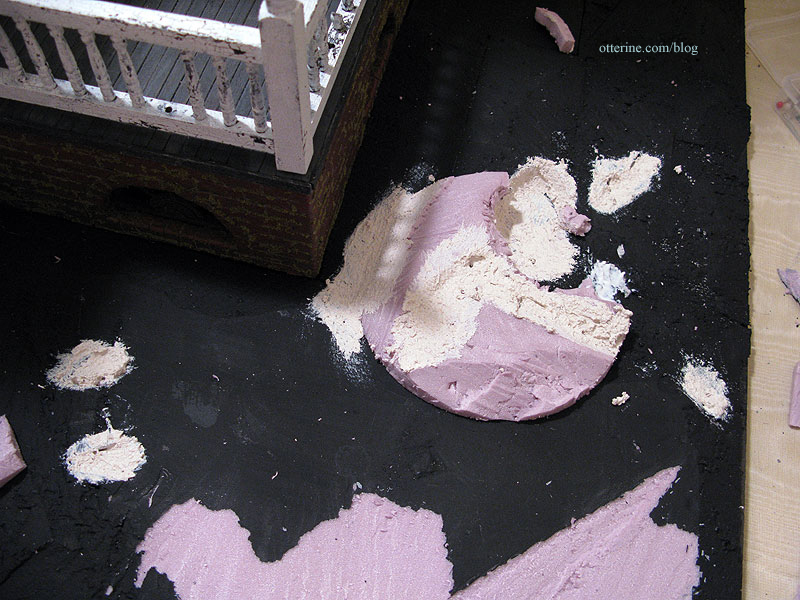
October 16, 2012 | 0 commentsHeritage – Planting The Tree, part 1
Time to tackle the portion of the landscaping surrounding The Tree. I sculpted the circular base to start, cutting out channels for the roots and making the outer edge of the circle blend into the surrounding areas. I also cut out the area under one of the upward-curving roots in both the circular base and the initial foam base down to the wood base board.
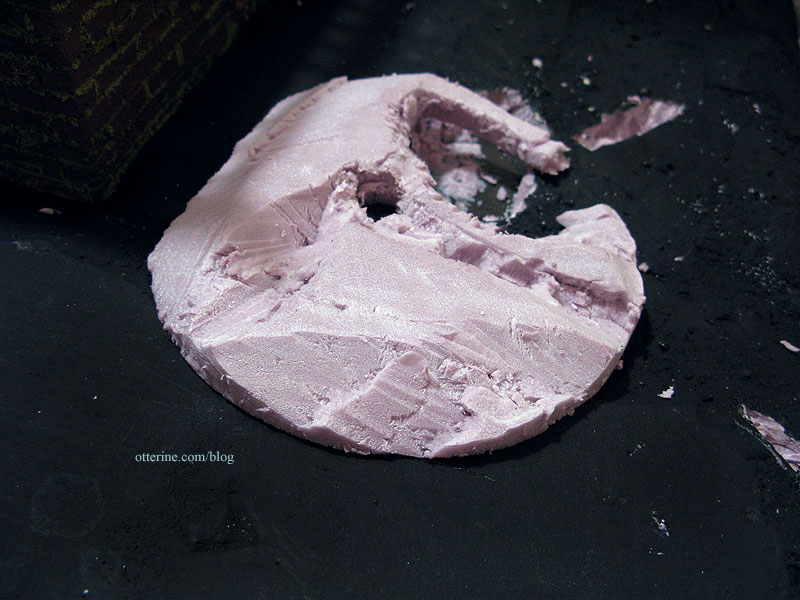
I made divots in initial base to sink the root tips.
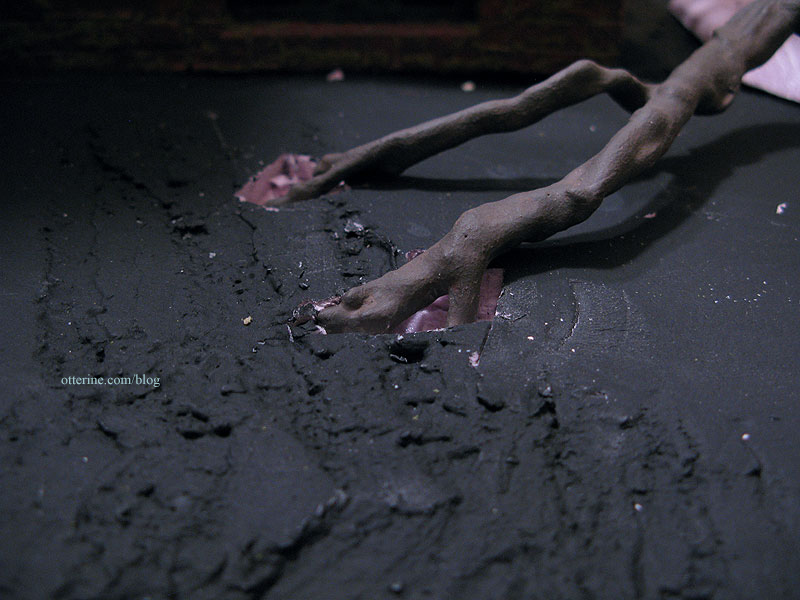
Using the slivers of foam cut from the initial foam pieces that make up the lawn, I built up the area under and around the roots though nothing is glued in place just yet. I’ll need to sculpt the flat front corner of the lawn as well. Yes, that big root will stick out of the ground…yet another lawn hazard. :O
I covered the hole and added foam pieces to abut the back of the root that defines its opening. These are also still loose and not glued in permanently.
So, what’s the hole for? Grahame!!! :D

I won’t make him live in this tiny, cramped burrow full time, but it sure will be cute to take some photos of him peeking out from under The Tree!
Categories: The Haunted Heritage
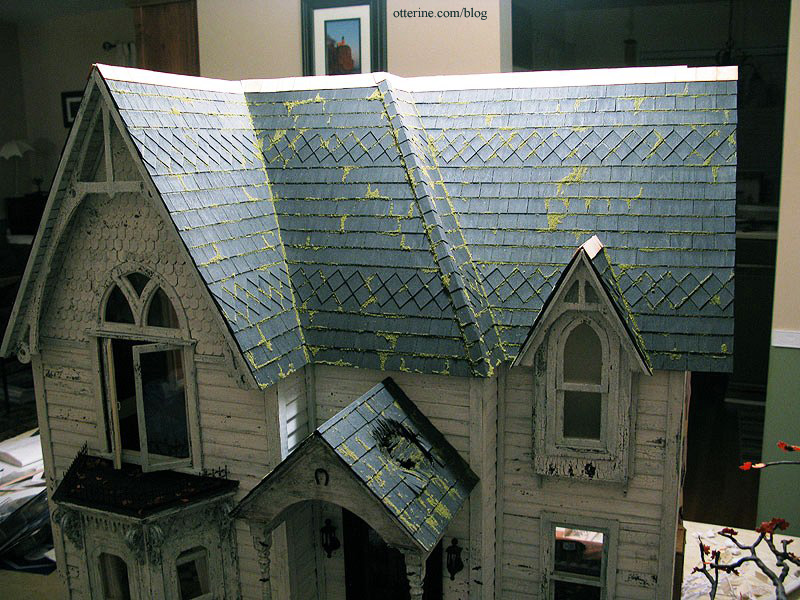
October 15, 2012 | 0 commentsHeritage – mossy roof
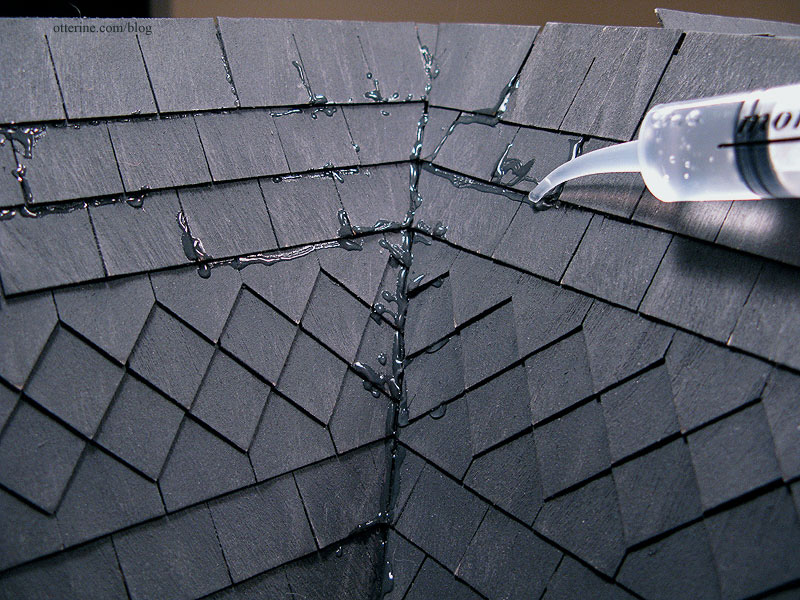
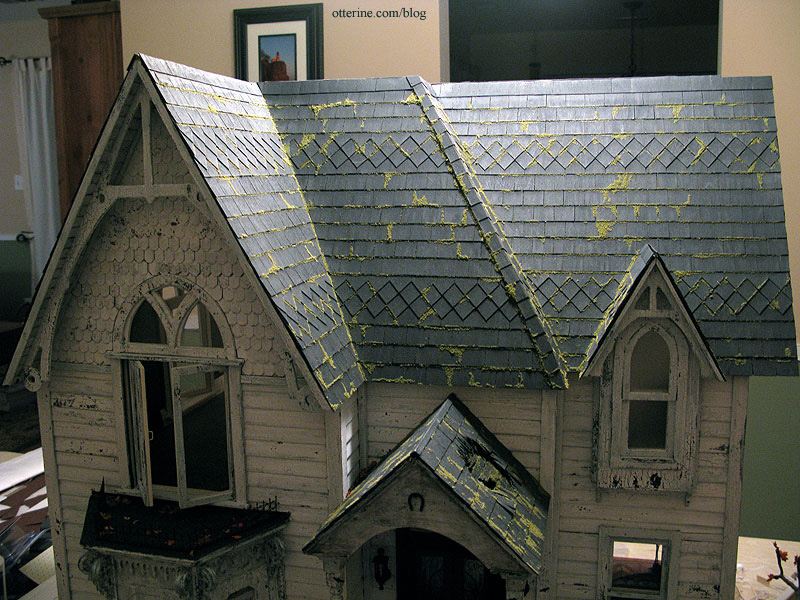
Moss = mess. That is a truism! :D To add moss to the roof, I used the same materials I had used on the mossy front steps – Aleene’s clear gel tacky glue and Fine Turf, Burnt Grass by Woodland Scenics.
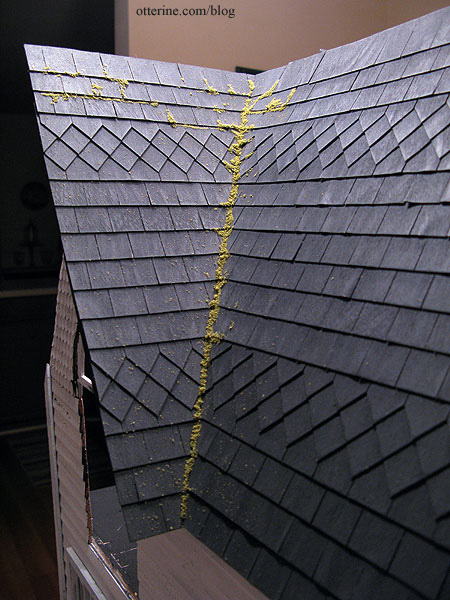
I used a glue syringe to apply the glue, focusing the glue on the seams between the shingle rows with a few lines following the vertical lines between the individual shingles. I worked in small areas so the glue wouldn’t have the chance to dry.
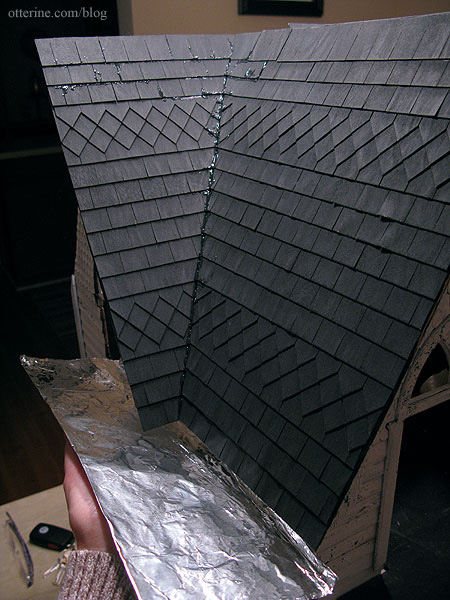
For the portions of the roof that allowed access, I used a foil tray to catch the excess moss as I applied it to the glue.
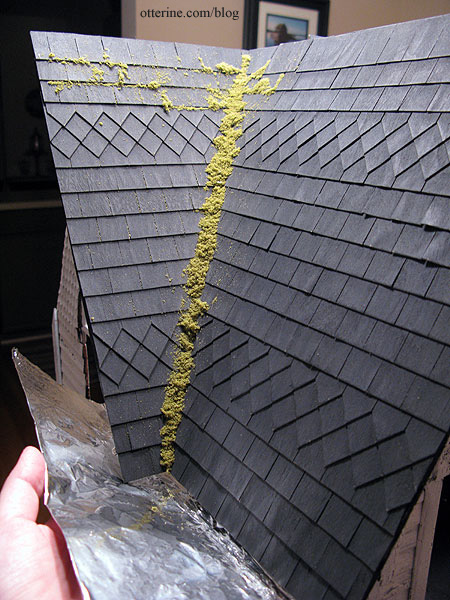
I applied the moss liberally and let it set for a few moments.
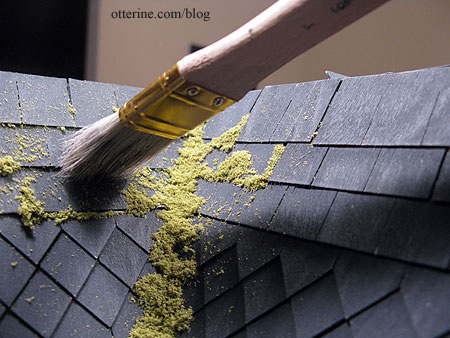
I used a large, soft brush to remove some of the excess. Once the glue has set overnight, I’ll go back and remove more.
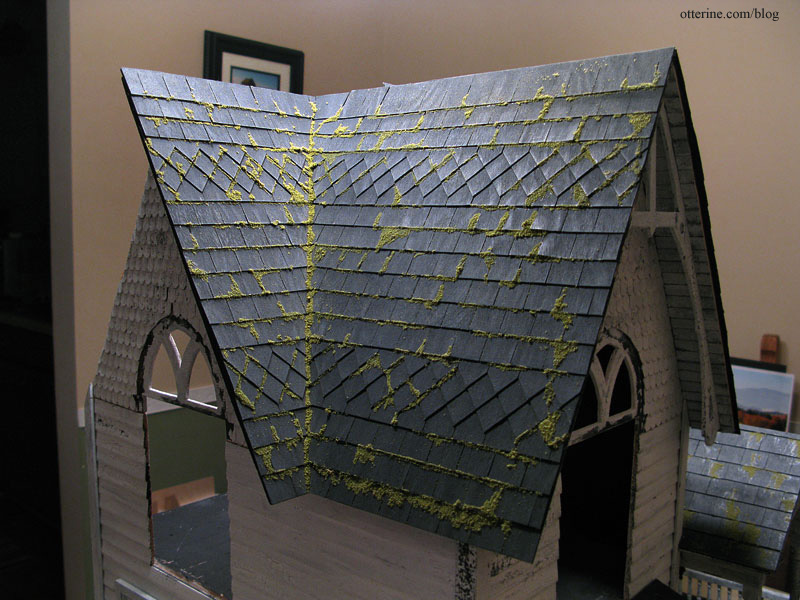
I filled that large gap in the left side valley…no need for that trim wood after all. :D
For the especially warped shingles, I worked those in my favor by adding a lot of glue under and around them. This makes them stand out more, but they look more realistic.
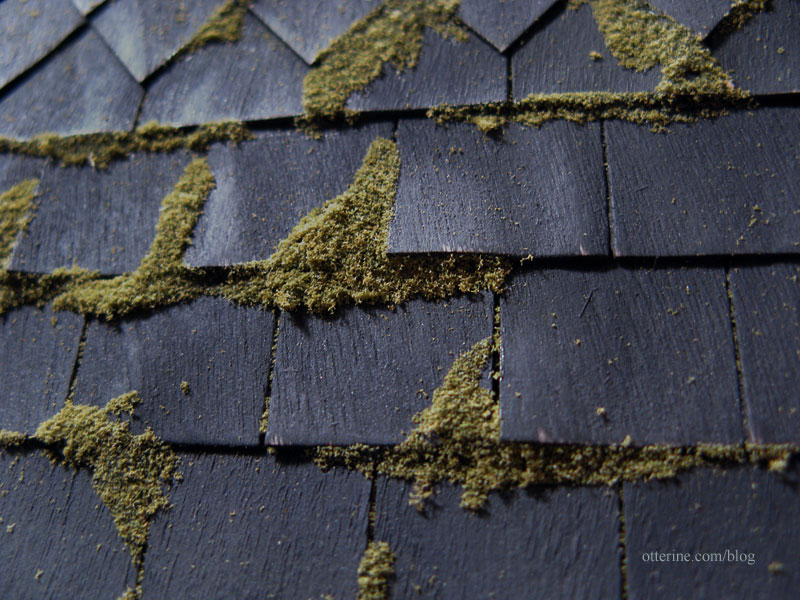
I think grandma might want to look into replacing a few of these before she ends up with water damage.
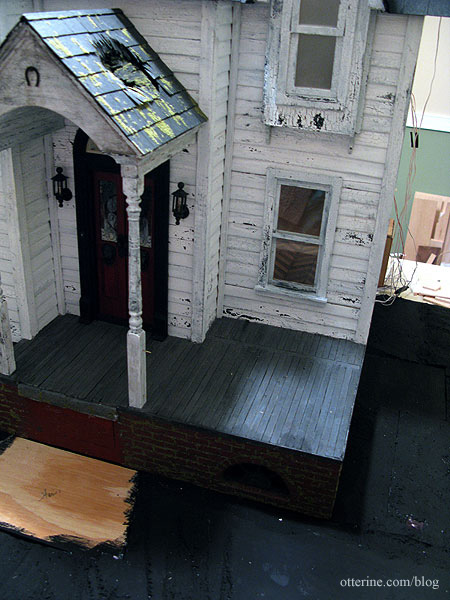
The railing on the sun porch is held in place with only pins, no glue. This means I can remove it as needed. I figured it would be easier to clean up the excess moss material without it.
I didn’t go overboard with the moss, and there will actually be less than you see here when I brush away the excess again tomorrow.
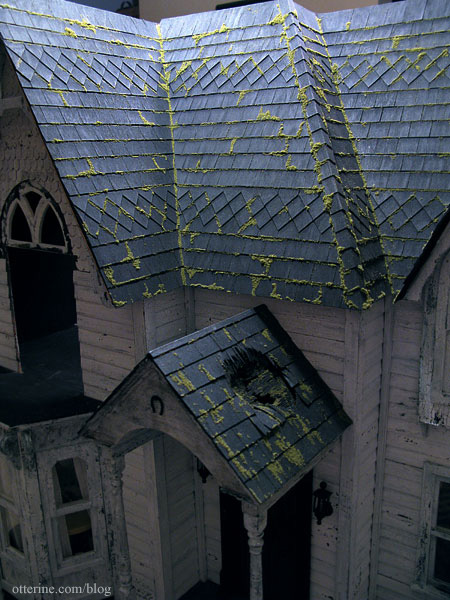
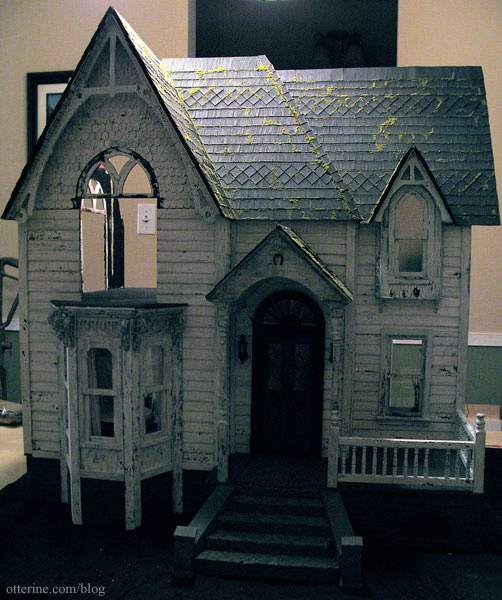
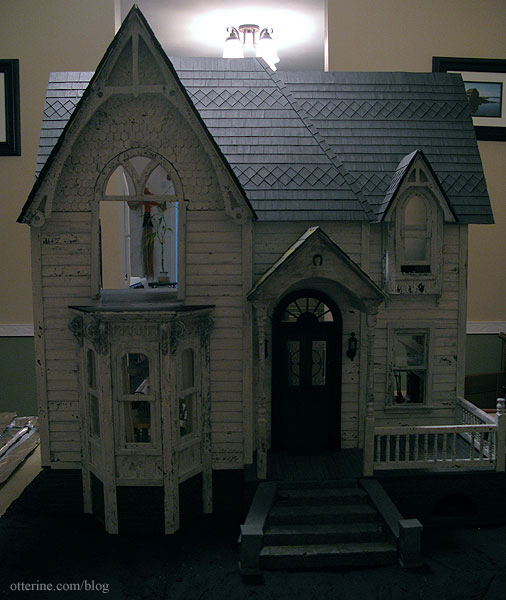
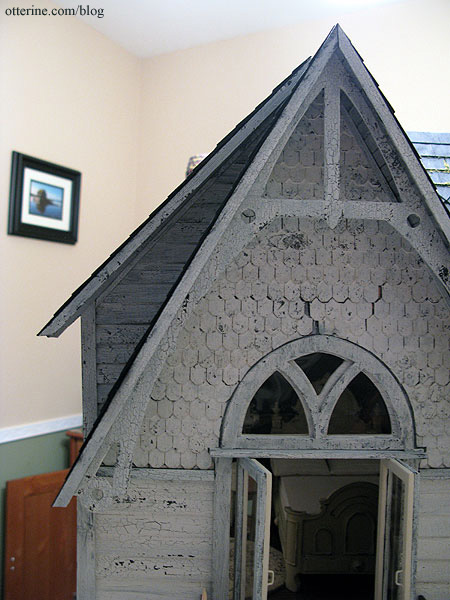
Yay for creepy, mossy house!!! :D
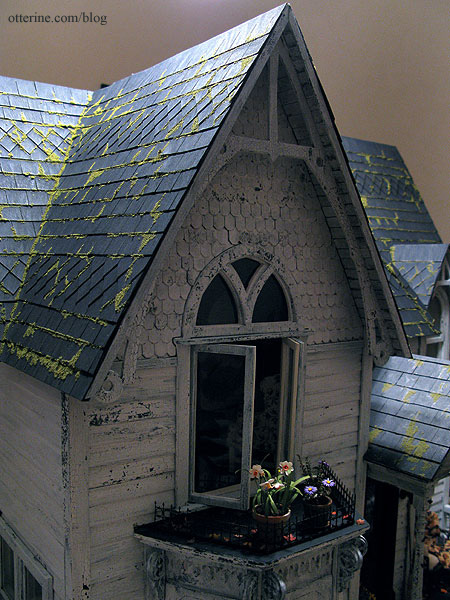
Update: after installing the bedroom swinging window, I added the final trim to the front gable as well as the trim between the main wall and the gable.
Categories: The Haunted Heritage
October 14, 2012 | 0 commentsHeritage – roof shingling, part 5
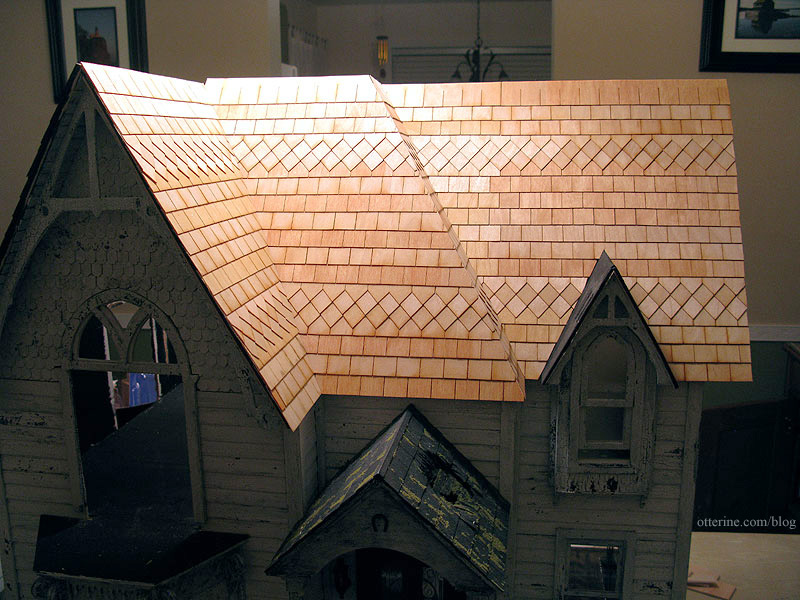
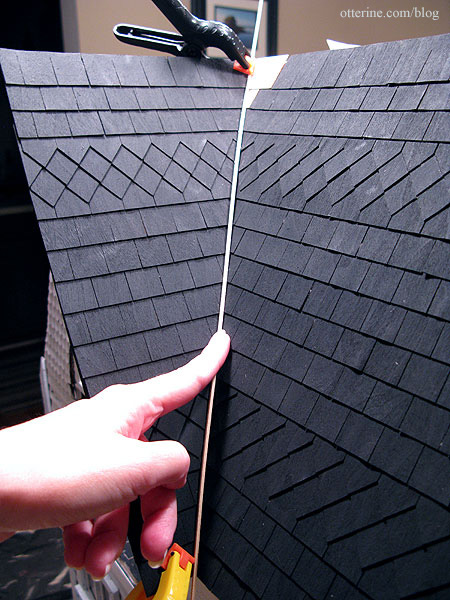
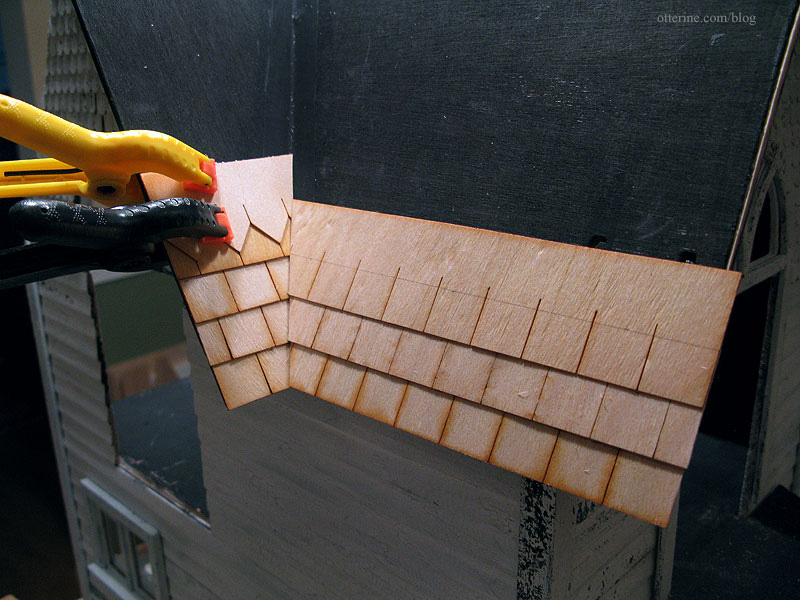
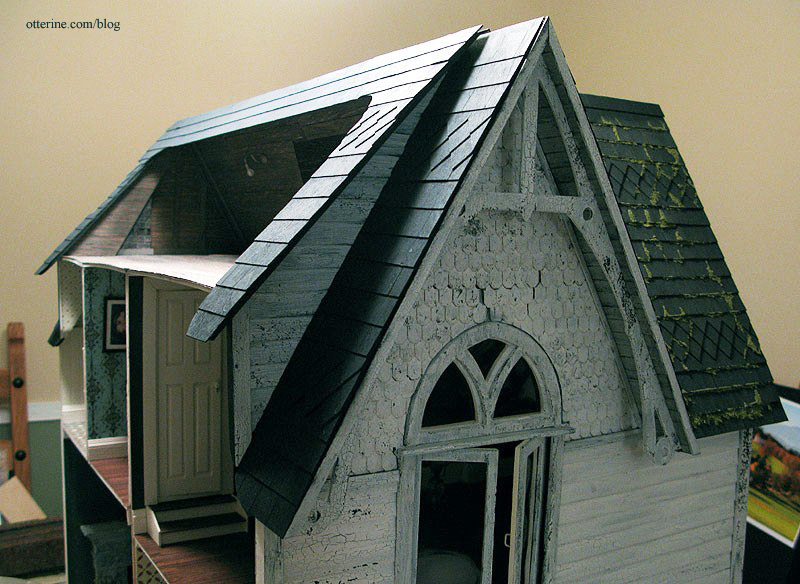
Continuing work on the roof. I cut and adjusted my templates for the two sides of the dormer window roof. The shingles for this portion were quick and easy to cut. The front roof is now completely covered.
I decided against any added strip wood to the gap on the left main roof since no gaps formed on the right main roof. The dormer roof will need to dry a few days to see if gaps occur there. I’ll just pile on the moss for the left side gap.
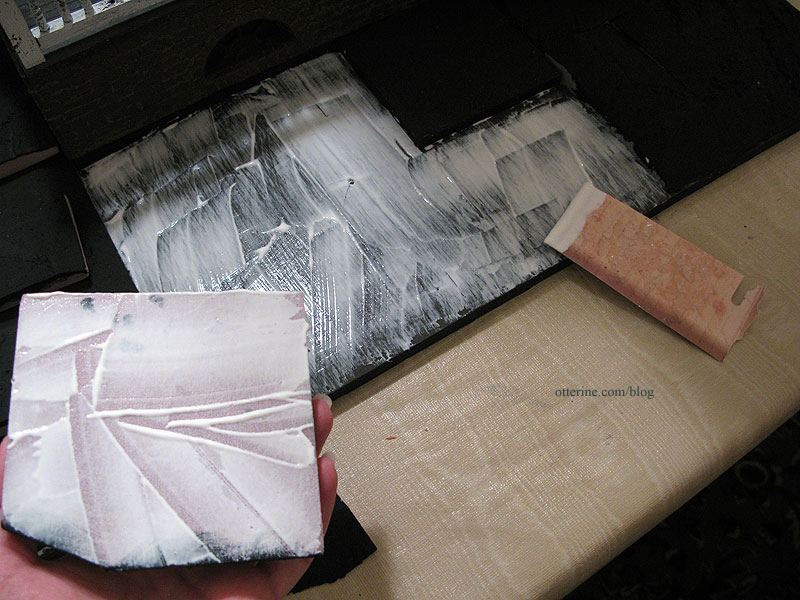
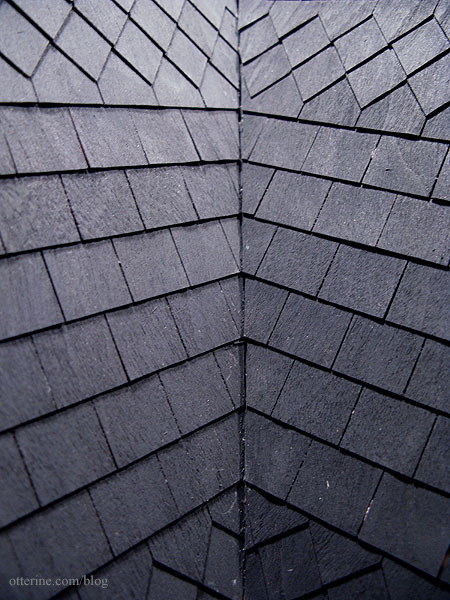
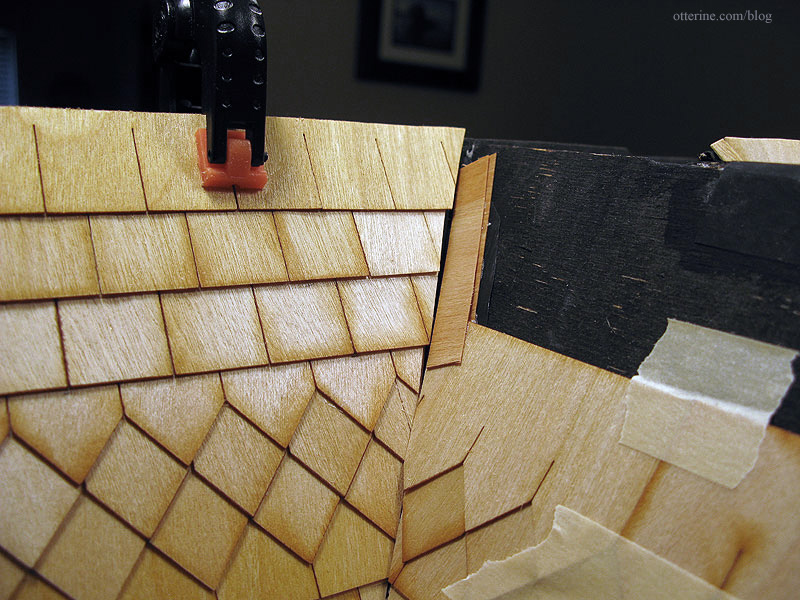
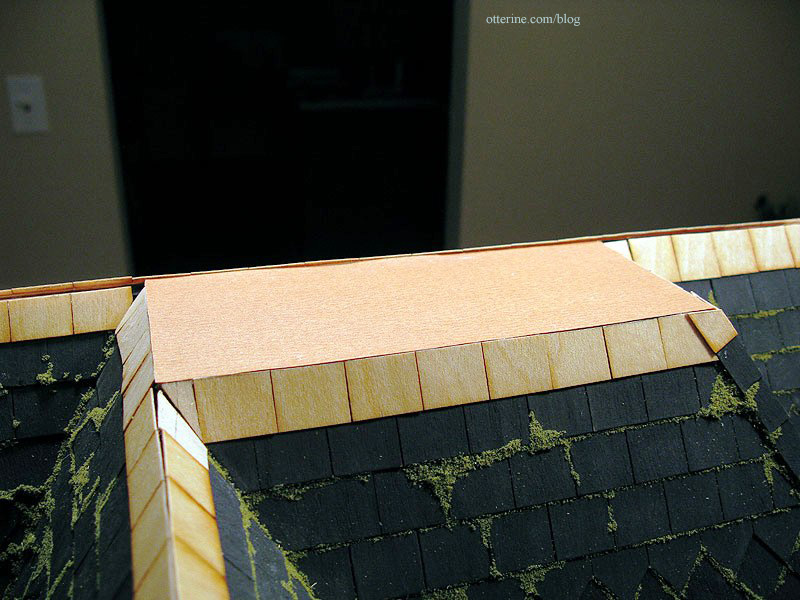
I shingled over the outer edge of the middle front section, using shingles cut in half lengthwise, with 5/8″ lines marked for consistency. I did this after the initial paint wash on the roof shingles in case those shifted or shrank from the paint treatments.
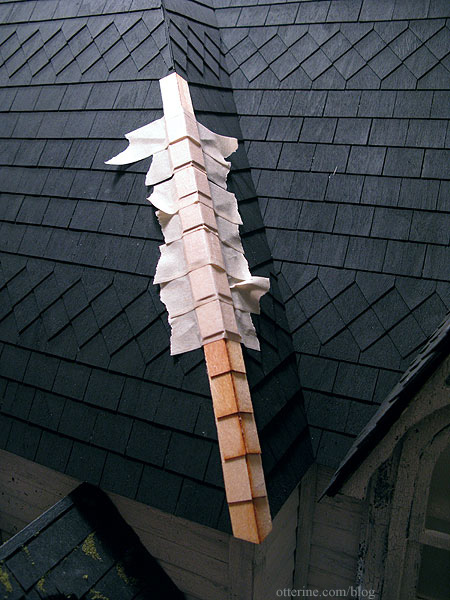
It finished off the edge very nicely.
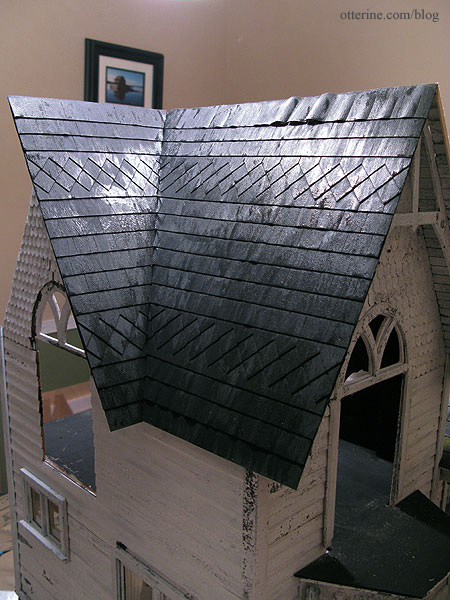
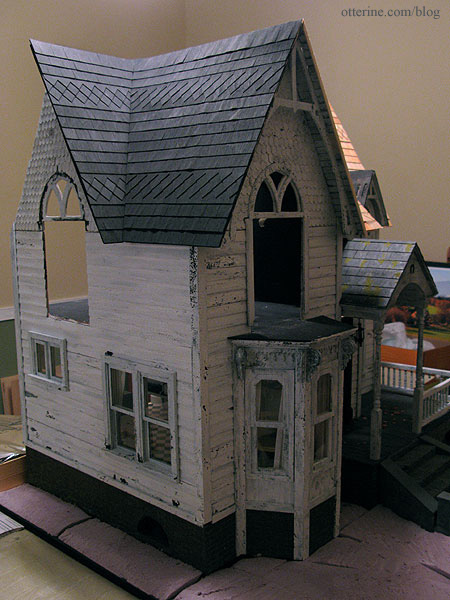
I painted the roof with a grey and black mixed glaze to match the main roof to the portico roof. I brushed on the glaze and wiped it away in a downward with a paper towel. I then used sandpaper to lift some of the color before adding another paint wash. Then I did a final sanding. I find doing multiple rounds of paint, washes, glazes and sanding creates a good depth of tone and a more realistic worn appearance.
I love the way it’s turning out!
I probably won’t do the roof ridges on the gable and dormer until I get the back roof on. I’ll need to finish off the top flat portion, too. For now, I’ll add some moss to the roof and concentrate on the landscaping. Halloween is fast approaching, and I want some Heritage Halloween photos this year!
Categories: The Haunted Heritage
October 13, 2012 | 0 commentsHeritage – The Tree, part 3
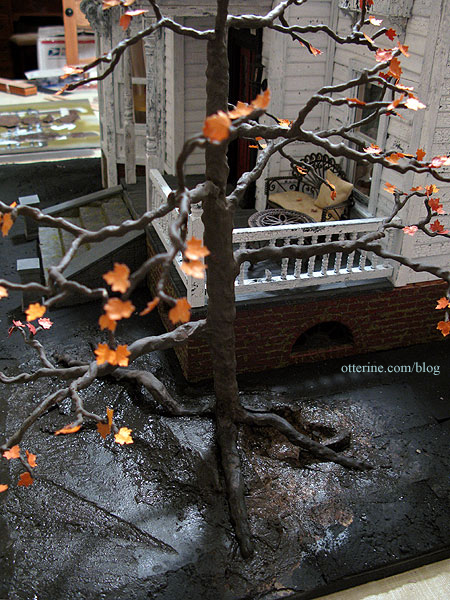
Continuing work on The Tree. After building the dogwood tree, with its individual leaves and flowers, I didn’t think The Tree would stand for foam foliage. Plus, I will be scattering the realistic leaves I took so much time to make, so the leaves on the ground should match those on The Tree.
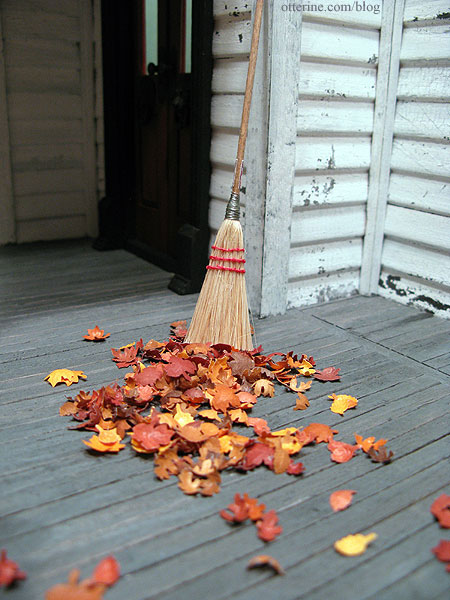
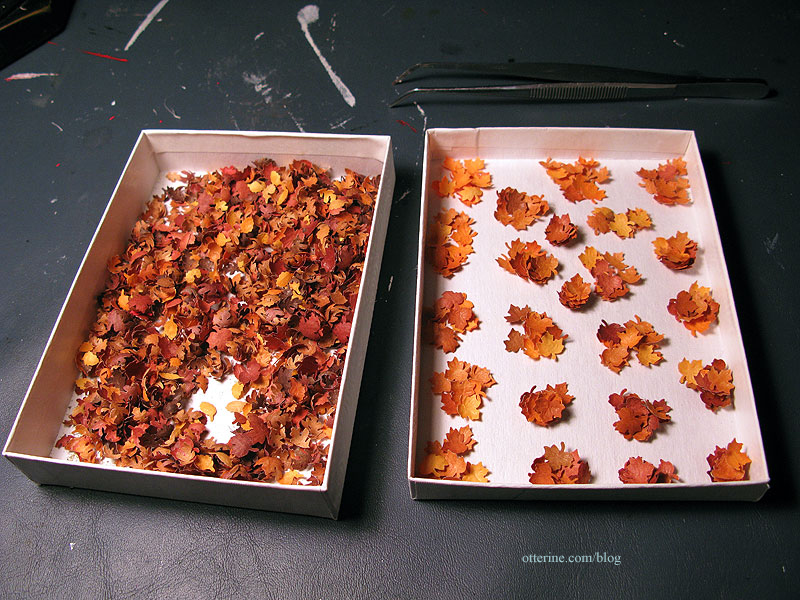
Instead of making more right from the start, I filtered out the maple leaves from the bunch I already had. There are 88 branches, so I figured 1-3 leaves per. Mid to late October often sees sparse trees with more leaves on the ground than on the branches.
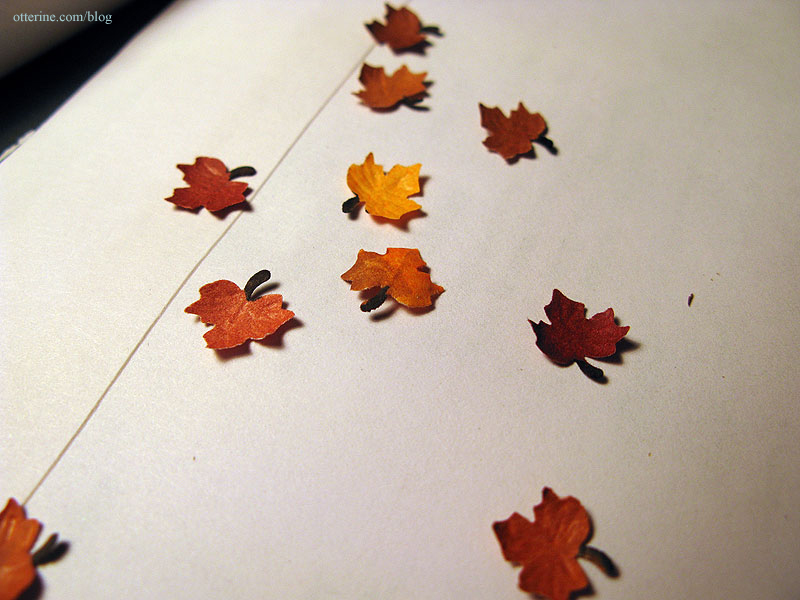
I colored the stems on these leaves with a brown marker so they would blend in more with the branches. I’ll leave the ones for the ground as is since those look better without the darker stem.
I glued them on individually, just enough to give The Tree a pop of color and some life. Having leaves on the ends of the branches also disguises the non-tapered ends resulting from the water putty process.
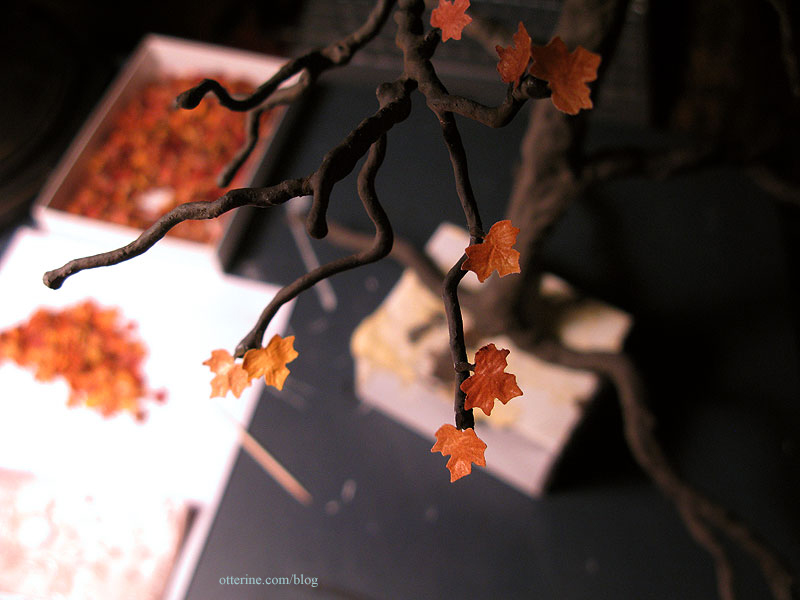
This old tree isn’t dead or dying by any means. It’s just ready for its winter slumber. zzzzzzzzzzzzzzzzz
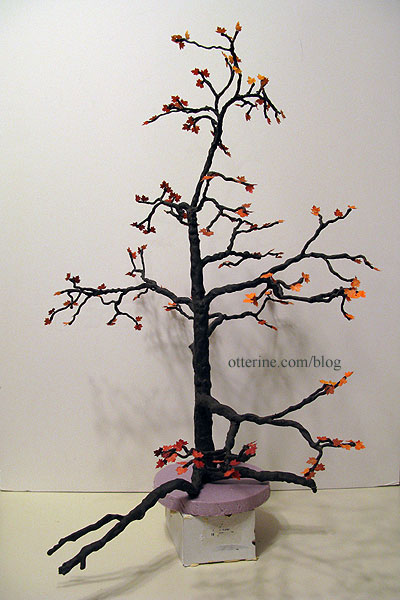
Once I have the roof finished, I’ll plant it and sculpt around the roots. :]
Categories: Flowers, plants, and trees, The Haunted Heritage
October 11, 2012 | 0 commentsHeritage – grandma’s neglected lawn, part 2
Continuing work on the lawn. I primed each foam piece with grey gesso. I had left the pieces removable since I didn’t want to risk getting gesso or paint on the brick foundation.
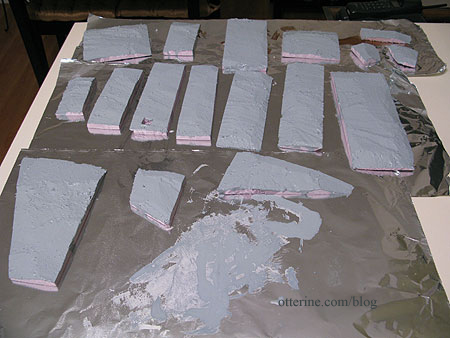
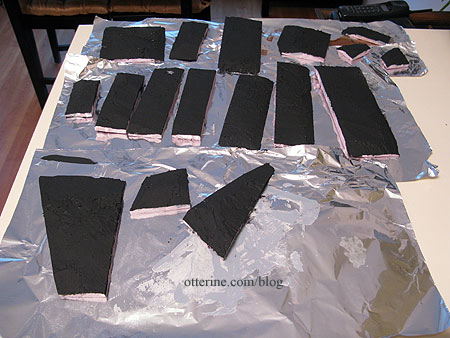
After these dried, I painted all of the pieces black. I still need to sculpt the area around the tree, but I sealed and painted all of the pieces I had cut previously.
I glued the foam to the landscaping board using Weldbond glue. I applied glue to both surfaces with a scrap of cardboard and then pressed the pieces into place.
I also glued the wood bases for the stairs and cellar doors in place, though the stairs and cellar doors will stay removable for the time being.
I added some leftover stucco patch to fill in the gaps between the pieces.

It will be easy enough to touch up the paint once it dries without marring the house foundation.

Categories: The Haunted Heritage
October 10, 2012 | 0 commentsHeritage – roof shingling, part 4
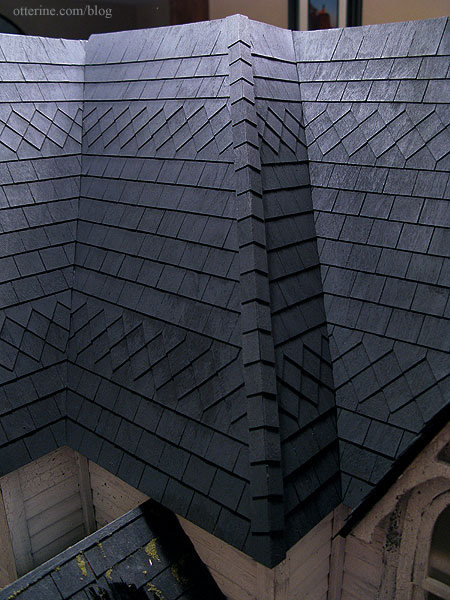
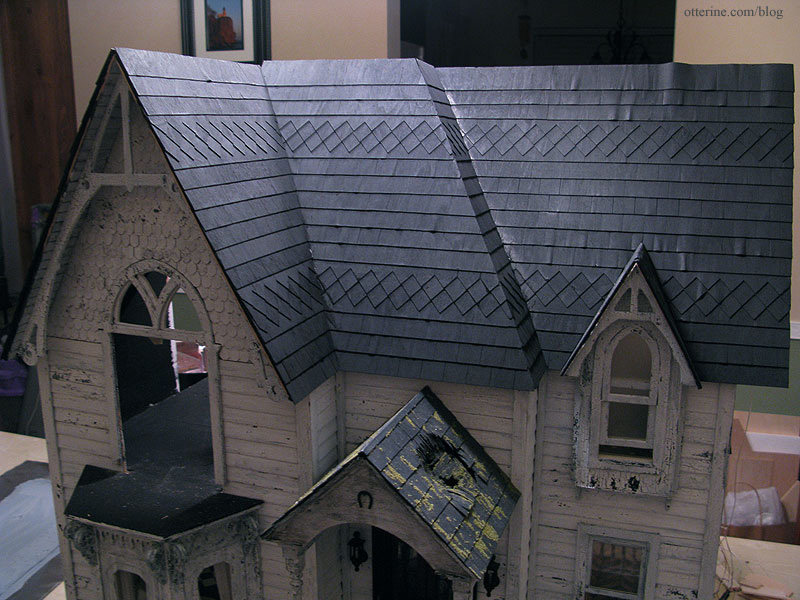
Continuing work on the roof. I finished applying shingles to the front of the house. I started with the right main front and then added shingles to the narrow piece in the middle that brings the roof forward over the portico. After those were in place, I added shingles to the center main front and then finally the right side of the front gable.
The only part remaining is the small dormer portion. I have just enough diamond shingles to finish the front, including the dormer window. I will need to order another batch to finish the back roof when I get to it.
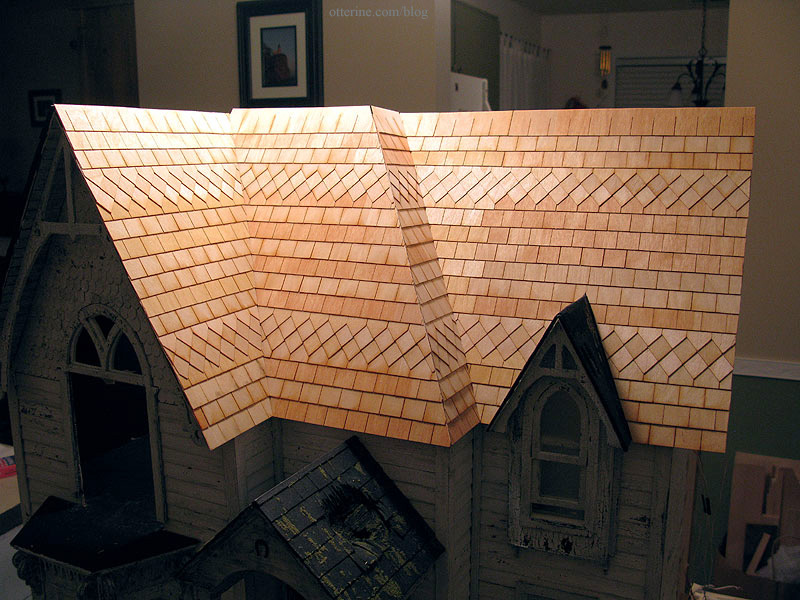
As you can see, the right side is higher than the left side and the gable. All this will be figured out once I get the top roof piece and the back roof in place. I suppose an uneven roof will work in my favor for a dilapidated house.
I added the black/brown/grey color wash, which seemed to cause less warping this time around. Here it is still wet from painting.
Most of the shingles from the first portion I painted have returned to their natural shape with only a few warped pieces here and there. Those, too, are acceptable for my old, rickety house. :D
Unfortunately, some of the shingles have shrunk from the inner corners, leaving gaps. I figured this might happen.
The usual dollhouse solution is to add strip wood, but I’m not sure if this would detract from the realistic illusion I have going so far. I have some very small strip wood that might blend in well enough once painted to match. It will make me feel like the roof is more polished without drawing a lot of attention.
Another option would be to add a whole lot of moss in the crevices. I do plan to have a mossy old roof, after all. I could do both: add the thin strip wood and moss over it to make it less obvious.
Categories: The Haunted Heritage
October 8, 2012 | 0 commentsHeritage – roof shingling, part 3
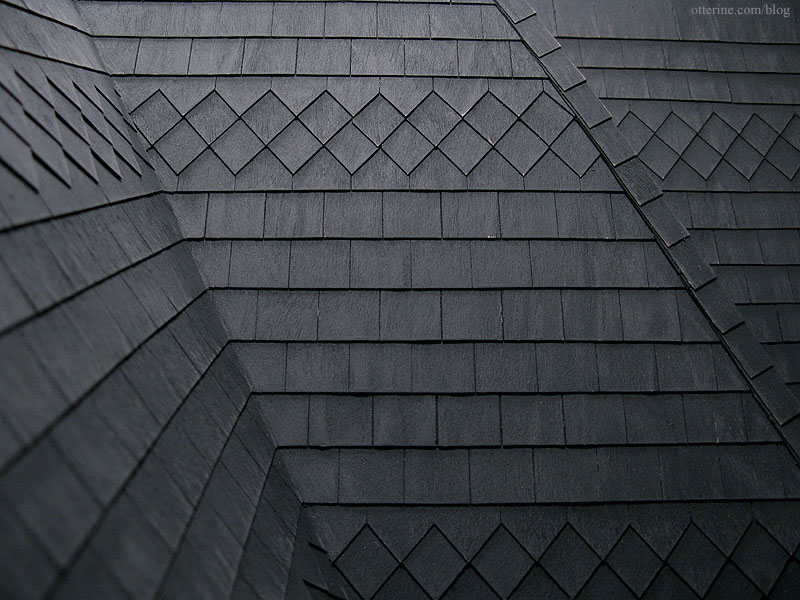
Continuing work on the roof. I started gluing the shingles onto the roof using E-6000 glue, forgetting that it doesn’t work for wood on wood, at least it doesn’t for me. I switched to Quick Grip glue, which was much better. I started with the left front and left gable to make sure the process would work before gluing on the remaining shingles.
There was a little warping on the roof boards, so I took some of the shingle wood scraps to build up the area at the top.
Once the glue had dried, I used a paint wash of black, brown and grey to paint the base color on the roof. The paint buckled the shingles in some places but it wasn’t bad overall. It buckled most in the rows where I had used the E-6000 glue. I had used it on the last (top) row on the gable since I ran out of Quick Grip.
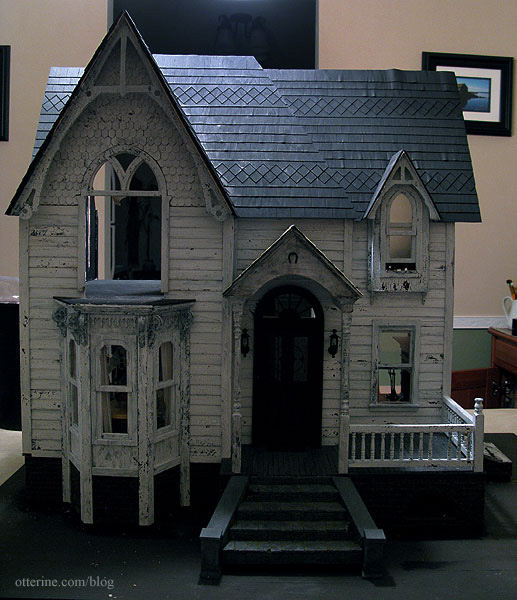
A few hours later, the buckling had calmed down. I love the look of a white house with a black roof!
I’ll let it dry while I continue with the shingle application on the rest of the roof and maybe the warped shingles will straighten out more. If not, I’ll figure something out, even if I have to iron the roof. :D
Categories: The Haunted Heritage
October 3, 2012 | 0 comments


NOTE: All content on otterine.com is copyrighted and may not be reproduced in part or in whole. It takes a lot of time and effort to write and photograph for my blog. Please ask permission before reproducing any of my content. (More on copyright)

Categories:
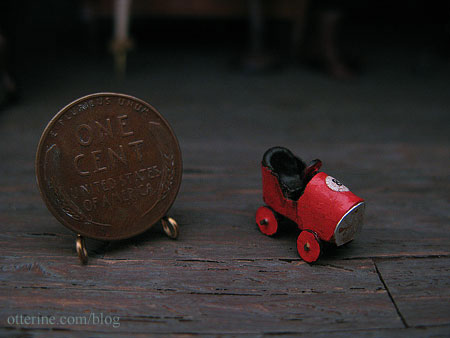
New minis for grandma’s attic
I received another lovely item for grandma’s attic…a vintage race car in red.

This insanely tiny piece was made by Andrea Thieck, and yes, the wheels turn!
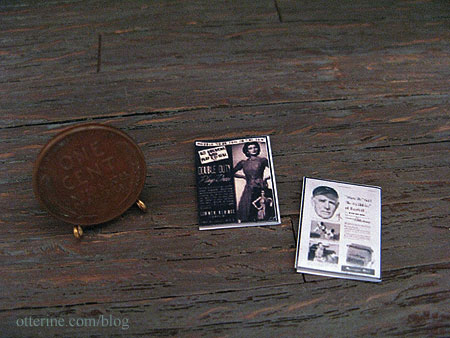
I also won a giveaway from Dolly’s Gallery. Gail sent me two lovely Saturday Evening Post magazines for the attic.
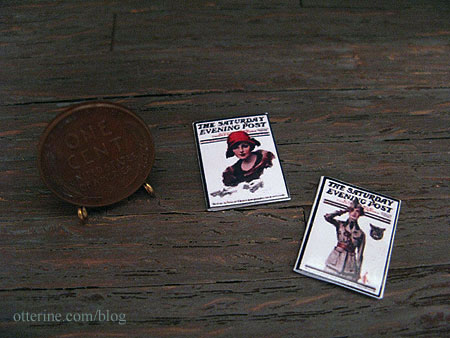
When it comes to vintage magazines, the ads on the back are just as interesting as the covers.
Categories: The Haunted Heritage
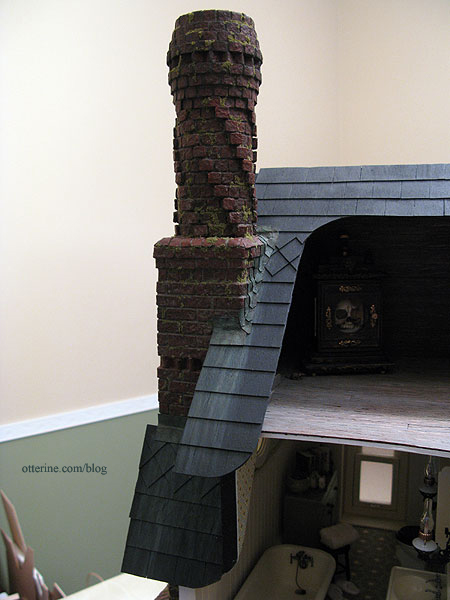
February 1, 2013 | 0 commentsHeritage – chimney side gable finishing
I finished the gable eave and trim for the chimney gable and the new back roof addition.
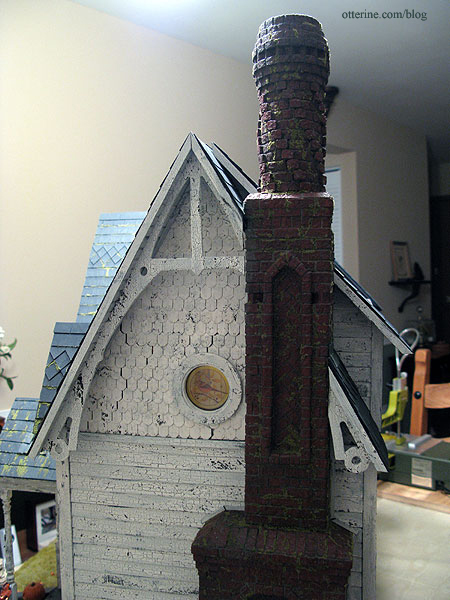
I trimmed the chimney with thin strip wood, and it looks a little awkward in places. But, I plan to cover it with ivy, so that will all work out in the end.
I finished the eaves on the new back roof and added finishing trim on the opposite side as well.
Categories: The Haunted Heritage
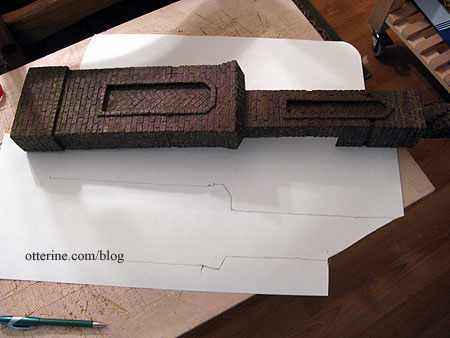
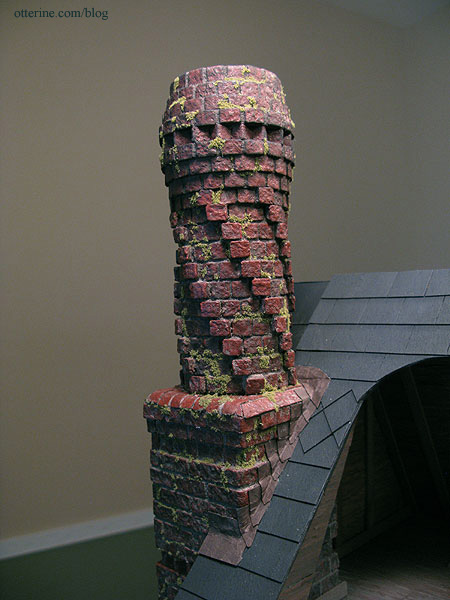
January 28, 2013 | 0 commentsHaunted Heritage chimney, part 11
Continuing work on the chimney. I traced the chimney outline onto a sheet of drawing paper to guide me in cutting the trim that will surround it. I didn’t end up using it as a guide, but it was worth taking the time just in case.
The chimney fits well against the house without additional adhesive, but that’s not to say it will stay removable. In theory, I can remove it in case of a major wiring disaster, but it would still require some deconstruction in that case. I just won’t weld it to the house.
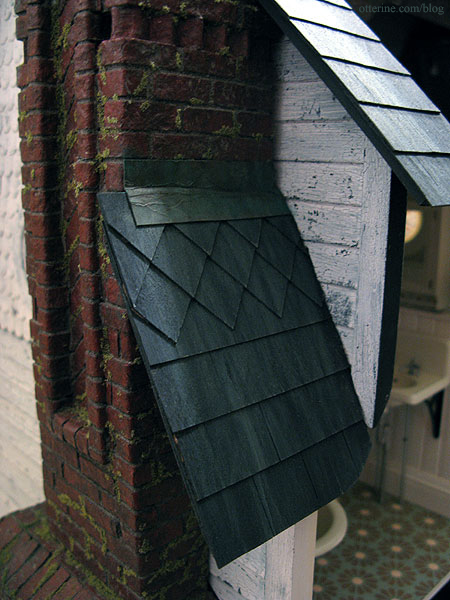
I added flashing to the chimney using brown cardstock. I crinkled the paper to make it look worn and to help it form to the contours of the brickwork.
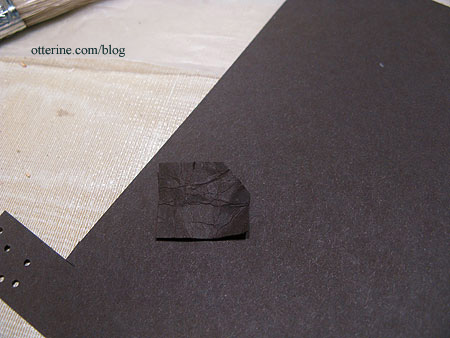
From my limited research, I believe chimney flashing is usually under the shingles on the sides, but we’ll just ignore that. :D
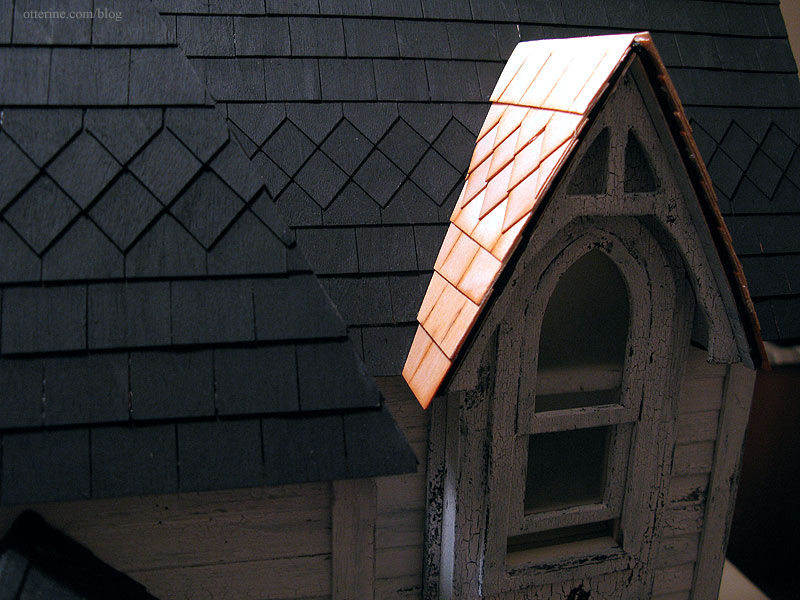
Next came the process of turning paper into old copper using paint. I dry-brushed each paint color over the paper flashing to age it. The final color of Bittersweet Chocolate toned down the other brighter and lighter colors.
Once I had that done, I added water to my palette and began streaking the same colors down the shingles to give the impression of mineral deposits building up over time.
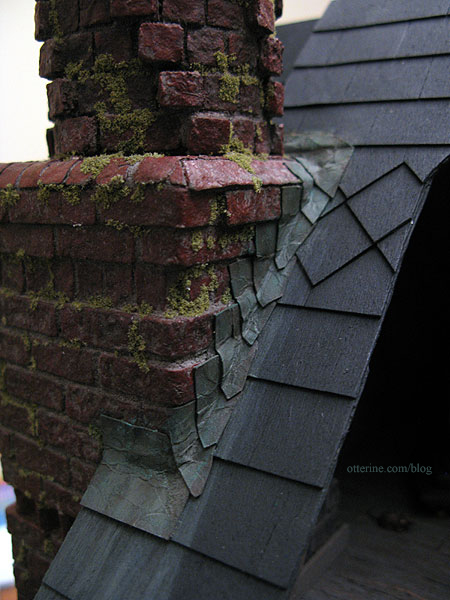
It’s hard to capture in photos, but I love the way it turned out.
Categories: The Haunted Heritage
January 27, 2013 | 0 commentsHeritage – Juliet balcony, part 1
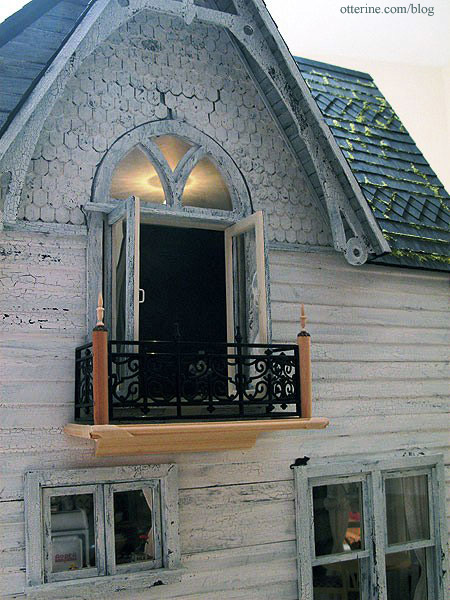
Since the swinging windows are floor-to-ceiling openings and we don’t want grandma toppling out the side window, I decided to add a Juliet balcony. Here’s the rough mockup I had made back in March 2012 that shows the general idea.
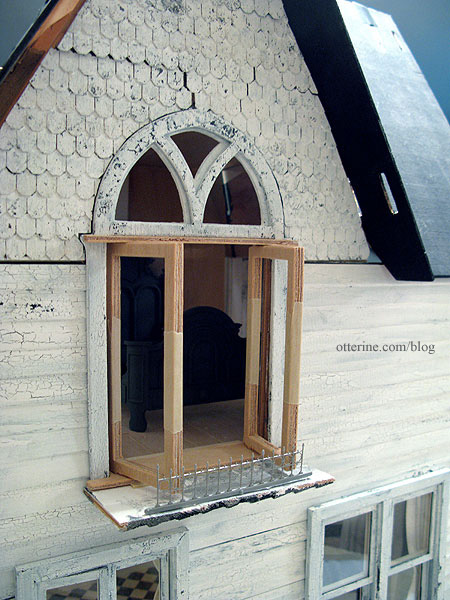
There isn’t a whole lot of room for the necessary support structure due to the first floor casement window if the bedroom windows are to swing out but it’s workable. Adding the balcony won’t detract from the interior view and it seems the most realistic and interesting to me.
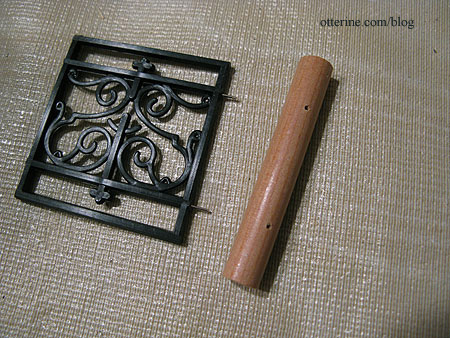
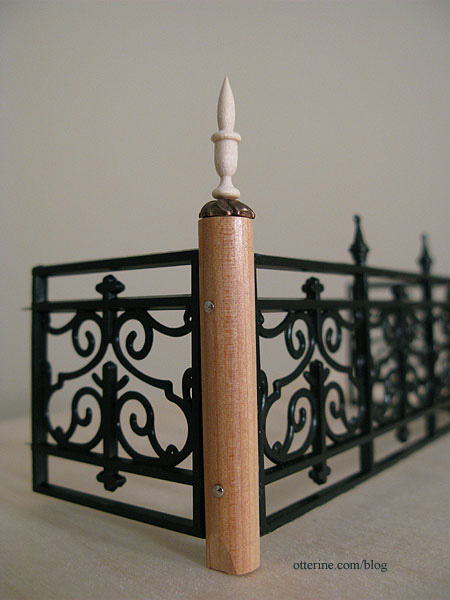
The tiny widow’s walk railing I used on the bay balcony doesn’t provide much in the way of safety, so I used plastic railings from The Dolls House Emporium. I used a large piece of fencing to make the longer span in the middle.
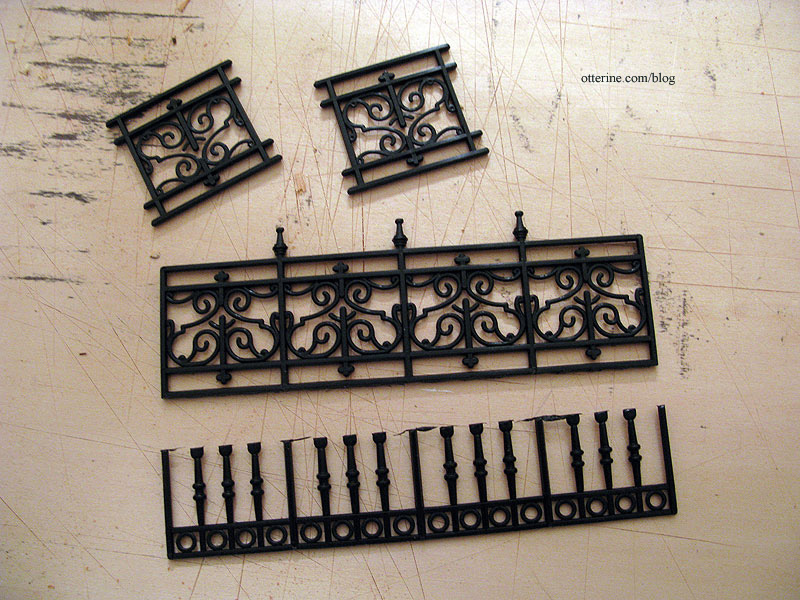
For the posts in between, I used 5/16″ diameter rods cut to 2″ in length. These were in a bag of random Dura-Craft parts from my long lost kit from the late 80s. I cut the tips from the ends of the plastic railings and drilled holes for pins.
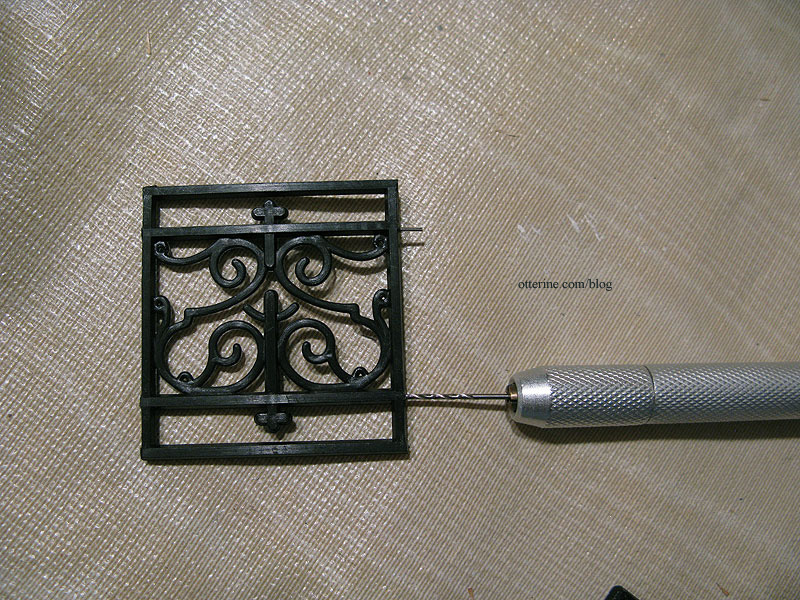
I drilled coordinating holes into the dowels.
I glued the railings to the dowels using the pins for stability.
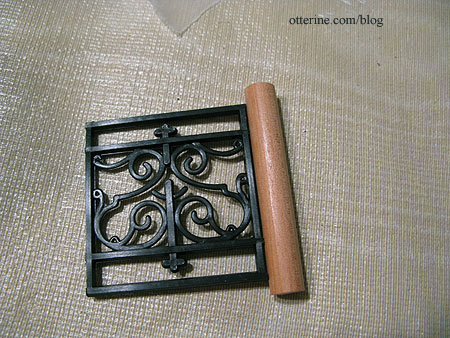
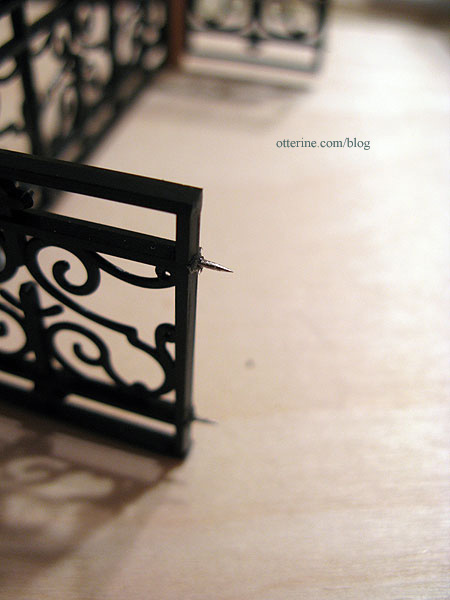
I added pins to the back sides of the plastic railings. These will attach to the house siding.
Next, a wood base from 1/16″ thick basswood. Anyone else hate the stickers they put on sheet wood? :\
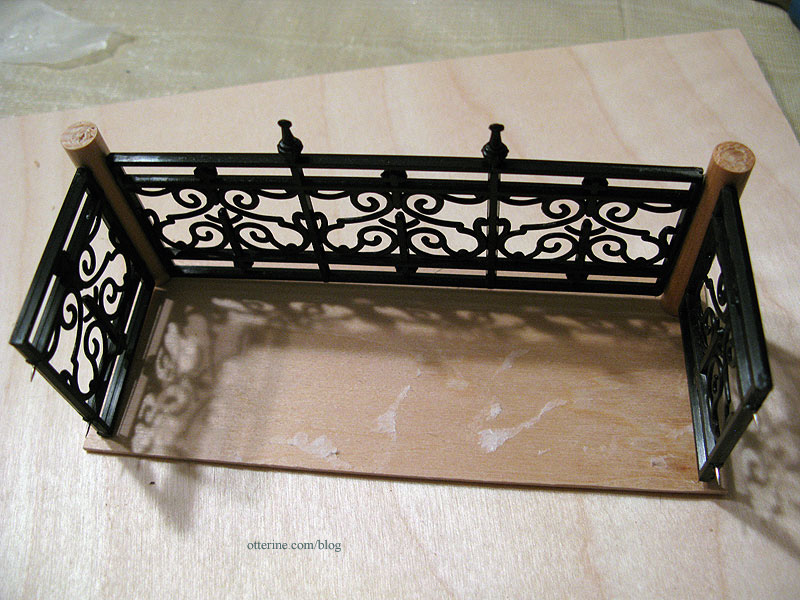
I was concerned with warping on such a relatively thin piece of wood, and I wanted to finish the edges in a way that made it seemed like a decorative and planned part of the house. A quick search through my stash of trims produced the unused stair railings from the narrow staircase kit. I had replaced the railing stock when I replaced the spindles.
Here on the balcony, the railing serves as both channel molding to keep the structure square and as decorative trim for a fancy edge treatment. A thin layer of sandpaper will cover the sticker residue and finish the upper surface of the balcony.
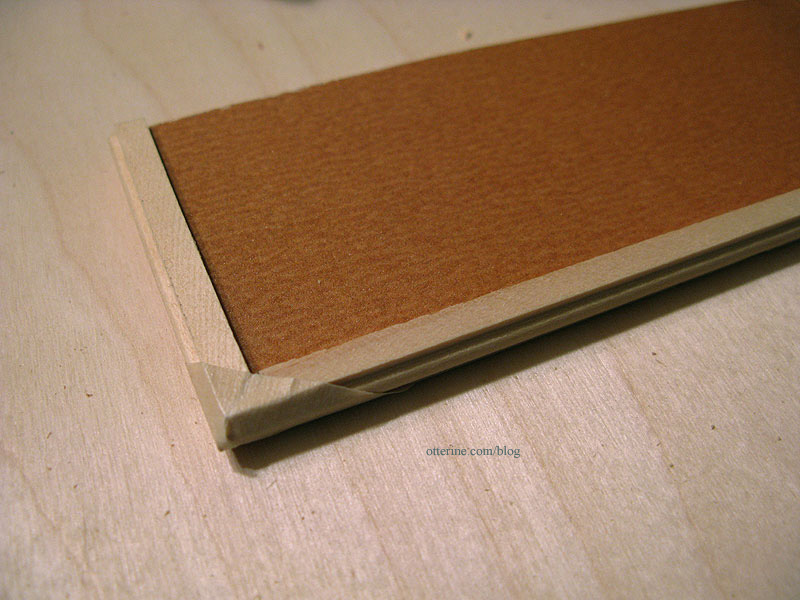
At this point, I would normally fill in any gaps with spackling and sand smooth. It’s an old house, so I left the gaps.
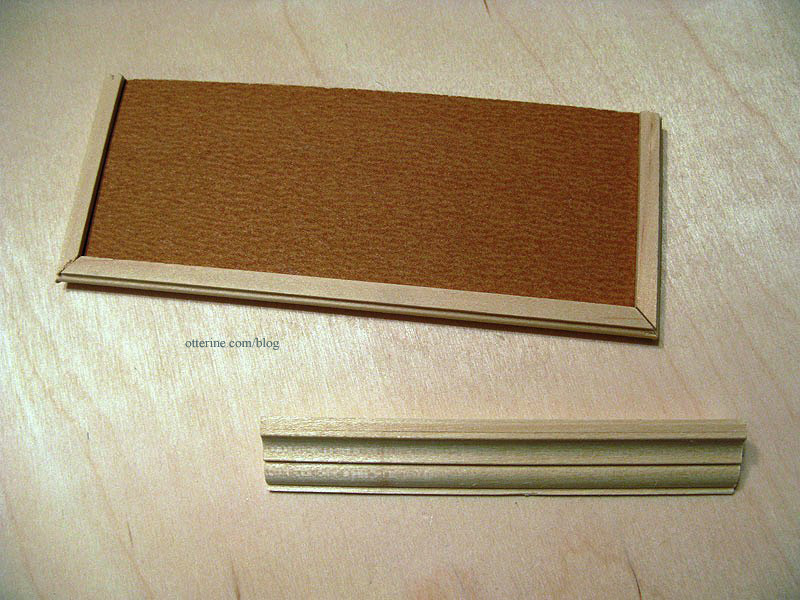
I used a sample piece of molding from Manchester Woodworks as a lower support.
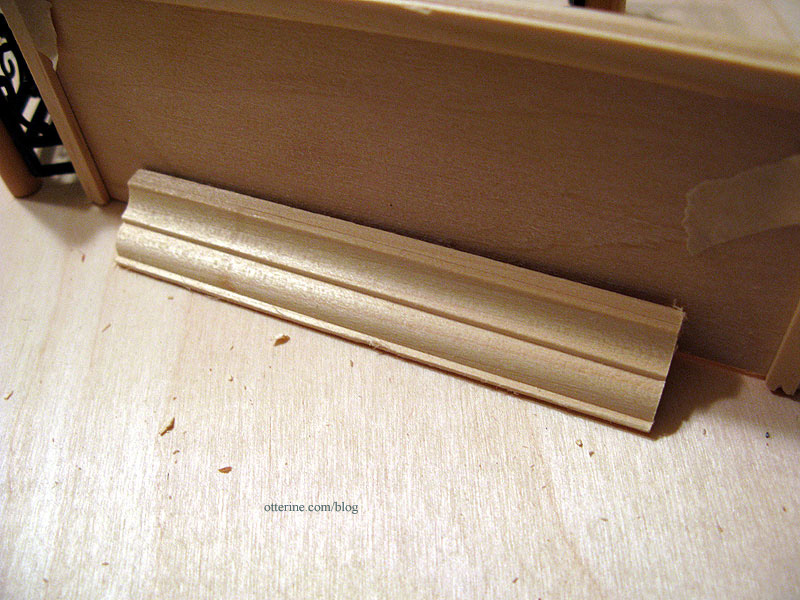
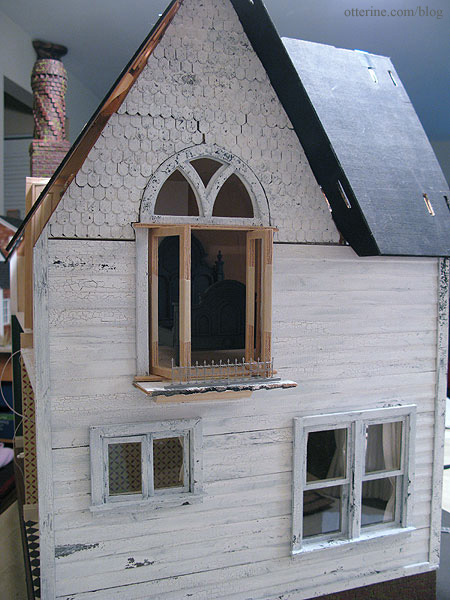
I checked the fit on the side of the house…all good! :D
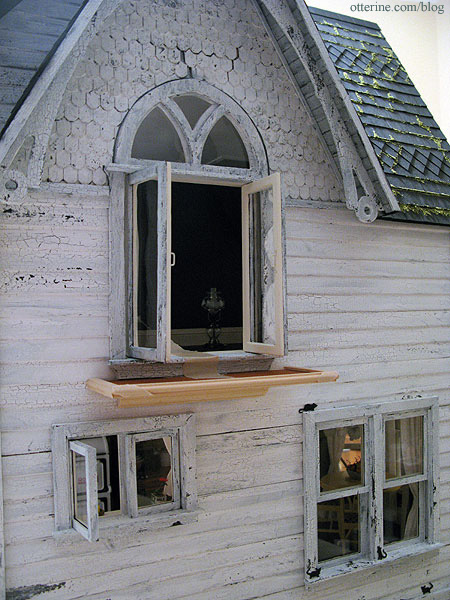
I topped the posts with copper bead caps and added Houseworks finials. I used flat head pins to decorate the outer edges of the dowels. I had to shave a little from the bottom of the dowels for fitting since my measurements were a little off. Once it’s all painted, you’ll never notice.
I need to wait for a decent weather day to spray paint the assembly. I will spray it flat black and then age it with acrylic paints.
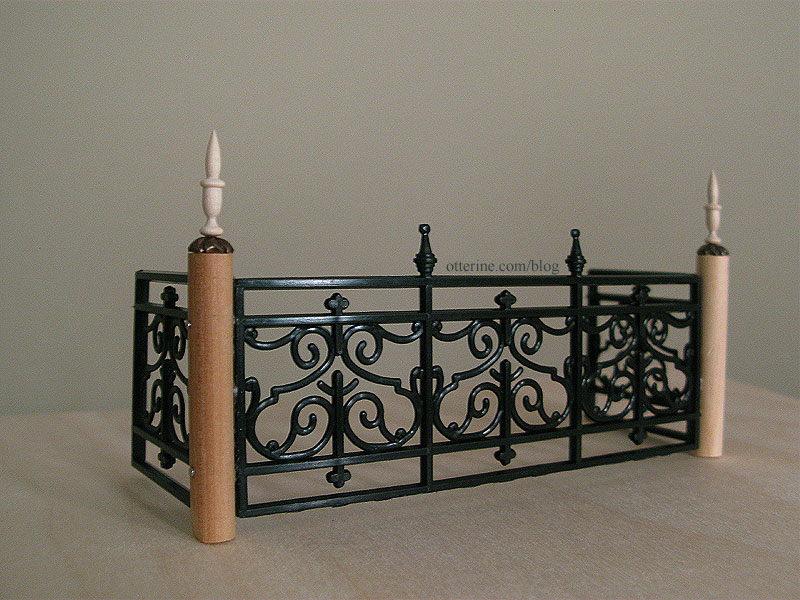
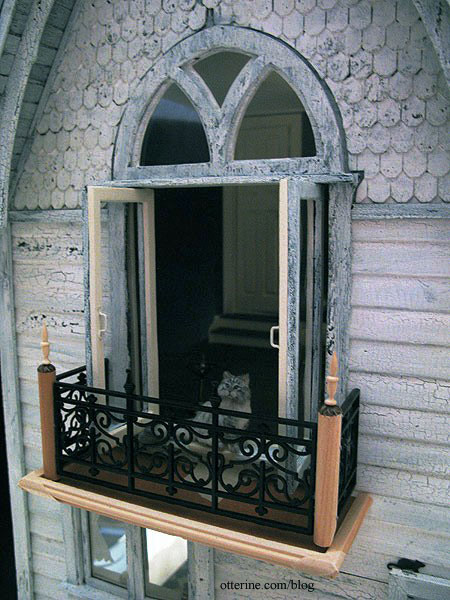
I finished the dry fit to see how it will look overall. It’s leaning a little because tape can only do so much. The base and support bracket will be painted to match the house. The sandpaper will be painted black and aged to match the front bay window roof.
I think Ophelia likes it! :D
Categories: The Haunted Heritage
January 26, 2013 | 0 commentsHeritage – roof finishing, part 1
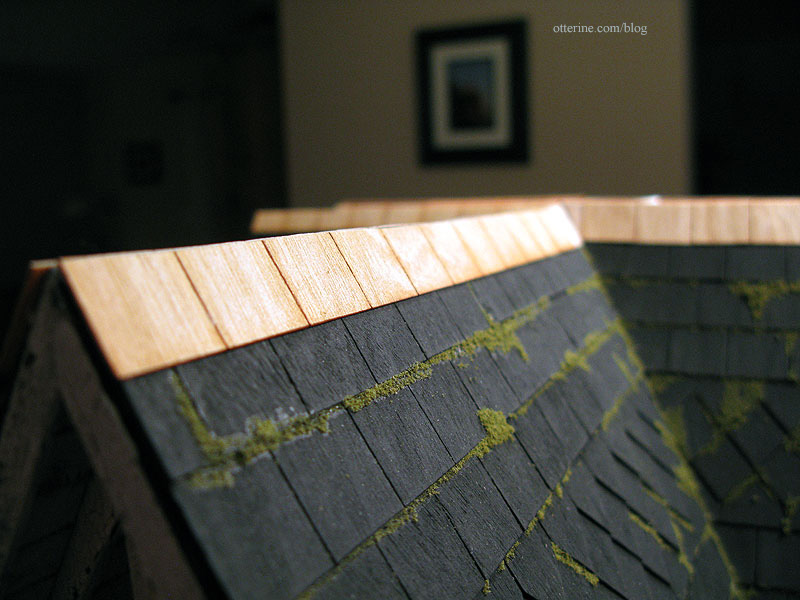
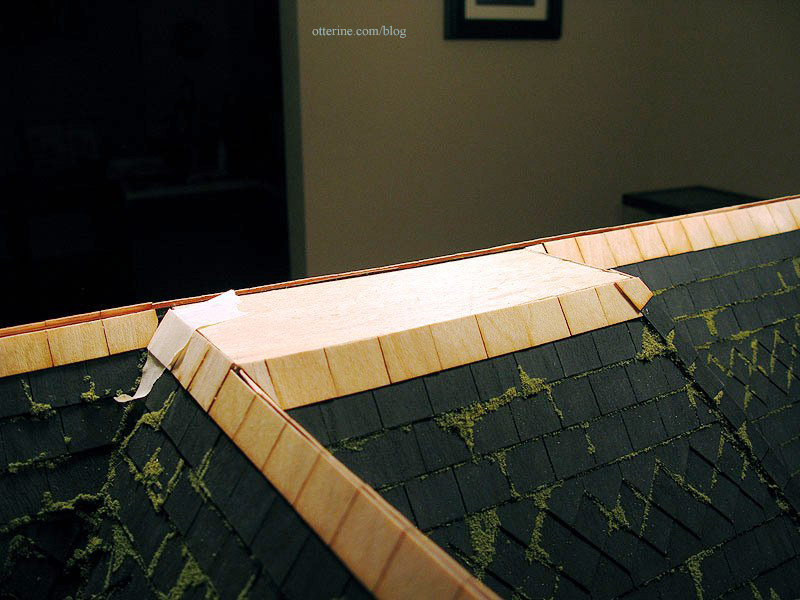
This merges the front roof and the back dormer roof. Now that I have the original back roof pieces attached on the sides and the new roof piece attached in the middle, I can address the roof ridges. The flat roof is now lower than the back roof, however, so I added a new 1/8″ thick plywood layer to it.

I added a new partial row of shingles at the top around the entire roof.
By partial, I mean that the full height of the shingle strips wouldn’t fit at the top so I marked and cut each shingle strip down to fit.
This includes the back.
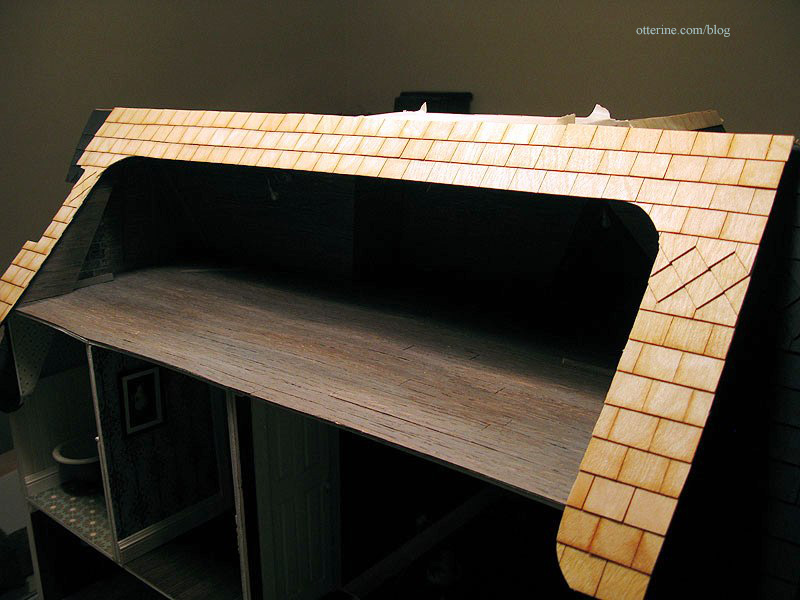
The new row of partial shingles finishes off the flat top portion of the roof as well.
I had to reapply the sandpaper surface to the flat roof since I had added more wood on the previously finished surface.
I lapped cut shingles over the ridge for the front roof edge, but I want to see if corner trim will create nicer finish for the ridges. I have some lengths of various corner trim widths on order, so the ridges will stay unfinished for now. But, so I can keep working on the structure, I painted the new shingles and flat roof to match the rest of the roof.
I’ll do a quick sanding once the paint dries, and then I’ll be ready to work on the chimney side. :D
Categories: The Haunted Heritage
January 25, 2013 | 0 comments
NOTE: All content on otterine.com is copyrighted and may not be reproduced in part or in whole. It takes a lot of time and effort to write and photograph for my blog. Please ask permission before reproducing any of my content. (More on copyright)