

Heritage – bedroom ceiling, part 2
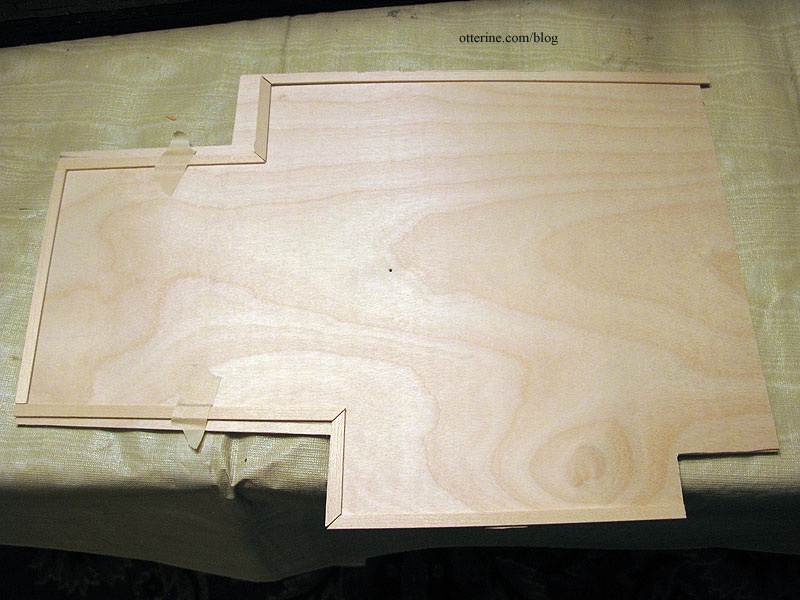
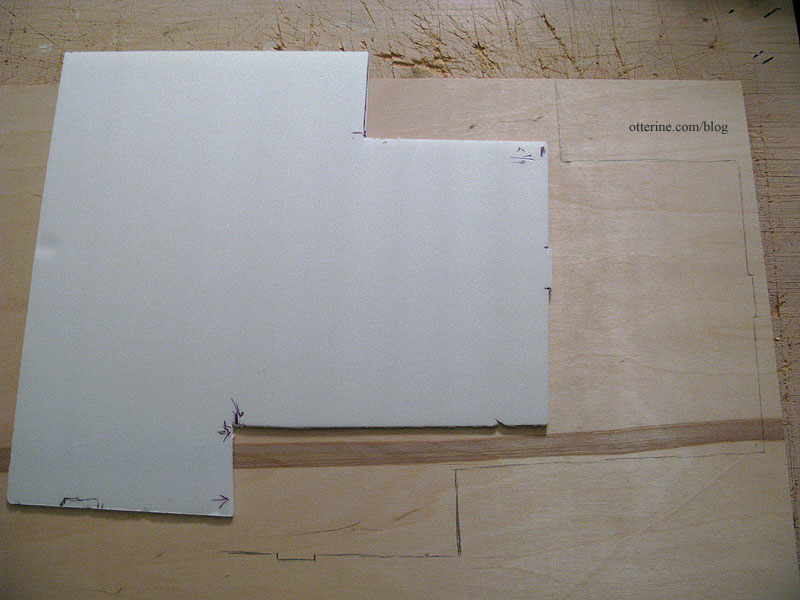
Continuing work on the bedroom ceiling. Since I’ll be installing flat trim around the bedroom ceiling to help disguise any gaps, I traced the walls onto the unpainted ceiling board.
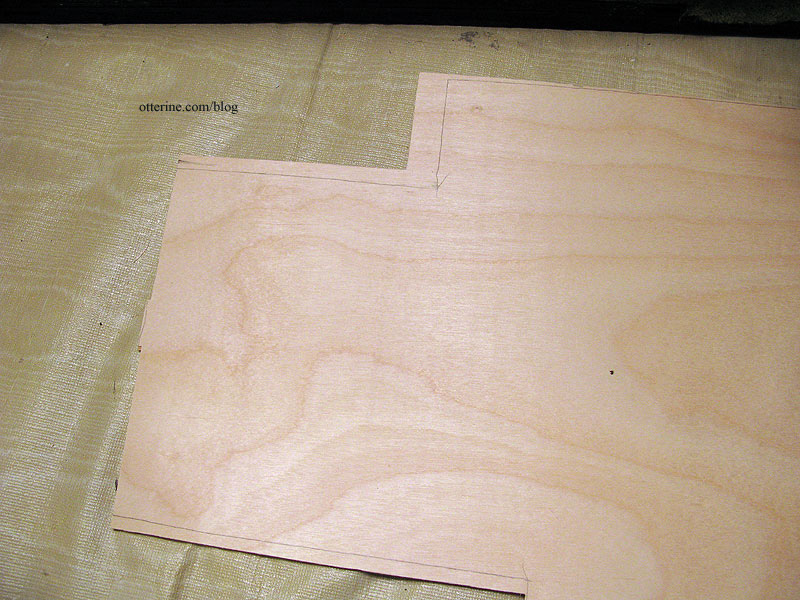
I then cut strip wood following these guidelines. I might have to do some adjusting during the actual installation, but this should give me a good approximation of lengths and angles. Much easier than trying to cut them in place later.
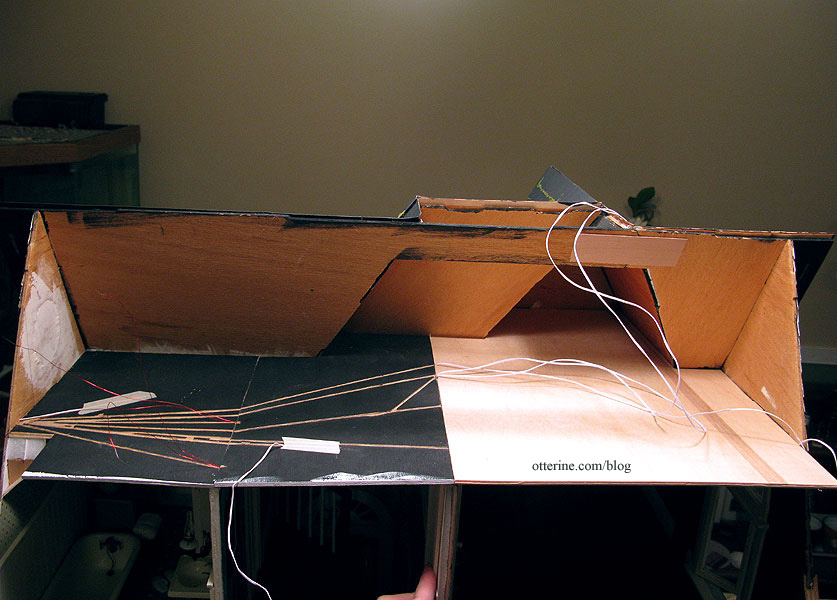
I painted the bedroom ceiling side with two coats of white paint, sanding once in between. I primed the attic floor side with black paint. I pressed the board to dry flat overnight to combat some warping in the plywood.
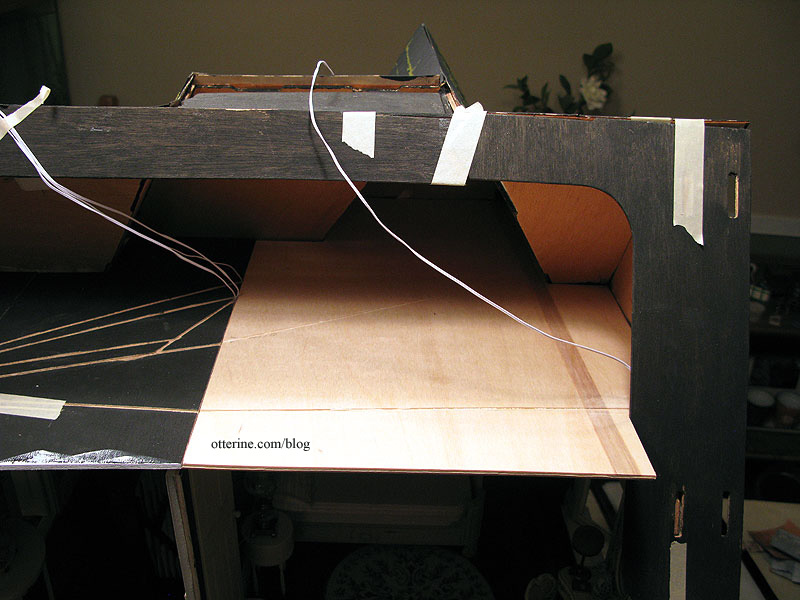
I glued the bedroom ceiling board in place first. The bedroom interior wall likes to lean into the hallway, so I had to hold it in place during the process. I added some straight pins for stability, cutting down the length as needed. I drilled pilot holes for them to keep the wood from splitting.
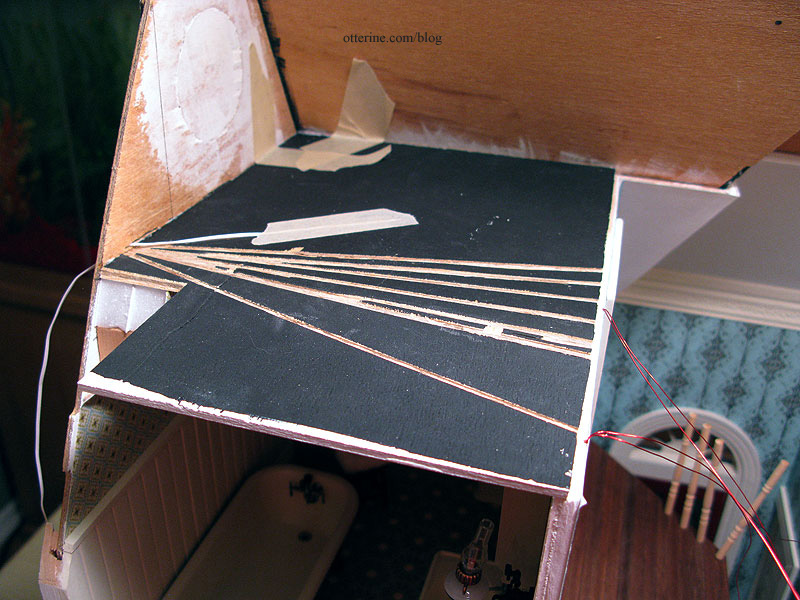
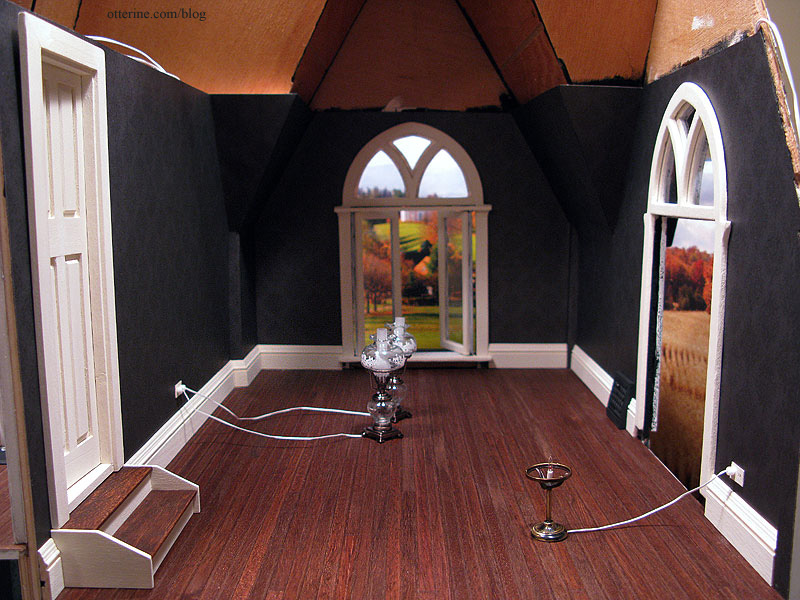
I glued in the hallway ceiling board that had been painted and prepped ahead of time. I taped the electrical wires into their respective channels, though I still have to lengthen a few of them on the outer wall to reach the power strip.
The ceiling line overall is a little crooked. Apparently, the bathroom and bedroom interior walls are slightly off in measurement from one another and the parlor ceiling has started to sag. It’s a good thing this is meant to be an old house. Haaaa! And, I’m hoping you will all be so wowed by the interior that you’ll ignore this problem. I have plans for finishing the back edges of the interior walls and floors to help disguise any warping. More on that later.
I’ve had a lot of challenges with this build, so I’ve taken these types of shortcomings in the final result in stride. I’ve learned a lot on this build, and I do love the way this house is turning out.
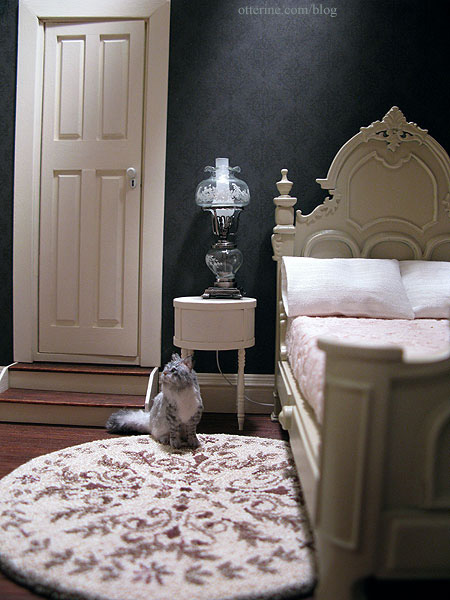
Update: After working on the back roof, I was able to finish up the bedroom ceiling trim. It’s a simple, flat strip wood trim, but it really brings it all together. It hides the slight gaps as well as the tabs and slots in the front and outer walls.
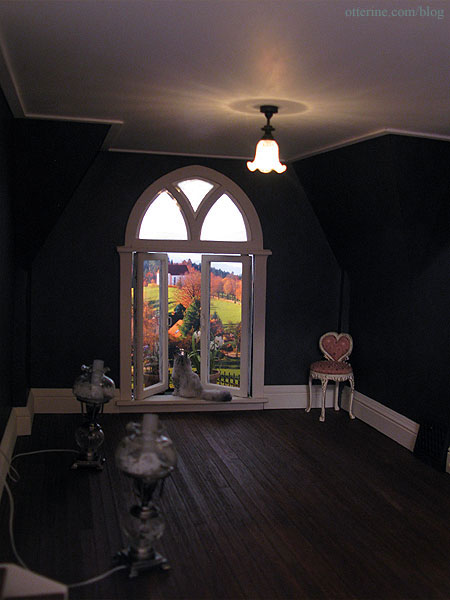
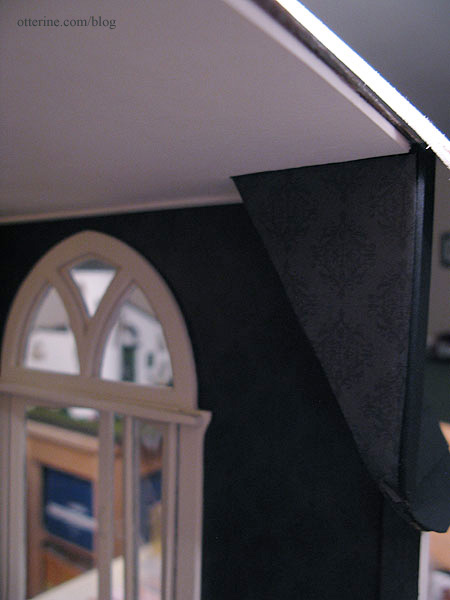
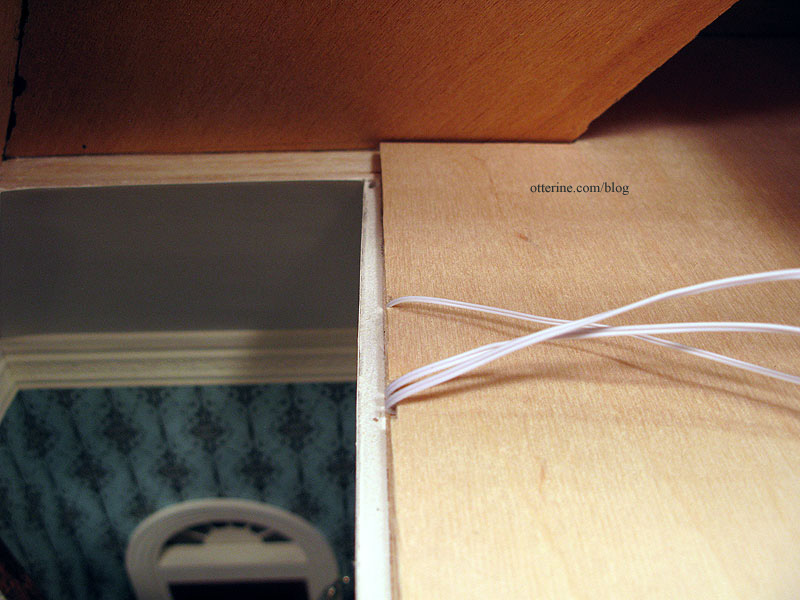
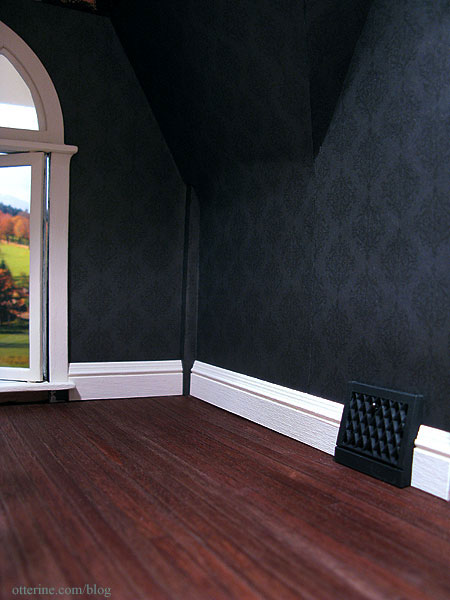
I cut and installed the final amount of bedroom wallpaper (I hadn’t yet added the flat ceiling trim around this corner to complete the room when I took this picture). There was a slight gap between the roof board and the gable wall, so I also added a thin strip of trim (painted black) along the angled wall that you can’t see unless you put your head inside the room.
Categories: The Haunted Heritage
January 2, 2013 | 0 commentsHeritage – back roof dormer, part 1
Grandma’s attic will be an eclectic array of novelties, antiques and storage. It is also mainly open and will require minimal lighting.
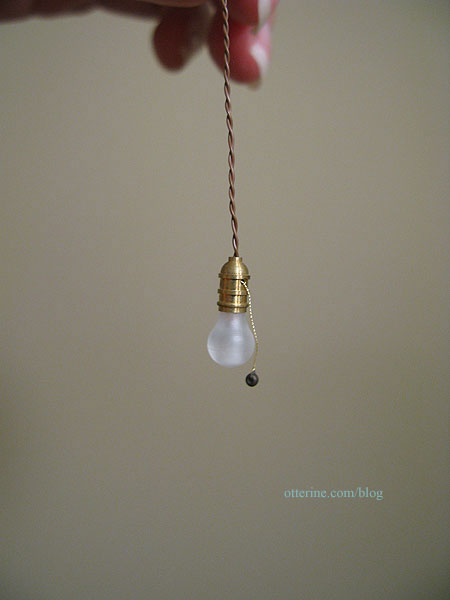
I bought two Lighting Bug lamps for the attic. One is the hanging kind with the pull chain. Love these! There will be more of these in my future builds. :D
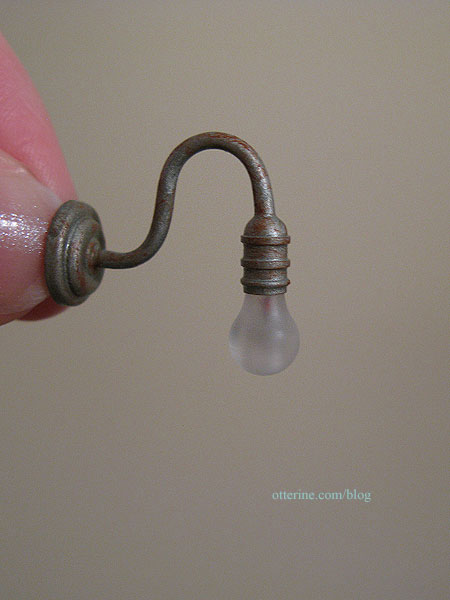
The other is a similar fixture with the bare bulb, but it has a wall fitting.
On the left side of the attic, there will be the interior portion of the chimney currently only a foam core base. There will also be a faux trap door like the one in Baslow Ranch where the scrap wood is placed on the floor. I’ve positioned the light so grandma can see what she’s doing up there.
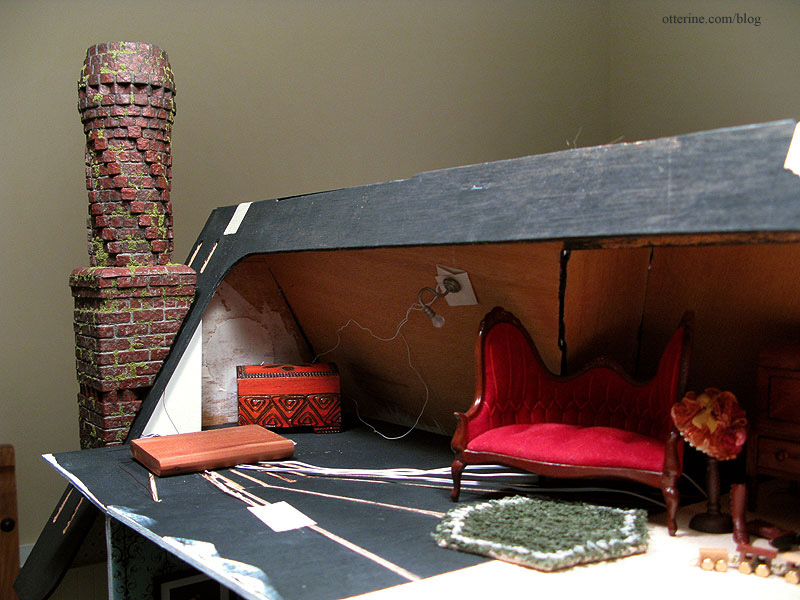
As I’ve said before, in my world, grandma is able to navigate those pull down attic stairs easily, walk about the attic without hitting her head and sit comfortably for hours in a space that doesn’t appear to have any airflow for the warmer months or heating for the colder ones.
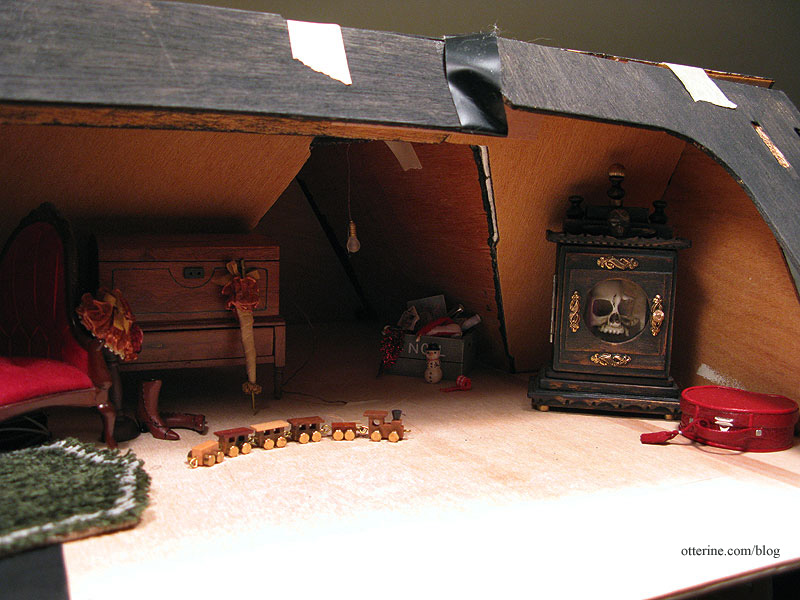
On the right side, there will be the forward storage area and Tony’s brilliant catacombs clock case. It’s up to you to decide who is in the case. :O I’ve put the hanging bulb at the opening to the front storage area. I think that will cast a nice glow into the space.
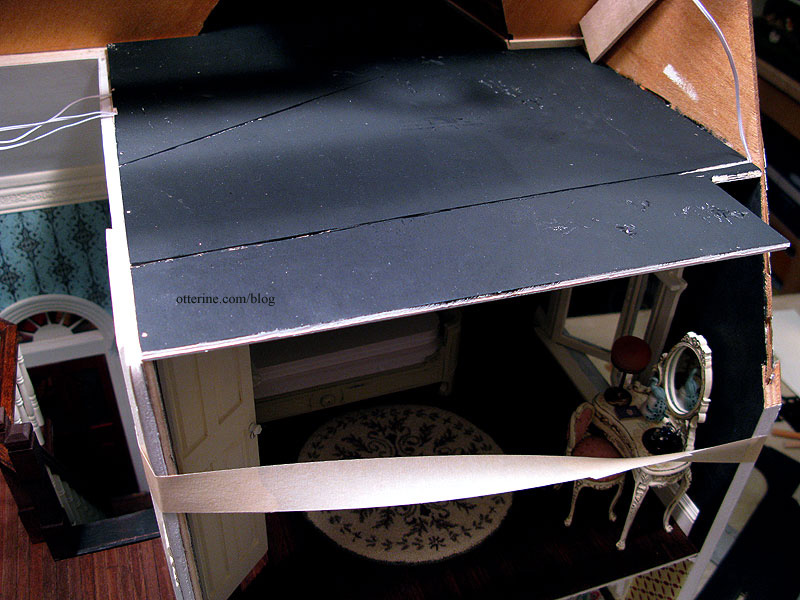
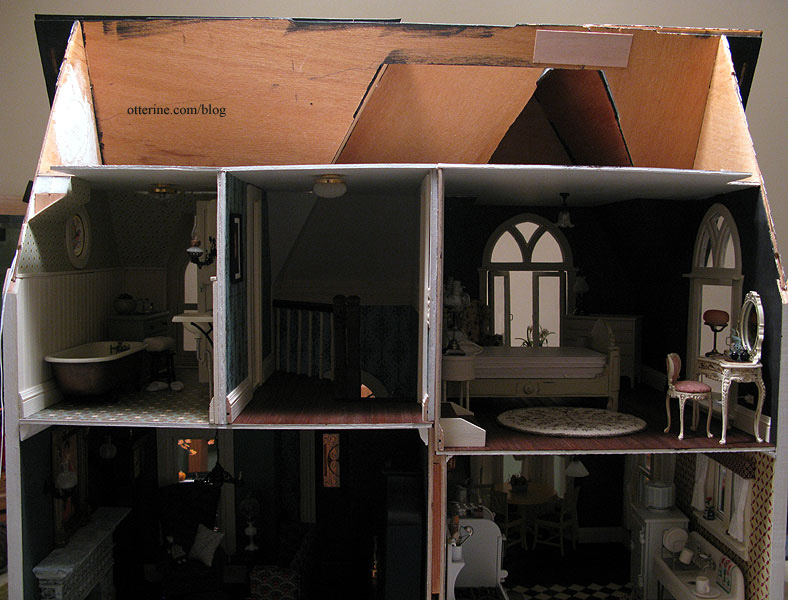
This is where the architectural issue comes into play. When I added to the ceiling boards in the back, I effectively eliminated the sloped ceilings on the second floor, except at the outer side gables. The bathroom vanity cabinet, hall table vignette and bedroom door would not have been possible had I kept the angled back walls that followed the slope of the roof.
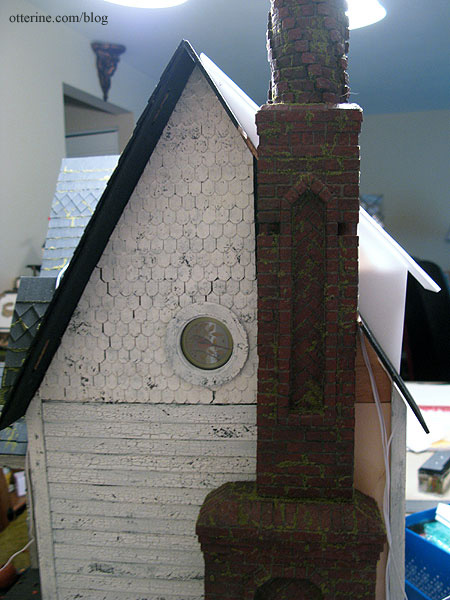
However, when viewed from the side, these outcroppings are visible.

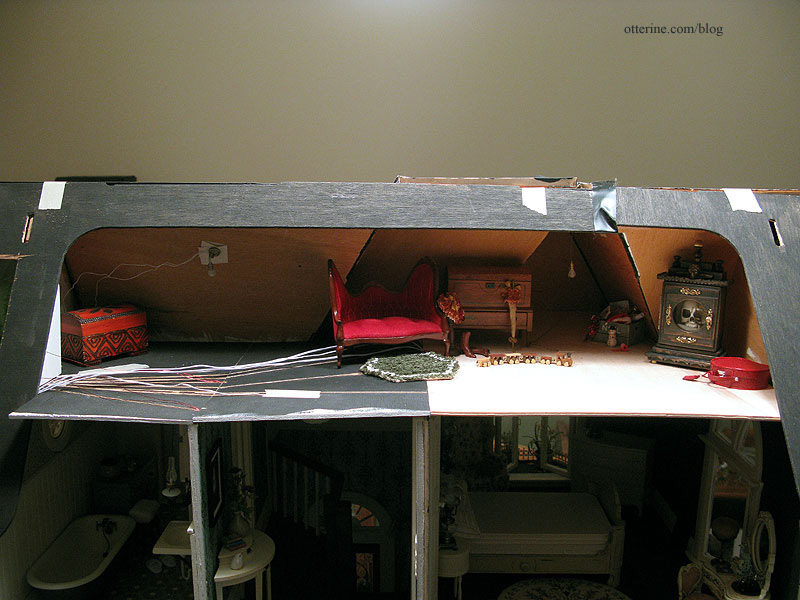
To remedy this problem, I’ve added a quick mockup cut from Cellfoam 88 (the same piece I used for the bedroom ceiling board – reduce, reuse and recycle!). This adds a triangular vertical wall that would be sided to match the house and an additional roof board to finish the back opening.
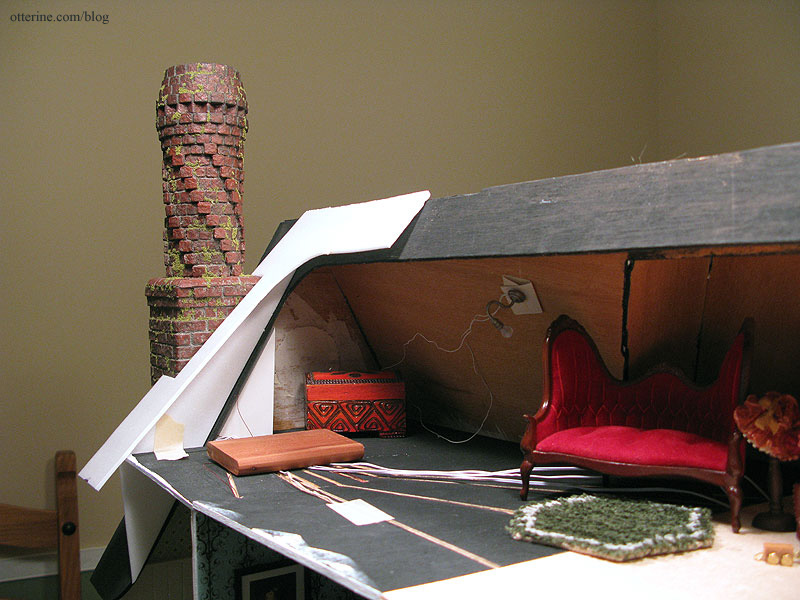
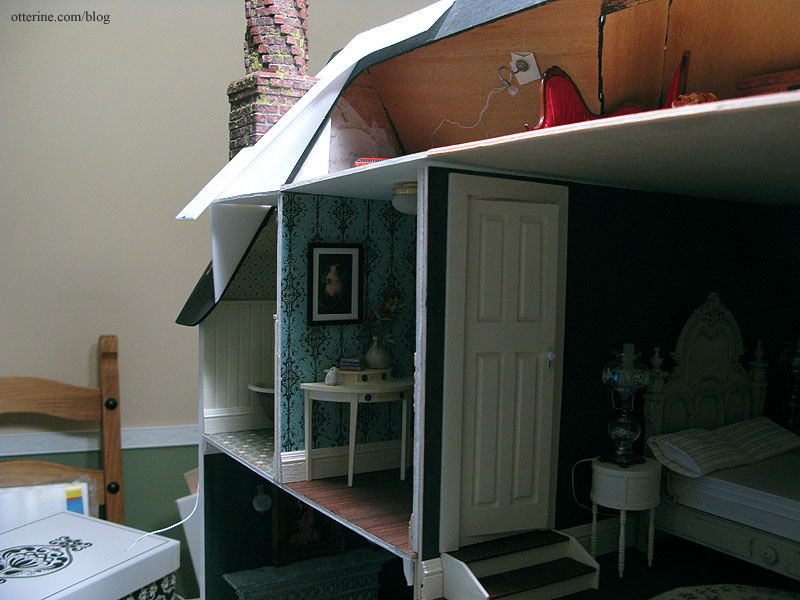
From the side, the bathroom wall is no longer visible. I think adding this outcropping makes architectural sense since it is in the back portion of the house and a viable renovation that could have been done at some point. It won’t be visible from the front, so it won’t detract from the Carpenter Gothic aesthetic.
I’ll have to do more wallpapering in the bathroom and bedroom to cover the new corners, but that should be straightforward enough. :D
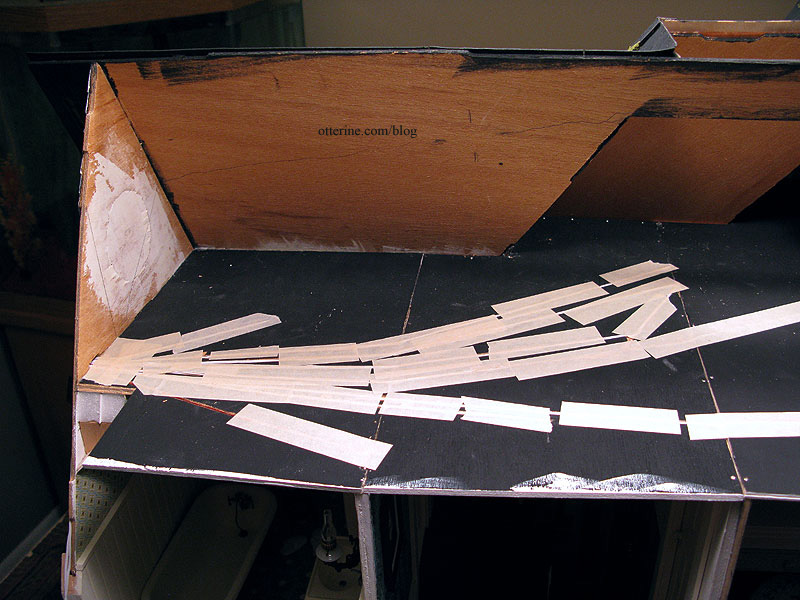
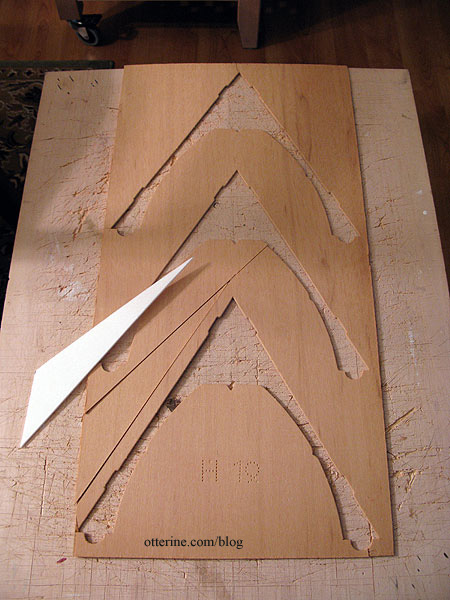
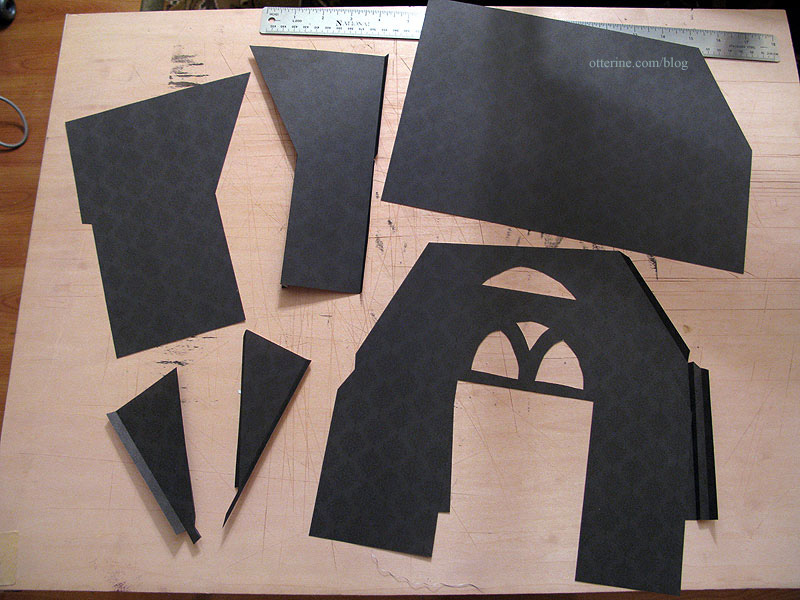
I then cut the new pieces for the roof addition but won’t install them until after the back roof is on.

I used the spare wood from a Heritage part sheet that held the gable trims. :D Waste not, want not.
Categories: The Haunted Heritage
January 1, 2013 | 0 commentsHeritage – bedroom ceiling, part 1
The original kit attic floor was a poor-fitting board to begin with, and it was pieced over the bedroom causing a noticeable seam on the ceiling. Additionally, since I added two walls on the second floor not originally intended as part of the house, I needed an attic floor that covered more area than the original. Trying to cut one board to span the entire house without having any fitting issues didn’t seem like something I wanted to attempt. So, I cut each ceiling board individually, having the seams over each new second floor wall.
The bathroom ceiling had its wiring channels cut prior to installation. All wires lead to the outer wall and will be hidden inside the chimney. The notch on the left side is where the back roof piece sits.
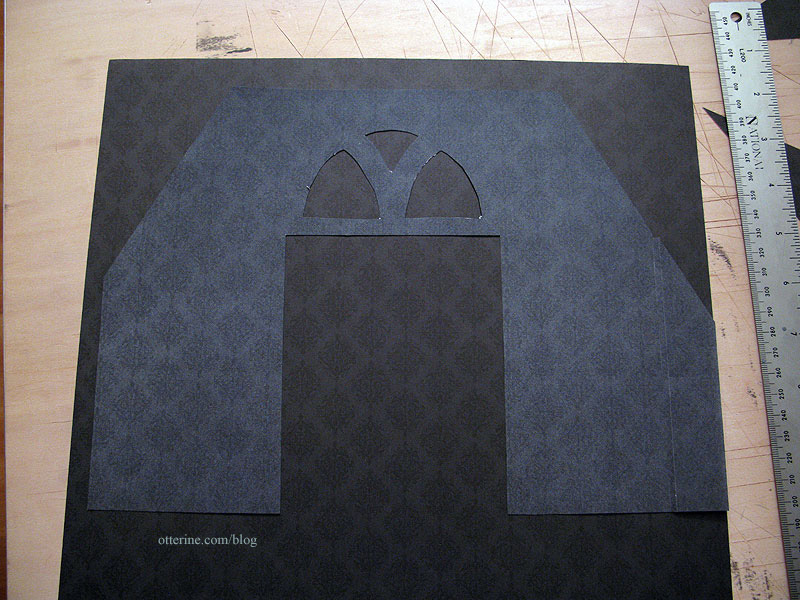
To make a template for the bedroom ceiling, I used a spare piece of Cellfoam 88. It’s the same thickness as the plywood I would be using for the final board, and it was easy to cut and adjust. First, some rough measurements.

I snipped and adjusted. I was still off in the end, so I marked where I needed to add more. I also marked where the tabs should be. Since there were slots on the front and side, I figured I might as well use them.

I traced the foam template onto a new piece of 1/8″ plywood and cut out the ceiling board. Here you can see my foam template was just of the front cuts. I projected the full length back from there.
Here are the notches I cut for the foyer light and bedroom table lamps previously installed.
The hallway ceiling has been started, too, but it remains separate. It needs to be installed last since it is a snug fit between the two outer sections. Here are the hallway and bedroom boards in place.
I made minor adjustments until the new ceiling board fit…mostly. I have to tell you, this is the most lopsided board I’ve ever had to cut for a build. That ought to tell you just how out of square this house is. Even at that, it’s still not a great fit, and I cannot figure out where the rub is that’s causing the problem. So, it stays its 95% self, and I will add flat molding along the edges of the ceiling. Crown molding on all those angles makes my head hurt just thinking about it, so flat molding it shall be.
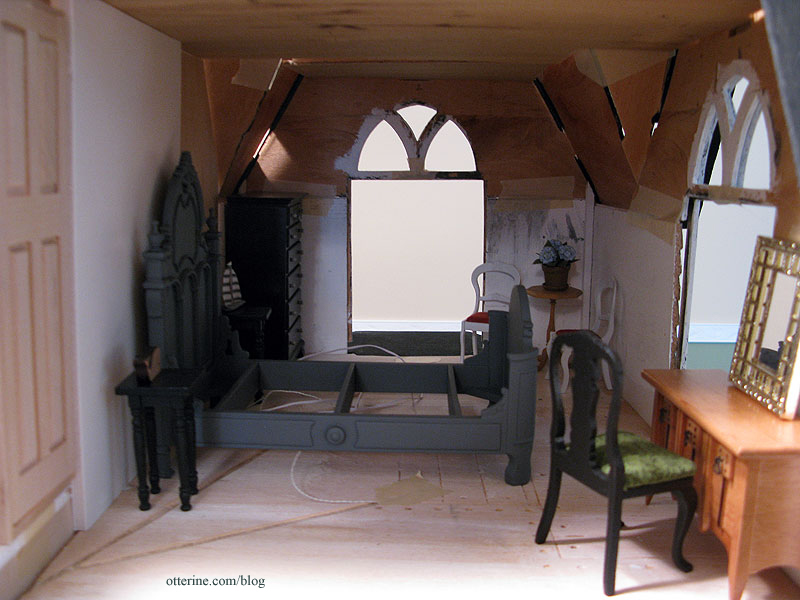
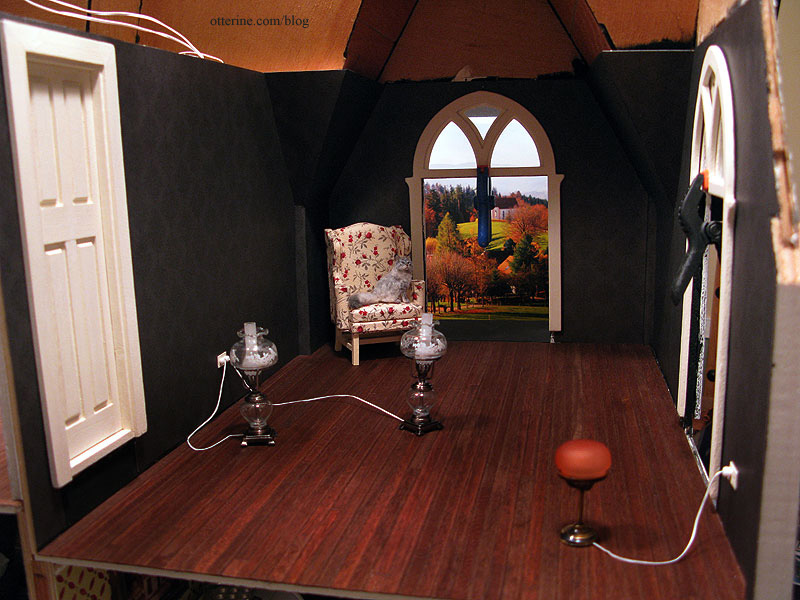
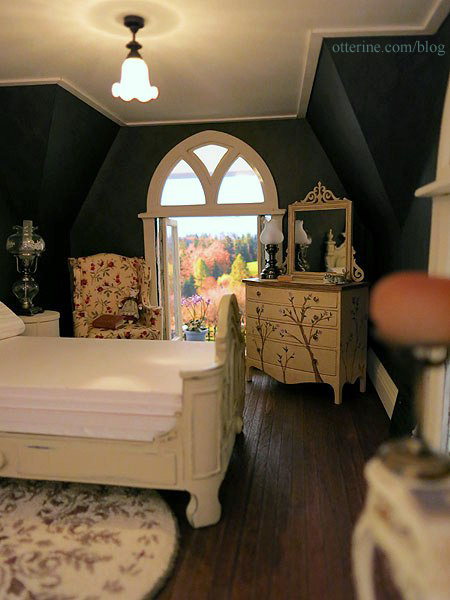
With the ceiling in place, I plugged in all the lights for the room. The lantern on the dresser is battery operated.
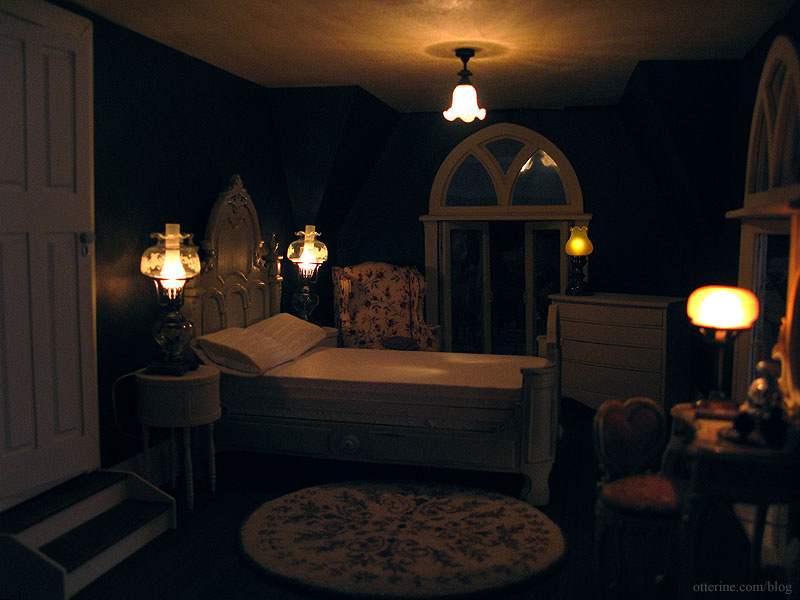
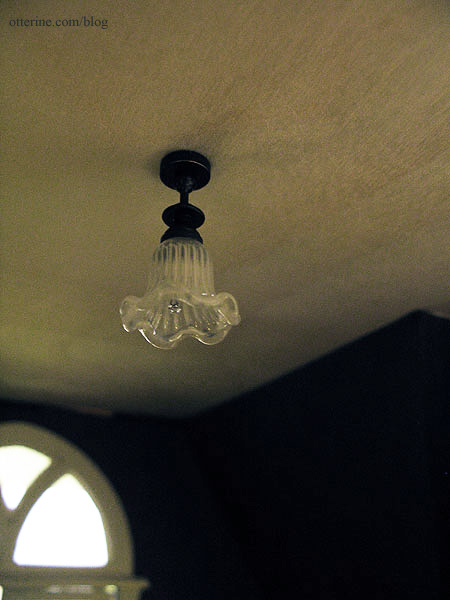
The Ray Storey ceiling fixture adds a good overhead glow to the room. I had thought about using a smaller, simpler ceiling medallion here with the fixture, but when I looked at the resin piece more closely I just didn’t like it. It was rough and uneven, and spending a lot of time to get it in paint-ready condition wasn’t something I wanted to do. Besides, this room has a relatively short ceiling so it’s probably not a good idea to lower the light fixture any more.
I had also thought about putting in a lamp over the comfy chair, but I think there is plenty of light in this room. Besides, grandma might just have a clip-on LED lamp for supplemental lighting just like I do for my needlework. Once I get the ceiling painted bright white, it will reflect more light as well.
I cut the notch for the back roof piece and carved the two remaining wire channels on the top surface of the bedroom ceiling board.
Part 2 here.
Categories: The Haunted Heritage
December 30, 2012 | 0 commentsBespaq bed makeover, part 1
You might recall from my previous post, this is where the bed started. The finish was too dark and the bedding too large for scale.
I then primed it with grey spray paint to cover the red wood and varnish shine. Of course, I didn’t take a better photo of it in grey. :\
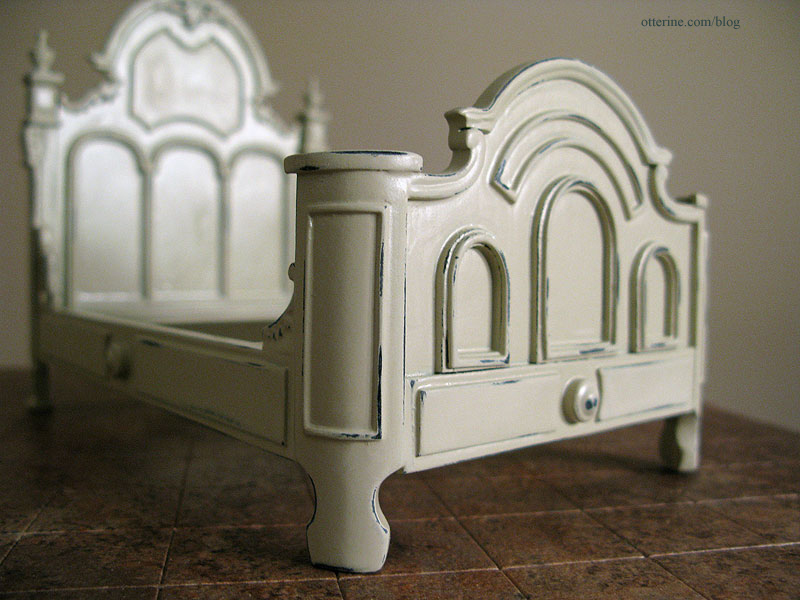
Here it is after a few coats of Krylon Almond in satin finish. :D We’re already getting somewhere!
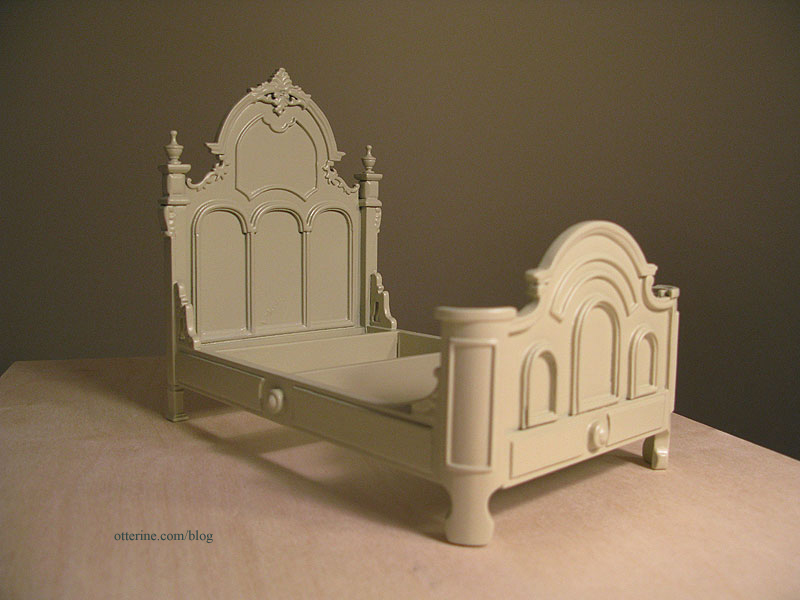
There are a few imperfections in the paint coverage, but those will be hidden by the bedding.

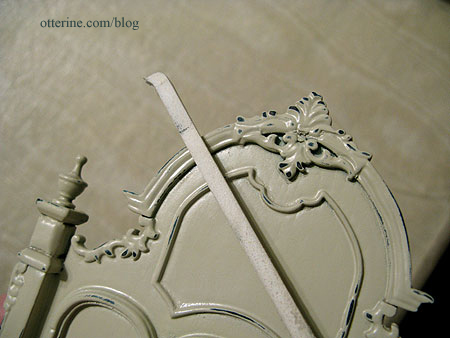
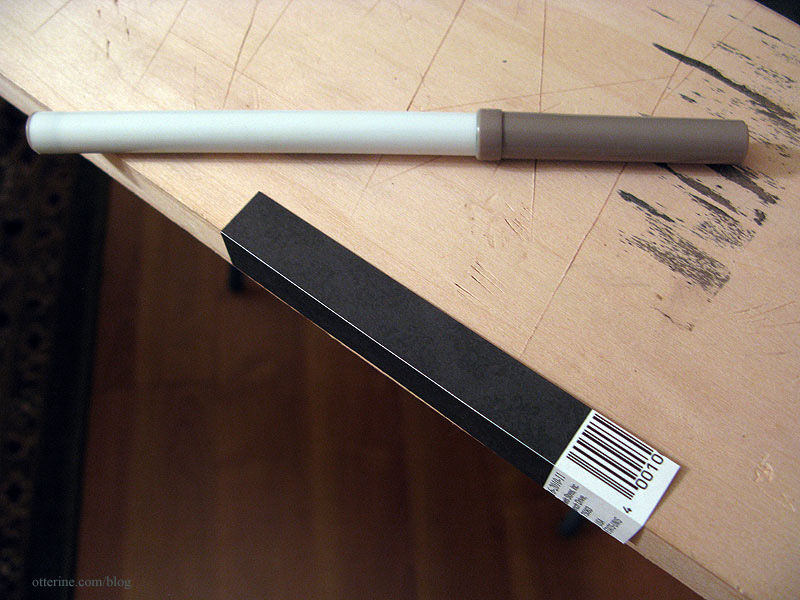
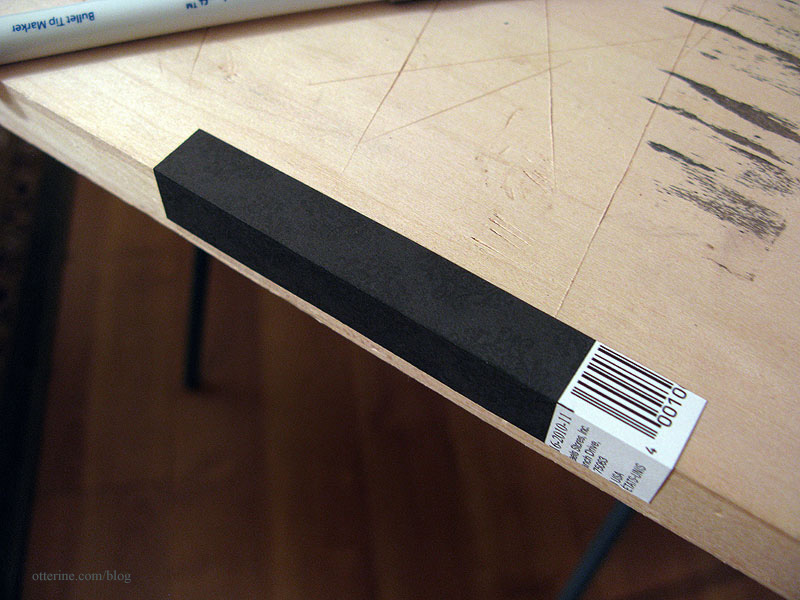
To age the bed, I removed some of the Krylon Almond satin paint using a sanding stick. I picked up a package of these at Hobby Lobby.
I went for a little less wear than my inspiration photo.
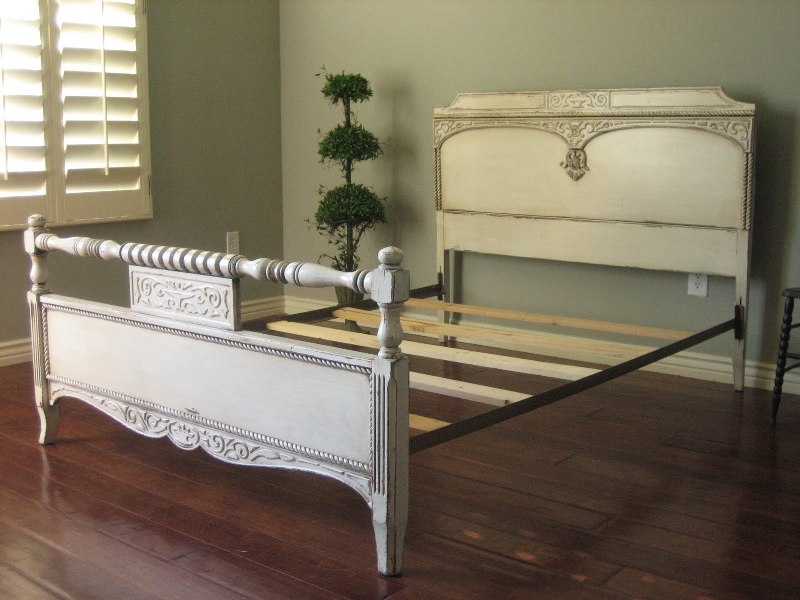
image from European Paint Finishes Detail of the wear patterns on the inspiration bed.
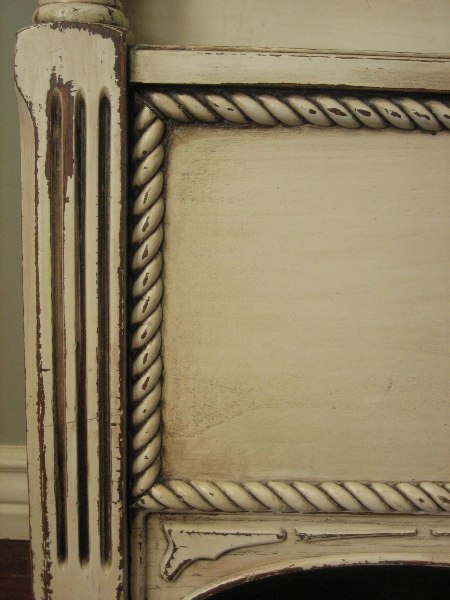
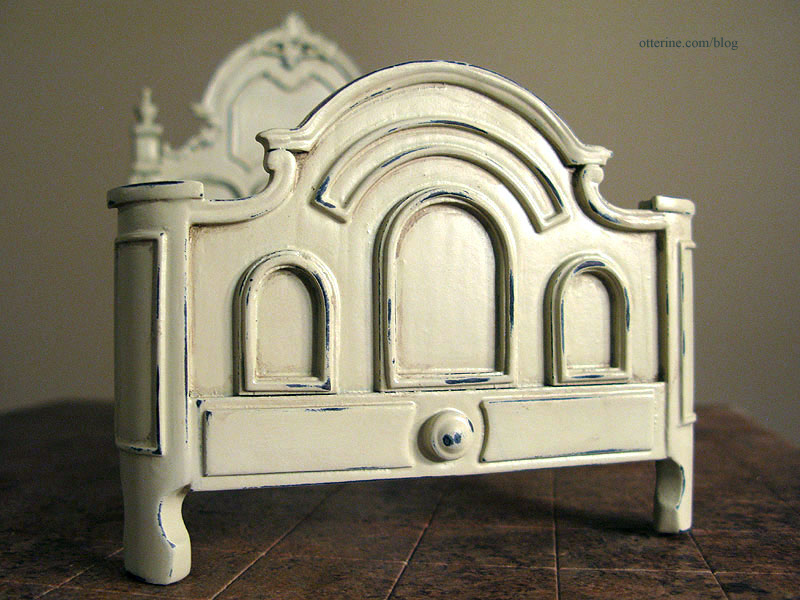
Detail of the wear on my bed. I wanted to emphasize the lines and details of the bed without overdoing it, especially since miniature finishes tend to work best when they are subtle.
I dry brushed some brown paint into the grooves and recesses, again using only a little. It added some nice depth.
I cut new foam core board pieces to replace the original mattress.
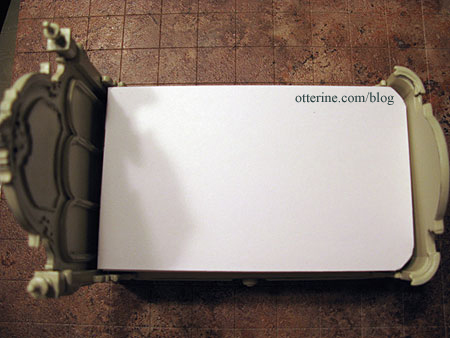
We’re ready for bedding!
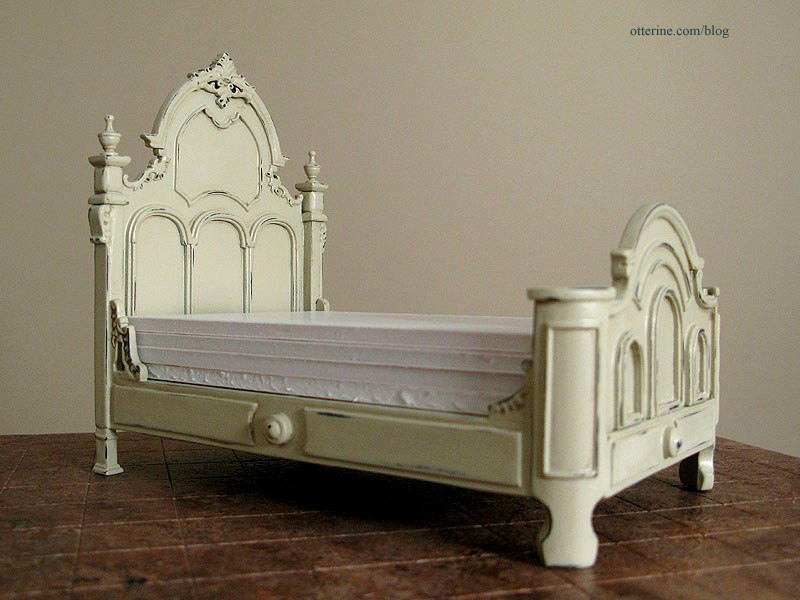
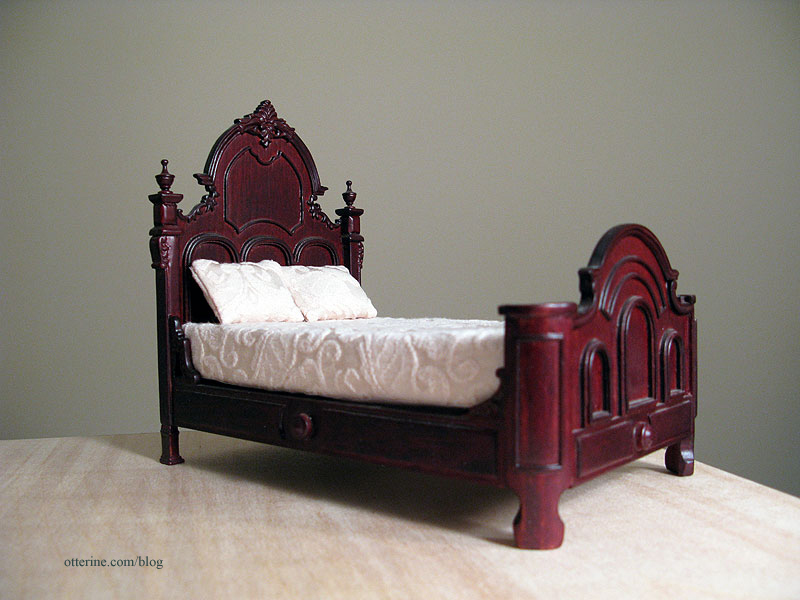
The bed looks somehow heavier now than it did in plain almond, don’t you think? :D
Categories: Furniture, The Haunted Heritage
December 28, 2012 | 0 commentsWiring…a necessary task
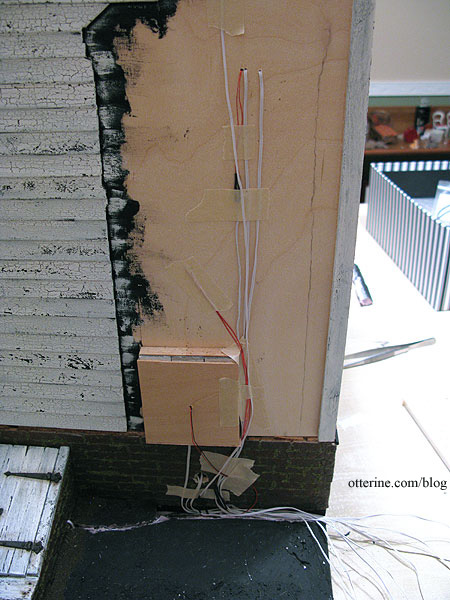
I’ve gotten far enough into the build that I need to start addressing the wires that will eventually be housed in the chimney. I have some wires lengthened and marked with masking tape so I know what is what.
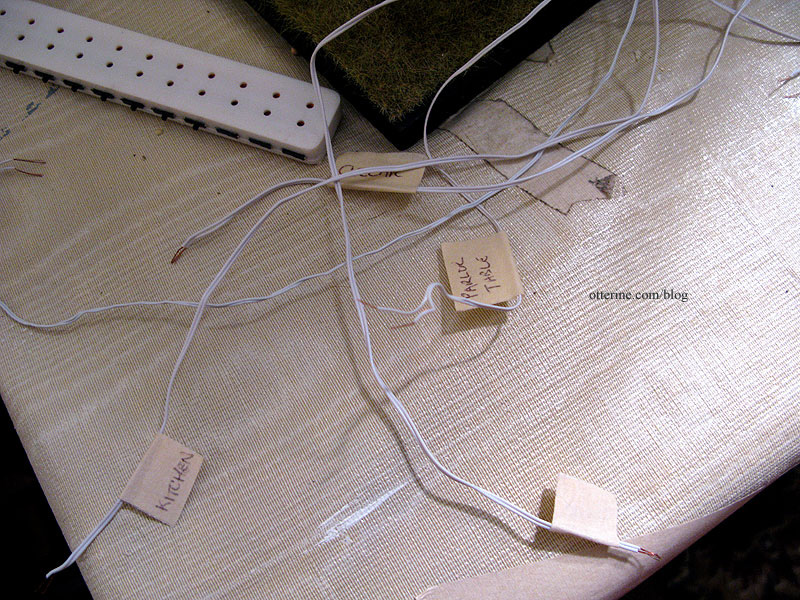
Others are just hanging around, too short, and I need to plug them in to see what happens. Haaaaa! What a mess….
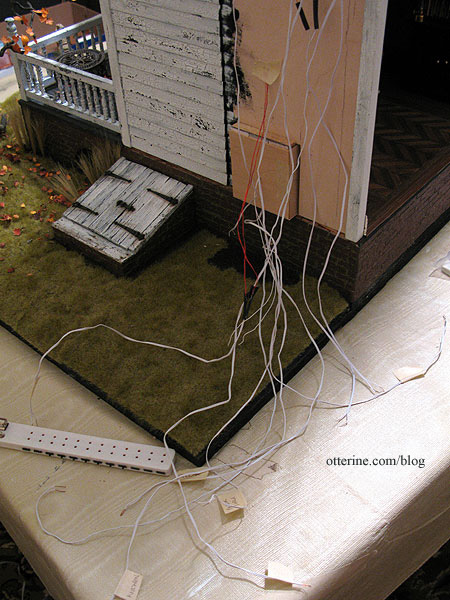
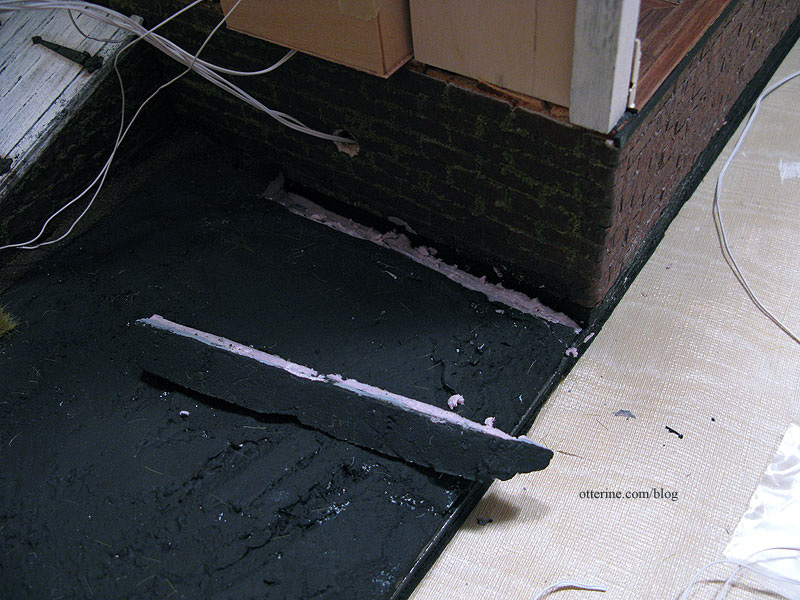
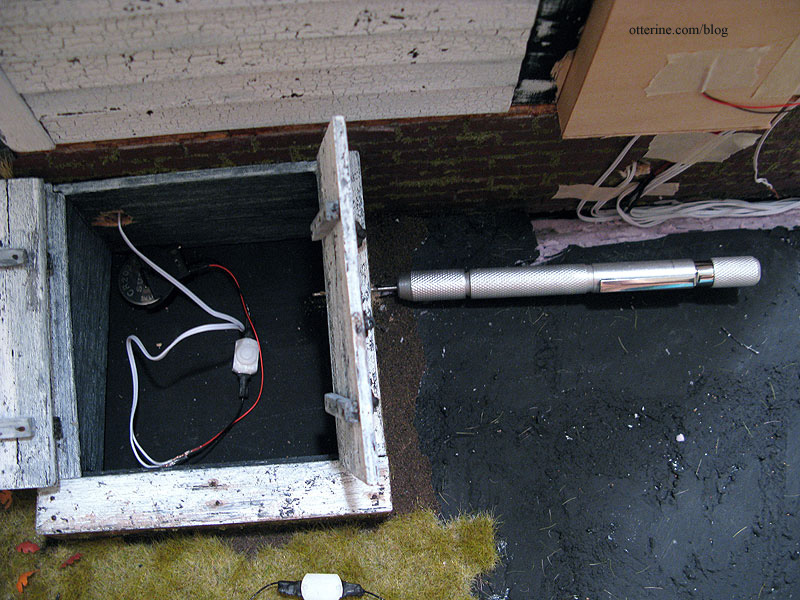
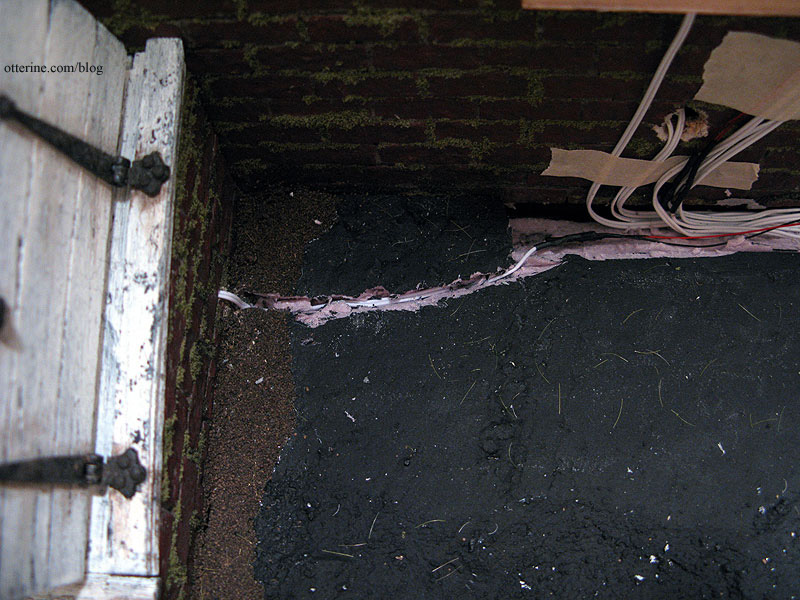
I decided to take some time tonight and remedy that issue. All the wires will come down the wall behind the chimney and that will require a track to the back of the baseboard. I cut the landscaping foam but kept the piece to later plug the channel over the wires.
I use the tiny clear, pre-cut shrink tubes by Cir-Kit when when I need to keep the wire joins thin, usually within a channel inside the walls or floor boards of the building itself.

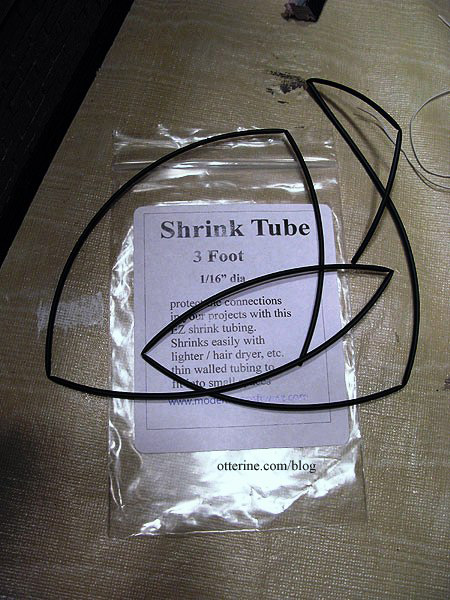
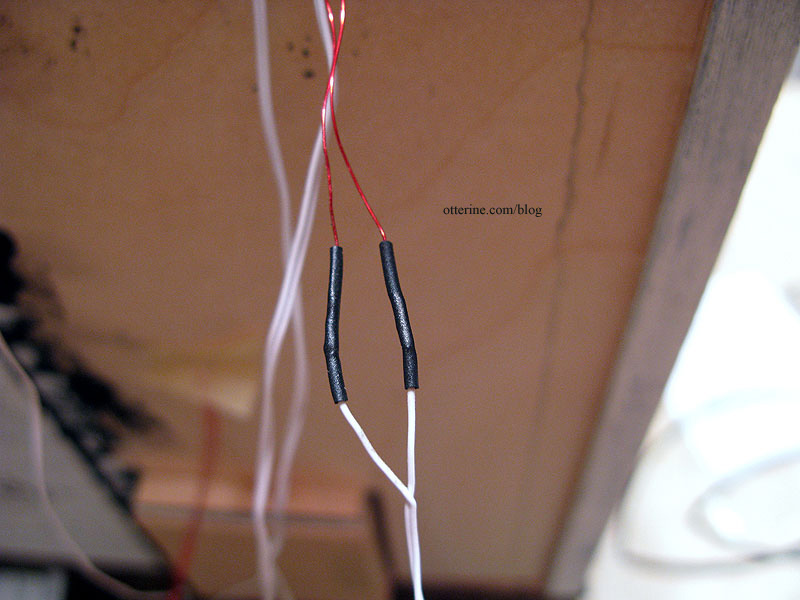
For the wires that join inside the chimney, the thickness of the wire joins doesn’t matter since they will be loose in the flue so I use shrink tubing from Evan Designs instead. This is a length of black tubing you cut yourself.
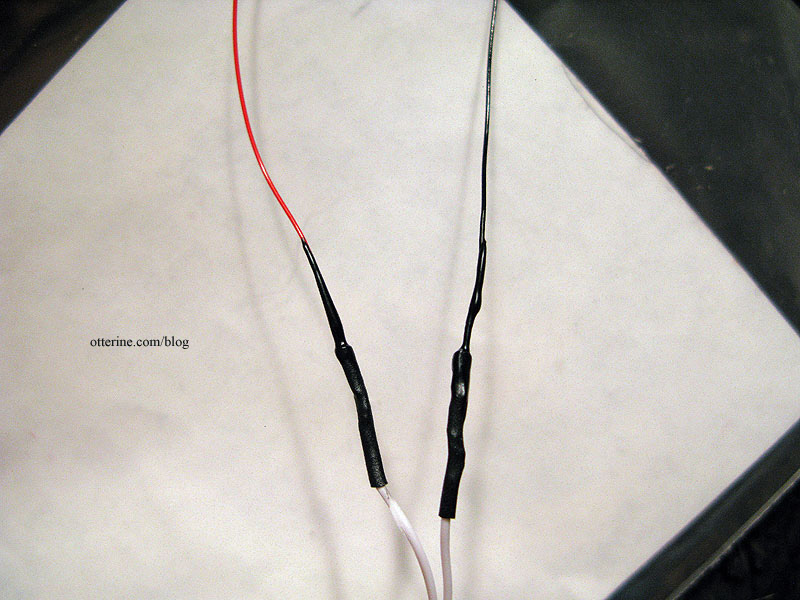
The result is comparable to the clear tubes just slightly thicker. I use a small lighter to shrink the tubing, putting the flame just close enough.
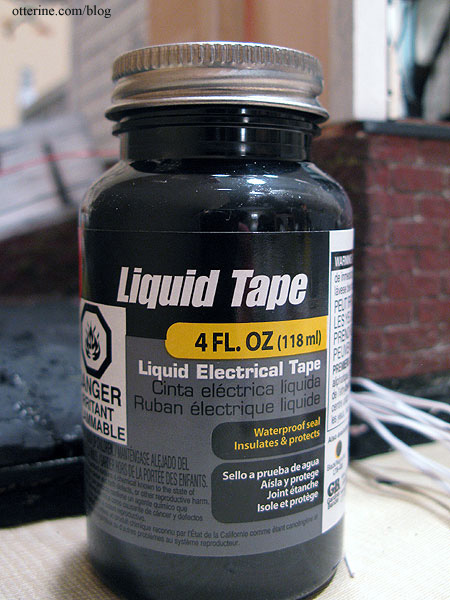
If you get the flame too close, you can use liquid electrical tape. This won’t hold wires together like a shrink tube, but it replaces any lost insulation.
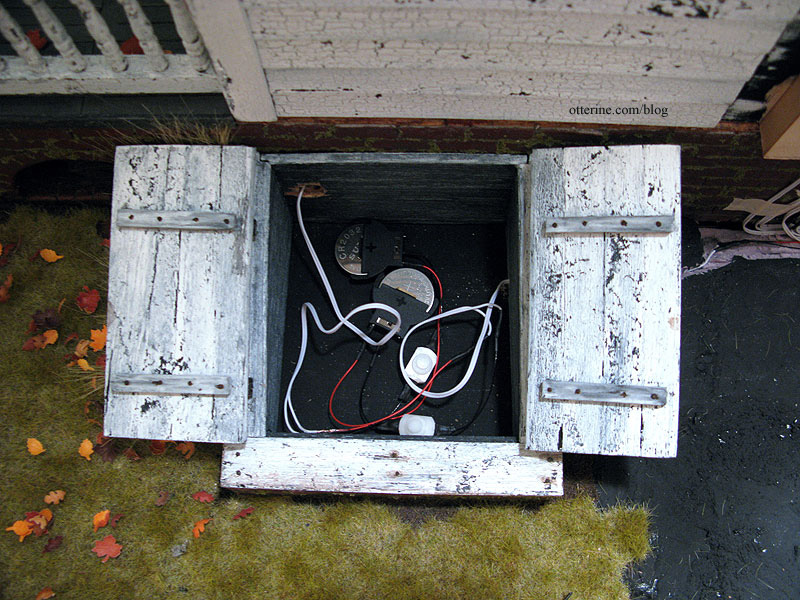
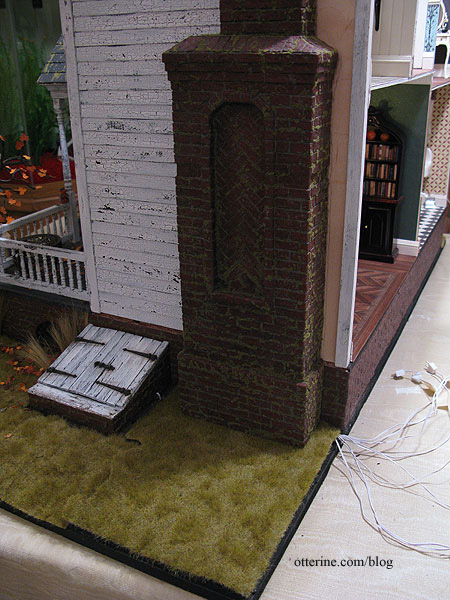
I decided to use a 3V flickering orange LED for the parlor fireplace, the same method used for the jack-o’-lantern on the front porch. I cut a channel in the landscaping foam and then drilled a hole into the cellar doors.
I wired the LED to a 3V battery adapter with a switch.
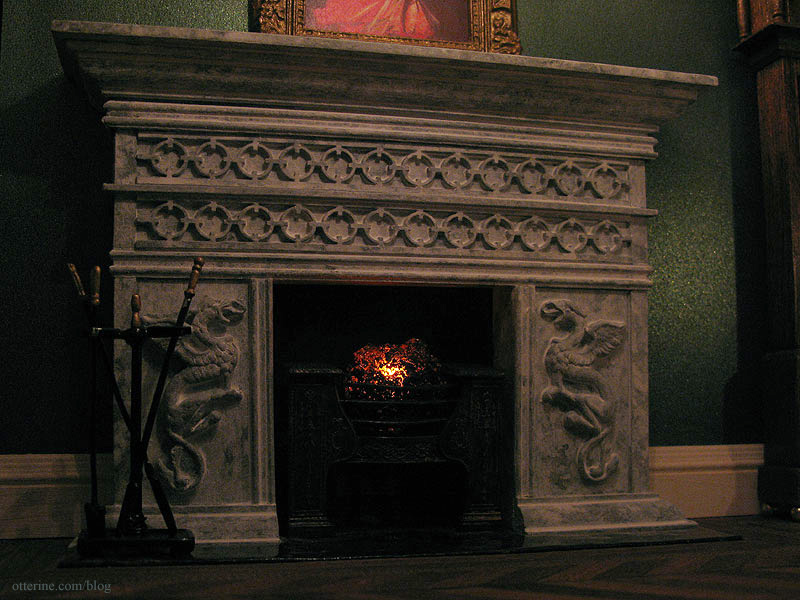
It’s a softer, more realistic light than the static red bulb. I love how spooky the fireplace looks in low light.
I taped the wires in place here and there to keep them tidy. Much better.
Once the remaining wires are in place, I’ll finish the landscaping and then add the chimney, but you can see the general idea of how it will look in the end. Having the chimney hiding the wires makes the Heritage completion seem like a solid reality.
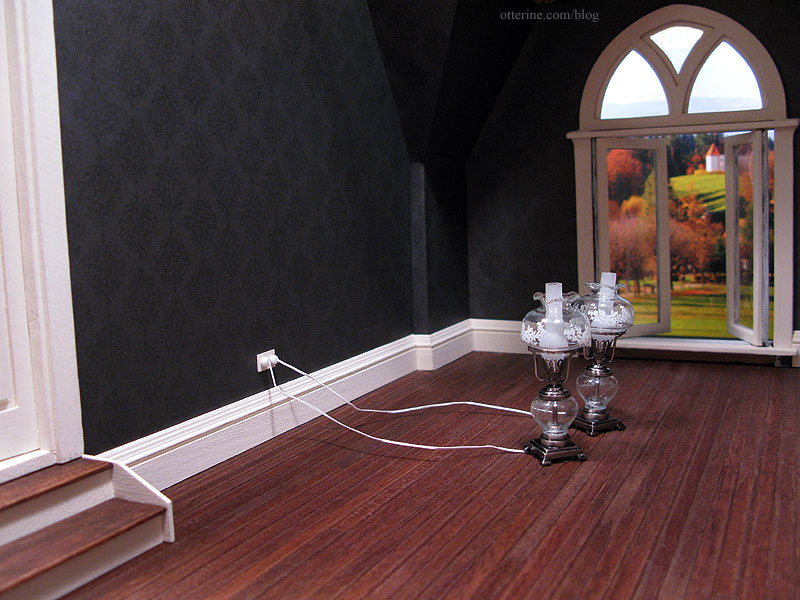
I even added the plugs at the ends of the wires. I use a 12-switch power strip, and yes, there are more than 12 lights to be plugged in at any given time. My transformer can definitely handle them all on at once, but I am more of a use-them-when-you-need-them type when it comes to lighting anyway. I could certainly add another power strip, but I don’t. And, yes, I know it’s already a bit of an octopus…ah, well, it works for me.
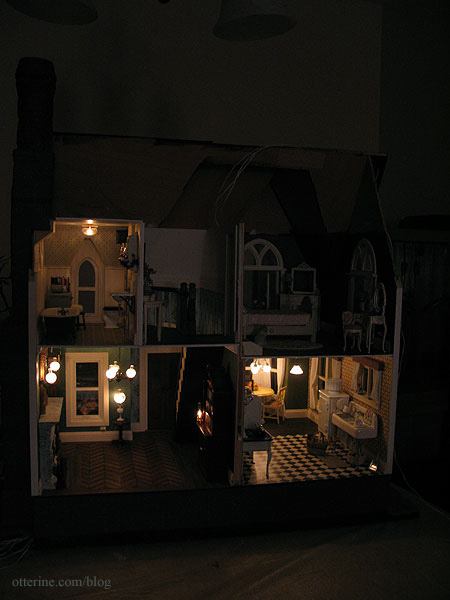
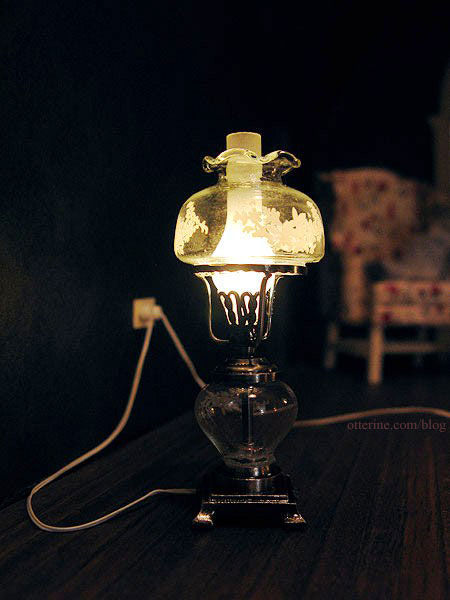
All this work is worth it once you see the soft glow of the light fixtures in place.
Categories: The Haunted Heritage
December 20, 2012 | 0 commentsHeritage – bedroom final trims
With the wallpaper installed, I cut the baseboard trim to fit around the room after putting in the front window. I later added the trim underneath the swinging window on the interior side.
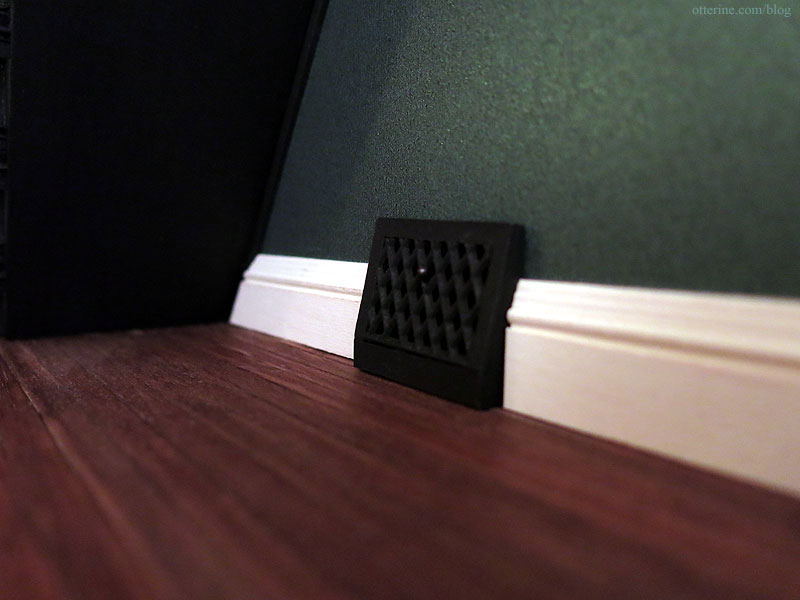
I added another baseboard heat register (my bash of a tutorial by Kris at 1 Inch Minis), this time by the window. Having it on the wall behind the bed would defeat the purpose of adding the detail at all, and the double outlet was already on the inside wall besides. The mismatched seam is definitely less noticeable, too. Hooray!
While I did cut the trim to follow the small outcropping on the left, I didn’t bother to cut the trim around the corner post in the back on the right. Cutting pieces that small tends to be more of an exercise in futility with limited results. Besides, a big dresser is going there. Cheating? Maybe. :D Less stress? Definitely!
The bedroom door has been finished, including door knobs from miniatures.com and keyholes from Bindels Ornaments. :D
I glued the door in place and added the interior trim.
Here’s the furniture placement, though the dresser, bed and nightstands still need final finishing.
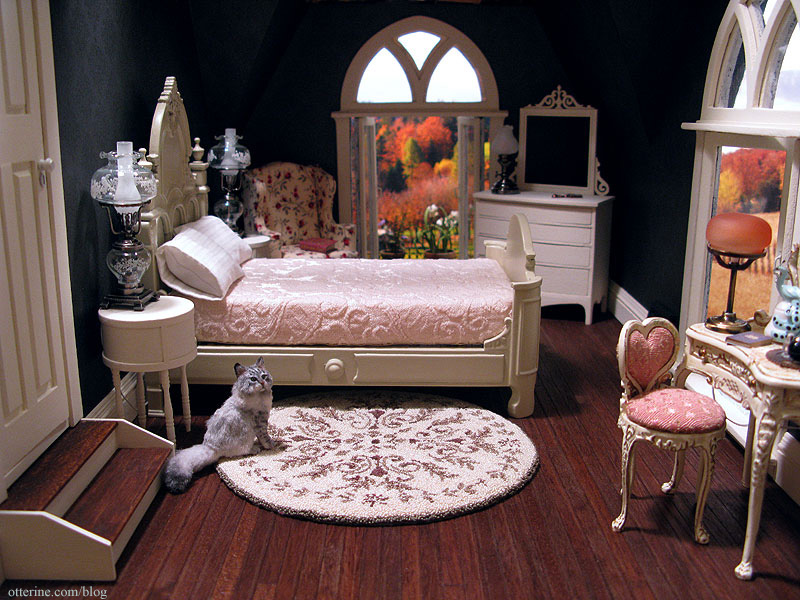
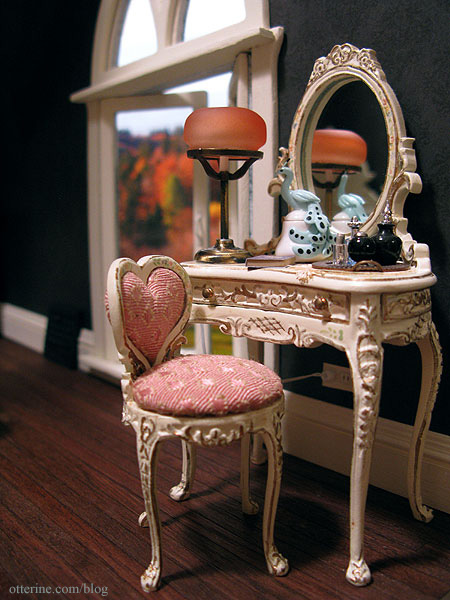
The Bespaq vanity and heart shaped chair fit perfectly in this corner.
We are ready for the ceiling!

Categories: The Haunted Heritage
December 18, 2012 | 0 commentsHeritage – bedroom swinging windows, part 4
Completing work on the swinging windows. After touching up any exposed wood that might show in the side tracks, I glued the window interior trim pieces in place.
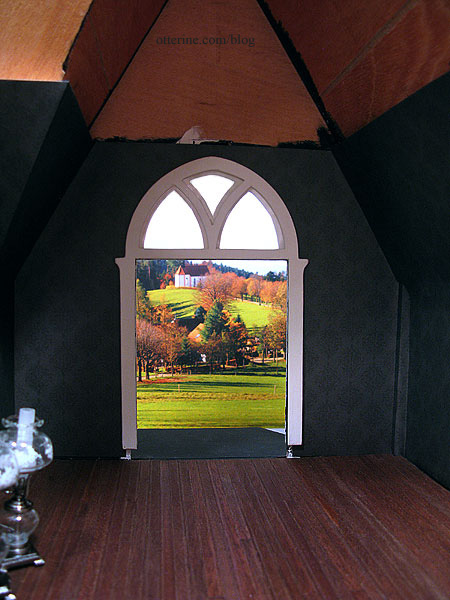
I rechecked the fit of the front swinging window pieces previously finished and installed the window. It doesn’t close all the way without some tension, so I’ll just leave it open. I couldn’t trim any more wood from the panes to make it fit without weakening the whole assembly, and I don’t mind them open.
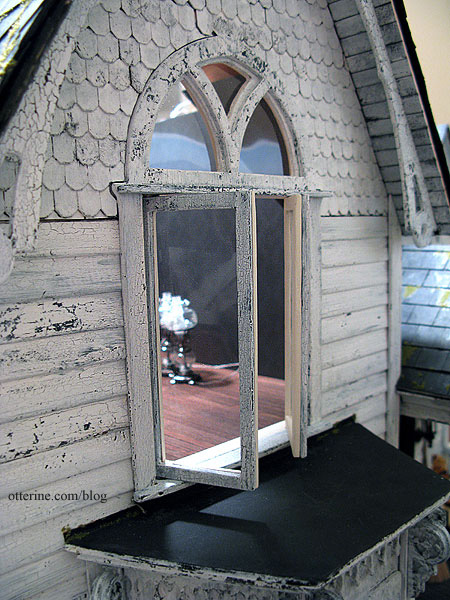
I added the exterior trim to hold the window in place. There’s no glue here; it’s all held together with tension. That’s probably not a bad thing in case I ever need to adjust or repair it.
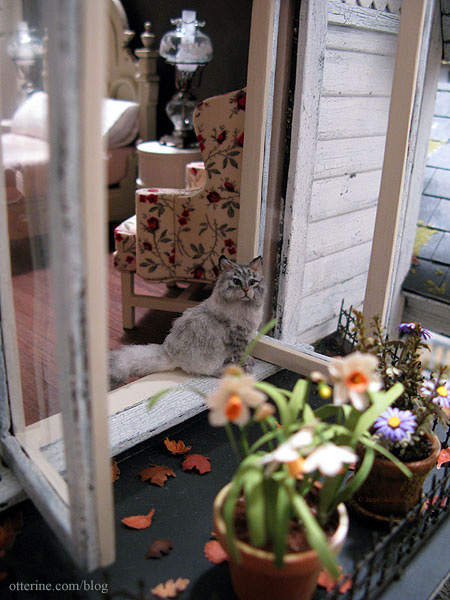
After finishing the bay window roof, I added some leaves and potted plants. The plant on the left is from Michelle of Little Rabbit Minis, and I made the potted daisies for The Aero Squadron Lounge.

The lower trim has been added under the swinging window on the interior side here. Ophelia seems to be enjoying the view.
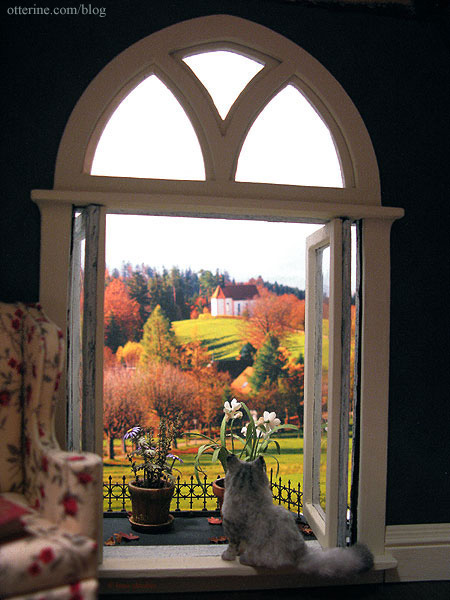
I get the feeling she spends a lot of time on the bay balcony. :D
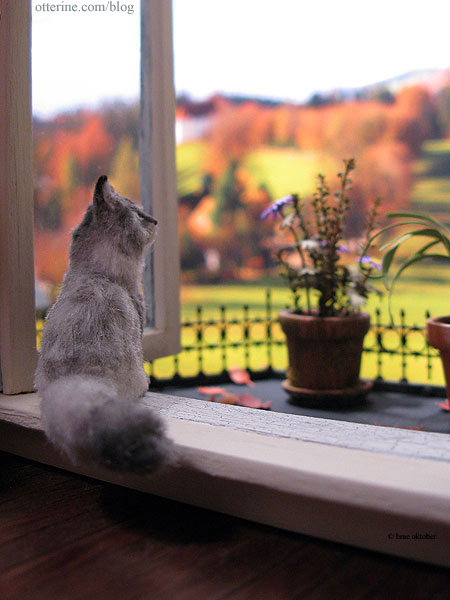
Pretty kitty.
I finished up the side swinging window and installed the trims to hold it all in place. The side gable finishing trims will be completed after the attic is completed and the back roof added.
There were slight gaps just below the arch windows for both swinging windows, so I added thin pieces of trim to hide these.
I also added window pulls. These were brass but have been painted Vintage White by Folk Art. Nothing says old house like painted over hardware.

Categories: The Haunted Heritage
December 17, 2012 | 0 commentsHeritage – hallway railing
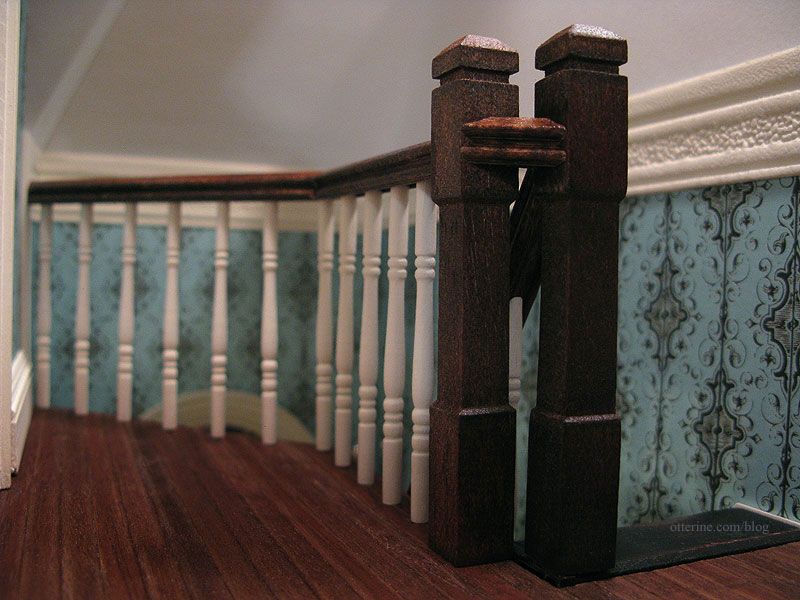
I’ve seen a few treatments for joining a stair railing to a balcony railing. The easiest by far is a double newel post option, but the way the room is set up they would have to be literally side by side with no gap between them. Not the most appealing aesthetic. :\
My Dremel savvy friend and I were talking about this today, and he had a brilliant solution: offset the newel posts and have a small angled section of railing between them. I think this will make perfect visual sense and it also eliminates having to navigate around a harsh corner on the way to the bathroom. :D
Before I could address that, I needed to tackle the railing and spindles around the balcony. I marked the floor where the spindles should go starting with the spindles adjacent to the stairs. I thought those adjacent spindles should line up, even though you probably won’t be able to see that once this room is enclosed. This made the spindles on the straightaway 5/8″ apart. On the angled section, I just put a dot at the space between every pair of boards.
There was a gap between the foyer paper and the hallway paper. I cut a scrap of basswood to hide this area and painted it Vintage White to match the trim. I’ll show that board further in this post.

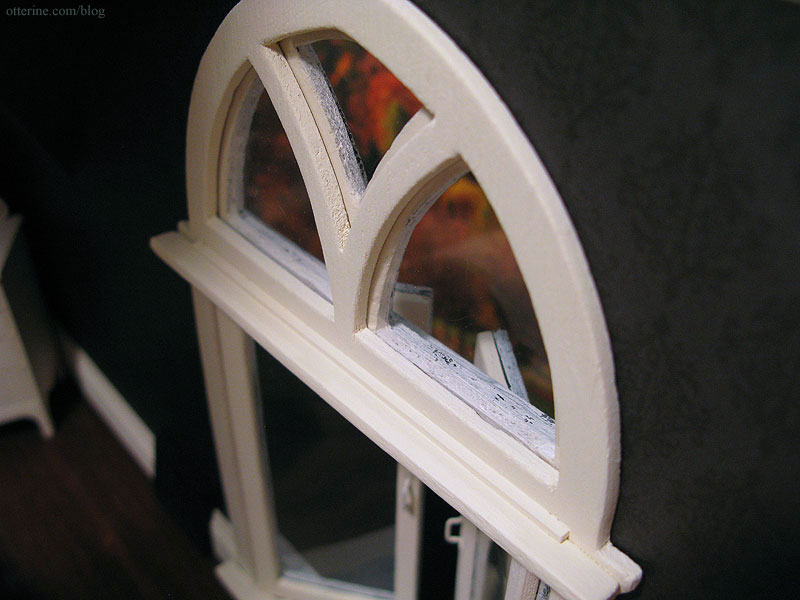
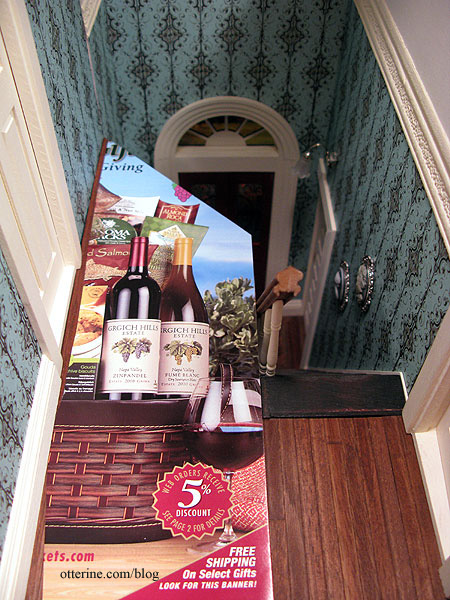
I had to do some math to determine the angle at which the two railing pieces would meet on the balcony. I took a piece of scrap paper (a wine gift catalog…how distracting) and folded it over the edge of the balcony.
I folded the point in half.

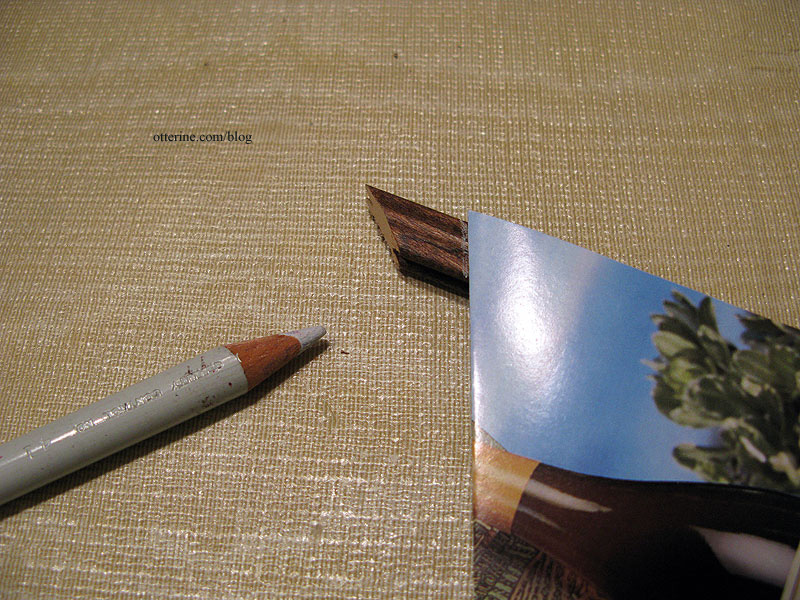
I lined up the fold with the end of the railing strip and marked it with a light pencil. I had already cut this piece to length, with a 45° angle at the end by the wall.
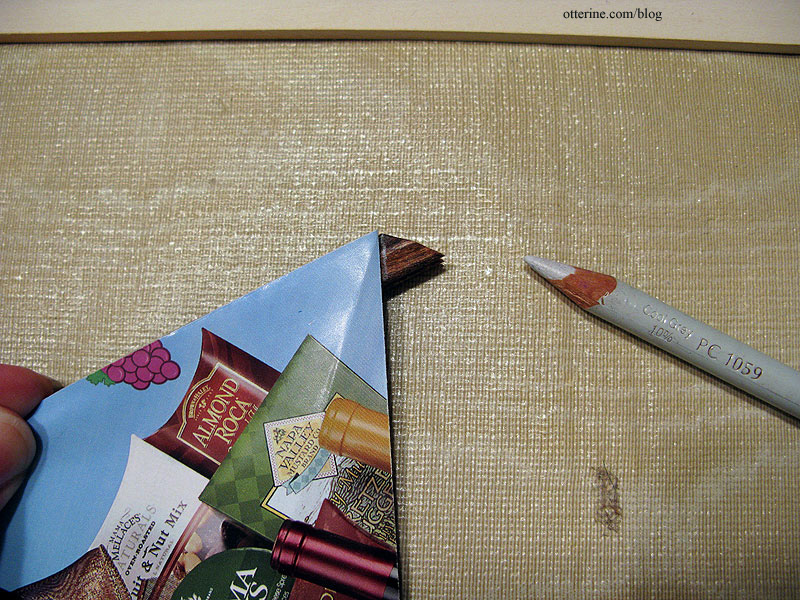
I then flipped the paper guide over and marked the railing piece that would join the first.
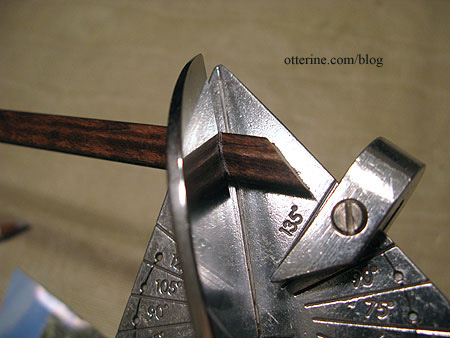
You can use an Easy Cutter even if the angle you want isn’t one of the presets on the tool. Just line up your blade with your guideline and cut using the tip of the cutter. The tip stays sharper longer because it doesn’t get used as much as the lower part of the blade.
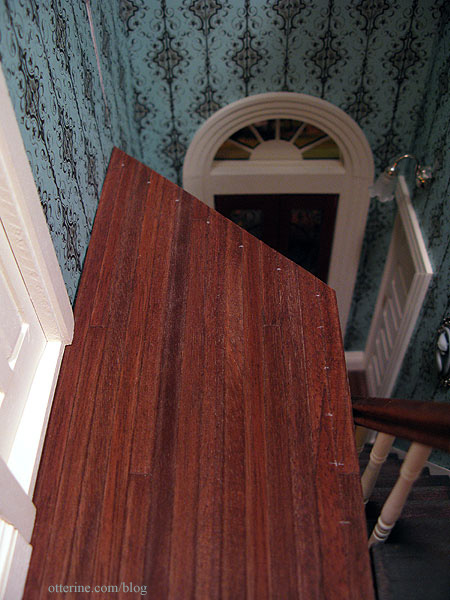
The wall board and two railings are cut and ready for spindles. I will cut the excess from the long straightaway railing piece after I get the spindles in place and the newel post position marked.
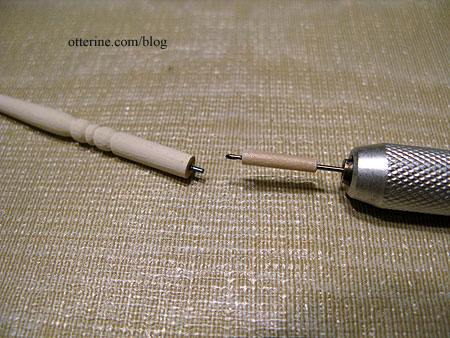
The floor board is just over 1/8″ thick. I cut down the wires I had glued into each spindle to sit within this depth.
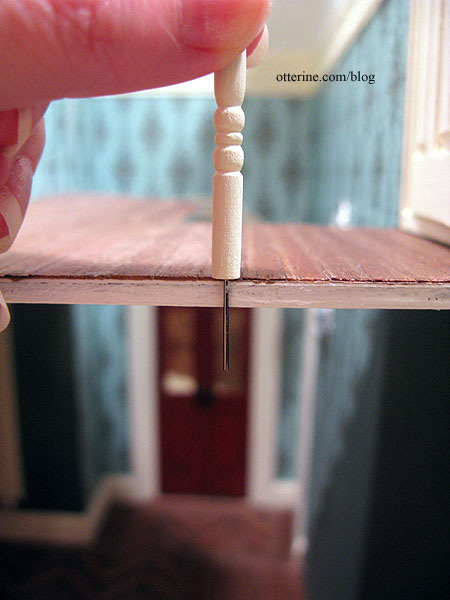
I taped around my drill bit to make sure I didn’t drill through the ceiling.
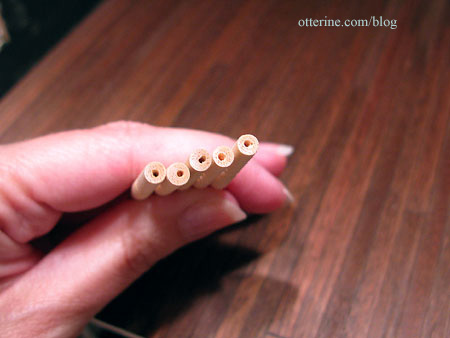
As with the stair spindles, I didn’t get the holes drilled in the bottoms of the spindles exactly in the middle, so there was some visual adjustment done for each one.
These are glued in place in addition to having the wire supports. I also installed the remaining baseboard now that I had the vertical finishing trim glued in place.
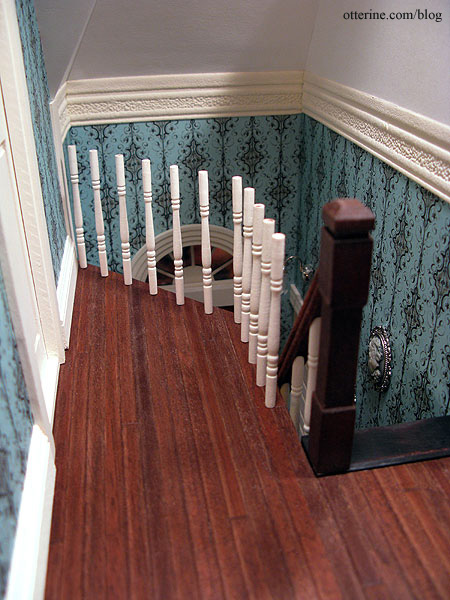
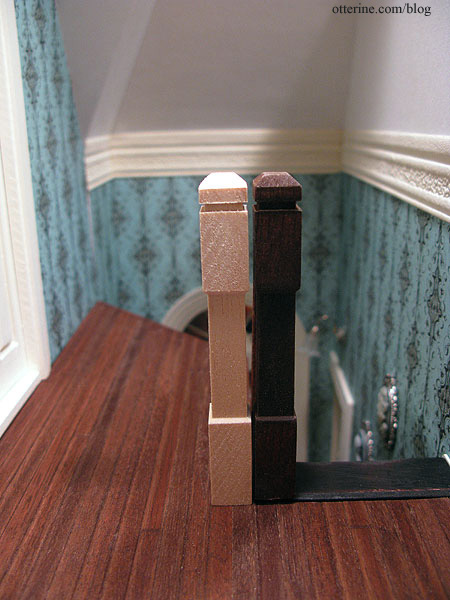
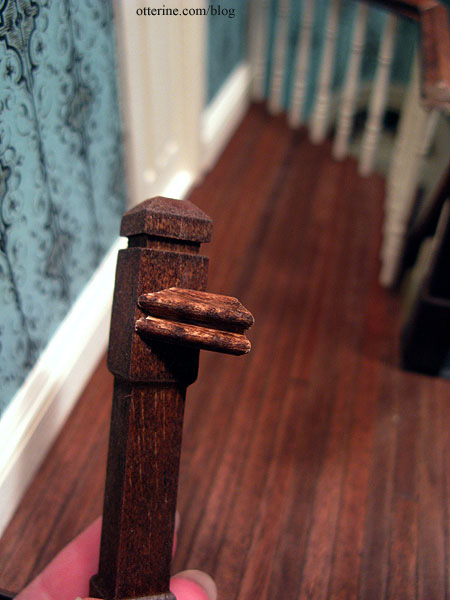
I cut a piece of railing with 45° cuts at either end to join the newel post at the top of the stairs with that of the balcony. Took me three times to get this to work, and it’s still not the cleanest cut. The wood kept splitting. I also had to shave off a little from bottom of the stair newel post since the staircase extended above the hallway flooring. I needed the two newel post tops to match relative to one another.
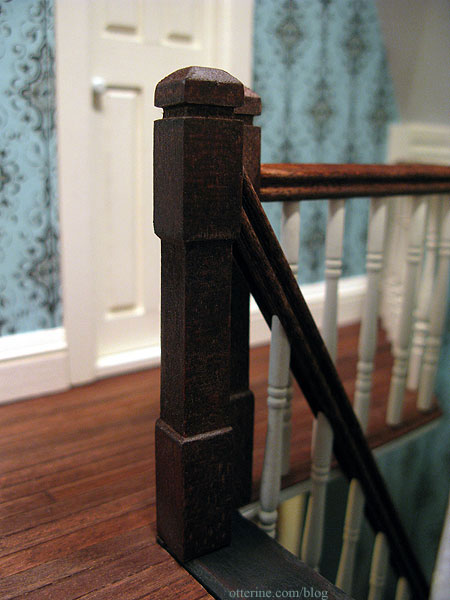
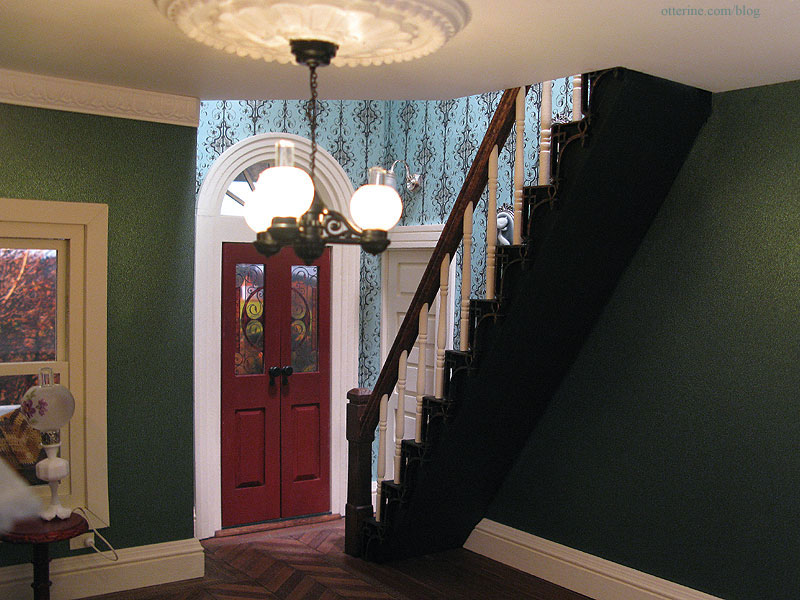
I did a dry fit of the railings, then it was time to glue it all in! Once I had it all in place, I touched up the stain on the railing. Success!!!! :D
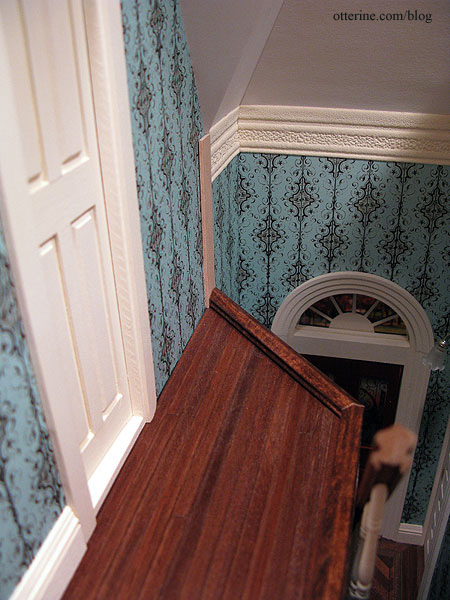
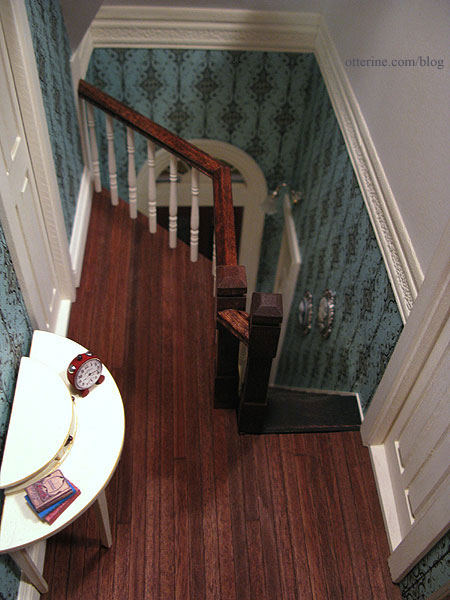
And, from overhead. The angle join could be cleaner but with the stain touch-up and the low light in the hallway, the minor gap isn’t really noticeable.
Overall, this part of the project was about as difficult as I thought it would be and turned out about as well as I had hoped. Definitely a success all around.
Categories: The Haunted Heritage
December 16, 2012 | 0 commentsHeritage interior staircase, part 6
Completing work on the interior staircase. After getting the new spindles painted and installed on the stairs, I stained the replacement railing from Manchester Woodworks. From there, I procrastinated, even breaking a new kit out of its box. :D I am now prepared to tackle the rest of this project. Truth be told, I can’t put the hallway ceiling on until I do, and that is holding up progress on the attic and finishing the house overall. In simpler terms, I have no choice! :O
I wish I could tell you there was a magical formula I used to get this railing on. I was just winging it with some visual measuring and crossed fingers. I have no idea if it is actually straight, but it looks it, so I suppose that is all that matters. Here’s what I did.
I used the back of my Micro-Mark gluing jig to hold the stair assembly in place. I bent all of the spindles to make them as even as possible (they have wires in the bottom that were glued into each stair). I dry fitted the railing onto the spindles to determine where the railing would hit the front newel post. I also measured where the top newel post would hit the railing and snipped the end.
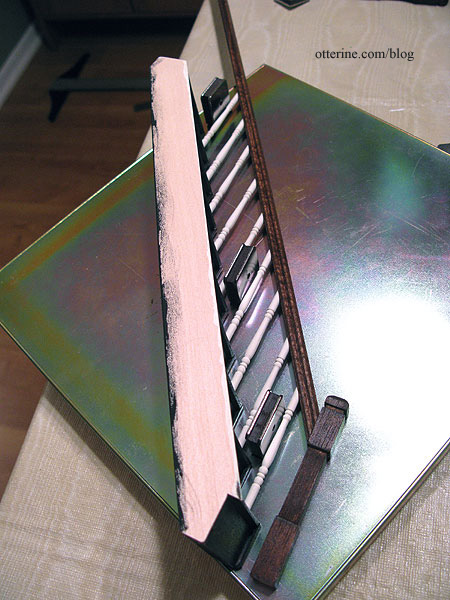
I marked where the spindles hit the railing with masking tape strips.
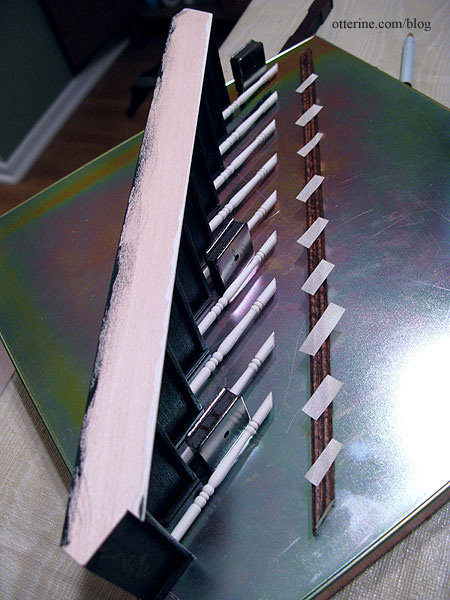
I added a drop of tacky glue and super glue gel behind each piece of tape.
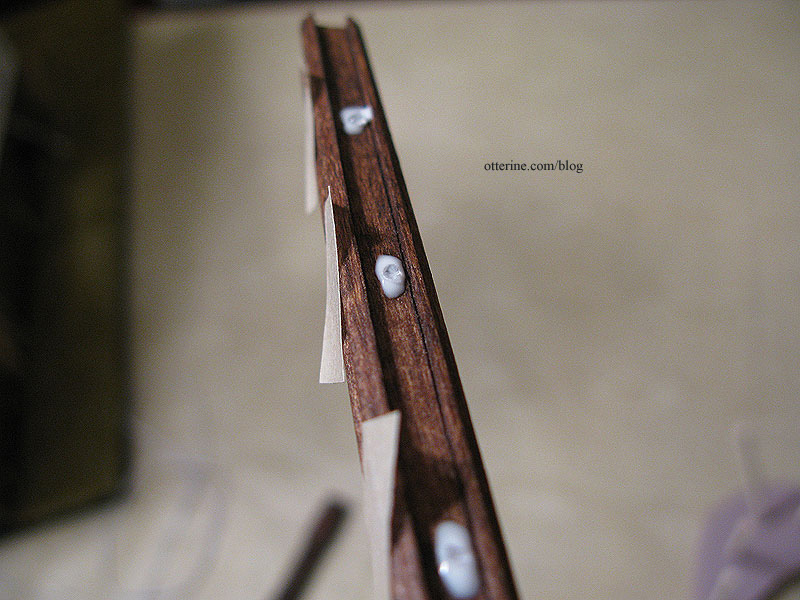
I placed the railing onto the spindles while the stairs were still on the jig but immediately lifted the assembly off the jig and adjusted the railing quickly before the glue set.
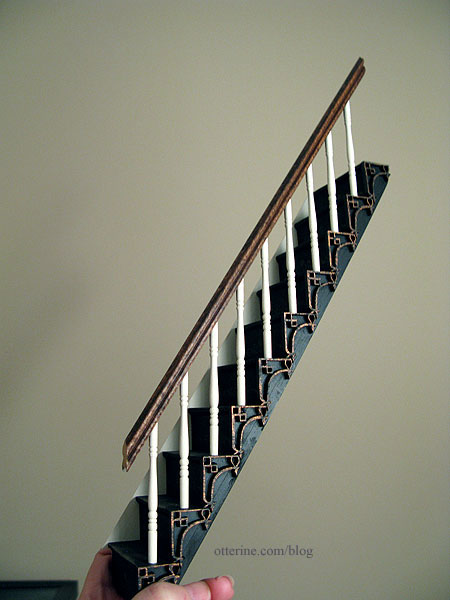
The stair assembly fits so snugly that I didn’t bother with glue along the wall. I did glue the foyer newel post to the floor and the railing.
It worked!!! :D
I was able to then add the final baseboard trim and crown molding behind the staircase. I also added a baseboard heat register (my bash of a tutorial by Kris at 1 Inch Minis).
Next up, the upper hallway balcony railing.
Categories: The Haunted Heritage
December 15, 2012 | 0 commentsHeritage – bedroom stairs
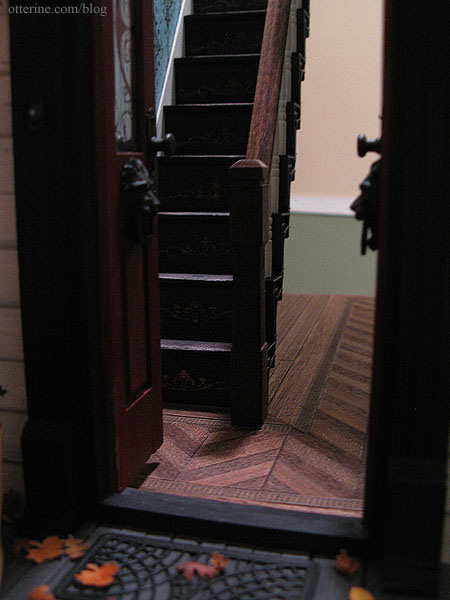
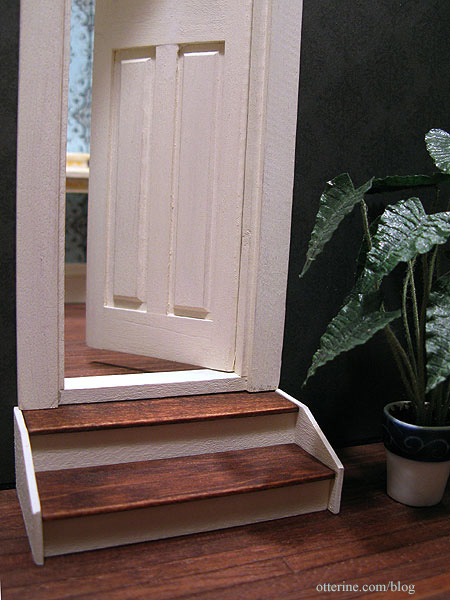
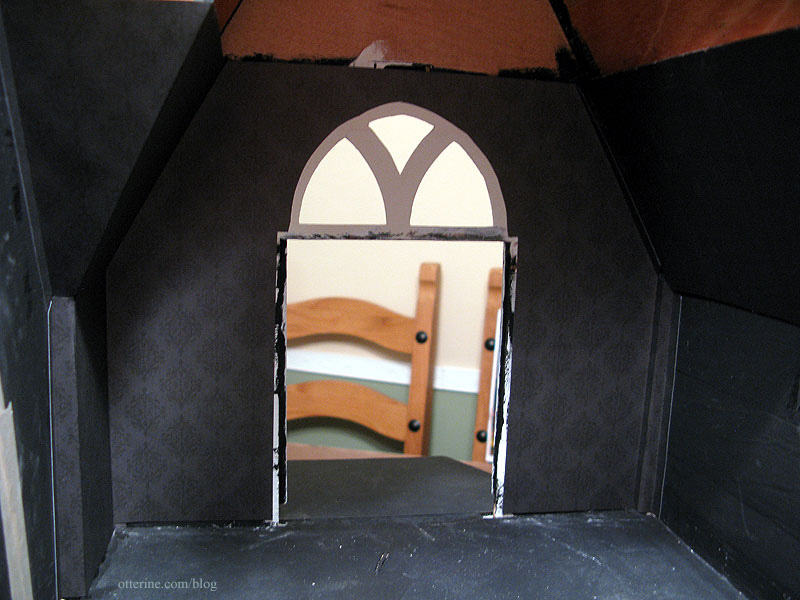
As you may recall, I raised the ceiling in the parlor on the first floor to accommodate the new narrow staircase but left the kitchen the original lower height so I wouldn’t have to alter the swinging windows of the upper floor. This means the hallway floor is higher than the bedroom floor. My childhood home had a door that opened to reveal the bottoms of a staircase, and I’ve seen this in other old house. I’ve also seen a set of two to three steps leading up a wall to a door. So, I figured this was the way to go for the Heritage.
When Lyssa and I went to the Art Institute during her visit this past October, we naturally saw the Thorne Miniature Rooms first. In one of the fine bedrooms, there was just such a setup. :] I already had a vague image in my mind, but this helped solidify the idea.
I like how the top step is even with the door, as though it were a continuation of the floor on the other side. This makes sense to me, so that one doesn’t open the door and immediately fall down a drop off.
I didn’t need to make up that much height between the floor and the bottom of the door, so I used pieces of foam core board to build two steps. I chose this material mainly because I had scraps and it is easy to cut. I cut two pieces 2 3/4″ L x 1 1/4″ W, and two pieces 2 3/4″ L x 1/2″ W. It wasn’t quite high enough, so I add a shim of 1/16″ thick balsa.

I then added risers from 1/16″ thick basswood.
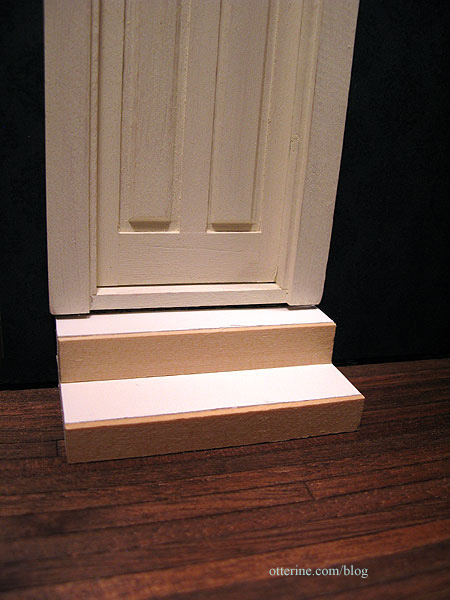
I cut treads from 1/16″ thick basswood but didn’t glue them to the assembly since I wanted to stain them to match the floor.
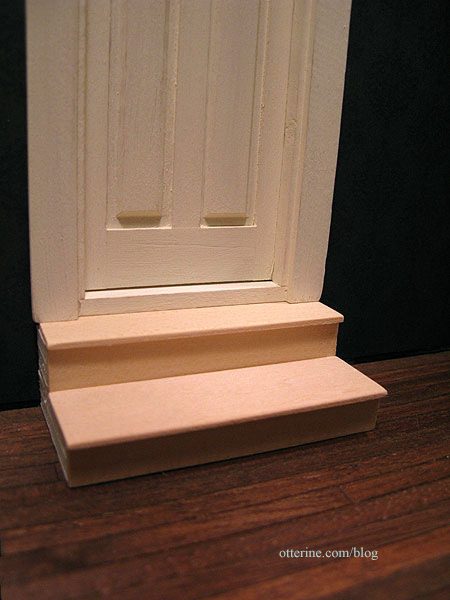
I cut side pieces from 1/16″ thick basswood that will enclose the entire unit.
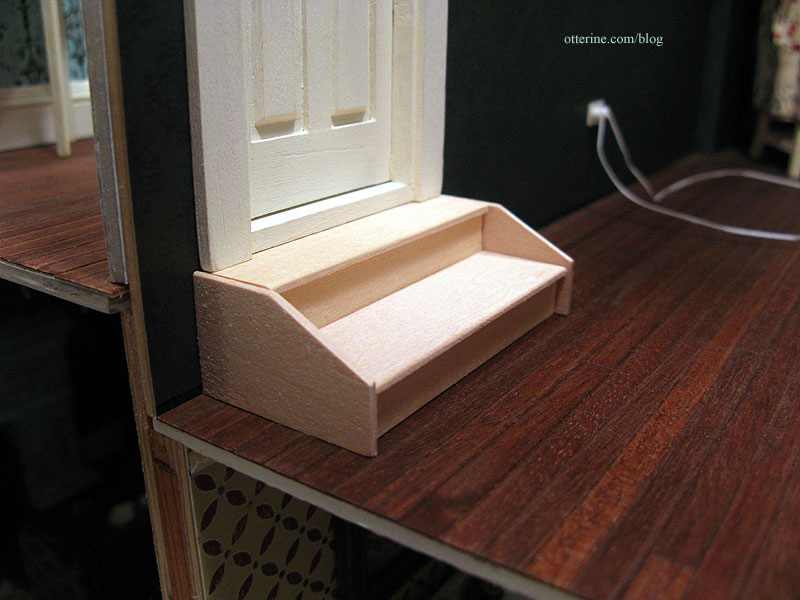
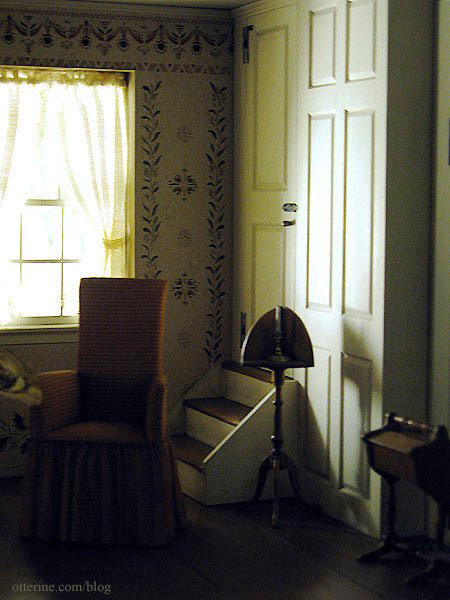
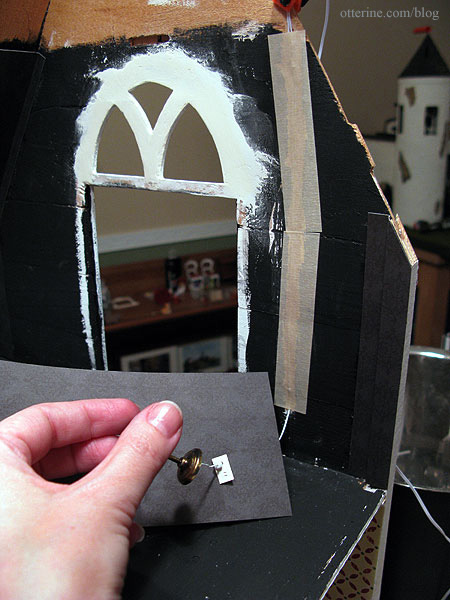
I stained the treads Minwax English Chestnut and painted the remaining pieces Vintage White by Folk Art to match the trim throughout the house. I was impatient for the stain to dry, so I’ve assembled the stairs for a quick photo shoot. No more floating door. :D
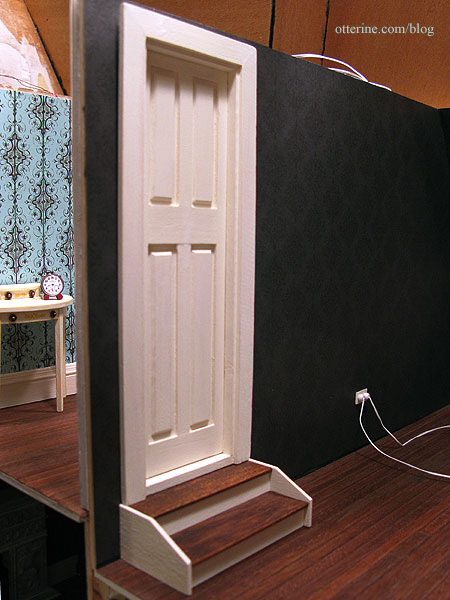
When installed permanently, the door will open into the bedroom, but the photos look better with the finished frame showing. The door is also in need of final finishing.
Categories: The Haunted Heritage
December 13, 2012 | 0 commentsHeritage – bedroom wallpaper, part 4
Completing work on the bedroom wallpaper. The wallpaper pieces had to be glued in place in a particular order for the tabs to work. I started with the two side triangle pieces and then added the pieces for the left side angled wall and the front window wall.
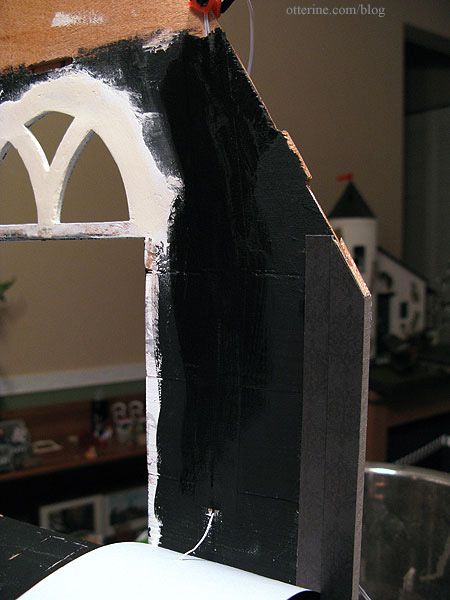
Next, the right side angled wall. The darkness of the paper made it hard to work with but it also helped mask any issues with the fit. As you can see, the outer wall is rather rough in texture. I didn’t smooth it because any modest bumps that show under the paper should work in my favor for an old house and it’s not as rough as it looks in the photo. :]
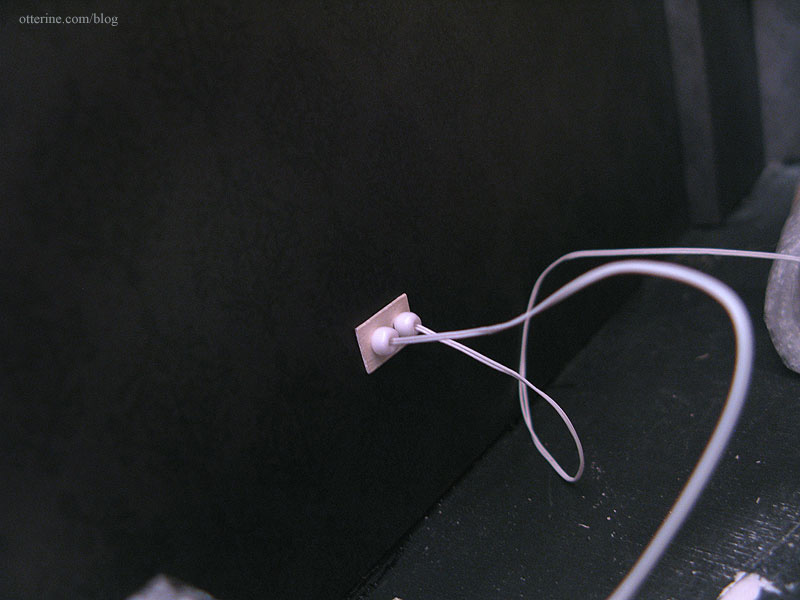
I had to wire the two bedside lamps and the vanity lamp before I could proceed. I used my usual faux outlet technique for the wiring: a bead for the plug and a handmade wooden outlet to disguise where the wire enters the wall. I had made the wiring channels previously.
I used masking tape to keep the wires in their respective channels and then painted it black.
Since there was a lot of work left to be done in and around this room, I encased the lights in protective wraps.
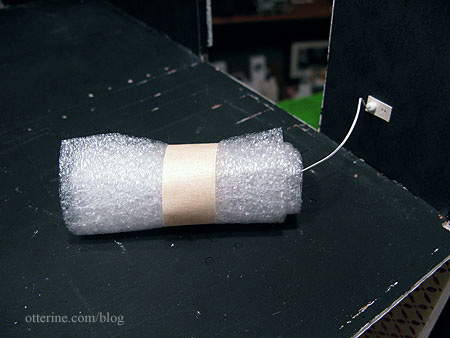
The bedside lamps were both plugged into the same outlet, which will be behind the headboard, but I didn’t wire them to work as a set. I thought it would be nice to take photos with only one or the other lit.
The pattern didn’t end up matching on the outer wall where it was pieced, but it doesn’t bother me enough to cut a new piece from the reserve sheet. Once the ceiling, baseboard and furnishings are in the room, I doubt it will even be noticeable.

I used tape to suspend the wrapped lights and glued the flooring in place.
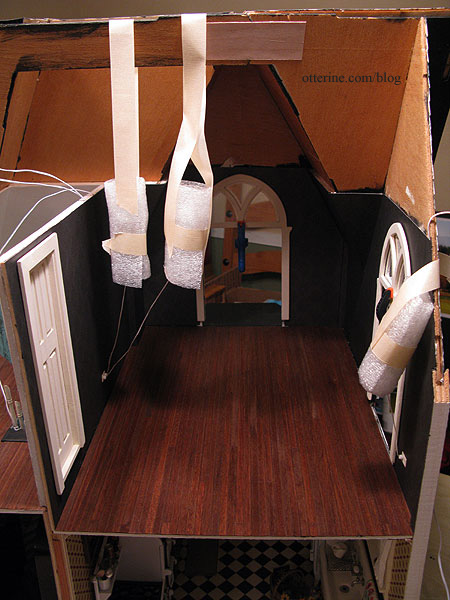
The interior window trim and door aren’t glued in place just yet, but we’re getting there! (Yes, I plan to address the floating door.)
I love these lamps! :D
Categories: The Haunted Heritage
December 12, 2012 | 0 commentsHeritage – bedroom wallpaper, part 3
Continuing work on the bedroom wallpaper. With the patterned paper copies ready to serve as templates, I started cutting the actual scrapbook paper – Out of Time by Recollections. I matched the pattern so the final pieces were exactly like the templates. (If I were to do this again, I would have mounted the final paper to an acid free backing paper to build up the thickness for durability.)
I cut all pieces before starting to glue them in place.
Unlike solid cardstock papers, printed papers often have a white paper core. When you score along the paper to make a crisp edge, the white core can show. As expected, the scored lines showed readily since the paper is black printed on white paper and any exposed core showed as a white line.
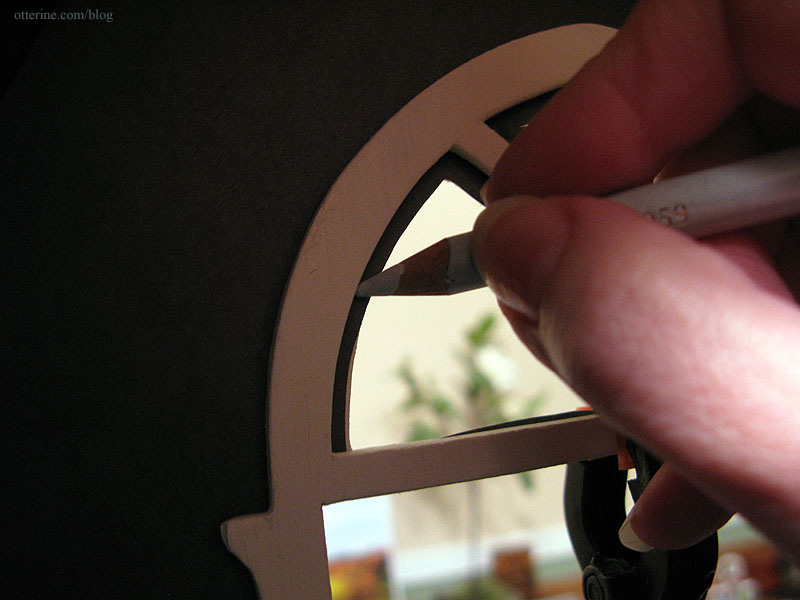
I ran a grey marker along the scored creases and exposed edges to mask these white lines. Here was my test scrap, used to find which of the various markers I had would be the best color match.
The front window wall piece required some trimming. I used a light colored pencil to mark the inside lines of the interior trim.
I cut outside these lines.
I checked the fit with the trim – no wallpaper showing. :]
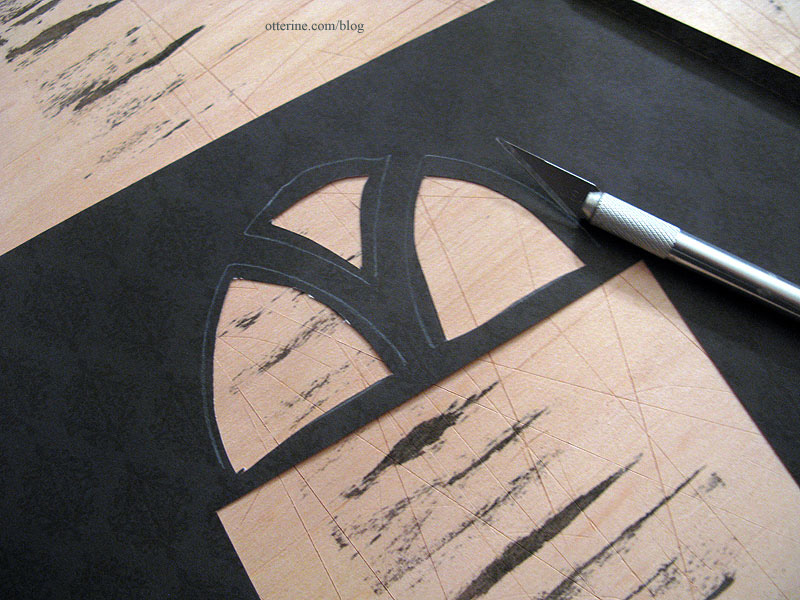
I also had to finish the interior portion of the diecut openings that would show through. They aren’t the cleanest, but they are workable enough for me. I can get away with sloppy chipped paint since this is an old house. Note to April (or anyone else who is building a Heritage) – had I wanted this to be a more pristine house, I would have finished these before assembly. It was hard to work with them upright.

Continued here.
Categories: The Haunted Heritage
December 11, 2012 | 0 comments


NOTE: All content on otterine.com is copyrighted and may not be reproduced in part or in whole. It takes a lot of time and effort to write and photograph for my blog. Please ask permission before reproducing any of my content. (More on copyright)

Categories:
Fancy bow front dresser, part 3
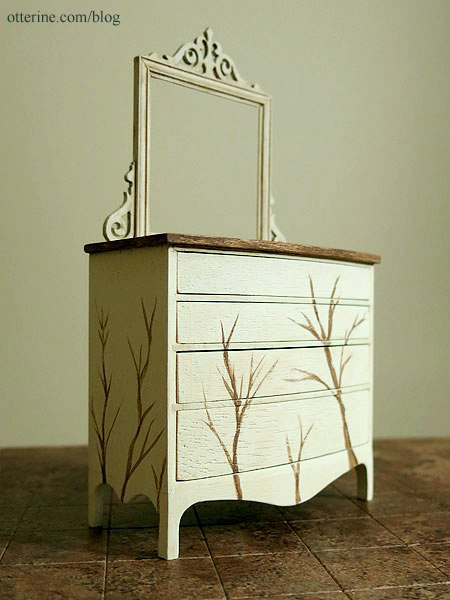
Continuing work on the fancy bow front dresser. As much as I loved the bare branches, I decided to go ahead with more painted details on the bow front dresser for the Heritage bedroom.
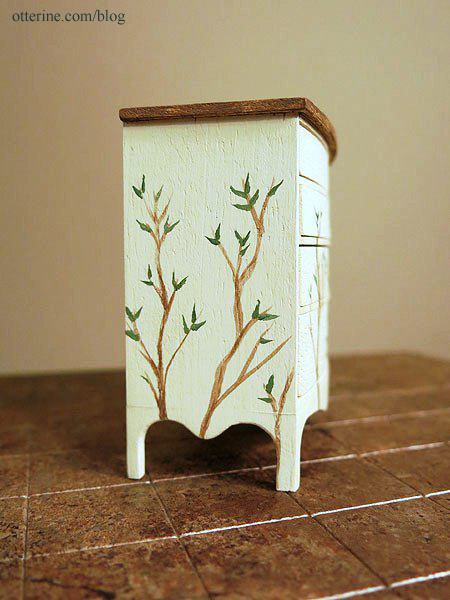
I added a smattering of leaves.
It softened the look overall.
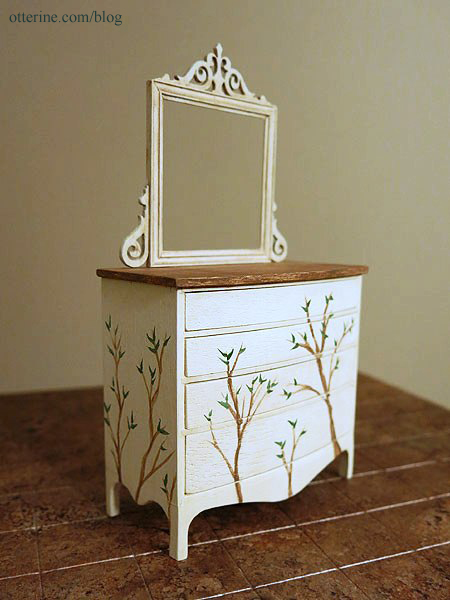
I added pale lavender flowers and then added a satin varnish. I would like to add a bird and left space for one, but I need to practice painting that small. The knobs are vintage hardware I bought from The Little Dollhouse Company at the Bishop Show.
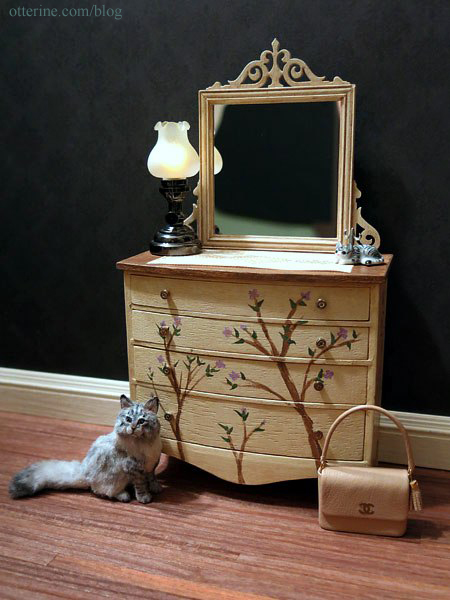
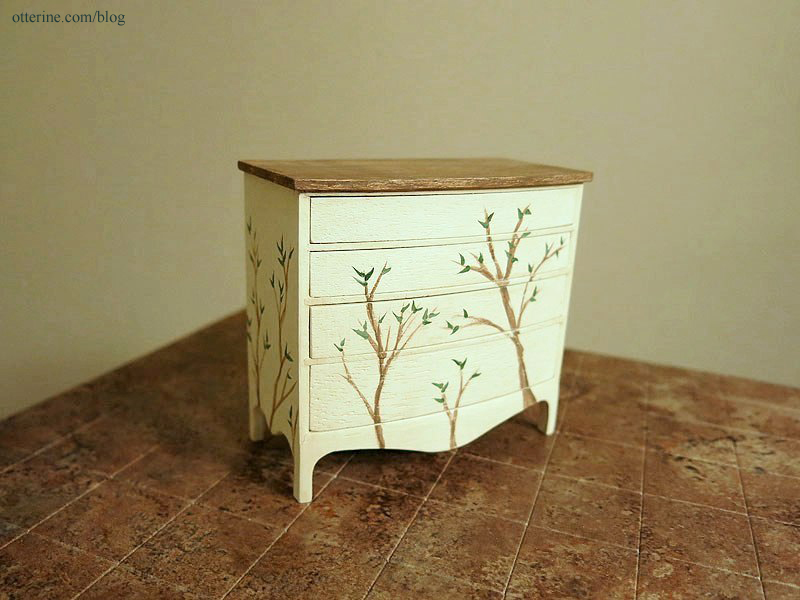
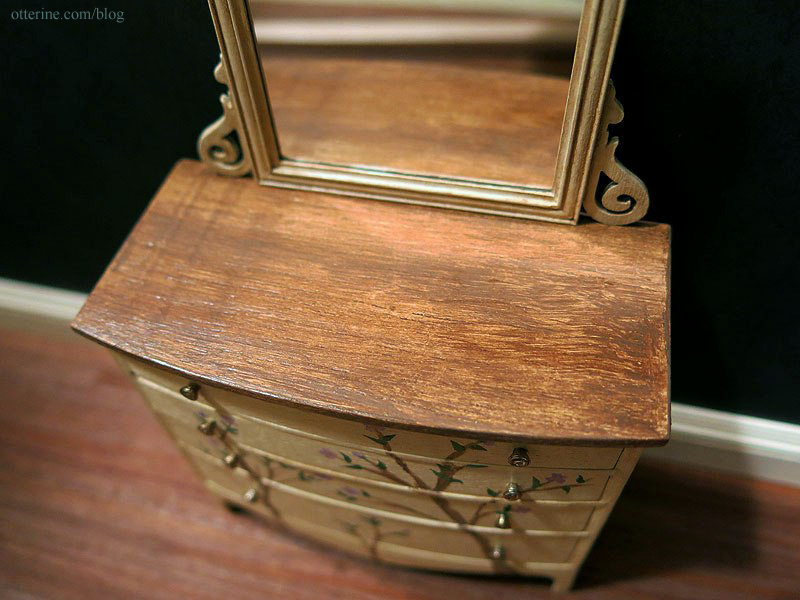
I love the worn wood top.
The paper lace doily is from Stewart Dollhouse Creations. The cat figurine, ring holder and doily were purchased at the local mini shows.
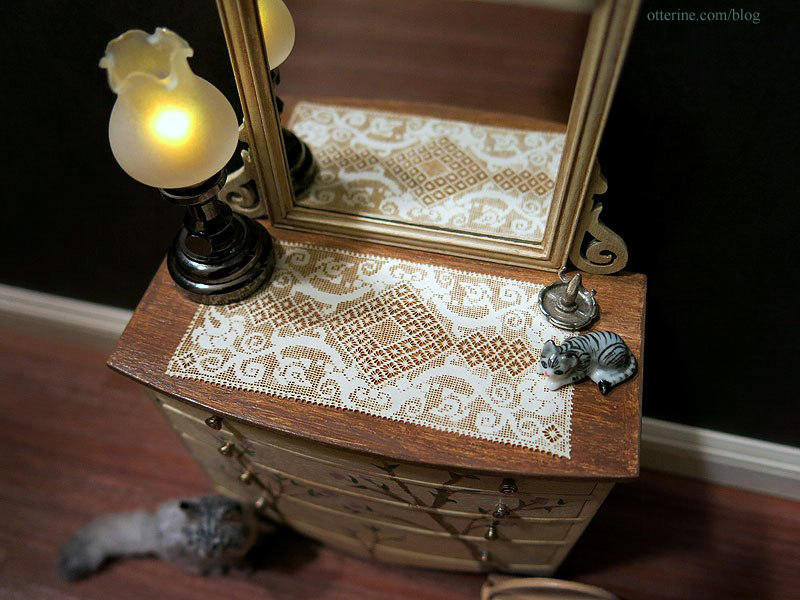
The Bentham Tulip Table Lamp by Houseworks is from miniatures.com, and I painted the LED to make the light more natural — a tip picked up on the Greenleaf forum.
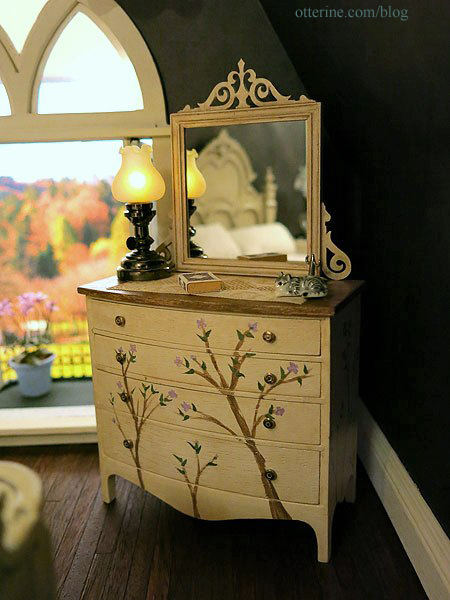
I think the dresser fits wonderfully with the bedroom furnishings.
Categories: Furniture, The Haunted Heritage
July 18, 2013 | 0 commentsFancy bow front dresser, part 2
I’ve worked more on the fancy bow front dresser including two coats of Tapioca paint by Folk Art.
The dresser construction left some gaps between the parts, so I spackled and sanded those seams before painting.
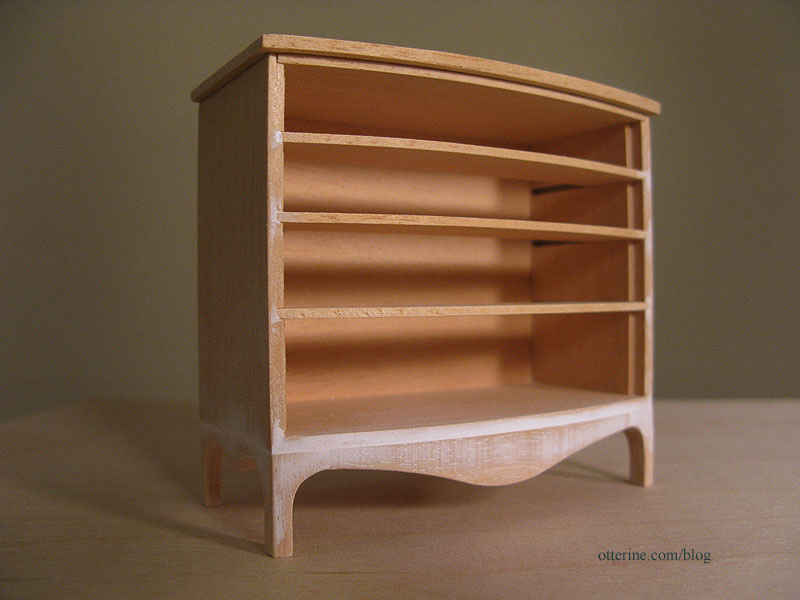
The dresser drawers have been sanded to fit. I’m always wary of that phrase. I bumped a corner on only one drawer, so I think I did pretty well.
The kit didn’t fit all that well in the front – the drawers were too recessed in comparison to the dividing panels. I added a shim of veneer to the inside back. This helped level the drawers in front by pushing them forward slightly.

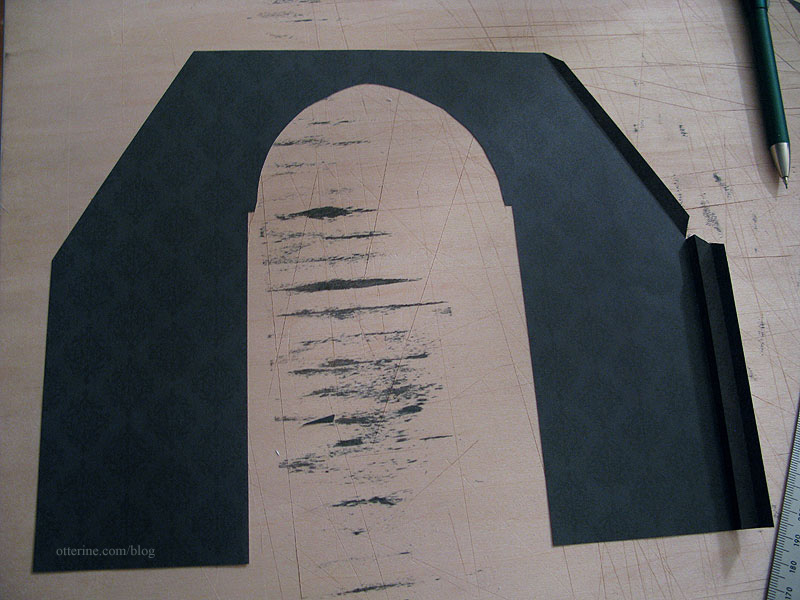
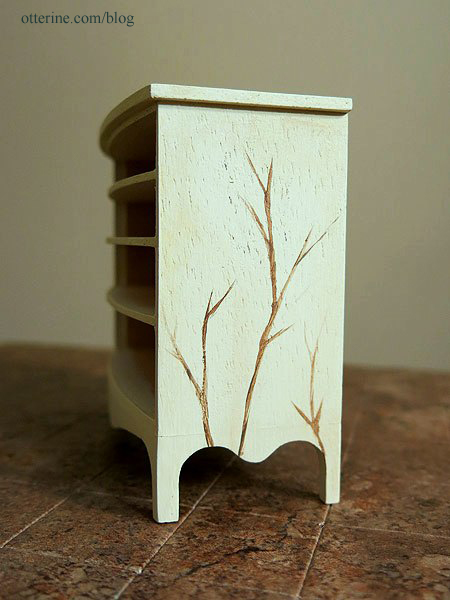
I wanted a painted finish with branches, flowers and birds, so I bought some small detailing brushes for fine painting.

I added an aging wash and then painted on the branches. The nice thing about making a vintage painted dresser is if you mess it up, you just wipe away the paint. And residue just adds to the age and depth of painting.
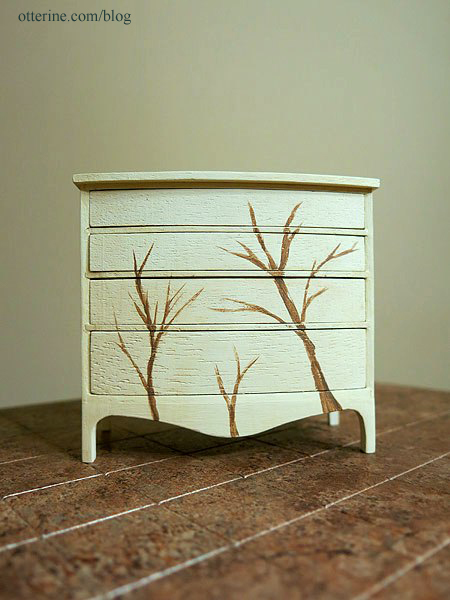
To paint the front, I added the drawers.
Once I had the branches painted, I masked off the top.
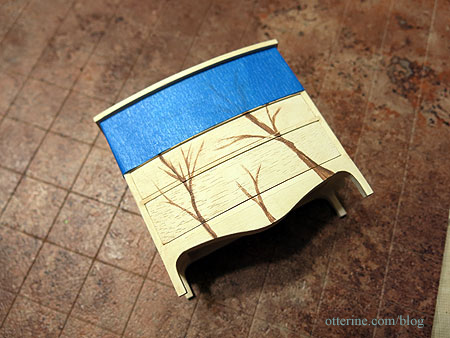
I painted it to look like stained wood. There are a few imperfections in the wood that I could not sand out in the initial construction, but it works well for a vintage piece.
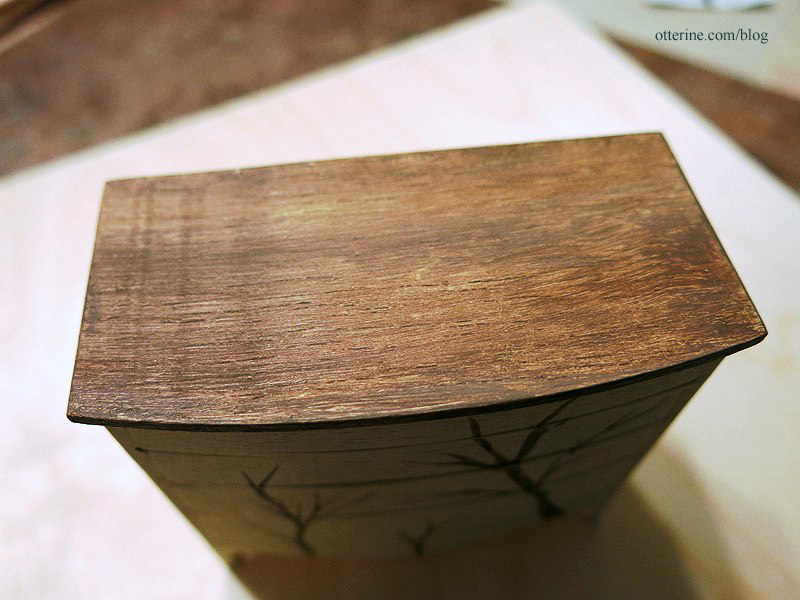
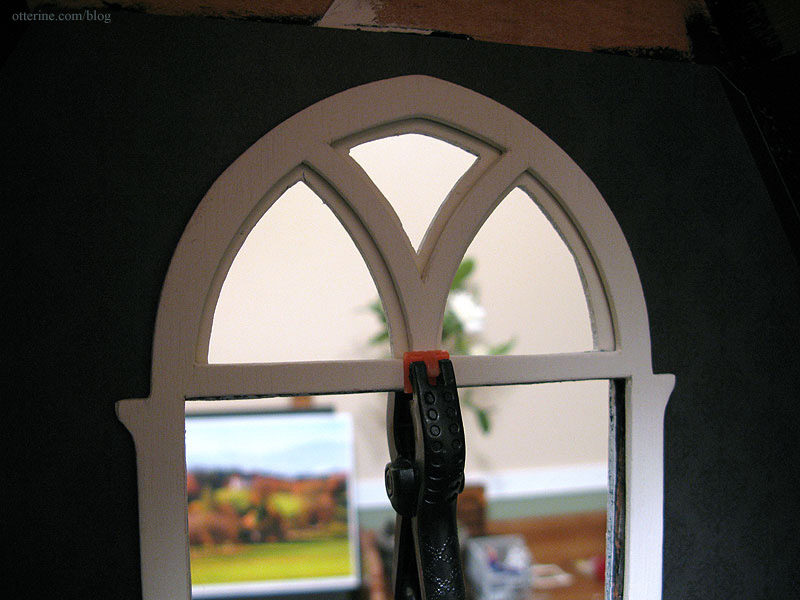
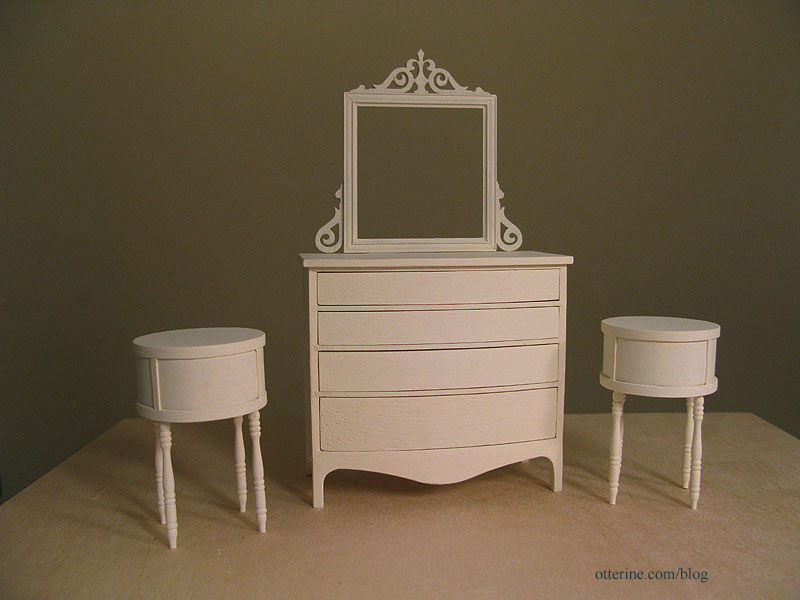
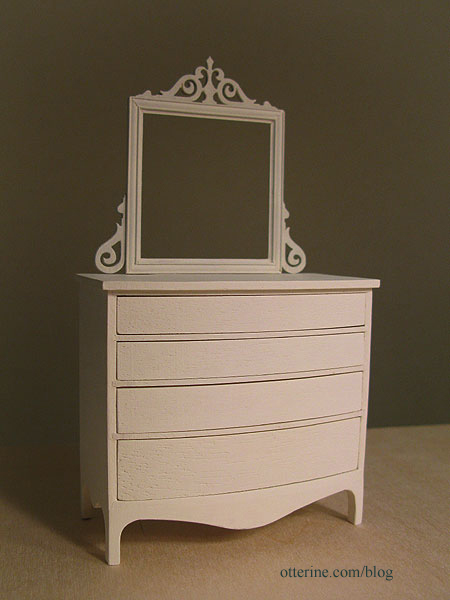
With the mirror propped in place, it looks like we’re getting somewhere.
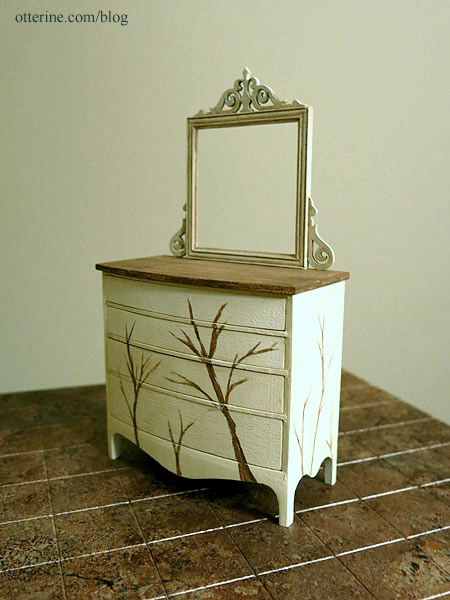
I rather like it with just the branches, but I wonder if it looks too incomplete like this…hmm…
Categories: Furniture, The Haunted Heritage
July 13, 2013 | 0 commentsHaunted Heritage chimney, part 12
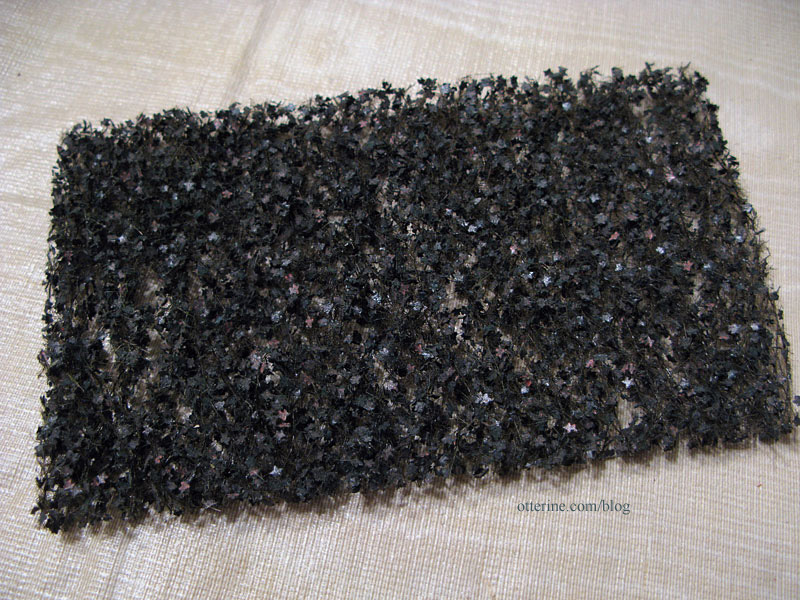
Completing work on the chimney. While I didn’t want to cover up all the lovely egg carton brickwork of the massive chimney, I did think some ivy was in order. You know I don’t shy away from cutting and shaping individual leaves, but I found something that not only looked realistic but made life easier. This is O-Scale (1:45) English Ivy from Scenic Express (Silflor Summer Ivy by Mininatur).
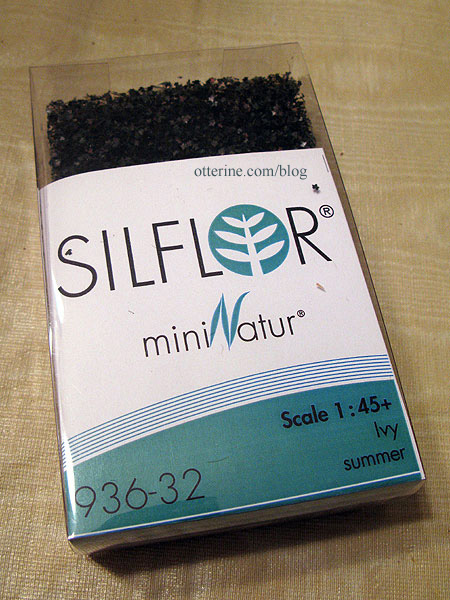
There are three sheets in the box. The leaves might be small for true 1:12 scale, but it worked very well. You cut and stretch it to create long vines.
I thought this store was called Scenery Express since I first started buying their landscaping materials, and that’s one of the web addresses that will get you there…but I just noticed that it is in fact Scenic Express. Maybe I always had it wrong or they changed the name or they just have two domain names for the same place. Regardless, they have a great selection of landscaping materials.
I didn’t overdo it and used just under one sheet of the ivy for the project, using Aleene’s clear gel glue to attach it to the house and chimney.
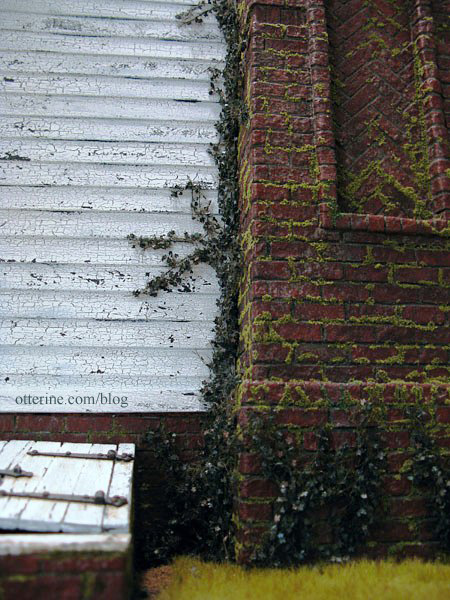
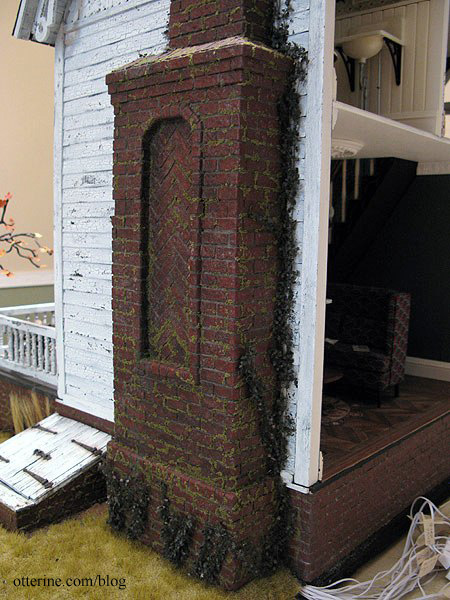
It disguises the awkward edge trim around the chimney.

Here’s the back side of the chimney.
The chimney is now complete! :D
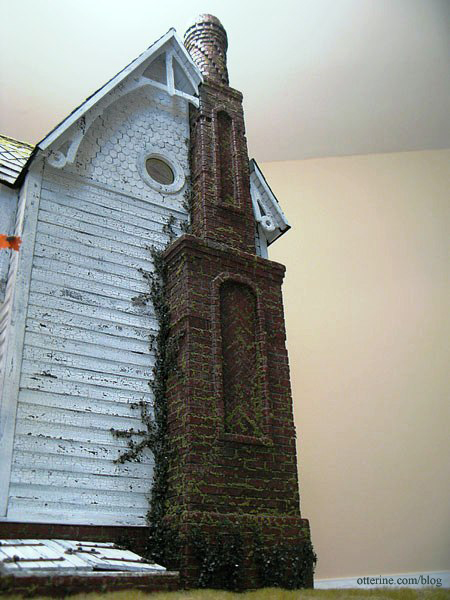
It amazes me how each little thing changes the look of the build.
Categories: The Haunted Heritage
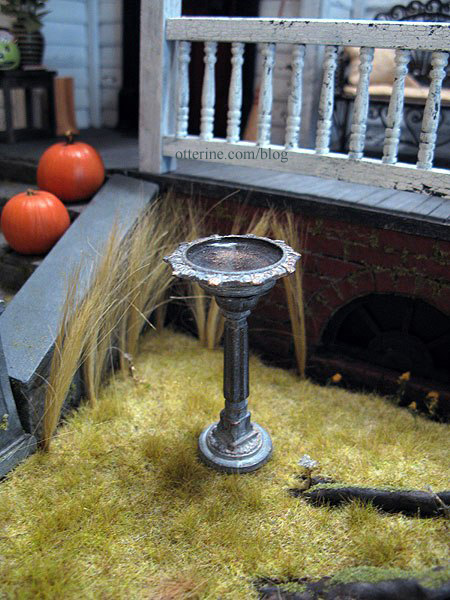
May 18, 2013 | 0 commentsHeritage – lawn ornaments
I added a beautiful aged metal birdbath by Island Crafts & Miniatures to the front lawn. The last time I made an aquarium, I used some leftover Acrylic Water resin to fill the bowl. The birdbath is from Dejoux Miniatures.
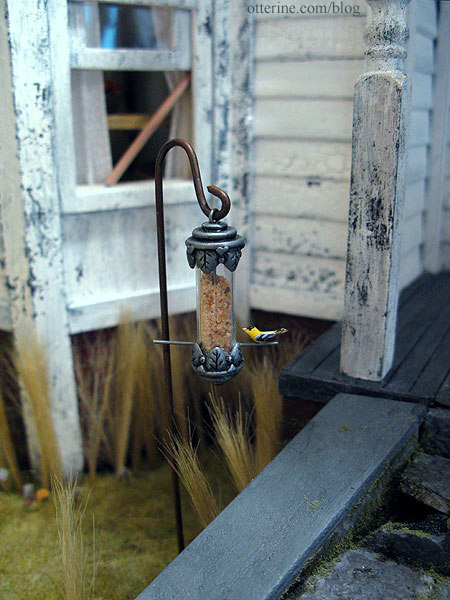
I also planted the shepherd’s hook on the side of the stairs to hang one of my birdfeeders. :]
Categories: The Haunted Heritage
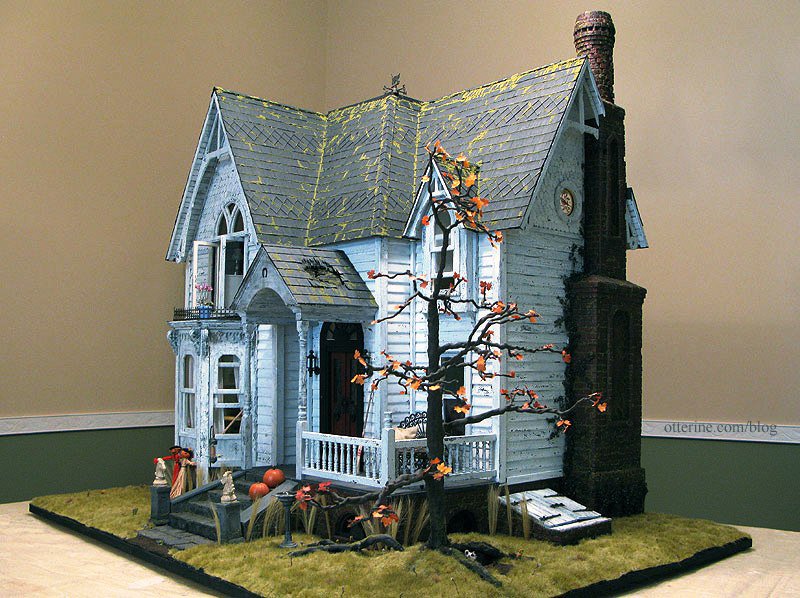
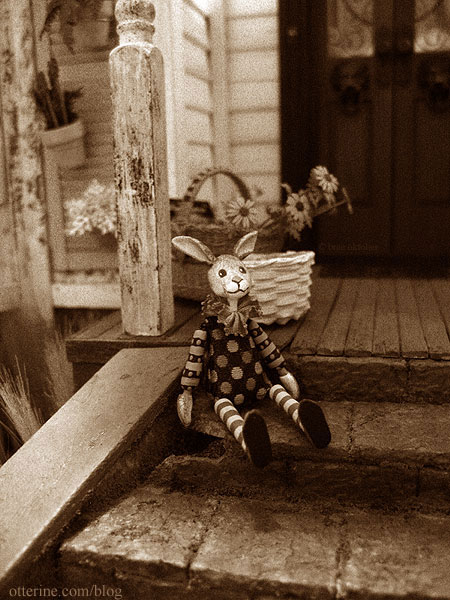
May 17, 2013 | 0 commentsHappy Easter from The Haunted Heritage
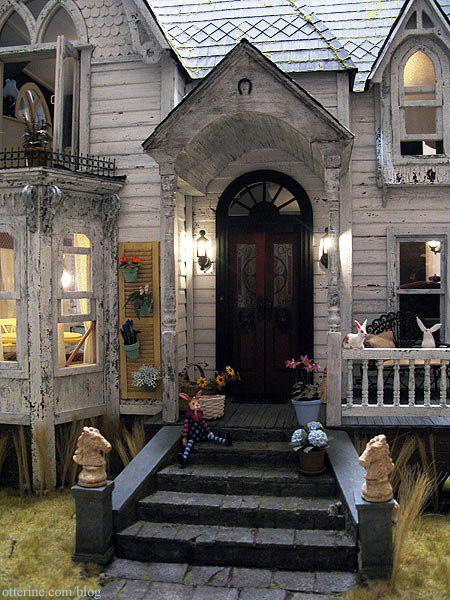
Presto! No more Halloween and on to Easter…as long as I don’t show the big autumn tree out front. :D
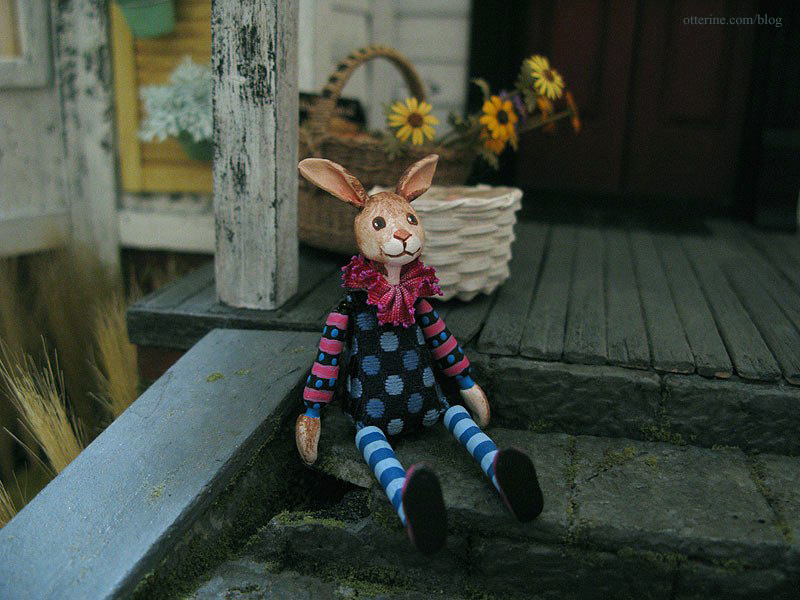
Mr. Rabbit is by K. Kuti Designs. The large basket is from Lidi at Basketcase Miniatures, and I made the flower stems from Bonnie Lavish kits. The white basket was purchased and holds eggs I made for The Aero Squadron Lounge.
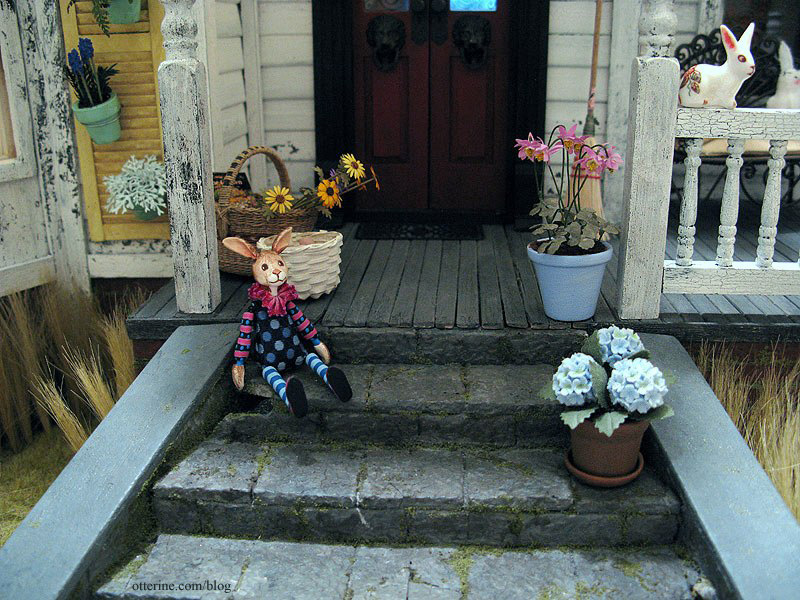
The purple flowers in the blue pot are from Michelle of Little Rabbit Minis, and the hydrangeas were purchased.
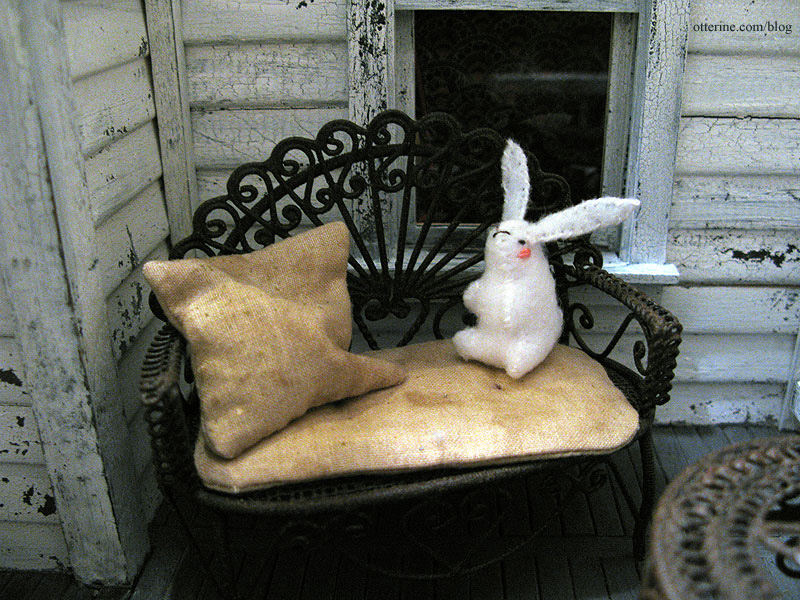
The stuffed rabbit is from Sisters Dreams.
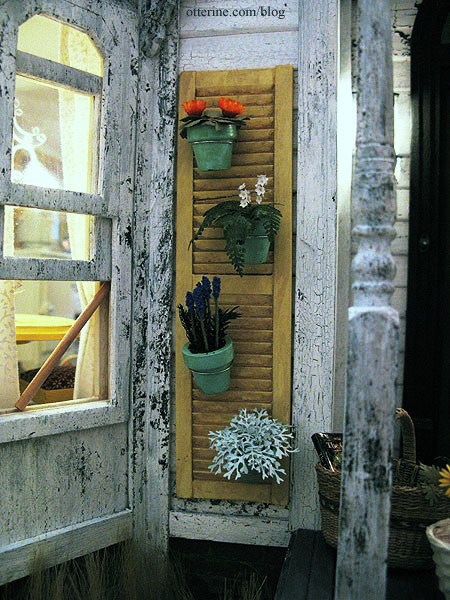
The shutter garden I made for The Artist’s Studio fits well on the Heritage, too. :D
Happy Easter!!!! :D
Categories: Roomboxes and Mini Scenes, The Haunted Heritage
March 31, 2013 | 0 comments
NOTE: All content on otterine.com is copyrighted and may not be reproduced in part or in whole. It takes a lot of time and effort to write and photograph for my blog. Please ask permission before reproducing any of my content. (More on copyright)