


NOTE: All content on otterine.com is copyrighted and may not be reproduced in part or in whole. It takes a lot of time and effort to write and photograph for my blog. Please ask permission before reproducing any of my content. (More on copyright)

Categories:
Aging the exterior, part 2
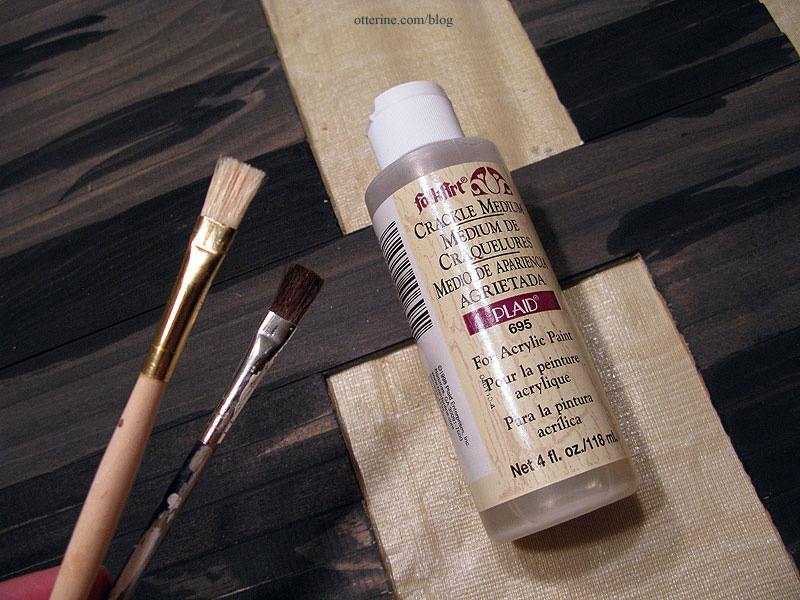
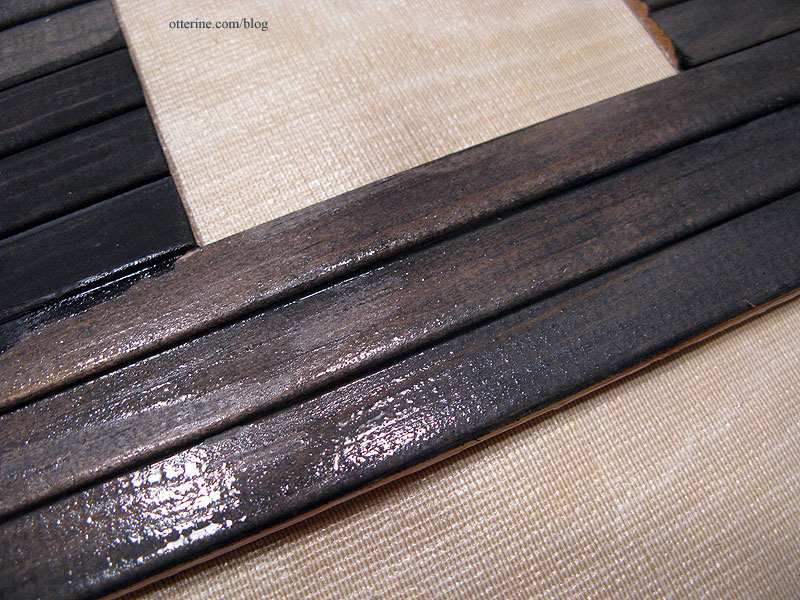
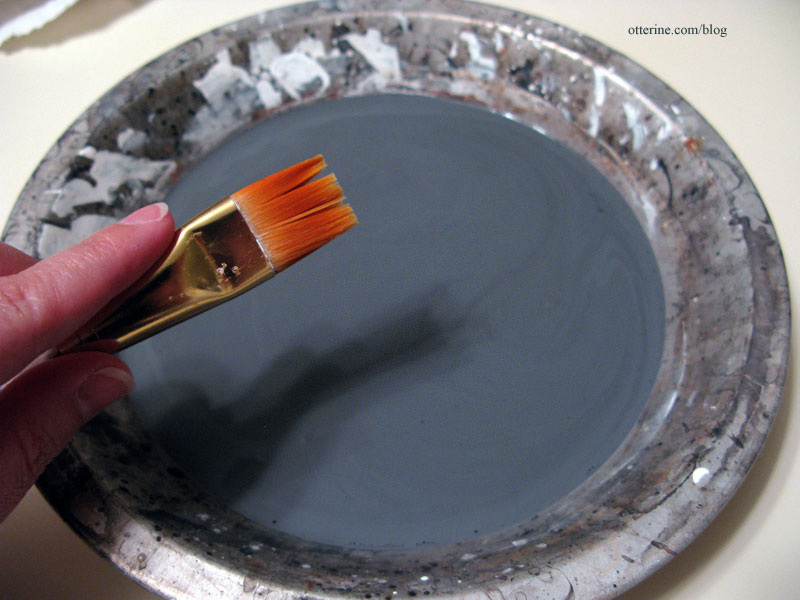
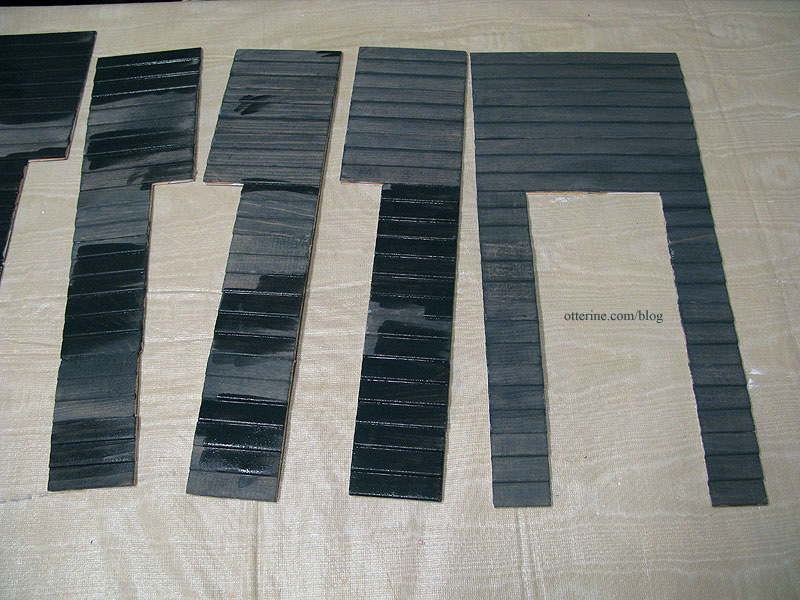
Part two of the aging process. I brushed on crackle medium with a smaller brush, basically the size relative to actually painting the house if I were in miniature. I used the lighter brush with the stiff bristles for the crackle medium and the darker soft brush for the paint. The stiff bristles allow me to move the medium around and the soft brush gives good paint coverage.
I didn’t apply the medium uniformly. Some areas were thicker and some areas I left all but untouched. In real life, paint will weather differently depending on the wood base as well as its exposure to the elements, so I wanted an uneven crackle effect. I brushed it on heavily at the lower corners of the windows and on any visibly damaged wood.
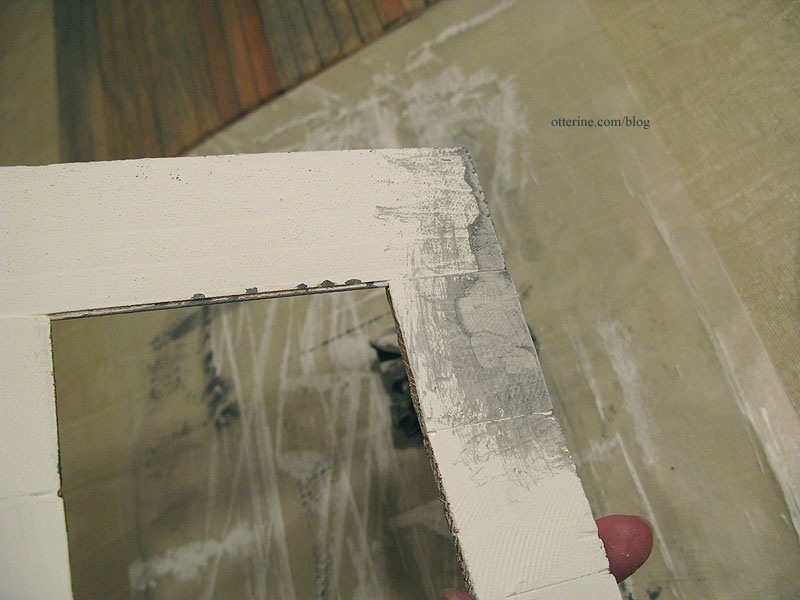
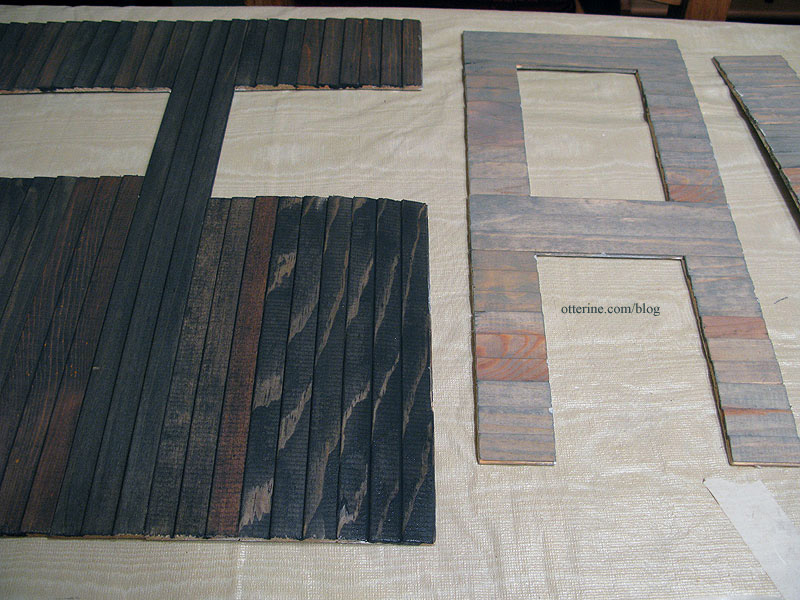
Once the crackle medium was dry, I painted the exterior with white craft paint. I painted one “row” at a time, all the way across. You have to work fast and use long brush strokes. If you need to fix an area, you’ll have to wait until it’s dry. Overworking it just makes a mess. But, watch it work as the paint dries!!! :D
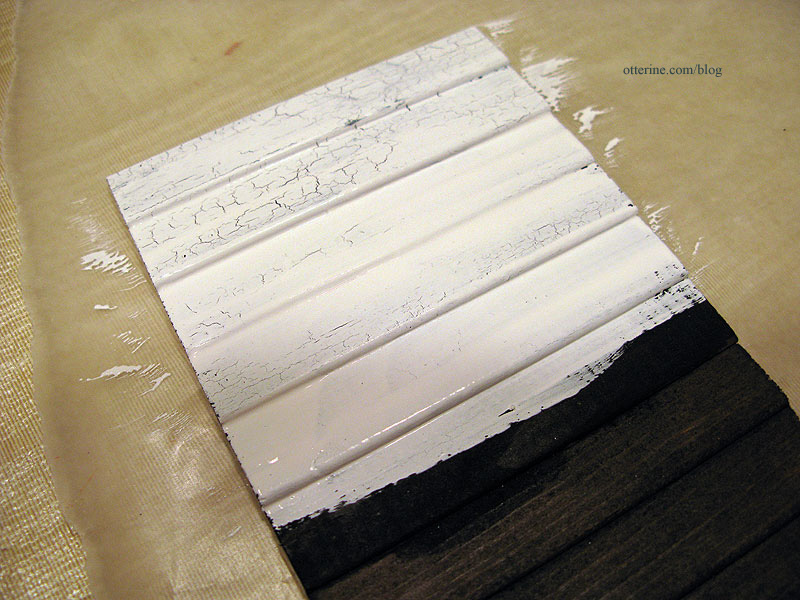
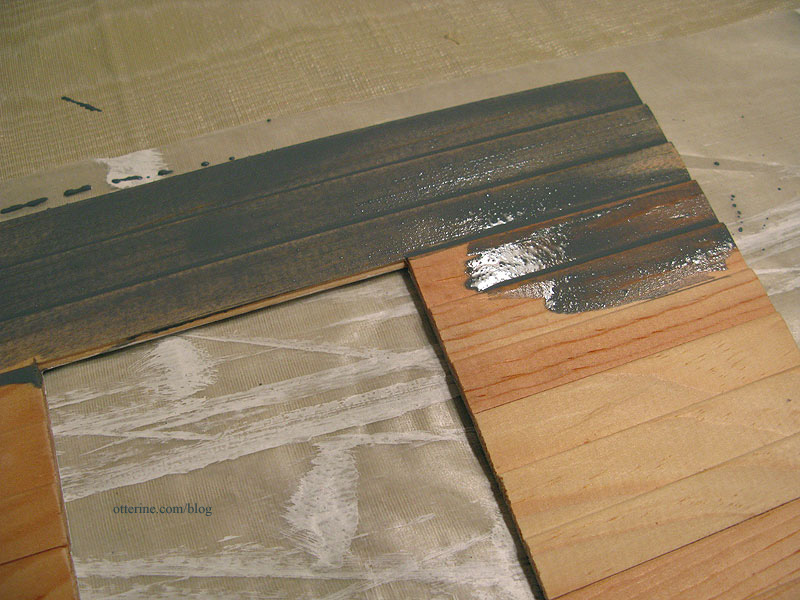
Here’s the first wall after the paint coverage.
I work from top to bottom so that when I am done, I can take a paper towel and dab a few random places and lift the paint completely.
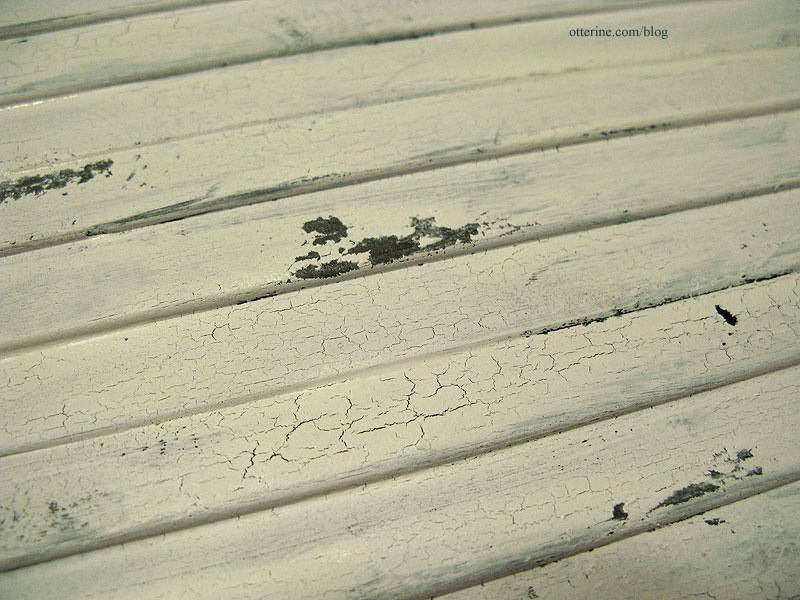
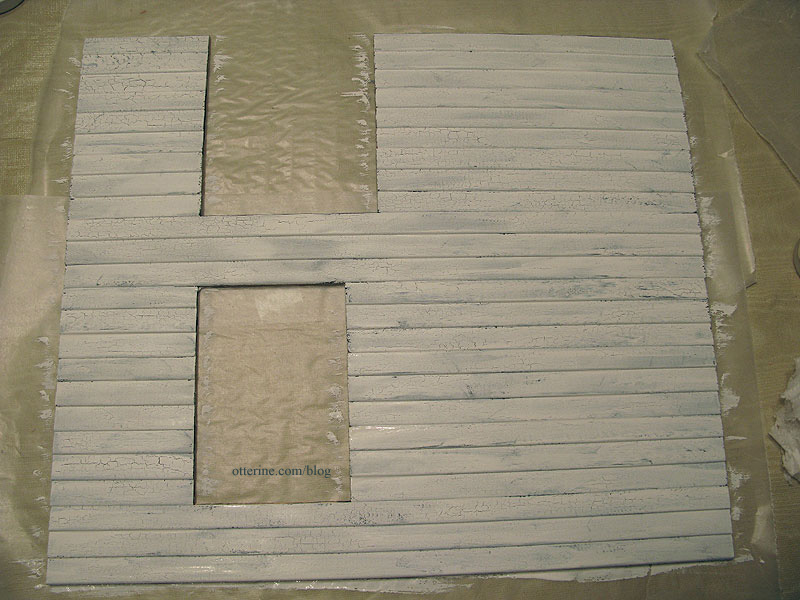
With this additional wear along the bottom and in a couple of places on the overall wall, I think it looks much more realistic. Later on during assembly, I will add more washes to age the white to keep it from looking too bright and new.
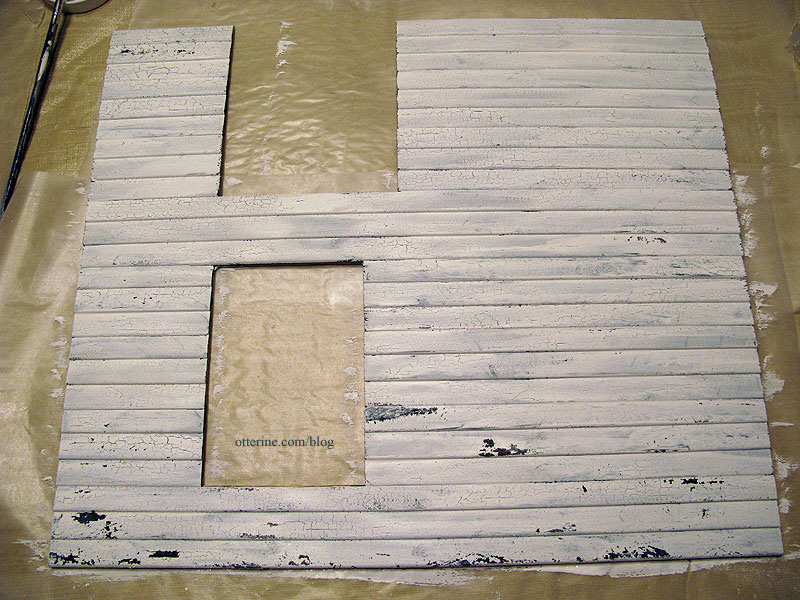
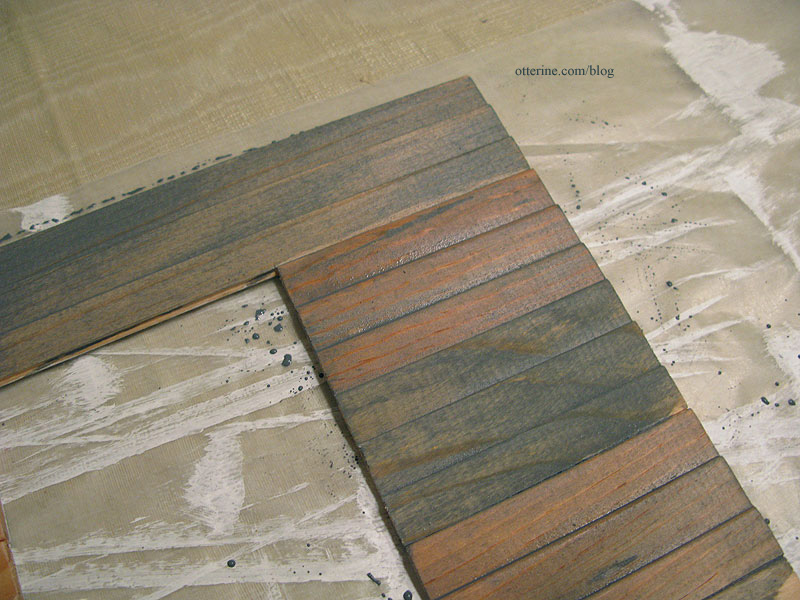
Now I need to repeat this entire process for the connectors so I can build the outer structure. I’ll eventually need to do this process for the gables, windows and front door, too.
Categories: The Haunted Heritage
July 26, 2011 | 0 commentsAging the exterior – priming the interior, part 1
Using my childhood home as an inspiration, I’ll be aging the exterior by crackling white paint over a grey washed base.
After assembling the walls, I primed the interior side with white craft paint (two coats). The walls will all be covered by wallpaper, but this process seals the wood and adds longevity to the paper.
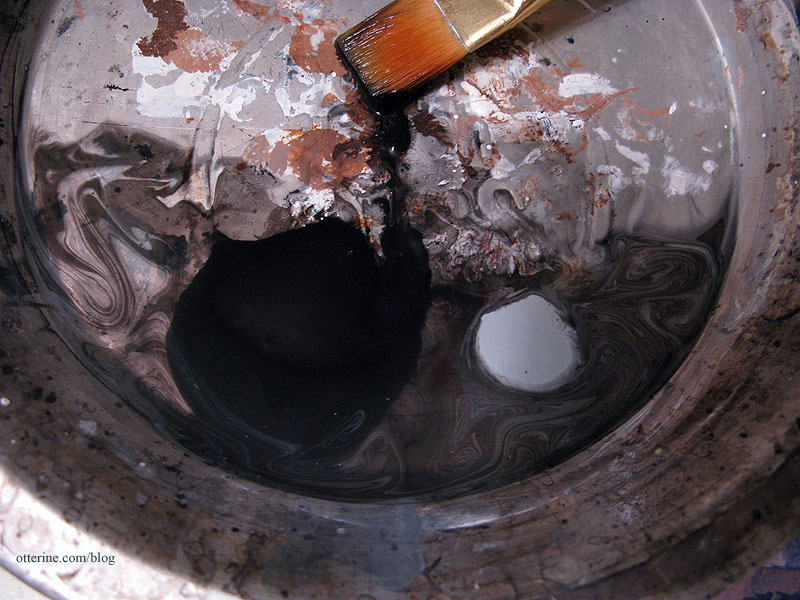
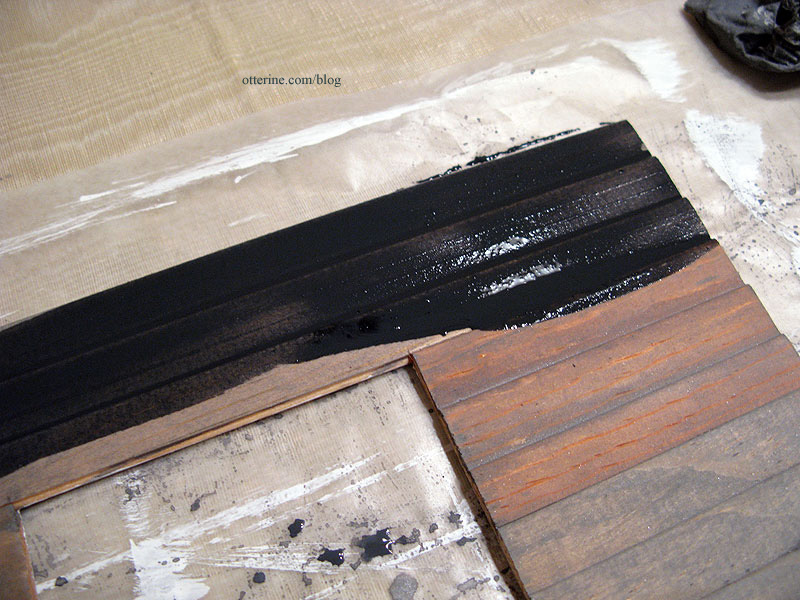
On the exterior, I used diluted washes of grey, black and brown acrylic paints to achieve the look of old, weathered wood that will show under the crackle effect of the exterior paint. This staining process takes a few coats to achieve a deep color, so I always start with a modest amount of paint and a lot of water mixed in a standard size pie tin.
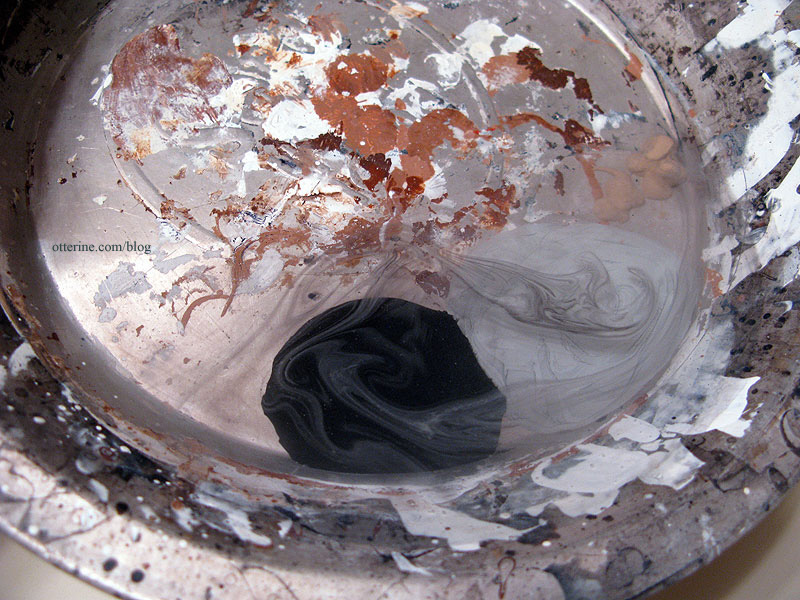
After stirring, I ended up with a grey soup that I brushed on with a large brush and then wiped off as I went.
Watered down paint will make the wood buckle and can loosen the tacky glue joining the pieces. Since this is such an early stage of assembly, this really isn’t anything to worry about. The walls can be pressed flat as they dry and joins can be glued back together before final assembly.
It’s almost impossible to not get the wash on the white primed side underneath. But, with an old weathered house, anything that gets dirty just looks more realistic. I just wipe any excess off the white and leave it grey. It won’t show under the wallpaper anyway. This is why aging finishes are so messy…and so fun!
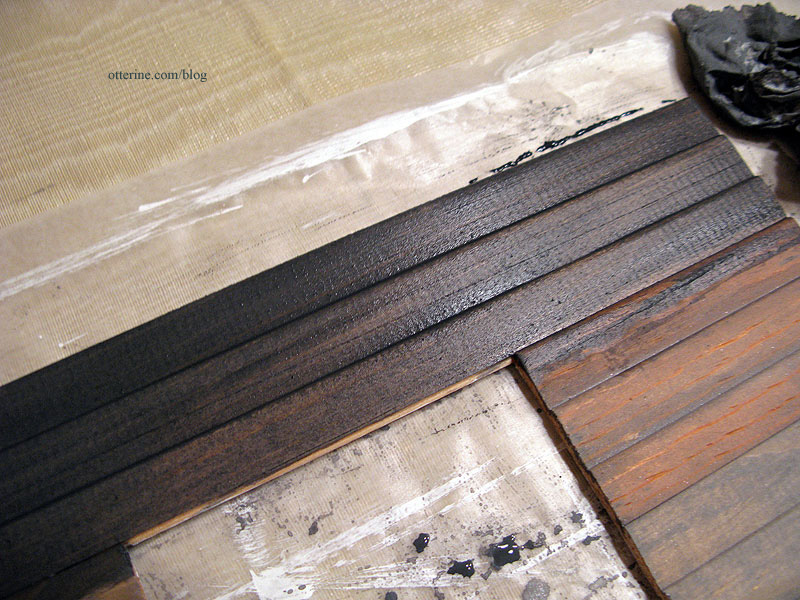
The first coat really just dirtied up the wood, so I went darker the next round. You can always add more color, but you can’t take it away. Best to do thin coats to build up to the color you want. For the second coat, I added more black than grey and left out the brown. I also added less water but still wiped away the excess as I went.
Now we’re getting somewhere…
There were still some reddish places, so I opted for a third wash. I dumped out most of the liquid from the second wash and added more black paint.

I brushed this dark mixture over only the red areas and left it on full strength. Some boards needed a lot and one didn’t need it at all. Light areas are fine, but red areas will clash with the weathered effect.
Once the wood was the appropriate color, I let the pieces dry for about half an hour before covering with wax paper and pressing flat with magazines to dry overnight.
Categories: The Haunted Heritage
July 25, 2011 | 0 commentsDura-Craft wall assembly
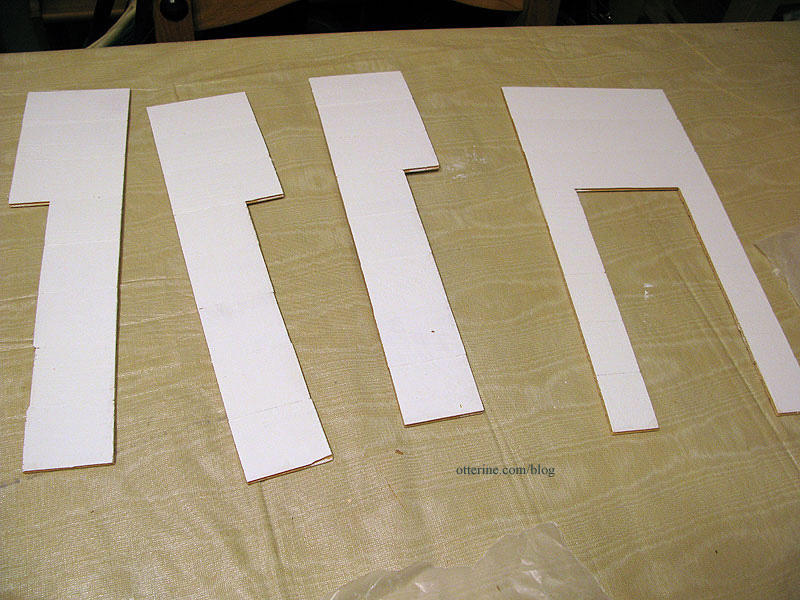
Construction has begun! I knew from experience that the walls would need to be assembled from milled siding pieces. I also expected the pieces to be rough and uneven. Interestingly, though, they went together pretty well. I used my Micromark gluing jig to assemble the pieces that would fit inside it, which worked for all but the two 15″ long pieces.
Once those assemblies were reasonably dry, I attached them to the longer boards.
And, of course, I’ve already made changes to the layout. I flipped the pieces on the bottom of the left-hand side wall so that both windows are toward the back. I also decided not to replace the broken pieces and used them as is. I think it will lend itself well to aging the exterior.
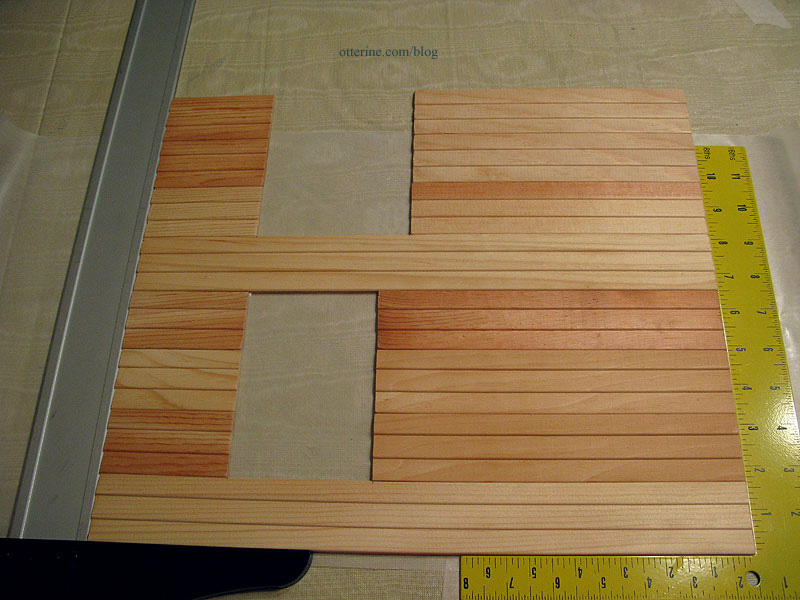
I won’t be using the stairs included with the kit; the layout takes up too much space on the second floor and obscures the view of the front bay window.
Categories: The Haunted Heritage
July 25, 2011 | 0 commentsHaunted Farmhouse – Dura-Craft Heritage
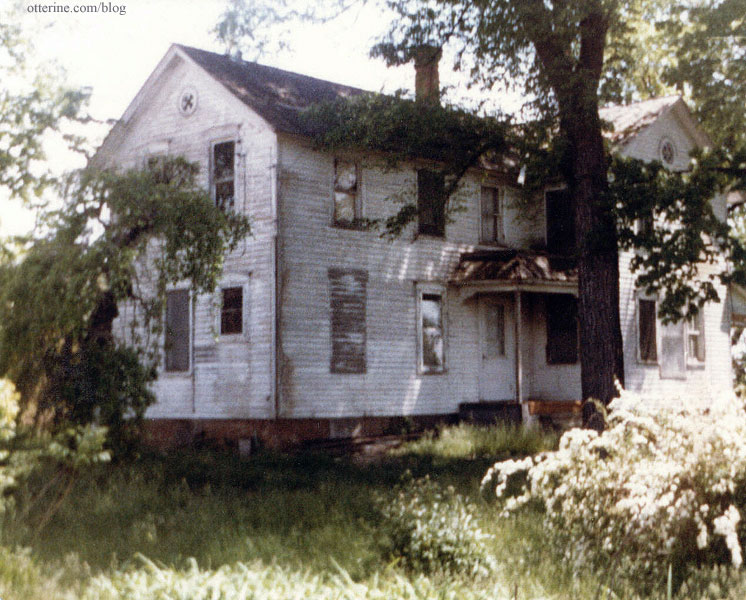
I grew up in an old white farmhouse that probably looked pretty creepy to others, but I loved it. It was way too cold in the winter, too hot in the summer and had generally outdated décor and musty upstairs rooms. But, it was my first home and even though it no longer stands, I love it still.
These first two photos were taken in 1983, two years after my family moved and just before they used it for fireman training. I didn’t go watch…I couldn’t. It’s overgrown and lush and green…and interestingly, when I dream of it, this is how it appears to me.
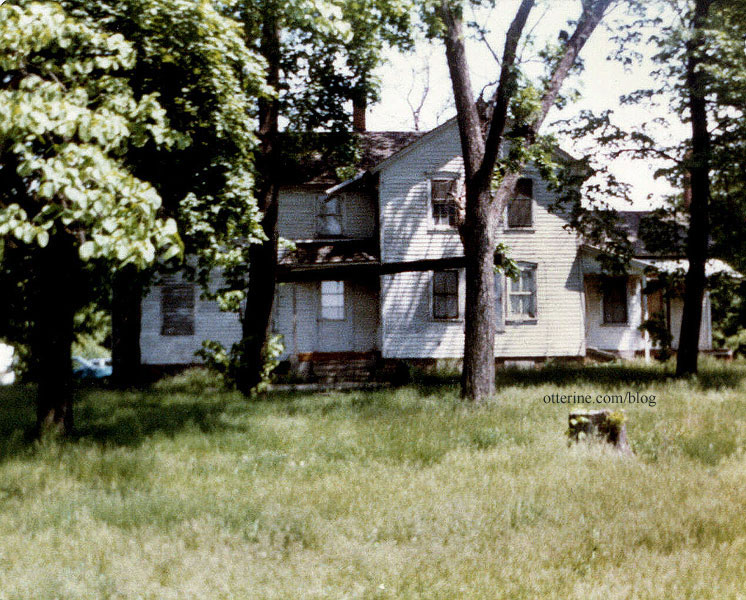
To the left is the mulberry tree where I would gather berries and fell in love with inchworms. To the right is one of the many tall and beautiful walnut trees that I often dream about. They were so lovely.
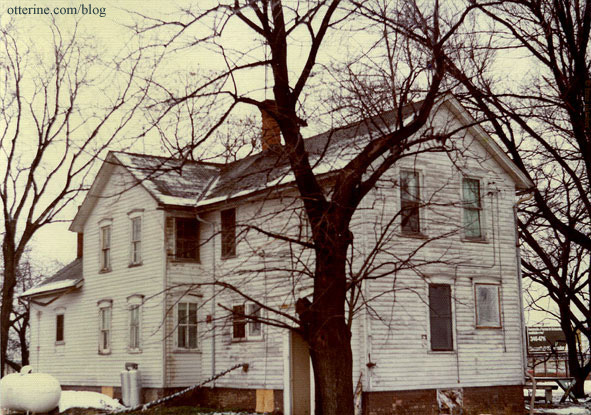
Here is what it looked like when I lived there, in winter. I see it as beautiful, so I suppose that means I was happy there. I think I was for the most part.
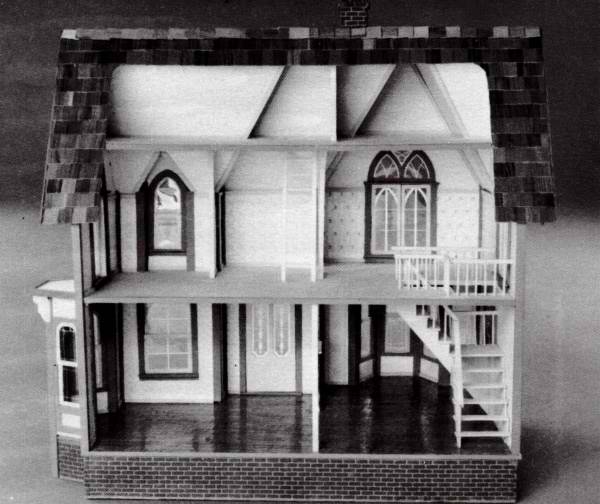
I bought a Dura-Craft Heritage kit sometime ago when I found a good deal on a kit in near perfect condition. I find it interesting that the few pieces broken in the Heritage kit I can replace with pieces I already have from the lost Dura-Craft kit I had a long time ago. Perhaps meant to be…
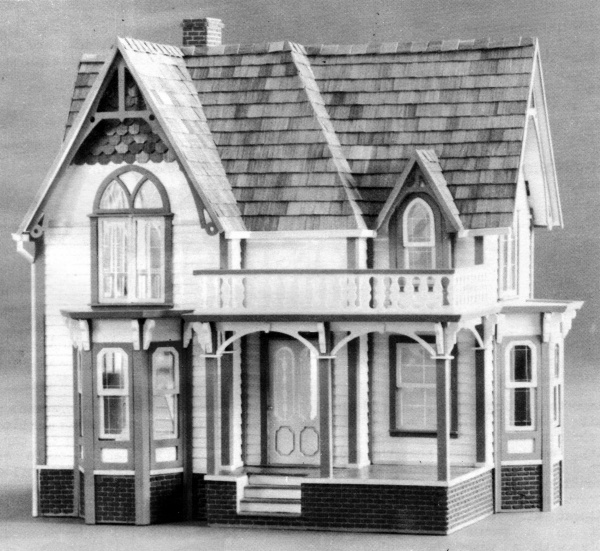
kit photo The other thing this old kit lends itself to is aging. After working with new mdf and laser cut wood, the idea of turning a milled and diecut house into a showroom new mansion makes my head hurt!
I have no idea where this project will end up, and I rather like that open energy. I see in my head an old white farmhouse…not completely dilapidated but in a state that might make you pause to enter…but with a warm albeit old and perhaps historically creepy interior. Maybe a place Jack Skellington might like to visit. Perhaps with these memories attached to the inspiration photo, this project may become more ‘haunting’ than ‘haunted’ by the time I am done.
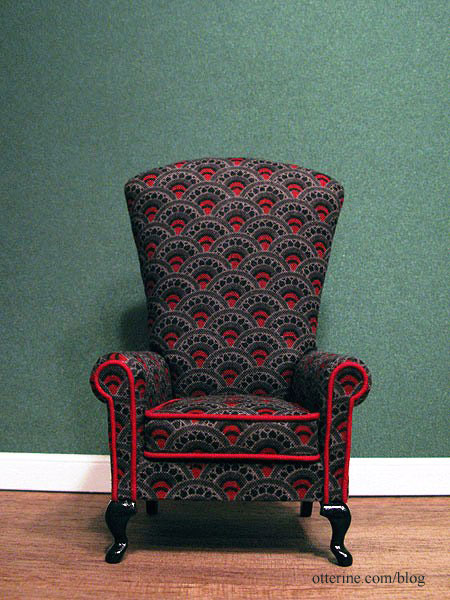
And, for my first piece…the newly purchased chair from Kris at 1 Inch Minis.
Since I started this mini hobby, I’ve bought a few lots of items and furniture kits that included pieces I never thought I would use. Now I think I might have a home for most of them after all. Since they’re already in hand, that keeps the budget on this project down substantially. This is good especially since there might be a few splurges in other areas. ;]
Three months to Halloween…maybe I can have a good portion done by then…at least enough to take some fun autumn photographs.
Categories: The Haunted Heritage
July 22, 2011 | 0 comments
NOTE: All content on otterine.com is copyrighted and may not be reproduced in part or in whole. It takes a lot of time and effort to write and photograph for my blog. Please ask permission before reproducing any of my content. (More on copyright)