


NOTE: All content on otterine.com is copyrighted and may not be reproduced in part or in whole. It takes a lot of time and effort to write and photograph for my blog. Please ask permission before reproducing any of my content. (More on copyright)

Categories:
Heritage – front bay window, part 1
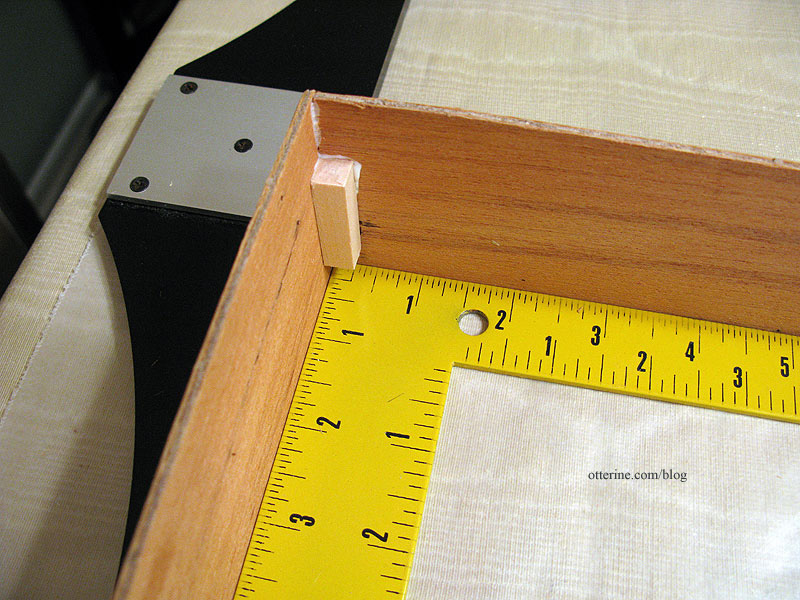
The bay windows are one of the nicer features of the Heritage, but they did take some work getting to fit correctly. I’m always leery of the phrase “sand to fit,” because it never works for me. The instructions state you need a distance of 2 1/4″ between the small connectors once in place, and to get there I had to cut 1/16″ off each side edge of the bay window walls and bay window bases. It still isn’t precisely that measurement, but now the whole thing fits solidly.
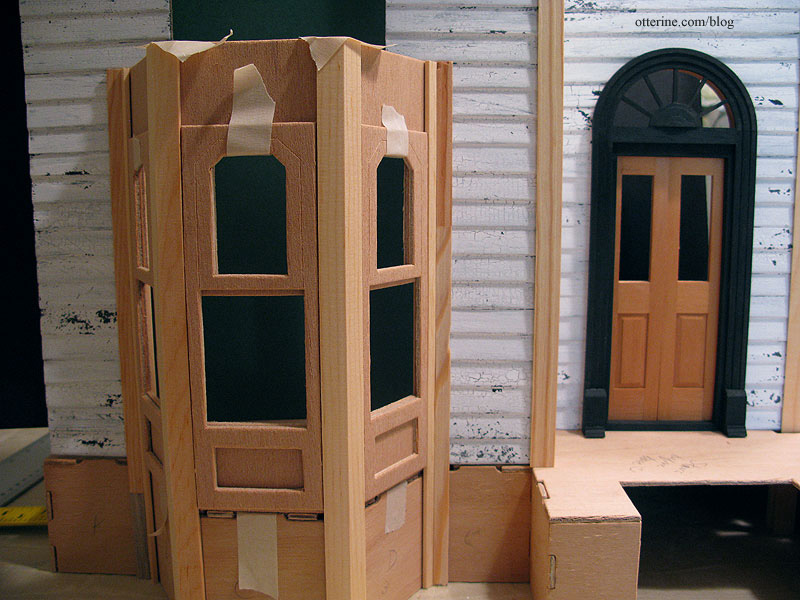
I also had to cut down the tabs on the main floor since they stuck out past the walls and bases.
Even with the structural integrity in place, there are still gaps between the connectors and the floor board. I wonder if this is more of an organic type of build where everything has a little wiggle room built in so that you can force things into being level and straight.
Categories: The Haunted Heritage
July 30, 2011 | 0 commentsPalladian Door – first upgrade
After seeing the dry fit with the Palladian door, I was sold!
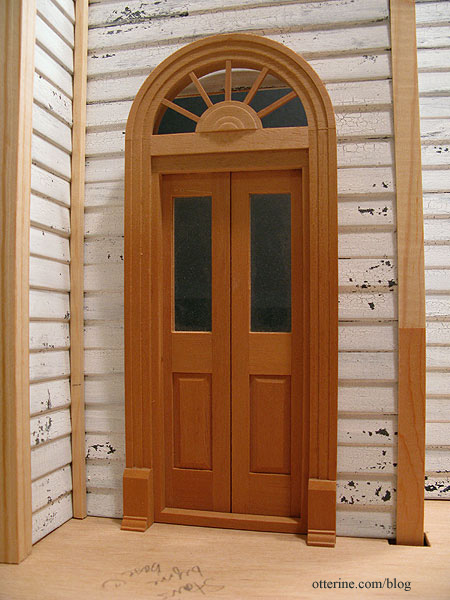
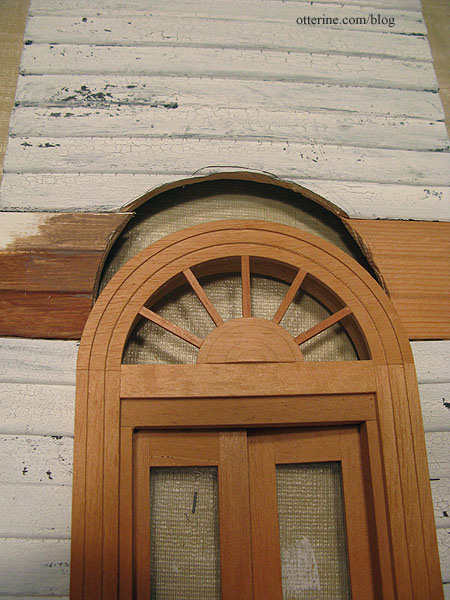
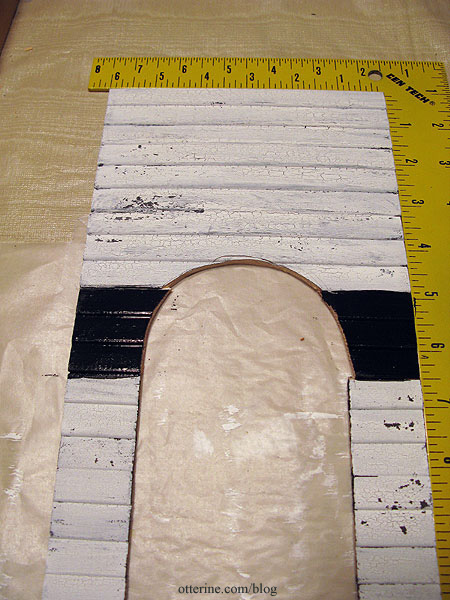
To get this door to work, I needed to adjust the rectangular hole to fit an arched door. You can’t tell from the above photo, but there were two triangle shaped gaps on either side of the top. Enter in two spare pieces from my old lost Dura-Craft kit. I had previously used one to try out finishes.
I had to disassemble the two long pieces on the front wall, but they pulled apart easily.
I marked the door opening on the new pieces and the bottom of the overhead piece and cut out the required opening.
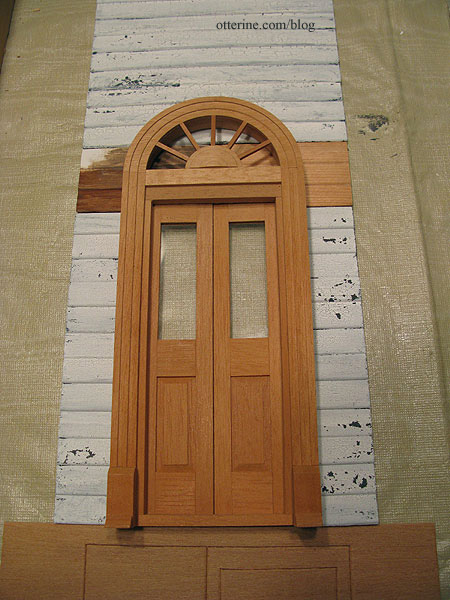
My cuts aren’t the best since I had only a utility knife, but they work fine – no gaps. :]
I glued the new pieces in and prepared the finish as I had for the rest of the walls.
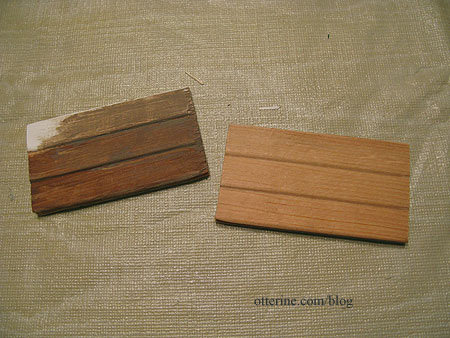
Voilà! Since the wood of this door was on the red side, I’ve painted it charcoal grey as the base layer on the outer trim.

And, a close-up of the top.
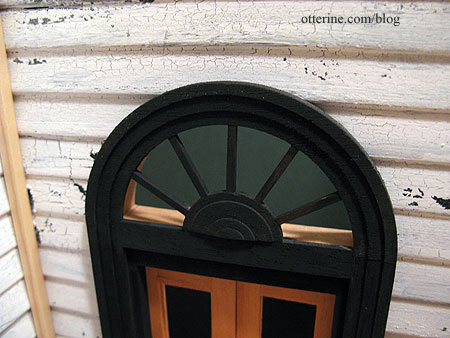
I am undecided as to which color I’ll crackle over it, but I needed the dark underlayer besides. The interior trim color will coordinate with the interior finishes…so that is also undecided. I’m still thinking about a door color, too, but might go with blood red. No, literally! I somehow managed to cut myself on the door…first time in awhile that I’ve sacrificed blood to a project.
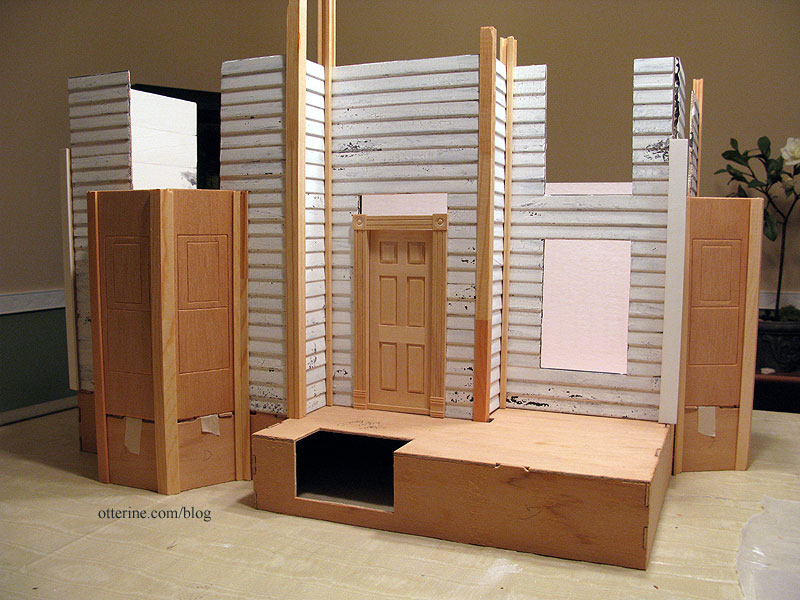
Now, this door change will require other changes. First, the front porch will have to be lifted to clear the top of this taller door, but I had already planned to replace the square posts with turned posts to dress it up a bit and those posts are taller anyway. I can cut them to the size I need. Second, there’s a window on top of the porch that will have to be shortened on the bottom. And third, the interior trim on this door will be too tall for the first floor ceiling. I am thinking a two-story foyer leading to my new centered staircase ought to fix that problem! Besides, a haunted house needs a dramatic entrance.
Categories: The Haunted Heritage
July 30, 2011 | 0 commentsHeritage – the first dry fit
A few of the square connectors were broken in the kit, so while I await replacement pieces from Manchester Woodworks I used some extras from the Newport kit to set up the first dry fit.
Above is a Houseworks interior door as a stand-in for the moment. But, I am considering using this gorgeous Houseworks Palladian Double Entry Door that I had in my stash from a bargain lot of miniatures I bought awhile ago. I even tried to sell it at a bargain price but no one wanted it. It was meant to be. Using this door will involve some extensive bashing, but that’s pretty much my way these days. (Yes, that’s the first note to myself written on the porch. It reads, “Stairs before base” with a smiley after.)
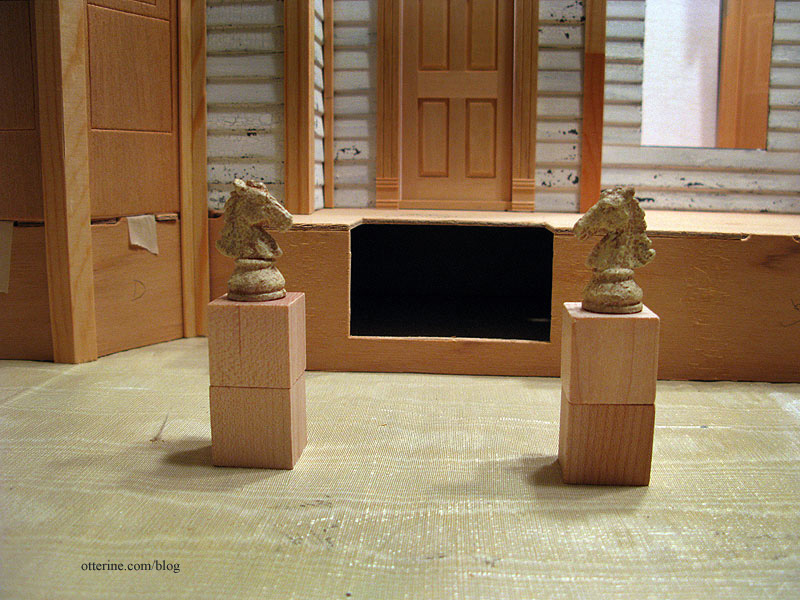
I also made a fine purchase from Katie’s Clay Corner…two stone horse heads. They are wonderfully made, and I see them atop columns on either side of an iron gate. =cue spooky music=
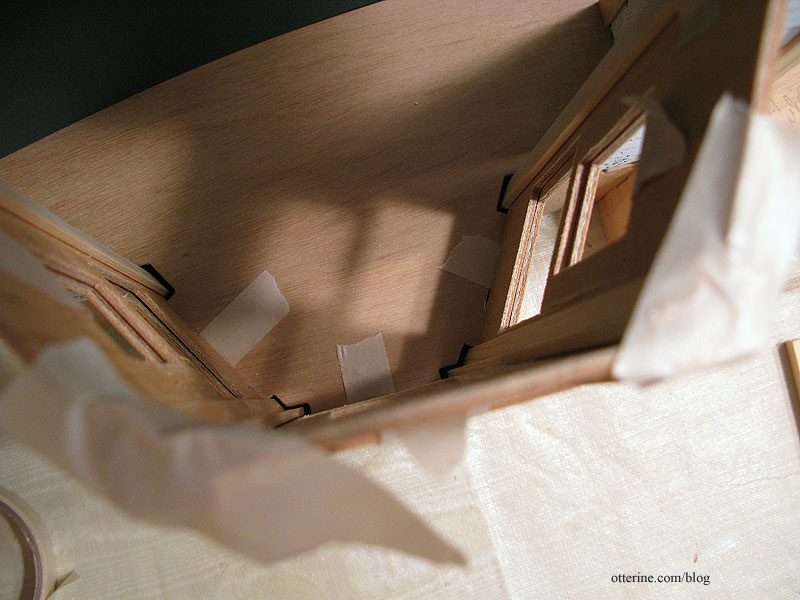
The angled bay window connectors for the Heritage needed to be cut from lengths of provided wood and assembled. I am glad this is not my first attempt at a kit so I have an idea of what the instructions are getting at and what the end result will be. I’ve mentioned my old Dura-Craft kit from when I was younger. That kit languished in the basement after overwhelming both my mom and me, then was lost almost entirely to a flood. Even with the limited experience I have now, I can easily see why this sort of kit overwhelmed us.
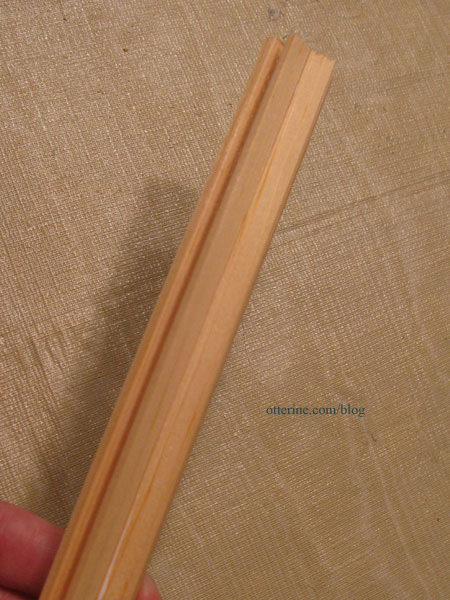
I cut the appropriate lengths for the small connectors and taped them together along the outer edge (without glue). This held them in place for me to check the fit.

I opened the two connector pieces like a book and spread glue along the inner surfaces.
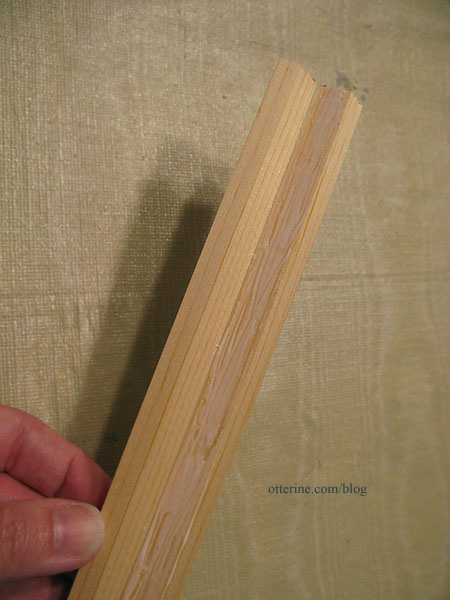
I then pressed the glued edges together and taped around the assembly at the top, bottom and middle.
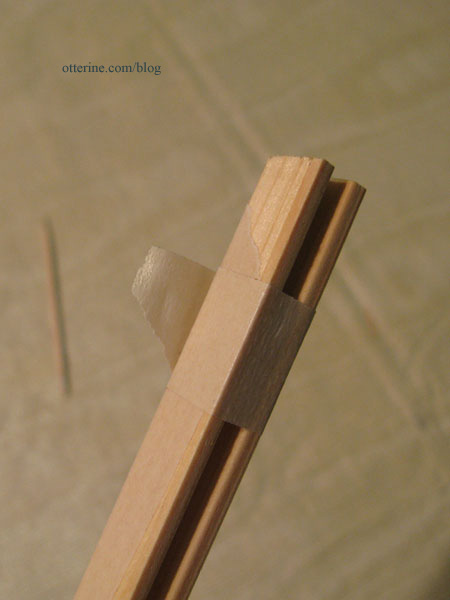
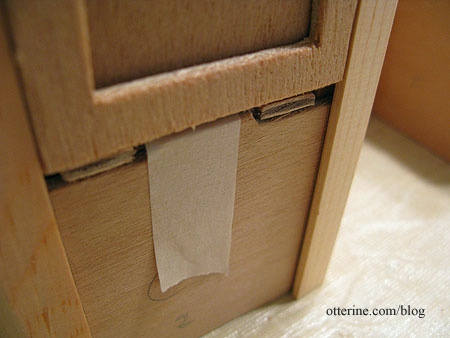
Easy peasy…until I got to the next step. I had to glue a small connector to a large connector then cut off the excess from the long edge.
Uh…okay. I followed the same principle for assembly as above but first taped the inner edges together to keep the pieces in line while I applied the glue to the inner surface. Cutting off the excess was a bit of a leap of faith. I used a utility knife to score along the edge and removed most of the overhang.
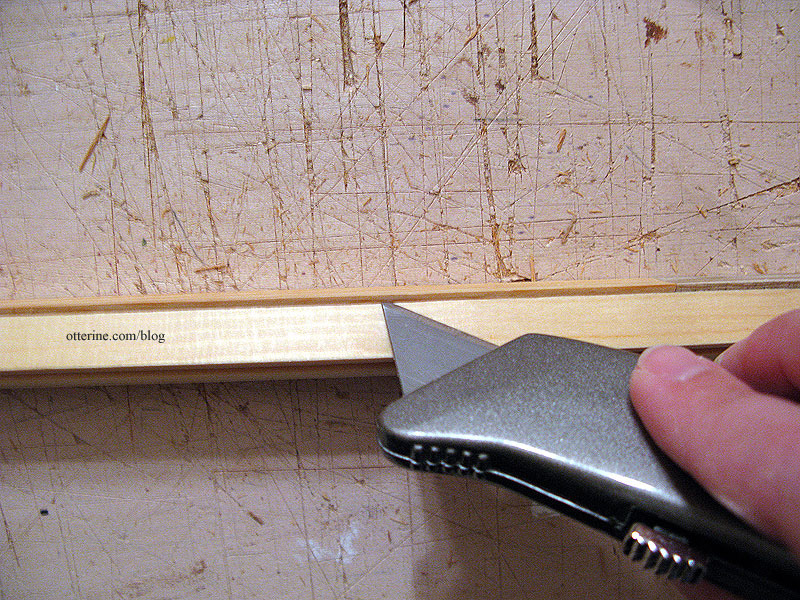
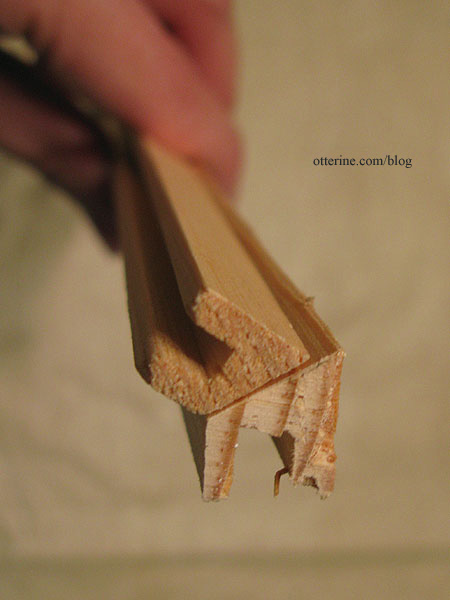
I then used the blade like a vegetable peeler to smooth it out. I was left with a choppy edge, though.
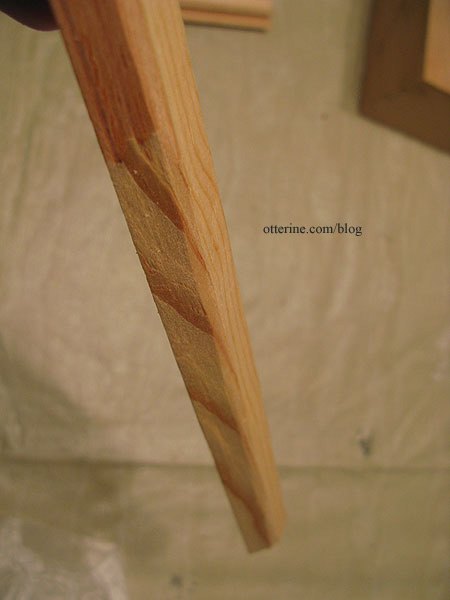
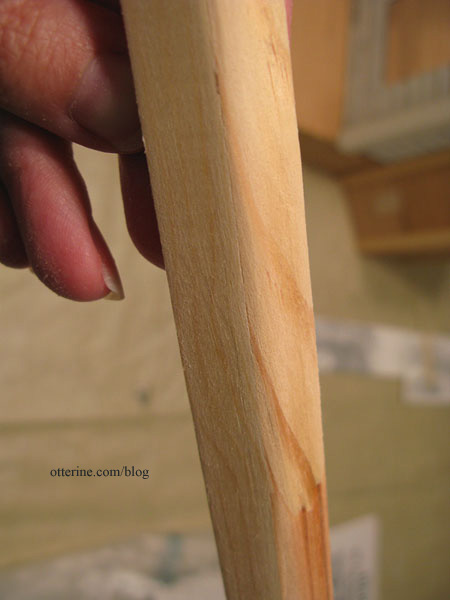
I sanded the edge it into a smooth, rounded corner. I actually think this unintentional detail might work wonderfully for an old house. But, it was my least favorite part so far.
Categories: The Haunted Heritage
July 29, 2011 | 0 commentsOld time gas lights
Other than Baslow Ranch, I’ve worked only in contemporary style. In keeping with the creepy old house on the hill theme I’ve started in the Heritage, I had to venture into the past. :D No LEDs here, my friends…just dim gaslight, kerosene and candles.
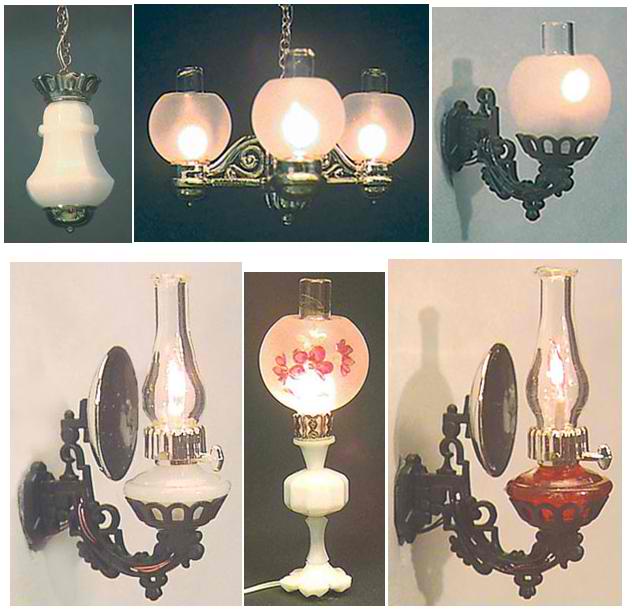
The photos here are all the product shots, so I can’t say for certain what the quality is like (other than the Clare Bell lights below, which are fab)…but I am hopeful I will be able to work some magic when the shipment arrives.
I’ll be using one or both of the Clare Bell Brass Coach Lamps that didn’t end up working for Baxter Pointe Villa on the front porch.

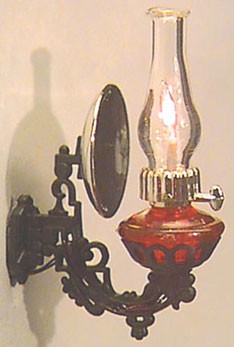
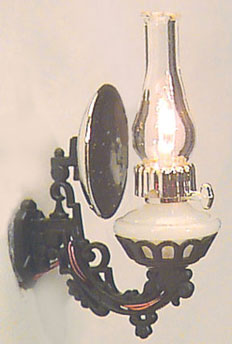
These are the lights I bought for the living room. First, a pair of Chrysolite Gaslight Wall Lamp Kits for above the yet-to-be-determined fireplace.
And, a Chrysolite Gaslight Chandelier Kit for general lighting.
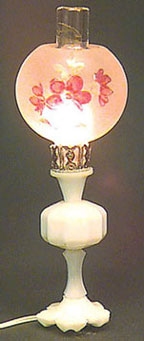
This is a fairly long room, so I might end up using the Chrysolite Banquet Lamp (not a kit) here as well, perhaps on a side table. The one I ordered has purple flowers.
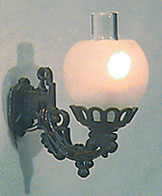
There are three kits for the bedroom, all by Chrysolite. First, the Bracket Lamp kits with ruby color bases. These will go in the bedroom, likely on either side of the bed.
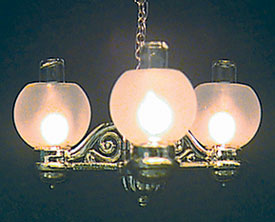
And, the Zenith Hanging Chandelier Kit for general lighting in the room.

I bought the same Bracket Lamp kits for the bathroom but chose white instead.
If something I have in the works for the bedroom pans out, I might be using a different lamp in addition to the ruby sconces and, in that case, the Zenith fixture will move to the bathroom. I am still deciding on kitchen and attic lighting, though I do have some things in mind.
Update: I am very pleased with the kits. They seem very straightforward and have good quality parts.
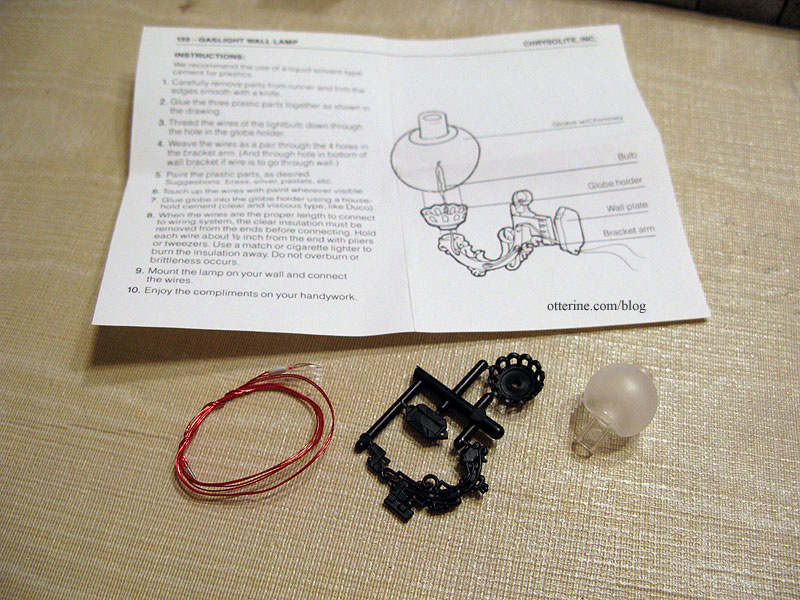
They are completely open to customization, which is the main reason I predominantly use kits for furniture. I like to pick my own colors and finishes.
The only snag in the Chrysolite kits is the supplied bulb; it’s not a replaceable type of unit. If I am going through the trouble of wiring my house, I want to be able to replace burned out bulbs. Since I use hardwiring and not the plug in type of lights, replaceable bulbs are a must for me. Since these are kits, I can purchase replaceable bulbs and use them instead.
Categories: The Haunted Heritage
July 28, 2011 | 0 commentsHeritage – foundation assembly
This is perhaps a bit of a boring post, unless you plan to build a Dura-Craft Heritage.
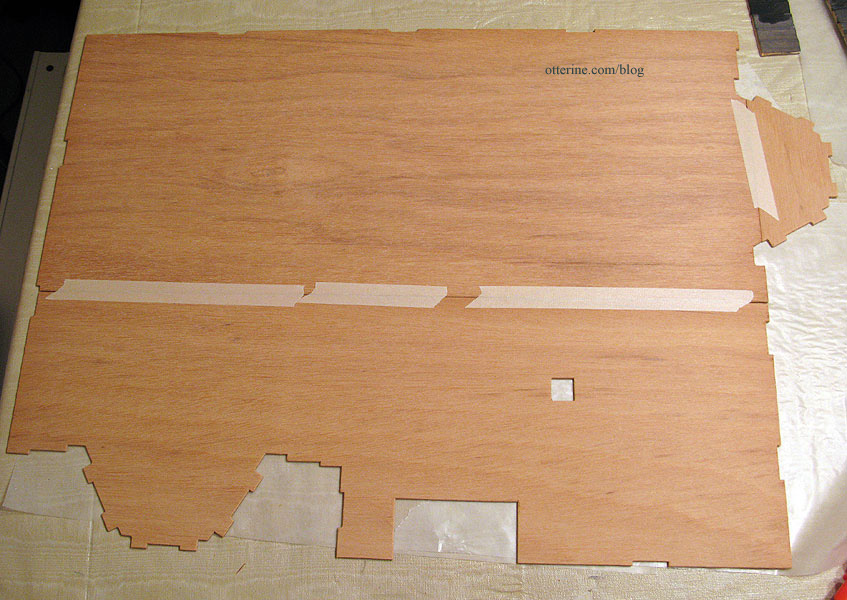
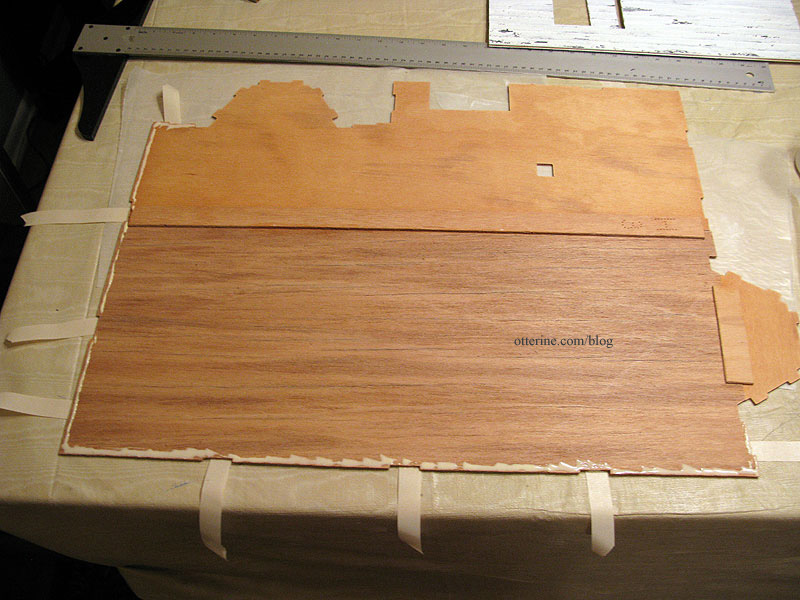
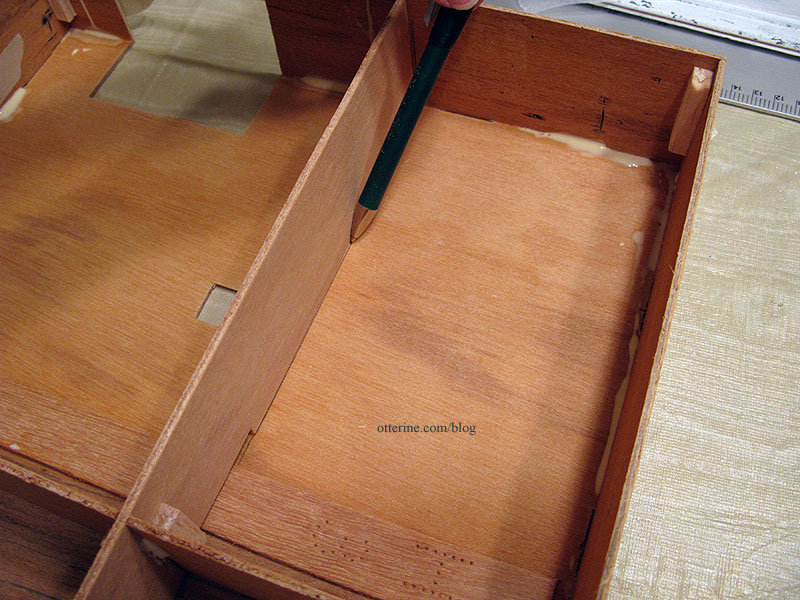
I took some pictures while assembling the first floor board. I cut the five required pieces from the die-cut wood sheets and sanded the edges smooth. The instructions tell you to place the boards right side down, but I started with them right side up. I held the front portion and the back portion close together and taped along the join. I did the same thing for the bay window portion.
I flipped the board over and used wood glue to attach the long center splice and the bay window splice. I’ve been using tacky glue otherwise but I wanted a stronger hold in this instance. I then put some tape over the splices to hold them in place.
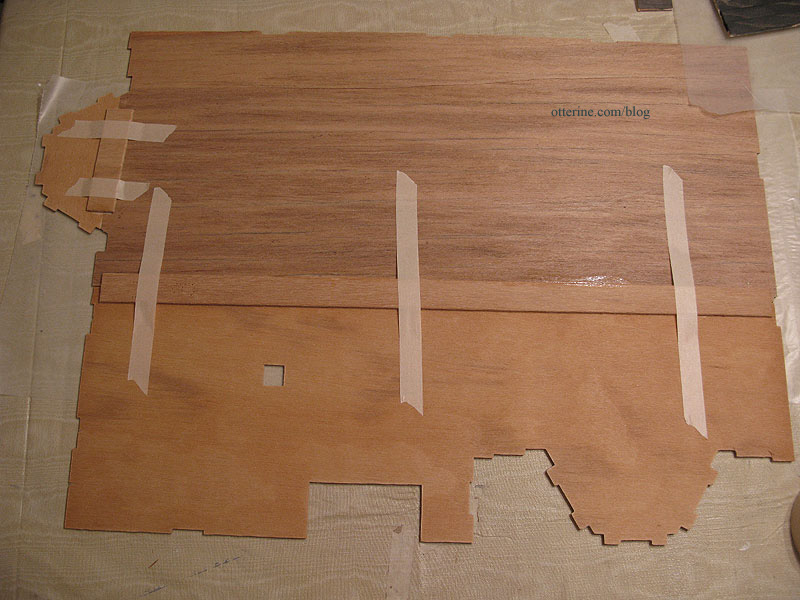
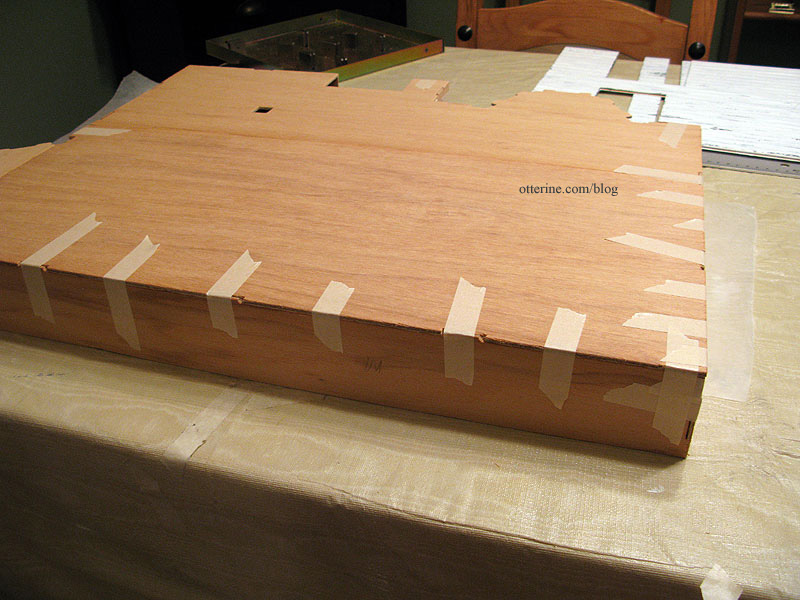
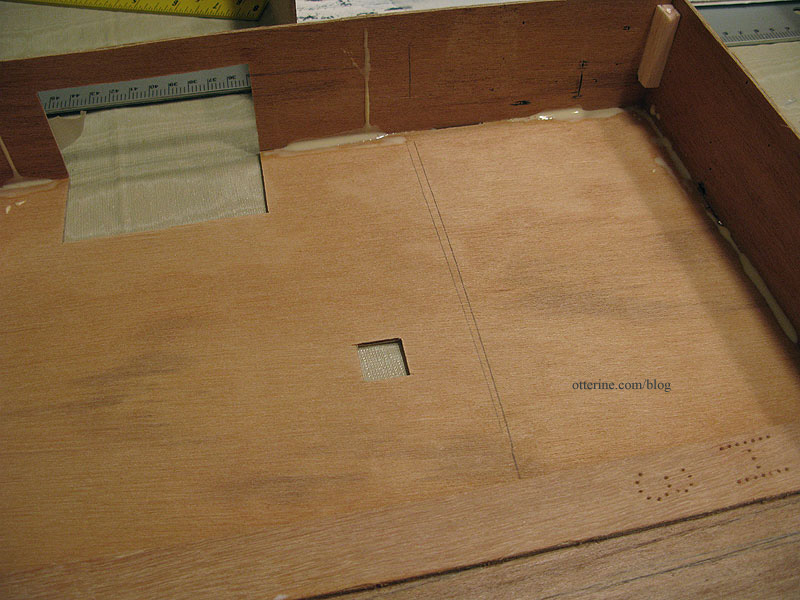
I flipped the board over once to make sure I didn’t have a ton of wood glue seeping through the other side and then returned it to its right side down position. I put magazines over the splices to hold the assembly flat while it dried.
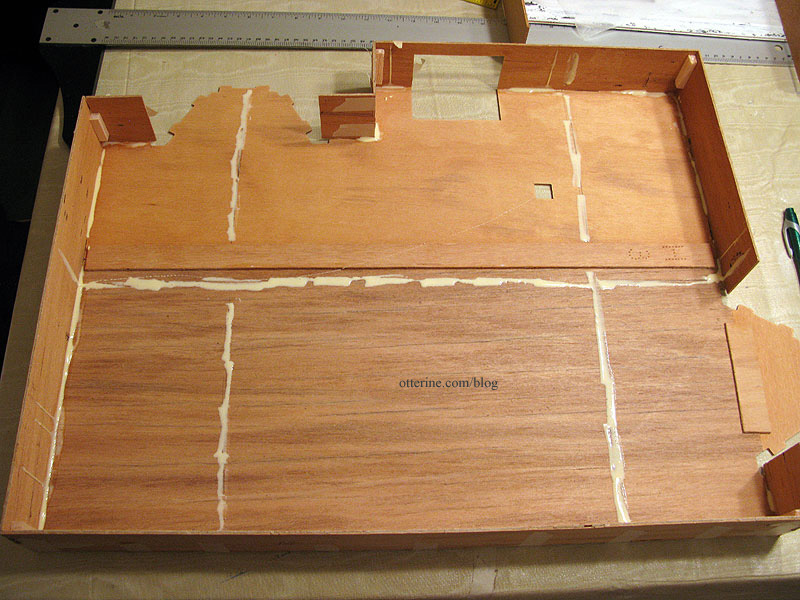
The foundation pieces went together well following the instructions, but I raided my wood scrap bag and added balsa or bass wood supports in the corners. Even though this is supposed to be an old house, I don’t need it falling off a rickety foundation! These braces helped keep the corners square as I worked with the foundation pieces and I think made it a whole lot easier. Most of the tabs did not fit well and the braces are pretty much the only thing holding the corners together.
In order to glue the two foundation assemblies to the first floor, I flipped the first floor board upside down on the table, placed a few pieces of masking tape along the edges and then drew a line of wood glue all along the outer edge. This photo shows the tape and glue for only the first of the two assemblies attached in this step.
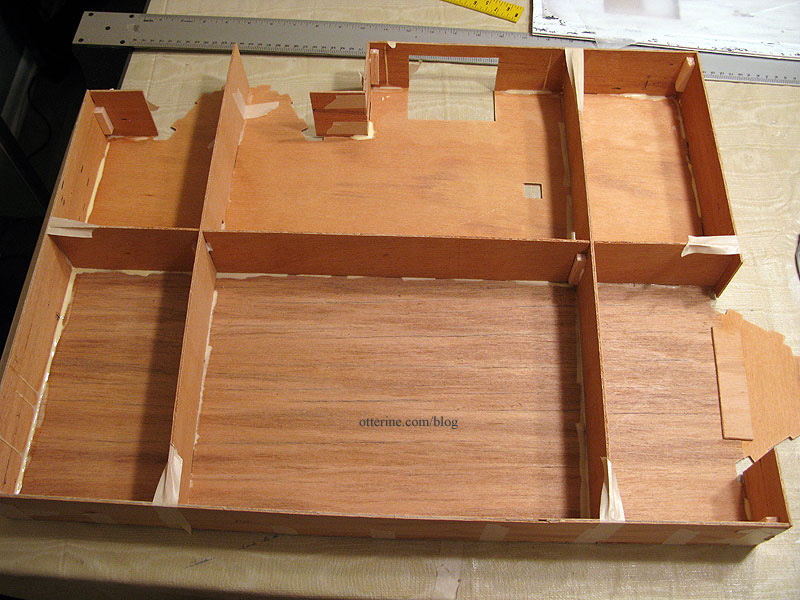
I placed the foundation assemblies on the board and then pulled the tape tight around the edges. I flipped the whole thing right side up and added more tape around the edges to make sure everything lined up well, especially at the corners.
For the base floor supports, I added a similar type of corner brace as I had for the base walls.
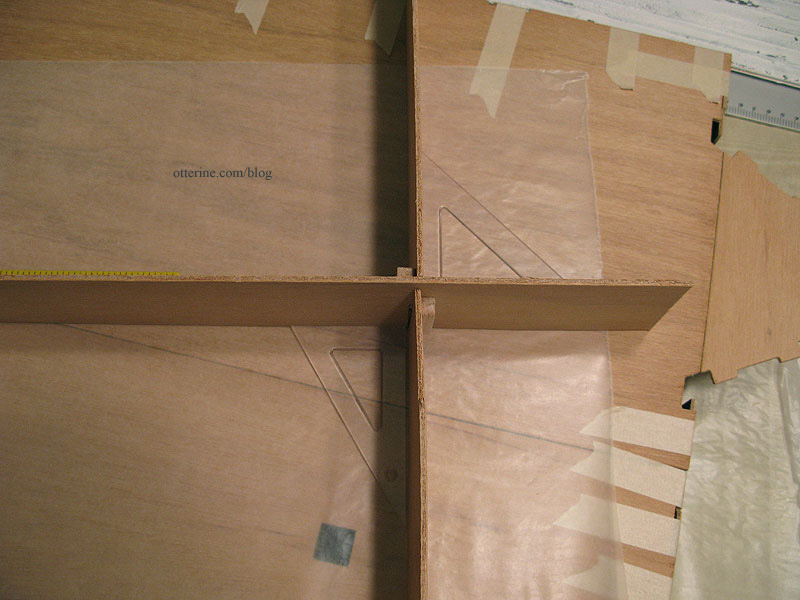
I flipped the foundation upside down and put the support assembly in place without glue. I traced around the boards and then drew lines of wood glue following those lines.
I put the supports in place on the glue lines and added tape to hold them in position while the glue dried.
I flipped the whole thing right side up again and placed magazines on top of the floor board so the base supports would form a good bond with the underside of the floor.
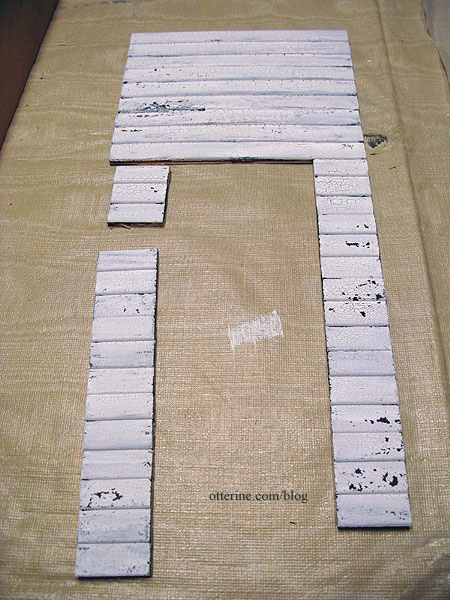
The next step for this portion will be bricking the foundation. The Heritage kit comes with Magic Brik to finish the foundation with a brick-like surface texture. I briefly thought about using this but decided against it for several reasons. First, I’ve seen it done well and I still don’t think it looks as much like real brick as I would personally like. Second, I’ve heard horror stories of it not working well at all for people and the subsequent mess involved in removing it. Third, this is an old kit (the instruction manual is stamped 1995) and I am not sure of this product’s shelf life. And lastly, when it comes to the results from the time-consuming process of egg carton bricks, I know it, love it and find it well worth the effort.
I opted for bricks measuring 1/4″ wide x 3/4″ long just because it sounded good to me. I usually use measurements somewhere close to these. Now, I’m off to cut a bunch of tiny egg carton bricks!
Categories: The Haunted Heritage
July 27, 2011 | 0 comments
NOTE: All content on otterine.com is copyrighted and may not be reproduced in part or in whole. It takes a lot of time and effort to write and photograph for my blog. Please ask permission before reproducing any of my content. (More on copyright)