


NOTE: All content on otterine.com is copyrighted and may not be reproduced in part or in whole. It takes a lot of time and effort to write and photograph for my blog. Please ask permission before reproducing any of my content. (More on copyright)

Categories:
Heritage – side bay window wall changes
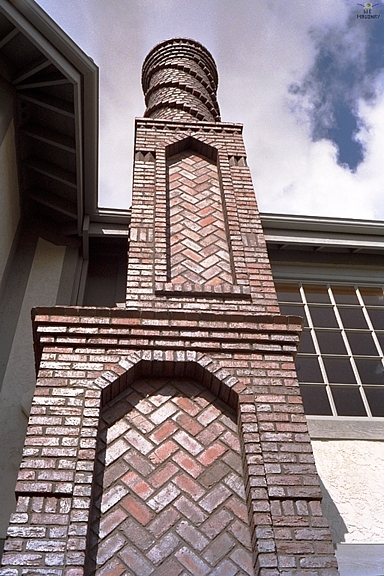
My mission, that I have chosen to accept, is to attempt a variation on this W E Masonry chimney for the haunted Heritage. (The website links to the original W E Masonry project seem to be defunct as of 2024. I couldn’t locate an updated location for this business.)
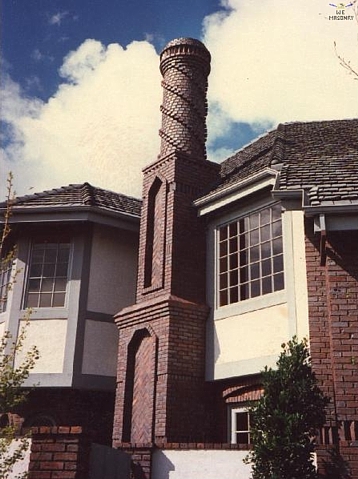
I will build the base from foam core board and cover it in egg carton bricks.
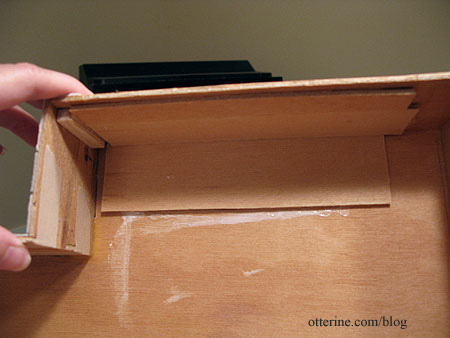
To that end, the side bay window has got to go. The first order of business in eliminating that window was fixing the foundation. I had glued the bay window floor on with wood glue, but it still came off pretty easily. I then used scraps from the die-cut boards to fill in the open space and to create backer boards to hold the piece in place.
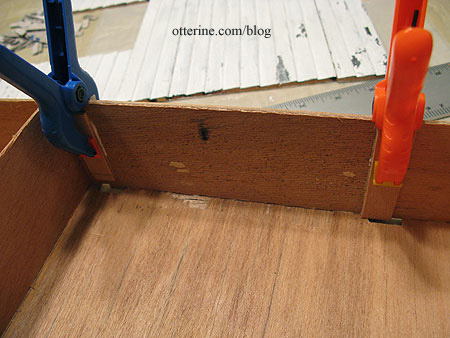
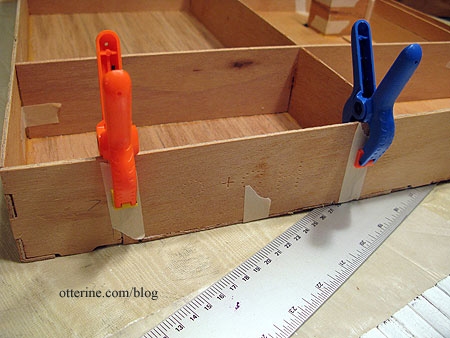
The next step involves basically redoing the entire side wall of siding. Since Dura-Craft houses are made from specifically designed siding pieces, this wasn’t going to be easy. With the suggestion from Mike, I made a new wall from 1/8″ plywood which I will later cover with Houseworks 1/2″ lap siding. (I will cut this wall to an accurate fit once I start gluing the walls to the foundation.) I figured it was better to do the whole wall instead of trying to piece it since any discrepancies between the two types of siding would be pretty evident. Since this is a side wall, any slight difference in appearance between it and the front of the house won’t be as noticeable, especially with the corner connector dividing the two planes.
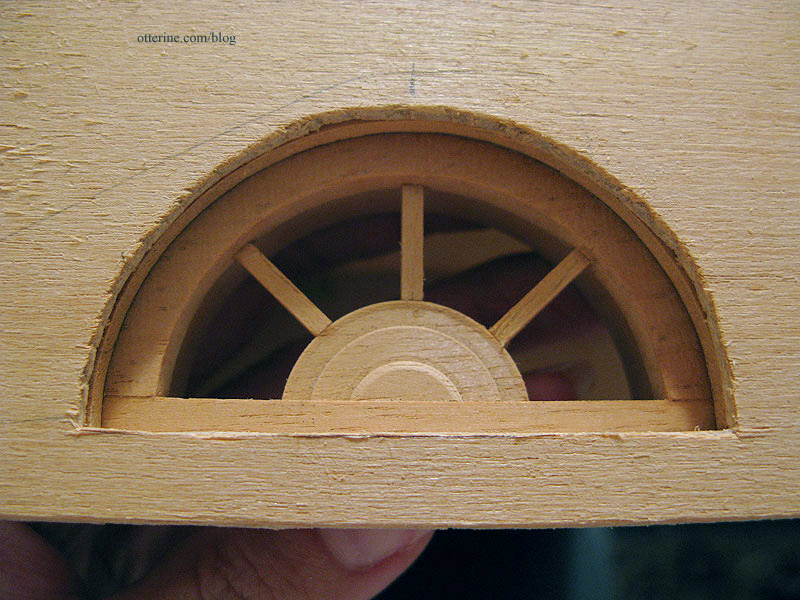
While redoing this wall, I also eliminated the swinging window that was to be above the bay window. In its place, I used the round window. Nothing says spooky like a round window on an old rundown house.
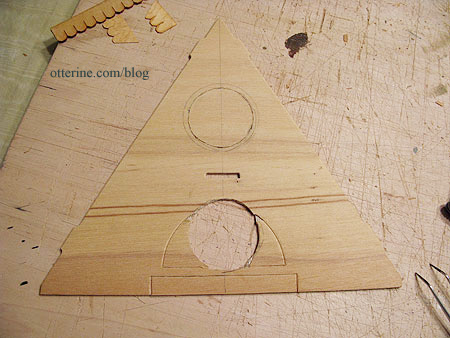
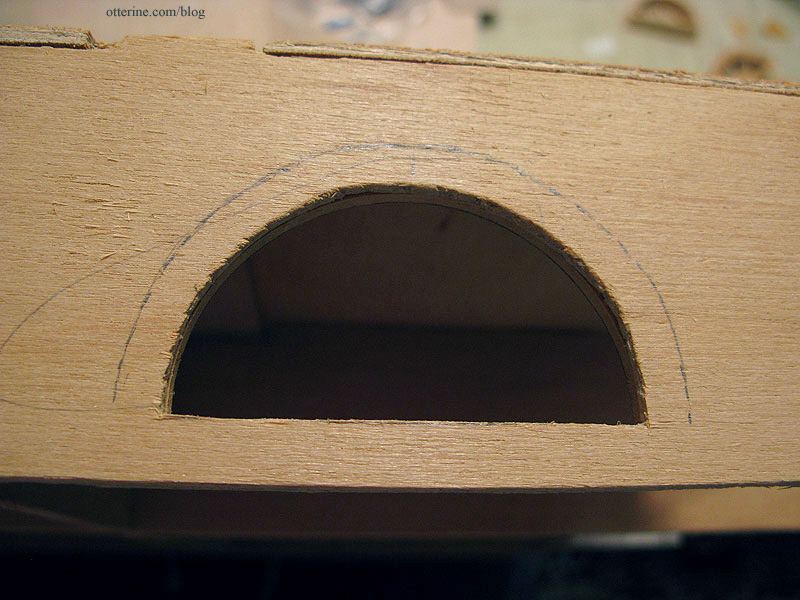
To do this, I left the die-cut parts intact on the gable window and filled in the bottom opening with the scrap that was meant to be cut from the gable. I then cut the round window shape. I was originally going to have this round window be in the attic (oh so creepy), but the gable trim would have partially blocked it. I just didn’t like the way that looked…so I moved it down to the second floor. After shingling the entire gable as I had done for the other two (those have the swinging windows intact), you won’t see where the gable is pieced.
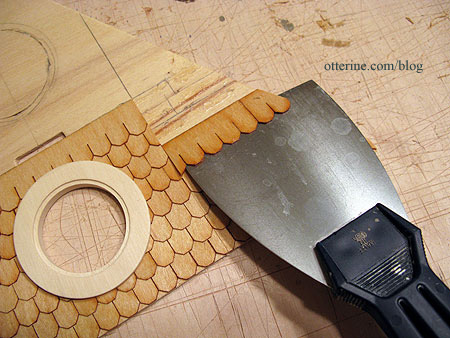
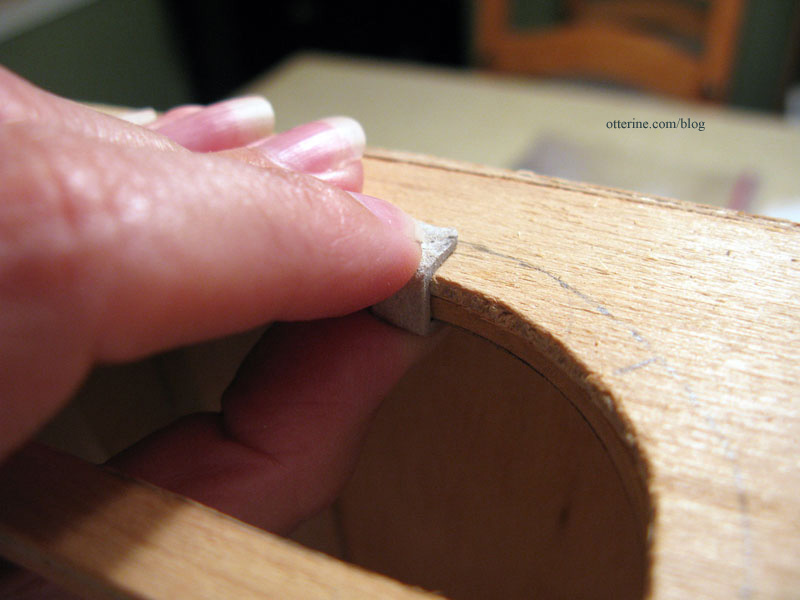
Of course, after I started to shingle the gable I realized I probably should have waited until after I built the chimney so I could shingle around the chimney instead of behind it. So, I cut along the shingles and used a spackling knife to lift the rows before the glue set permanently.
It still didn’t seem like enough, so I cut it back a bit more. This is the minimum distance I would want from the window to the chimney. I will shingle the other side of the gable to the right of the chimney once I have the chimney built.
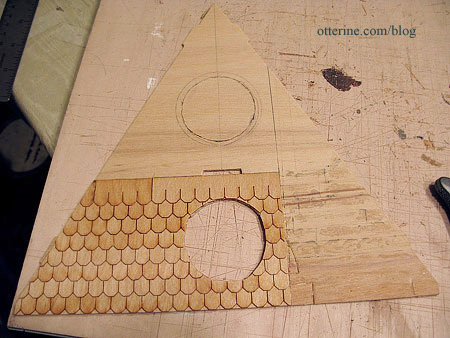
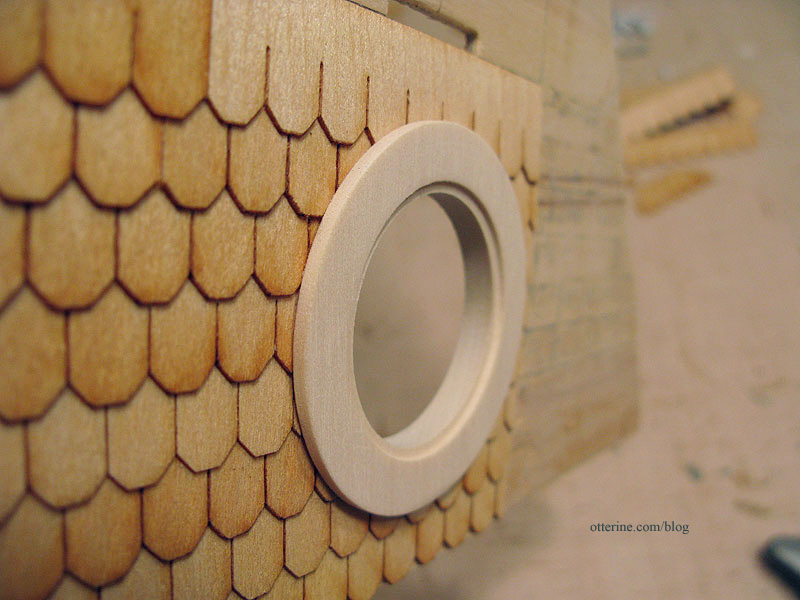
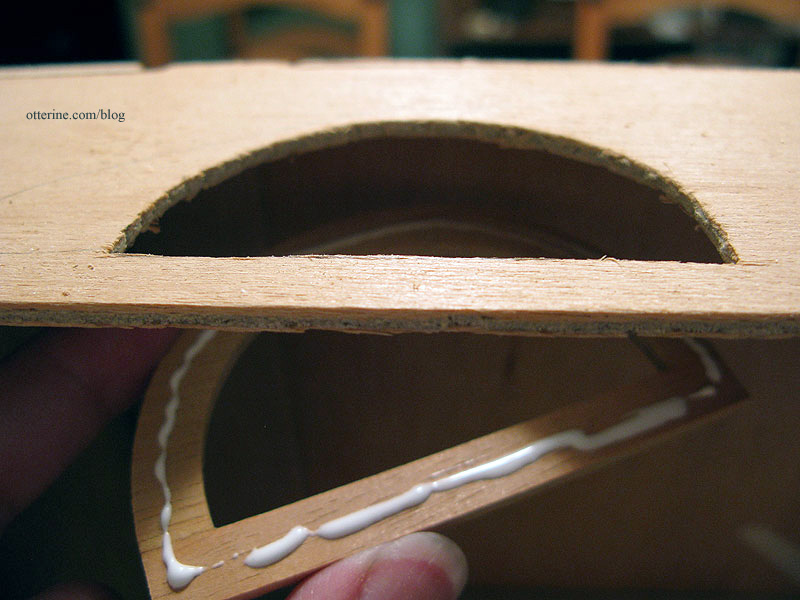
I also shingled up to the circle opening and set the window on top of the shingles since this window is made for 3/8″ thick walls. I’ll still need to fill in a bit on the other side for a good fit.
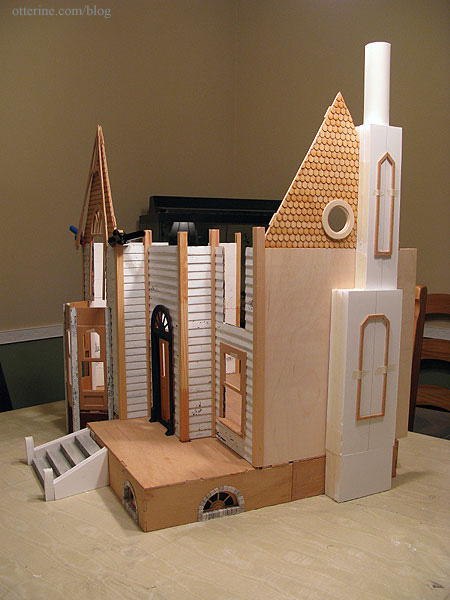
I put the house back into a quick dry fit to check things.

I used some 1/2″ foam core board and drawing paper rolled into a tube to make a quick mockup of the chimney I want to recreate. I used the spare bay window parts for the detailing since they had the right shape. I still need to build up the base to achieve all the detailing of the original, but I like the overall shape with the Heritage. I think it adds a lot to this side of the house now that the bay window is no more.
Categories: The Haunted Heritage
August 11, 2011 | 0 commentsHeritage – creepy cellar windows
I’ve added something creepy (but kinda exciting) to the Heritage.
The egg carton brick foundation is turning out well, but I was glad it was slow going since in the meantime I found this inspiration photo. :O Don’t go in that house!!!!
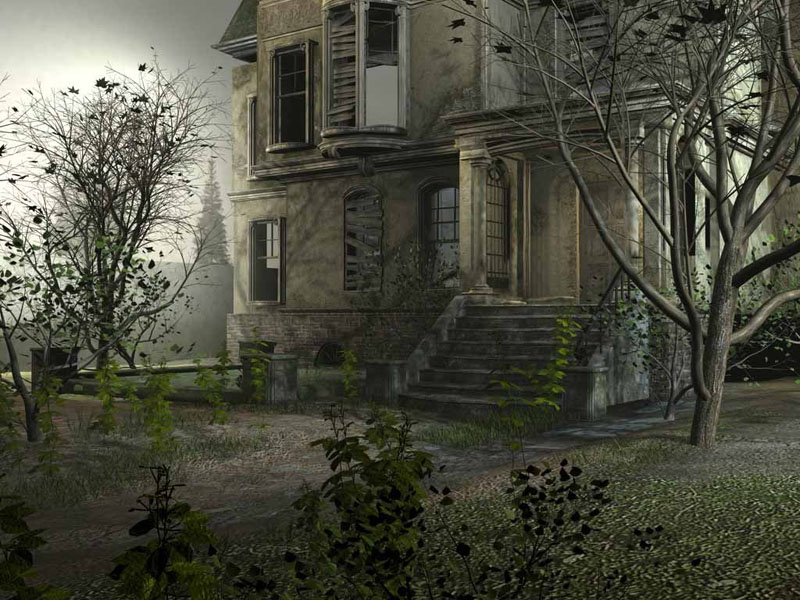
no discernible source I used Houseworks Circlehead Windows, which mirror the Palladian front door. I scored a great deal on four of these windows as well as a bunch of turned spindle packs that I’ll use for my new staircase idea on the inside.
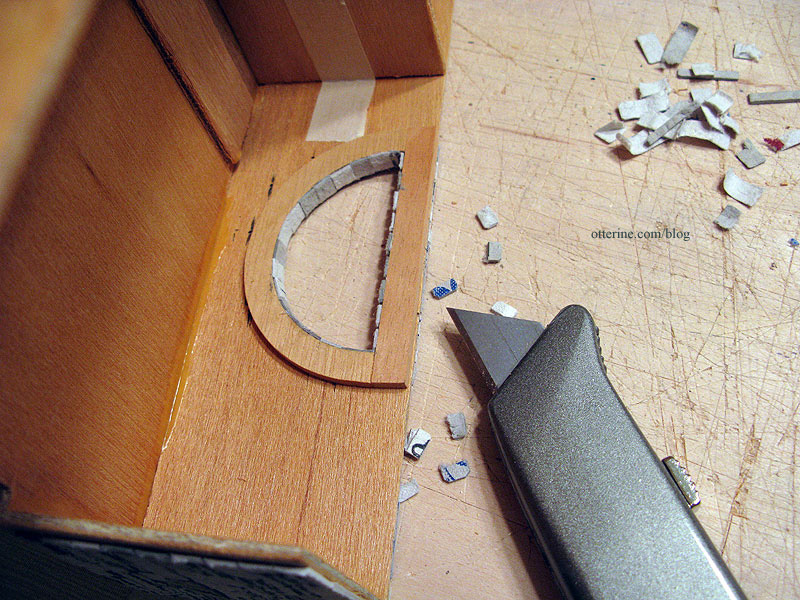
To set the windows inside the brick, I cut the openings smaller than the outer trim of the windows – using the supplied interior trim pieces as a guide.
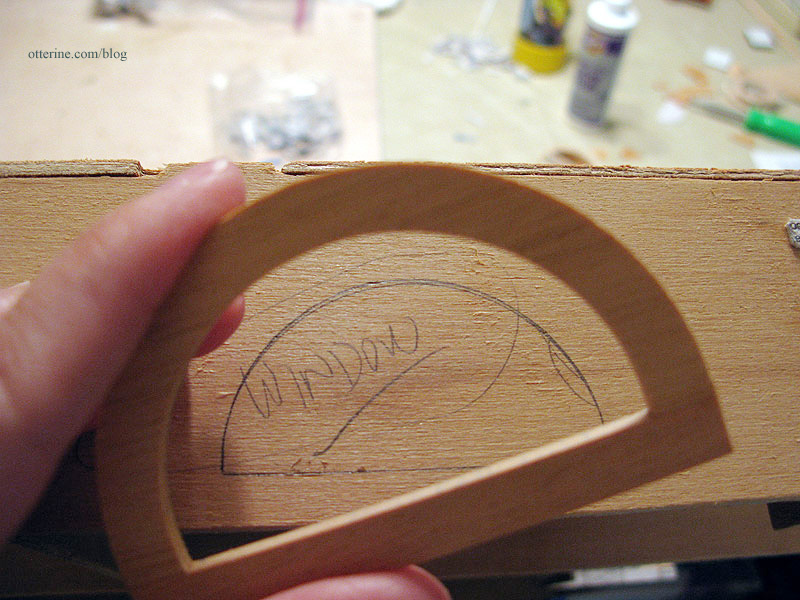
I glued the interior trim behind that opening inside the foundation, making the window well a bit deeper.
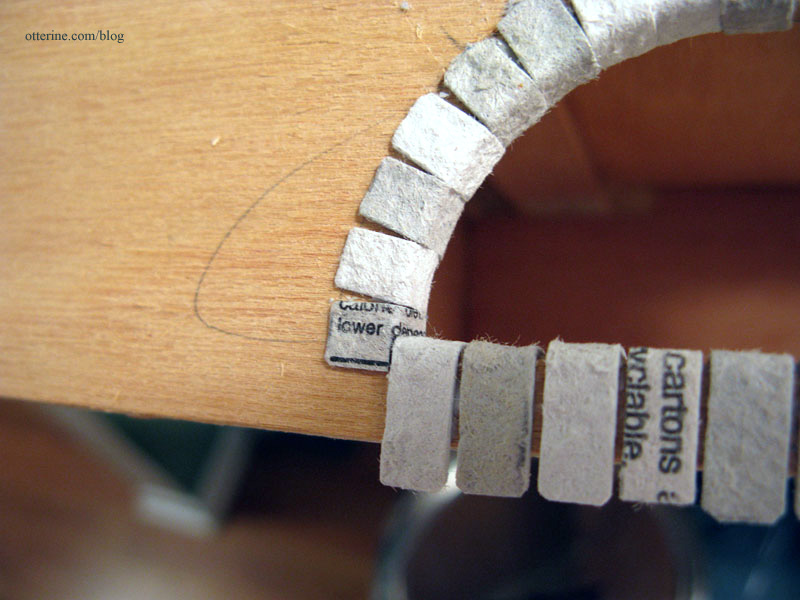
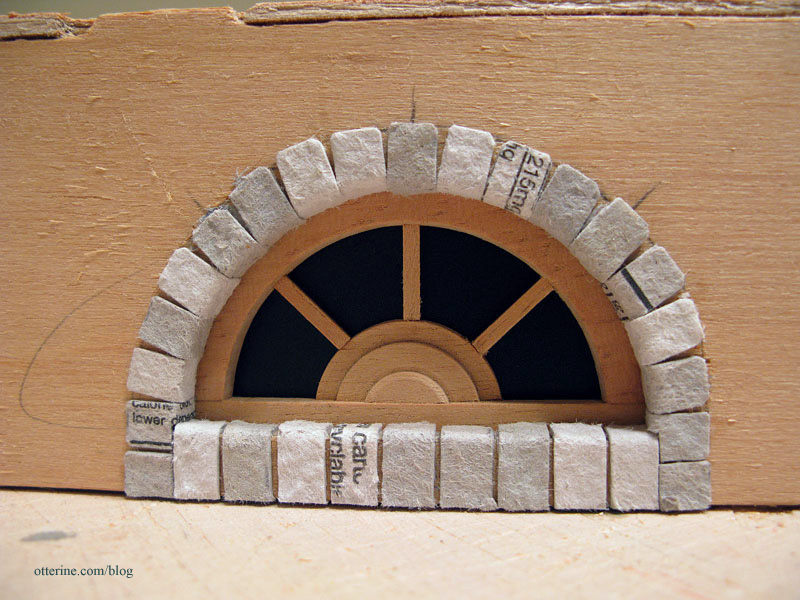
I marked the top center of the window opening and drew a 1/4″ perimeter along the curved edge of the opening to use as a guide for my bricks.
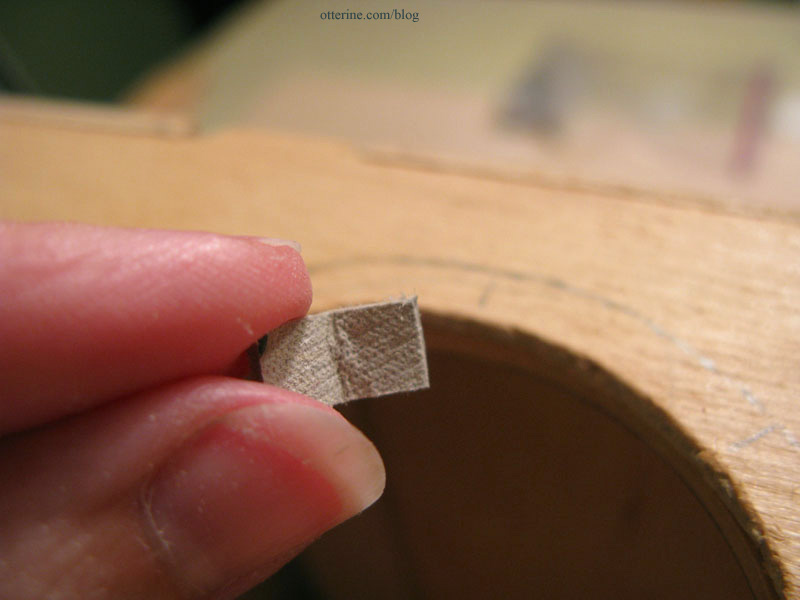
The egg carton bricks I used for this portion of the foundation were 1″ long x 1/4″ wide. The standard bricks I’ve been using are 3/4″ long by 1/4″ wide, but I use these longer bricks for corners and, in the case of the new arch windows, to line the opening with a decorative brick treatment. The longer bricks give me plenty to work with even though I end up cutting a portion off during the process.
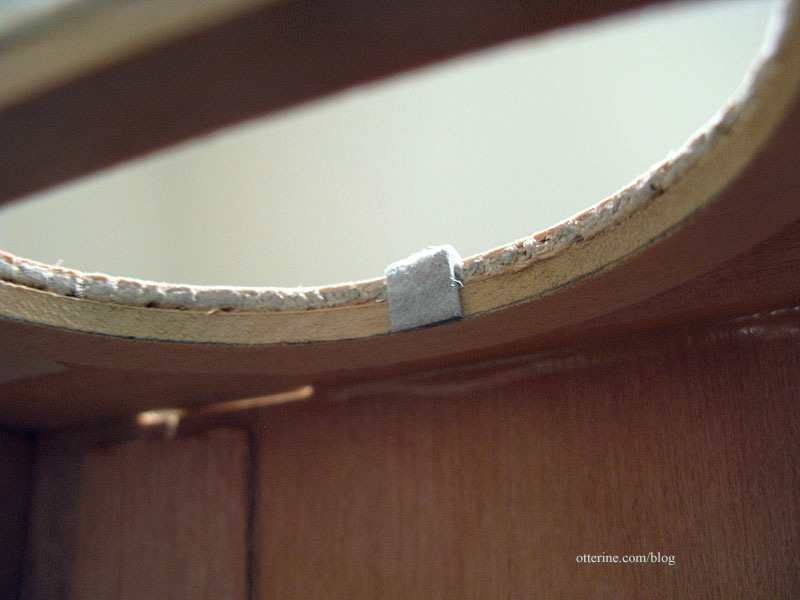
Holding one end of the brick at the top center position on the perimeter, I folded the brick around the edge and creased it.
I cut off the excess at the interior edge and glued it in place along the opening.
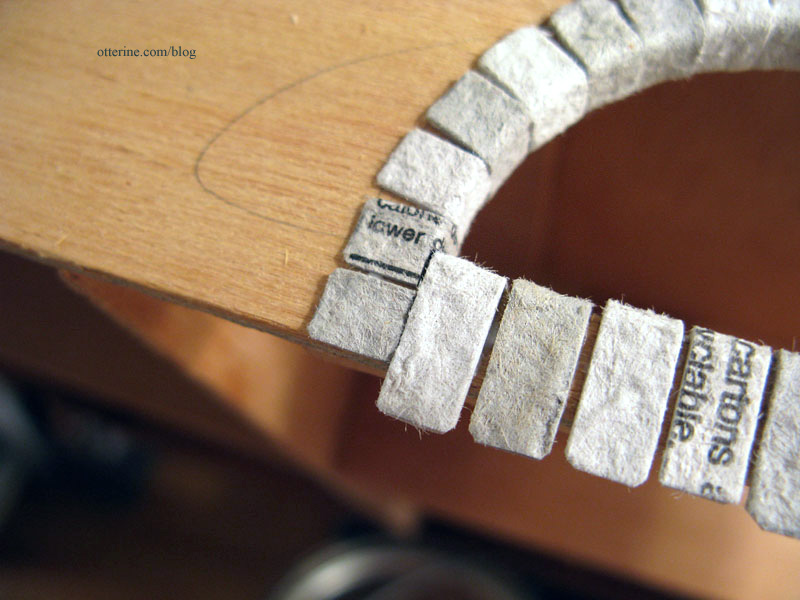
I then added the subsequent bricks to the right and left of the center brick, butting them close along the inner edge. As an aside, I like using egg cartons from different manufacturers since there are variations in the thickness of the material. When used together, they give a more realistic appearance, especially on an older building where settling has occurred over time. :] As I got near the lower edge, I realized I probably should have started with the bottom of the opening.
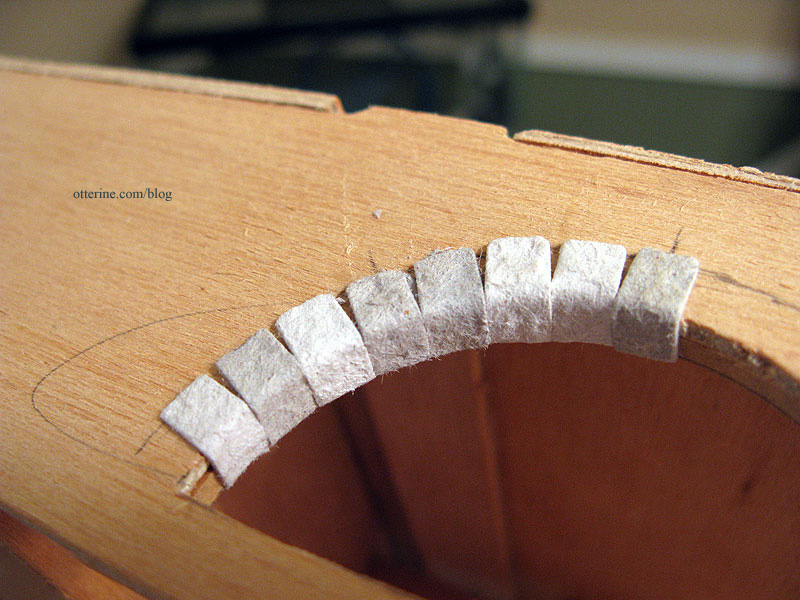
So, I stopped just short and finished that portion, lining the bricks vertically starting at the center. I left them long so I could cut them uniformly at the end. For the side brick at the lower edge, I cut it to fit around the bottom brick.
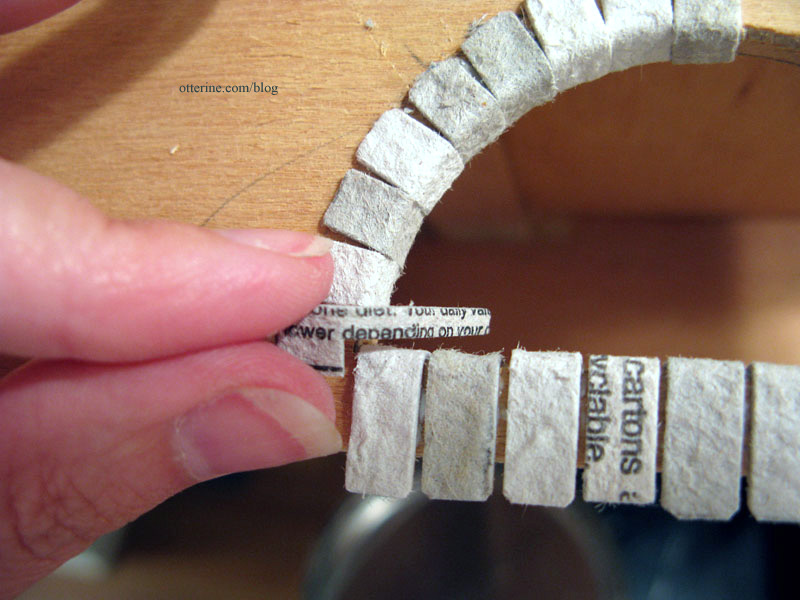
To finish off the side bricks, I cut a partial brick to fit.
I finished up the other side and then cut off the bottom vertical bricks with a utility knife.
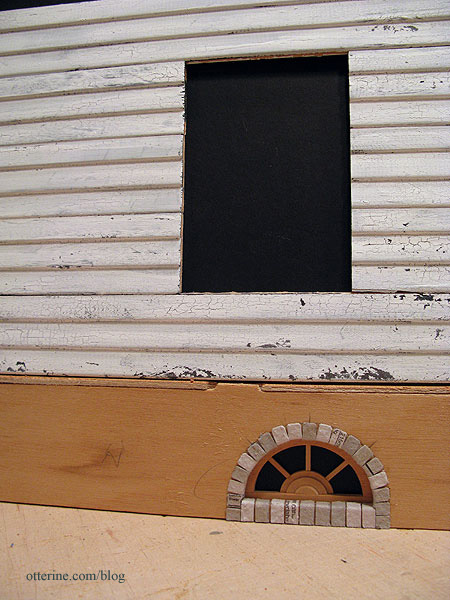
And, since I really don’t want nosy eyes looking into my creepy basement (well, that, and the fact that there really is no creepy basement – just the foundation supports), I blacked out the acrylic inserts with a quick spray of flat black paint. Flat black paint gives the muted appearance of dirt clinging to the windows and can easily be dirtied up more with acrylic paint washes. I didn’t cover all of the acrylic to maintain a certain transparency since I’m thinking of adding some dim bulbs under the foundation just for added spookiness. :D What’s going on in that cellar?!!! :O
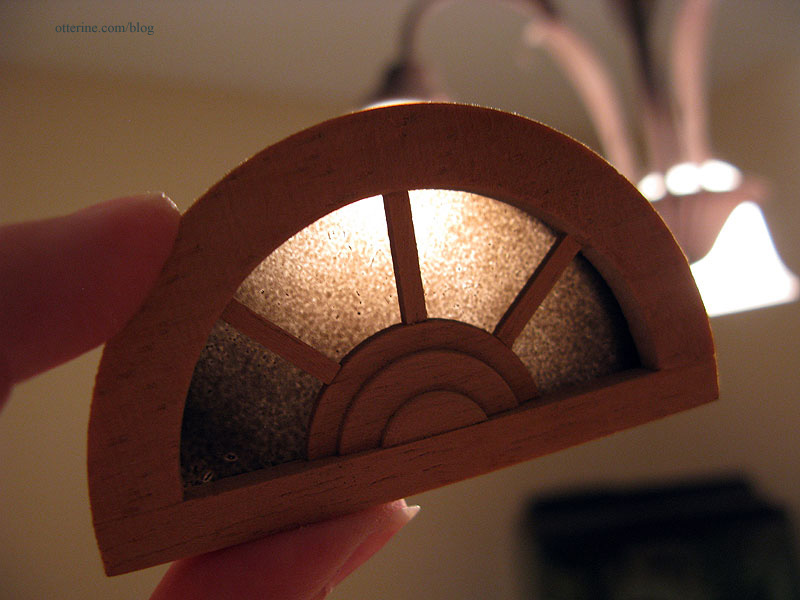
I still need to age and paint the windows themselves, but this is looking exactly as I had hoped. Now to conquer the others.
Categories: The Haunted Heritage
August 9, 2011 | 0 commentsHeritage – stair change and bay window work
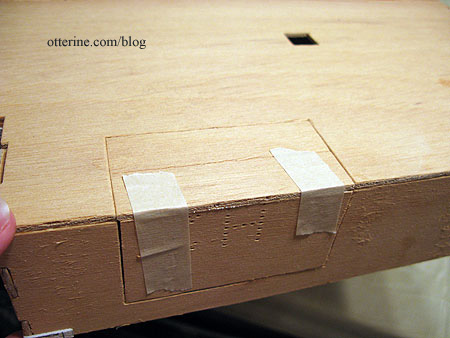
Since I have another idea in mind for the entryway, I plugged the hole where the original stairs were to be with the very pieces that were originally cut from them along with a couple of backing pieces made from scraps from the die-cut boards.
The wood for the connectors for the bay window was a bit more resistant to the paint washes, so I followed up with a dark grey paint mixture. I painted only the portions that would face the exterior of the house since I am still deciding on what to do for the interior, but I wasn’t especially careful to avoid getting any paint on the interior portions. Any stray marks will all be covered eventually.
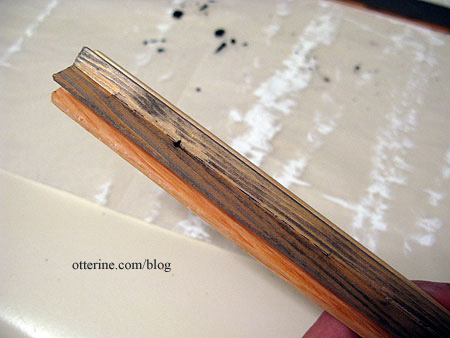

I also didn’t bother to repair any defects or cracks in the wood or gaps in the joins between pieces. All of these imperfections will actually work in my favor for an old rundown house. Maybe a tree branch fell on the house at some point. ;]
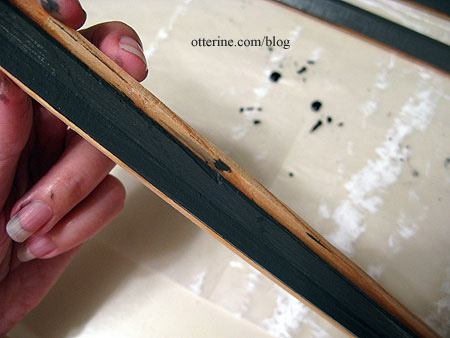
Once these dried, I used the same crackle medium and white paint process as I did for the siding. Now we’re getting somewhere. :D
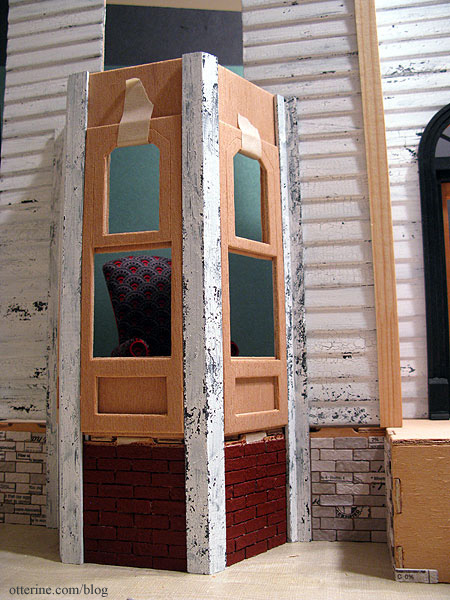
I think the red brick is going to anchor the nearly all white-grey house very well.
Categories: The Haunted Heritage
August 5, 2011 | 0 commentsEgg carton brick foundation
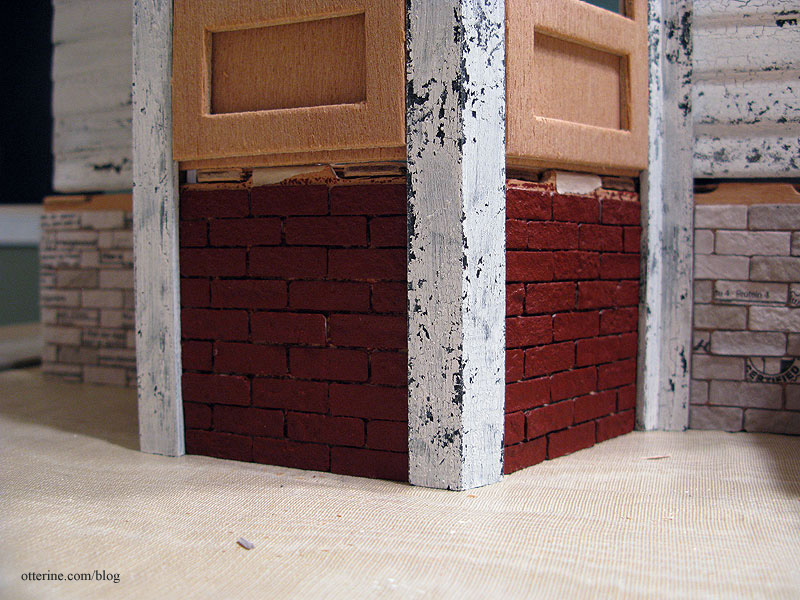
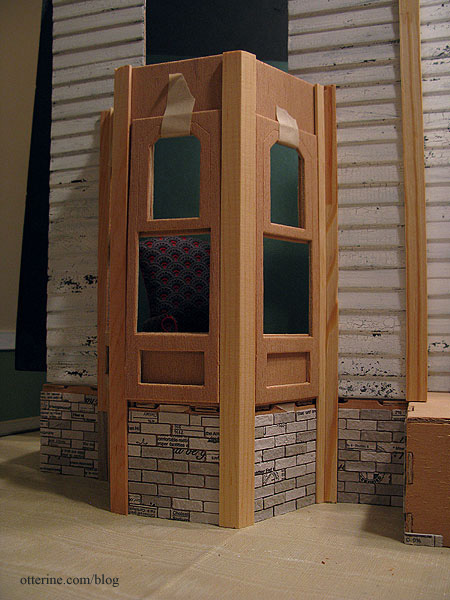
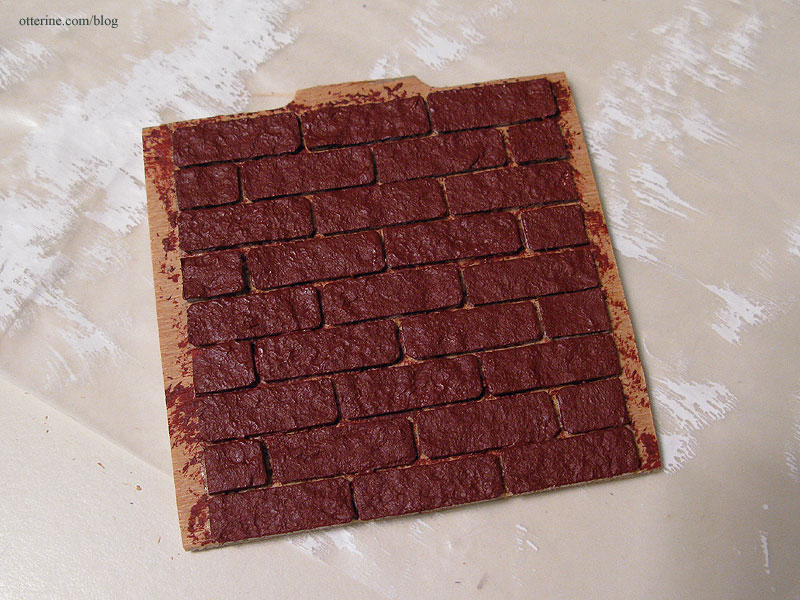
I spent some time tonight gluing on the egg carton bricks, starting with the area under the bay window that I fit the other night. I love it, as expected. :D There will be trim between the bottom of the siding and the top of the bricks.
I tried out the color I bought for the foundation: Liquitex Burnt Sienna. This is a thicker artist color acrylic, but it is a wonderful brick red color and has a great texture when stippled on with a stencil brush (two coats). It was on sale for 30% off at Hobby Lobby this week, so I didn’t mind paying a bit more for it. Grouting will come later.
Categories: The Haunted Heritage
August 2, 2011 | 0 commentsHeritage – shingled gables
The three large gables are supposed to be shingled above the windows according to the instructions. The kit even includes fancy shingles for this purpose.

But, I think something about it is off. First, I think the shingles are too large. Second, and more importantly, I don’t think you’d leave any gable wood exposed on a real life house. It would either also be shingled or have some sort of siding on it. I am guessing the kit is like this to add some Victorian charm while making it a relatively easy job to add the shingles.
To remedy both of these points, I bought Greenleaf half scale speed shingle strips (octagon shape) with the plan to apply them to the entire gable.
Since I would ultimately be painting them, I decided to glue them onto the gable before staining them with the black/grey aging wash. I could always press the pieces flat while drying if they curled while painting and it didn’t matter if I got excess glue on the stained portions since the shingles would be covered by the crackle effect paint.
Here are the three samples I put together to test out which glue would work best and whether the same aging process as the siding would work here as well.
From left to right are Elmer’s wood glue, Aleene’s quick dry tacky glue and Quick Grip glue. I taped the shingles down while drying. The first two lifted after the dark wash. Not necessarily a bad thing on an old house as long as it doesn’t get out of hand.

I then brushed on crackle medium followed by white craft paint. Interestingly, the first one flattened out a bit with only a couple a lifts there and there. Still, I decided to stick (tee-hee) with the Quick Grip glue just for the fact that it dries so fast.

I started by placing the outer gable window trim on the gable and tracing around the edge.

I placed the first shingle strip so that the vertical lines between the shingles lined up with the bottom edge of the gable.

I placed the window trim over the first shingle strip and traced the outline.

I cut the shingle strip to fit with an X-Acto blade and then glued in place with Quick Grip.

The next row was applied so that the bottom shingles lined up with the top of the vertical lines of the first row. Again, I used the window trim as a template.


Once I had a few rows on, I cut the excess off the bottom and sides.

I’ll continue up to the top peak and then repeat for the other two gables, but I already think this looks like a better scale match. There will be trim between the gable shingles and siding to finish off the edge between the two.

I’m very pleased with the results of my experiment. I think it looks more like the real Victorian houses in my area than it would have with the kit’s oversize shingles.

I absolutely love the shape of the gable windows, too! I’ve adored this house for years, and it’s so much fun finally bringing it to life.

Note to or anyone who is building a Heritage: the diecut arches of the gables end up being a structural part of the finished swinging windows. If you want these to be pristine, take the time now to repair both the interior and exterior portions of these gable parts. You may choose to cut new parts if the kit parts are too far gone. I was able to salvage them later, but it would have been easier before assembly. It was hard to work with them upright. See this post for details.
Categories: The Haunted Heritage
August 1, 2011 | 0 comments
NOTE: All content on otterine.com is copyrighted and may not be reproduced in part or in whole. It takes a lot of time and effort to write and photograph for my blog. Please ask permission before reproducing any of my content. (More on copyright)