

Heritage – back roof dormer, part 5
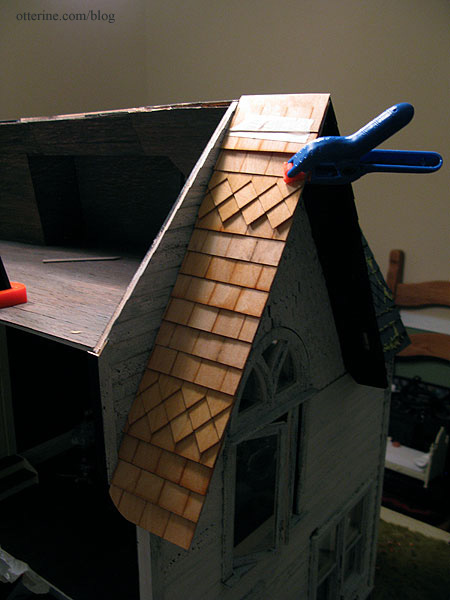
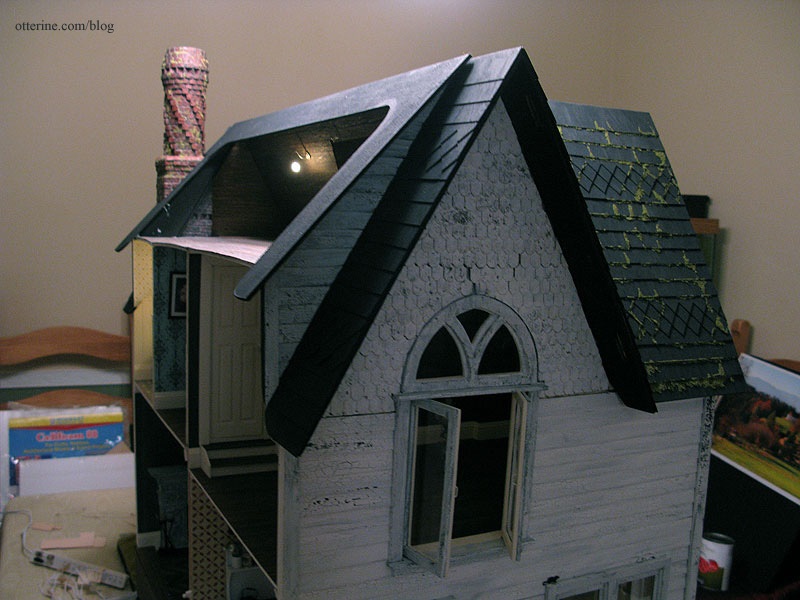
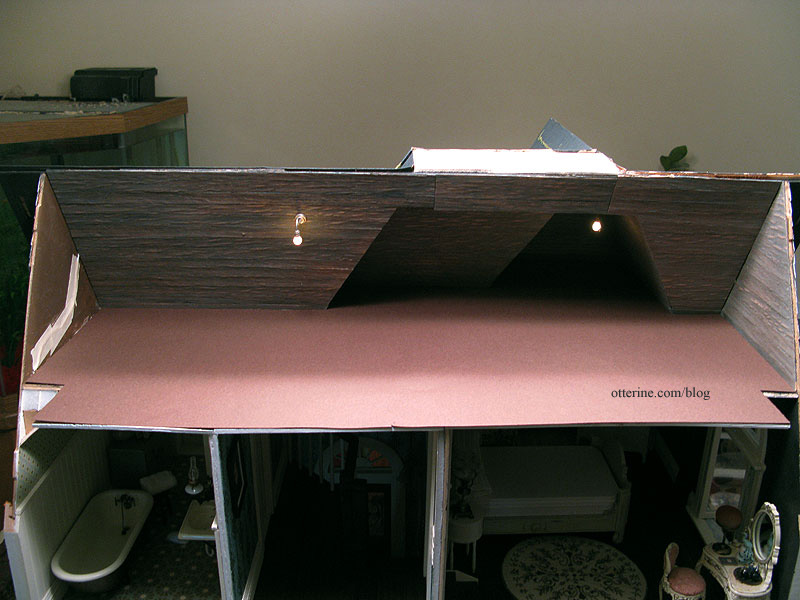
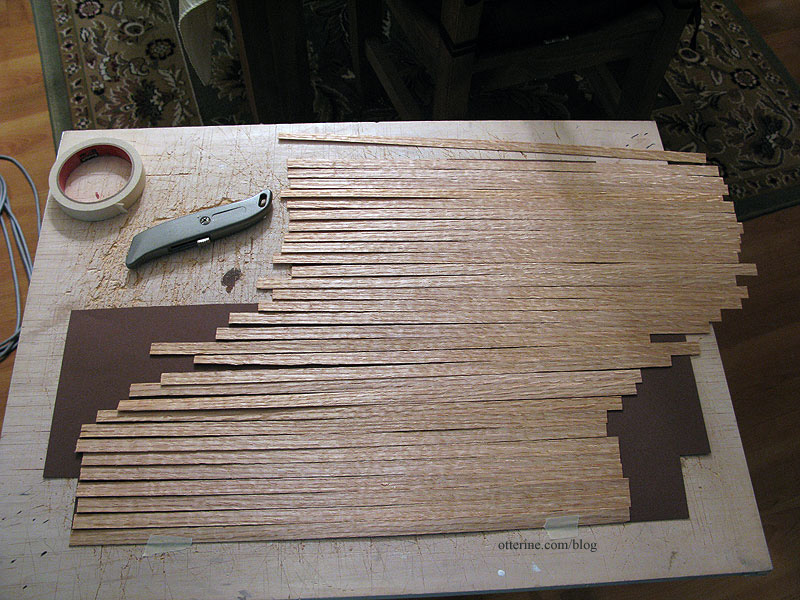
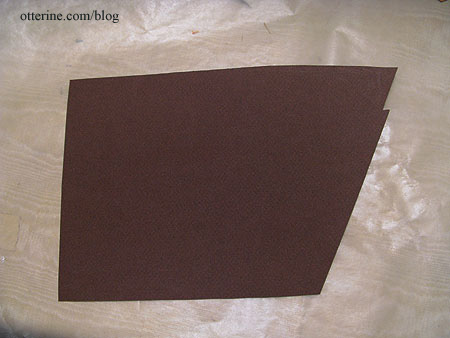
Continuing work on the back roof dormer. I glued on the flat roof and while that was drying, I cut the shingles for the new back roof using a paper template. I had to work from the top down so the shingles would align correctly over the open back and along each side section.
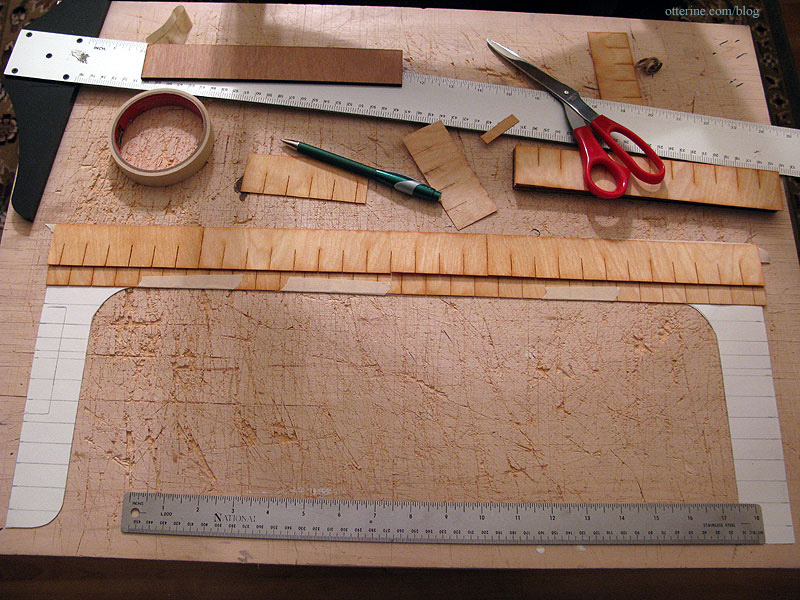
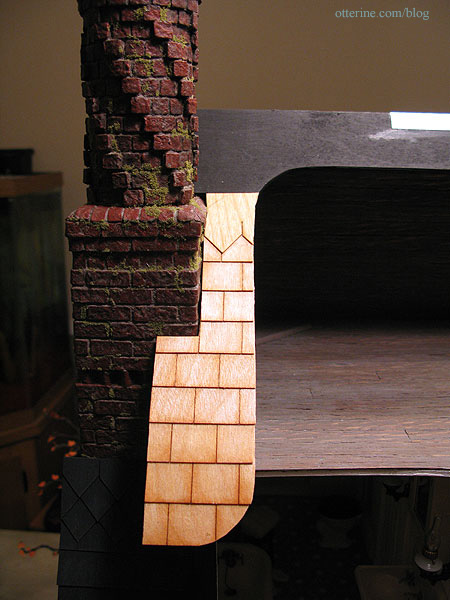
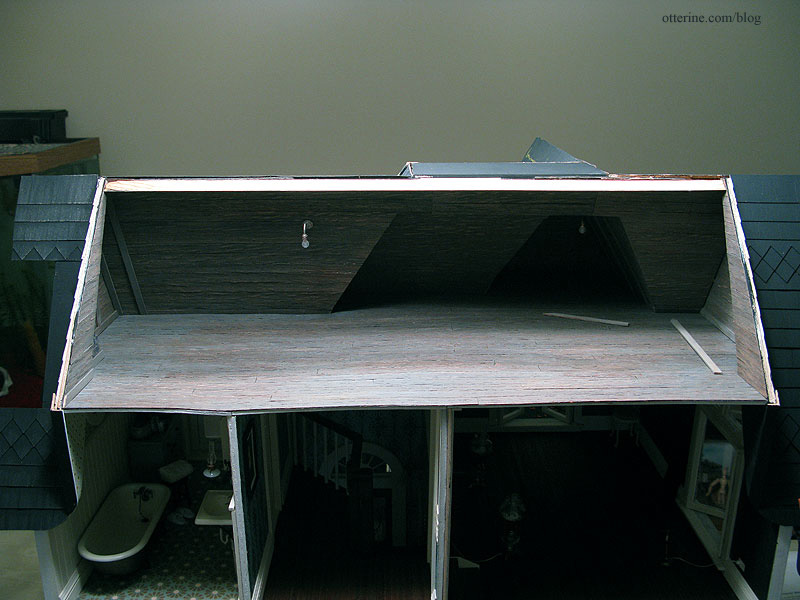
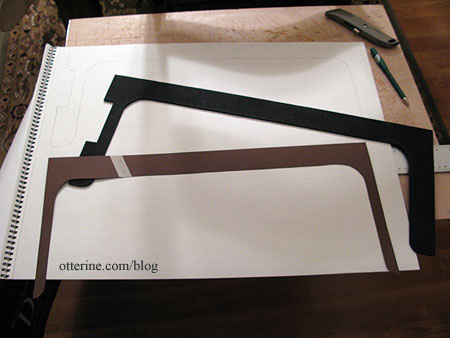
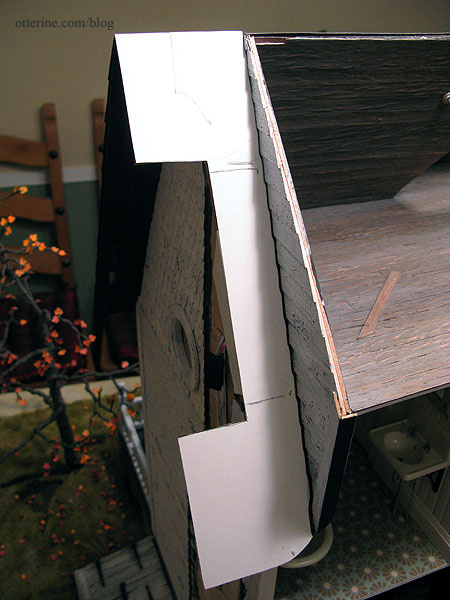
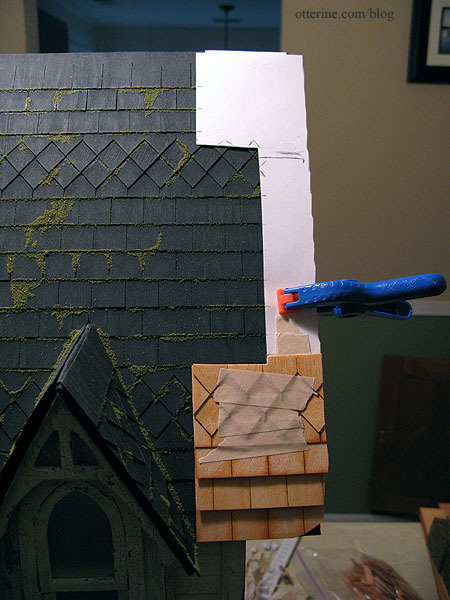
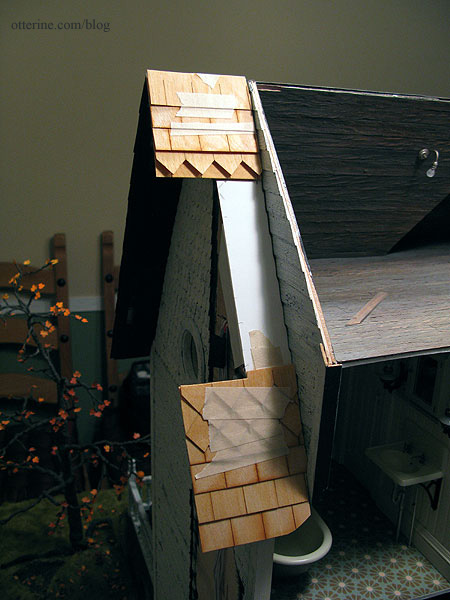
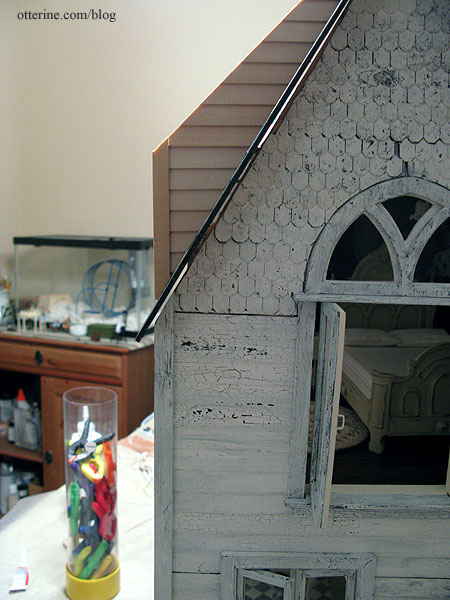
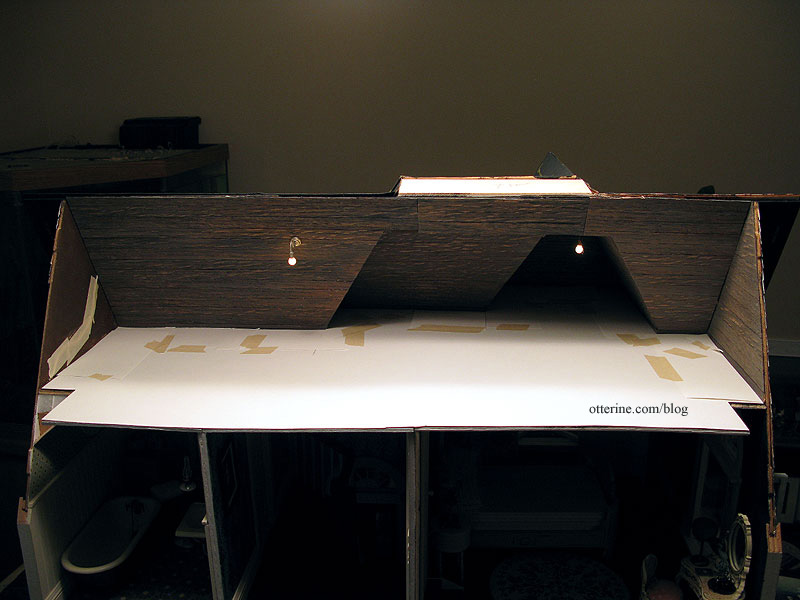
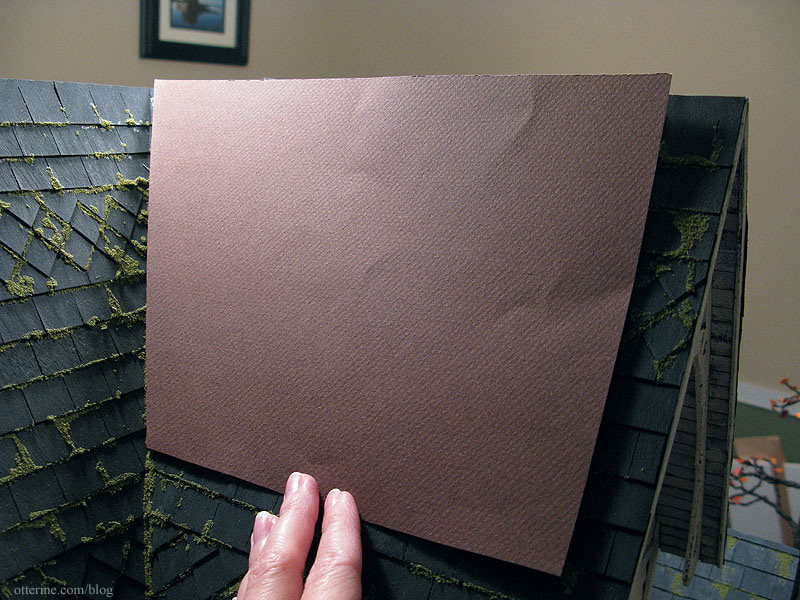
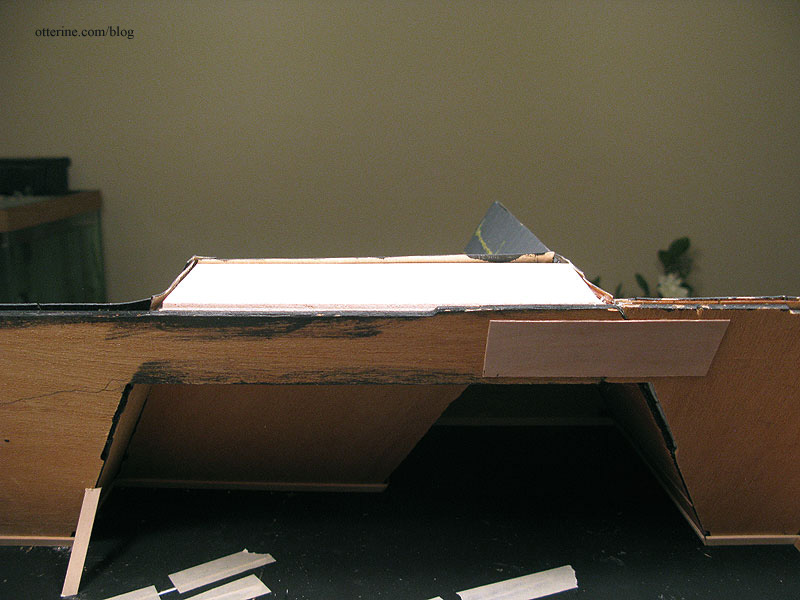
I taped the completed template onto the house to see if the layout works well. The back roof isn’t as long top to bottom as the other roof pieces, so the shingle pattern had to be adjusted slightly as well. I omitted the bottom diamond section but kept the top one. The chimney notch will be adjusted when I shingle the final roof piece, but I’ve left those pieces long for now.
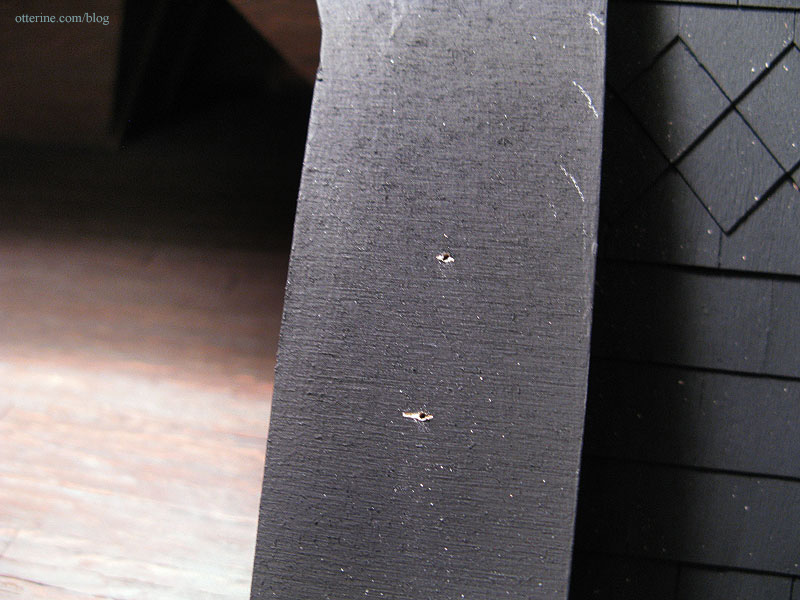
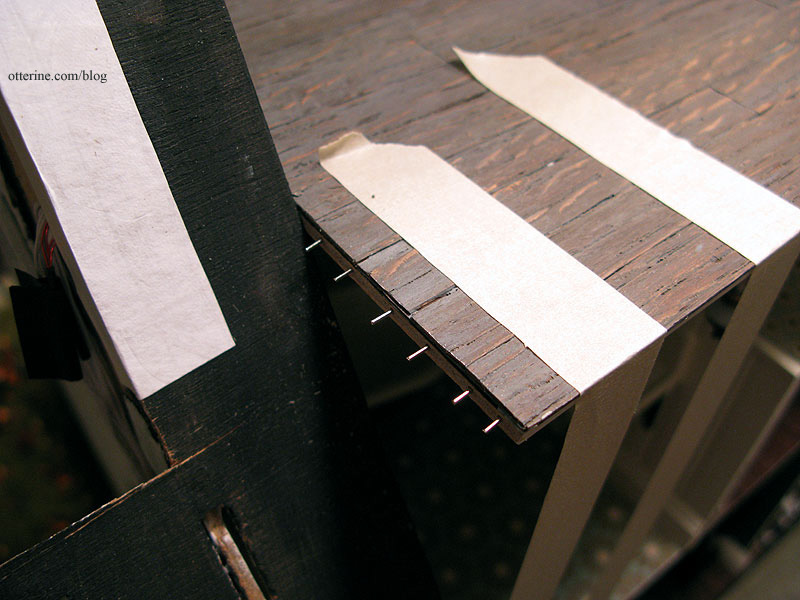
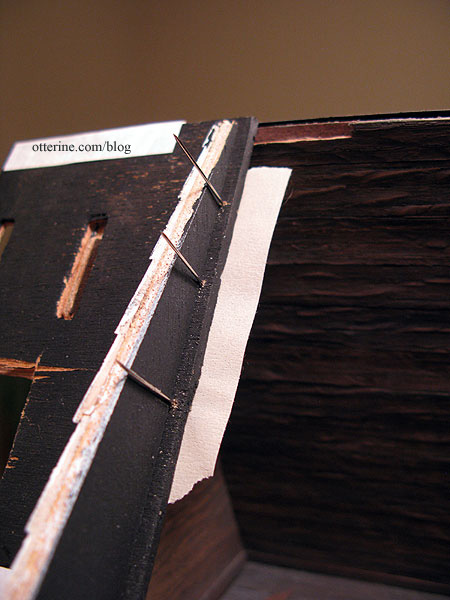
Before gluing on the new back roof, I drilled pilot holes for pins to reinforce the joins.
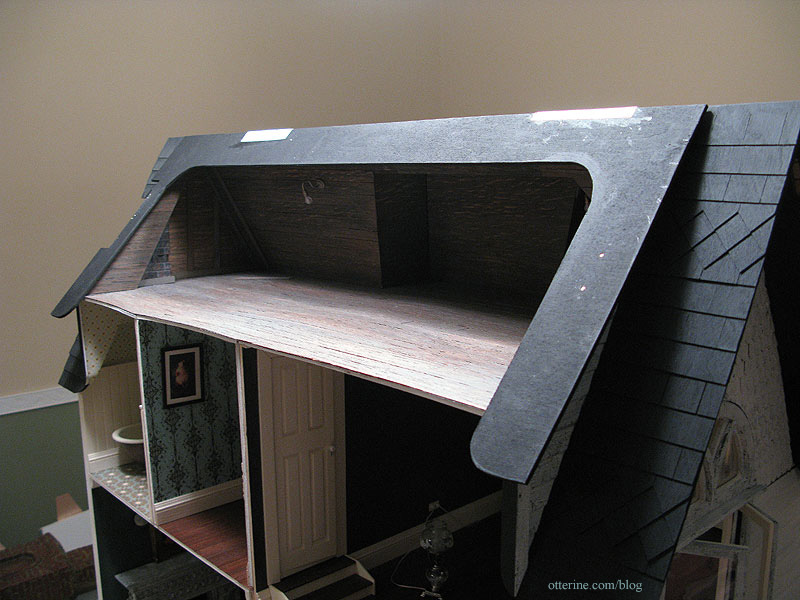
I glued on the new back roof, adding Tyvek reinforcement over the roof ridge. The final finishing of the roof ridge will cover it.
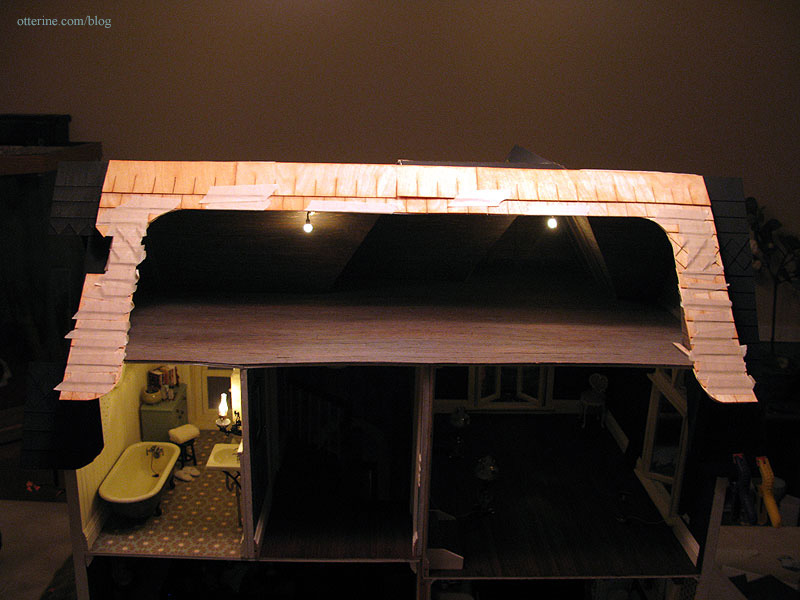
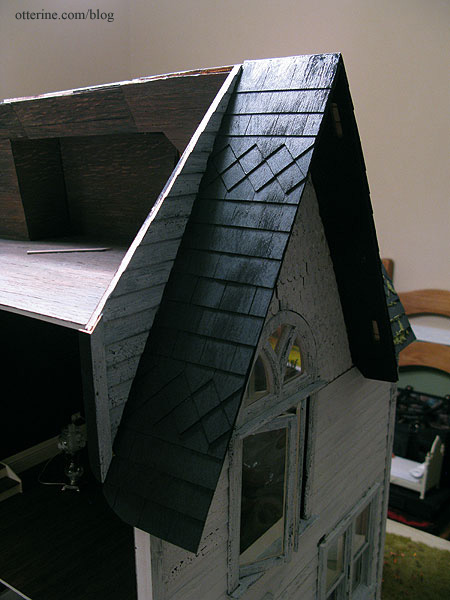
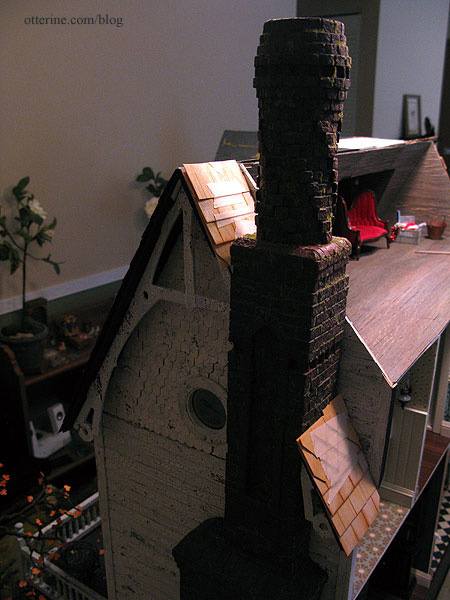
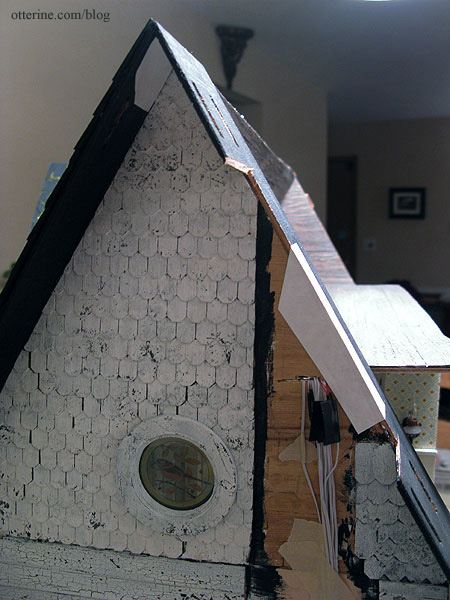
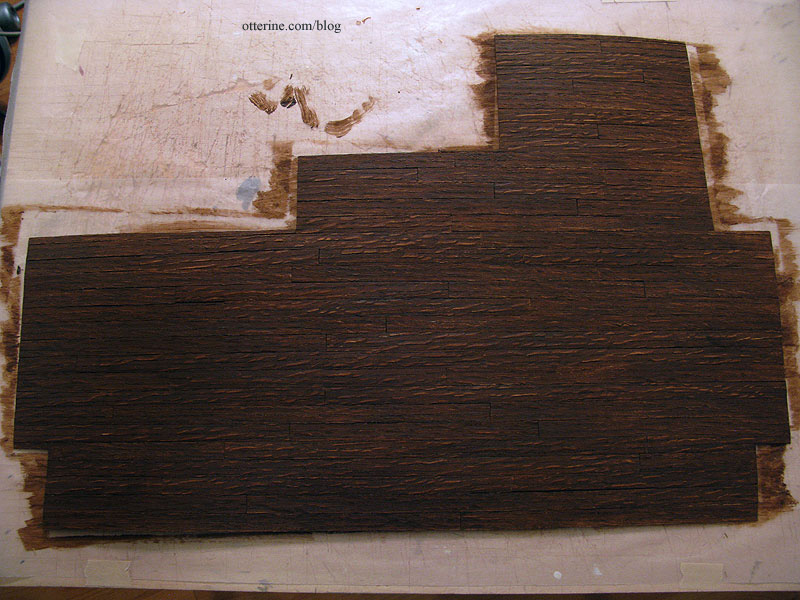
I shingled the new back roof, adjusting the shingles I had cut using the template. Here is the right side.

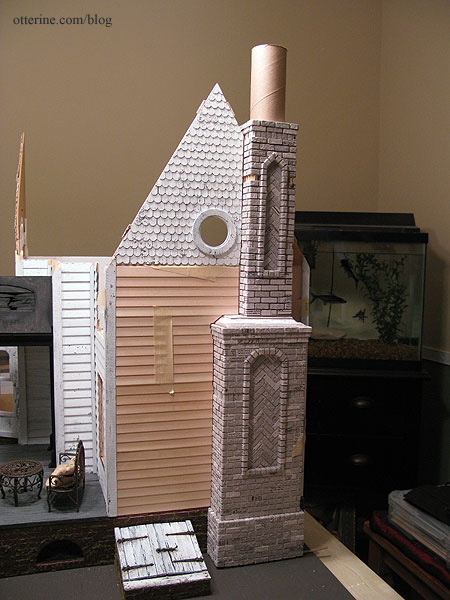
And, the left side. The chimney is still removable.
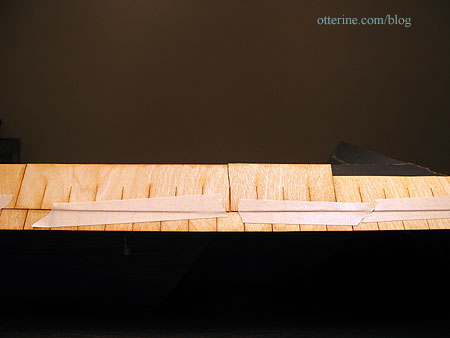
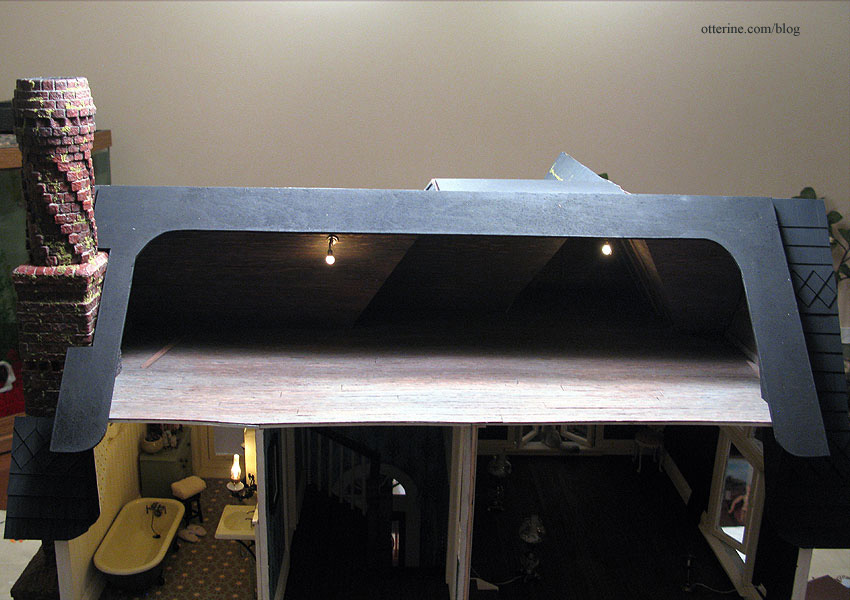
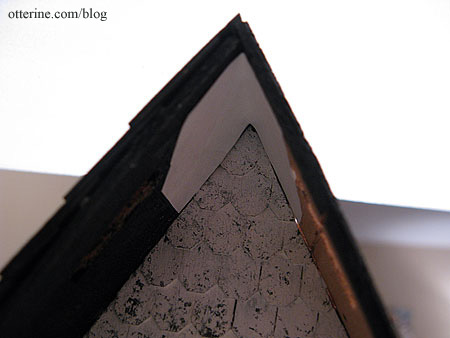
There are two long rows of shingles to complete the top. Before gluing on the top row, I taped it in place and marked where the roof ridge hit behind them. I cut the shingle strips along that line and glued them in place.
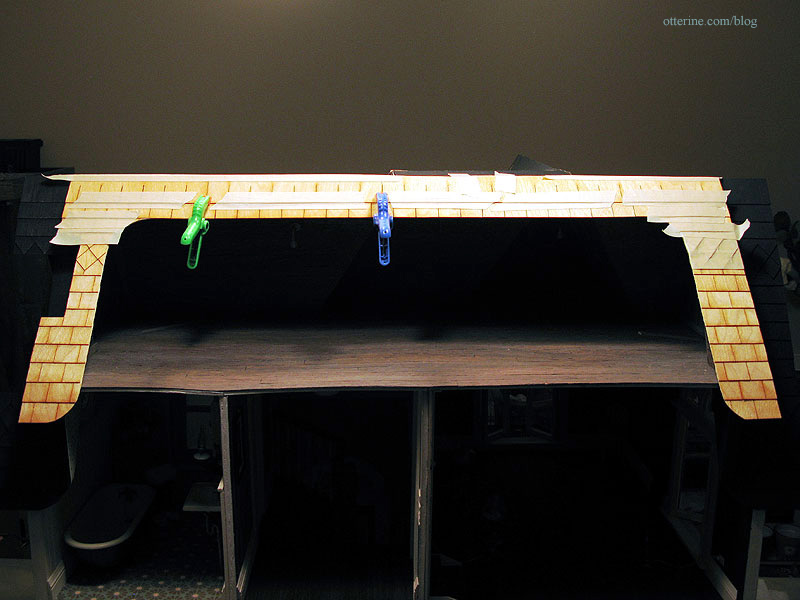
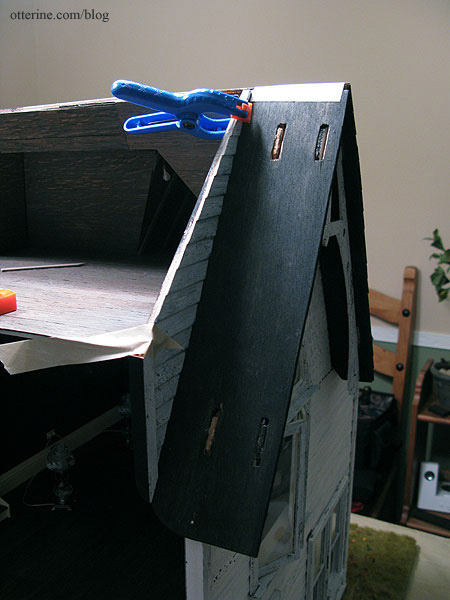
I taped and clamped the shingles to dry overnight.
Categories: The Haunted Heritage
January 21, 2013 | 0 commentsGrandma’s attic – faux slats and rafters, part 3
I continued working on the faux slats and rafters for the attic. After getting the attic flooring done and installed, I cut the rafters to fit the forward gable and glued them in place.
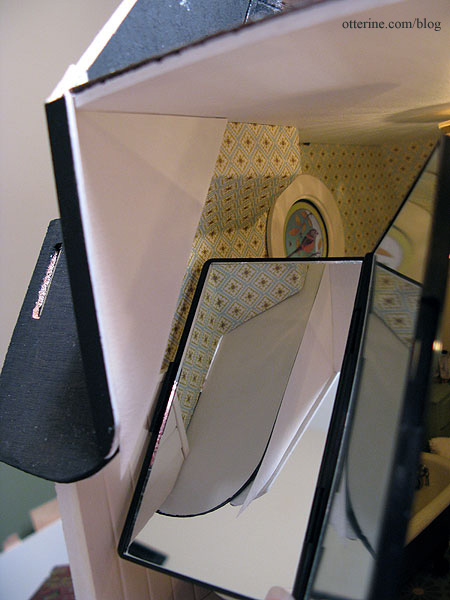
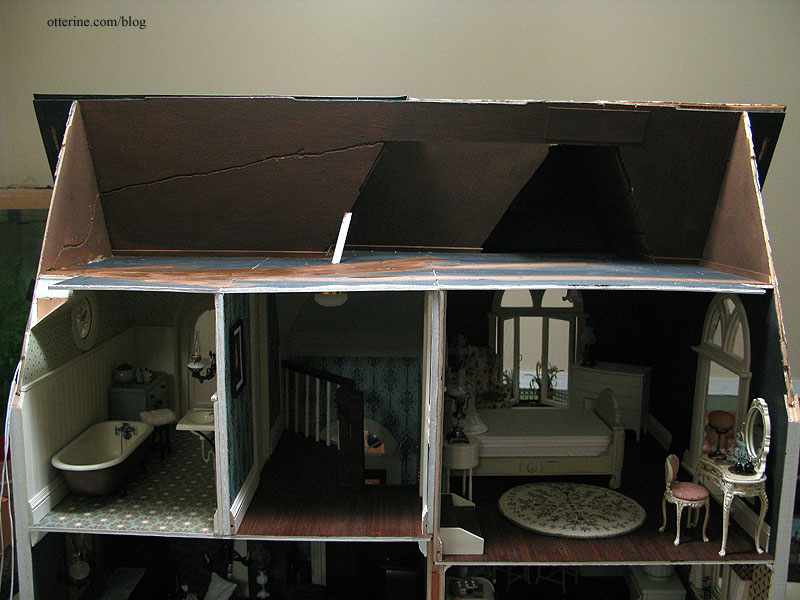
After adding the remaining roof pieces to finish off the back of the house and attaching the chimney to the house, I was able to work on finishing those portions of the attic walls. Had to use a mirror to work in some tight spots.
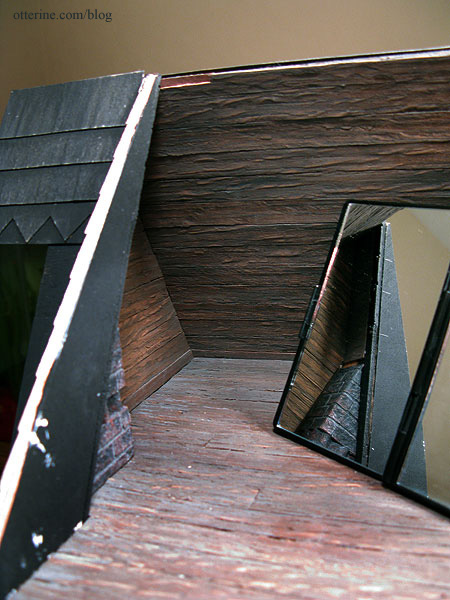
I glued in the beams and rafters in the two side gables and cut rough rafter lengths for the adjacent walls that will be trimmed to the correct length during final installation. I trimmed around the chimney as well.
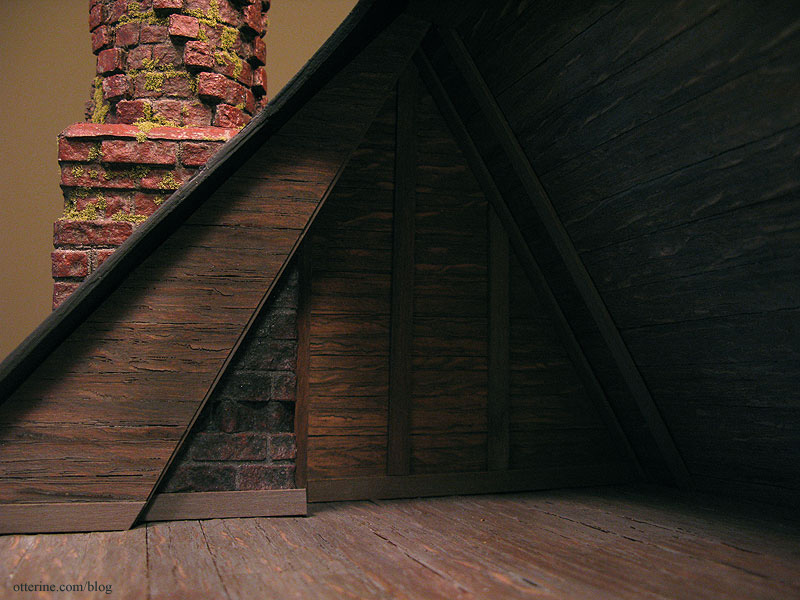
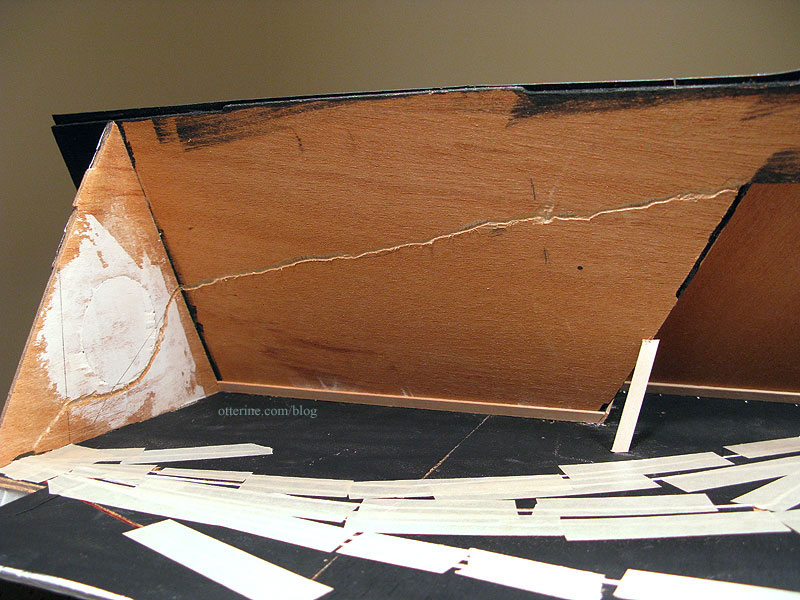
I installed the main long beam made from the triangular strip wood used in the forward gable. Because the angle of the roof changes with the added back dormer, the triangular beam spans only between the two new roof side addition walls. The unpainted portion will be covered by the new roof back piece. It is secured mostly by tension with a spot of glue and tape in the middle.
Categories: The Haunted Heritage
January 20, 2013 | 0 commentsHeritage – back roof dormer, part 4
Continuing work on the back roof dormer. I added the remaining side roof piece and its roof addition wall. I used the same pin technique used for the opposite side to help counteract any warping in the attic floor. I added some Tyvek reinforcements to the attic interior and over the roof ridge. The roof ridge finishing will cover this patch.
I shingled the back roof piece, first by making a template and then shingling directly onto the house before painting the new shingles to match.
Moss will come later.
I cut the new back roof piece from 1/8″ thick plywood using my foam template as a guide and then primed both sides with black acrylic paint. I finished the top of the flat roof with sandpaper and painted it black, too. Both final roof pieces remain unattached at this point.
I cut a paper template for the interior attic slats and rafters treatment as well as a template for the exterior roof shingles for the new back roof piece.
Next, I have a whole bunch of trim to add to the house, and most of it needed to have white paint crackled over black. Figuring it would be easiest to paint first and then add touch-ups to any clipped ends, I painted all of the long strips of wood whole. Those are drying right now.
Categories: The Haunted Heritage
January 19, 2013 | 0 commentsHeritage – back roof dormer, part 3
Continuing work on the back roof dormer. Since I last posted about the dormer walls, I’ve added the aged paint treatment to them.
Before gluing the roof addition wall onto the roof, I adjusted the template for the shingles. I can’t place any thickness under the chimney portion, so I marked where the shingles will be. This is going to be an interesting bit of shingling.
The lower portion of the left side roof addition completes the bathroom outer wall and the upper part is an attic wall. I primed the top black and the bottom white. A warp in the bathroom ceiling board developed on this corner when I installed the attic flooring. I held the ceiling board down with masking tape while I mapped out my plan.
First, I drilled a bunch of holes in the ceiling board where it would be glued to the roof addition wall. I cut the ends from straight pins to make headless pins and glued them into the drilled holes.
To mark the same spots on the roof addition wall, I dabbed some black paint onto the end of each pin and lightly pressed it to the wall. I drilled holes to match and tested the fit but didn’t get a photo.
I drilled three holes in the roof board to stabilize the join with the roof addition wall. I marked where these would be along the wall and drilled holes into the roof addition wall. I cut the pins to fit.
I added another pin in the bathroom along the roof board. I removed the longer pins from the roof board and spread glue where the pieces would meet. I pressed the wall into place along the short pins in the ceiling board. I then inserted the longer roof pins into the predrilled holes. This wall is solid!!! Hooray! :D
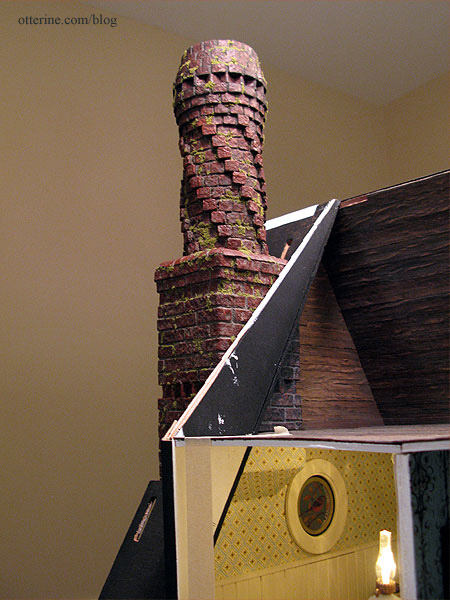
The below photo shows the exterior main chimney, the attic chimney and the covered chimney section in the bathroom. When viewed together, they create the illusion that the chimney is a solid structure with the house built around it.
I made templates for the two areas where the roof board and the roof addition wall show in the bathroom. I had to check the fit of the interior one with a mirror because there is no way to see in there otherwise. I also used the mini bathroom lights as work lights. :D
I then made a template for the attic wall. This will have the same slat treatment as the rest of the attic.
Back to the roof template for shingling. I started at the bottom and followed the same square and diamond pattern I had done for the front roof. Once that section was cut and fitted around the chimney, I clipped it to the front roof to mark where the shingles would align.
I finished the shingling and fitting on the template following these markings. I’ll adjust that top row of diamond shingles on the lower half to be straight across when I do the final shingling.
Looks like it worked! :D
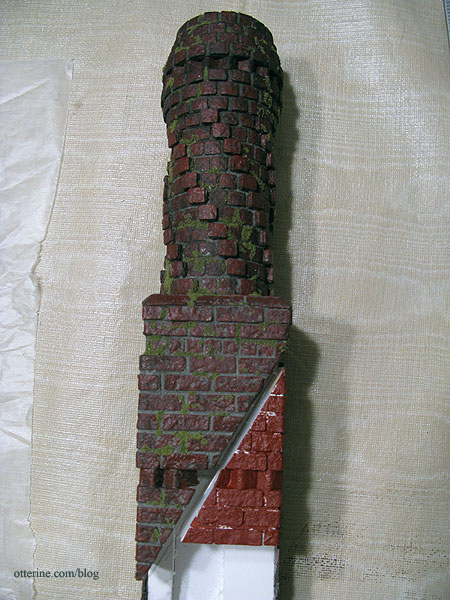
After gluing the shingles to the roof board, I painted the new roof with a blend of black and grey, then sanded the surface slightly to wear down the finish.
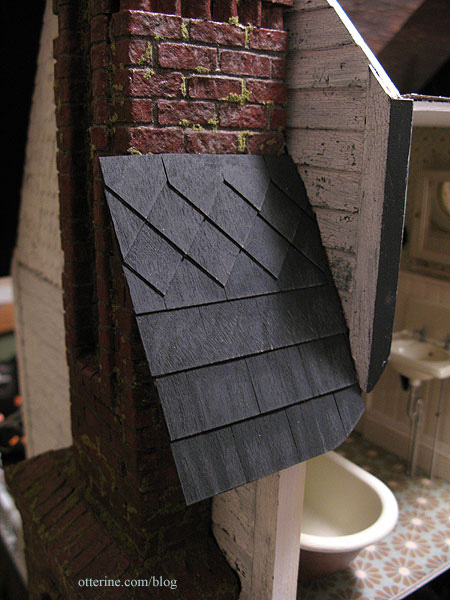
I still need to add the moss and address the flashing on the chimney, too. (From my limited research, I believe chimney flashing is usually under the shingles on the sides, but we’ll just ignore that.)
Categories: The Haunted Heritage
January 13, 2013 | 0 commentsHeritage – chimney side gable trim
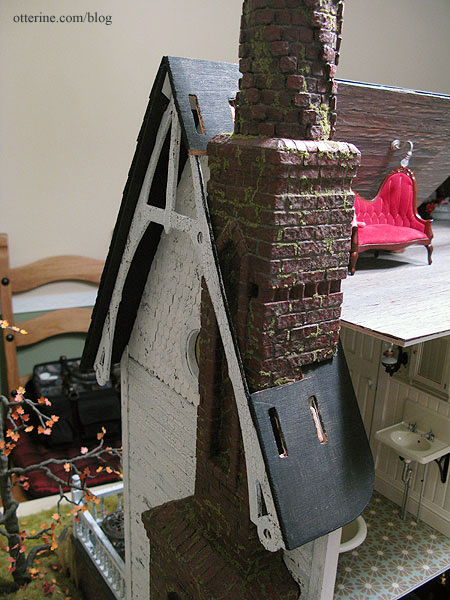
Unlike the front and left side gables, the chimney gable on the right posed problems with the gable trim. The chimney sticks out further than the roof edge and therefore blocks the space where the gable trim is intended to be.
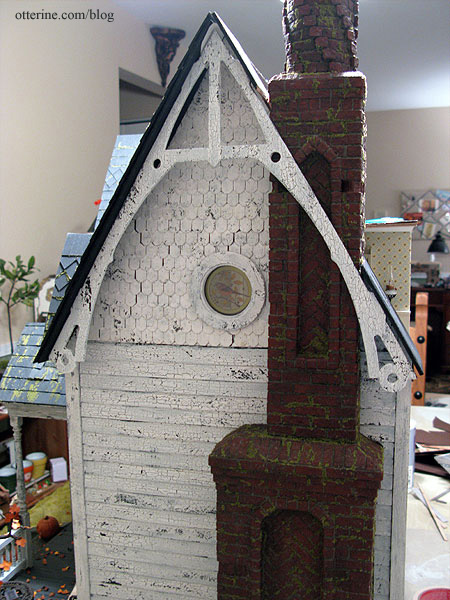
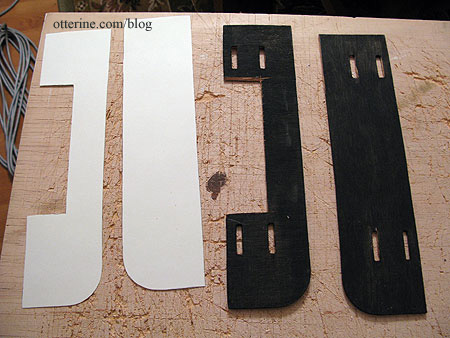
The gable trim’s tabs should align with the slots on the roof.
Whenever I have a situation like this, I try to find at least one real life example of a solution. In this case, I found one from Eastern Kentucky University. This shows the gingerbread trim added on either side of the chimney. Works for me! And, yes, had I thought this through earlier, I might have made adjustments to the roof boards, the chimney or both.
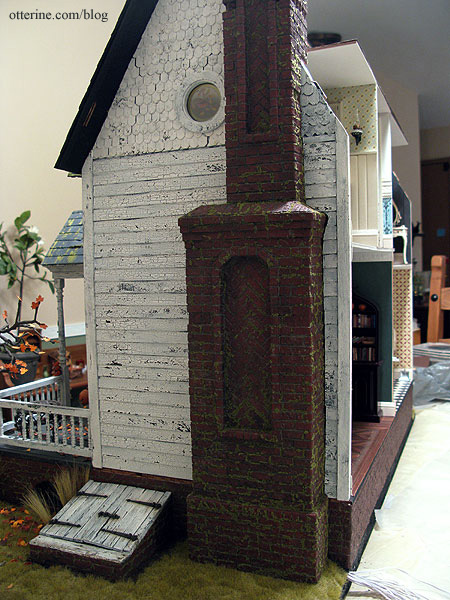
I lined up the whole gable trim piece with the chimney in place (but still removable). I marked the break on the main part first and made a few cuts to get a good fit. I had to adjust the tabs on the gable trim to fit better. Once I had that portion figured out, I measured and cut the smaller piece on the other side. Success!
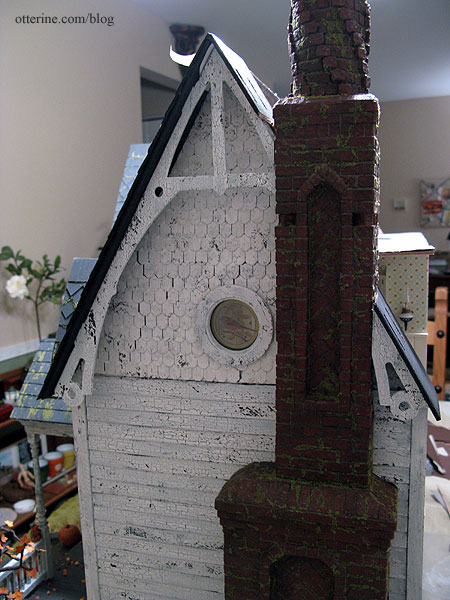
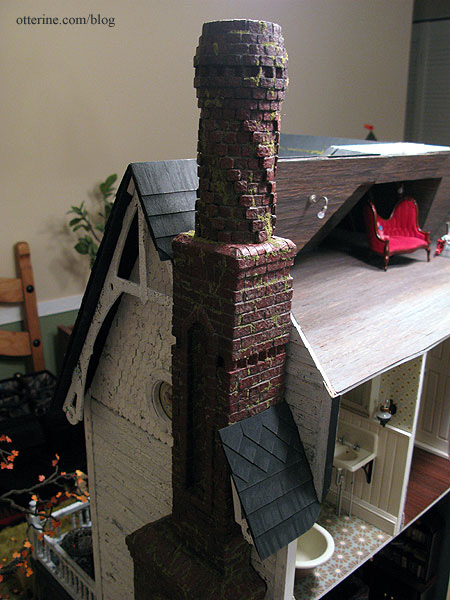
Completed chimney gable here.
Categories: The Haunted Heritage
January 12, 2013 | 0 commentsHeritage – back roof dormer, part 2
Continuing work on the back roof dormer. There’s a good deal of chicken or the egg happening with the attic and its new roof addition. Before I can glue the back roof pieces on, I need to finish them as much as possible. It is close to impossible to work on these areas once in place, because you effectively have to work backwards and without a clear view.
Since I will be cutting a new U-shaped back roof piece, I cut the original side roof pieces flush with the roof addition side walls.

I made a template of these pieces to help me with the interior attic boards and exterior roof shingles.
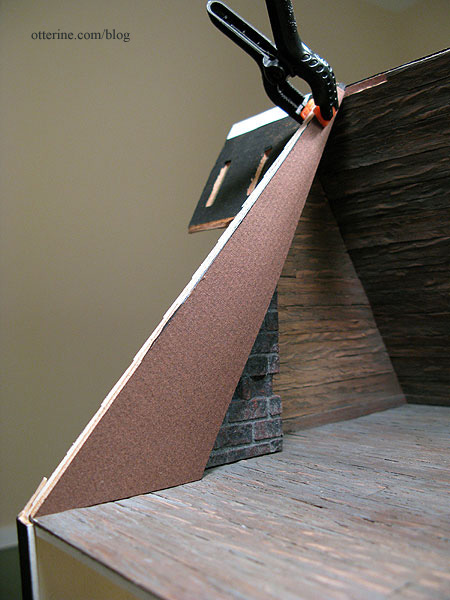
The roof addition side walls needed siding on the outside, which is easiest to apply when you can press the pieces flat to dry. I used scraps of the 1/2″ lap Houseworks siding I had used for the replacement side wall. To finish off the edges to match the rest of the house, I used 3/8″ corner molding for the back edges. I thought regular siding made more sense than matching the shingled gable since this is an architectural feature in the back of the house and not a decorative feature seen from the front.
I glued on the back roof piece for the left side and reinforced the joins with Tyvek where I could.
I did the same thing at the inside peak of the gable. Had I not finished the front roof previously, I would have added the Tyvek over the roof ridge instead.
Categories: The Haunted Heritage
January 11, 2013 | 0 commentsReplacement side wall siding completion
Remember how carefully I planned the siding around the chimney?
Yeah, well, it was somewhat a waste of time because it no longer lines up. I’ll need to edge the chimney with trim, which won’t detract from the realism.
But, before I can glue the chimney in place, I do need to finish up the rest of the siding for the wall and the gable. Since it would be a better fit if the gable shingles were under the chimney and the wall siding outside the chimney, that was the way I proceeded.
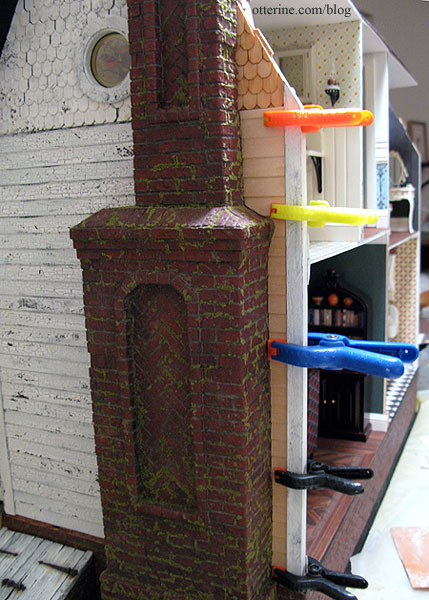
I painted and aged the siding and gable shingles to match the rest of the house.
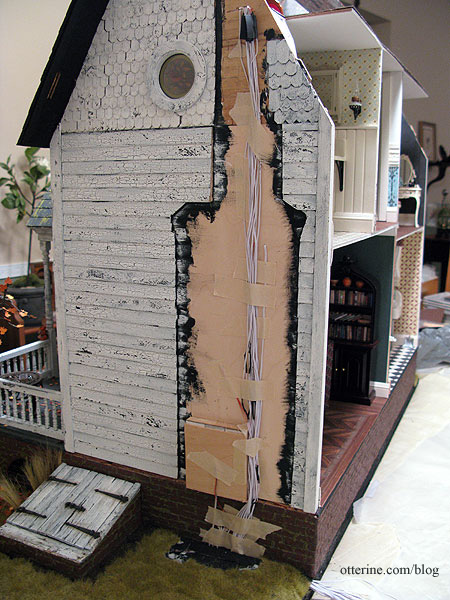
I replaced the sliver of builders foam to cover the mass of wires at the base. I didn’t glue it…just pressed it into the groove.
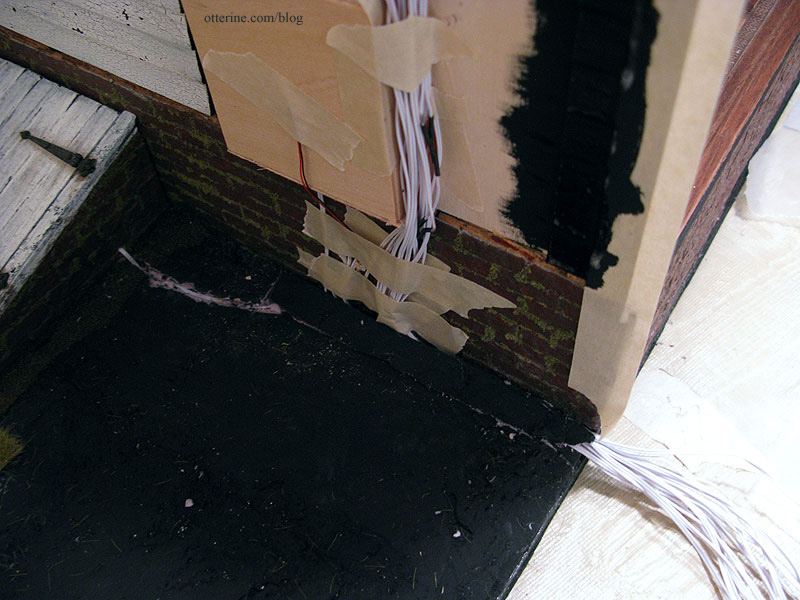
I painted the wire from the flickering LED in the fireplace and finished up the landscaping on this back corner. Well, there’s more to be added here and there, but the grass is in place.
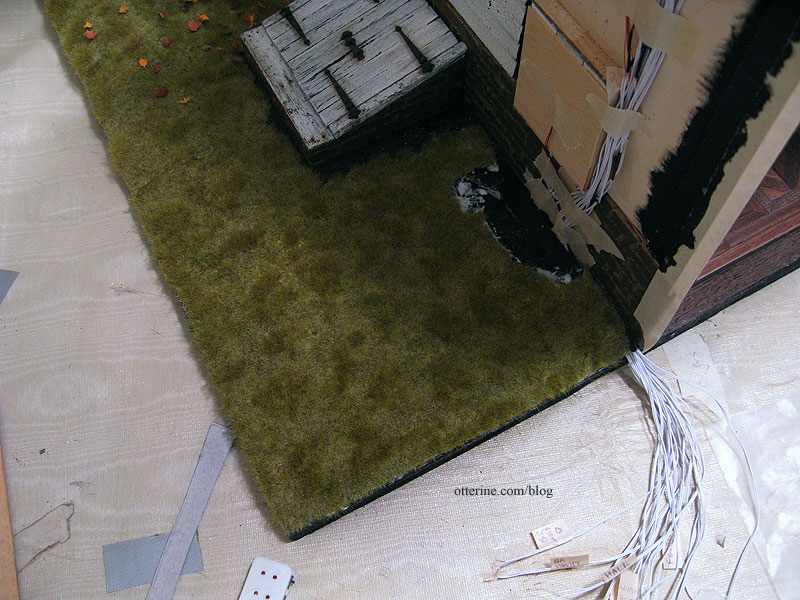
The chimney will cover the bare spot. :]
Categories: The Haunted Heritage
January 9, 2013 | 0 commentsHaunted Heritage chimney, part 10
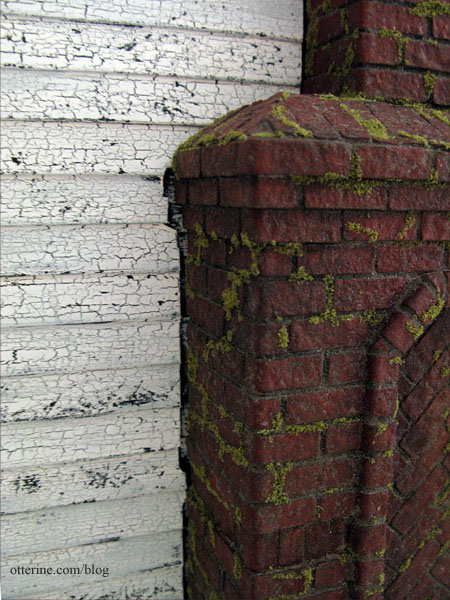
Continuing work on the chimney. I’ve bricked the interior chimney section. I will add trim around the bottom to disguise the fact that it will sit on top of the attic flooring.

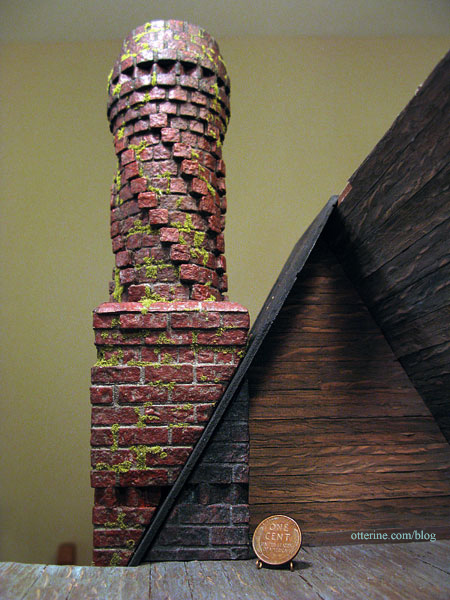
It won’t really be seen side by side with the main chimney, but I did match up the rows of bricks. :D Here it is with its initial coat of Liquitex Burnt Sienna.
After grouting and aging the interior chimney piece, I installed the attic wall board and the chimney piece. The main chimney is still removable. Once the dormer wall is in place you won’t be able to see how well it all lines up, but I have this photo to prove it. :D
The below photo shows the exterior main chimney, the attic chimney and the covered chimney section in the bathroom. When viewed together, they create the illusion that the chimney is a solid structure with the house built around it.
Categories: The Haunted Heritage
January 8, 2013 | 0 commentsGrandma’s attic – wood floor
Before the rafters and support beams could be put in place, the floor needed to be finished. Since I had so many wood strips on hand, I decided to use them for the flooring in addition to the walls. I made a template of the attic with plain paper first and adjusted the fit accordingly.
I then used that to make my final brown paper template.
I set a bunch of strips on the template to give me an idea of where the pieces would fall front to back so I could plan any less-than-full-width boards.
I glued the wood on in random lengths, one at a time. This took quite a bit of time. I painted it before gluing it in place, following the same process as the walls though I did sand once in between two coats of the initial brown base. I figured the floor would be smoother than the walls. I don’t think I’ll be foregoing pre-made flooring sheets for good, but it is a lovely look in the right circumstances. :D This would make a fine country floor.
I “dusted” the corners and edges a little more with a heavier application of Slate Grey mixed with Staining Antiquing Medium. I also finished up the remaining wiring and tested all the lighting beforehand. This is by no means a guarantee that things won’t go awry in the future, but I at least know the connections were sound up to this point.
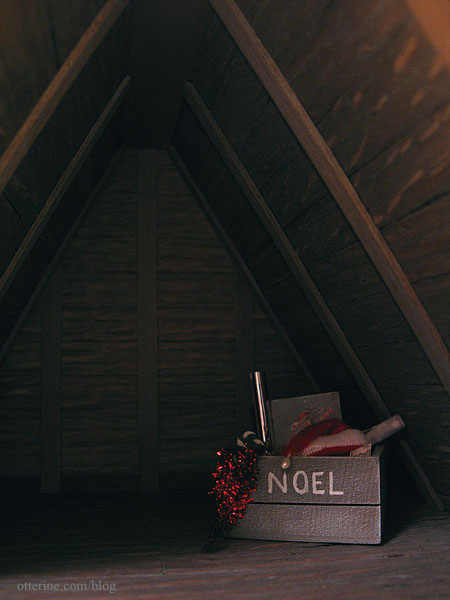
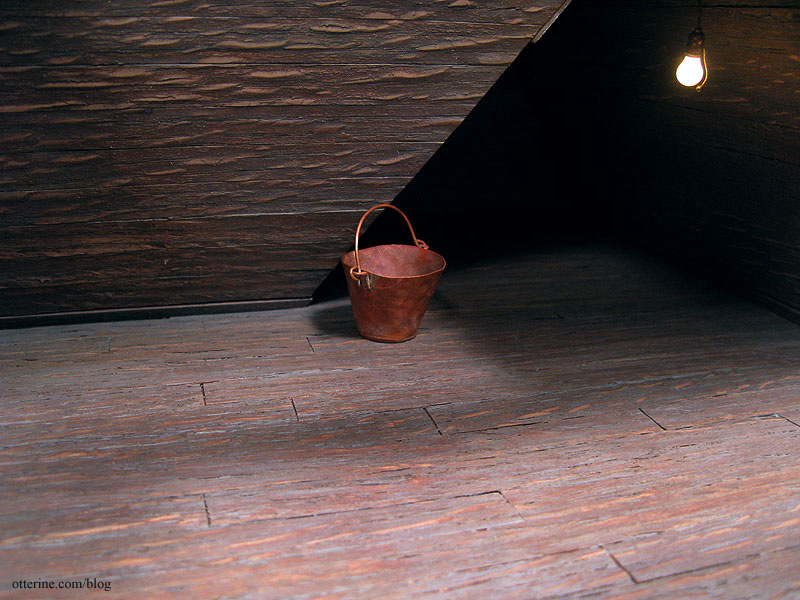
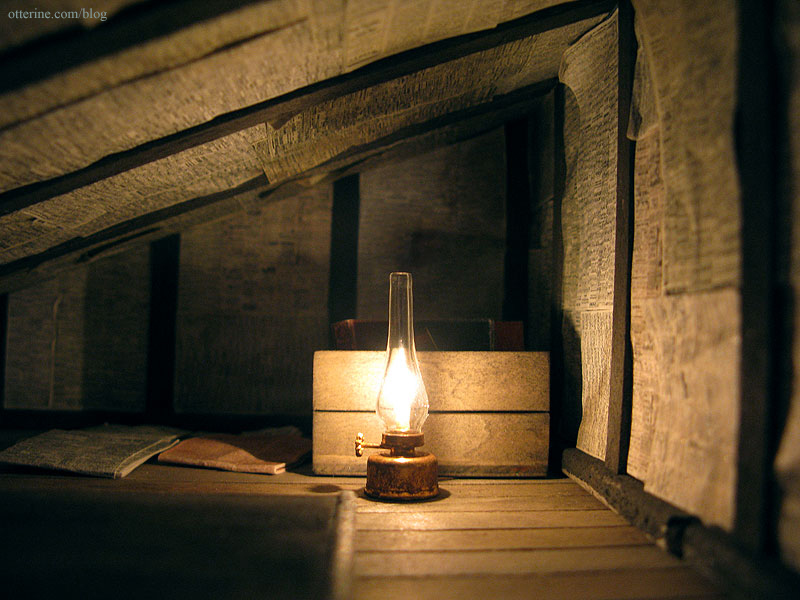
I tested the fit a final time and took a couple of photos to make sure the finishes looked good together. The floor appears dustier than the walls, which is the look I was aiming for. The copper bucket is from Celtic Juju.
I had been gluing in the templates with Aleene’s Quick Dry, but this time I used Yes paste since it would give me more time to apply the adhesive to the large surface. I taped the edges down and now it just needs to set. I will have to finish the back portions of the roof before I can install the beams and rafters, but I think it’s coming along well. (Note: I no longer recommend Yes paste – I use Wallpaper Mucilage instead. Yes paste has problems with longevity.)

The box of Christmas items was made by M Carmen; the snowman bead was purchased.
Categories: The Haunted Heritage
January 6, 2013 | 0 commentsGrandma’s attic – faux slats and rafters, part 2
I continued working on the faux slats and rafters for the attic. Now, the front gable portion is small to work in, but it is manageable. Even so, I was not able to get in there to measure. I used the original gable template from the side gable and used that as an approximation. It worked very well.
Since I used the roof templates to make other templates after the shingling was done, I had to start over with those. I made the front gable templates by placing the paper on the outside of the roof to get the basic shape and size. Note to anyone making a Heritage: make at least two templates of these roof pieces and keep them until you’re finished!
I then cut them down to fit.
I added the wood, painted and measured the rafters. Here are the forward and right side pieces in place.
I didn’t remember to mark the rafters on the right side gable, but I did remember on the left side. It shouldn’t be much of a problem figuring it out from there.
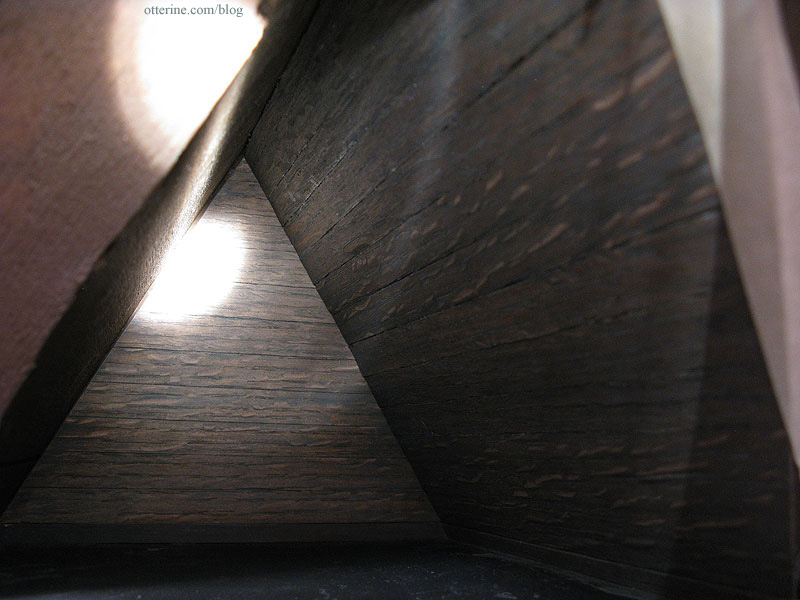
For the inside peak, I used a triangular piece of wood from my stash. This isn’t listed in the Heritage parts, so I am guessing it came from the old lost Dura-Craft kit. The piece I had is long enough to use both here in the gable and for the main span across when I get to that part.

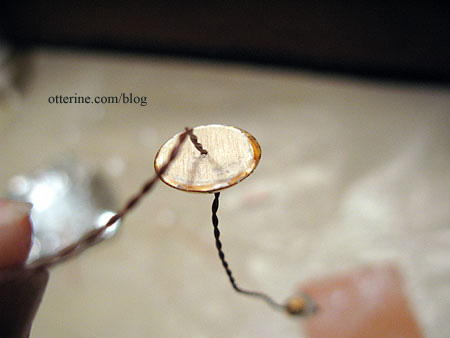
I painted it to match and then glued it in place. I installed the hanging light from The Lighting Bug and pulled the wire through. I aged the ceiling plate and socket with acrylic paint since it wouldn’t be handled at all.
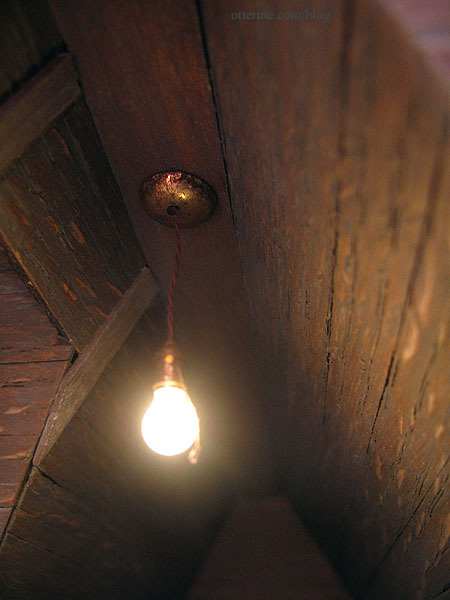
I love this light!!!! :D
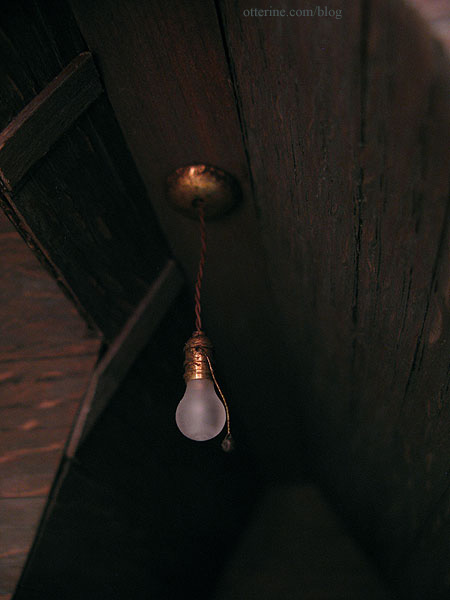
One tip for these. The ceiling plate is hollow, so I added a small Woodsies circle to steady the whole thing. The Woodsies circle is glued to the plate and the ceiling board.
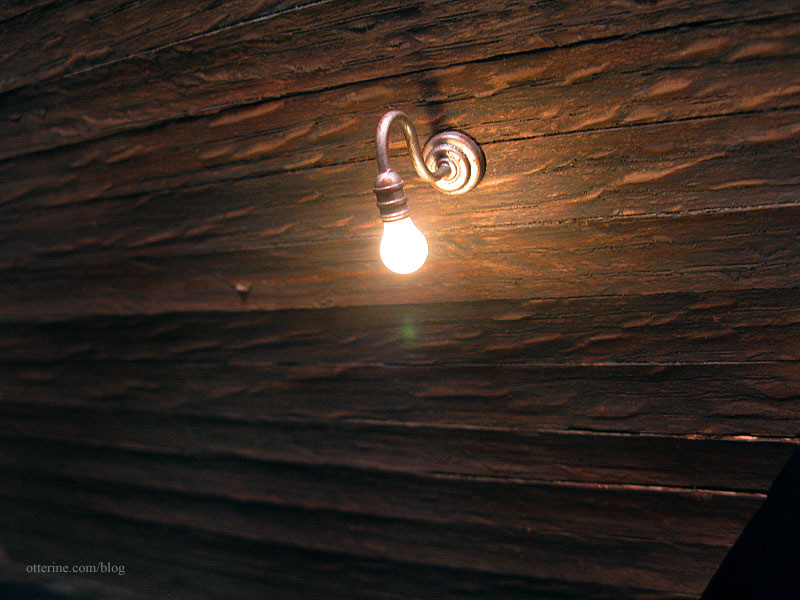
I finished up the rest of the front roof walls and installed the wall light, also from The Lighting Bug. The left side gable and its floor support will be installed after I get the attic chimney completed.

I love this light, too!!!! :D
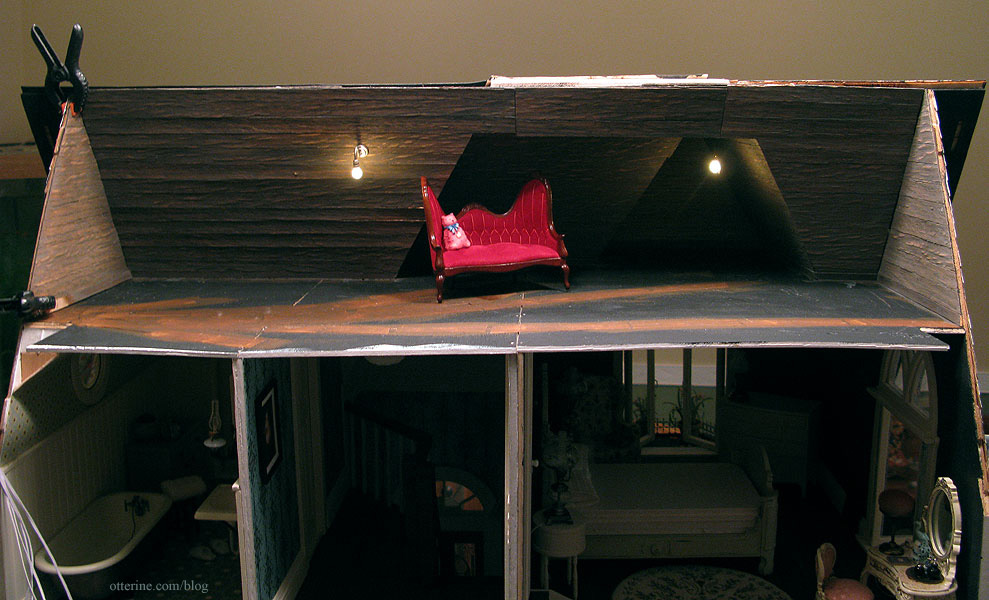
I think this rustic background will be perfect for the antiques and treasures stored here.
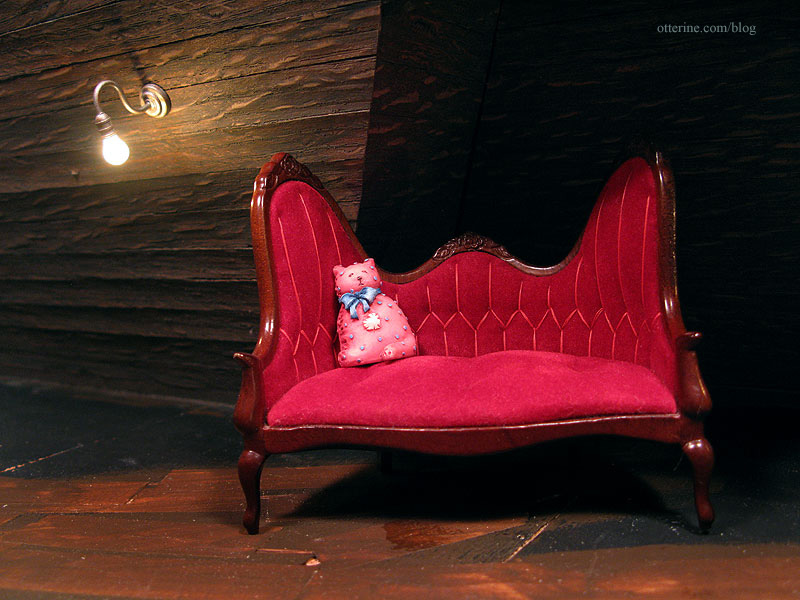
Rafters and detailing still to come…
Categories: The Haunted Heritage
January 5, 2013 | 0 commentsGrandma’s attic – faux slats and rafters, part 1
I’m mulling over the idea of using vintage newspaper to line the attic in the same manner as the attic in Baslow Ranch.
But, I also like the look of exposed wood in an old attic regardless of the energy inefficiency. Since I know what a newspaper covered attic would look like, I decided to try a wood slat attic. I can always cover it if I don’t like it, or do a combination of the two. :D
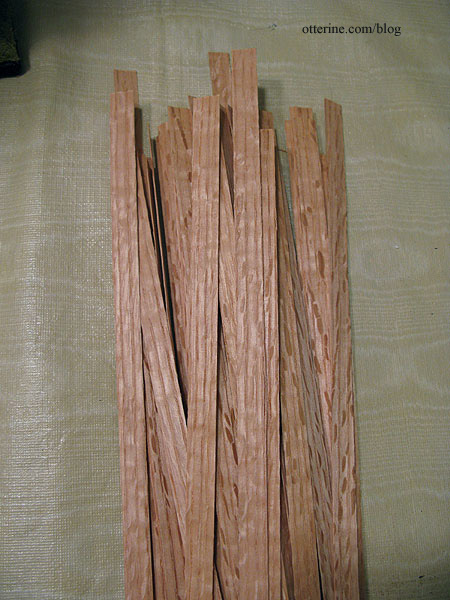
I used Dura-Craft wood flooring strips for the roof boards. These are pieces from both the old lost Dura-Craft kit and the Heritage.
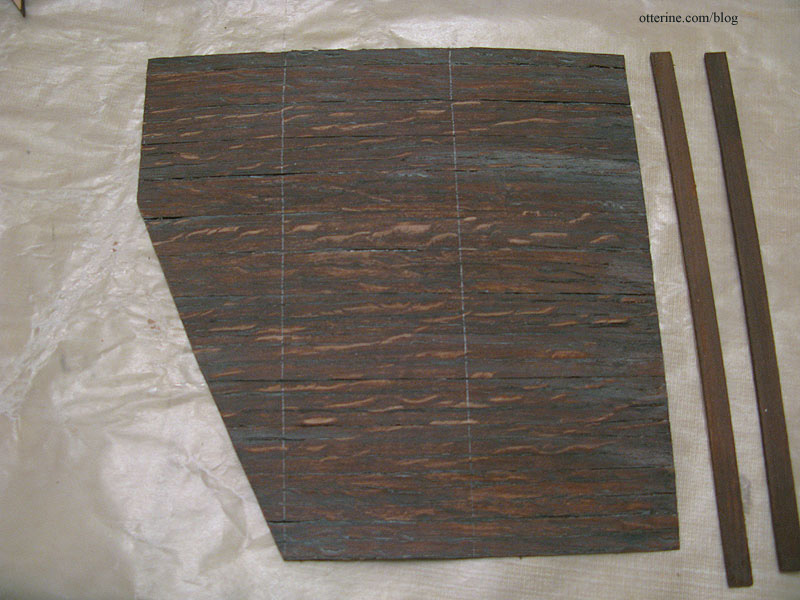
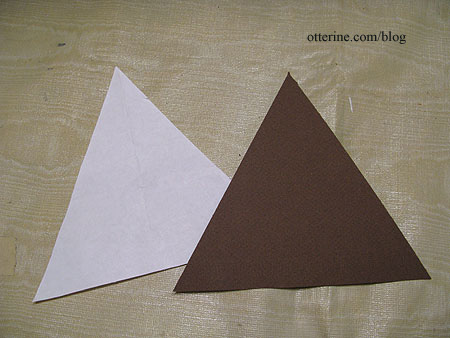
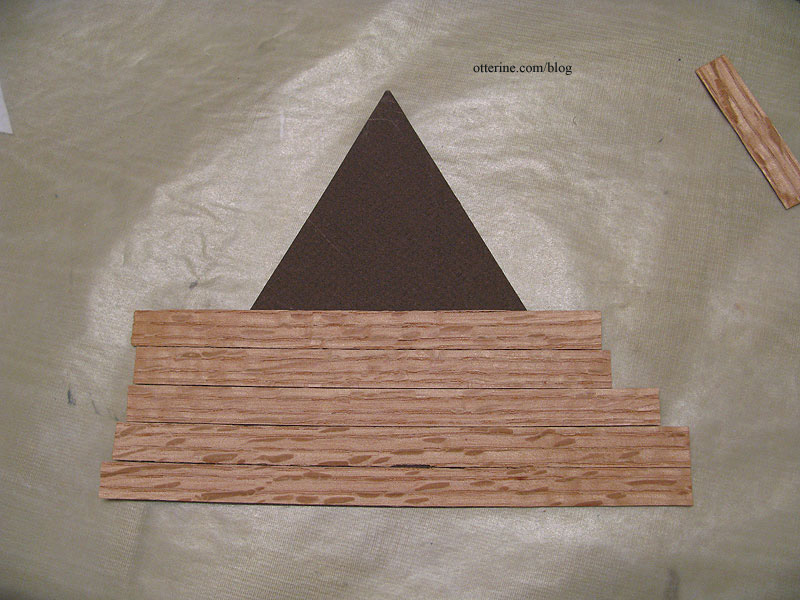
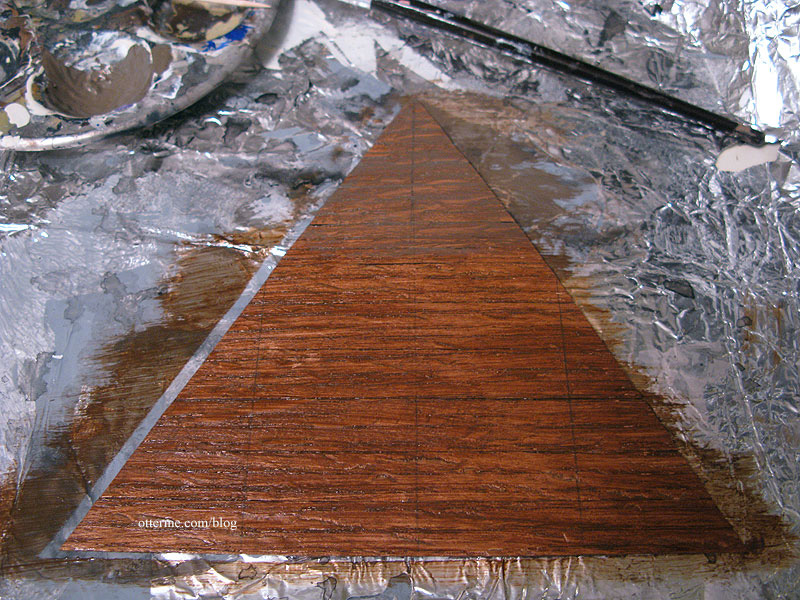
I started with the three gables that are roughly the same size and shape, because they are the smallest and simplest pieces. If I didn’t like the result, I wouldn’t have wasted much time. I made a regular paper template of the side gable and then made the final template from dark brown paper in case it showed through.
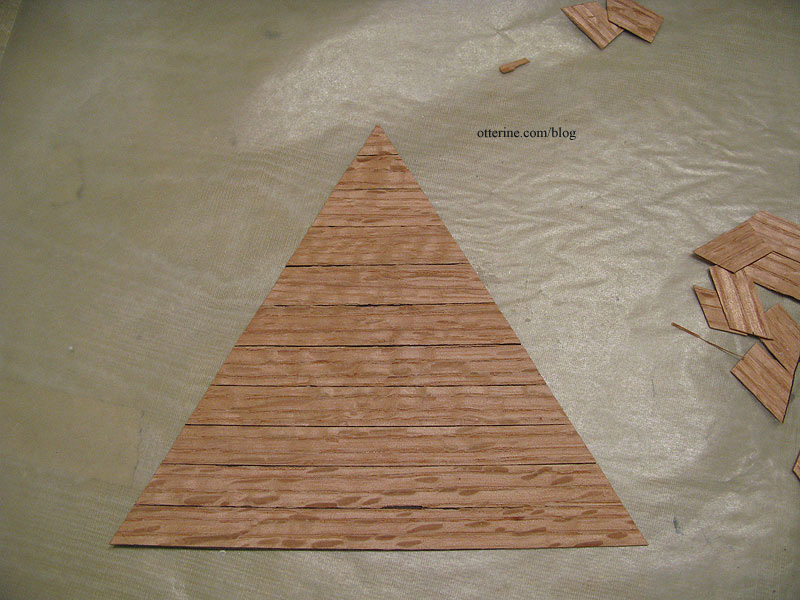
I glued wood strips to the back of the template, leaving them long.
I then cut around the template.
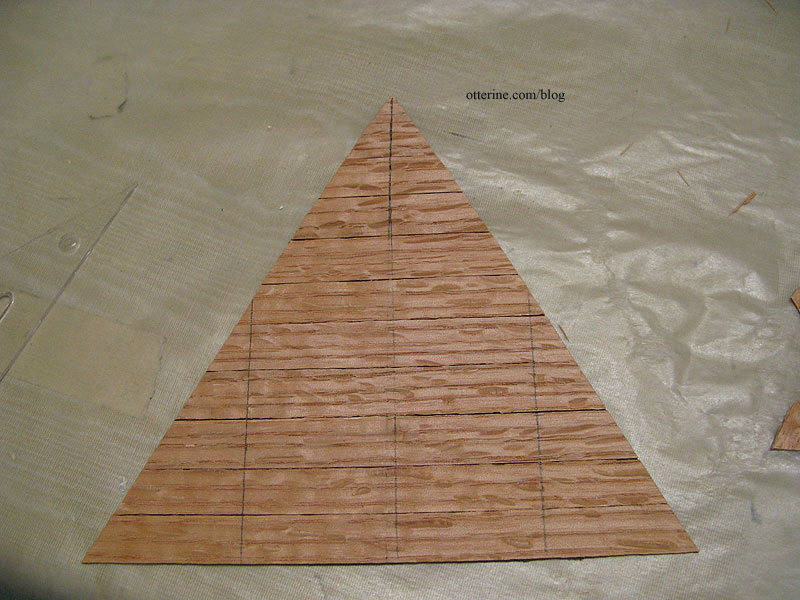
I checked the fit and then marked the visual center and the location of the two side supports.
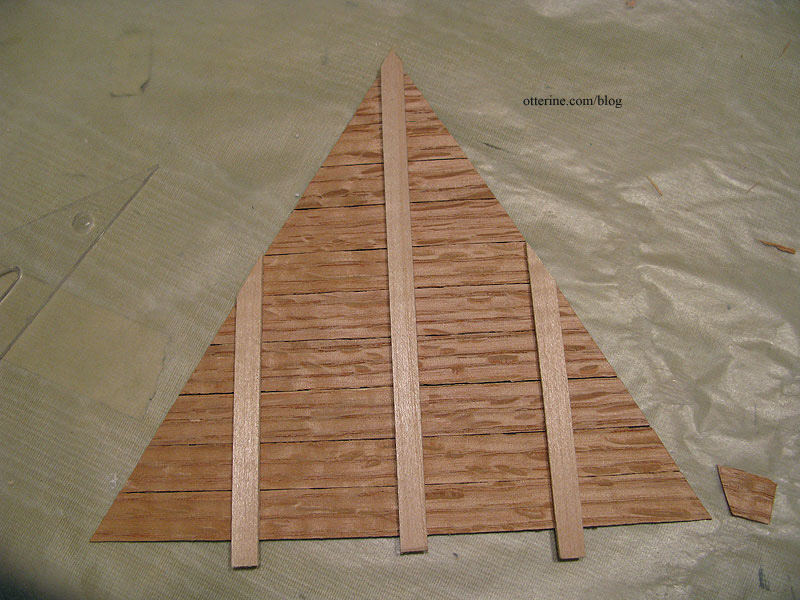
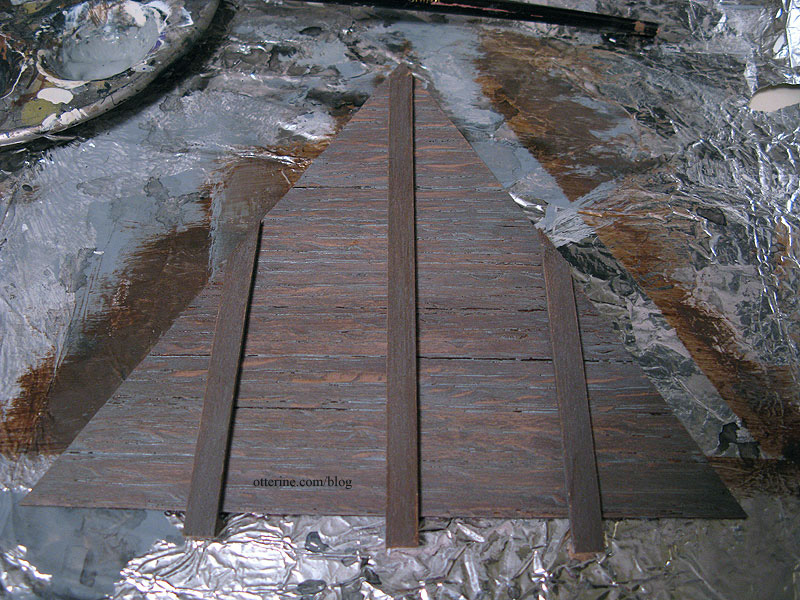
I cut rafters from 1/16″ x 1/4″ strip wood. If this were an actual roof, the rafters wouldn’t be flat, but I wanted mainly the look of an attic more than an architectural model.
I decided to add color before installation in case I needed to press the boards flat as they dried. I stained the wood by mixing Staining Antiquing Medium with Asphaltum, both by Americana. It was a rich color I will definitely keep in mind for future use, but it was too new and warm for an old attic. I added a stain of Staining Antiquing Medium mixed with Neutral Grey by Americana. It toned down the brown.
But, it wasn’t “dusty” enough, so I added a third stain of Staining Antiquing Medium mixed with Slate Grey by Americana. Very nice! Of course, I had to add this grey layer to the support boards I had primed brown previously.
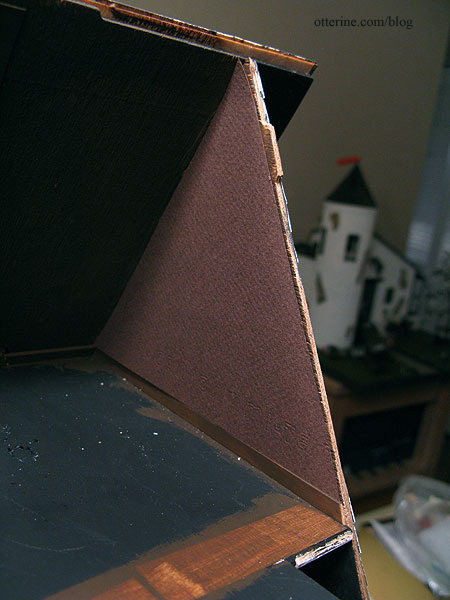
Once dry, I checked the fit again and then glued the main piece in place. I won’t glue in the rafters until I get the rest of the walls done and the floor installed, but I propped them up with mini hold wax.
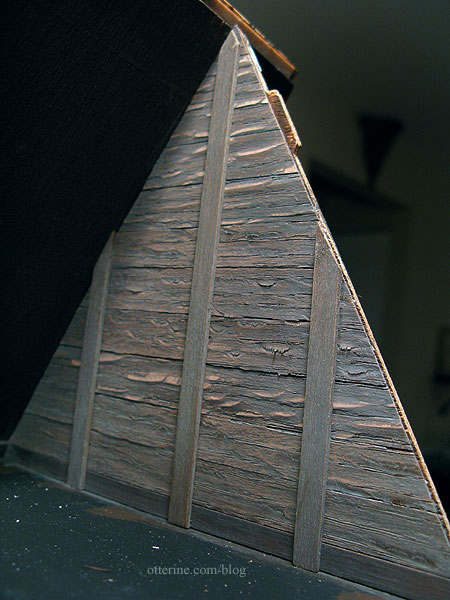
I absolutely love the way this looks! I didn’t sand the boards or the rafter pieces, and I think that really solidifies the rough-hewn look. Hooray!
Categories: The Haunted Heritage
January 4, 2013 | 0 commentsGrandma’s attic – prep work
To help keep the ceiling board in place and (relatively) level, I glued in wood supports along the attic floor. These were cut very rough to keep with the look of an attic.
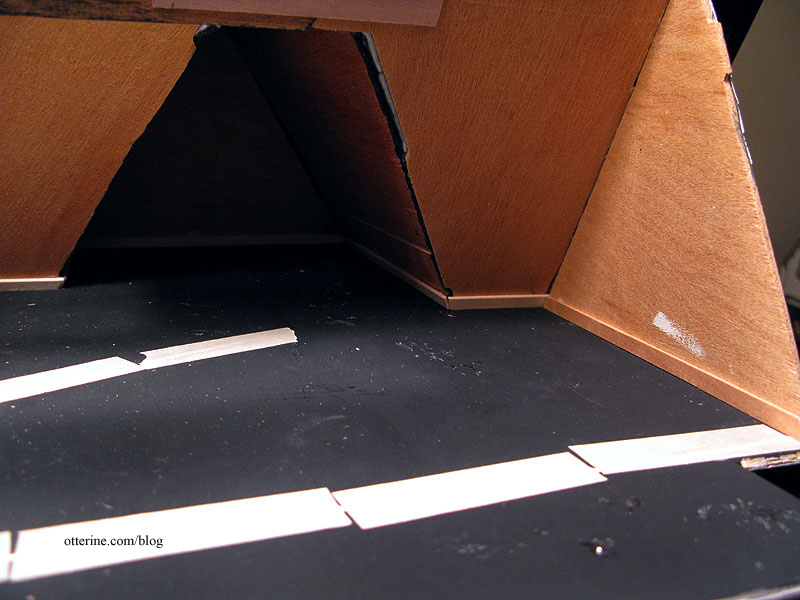
I cut a new plywood piece for the flat roof since the original kit piece was beyond warped and didn’t fit at all. It won’t be glued in place until I finish the interior of the attic.
I used my new Dremel to cut my first wire channel in place! How exciting! It’s not pretty, but it doesn’t have to be. It took two minutes and was easier than it would have been with the utility blade. With practice, I’ll be steadier with it. I made the channel around the circular patch where I first cut the round window. I didn’t want to weaken the patch. As you can see, there is no floor support on the side gable. That will be put in place after I get the attic portion of the chimney installed.
I then primed the attic walls and supports with Asphaltum by Americana. It’s already starting to look like a cohesive room.
Categories: The Haunted Heritage
January 3, 2013 | 0 comments


NOTE: All content on otterine.com is copyrighted and may not be reproduced in part or in whole. It takes a lot of time and effort to write and photograph for my blog. Please ask permission before reproducing any of my content. (More on copyright)

Antique drum nightstands, part 2
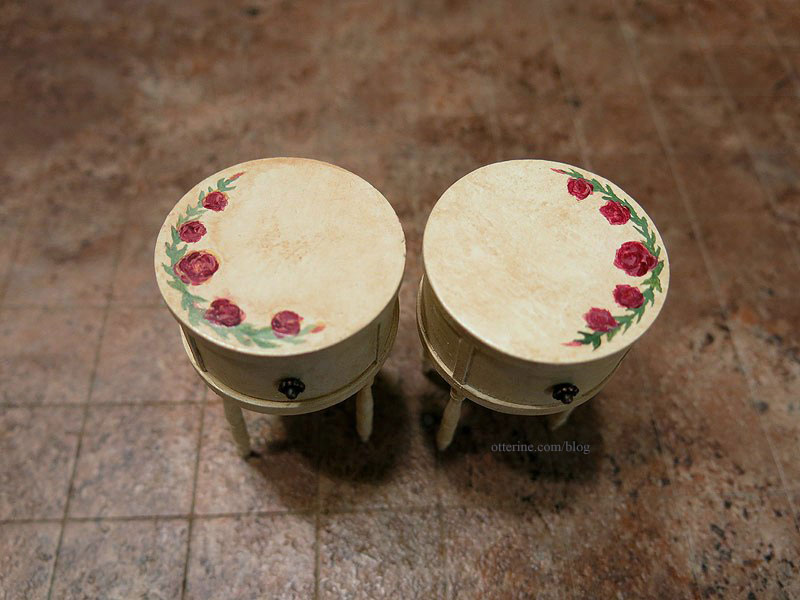
Continuing work on the antique drum nightstands. Instead of matching the painted bow front dresser, I chose a different design for the nightstands.
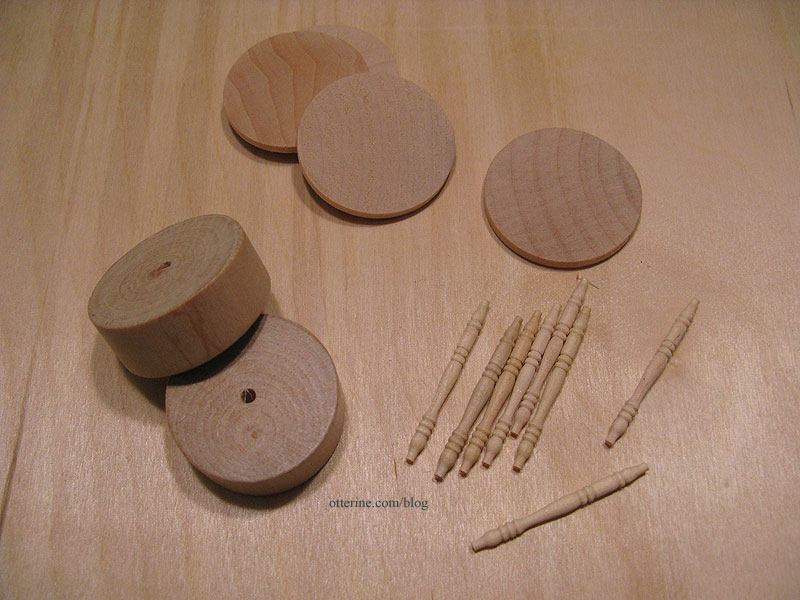
As a reminder, the nightstands were made from the round stands that came with my artist models, 1 1/2″ x 1/8″ wood circles and Houseworks 1 9/16″ long spindles.
I painted them with a base coat of Tapioca by Folk Art then added an aging wash of light brown. I then painted the green vines, followed by red and yellow for the roses.
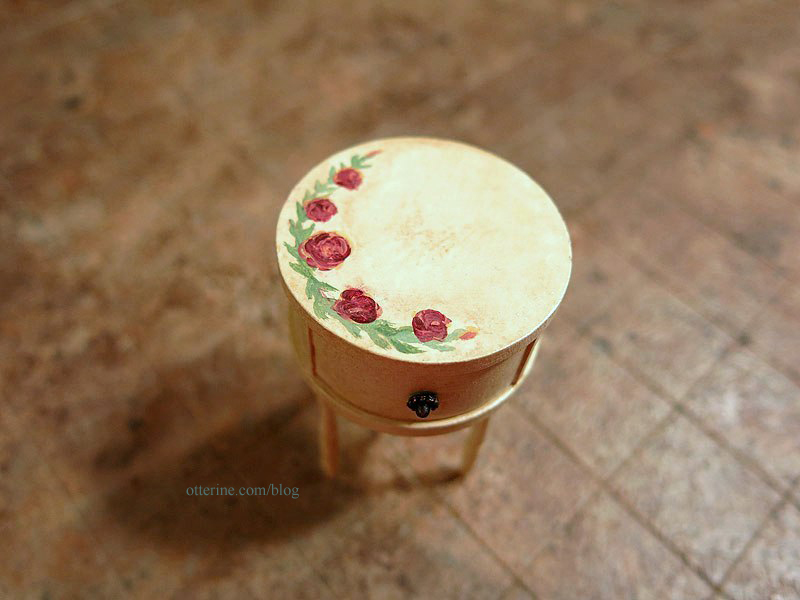
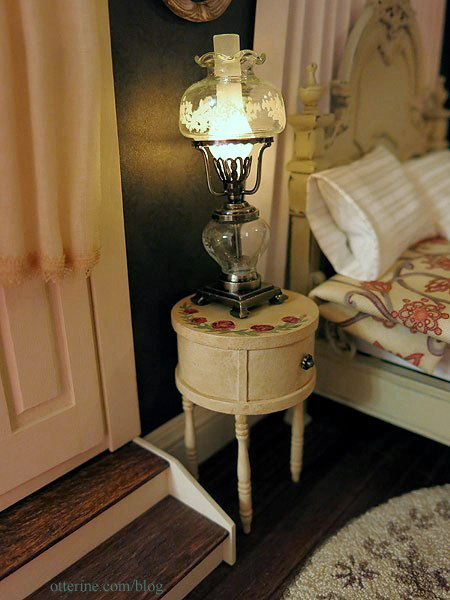
The knob is the fancy end of an antique copper headpin. I love the way it turned out.
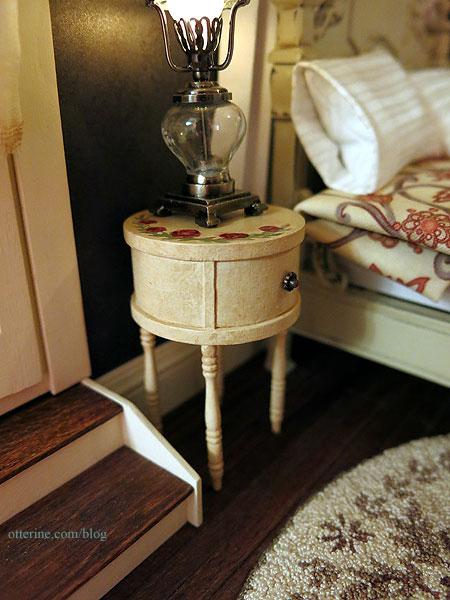
It fits in well with the rest of the furnishings.
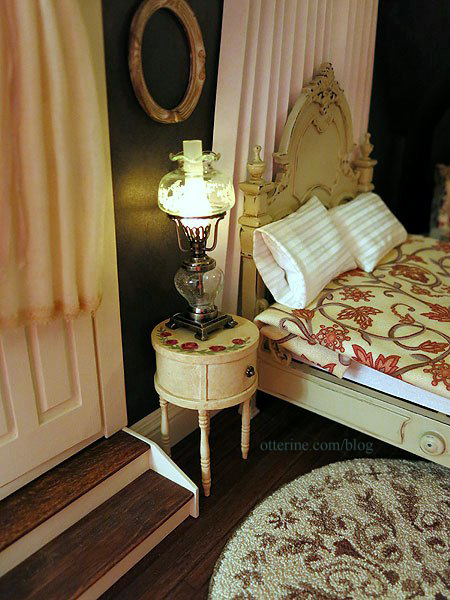
I finished painting the second nightstand, and they are a pretty close match to one another.

I opted for doing mirror image painting so they would look more like a planned set than two of the same table.
There’s not much room on them for anything besides the lamps, but it all seems to work well together.
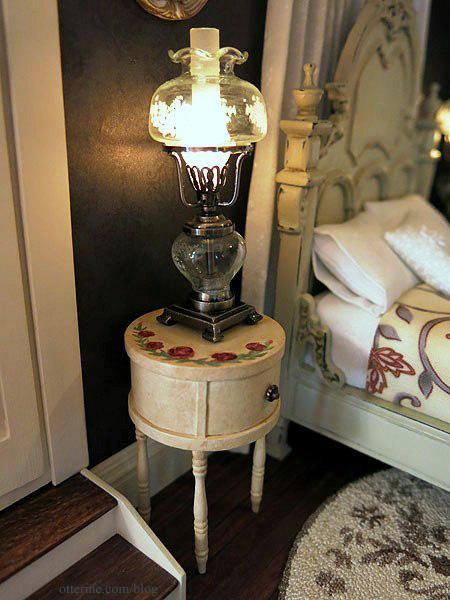
With these completed, this room is almost finished! :D
Of course, it hasn’t been fully accessorized yet, so stay tuned!
Categories: Furniture, The Haunted Heritage
August 1, 2013 | 0 commentsRepairing buckled wallpaper without redoing the entire wall
If you recall from a previous post, I noticed that the Heritage bedroom paper had buckled in a few places on the long wall after using Yes paste. After posting a question on the Greenleaf forum for suggestions, I received two great ideas. (Note: I no longer recommend Yes paste – I use Wallpaper Mucilage instead. Yes paste has problems with longevity.)
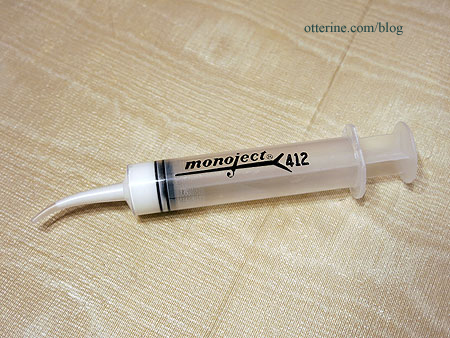
One suggestion for fixing the paper involved using a glue syringe. I would cut a small slit in the paper, lift the edge and inject glue under the paper. I would use a credit card or similar flat edge to distribute the glue and even out the paper. To disguise the slit in the paper, I would just hang a framed photograph or small painting. The other suggestion was to form a curtain behind the bed. I’ve seen fancy valances and partial canopies that fasten to the wall and have draped fabric hanging down to the floor.
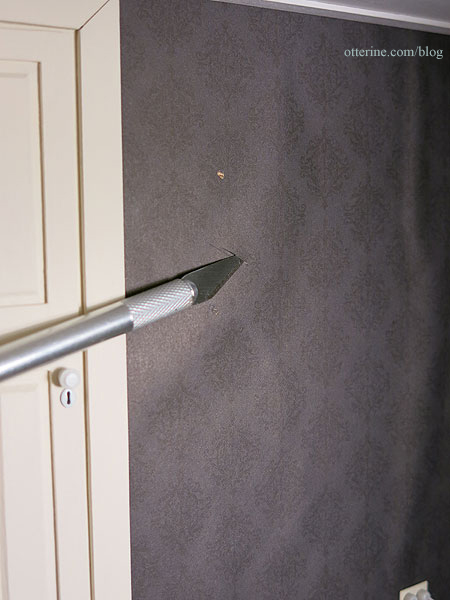
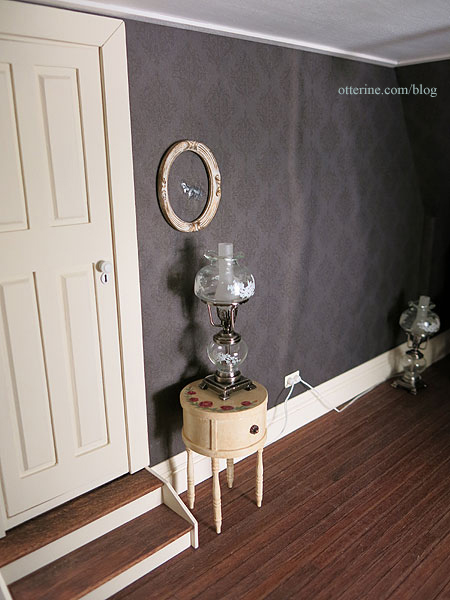
First, I worked on repairing the one large bubble between the bed and the door. I used a bright light to make sure I was getting the right spot.
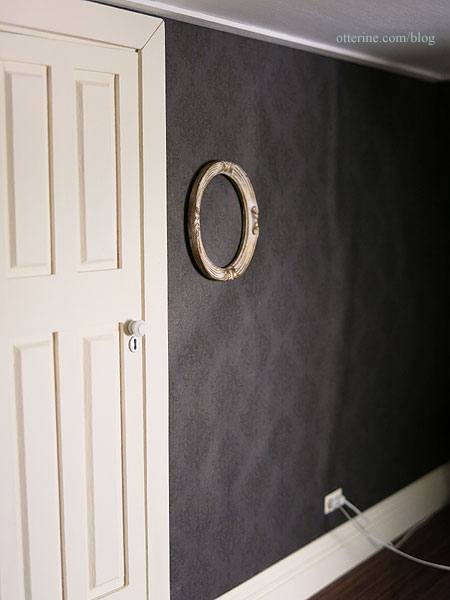
I kept my oval frame in place to show where the cut would need to be. I used a brand new blade to make a clean cut in the paper about 1/2″ long.

The dot above the cut is the mini hold wax I used to hold the frame in place. I left it to make sure I put the frame back in the same spot after the repair.
I put some Aleene’s Quick Dry glue into my syringe.
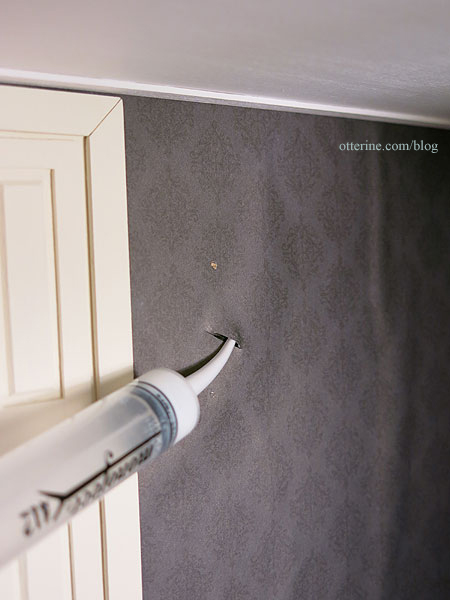
I lifted the edge of the paper and inserted the syringe tip. I squeezed out a good amount of glue into the bubble.
Using a plastic gift card, I smushed (technical term there) the glue around inside the upper portion of the bubble. I then repeated the process for the lower portion.
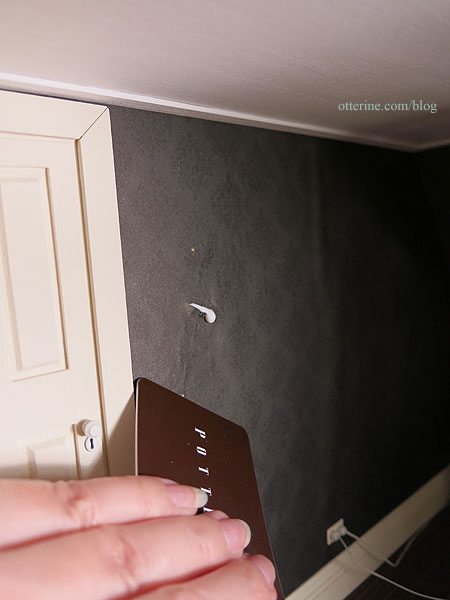
I used the back of my fingernail and lightly rubbed the surface in a circular motion to even out the texture. It’s not perfect by any means, but it looks so much better than it did. There was one spot where there was something under the paper, so it marred the front just a little. The tall lamp covers that without a problem. The seam will be behind the oval frame and hidden. I just need something for the frame…I’m thinking a 1920s wedding photo. :D
Success!
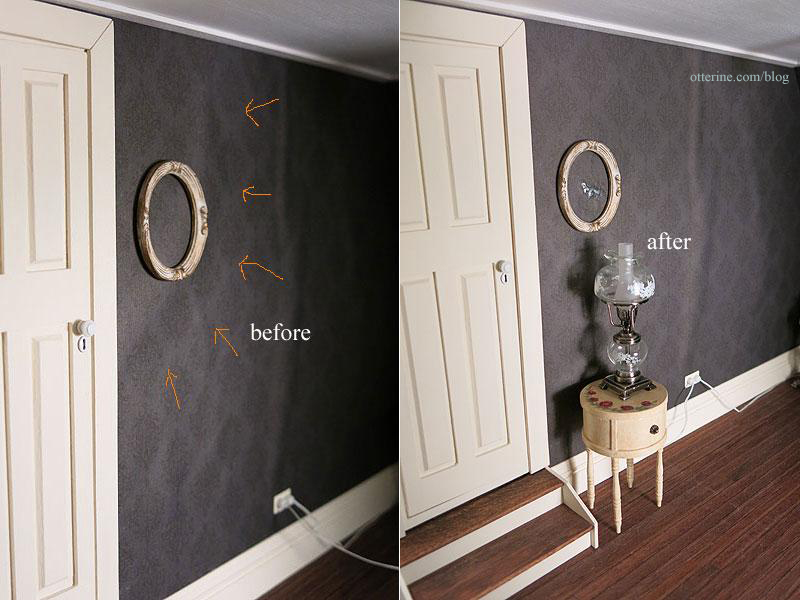
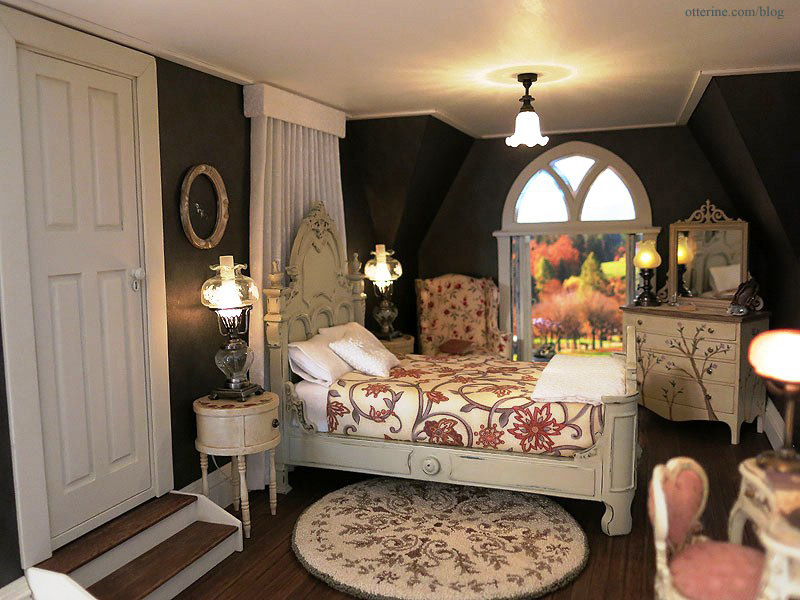
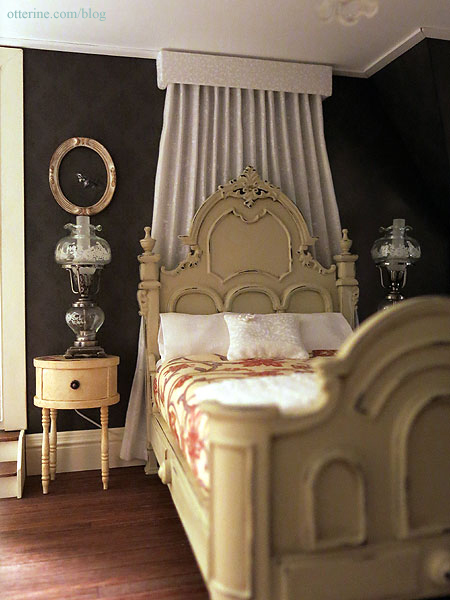
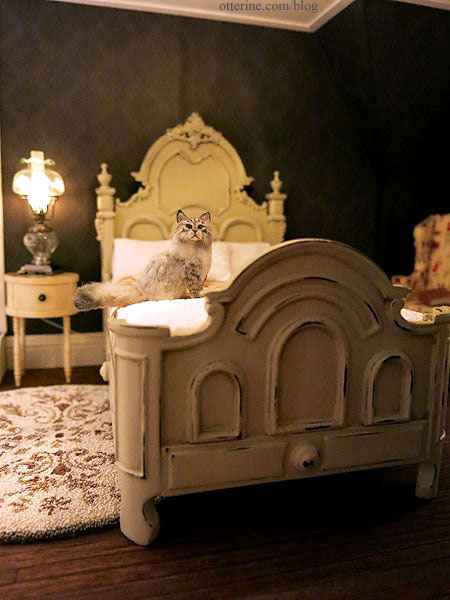
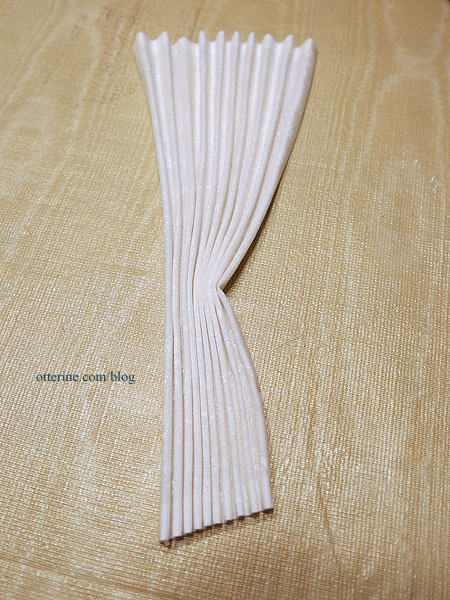
For the larger vertical bubble and the small one right next to it, I used the wall curtain idea instead of attempting to inject glue into the bubbles. I mocked up a drapery panel with plain white paper even though I wasn’t sure about using a light colored fabric behind the light colored headboard. But, I loved it instantly, and it was just quickly folded paper! The drapery would be less stark since the fabric I had in mind was relatively sheer.
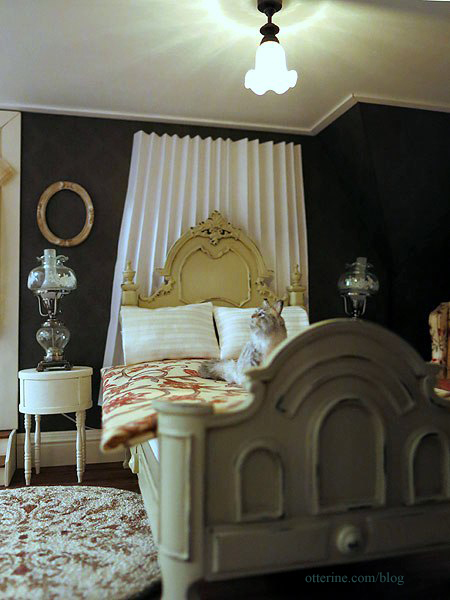
The drapery panel also creates the perfect balance with the two floor-to-ceiling windows on the other two walls.
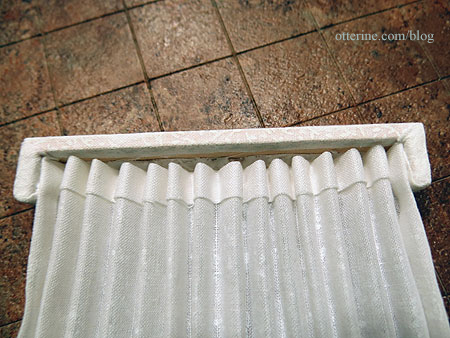
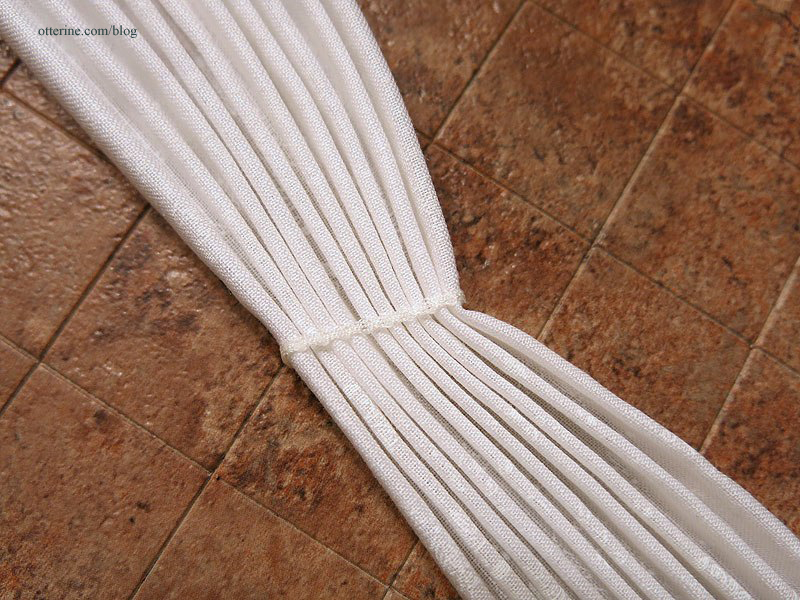
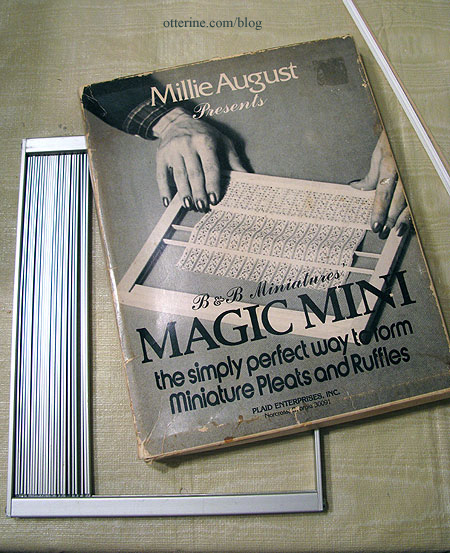
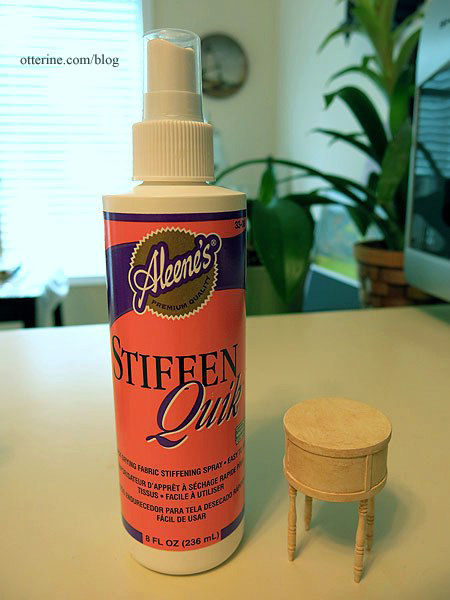
I made the wall panel a few days ago using the Millie August Magic Mini pleating tool. I made the pleats with the tool and then sprayed them with Aleene’s Stiffen Quik to set my final arrangement.
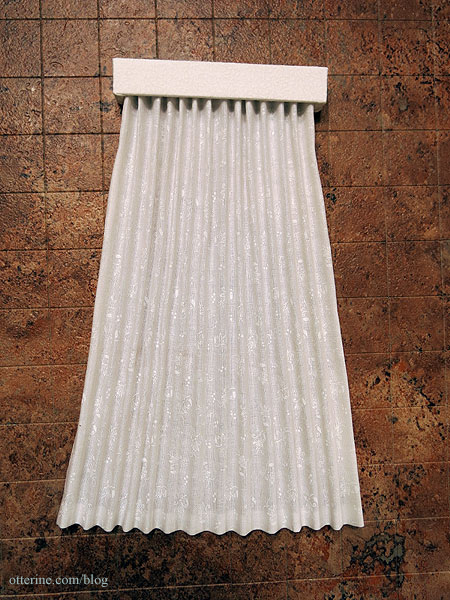
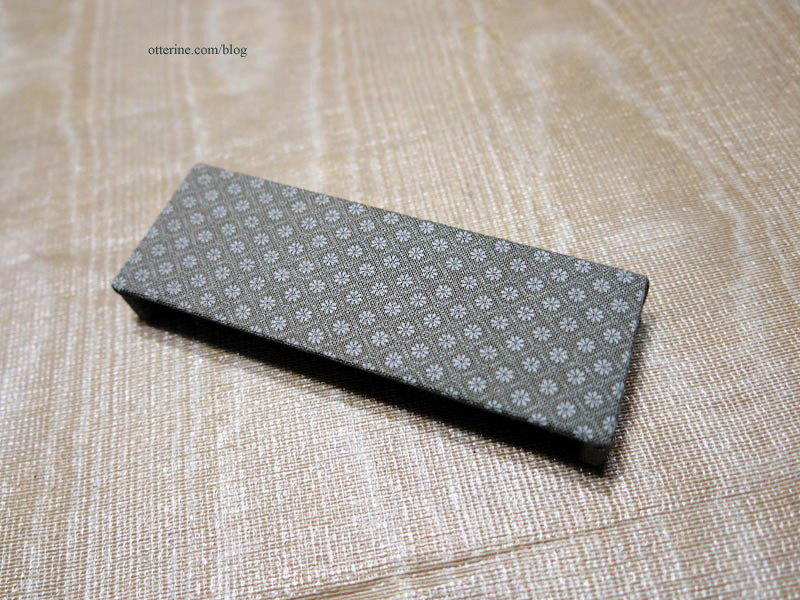
I made a pelmet for the bedroom curtain (top) smaller than the one I made for the parlor (bottom).

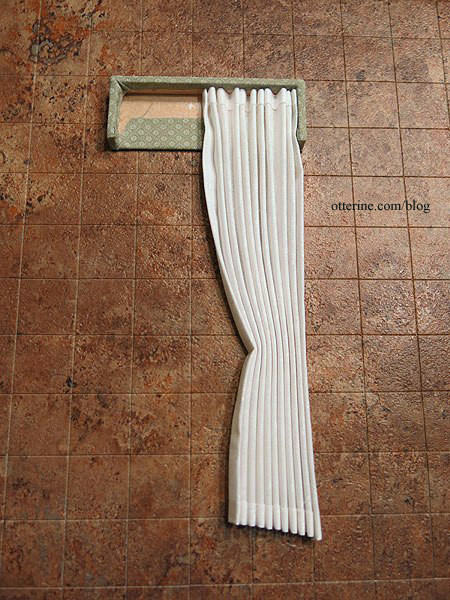
I painted it white and then covered it with the same fabric I used for the accent pillow on the bed. I hadn’t needed to paint the pelmet in the parlor since the fabric was darker. I glued the curtain inside the pelmet.
I used mini hold wax to attach the pelmet to the wall. If I ever need to remove it for cleaning or replacement, I won’t risk damaging the delicate paper on the wall.
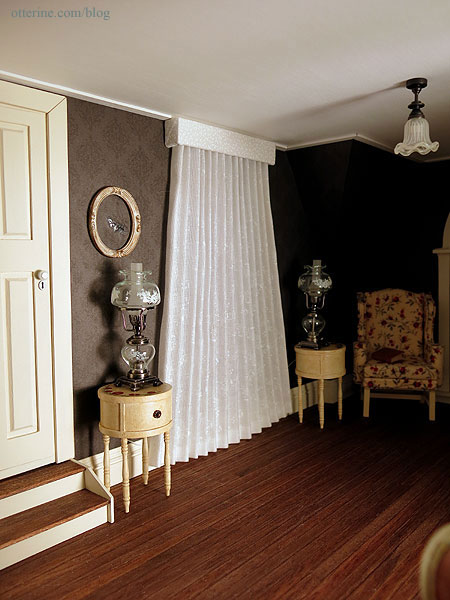
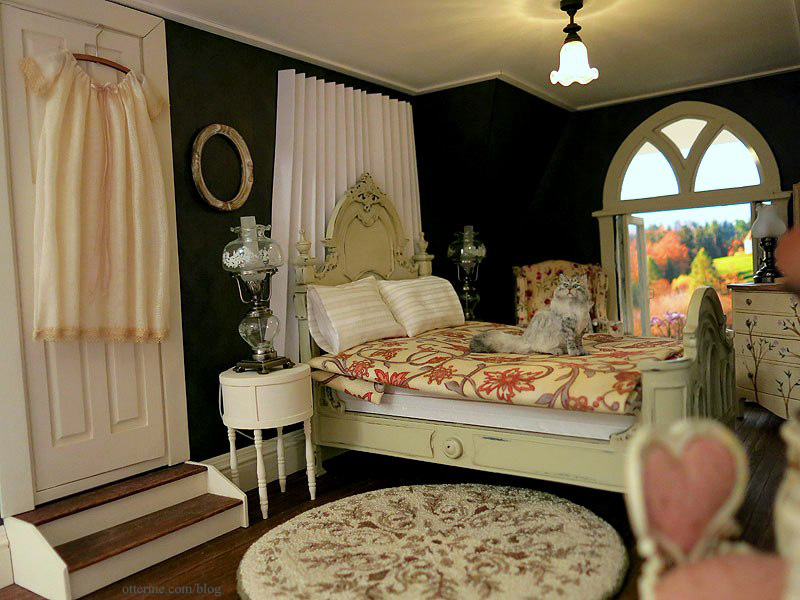
The bubbles are covered, and the panel adds a wonderful design element. I would never have done this without the wallpaper problem, so I suppose it’s another one of those happy accidents. :D
Categories: The Haunted Heritage
July 31, 2013 | 0 commentsBespaq bed makeover, part 2
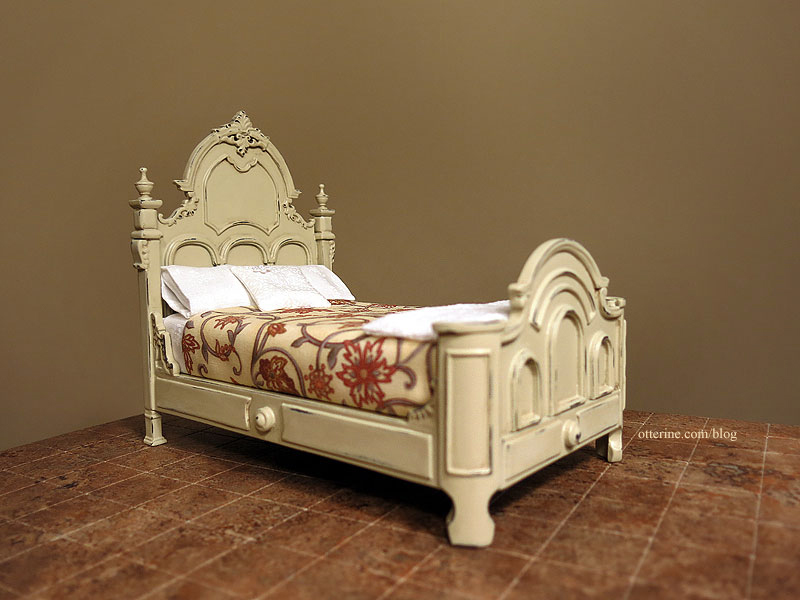
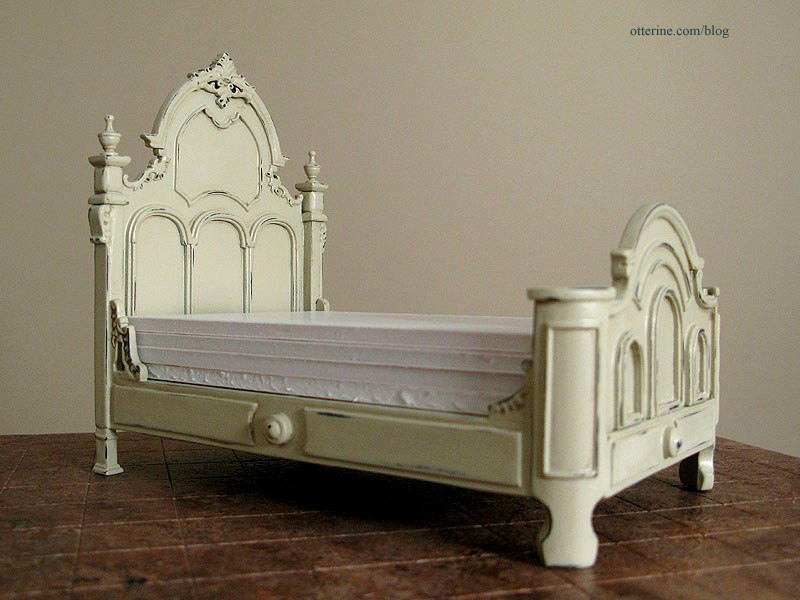
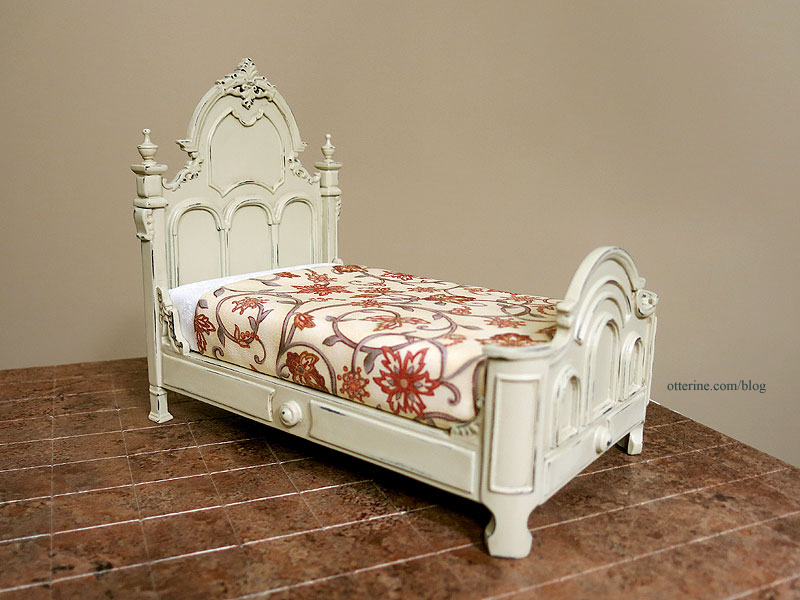
The Bespaq bed makeover is done!
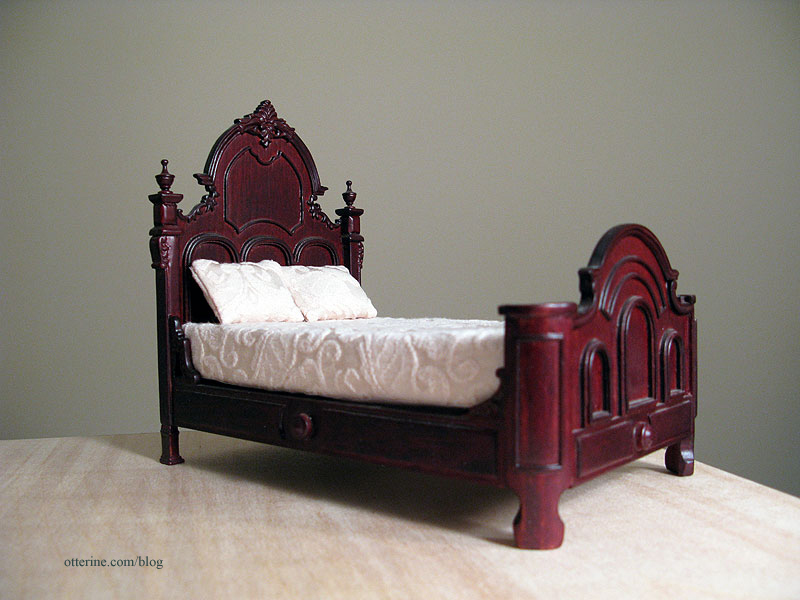
This is where the bed started.
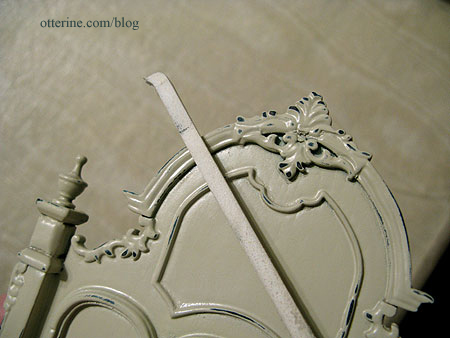
Then primed (grey) and painted with Krylon Almond in satin finish.
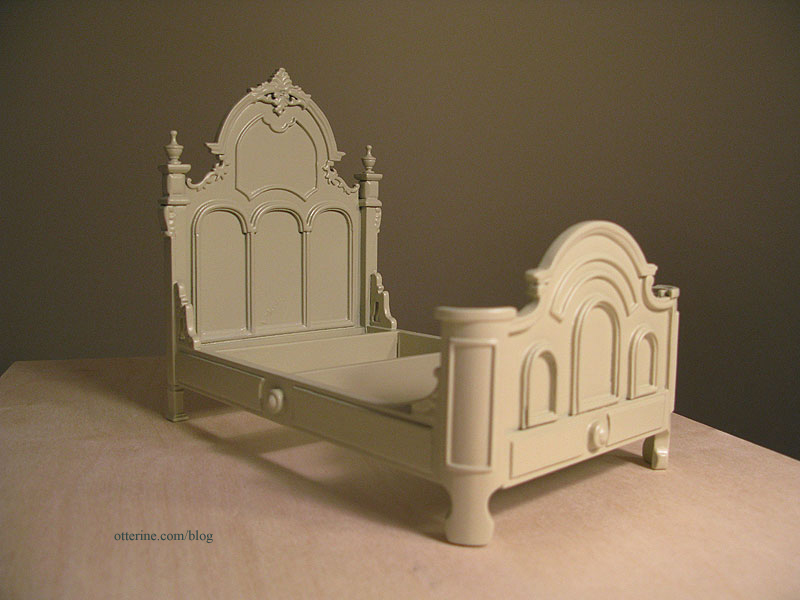
Then aged by sanding.
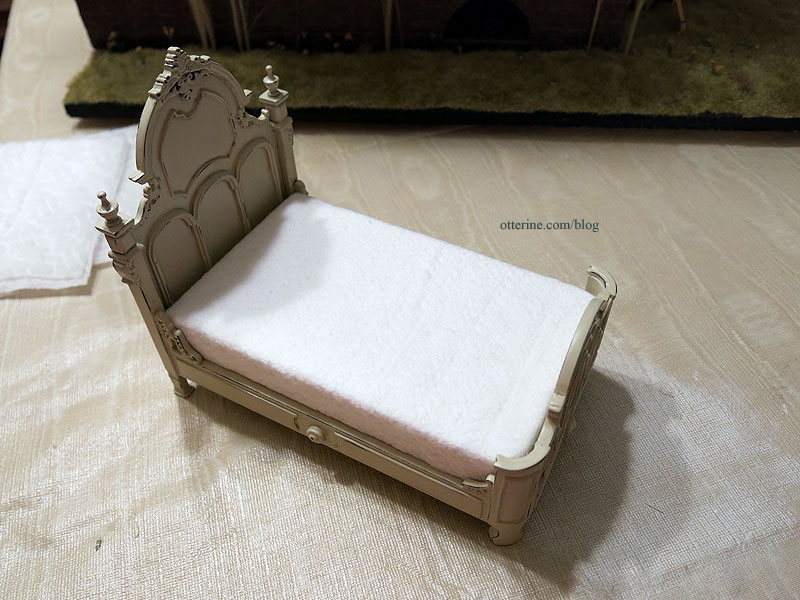
I cut new foam core board pieces to replace the original mattress.
I started the bedding, first by applying a layer of millinery batting to the foam core board mattress base.
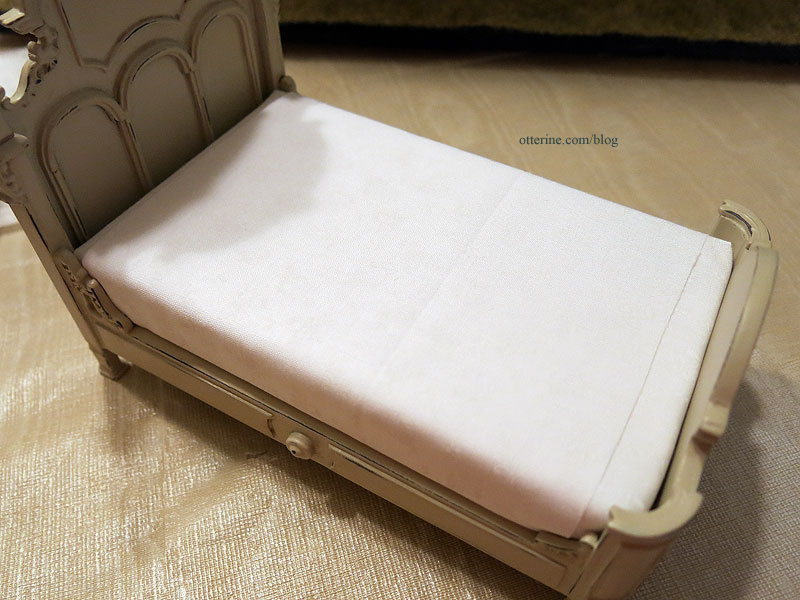
I added sheets made from sheer white floral fabric. Since there would be a coverlet, I opted to keep the top sheet short to cut down on the bulk.
I sewed the coverlet from the fabric April sent to me, adding a plain white backer. I would like to try my hand at an unmade bed, but in the interest of time I went with my standard treatment.
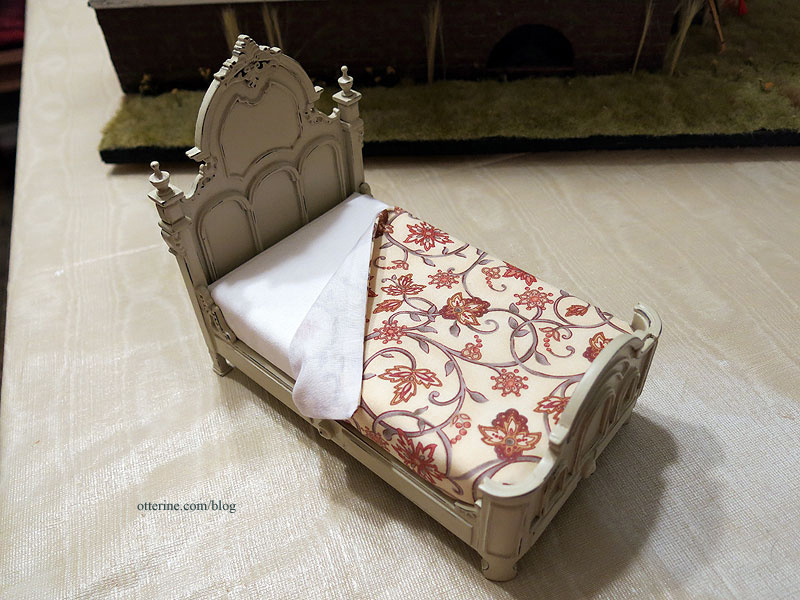
I like the way it pulls in the colors of the other furnishings, and the large scale of the flowers balances out the busier patterns throughout the room.
I sewed some pillows and made pillowcases from the same sheer white floral fabric as the sheets. I added one small white printed floral pillow to complete the bedding. It has a tiny venise lace flower attached in the corner.

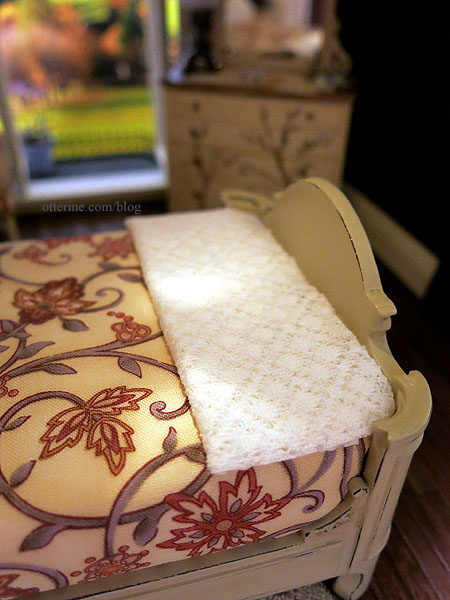
I made a small lace throw from some open weave fabric. It is full sized to cover the entire bed when opened, but I’ve pressed it flat to sit at the end of the bed as an extra blanket for those chilly autumn evenings.
Hooray for a successful makeover! :D
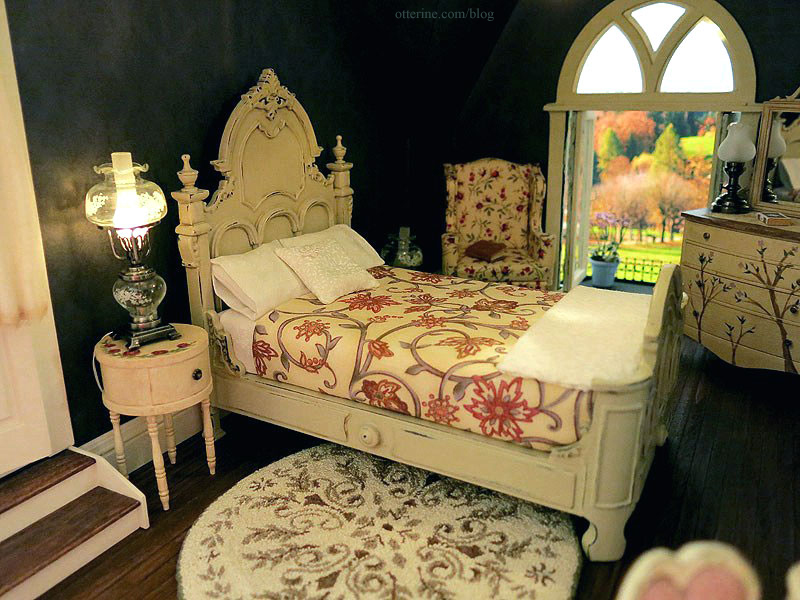
Now, who wants to take a cat nap with Ophelia?! :D
Categories: Furniture, The Haunted Heritage
July 30, 2013 | 0 commentsParlor drapery, completed
The pelmets and pleated draperies worked so well in the kitchen, I decided to add them to the one parlor window as well. There is a lot going on in this room in the way of color, texture and pattern already, so I again chose a soft white printed curtain topped with a subtle pelmet.
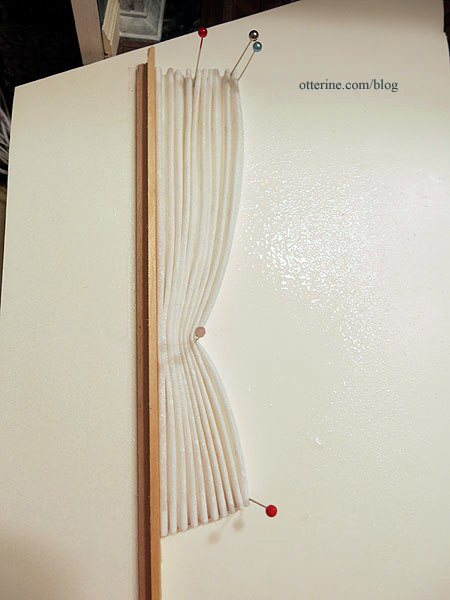
Here is the panel after the Aleene’s Stiffen Quik dried. Using the back board for the straight left edge resulted in a much cleaner panel than the all-pin version I did for the kitchen.
I made a tall pelmet since there was a lot of space between the window and the ceiling. In the photo below, the bedroom pelmet (top) is smaller than the one I made for the parlor (bottom).
A tall pelmet with long curtains makes a window look taller. I covered the pelmet with a soft grey-green fabric from Mini Decorators, purchased at one of the local mini shows.
I glued the curtains to the pelmet.
I glued a piece of fairy lace around the bend to serve as a tieback.
I glued the crown molding in place and touched up the joins first to make sure the window treatments were spaced properly on the wall. This also eliminated my possibly slopping paint onto my new window treatments. I then glued the pelmet to the wall.
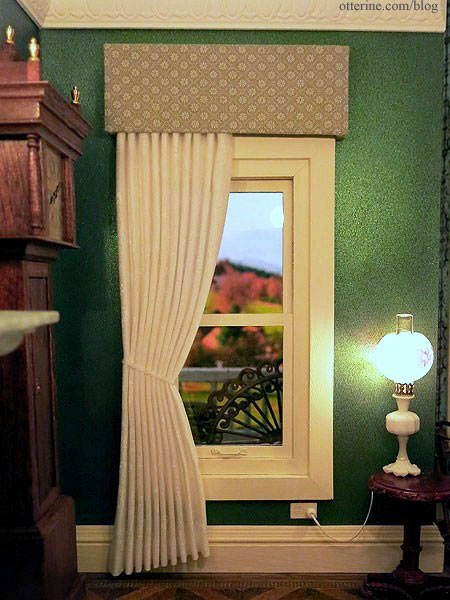
I opted for a single side swept panel for the sole purpose of not hiding that little outlet I took the time to add. Though The Chair will block both the curtain and the outlet for the most part, anyone who looks for the details will find them.
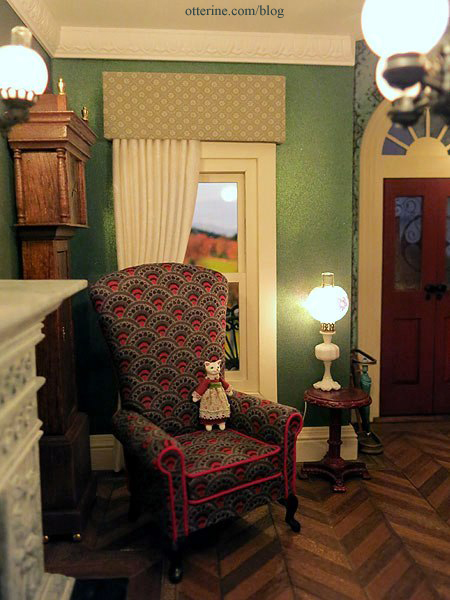
I think this simple panel and pelmet adds just the right amount of design to complete the décor, and the white curtain reflects some soft light into an otherwise dark corner.
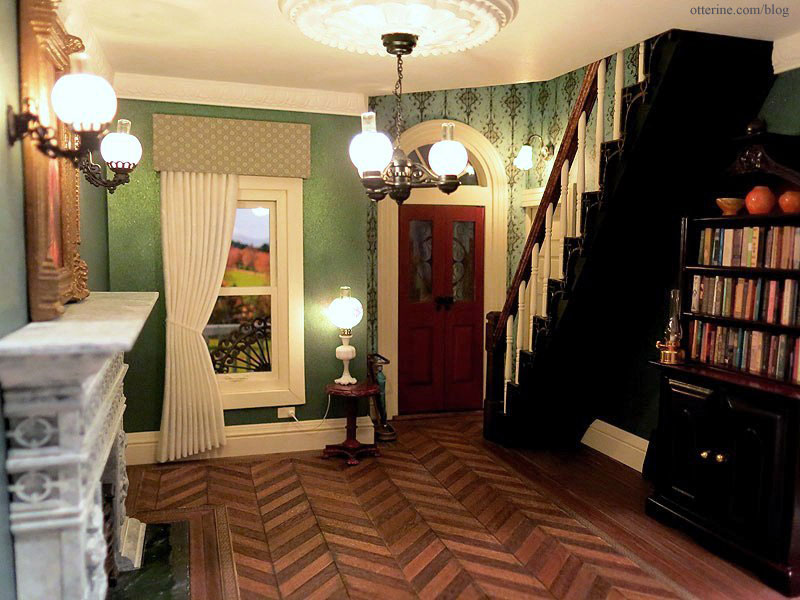
The parlor is complete now, but it’s too late to set up for a fully decorated photo shoot.
Categories: The Haunted Heritage
July 29, 2013 | 0 commentsParlor and bedroom drapery, part 1
Today was a fabric day, and I used my vintage Millie August Magic Mini pleating tool.
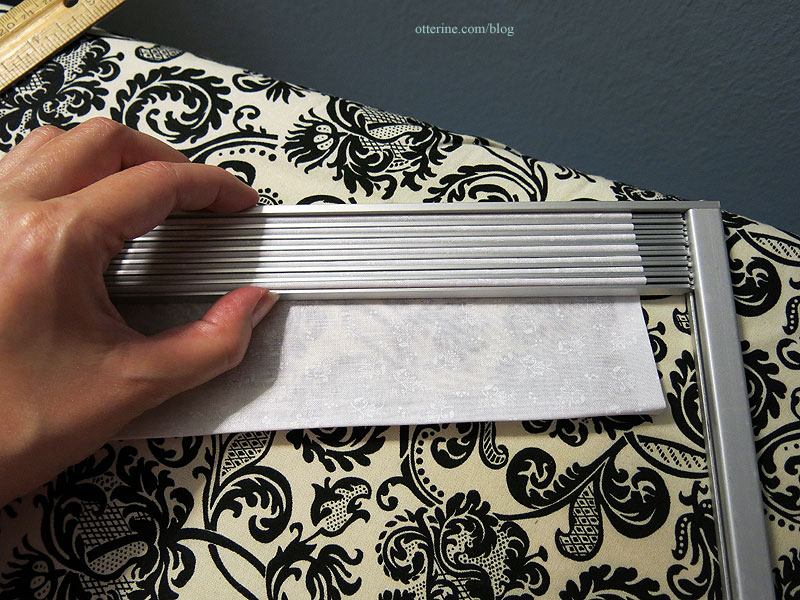
I turned under the four edges of the fabric panels first, but I didn’t sew or glue them. Once the drapery is in place, it won’t show and it won’t be touched so fraying isn’t much of a worry. Plus, I find that there is less pulling and binding when the edges are left unsecured.
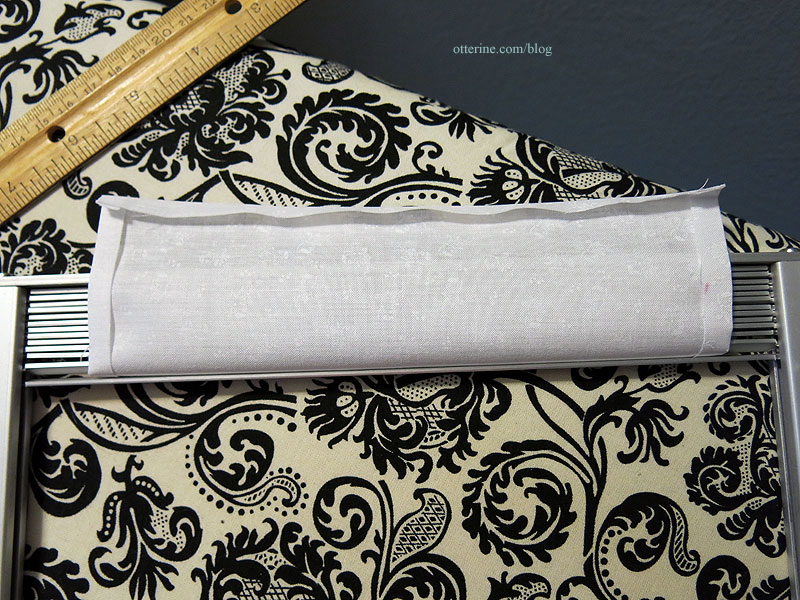
The instructions indicate you should wrap the fabric around the metal slats and then use a steam iron. So, that’s what I did. :]
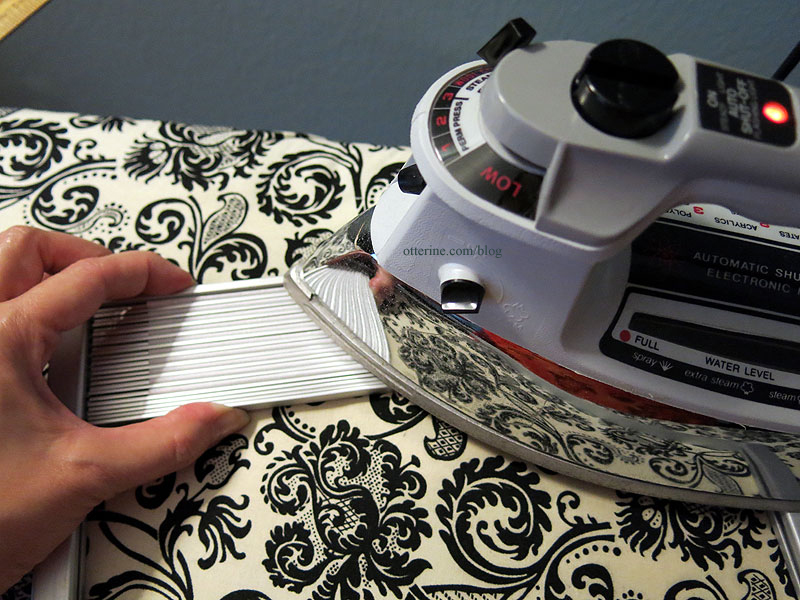
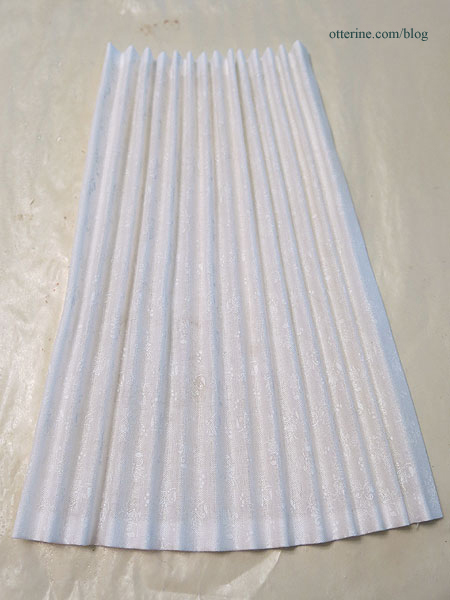
I removed my panels just before they were completely dry so I could manipulate them more. For the bedroom wall panel, I adjusted the pleats by hand on a piece of waxed paper. I had to pleat this panel in sections since it was wider than the number of pleat bars could handle at once.
I used Aleene’s Stiffen Quik to hold the shape. The panel will stay here until completely dry.
For the parlor drapery, I took a scrap of foam core board and attached a spare piece of wood trim using double sided tape. This gives the drapery a straight back to lean against. Using as few pins as possible, I created the fold where the tie back will be. Pins do leave holes in the fabric that can sometimes be tricky to remove, especially on white fabric where the slightest dark spot can show so easily.
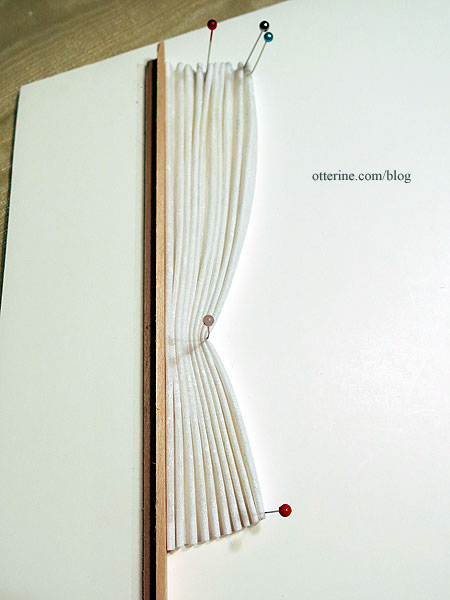
A good spray of Aleene’s Stiffen Quik, and the panel was set aside to dry.
Categories: The Haunted Heritage
July 28, 2013 | 0 comments
NOTE: All content on otterine.com is copyrighted and may not be reproduced in part or in whole. It takes a lot of time and effort to write and photograph for my blog. Please ask permission before reproducing any of my content. (More on copyright)