


NOTE: All content on otterine.com is copyrighted and may not be reproduced in part or in whole. It takes a lot of time and effort to write and photograph for my blog. Please ask permission before reproducing any of my content. (More on copyright)

Categories:
3 Blind Mice show – January 2012
I am lucky to live in an area that has a mini show of some sort every few months as well as the larger Bishop International Show in April every year. This weekend, I attended the 3 Blind Mice show. :]
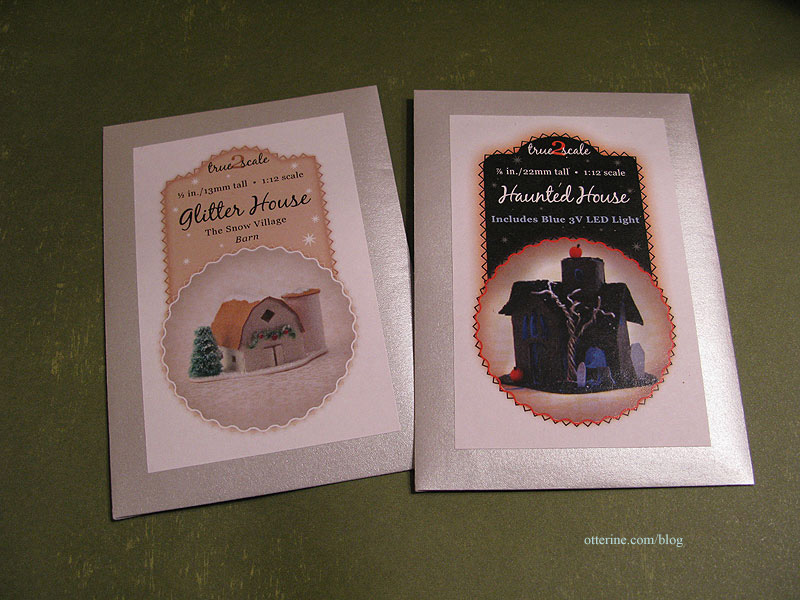
I met Carol of True 2 Scale. It was fun putting a face to a name. :D You may recall I made her milk carton flower kit for the Heritage. I picked up two of her glitter house kits – the Haunted House and the Barn. She has amazing kits, so be sure to check out her website! I already have her florist boxes and a cake box kit, though I haven’t worked with those just yet.
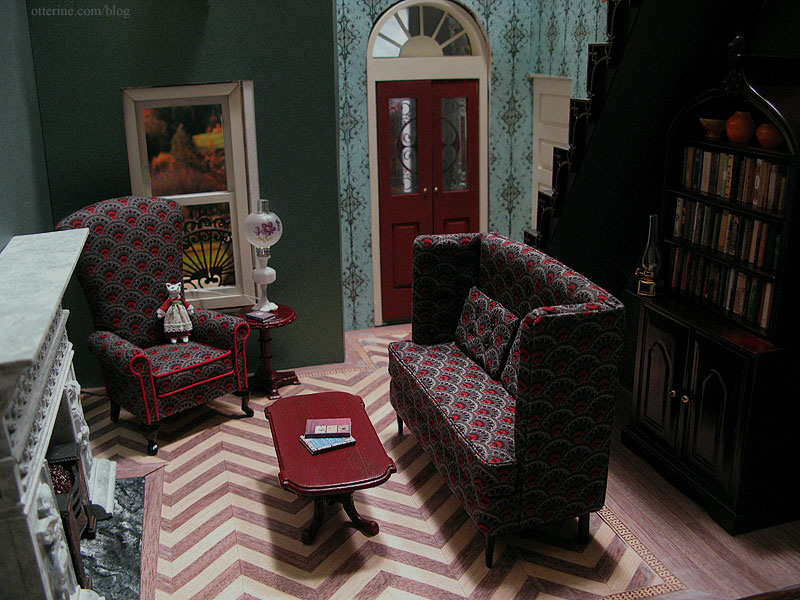
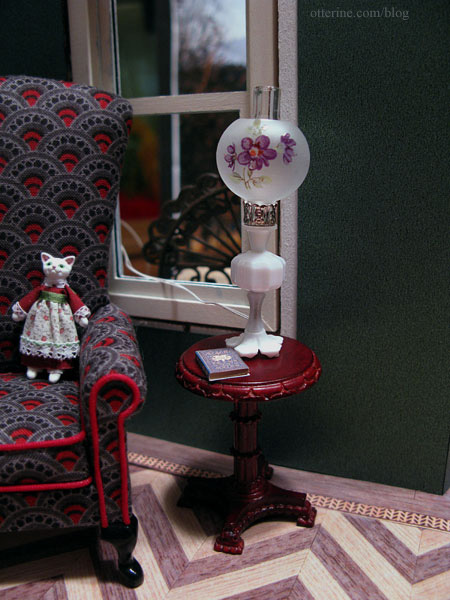
I picked up a small round side table for the Heritage parlor. I was going to make something for this space, but the color and style work well for the setting.
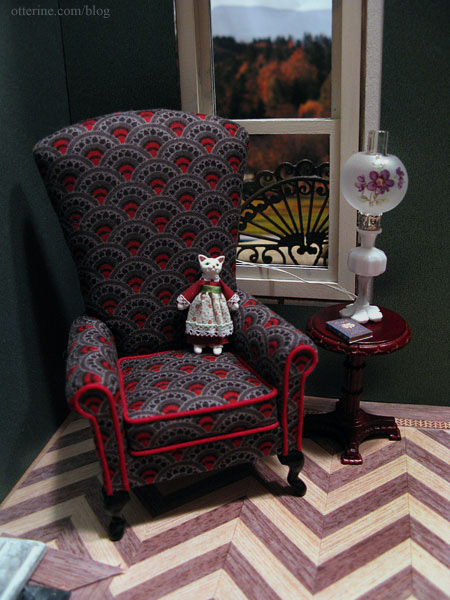
I like that it coordinates but doesn’t necessarily match the style of the coffee table. Grandma has eclectic taste like me! And, this one is the right color to start. A good buy, I must say!
The Chrysolite table lamp I bought previously fits perfectly!
I hadn’t planned to buy much since I have most of what I need for my current project, but I did pick up an online order from Missy at Green Gables Dollhouse. I figured it was just as easy to pick it up in person at the show as to have her ship it, and we got to meet in person after talking online and on the phone a number of times. :D You’ll see those items in future posts.
Categories: Miniature Shows and Shops, The Haunted Heritage
January 14, 2012 | 0 commentsClare Bell Brass hurricane lamp
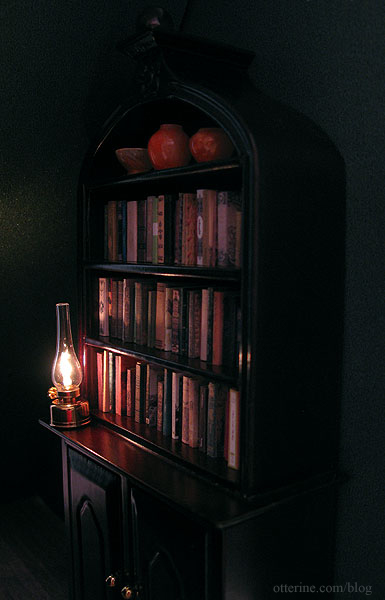
The area under the stairs in the parlor is very dark, and I don’t want to lose the detail of the bookcase after spending all that time on making books.
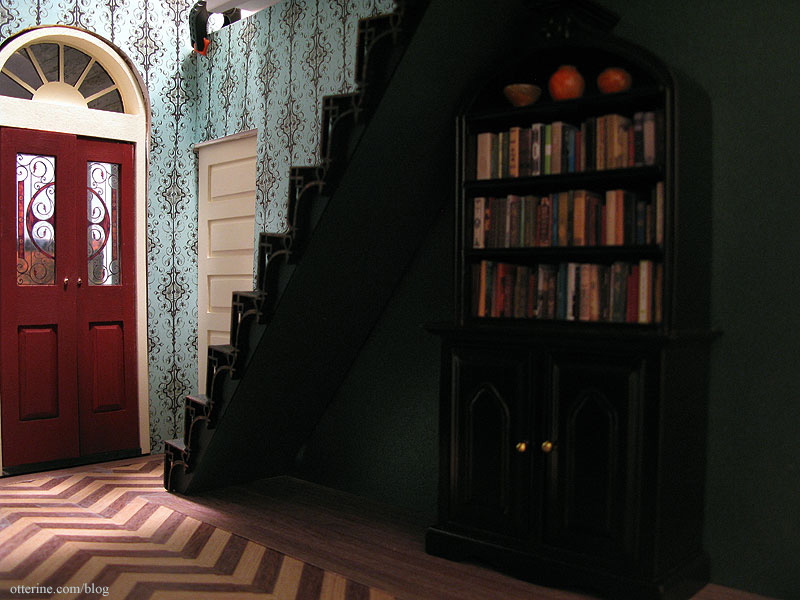
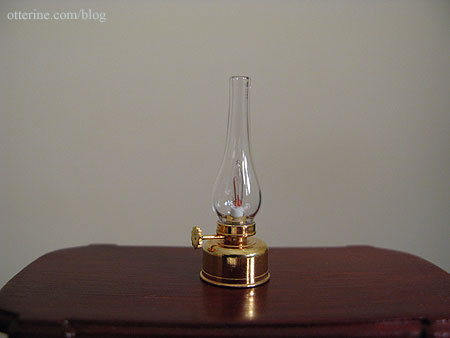
I needed a light here, but I didn’t want to clutter the space with another table or even a floor lamp. I opted instead for a Clare Bell Brass hurricane lamp. It’s one of the few brass items I find beautiful. I used one in the attic of Baslow Ranch.
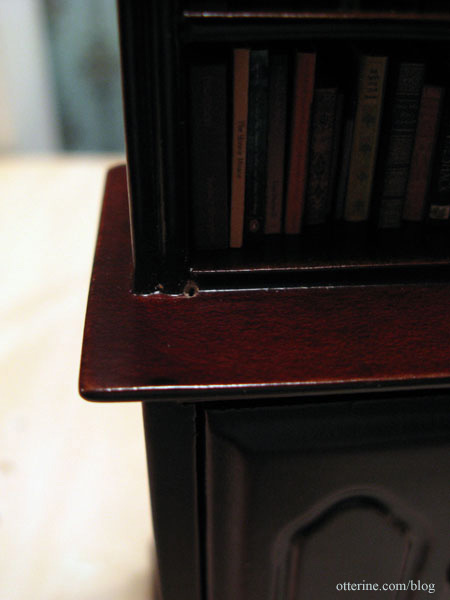
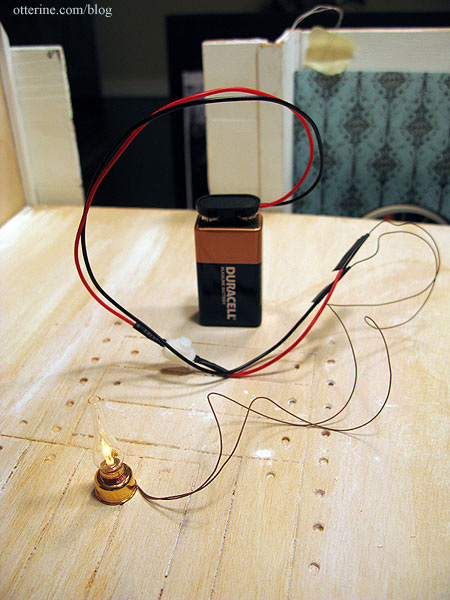
To avoid having the wire show, I drilled a tiny hole into the bookcase.
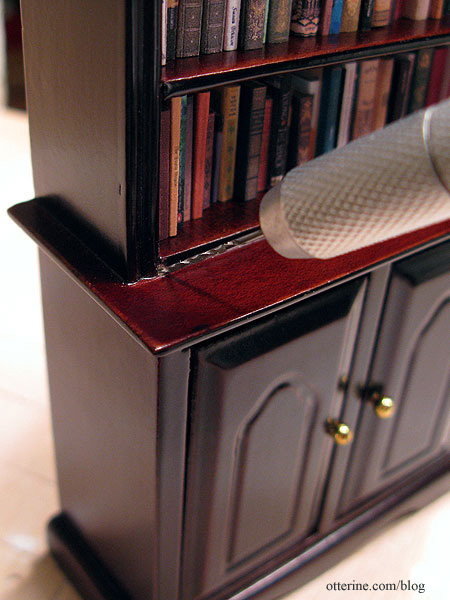
I drilled the hole in an inconspicuous place.
I also wished to avoid hard wiring the lamp for the ability to move the bookcase freely, so I fed the wire into the bottom cabinet portion and used a 9V battery, which fits easily inside the cabinet. A bit of mini hold wax keeps the lamp in place on the cabinet ledge.
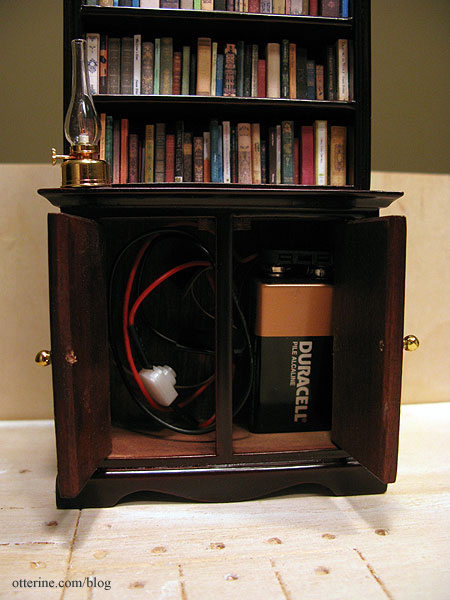
This adapter from Evan Designs has an on/off switch to easily operate the lamp without having to unplug the battery.
With the doors closed and the light on, you can’t tell it’s not a candle flame in miniature! :D
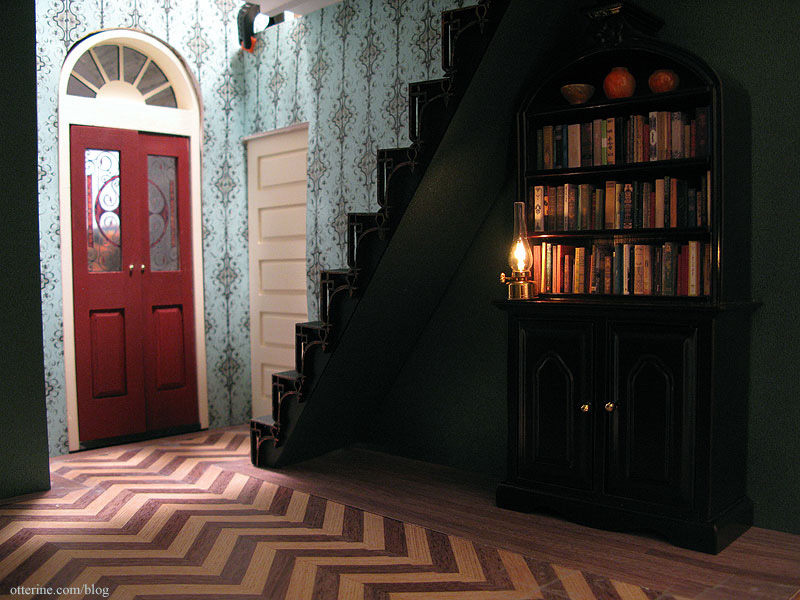
No more dark area under the stairs.
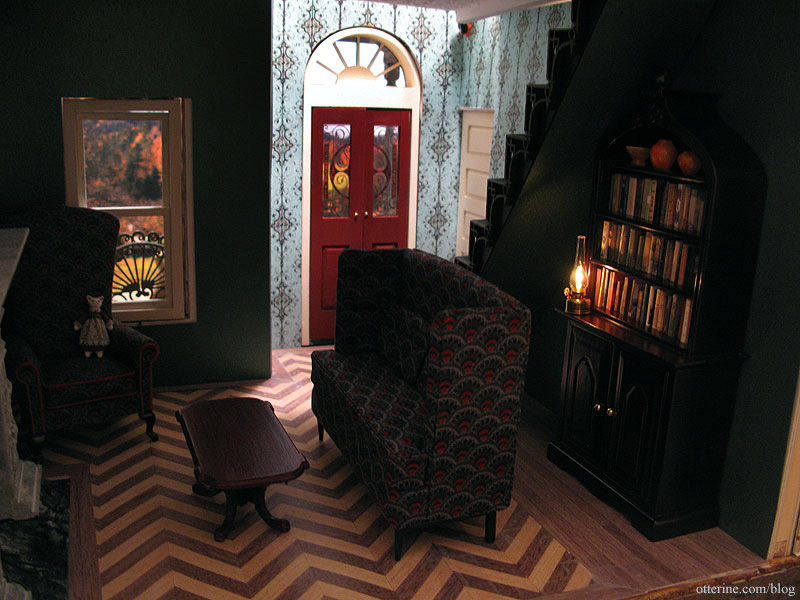
Love it!
Categories: The Haunted Heritage
January 11, 2012 | 0 commentsHeritage – kitchen accessories
I received these amazing mini Goldfish Crackers from Cindy at Snowfern Clover. Amazing doesn’t even do it justice! Everything is perfect about them, from the exact replica of the paper container with foil inside to the teeny tiny goldfish crackers. The only thing that gives them away is they leave no cheese and salt residue on your fingers!

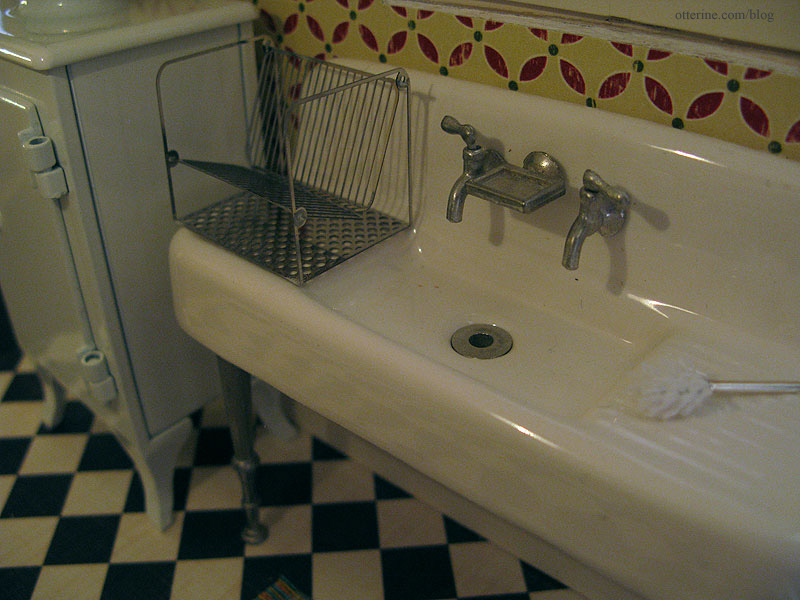
For the kitchen sink, I bought a dish drainer from The Dolls House Mall. I love this shop! The dish drainer came with a mop, too. Love, love, love! :D
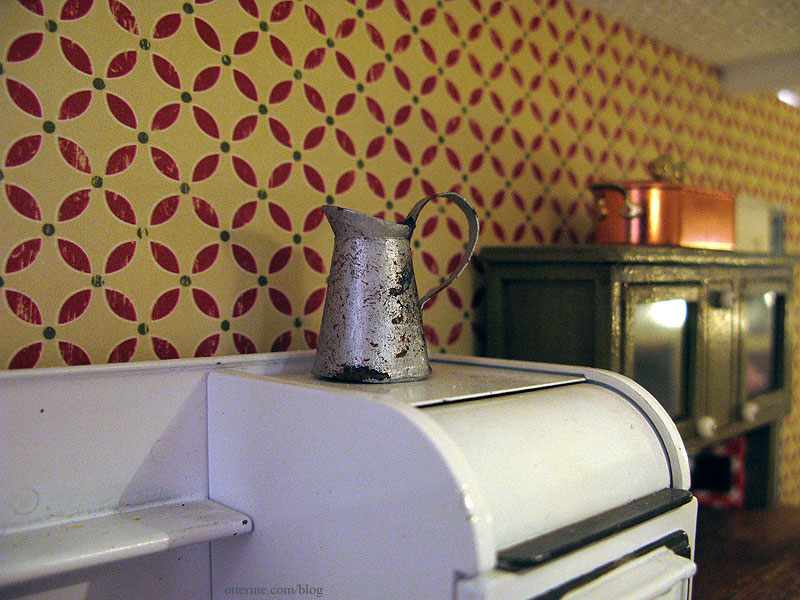
Caterina sent me a beautiful old pitcher for my kitchen. It’s made of paper but looks so much like metal. It fits right in!
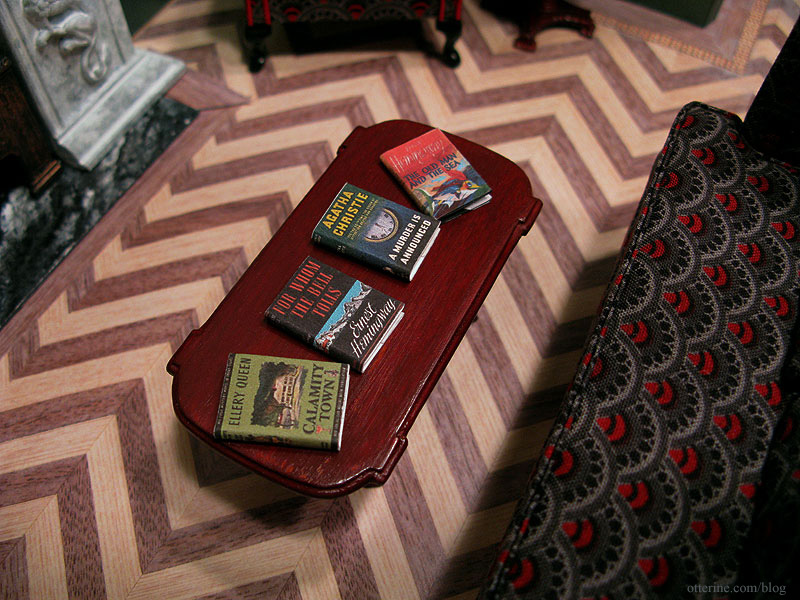
She also sent me some books. They look like real vintage hardcover books you see in used bookstores. They have dust jackets and real pages, too! These will be right at home in the Heritage. Thank you so much, Caterina!
Categories: The Haunted Heritage
January 6, 2012 | 0 commentsHeritage – Kitchen ceiling
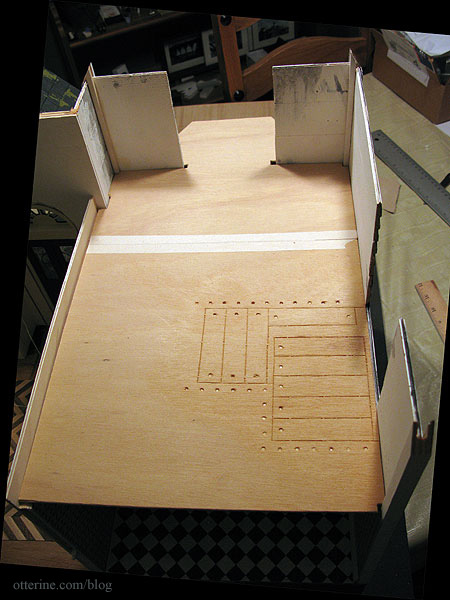
As mentioned before, the kitchen ceiling will be lower than the parlor ceiling, which I had to raise to accommodate the new front door and the narrow stairs. The ceiling board that came with the kit is made of three different die cut pieces that you assemble to make one board that spans the entire floor.
It also had the parts for the original kit stairs that were meant to be removed and assembled in the kitchen. I’ve kept those pieces intact and reinforced them with wood glue spread over the die cuts.
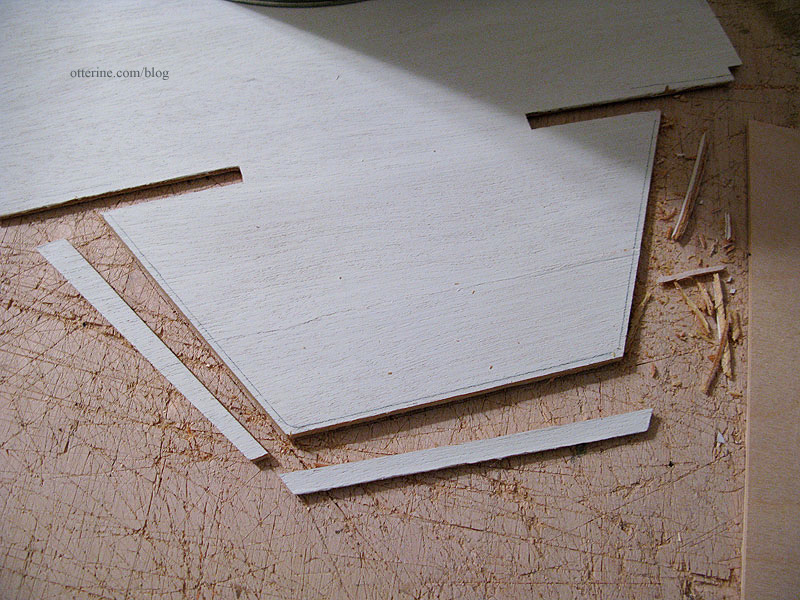
I won’t be using the piece that made the front porch since I replaced that with the portico. So, I taped the other two pieces together, measured the amount needed to make the kitchen ceiling and cut along that line.

This new board sits atop the lower portion of the pocket door wall and is supported around the rest of the room by all of the wood padding I added to build up the walls to install new working windows as well as the front bay window.
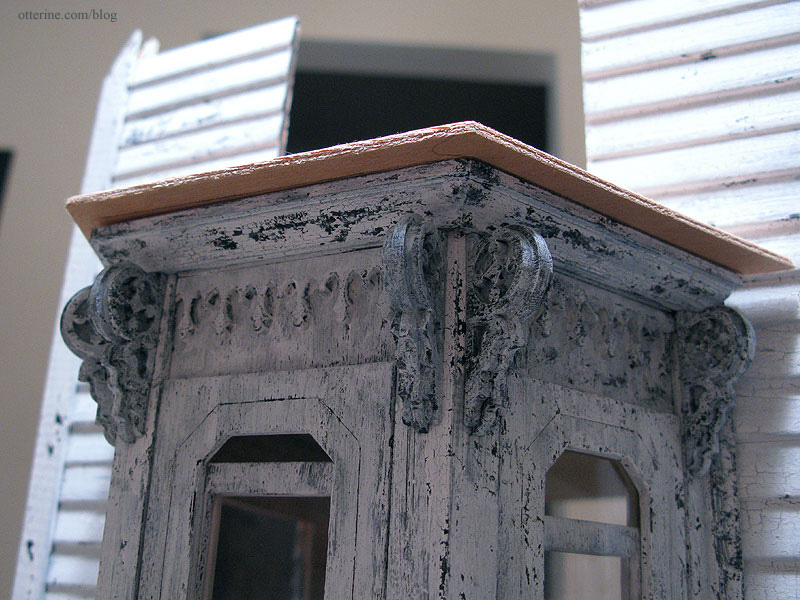
Speaking of which, I am going to trim the excess from the bay roof portion. It’s uneven to start with and second, I’ve already finished the top of the bay window. I’ll finish the new cut edge to match the finished bay window trim.
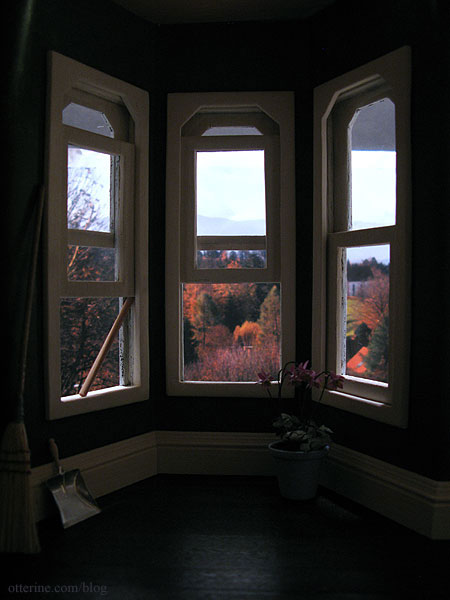
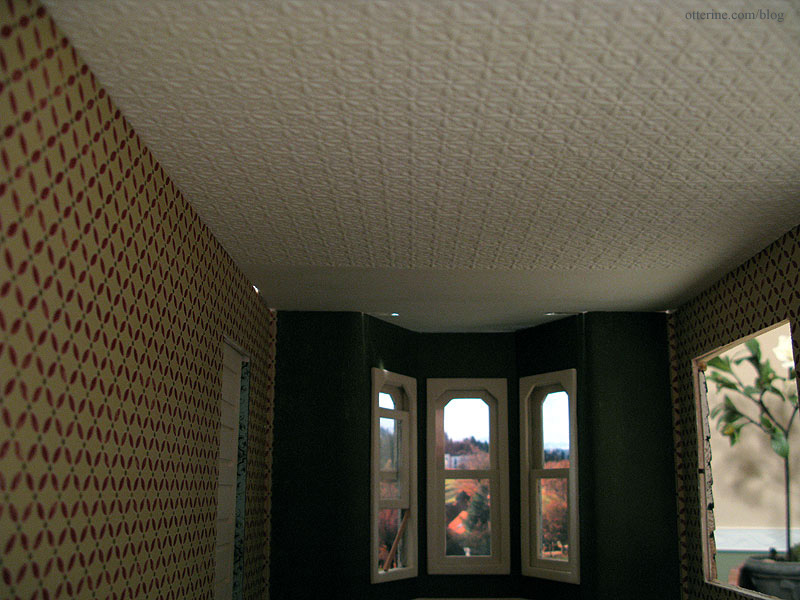
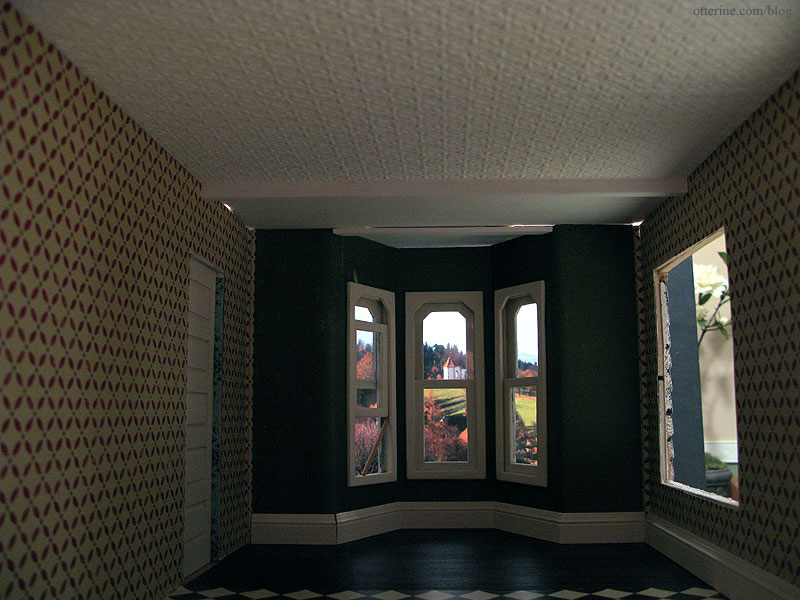
I love the way adding a ceiling changes the feel of a room in a dollhouse.
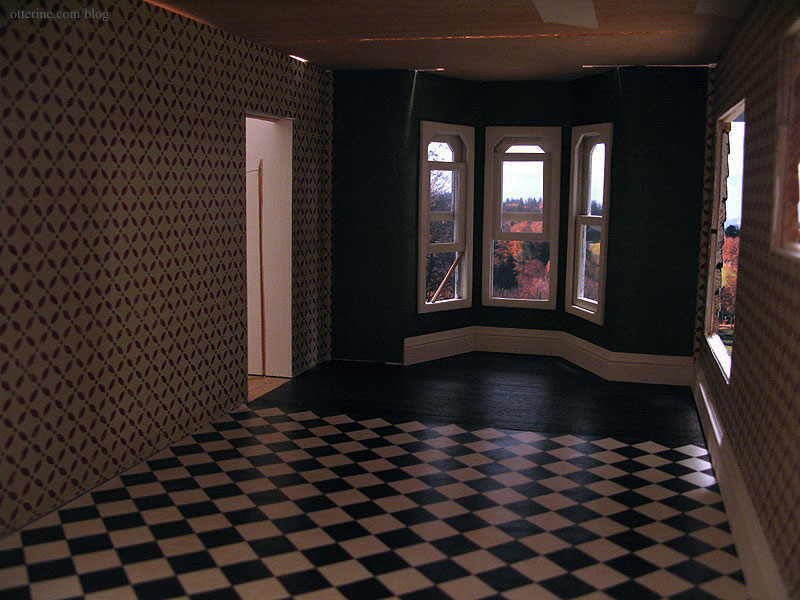
It creates inhabitable space. :D
There are some gaps, part of the issue with this kit to begin with, but I’ll fill in where I need to. Plus, I have a few ideas for a faux tin ceiling or some other texture if I don’t like the look of the tin ceiling. But, you can’t beat that view! With minis, it can be beautiful autumn all year round.
As I mentioned earlier, the ceiling board is made from two separate pieces, joined together with wood glue. The original instructions called for splices or pieces of wood to be glued over these joins. It seemed ugly to me to have these odd pieces of wood glued to the ceiling, so I omitted them altogether. With the flooring added on the second floor and some ceiling paper on the first floor, I figured the wood glue would be enough to hold it together.
In addition to these issues, the board itself was too short front to back. I added a piece of strip wood to the back end to make up the difference. Once the ceiling board is finished, you won’t even know it’s there.
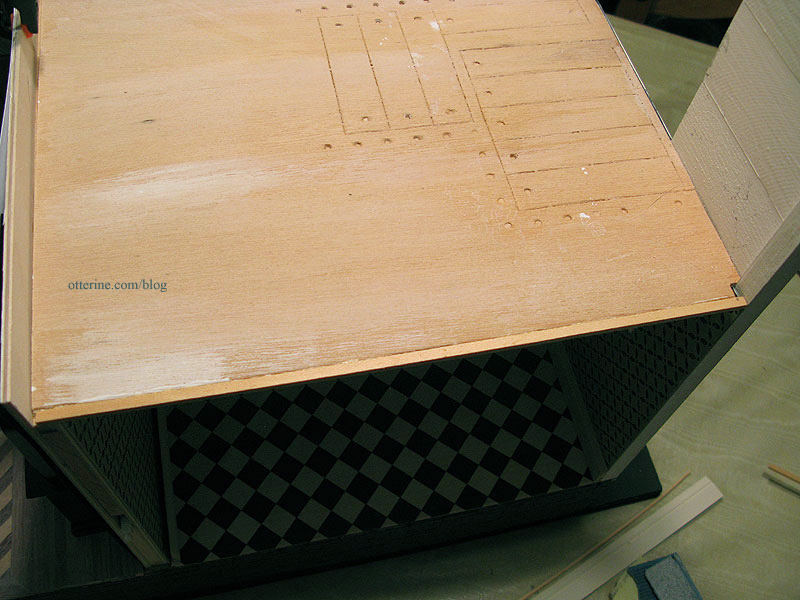
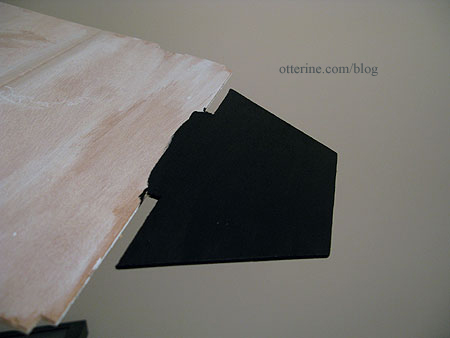
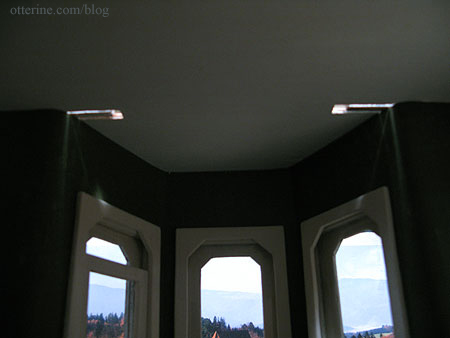
I started the finishing process by priming the ceiling with white paint. To make sure I wouldn’t mess up the interior finishes once they were in place, I next worked on the bay window roof. I marked around the existing trims and cut the excess from the ceiling board, leaving a little overhang for finishing.
I painted the edges and top black. I will finish the rest of the bay window roof when I install the swinging window on the second floor.
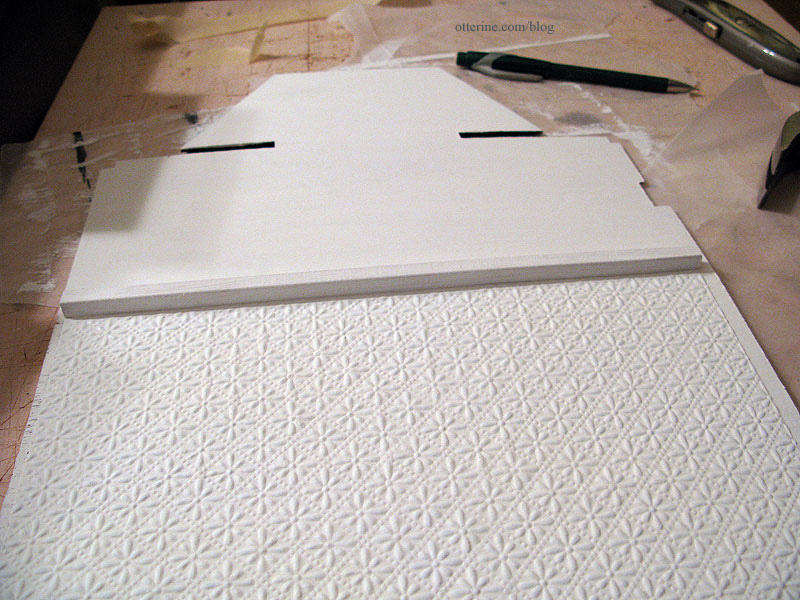
To finish the kitchen portion of the ceiling, I used a piece of textured scrapbook paper called Pressed Tiles in Brown, by The Paper Studio. Love this paper!
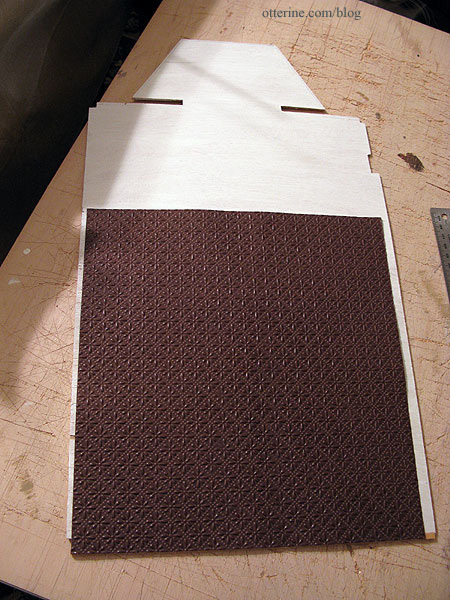
I cut a piece to cover the ceiling from the open back to just past the join. I glued it to the ceiling board and once dry, painted it with a few coats of white acrylic. The paper buckled in a few places, but I like that imperfect look to it, as though some of the tiles have popped out of place over the long years. :D
I left the original wood for the remaining kitchen and the bay window ceiling but painted it with a few coats of white acrylic to even out the tone. The wood is in good shape and the minor imperfections it does have only add to the realistic age of the house.
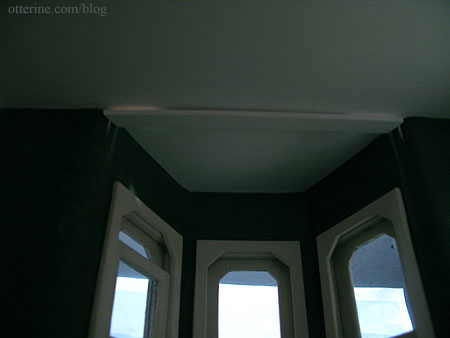
The ceiling board is cut in such a way to allow for its installation around the front wall siding. This leaves two obvious gaps on either side of the bay window.
Since I find it easier to finish a ceiling board before it is in place and this issue needs to be addressed after the ceiling board is in place, I decided to cut a piece of strip wood to bridge the gap of the bay window to add after installation. I painted it white to match the ceiling so it will look like a structural element while covering these gaps. It’s just taped in place right now, so you can still see light coming through.
Even with pressing, the ceiling board had a rather obvious warp making the center of the ceiling dip in the middle. To fix this problem, I added a solid wood beam across the width of the kitchen just beyond the ceiling tile paper. I used tacky glue, super glue and some nails hammered in from above. It should hold. haaaaaaaaaa! I then painted it white to match.
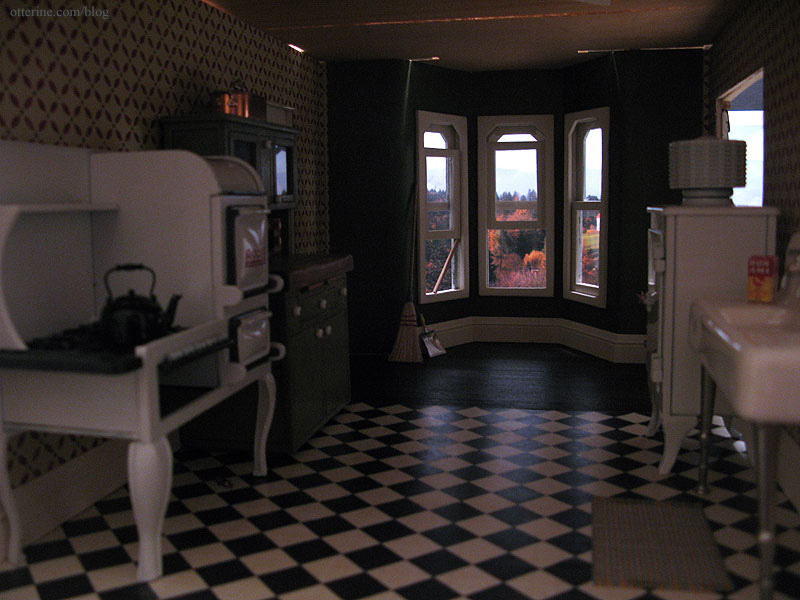
I have a few more things to work on in the kitchen before I can install the ceiling board permanently, but it is starting to take shape! There are gaps that will need to be addressed, but trim can cover these remaining problems.
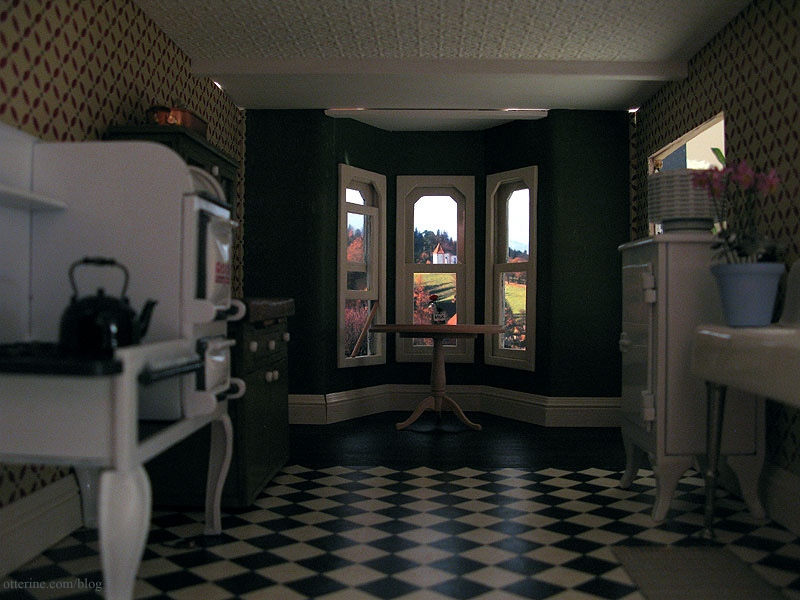
With the furnishings in place, the textured ceiling really adds that vintage feel.
Categories: The Haunted Heritage
December 23, 2011 | 0 commentsBespaq bed makeover and bedroom layout
It’s fun to take a piece of unfinished furniture and spruce it up just so. It’s even good to take a relatively inexpensive piece and change it, even paint it, to make it fit into a scene better. But, I feel as though I am going to get a collective GASP when I say I intend to redo this Bespaq bed, including the finish, which I intend to paint.
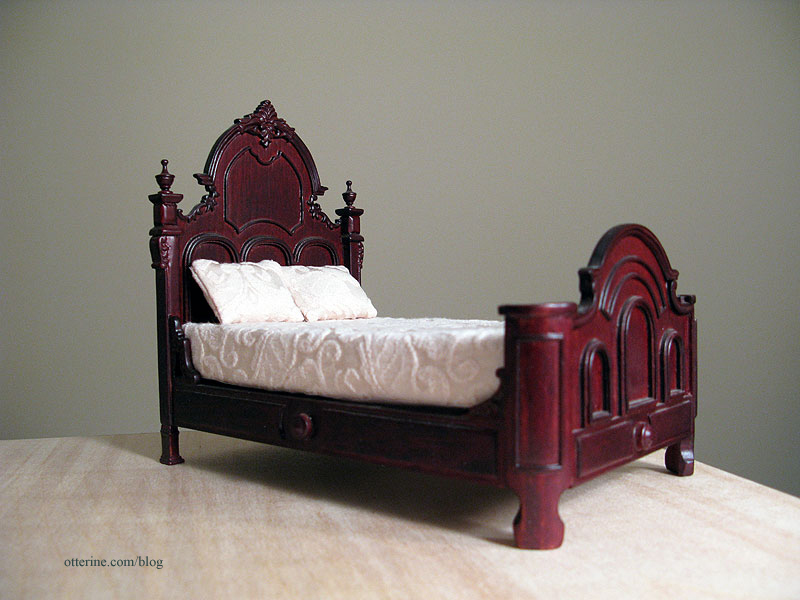
I love the bones of it, and the detailing is wonderful. But, the stain is all wrong, and the bedding is just deplorable for scale. Changing the bedding alone still wouldn’t fix the problem with the color.
As a refresher, here is the paper for the bedroom. This is by Recollections and has the macabre name of Out of Time.

To cover the varnished surface, I first sprayed the bed with grey primer. This is how it will stay until probably after the first of the year when I get a chance to paint it.
Since the kitchen is the same shape as the bedroom, I’ve used it to determine the general layout of the bedroom. You’ll need to do some imagining here with me. If you look at the top of the front and side walls, you can see where the two swinging windows will be — there won’t be a bay window up front. The rest will be solid walls.
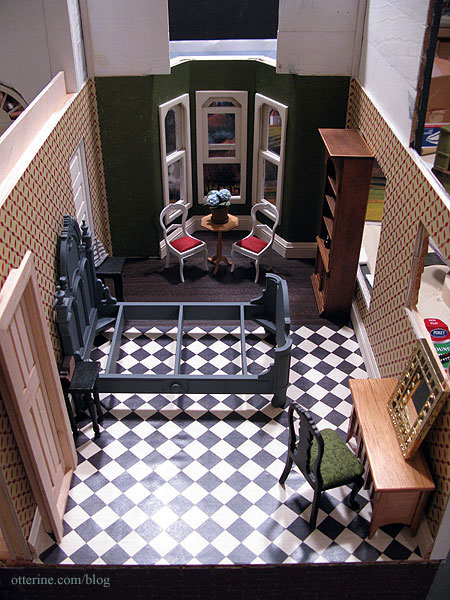
This leaves room for the big bed, one or two small nightstands on either side, and the narrow door on the inside wall. There won’t be a door where you see the pocket door, of course. I’d like to have seating, so maybe I will set up the Chrysnbon Victorian chairs and small table in front of the swinging window.
On the outer wall, there will be a wardrobe (where the bookcase is) and a vanity and chair (where the Mackintosh sideboard, Lundby mirror and black chair are).
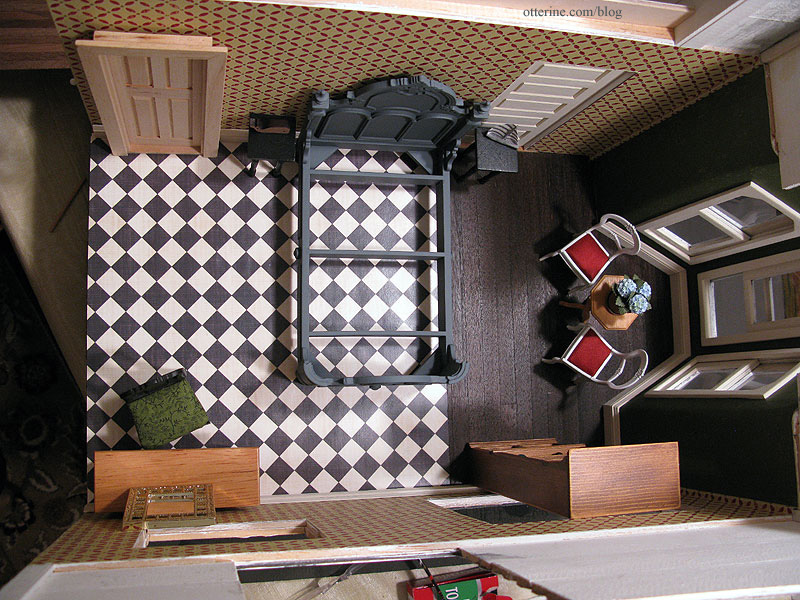
I think the layout works well, though there are the roof peaks to deal with concerning the height of the wardrobe. I might end up with a shorter dresser instead.
Categories: Furniture, The Haunted Heritage
December 22, 2011 | 0 comments
NOTE: All content on otterine.com is copyrighted and may not be reproduced in part or in whole. It takes a lot of time and effort to write and photograph for my blog. Please ask permission before reproducing any of my content. (More on copyright)