

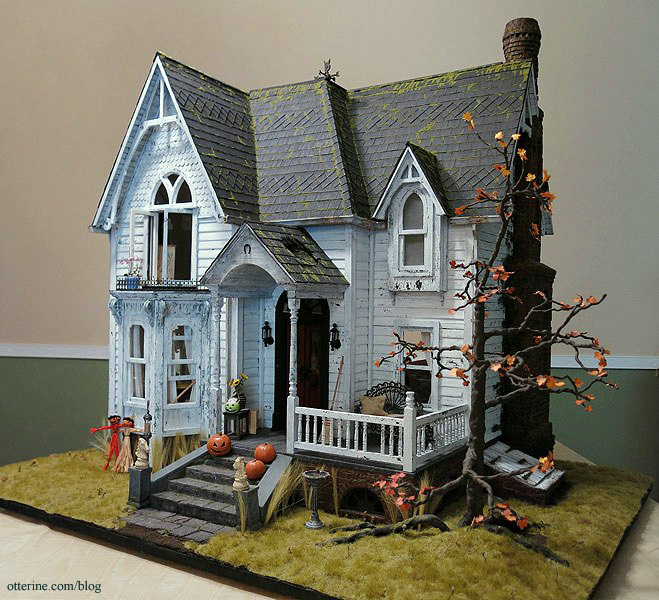
Happy Easter from The Haunted Heritage
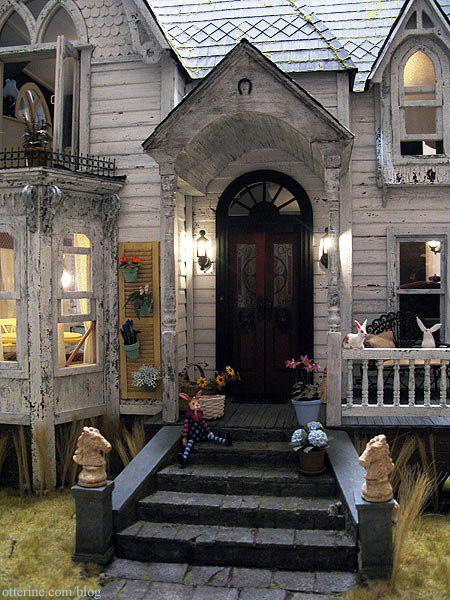
Presto! No more Halloween and on to Easter…as long as I don’t show the big autumn tree out front. :D
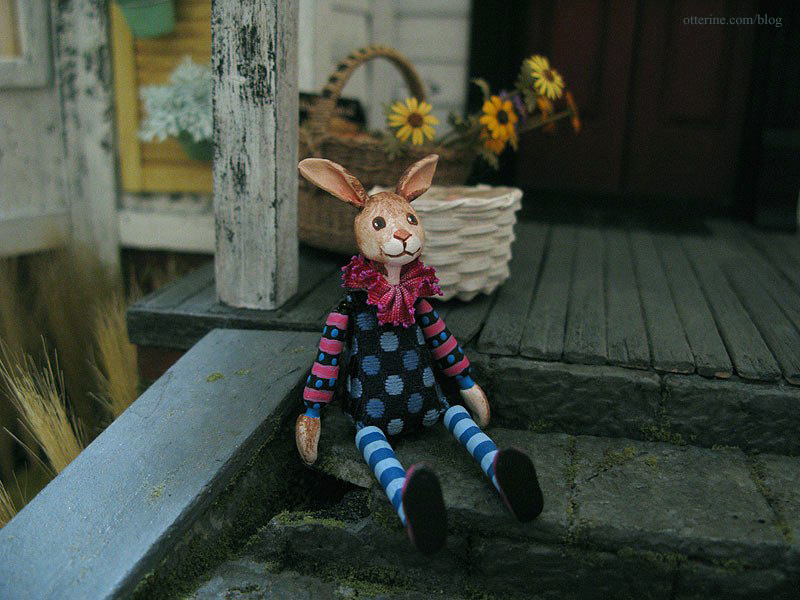
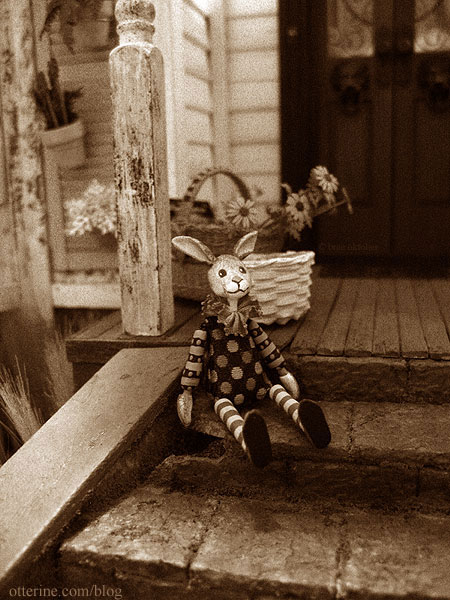
Mr. Rabbit is by K. Kuti Designs. The large basket is from Lidi at Basketcase Miniatures, and I made the flower stems from Bonnie Lavish kits. The white basket was purchased and holds eggs I made for The Aero Squadron Lounge.
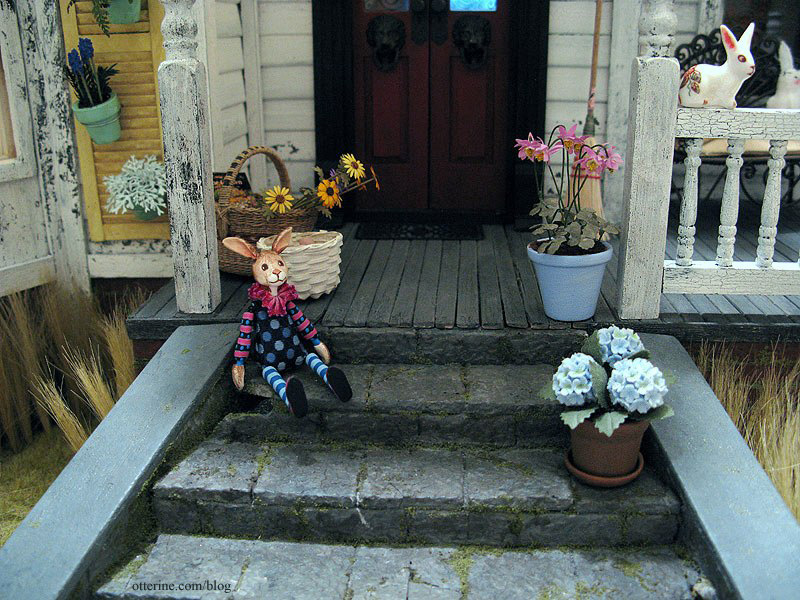
The purple flowers in the blue pot are from Michelle of Little Rabbit Minis, and the hydrangeas were purchased.
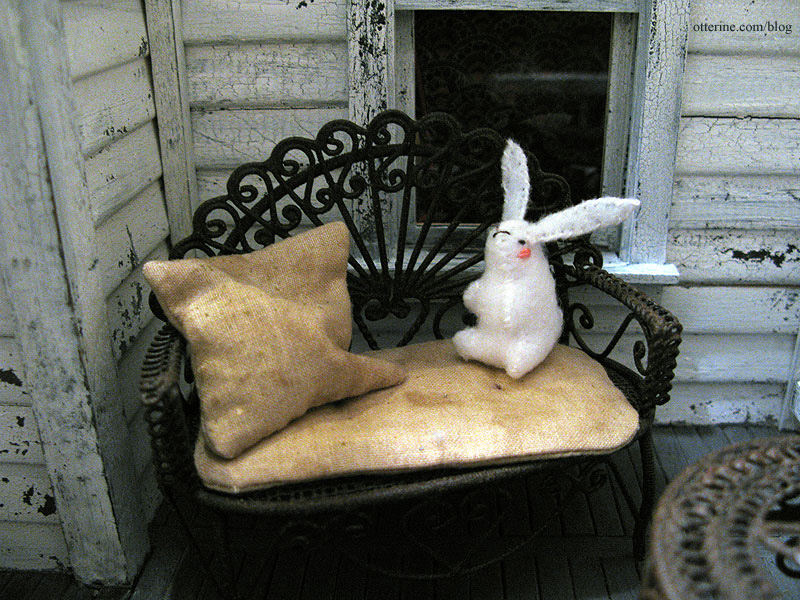
The stuffed rabbit is from Sisters Dreams.
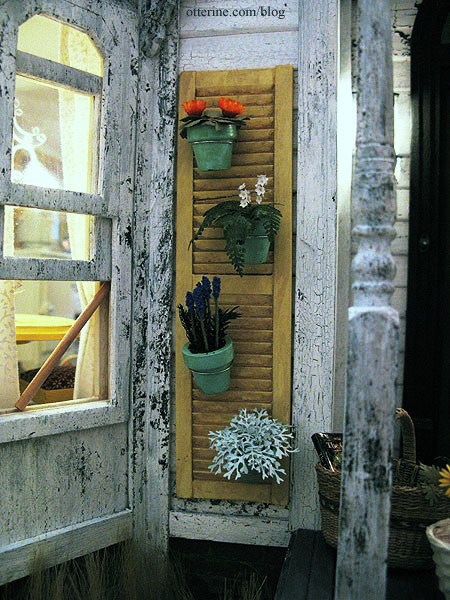
The shutter garden I made for The Artist’s Studio fits well on the Heritage, too. :D
Happy Easter!!!! :D
Categories: Roomboxes and Mini Scenes, The Haunted Heritage
March 31, 2013 | 0 commentsBlack cat weathervane, moss and lawn care
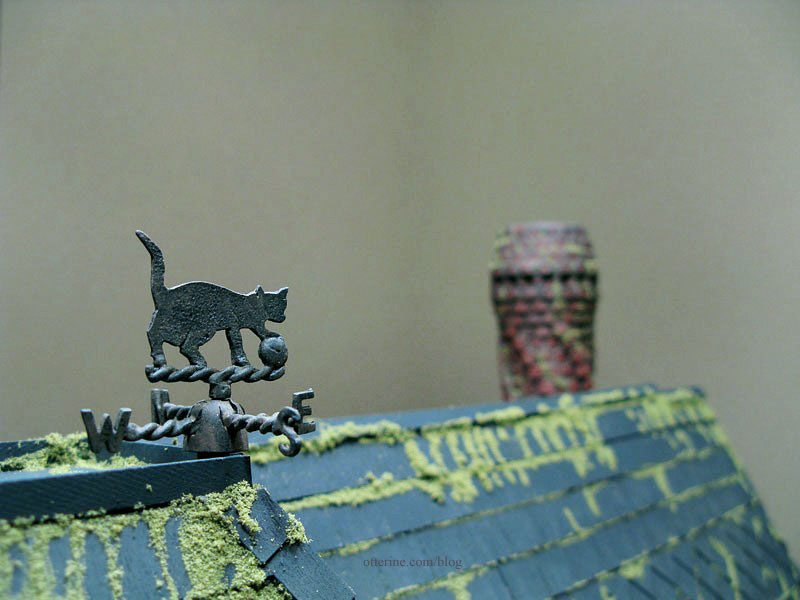
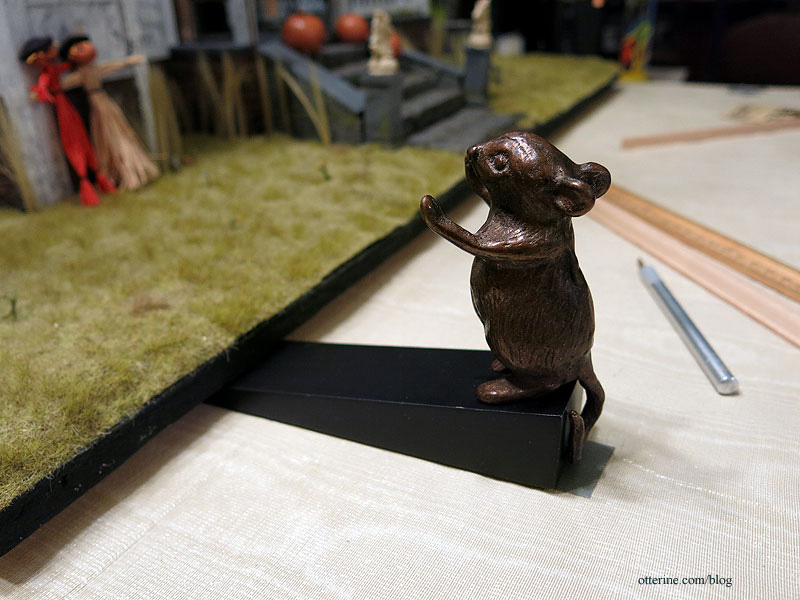
What’s a haunted house without a black cat? Boring and unfinished, that’s what it is.
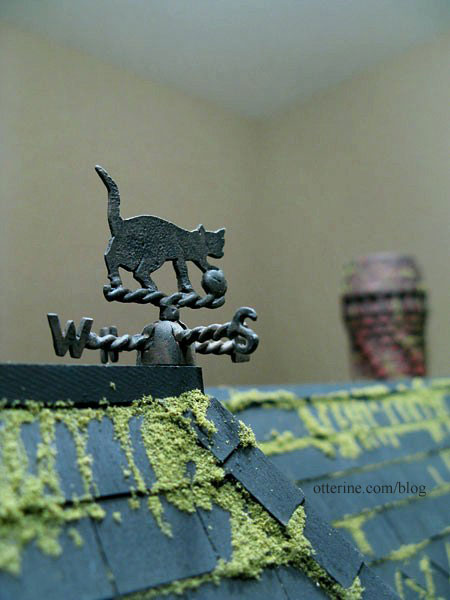
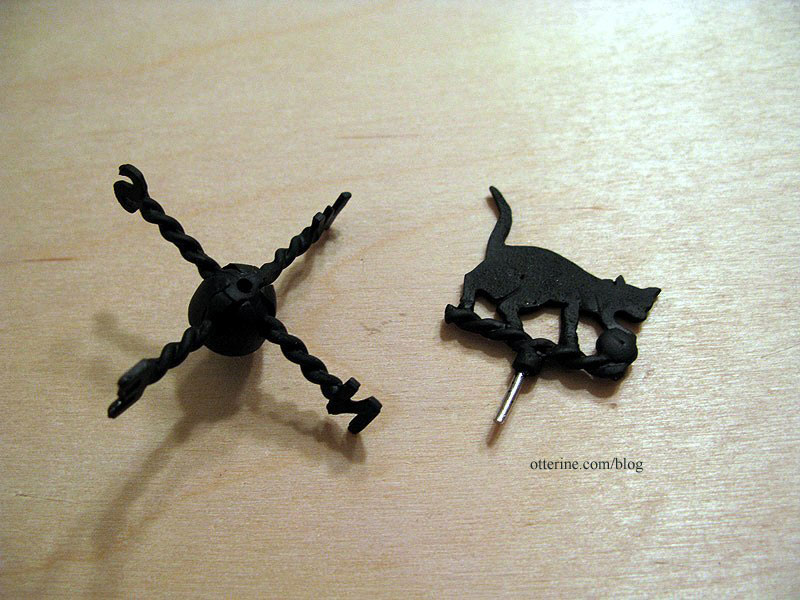
I bought this delightful weathervane from Minimum World. It’s made from silver metal, so you can paint it any color you like, but not brass, please. No additional brass is needed in the miniature world. I sprayed the pieces flat black and cut off the bottom from the mounting bracket. The bottom pin I left unpainted. The pin sits in the base and allows the cat portion to spin.
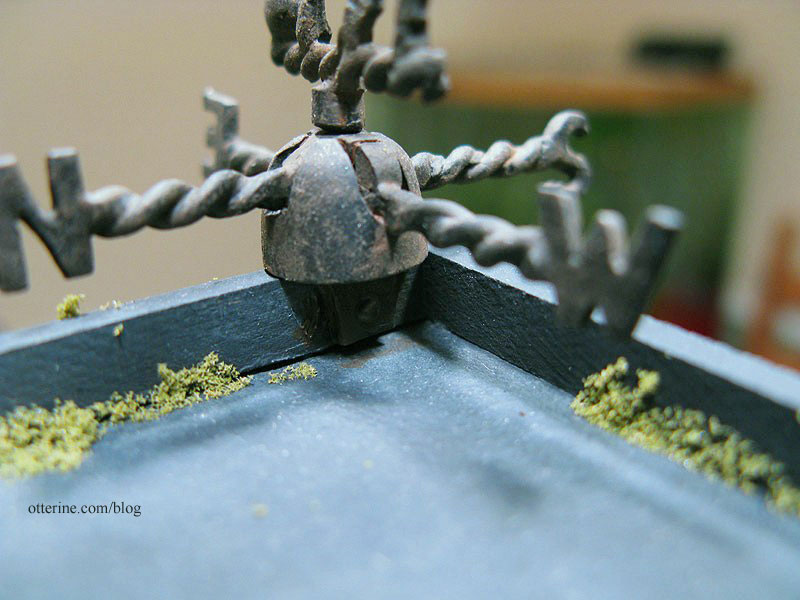
I then applied the same weathering technique I had used for the Juliet balcony.
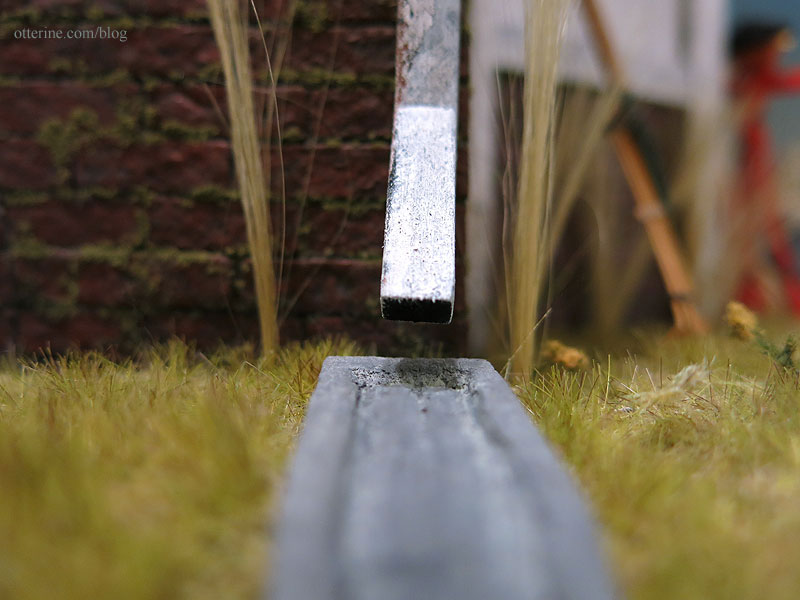
There was no screw included, so I faked a bolt with glue. I added more glue than necessary and let it ooze out the hole when attached to the flat roof trim.
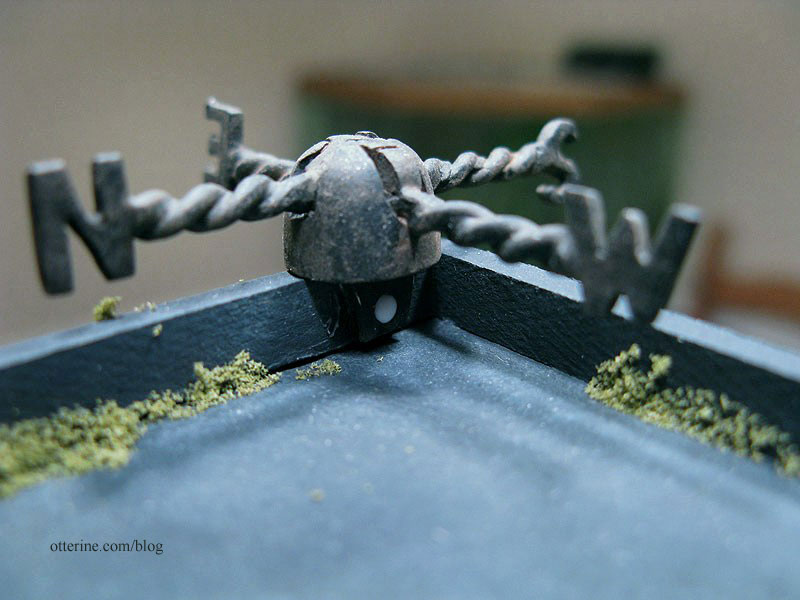
Once dry, I painted it to match.
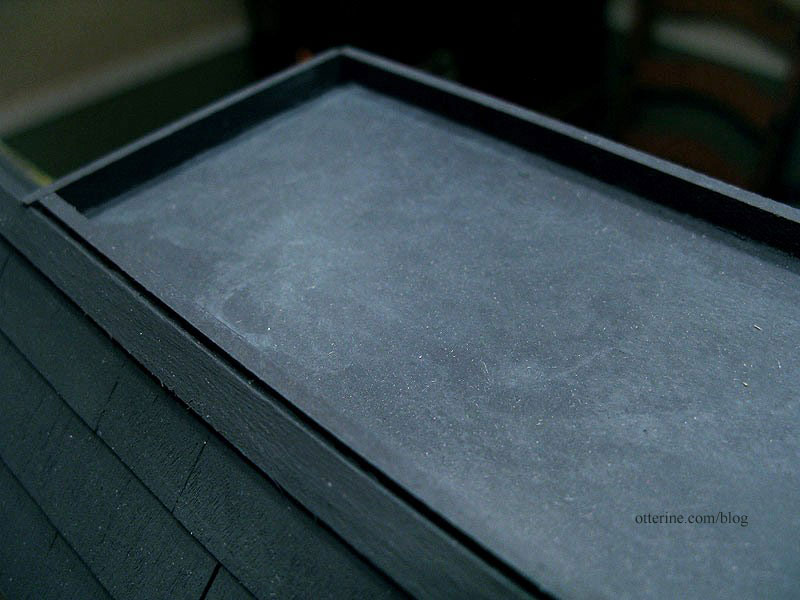
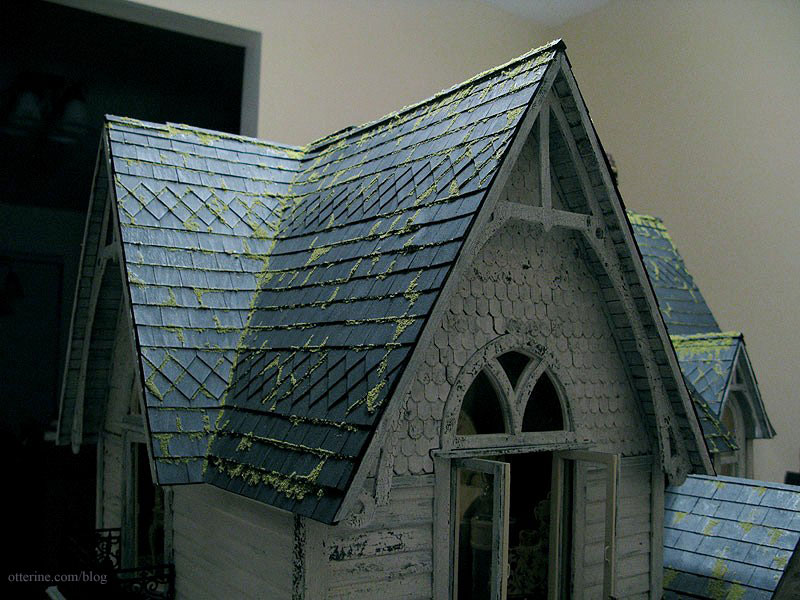
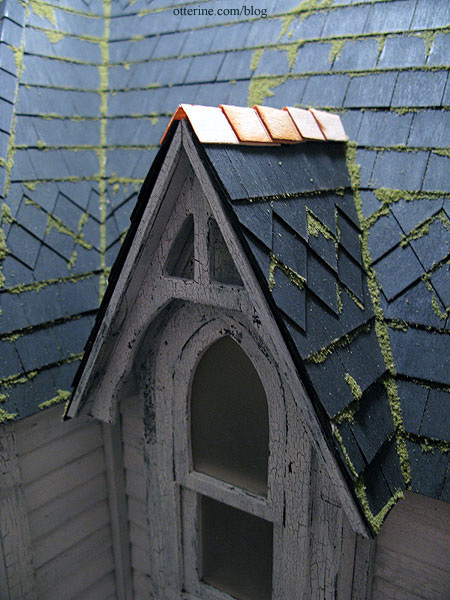
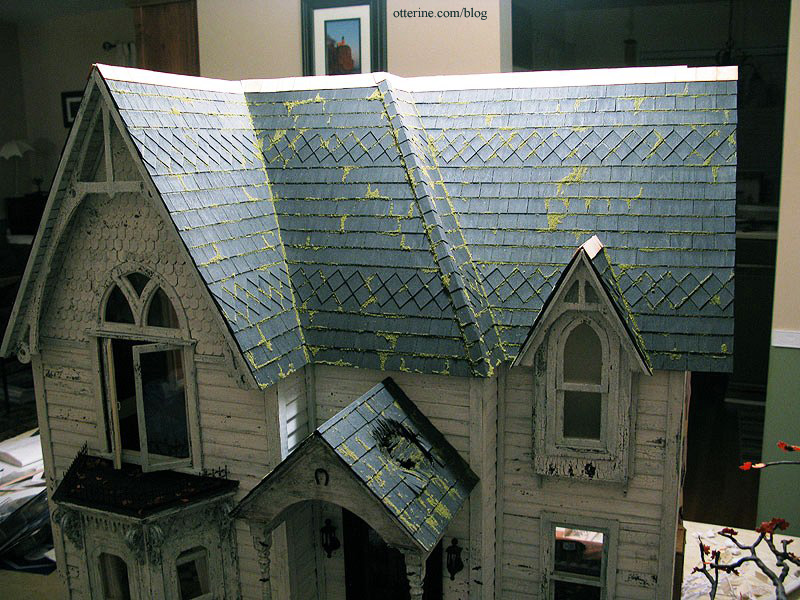
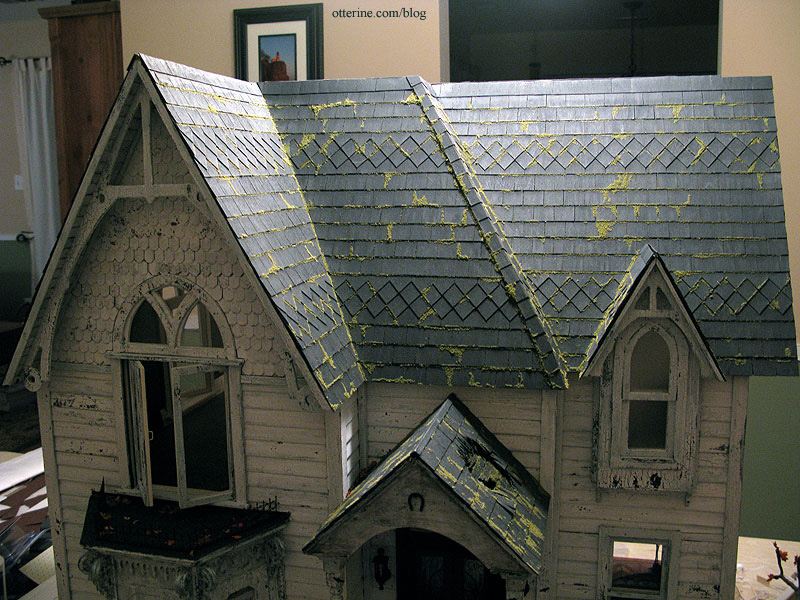
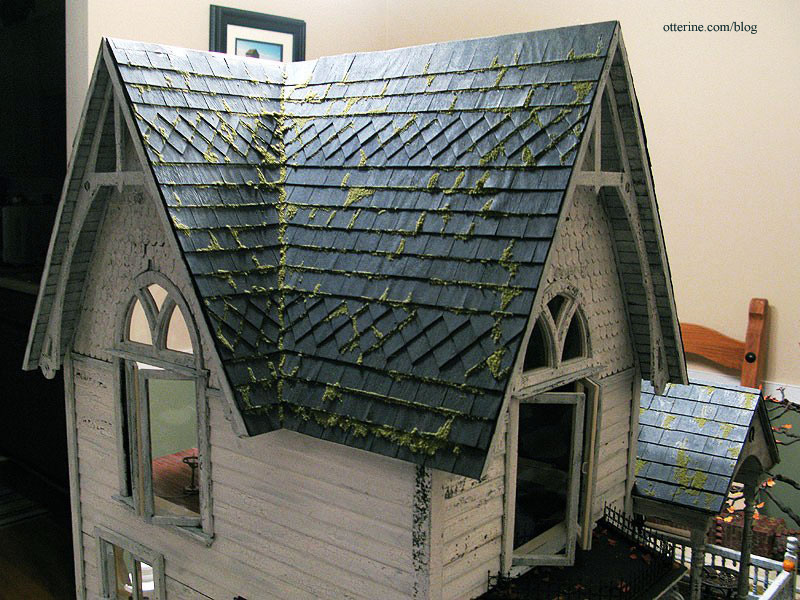
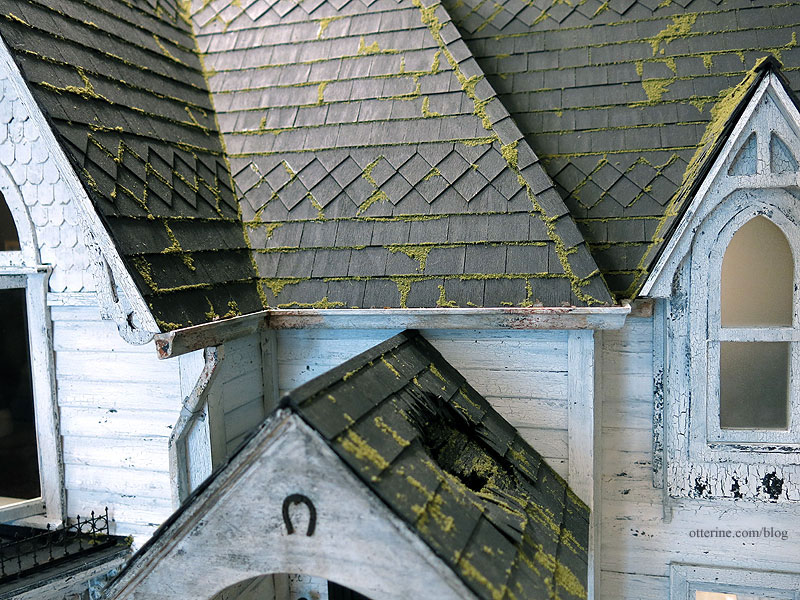
While I was up on the roof, I decided to apply a grey wash to the flat roof portion. This gives it a slight age and weathered appearance.
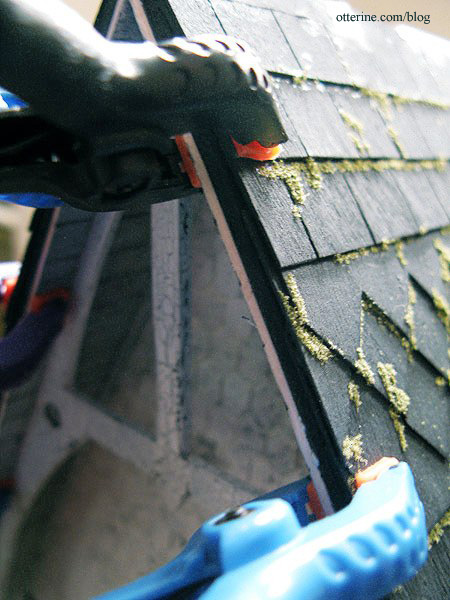
I also finished the moss on the roof.
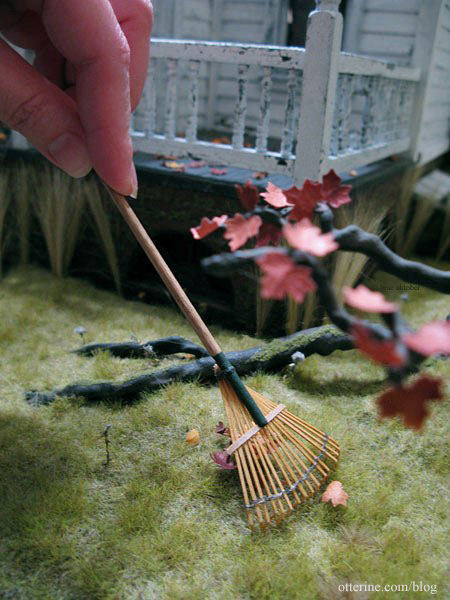
It was a large job only because I had to clear out the attic and rake up the leaves before working. Otherwise, it would have been impossible to clean up the excess foam that gets everywhere.
Now, I’ve never raked a lawn in real life, but here I am happily doing it in mini! This little rake from Sir Thomas Thumb really works! :D No, I’m not left-handed, but I can’t photograph my right hand all that easily.
Categories: The Haunted Heritage
March 14, 2013 | 0 commentsHeritage – Juliet balcony, part 2
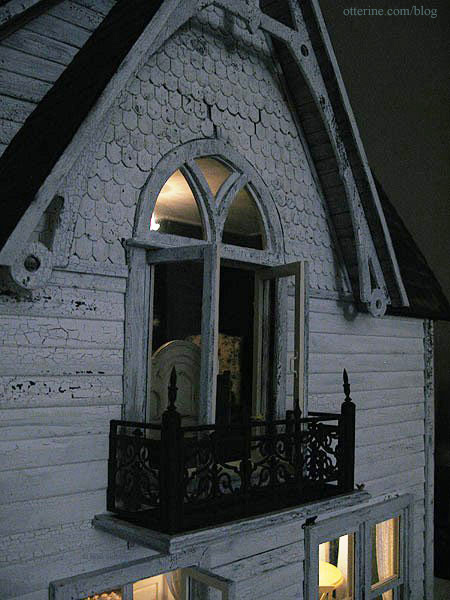
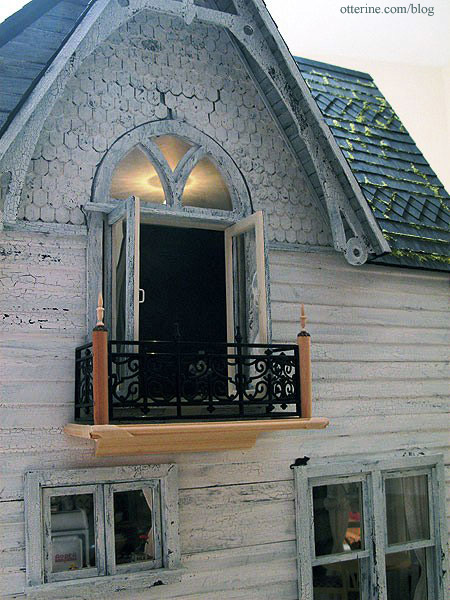
Completed work on the Juliet balcony. It has been glued in place outside the bedroom swinging window.
Here’s a reminder of what the basic structure looked like last time.
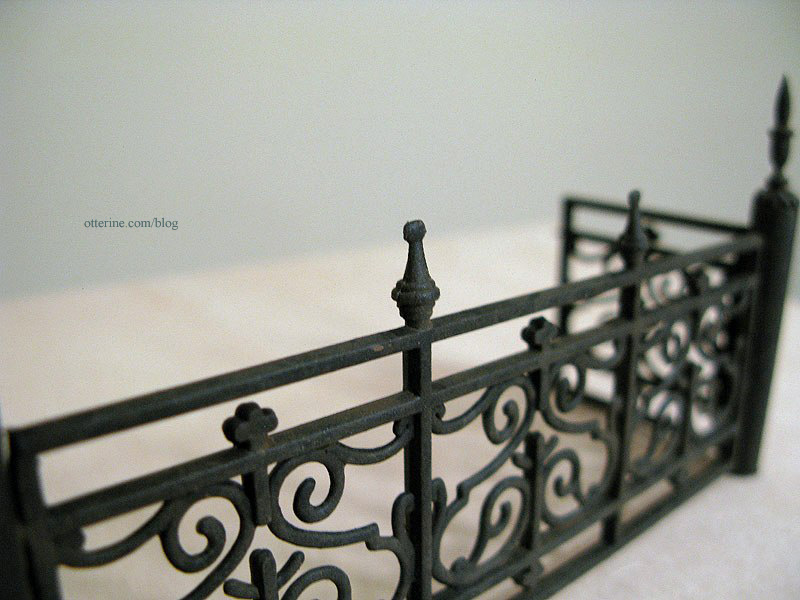
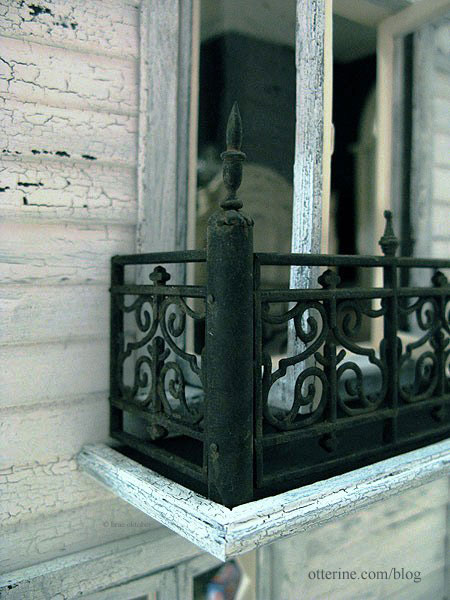
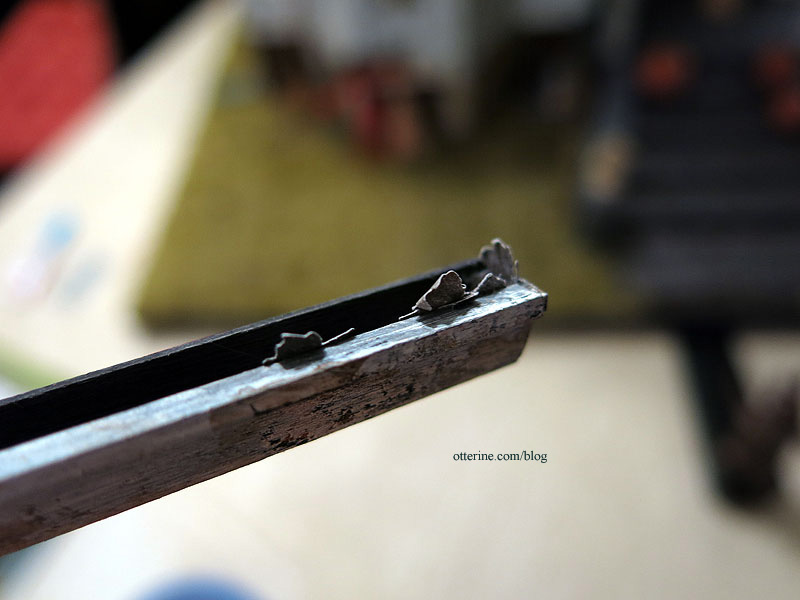
I spray painted the “wrought iron” assembly flat black, which instantly changed the entire look. The finials are a little bent, but I like that for an old house.
To age the iron, I dabbed on Bittersweet Chocolate by Americana, followed by a light wash of Terra Cotta, also by Americana.
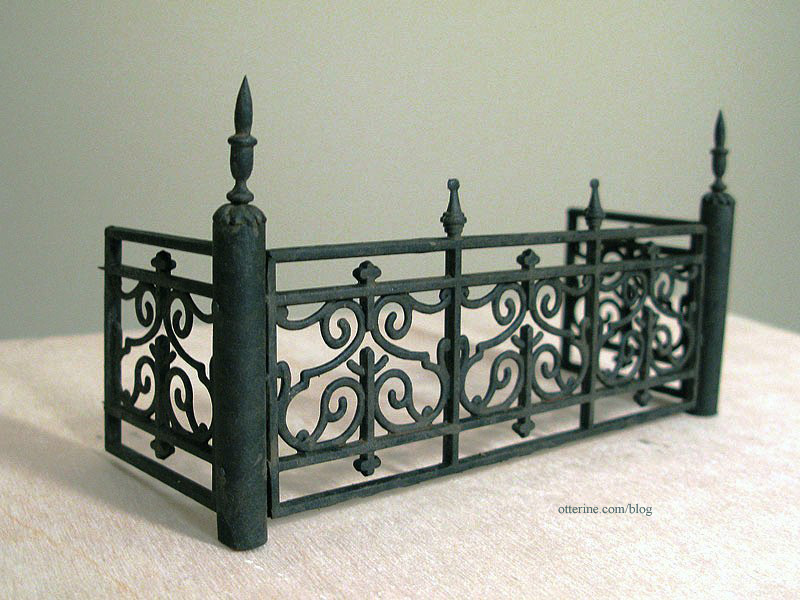
Doesn’t look like plastic anymore.
I painted the balcony floor with the charcoal grey mix I had used for the main roof and painted the wood trim and underside plain black. I also painted the support piece black. I crackled white over the wood trim and underside of the balcony as well as the support piece. I added a grey wash to the balcony floor to give the charcoal grey paint some depth and age.

With all these layers of glue and paint, the wood bowed on the bottom of the balcony – a happy accident I couldn’t have planned for if I tried.
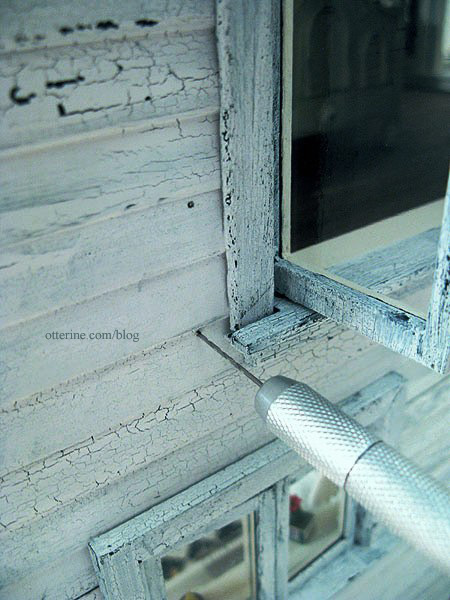
I widened the nail holes that attach the balcony railing to the house, careful not to poke through the walls into the bedroom. It wasn’t until after I did this that I realized the balcony was not centered around the window. But, you know what? Maybe the miniature carpenters who built this house didn’t measure twice drill once and just left it. Who am I to argue? :D
I glued the balcony railing to the balcony floor and then glued the whole balcony to the side of the house. I added the bottom support right away to keep the balcony from falling off the house. :O
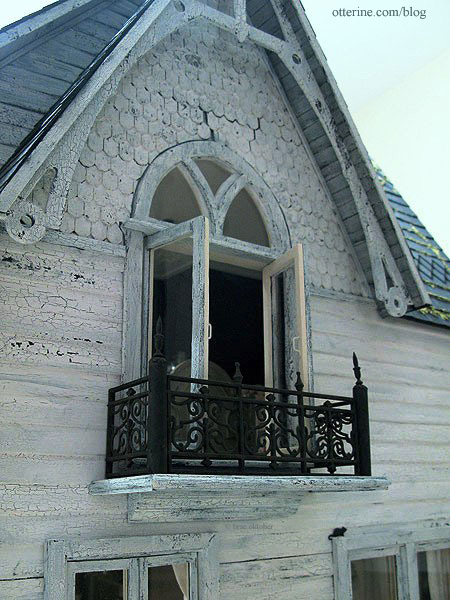
Love this rickety old balcony!
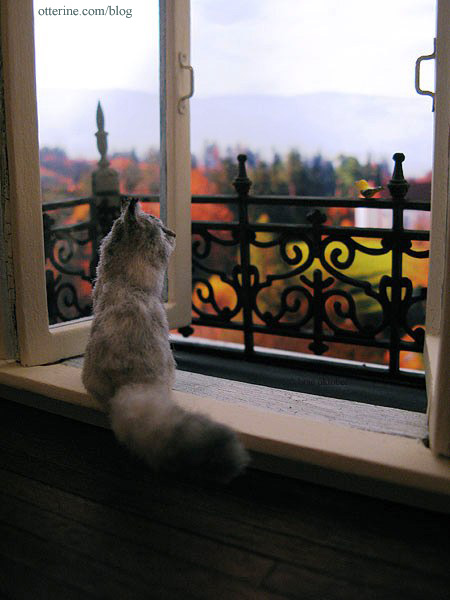
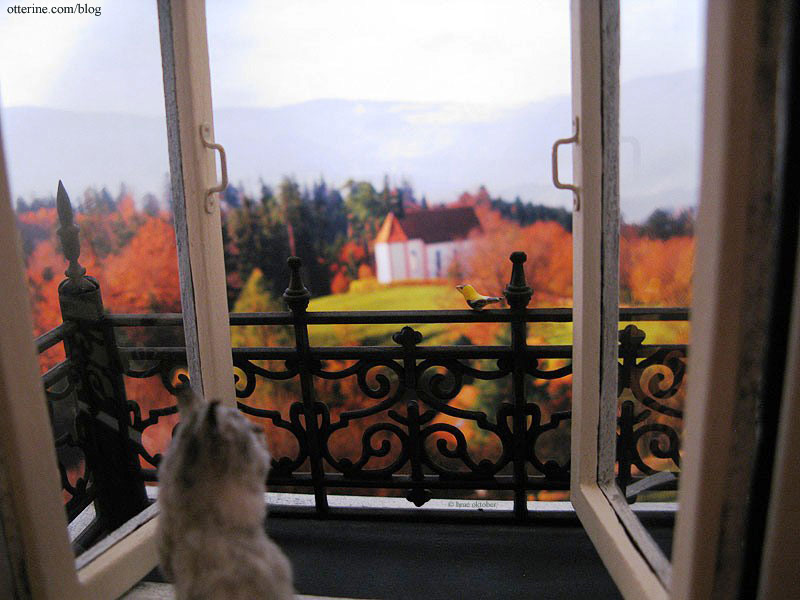
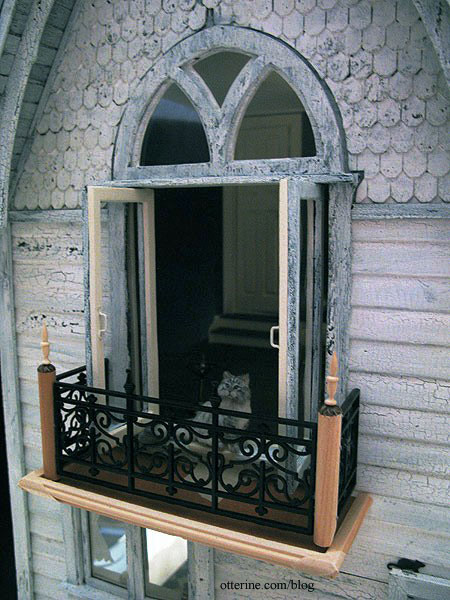
Ophelia couldn’t care less about chasing birds. How beneath her. But, she’ll sit and watch them. :D
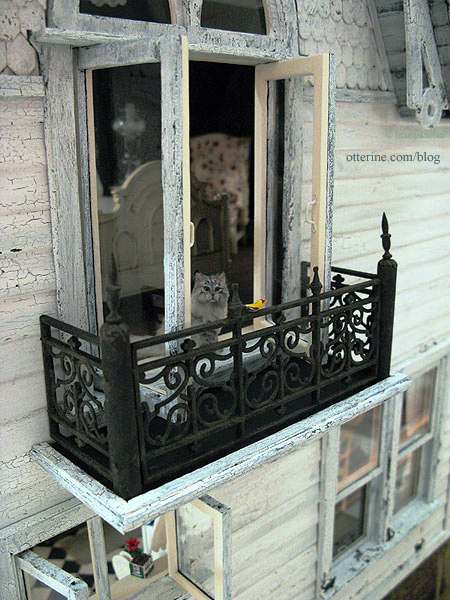
Or, she’ll just enjoy the fresh air and beautiful view.
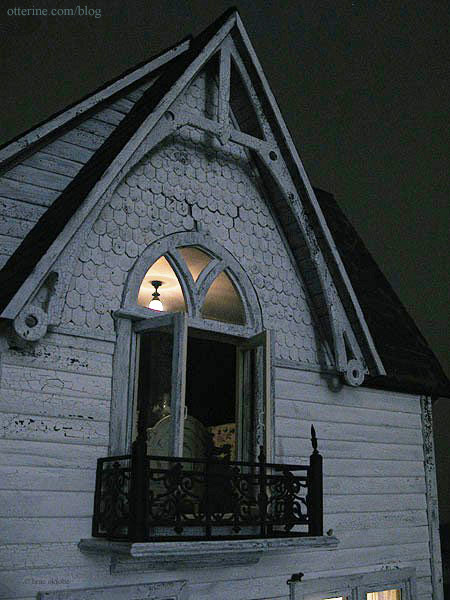
And, grandma won’t risk falling out the window.
A little later in the evening…
Categories: The Haunted Heritage
March 13, 2013 | 0 comments1908 Miniature Underwood Typewriter
I received a nice bonus this year, so I decided to spoil myself a little. For some time now, I’ve had my eye on this 1908 Miniature Underwood Typewriter by Ken Byers of Shaker Works West.

It fits wonderfully in grandma’s attic for now, though I foresee this piece making the rounds in my various builds just as Mary’s afghans tend to do.
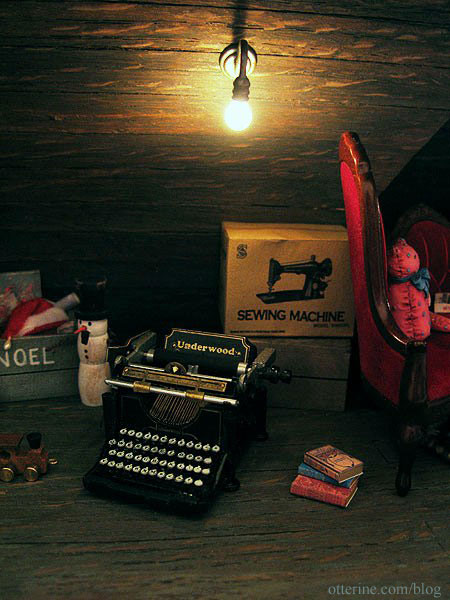
Lots of wonderful minis are making their way to grandma’s attic.
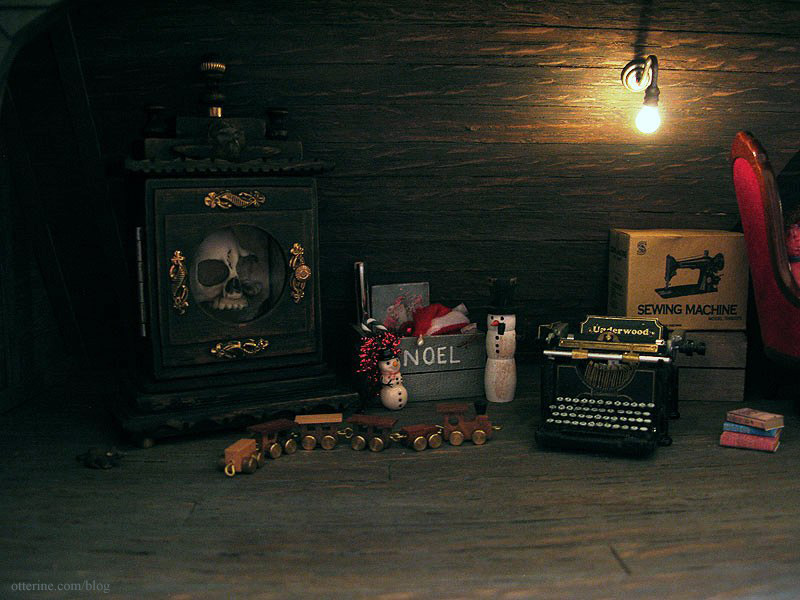
From the left, there is a mouse from Sussex Crafts next to Tony‘s catacombs case clock. The wood and brass train is from a vintage lot of miniatures I bought on craigslist. The Christmas box is from M Carmen for Caterina’s holiday swap. I purchased the two snowmen. The sewing machine box is from Four Little Walls. It’s sitting on a crate with some random books I made in front. :]
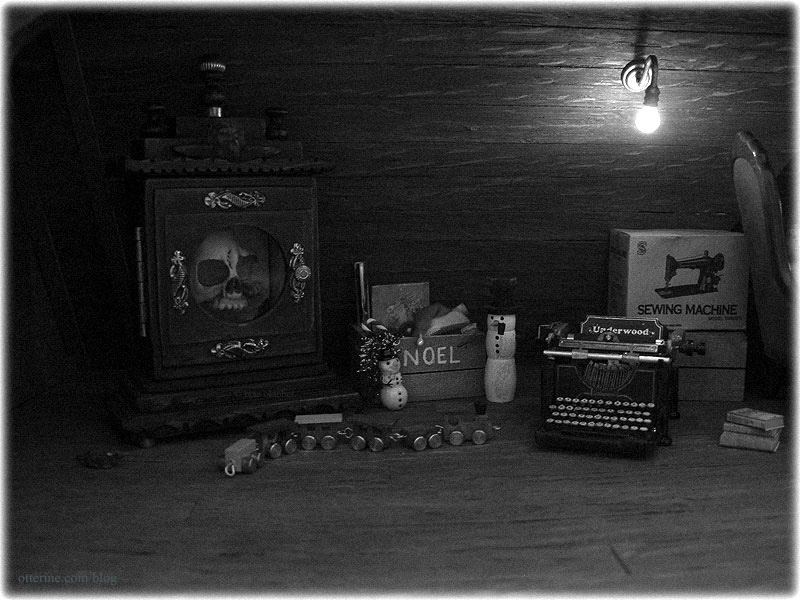
In black and white, it looks even more vintage!
There’s an interesting story about the taller snowman. A week ago, I noticed he was facing backwards. I thought this was odd of me to do, but I just shrugged and turned him around. When I set up this scene, he was facing backwards again!!!! :O Haunted attic indeed! I was seriously disturbed by this because I knew I had turned him around days earlier. Later that day, I was using the scroll saw and something fell out of the Heritage (the saw is attached to the same table). After picking up the wayward mini, I checked the attic and sure enough, that snowman had walked forward! Mystery solved…or was it? Hmm….
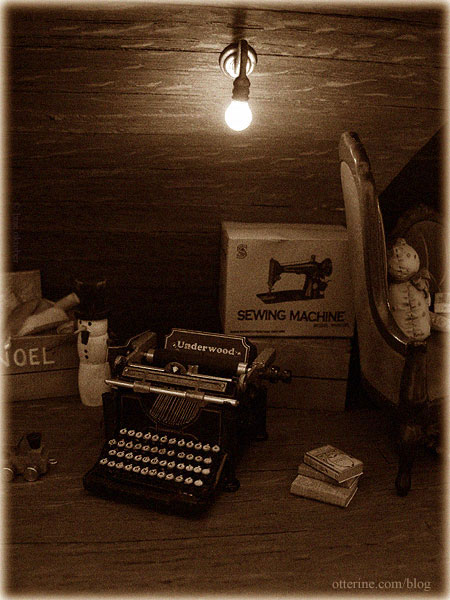
And, have you seen this baby from Uncommon Goods? Nothing like blending vintage and modern! :D
Categories: Miniatures, The Haunted Heritage
March 11, 2013 | 0 commentsWho wants freshly baked cookies?!!
I suppose that is a bit of a silly question. Who doesn’t want freshly baked cookies?!! :D Grandma knows this and has been hard at work.
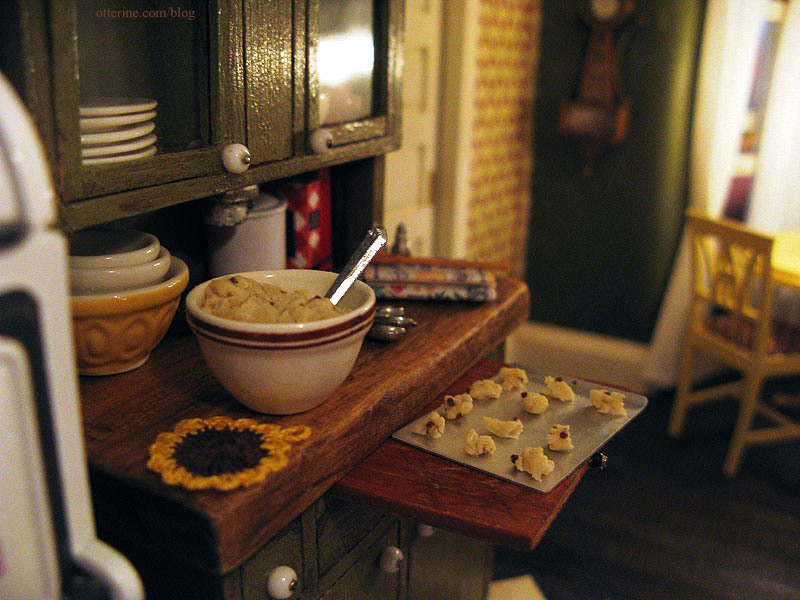
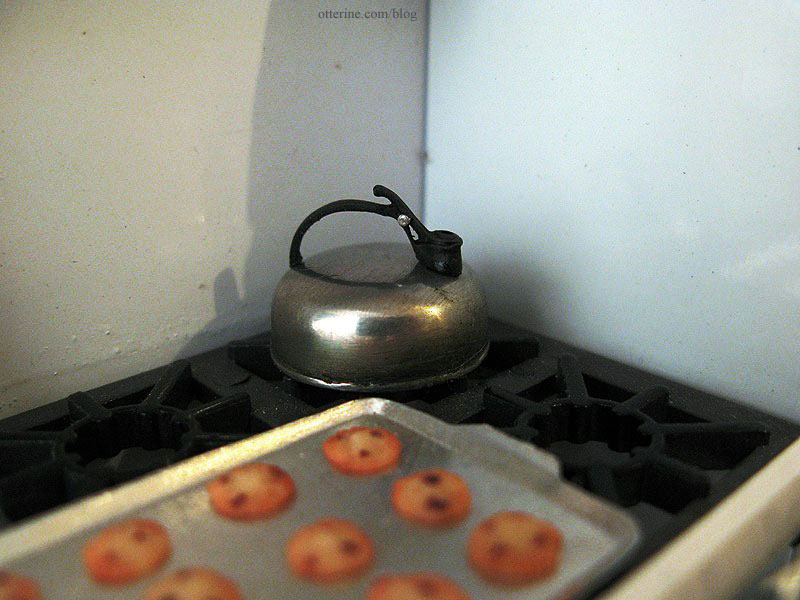
I won this lovely cookie baking set from Creating Dollhouse Miniatures. The pieces are so well made and realistic.
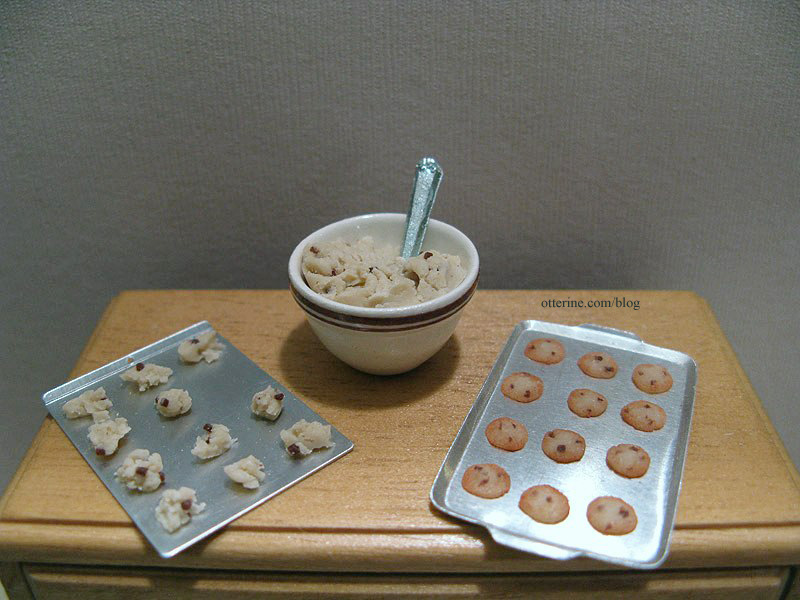
My mom makes the best chocolate chip cookies. No kidding. Every family gathering has people hoarding the cookies she brings, even though she brings dozens! I know chocolate chip cookies, and these minis are just like hers! :D
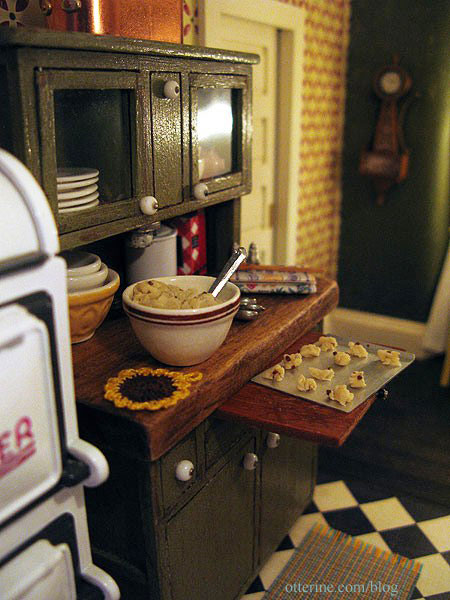
Cookies in progress certainly warm up a kitchen, don’t they? :D
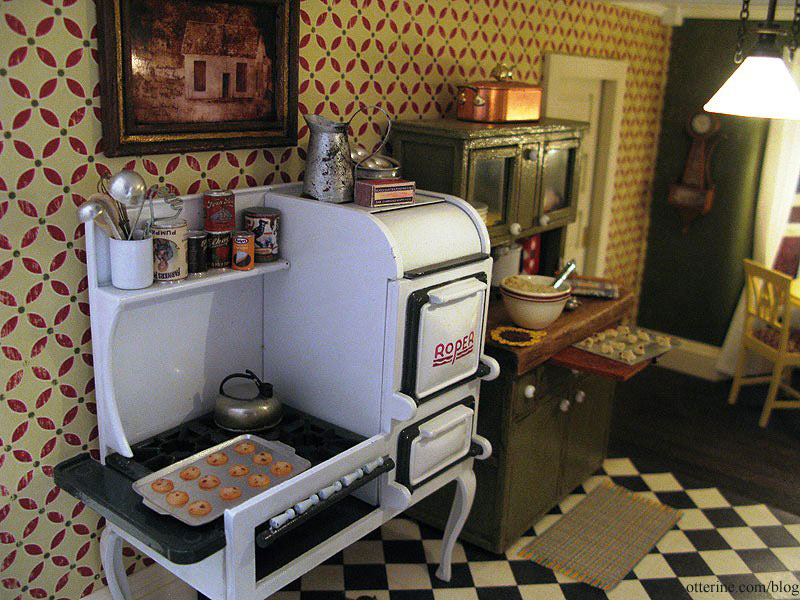
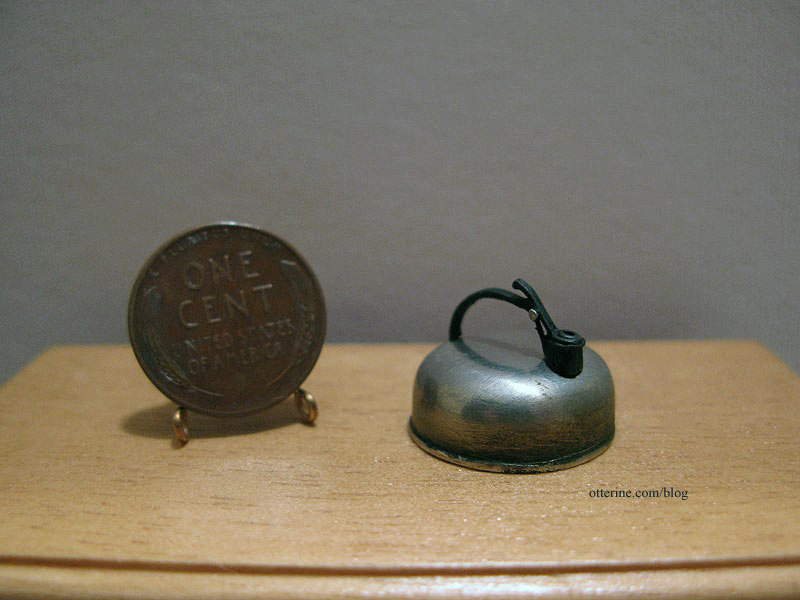
Another recent acquisition is the whistling tea kettle by Ulus Miniaturas – purchased from Mainly Minis when I replaced the fire in the wood stove.
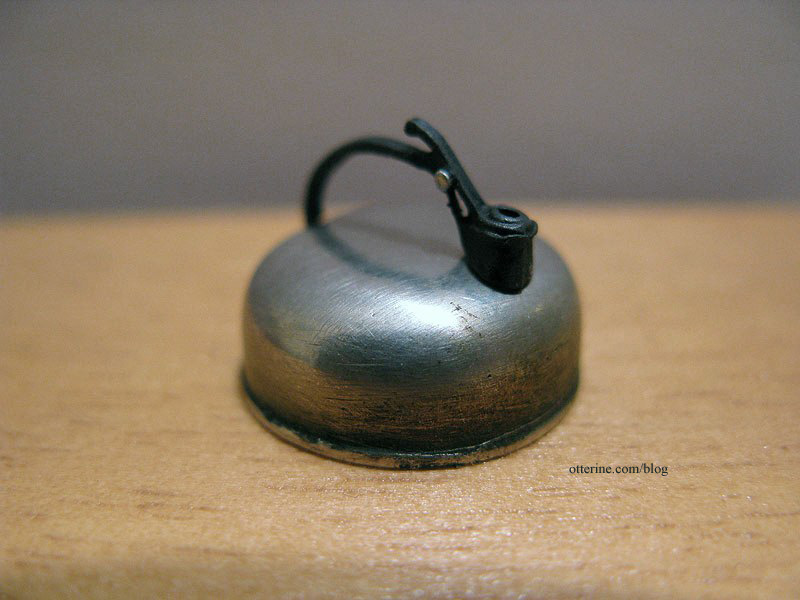
We had one of these in real life at my childhood farmhouse. Mom still has it and uses it, too! Next time I’m over at her house, I will snap a photo of it.
The mini version is just as well made and quite heavy.
Categories: Miniatures, The Haunted Heritage
March 4, 2013 | 0 commentsHeritage – roof finishing, part 2
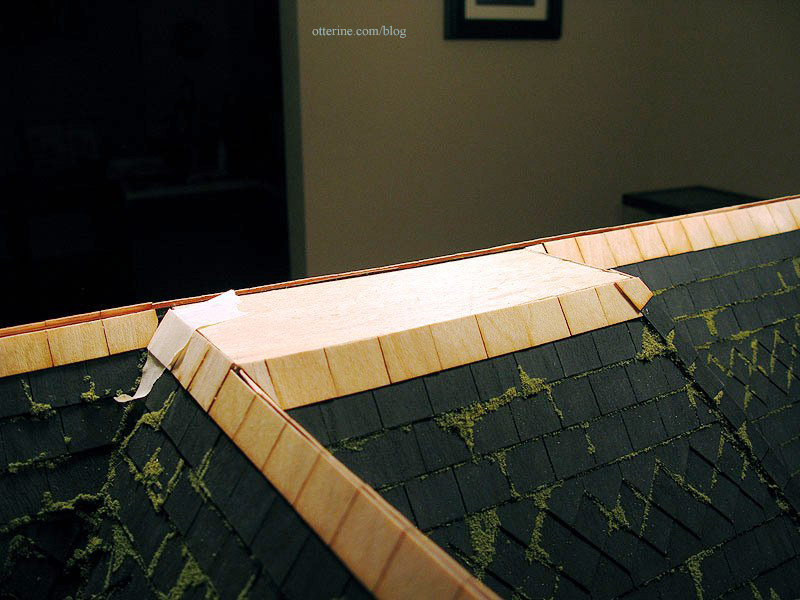
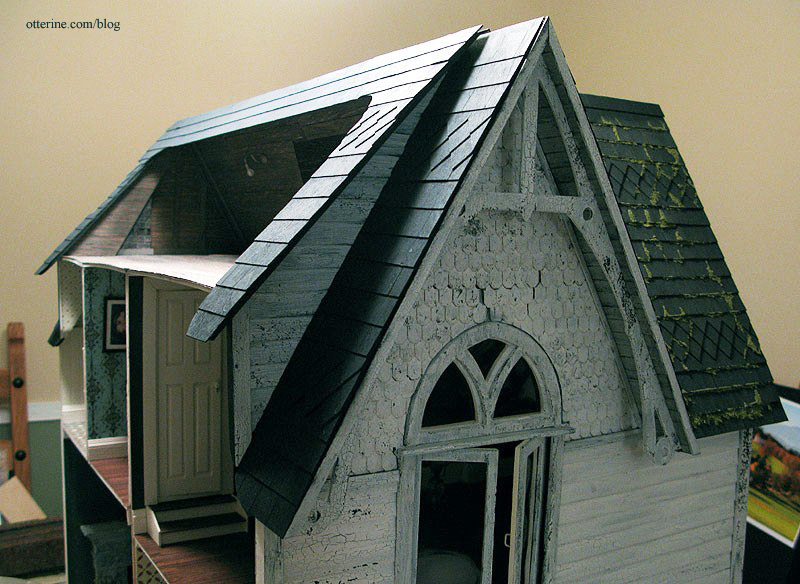
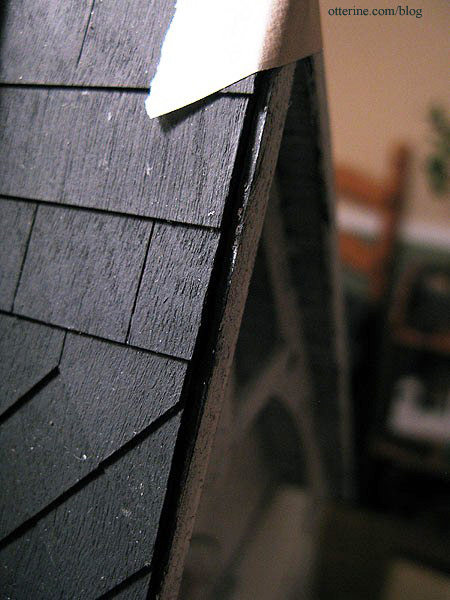
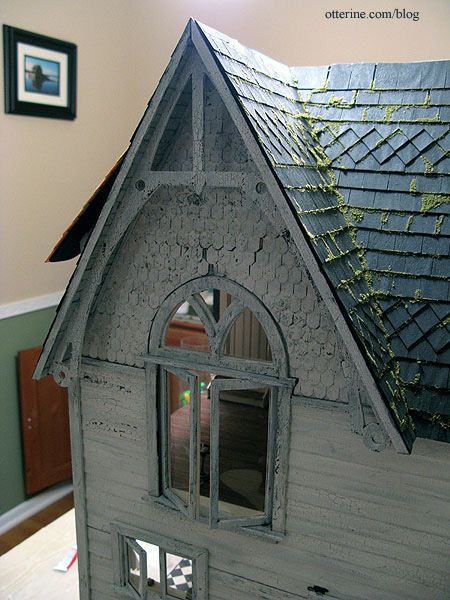
Continuing work on the roof finishing. With the roof shingles applied and painted, the only thing left was to finish the roof ridges. I thought about doing lapped shingles but didn’t like the way it looked on the dormer when I tried it. It doesn’t look terrible here in this photo, but there were a lot of gaps on the top and it just looked off.
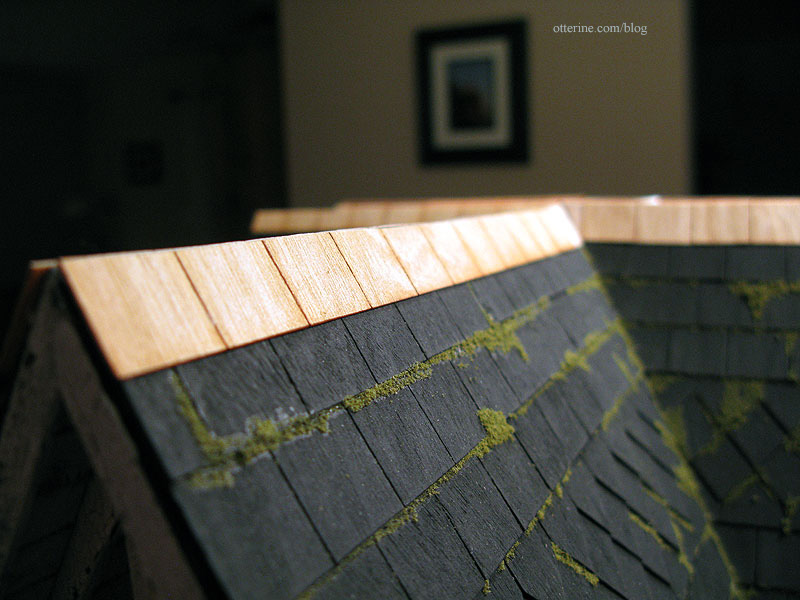
I decided to go with 1/4″ corner trim from Manchester Woodworks, which is also an easier solution. I used my new scroll saw to make the cuts; it’s a wonderful machine!

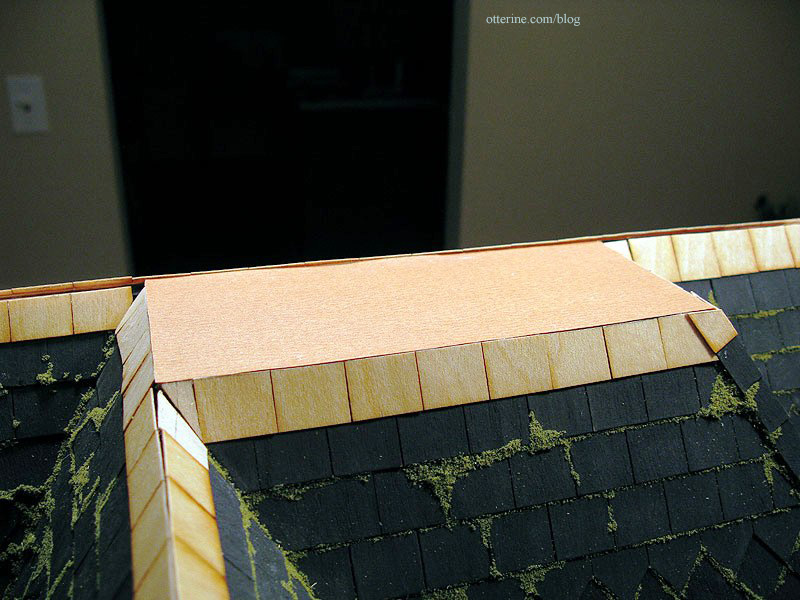
I used old Dura-Craft strip wood to enclose the flat roof portion. I didn’t trim around the bottom edge, because I didn’t like the way it looked.
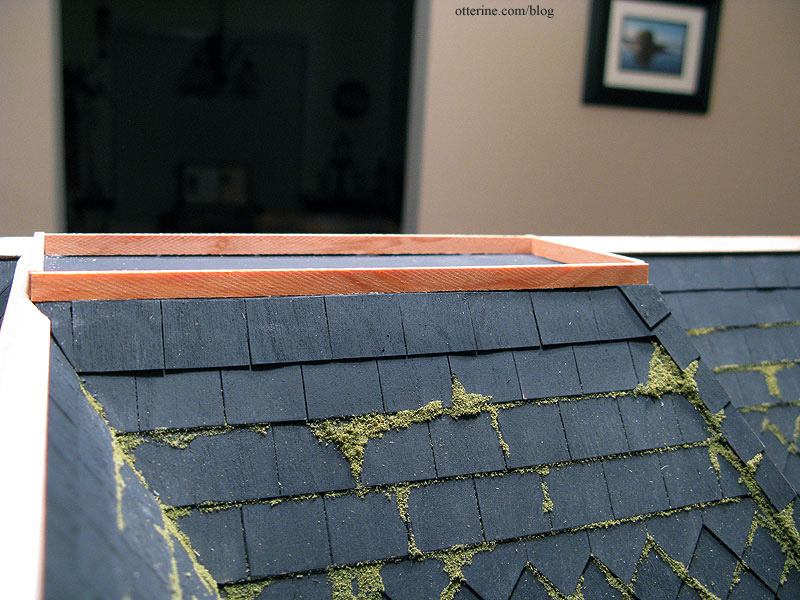
I painted the new pieces to match the roof.
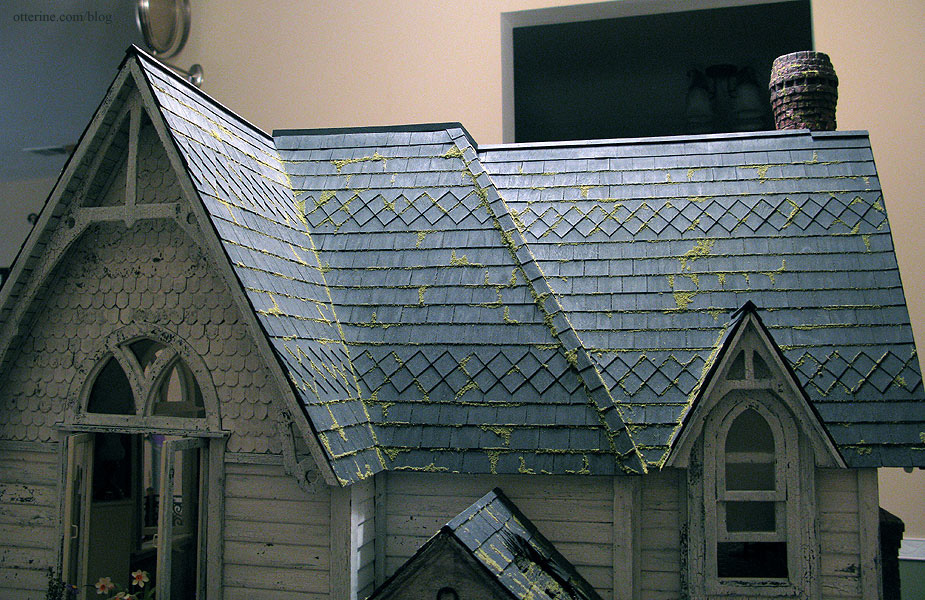
It already looks more finished, but once the moss is on it will blend better.
Final roof touches here.
Categories: The Haunted Heritage
February 10, 2013 | 0 commentsNew minis for grandma’s attic
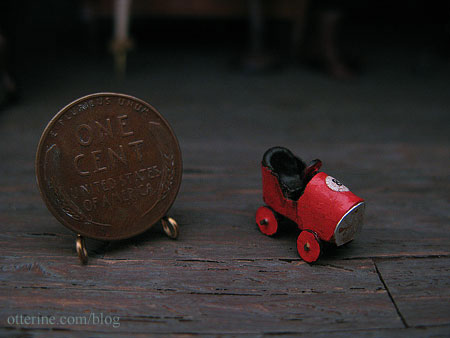
I received another lovely item for grandma’s attic…a vintage race car in red.

This insanely tiny piece was made by Andrea Thieck, and yes, the wheels turn!
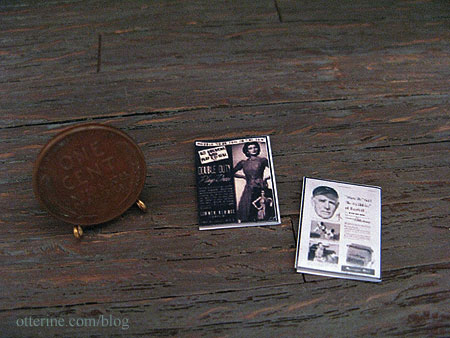
I also won a giveaway from Dolly’s Gallery. Gail sent me two lovely Saturday Evening Post magazines for the attic.
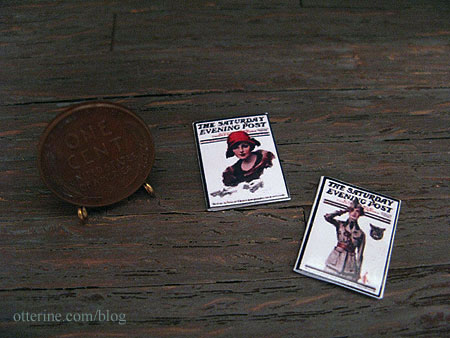
When it comes to vintage magazines, the ads on the back are just as interesting as the covers.
Categories: The Haunted Heritage
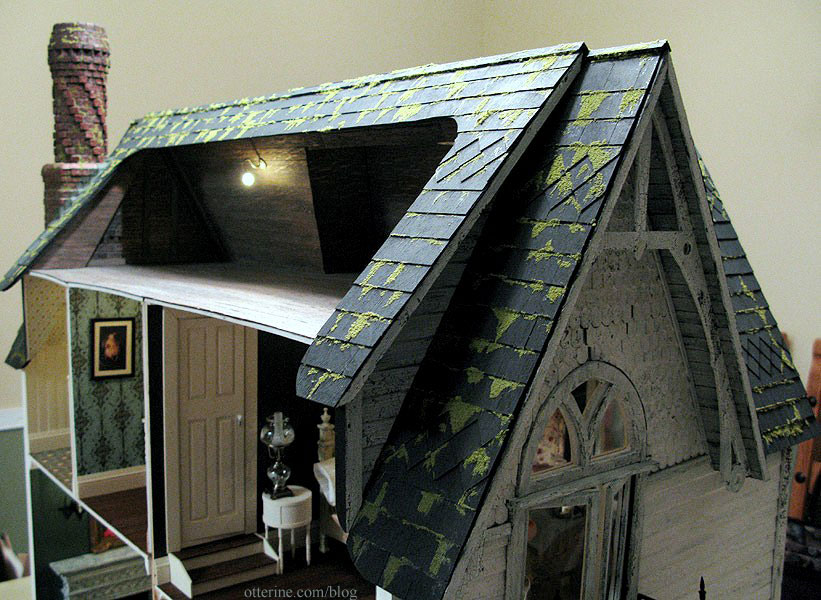
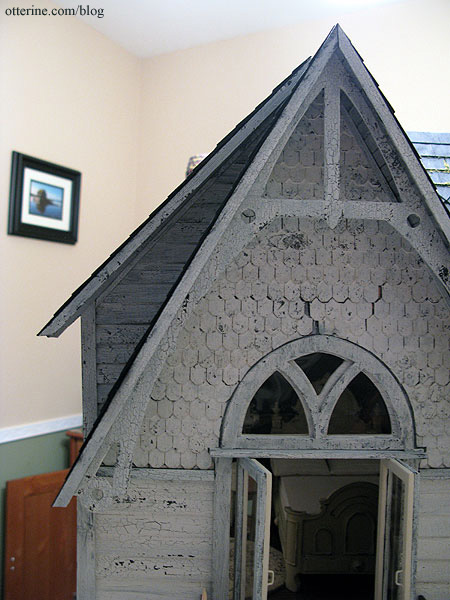
February 1, 2013 | 0 commentsHeritage – chimney side gable finishing
I finished the gable eave and trim for the chimney gable and the new back roof addition.
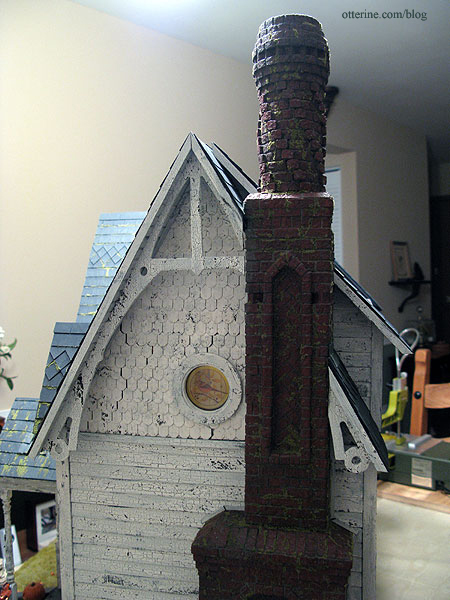
I trimmed the chimney with thin strip wood, and it looks a little awkward in places. But, I plan to cover it with ivy, so that will all work out in the end.
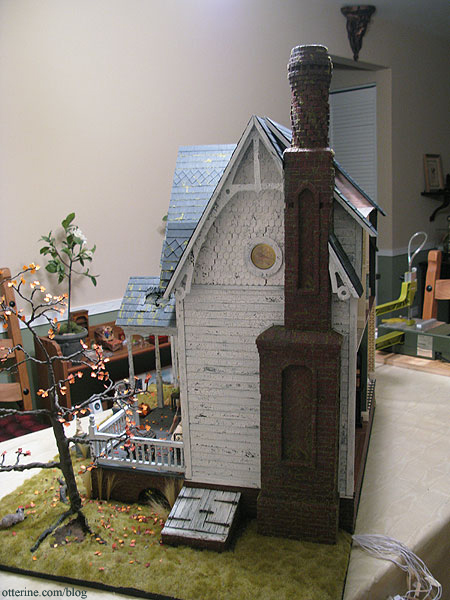
I finished the eaves on the new back roof and added finishing trim on the opposite side as well.
Categories: The Haunted Heritage
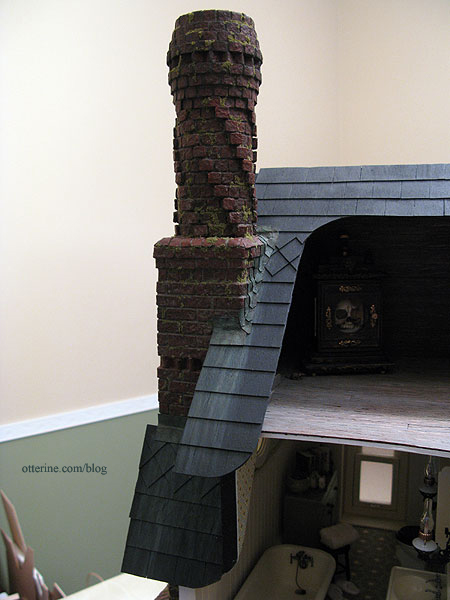
January 28, 2013 | 0 commentsHaunted Heritage chimney, part 11
Continuing work on the chimney. I traced the chimney outline onto a sheet of drawing paper to guide me in cutting the trim that will surround it. I didn’t end up using it as a guide, but it was worth taking the time just in case.
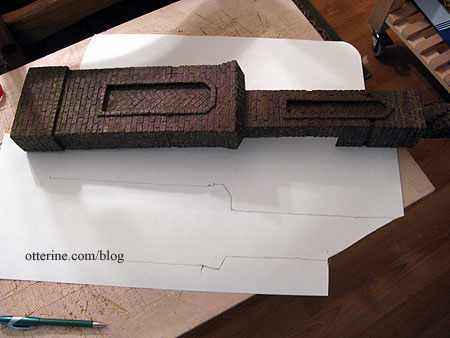
The chimney fits well against the house without additional adhesive, but that’s not to say it will stay removable. In theory, I can remove it in case of a major wiring disaster, but it would still require some deconstruction in that case. I just won’t weld it to the house.
I added flashing to the chimney using brown cardstock. I crinkled the paper to make it look worn and to help it form to the contours of the brickwork.
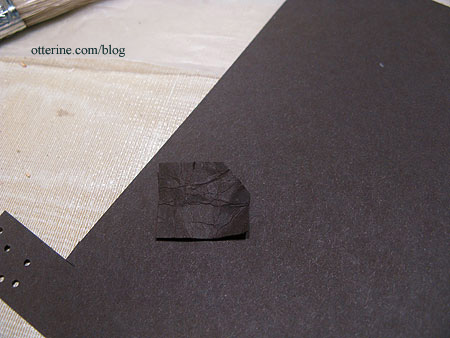
From my limited research, I believe chimney flashing is usually under the shingles on the sides, but we’ll just ignore that. :D
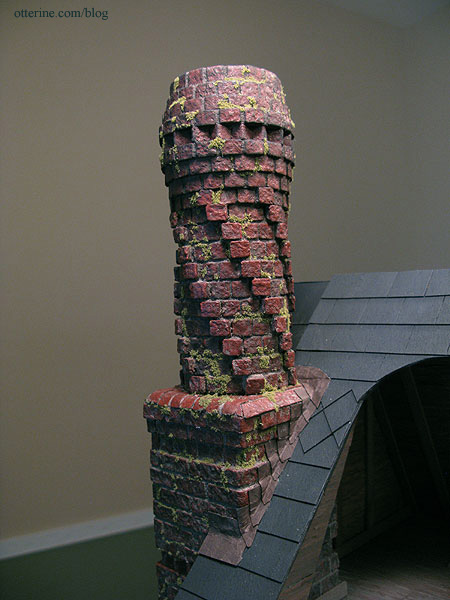
Next came the process of turning paper into old copper using paint. I dry-brushed each paint color over the paper flashing to age it. The final color of Bittersweet Chocolate toned down the other brighter and lighter colors.
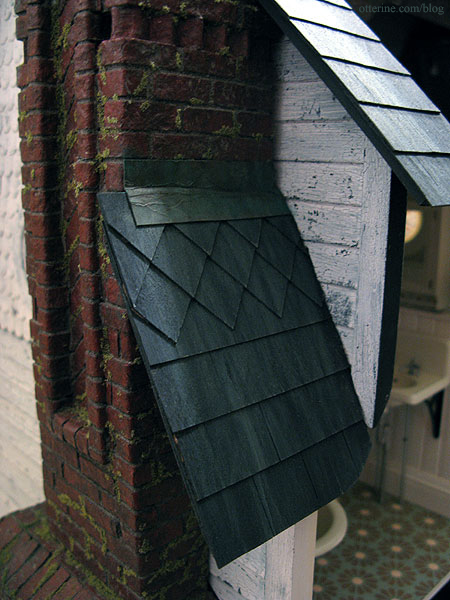
Once I had that done, I added water to my palette and began streaking the same colors down the shingles to give the impression of mineral deposits building up over time.
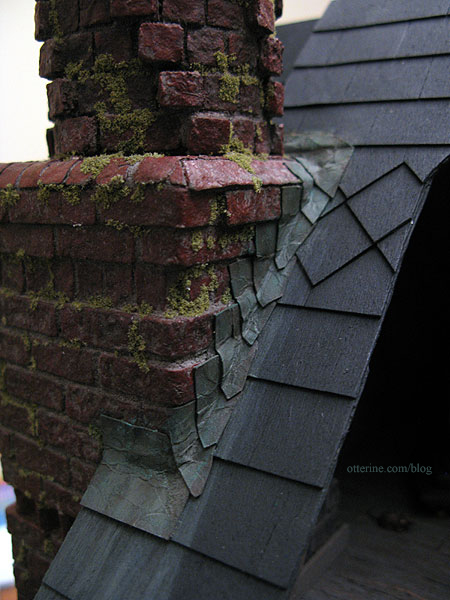
It’s hard to capture in photos, but I love the way it turned out.
Categories: The Haunted Heritage
January 27, 2013 | 0 commentsHeritage – Juliet balcony, part 1
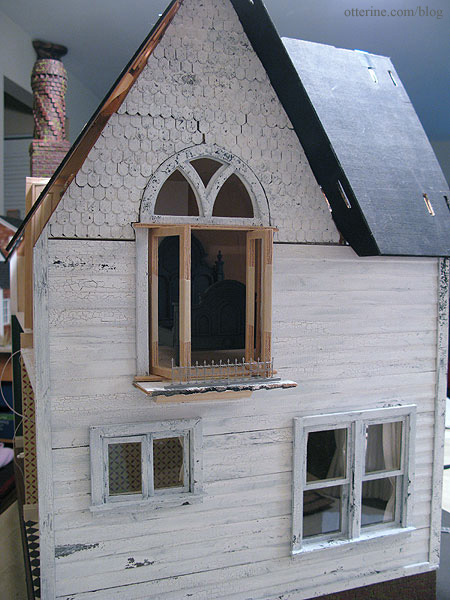
Since the swinging windows are floor-to-ceiling openings and we don’t want grandma toppling out the side window, I decided to add a Juliet balcony. Here’s the rough mockup I had made back in March 2012 that shows the general idea.
There isn’t a whole lot of room for the necessary support structure due to the first floor casement window if the bedroom windows are to swing out but it’s workable. Adding the balcony won’t detract from the interior view and it seems the most realistic and interesting to me.
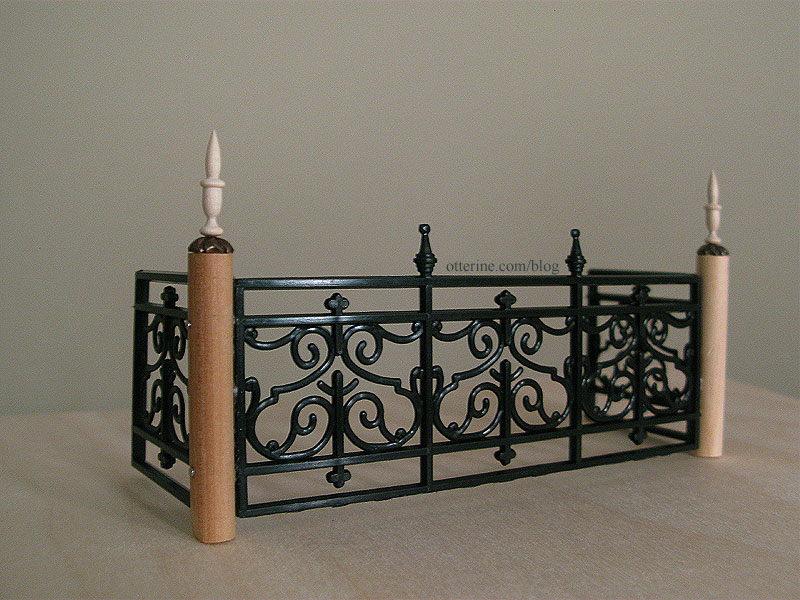
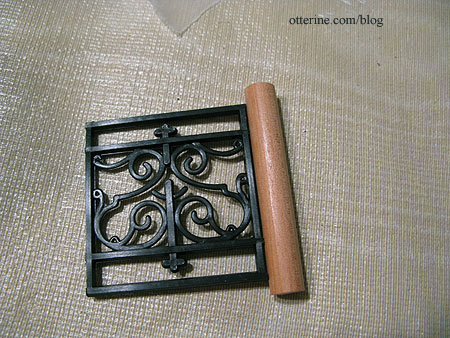
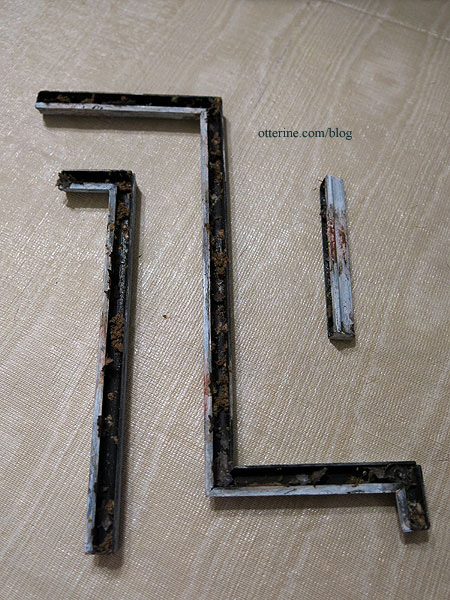
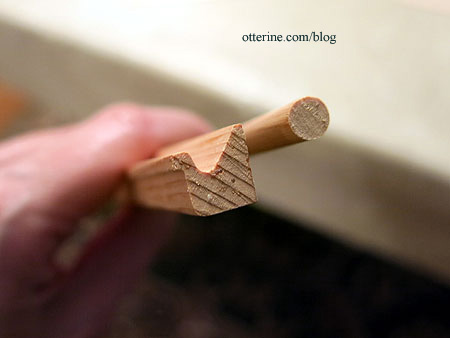
The tiny widow’s walk railing I used on the bay balcony doesn’t provide much in the way of safety, so I used plastic railings from The Dolls House Emporium. I used a large piece of fencing to make the longer span in the middle.
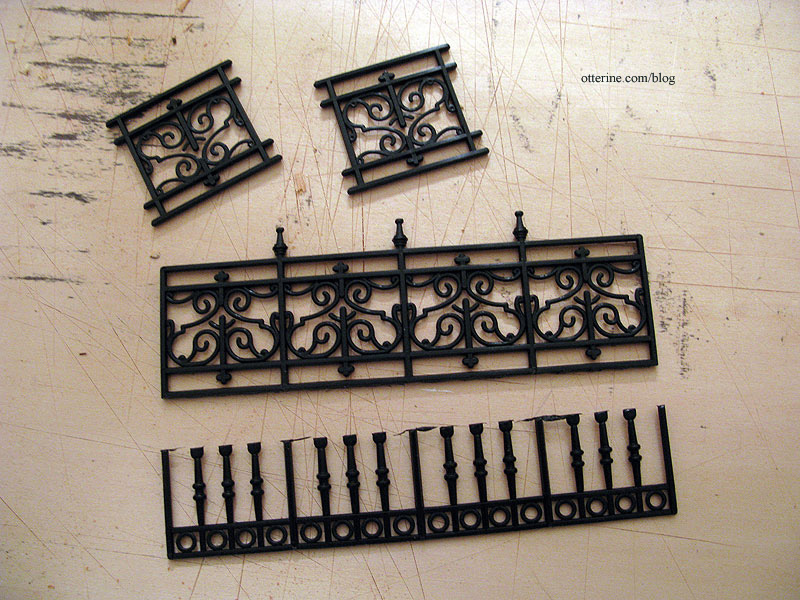
For the posts in between, I used 5/16″ diameter rods cut to 2″ in length. These were in a bag of random Dura-Craft parts from my long lost kit from the late 80s. I cut the tips from the ends of the plastic railings and drilled holes for pins.
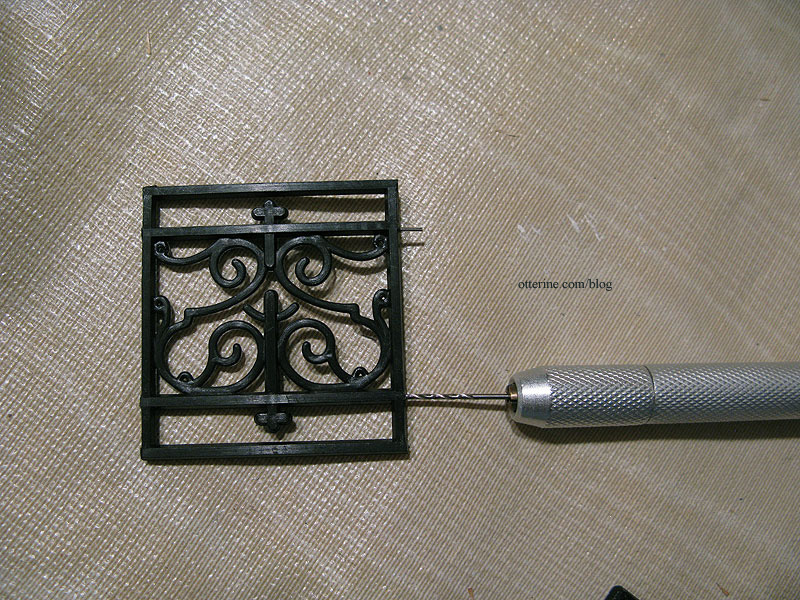
I drilled coordinating holes into the dowels.
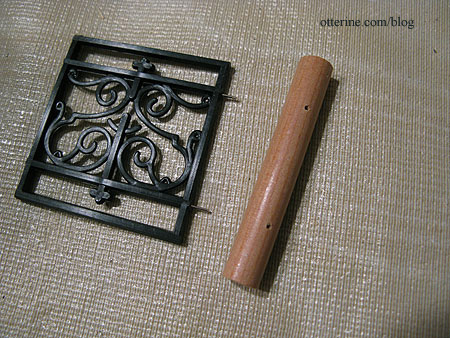
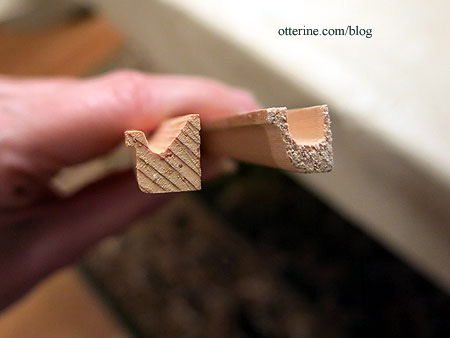
I glued the railings to the dowels using the pins for stability.
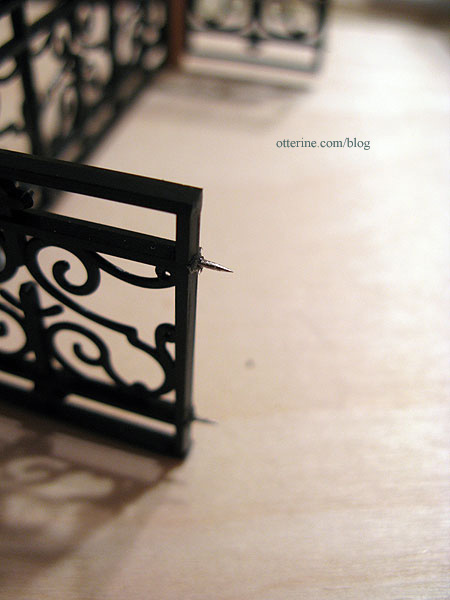
I added pins to the back sides of the plastic railings. These will attach to the house siding.
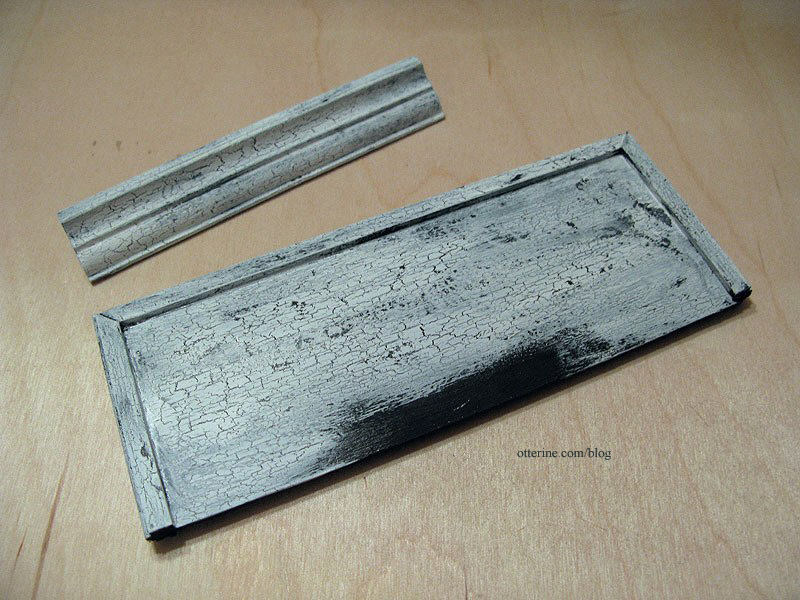
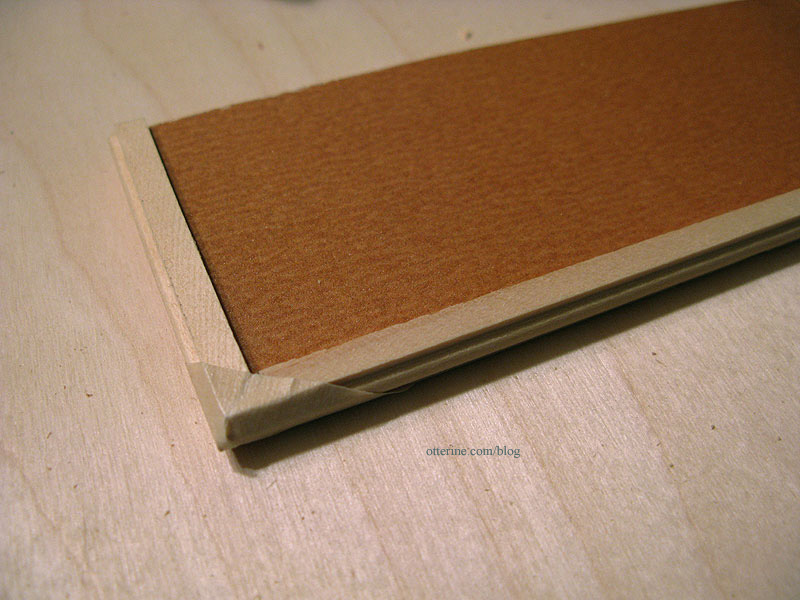
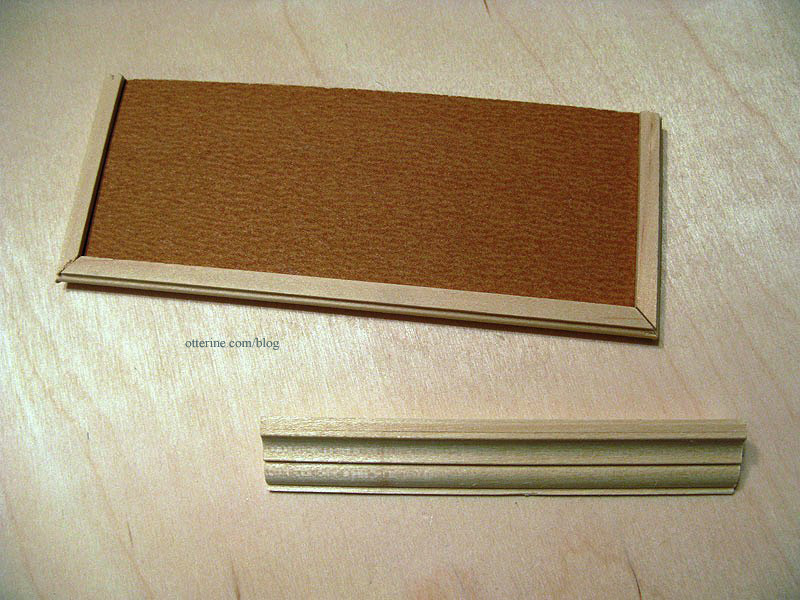
Next, a wood base from 1/16″ thick basswood. Anyone else hate the stickers they put on sheet wood? :\
I was concerned with warping on such a relatively thin piece of wood, and I wanted to finish the edges in a way that made it seemed like a decorative and planned part of the house. A quick search through my stash of trims produced the unused stair railings from the narrow staircase kit. I had replaced the railing stock when I replaced the spindles.
Here on the balcony, the railing serves as both channel molding to keep the structure square and as decorative trim for a fancy edge treatment. A thin layer of sandpaper will cover the sticker residue and finish the upper surface of the balcony.
At this point, I would normally fill in any gaps with spackling and sand smooth. It’s an old house, so I left the gaps.
I used a sample piece of molding from Manchester Woodworks as a lower support.
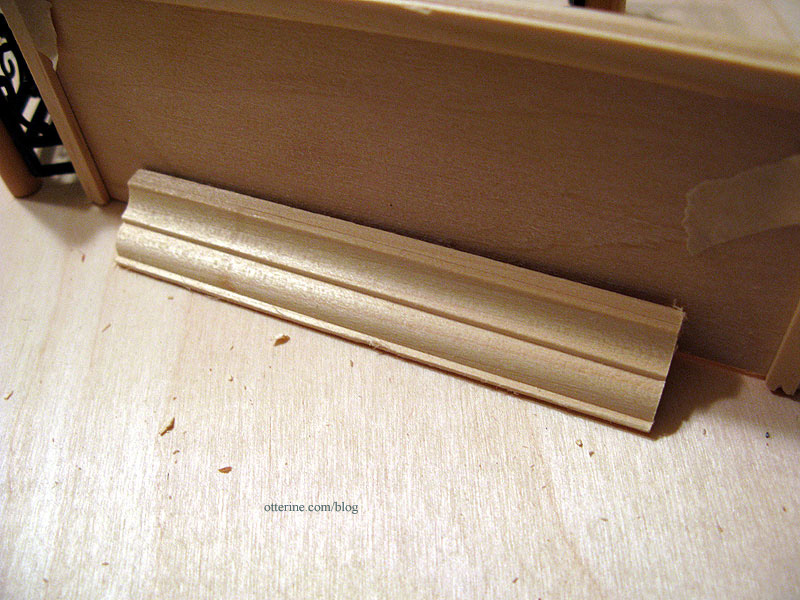
I checked the fit on the side of the house…all good! :D
I topped the posts with copper bead caps and added Houseworks finials. I used flat head pins to decorate the outer edges of the dowels. I had to shave a little from the bottom of the dowels for fitting since my measurements were a little off. Once it’s all painted, you’ll never notice.
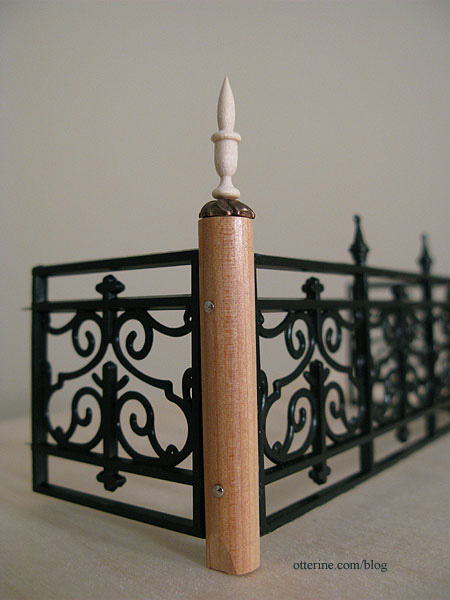
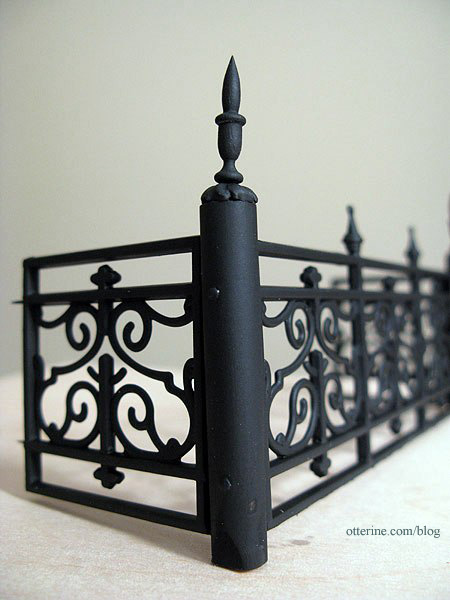
I need to wait for a decent weather day to spray paint the assembly. I will spray it flat black and then age it with acrylic paints.
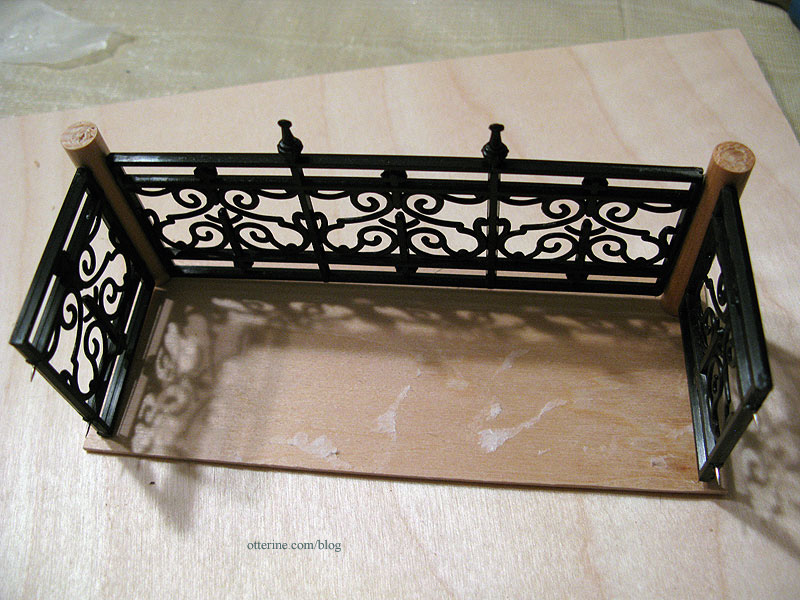
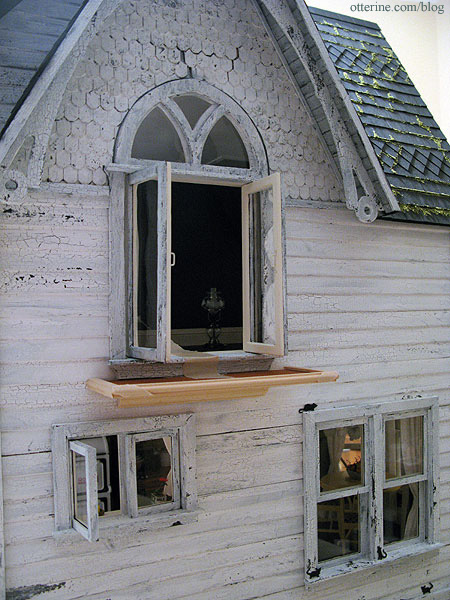
I finished the dry fit to see how it will look overall. It’s leaning a little because tape can only do so much. The base and support bracket will be painted to match the house. The sandpaper will be painted black and aged to match the front bay window roof.
I think Ophelia likes it! :D
Categories: The Haunted Heritage
January 26, 2013 | 0 commentsHeritage – roof finishing, part 1
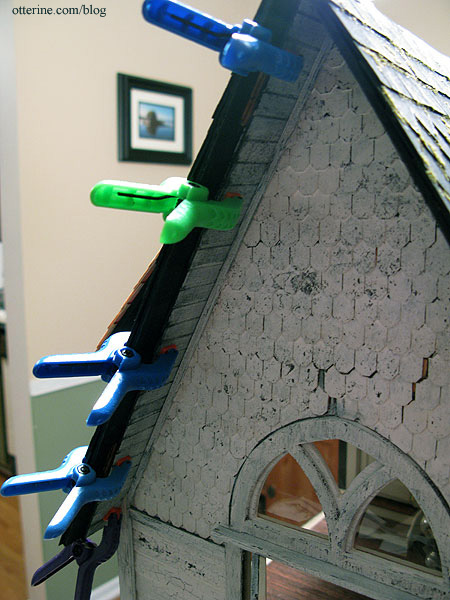
This merges the front roof and the back dormer roof. Now that I have the original back roof pieces attached on the sides and the new roof piece attached in the middle, I can address the roof ridges. The flat roof is now lower than the back roof, however, so I added a new 1/8″ thick plywood layer to it.

I added a new partial row of shingles at the top around the entire roof.
By partial, I mean that the full height of the shingle strips wouldn’t fit at the top so I marked and cut each shingle strip down to fit.
This includes the back.
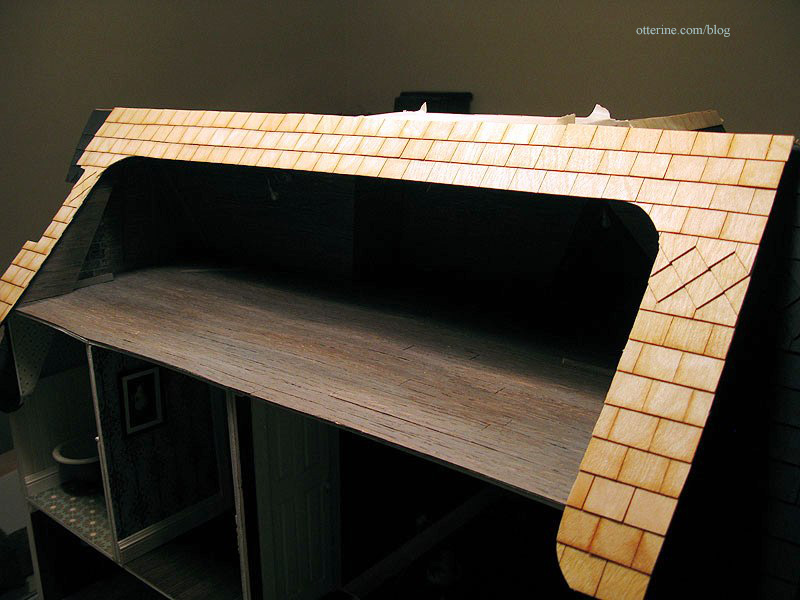
The new row of partial shingles finishes off the flat top portion of the roof as well.
I had to reapply the sandpaper surface to the flat roof since I had added more wood on the previously finished surface.
I lapped cut shingles over the ridge for the front roof edge, but I want to see if corner trim will create nicer finish for the ridges. I have some lengths of various corner trim widths on order, so the ridges will stay unfinished for now. But, so I can keep working on the structure, I painted the new shingles and flat roof to match the rest of the roof.
I’ll do a quick sanding once the paint dries, and then I’ll be ready to work on the chimney side. :D
Categories: The Haunted Heritage
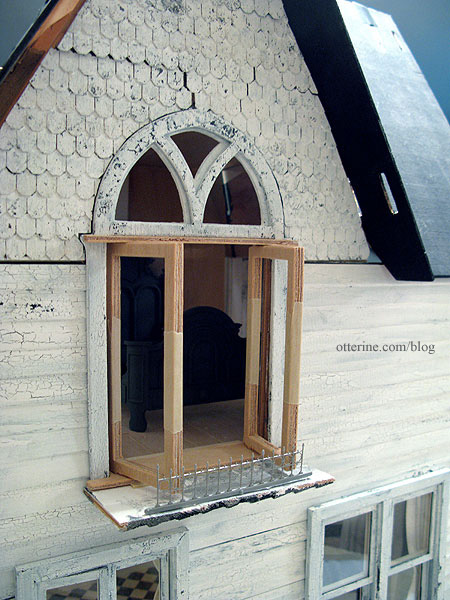
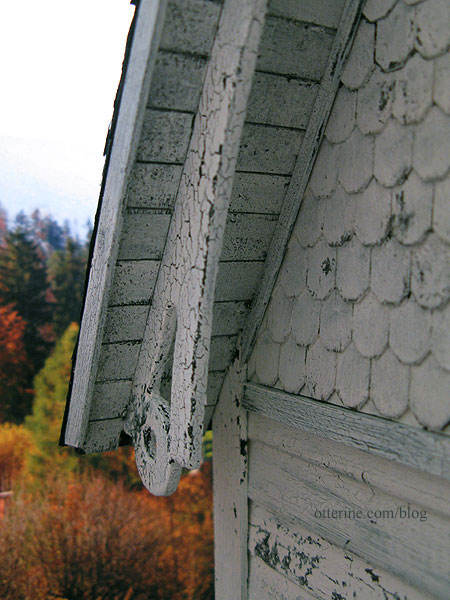
January 25, 2013 | 0 commentsHeritage – gable and eave finishing
I added the final trim for the front gable between the eave and the house. I find that the more trim I add, the more realistic the house seems. (Note to April: if you plan on adding finishing trim like this, do it before adding the fancy gable gingerbread…trying to get my fingers in this space was interesting.) Yes, I am aware I need a wasp’s nest or hanging bat here. :D
I added the final trim for the front dormer on the outer edges and at the inner eave. I had to use tweezers to glue the inner trim in place. All that’s left for the dormer is the roof ridge finishing.
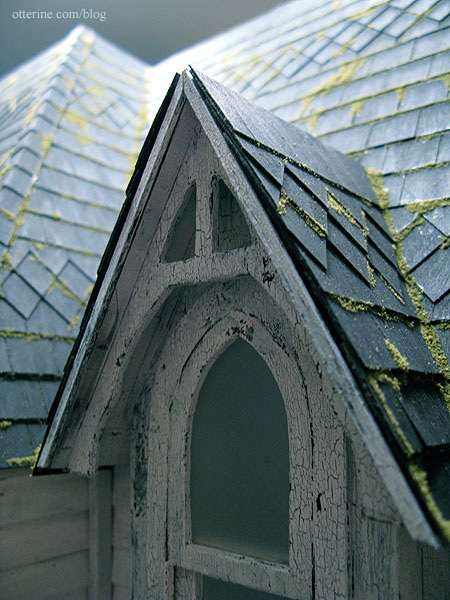
I completed the gable eaves and trims for the open side gable as I had done for the front gable. This time, I added the finishing trim between the eave and the house before adding the gingerbread.
Before adding the outer edge trim, I checked the fit and cut any excess from the forward edge. The photo is a little blurry, but you can see the unpainted portion where I cut away the excess.
When I shingled the edges of both side gables, the shingles didn’t protrude over the edge as much as they had for the front gable and front dormer. The trim here sticks out just a little farther than the shingles, so I painted the top edge of the trim to match the roof to make it blend more. Again, it was hard to photograph with the way the house is sitting under the lights.
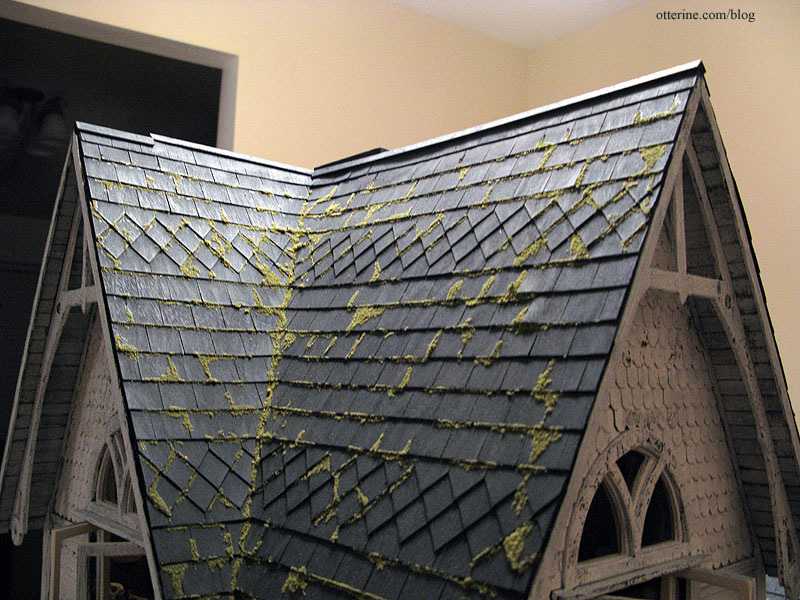
Some of the half scale shingles on the gable shrank away from the arch window and in the middle. This didn’t happen on the front gable, and I used the same glue and paint processes on each. Who knows? It works, though, for my falling apart manor. ;]
I like the way the two finished gables look together. :]
For the chimney gable, see part 1 and part 2.
Categories: The Haunted Heritage
January 24, 2013 | 0 comments


NOTE: All content on otterine.com is copyrighted and may not be reproduced in part or in whole. It takes a lot of time and effort to write and photograph for my blog. Please ask permission before reproducing any of my content. (More on copyright)

Heritage – open back trim details
One of the small things that can make a big difference is finishing the back edges of an open dollhouse. I haven’t needed to do much besides paint these edges in the various houses I’ve built because the wood was nice and clean, or I covered it with another material that eliminated the need for finishing. For The Haunted Heritage, there was channel trim on the outer edges but none on the inside edges. Additionally, some of the inside edges were warped or comprised of multiple layers of wood, like the pocket door wall.

You can see from my previous post on the attic, that the second floor ceiling board is rather uneven. This is due to the fact that I made the board from three pieces, the bathroom wall might be slightly shorter than the bedroom wall, and the parlor ceiling is sagging ever so slightly. Being an old house, it actually works in my favor, but I wanted to tone it down when looking at the open back.
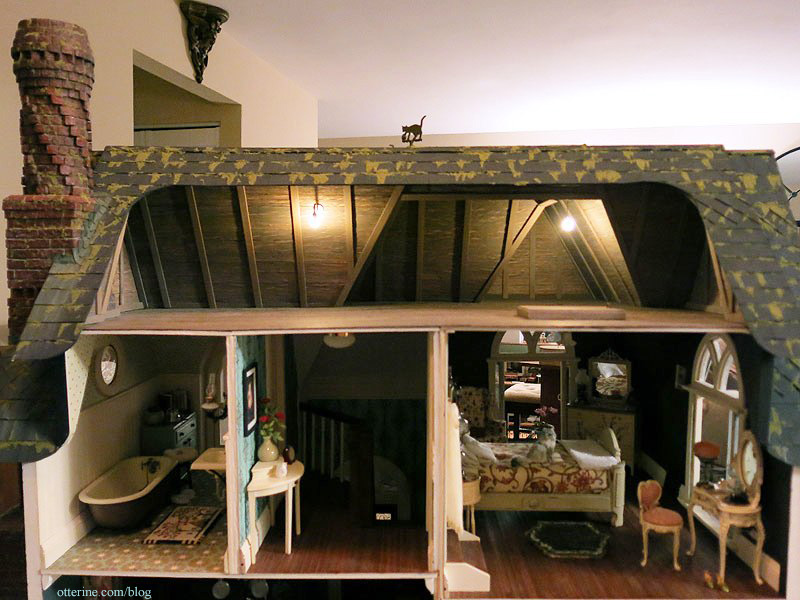
Using one long strip of corner trim across the back edge of the attic floor helps disguise the minor warp between the three boards that make up the second floor ceiling. The back surface of the trim is painted dark brown, but I painted the top portion to match the attic floor.
For the remaining back edges, I used various widths of basswood to make a clean finish.

I painted these dark brown to be less obvious when the open back is viewed as whole.
Dark brown allows the edge to fade into the background so the focus remains on the rooms and furnishings.
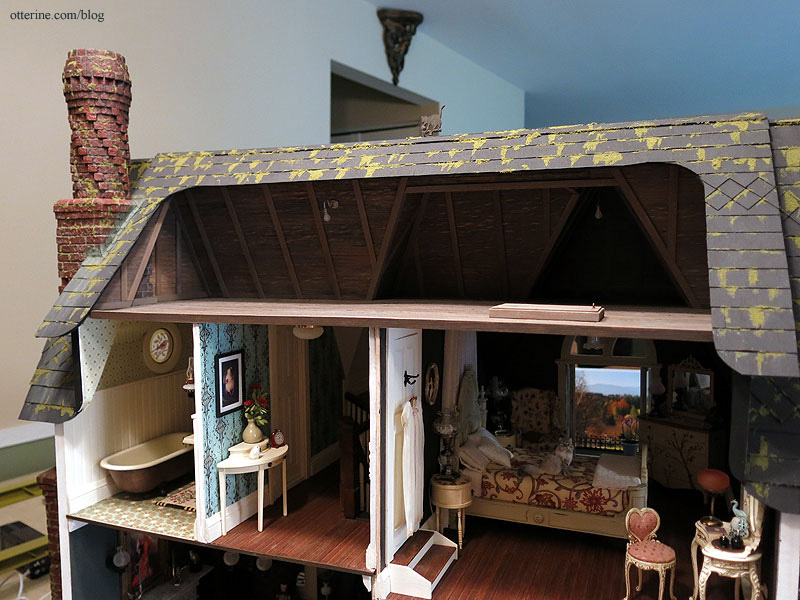
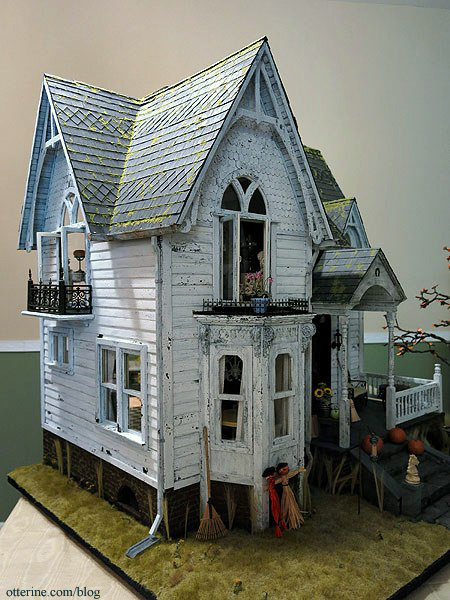
Over the next week or so, I’ll be posting room by room finished settings of The Haunted Heritage. Of course, no dollhouse is ever completely finished, but it’s time for me to wrap this one up and move on to the next great thing! :D
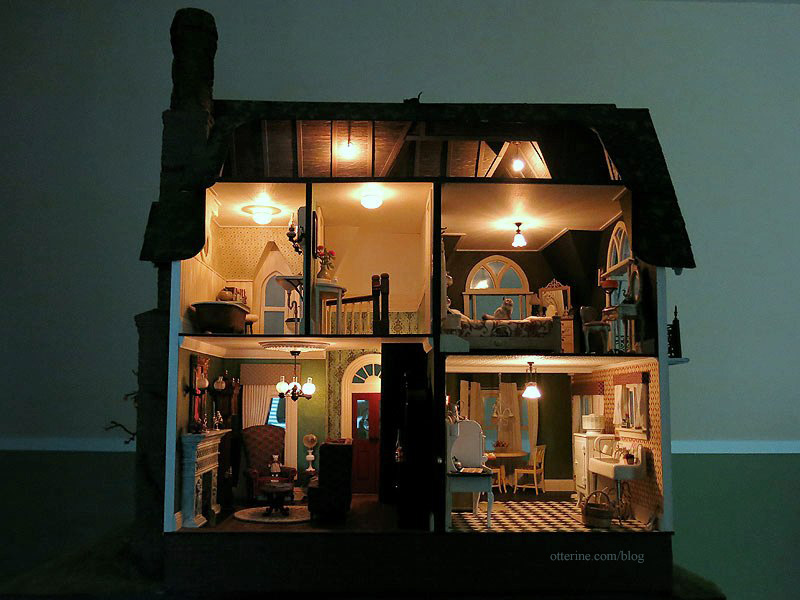
I love the silhouette of the black cat on the roof. :D
Categories: The Haunted Heritage
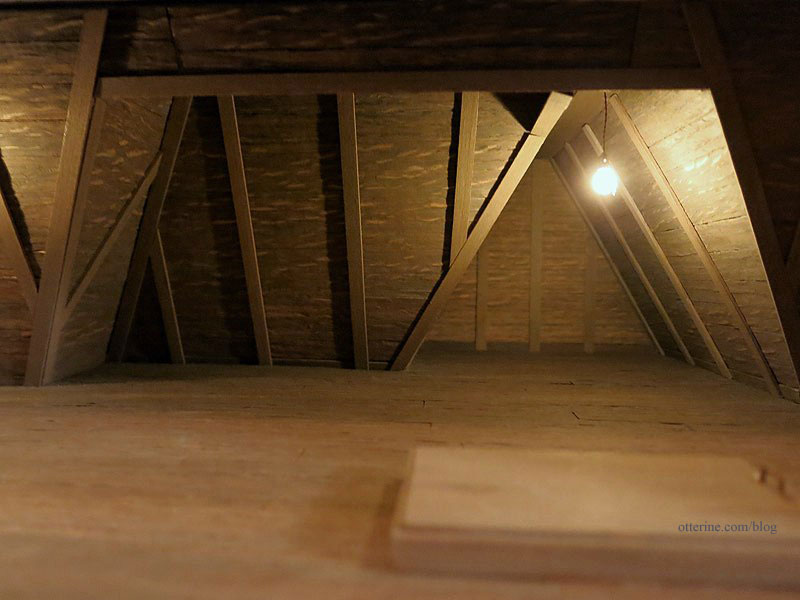
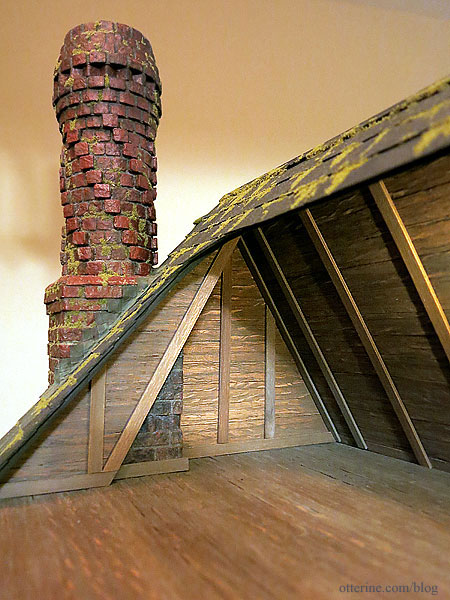
August 8, 2013 | 0 commentsGrandma’s attic – faux slats and rafters, part 4
I continued working on the faux slats and rafters for the attic. Once the back roof pieces were in place, I could finish up the rafters and trim. To save myself aggravation and ruined trim wood, I used paper strips to measure. I learned to cut the long pieces first since if they are too short, you can still cut your shorter pieces from those lengths. I cut each piece a little long so it would need just a bit of sanding to fit in place. The paper patterns worked especially well.
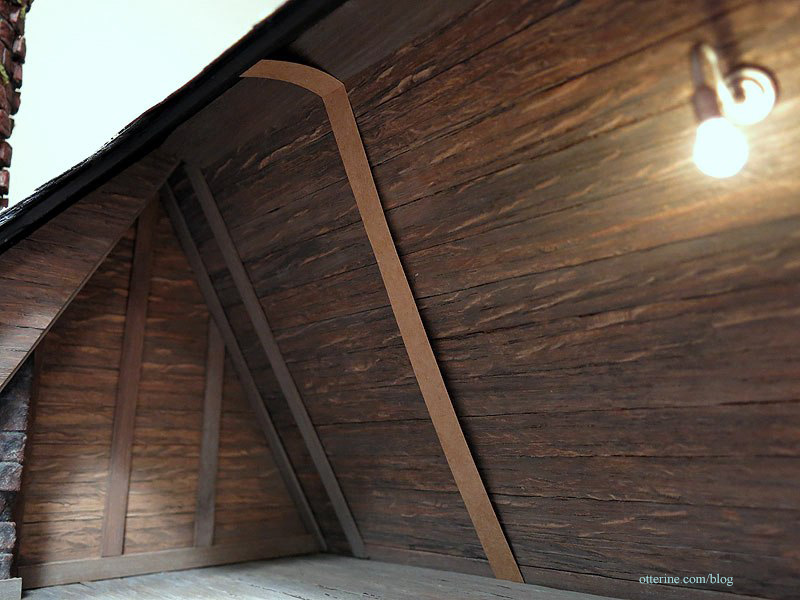
The layout I used was mainly to give the illusion of structure without much concern for how rafters would actually be placed for support. I needed to finish the edges of the cross boards and corners, and this configuration accomplishes just that. In fact, I can see in these photos that I missed the short vertical boards above the main cross beam in the middle. I have enough scraps to fix that.
Love the tiny bit of chimney in the attic. :D
The last item in the attic was the faux stairs. I put one of these in Baslow Ranch based on the Greenleaf tutorial. I altered the upper portion a little, making the door taller than the sides.
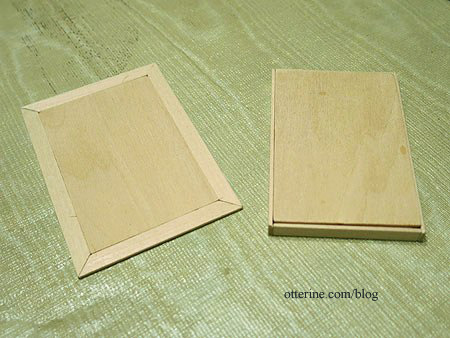
It’s not yet glued in place since I need to determine where the lower door will be on the second floor. Most likely, it will end up installed in the bedroom since that room has the largest ceiling expanse. I had originally planned to have this in the bathroom but there was no room there to realistically have stairs that pull down. The same issue arose in the hallway. That leaves the bedroom. It’s a small detail and should be not at all obtrusive.
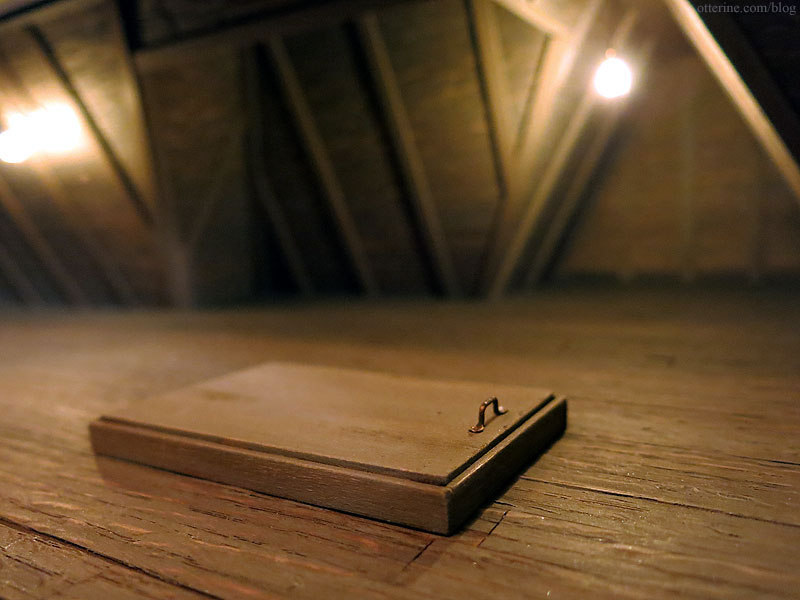
I love the atmosphere of this space.
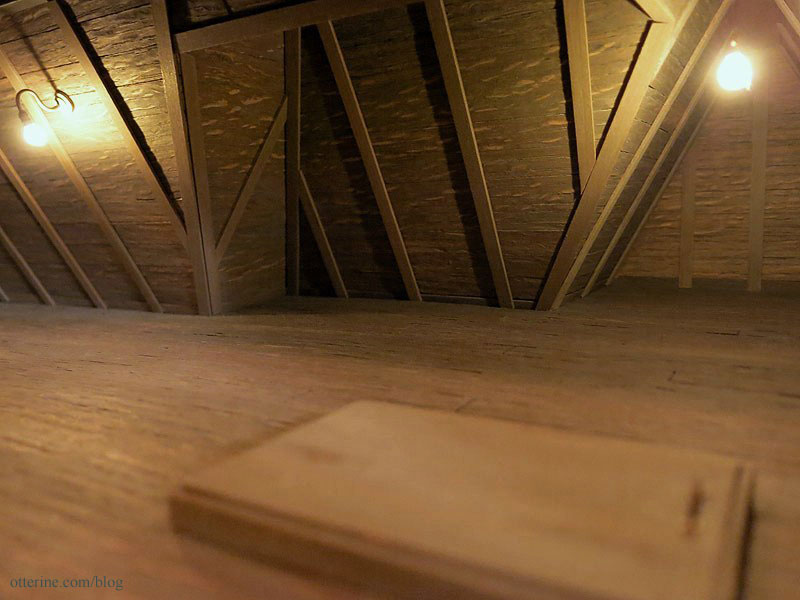
Even empty it exudes character. Hmm…looks like I need another vertical board in the front gable, too.
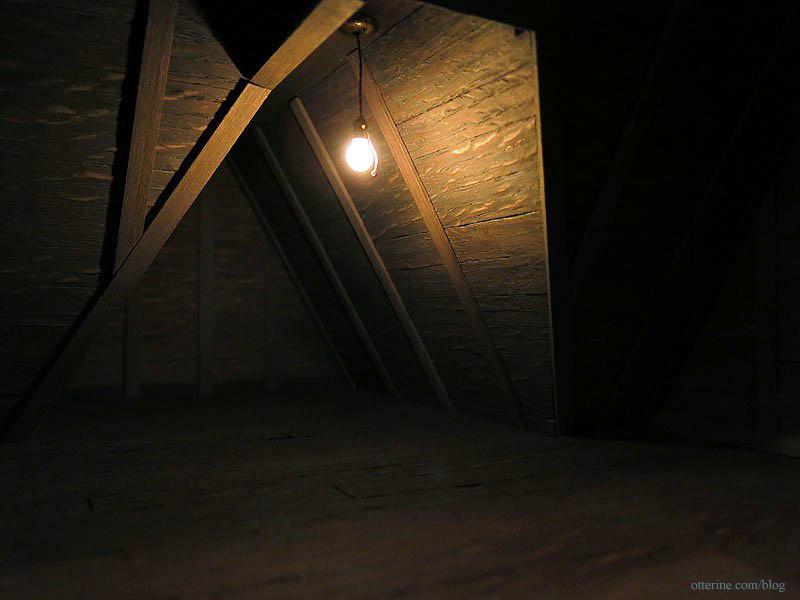
Overall, it’s really taking shape.
Categories: The Haunted Heritage
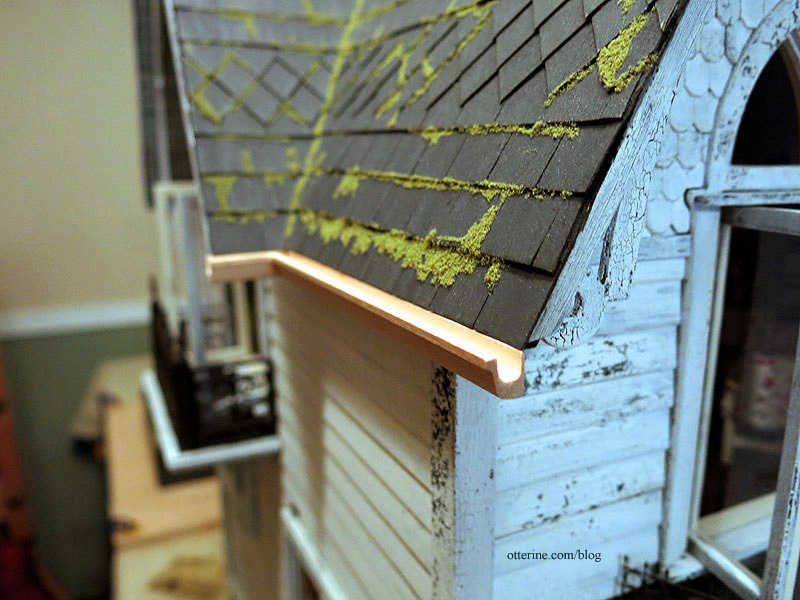
August 5, 2013 | 0 commentsHeritage – gutters and downspouts, completed
Finishing work on the gutters and downspouts. The original kit intended for only the left side to have a downspout yet there would be gutters all around the front.
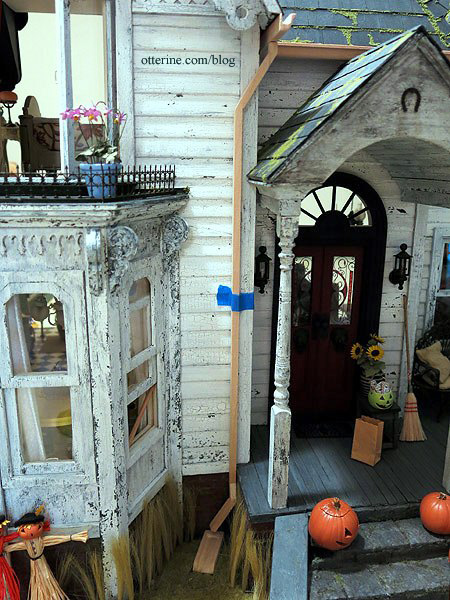
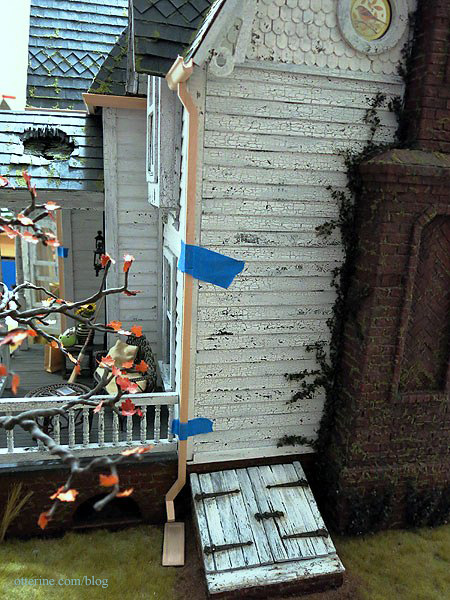
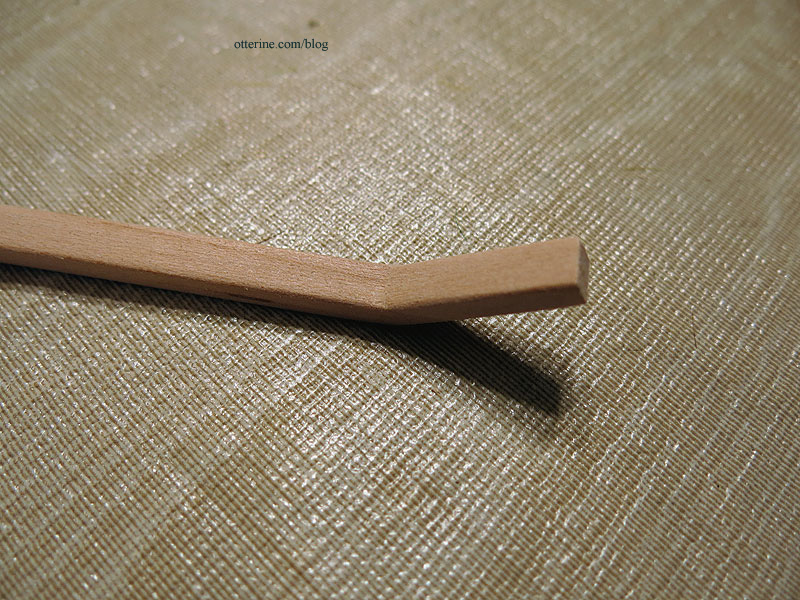
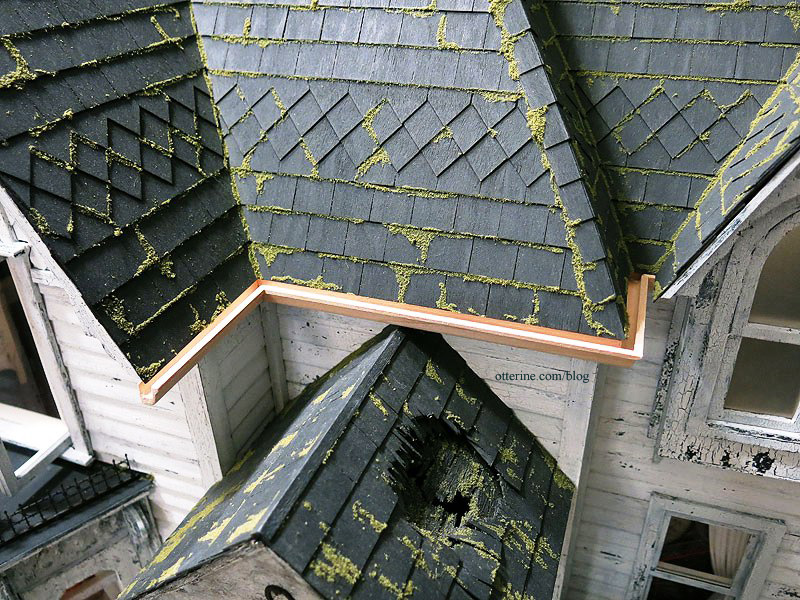
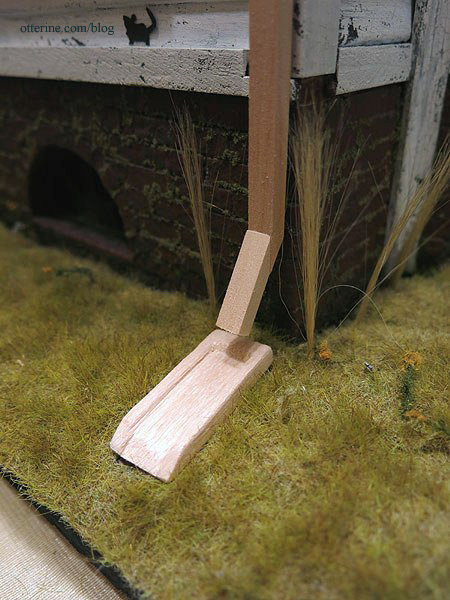
Well, that wouldn’t do! Water would be pouring over the sides all over the entryway and porch. The middle gutter required a diverted end to move away from the house and empty into the splash block.
I found a website with a flat bent downspout to help me figure out the shape I needed.
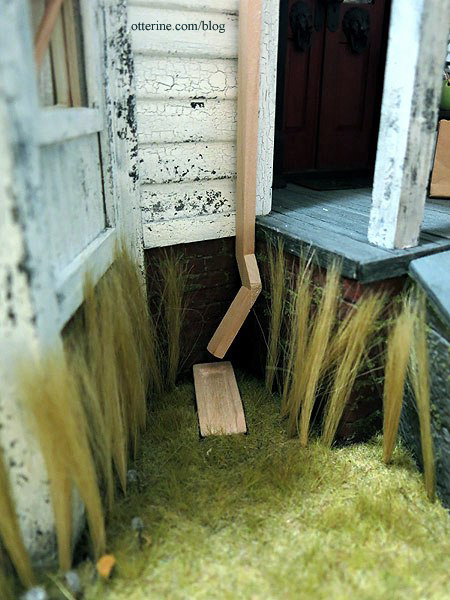
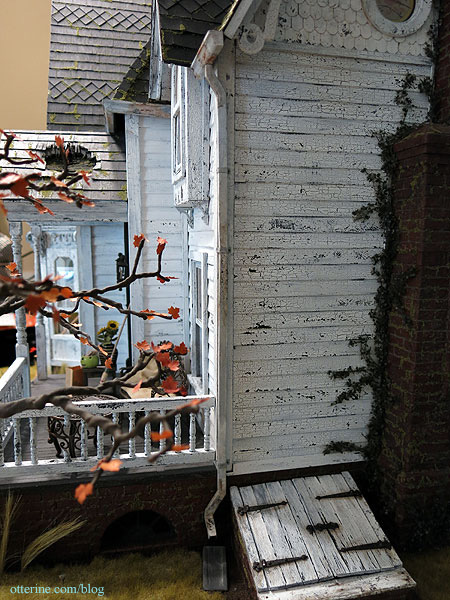
The last gutter required some demolition. The cellar doors had to be moved over about 3/4″ closer to the chimney. There was room, but it was a pain prying the assembly off the base. I built things securely. Anyway, I took no photos of the process since I worked fast to put it all back together. I glued some new dirt cover over the bare spots and then needed to wait for that glue to dry. I still have landscaping to finish besides, so it’s not much of a big deal, just a speed bump.
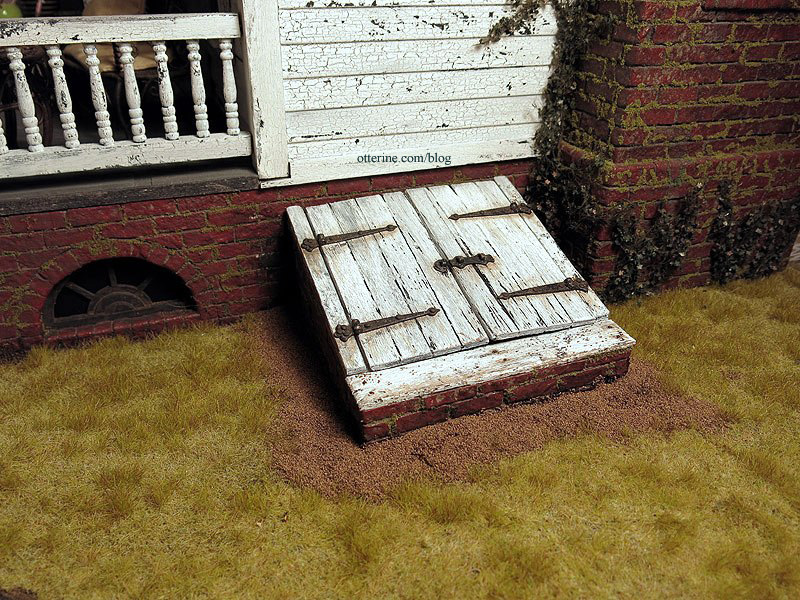
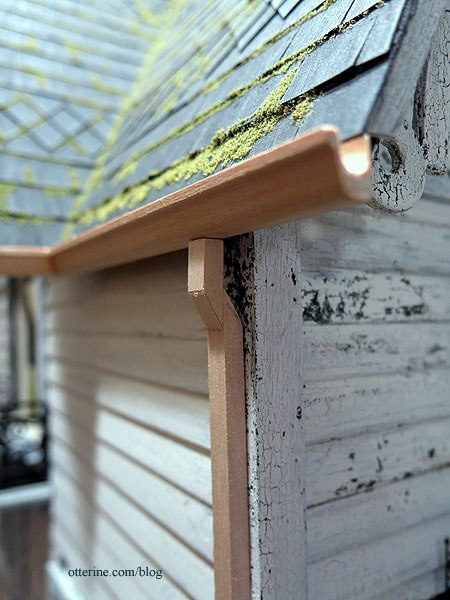
With the cellar doors moved, the final side downspout could be finished without looking like a wet noodle stuck to the wall. :]
To make the end caps for the gutters, I added pieces of cardstock cut to shape.
I sanded the edges and turns of the downspouts to be more rounded.
To give them a bit of age, I first painted some spots Terra Cotta by Americana, followed by crackle medium. The rest of the pieces were painted black. They look like coral snakes! :D
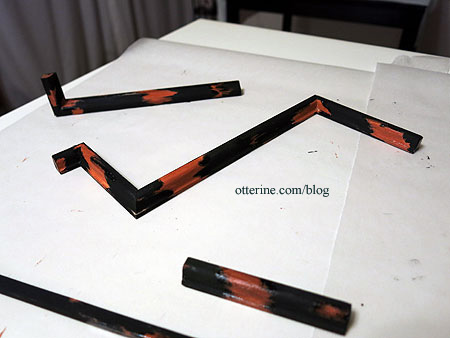
When I painted white over the assemblies, the black paint toned down the brightness of the white overall, and the paint flaked where there was crackle medium.
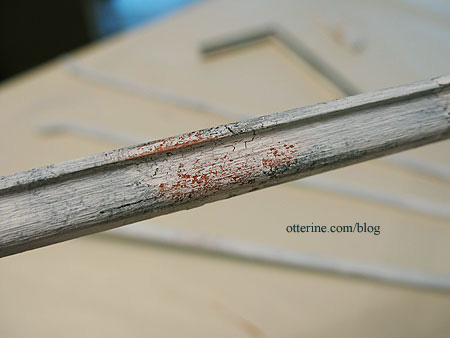
With a slight terracotta and brown wash, it became rusted flaked paint. :D
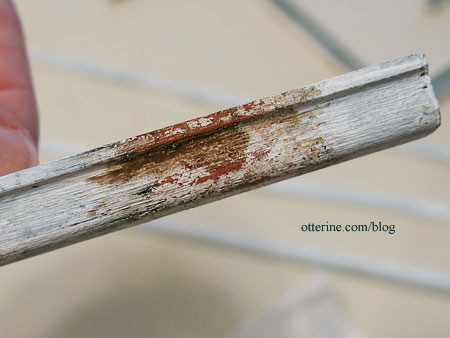
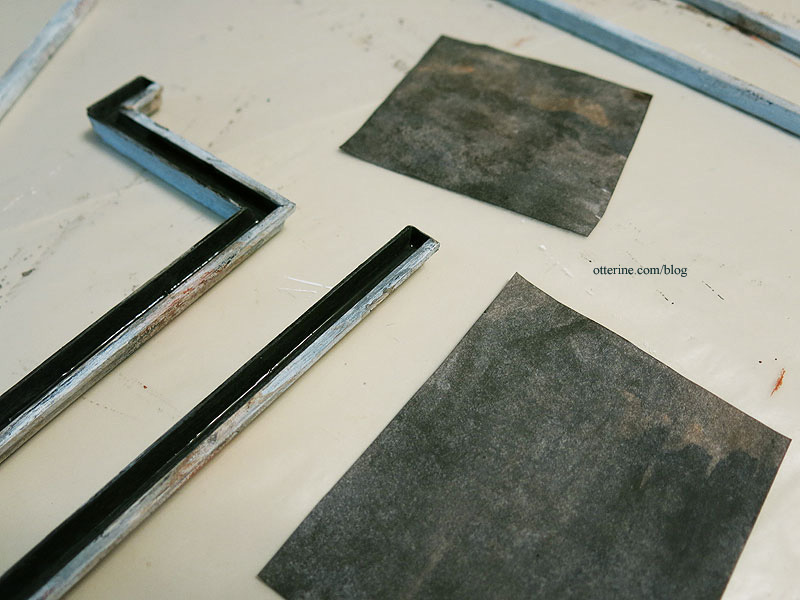
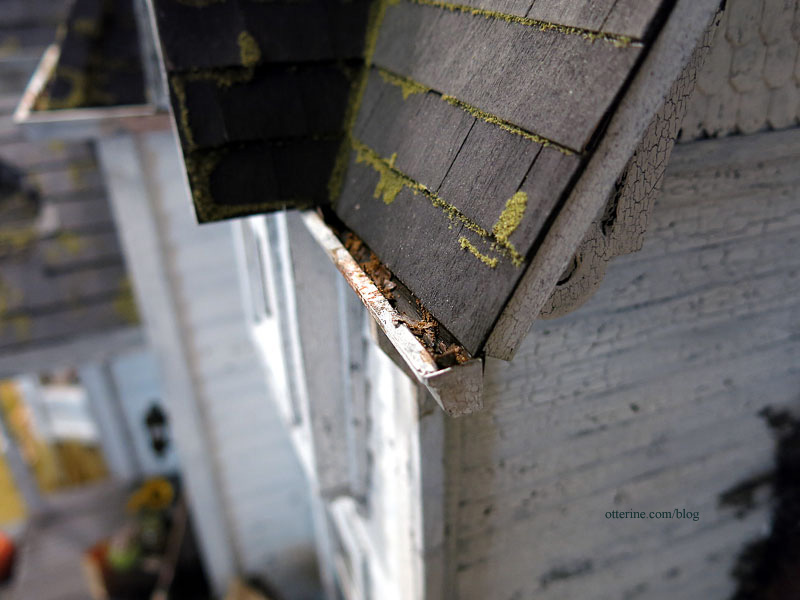
I added an aging wash to the whole thing and then dirtied up the inner track since these are old gutters. I painted some scraps of paper with the leftover paint washes and let them dry.
I punched as many maple leaves as I could from the scraps.
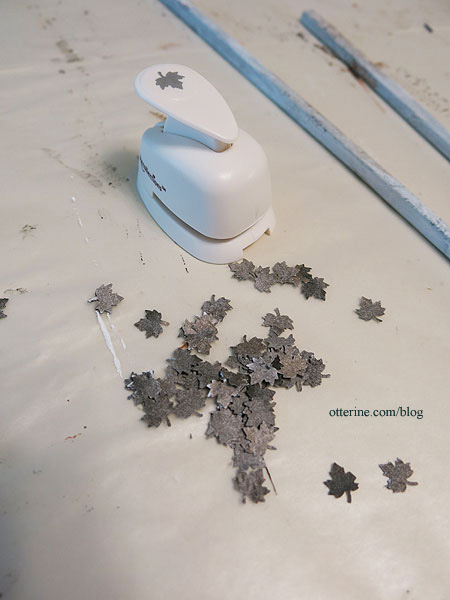
I smashed the leaves and glued them into the track, some sticking out over the top edge.
I glued in some moss material besides.

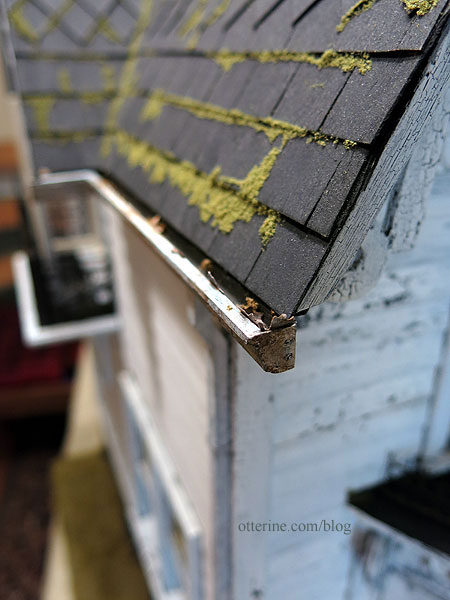
I then added a final brown wash. Voilà! Good and dirty gutters. :D
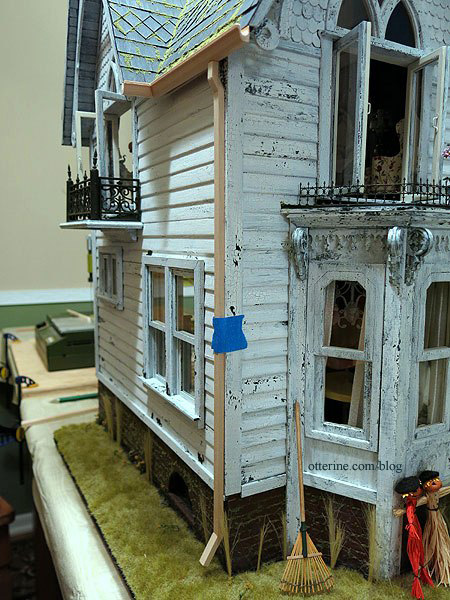
I glued the assemblies to the house, and the downspouts helped hold the gutters in place while the glue dried.
The bottom ends of the downspouts aren’t easily seen, but I did paint them black to give the illusion of being hollow.
I painted the splash blocks to look like concrete.
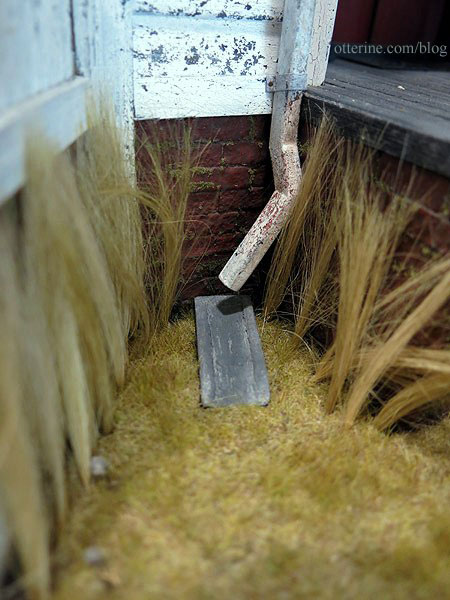
The straps are cardstock. I cut them long so I would be able to work with them during the final fitting.
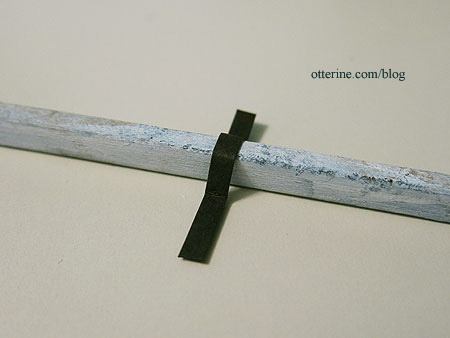
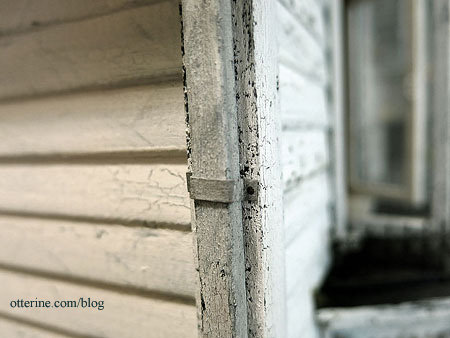
I painted the paper with a grey wash and then glued them in place. The nails are just painted dots. The straps are mostly decorative since the downspouts are glued in place.
It really adds that little something, no?
Grandma has no leaf screens, so looks like she’ll need some yearly help getting these cleaned up. :D
Left assembly.
Middle assembly.
Right assembly.
Almost done with the exterior! Hooray! :D
Categories: The Haunted Heritage
August 4, 2013 | 0 commentsHeritage – gutters and downspouts, part 1
When you’re working on a house that sits on a turntable, you need a little help. Whoa, Heritage!
The Heritage kit included gutters and downspout materials. One length of gutter-shaped wood and one long dowel. These were acceptable, but I went with different parts.
I bought gutter shaped wood from All Small Miniatures the day I went there for the asphalt shingles for The Artist’s Studio. It’s shaped differently and it is lighter in weight. Considering there will be very little surface area for gluing, I thought the lighter weight material would work better in the end.
I cut the lengths I would need using my scroll saw. The corner joins weren’t the cleanest fit mainly because this house is so rickety. :D But, I was able to sand them to fit well enough. A little spackling here and there, and it won’t be an issue in the end. The ends will also be capped before painting.
I had to forego putting gutters on either side of the dormer, because the area between the main roof and the left side of the dormer didn’t allow for a full turn. Putting it on the right side only would have brought more attention to the problem.
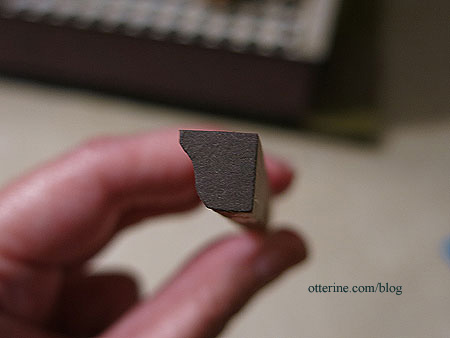
I formed the downspouts by cutting 1/8″ x 1/4″ wood. These will be sanded to shape before painting.
I thought this was a more realistic approximation than round downspouts.
The splash blocks are balsa, shaped by sanding. I had to cut away some of the landscaping to get them to sit flat on the ground.
Update: part 2 here.
Categories: The Haunted Heritage
August 3, 2013 | 0 commentsFramed photos add a personal touch
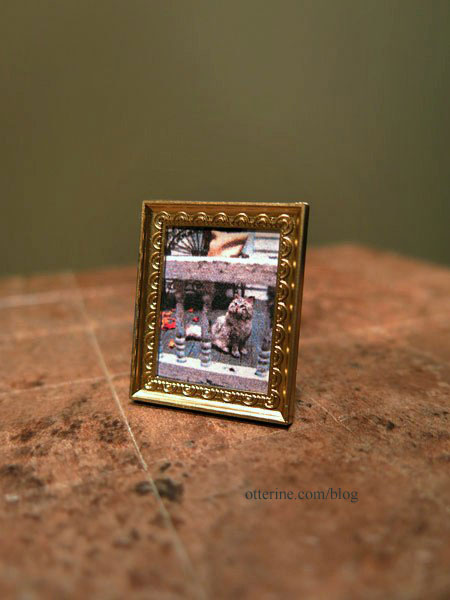
When I bought Ophelia from *Reve*, there was a photo in the listing that I loved. I asked the artist if I could use the photo, and she graciously said yes. I edited it in PhotoShop and printed a teeny tiny copy for a vintage looking frame I had.
This photo of Ophelia is one I took.
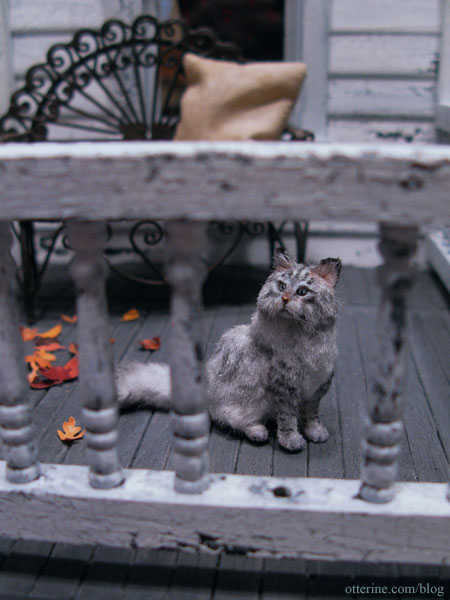
I loved it so much I decided to print it for framing as well. This one is a little larger to keep the details visible.
The bedroom is hard to decorate with its odd angled corner walls, so this is the perfect size for the space.
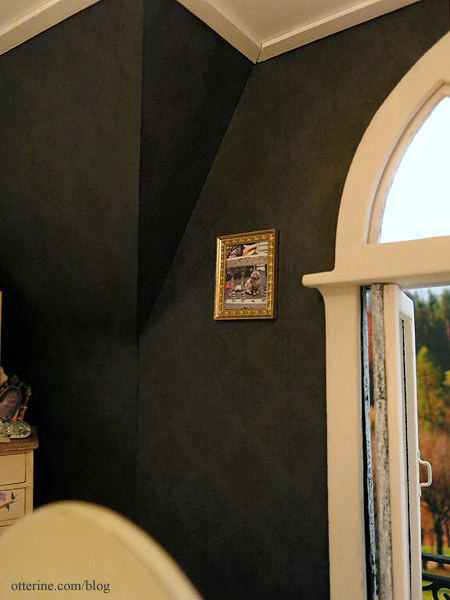
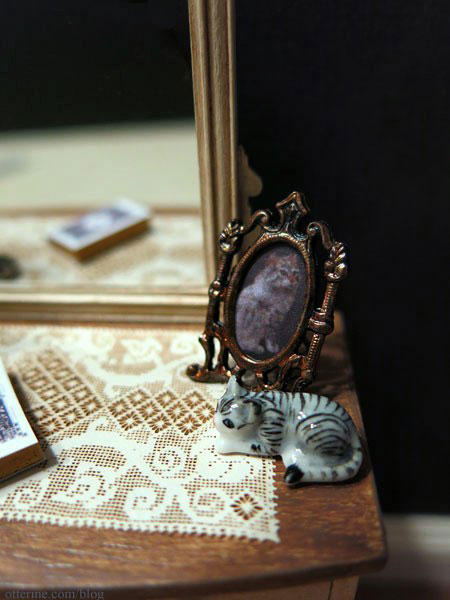
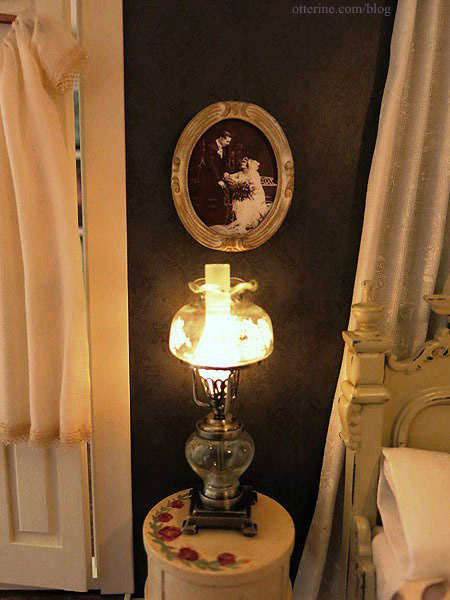
After repairing the bubble in the bedroom wallpaper, I needed a photo to fill the oval frame that would mask the repair seam. I thought a 1920s wedding photo would be perfect, but I didn’t have any in my own family to use. I searched online and found this wonderful photo from Rick Zolla, who granted me permission to use it for the Heritage. :D I edited it in PhotoShop – adding some background to the left of the man and at the top of the photo, then feathering the border into an oval shape.
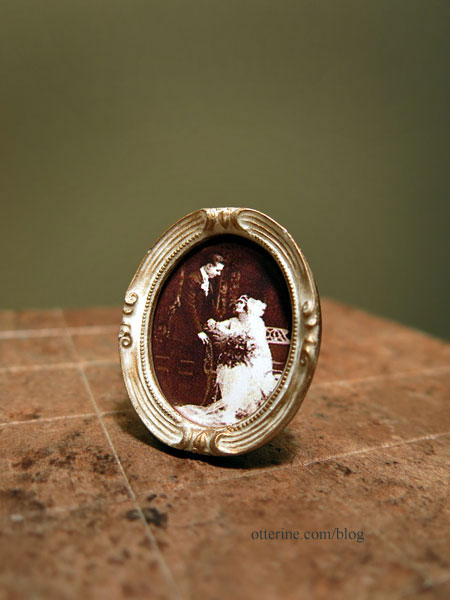
It fits perfectly with the ambiance of the room.
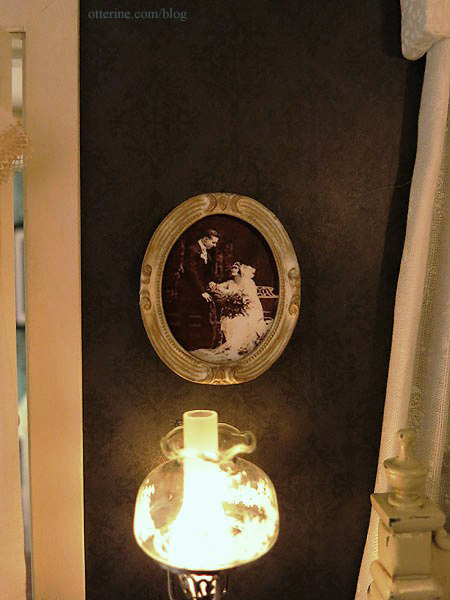
I love the relaxed pose and setting…such a great image! Thank you, Rick!
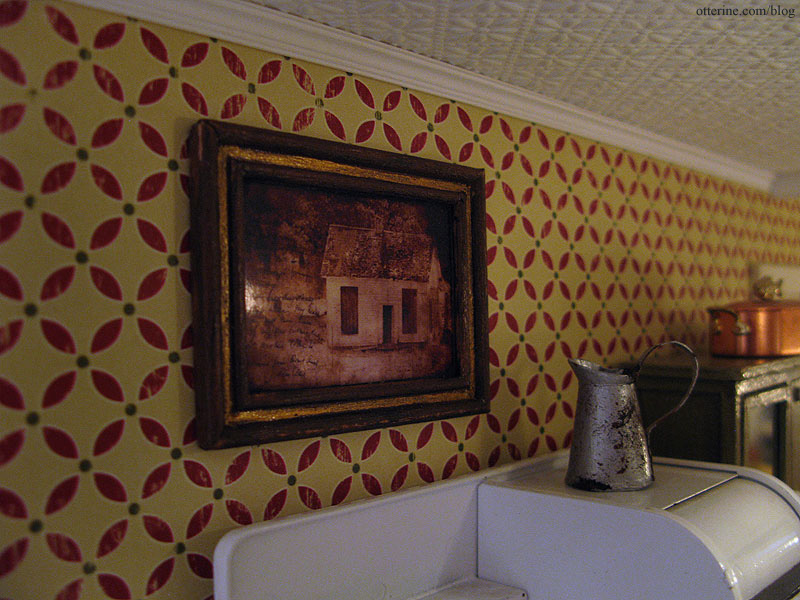
Kelly recently told me she and I share a love of photography, and she was so generous to send me one of her miniature works for the Heritage. It’s titled Ghosts of the Past. How perfect! :D
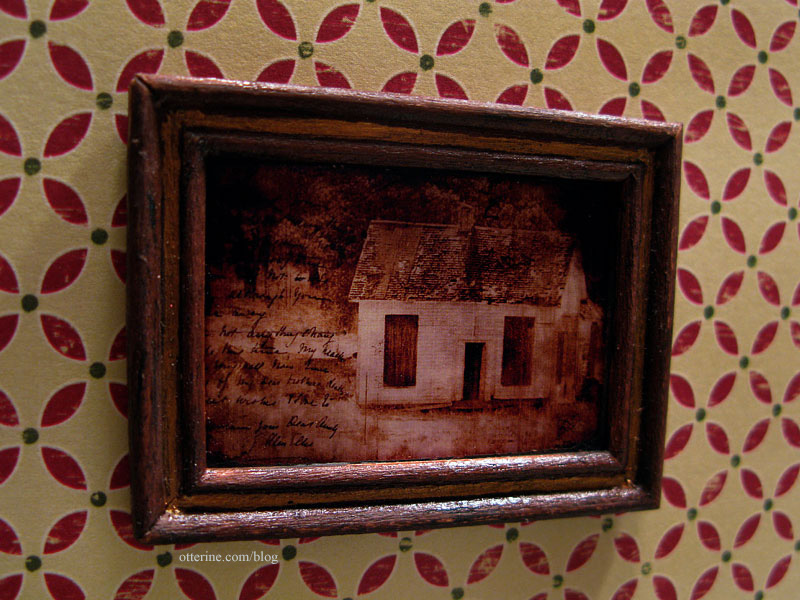
I think it works wonderfully in the kitchen. Maybe it’s an old faded photo of grandma’s childhood home. The lovely pitcher is from Caterina.
Categories: The Haunted Heritage
August 2, 2013 | 0 comments
NOTE: All content on otterine.com is copyrighted and may not be reproduced in part or in whole. It takes a lot of time and effort to write and photograph for my blog. Please ask permission before reproducing any of my content. (More on copyright)