
NOTE: All content on otterine.com is copyrighted and may not be reproduced in part or in whole. It takes a lot of time and effort to write and photograph for my blog. Please ask permission before reproducing any of my content. (More on copyright)
Categories:

Grandma’s attic, planning
In my world, grandma is able to navigate those pull down attic stairs easily, walk about the attic without hitting her head and sit comfortably for hours in a space that doesn’t appear to have any airflow for the warmer months or heating for the colder ones. :D To that end, the attic will be a collection of fine (or not so fine) antiques set into vignettes where Grandma can get away from it all.
I recently entered a competition hosted by Minimum World in the UK. Contestants were to submit pictures of their “period” room in any era or design style they wished. I entered the 1920s inspired kitchen from the Heritage. You can see all the contestants and the winner on the Minimum World facebook page.
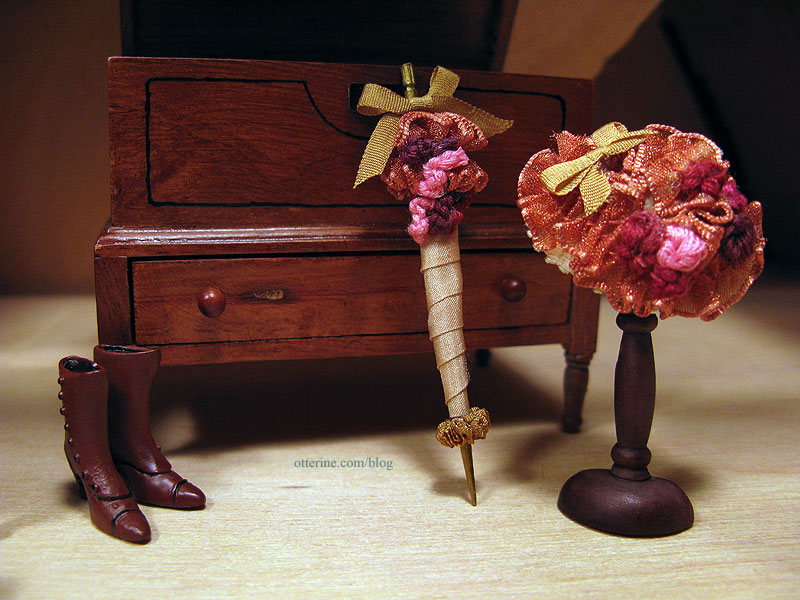
Though I didn’t win the top prize, each contestant was sent a prize for participating. I received my gift today: a lovely set of granny boots, a fancy hat with stand and a parasol by Katy Sue Designs. They are lovely and the perfect addition for grandma’s attic! :D A huge thank you to Minimum World for holding the competition and for the lovely participation prizes!
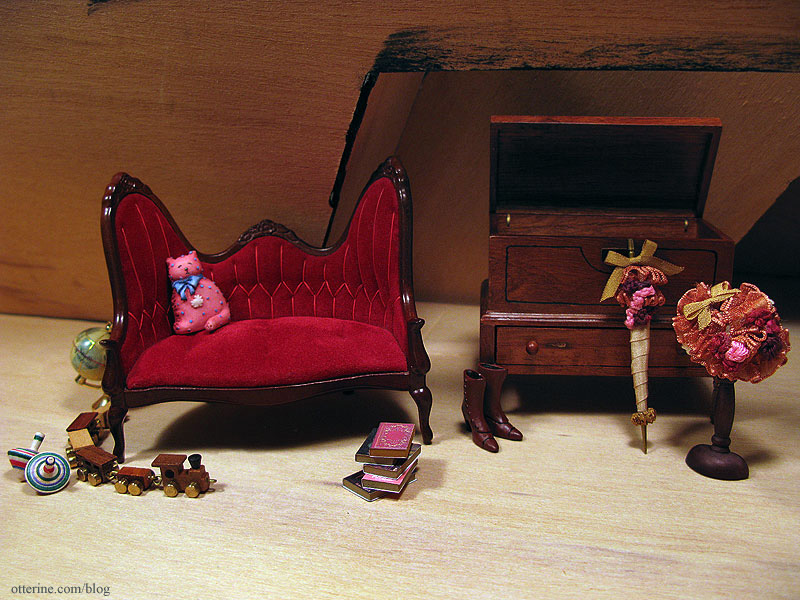
Here are a few other things that might end up in grandma’s attic. I have plenty of ideas up my sleeve, but these are things I already had on hand.
Categories: The Haunted Heritage
March 21, 2012 | 0 commentsRickety persnickety house
Alright, Heritage, I’ve accepted your challenge of rough interior walls, warping and large gaps! :D
I put together the attic floor, though it won’t be glued in for quite some time. I tested the fit against the roof that gave me such trouble. It doesn’t fit in the same places where there are gaps between the walls and the roof. With minor adjustments, I should be able to keep and use most of this board. I know I will have to re-cut the part that fits into the front gable because the gaps are all around and there is no way to attach it to the house.
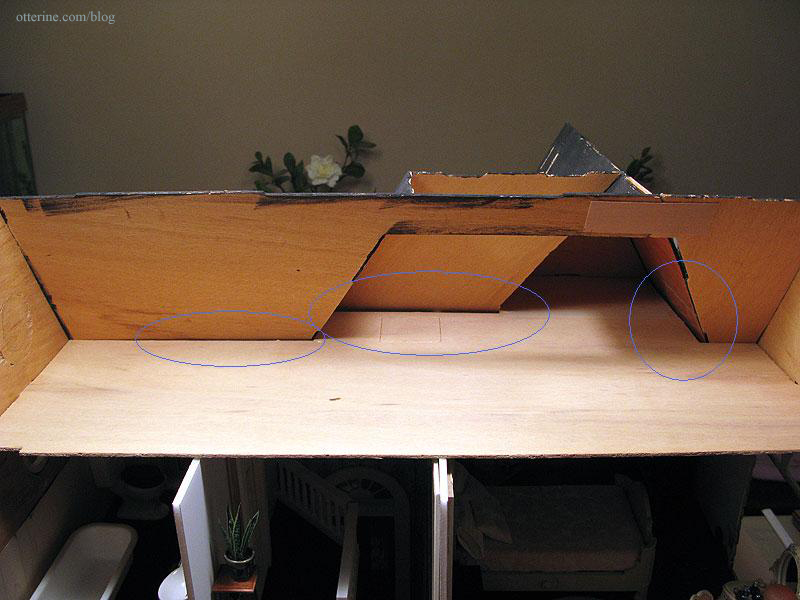
I marked the line around the house where the attic board sits: 7 1/4″ on the bathroom/parlor side and 8 3/16″ on the bedroom/kitchen side. This guideline shows me where the walls end on the second floor.
Now, for the gaps. Even though the two main gaps between the lower edge of the roof and the upper walls don’t show from the outside unless you look for them, light will stream through if they are left uncovered. They also make it difficult to wallpaper since there are uneven surfaces and breaks in the wall.
I decided to address the bedroom gap first since it seemed the most straightforward. I needed to join the wall with the ceiling in a fluid manner. I started by adding a scrap wood brace at the top of the wall.
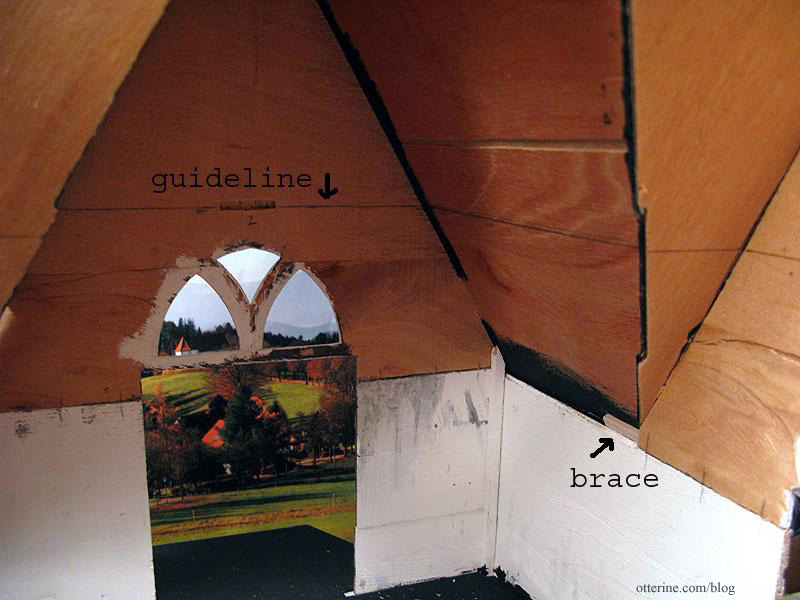
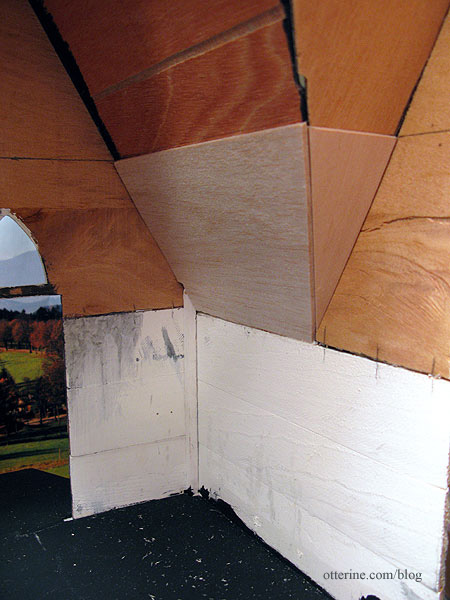
I then covered the surface of the wall with balsa cut to meet the ceiling guideline and the triangular bend in the wall. This minor bit of padding won’t interfere with the fit of the windows and smooths out this entire corner.
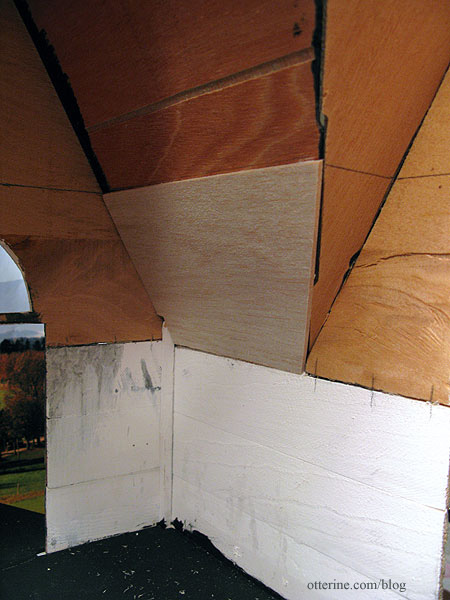
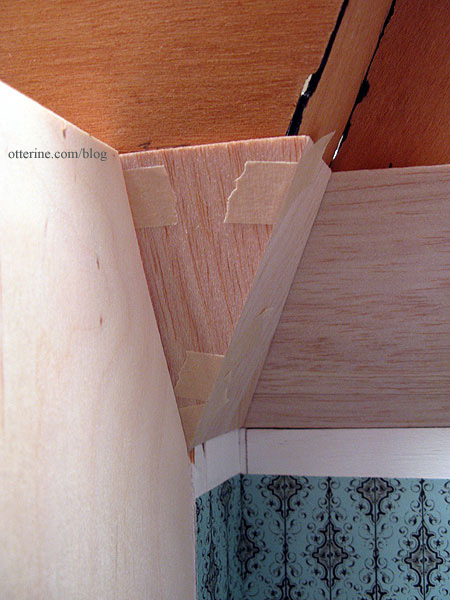
I added a small basswood triangle to finish off the edge. There is now a flat, even surface for the wallpaper.
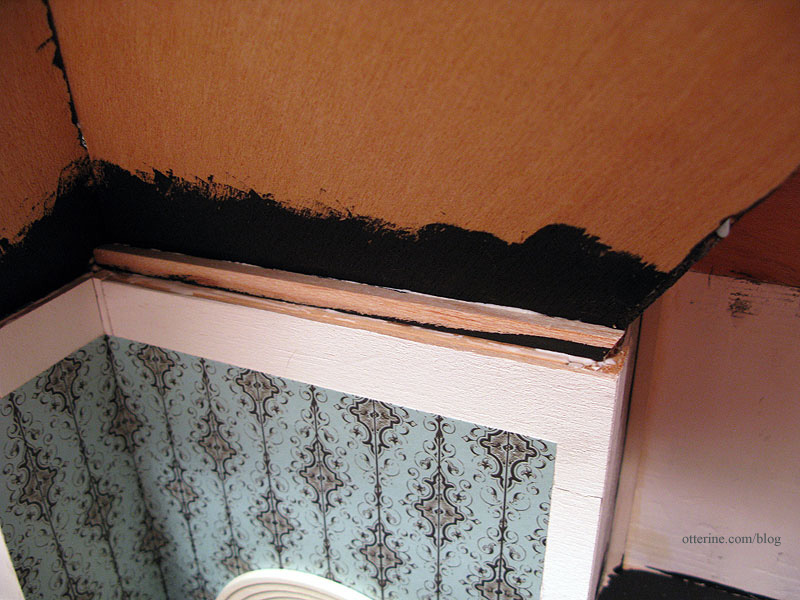
The large front gap in the two-story foyer was at least uniform. I built up the front wall with strip wood and used black paint on the side that might show from the outside (if you were standing on your head and looking where you shouldn’t be looking).
There was more to build up on this wall, so I made makeshift rafters, cutting the top one at an angle to support the attic floor. I’d like to avoid putting in crown molding if possible. If anything, flat decorative trim would be the only thing possible with all the angles and pitch changes in the roof. I also made sure the ends of the rafters followed the angle of the side wall into the bedroom.
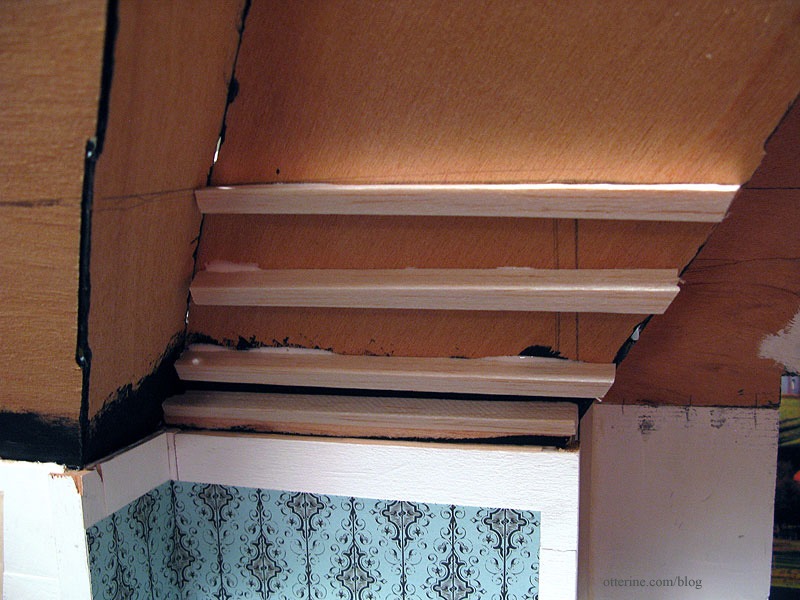
I cut pieces of balsa sheet to cover the rafters, using two layers. The start of the first layer is shown here.
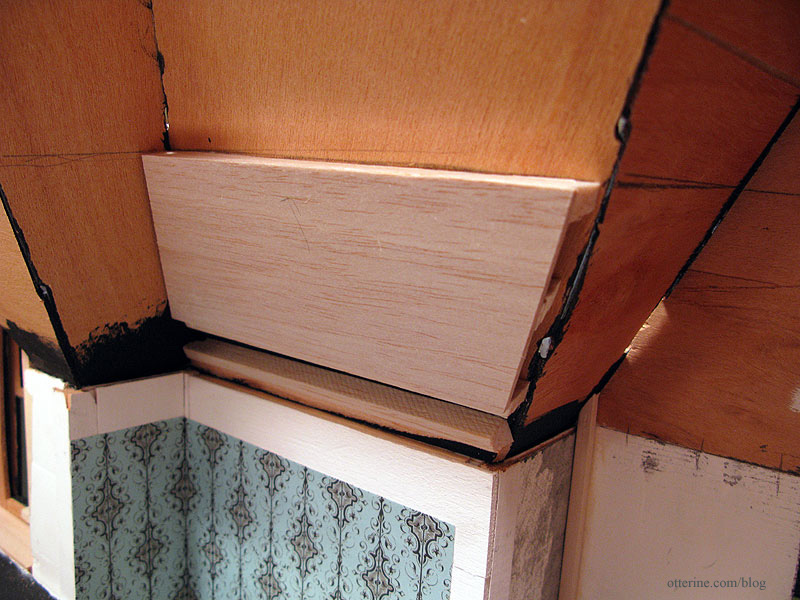
I had to adjust the angle of the bedroom wall template.
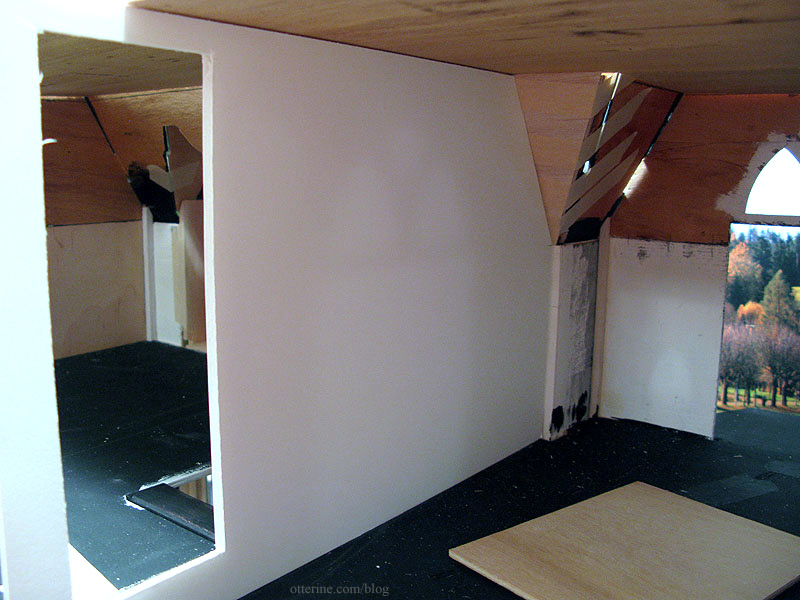
On the left side of the bedroom, I finished padding the wall and angled ceiling. I first added scraps of 3/32″ thick wood to fill in to the depth of the inner wall connector.
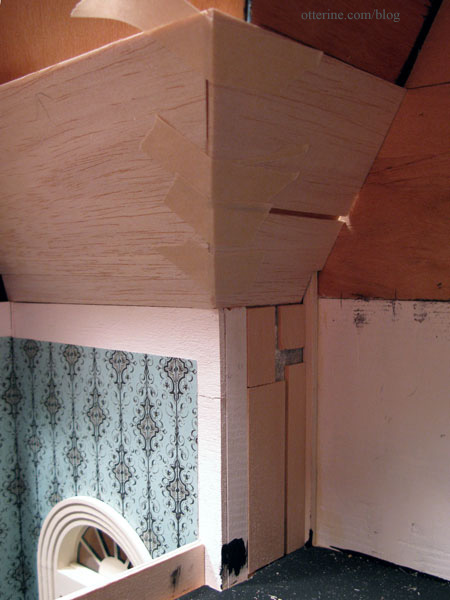
I then filled in with 1/8″ thick wood to the depth of the outer wall connector. Now I won’t have to wallpaper around those angles.
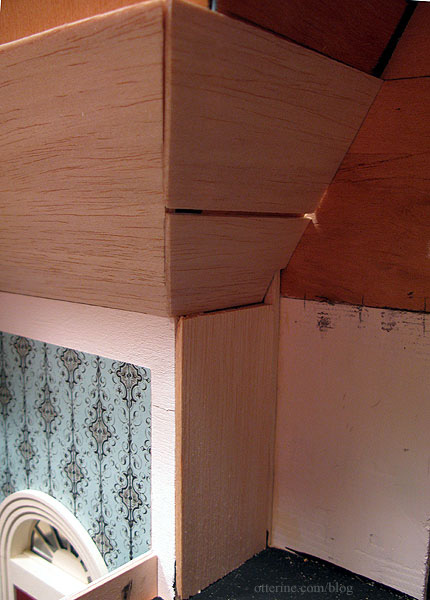
I finished the angled ceiling with 1/8″ thick balsa to even out the transition between the wall and the ceiling. Since I added more wood to this side than I had to the opposite wall, I added one more layer to that wall to balance out the sides. I have since applied spackling over the few gaps and ends to even out the surfaces further.
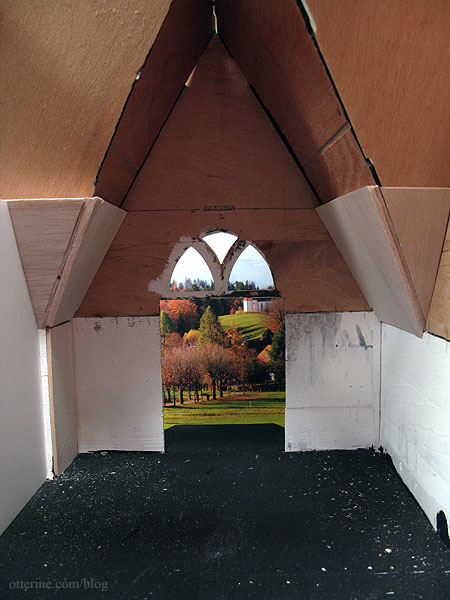
I finished padding the left upper corner in the two story foyer and cut the new bathroom wall from 1/4″ thick plywood.
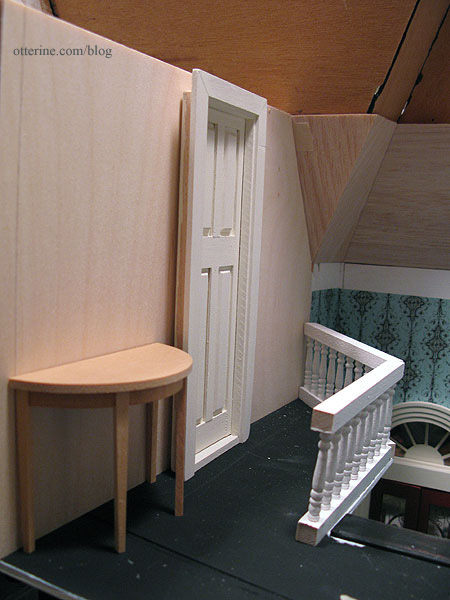
The wall isn’t yet installed since I need to cut the door opening. I think the House of Miniatures Hepplewhite Side Table will be the perfect addition to this small space.
Categories: The Haunted Heritage
March 20, 2012 | 0 commentsHeritage – second story planning
With the roof on, the next order of business was cutting new walls for the bathroom and bedroom. I won’t glue these in just yet, but I needed to get a feel for the final walls so I could begin to address the imperfections caused by the ill-fitting roof.
I started with foam core board to make templates which I will later use to cut the wall from plywood. The bathroom wall continues from the top of the foyer side wall to the open back. I’ll have a fancy railing; these are just mockup pieces. There will be room for a small table and some artwork.
The narrow doors are going to be a tight fit for height, but I didn’t have room to raise the ceiling board. I want the attic to be usable space, so that’s the sacrifice I will make — doors that almost touch the ceiling.
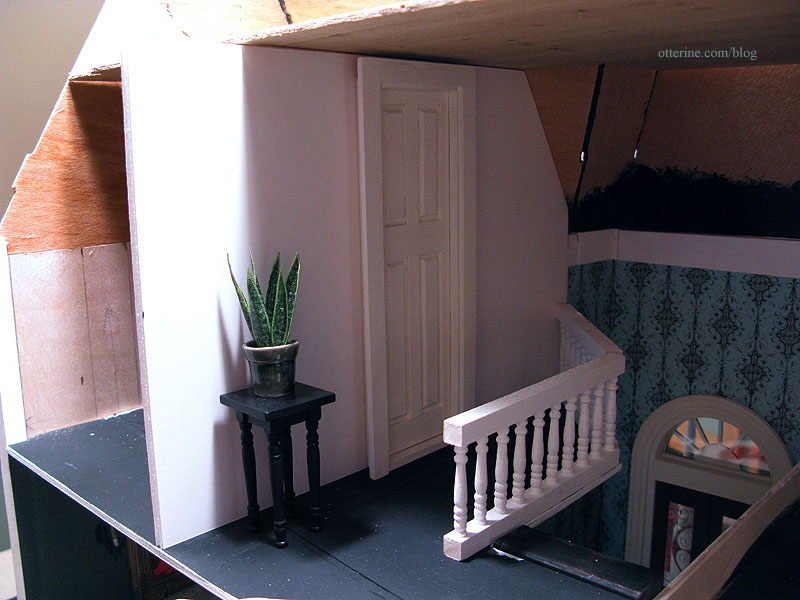
On the other side of this wall, there’s the bathroom. I’ll be using a Chrysnbon bathtub (not yet built) and sink (where the washstand sits in the photo). In the back will be a toilet (this one is from Baxter Pointe Villa) and a small shelving unit (this one is borrowed from the Newport). Grandma is going to need some frosted glass on that window!
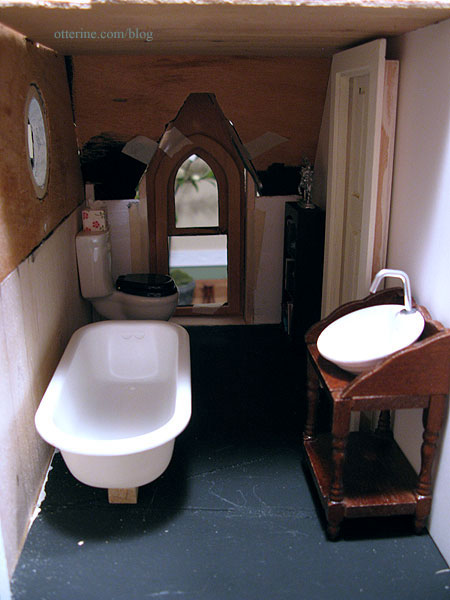
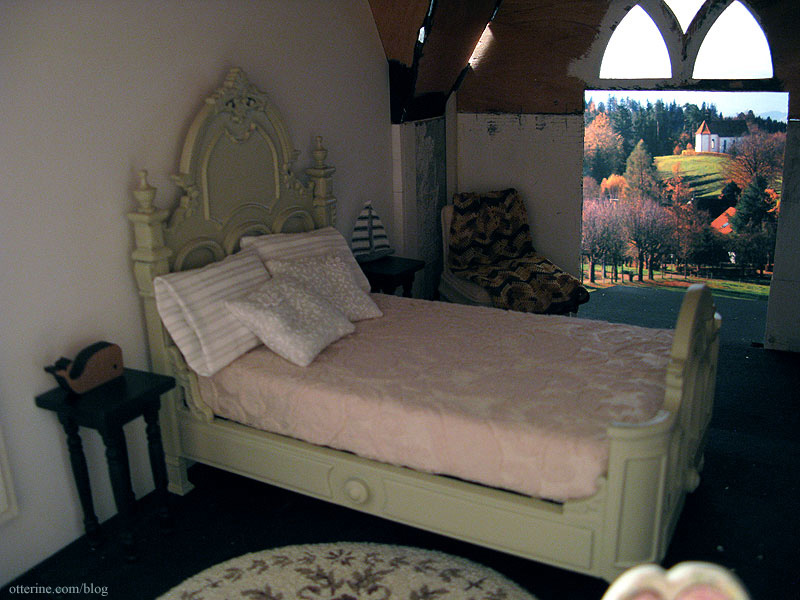
The bedroom wall continues from the front of the house to the open back. With the open foyer below, I had no other choice but to put the door at the top of the stairs even though the attic floor isn’t quite deep enough to cover the either of the two new walls. The pitch of the back roof would make this door impossible, so we’re going to need a change in pitch for the back of the house. More on that later.
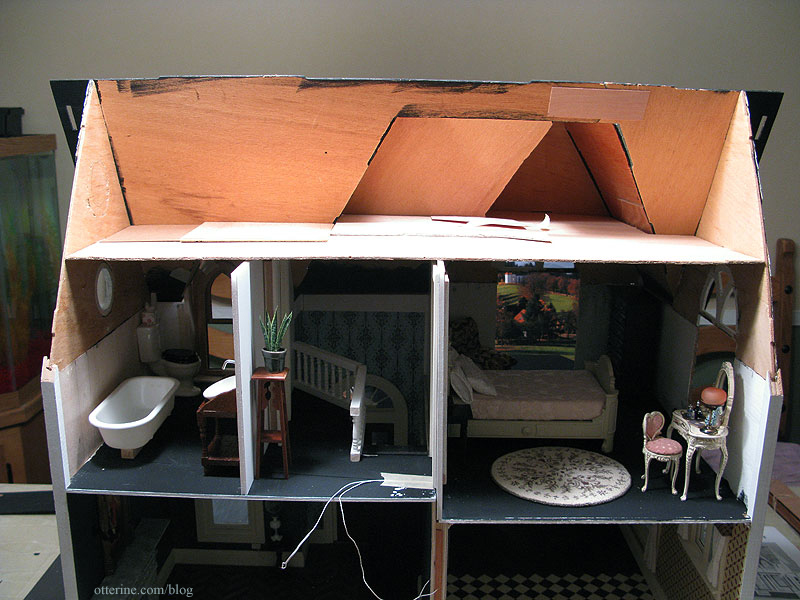
There will be steps down from the door. I borrowed the rug by Katie Arthur from the parlor during setup tonight. It might just end up finding a new home here in the bedroom leaving a vacancy in the parlor. :]
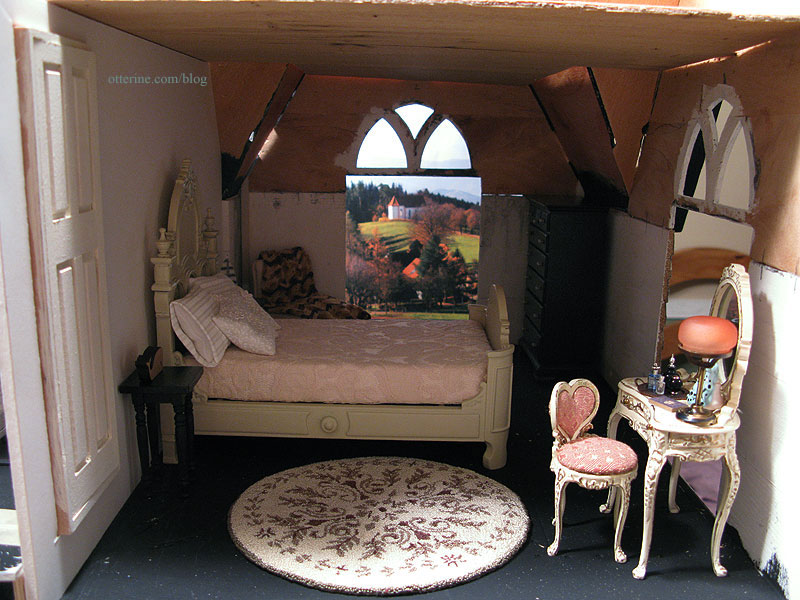
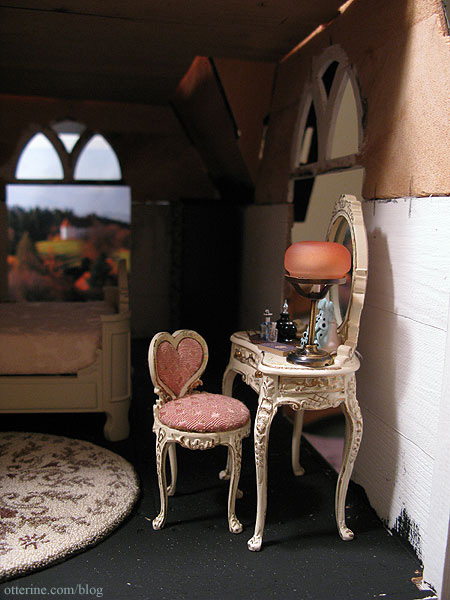
Love the vanity in this space! I’ll probably move the lamp to the other side so it won’t obscure the peacock box and vanity tray details.
I’ve put the original Bespaq mattress on the bed for mockup purposes along with a few of the pillows I’ve made. The nightstands are from Baxter Pointe Villa. I think grandma needs a comfy chair in the corner. This one is from Baxter Pointe Villa but I like the way it fills the space though it needs to be a little taller.
Categories: The Haunted Heritage
March 19, 2012 | 0 commentsHeritage – roof assembly, part 1
A number of pieces in the Heritage kit need splicing together, including the two main roof pieces. I didn’t use the splicing method for the various floor boards since nothing ruins the illusion of is it real or miniature faster than big hunks of wood holding pieces together. For the roof, though, I opted to keep them in for two reasons.
First, there isn’t anything else that will hold the pieces together besides shingles. I didn’t want to take the chance that this would be unstable. And, second, it’s an attic and uneven textures can be more easily disguised.
Instead of using the 1/8″ thick plywood splices included in the kit, I used thin wood veneer held in place with wood glue. I have some plans for the attic that will make this just the first level of stability – something to mainly hold the pieces together until I get to that part.
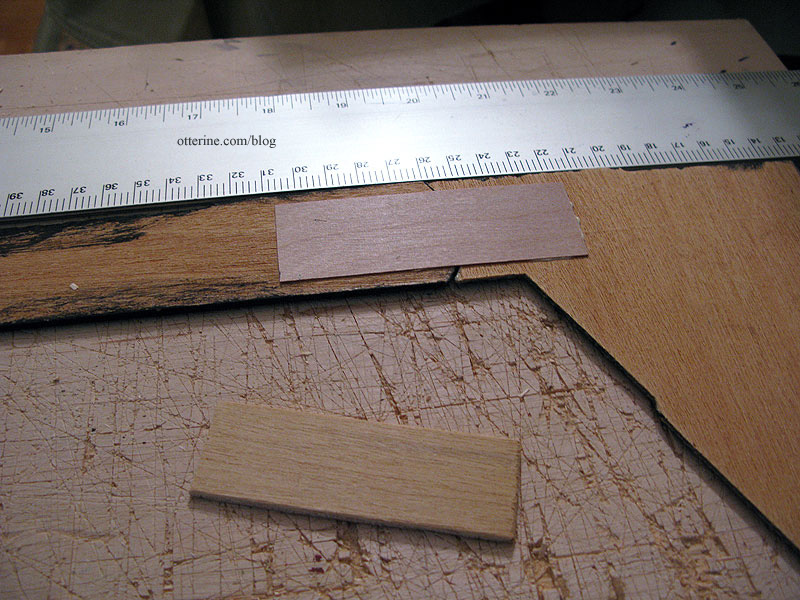
Since the diecut pieces did not fit all that well side by side, I used a T-square to make sure the roof pieces were properly aligned as the glue dried.
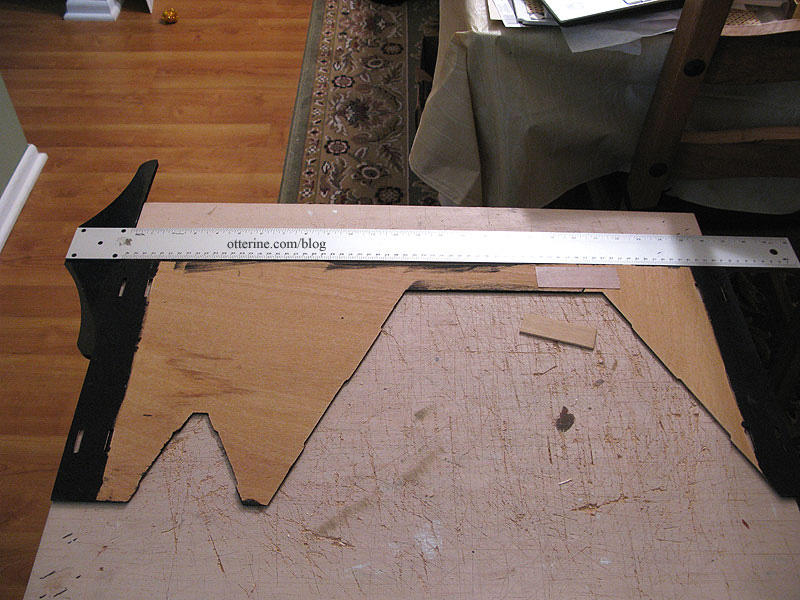
On the outside, as a temporary measure to reduce the strain on the thin wood splice on the interior, I added a piece of duct tape across the join. One more odd thing about this kit is that the splice is right where you are supposed to join the front gable roof to the main front roof. Seems like it would make more sense to have a solid support there instead of the splice. I have some ideas on how to reinforce the area and I’ll share those when I get to that part.
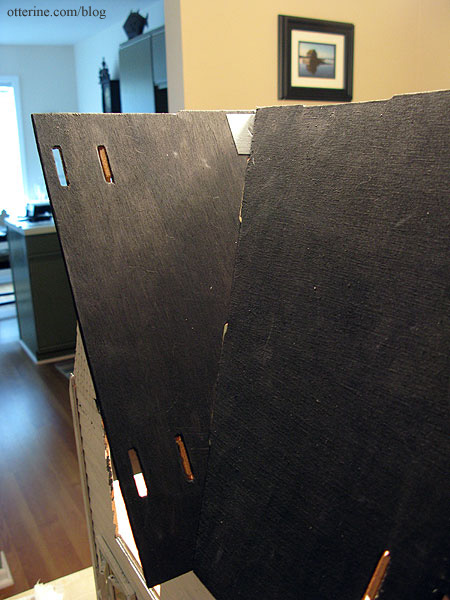
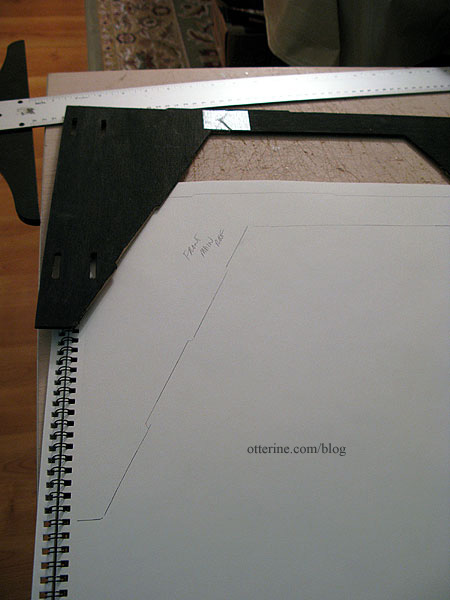
I decided to not add the shingle guidelines at this point, because I doubt they would be helpful due to the ill-fitting pieces. I plan to use Greenleaf speed shingles, which are strips of thin laser cut wood shingles. I traced all of the roof pieces onto drawing paper that I’ll later use to refine my final templates.
I glued the main front roof board to the gables. I’ll have to do some work on the attic floor before I can glue on the back roof piece. It then occurred to me that I hadn’t looked at the kit instructions for awhile, so took a look just to make sure I hadn’t missed something. :D
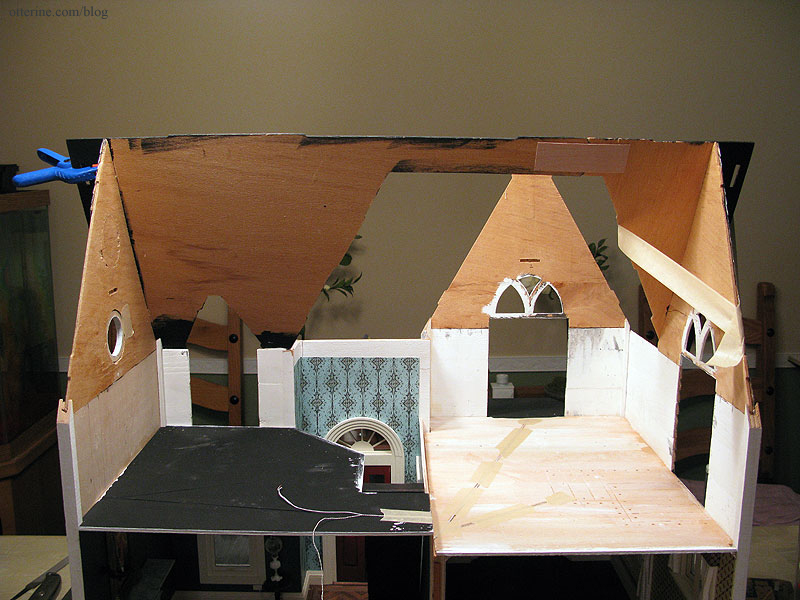
The front gable roof pieces were a bear to say the least. These two pieces did not want to fit at all. I tried to get them to match up as best as possible and just accepted the imperfections. Figuring it would be easier to mask gaps and uneven lines on the interior with wall and ceiling treatments as well as furnishings, I tried to make the roof look as best as possible on the outside.
For example, I made sure the roof pieces matched up at the bottom edge, were relatively level, and were consistent with the siding lines.
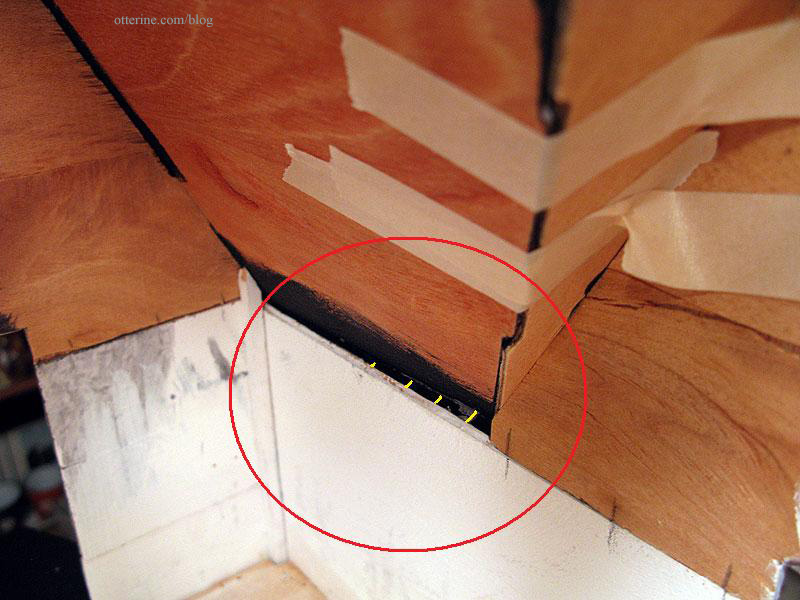
But, on the inside, the gable roof piece doesn’t meet up with the wall and there’s a large gap (shown with the yellow lines).
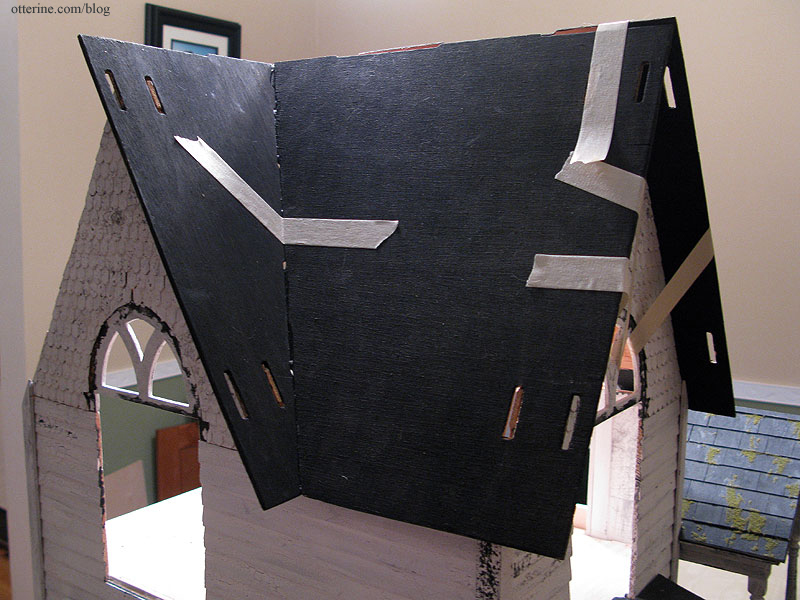
The gable roof peak is really off. No amount of pulling or taping was going to make the seam uniform. If I pulled too tight, then the front gable itself was pulled out of whack. It didn’t really work in dry fit, either, so I wasn’t surprised to find that these pieces were so far off in the final assembly. I taped the gable peak as close as possible and glued where the pieces would meet. I’ll reinforce the gaps later on as I work on the interior, but the roof is still structurally solid even with all the gaps.
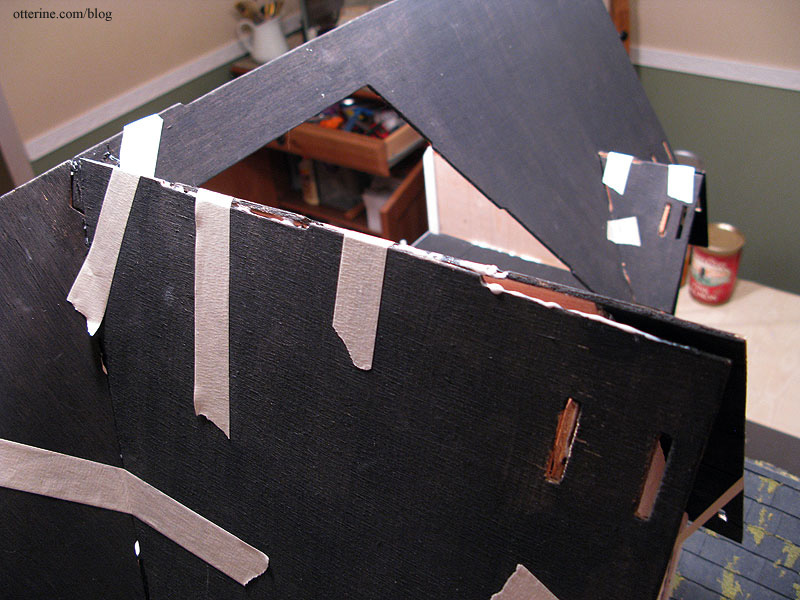
Of course, once one part is off, the rest are sure to follow. I couldn’t even figure out where the problems came from. It just seemed a general problem of ill-fitting pieces from the ground up. From the other blogs and photo sites I’ve found regarding the Heritage, no one else has mentioned the roof being such a problem. It could be just a reflection of the age and wood condition in this particular kit.
There is a sizable gap in the roof over the portico, and this seems due to a piece that is larger than it should be. Since these fit together with tab and slot construction, it’s clear the instructions didn’t intend for the parts to be altered to fit.
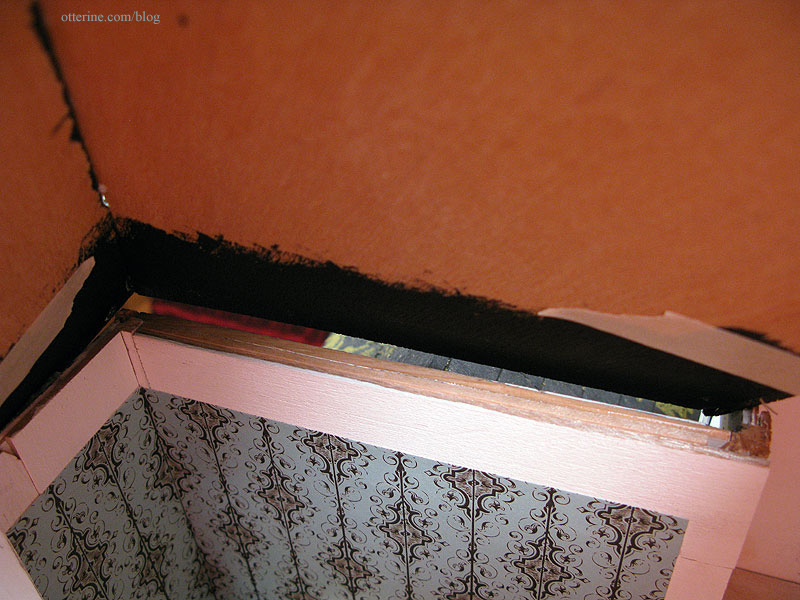
From the outside, however, it’s not even noticeable and the roof line seems generally solid. So, I just shrugged. (Note from the future in 2024 – now that I have more experience, I would cut new parts or alter the ones to fit better.)
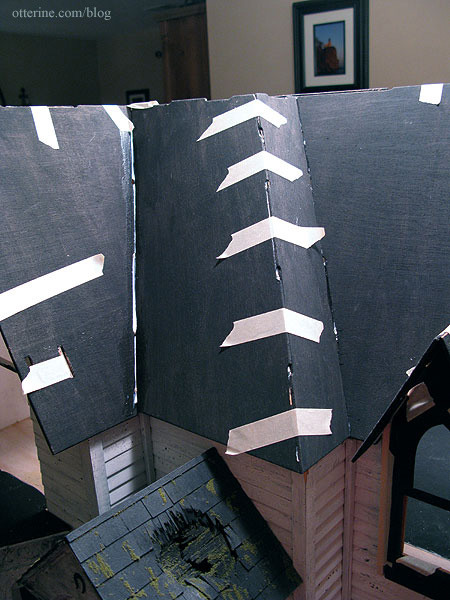
The Haunted Heritage wants (and will benefit from) an old, rickety, crooked roof. :D And, I have to address the imperfections and gaps already – dealing with a large gap is just the same as dealing with a small one. I have to tell you, though, I am glad I didn’t waste my time drawing those shingle guidelines! My templates might even be unusable, but that took only five minutes to do. ;]
—–
Continued in part 2.
Categories: The Haunted Heritage
March 18, 2012 | 0 commentsHeritage – Stable gables
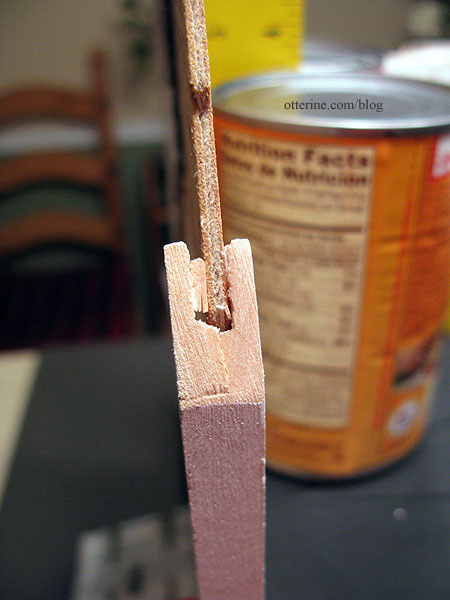
With the parlor ceiling installed, I glued in the first gable; this is the bathroom side wall. I used a carpenter’s square held up with canned goods to keep the wall straight.
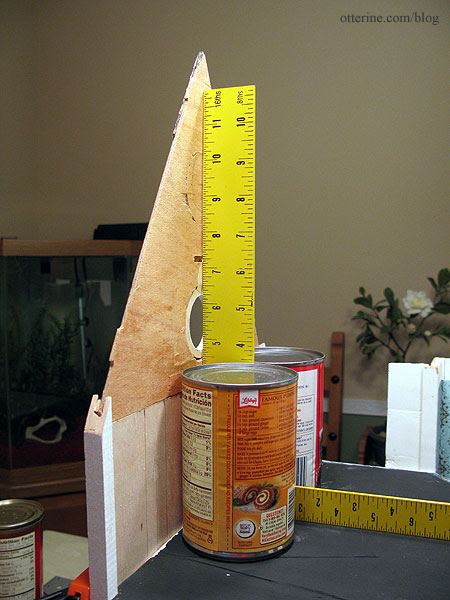
Since the gables are loose in the connector channels, I added small shims of wood to hold the wall flush on the inside.
Added trim on the exterior will help hold the gable in place. Right now, the trim is just held in place with mini hold wax.
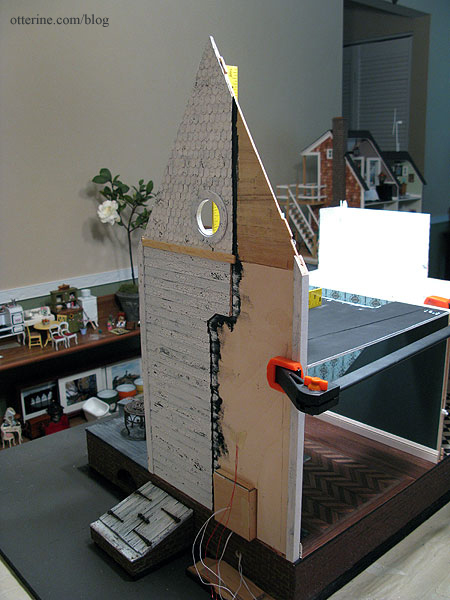
This trim piece will be cut to fit next to the chimney, then painted and aged later in the build.
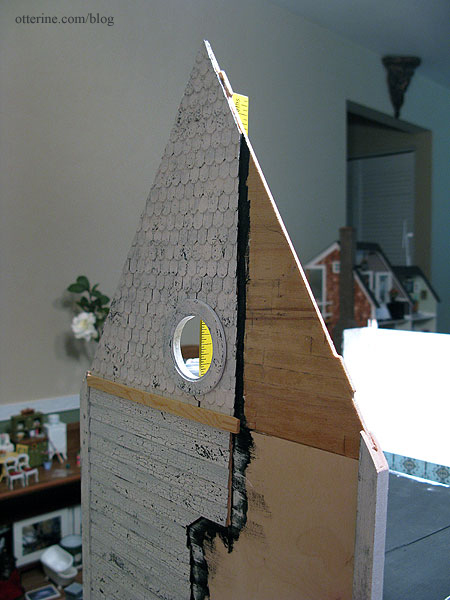
The bathroom side gable was easy to install since I had replaced the side wall with plywood that had a nice smooth, even surface for gluing the pieces together. The two gables in the bedroom were another matter. Both were fitted above the Dura-Craft siding pieces, which have a lip exposed at the top. One gable also has only one side connector with the other side free until the main front roof piece is put in place. To top it all off, both of these gables were cut from probably the worst piece of wood possible. They have a long strip of knotted, whirled wood along the bottom creating a severe warp in both pieces.
To adjust the warp, I ran them under the faucet – yes, water logged the hell out of them – then pressed them flat for two weeks. I ended up with relatively flat boards. However, I figured glue and wallpaper paste moisture would put me right back up Warped Creek.
To achieve more stability for the gables, I first scraped off the extra lip from the tops of the siding pieces. I then drew connecting lines on the wall and gable pieces.
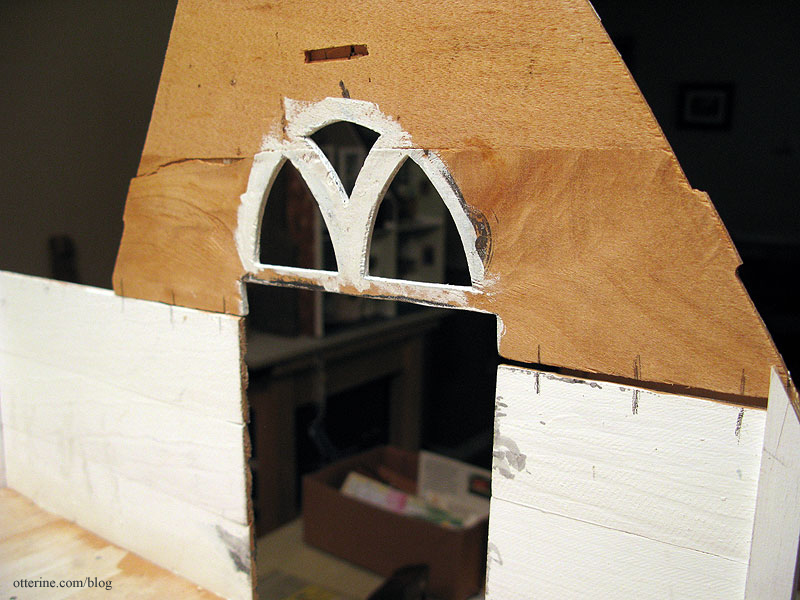
I drilled holes for headless pins in the base wall.
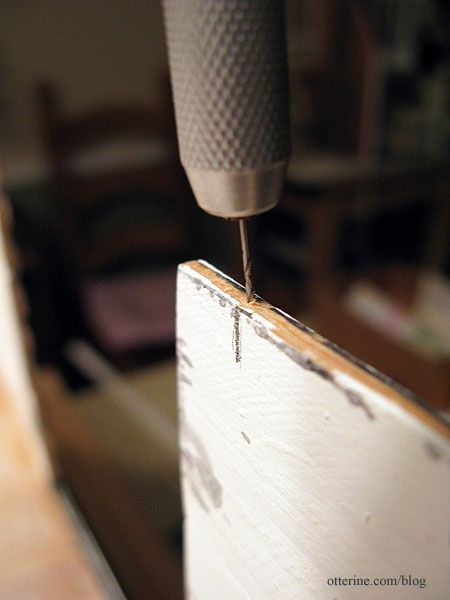
I added three headless pins on either side of the gable window opening on the base wall.
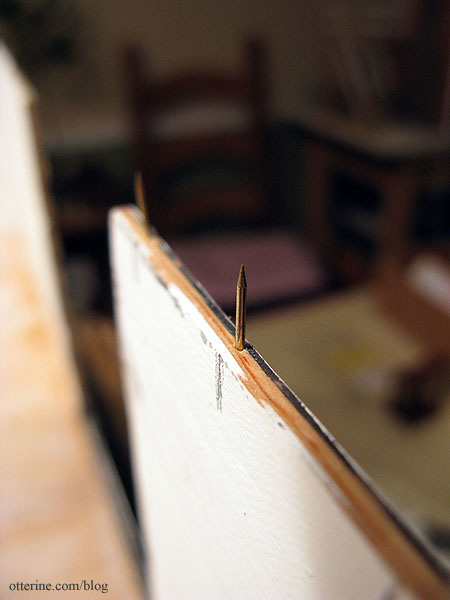
I drilled holes in the gables to line up, applied glue along the bottom edge and then pressed the gable onto the base wall over the headless pins.
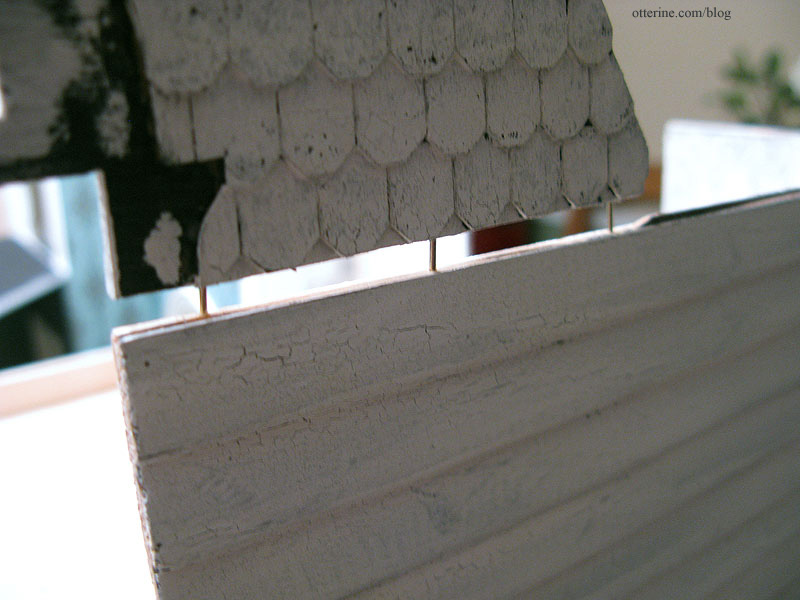
I lined up the carpenter’s square to check it, but the pins were doing their job perfectly. :D
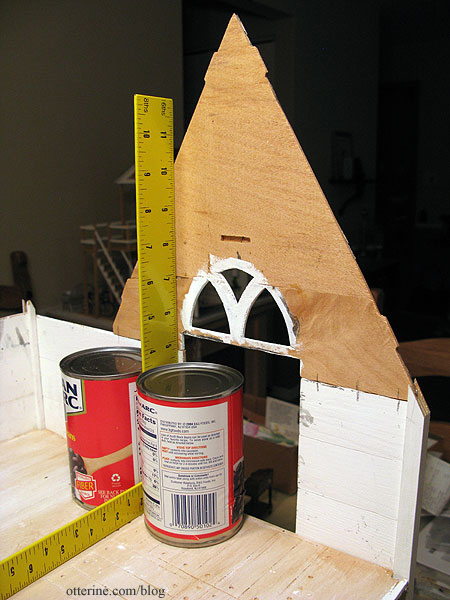
I repeated the process for the front gable even though it has two side connectors.
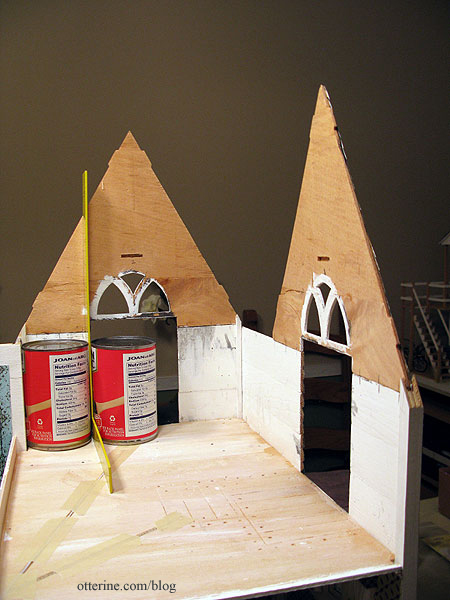
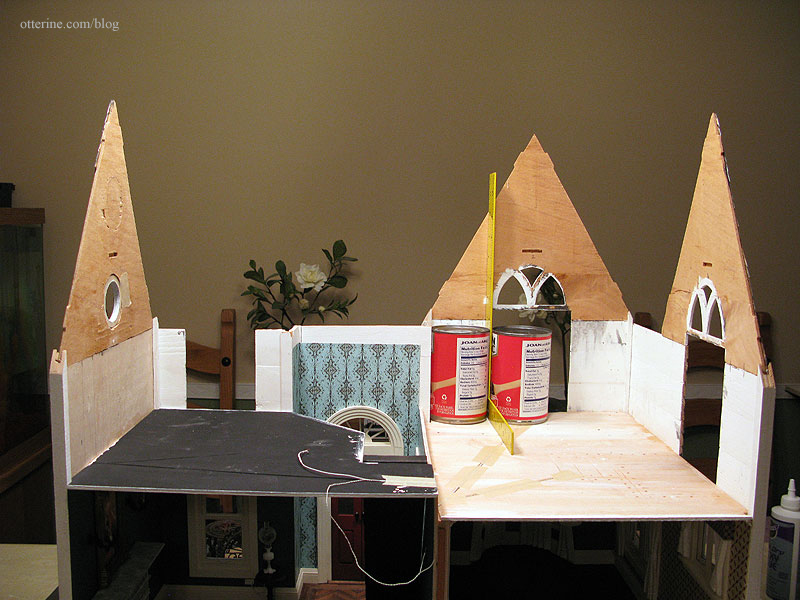
All of the gables are now installed. Since the roof pieces make up part of the second floor walls, those will be next for fitting and finishing.
Categories: The Haunted Heritage
March 17, 2012 | 0 comments
NOTE: All content on otterine.com is copyrighted and may not be reproduced in part or in whole. It takes a lot of time and effort to write and photograph for my blog. Please ask permission before reproducing any of my content. (More on copyright)


