

Old time gas lights
Other than Baslow Ranch, I’ve worked only in contemporary style. In keeping with the creepy old house on the hill theme I’ve started in the Heritage, I had to venture into the past. :D No LEDs here, my friends…just dim gaslight, kerosene and candles.
The photos here are all the product shots, so I can’t say for certain what the quality is like (other than the Clare Bell lights below, which are fab)…but I am hopeful I will be able to work some magic when the shipment arrives.
I’ll be using one or both of the Clare Bell Brass Coach Lamps that didn’t end up working for Baxter Pointe Villa on the front porch.

These are the lights I bought for the living room. First, a pair of Chrysolite Gaslight Wall Lamp Kits for above the yet-to-be-determined fireplace.
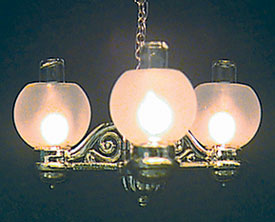
And, a Chrysolite Gaslight Chandelier Kit for general lighting.
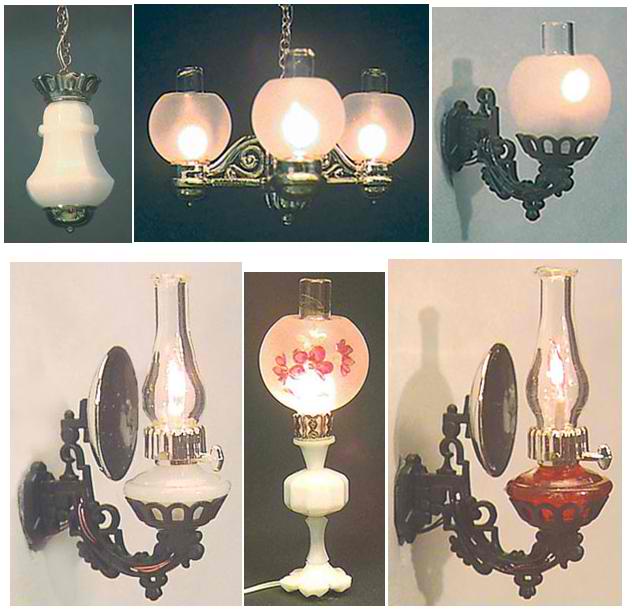
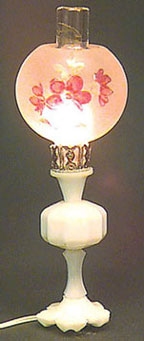
This is a fairly long room, so I might end up using the Chrysolite Banquet Lamp (not a kit) here as well, perhaps on a side table. The one I ordered has purple flowers.
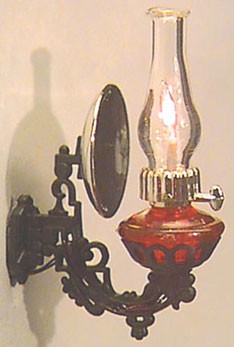
There are three kits for the bedroom, all by Chrysolite. First, the Bracket Lamp kits with ruby color bases. These will go in the bedroom, likely on either side of the bed.
And, the Zenith Hanging Chandelier Kit for general lighting in the room.

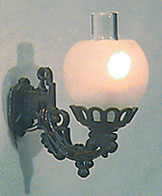
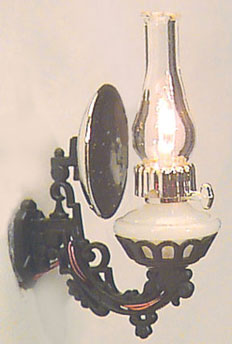
I bought the same Bracket Lamp kits for the bathroom but chose white instead.
If something I have in the works for the bedroom pans out, I might be using a different lamp in addition to the ruby sconces and, in that case, the Zenith fixture will move to the bathroom. I am still deciding on kitchen and attic lighting, though I do have some things in mind.
Update: I am very pleased with the kits. They seem very straightforward and have good quality parts.
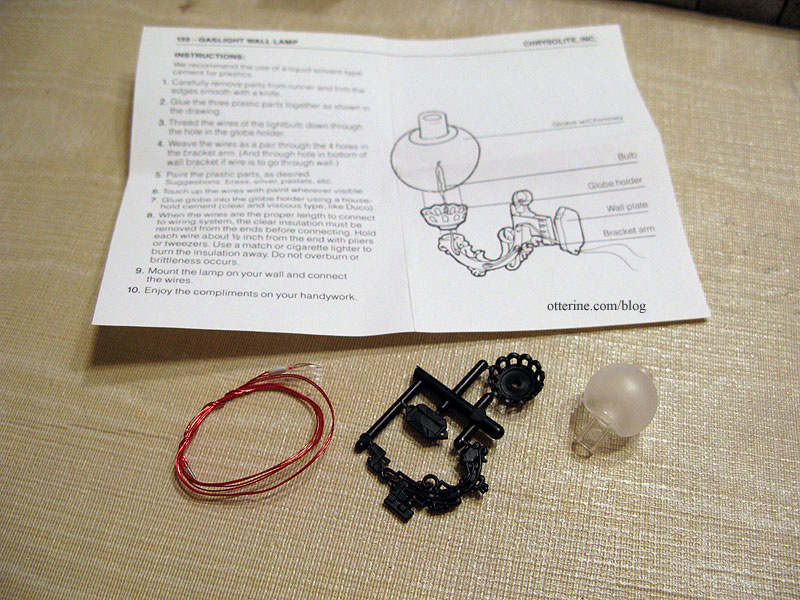
They are completely open to customization, which is the main reason I predominantly use kits for furniture. I like to pick my own colors and finishes.
The only snag in the Chrysolite kits is the supplied bulb; it’s not a replaceable type of unit. If I am going through the trouble of wiring my house, I want to be able to replace burned out bulbs. Since I use hardwiring and not the plug in type of lights, replaceable bulbs are a must for me. Since these are kits, I can purchase replaceable bulbs and use them instead.
Categories: The Haunted Heritage
July 28, 2011 | 0 commentsHeritage – foundation assembly
This is perhaps a bit of a boring post, unless you plan to build a Dura-Craft Heritage.
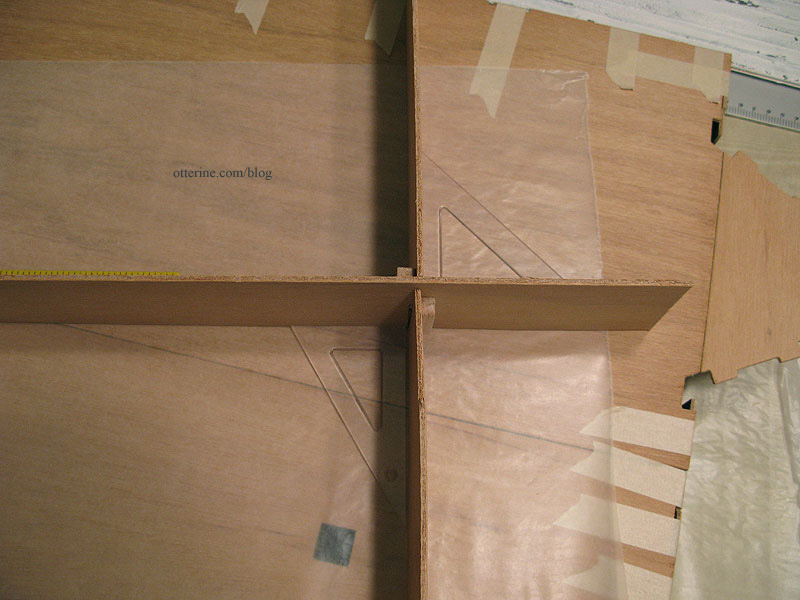
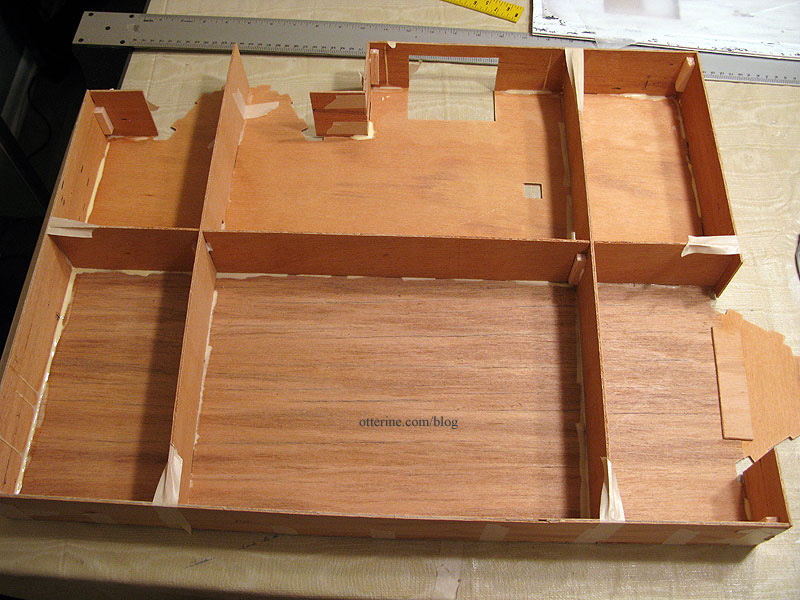
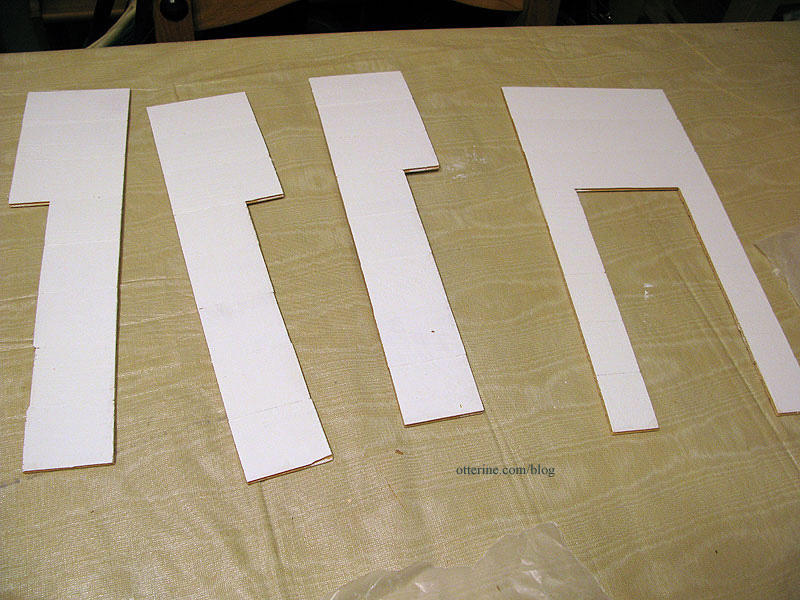
I took some pictures while assembling the first floor board. I cut the five required pieces from the die-cut wood sheets and sanded the edges smooth. The instructions tell you to place the boards right side down, but I started with them right side up. I held the front portion and the back portion close together and taped along the join. I did the same thing for the bay window portion.
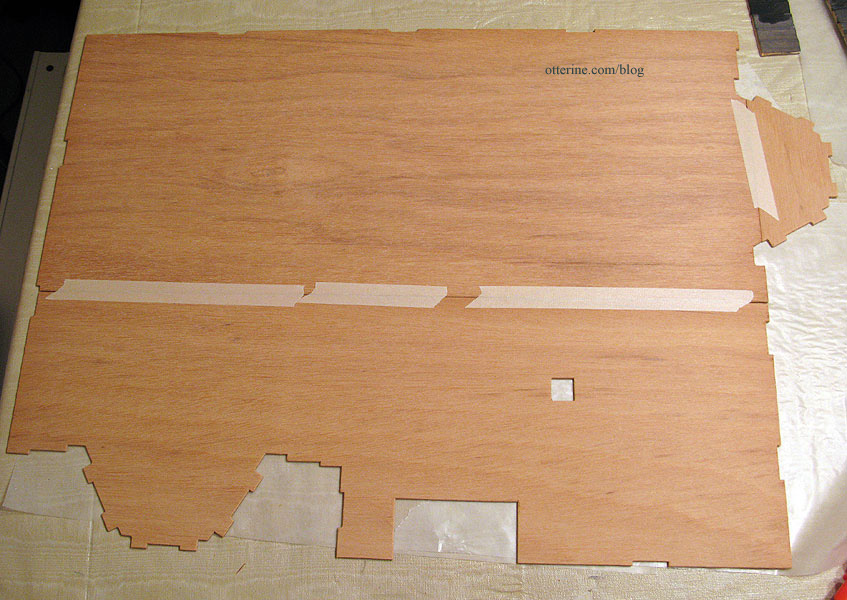
I flipped the board over and used wood glue to attach the long center splice and the bay window splice. I’ve been using tacky glue otherwise but I wanted a stronger hold in this instance. I then put some tape over the splices to hold them in place.
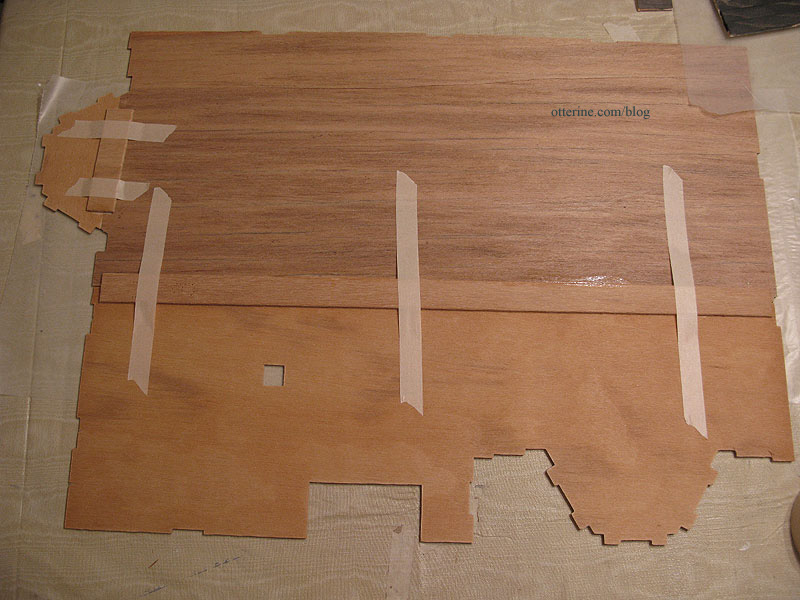
I flipped the board over once to make sure I didn’t have a ton of wood glue seeping through the other side and then returned it to its right side down position. I put magazines over the splices to hold the assembly flat while it dried.
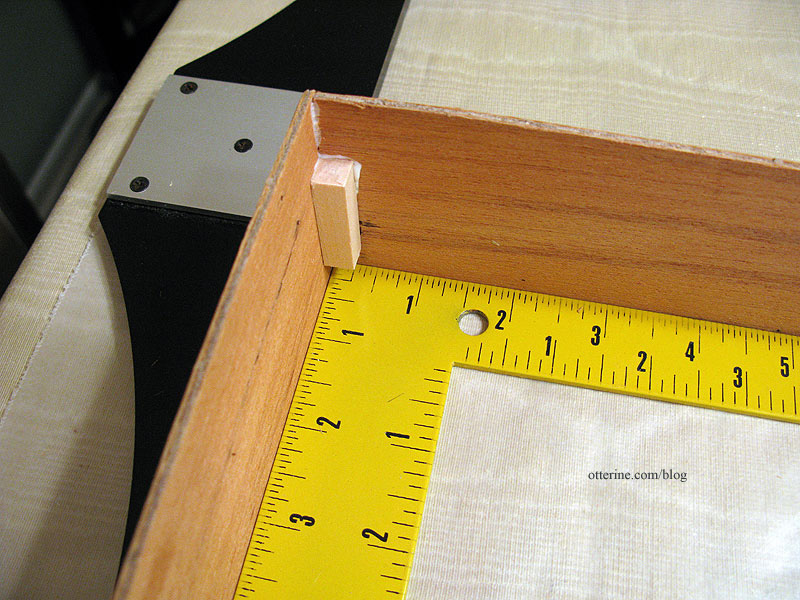
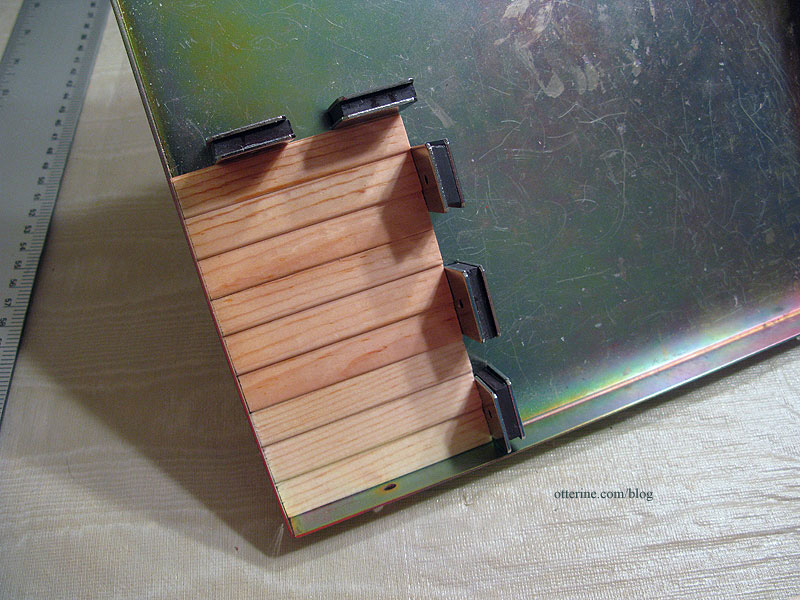
The foundation pieces went together well following the instructions, but I raided my wood scrap bag and added balsa or bass wood supports in the corners. Even though this is supposed to be an old house, I don’t need it falling off a rickety foundation! These braces helped keep the corners square as I worked with the foundation pieces and I think made it a whole lot easier. Most of the tabs did not fit well and the braces are pretty much the only thing holding the corners together.
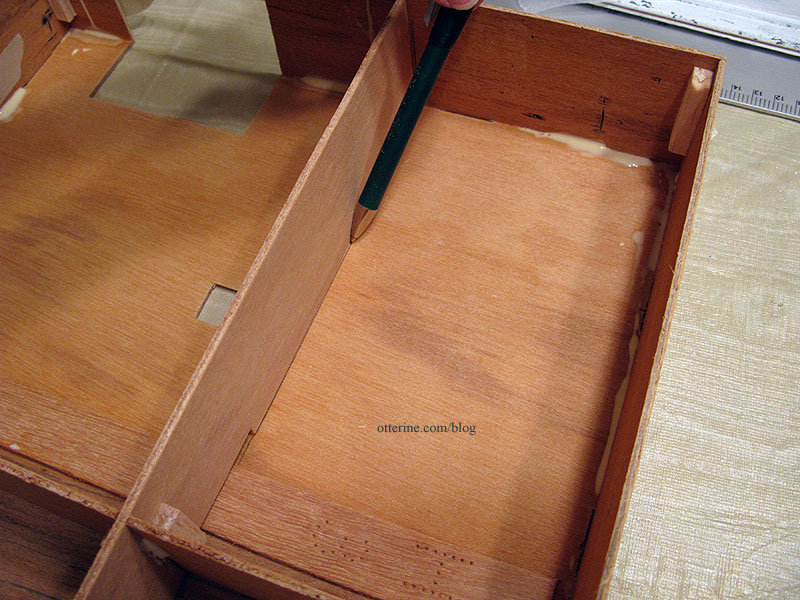
In order to glue the two foundation assemblies to the first floor, I flipped the first floor board upside down on the table, placed a few pieces of masking tape along the edges and then drew a line of wood glue all along the outer edge. This photo shows the tape and glue for only the first of the two assemblies attached in this step.
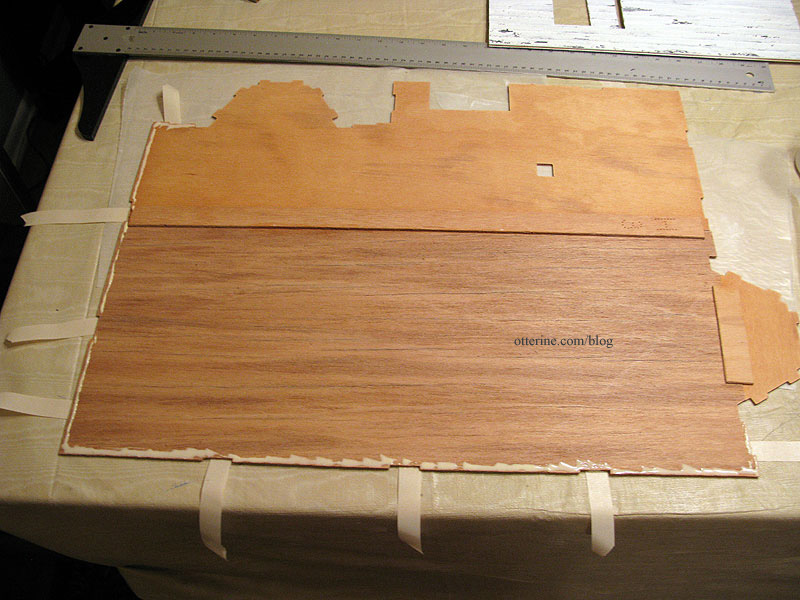
I placed the foundation assemblies on the board and then pulled the tape tight around the edges. I flipped the whole thing right side up and added more tape around the edges to make sure everything lined up well, especially at the corners.
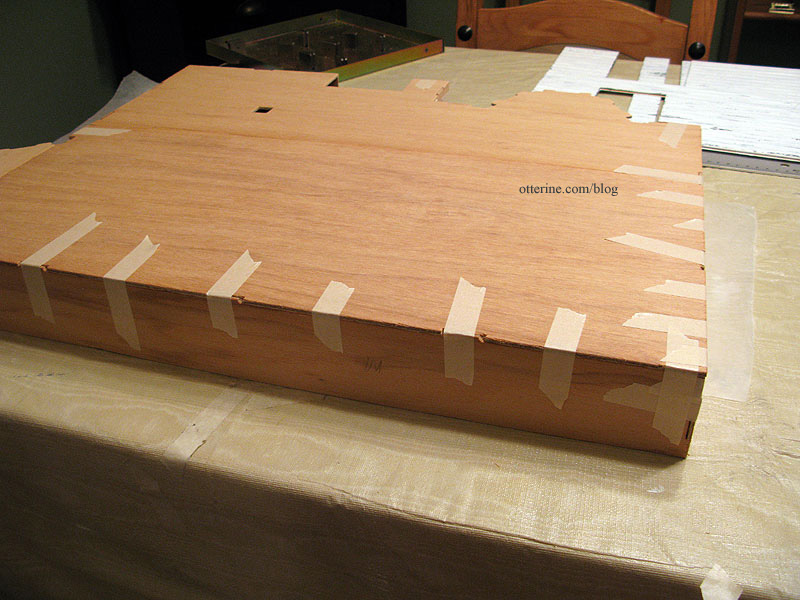
For the base floor supports, I added a similar type of corner brace as I had for the base walls.
I flipped the foundation upside down and put the support assembly in place without glue. I traced around the boards and then drew lines of wood glue following those lines.
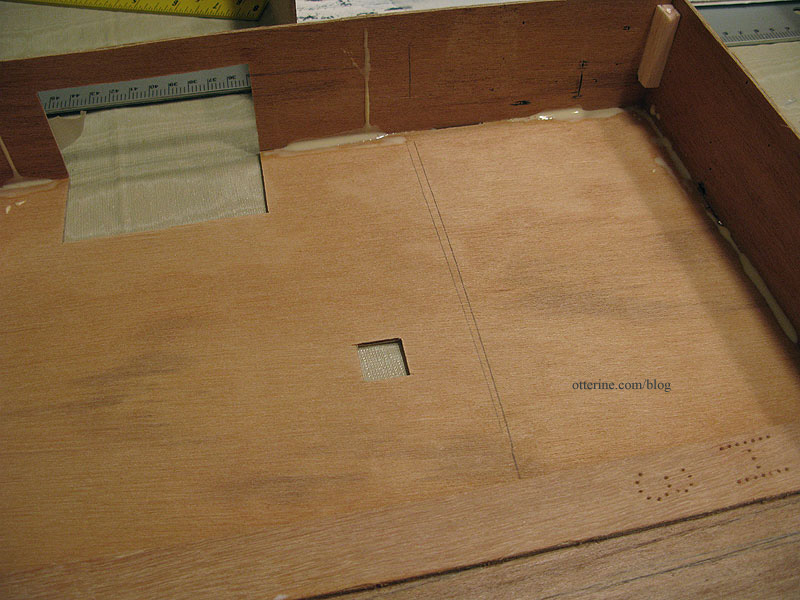
I put the supports in place on the glue lines and added tape to hold them in position while the glue dried.
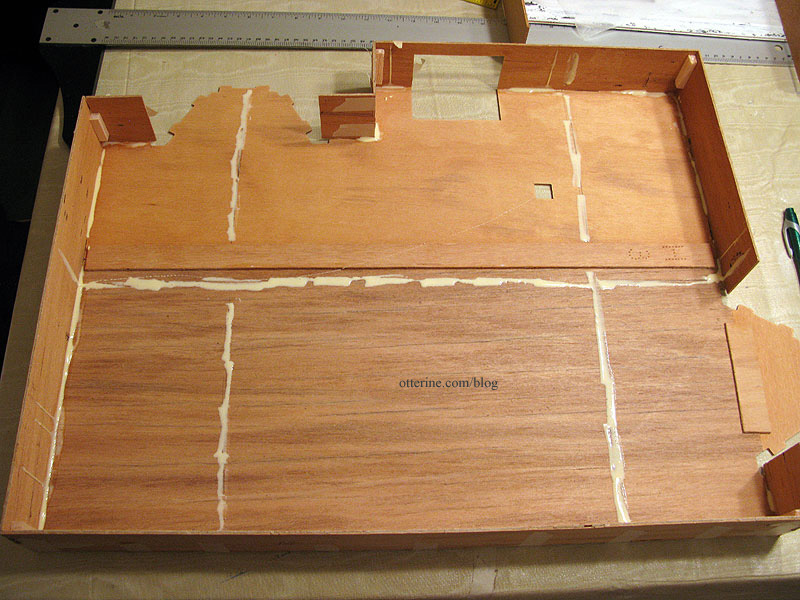
I flipped the whole thing right side up again and placed magazines on top of the floor board so the base supports would form a good bond with the underside of the floor.
The next step for this portion will be bricking the foundation. The Heritage kit comes with Magic Brik to finish the foundation with a brick-like surface texture. I briefly thought about using this but decided against it for several reasons. First, I’ve seen it done well and I still don’t think it looks as much like real brick as I would personally like. Second, I’ve heard horror stories of it not working well at all for people and the subsequent mess involved in removing it. Third, this is an old kit (the instruction manual is stamped 1995) and I am not sure of this product’s shelf life. And lastly, when it comes to the results from the time-consuming process of egg carton bricks, I know it, love it and find it well worth the effort.
I opted for bricks measuring 1/4″ wide x 3/4″ long just because it sounded good to me. I usually use measurements somewhere close to these. Now, I’m off to cut a bunch of tiny egg carton bricks!
Categories: The Haunted Heritage
July 27, 2011 | 0 commentsAging the exterior, part 2
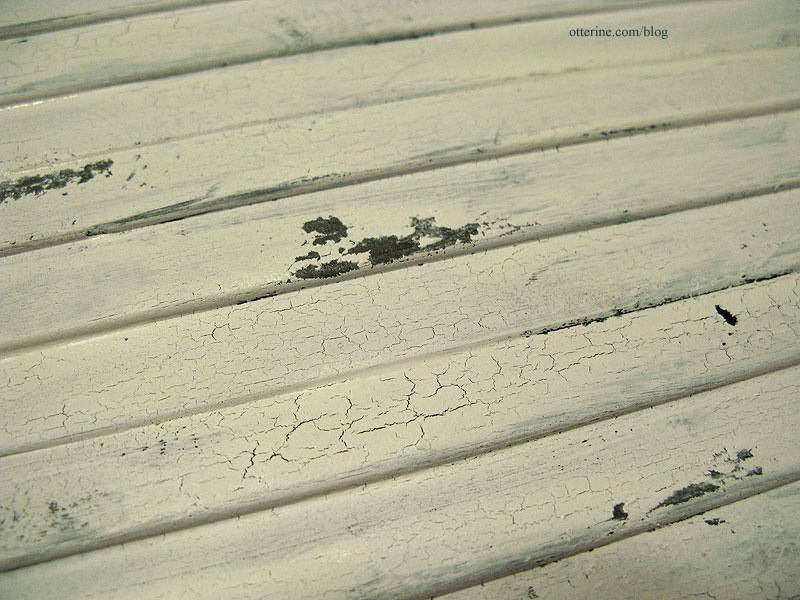
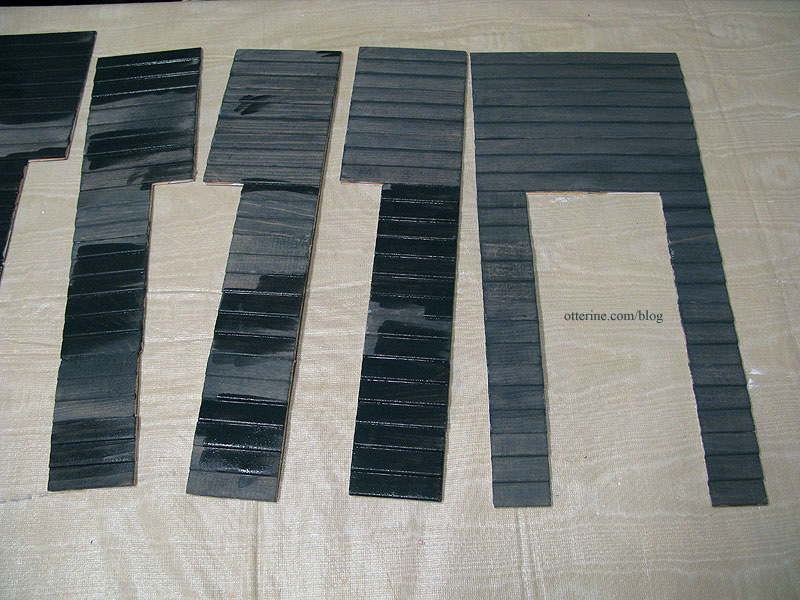
Part two of the aging process. I brushed on crackle medium with a smaller brush, basically the size relative to actually painting the house if I were in miniature. I used the lighter brush with the stiff bristles for the crackle medium and the darker soft brush for the paint. The stiff bristles allow me to move the medium around and the soft brush gives good paint coverage.
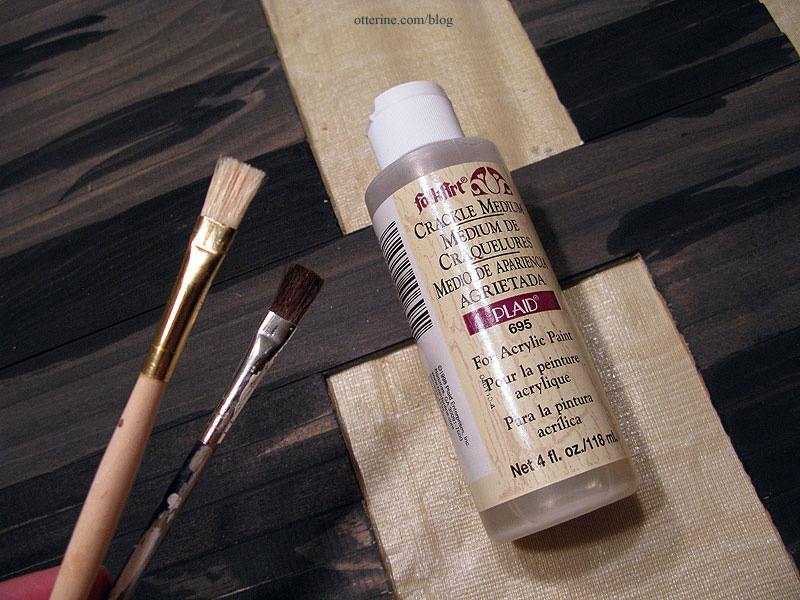
I didn’t apply the medium uniformly. Some areas were thicker and some areas I left all but untouched. In real life, paint will weather differently depending on the wood base as well as its exposure to the elements, so I wanted an uneven crackle effect. I brushed it on heavily at the lower corners of the windows and on any visibly damaged wood.
Once the crackle medium was dry, I painted the exterior with white craft paint. I painted one “row” at a time, all the way across. You have to work fast and use long brush strokes. If you need to fix an area, you’ll have to wait until it’s dry. Overworking it just makes a mess. But, watch it work as the paint dries!!! :D
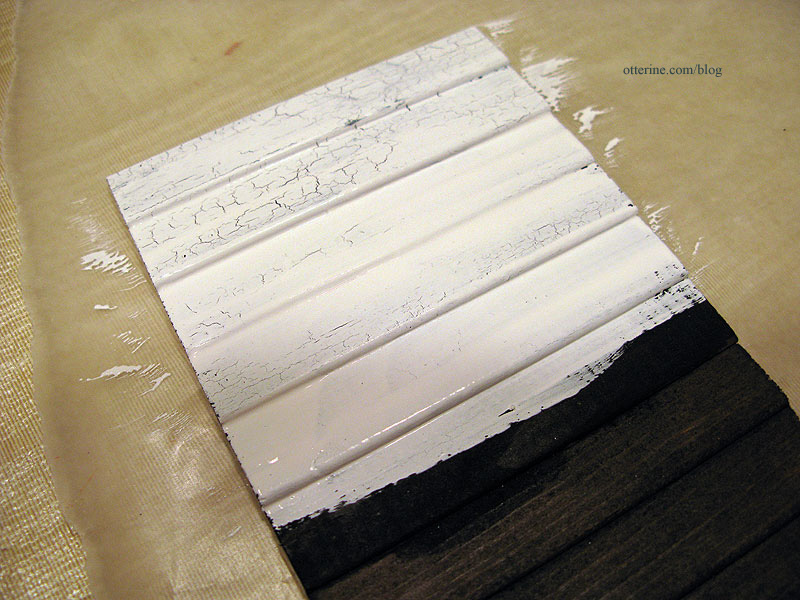
Here’s the first wall after the paint coverage.
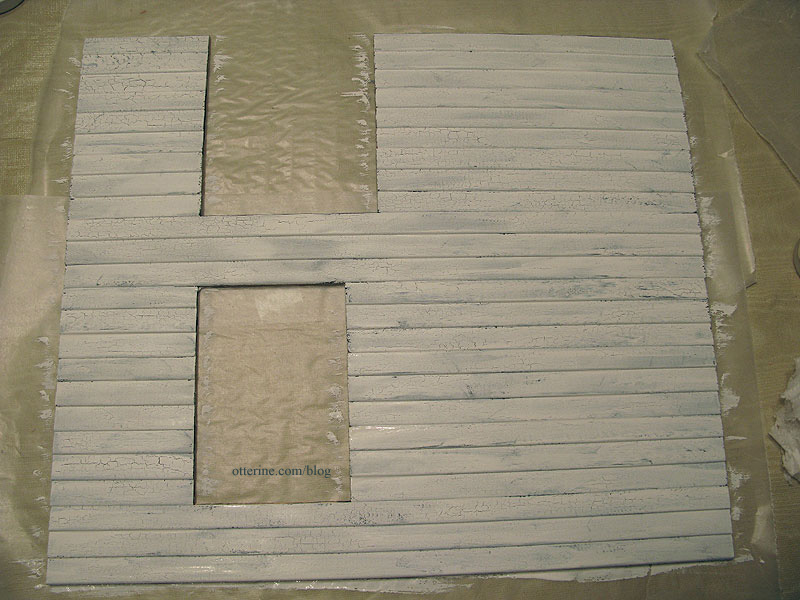
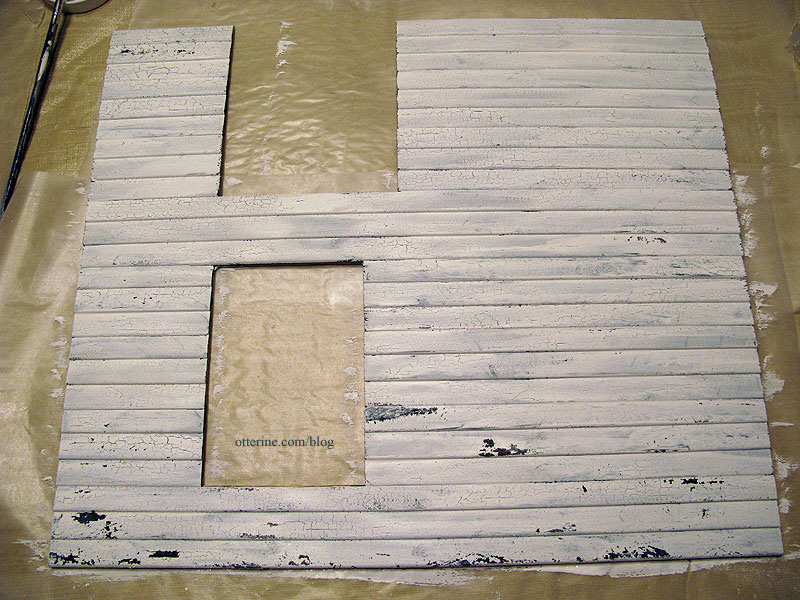
I work from top to bottom so that when I am done, I can take a paper towel and dab a few random places and lift the paint completely.
With this additional wear along the bottom and in a couple of places on the overall wall, I think it looks much more realistic. Later on during assembly, I will add more washes to age the white to keep it from looking too bright and new.
Now I need to repeat this entire process for the connectors so I can build the outer structure. I’ll eventually need to do this process for the gables, windows and front door, too.
Categories: The Haunted Heritage
July 26, 2011 | 0 commentsAging the exterior – priming the interior, part 1
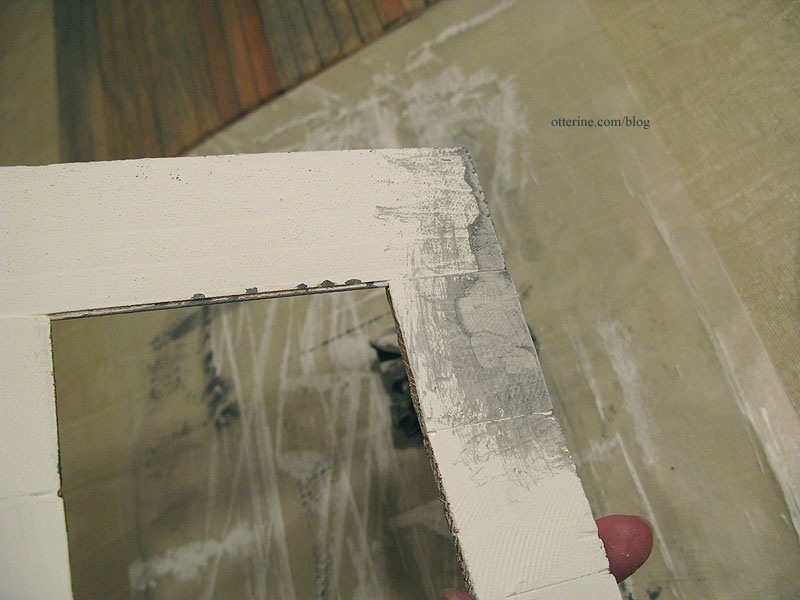
Using my childhood home as an inspiration, I’ll be aging the exterior by crackling white paint over a grey washed base.
After assembling the walls, I primed the interior side with white craft paint (two coats). The walls will all be covered by wallpaper, but this process seals the wood and adds longevity to the paper.
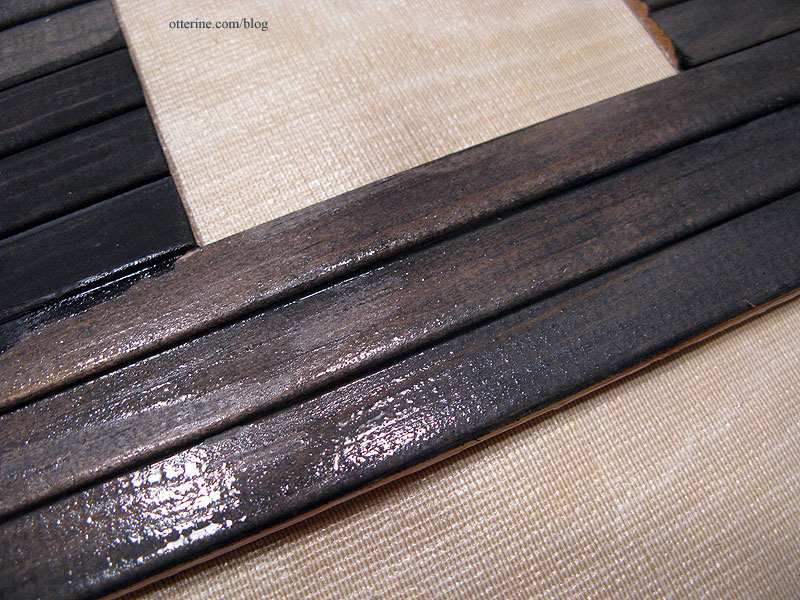
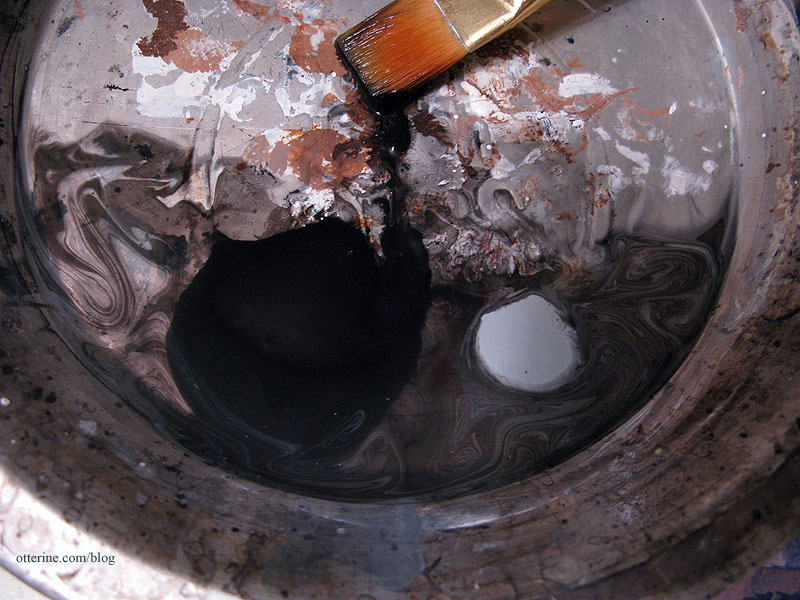
On the exterior, I used diluted washes of grey, black and brown acrylic paints to achieve the look of old, weathered wood that will show under the crackle effect of the exterior paint. This staining process takes a few coats to achieve a deep color, so I always start with a modest amount of paint and a lot of water mixed in a standard size pie tin.
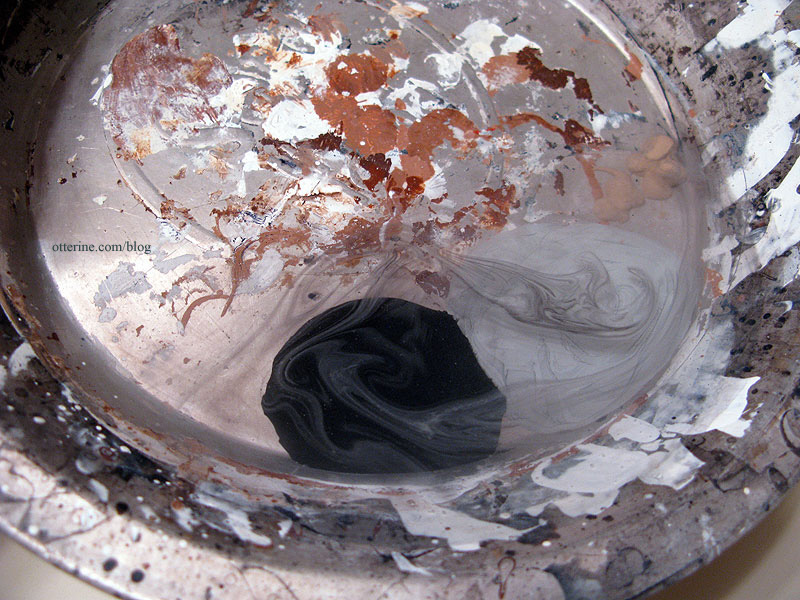
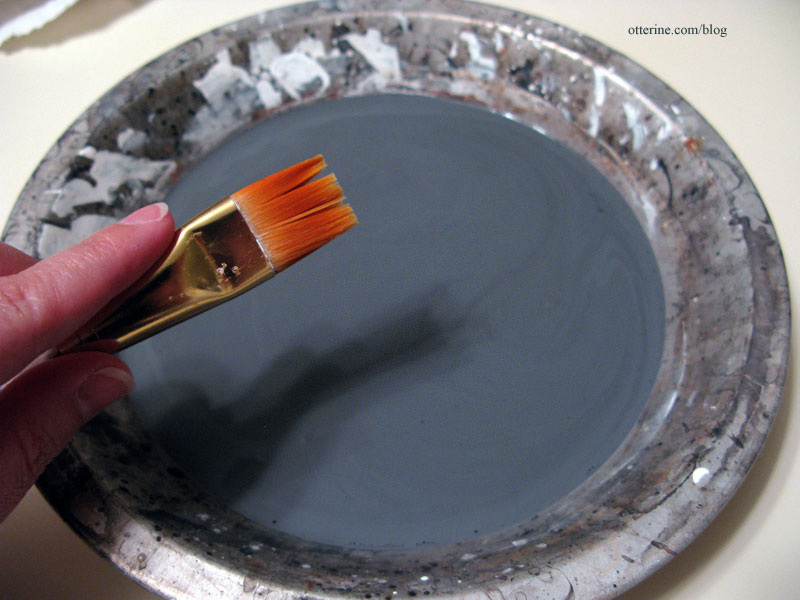
After stirring, I ended up with a grey soup that I brushed on with a large brush and then wiped off as I went.
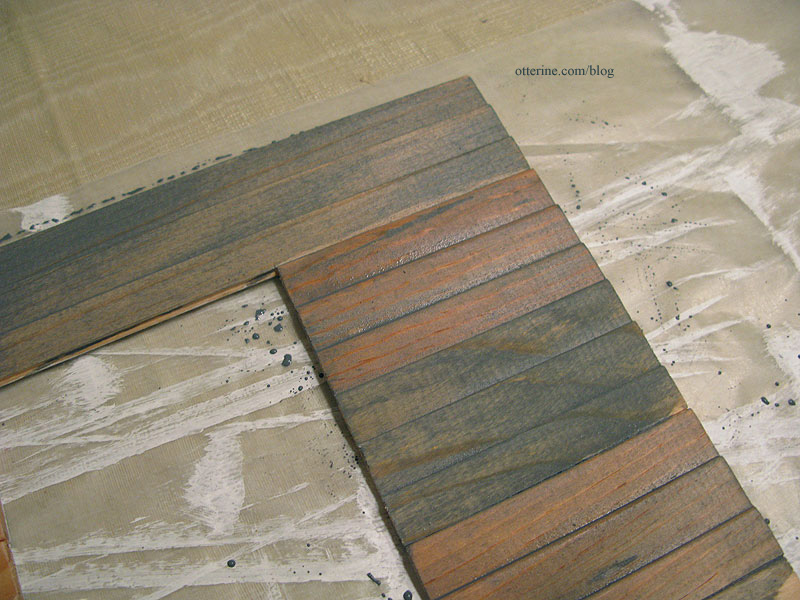
Watered down paint will make the wood buckle and can loosen the tacky glue joining the pieces. Since this is such an early stage of assembly, this really isn’t anything to worry about. The walls can be pressed flat as they dry and joins can be glued back together before final assembly.
It’s almost impossible to not get the wash on the white primed side underneath. But, with an old weathered house, anything that gets dirty just looks more realistic. I just wipe any excess off the white and leave it grey. It won’t show under the wallpaper anyway. This is why aging finishes are so messy…and so fun!
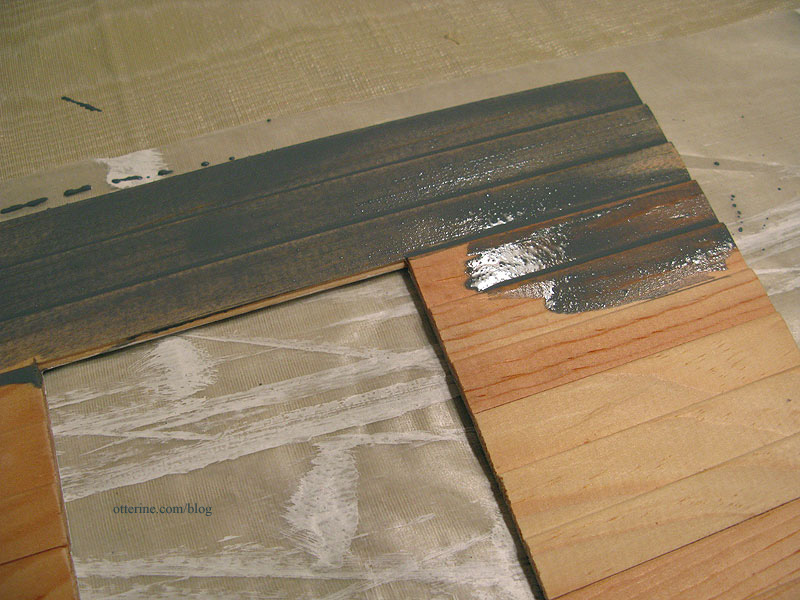
The first coat really just dirtied up the wood, so I went darker the next round. You can always add more color, but you can’t take it away. Best to do thin coats to build up to the color you want. For the second coat, I added more black than grey and left out the brown. I also added less water but still wiped away the excess as I went.
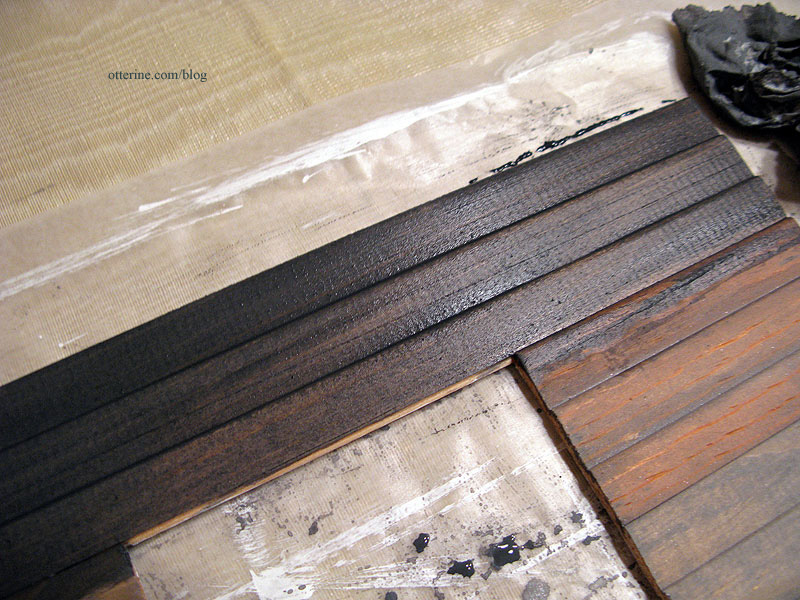
Now we’re getting somewhere…
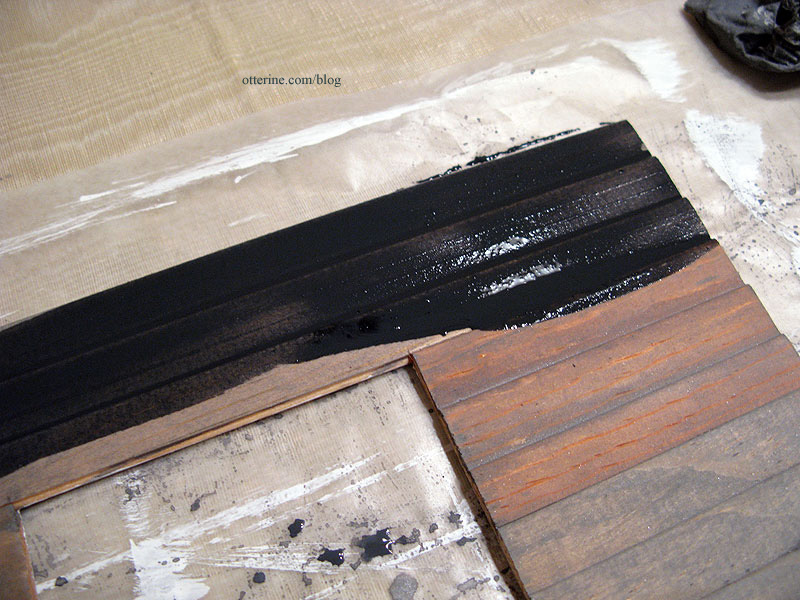
There were still some reddish places, so I opted for a third wash. I dumped out most of the liquid from the second wash and added more black paint.

I brushed this dark mixture over only the red areas and left it on full strength. Some boards needed a lot and one didn’t need it at all. Light areas are fine, but red areas will clash with the weathered effect.
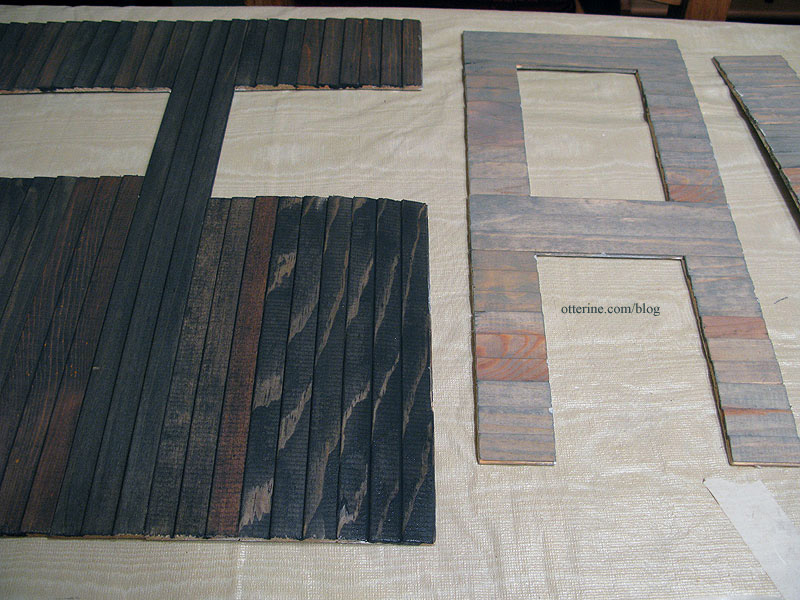
Once the wood was the appropriate color, I let the pieces dry for about half an hour before covering with wax paper and pressing flat with magazines to dry overnight.
Categories: The Haunted Heritage
July 25, 2011 | 0 commentsDura-Craft wall assembly
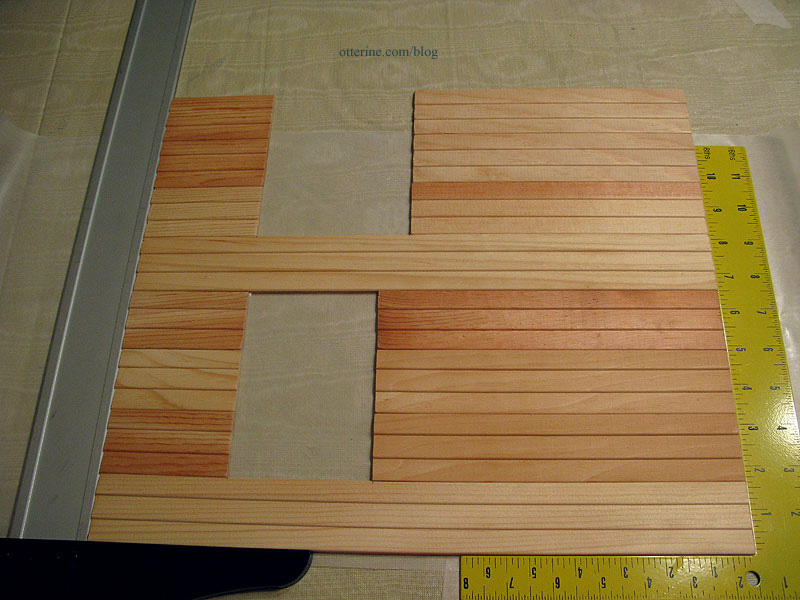
Construction has begun! I knew from experience that the walls would need to be assembled from milled siding pieces. I also expected the pieces to be rough and uneven. Interestingly, though, they went together pretty well. I used my Micromark gluing jig to assemble the pieces that would fit inside it, which worked for all but the two 15″ long pieces.
Once those assemblies were reasonably dry, I attached them to the longer boards.
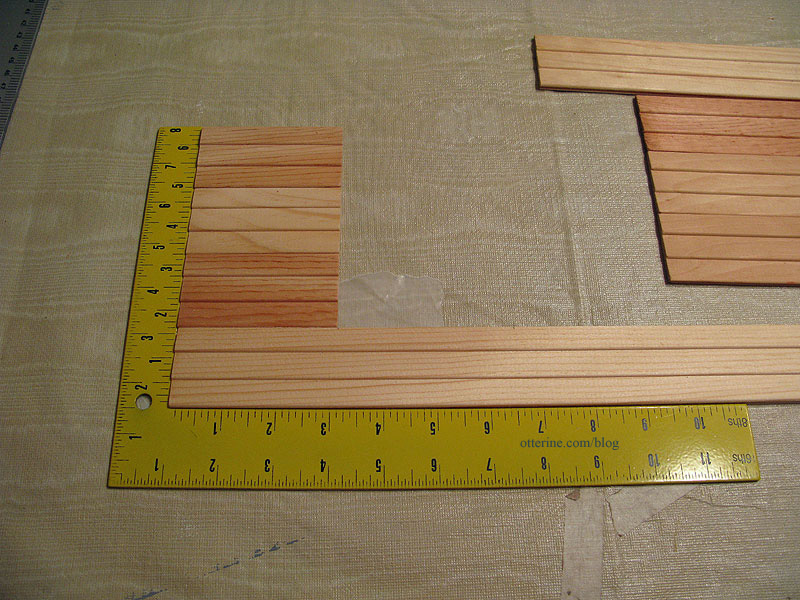
And, of course, I’ve already made changes to the layout. I flipped the pieces on the bottom of the left-hand side wall so that both windows are toward the back. I also decided not to replace the broken pieces and used them as is. I think it will lend itself well to aging the exterior.
I won’t be using the stairs included with the kit; the layout takes up too much space on the second floor and obscures the view of the front bay window.
Categories: The Haunted Heritage
July 25, 2011 | 0 commentsHaunted Farmhouse – Dura-Craft Heritage
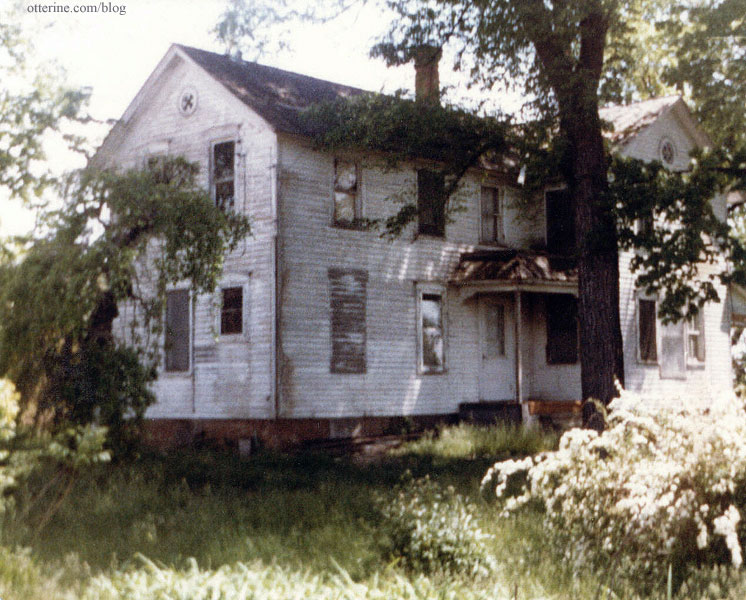
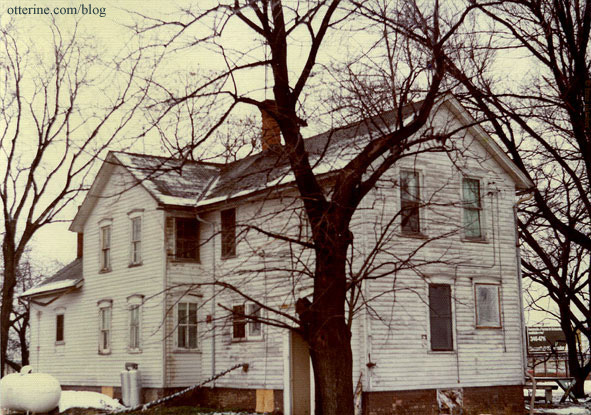
I grew up in an old white farmhouse that probably looked pretty creepy to others, but I loved it. It was way too cold in the winter, too hot in the summer and had generally outdated décor and musty upstairs rooms. But, it was my first home and even though it no longer stands, I love it still.
These first two photos were taken in 1983, two years after my family moved and just before they used it for fireman training. I didn’t go watch…I couldn’t. It’s overgrown and lush and green…and interestingly, when I dream of it, this is how it appears to me.
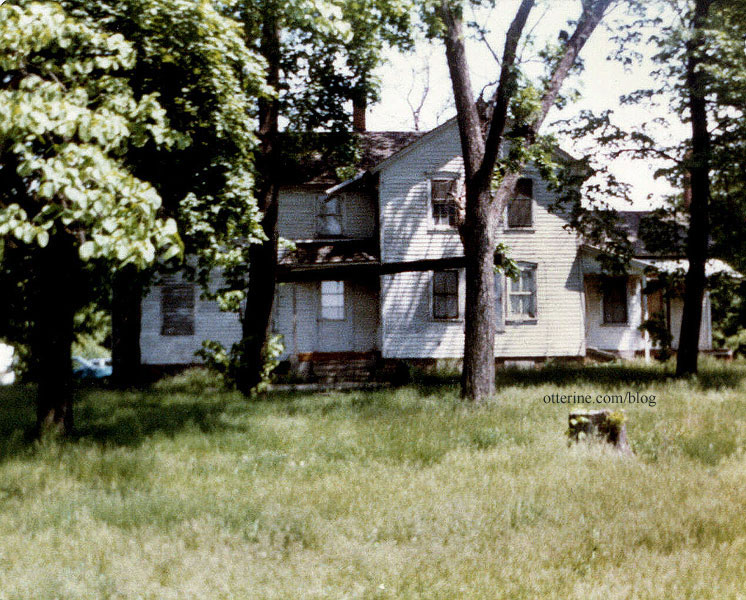
To the left is the mulberry tree where I would gather berries and fell in love with inchworms. To the right is one of the many tall and beautiful walnut trees that I often dream about. They were so lovely.
Here is what it looked like when I lived there, in winter. I see it as beautiful, so I suppose that means I was happy there. I think I was for the most part.
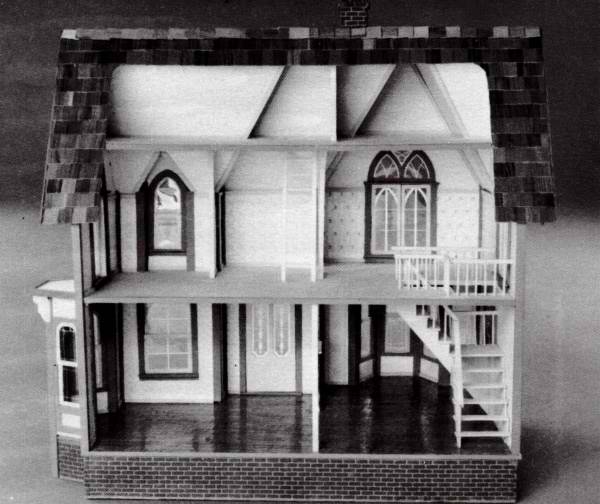
I bought a Dura-Craft Heritage kit sometime ago when I found a good deal on a kit in near perfect condition. I find it interesting that the few pieces broken in the Heritage kit I can replace with pieces I already have from the lost Dura-Craft kit I had a long time ago. Perhaps meant to be…
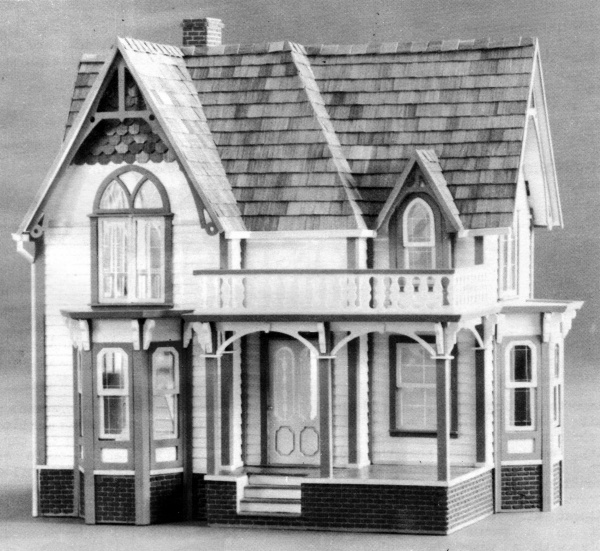
kit photo The other thing this old kit lends itself to is aging. After working with new mdf and laser cut wood, the idea of turning a milled and diecut house into a showroom new mansion makes my head hurt!
I have no idea where this project will end up, and I rather like that open energy. I see in my head an old white farmhouse…not completely dilapidated but in a state that might make you pause to enter…but with a warm albeit old and perhaps historically creepy interior. Maybe a place Jack Skellington might like to visit. Perhaps with these memories attached to the inspiration photo, this project may become more ‘haunting’ than ‘haunted’ by the time I am done.
And, for my first piece…the newly purchased chair from Kris at 1 Inch Minis.
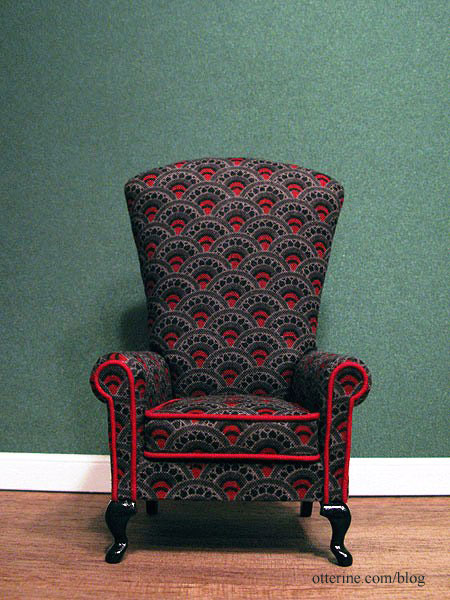
Since I started this mini hobby, I’ve bought a few lots of items and furniture kits that included pieces I never thought I would use. Now I think I might have a home for most of them after all. Since they’re already in hand, that keeps the budget on this project down substantially. This is good especially since there might be a few splurges in other areas. ;]
Three months to Halloween…maybe I can have a good portion done by then…at least enough to take some fun autumn photographs.
Categories: The Haunted Heritage
July 22, 2011 | 0 comments


NOTE: All content on otterine.com is copyrighted and may not be reproduced in part or in whole. It takes a lot of time and effort to write and photograph for my blog. Please ask permission before reproducing any of my content. (More on copyright)

Categories:
Heritage – copper claw foot tub
Stepping further into creative license here. I know that a tall tank loo isn’t exactly 1920s, but I really like the Chrysnbon Victorian set for a vintage bathroom and I don’t know when I’ll next build a house where it would be even remotely appropriate. So, the Chrysnbon bathroom kit has found a home in the Haunted Heritage.
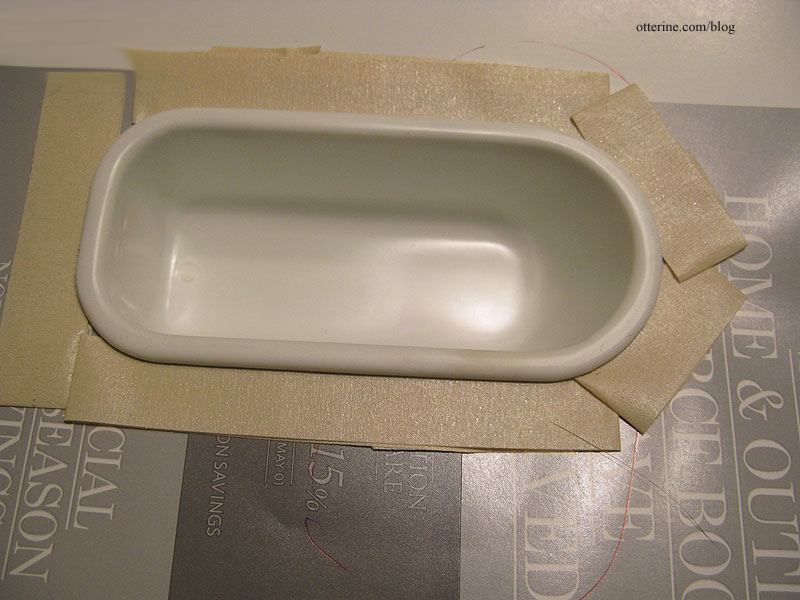
For the bathtub, I first masked off the top and sprayed the bottom with Burnished Copper Metal by Rust-Oleum. I let that set for well over a week, not for any particular reason other than life kept moving along after I sprayed it.
To make the inner portion a different color, I traced the tub onto a piece of heavy paper and cut an opening just wide enough to have the tub sit inside to cover the copper painted portion. Quite fitting that this is an ad for Restoration Hardware, no?
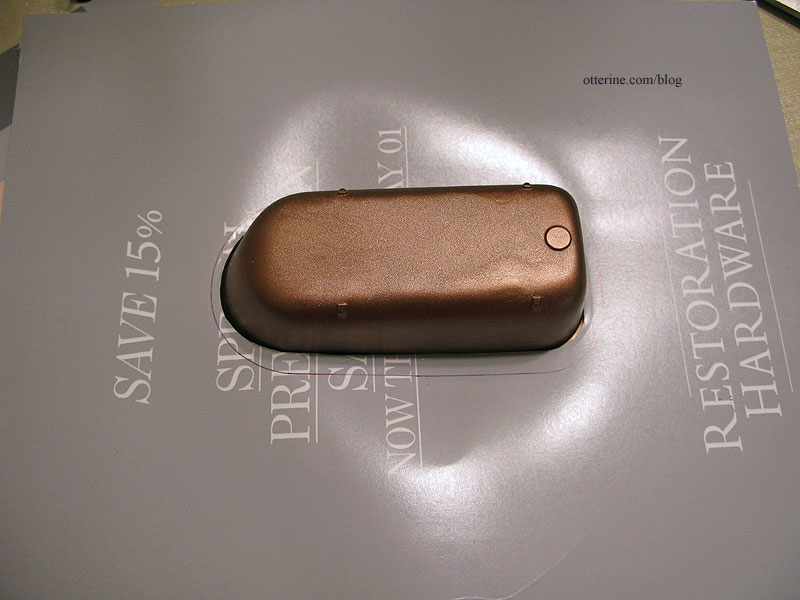
I used masking tape on the opposite side and pressed the tub onto the surface.
I sprayed the inner portion of the tub and the sides with Krylon Gloss Ivory. After the first coat, I noticed the inside of the tub wasn’t as glossy as the overhang. I thought that would work well for an old tub, so I didn’t add too much more paint to the bottom of the tub.
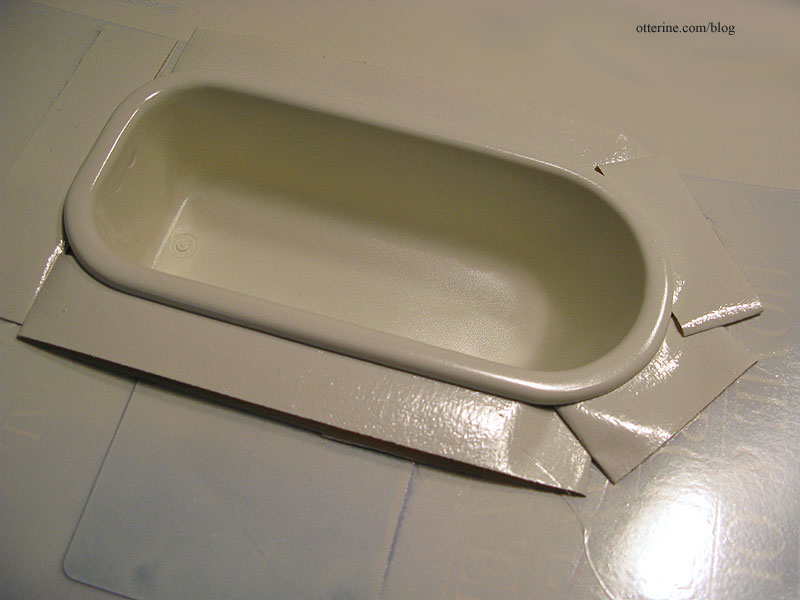
I sanded the edge to remove any excess paint and roughed up the surface in a few areas. It’s an old tub, after all. I had a little bit of overspray even with my precautions, but that didn’t matter in the end.
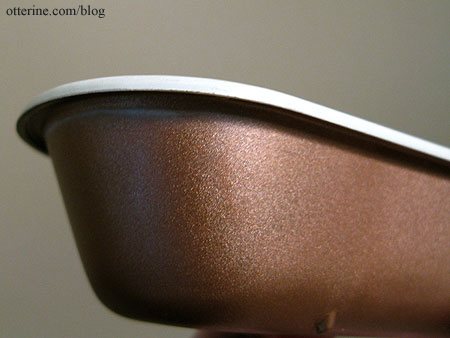
I used acrylic paint washes to darken and age the copper.
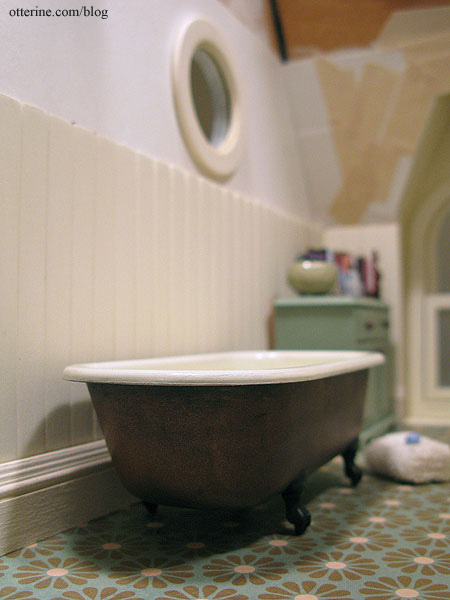
The feet were sprayed with flat black, but I added a black acrylic wash to them to tone down a little bit of the shine. I’ll age the inside of tub later when I install the faucets but so far, I love it!

The copper color of the tub brings out the copper color in the flooring. I love how this little plastic tub looks like real metal. :D
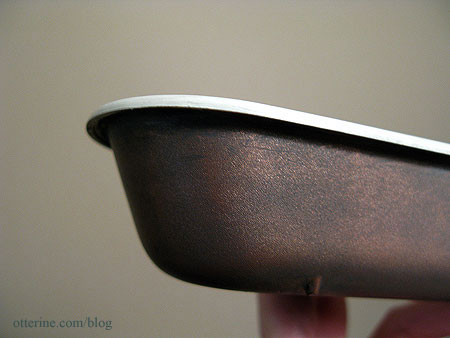
I painted the inner drain of the tub with Testors Aluminum and then added aging washes to the bathtub once the paint was dry. I watered down Terra Cotta acrylic paint by Folk Art and used it to simulate the residue of well water stains. It was a little bright, so I added a wash of dark brown. I wiped most of the pigment away going for subtle staining from years of luxurious baths.
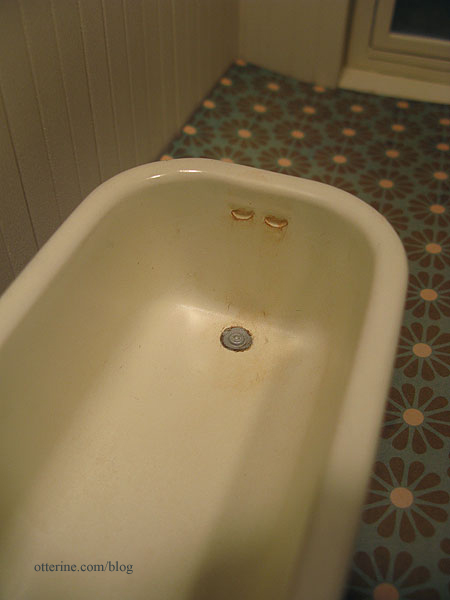
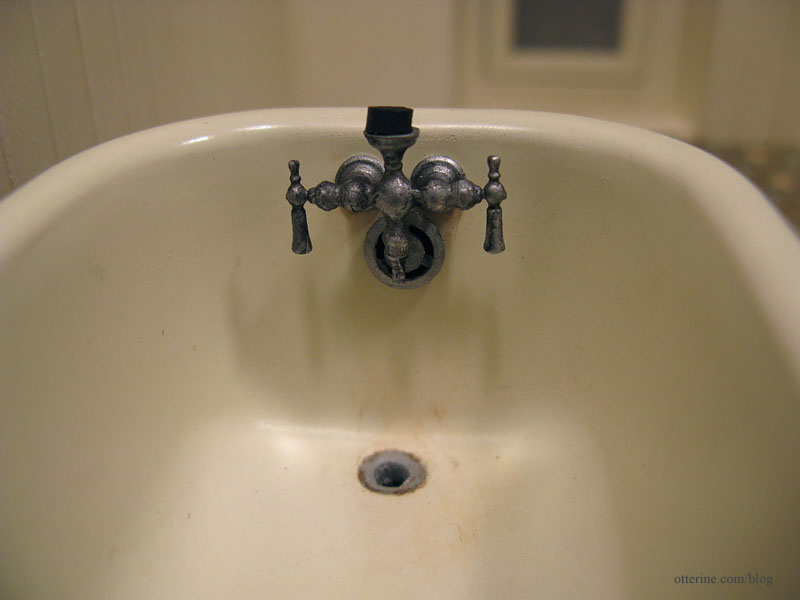
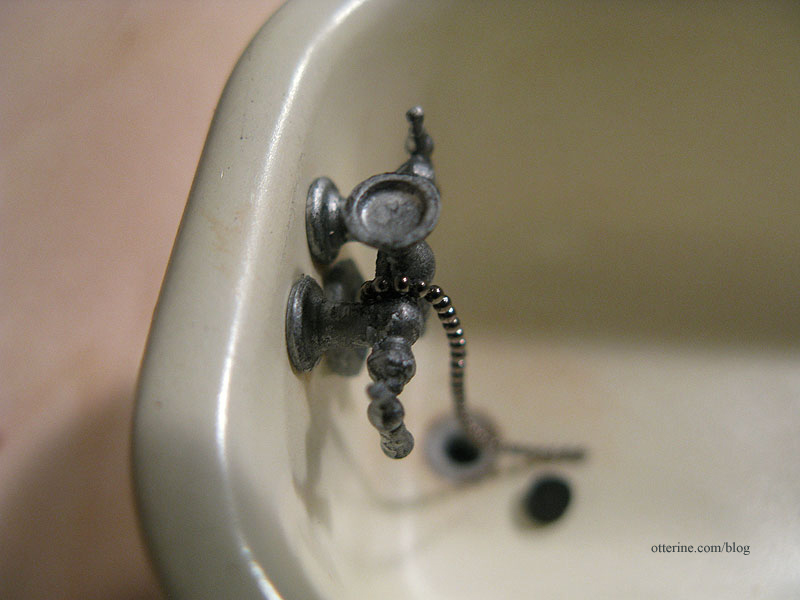
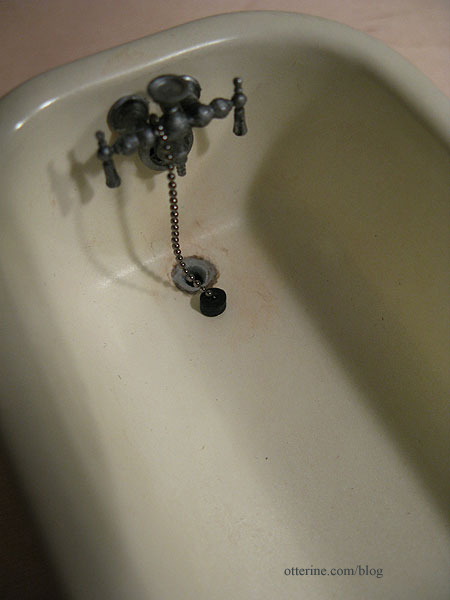
I assembled the tub faucets and painted them Testors Aluminum. I added a light wash of black to bring out the details before installing them in the tub. I also decided to add a stopper on a chain, so I drilled out the bottom of the tub to make an open drain.
If you have an open drain, you need a pipe…made from excess sprue (the frame around plastic molded parts) and a washer. The pipe is glued to the tub, but the washer will remain loose so it can sit flush with the floor while disguising the end of the pipe.

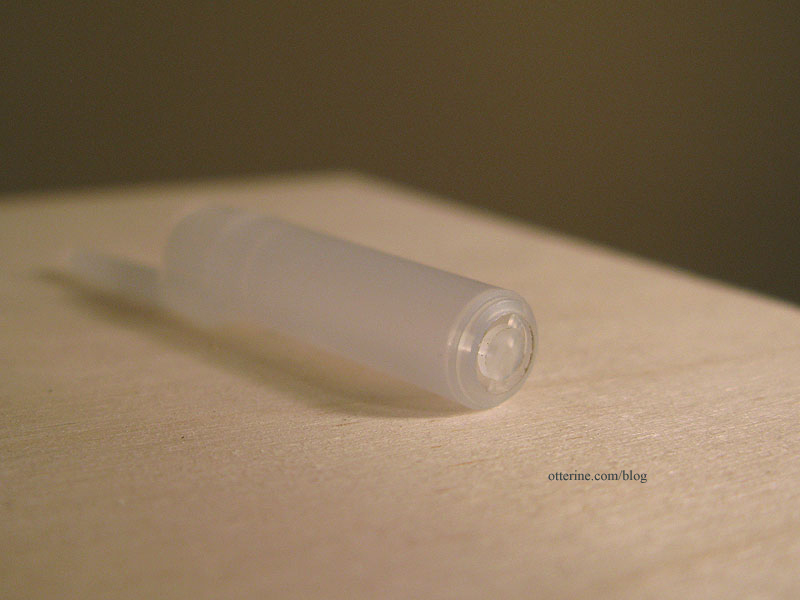
I added an overflow made from a pen cap.
Where’s the drain pipe for the overflow? Never you mind that! I have to draw the line somewhere. It’s not like the thing has actual running water. ;D
The stopper is made from a spare piece of sprue and is currently sitting in the stopper holder. How appropriate.
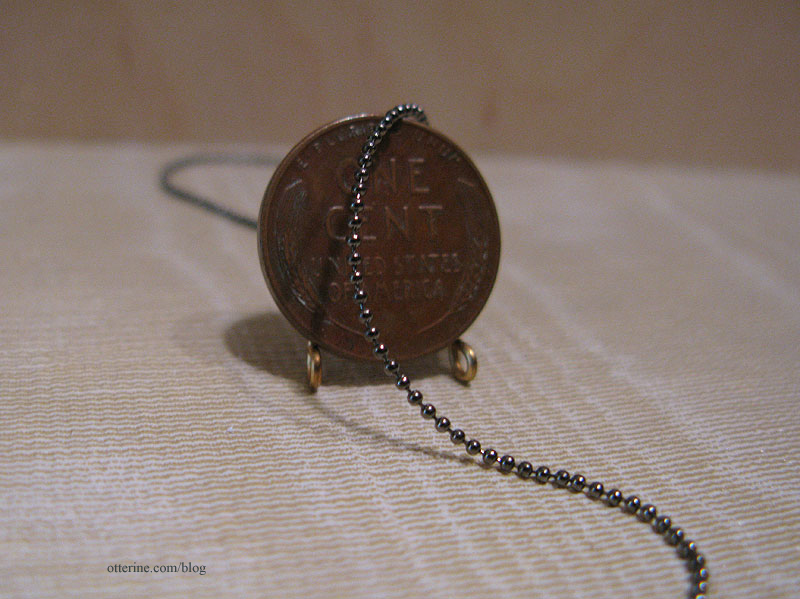
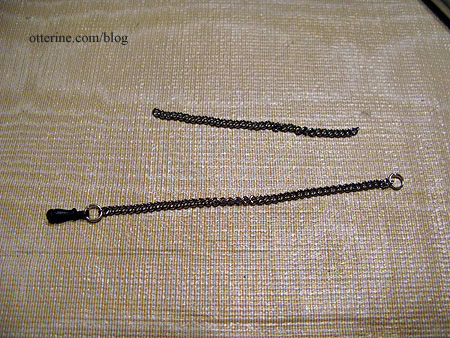
The finest chain I had on hand looked too bulky, and it was brass though I could have painted it if it had worked otherwise.
I went on the search for fine ball chain, but you can’t find it in the local stores around here. The smallest they have is 2mm, which is too large for scale. I bought a 5′ length of 1mm gunmetal ball chain from Cindy Chan since that was the lowest price I could find. I need to come up with some uses for the other 4′ 10″ of chain!
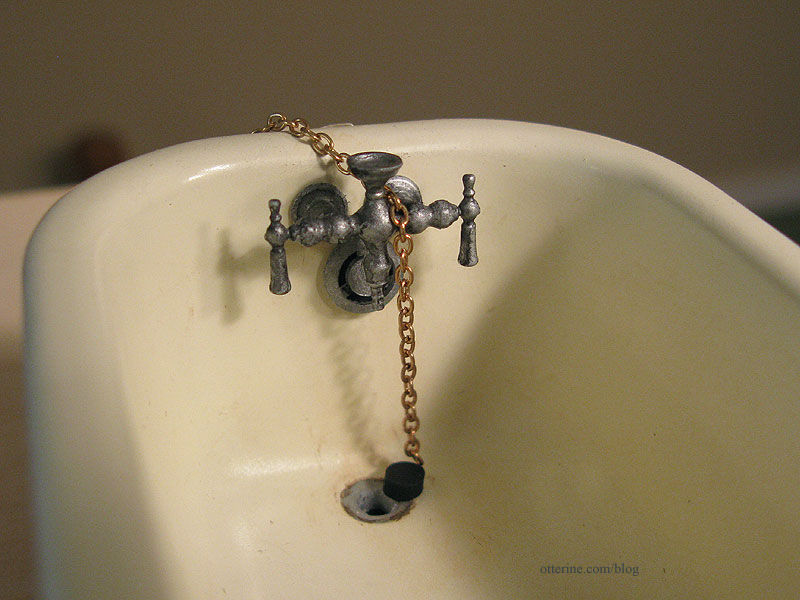
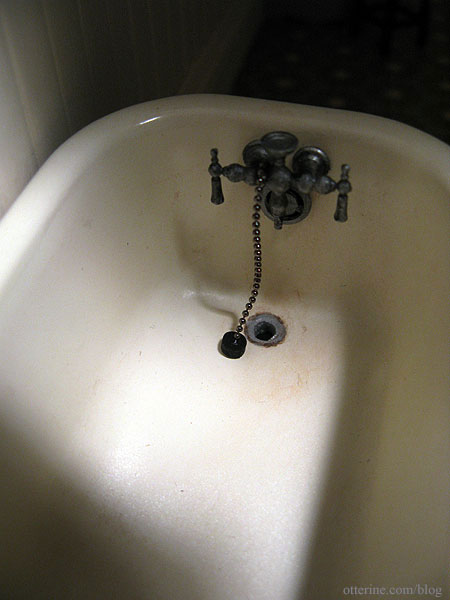
I cut a bit of chain longer than I needed and used super glue gel to attach it over the faucet. I bent it into a small curve with my fingernail to make sure it was a snug fit over the top.
I placed the chain by the stopper I made from a spare piece of sprue to determine the final length of chain.
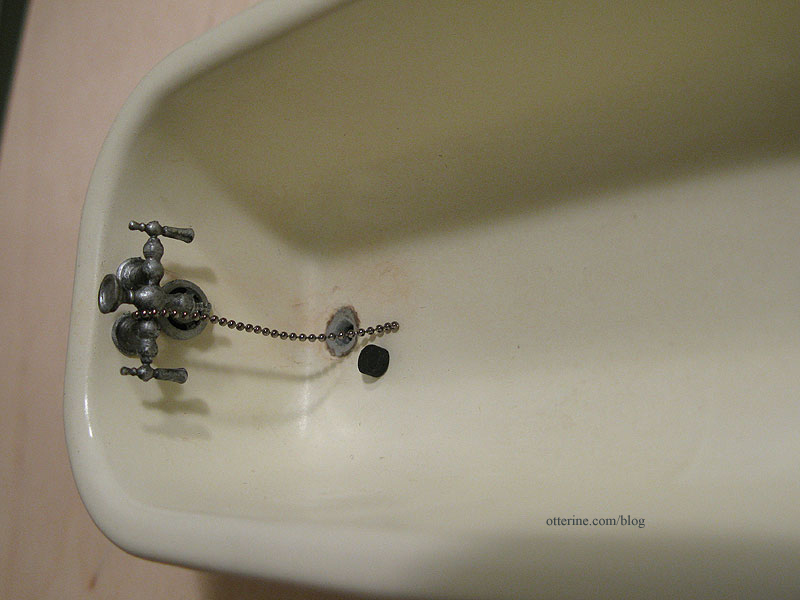
Since this is still large for exact scale, it doesn’t drape the way it would if it were real life chain. So, I made it just long enough to have some slack but look as though it has sufficient length to plug the drain. I attached the end of the ball chain to the stopper with super glue gel.
I might be able to manipulate the drape once the glue sets, but I think it looks pretty convincing as is. :D
Categories: The Haunted Heritage
June 19, 2012 | 0 commentsHeritage – bathroom finishing, part 4
Continuing work on the bathroom. I finished the beadboard trim I started over the weekend.
I cut a notch to accommodate the pipe running from the high tank to the loo.
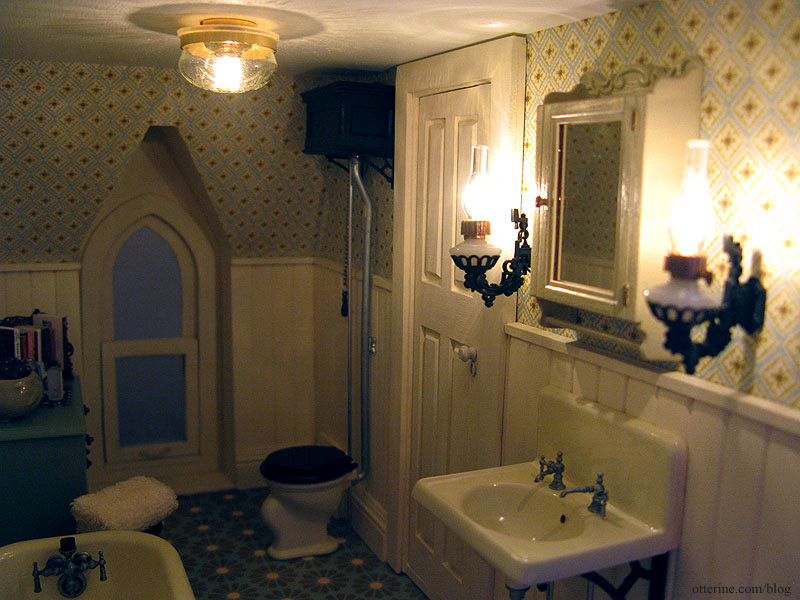
I also added a water line with a shutoff valve to the tank just as I had done for the wall sink, though I didn’t think to take a better picture of it before I had the loo in place. Because the beadboard wall treatment adds some thickness, I had to glue the loo to the floor and the tank to the wall.
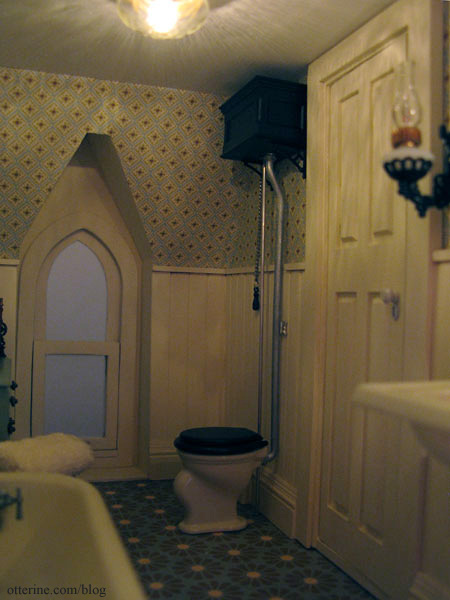
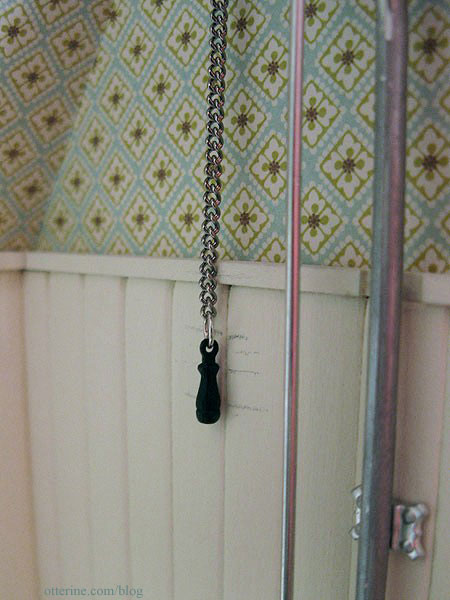
I shortened the chain that came with the kit, because it was nearly hitting the floor.
I figured the handle has been hitting the wall for years, so I dragged it across the beadboard to transfer some of the paint. :D
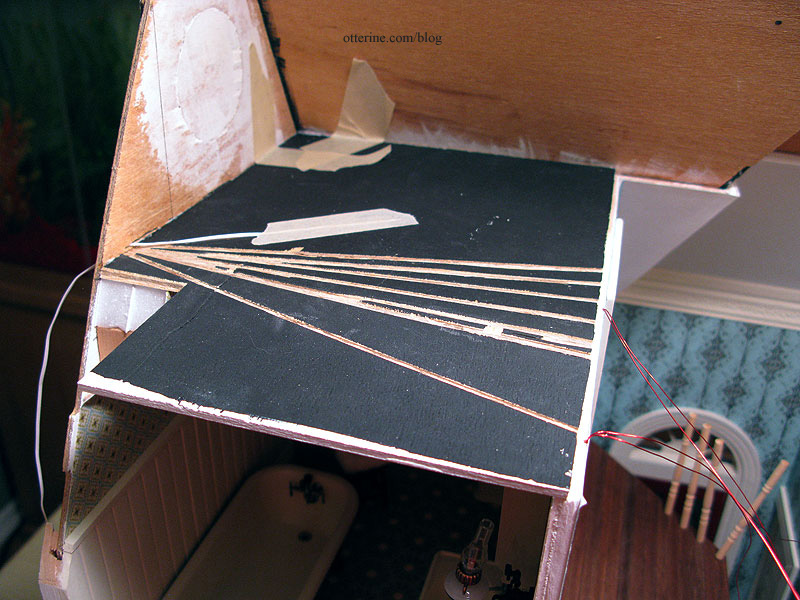
The new ceiling board for the bathroom has the required electrical channels already cut so it was ready to install.
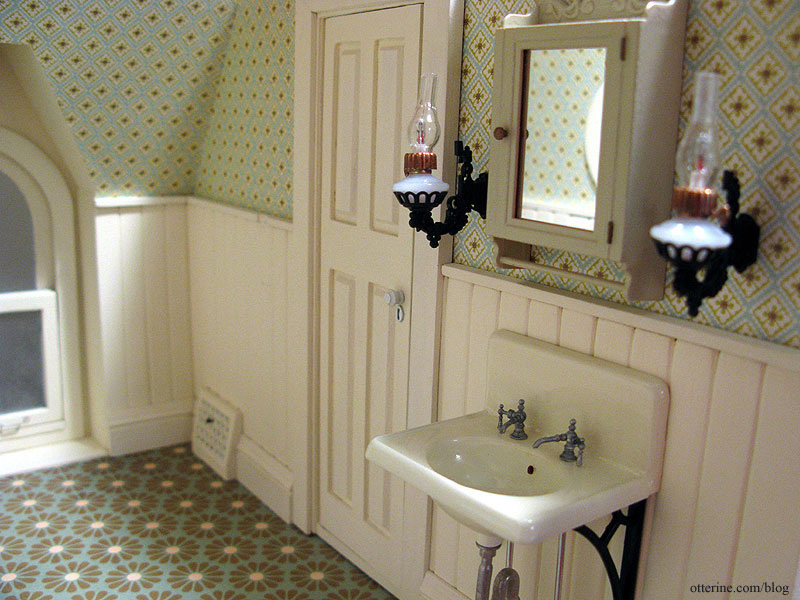
Love this room!
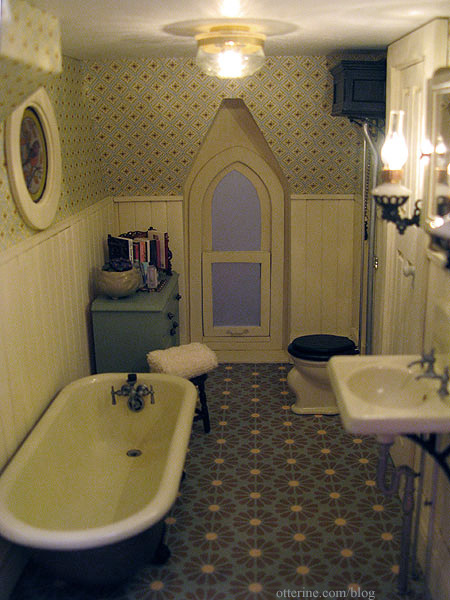
I need only a few more accessories, and this room will be complete! :]
Update: After working on the back roof, I was able to finish up the bathroom wallpaper. I added one small strip of trim on the outer wall to disguise the tab and slot that had been showing in that area. I also added ceiling trim along the front wall to hide the slight gap there. I plan to add more trim around the outer wall here, but the height of the bathroom door makes it impossible to add the same trim to the inner wall. More on that to come.
Categories: The Haunted Heritage
June 11, 2012 | 0 commentsHeritage – bathroom finishing, part 3
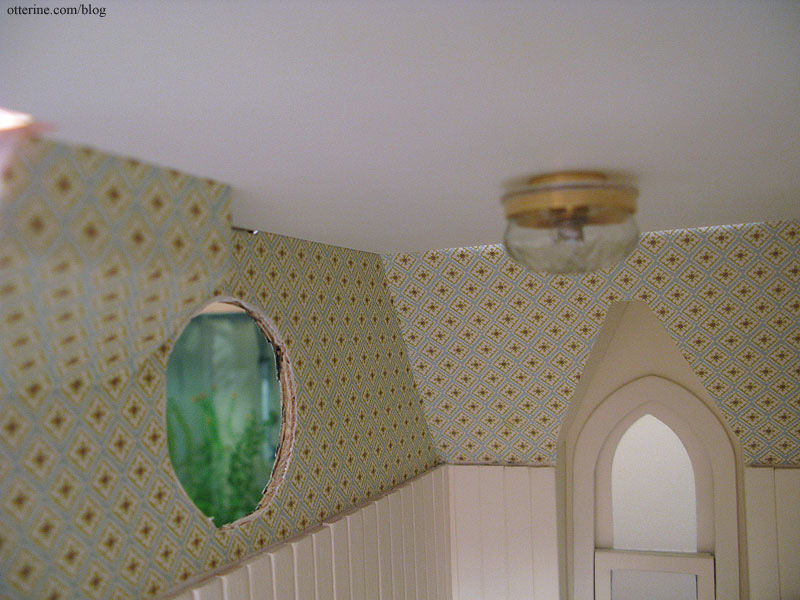
Continuing work on the bathroom. I had applied the wallpaper on the interior wall quite awhile ago, and I fully admit to procrastinating on the other two walls. I had never wallpapered around off angles like the one created by the interior chimney extension.
I had cut plain paper templates previously, so I used those to work on a new template to fit around the chimney extension.
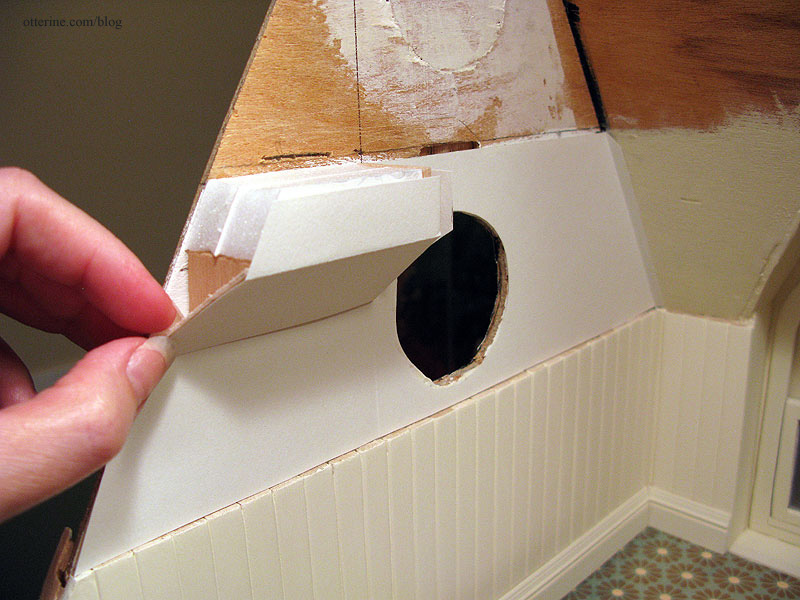
I had one long piece for the wall and one smaller piece for the chimney.
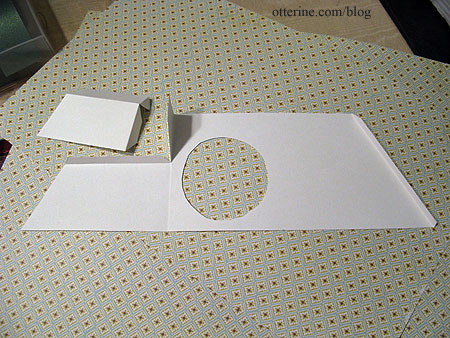
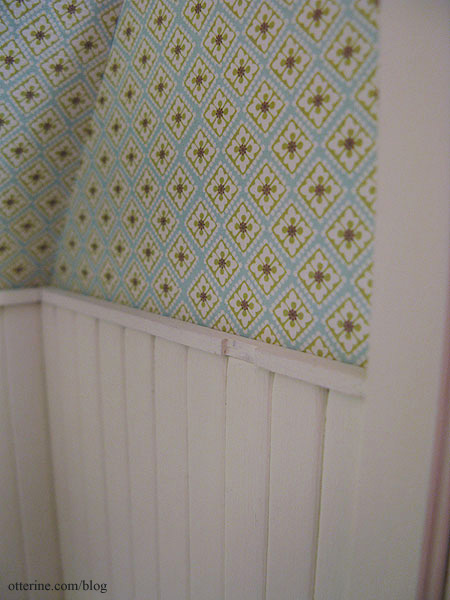
I first cut the long piece from the scrapbook paper – Cute Little Diamonds by The Paper Company – and applied it to the wall with Yes paste, leaving the small piece on the inner side of the chimney loose. (Note: I no longer recommend Yes paste – I use Wallpaper Mucilage instead. Yes paste has problems with longevity.)
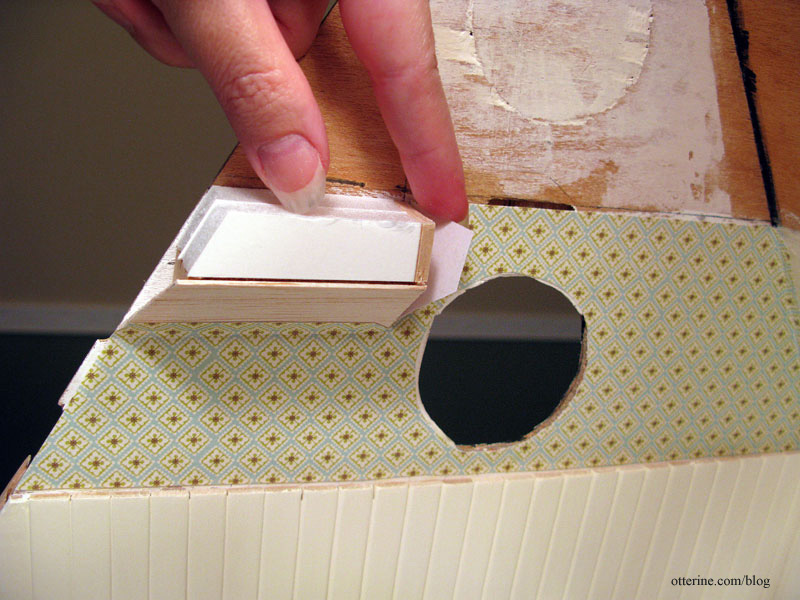
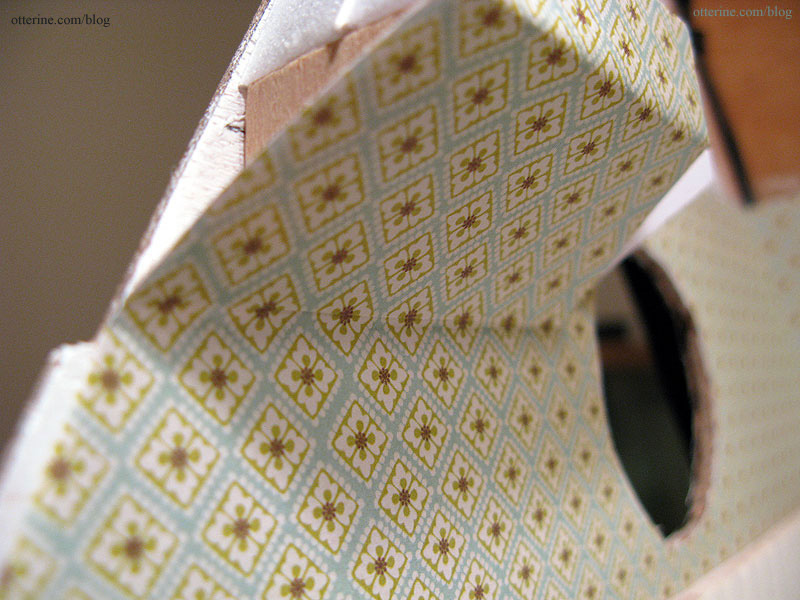
I pasted the wallpaper onto the front wall and then glued the smaller piece to the chimney. Now, that’s a nice seam, don’t you think? :D I’m rather proud of it! I guess all those years of sewing come in handy for pattern matching.
I glued the small flap from the main wallpaper piece in place. It’s not a perfect fit there, but the entire wall is covered and this side won’t be seen.
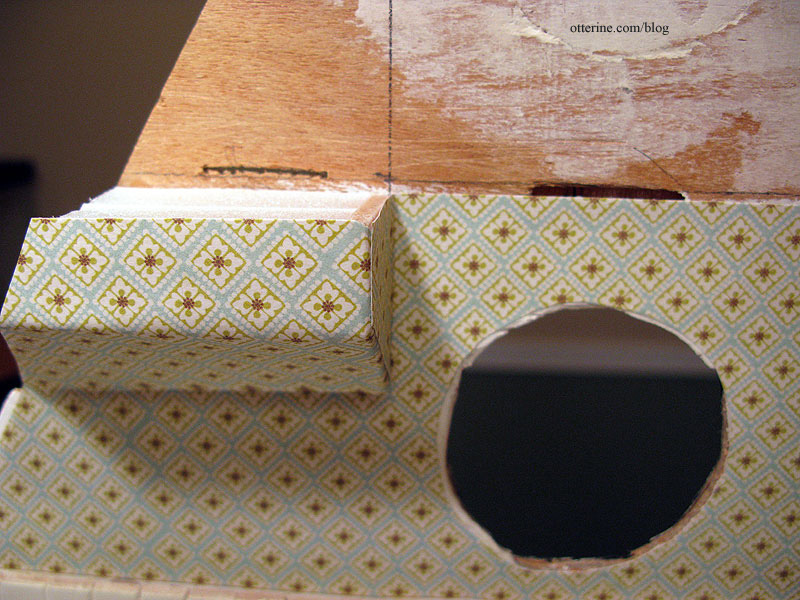
I already knew there would be sizing issues around the ceiling tab and on the front wall, but I plan to add some trim around the ceiling to hide these gaps.
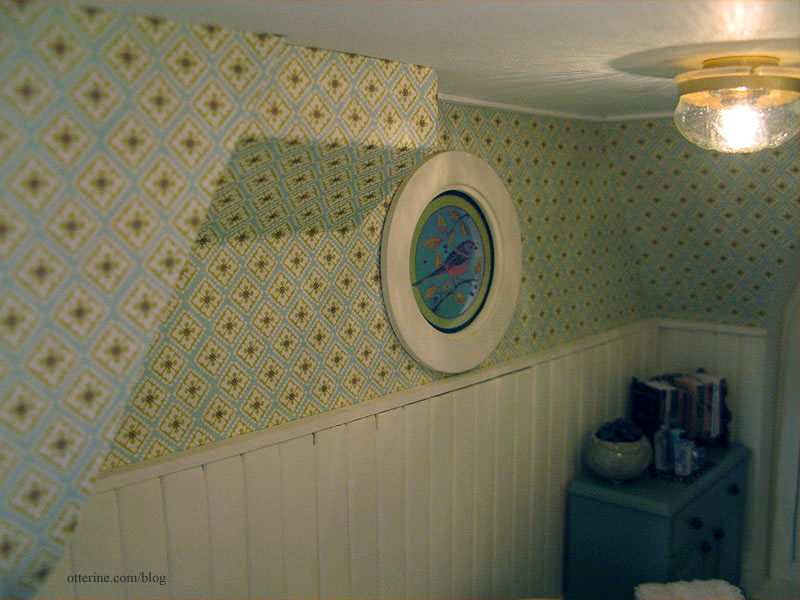
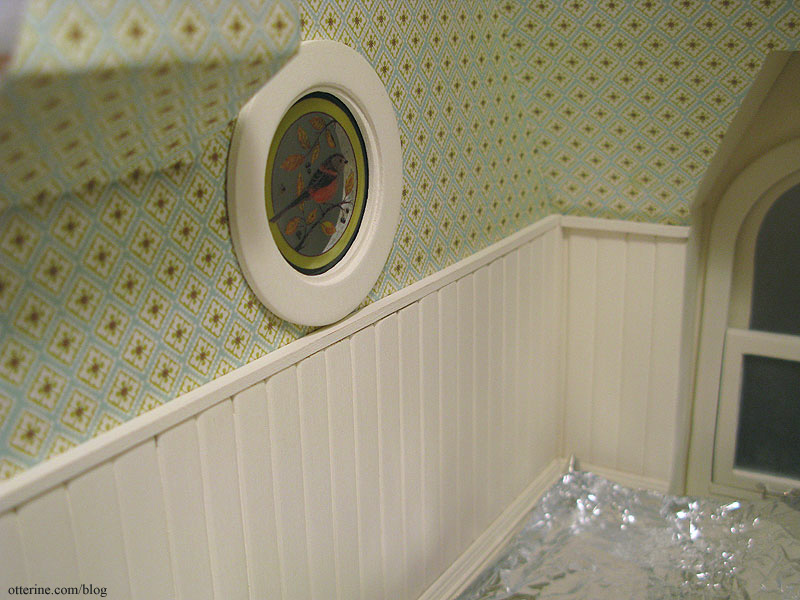
Once the wall treatments were complete, I installed the outer window. I added a thin strip of wood to finish the beadboard, painted to match.
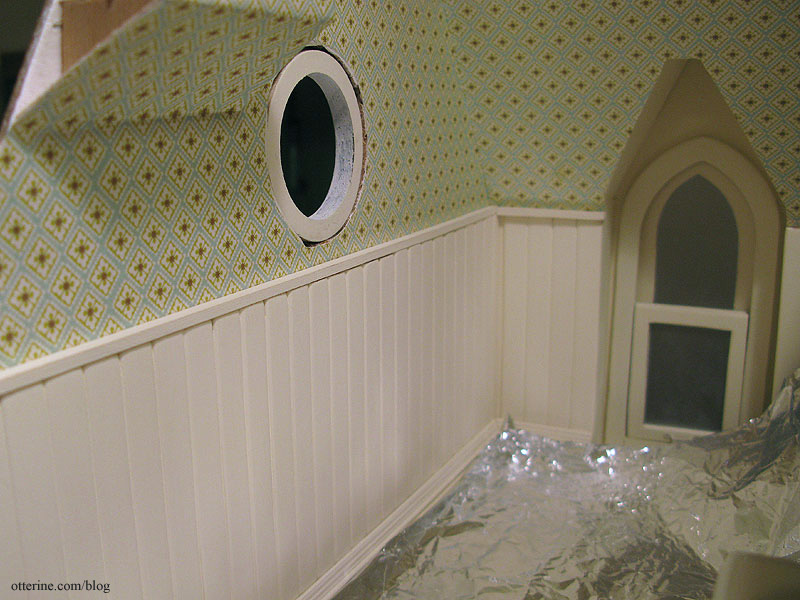
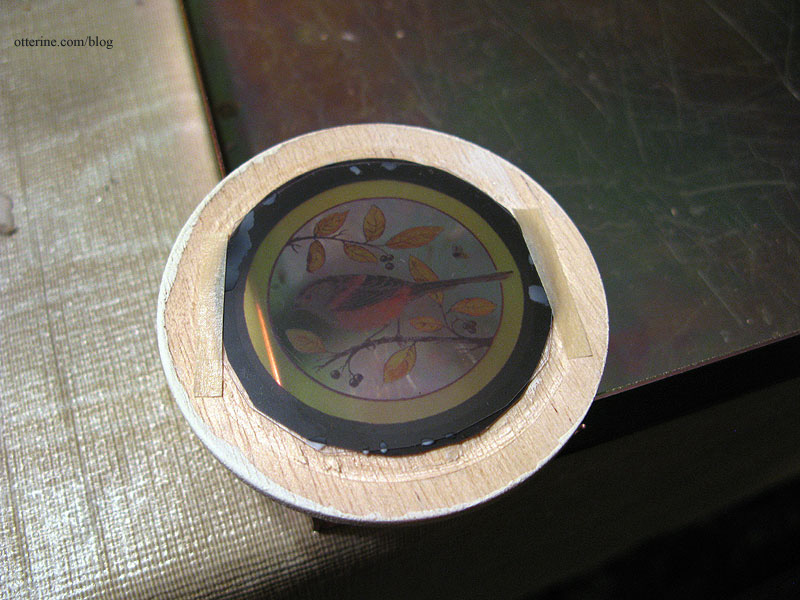
Since the back of the bird and bee window transparency print is dull, I cut a piece of clear acetate to act as the outside surface. I dabbed Aleene’s Quick Dry glue around the edges just to hold the two pieces together. (Bird and bee image by Flora used with permission.)
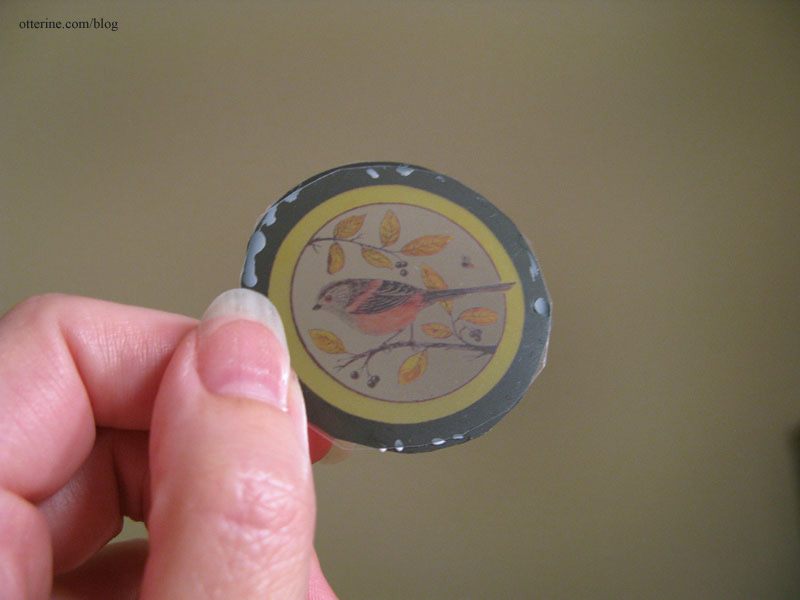
I dabbed glue around the edge of the assembled films and centered the interior trim over the image.

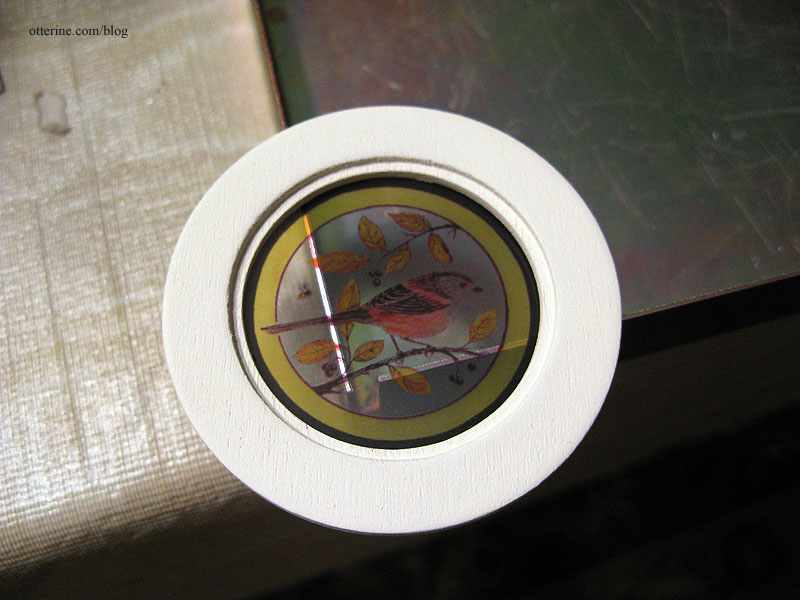
To keep the window from shifting in case the glue fails, I added two thin strips of masking tape.
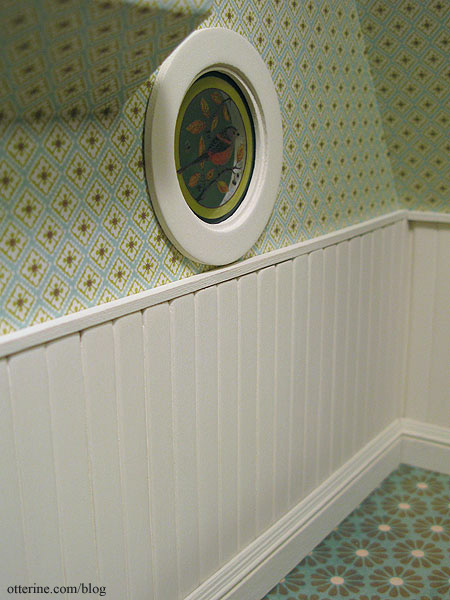
I then glued the window to the wall. Lovely. :D
This room is just about complete.
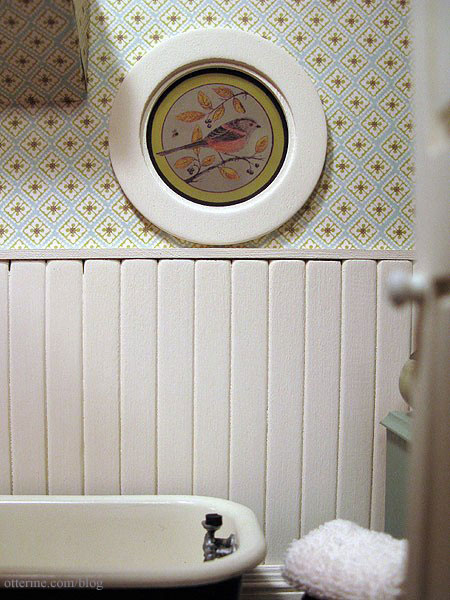
Here’s the window with the furniture and bathtub in place. :D
Categories: The Haunted Heritage
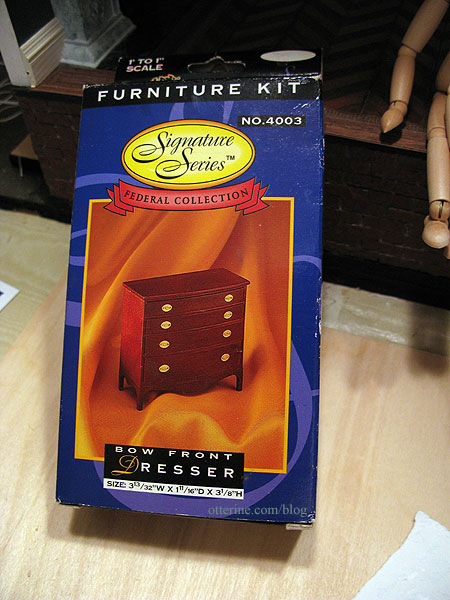
June 11, 2012 | 0 commentsFancy bow front dresser, part 1
What I like most about the Heritage bedroom is while all required pieces are accounted for — fancy bed, nightstands and vanity — nothing matches exactly. I don’t mind a bedroom suite, but I rather like the idea that grandma has chosen pieces simply because they spoke to her not because they made up a matched set.
To that end, grandma still needed a dresser. I picked up a furniture and accessories lot from craigslist some time ago, and in it was a Houseworks bow front dresser kit.
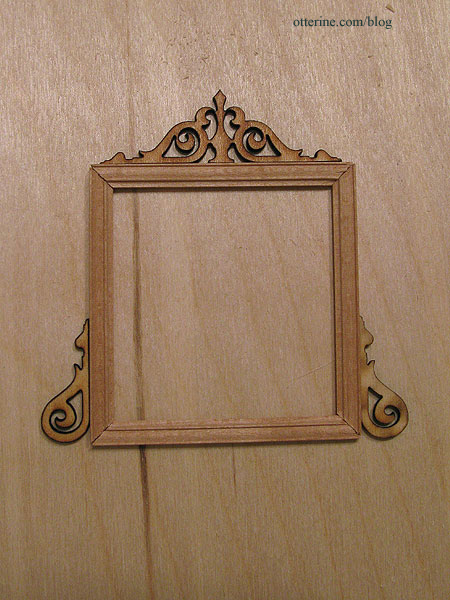
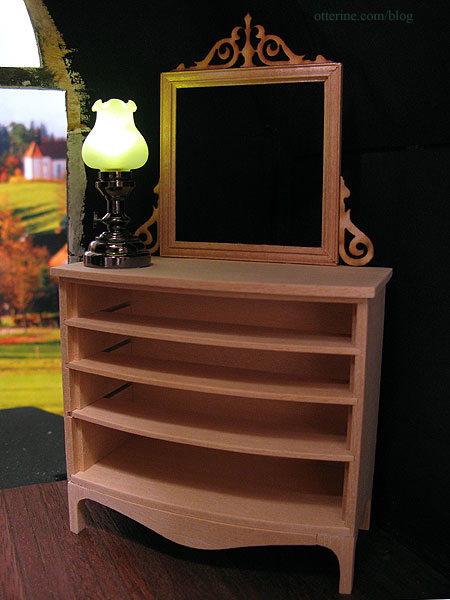
I made no changes to the base kit, though I did add a mirror made of frame strip wood.
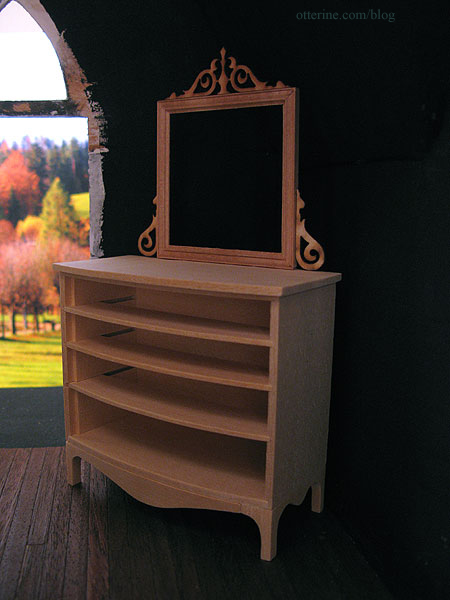
To fancy up the mirror, I added laser cut embellishments from Heritage Laser Works. They have such great things!
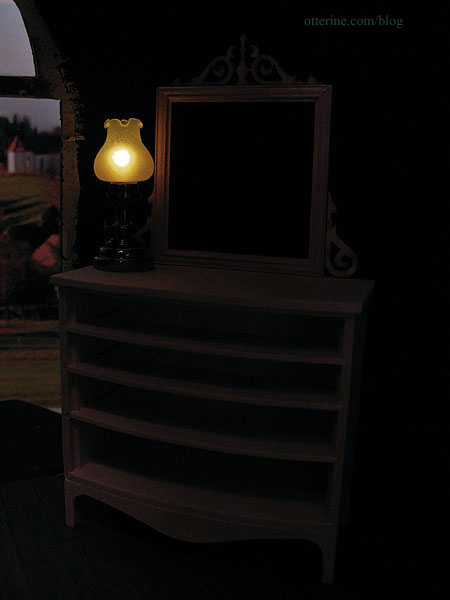
I made sure the dresser wouldn’t be too tall for the corner with the added mirror. I plan to angle the dresser so I can see more of it when looking into the room from the open back. Here I’ve used The Chair from the parlor as a stand in for the one I plan to make. I think everything will fit well in the room without seeming crowded.
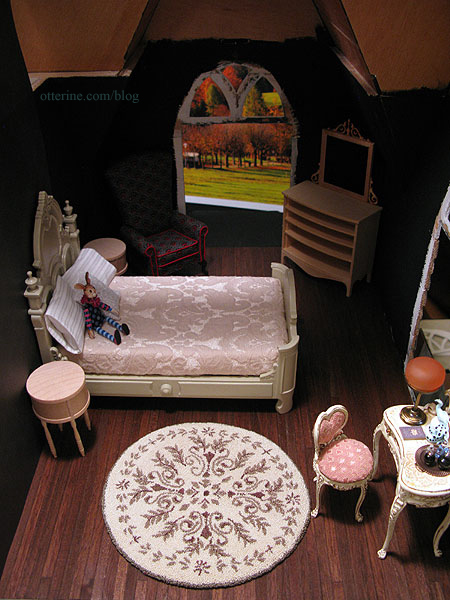
I wasn’t keen on wiring this corner, so I picked up a battery operated LED lamp for the dresser. It’s been noted on other blogs and forums that these lights have a blue cast that’s not like candlelight or incandescent bulbs. A Greenleaf forum member, Debora, found a wonderful fix for it. She dotted some peach/orange glass paint on the tip of the bulb. The complementary color softens the blue and makes for much better light. The light from this lamp is actually a bit green.
The paint I had on hand for glass and ceramics wasn’t transparent, but I used just a little bit of it so it didn’t block out too much light. I had to mix red and yellow, but it worked! :D
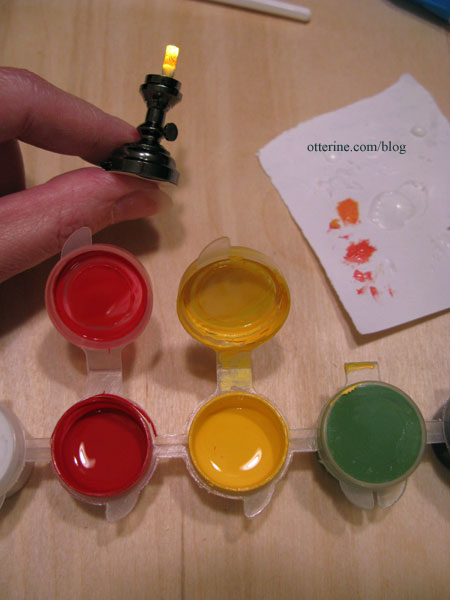
The red paint on the bulb is somewhat visible when the lamp is off, but I’d rather have a closer approximation of candlelight when the lamp is on, so it’s not really an issue for me.
Categories: Furniture, The Haunted Heritage
May 23, 2012 | 0 commentsAntique drum nightstands, part 1
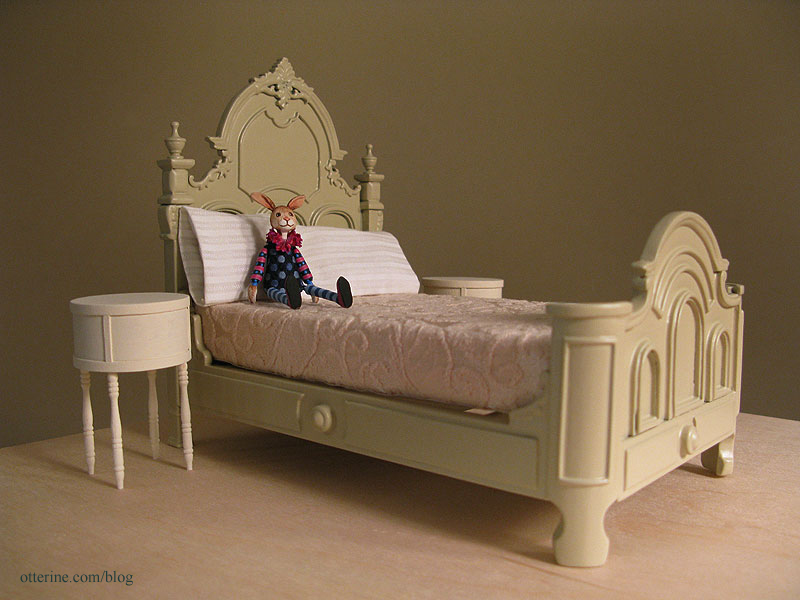
I’ve been thinking awhile on the type of side tables I wanted for the Heritage bedroom. With the ornate bed and feminine vanity and chair, I needed something with antique style while not being overpowering.
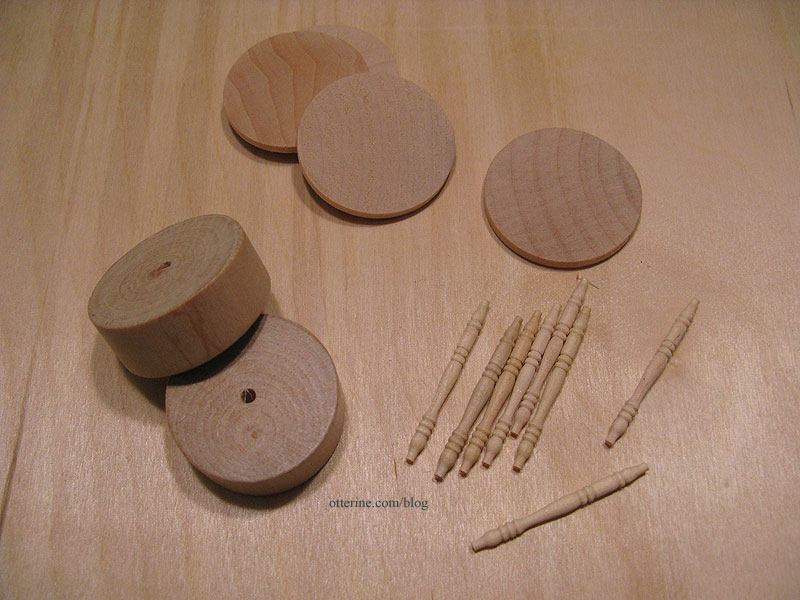
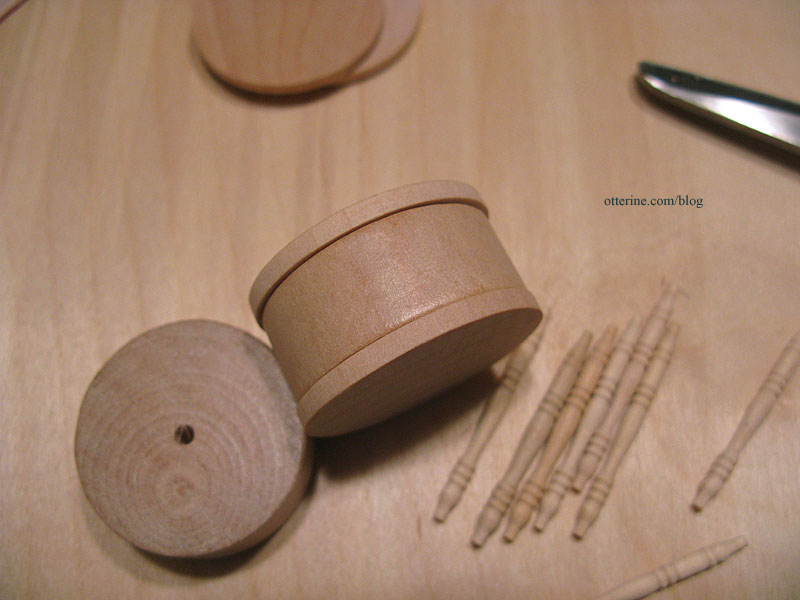
My artist models came with round wood bases and metal pins to hold them up, though they stand on their own just fine. I removed these bases when I first got the models, but I kept them since they were smooth round wood shapes and I knew they would make a fabulous trash to treasure project some day.
The bases measure 1 3/8″ in diameter and 9/16″ tall. I grouped them with 1 1/2″ x 1/8″ wood circles and Houseworks 1 9/16″ long spindles.
I first glued two circles to the top and bottom of the base.
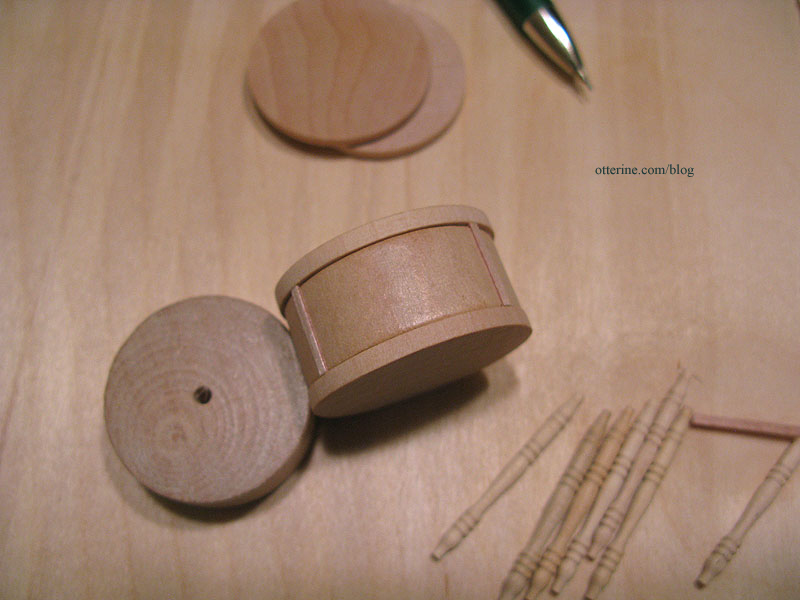
I then added thin veneer strips to delineate a front drawer.
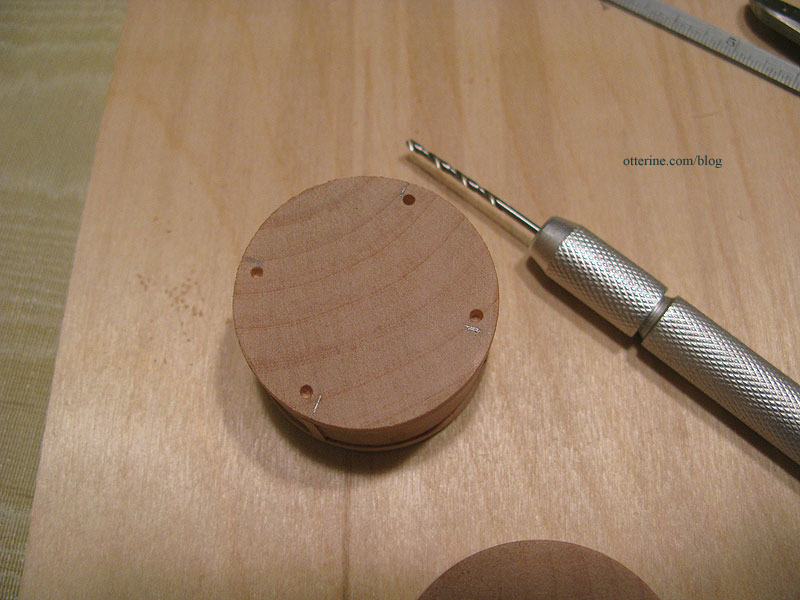
I drilled pilot holes for the four legs.
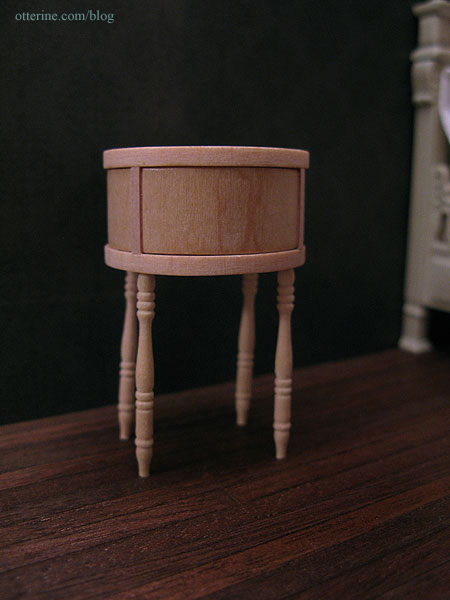
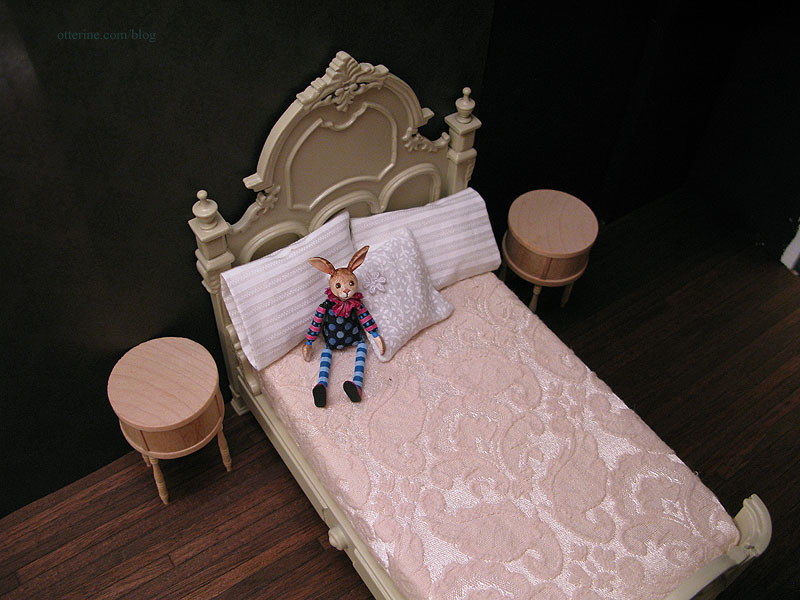
For now, I’ve just pushed the legs into place. I need a clear head and a steady hand to get these glued in straight and even since I like the tables without cross supports.
The pillows were made by me, and Mr. Rabbit is by K. Kuti. I still haven’t replaced the stock bedding that came with the Bespaq bed I’m in the process of refinishing.
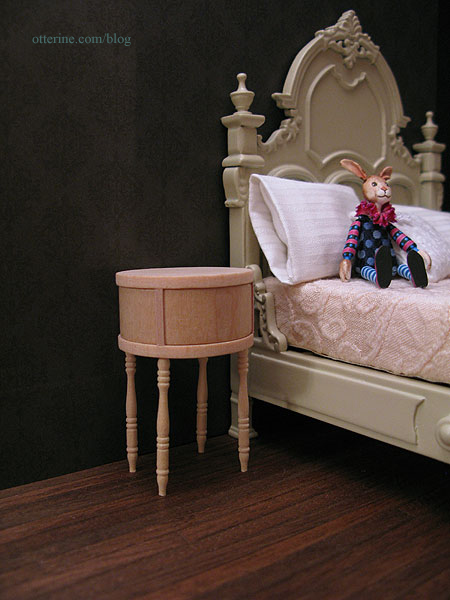
With some fancy painting and antique knobs, the nightstands will fit right in! :D They don’t take up much room but have a nice style.
The nightstands received a light spackling to remove some of the imperfections in the wood pieces as well as the rough grain that was showing through the paint. They will need at least one more coat of paint.
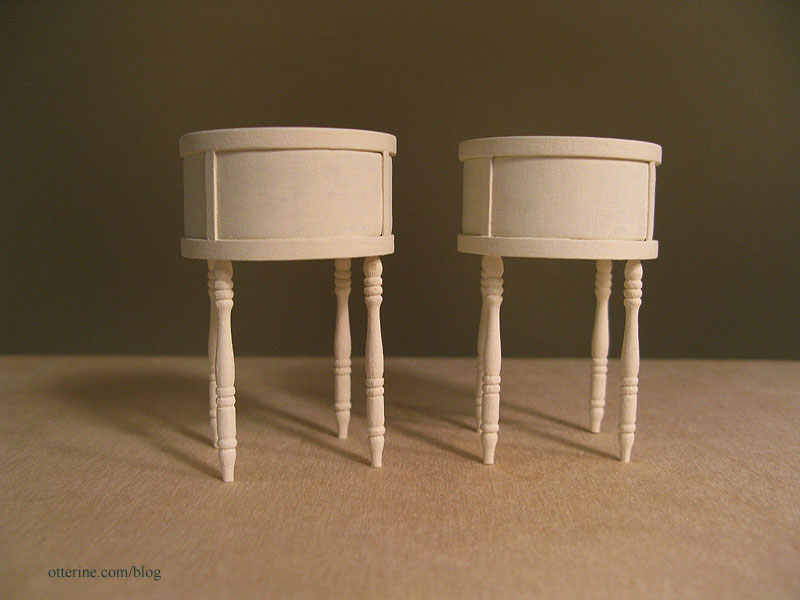
Even though the base coat is lighter than that of the bed, I think the pieces will coordinate well in room. As I mentioned before, I don’t want everything to match but be a collection of well-loved items.
I might give hand painting designs a try for these pieces. They seem to call out for fancying up beyond just pretty hardware, don’t they? I will practice on scraps first, though. I don’t want to have to start all over!
Categories: Furniture, The Haunted Heritage
May 22, 2012 | 0 comments
NOTE: All content on otterine.com is copyrighted and may not be reproduced in part or in whole. It takes a lot of time and effort to write and photograph for my blog. Please ask permission before reproducing any of my content. (More on copyright)