

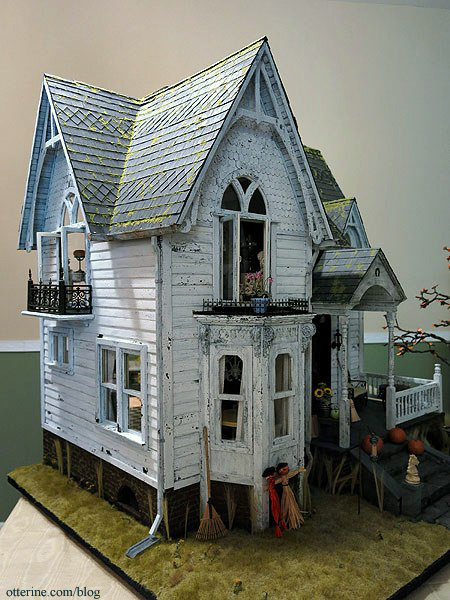
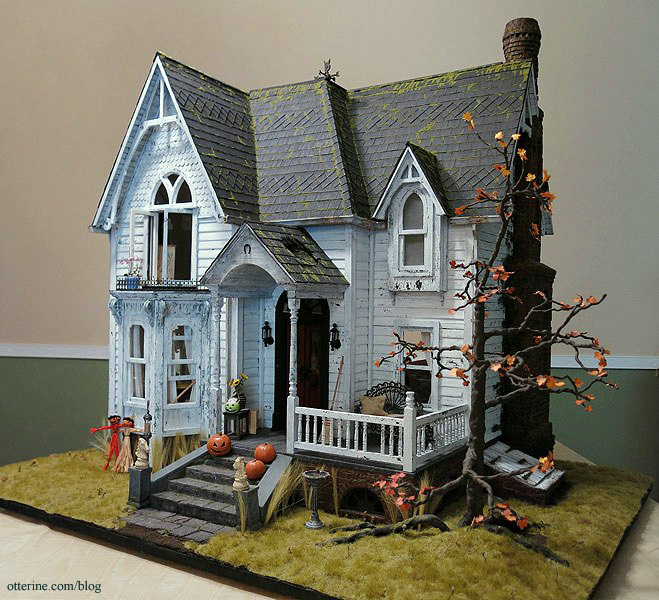
Heritage – gutters and downspouts, completed
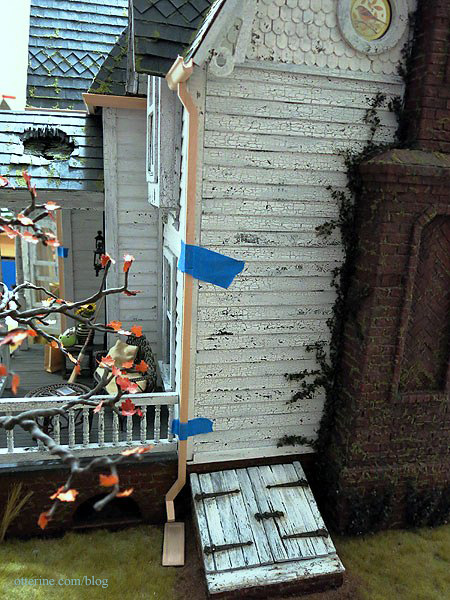
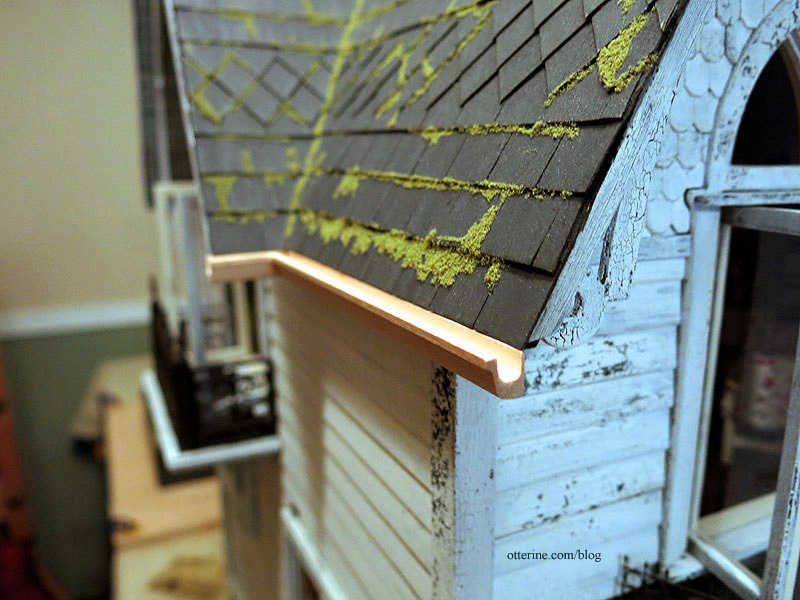
Finishing work on the gutters and downspouts. The original kit intended for only the left side to have a downspout yet there would be gutters all around the front.
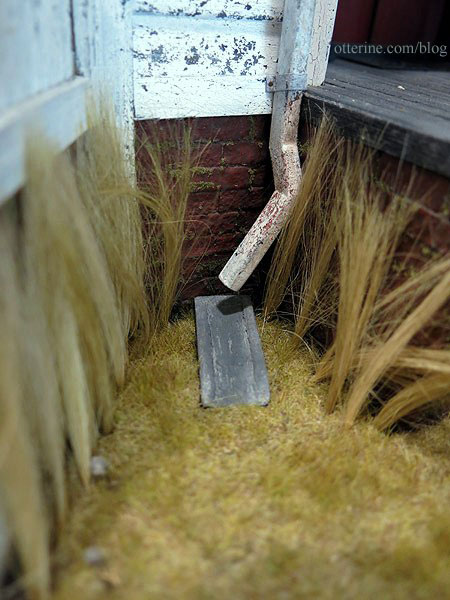
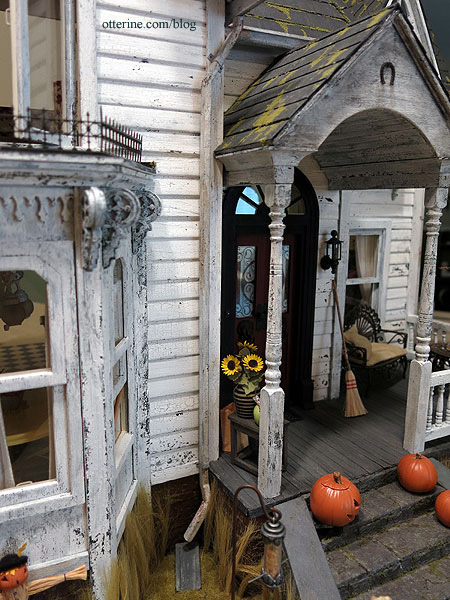
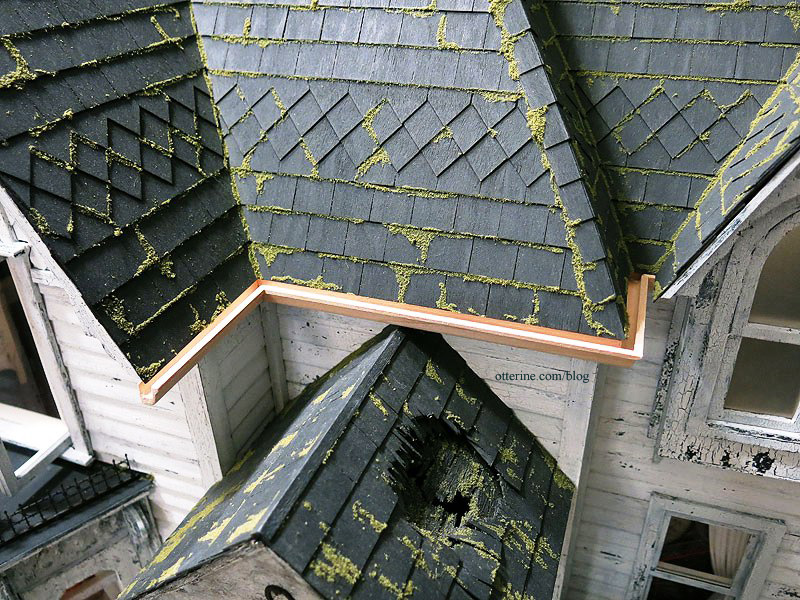
Well, that wouldn’t do! Water would be pouring over the sides all over the entryway and porch. The middle gutter required a diverted end to move away from the house and empty into the splash block.
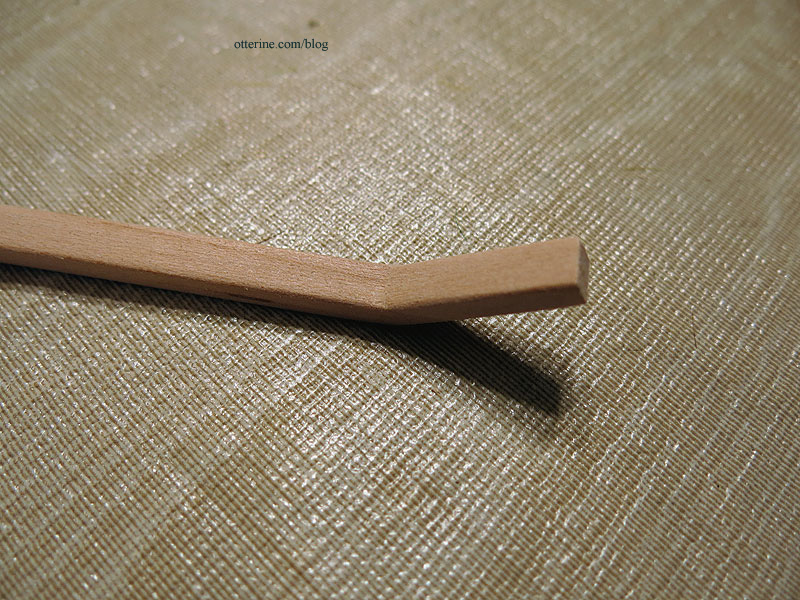
I found a website with a flat bent downspout to help me figure out the shape I needed.
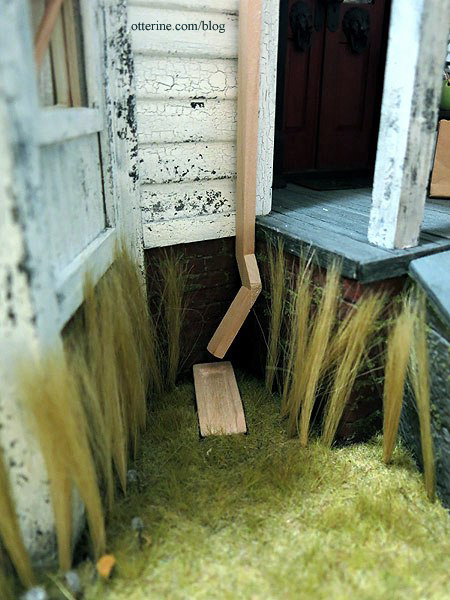
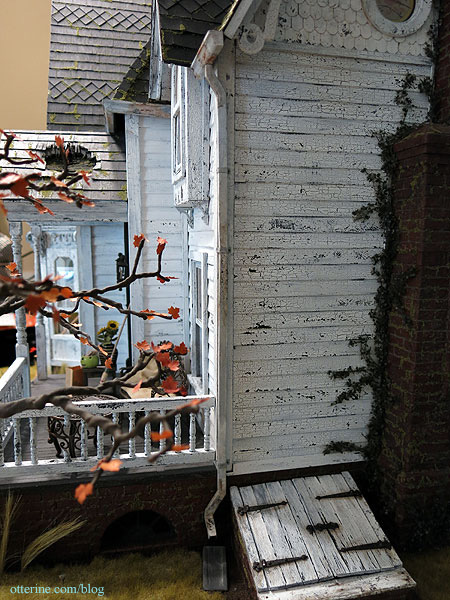
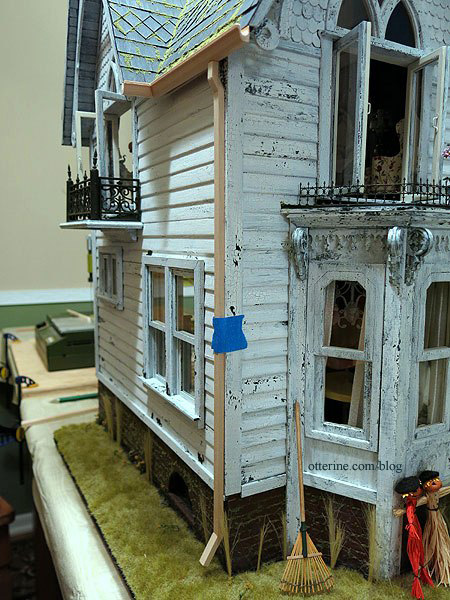
The last gutter required some demolition. The cellar doors had to be moved over about 3/4″ closer to the chimney. There was room, but it was a pain prying the assembly off the base. I built things securely. Anyway, I took no photos of the process since I worked fast to put it all back together. I glued some new dirt cover over the bare spots and then needed to wait for that glue to dry. I still have landscaping to finish besides, so it’s not much of a big deal, just a speed bump.
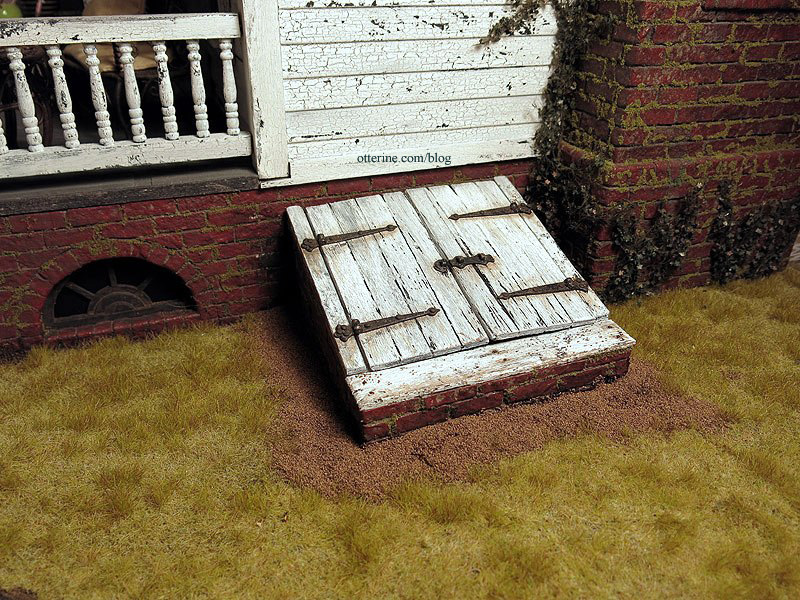
With the cellar doors moved, the final side downspout could be finished without looking like a wet noodle stuck to the wall. :]
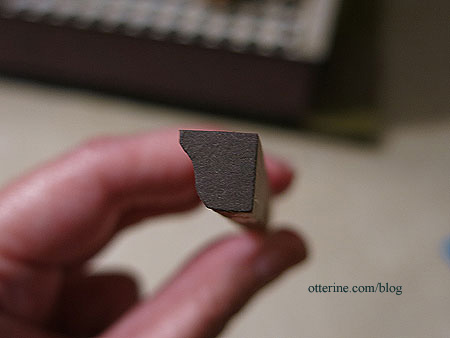
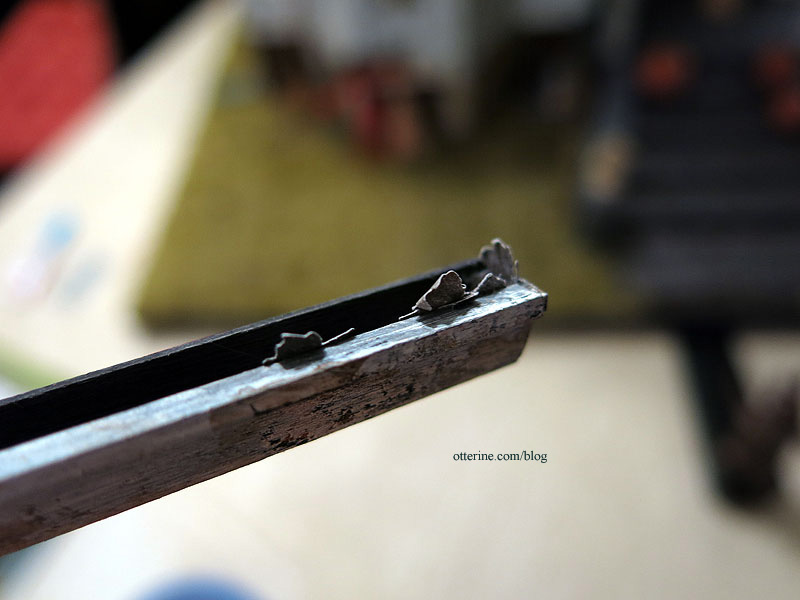
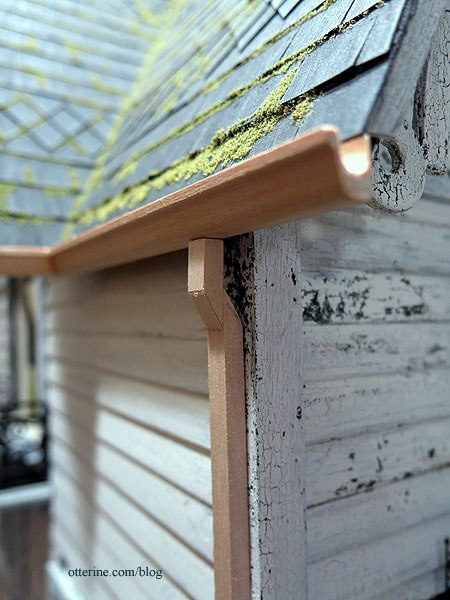
To make the end caps for the gutters, I added pieces of cardstock cut to shape.
I sanded the edges and turns of the downspouts to be more rounded.
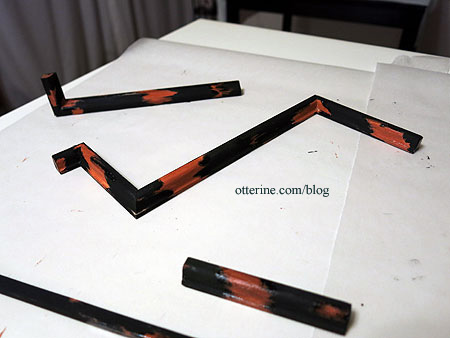
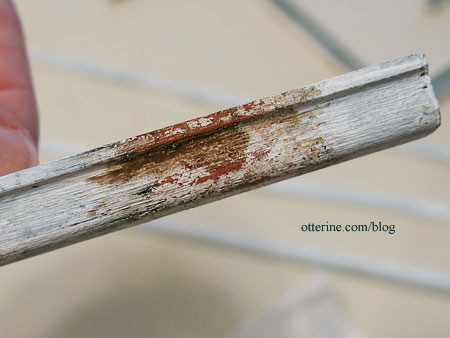
To give them a bit of age, I first painted some spots Terra Cotta by Americana, followed by crackle medium. The rest of the pieces were painted black. They look like coral snakes! :D
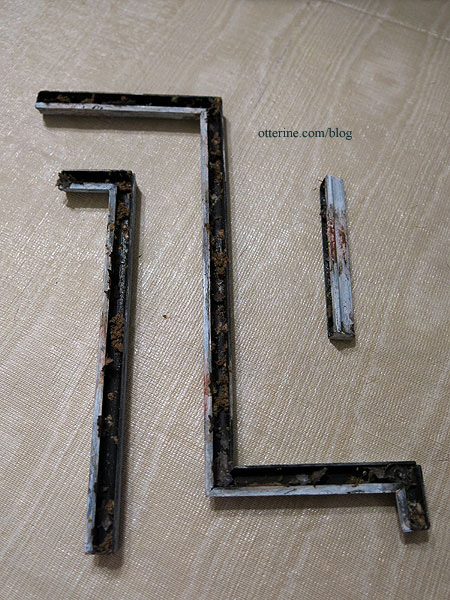
When I painted white over the assemblies, the black paint toned down the brightness of the white overall, and the paint flaked where there was crackle medium.
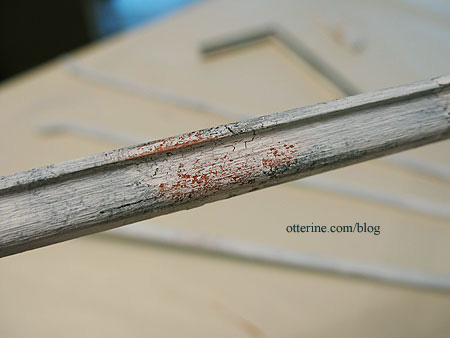
With a slight terracotta and brown wash, it became rusted flaked paint. :D
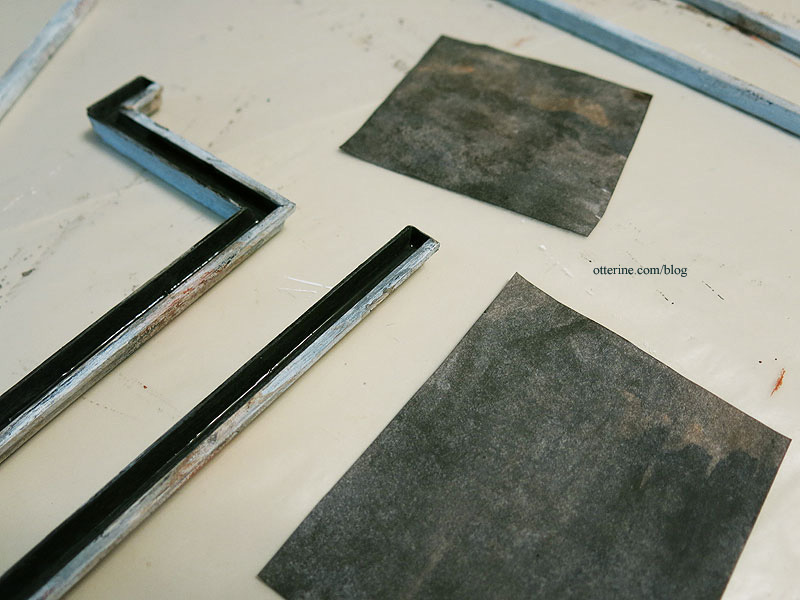
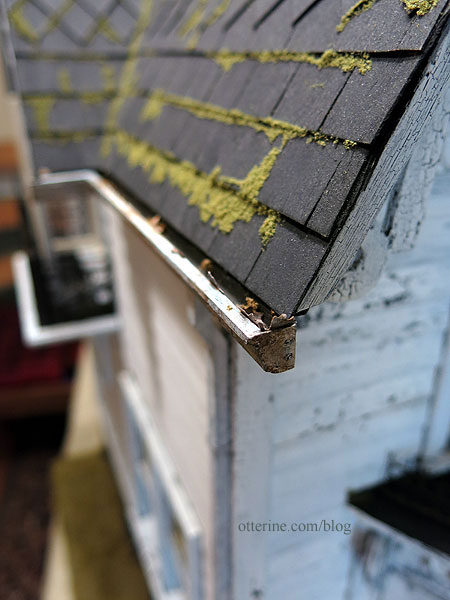
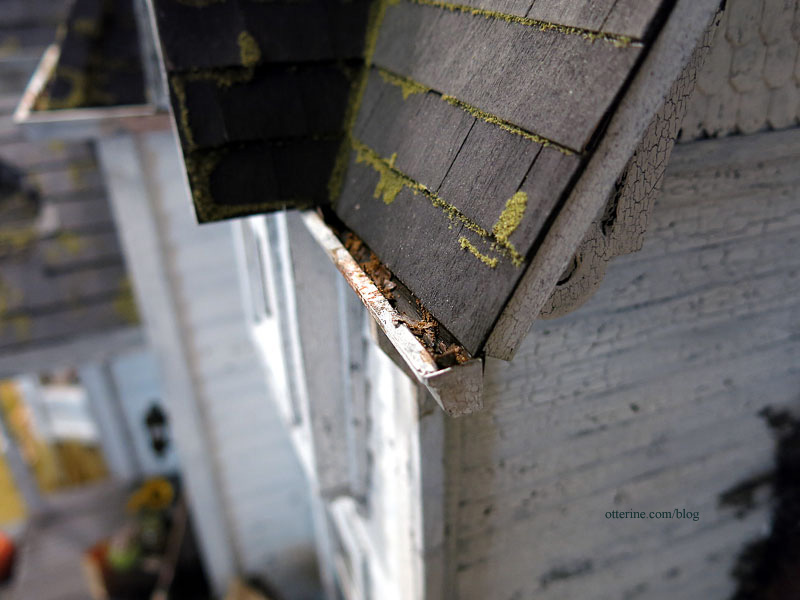
I added an aging wash to the whole thing and then dirtied up the inner track since these are old gutters. I painted some scraps of paper with the leftover paint washes and let them dry.
I punched as many maple leaves as I could from the scraps.
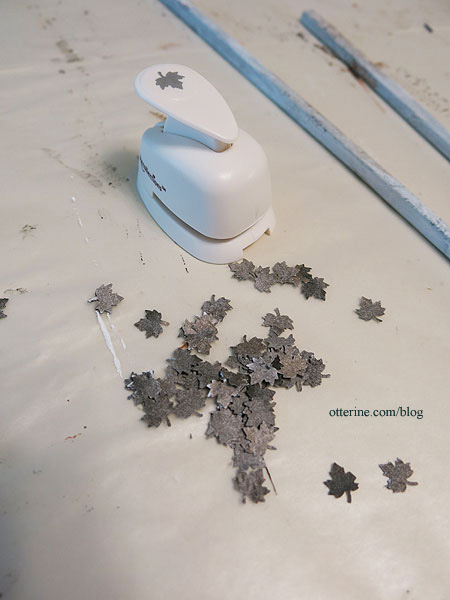
I smashed the leaves and glued them into the track, some sticking out over the top edge.
I glued in some moss material besides.

I then added a final brown wash. Voilà! Good and dirty gutters. :D
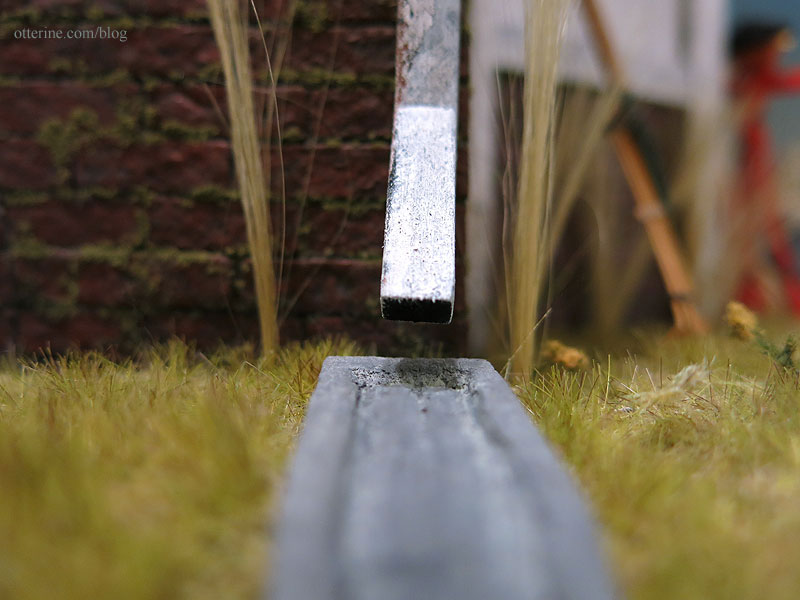
I glued the assemblies to the house, and the downspouts helped hold the gutters in place while the glue dried.
The bottom ends of the downspouts aren’t easily seen, but I did paint them black to give the illusion of being hollow.
I painted the splash blocks to look like concrete.
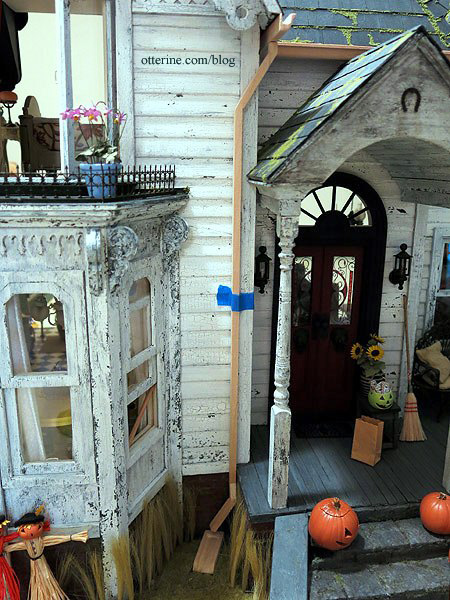
The straps are cardstock. I cut them long so I would be able to work with them during the final fitting.
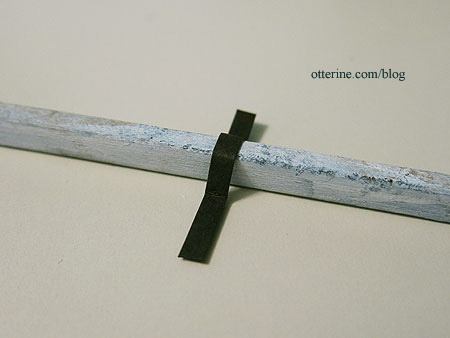
I painted the paper with a grey wash and then glued them in place. The nails are just painted dots. The straps are mostly decorative since the downspouts are glued in place.
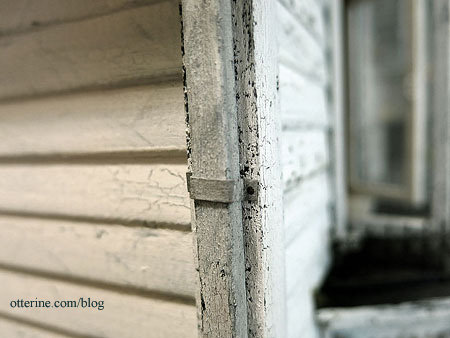
It really adds that little something, no?
Grandma has no leaf screens, so looks like she’ll need some yearly help getting these cleaned up. :D
Left assembly.
Middle assembly.
Right assembly.
Almost done with the exterior! Hooray! :D
Categories: The Haunted Heritage
August 4, 2013 | 0 commentsHeritage – gutters and downspouts, part 1
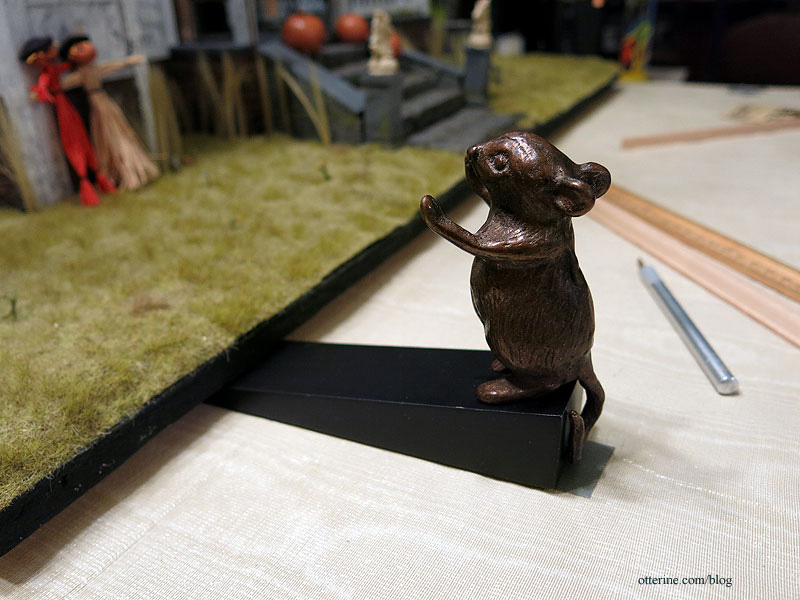
When you’re working on a house that sits on a turntable, you need a little help. Whoa, Heritage!
The Heritage kit included gutters and downspout materials. One length of gutter-shaped wood and one long dowel. These were acceptable, but I went with different parts.
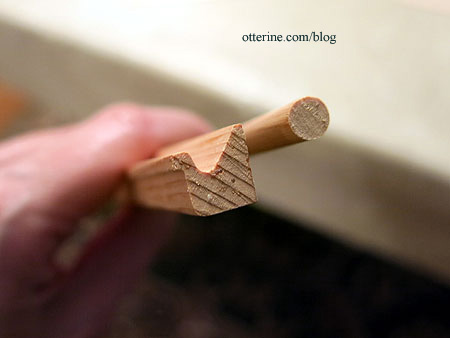
I bought gutter shaped wood from All Small Miniatures the day I went there for the asphalt shingles for The Artist’s Studio. It’s shaped differently and it is lighter in weight. Considering there will be very little surface area for gluing, I thought the lighter weight material would work better in the end.
I cut the lengths I would need using my scroll saw. The corner joins weren’t the cleanest fit mainly because this house is so rickety. :D But, I was able to sand them to fit well enough. A little spackling here and there, and it won’t be an issue in the end. The ends will also be capped before painting.
I had to forego putting gutters on either side of the dormer, because the area between the main roof and the left side of the dormer didn’t allow for a full turn. Putting it on the right side only would have brought more attention to the problem.
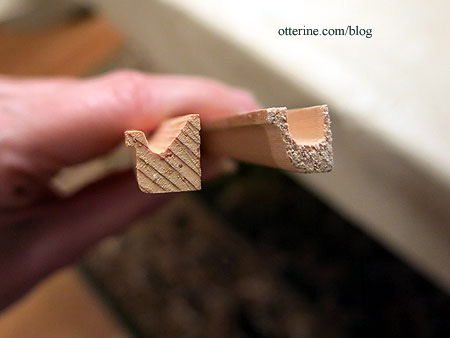
I formed the downspouts by cutting 1/8″ x 1/4″ wood. These will be sanded to shape before painting.
I thought this was a more realistic approximation than round downspouts.
The splash blocks are balsa, shaped by sanding. I had to cut away some of the landscaping to get them to sit flat on the ground.
Update: part 2 here.
Categories: The Haunted Heritage
August 3, 2013 | 0 commentsFramed photos add a personal touch
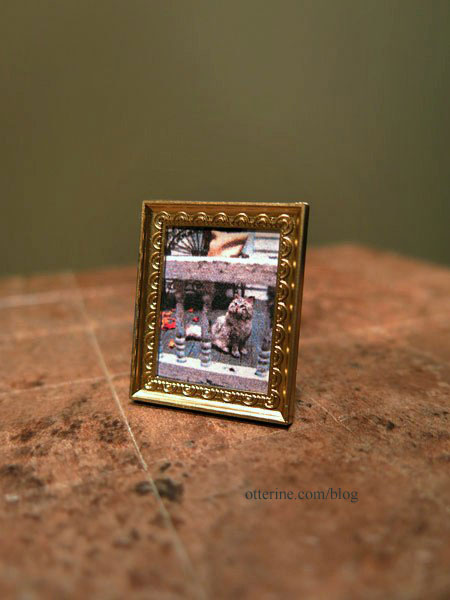
When I bought Ophelia from *Reve*, there was a photo in the listing that I loved. I asked the artist if I could use the photo, and she graciously said yes. I edited it in PhotoShop and printed a teeny tiny copy for a vintage looking frame I had.
This photo of Ophelia is one I took.
I loved it so much I decided to print it for framing as well. This one is a little larger to keep the details visible.
The bedroom is hard to decorate with its odd angled corner walls, so this is the perfect size for the space.
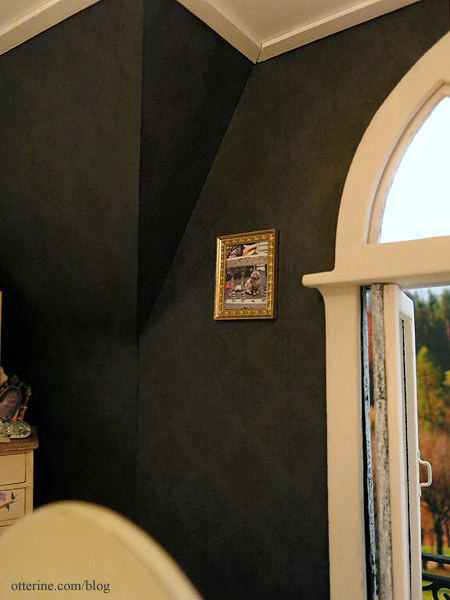
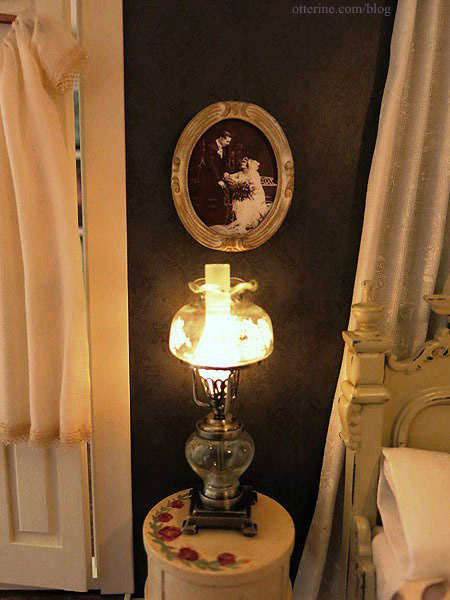
After repairing the bubble in the bedroom wallpaper, I needed a photo to fill the oval frame that would mask the repair seam. I thought a 1920s wedding photo would be perfect, but I didn’t have any in my own family to use. I searched online and found this wonderful photo from Rick Zolla, who granted me permission to use it for the Heritage. :D I edited it in PhotoShop – adding some background to the left of the man and at the top of the photo, then feathering the border into an oval shape.
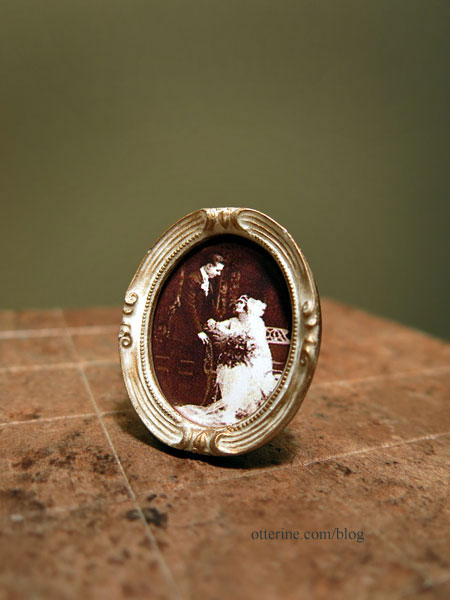
It fits perfectly with the ambiance of the room.
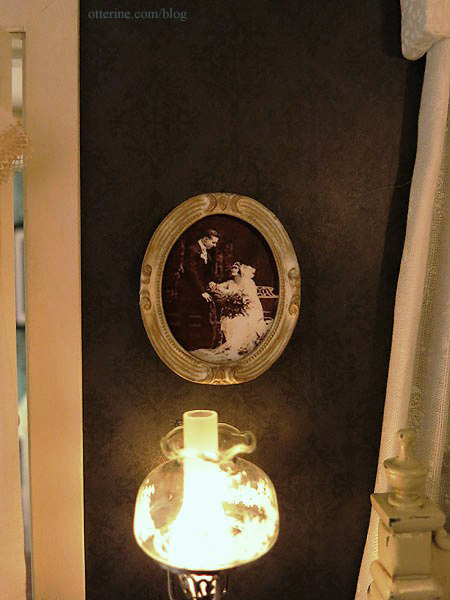
I love the relaxed pose and setting…such a great image! Thank you, Rick!
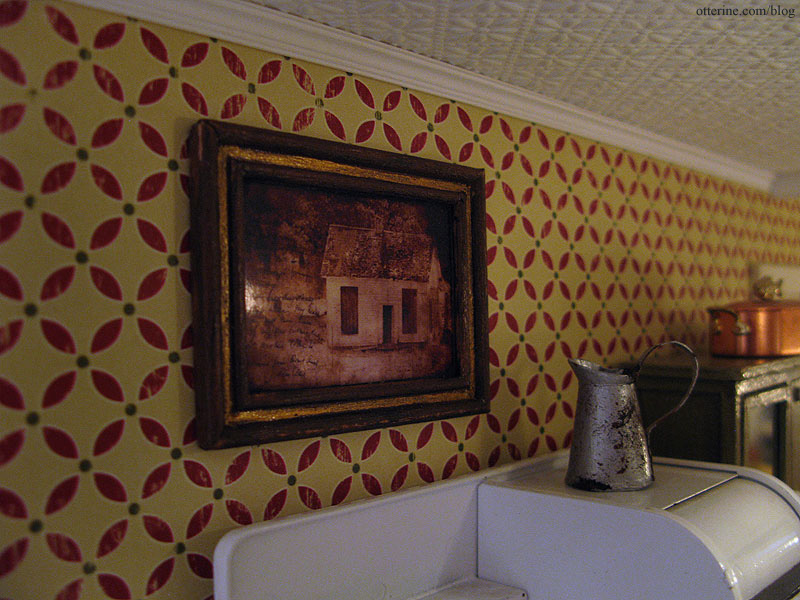
Kelly recently told me she and I share a love of photography, and she was so generous to send me one of her miniature works for the Heritage. It’s titled Ghosts of the Past. How perfect! :D
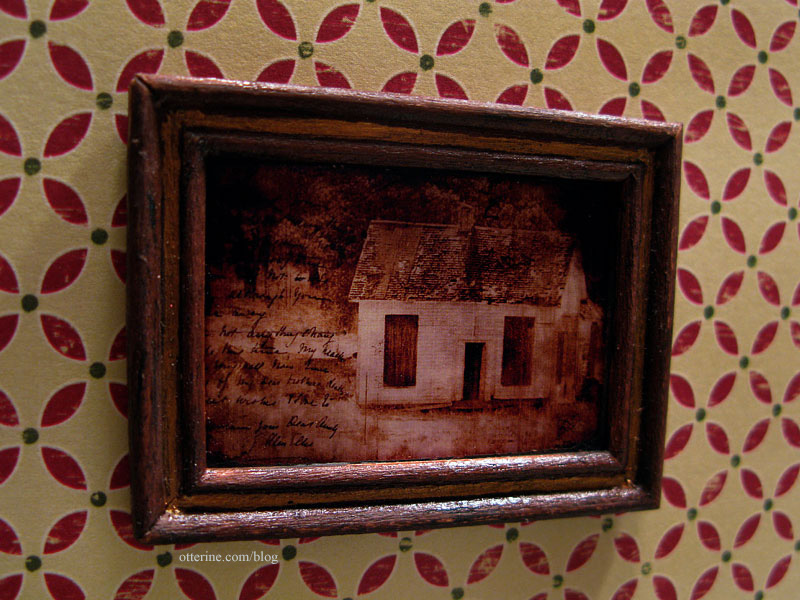
I think it works wonderfully in the kitchen. Maybe it’s an old faded photo of grandma’s childhood home. The lovely pitcher is from Caterina.
Categories: The Haunted Heritage
August 2, 2013 | 0 commentsAntique drum nightstands, part 2
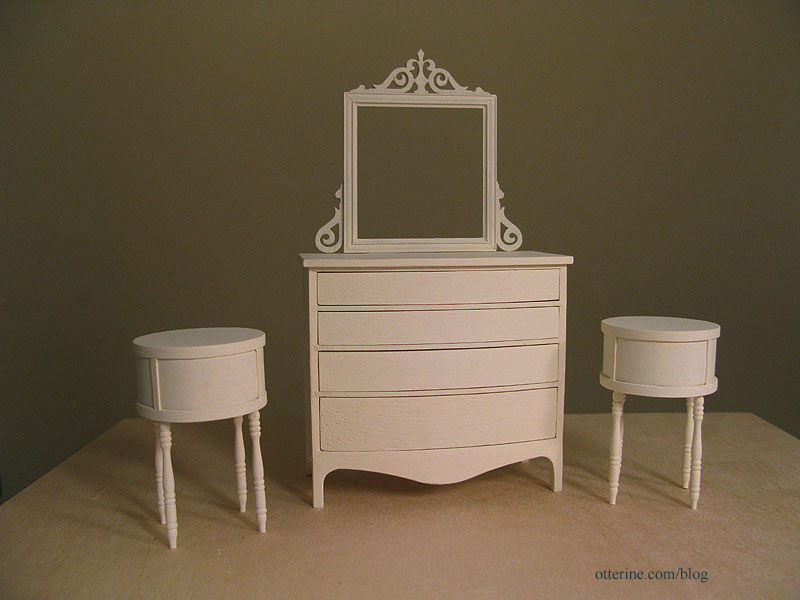
Continuing work on the antique drum nightstands. Instead of matching the painted bow front dresser, I chose a different design for the nightstands.
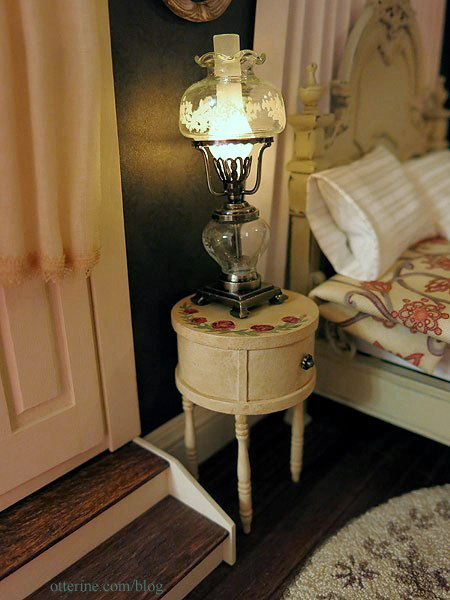
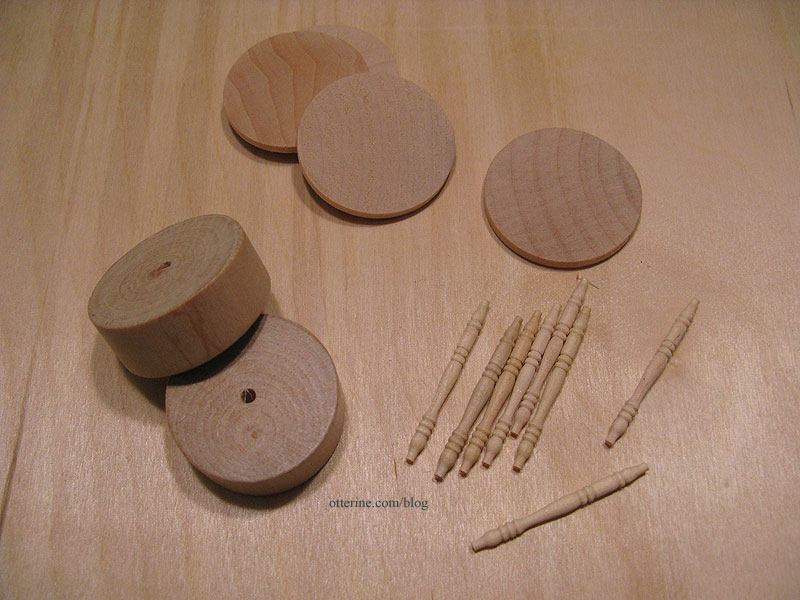
As a reminder, the nightstands were made from the round stands that came with my artist models, 1 1/2″ x 1/8″ wood circles and Houseworks 1 9/16″ long spindles.
I painted them with a base coat of Tapioca by Folk Art then added an aging wash of light brown. I then painted the green vines, followed by red and yellow for the roses.
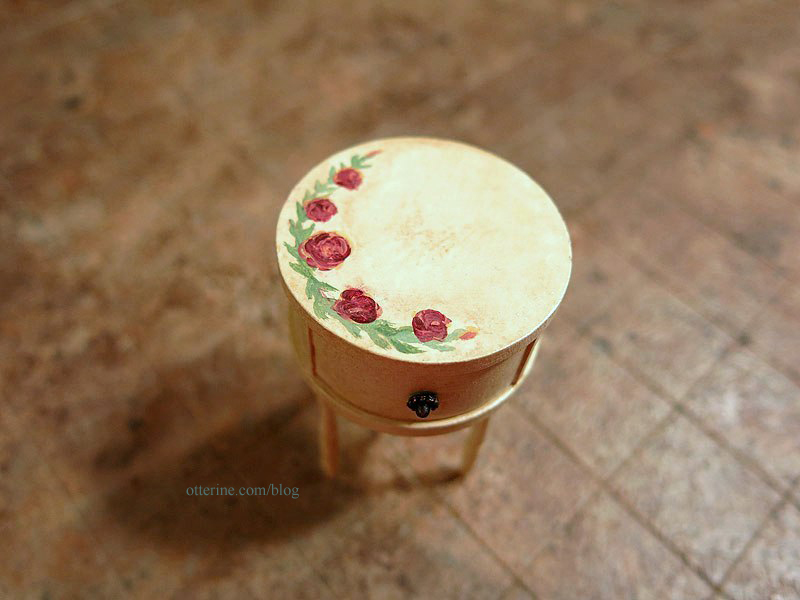
The knob is the fancy end of an antique copper headpin. I love the way it turned out.
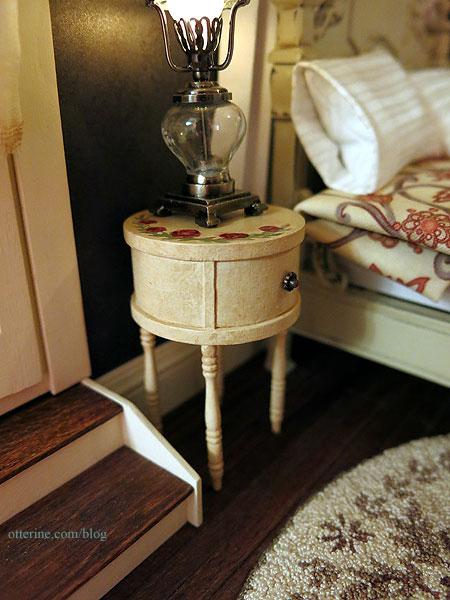
It fits in well with the rest of the furnishings.
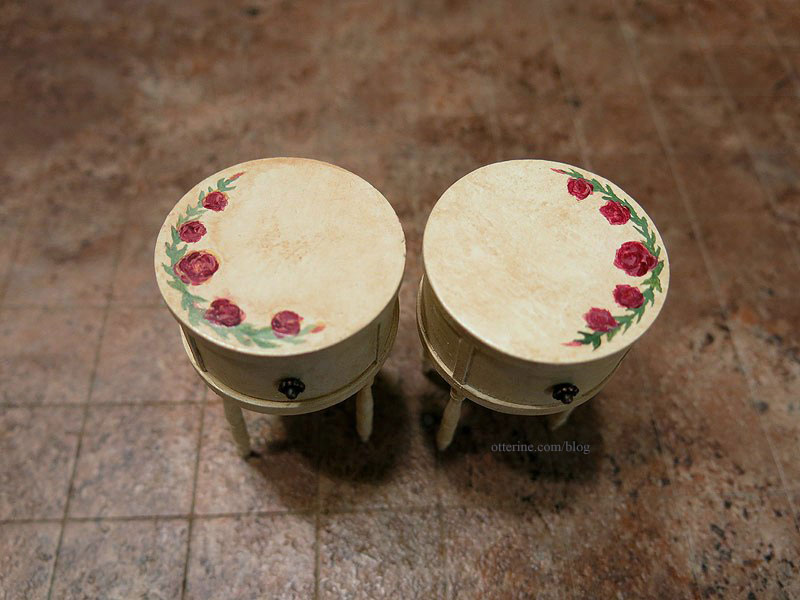
I finished painting the second nightstand, and they are a pretty close match to one another.

I opted for doing mirror image painting so they would look more like a planned set than two of the same table.
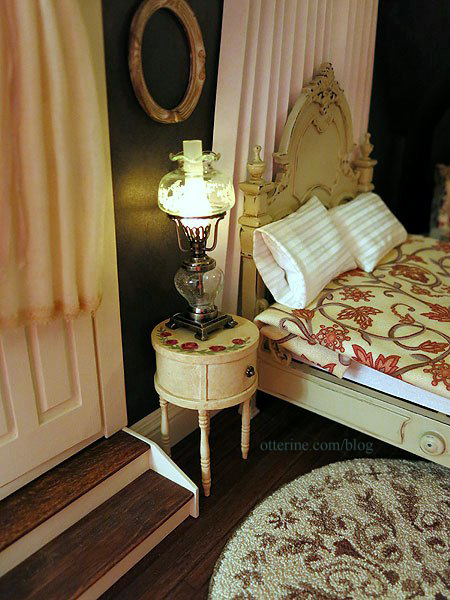
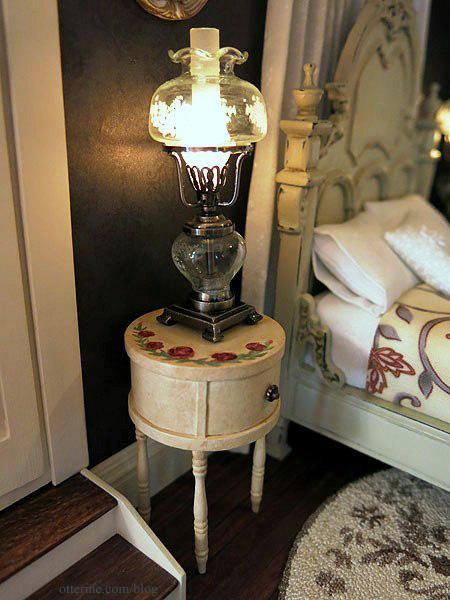
There’s not much room on them for anything besides the lamps, but it all seems to work well together.
With these completed, this room is almost finished! :D
Of course, it hasn’t been fully accessorized yet, so stay tuned!
Categories: Furniture, The Haunted Heritage
August 1, 2013 | 0 commentsRepairing buckled wallpaper without redoing the entire wall
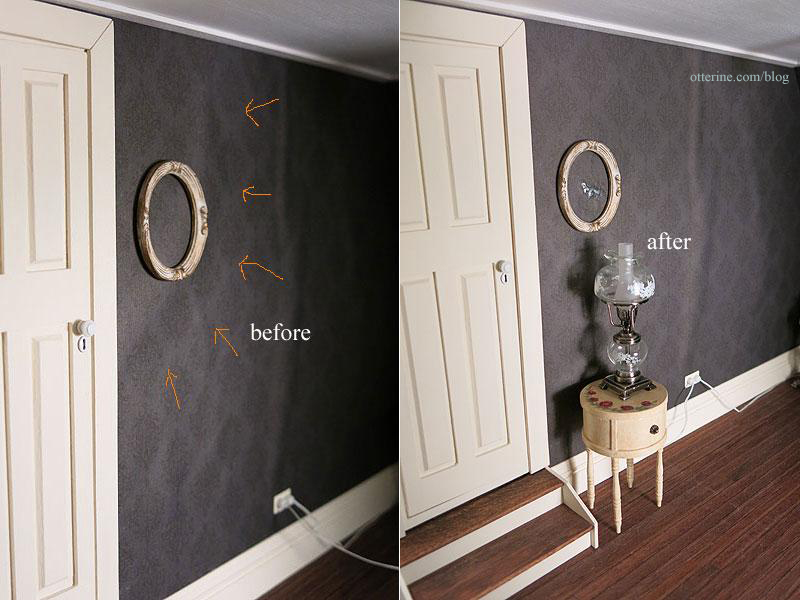
If you recall from a previous post, I noticed that the Heritage bedroom paper had buckled in a few places on the long wall after using Yes paste. After posting a question on the Greenleaf forum for suggestions, I received two great ideas. (Note: I no longer recommend Yes paste – I use Wallpaper Mucilage instead. Yes paste has problems with longevity.)
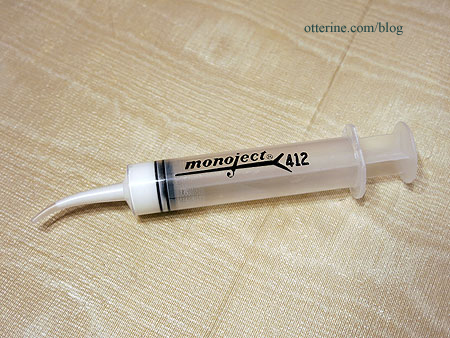
One suggestion for fixing the paper involved using a glue syringe. I would cut a small slit in the paper, lift the edge and inject glue under the paper. I would use a credit card or similar flat edge to distribute the glue and even out the paper. To disguise the slit in the paper, I would just hang a framed photograph or small painting. The other suggestion was to form a curtain behind the bed. I’ve seen fancy valances and partial canopies that fasten to the wall and have draped fabric hanging down to the floor.
First, I worked on repairing the one large bubble between the bed and the door. I used a bright light to make sure I was getting the right spot.
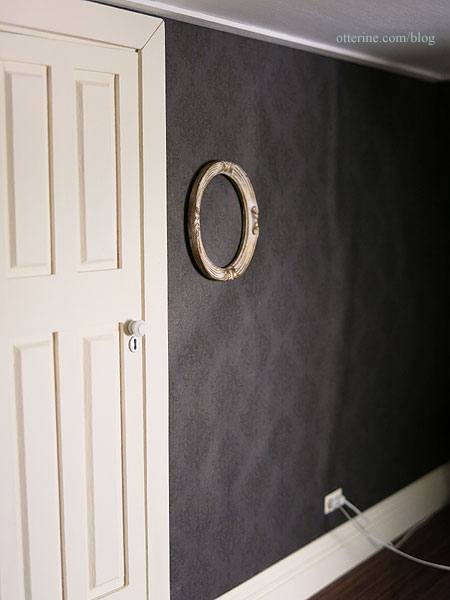
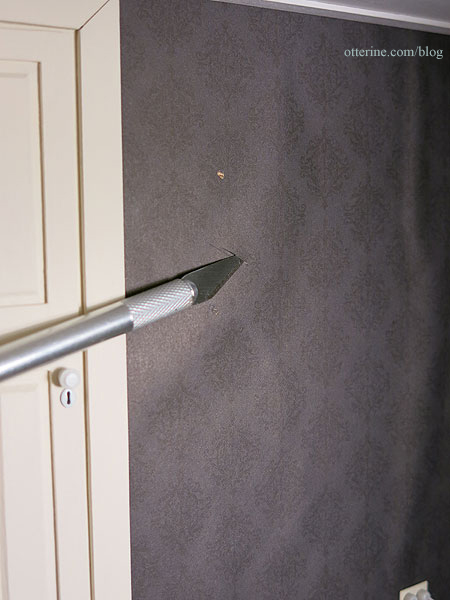
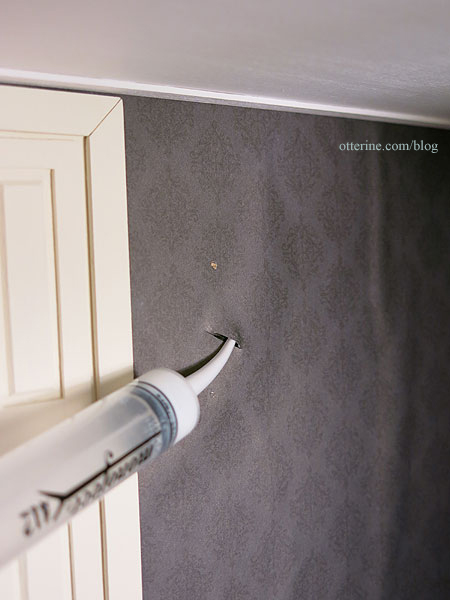
I kept my oval frame in place to show where the cut would need to be. I used a brand new blade to make a clean cut in the paper about 1/2″ long.

The dot above the cut is the mini hold wax I used to hold the frame in place. I left it to make sure I put the frame back in the same spot after the repair.
I put some Aleene’s Quick Dry glue into my syringe.
I lifted the edge of the paper and inserted the syringe tip. I squeezed out a good amount of glue into the bubble.
Using a plastic gift card, I smushed (technical term there) the glue around inside the upper portion of the bubble. I then repeated the process for the lower portion.
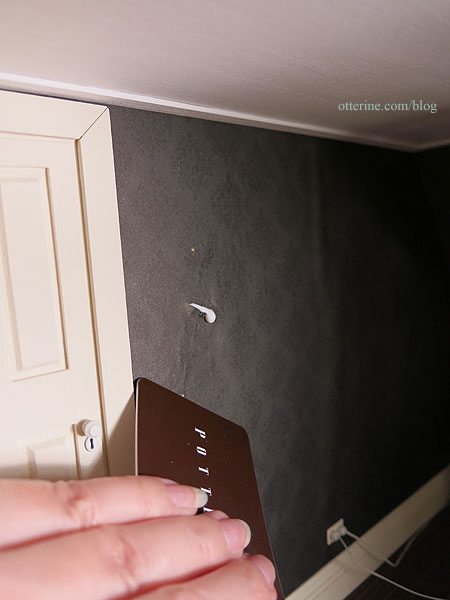
I used the back of my fingernail and lightly rubbed the surface in a circular motion to even out the texture. It’s not perfect by any means, but it looks so much better than it did. There was one spot where there was something under the paper, so it marred the front just a little. The tall lamp covers that without a problem. The seam will be behind the oval frame and hidden. I just need something for the frame…I’m thinking a 1920s wedding photo. :D
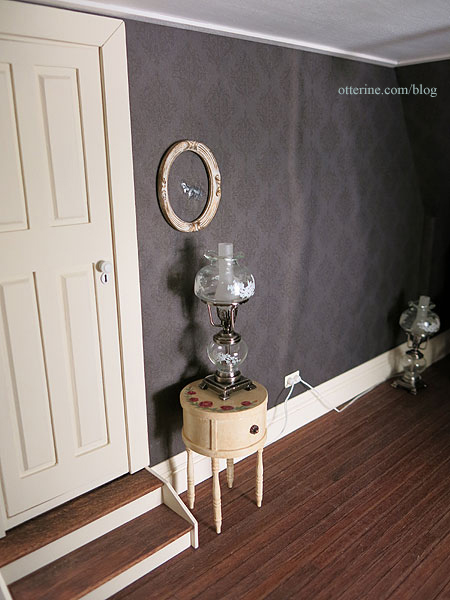
Success!
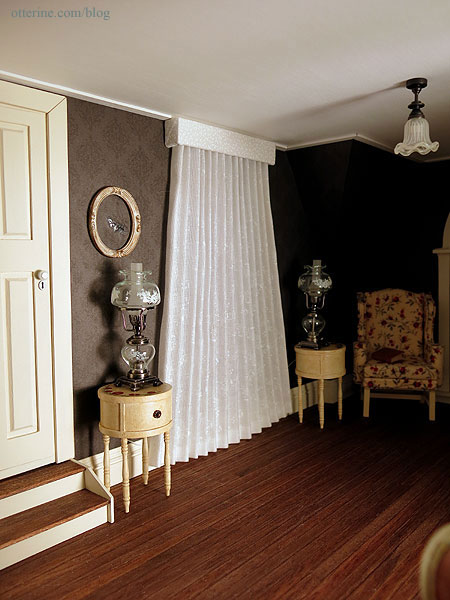
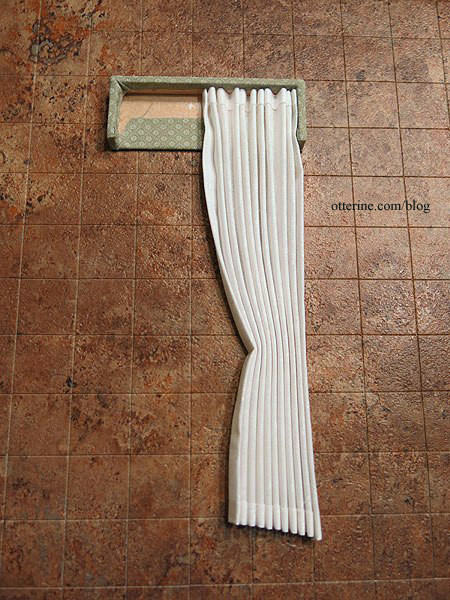
For the larger vertical bubble and the small one right next to it, I used the wall curtain idea instead of attempting to inject glue into the bubbles. I mocked up a drapery panel with plain white paper even though I wasn’t sure about using a light colored fabric behind the light colored headboard. But, I loved it instantly, and it was just quickly folded paper! The drapery would be less stark since the fabric I had in mind was relatively sheer.
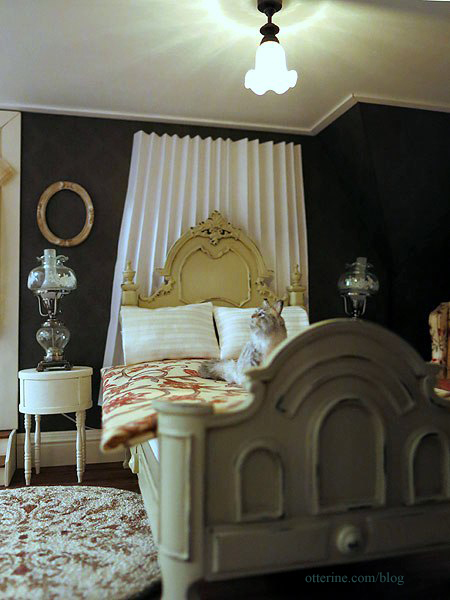
The drapery panel also creates the perfect balance with the two floor-to-ceiling windows on the other two walls.
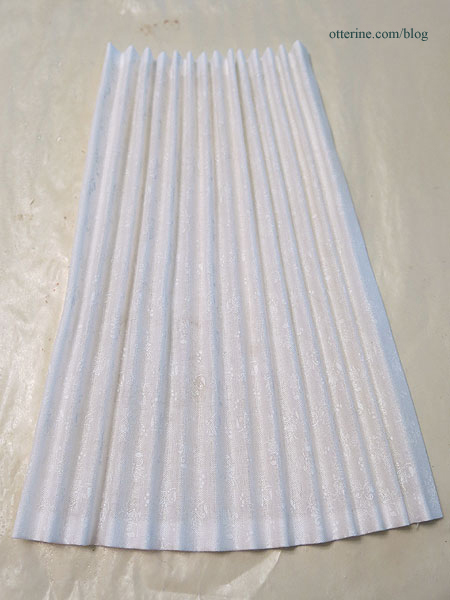
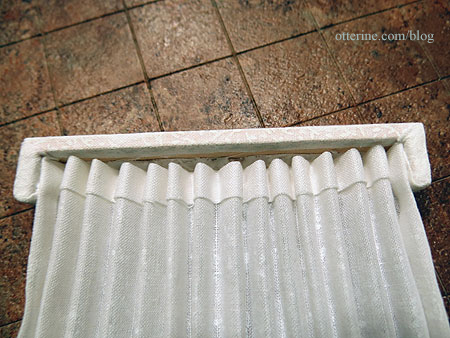
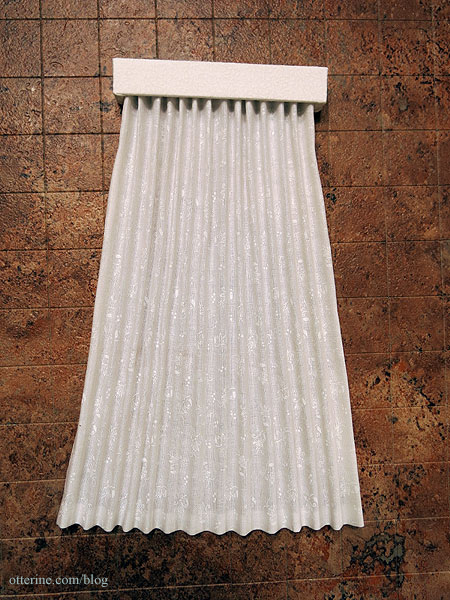
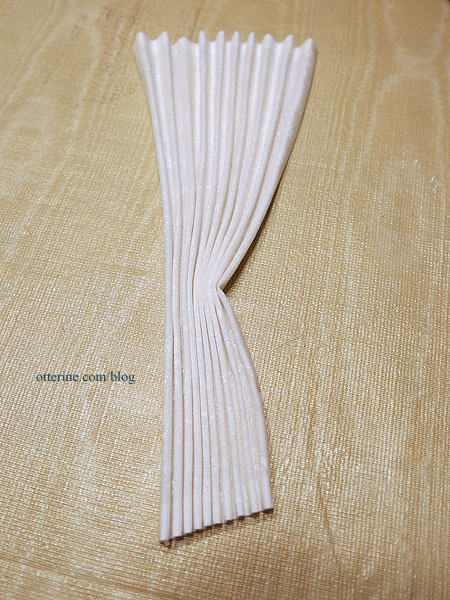
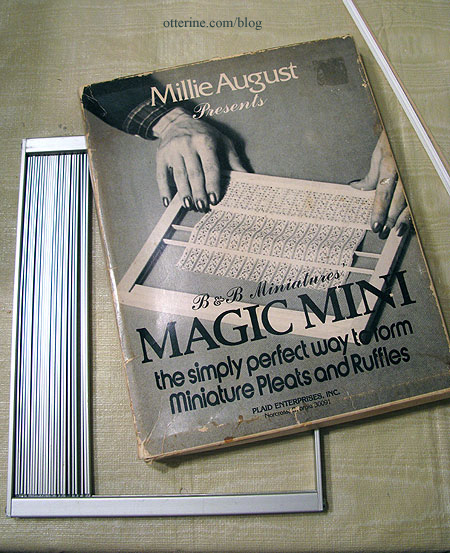
I made the wall panel a few days ago using the Millie August Magic Mini pleating tool. I made the pleats with the tool and then sprayed them with Aleene’s Stiffen Quik to set my final arrangement.
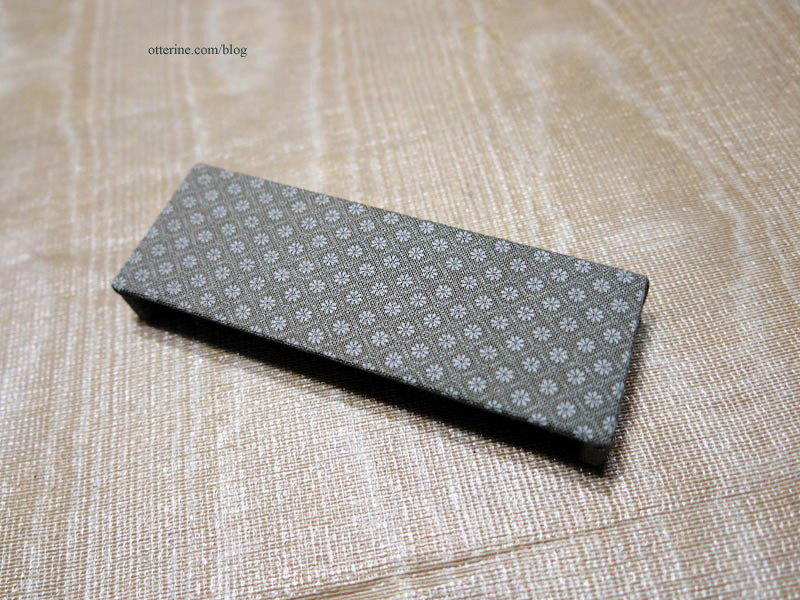
I made a pelmet for the bedroom curtain (top) smaller than the one I made for the parlor (bottom).

I painted it white and then covered it with the same fabric I used for the accent pillow on the bed. I hadn’t needed to paint the pelmet in the parlor since the fabric was darker. I glued the curtain inside the pelmet.
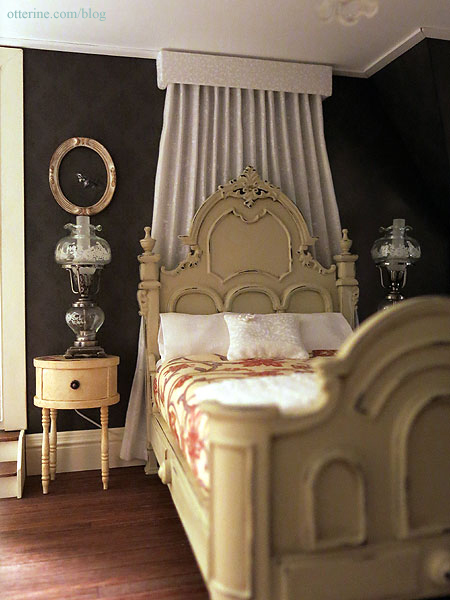
I used mini hold wax to attach the pelmet to the wall. If I ever need to remove it for cleaning or replacement, I won’t risk damaging the delicate paper on the wall.
The bubbles are covered, and the panel adds a wonderful design element. I would never have done this without the wallpaper problem, so I suppose it’s another one of those happy accidents. :D
Categories: The Haunted Heritage
July 31, 2013 | 0 commentsBespaq bed makeover, part 2
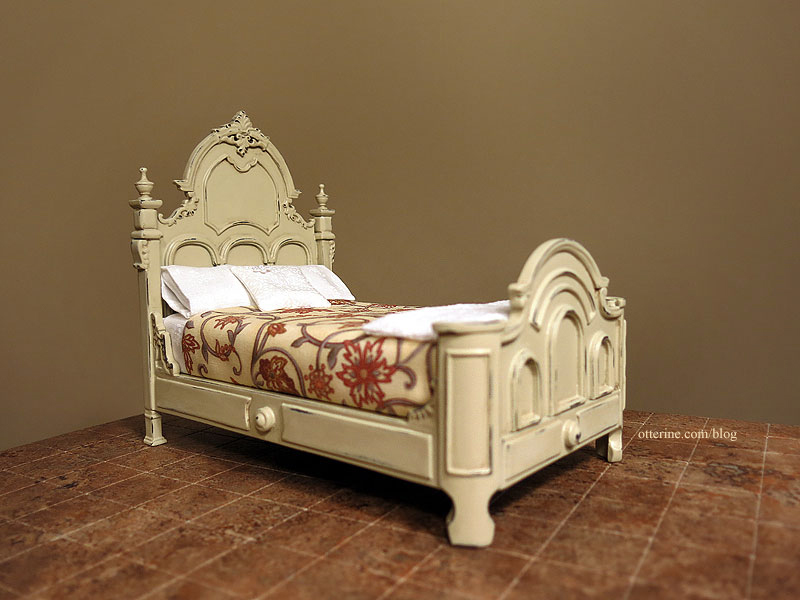
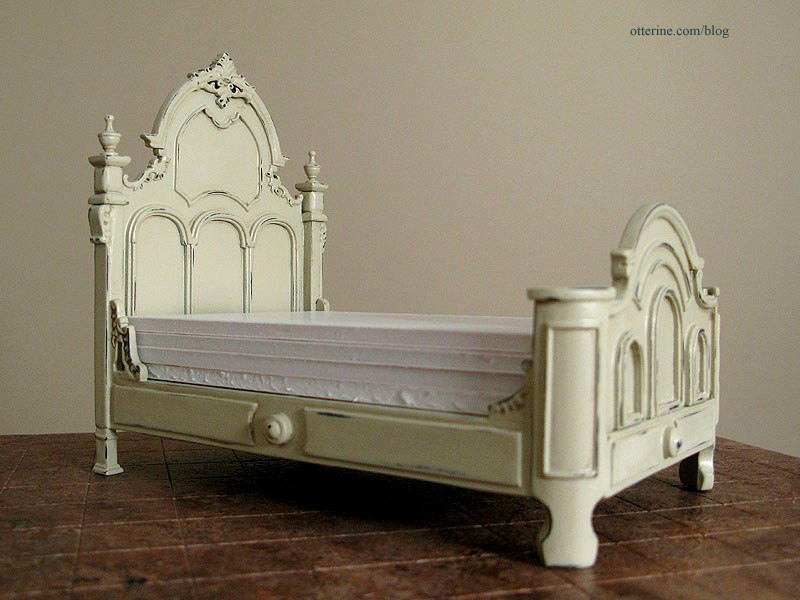
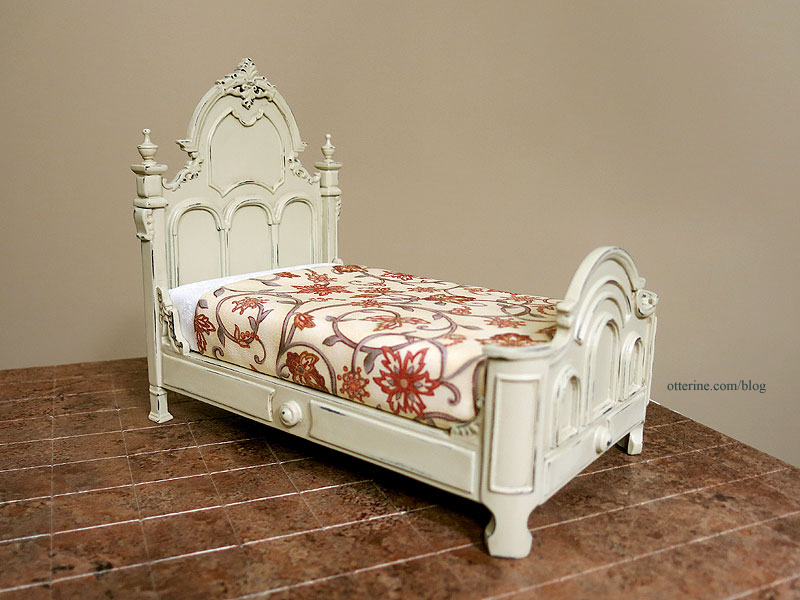
The Bespaq bed makeover is done!
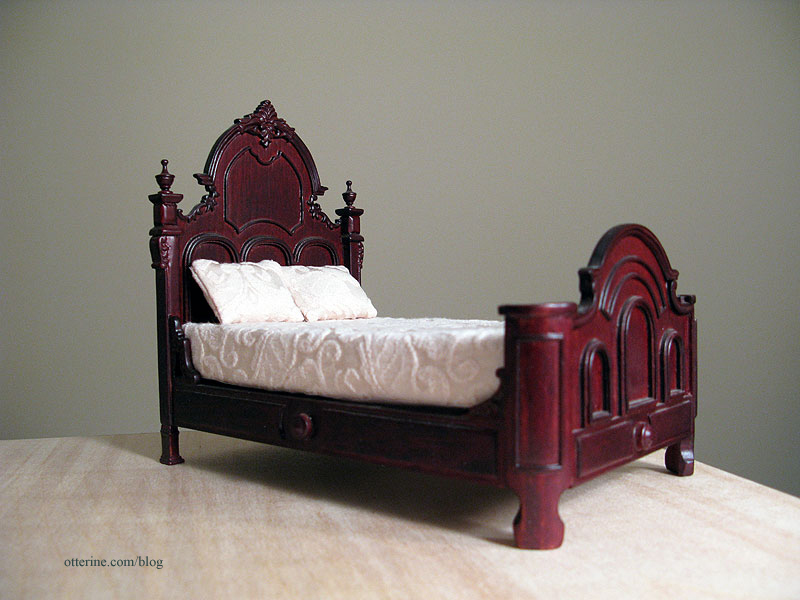
This is where the bed started.
Then primed (grey) and painted with Krylon Almond in satin finish.
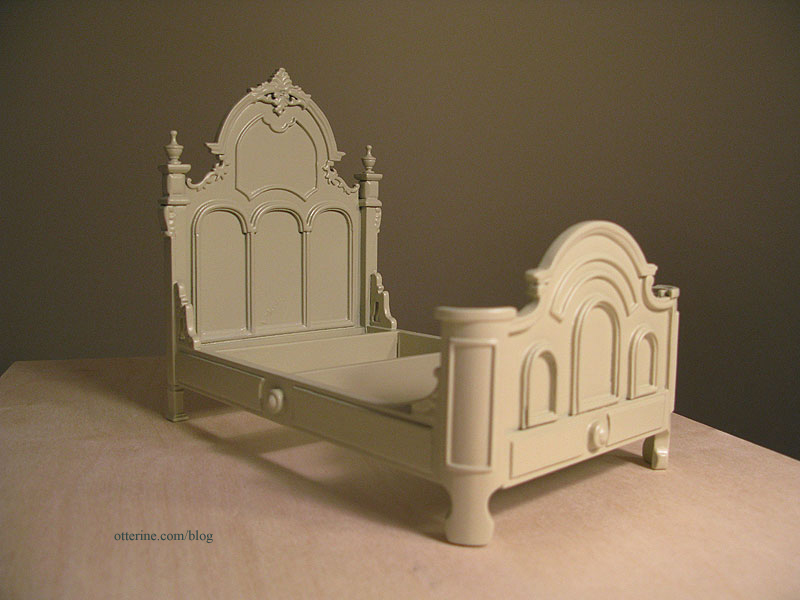
Then aged by sanding.
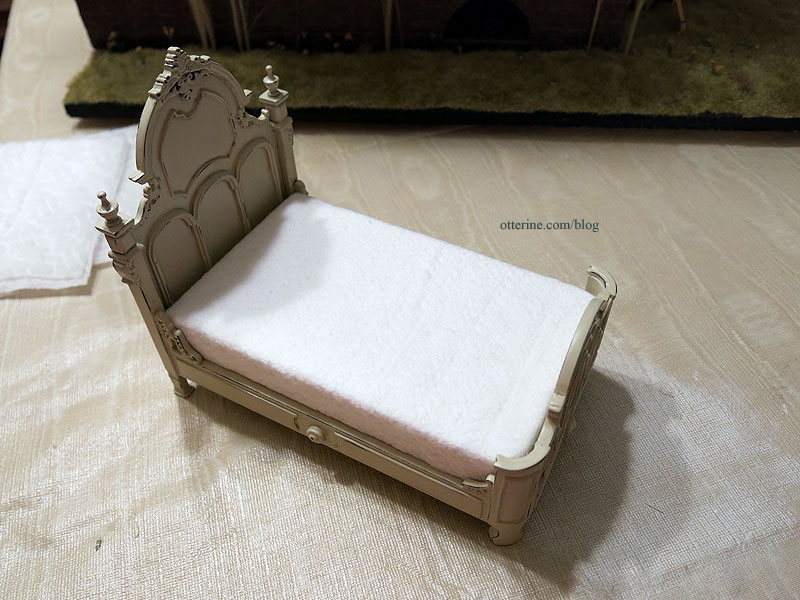
I cut new foam core board pieces to replace the original mattress.
I started the bedding, first by applying a layer of millinery batting to the foam core board mattress base.
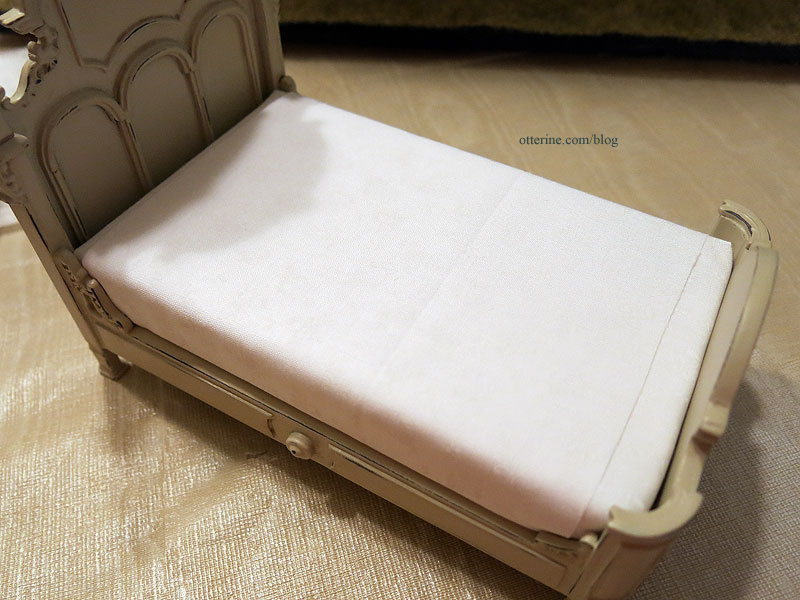
I added sheets made from sheer white floral fabric. Since there would be a coverlet, I opted to keep the top sheet short to cut down on the bulk.
I sewed the coverlet from the fabric April sent to me, adding a plain white backer. I would like to try my hand at an unmade bed, but in the interest of time I went with my standard treatment.
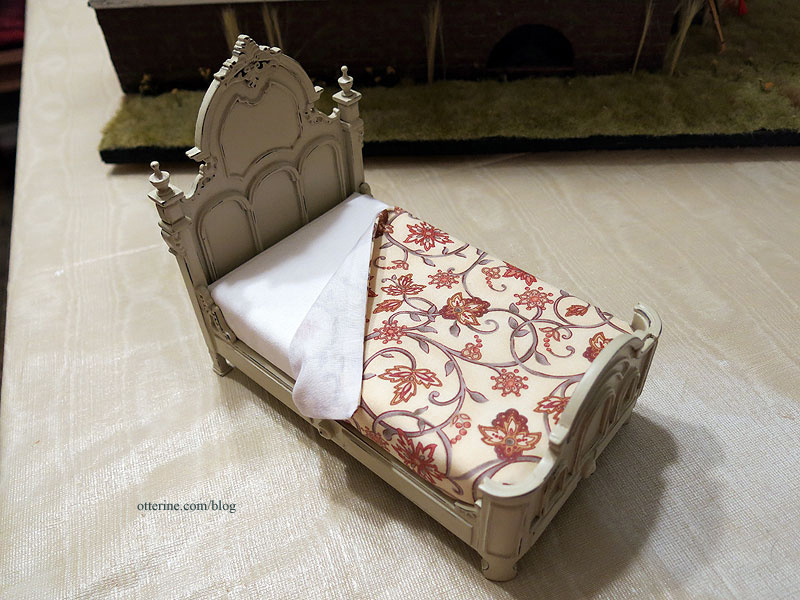
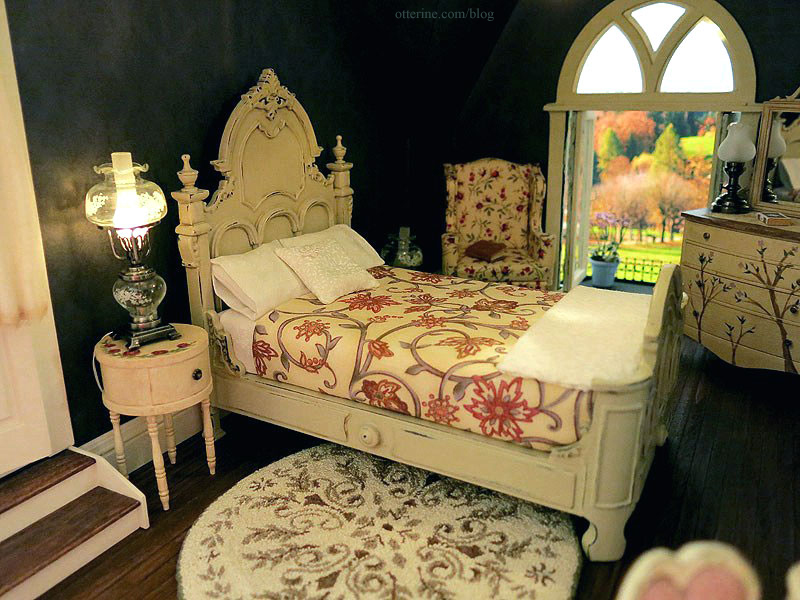
I like the way it pulls in the colors of the other furnishings, and the large scale of the flowers balances out the busier patterns throughout the room.
I sewed some pillows and made pillowcases from the same sheer white floral fabric as the sheets. I added one small white printed floral pillow to complete the bedding. It has a tiny venise lace flower attached in the corner.

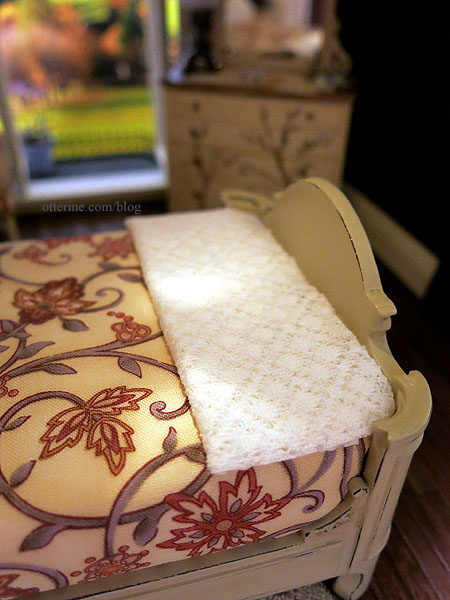
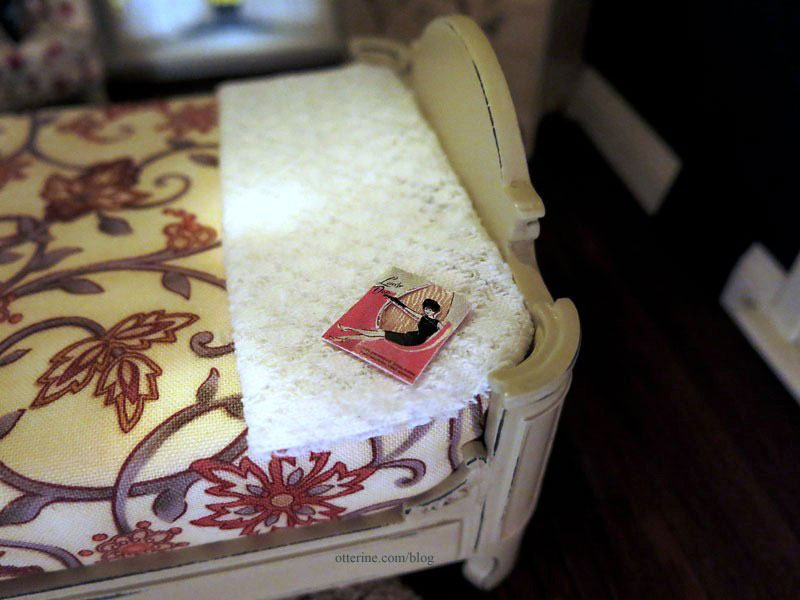
I made a small lace throw from some open weave fabric. It is full sized to cover the entire bed when opened, but I’ve pressed it flat to sit at the end of the bed as an extra blanket for those chilly autumn evenings.
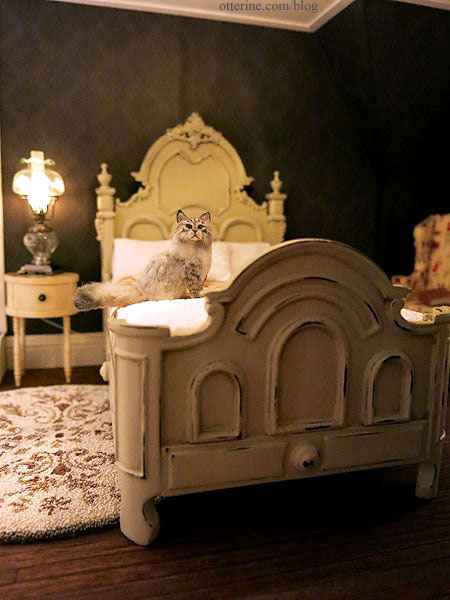
Hooray for a successful makeover! :D
Now, who wants to take a cat nap with Ophelia?! :D
Categories: Furniture, The Haunted Heritage
July 30, 2013 | 0 commentsParlor drapery, completed
The pelmets and pleated draperies worked so well in the kitchen, I decided to add them to the one parlor window as well. There is a lot going on in this room in the way of color, texture and pattern already, so I again chose a soft white printed curtain topped with a subtle pelmet.
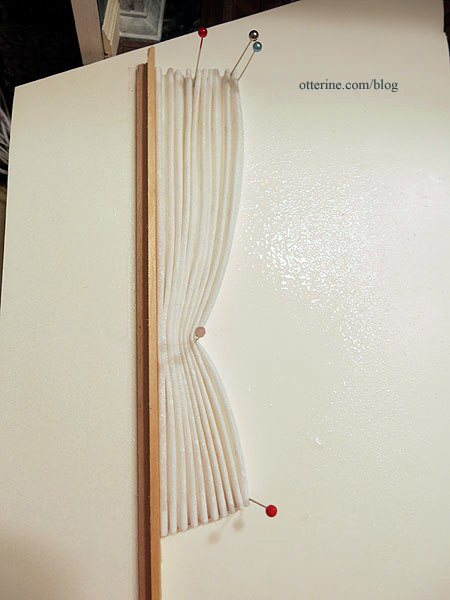
Here is the panel after the Aleene’s Stiffen Quik dried. Using the back board for the straight left edge resulted in a much cleaner panel than the all-pin version I did for the kitchen.
I made a tall pelmet since there was a lot of space between the window and the ceiling. In the photo below, the bedroom pelmet (top) is smaller than the one I made for the parlor (bottom).
A tall pelmet with long curtains makes a window look taller. I covered the pelmet with a soft grey-green fabric from Mini Decorators, purchased at one of the local mini shows.
I glued the curtains to the pelmet.
I glued a piece of fairy lace around the bend to serve as a tieback.
I glued the crown molding in place and touched up the joins first to make sure the window treatments were spaced properly on the wall. This also eliminated my possibly slopping paint onto my new window treatments. I then glued the pelmet to the wall.
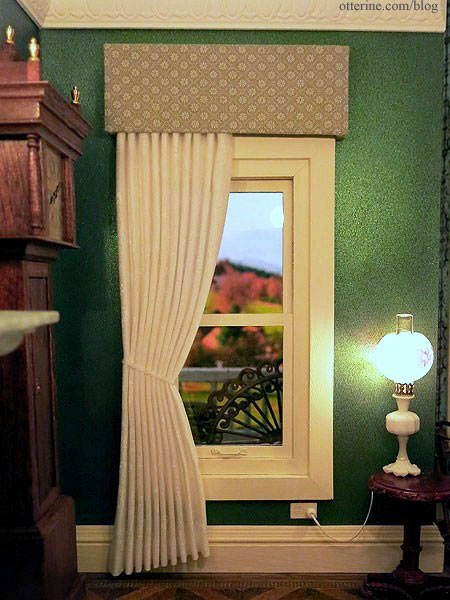
I opted for a single side swept panel for the sole purpose of not hiding that little outlet I took the time to add. Though The Chair will block both the curtain and the outlet for the most part, anyone who looks for the details will find them.
I think this simple panel and pelmet adds just the right amount of design to complete the décor, and the white curtain reflects some soft light into an otherwise dark corner.
The parlor is complete now, but it’s too late to set up for a fully decorated photo shoot.
Categories: The Haunted Heritage
July 29, 2013 | 0 commentsParlor and bedroom drapery, part 1
Today was a fabric day, and I used my vintage Millie August Magic Mini pleating tool.
I turned under the four edges of the fabric panels first, but I didn’t sew or glue them. Once the drapery is in place, it won’t show and it won’t be touched so fraying isn’t much of a worry. Plus, I find that there is less pulling and binding when the edges are left unsecured.
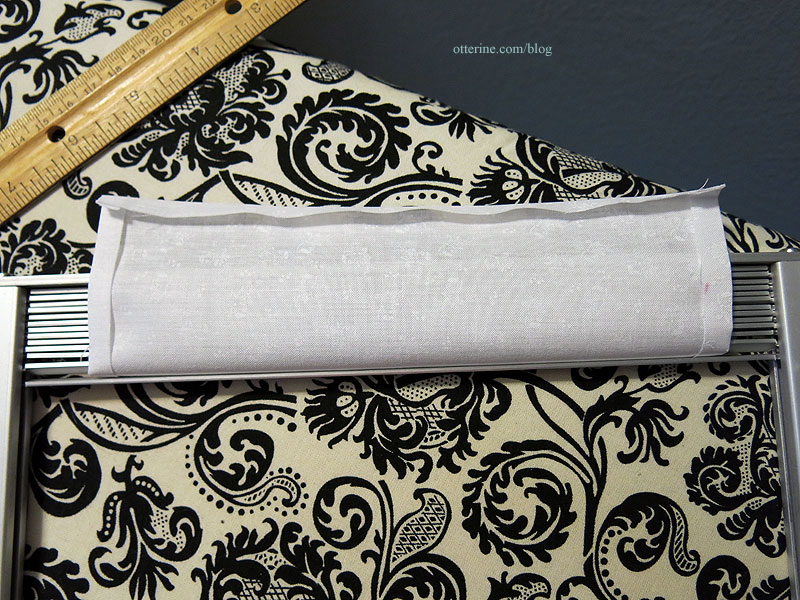
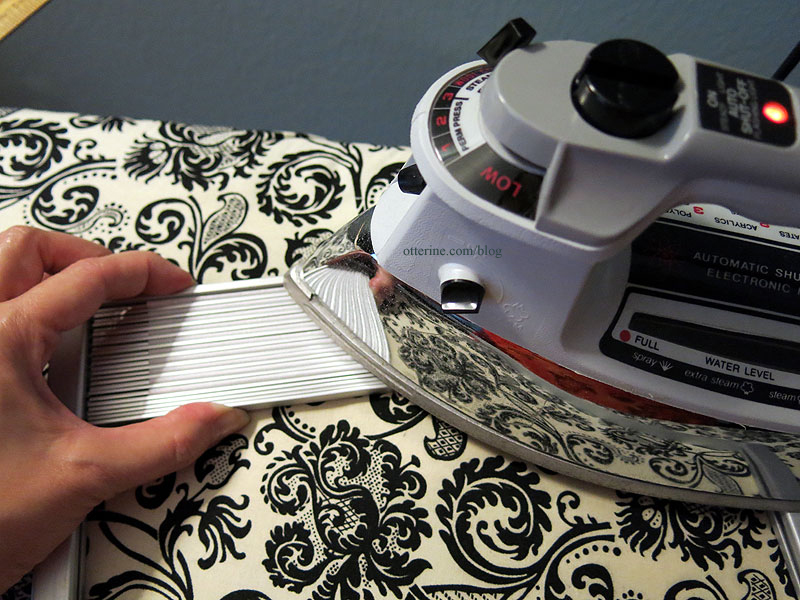
The instructions indicate you should wrap the fabric around the metal slats and then use a steam iron. So, that’s what I did. :]
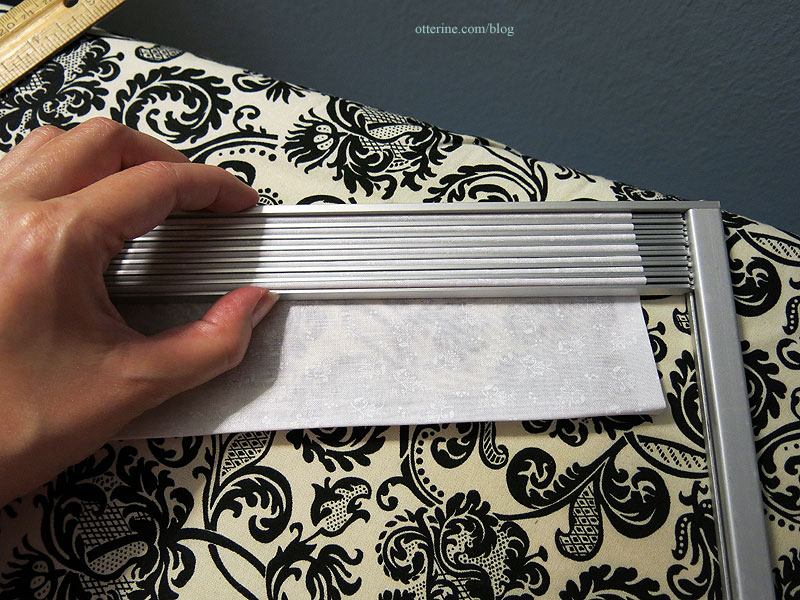
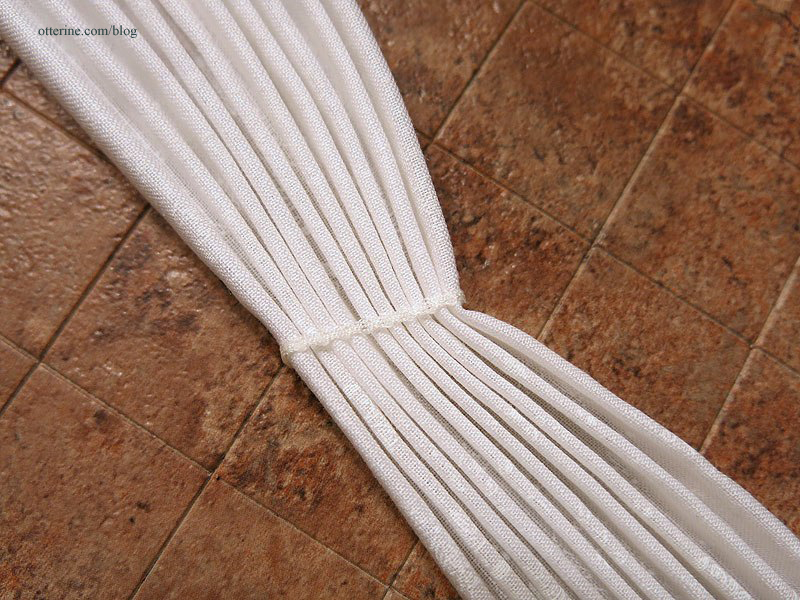
I removed my panels just before they were completely dry so I could manipulate them more. For the bedroom wall panel, I adjusted the pleats by hand on a piece of waxed paper. I had to pleat this panel in sections since it was wider than the number of pleat bars could handle at once.
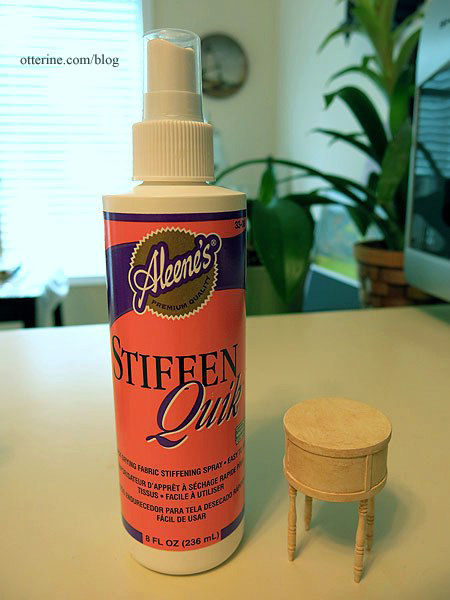
I used Aleene’s Stiffen Quik to hold the shape. The panel will stay here until completely dry.
For the parlor drapery, I took a scrap of foam core board and attached a spare piece of wood trim using double sided tape. This gives the drapery a straight back to lean against. Using as few pins as possible, I created the fold where the tie back will be. Pins do leave holes in the fabric that can sometimes be tricky to remove, especially on white fabric where the slightest dark spot can show so easily.
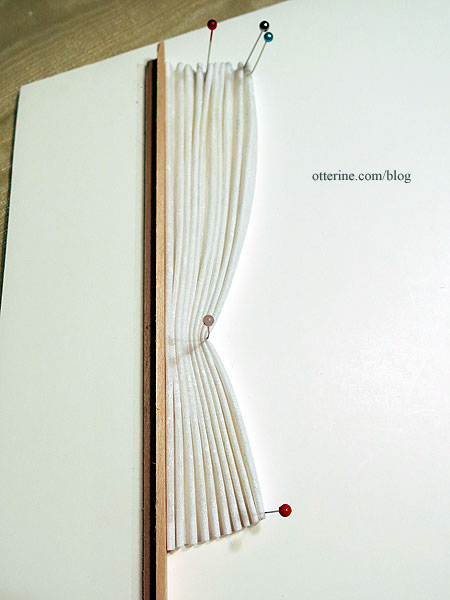
A good spray of Aleene’s Stiffen Quik, and the panel was set aside to dry.
Categories: The Haunted Heritage
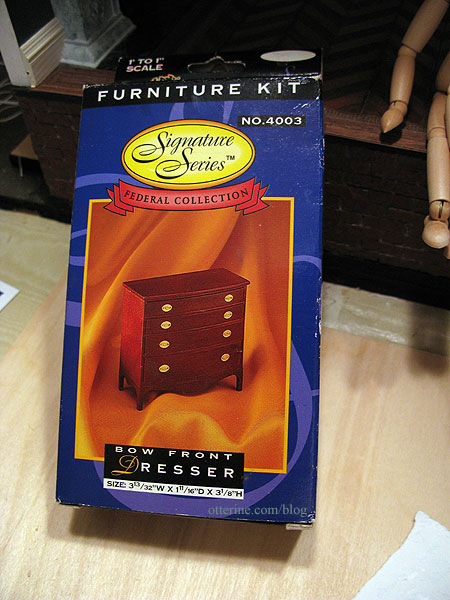
July 28, 2013 | 0 commentsFancy bow front dresser, part 3
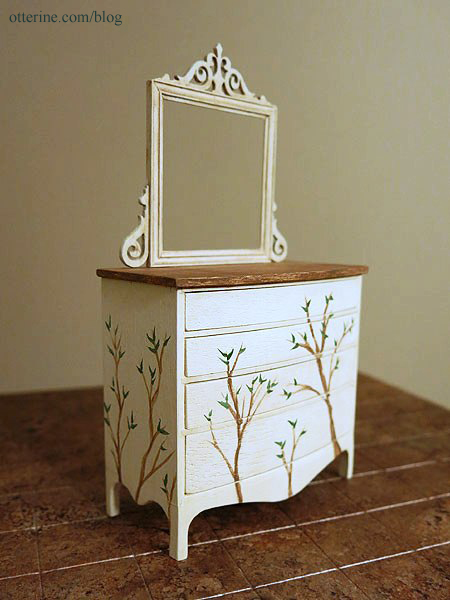
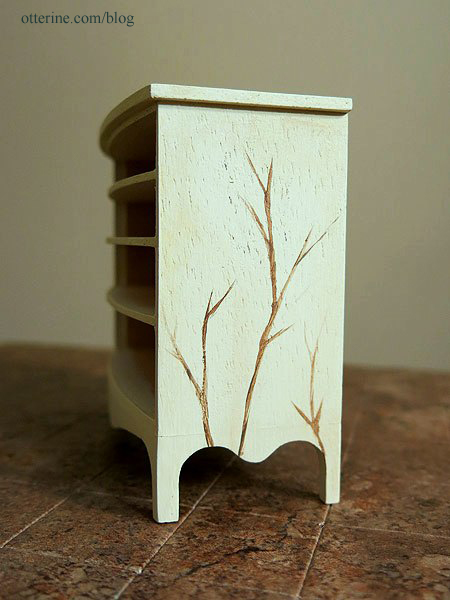
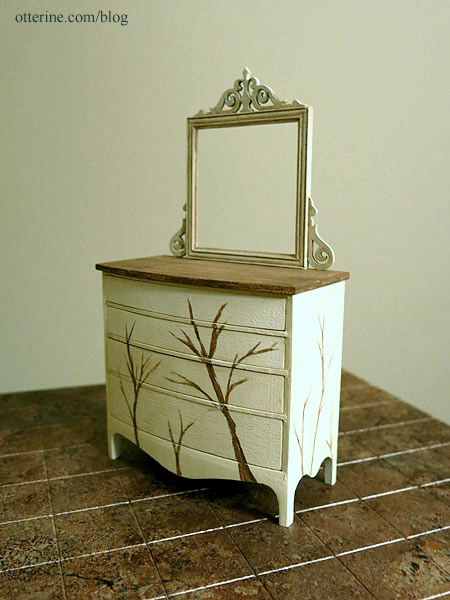
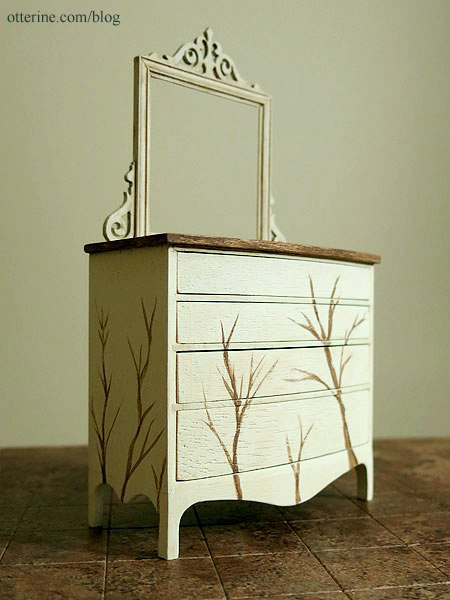
Continuing work on the fancy bow front dresser. As much as I loved the bare branches, I decided to go ahead with more painted details on the bow front dresser for the Heritage bedroom.
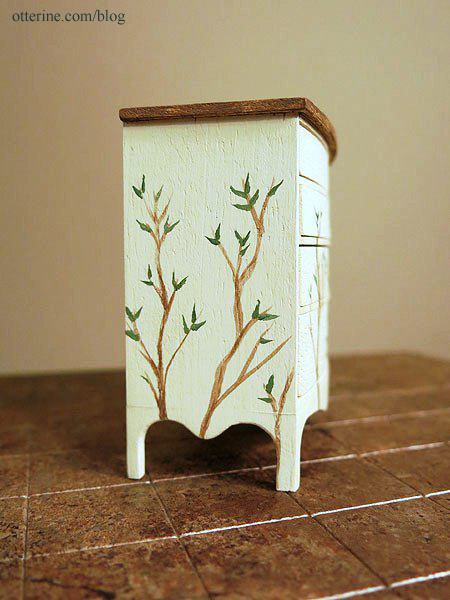
I added a smattering of leaves.
It softened the look overall.
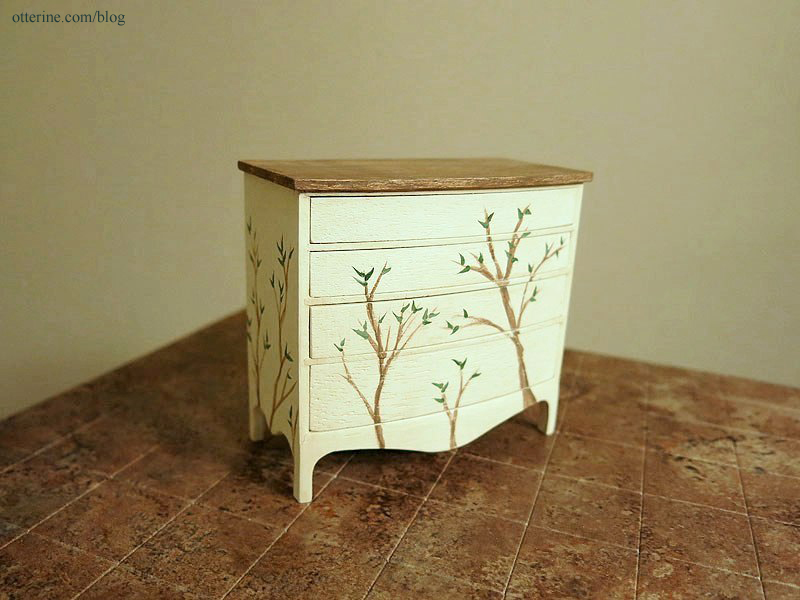
I added pale lavender flowers and then added a satin varnish. I would like to add a bird and left space for one, but I need to practice painting that small. The knobs are vintage hardware I bought from The Little Dollhouse Company at the Bishop Show.
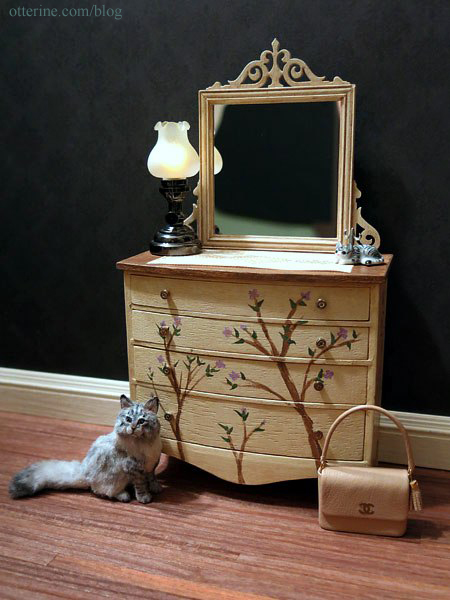
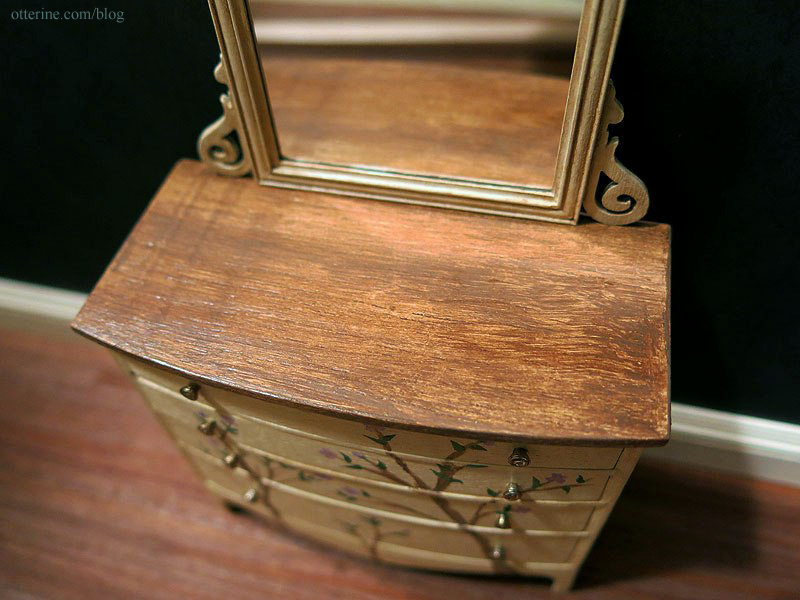
I love the worn wood top.
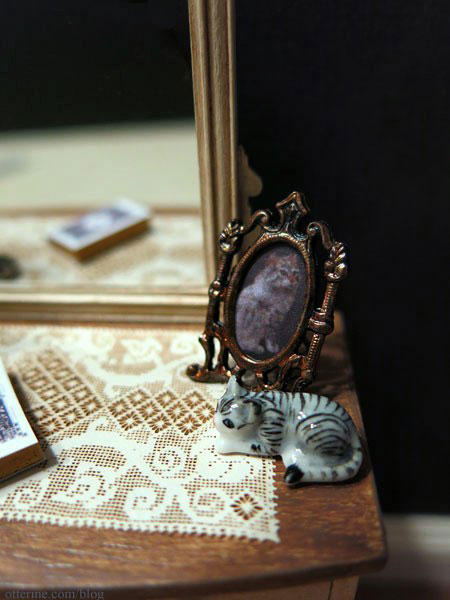
The paper lace doily is from Stewart Dollhouse Creations. The cat figurine, ring holder and doily were purchased at the local mini shows.
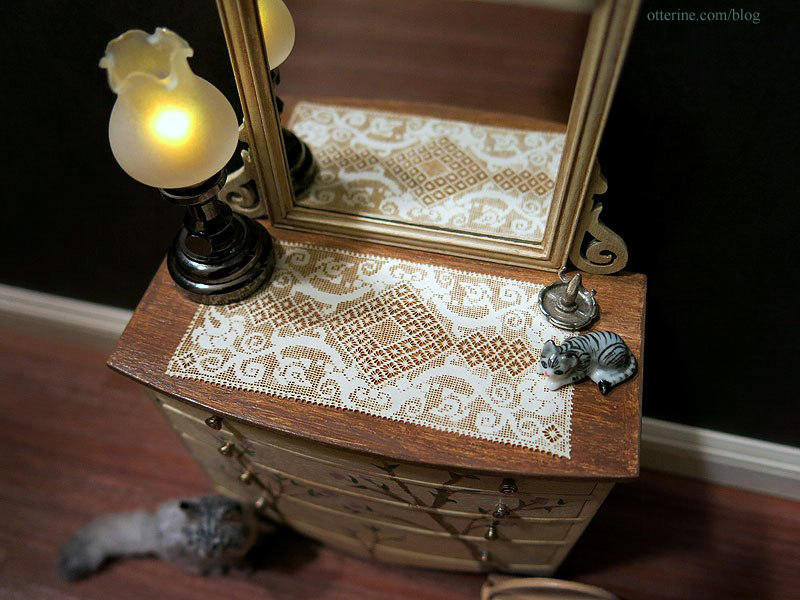
The Bentham Tulip Table Lamp by Houseworks is from miniatures.com, and I painted the LED to make the light more natural — a tip picked up on the Greenleaf forum.
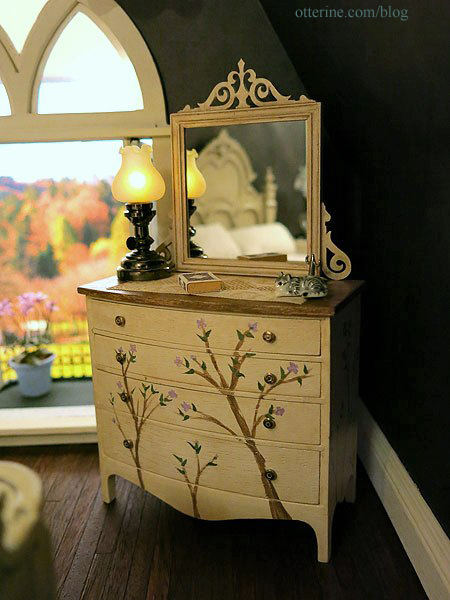
I think the dresser fits wonderfully with the bedroom furnishings.
Categories: Furniture, The Haunted Heritage
July 18, 2013 | 0 commentsFancy bow front dresser, part 2
I’ve worked more on the fancy bow front dresser including two coats of Tapioca paint by Folk Art.
The dresser construction left some gaps between the parts, so I spackled and sanded those seams before painting.
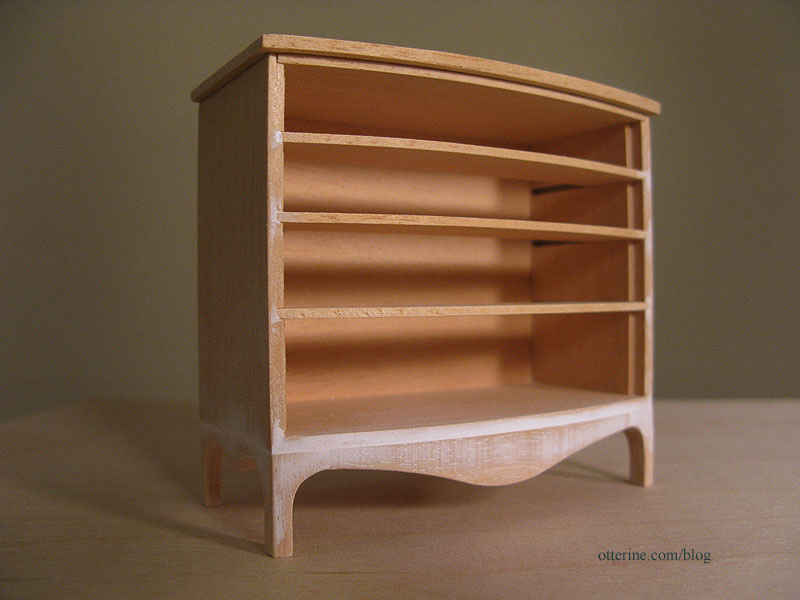
The dresser drawers have been sanded to fit. I’m always wary of that phrase. I bumped a corner on only one drawer, so I think I did pretty well.
The kit didn’t fit all that well in the front – the drawers were too recessed in comparison to the dividing panels. I added a shim of veneer to the inside back. This helped level the drawers in front by pushing them forward slightly.

I wanted a painted finish with branches, flowers and birds, so I bought some small detailing brushes for fine painting.

I added an aging wash and then painted on the branches. The nice thing about making a vintage painted dresser is if you mess it up, you just wipe away the paint. And residue just adds to the age and depth of painting.
To paint the front, I added the drawers.
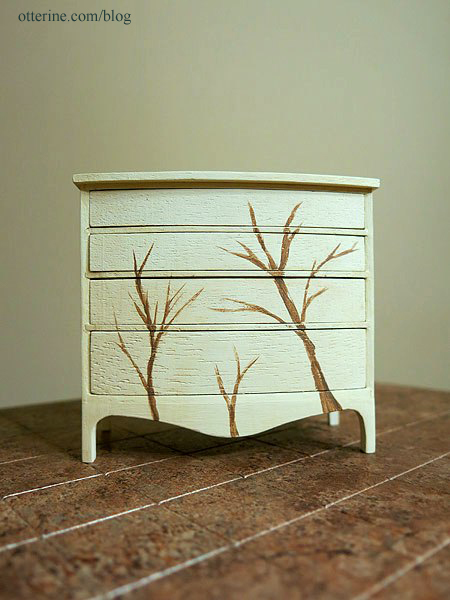
Once I had the branches painted, I masked off the top.
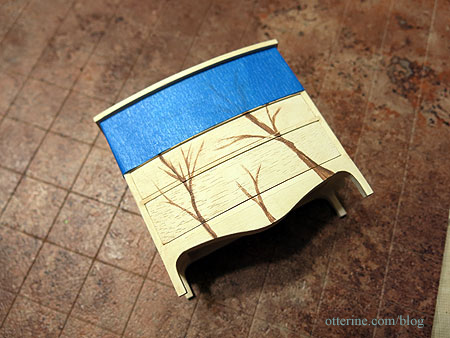
I painted it to look like stained wood. There are a few imperfections in the wood that I could not sand out in the initial construction, but it works well for a vintage piece.
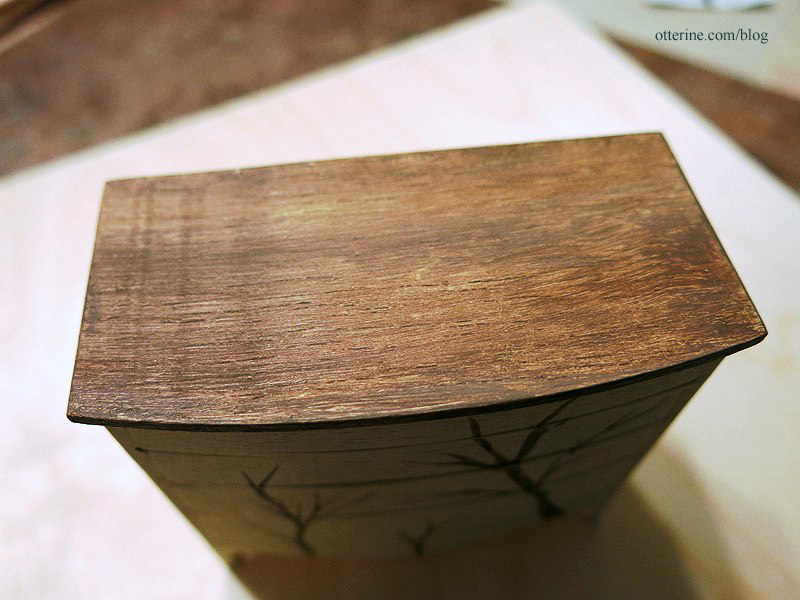
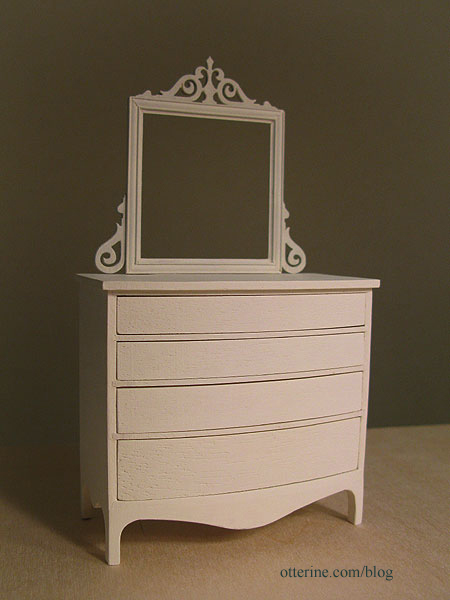
With the mirror propped in place, it looks like we’re getting somewhere.
I rather like it with just the branches, but I wonder if it looks too incomplete like this…hmm…
Categories: Furniture, The Haunted Heritage
July 13, 2013 | 0 commentsHaunted Heritage chimney, part 12
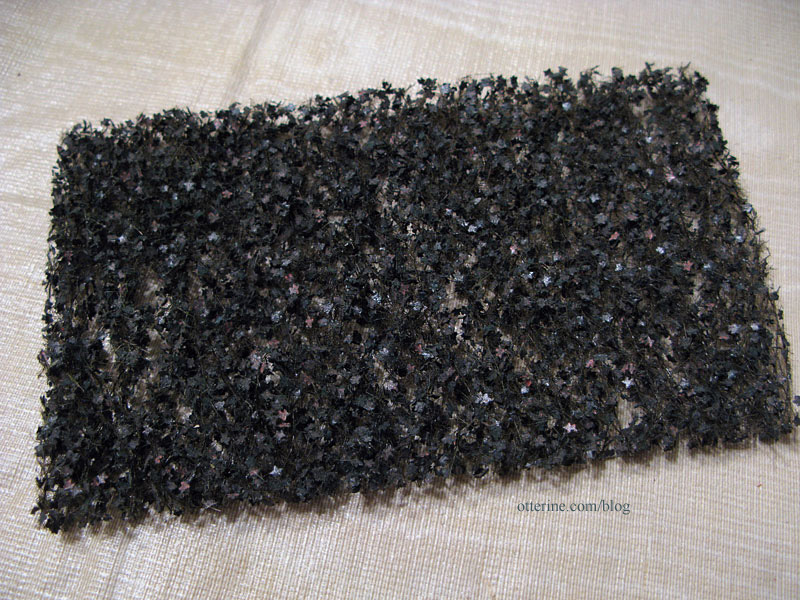
Completing work on the chimney. While I didn’t want to cover up all the lovely egg carton brickwork of the massive chimney, I did think some ivy was in order. You know I don’t shy away from cutting and shaping individual leaves, but I found something that not only looked realistic but made life easier. This is O-Scale (1:45) English Ivy from Scenic Express (Silflor Summer Ivy by Mininatur).
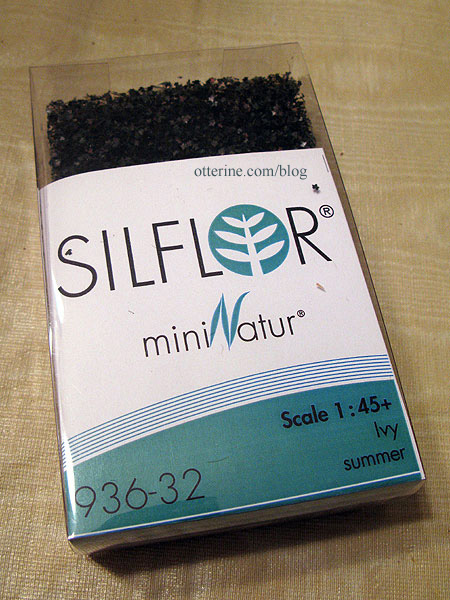
There are three sheets in the box. The leaves might be small for true 1:12 scale, but it worked very well. You cut and stretch it to create long vines.
I thought this store was called Scenery Express since I first started buying their landscaping materials, and that’s one of the web addresses that will get you there…but I just noticed that it is in fact Scenic Express. Maybe I always had it wrong or they changed the name or they just have two domain names for the same place. Regardless, they have a great selection of landscaping materials.
I didn’t overdo it and used just under one sheet of the ivy for the project, using Aleene’s clear gel glue to attach it to the house and chimney.
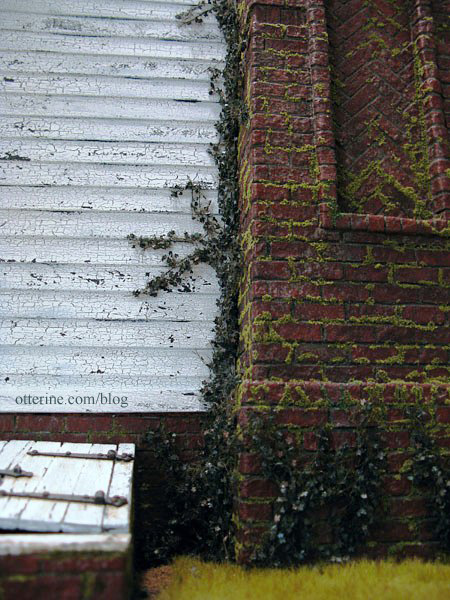
It disguises the awkward edge trim around the chimney.

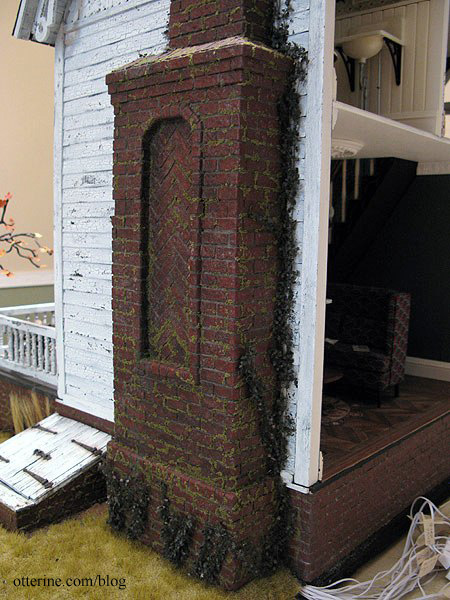
Here’s the back side of the chimney.
The chimney is now complete! :D
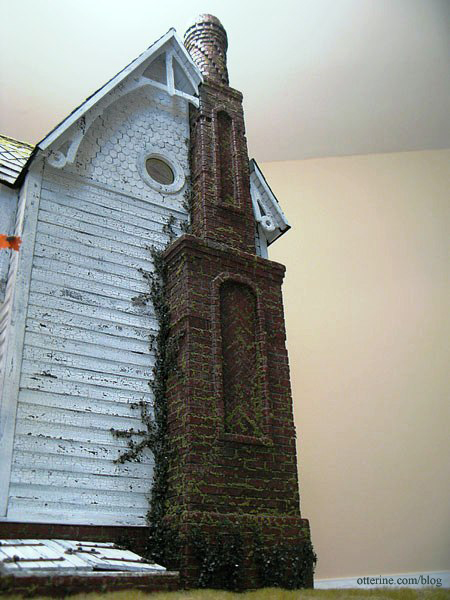
It amazes me how each little thing changes the look of the build.
Categories: The Haunted Heritage
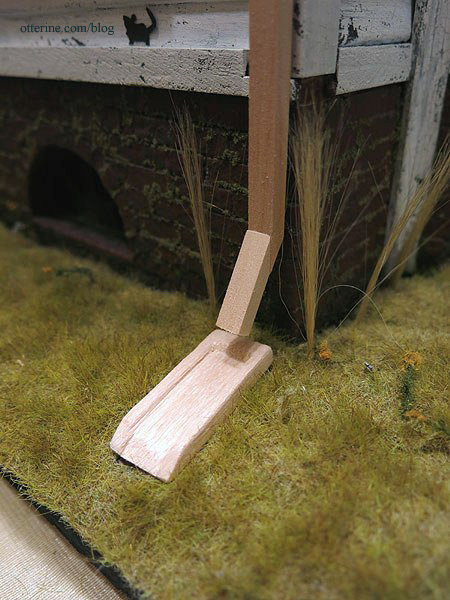
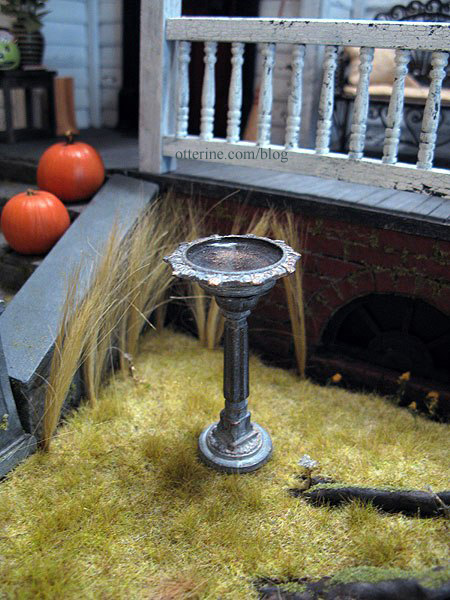
May 18, 2013 | 0 commentsHeritage – lawn ornaments
I added a beautiful aged metal birdbath by Island Crafts & Miniatures to the front lawn. The last time I made an aquarium, I used some leftover Acrylic Water resin to fill the bowl. The birdbath is from Dejoux Miniatures.
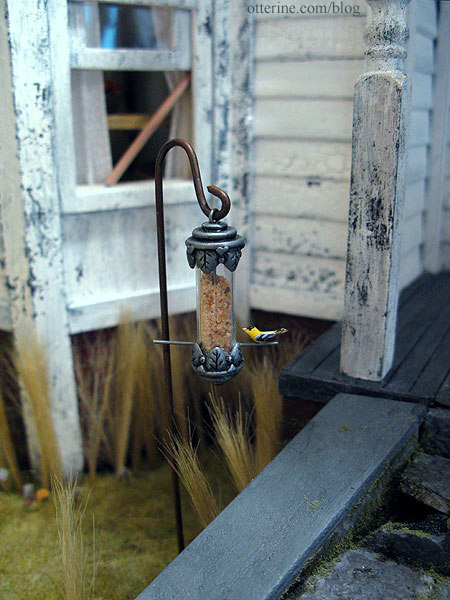
I also planted the shepherd’s hook on the side of the stairs to hang one of my birdfeeders. :]
Categories: The Haunted Heritage
May 17, 2013 | 0 comments


NOTE: All content on otterine.com is copyrighted and may not be reproduced in part or in whole. It takes a lot of time and effort to write and photograph for my blog. Please ask permission before reproducing any of my content. (More on copyright)

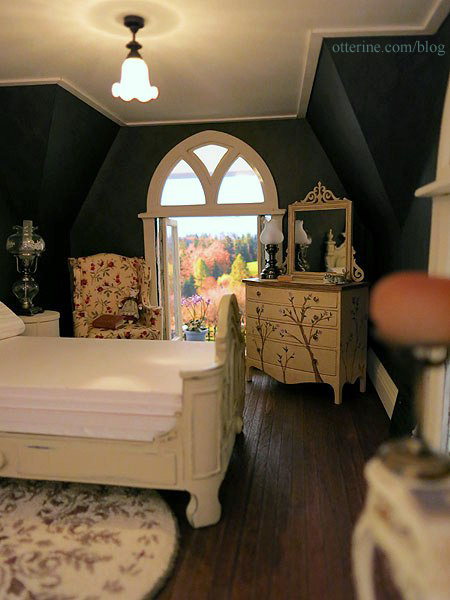
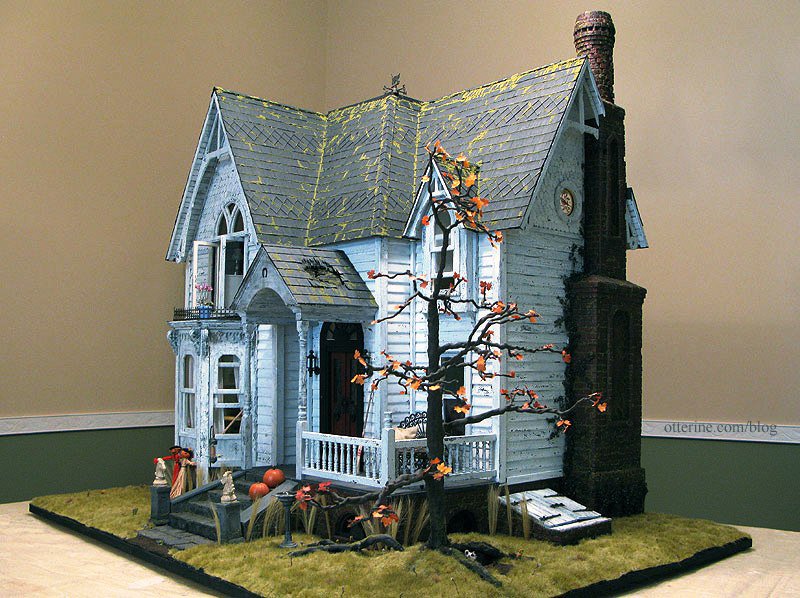
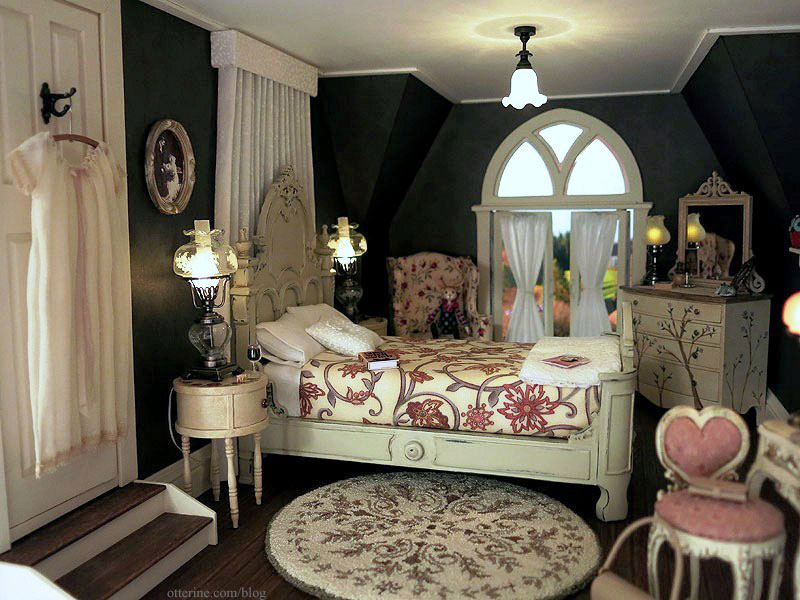
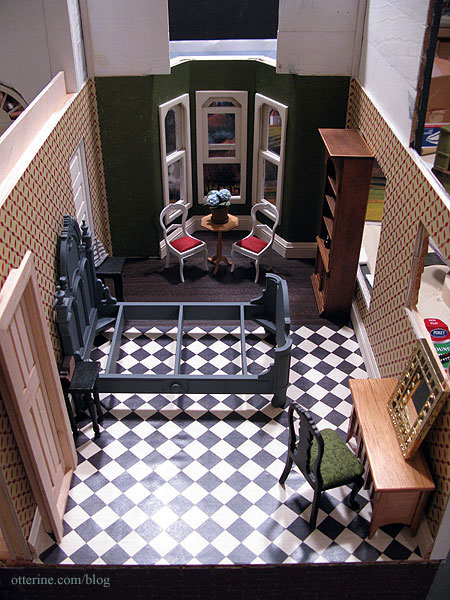
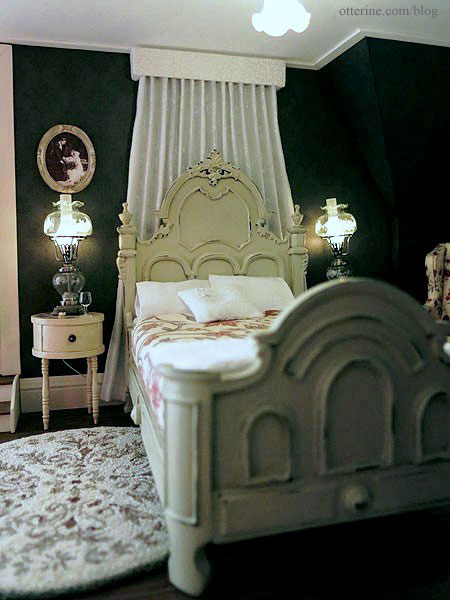
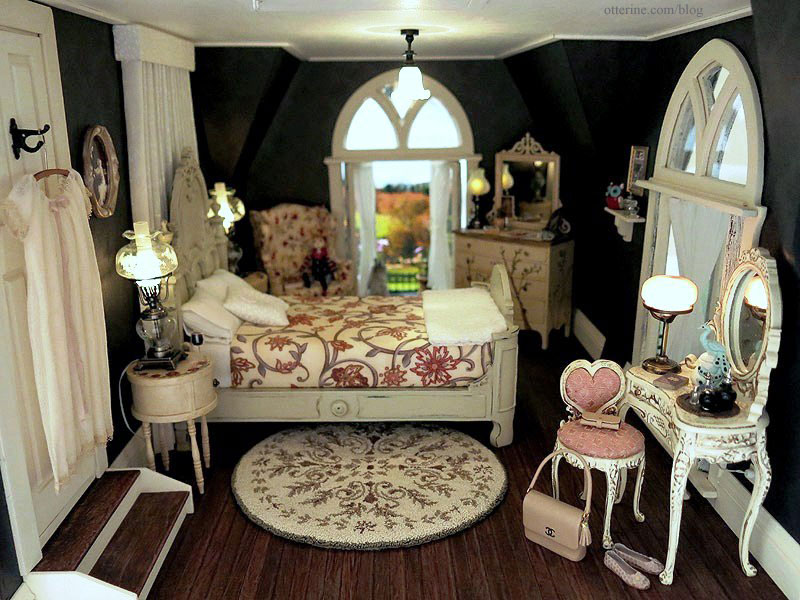
The Haunted Heritage – Grandma’s resplendent bedroom
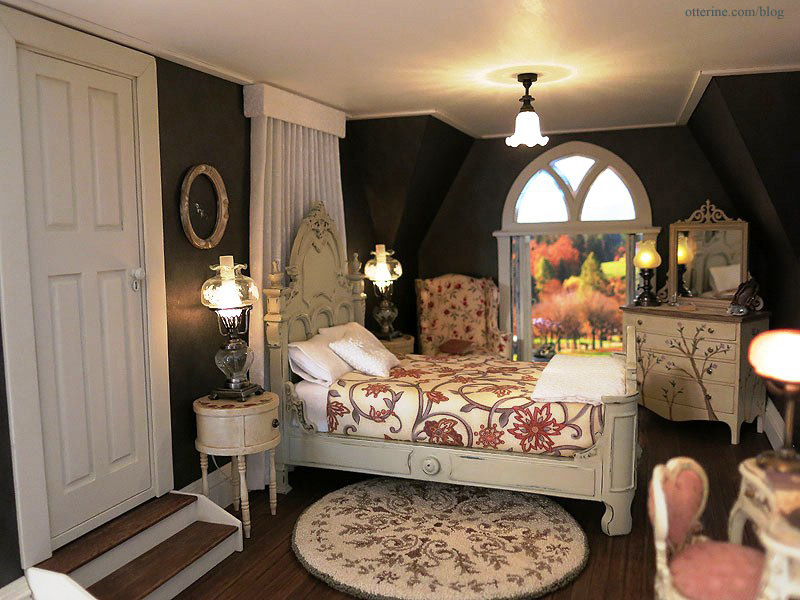
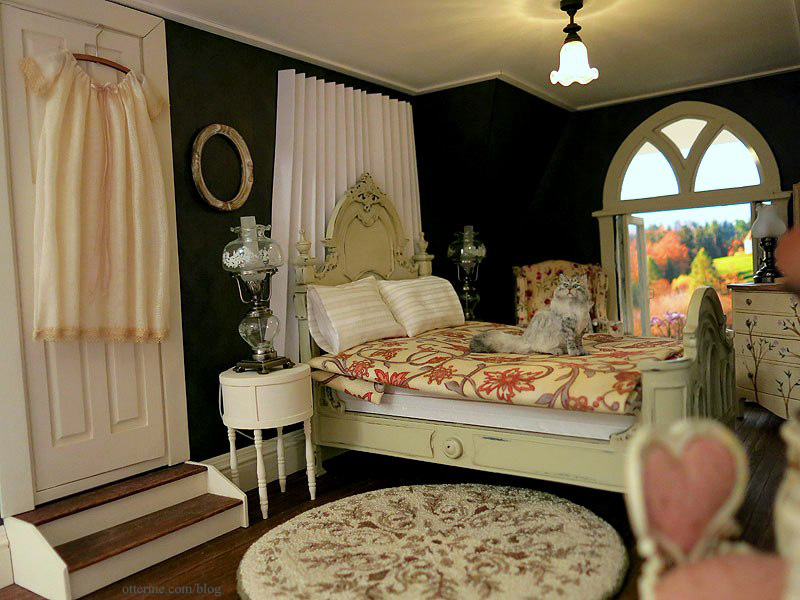
I just adore this room with its feminine décor and the play between light and dark.
I planned the initial layout using the kitchen since the rooms are the same size and shape.
By the time I started working on the bedroom, the plan had changed only slightly.
There was very little done in the way of structure changes, but this room was definitely a challenge on many levels. First, there were a lot of angles from the roof structure, which made for interesting wallpaper application. Second, since I had raised the ceiling height in the parlor but left the kitchen ceiling in its original position, the door from the hallway was too far off the ground to be a believable step. And, third, the swinging window pieces from the original kit were in poor condition (the nature of old diecut parts) and I wasn’t yet a whiz at the scroll saw to replicate them.
The wallpaper is Out of Time by Recollections. Not only did I have barely enough to paper the room (and the paper was then discontinued), it was nearly impossible to see the subtle black on charcoal pattern in a dark dollhouse room. I made color copies of the paper for a dry run to get the layout down before cutting the final paper.
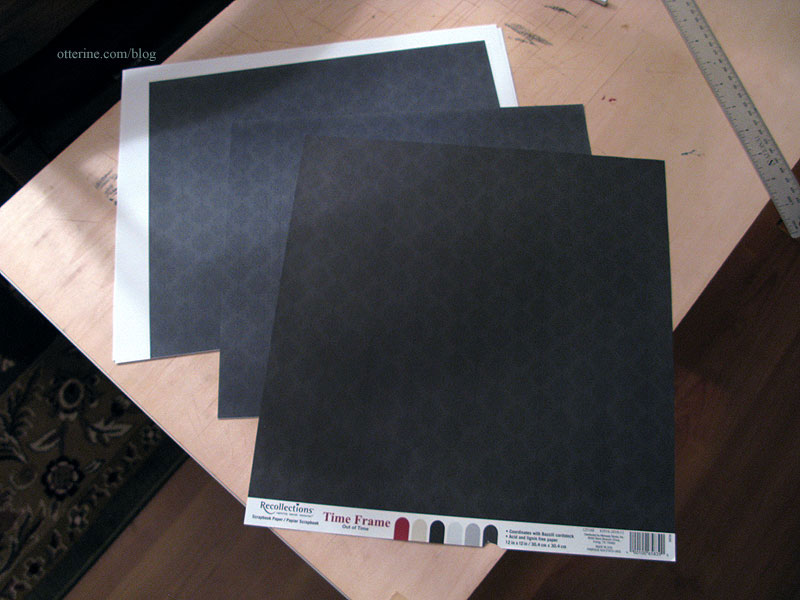
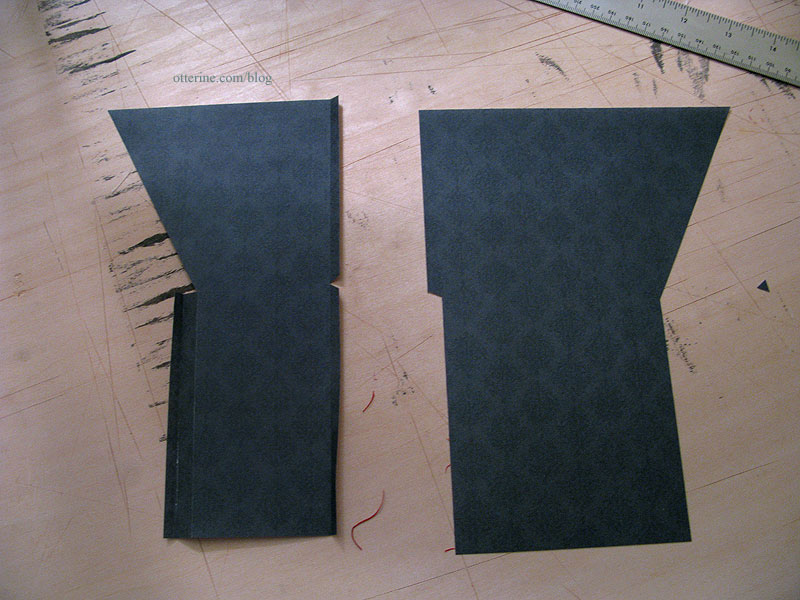
Installing the final paper proved to be easier than expected because of the prep work I did.
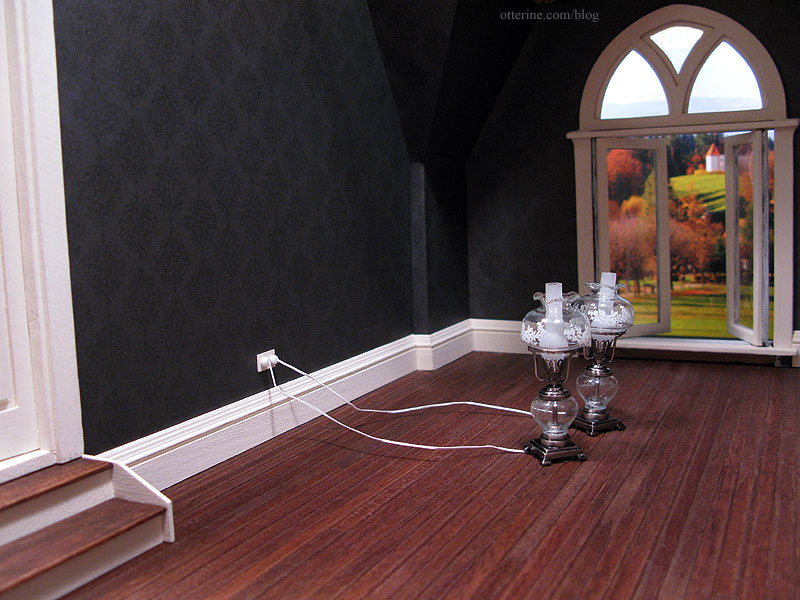
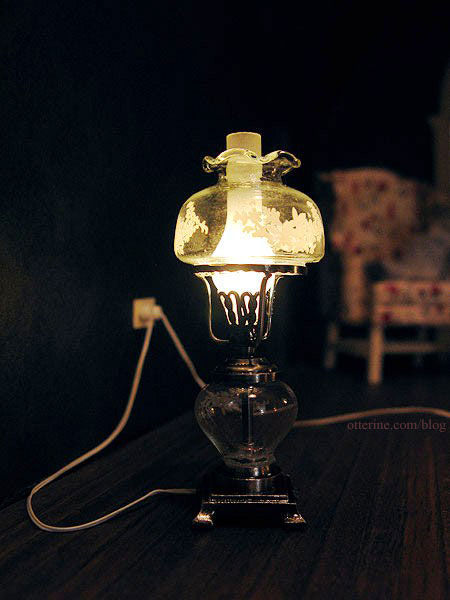
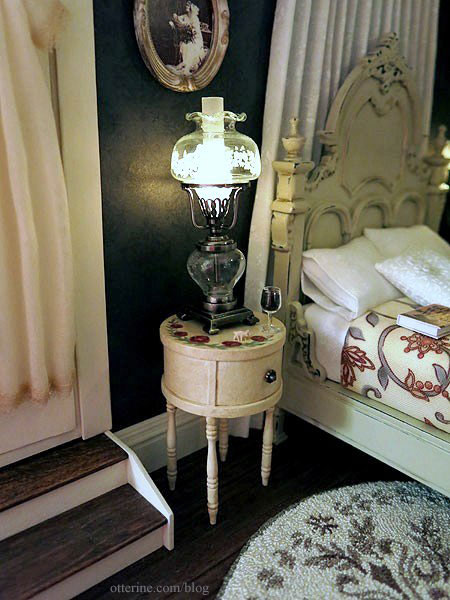
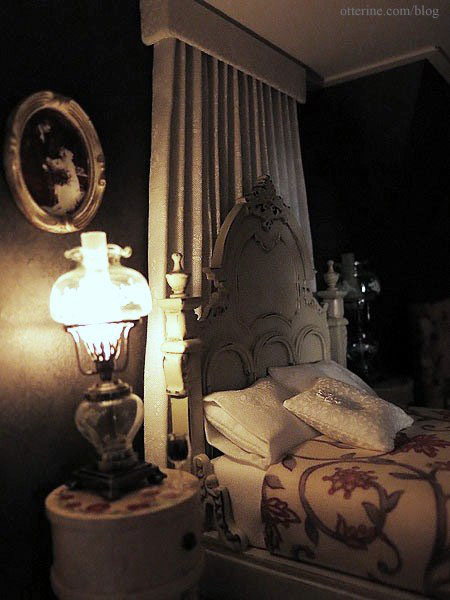
The bedside lamps are from Heidi Ott. I love these lamps!
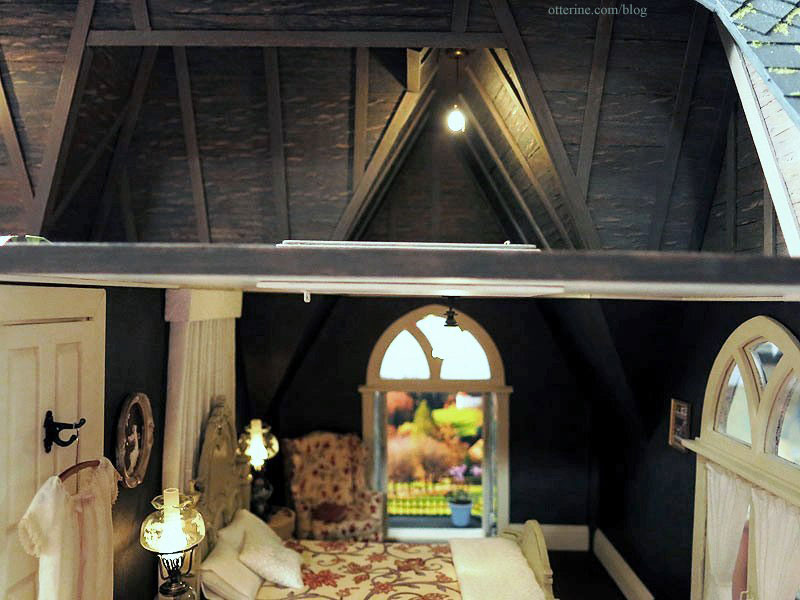
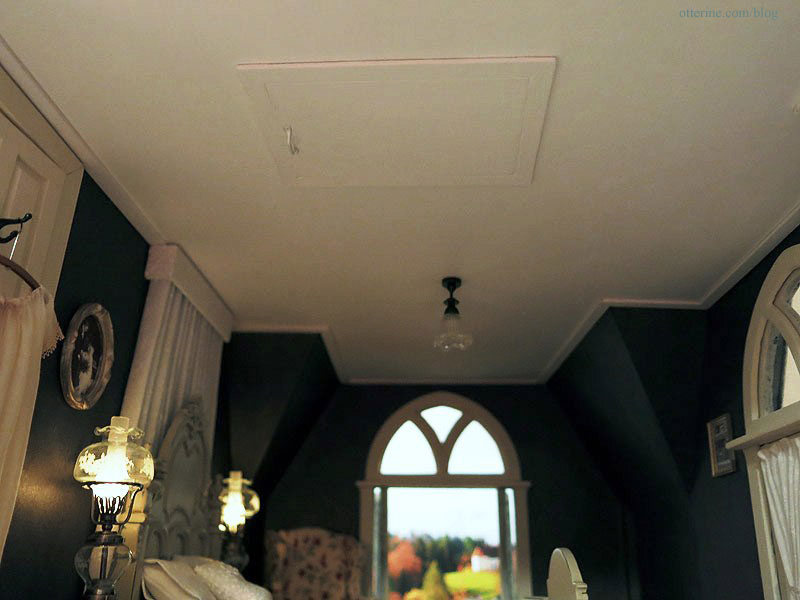
The ceiling light is a Ray Storey fixture. I had thought about using a small, simple ceiling medallion here with the fixture, but when I looked at the resin piece I had on hand more closely I just didn’t like it. It was rough and uneven, and spending a lot of time to get it in paint-ready condition wasn’t something I wanted to do. Besides, it is a relatively short ceiling so it probably would not have been a good idea to lower the light fixture any more.

I installed the lower half of the faux attic stairs toward the open back.
It’s the only place it really made spatial sense, and it’s the least intrusive place in the scene. I painted the door, trim and handle white to make it blend even more.
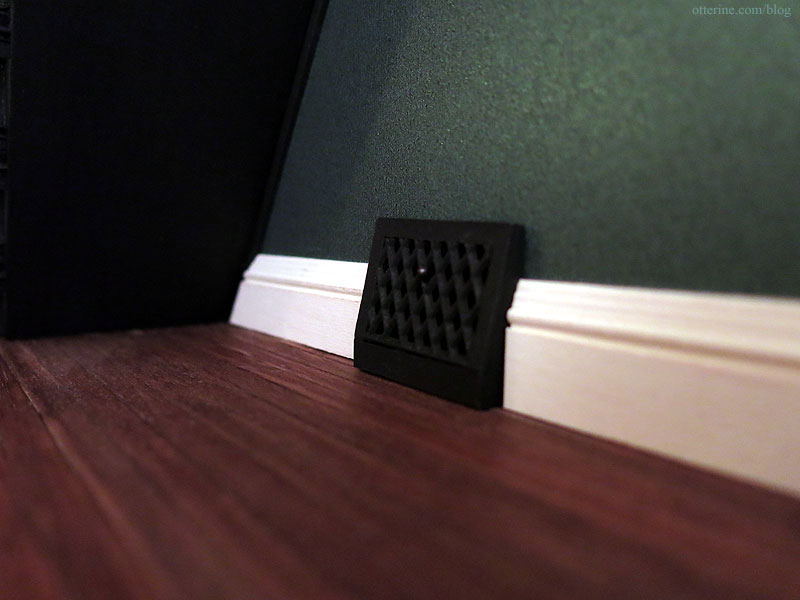
I added another baseboard heat register (my bash of a tutorial by Kris at 1 Inch Minis), this time by the window on the outside wall. Having it on the wall behind the bed would have defeated the purpose of adding the detail at all, and the double outlet was already on the inside wall besides.
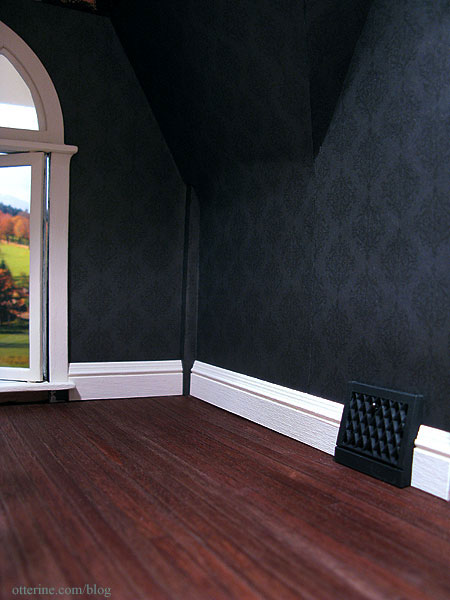
When Lyssa and I went to the Art Institute when she came for a visit last October, we naturally saw the Thorne Miniature Rooms first. In one of the fine bedrooms, there was a perfect tiny staircase. :] I already had a vague image in my mind of how to address the problem of my floating door, but this helped solidify the idea.
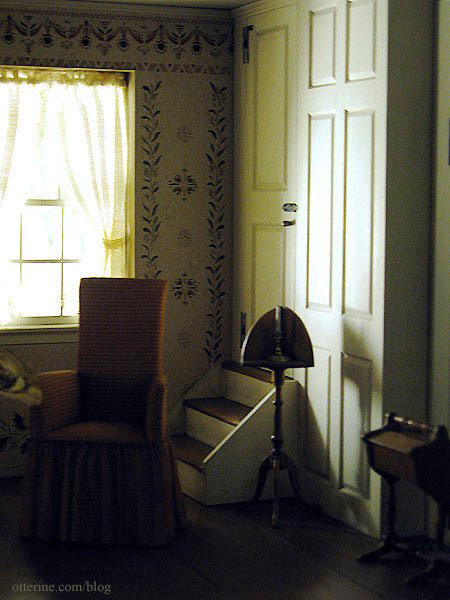
I like how the top step is even with the door…as though it were a continuation of the floor on the other side. This makes sense to me, so that one doesn’t open the door and immediately fall down a drop off.
I built my stairs from foam core board and basswood, then stained and painted to match the flooring and trim.
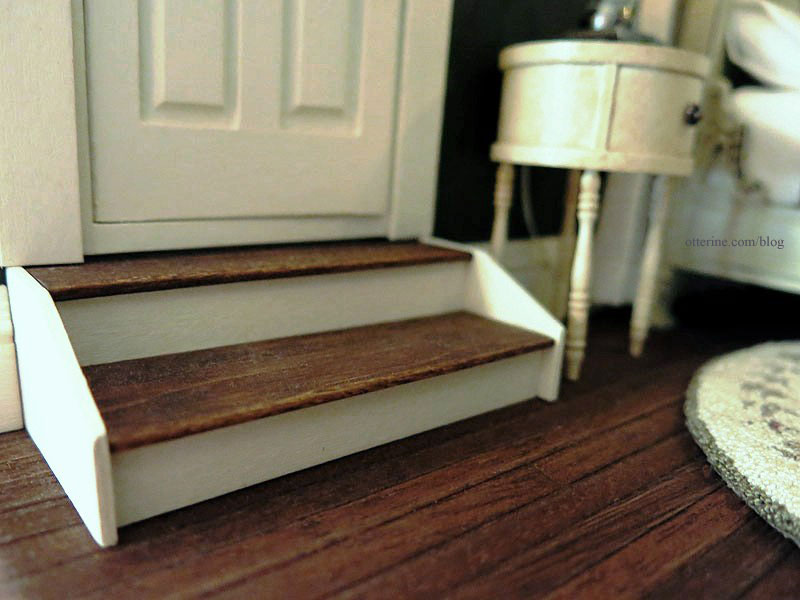
They are exactly that sort of vintage detail you often see in old houses.
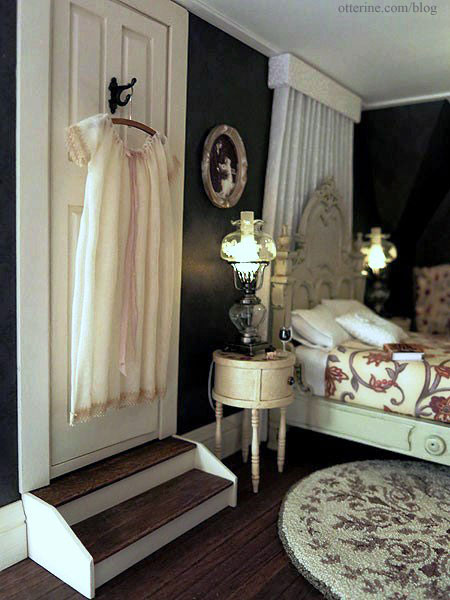
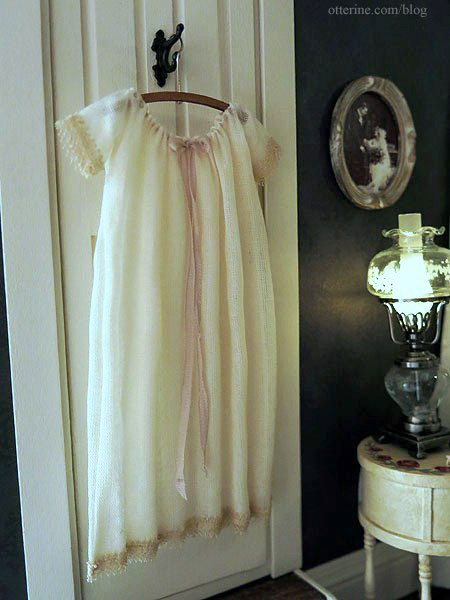
This gorgeous nightgown is from Janet Middlebrook – so perfect for grandma and the Heritage. Simply beautiful work!
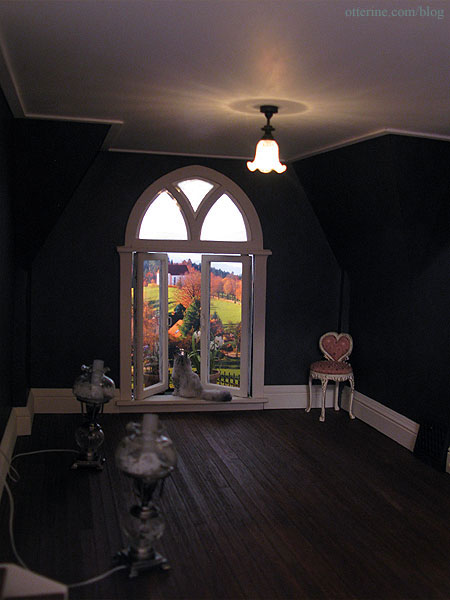
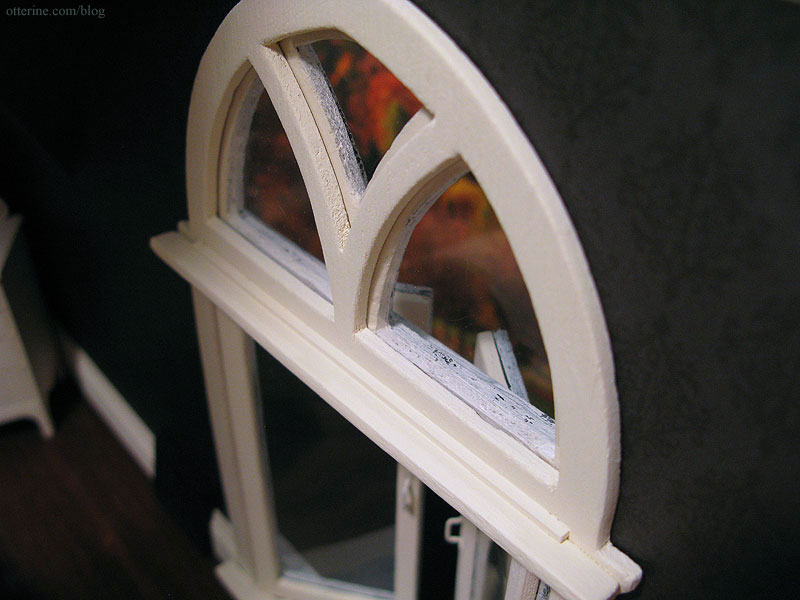
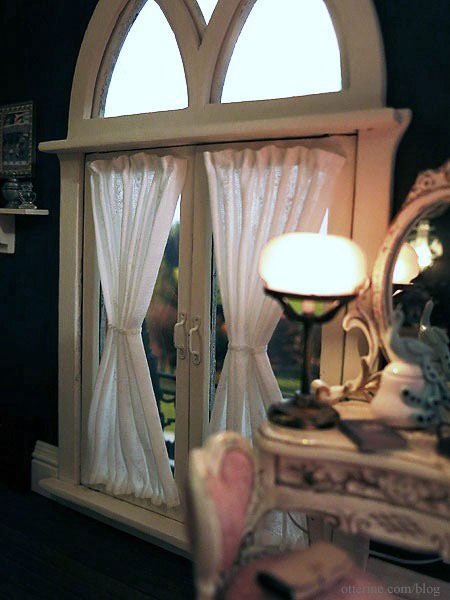
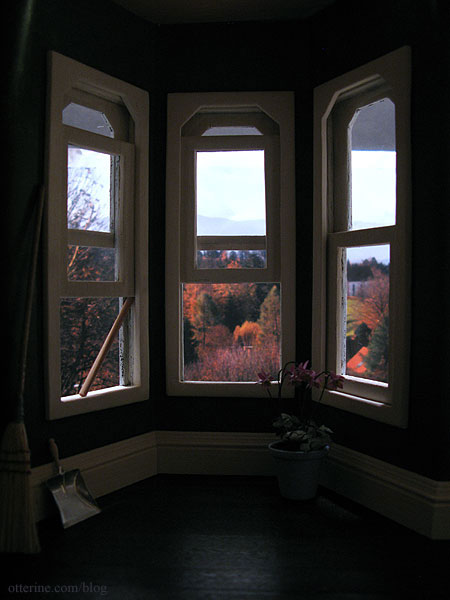
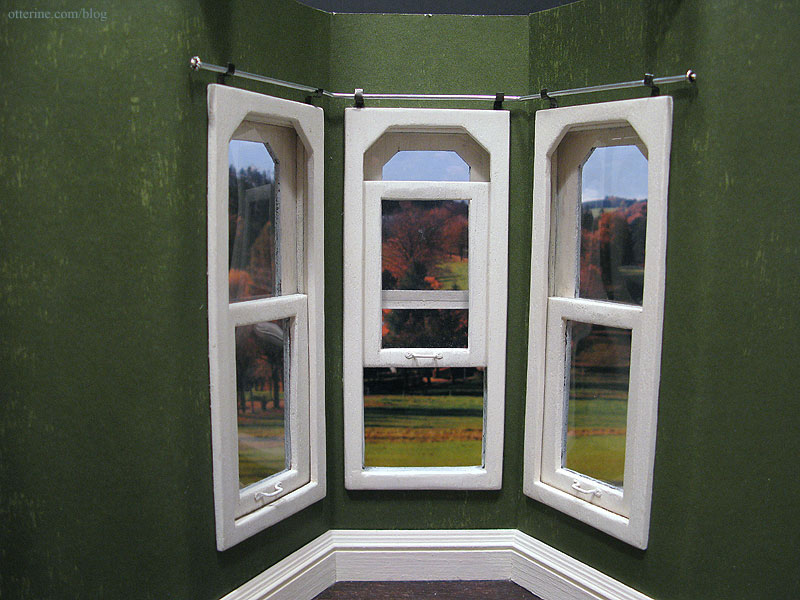
I was able to salvage the swinging windows from the original kit parts. Now that I know how to use a scroll saw, I would be able to cut new ones without an issue. At the time, however, I thought making all new parts would be more trouble than it was worth.
There were slight gaps just below the arch windows for both swinging windows, so I added thin pieces of trim to hide these.
I also added window pulls. These were brass but have been painted Vintage White by Folk Art. Nothing says old house like painted over hardware.

I added individual panels to each window, mimicking the look of rod pocket top and bottom curtains. I used relatively sheer printed white cotton fabric. I normally don’t glue the seam allowances on the edges, but I did for these. I turned under 1/8″ all around the panels, used pins to shape them on a foam core board and sprayed them with Aleene’s Stiffen Quik. I added fairy lace around the middles and then glued the panels directly to the windows. I wanted to make curtain rods, but the space was just to tight to fit them properly.
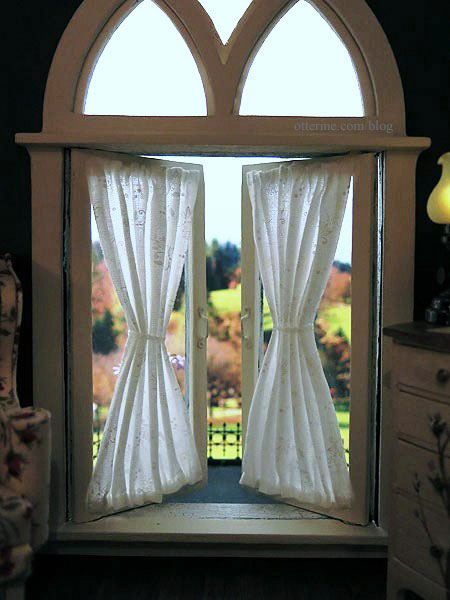
They add just that little something that completes the windows without overpowering or detracting from the beautiful arch windows. There’s still a hint of the view, and the windows can still be opened wide.

The side window closes all the way with some tension between the two sides, but I was just happy they worked at all.
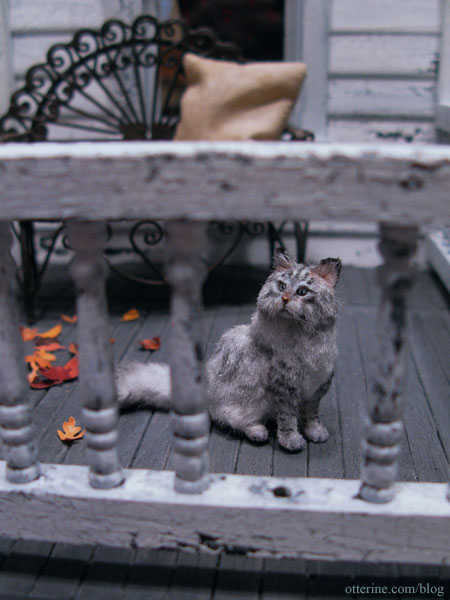
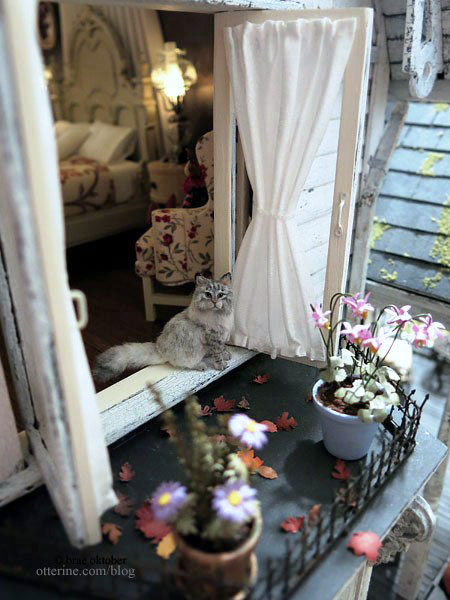
I get the feeling Ophelia spends a lot of time on the bay balcony. :D
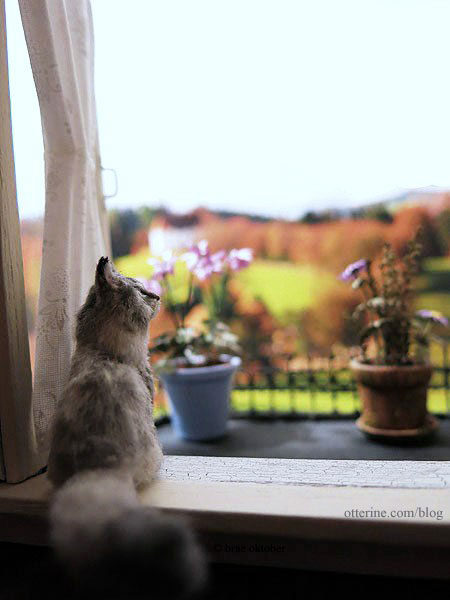
Pretty kitty.
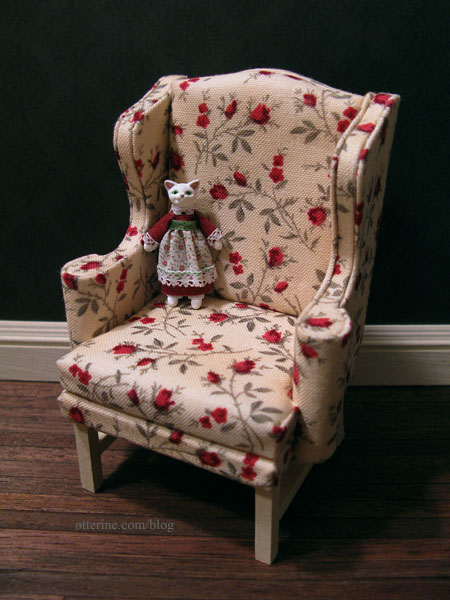
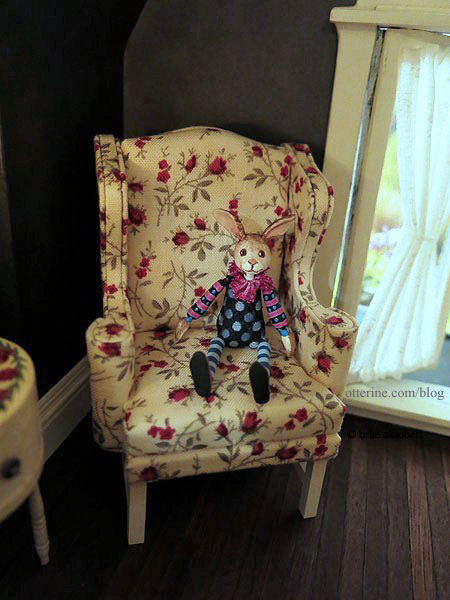
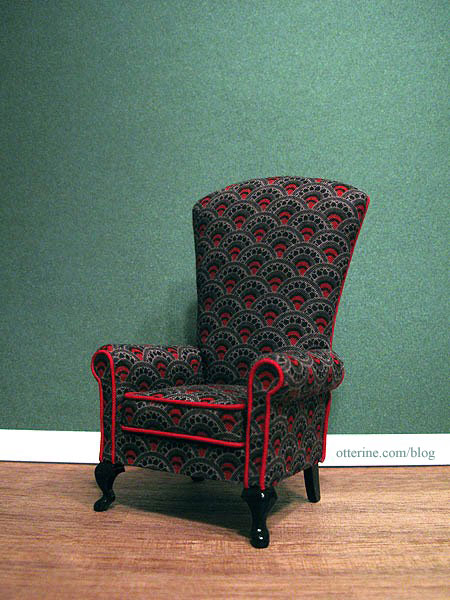
Grandma’s comfy chair was made from a House of Miniatures Chippendale Wing Chair kit.
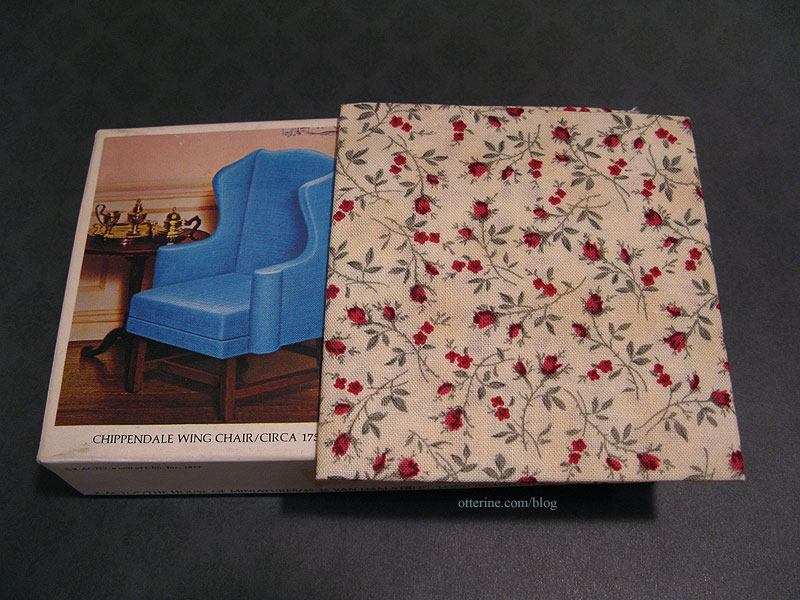
I think the chair turned out very well and I’m so pleased with it. Using patterned fabric helped hide any inconsistencies that the solid blue fabric included with the kit would have likely accentuated. :]
Mr. Rabbit is from K. Kuti Designs.
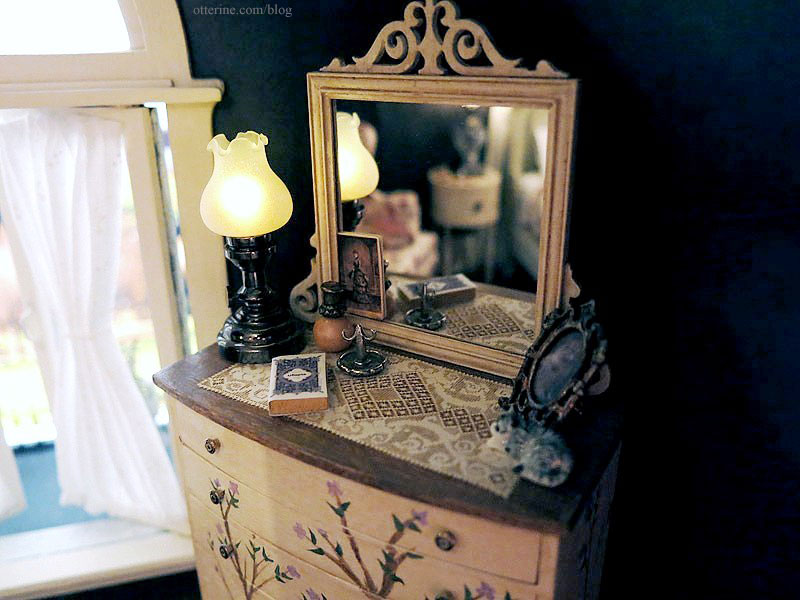
The dresser was made from a kit I picked up in a furniture lot. I made no changes to the base kit, though I did add a mirror made of frame strip wood.
I hand painted the branches, leaves and flowers. I would like to add a bird and left space for one, but I need to practice painting that small. The knobs are vintage hardware I bought from The Little Dollhouse Company at the Bishop Show.
I love the worn wood top.
The paper lace doily is from Stewart Dollhouse Creations. The cat figurine, ring holder and doily were purchased at the local mini shows.
The Bentham Tulip Table Lamp by Houseworks is from miniatures.com, and I painted the LED to make the light more natural — a tip picked up on the Greenleaf forum.
I added a few more items in the final setup. The vintage photo on the mirror is from L Delaney, and the bottle is the remaining one from Thyme Soul Miniatures.
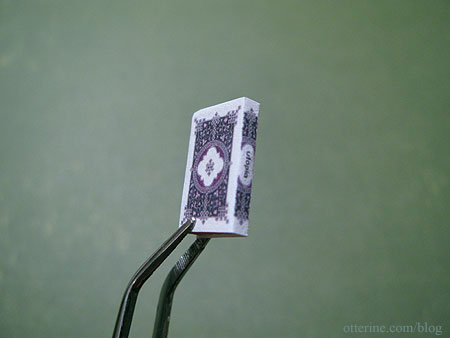
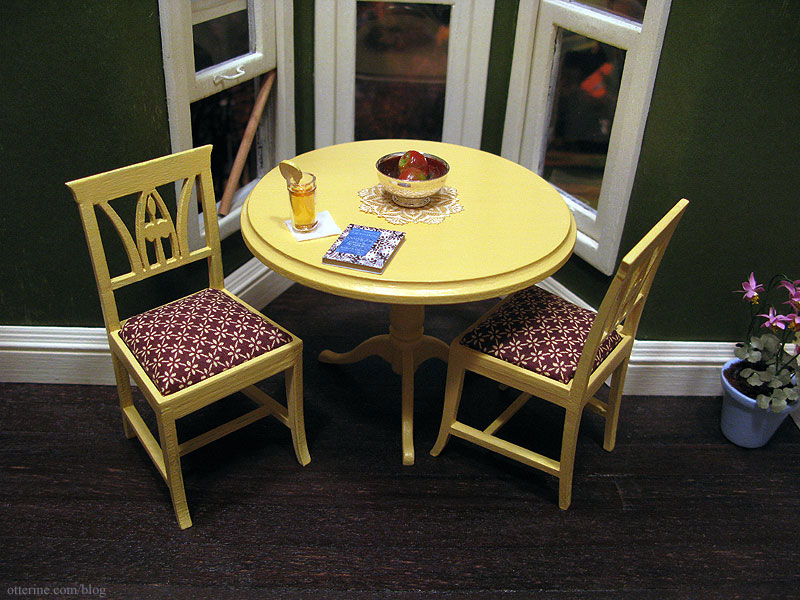
Utopia by Thomas Moore is a book first published in 1516, though I don’t believe this is the original cover. Ever After is one of my favorite movies for its fun take on the Cinderella story, not to mention the costumes, and this book plays a part in that movie. When I first stumbled onto the cover during my online searches, I knew I had to use it.
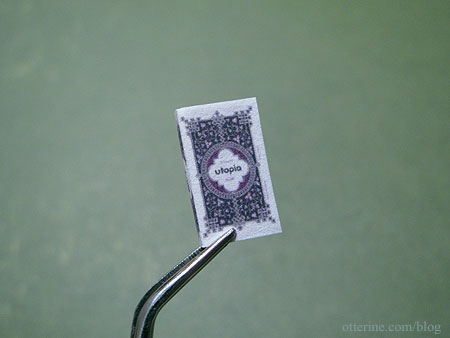
I created the back by mirroring the front, removing the text and copying some of the border design elements into the middle. The spine is a section of the front cover, with text replaced.
When I bought Ophelia from *Reve*, there was a photo in the listing that I loved. I asked the artist if I could use the photo and was granted permission. I edited the image in PhotoShop and printed a teeny tiny copy for a vintage looking frame I had.
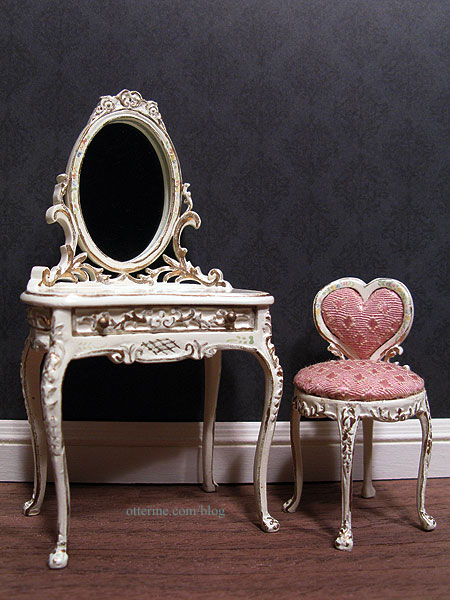
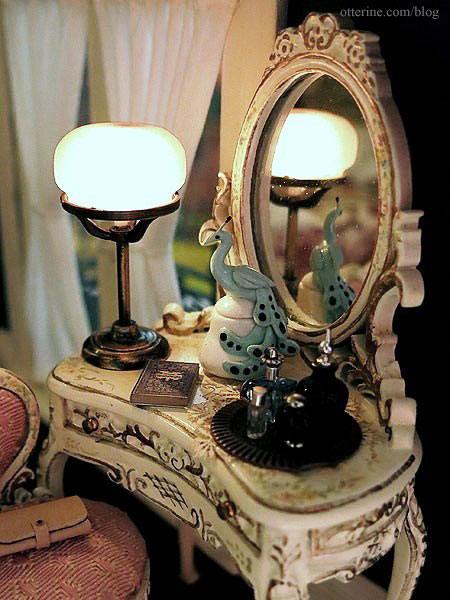
The beautiful Bespaq vanity and heart-shaped chair came from Small World Miniatures on eBay. I think the pieces look wonderful against the wallpaper.
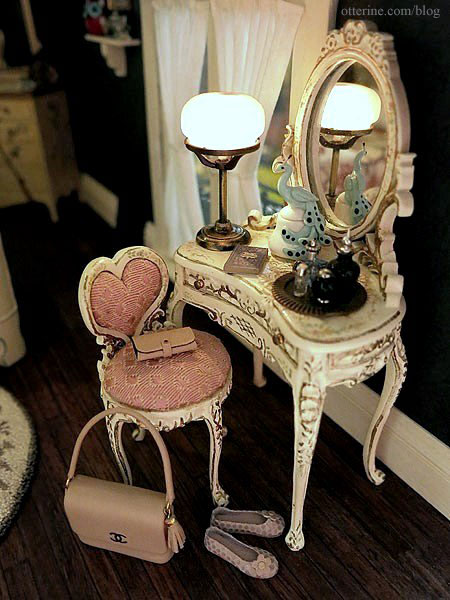
The hand painted details are incredible.
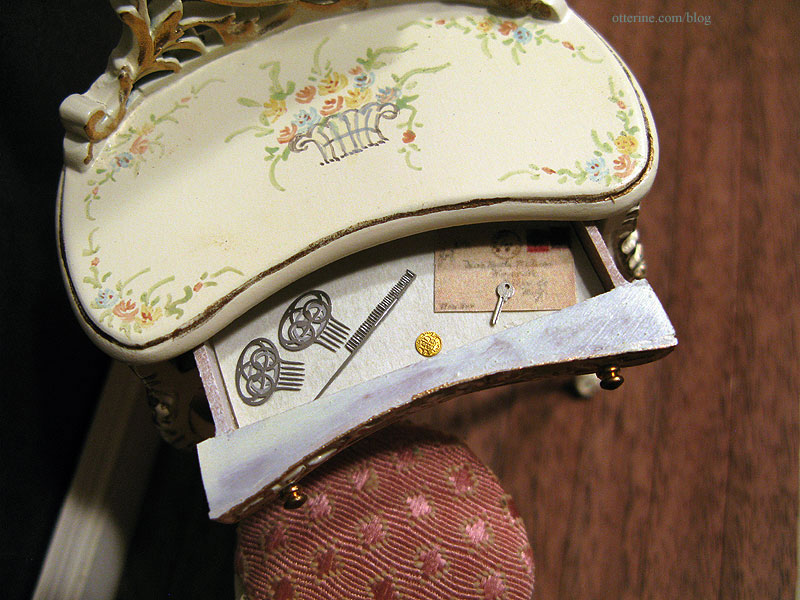
I’ve lined the drawer with pretty parchment paper and added a few things I had on hand. The laser cut hair combs are from The Dolls House Mall. The letter is just a paper cutout for now, but I’ll have to make a pretty opening envelop and letter for the drawer. The laser cut key is by le mini di Pierliugi, purchased at one of the Bishop shows. Grandma’s lucky gold coin is made by Phoenix Models.
I chose vintage inspired accessories for the vanity.
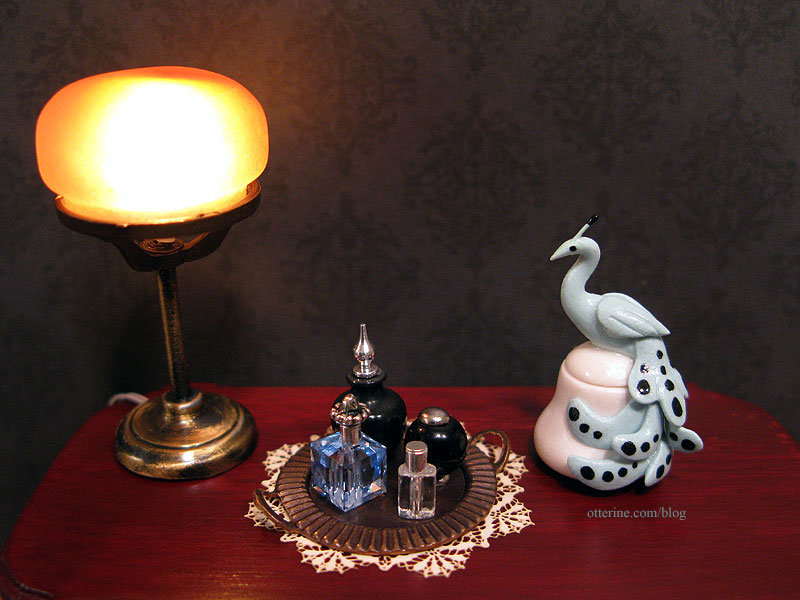
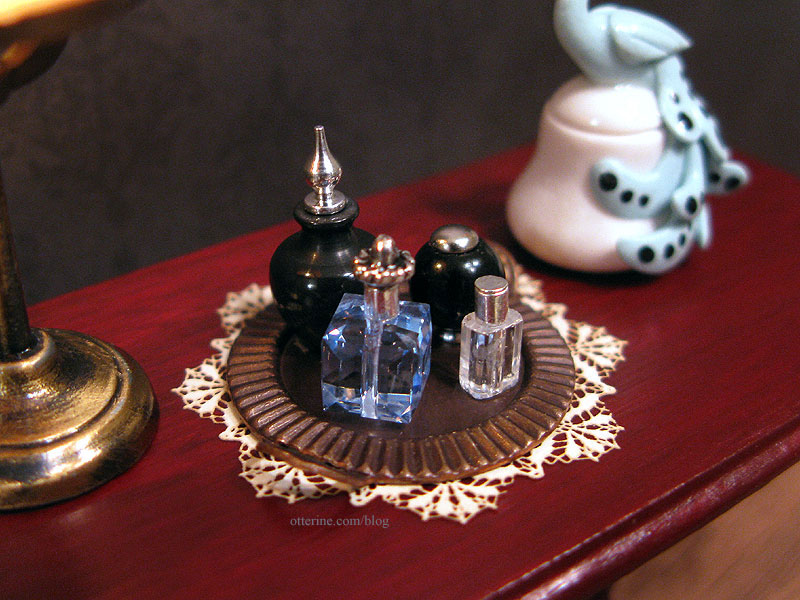
The vanity tray I made fits perfectly on one side with the C. Rohal peacock box and Art of Mini lamp on the other. Not much room for anything else besides a small book. At first I thought the lamp might be too big for the vanity, but I rather like it. It has a warm glow and the perfect vintage feel.
The tray is a jewelry finding that had been completely flat. I used pliers to bend the handles up. The tall black bottle with the silver stopper is a turning from CW Lubin, but the others I made. The blue crystal bottle has a silver crimp bead and a fancy head pin to make the topper. The round black bottle has an earring stud for a base and a brad as a lid. The clear bottle has a silver crimp bead and a flat head pin for the topper. All are attached to the tray with mini hold wax.
The Italian leather shoes are from Patrizia Santi.
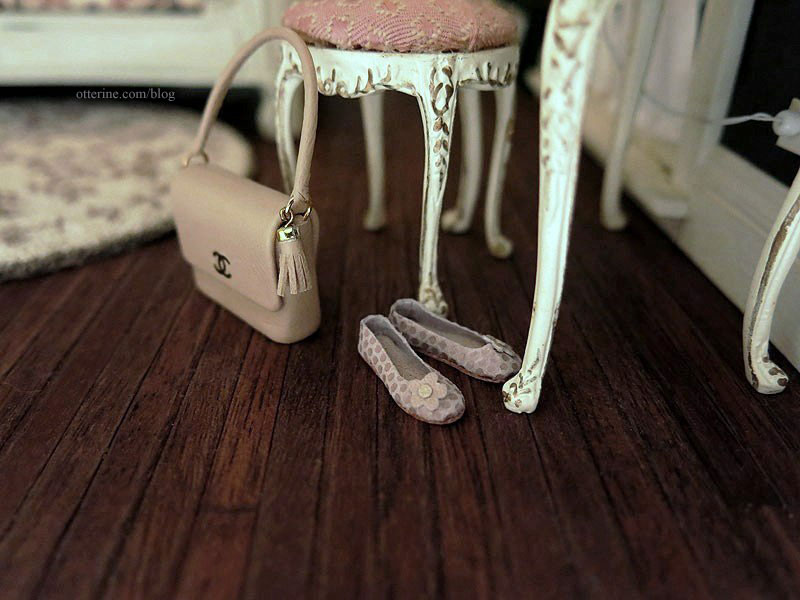
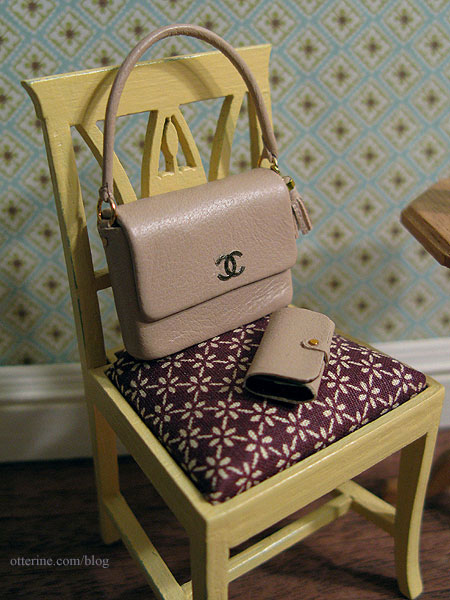
The pale pink Chanel replica handbag and wallet are from Dollhouse Ara. They are so well made and have a nice weight to them. I chose this set for the Heritage since they are a nice classic style that shouldn’t interfere with the era of the house. Grandma has good taste! :D
The Bespaq bed started as shiny mahogany with pink chenille bedding that was too large for scale.
After the makeover, you’d barely recognize it.
I sewed some pillows and made pillowcases from the same sheer white floral fabric as the sheets. I added one small white printed floral pillow to complete the bedding. It has a tiny venise lace flower attached in the corner.
I made a small lace throw from some open weave fabric. It is full sized to cover the entire bed when opened, but I’ve pressed it flat to sit at the end of the bed as an extra blanket for those chilly autumn evenings. :]
Ophelia has found her favorite spot on the bed. :D
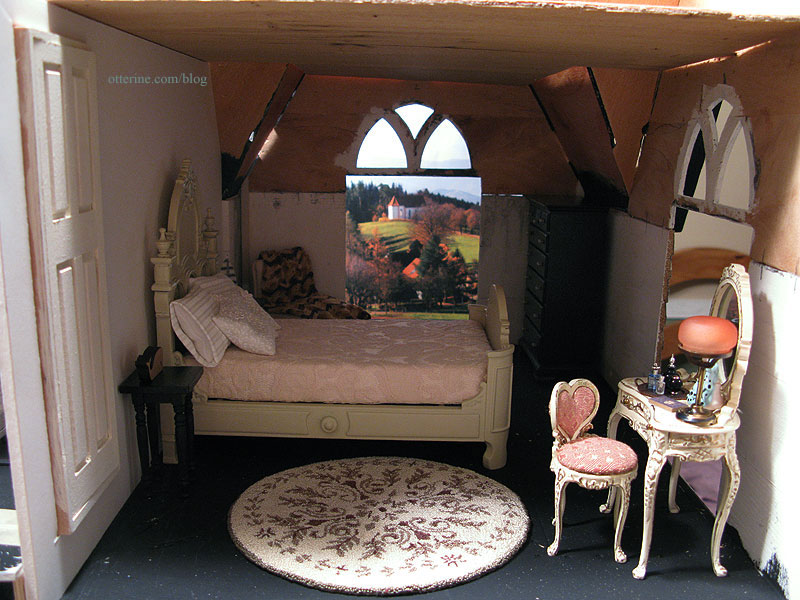
Unfortunately, the wallpaper buckled months after installation (seen in the above photo). I didn’t want to redo the whole wall, so I chose to make a wall curtain, a brilliant suggestion from the Greenleaf forum. The glue smear inside the oval frame is where I repaired the bubble that still would have been visible even with the wall curtain panel in place. Full process here.
I needed a photo to fill the oval frame that would mask the repair seam. I thought a 1920s wedding photo would be perfect, but I didn’t have any in my own family to use. I searched online and found this wonderful photo from Rick Zolla, who granted me permission to use it for the Heritage. :D I edited it in PhotoShop – adding some background to the left of the man and at the top of the photo, then feathering the border into an oval shape.
It fits perfectly with the ambiance of the room. I love the relaxed pose and setting…such a great image!
So, the problem turned into a happy accident since I love both the curtain and the new photo frame.
The antique drum nightstands were made from the round stands that came with my artist models, 1 1/2″ x 1/8″ wood circles and Houseworks 1 9/16″ long spindles.
I painted them with a base coat of Tapioca by Folk Art then added an aging wash of light brown. I then painted the green vines, followed by red and yellow for the roses. I opted for doing mirror image painting so they would look more like a planned set than two of the same table. The knob is the fancy end of an antique copper headpin.
There’s not much room on them for anything besides the lamps, but it all seems to work well together. Looks like grandma is going to have a glass of port and read for a bit.
This was the perfect place for the smallest piggy I’ve ever seen! :D
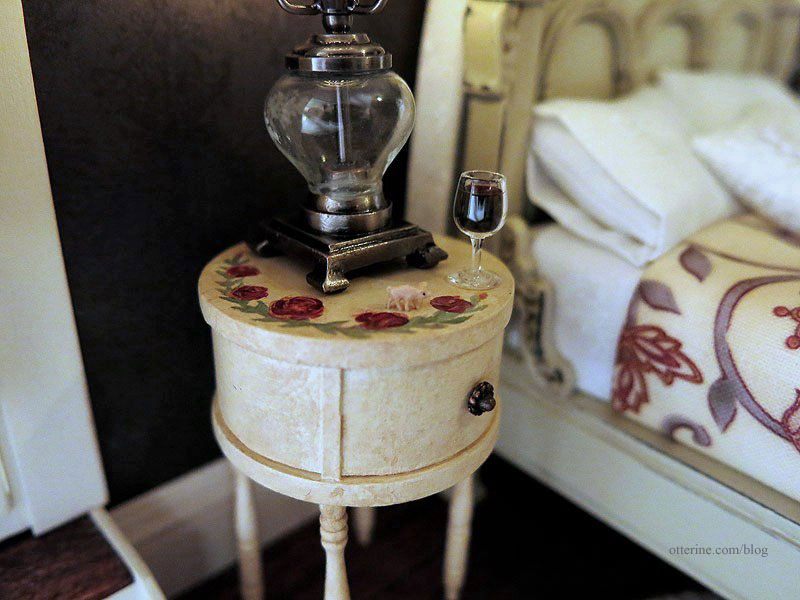
I bought this from The Kennedys at a local miniature show. So cute, so wee! I put the tiniest amount of tacky glue on his feet, and I hope he doesn’t get the notion to wander off.

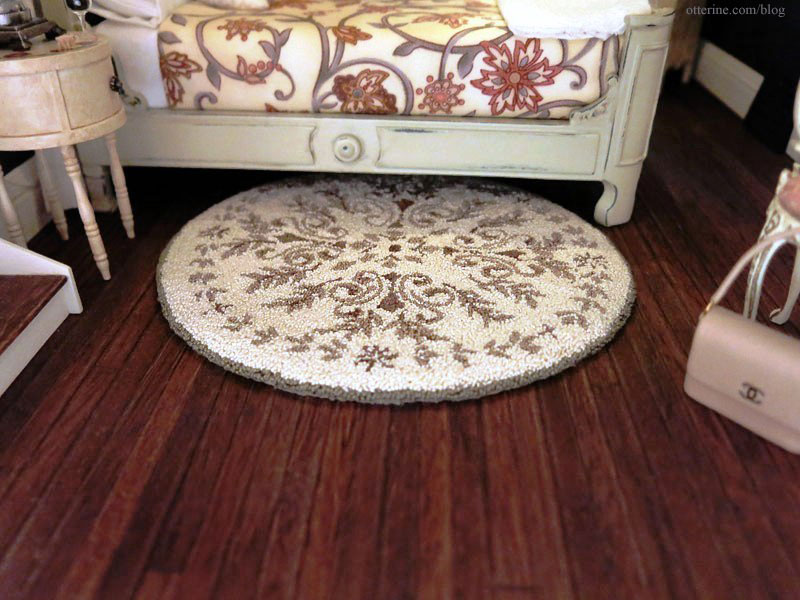
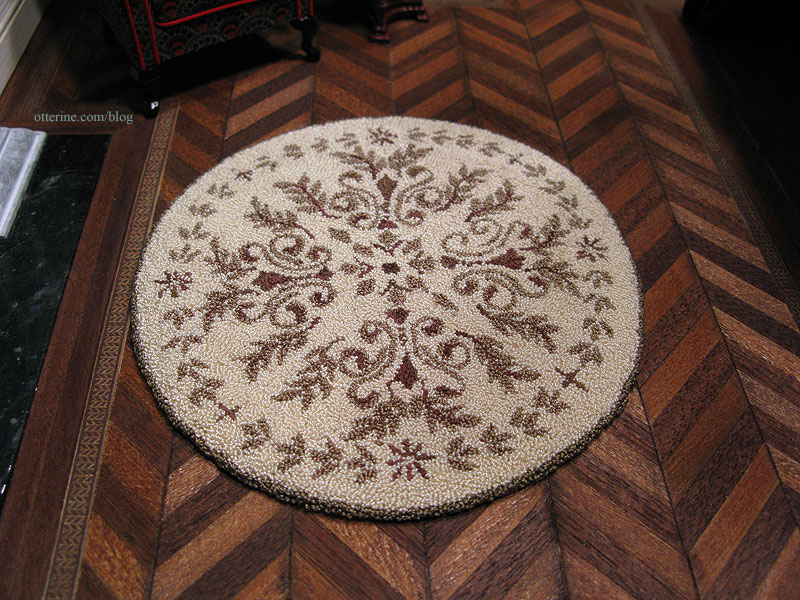
The beautiful rug by Katie Arthur of Dollhouse Littles used to reside in the parlor, but it fits so well with the bedroom colors and patterns that right now it shifts between the two rooms.
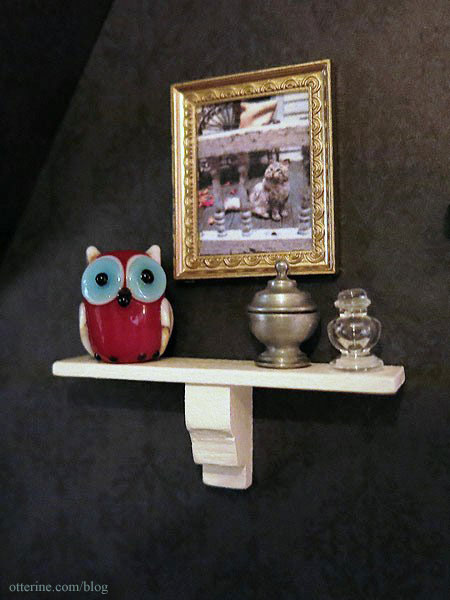
This photo of Ophelia is one I took.
I loved it so much I decided to print it for framing as well. This one is a little larger to keep the details visible.
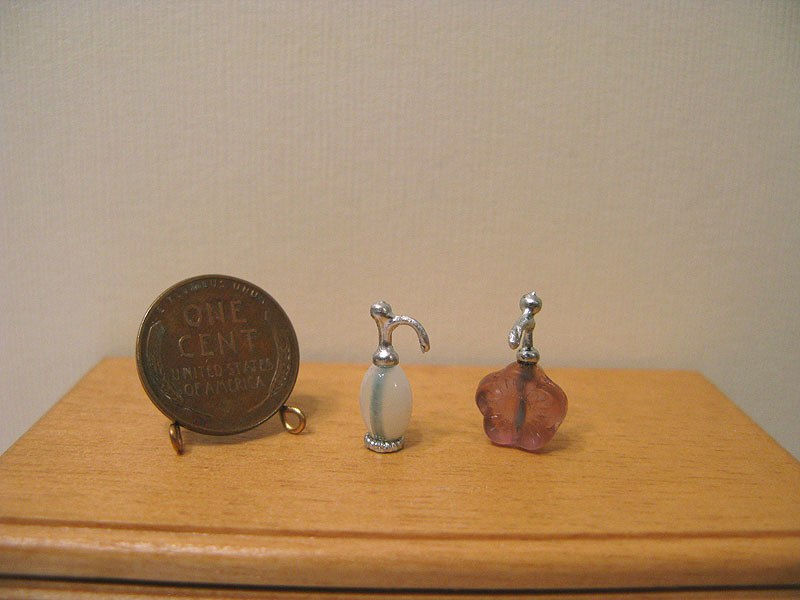
The bedroom is hard to decorate with its odd angled corner walls, so this is the perfect size for the space. I added a small wall shelf since the space looked too empty with just the photo. Grandma can display a few of her treasures here. The owl bead is from Keli, and I purchased the pewter pot from Mini-Tiques and glass perfume bottle from The Little Dollhouse Company. Both have removable lids.
I didn’t fill the dresser drawers as I did in the bathroom cabinet, but I had to get these vintage nylons from L Delaney for grandma. :D Too stinkin’ cute!
I think the black wallpaper works well in this room only because the room is so large and all of the furnishings are painted varying shades of ivory. I didn’t want a matched set of furniture for this room. I preferred that the ensemble be cherished pieces purchased over the years.
yawn…and stretch…

‘night, all!
Categories: The Haunted Heritage
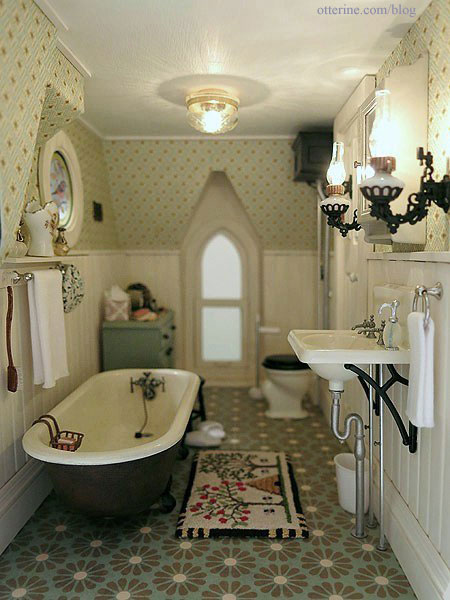
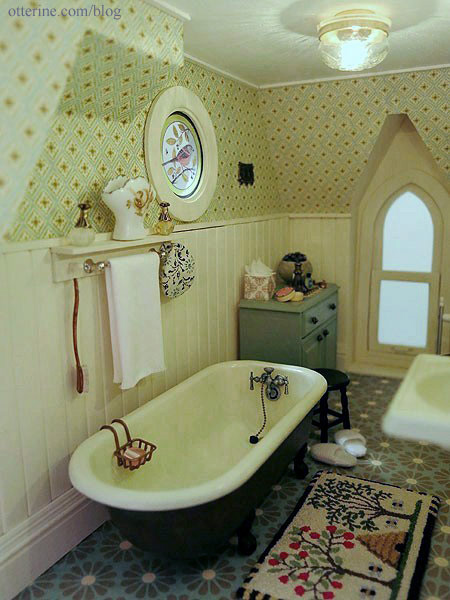
August 15, 2013 | 0 commentsThe Haunted Heritage – Farmhouse bathroom
The vintage farmhouse bathroom is one of two rooms on the second floor of The Haunted Heritage. It’s a small room but just right for an old farmhouse.
The initial dry fit had the cabinet and toilet reversed.

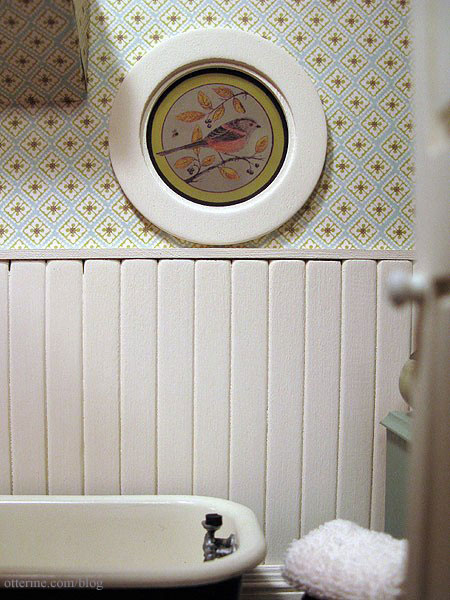
Two major structural changes were made to this room. First, the outside wall on the left originally had a swinging window. I eliminated this window when I removed the bay window on the first floor to make room for the fireplace and chimney. I replaced the swinging window with a small round window to keep some light flowing into the room.
The second modification involved the front dormer window. Since I made changes to the ceiling height in the parlor below, the dormer had to be modified from the original kit instructions. It’s similar but is even with the floor in my version. This required a good amount of padding to get it to look finished.
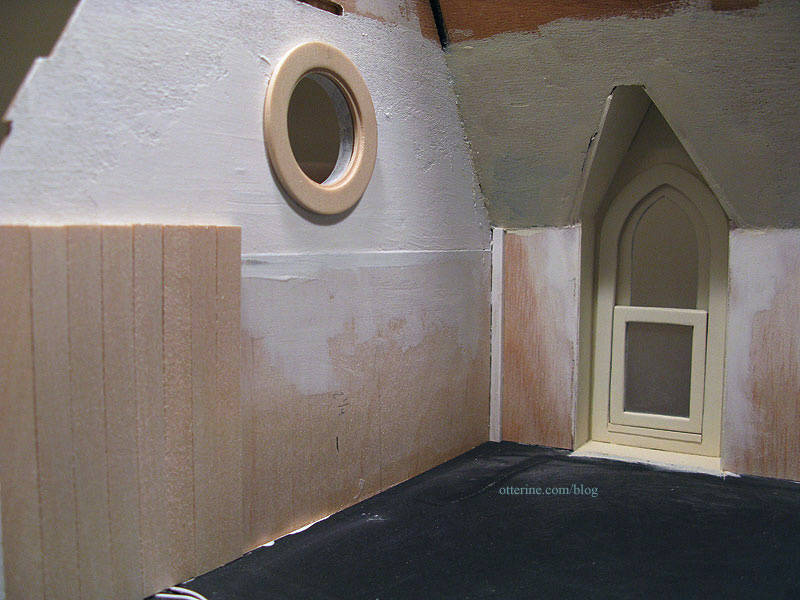
A small portion of the chimney continues through this room with most of the inner portion in the attic. I formed the inside chimney from a double layer of 1/2″ thick foam core board and cut it to align with the outer chimney. I then lined it with scrap wood for a smoother surface for wallpapering.

I cut wallpaper to cover the portion in the bathroom. Now, that’s a nice seam, don’t you think? :D I’m rather proud of it! I guess all those years of sewing come in handy for pattern matching.
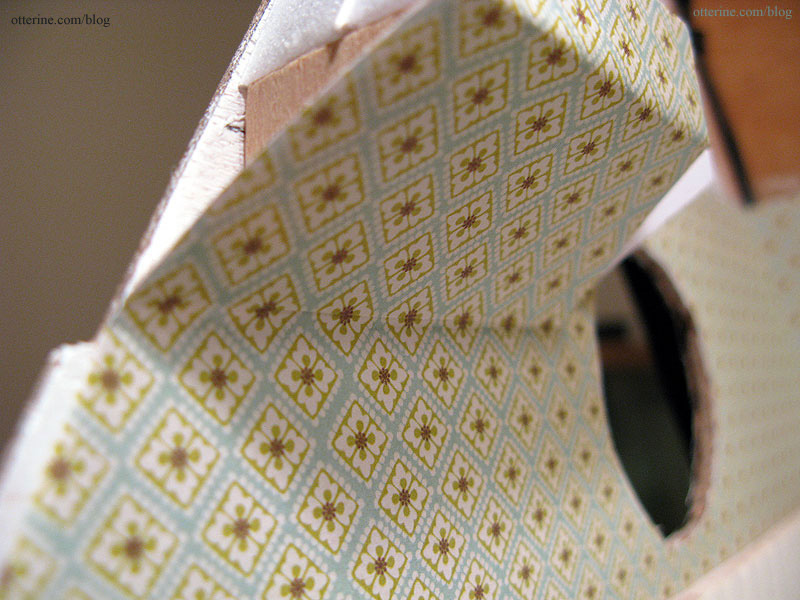
The beadboard treatment around the lower portion of the walls coordinates with the pale patterned paper above.
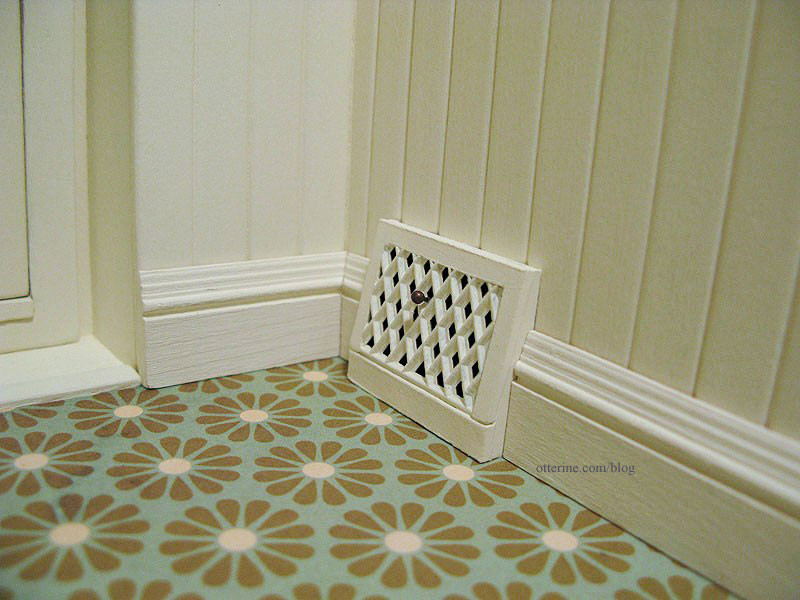
I made a heat register for the bathroom like the one in the kitchen, again modifying the tutorial by Kris at 1 Inch Minis. With the addition of water pipes for the sink, there wasn’t room for the register on that side of the room. The remaining portion of the inside wall had the tall tank toilet, so I placed the register near the corner there. This one I painted Vintage White by Folk Art to match the trim.
The bird and bee design by Flora for the bathroom window really sets the room apart. After Flora graciously permitted me to use her artwork, I edited the image in PhotoShop, turning the bird more grey and removing all stray spots. The white in the bird wouldn’t print on transparency and any spots would be magnified in this small scale. I bumped up the coloration since printing on transparency usually results in some color loss. Beautiful.
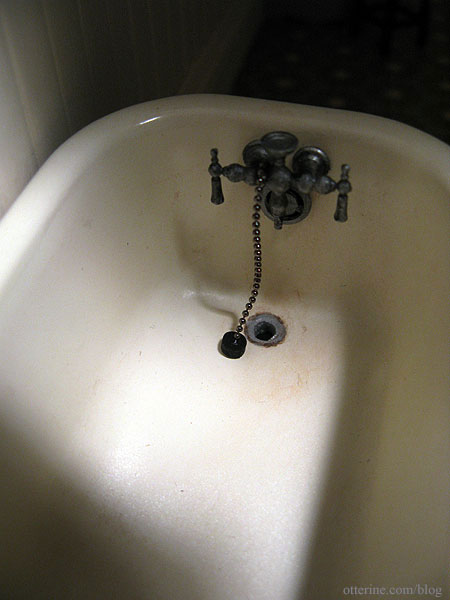
I built a Chrysnbon bathroom kit to furnish the room. I painted the tub to look like an old copper claw foot tub.
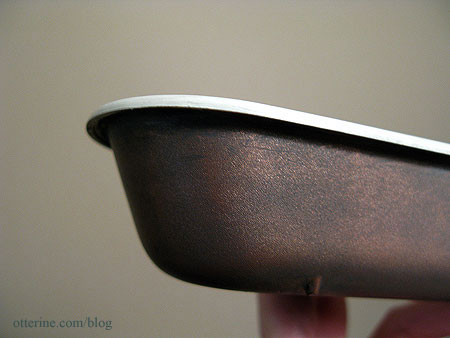
I love this style of vintage tub!

The inside of the tub is also aged, with a custom made overflow drain made from a pen cap.
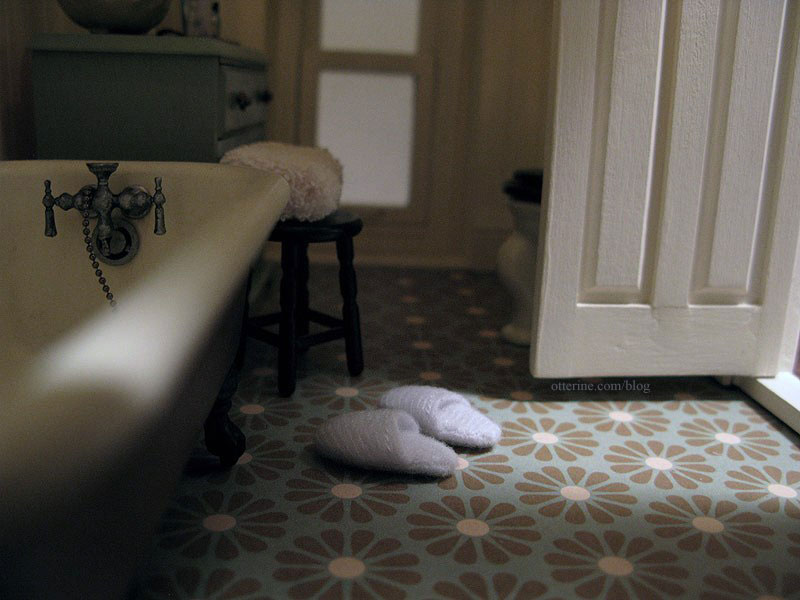
Grandma’s white fuzzy slippers are from The Dolls House Emporium. They’re quite cute. :D
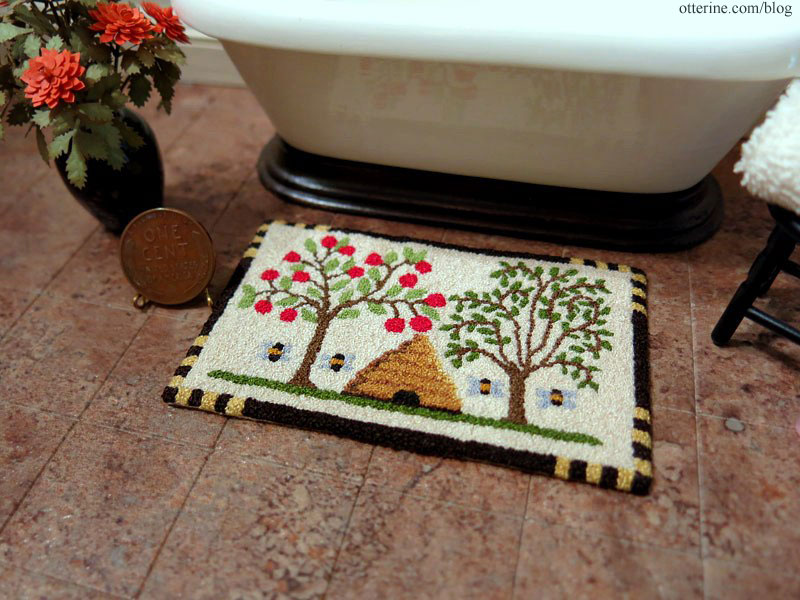
The Bees and Trees rug made from a Teresa Layman French knot kit sits in front of the tub.
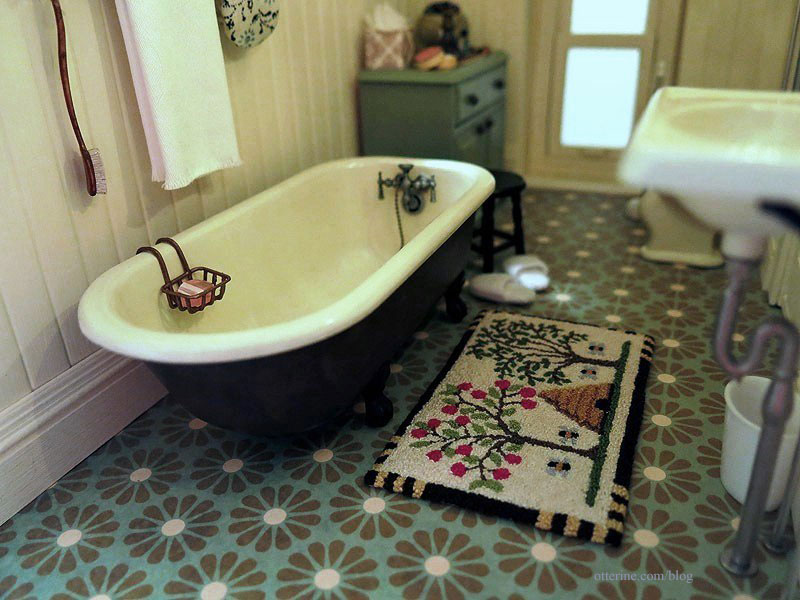
I’m not sure if it will stay here permanently, though it does coordinate well with the bird and bee window.
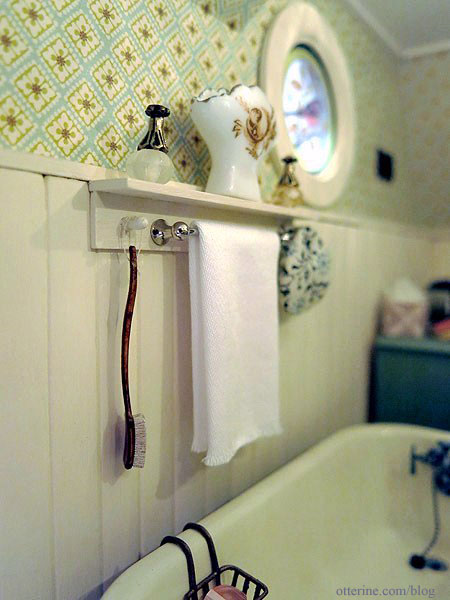
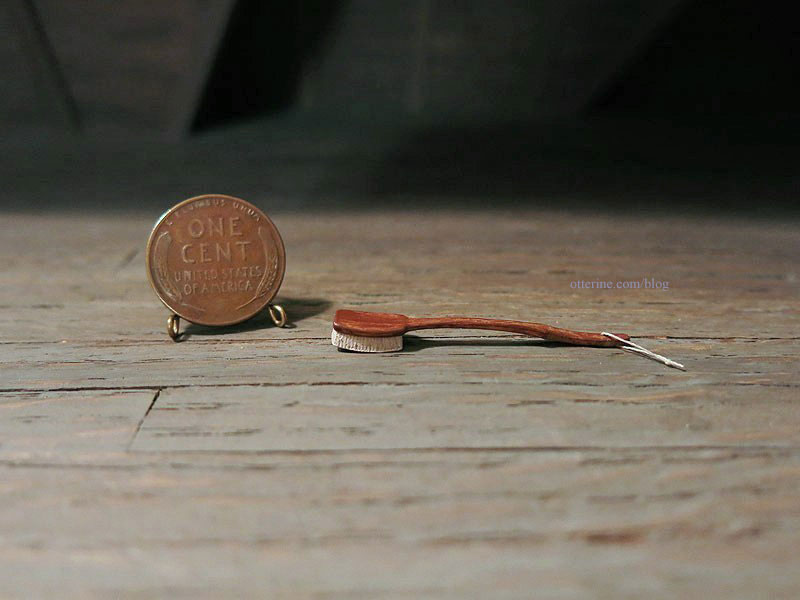
I added a small shelf with a towel bar and two knob hooks. The pot was a gift from Jeannette. I made the shower cap from a scrap of floral fabric. The bath brush and soap holder were made from a Chrysnbon kit. The two bead bottles are from Thyme Soul Miniatures.
Here’s a view of the items outside of the bathroom.

I painted the bath brush to look like wood and added a cord for hanging.
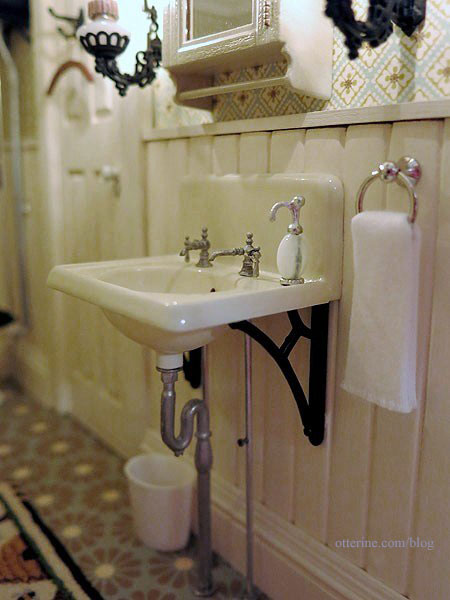
The sink is from the same Chrysnbon kit.
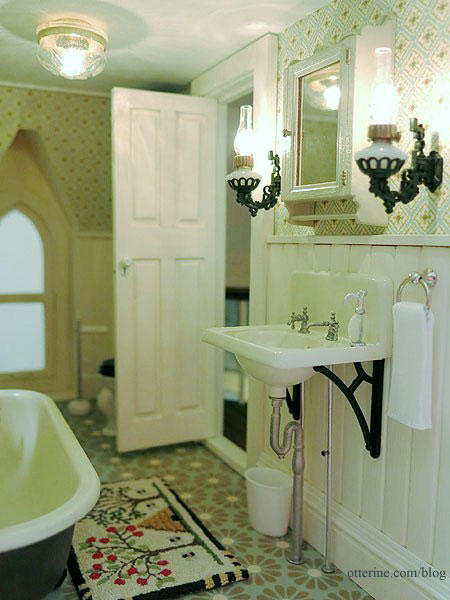
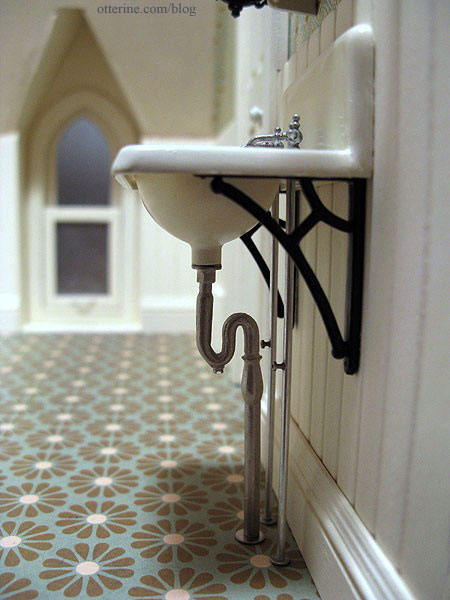
The pipe included with the kit would have made the wall sink too low, so I used a spare pipe I purchased from Sussex Crafts. It also bothered the realist in me that there was no way for the water to get to the taps. So, I added two lines of aluminum tubing from the sink to the floor.
I added tiny washers for these new pipes as well as little valve knobs so grandma can turn off the water in an emergency. :D I know these are typically oval, but all I could find were round ones in my box of watch parts. I drilled holes into the aluminum tubing and glued them in place with super glue gel.
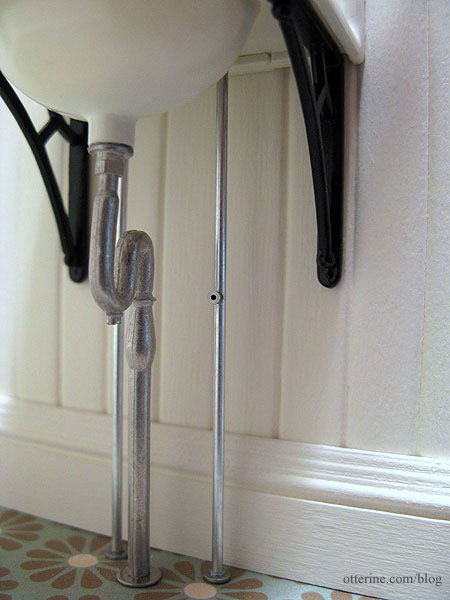
It might not be up to code, but I love the way it looks!
I added a washer to the sink bowl and drilled out a hole for the overflow. I placed a piece of black paper behind the overflow so no light would show through. I added a couple of brown paint washes but didn’t dirty it up too much…just enough to tone down the shine and make it look like it has been there awhile.
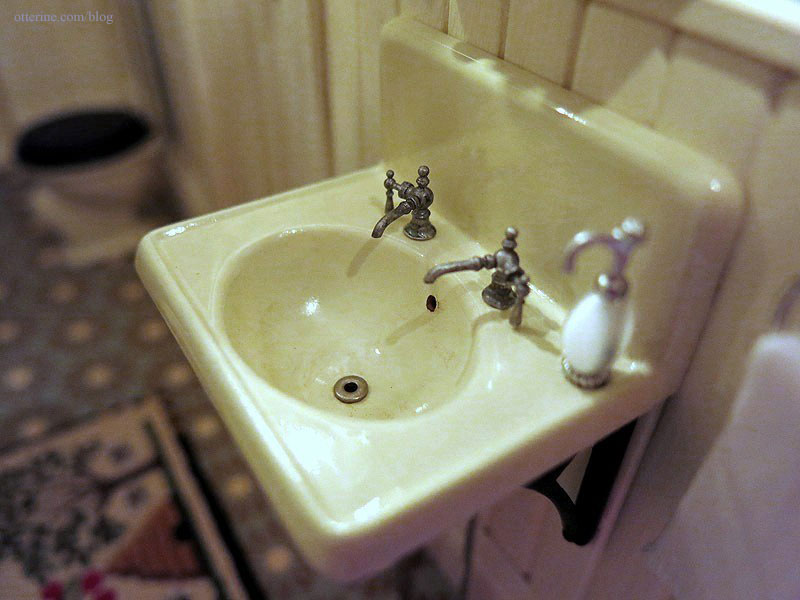
Keli sent me some fabulous soap bottles, so I’ve put one here on the sink. The towels are fine cotton sateen, pressed into shape and with a few rows of thread removed to make the fringed edge.
They have perfect pump dispensers!
The medicine cabinet is also from the Chrysnbon kit. I painted it with Krylon Almond in satin finish, the same paint I used on the Bespaq bed. I like that it matches somewhat but I didn’t want a glossy finish to compete with the sink. The hinges and knob are painted with Liquitex Iridescent Bronze. I am still working on the Chrysnbon sink.
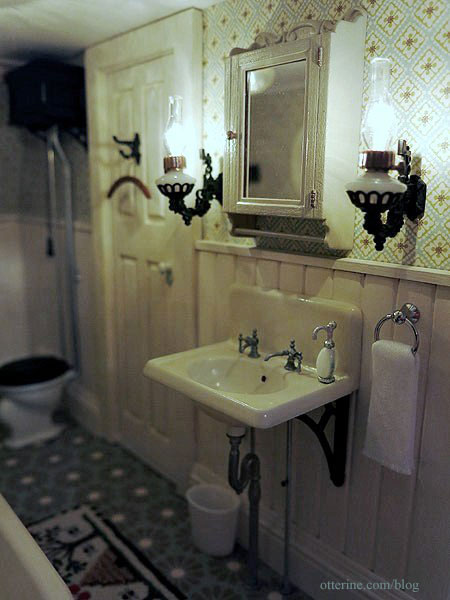
The wall sconces are Chrysolite kits, though I left off the reflectors.

I painted the brass parts copper to match the bathroom colors and switched out the included wires for replaceable bulb sockets. I painted the wires black to make them less obvious.
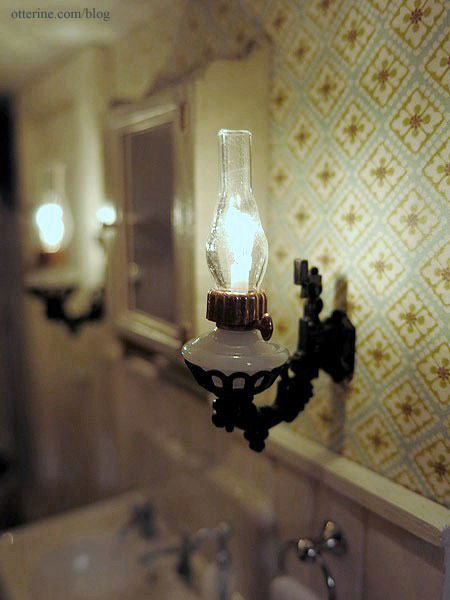
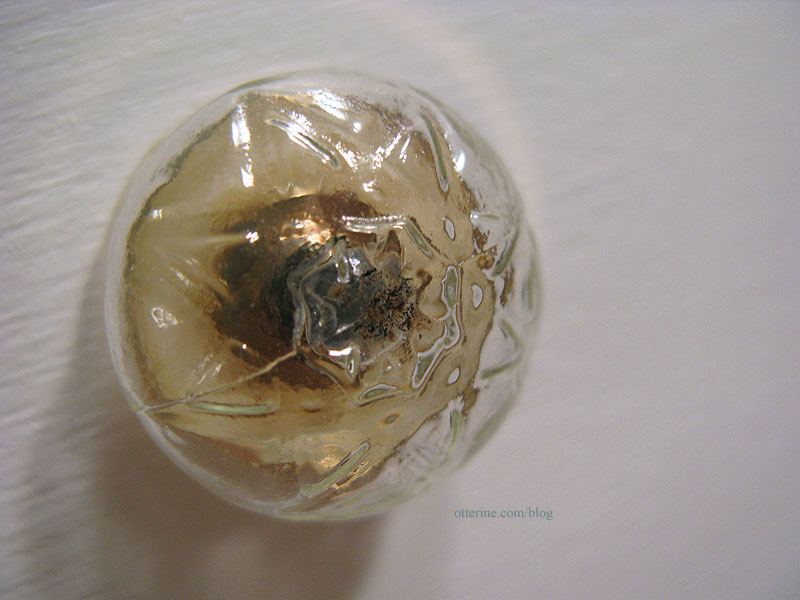
The overhead light casts a wonderful glow with the sconces. Though it’s nearly impossible to tell now that it’s installed, I added some 1:12 scale insects inside the globe. :D Lyssa egged me on when I joked about it to her, so she is to blame! It’s just a little dry-brushed brown and black paint, but it’s rather convincing in person.
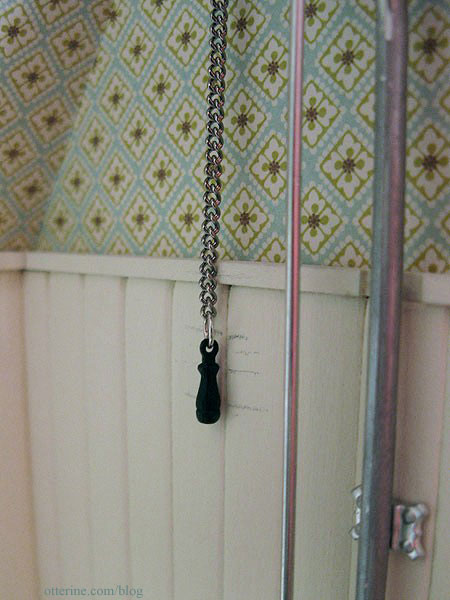
I also added a water line with a shutoff valve to the toilet tank, though I didn’t think to take a better picture of it before I had the loo in place. Because the beadboard wall treatment adds some thickness, I had to glue the loo to the floor and the tank to the wall.
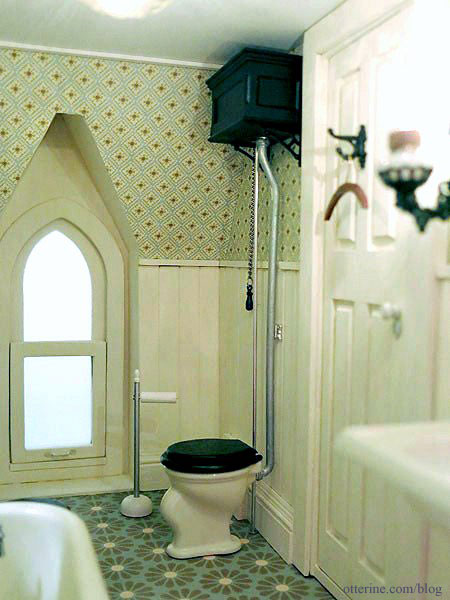
I shortened the chain that came with the kit, because it was nearly hitting the floor. I figured the handle has been hitting the wall for years, so I dragged it across the beadboard to transfer some of the paint. :D
The toilet paper holder is modeled after the one I have in my real life home. It’s a fun and interesting alternative to a wall mounted holder. I’ll wind some more tissue on here later…it got late, and I needed to get to bed! :D

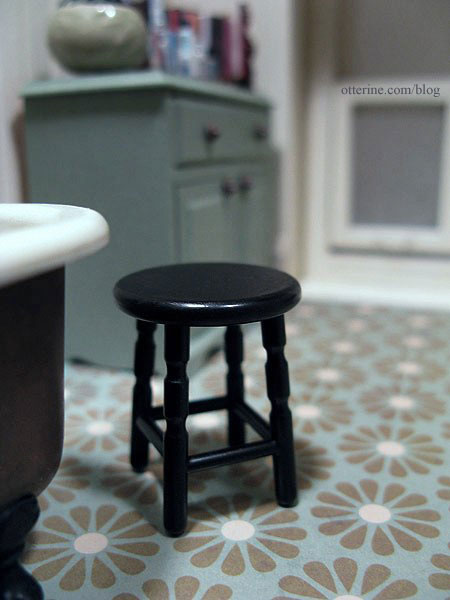
I made the small stool from the bath kit, too. I sprayed it flat black, but the top was rough so I had to follow up with acrylic paint. I topped it off with satin varnish, and now it looks like a vintage piece that’s been painted and painted and painted.
For the flooring, I used spray adhesive to mount the Flower Frenzy paper by We R Memory Keepers onto a sheet of regular drawing paper for stability and then sprayed it with matte sealer. I didn’t want it to be shiny, just a little deeper in color and not so paper-y. ;] I like the way it looks like worn down linoleum.
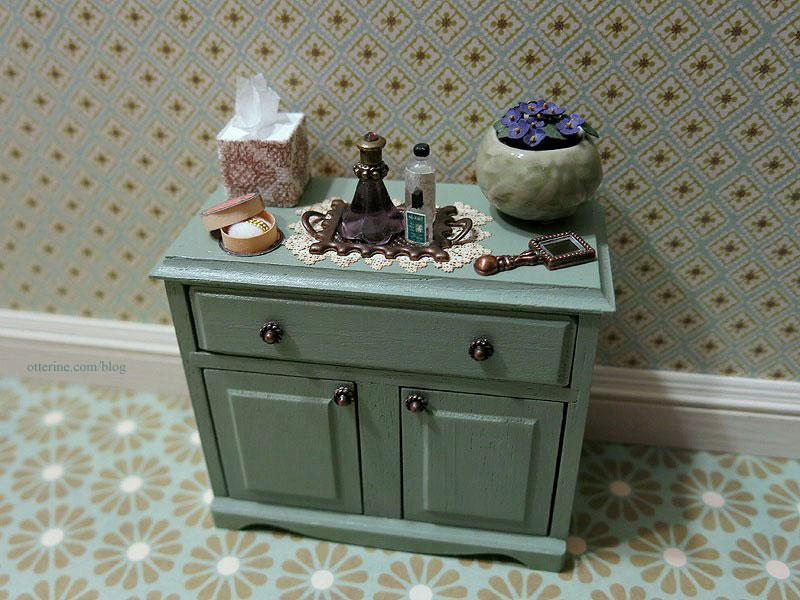
Opposite the loo sits a bath cabinet made from a House of Miniatures kit. I’ve taken it out of the room to photograph the details.
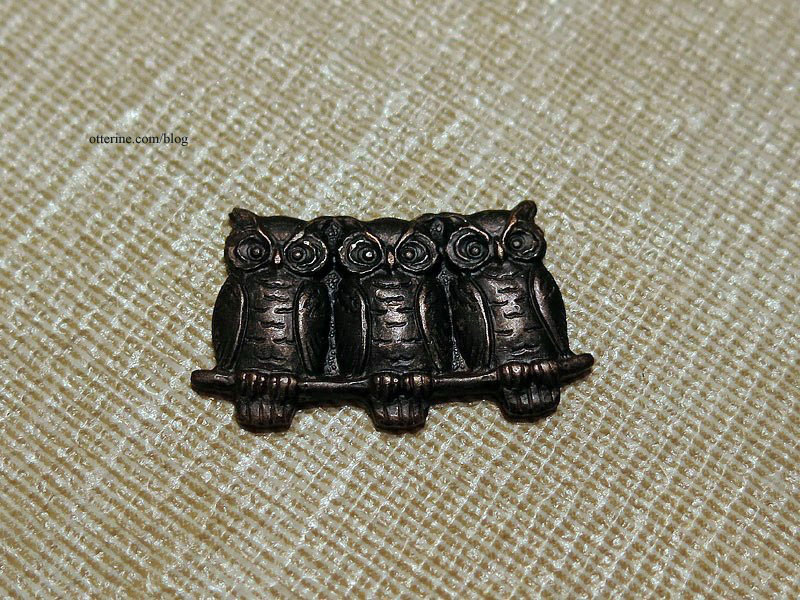
The owl wall art is a jewelry finding with the loops removed. My grandmas always had decorations such as these.
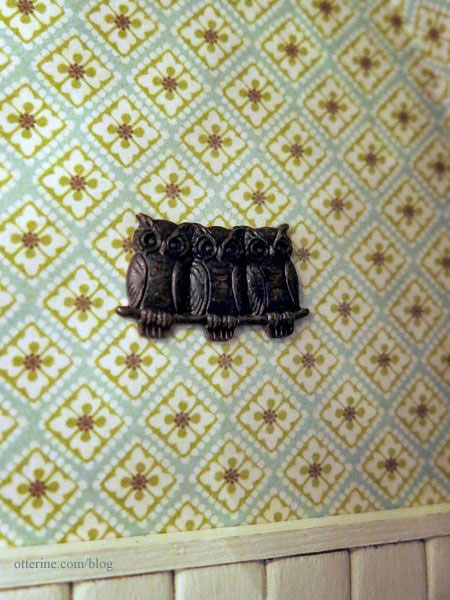
It’s a small piece but it has a lot of detail. It’s so hard to see in the room, unfortunately.
The tissue box is a wood block covered with Martha Stewart sticky ribbon and a bit of real tissue glued to the top. The mirror is a jewelry charm with the loop removed. The doily is from Stewart Dollhouse Creations, and the tray is a jewelry finding. The purple bottle and powder are Thyme Soul Miniatures. The other two bottles were purchased blanks for which I made the labels.
I lined the drawer with a scrap of Cute Little Diamonds paper by The Paper Studio, the same paper used for the wallpaper. Grandma is frugal and has found a use for her leftover wallpaper scraps!
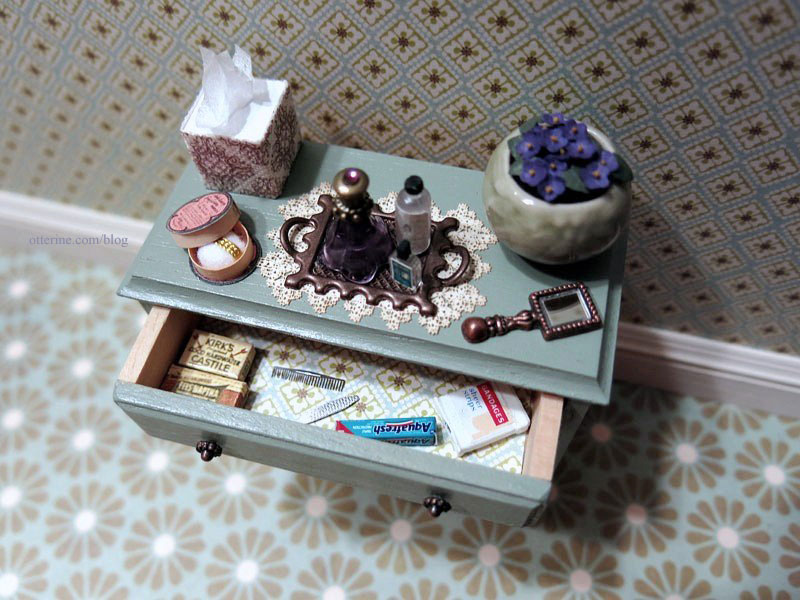
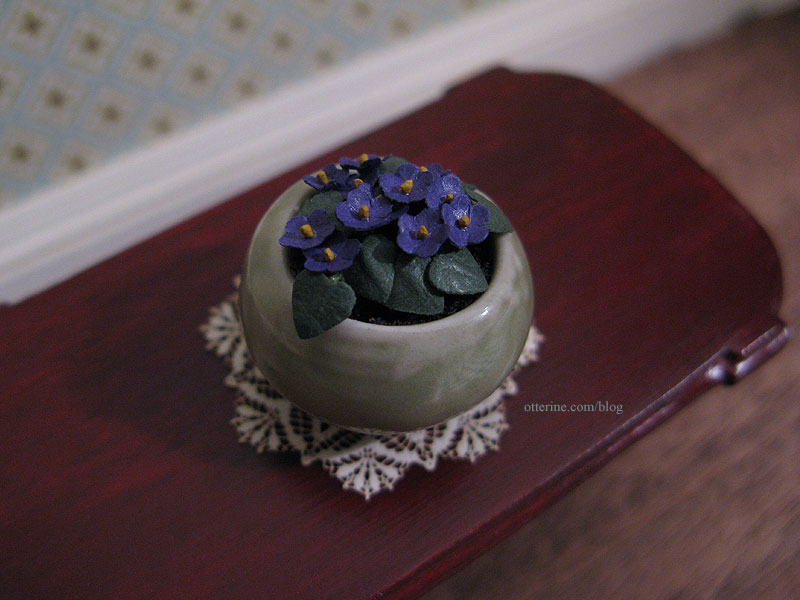
The African violets were made from a kit from Georgie at The Miniature Garden. The kit makes three colors of violets, but I chose the darkest purple since those are the ones my great grandma kept.
Categories: The Haunted Heritage
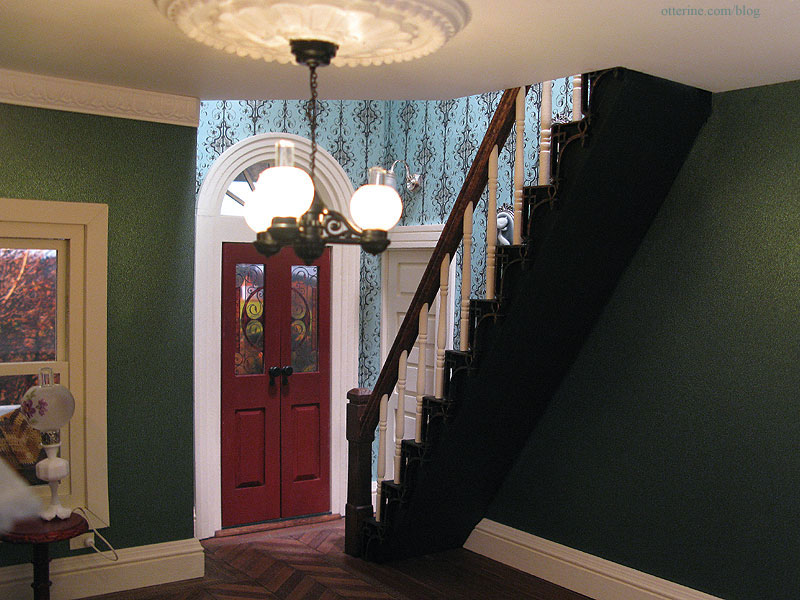
August 13, 2013 | 0 commentsThe Haunted Heritage – Entry, staircase and hallway
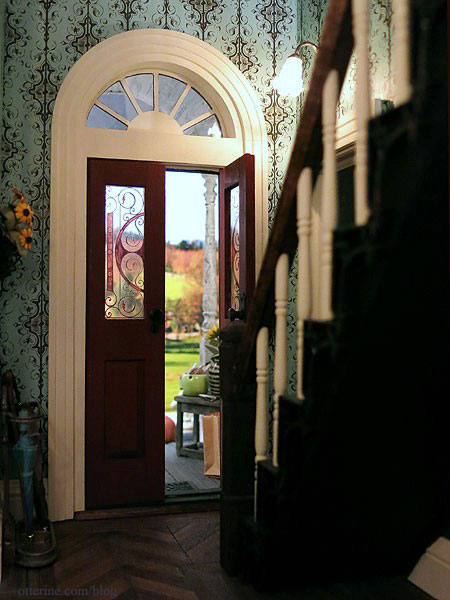
The entryway and upstairs hallway are relatively small and minimally decorated, but I thought they deserved their own post. First up is the elegant entryway. It’s a small area but there is just enough room for some fancy miniatures.
Here are a couple of work in progress shots before the permanent installation of the final floor and staircase.
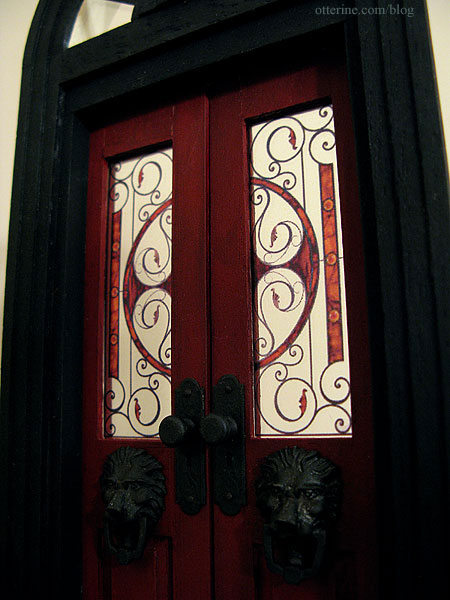
The lion doorknockers are from Sussex Crafts.
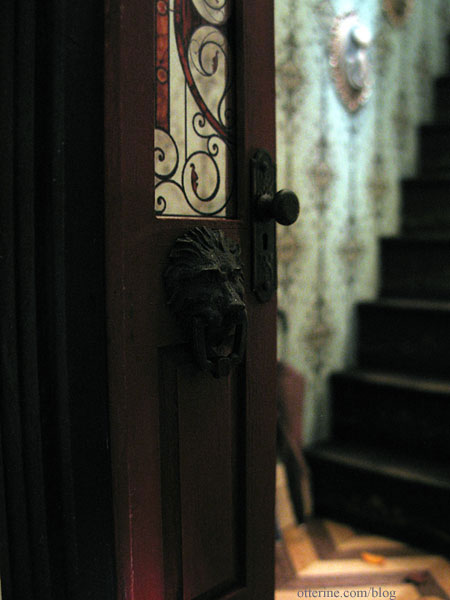
The doorknobs and plates were originally brass, but I painted them to coordinate with the doorknockers.
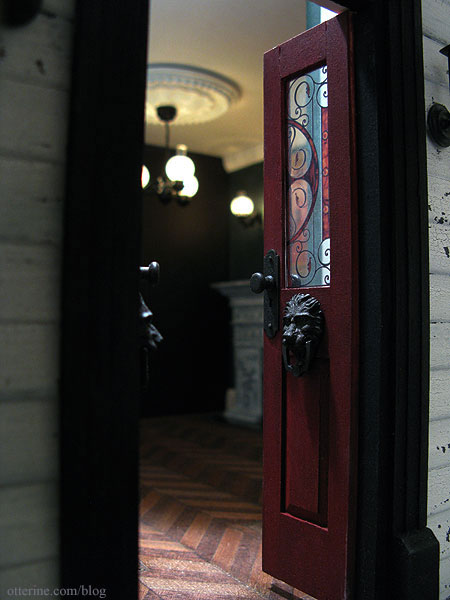
The stained glass inserts are printed designs from MD Doors. They are printed on transparency film, which was slid into the openings with the original door inserts right behind them. It’s not a tight fit but it works well enough to keep them in place.
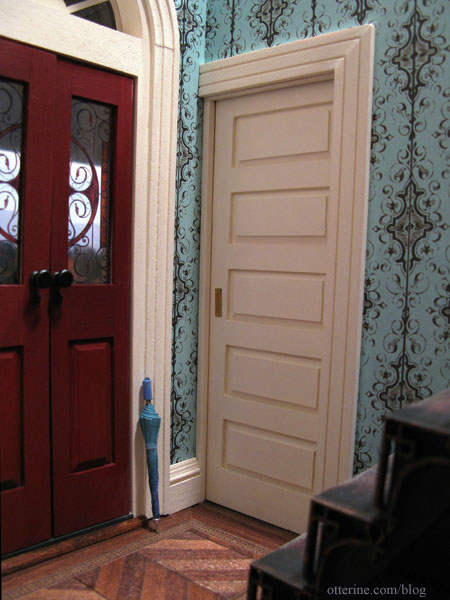
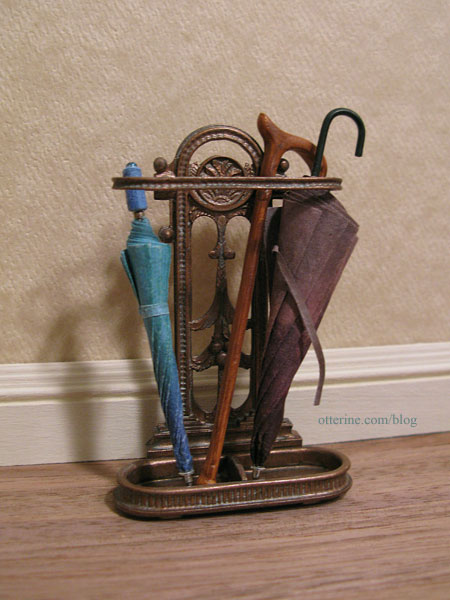
Adjacent to the front door is the working pocket door that leads to the kitchen. The beautiful umbrella is from FranMadeMinis.
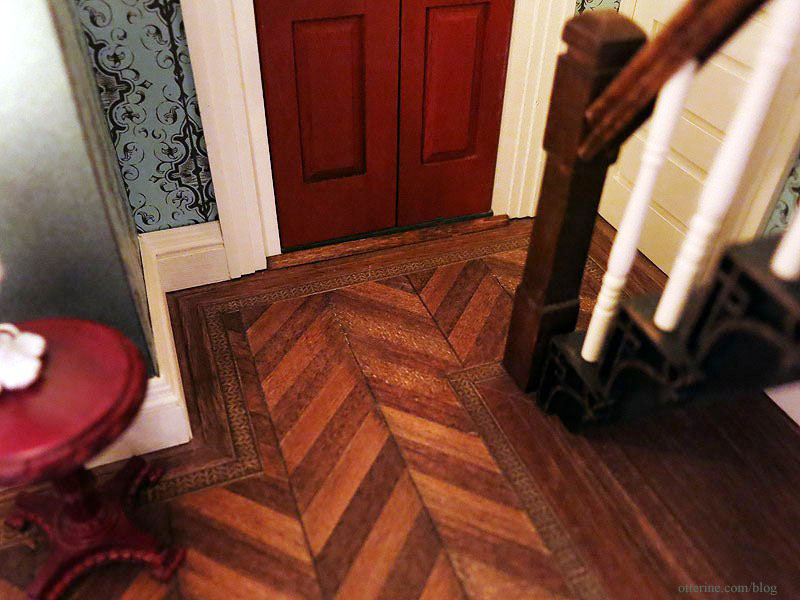
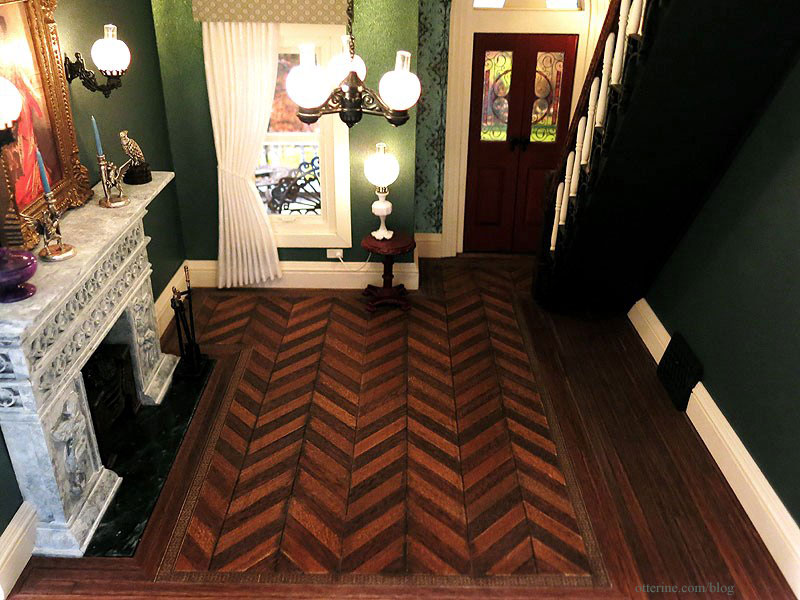
The entryway floor was planned and installed to coordinate with the parlor.
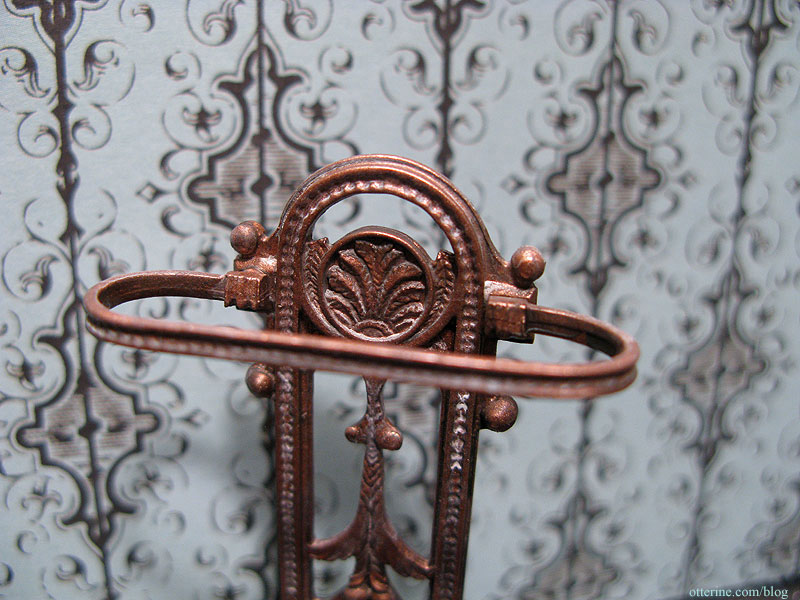
I assembled and painted a Phoenix Model umbrella stand kit to hold the two beautiful umbrellas by Fran and a walking stick.
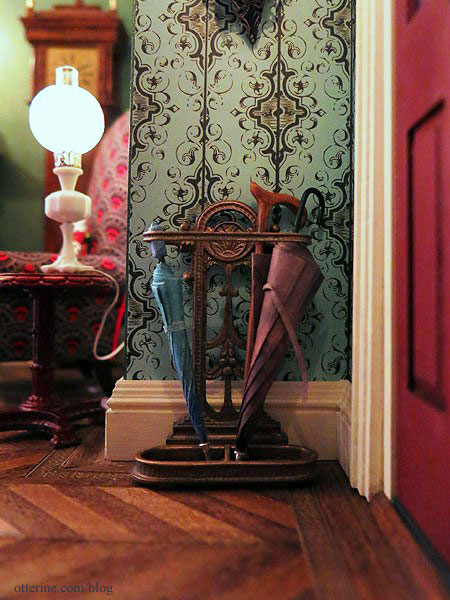
The stand has so many beautiful details – a true quality kit.
To give Fran a sense of what I was looking for with the umbrellas, I had to give her the backstory on the Heritage build. I told her I was leaning toward an old woman living in the house she’s always loved, but she can’t get around as well anymore and the place has fallen into disrepair. I didn’t want the umbrellas to be crazy tattered, just maybe a bit worn and well loved. I was thinking the umbrellas would be treasures in the house, even with – or especially because of – their age. One would be her lost love’s umbrella that didn’t feel right being anywhere else but still waiting by the door and the other would be the one he bought for her.
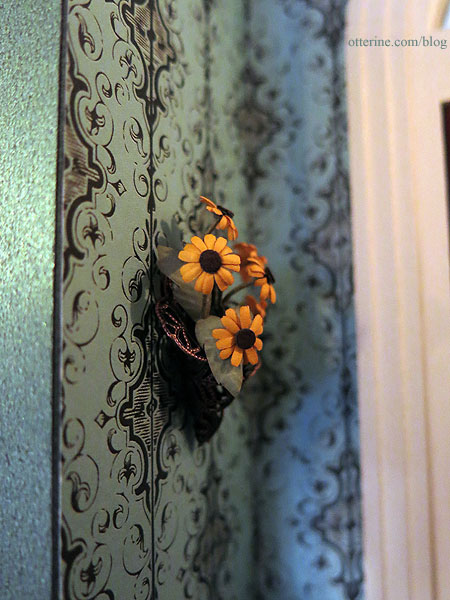
The wall vase is a cornucopia shaped jewelry finding with Bonnie Lavish flowers. Any artwork added to this side wall would have been hard to see, so I thought a three-dimensional piece would suit the space best.
Just enough minis to make the entry inviting….

The kit staircase was meant for the right back of the house, but took up a lot of space and blocked the view of the lower room.
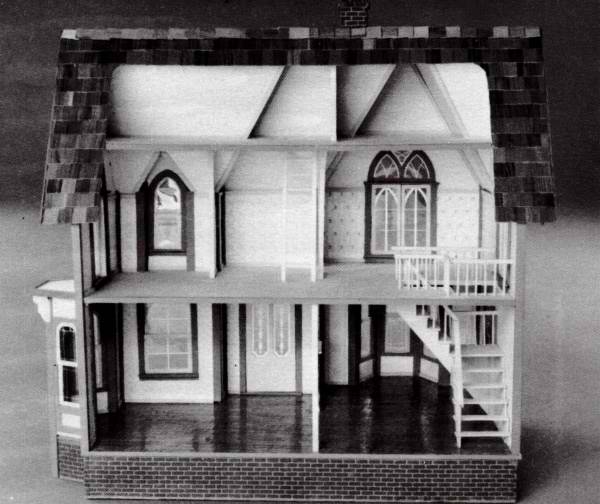
kit photo I had had other stairs in mind at first, but this is the final mockup I decided on.
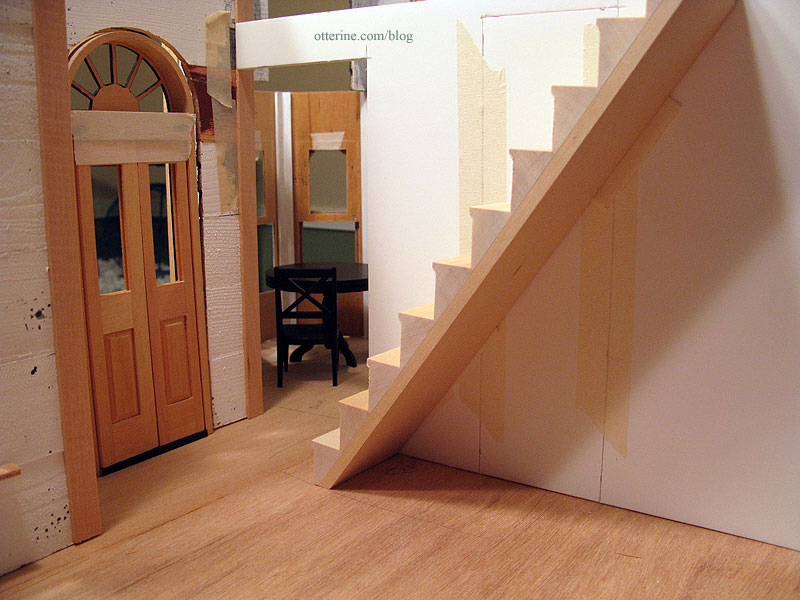
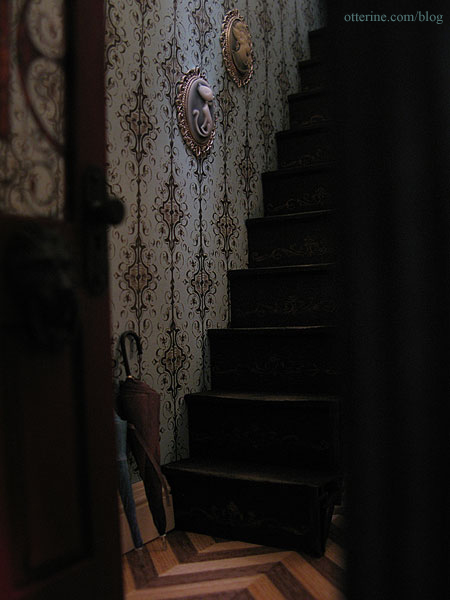
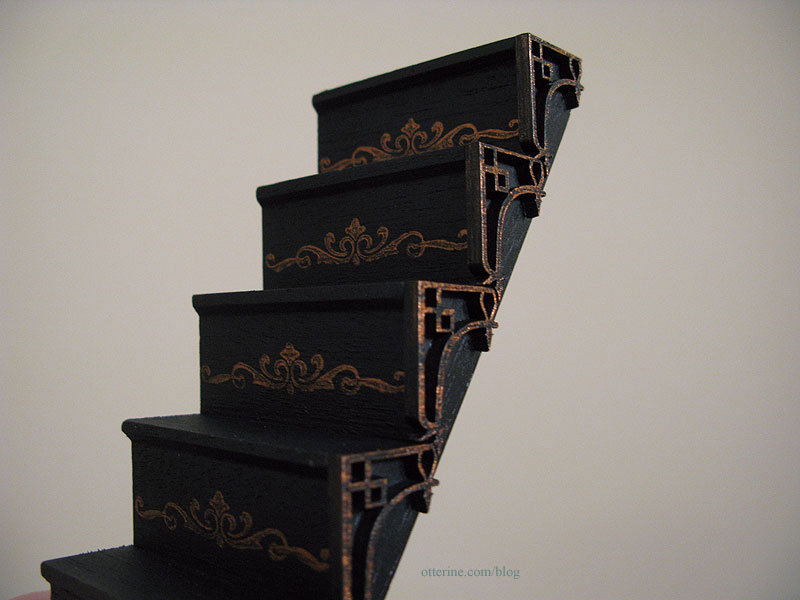
I didn’t use the kit parts and installed a Houseworks narrow staircase instead. I added laser cut trim, dry brushed bronze paint and stenciled detailing.
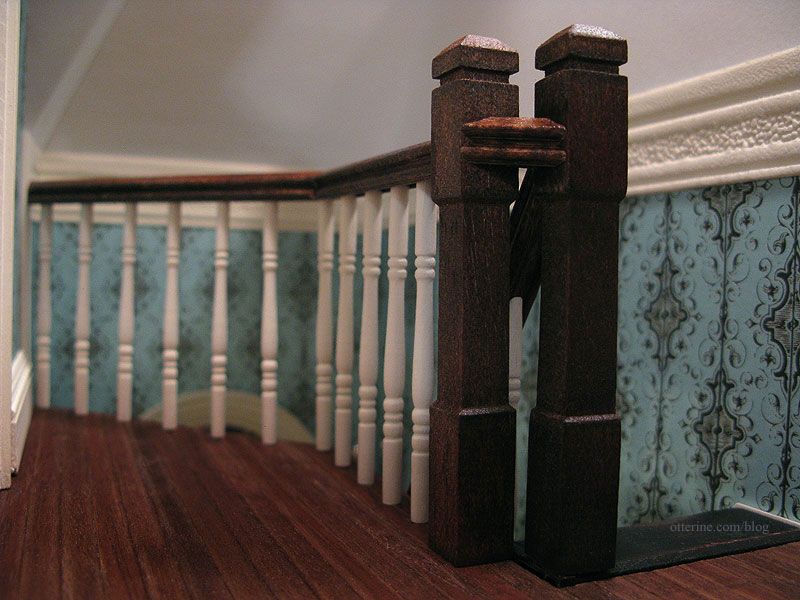
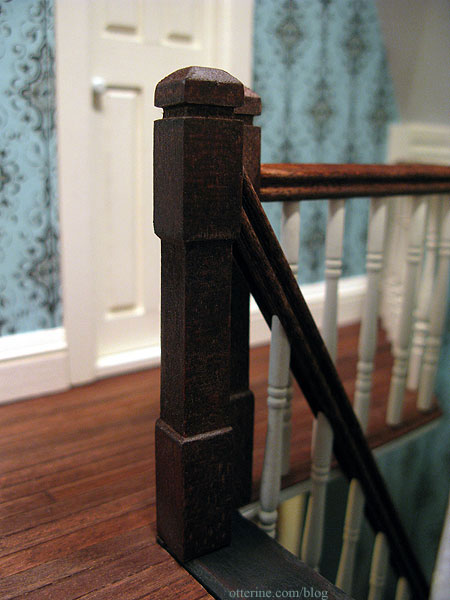
I upgraded the stair railing, painting the spindles and staining the railing to match the floors. Assembling the railing was a huge challenge, but it all worked out in the end. :D
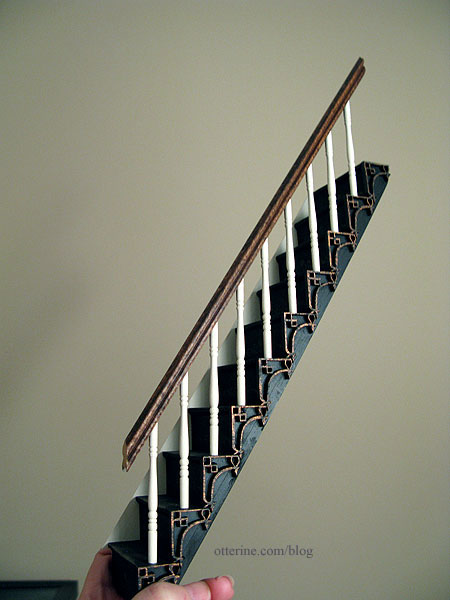
The stair assembly fits so snugly that I didn’t bother with glue along the wall. I did glue the foyer newel post to the floor and the railing.
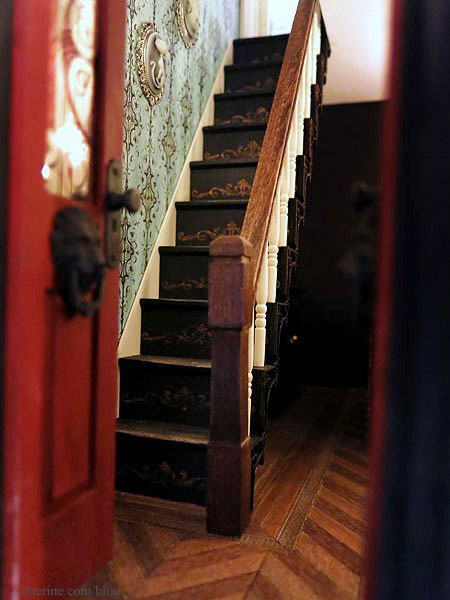
I think it suits the entry and parlor very well.
My favorite part? Something that can be seen only with the camera…the way the stringer meets the baseboard trim at the base of the stairs.

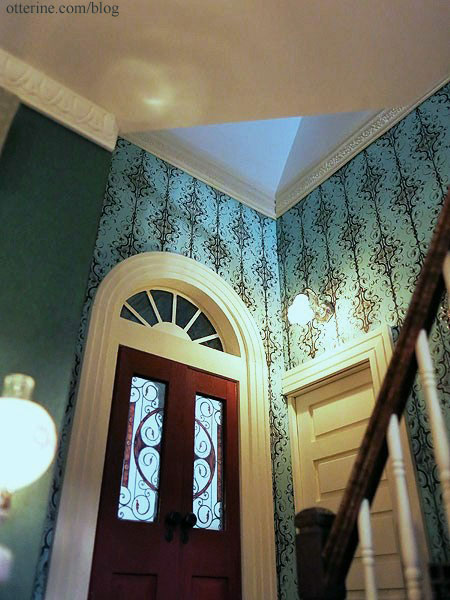
I saw a wonderful idea on The Dangerous Mezzo’s blog using what’s called anaglypta — paintable textured wallpaper. I did some looking around on the internet and found the same one. It was $10 for a roll at the local Lowes. I cut a portion of the design to create the trim between the foyer and the upstairs hallway papers. It’s not a perfect solution, but I needed something flexible and fancy to finish the seam between the papers.
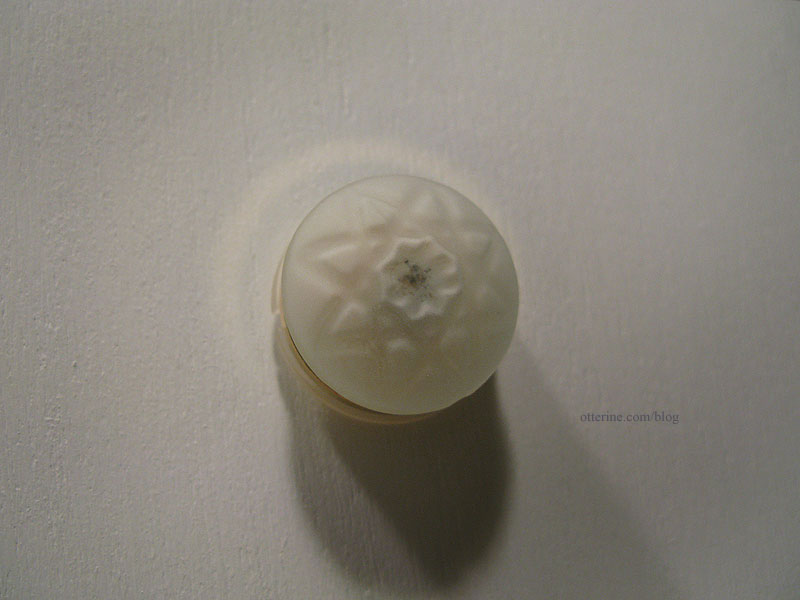
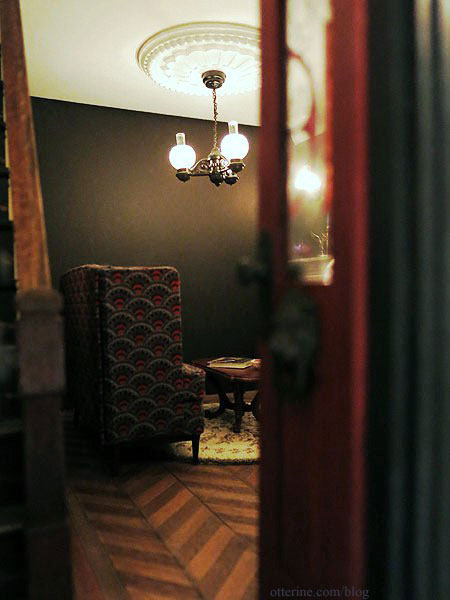
I glued the foyer light in place with the bulb facing downward. With the light on, the bulb would be distractingly bright when viewed through the open stairwell. I can still reach the fixture to remove the shade and change the bulb as needed. It’s just enough illumination without looking out of place.
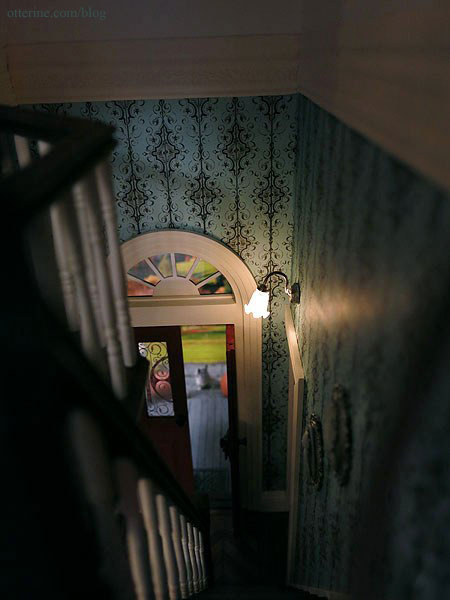
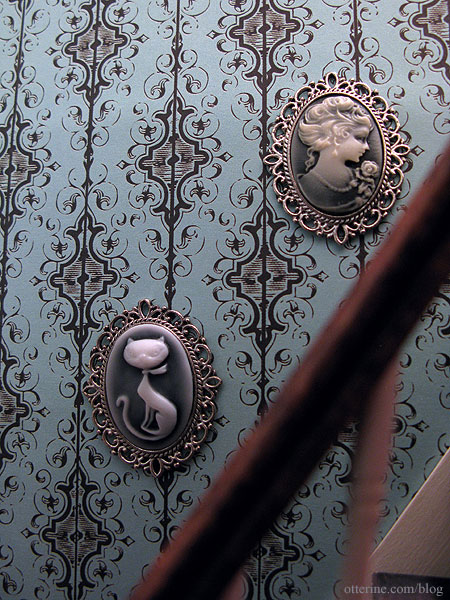
Ophelia beckons you to come on upstairs…
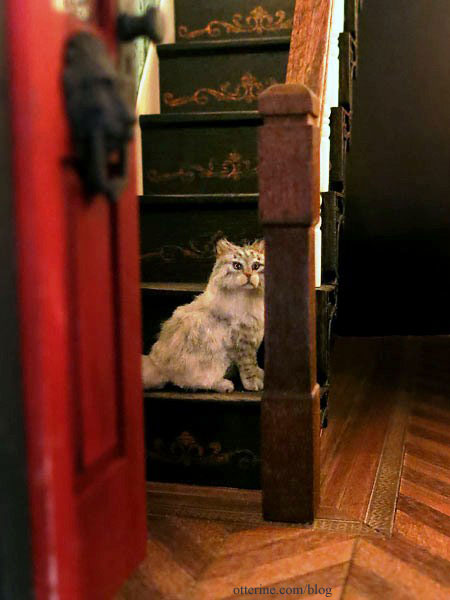
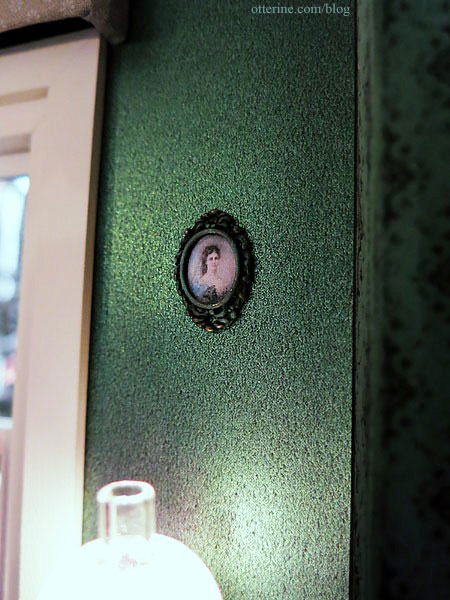
The cameos that hang in the stairway are pendants from Fairy Tale Fantasies. One is a retro kitty and the other a beautiful vintage lady. I cut the loops from the tops to use them as framed art. I love their ghostly appearance.
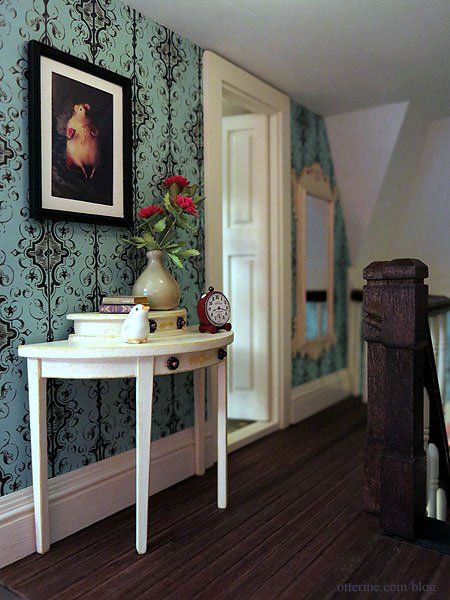
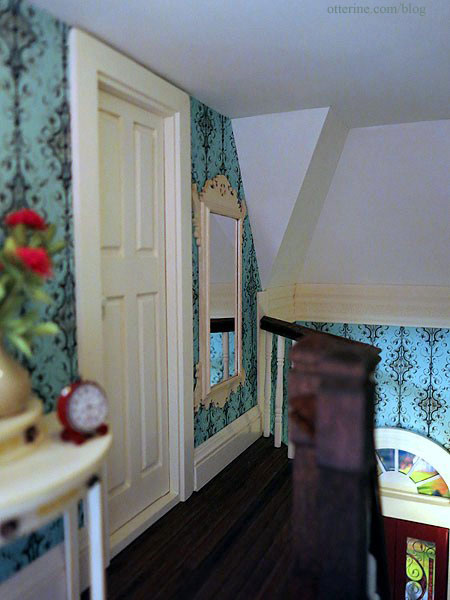
The upstairs hallway is large enough for only a modest table, some artwork, and a mirror.
The original mockup plan is what I stuck with in the end.

The balcony railing was challenging but I love the way it turned out. A rather savvy friend and I were talking options, and he had a brilliant idea: offset the newel posts and have a small angled section of railing between them. It made perfect visual sense and also eliminates having to navigate around a harsh corner on the way to the bathroom.
After trying out some paper mockups of fancy designs similar to the parlor floor, I opted for simple stained flooring upstairs since it was such a tight space.
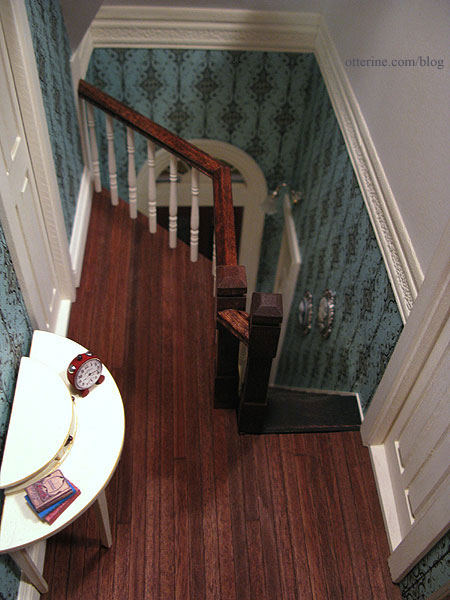
There was a lot of customization between the parlor ceiling, the new stairs and the balcony, but it all came together in the end.
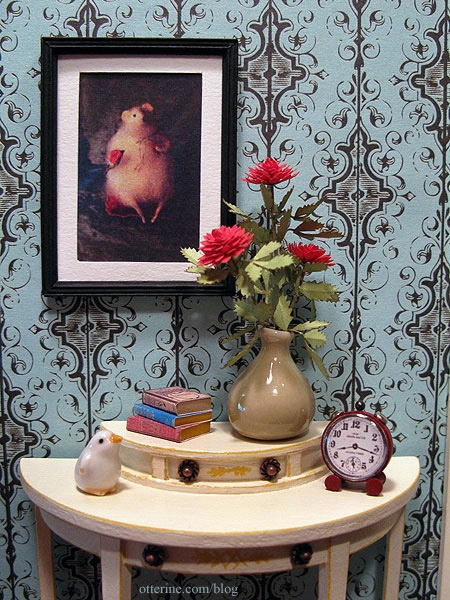
There’s a simple vignette that occupies the area to the left of the bathroom door.
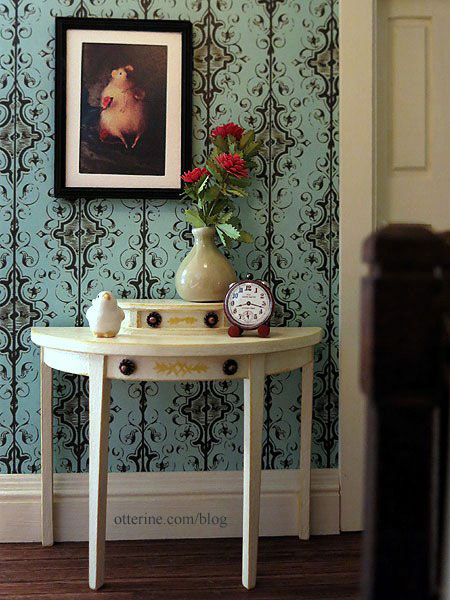
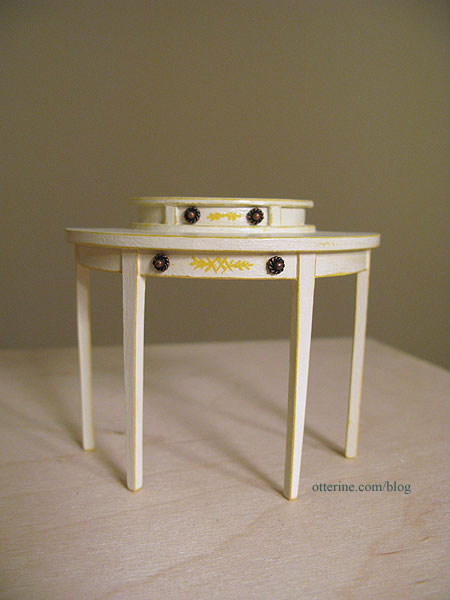
The table is a House of Miniatures Hepplewhite Side table with hand painted designs and added elements inspired by a real life sized antique table.
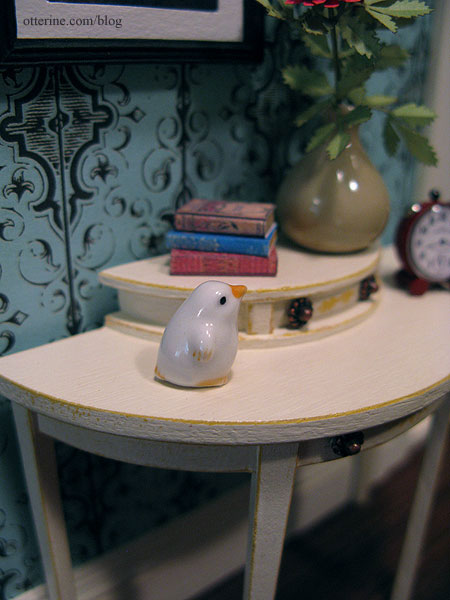
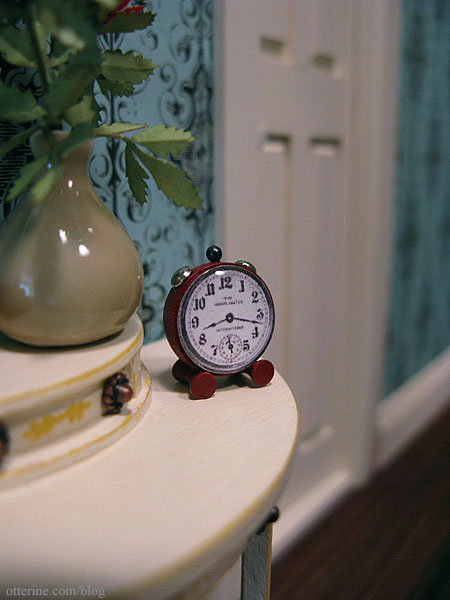
I added some books from the many I made while filling the parlor bookcase. The vase and bird figurine were purchased awhile ago, but I’m no longer sure of the vendor. The flowers are Bonnie Lavish red dahlias.
I made the tiny red alarm clock with a face printed image from The Graphics Fairy with a clear cabochon sticker to simulate glass. I had made a set of vintage table clocks for another miniaturist through my etsy shop, and I liked the red one so well I knew I would need one for the Heritage.
The artwork is a photograph from artisan Natasha Fadeeva. She makes the most amazing little animals. I just swoon over her mice!!! :D I contacted her about using the vintage mice photos in the Heritage, and she graciously gave me her permission. I love the red and round theme of this vignette. :D
To the right of the door is a House of Miniatures Chippendale Pier Glass painted ivory with a tan aging wash to give it an heirloom quality. I replaced the mirror with Darice plastic mirror sheet since the original glass was in poor condition and rather heavy to hang on the wall. It is a large piece, but the space needed something and mirrors tend to add to a space instead of subtracting from it.
You know me; I am all about the realism. So, I added some 1:12 scale insects inside the globe. :D Lyssa egged me on when I joked about it to her, so she is to blame! It’s just a little dry-brushed brown and black paint, but it’s rather convincing. ;]
Categories: The Haunted Heritage
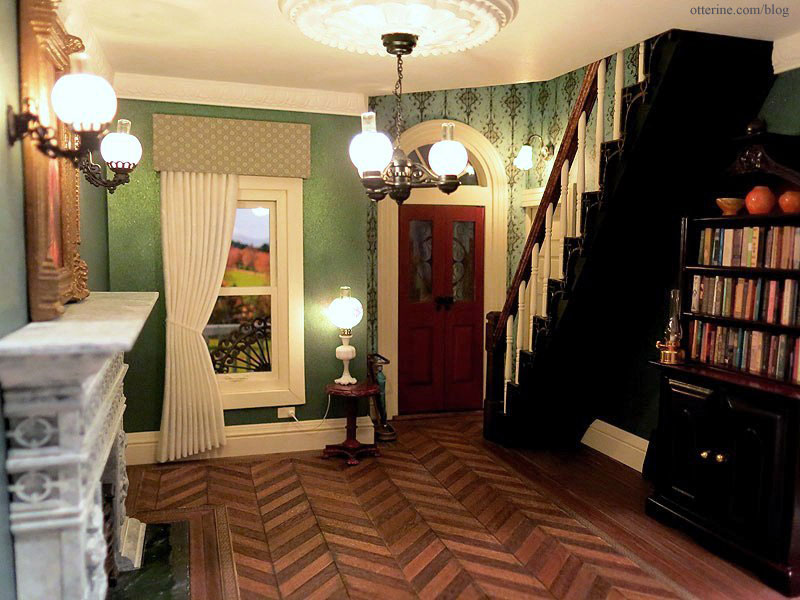
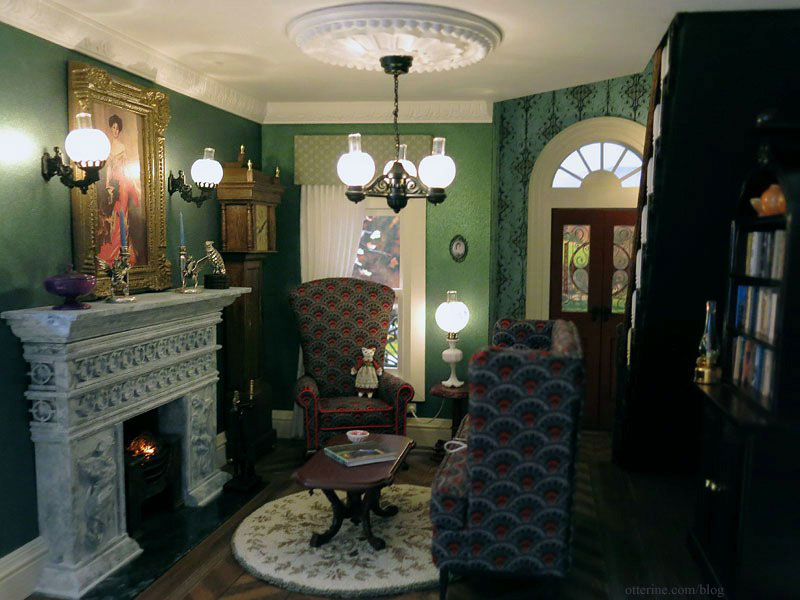
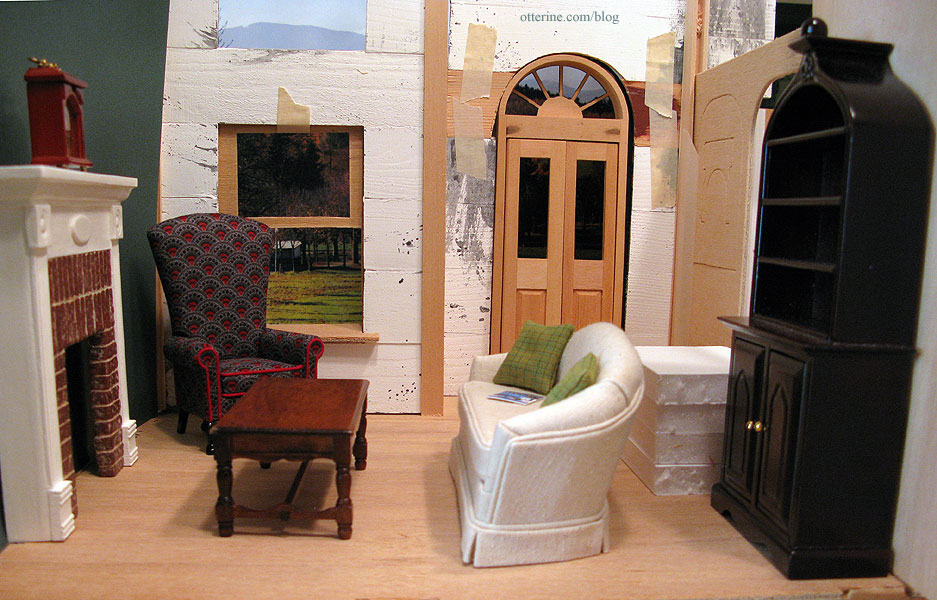
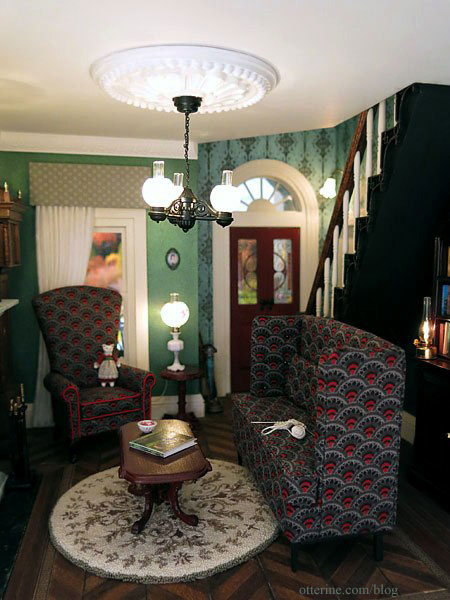
August 11, 2013 | 0 commentsThe Haunted Heritage – Grandma’s fine parlor
Grandma’s fine parlor is the other first floor room in The Haunted Heritage. There are so many elements of this room that I just adore. My real life home is much simpler in its décor, but I do so love the high society vintage style here.
This is the first dry fit to determine furniture placement. Nothing really changed in the end other than the staircase.
The fancy parlor floor was a labor of love but so worth the effort.
It adds just the right amount of extravagance to a room filled with subtle color and high-end ornamentation.
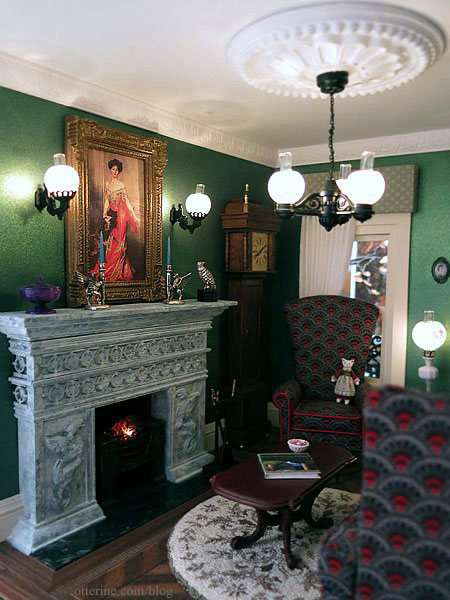
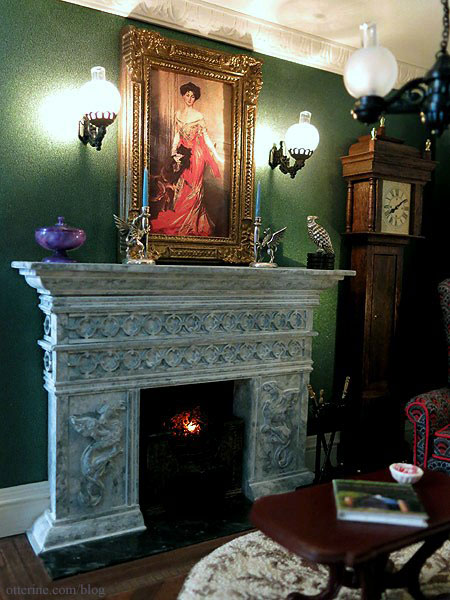
On the left side of the room is a large fireplace.
On the opposite side, the stairs lead to the second floor.
All the lights in this room are Chrysolite except the Clare Bell brass hurricane lamp on the bookshelf.
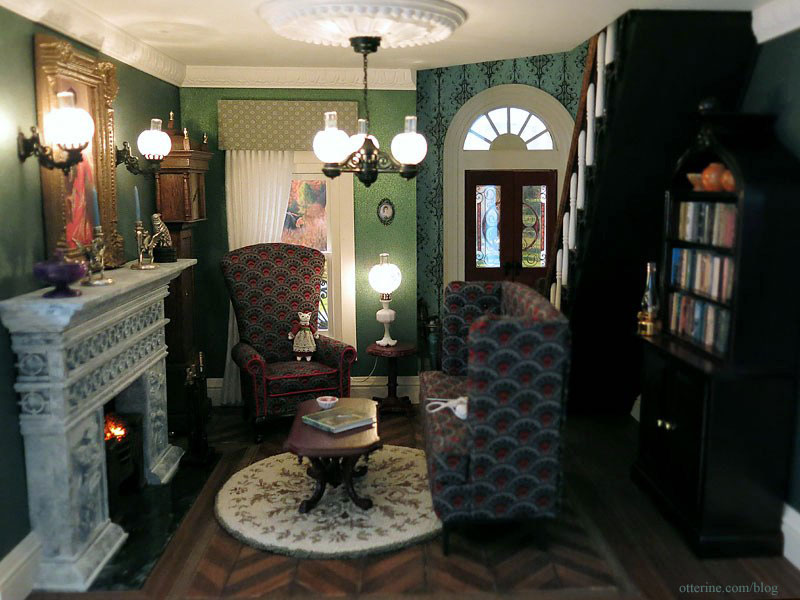
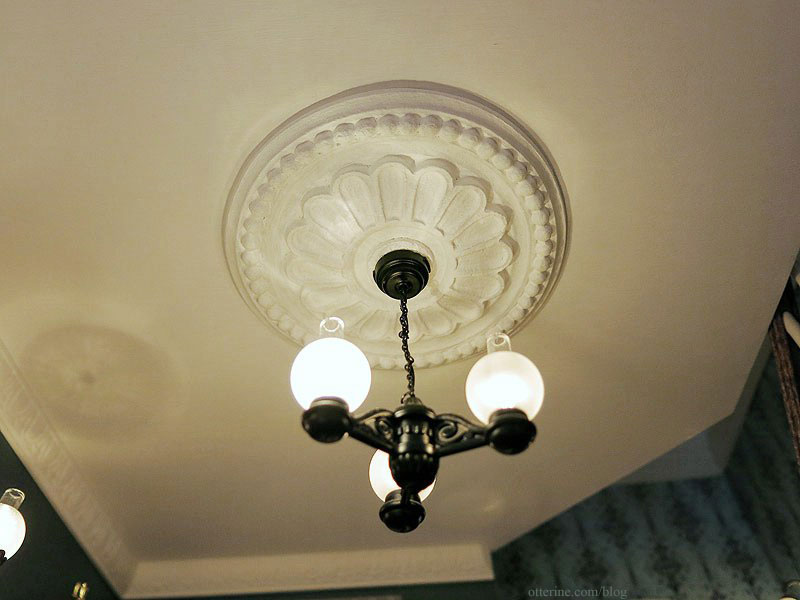
I assembled the wall sconces above the fireplace as well as the gaslight chandelier. At first I thought the ceiling medallion was too much, but I love the way it frames the chandelier. This particular chandelier is a little temperamental since I wired it to have replaceable bulbs. The slightest movement makes the globes teeter. It’s not easy to adjust three of them with two hands. Haha! :D
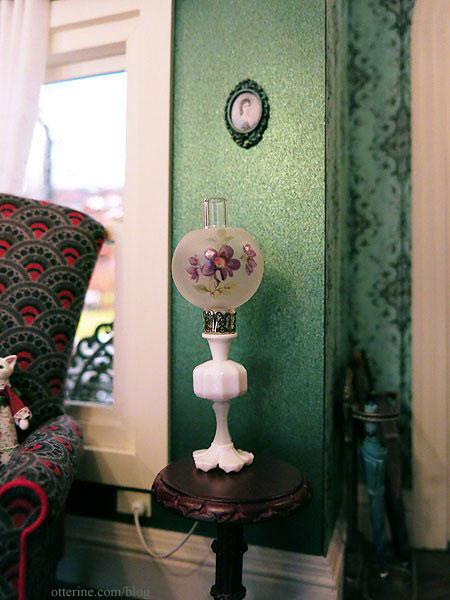
The table lamp was purchased already assembled and is wired with one of my signature faux outlets. The side table is a Bespaq piece purchased at a local mini show.
The frame was a gift from Annie at Thyme Soul Miniatures. I bought a grouping of her miniatures which you’ll see in upcoming posts. This frame is the perfect little something for the space.
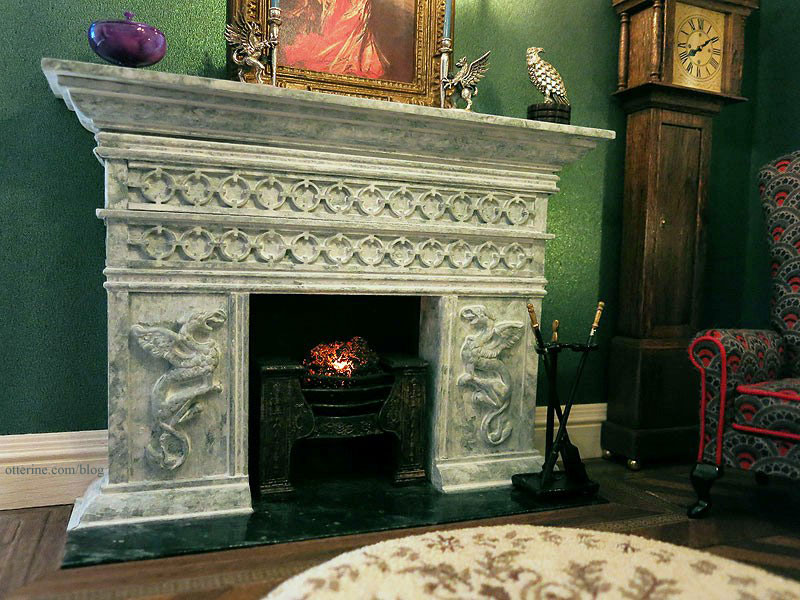
The white stone griffin fireplace was made from foam core board, wood trims and polymer clay, then painted to a faux stone finish. I love how spooky the fireplace looks in low light.
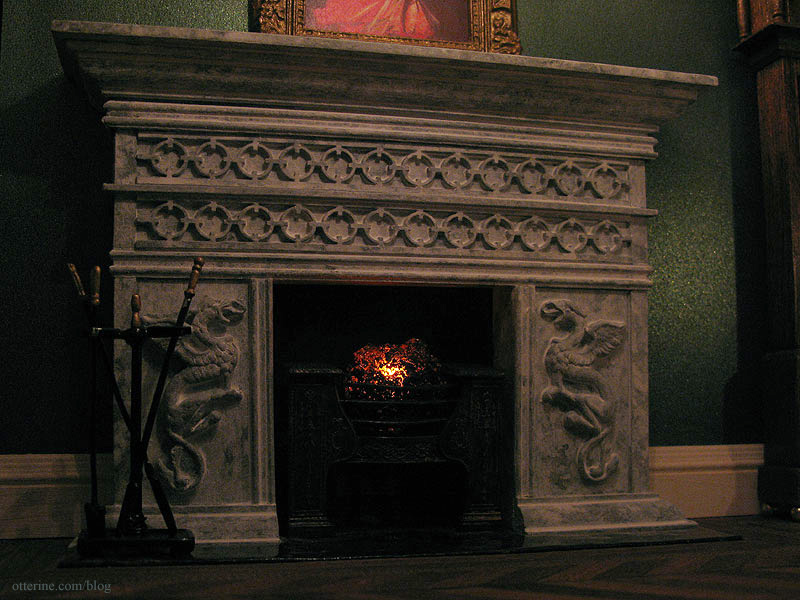
The marble hearth started out as cardboard.
It was partially inspired by a Lawbre fireplace and the griffins were cast from molds made from metal earrings.
A close-up of one of the griffins.

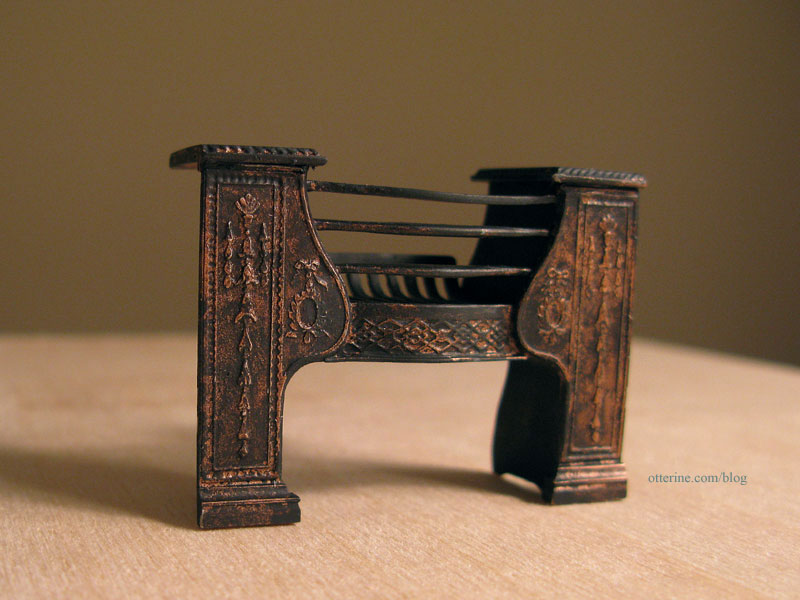
The resin coals are held by the Phoenix Parlour Hob Grate. I painted it Burnished Copper Metal by Rustoleum, then aged it with layers of black and grey acrylic to get the look I wanted. I installed a flickering LED to light the resin coals.
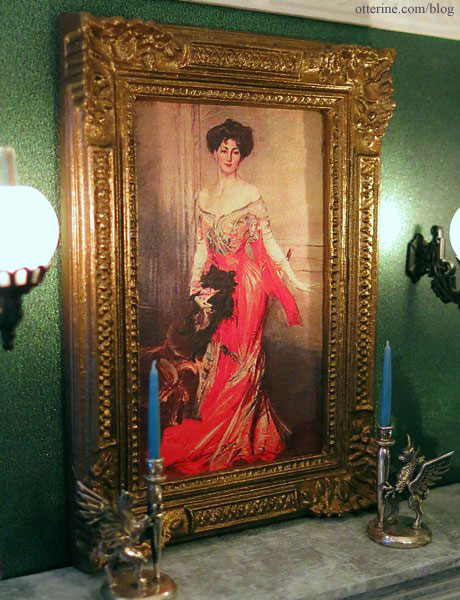
The painting above the fireplace is by Giovanni Boldini of Elizabeth Wharton Drexel, 1905. I printed the image on regular paper and painted the purchased frame to tone down the original gold finish.
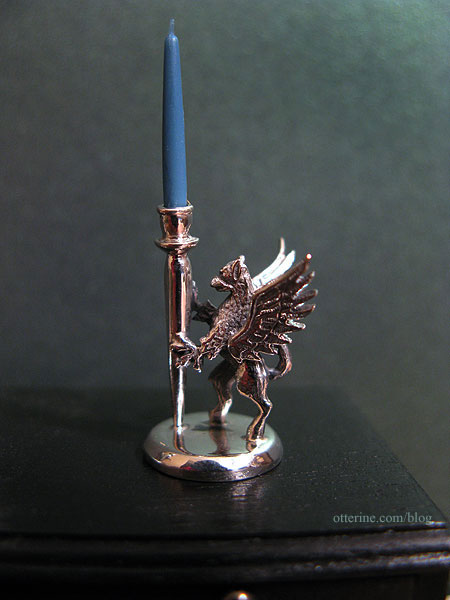
One of the finest (and most expensive) miniature purchases to date: a pair of sterling silver griffin candlesticks. These were crafted by Don Henry for Small Treasures Miniatures.
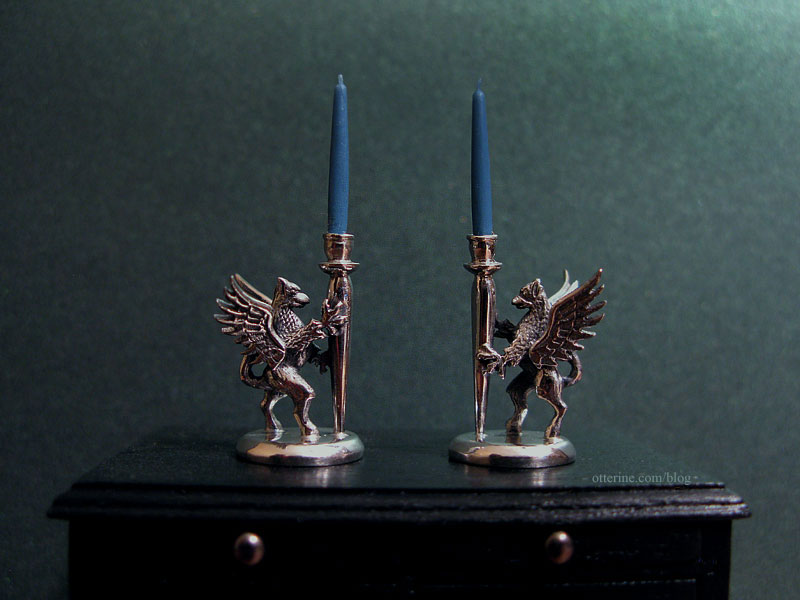
The detailing on them is incredible. They stand just 15/16″ tall without the candles.
The purple lidded dish is from CW Lubin Wood Turning.
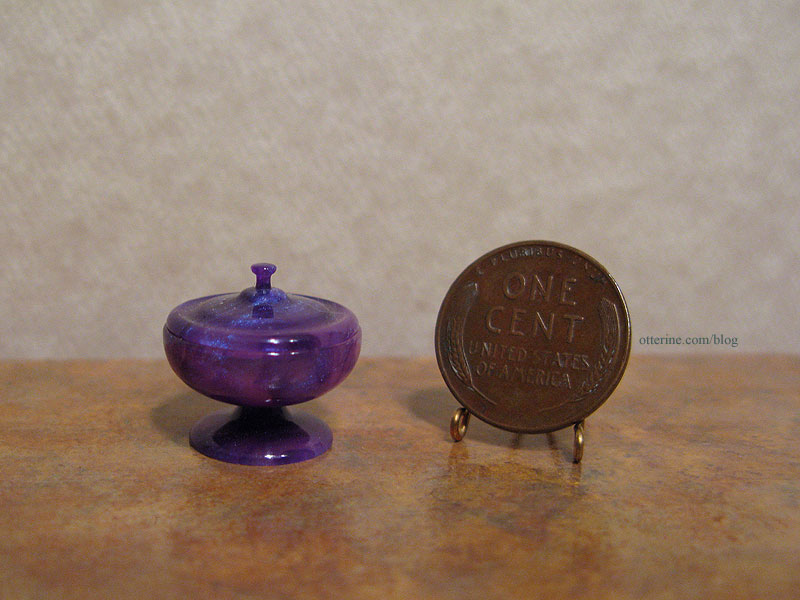
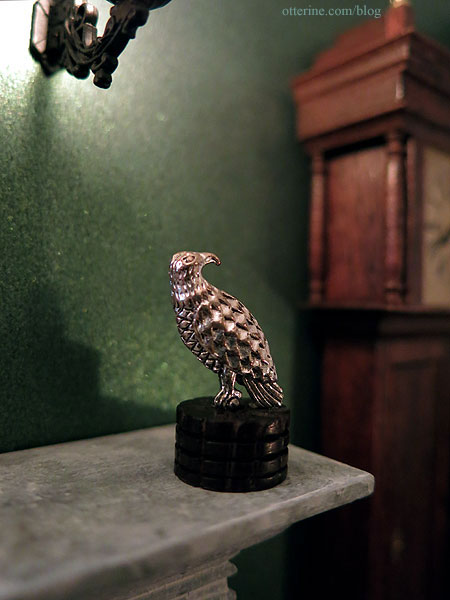
I made the bird statue a long time ago from a wood bead and jewelry charm with the loop removed.
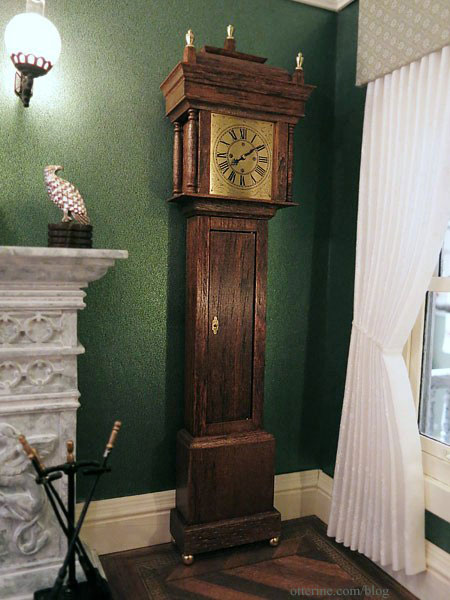
The beautiful Bagnall clock was made from a House of Miniatures kit.
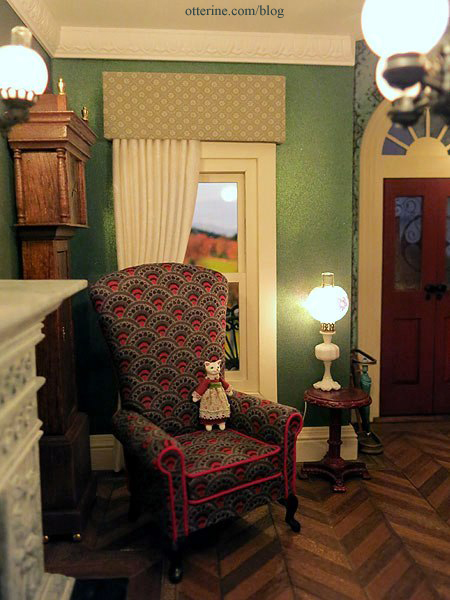
The Chair was made by Kris of 1 Inch Minis.
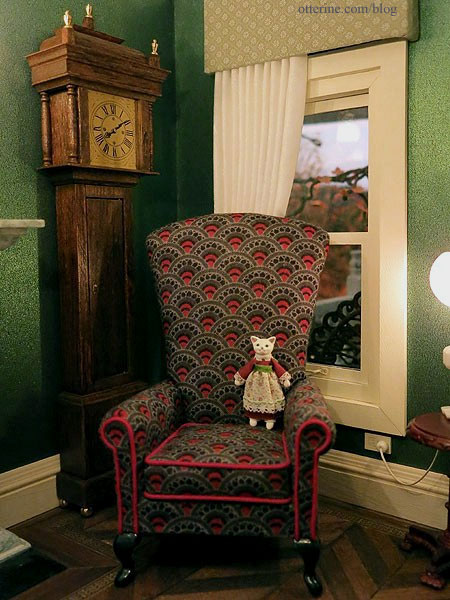
Buying this piece set this whole project in motion. :D
I opted for a single side swept curtain for the sole purpose of not hiding that little outlet I took the time to add. Though The Chair will block both the curtains and the outlet for the most part, anyone who looks for the details will find them.
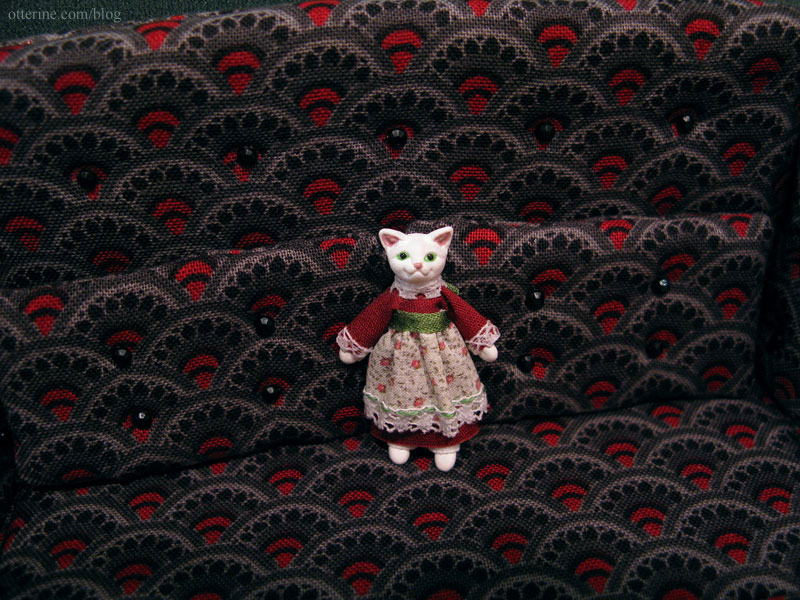
Miss Kitty was made by Pamela of PamelaJunkMinis.
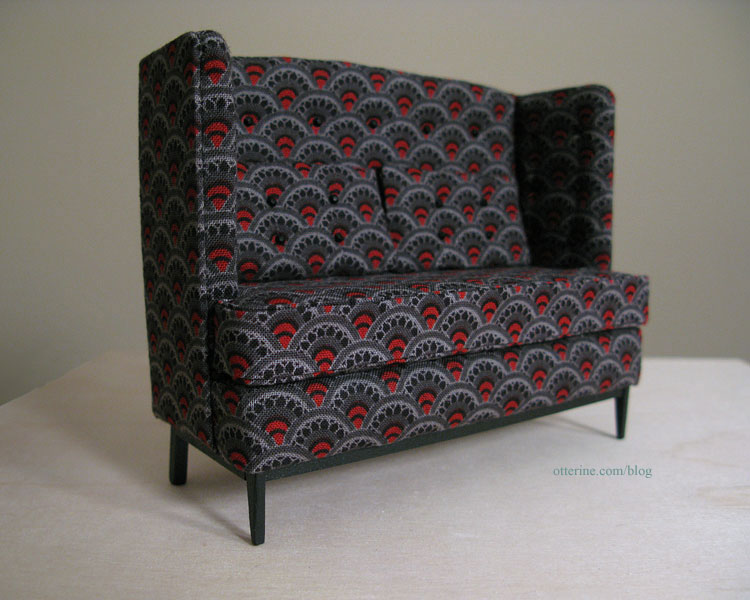
The Sofa was my second “from scratch” upholstered piece and made to match The Chair. :D
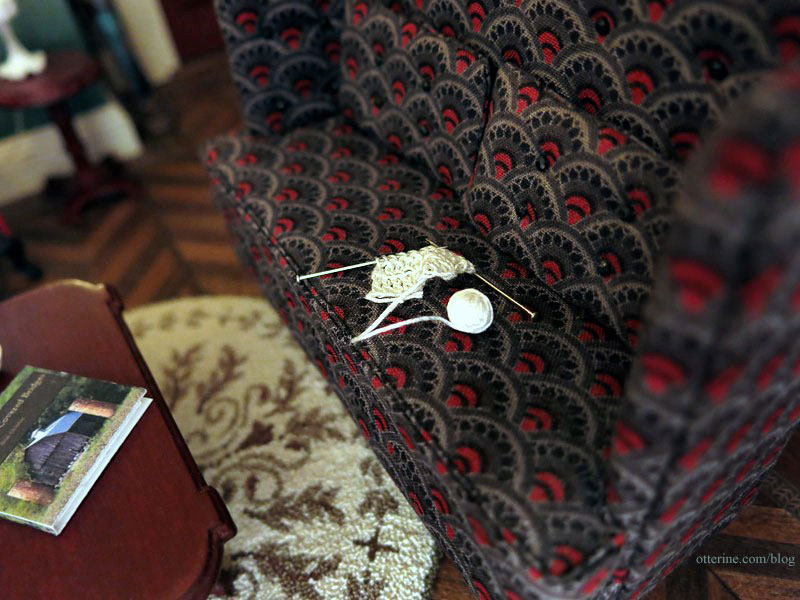
The knitting was purchased from Small Talk at a local miniature show.
The beautiful rug is by Katie Arthur of Dollhouse Littles. The texture of it is amazingly lifelike. This rug will live in the bedroom going forward, but I haven’t found or made one to replace it just yet, so I’ve borrowed it for the photos.
The coffee table is a refinished Bespaq piece. I made the book, but the candy dish was purchased.
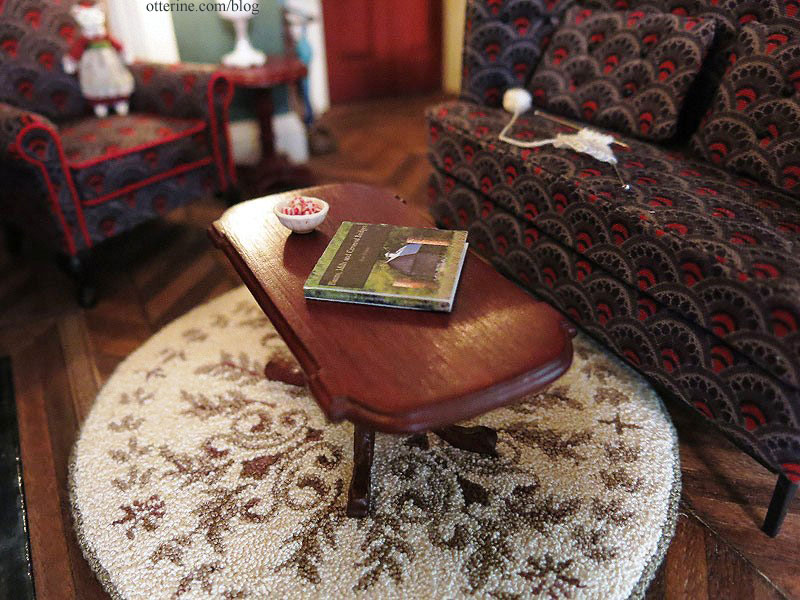
Jane of MiniFanaticus made the tiny candies for me in a swap.

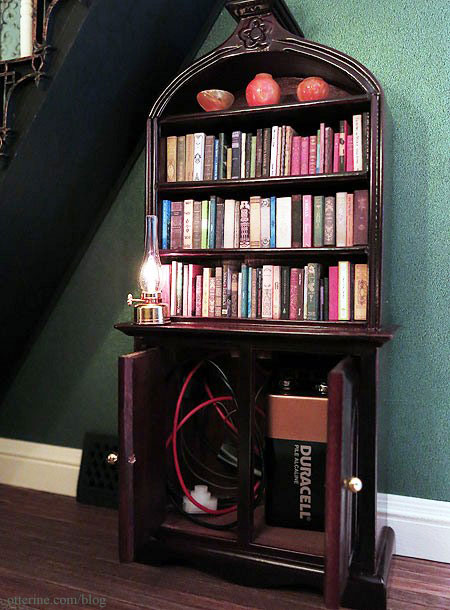
The bookshelf was purchased, but I made all the tiny books that line the shelves. The top shelf holds a matched set of orange acrylic turned items from CW Lubin Wood Turning, two vases and a bowl. They were advertised as quarter scale or half scale items, but I often find those smaller scale items look wonderful in full scale scenes. I arranged the two shorter items on either side of the taller vase to make the most of the space on the top shelf.
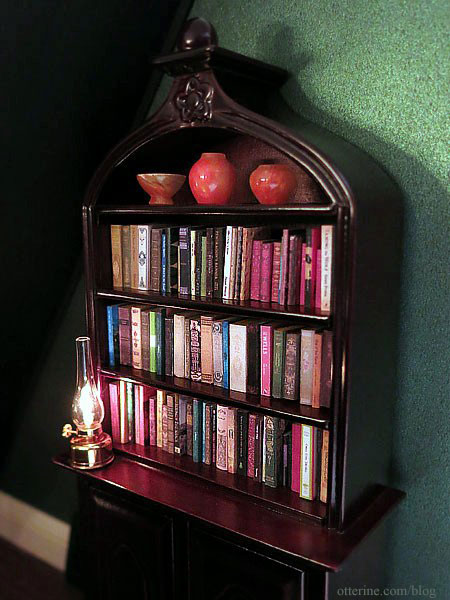
The hurricane lamp is battery operated.
I added a baseboard heat register (my bash of a tutorial by Kris at 1 Inch Minis).
Next time you are invited for tea, don’t let the bedraggled exterior of the Heritage scare you away. :D
Categories: The Haunted Heritage
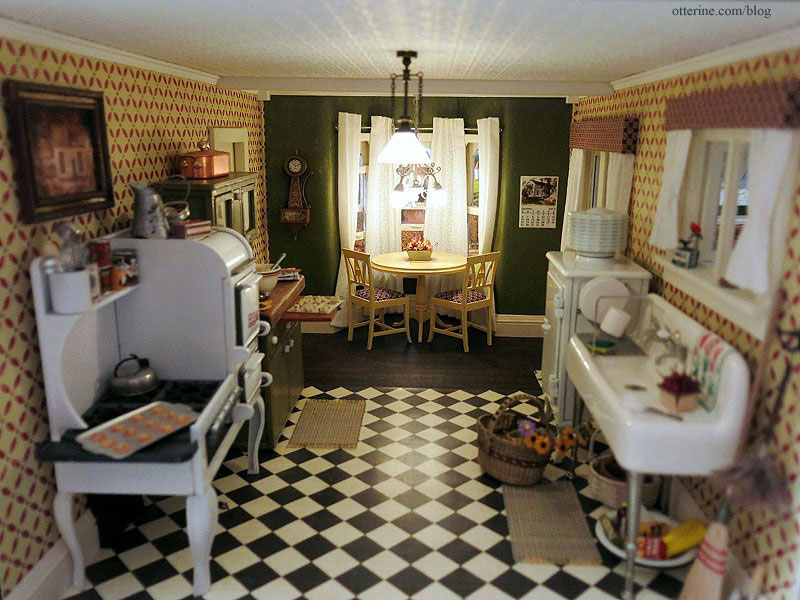
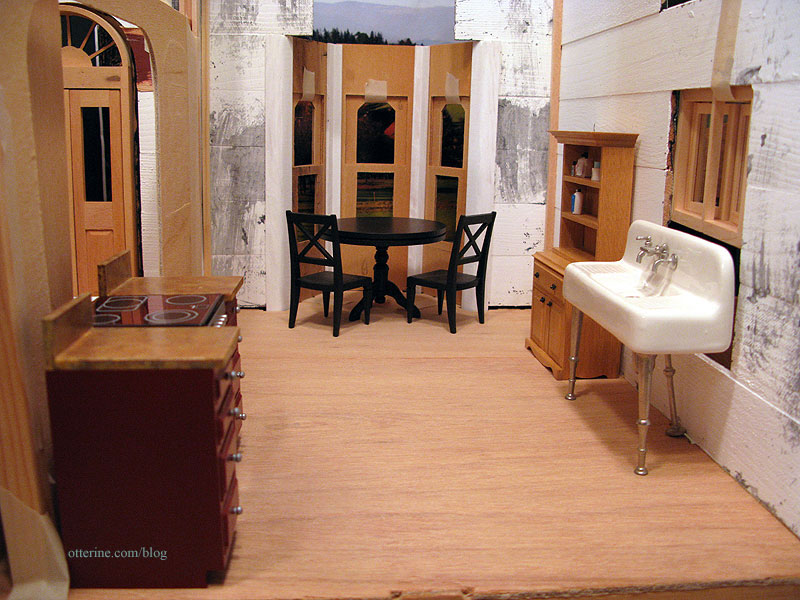
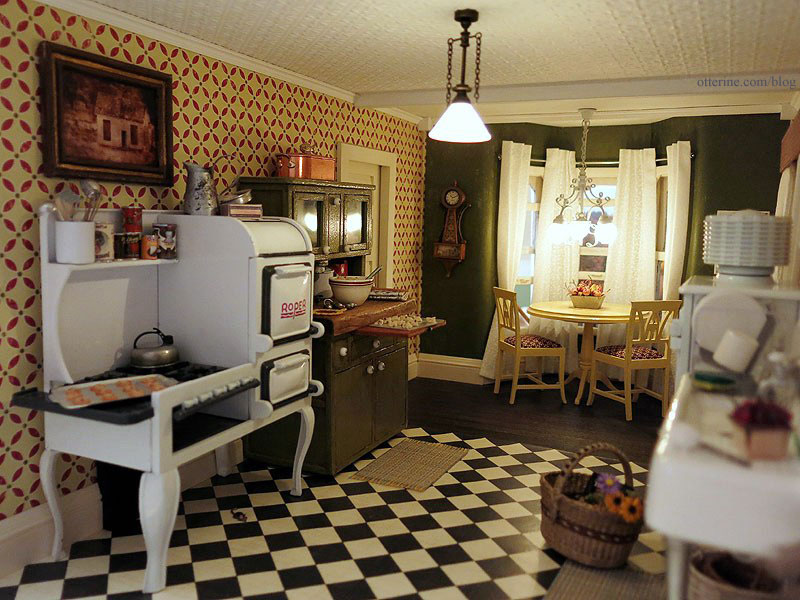
August 10, 2013 | 0 commentsThe Haunted Heritage – 1920s inspired kitchen
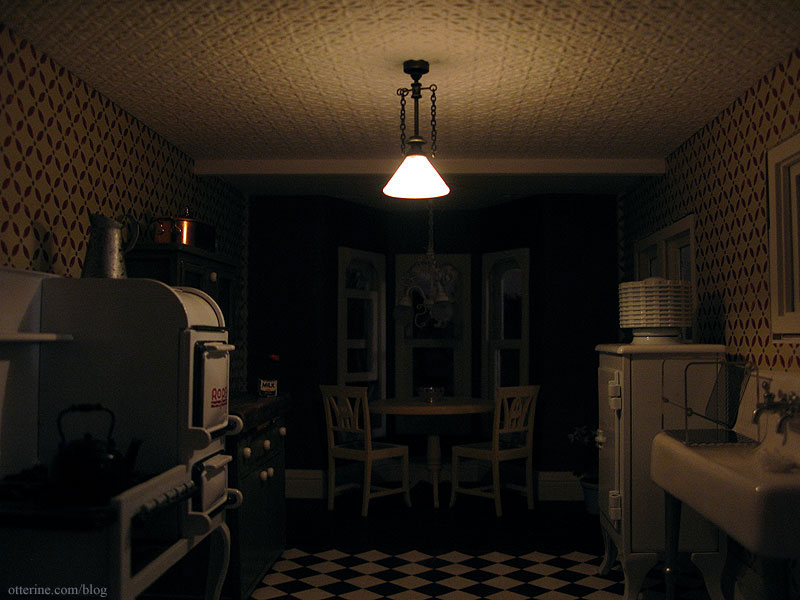
The 1920s inspired kitchen was the first room I completed in The Haunted Heritage. It’s a large room with a dining area and vintage kitchen appliances. I tried to avoid adding too much clutter, just a few added accessories really make a difference. Feels like home.
The furniture arrangement didn’t change much from the original dry fit layout trial.
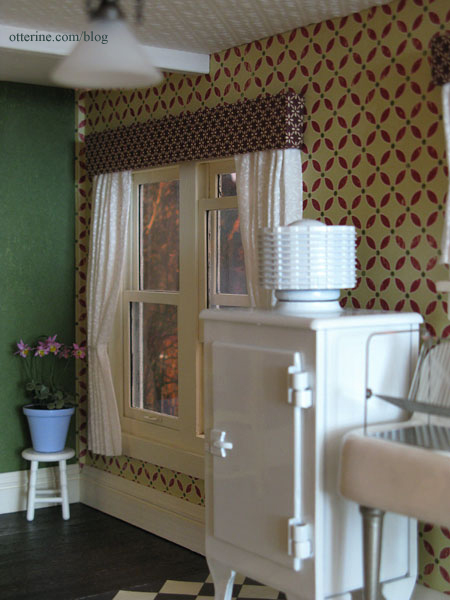
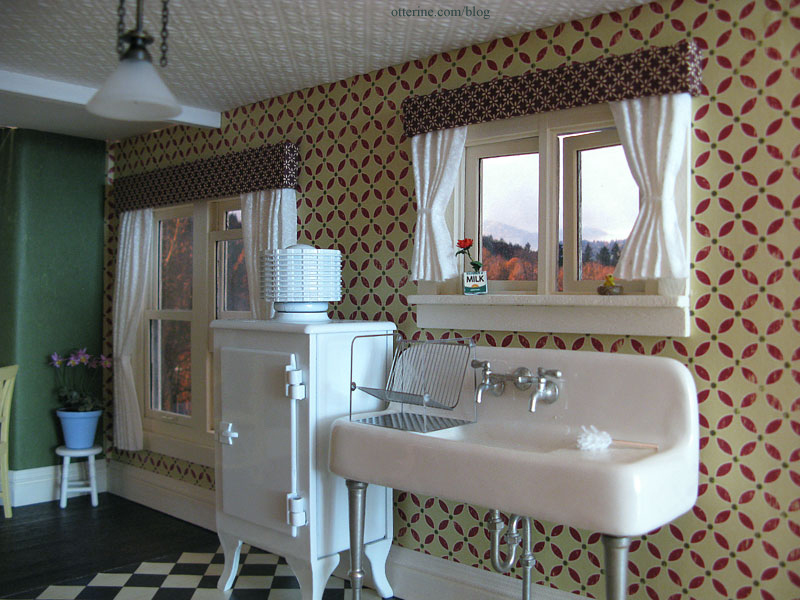
Structurally, I upgraded the side window with a Houseworks working window and added a casement window above the sink.
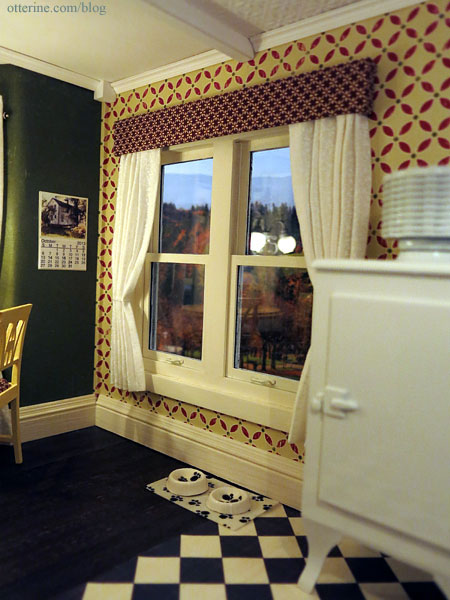
The tile flooring is Cream Diamonds by The Paper Studio, and the wallpaper in Geometric Fa La La by Making Memories. The back of the wallpaper is aged green, so I used that in the bay window section.
I went with subtle white patterned curtains and simple fabric pelmets for the window treatments. It softens the look of the room without being over the top. The potted flowering plant is from Michelle.
The casement window curtains ended up being a little too short, but I liked them well enough to leave them as is.
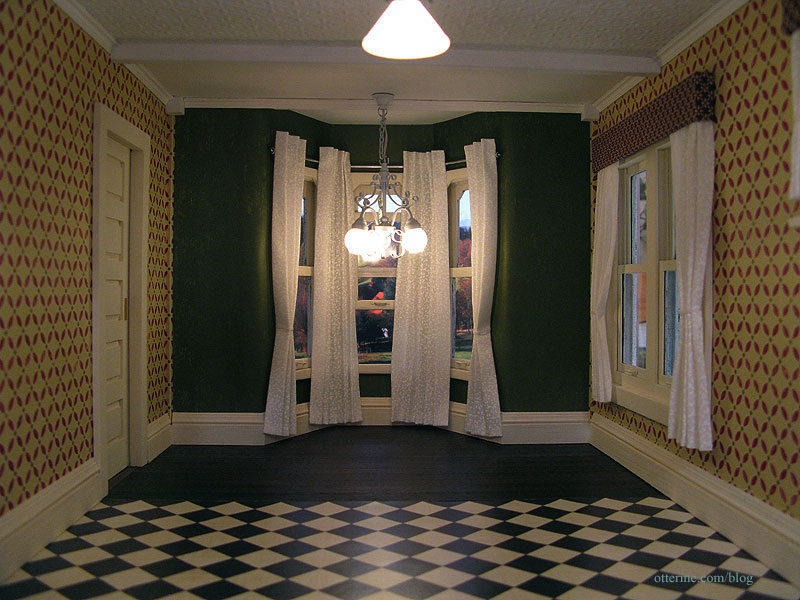
The front bay window is part of the original kit, and considering the age of the kit wood I was happy with the way it turned out.
One window assembly is completely glued together and the window is shut since the wood for these pieces was beyond repair. The second window is set partially open, and though the window slider isn’t glued in place, the wood for this assembly is not in the best condition and doesn’t allow for very fluid raising and lowering of the window. The third window, however, works so well that I need a dowel to keep it propped open! How positively wonderful! It’s just like a real life old house – one window is painted shut, one window sticks and one window won’t stay open!!! :D
The curtains in the bay window have a custom made rod to hold them in place.
I used fairy lace tiebacks on the outer panels but I liked the look of the inner panels left straight. This way, grandma doesn’t have to reach over the table to untie them every time she wants a little privacy. ;D
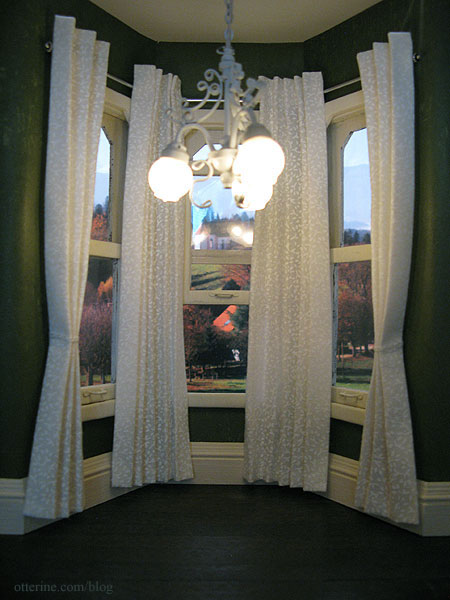
With the table and chairs in place, it really sets the mood. First, with the curtains in focus.

And, then with the furniture in focus.
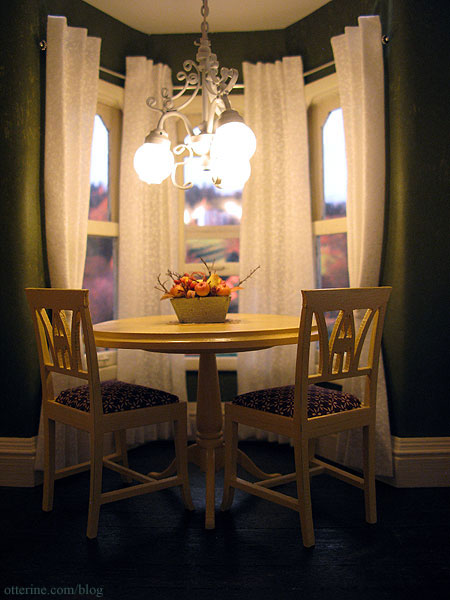
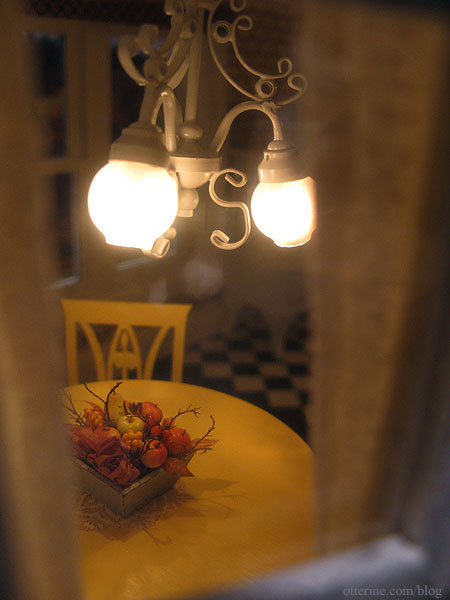
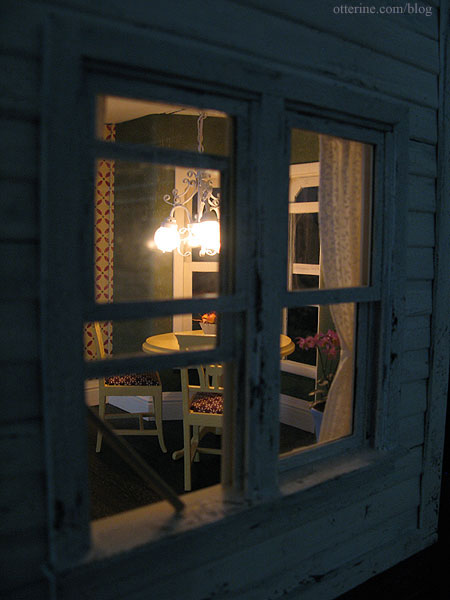
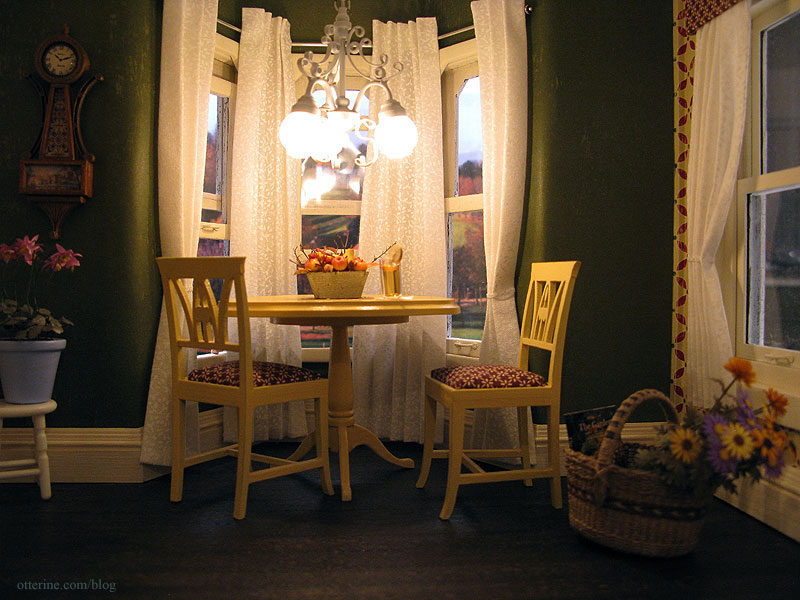
I love through-the-window photo views. :] The autumn fruit basket is from Hungarian Miniatures.
In this photo, I feel as though I can hear the crickets and see fireflies outside.
I replaced the interior wall, adding a working pocket door. There is a lever that operates the door from the open back so you don’t have to reach inside to open the door. It has a leather and Tyvek hinge to fold flat when the door is open.
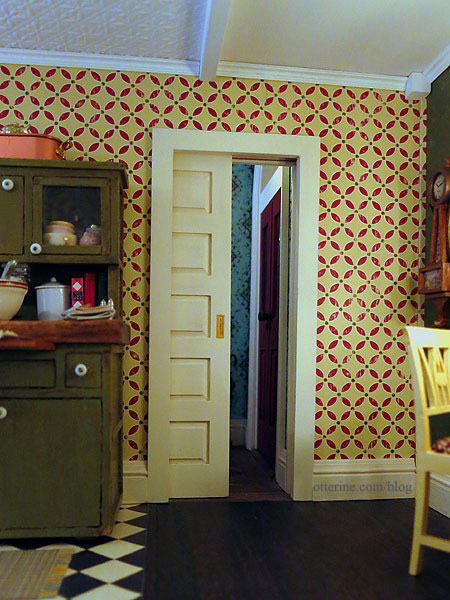
I really love the way the crown molding completes the room.
My original thought for heating the Heritage beyond the parlor fireplace was to place painted radiators in the rooms. Even though the rooms are somewhat spacious, radiators do take up a decent amount of space. Then I ran into a fantastic tutorial by Kris at 1 Inch Minis: gravity baseboard registers. Perfect!
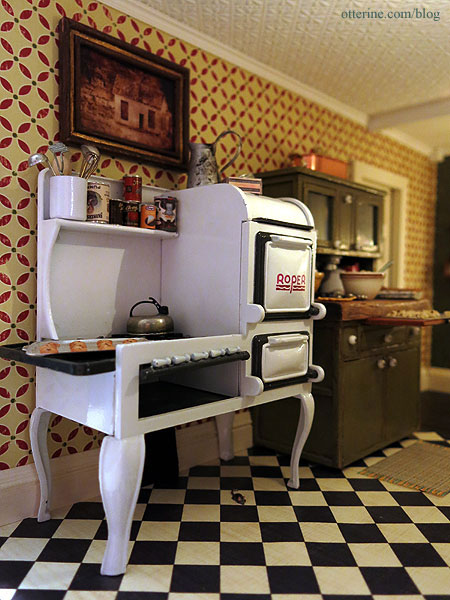
I used diamond canvas instead of square and added a metal headpin for the lever. I placed the heat register under the Roper range so it could be seen, though it’s one of those details that’s mainly for me. It’s not strikingly obvious, but I am glad it’s there.
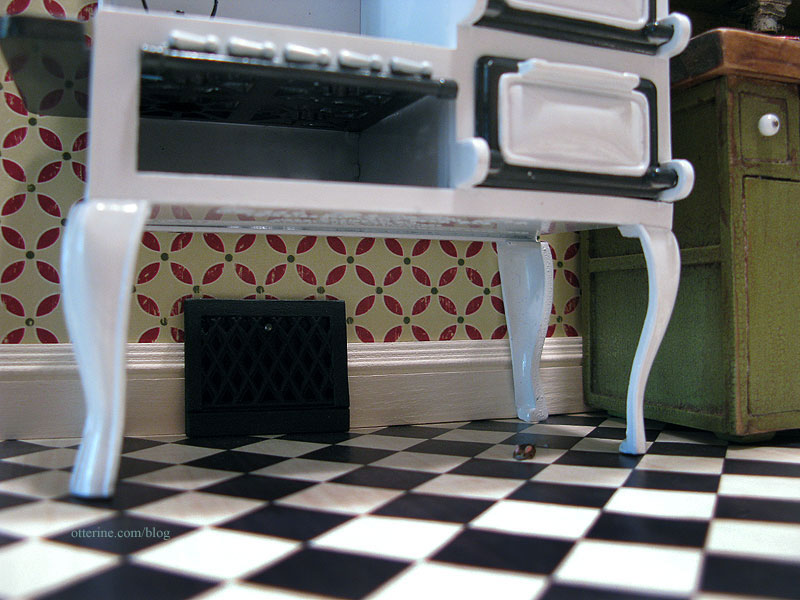
The cast metal Roper range is by Jacqueline Kerr Deiber. It’s a heavy piece with lots of character.
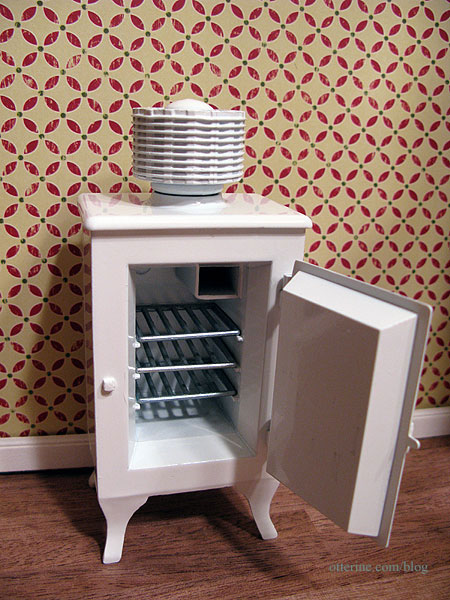
The metal Monitor Top Refrigerator was also designed by Jacqueline Kerr Deiber. It has wonderful lines and is also very heavy.

I love the shelves and the ice box. :D
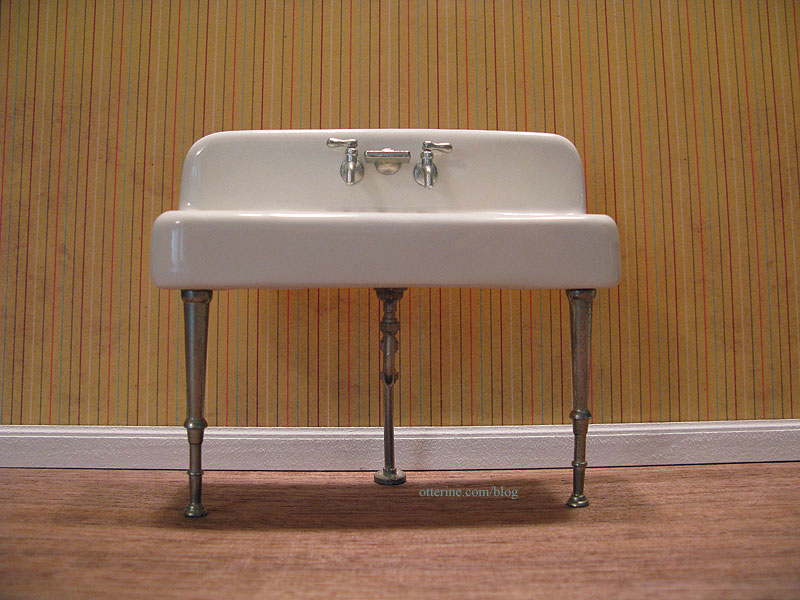
The kitchen sink is one of my favorite minis! The dish drainer is from The Dolls House Mall and it came with a mop, too. The laser cut stainless steel has wonderful detail and looks great for scale.
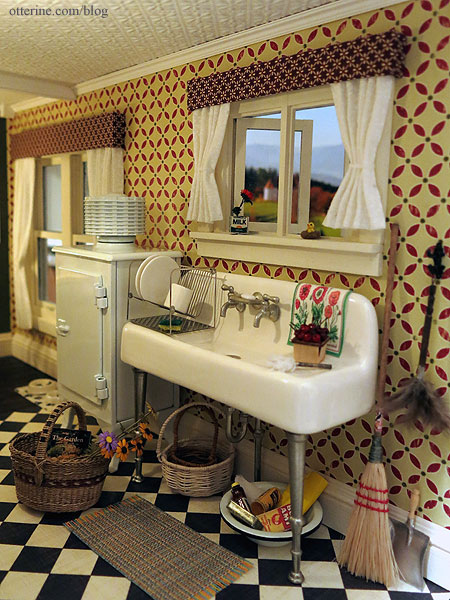
It’s a 1920s porcelain Kohler kitchen sink by Jacqueline Kerr Deiber. I’ve always liked the look of this sink but never thought I’d build a house to use one.
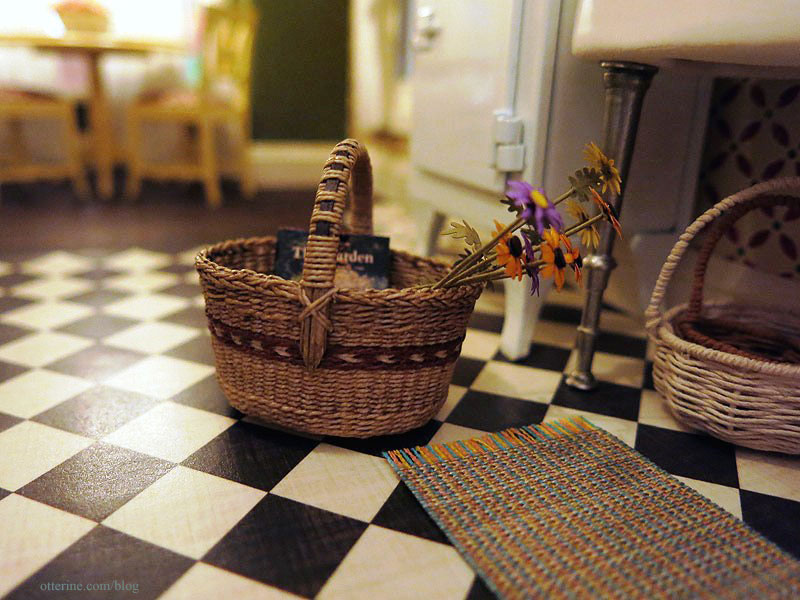
Grandma has her cleaning supplies and some extra baskets under the sink. Lyssa made the beautiful white and brown baskets
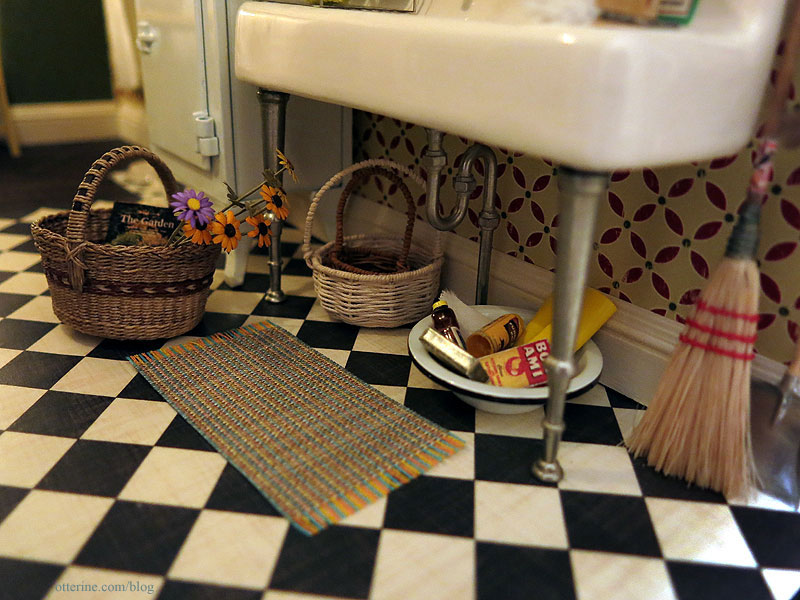
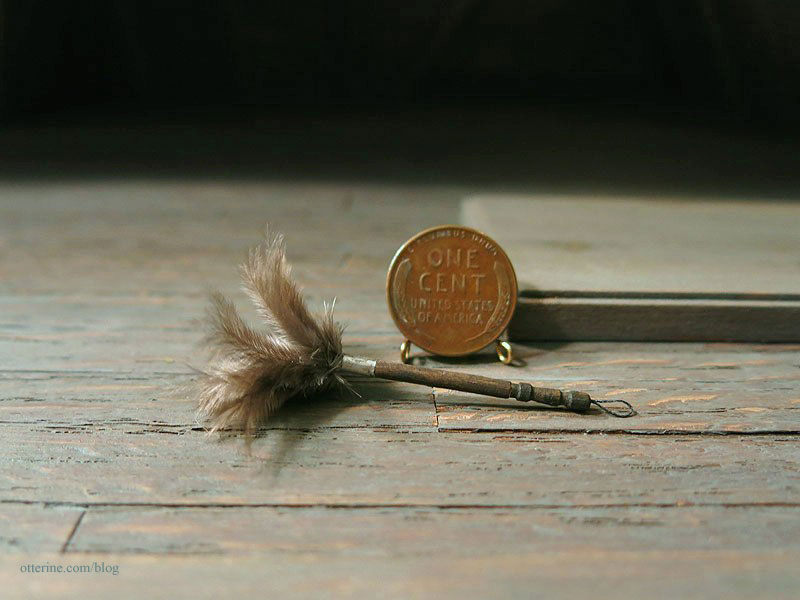
I made the duster from a Silly Sisters tutorial. I added a cord loop on the end for hanging.
The chick in the nest was made by Cathy Rohal.
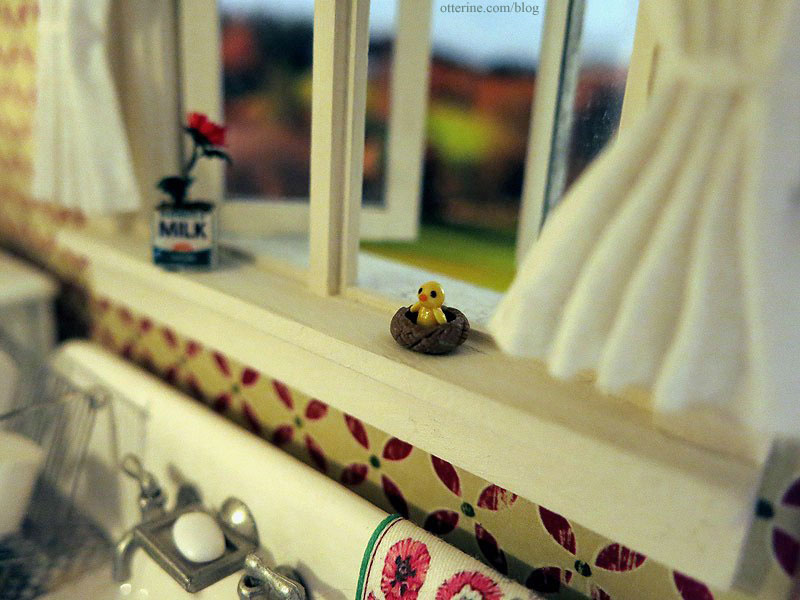
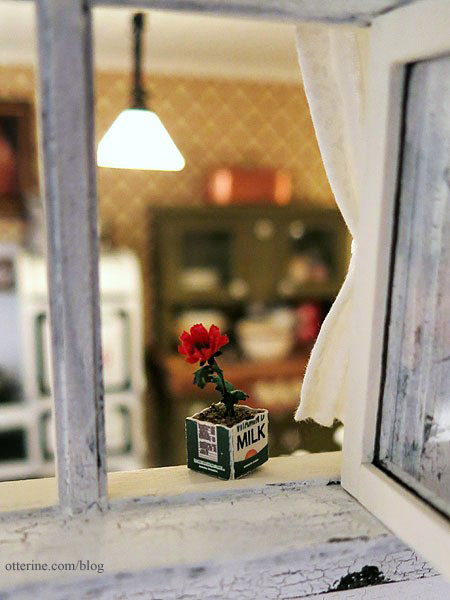
The flower in the milk carton was made from a true2scale kit.
The pint of perfect cherries is from The Garden Path, purchased at a local mini show.

This wonderfully made basket is from Lidi, and I made the Bonnie Lavish flowers from kits.
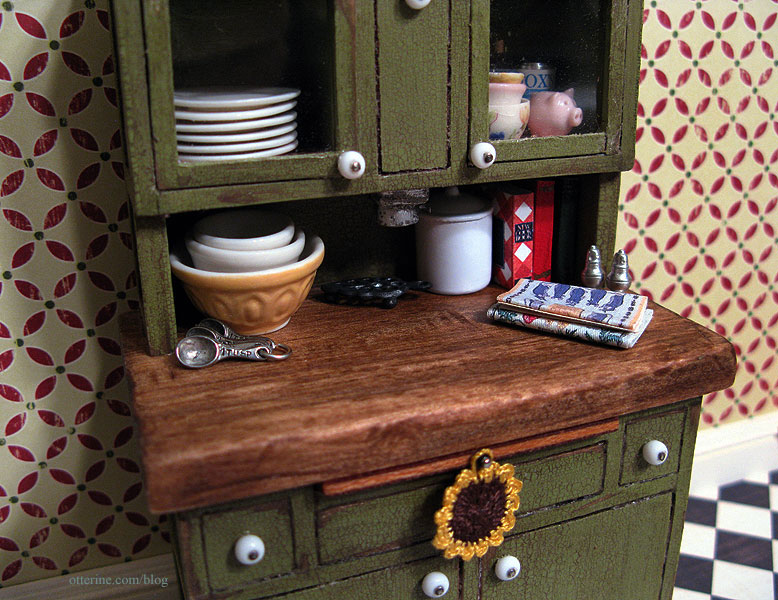
Keli made this amazing Hoosier cabinet for me – such a wonderful and generous gift.
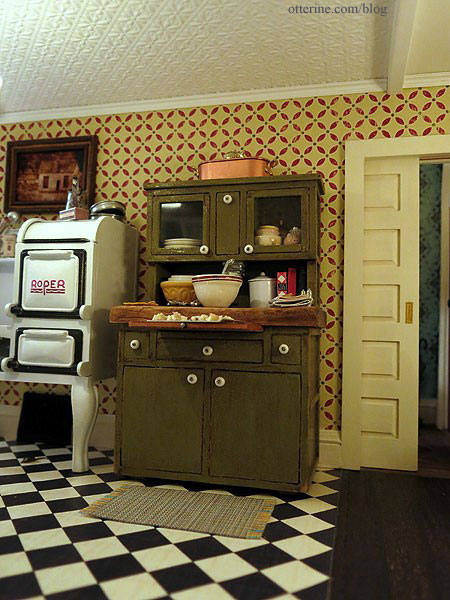
I had to set up the vignette outside of the kitchen to get a photograph of the details since the kitchen is a little tight to fit the camera. The tea towels throughout the kitchen are from Marlene.
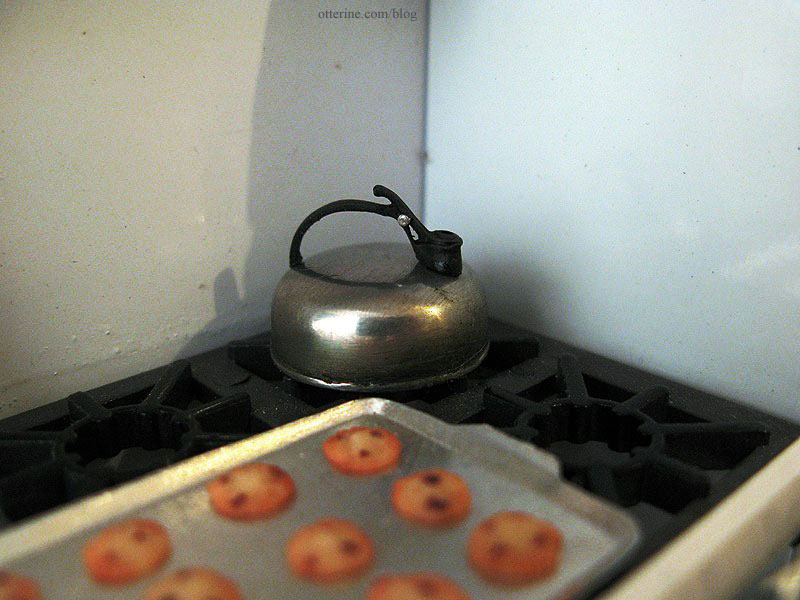
I won a lovely cookie baking set from Creating Dollhouse Miniatures. The pieces are so well made and realistic.
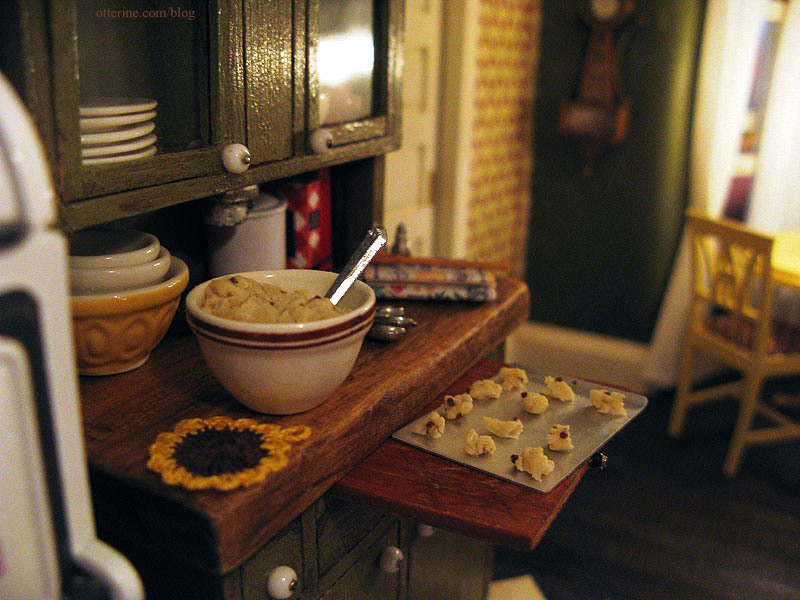
My mom makes the best chocolate chip cookies. No kidding. Every family gathering has people hoarding the cookies she brings, even though she brings dozens! I know chocolate chip cookies, and these minis are just like hers! :D
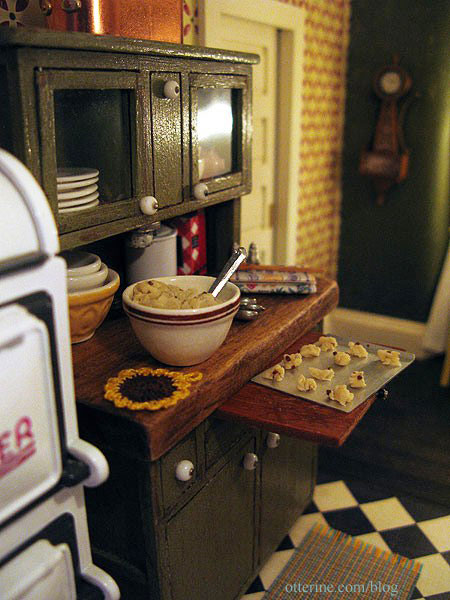
Cookies in progress certainly warm up a kitchen, don’t they?
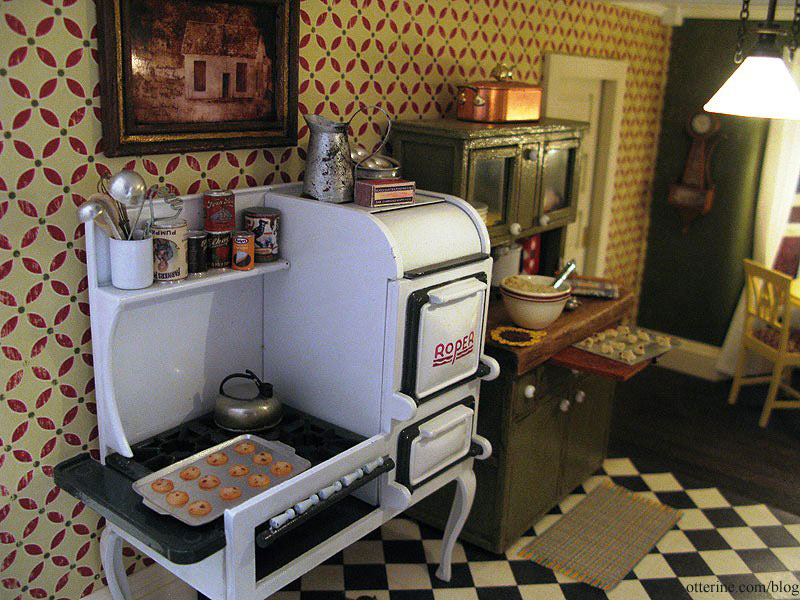
The whistling tea kettle is by Ulus Miniaturas – purchased from Mainly Minis. We had one of these in real life at my childhood farmhouse. Mom still has it and uses it, too!
There is a white ceiling fixture above the dining table. Here’s a post on the kitchen lighting details.
The kitchen area has a lovely Ray Storey pendant gas light. If I had had a larger budget, I would have bought the matching 3-arm down light for the dining table. But, the white ceiling fixture is still a beautiful piece. The gas light is very well made. I love the way it highlights the textured ceiling. It’s the perfect vintage touch to the textured ceiling.
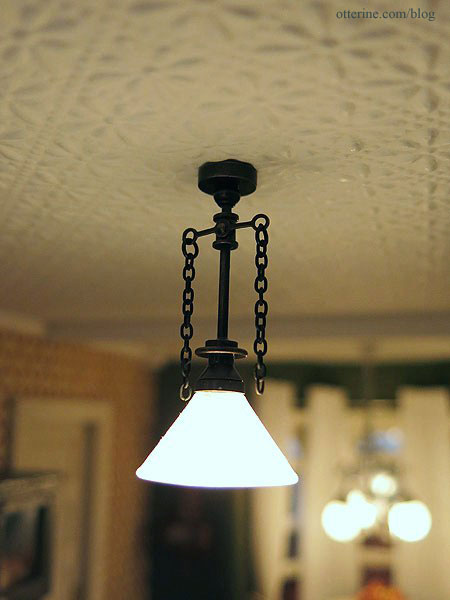
I don’t suppose in reality this dim fixture would do much good in the kitchen for nighttime cooking, but it casts such a wonderfully soft light over this part of the room.
In the bay window nook, there’s just enough room for a small table and chairs. The dining table was made from a House of Miniatures kit, and the Lilje chairs kit came from Art of Mini. For the upholstery, I chose a brown and ivory print. I think it is close enough to the dark red to tie in well with the wallpaper.
The banjo clock was made from a Cynthia Howe Miniatures kit. Love it!!!! :D
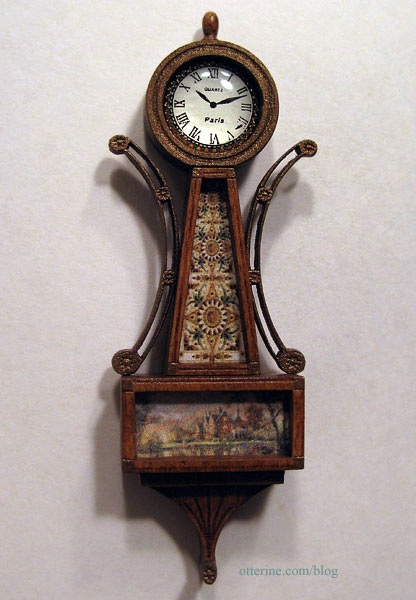
The artwork fits the kitchen décor perfectly, and the cabochon clock face is very realistic. My grandparents had lovely vintage clocks in their home, one of which now hangs in my real life kitchen.
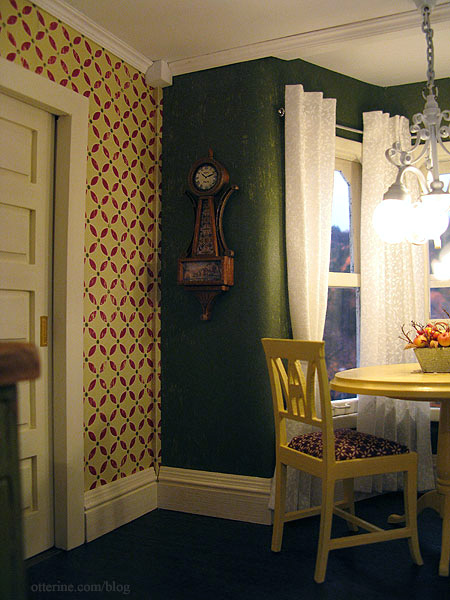
Kelly made this wonderful artwork called Ghosts of the Past. I think it works wonderfully here in the kitchen. Maybe it’s an old faded photo of grandma’s childhood home. :] The lovely pitcher is from Caterina.
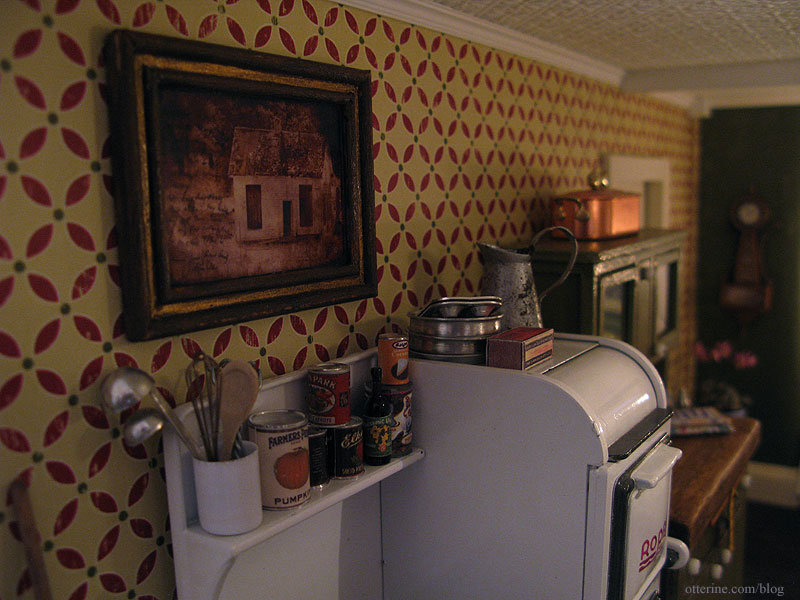
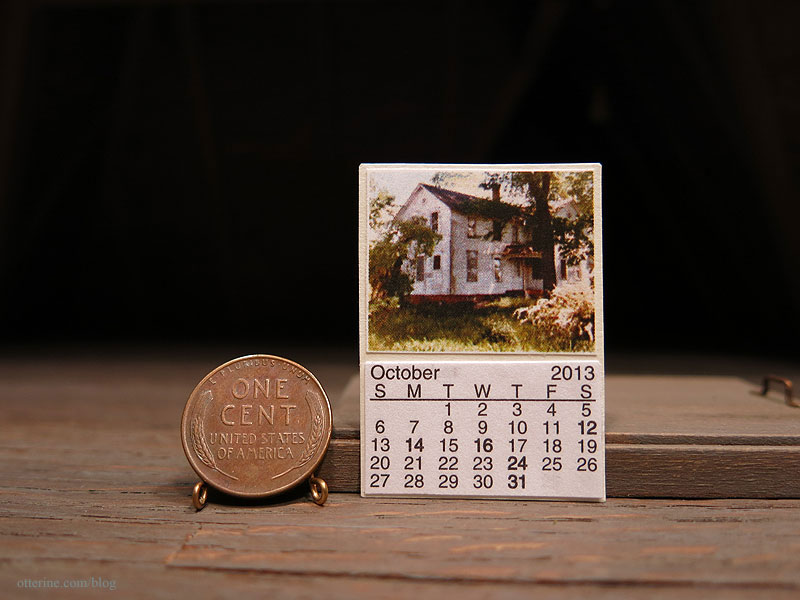
I made a wall calendar using the image of my childhood home, the lovely place from my dreams that inspired this build.
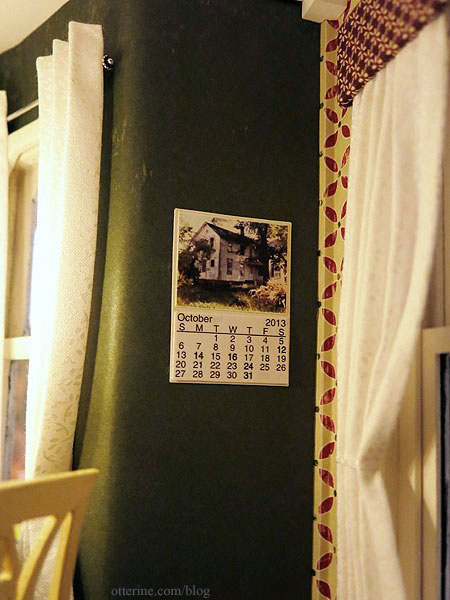
The tiny paper months of October, November and December were cut from a mini desk calendar and pasted to a piece of cardstock along with the printed photo.
The cat bowls are from D’s Miniatures and Collectibles, and I made a mat for them from paw print fabric.
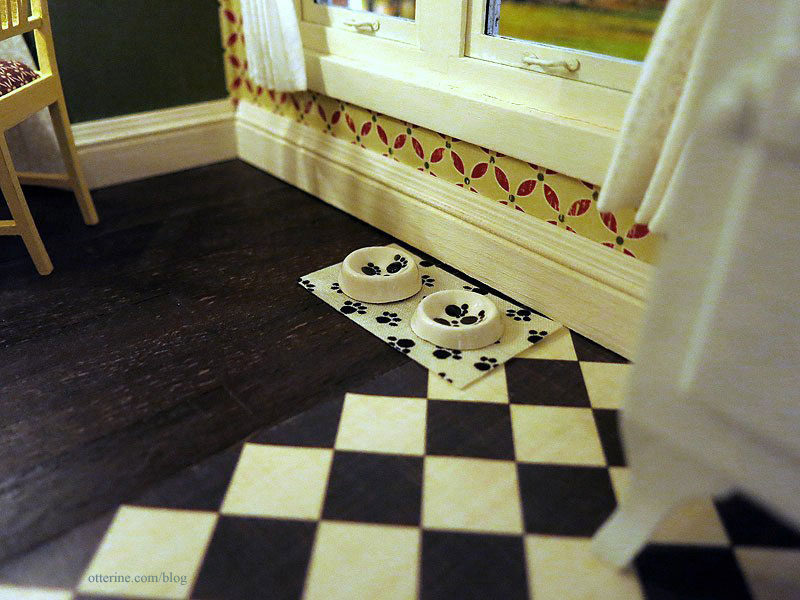
They are under the side window ready for Ophelia.
I love the way this room turned out…now let’s have some cookies!
——
For The Haunted Heritage pictorial recap post, please click here. Click here for a full list of Heritage posts, including how I made things and the materials used.Categories: The Haunted Heritage
August 9, 2013 | 0 comments
NOTE: All content on otterine.com is copyrighted and may not be reproduced in part or in whole. It takes a lot of time and effort to write and photograph for my blog. Please ask permission before reproducing any of my content. (More on copyright)